If you’re looking for a protective style that doesn’t scream “weave,” you’re in the right place. Weave ponytails have become increasingly popular because they strike that perfect balance between low-maintenance protection and undeniable style. The key to making any weave ponytail look natural isn’t just about the hair quality—it’s about how you blend it, position it, and finish it off. A well-executed weave ponytail can look so seamless that people won’t even realize you’re wearing extensions, and that’s the real art form.
The difference between a weave ponytail that looks obviously done and one that could pass as your natural hair comes down to several specific techniques. You need the right placement at the hairline, proper blending with your natural hair, realistic styling choices, and edges that look intentional rather than forced. The good news? These aren’t hard skills to master once you understand the fundamentals. Whether you’re going for sleek sophistication, textured elegance, or something in between, the weave ponytails below offer versatile options that actually work for real life—not just for Instagram photos.
Each of these styles offers its own flavor while maintaining that crucial “she woke up like this” energy that makes a protective style truly work for you. The styles range from minimalist and professional to bold and playful, so there’s genuinely something for every occasion, hair type, and personal aesthetic. Let’s walk through twelve weave ponytail styles that deliver the natural-looking results you’re after.
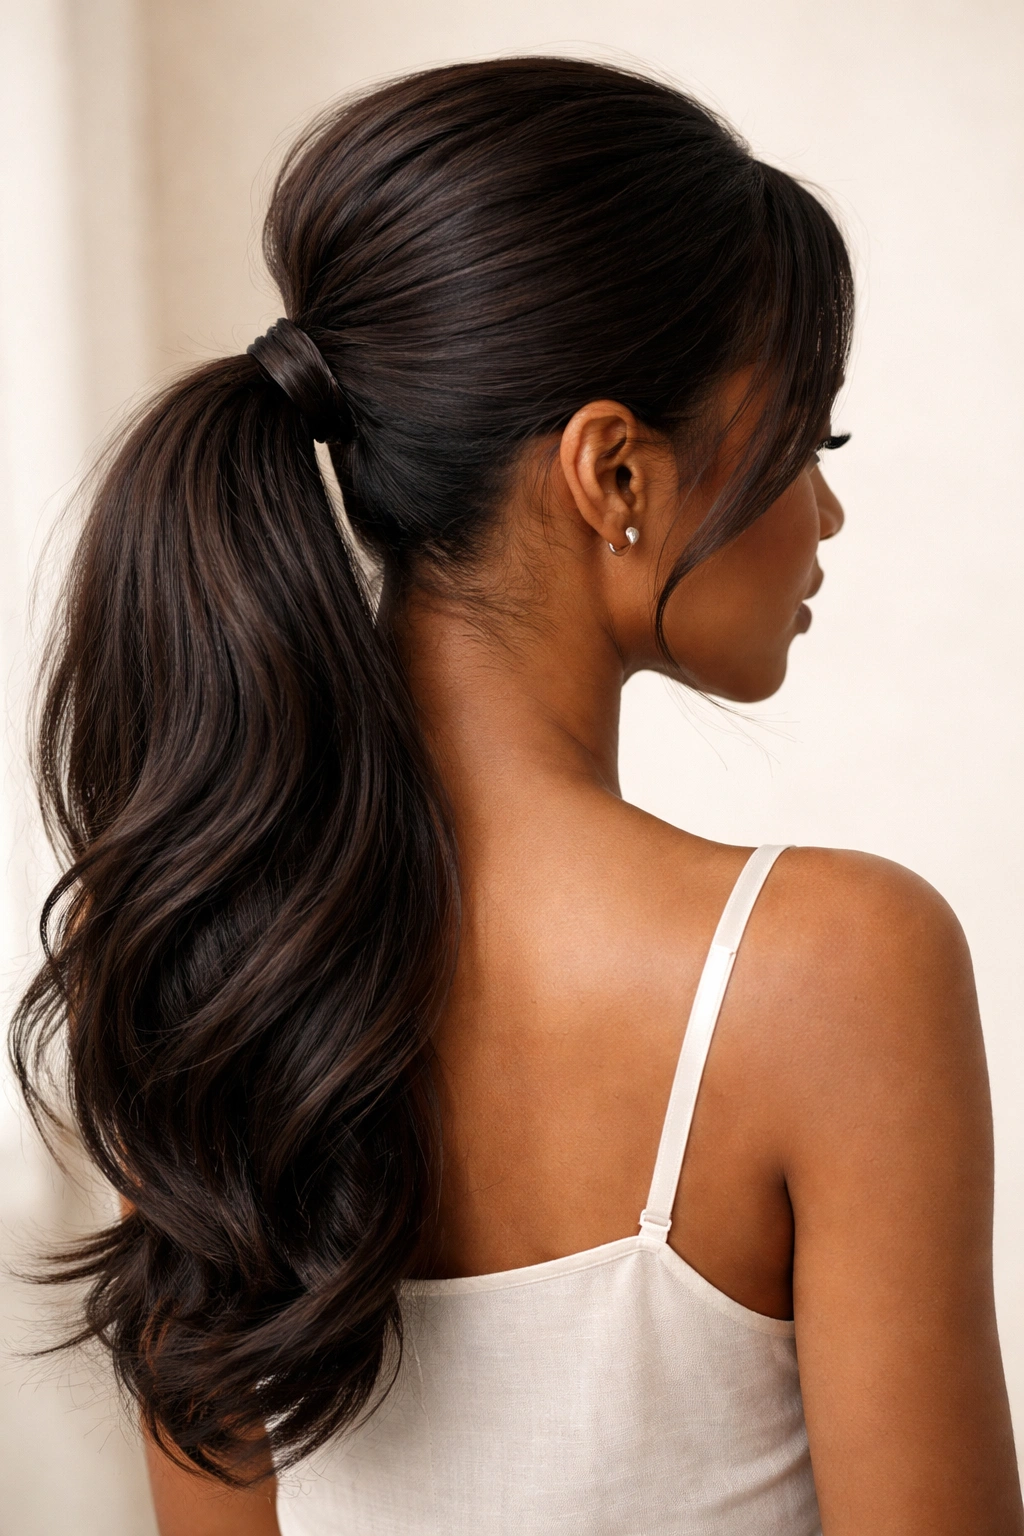
1. Classic Straight Weave Ponytail
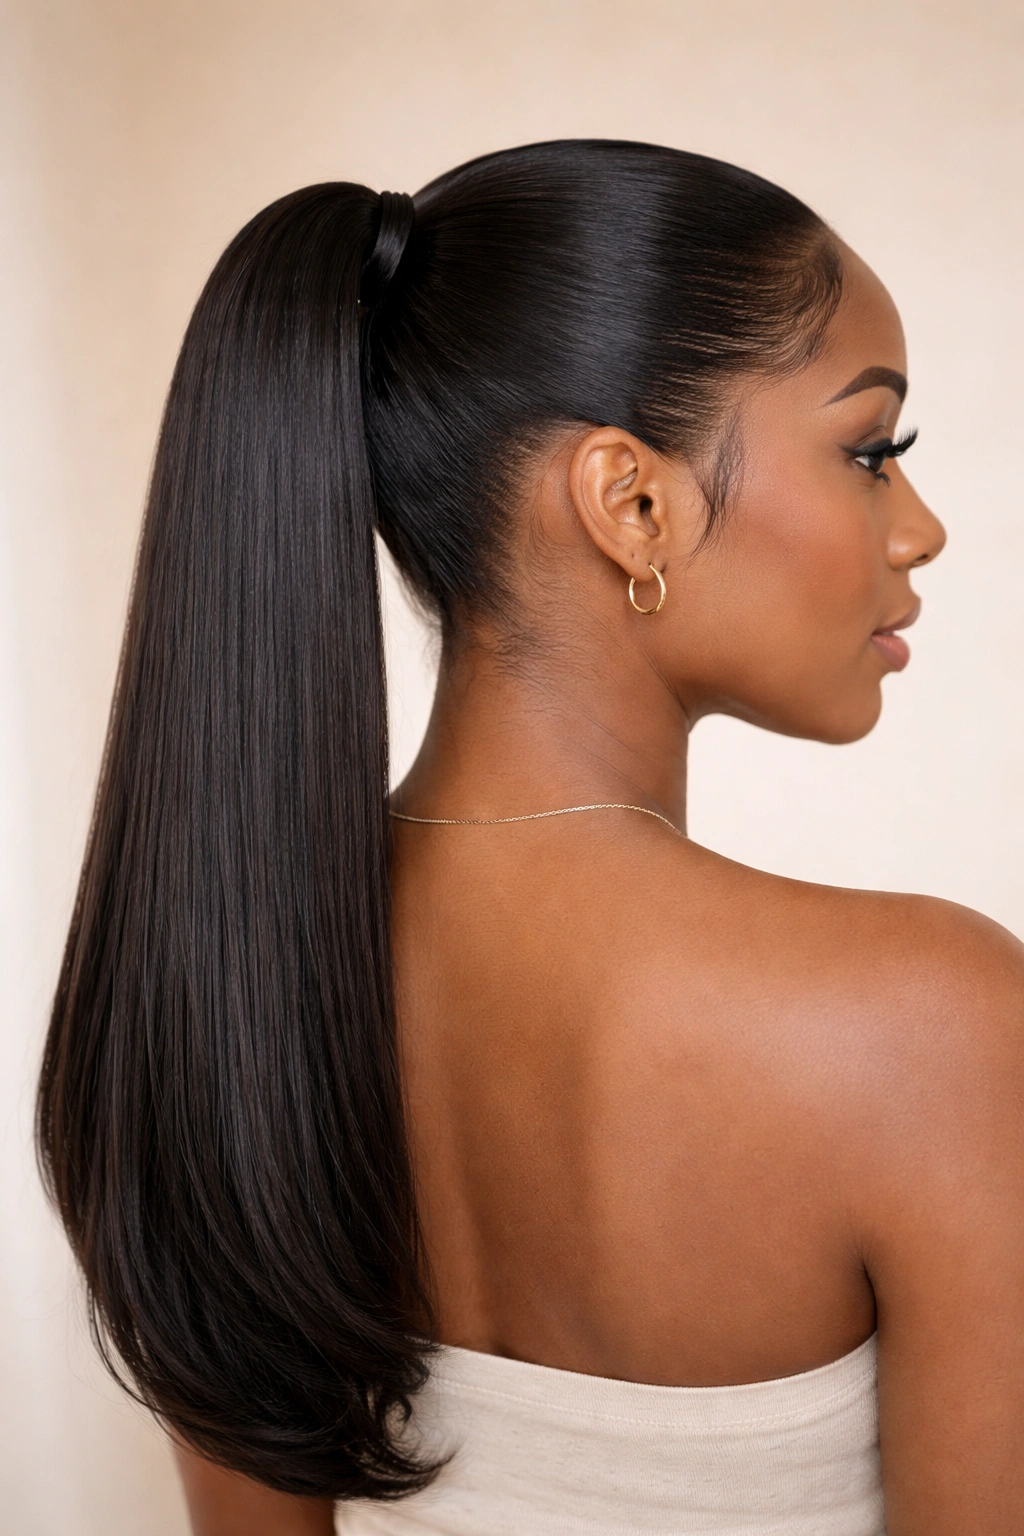
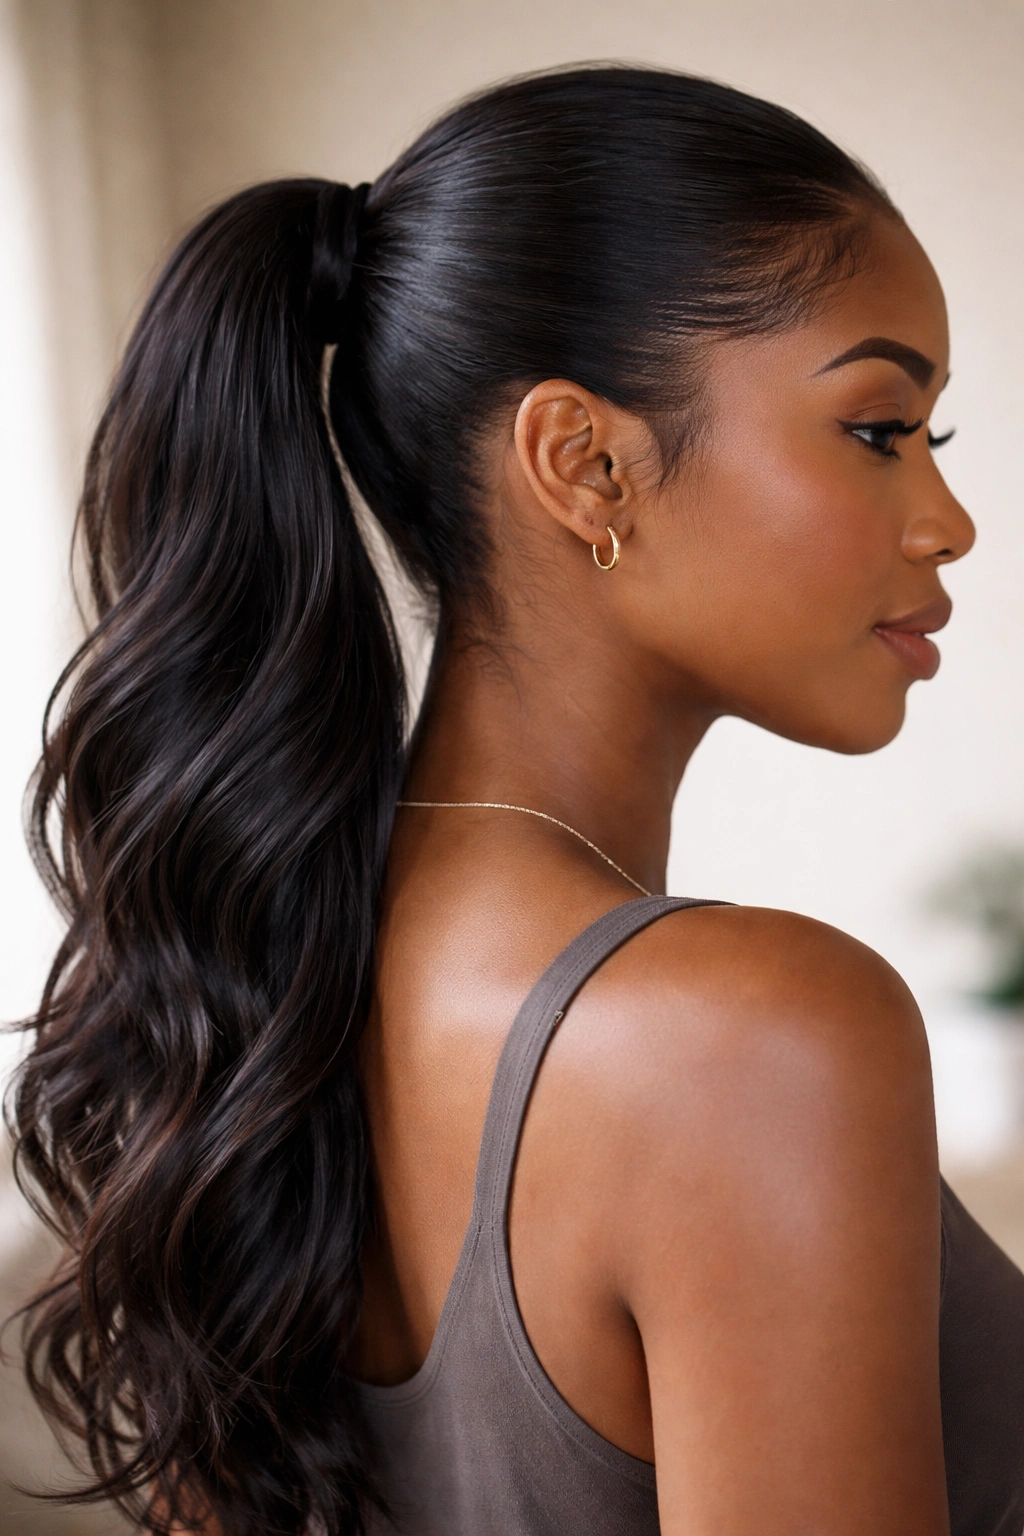
This is the foundational style that works for basically every occasion and skill level. You’re starting with your natural hair blown out smooth at the roots, then adding a quality straight weave bundle that matches your hair texture and color—or intentionally doesn’t, if you’re going for that subtle ombré effect. The ponytail sits at the nape of your neck or slightly higher, depending on your face shape and the vibe you’re going for, and the finish is simply polished without being overdone.
Why This Style Passes the Natural Hair Test
The straight weave ponytail doesn’t try too hard, which is exactly why it reads as natural. Straight hair is common and recognizable, so when people see a well-blended straight ponytail, their brain just registers “neat ponytail” rather than “obviously extended hair.” You’re not fighting against texture expectations or trying to convince people that an impossibly voluminous style is all real hair. The simplicity is the strength here—everything about it signals confidence rather than covering something up.
What Makes This Version Work
- Your natural hair at the base should be slicked back or gently smoothed, not crimped or overworked in a way that creates obvious texture variation
- The weave bundle should hit at the same density as your natural hair—thicker weave on thinner natural hair creates an obvious jump that breaks the illusion
- Straight weave ponytails work best when you let the hair finish naturally at the length, rather than blunt-cutting them all to the same length, which reads as immediately installed
- A simple clear elastic or silk-wrapped tie keeps the look refined and lets the focus stay on the hair itself rather than the fastening mechanism
Pro tip: If you’re worried about the connection point at the tie being too obvious, keep the weave slightly longer than you think you want it, then use a straightening iron to create a subtle bend where the tie sits—this mimics the natural crease your hair would have from an actual ponytail.
2. Textured Boho Weave Ponytail
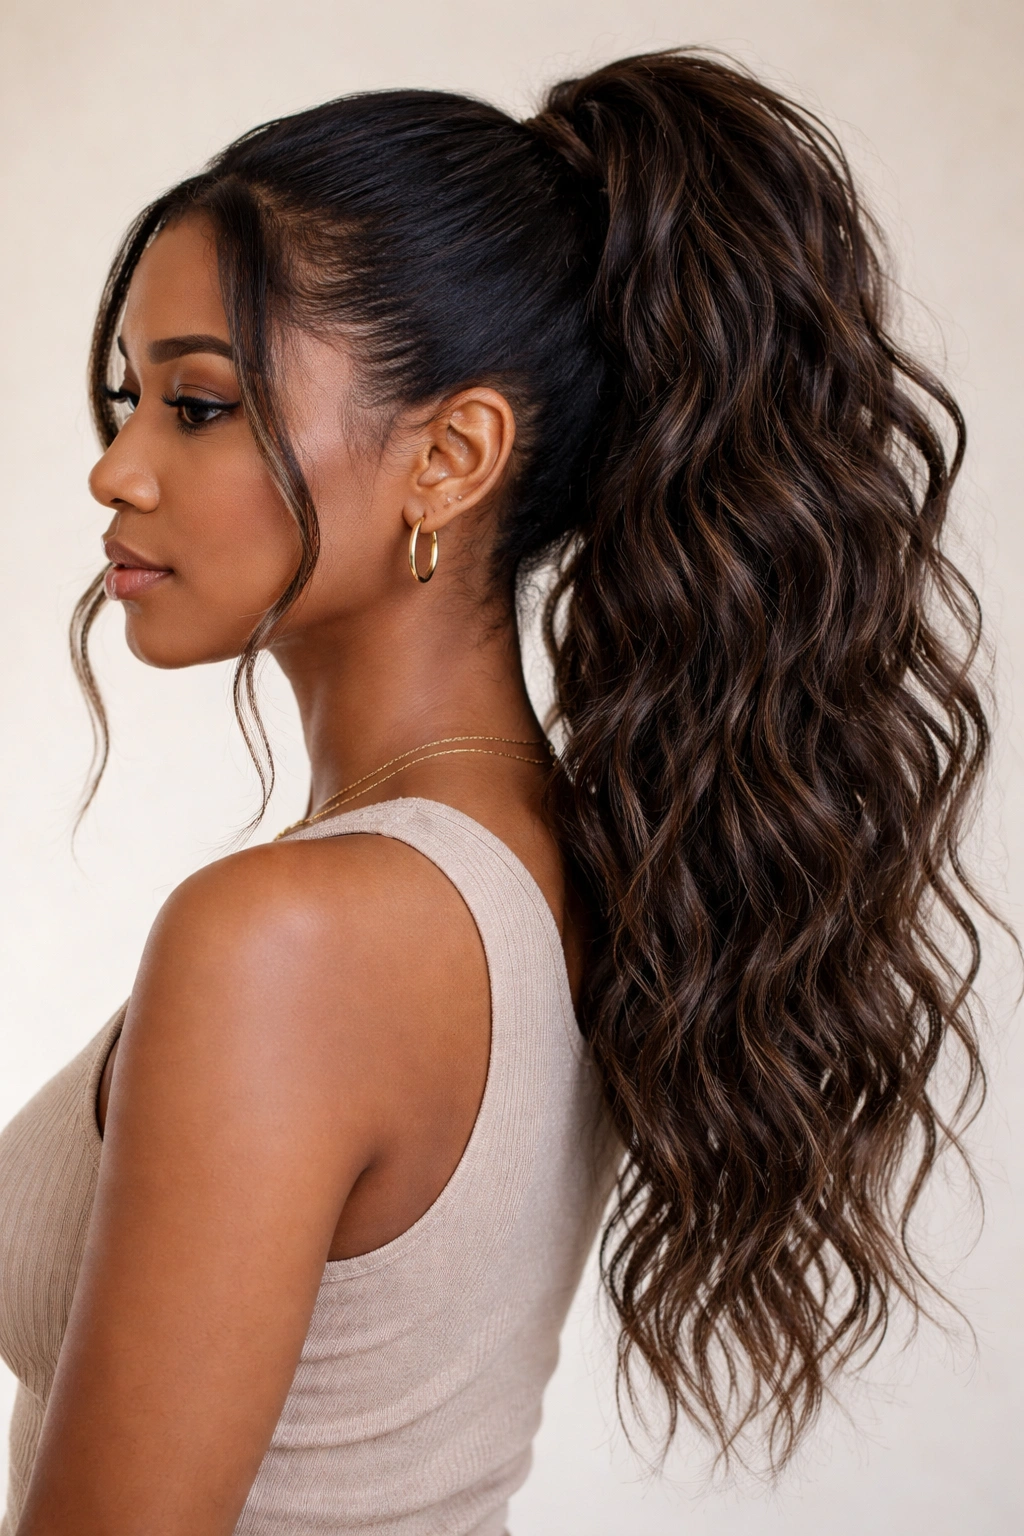
This style takes everything people love about bohemian hair and adds the dimension that makes it look completely undone and utterly intentional at the same time. You’re working with wavy or curly weave bundles that create movement and texture, positioned in a way that lets smaller pieces frame the face naturally, the way actual hair falls when you’re trying not to look like you tried. The texture itself becomes your disguise because curly and wavy hair hides blend lines much more effectively than straight hair.
Why Textured Hair Blends So Seamlessly
Curls and waves are natural camouflage for where your hair ends and the weave begins. When you’ve got movement and texture happening, the eye doesn’t land on the connection point the way it does with sleek straight hair. Even slight color variations or texture differences disappear into the overall pattern. This is partly why curly-haired people sometimes find it easier to rock weave styles—the texture does half the blending work for you. You’re also working with a style that’s inherently more forgiving about minor imperfections in installation.
How to Build the Boho Effect
- Start with loose wave or curly bundles rather than a single straight pack—mixing two different curl patterns creates more dimension
- Tease your natural hair at the base to match the texture of the weave, so the transition isn’t a sharp jump from your smoother natural hair to bouncy curls
- Position the ponytail slightly off-center rather than dead middle—off-center ponytails automatically read as more relaxed and natural
- Finger-separate and reshape the curls after styling, breaking up any too-perfect waves that look freshly installed
- Use a light mousse or curl-defining cream to enhance the wave pattern without making it look wet or sticky
Pro tip: Boho styles look more natural when you let a few smaller strands fall loose around the face—these baby hairs soften the overall look and make it feel less constructed.
3. Sleek High Ponytail with Wrap
The high ponytail with a wrap is almost cheating in terms of making weave look intentional. That wrap—whether it’s a piece of your own hair, a synthetic hair wrap, or a ribbon—instantly draws attention away from the connection point and suggests that you styled this on purpose, with intention. It’s particularly genius because adding a wrap is something people do with their natural hair all the time, so it doesn’t raise any red flags about extensions.
Why the Wrap Is Your Secret Weapon
A wrap serves multiple purposes beyond aesthetics. It hides the tie, it covers the seam where your hair ends and the weave begins, and it signals that this isn’t an accident—you styled this deliberately. The wrap essentially says “this is a chosen look” rather than “this is what I’m working with,” which shifts the entire perception. You could have visible blend lines, but the wrap just redirects the eye and makes the style feel polished. It’s a small detail that makes a massive difference in whether a weave ponytail reads as high-effort or high-maintenance.
Building the Perfect Wrapped High Ponytail
- Pull your ponytail high enough that you can see the connection point slightly—don’t pull too tight at the edges, which creates obvious tension lines that read as installed
- Smooth your edges with gel, but not so much that they’re shellacked—that glazed look defeats the purpose of making it look natural
- Choose a wrap color that either matches your hair exactly or contrasts intentionally (a gold or silver wrap reads as styled; a mismatched wrap reads as trying too hard)
- Wrap multiple times around the base—three full wraps minimum to cover the tie completely—then tuck the end into the wrapped section
- If you’re using your own hair as a wrap, take a small section from underneath the ponytail, twist it, and wrap it around the base, securing the end with a bobby pin hidden inside
Worth knowing: The higher the ponytail, the more the wrap becomes the focal point, which means the less attention anyone pays to the actual connection point or blend.
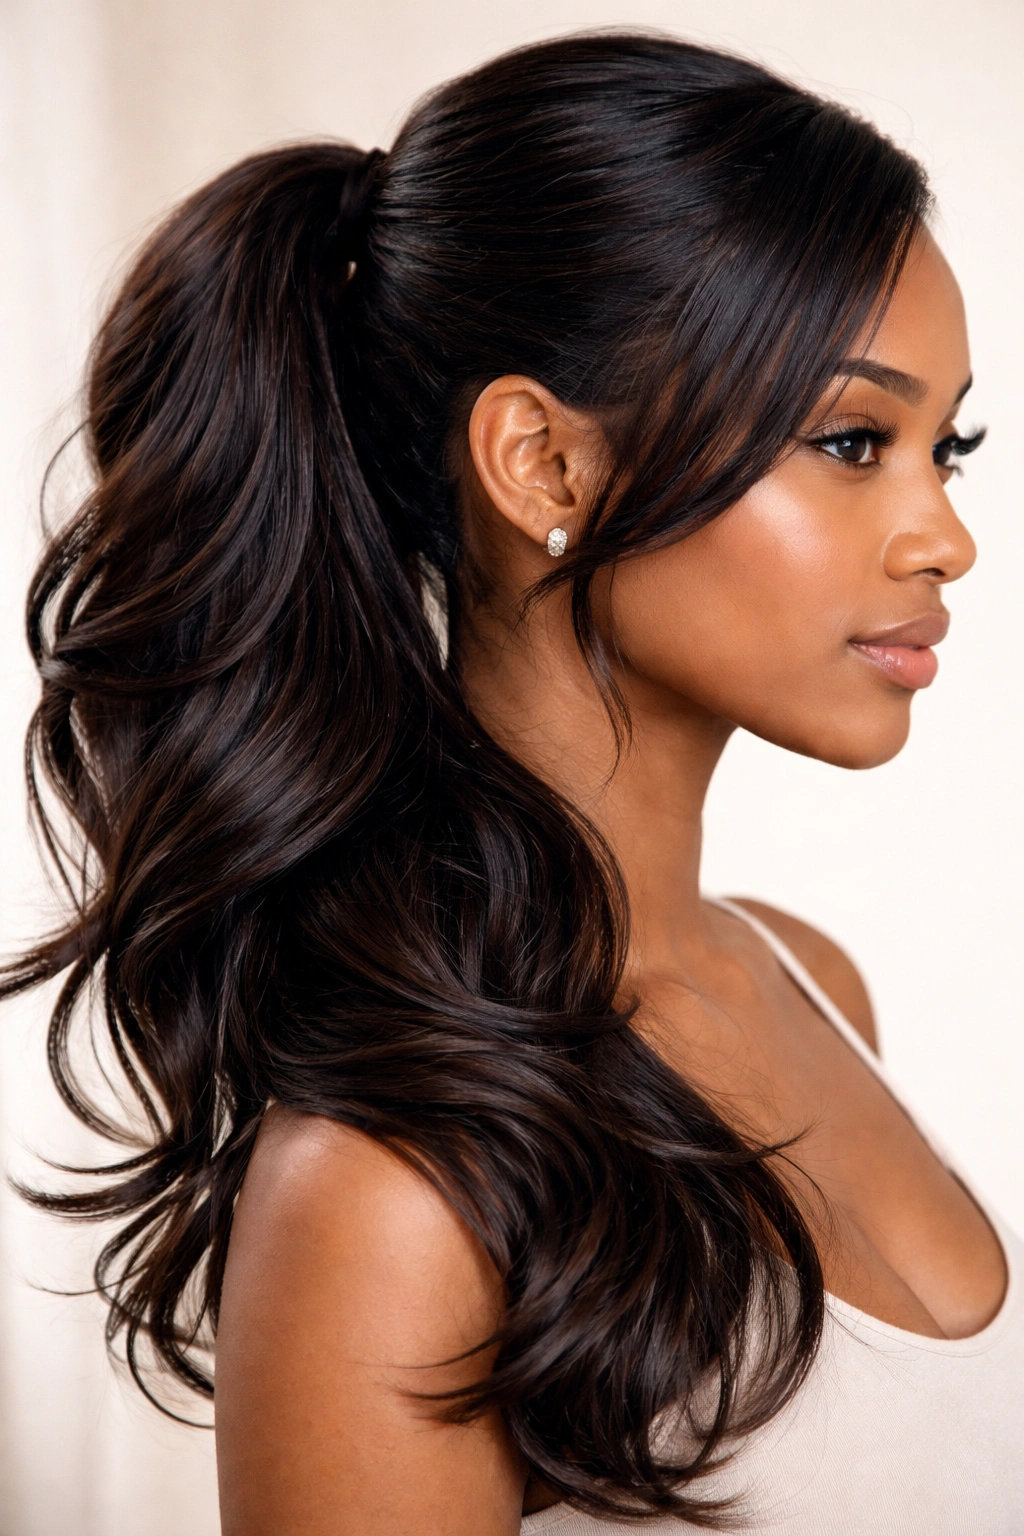
4. Wavy Natural-Looking Weave Ponytail
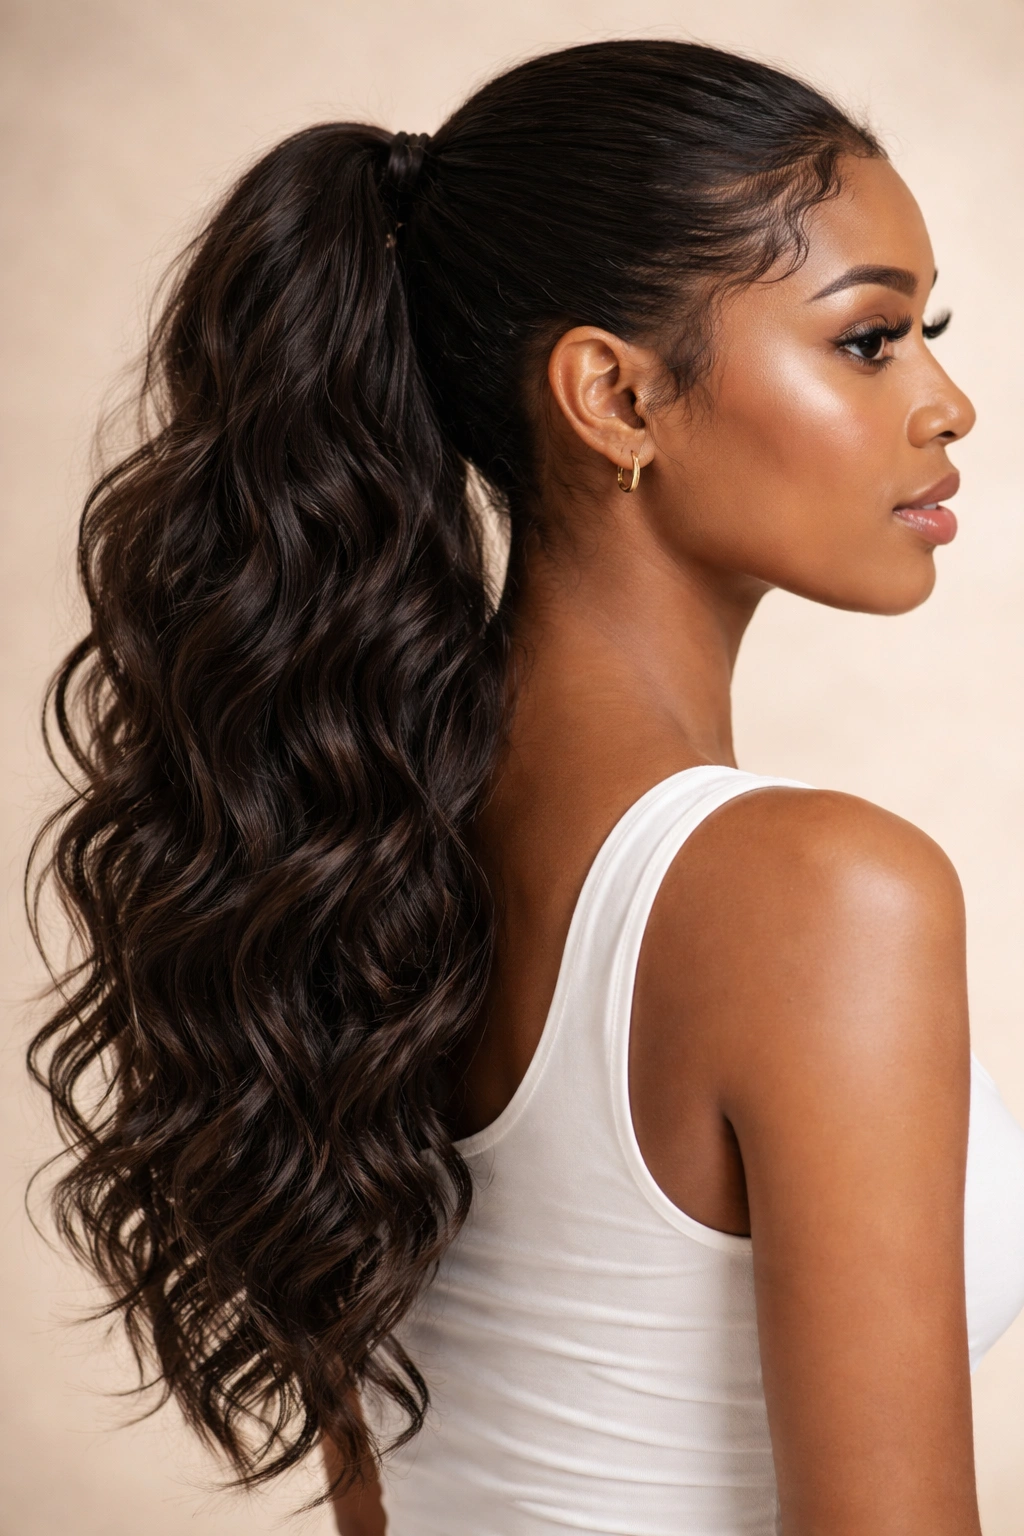
This style lives in that perfect middle ground between textured and straight, offering waves soft enough that they look like they could be your actual hair, but with enough movement to provide that protective-style polish. You’re looking for bundles with a wave pattern—not tight curls, not pin-straight, but genuine waves that mimic how straight hair looks after you’ve slept on braids or worn a ponytail all day. The end result reads as effortlessly put-together rather than freshly installed.
Why Waves Read as the Most Natural Hair Texture
Straight hair can look polished, and curly hair can look intentional, but waves hit that sweet spot where people see them and think “oh, that’s just how her hair naturally behaves.” Many people have naturally wavy hair, so waves don’t trigger the same “suspicious extension” bells that extremely thick or perfectly uniform straight or curly hair might. Waves also hold style longer than straight weave, so your ponytail actually looks better on day two or three than it does day one—that’s a genuine advantage of this texture choice.
Styling Wavy Weave for Maximum Naturalness
- Use bundles with a natural wave pattern rather than waves that look heat-created and uniform—S-waves read more naturally than perfect ringlets
- Your own hair underneath should have some texture too, even if it’s just light waves from braiding the night before—super smooth hair under wavy weave creates an obvious contrast
- Avoid overstyling the waves; let them fall naturally instead of re-waving them to perfection with a flat iron
- A light sea salt spray enhances the wave pattern without adding shine or stiffness that reads as product-heavy
- Position the ponytail at the base of your neck rather than high, which feels more relaxed and everyday
Quick tip: Wavy weave actually benefits from a day or two of wear because it softens and looks more lived-in, so don’t stress about getting it absolutely perfect on installation day.
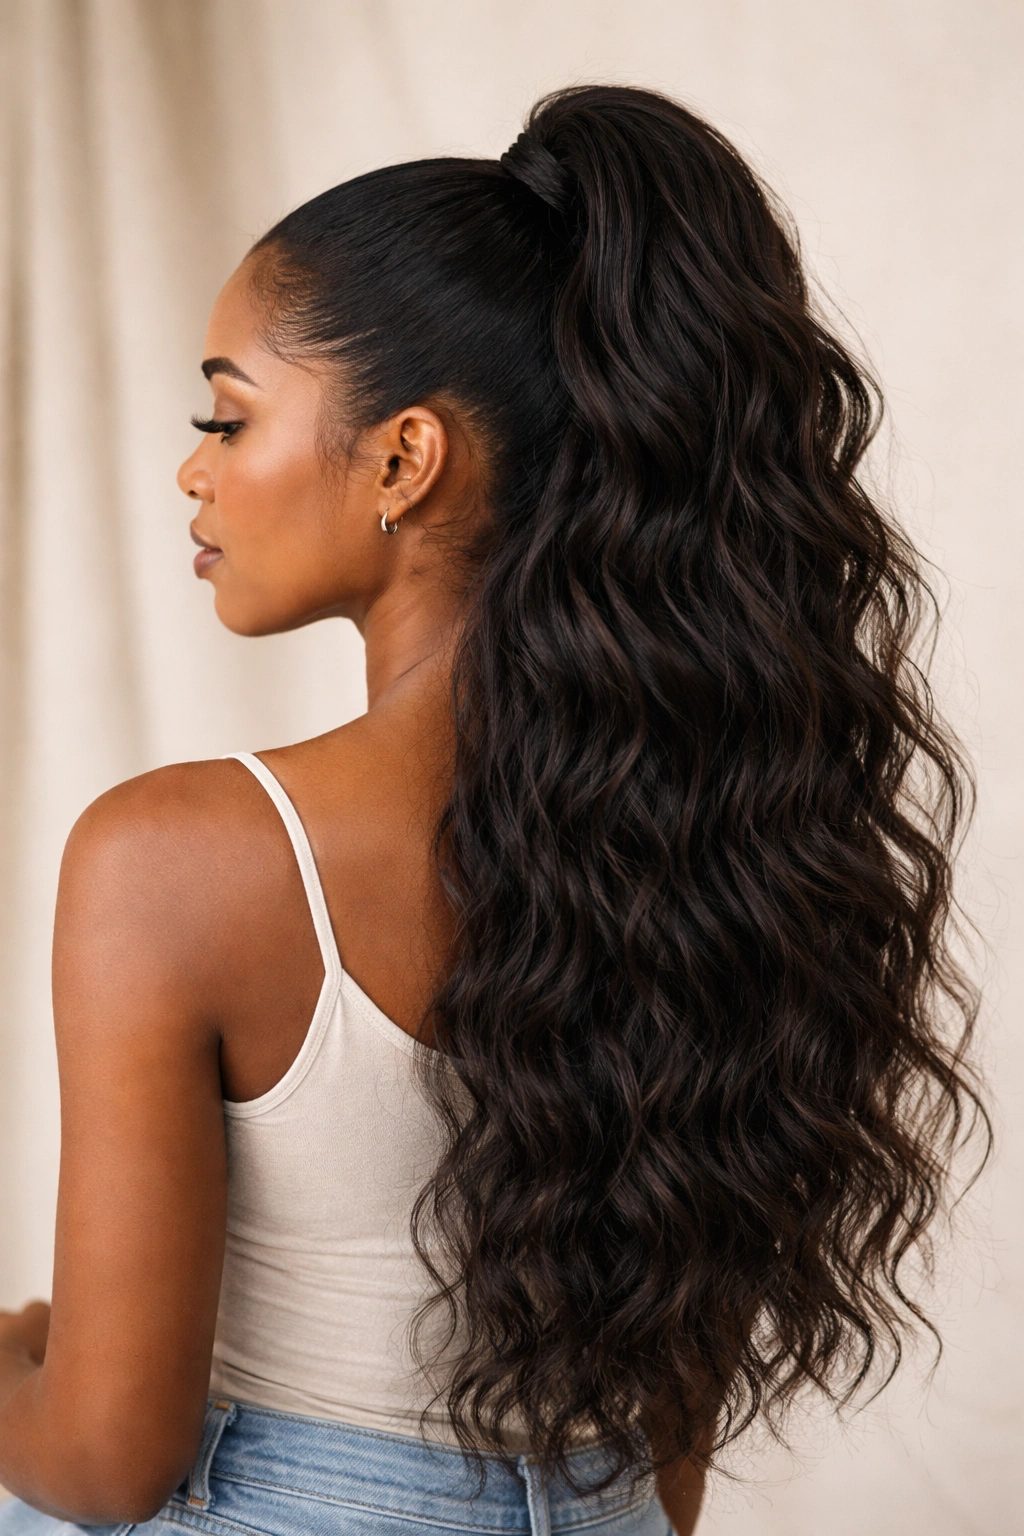
5. Low Ponytail with Volume at Crown
This style creates the illusion of fuller, thicker natural hair at the crown while keeping the actual ponytail placement low and understated. You’re using your natural hair to create height and dimension at the top of your head, then blending the weave into a lower ponytail position. This approach makes the weave look like it’s simply lengthening and adding weight to your actual hair, rather than replacing it entirely.
Why Lower Placement Looks More Natural
High ponytails immediately signal “styled,” while lower ponytails read as everyday. If you walk into a room with a high, tight, perfectly polished ponytail, people notice the style. A low ponytail? That looks like what you grabbed because you needed your hair off your face. By keeping the ponytail low, you’re working with the most natural-looking placement option. The volume at the crown is where human hair naturally appears fullest anyway, so building there doesn’t feel like cheating—it feels like you just have thicker hair at the roots than the ends.
Creating Crown Volume That Reads Natural
- Blow-dry your natural hair with a round brush at the crown to create natural-looking lift, not a flat base
- Lightly tease your crown hair, but not so much that it creates a ridge when you add the weave
- Apply the weave bundles starting slightly lower than you’d normally position a ponytail, then blend upward into your crown area
- Use a fine-tooth comb to smooth the blend where your crown hair meets the weave
- Keep your edges around the face slightly softer than the back—slicked-back edges everywhere read as more constructed than natural
Essential point: The longer your low ponytail hangs, the more natural it looks—hanging ponytails feel like they belong to you, while ponytails that end right at your shoulders feel like they’re being imposed on you.
6. Braided Base Weave Ponytail
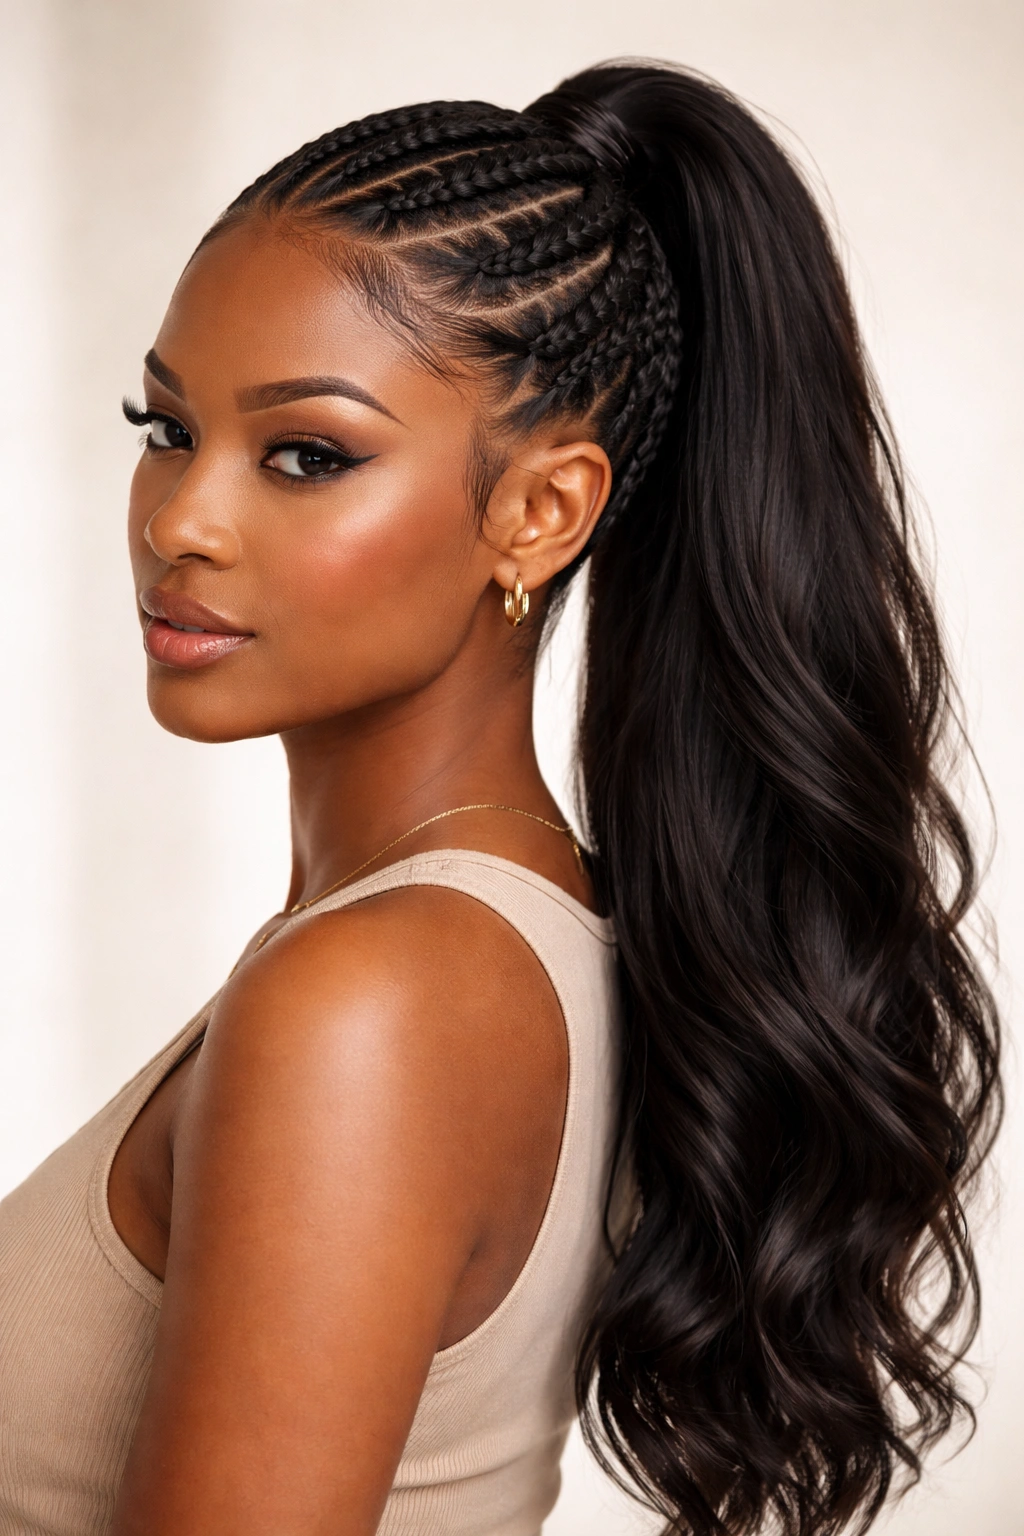
Instead of using a traditional ponytail base, you’re cornrowing your hair or creating Dutch braids that lead to the ponytail point, then attaching the weave bundles at that braid base. This approach serves dual purposes: it adds style interest and it distributes tension more evenly across your scalp, which is better for your actual hair. The braids become a design feature rather than hidden infrastructure, which changes the entire visual impact.
Why Braids Create the Most Natural-Looking Foundation
When you cornrow from the hairline to the ponytail point, you’re essentially creating a personalized anchor system that looks intentional rather than like you’re just trying to keep extensions attached. The braids become visual evidence that you styled this on purpose and put thought into the construction. Braids also create a cleaner line where your hair ends and the weave begins, because the braid itself is a distinct design element rather than a seam. People see the braids and think “that’s a style choice,” not “that’s a connection point.”
Braiding Patterns That Work Best
- Feed-in braids or cornrows offer the thinnest, least bulky base and read the most natural
- Create three or four braids leading from your hairline to your ponytail point—multiple thinner braids look more considered than one thick braid
- Don’t braid too tightly, which creates obvious bumps and tension on your scalp; aim for secure but comfortable tension
- You can braid with your own hair only, then add the weave at the base, or you can feed weave throughout the braid to blend earlier
- Finishing braids to a point rather than leaving loose ends means you can secure the weave bundles flush to the braid without gaps
Pro insight: Braided ponytail bases are particularly good if you have a smaller head or a rounder face, because the braids draw the eye upward and backward rather than calling attention to where the ponytail connects at the nape.
7. Side Ponytail with Layers
A side ponytail that actually works with your face shape and has intentional layers built in looks deliberately styled in a way that makes the weave less noticeable. You’re not creating a one-dimensional side ponytail where everything flows in a single direction; instead, you’re layering the weave so there’s movement and dimension coming from multiple points. This creates visual complexity that hides blend lines and installation seams.
Why Side Positioning Makes Extension Blending Easier
A side ponytail automatically looks more fashion-forward and intentional than a centered ponytail, which means people expect a certain level of polish and styling. That expectation actually works in your favor because a styled look distracts from examining the technical details of how the hair is constructed. The side placement also means the connection point sits off to the side, where people are less likely to stare directly at it. You’ve moved the focus away from where your hair ends and where the weave begins.
Building Layers Into Your Side Ponytail
- Pull your natural hair to the side, but don’t pull it all the way into one tight section
- Grab a smaller section at the crown that’s separate from the rest—this creates your first layer and adds dimension
- Attach weave bundles to create length on your main ponytail section, then add a thinner bundle separately to the crown section, creating visible layers
- Curl or wave both layers with a curling iron to enhance the dimensional effect
- Use the smaller top layer to frame your face with a few wispy pieces that fall naturally
Style note: Side ponytails work particularly well if you have a side part already, because you’re just leaning into an existing pattern rather than creating an obvious style shift.
8. Curly Blended Weave Ponytail
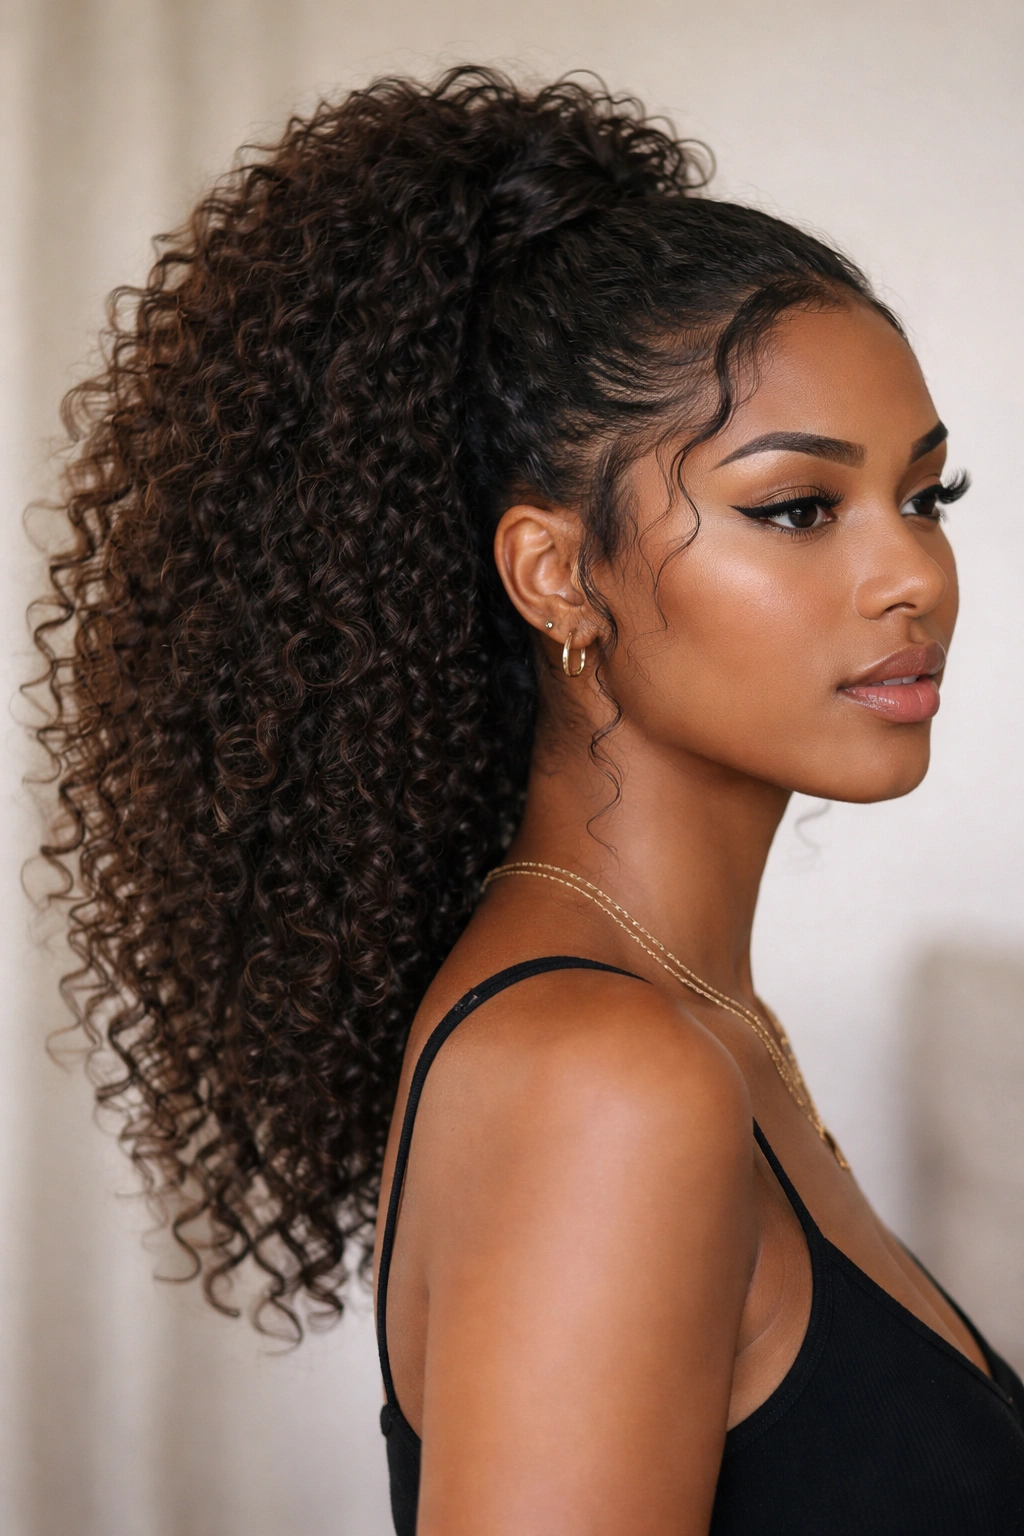
This style takes curly weave to its most natural-looking extreme. You’re not going for uniform, perfectly defined curls, but rather a blend of curls, waves, and slightly straighter pieces that mimic how actual curly hair looks when it’s been through a style, slept on, and lived in for a few days. The irregularity is the entire point—it’s what makes it look real.
Why Imperfection Is Your Best Asset Here
Real curly hair isn’t uniformly coiled from root to tip. It has variations in curl pattern, some frizz, some pieces that have loosened since the last wash, and overall character that’s impossible to replicate if you’re trying too hard. When you embrace that imperfection in your weave ponytail—not carefully defined curls but curls in conversation with each other—it reads as genuine. You’re not fighting against what curly hair actually looks like; you’re leaning into it. This is the style where you can actually get away with a slightly less perfect install because the texture hides everything.
Creating Realistic Curl Texture
- Use curly bundles with varying curl patterns—tight, medium, and loose curls mixed together—rather than uniformly coiled hair
- Don’t re-curl the weave after install; let the curls settle naturally and potentially loosen slightly
- Finger-separate every curl, messing up the uniformity intentionally
- Use a curl cream or leave-in conditioner that adds shine without smoothing the curls completely
- Refresh the ponytail with a spray bottle of water and some product rather than heat styling, which can make the curls look too perfect
Real talk: Curly weave ponytails actually look better when they’re a few days into wear because the curls have relaxed and softened, creating a more believable texture.
9. Bubble Ponytail with Weave Extension
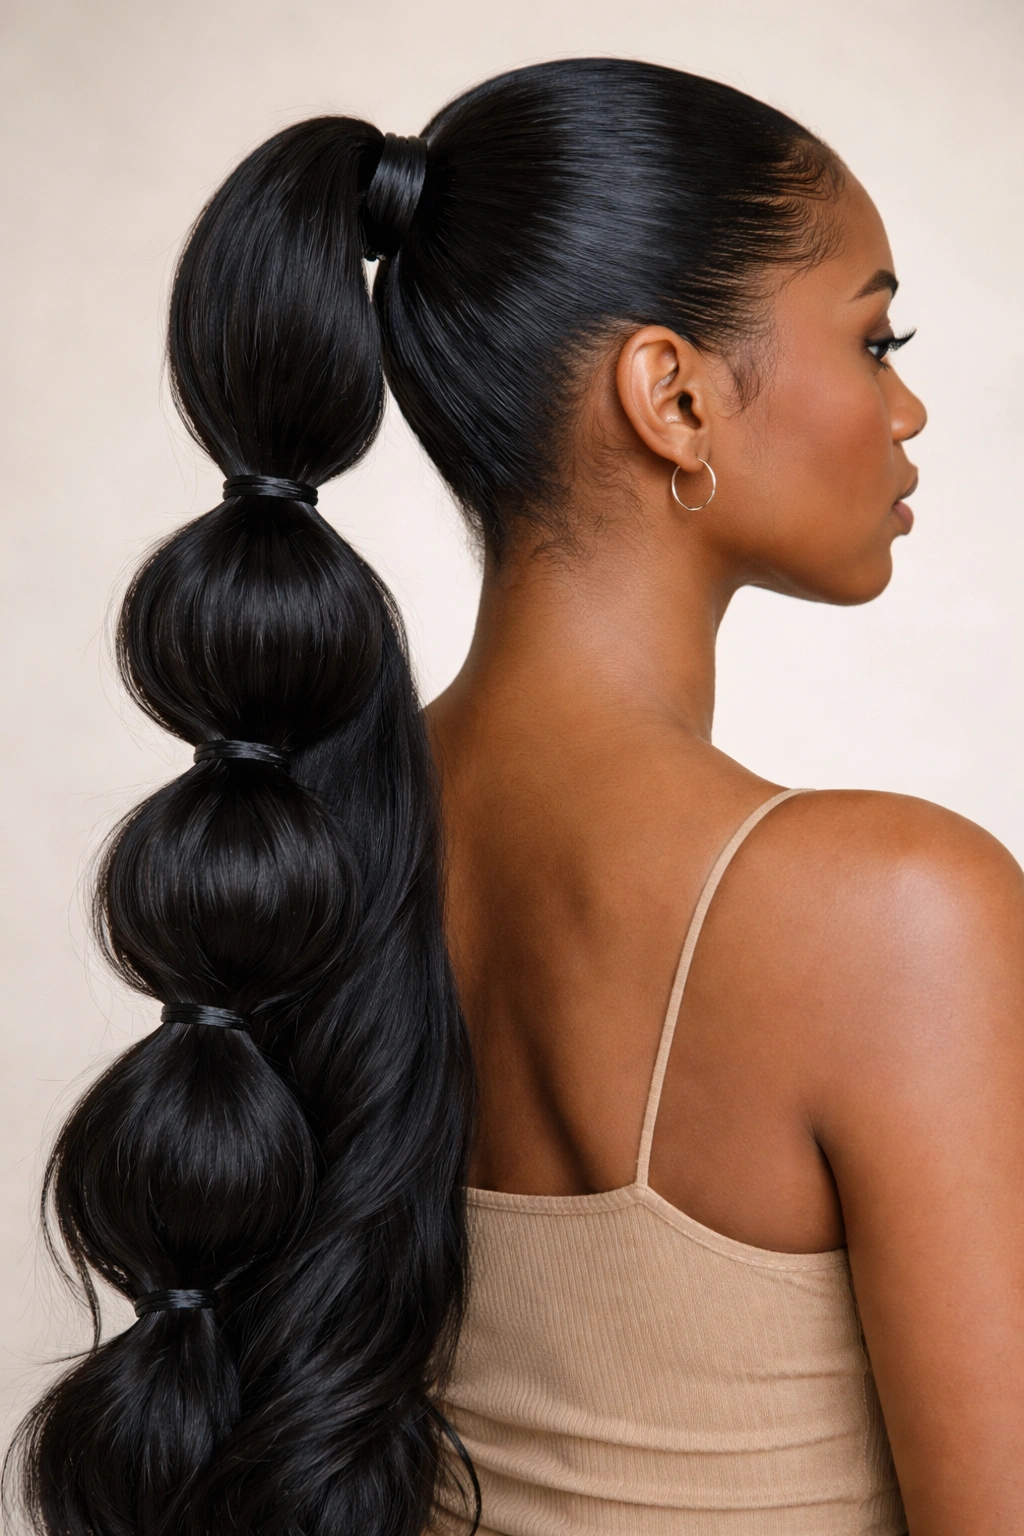
The bubble ponytail—multiple stacked ponytails tied with intervals between them—creates enough visual interest and style complexity that the weave blends into the overall design rather than standing out as extensions. You’re building a playful, intentional style that reads as a choice rather than a coverage method. Each bubble becomes a focal point, which means the connection points and blend lines distribute across the entire length rather than concentrating at a single base.
Why Segmentation Hides Extension Points
When you create bubble segments, you’re essentially breaking the ponytail into multiple smaller sections, each with its own tie point. This means no single part of the ponytail carries the visual burden of being obviously extended. A person looking at a bubble ponytail sees a series of separated, voluminous sections rather than examining how the hair attaches. The bubbles are the style, and the attachment points become secondary design details rather than the focal point. It’s a genuinely clever way to disguise weave while creating something that looks intentional and modern.
Building Bubble Ponytails With Weave
- Start with your base ponytail at the nape of your neck, incorporating weave bundles to create fullness
- Create your first bubble by tying the ponytail with a clear elastic, then gently puffing out the hair between the tie and your scalp
- Grab the ponytail below the first bubble and secure it with another elastic, creating a second bubble, and repeat down the length
- Use clear elastics that blend with the hair color rather than visibility adding an extra design element
- Curl or wave each individual bubble section for added dimension and visual impact
Pro detail: Bubble ponytails work best when each bubble is noticeably puffy and separated, not when they’re subtle—the more obvious the bubble pattern, the less people focus on the technical construction.
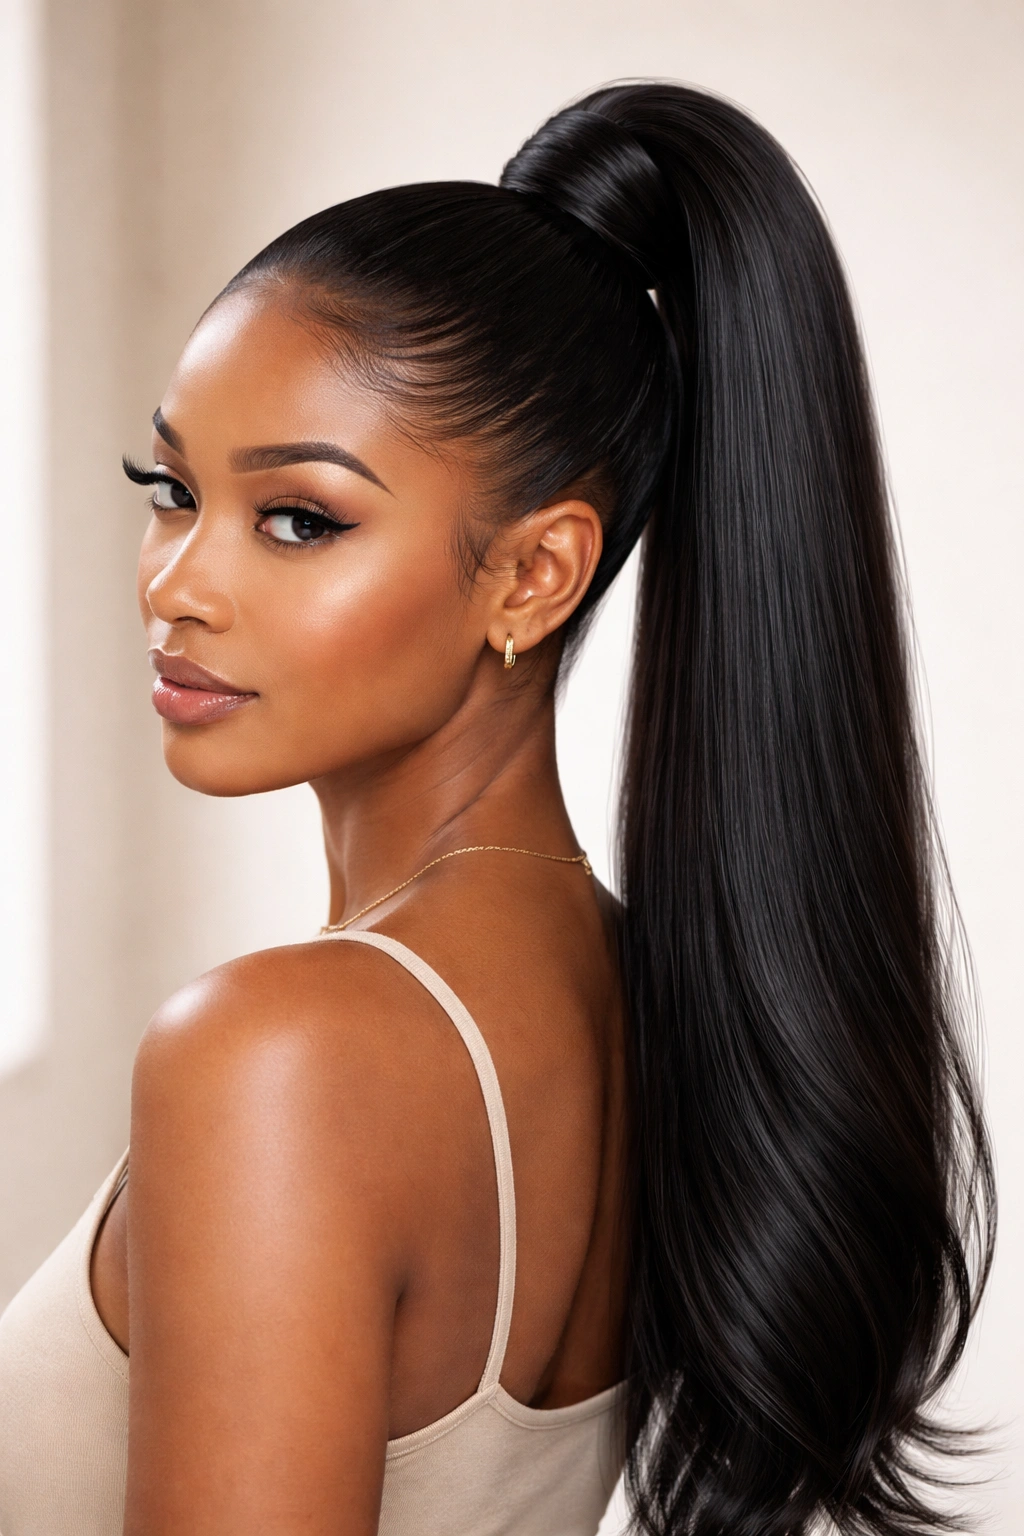
10. Stick Straight Weave Ponytail with Polished Edges
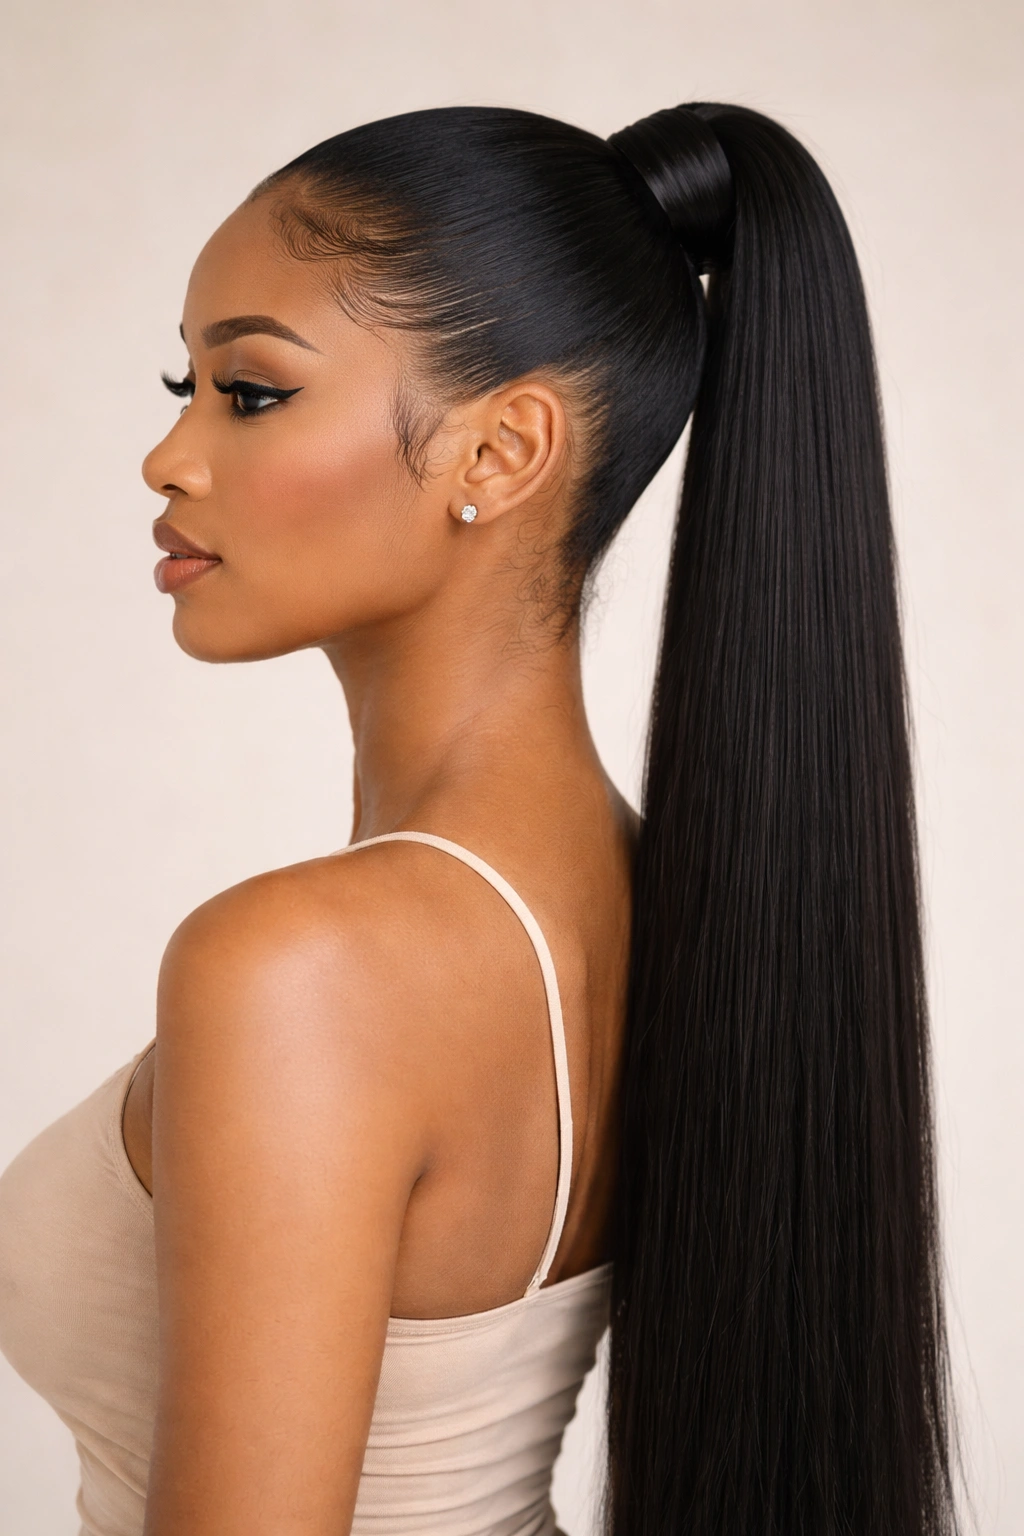
This is the “not sorry about it” version of a straight weave ponytail. You’re going for sleek, sharp, polished edges, and a perfectly straight ponytail that reads as intentionally styled rather than trying to hide the fact that it’s an extension. The straightness is the entire point—you’re not pretending this is your natural hair, you’re confidently saying “this is a choice I made, and it looks good.” That confidence changes how people perceive the style.
Why Visible Intentionality Reads as Confidence
There’s a psychological component to how people perceive weave styles. If you’re nervously trying to hide the fact that you’re wearing extensions, people sense that and look more closely at the seams. If you’re confidently owning a polished, obviously-styled look, people accept it as a aesthetic choice. A perfectly straight ponytail with sharp edges, a wrap, or a decorated tie isn’t trying to fool anyone—it’s announcing that this is a deliberate style, and that confidence is actually more attractive than a style that’s desperately trying to seem natural.
Executing the Polished Straight Style
- Use high-quality straight weave that doesn’t have bumps, tangles, or inconsistencies in texture
- Straighten the weave with a flat iron before installation to ensure it’s perfectly smooth, not just naturally straight
- Slick your edges back completely with a strong-hold edge control—no wisps or flyaways, full commitment to the sleekness
- Add a wrap, a hair clip, or a decorated elastic as a deliberate accent that says “this is styled”
- Keep your natural hairline completely clean and defined—strong edges are the signature of an intentional look
Key point: This style actually works better when you make no apologies for it being extensions—the confidence makes it look ten times better than trying to pass it off as natural hair.
11. Textured Tribal Braids Weave Ponytail
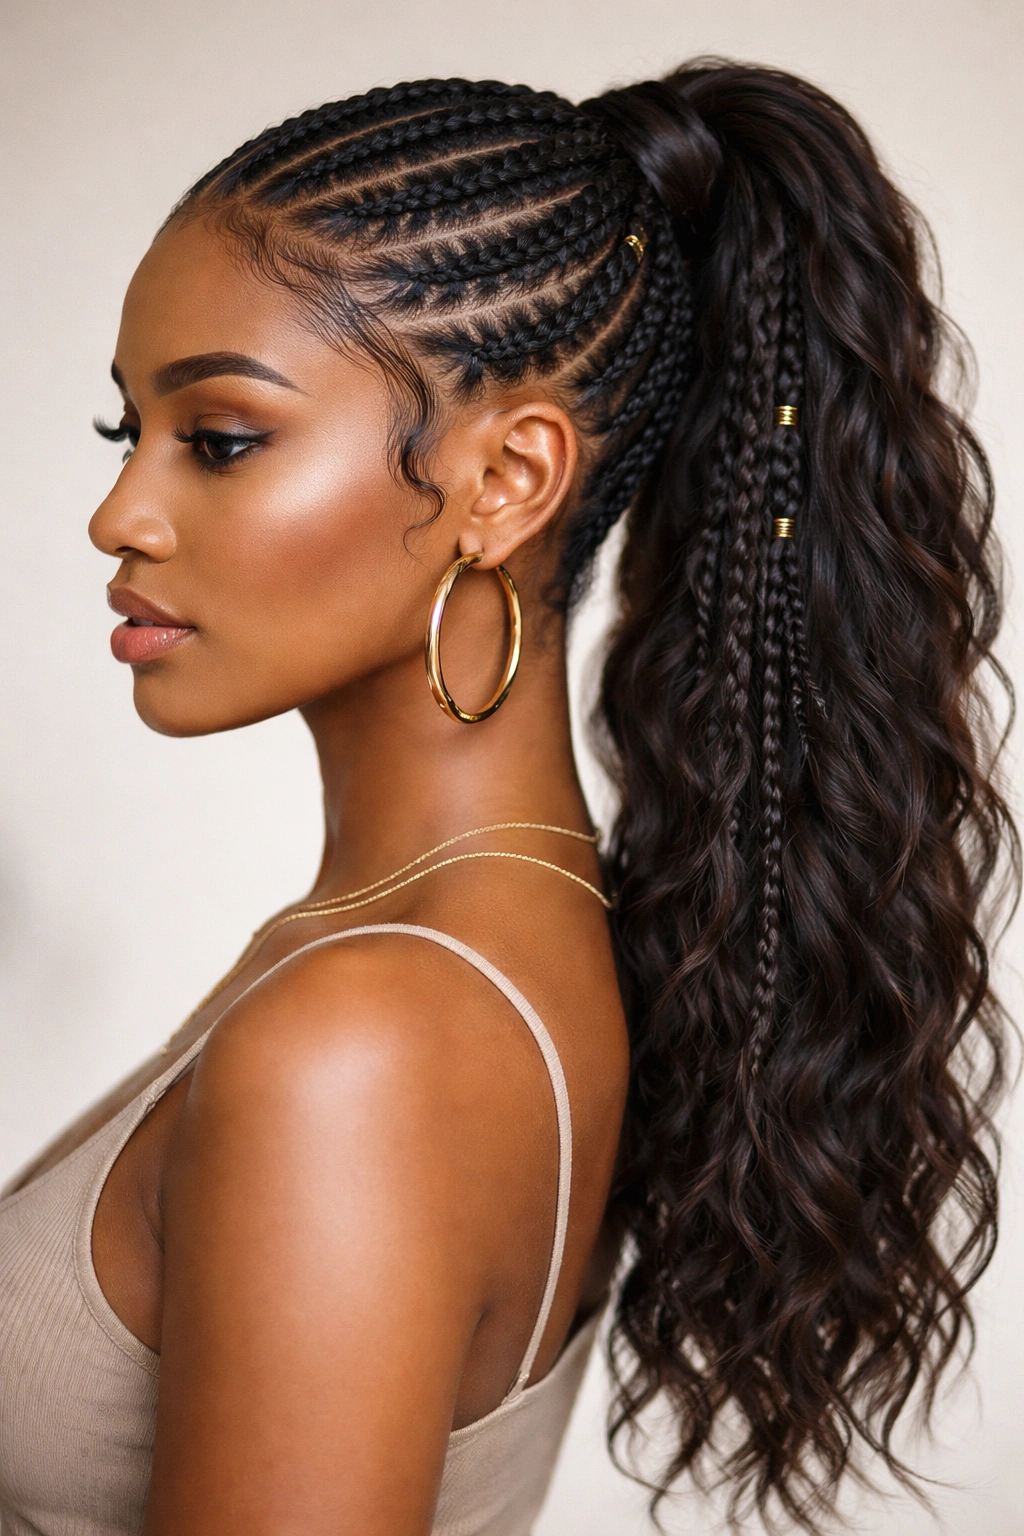
This style incorporates braided sections directly into the ponytail itself, mixing sleeker hair with braided texture throughout the length. You might have three sections—one braided, one wavy, one straight—that are gathered together at a single point, or you might have smaller braids woven through a fuller ponytail. Either way, the braided texture becomes a design feature that adds visual interest and makes any blend lines or construction details invisible among the complexity.
Why Braided Sections Camouflage Extensions
Braids are textured, they’re intentional, and they demand visual attention. When you’re looking at a ponytail with braided sections, your eye focuses on the braid pattern rather than examining the raw hair. You could have a visible seam right next to a braid and nobody would notice because the braid is what’s catching their attention. Braids also allow you to incorporate your natural hair more visibly into the ponytail, because braids can hide where your hair starts and the weave begins naturally. You’re not trying to match textures; you’re creating deliberate texture variation.
Mixing Braids Into Ponytail Design
- Create two or three braids using your natural hair, starting from your scalp and braiding down, leaving the ends loose to fold into your ponytail
- Create a main ponytail with weave bundles in the center, then feed the loose braid ends and unbraided sections into that center ponytail
- The result should look like three distinct texture sections gathered together—braids, weave, and possibly loose hair all playing a role
- Secure everything together with a strong elastic that can handle multiple sections meeting at one point
- You can leave the braids as-is for definition, or slightly unravel them for a softer, more blended look
Practical note: This style distributes the weight more evenly since you’re using your natural hair as part of the ponytail structure rather than just as a base, which can be more comfortable for all-day wear.
12. Half-Up Weave Ponytail Style
The half-up ponytail uses your full-length weave hair as the length-adding element while keeping a significant portion of your hair down and free, which automatically reads as more natural because you’re showing your actual hair texture throughout the style. You’re creating a hybrid look that’s part protective style, part your regular hair situation, which is inherently less dramatic and more believable than a full ponytail where everything is extended.
Why Half-Up Styles Read as the Most Natural
When half your hair is down, showcasing your actual texture, color, and pattern, that becomes the visual anchor that everything else references. The extensions in the ponytail are then perceived as simply adding length and fullness to what’s already there, rather than replacing your hair entirely. Half-up styles are also inherently more casual and everyday—nobody questions a half-up ponytail as much as a full ponytail because half-up doesn’t feel like a style statement; it feels like you just wanted your hair off your face.
Building a Half-Up Weave Ponytail
- Section your hair so you’re leaving enough down around your face and shoulders to show off your actual texture
- Gather the top section into a ponytail at the crown or slightly back, incorporating weave bundles to extend and add volume
- Let the bottom section remain completely down and natural, framing your face
- Curl or wave both the down section and the ponytail section for a more cohesive look, or leave them different textures for intentional contrast
- This style works with straight, wavy, or curly weave—the portion of your hair that’s down will anchor everything
Worth knowing: Half-up styles are particularly good for shorter natural hair because you’re not trying to hide your length—you’re creating a style that works with what you have and adds to it.
Final Thoughts
The secret to making any weave ponytail look natural isn’t one single trick—it’s a combination of intentional choices that all work together. Your weave quality matters, yes, but so does your installation technique, your blending strategy, your edge care, and your overall styling approach. The styles that look most natural are often the ones where you’re not fighting against your actual hair texture or pretending you have something you don’t.
What actually reads as natural is a ponytail that looks like it belongs to you, where the weave enhances what you already have rather than obviously replacing it. That might mean embracing braids, adding texture, keeping placement low and casual, or intentionally styling in a way that screams confidence rather than camouflage. The most important factor is that you feel good in whatever style you choose. When you’re comfortable and confident, that confidence shows in how you wear the style, and that’s the real magic that makes any weave ponytail look like it’s actually yours.