If you’ve been scrolling through hairstyle inspiration and kept seeing delicate, intricate braids woven into ponytails, you’ve probably spotted butterfly braids in action. These aren’t your grandmother’s ordinary braids—they’re a modern, textured take on classic braid-and-ponytail combinations that work for literally any occasion, hair type, and hair length. The “butterfly” effect comes from how the braid loops and curves, creating the illusion of wings flowing through your style.
What makes butterfly braid ponytails so appealing is their versatility. They look polished enough for professional settings, creative enough for casual hangouts, and elegant enough to work as wedding or event hairstyles. The technique itself sits somewhere between approachable and advanced—it’s not as simple as a basic three-strand braid, but it’s absolutely achievable with a little practice and the right approach. Real talk: once you nail the butterfly braid technique, you’ll want to do it on everyone.
The beauty of this style is that it works whether your hair is bone straight, naturally wavy, curly, or textured. You can make it look sleek and refined or deliberately messy and romantic. The same braid translates completely differently depending on whether you tease your hair beforehand, add extensions, incorporate ribbons, or leave it smooth. Let’s dive into ten variations that prove butterfly braid ponytails truly do work for any look you’re going for.
1. The Classic Sleek Butterfly Braid Ponytail
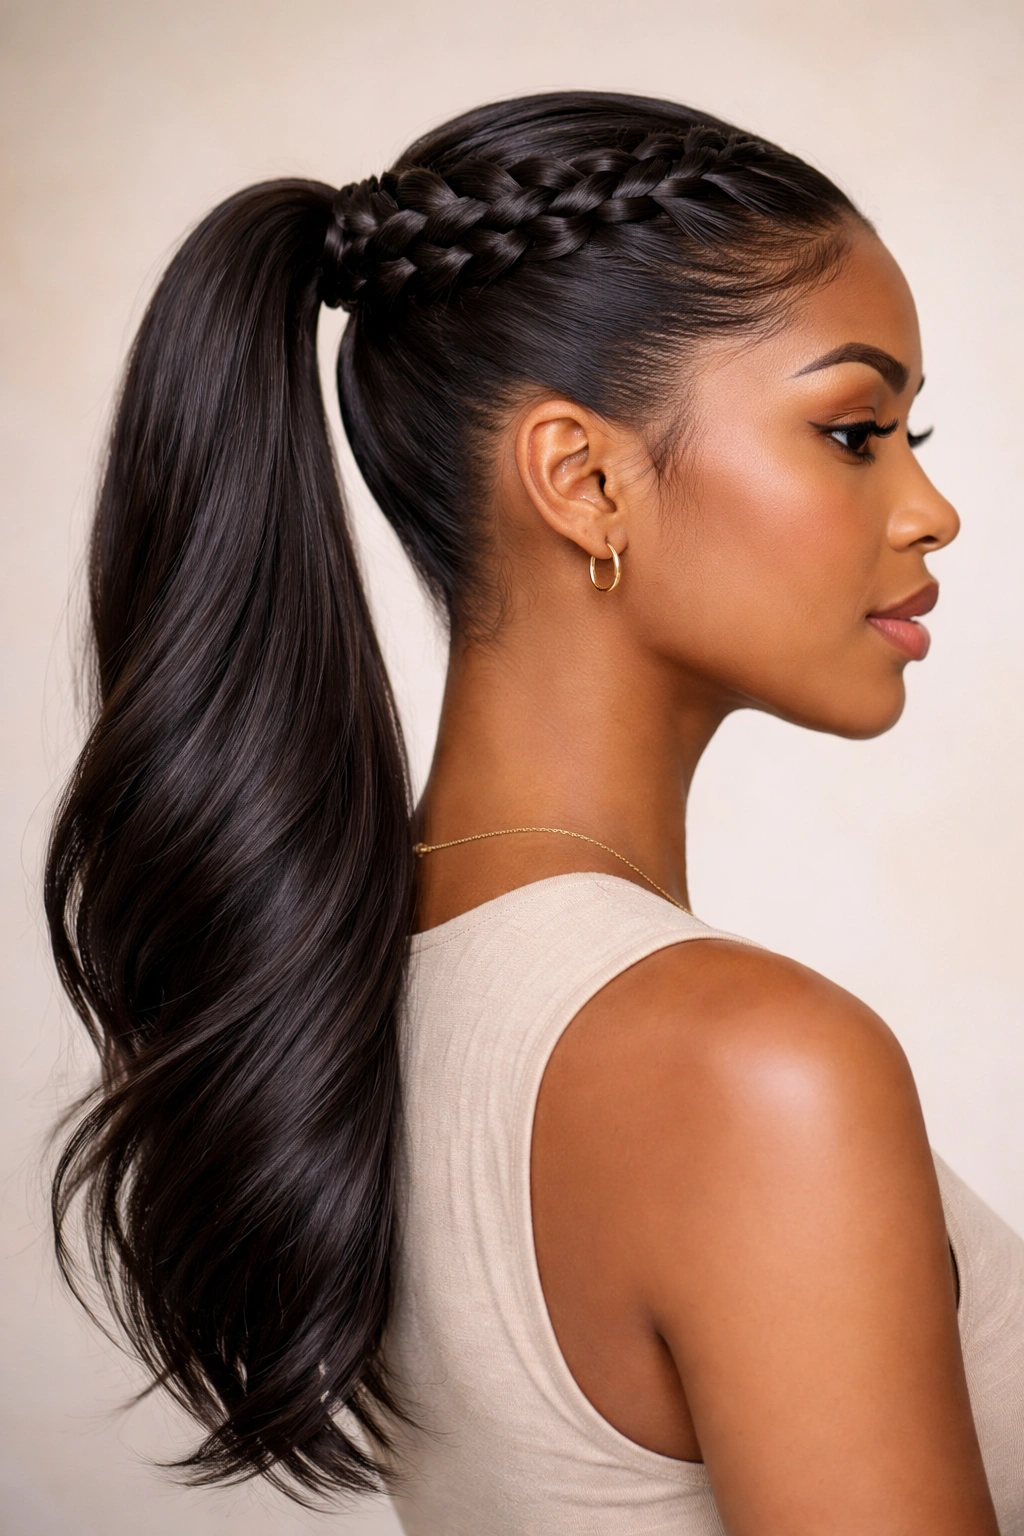
This is the foundation—the style that proves you’ve mastered the butterfly braid technique and can execute it cleanly for work, dates, or everyday wear. Start by applying a smoothing serum or lightweight gel to damp hair, then blow-dry it completely straight for that pristine finish. A flat iron pass ensures zero flyaways and maximum polish. The butterfly braid should sit at the crown or just slightly off-center, with the ponytail gathered at mid-to-lower length for a refined silhouette.
Why It’s Your Everyday Armor
The sleek version grounds you. It reads professional without trying too hard, which is exactly why it works in boardrooms, client meetings, and anywhere you want to look put-together without announcing you tried. The butterfly braid creates visual interest that elevates past a plain ponytail, but the smooth texture keeps everything clean and intentional. Your hair stays in place all day—this matters when you’re moving between meetings or dealing with air conditioning that fights against your style.
How to Create the Perfect Sleek Foundation
- Apply a heat-protectant spray to damp hair before blow-drying completely straight
- Use a flat iron on each section, including around the hairline and underneath layers
- Apply a tiny amount of edge control or clear gel to smooth flyaways at the crown and sides
- Start the butterfly braid right at the crown using three small, even sections
- Keep tension consistent and tight throughout the braid—this prevents the loose, undone look
- Secure the braid’s end with a small clear elastic, then gather remaining hair into the ponytail
- Use a fine-tooth comb to smooth the ponytail and tuck any loose strands back into the braid
- Finish with a lightweight hairspray that doesn’t feel stiff or crunchy
Pro tip: This style lasts longer when you start with second-day hair (hair that’s a day old has more texture and grip than freshly washed strands). If you absolutely must work with fresh hair, roughing up your scalp with a dry texture spray before braiding helps everything stay put.
2. The Undone Romantic Butterfly Braid Ponytail
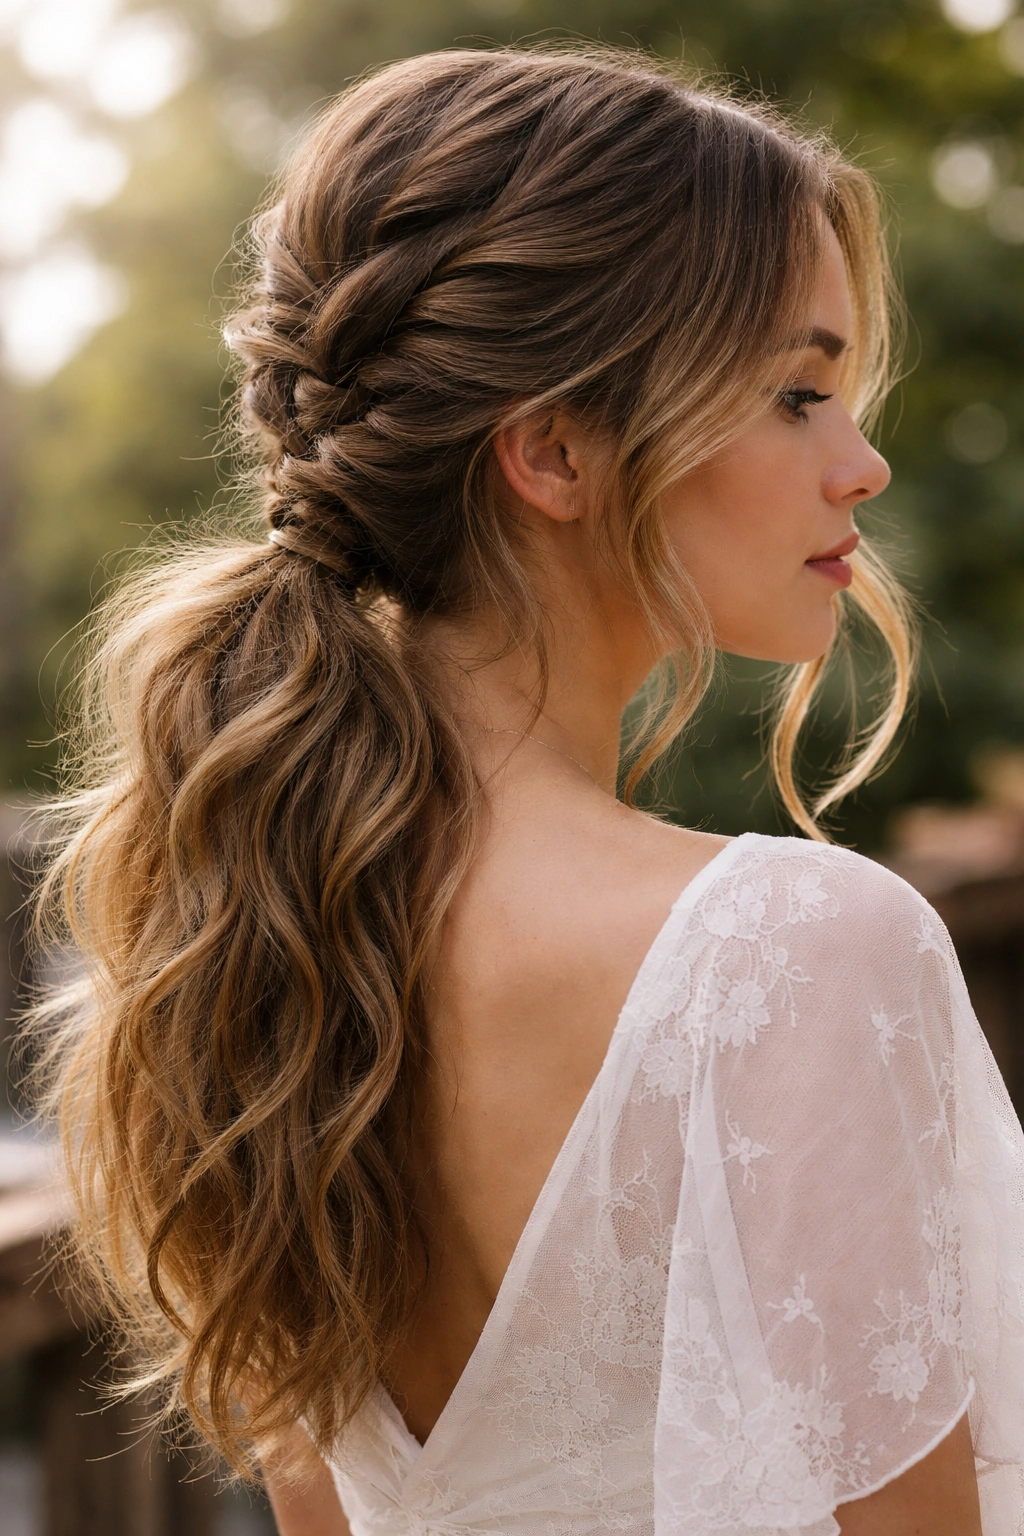
Now flip the script completely. This version leans into texture, movement, and a deliberately imperfect vibe that whispers “effortless” instead of screaming “I spent two hours on this.” Start with wavy or curled hair—you can either curl your hair with a waving iron before braiding or braid damp hair and let it air-dry for natural waves. The key is having volume and texture as your starting point.
Why the Messy Approach Actually Takes More Skill
Here’s the counterintuitive part: making something look accidentally perfect requires more intention than actually perfecting it. The romantic butterfly braid only works when you have enough texture that it can slightly loosen without collapsing completely. You’re creating what looks like a “failed” sleek braid, but you’ve actually engineered it that way. The ponytail should be lower, looser, and offset to one side. Pieces should fall around your face, but intentionally so—not because your braiding went sideways.
Building Your Romantic Texture
- Start with clean, damp hair and apply a texturizing spray or sea salt spray
- Blow-dry your hair with a diffuser attachment to enhance natural texture, or use a curling iron to create gentle waves
- Create the butterfly braid while your hair is still slightly damp—it’ll tighten as it dries
- Deliberately loosen each segment of the braid by gently tugging the sides outward, starting from the bottom
- Leave pieces around your face and lower sections unbraided for that “some hair escaped” look
- Gather the ponytail lower (around ear-level or below) and slightly off to one side
- Use a clear or textured elastic that won’t look too perfect—avoid shiny metallics
- Mist everything with a flexible hold hairspray that allows movement
Worth knowing: This style actually improves throughout the day. As the braid continues to relax and your hair moves naturally, it becomes more beautiful by evening. Wear it to a morning event and you’ll still look polished by dinner.
3. The Statement Double-Loop Butterfly Braid Ponytail
Take the butterfly braid up a notch by looping the braided section into the ponytail itself instead of just laying it flat. This creates architectural interest and transforms your style from pretty to genuinely eye-catching. You’re braiding at the crown, then instead of securing a separate ponytail below it, you’re weaving the braid loops into a higher, tighter updo-adjacent style.
What Makes the Double-Loop Different
The double-loop version sits somewhere between a ponytail and a low bun—it’s structured, holds incredibly well, and creates the illusion of more intricate work than you actually did. The braided sections literally become the vessel for the ponytail, which means you need less actual hair to achieve volume. This style works beautifully if you have medium to thick hair, and it’s especially effective for smaller heads or finer hair textures where traditional ponytails can look thin.
Executing the Loop Technique
- Brush hair back smoothly and start your butterfly braid at the crown
- Braid slightly looser than you normally would—you need flexibility to loop it
- As you complete the braid, don’t pull it completely down your back
- Instead, curve the braid upward and tuck the end into itself, creating a loop
- Secure the loop with bobby pins placed horizontally through the braid layers
- Take remaining hair below the braid and gather it into a second elastic slightly below the loop
- Gently tease this lower ponytail for volume, then smooth the outer layer
- Optional: wrap a small section of hair from the ponytail around the elastic to hide it
Insider note: This style is exceptionally secure. The loop-and-pin combination holds through movement, humidity, and physical activity. Dancers, athletes, and anyone doing anything remotely active should keep this one in rotation.
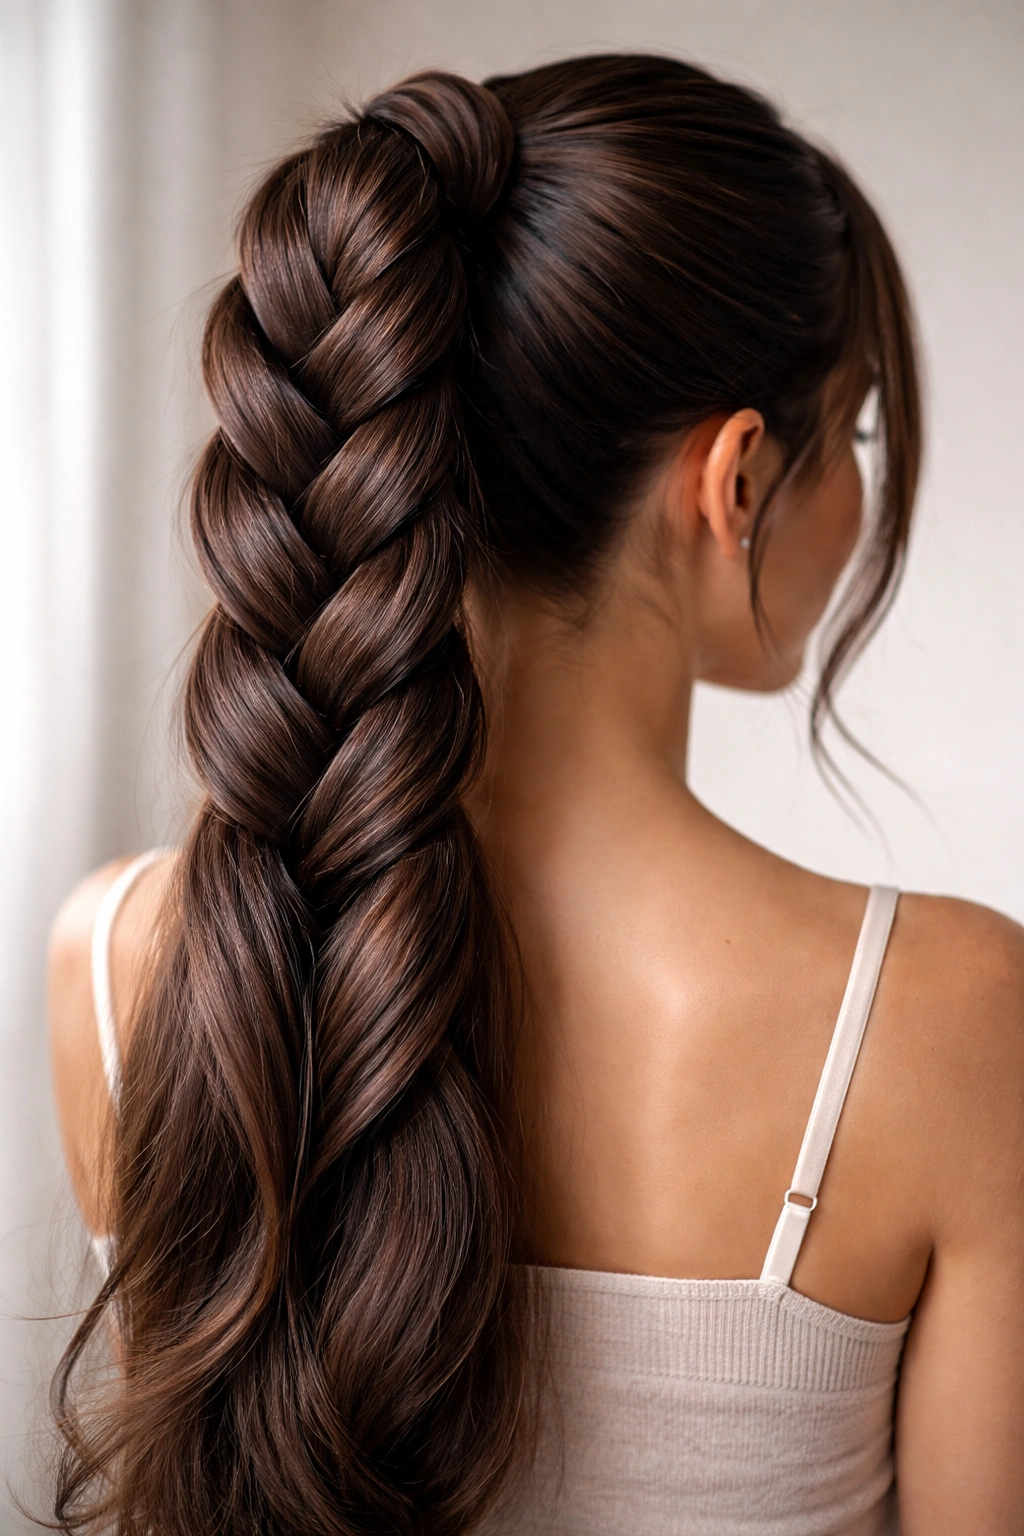
4. The Thick Textured Butterfly Braid Ponytail
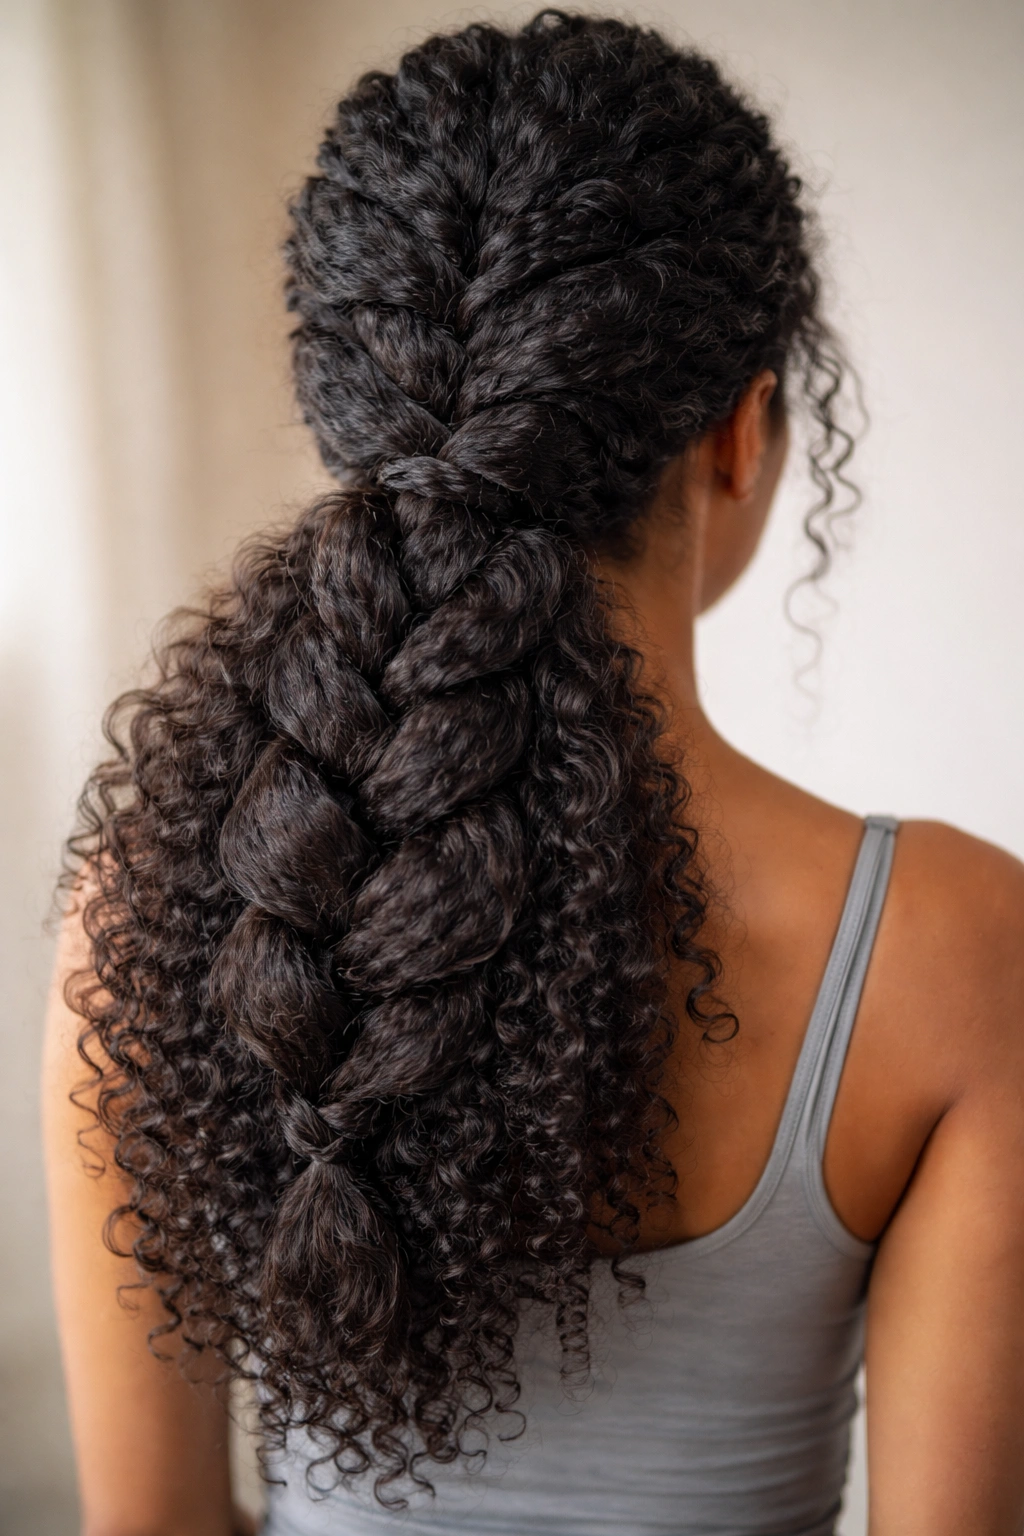
Embrace the full potential of textured hair by braiding sections that are deliberately thicker and more visible than in sleek versions. Textured butterfly braids create drama and graphic interest—each segment of the braid becomes a sculptural element. Start with completely dry, textured hair (natural texture, braids, twists, or curls that you’ve set and dried). Don’t smooth or straighten anything.
Why Thick Braids Hit Different
Thick sections mean your butterfly braid becomes a focal point rather than an accent. The individual strands of the braid are separated enough to see the detailed architecture of the pattern, creating a three-dimensional effect that flat, sleek braids simply can’t achieve. This style celebrates texture rather than fighting against it. It’s bold, it’s modern, and it’s actually easier to execute than thin braids because you have more material to work with and slight imperfections read as intentional texture.
Building Texture Into Your Braid
- Start with hair that’s genuinely dry and has inherent texture or curl pattern
- Apply a leave-in conditioner or braid cream to each section before incorporating it into the braid
- Divide your braiding section into three very chunky segments—approximately the size of quarters
- Keep your hands relaxed as you braid; tension on thick sections should be gentle
- The braid naturally separates as you work, which is exactly what you want
- Don’t smooth the finished braid or tighten it obsessively
- Gather remaining hair into the ponytail with the braid secured, using a thick elastic
- Consider adding metallic cuffs or hair jewelry along the braid for extra dimension
Pro tip: Spray the finished style with a flexible texturizing spray rather than a slick hairspray. You want to maintain the separated, chunky look, not seal everything into place like a helmet.
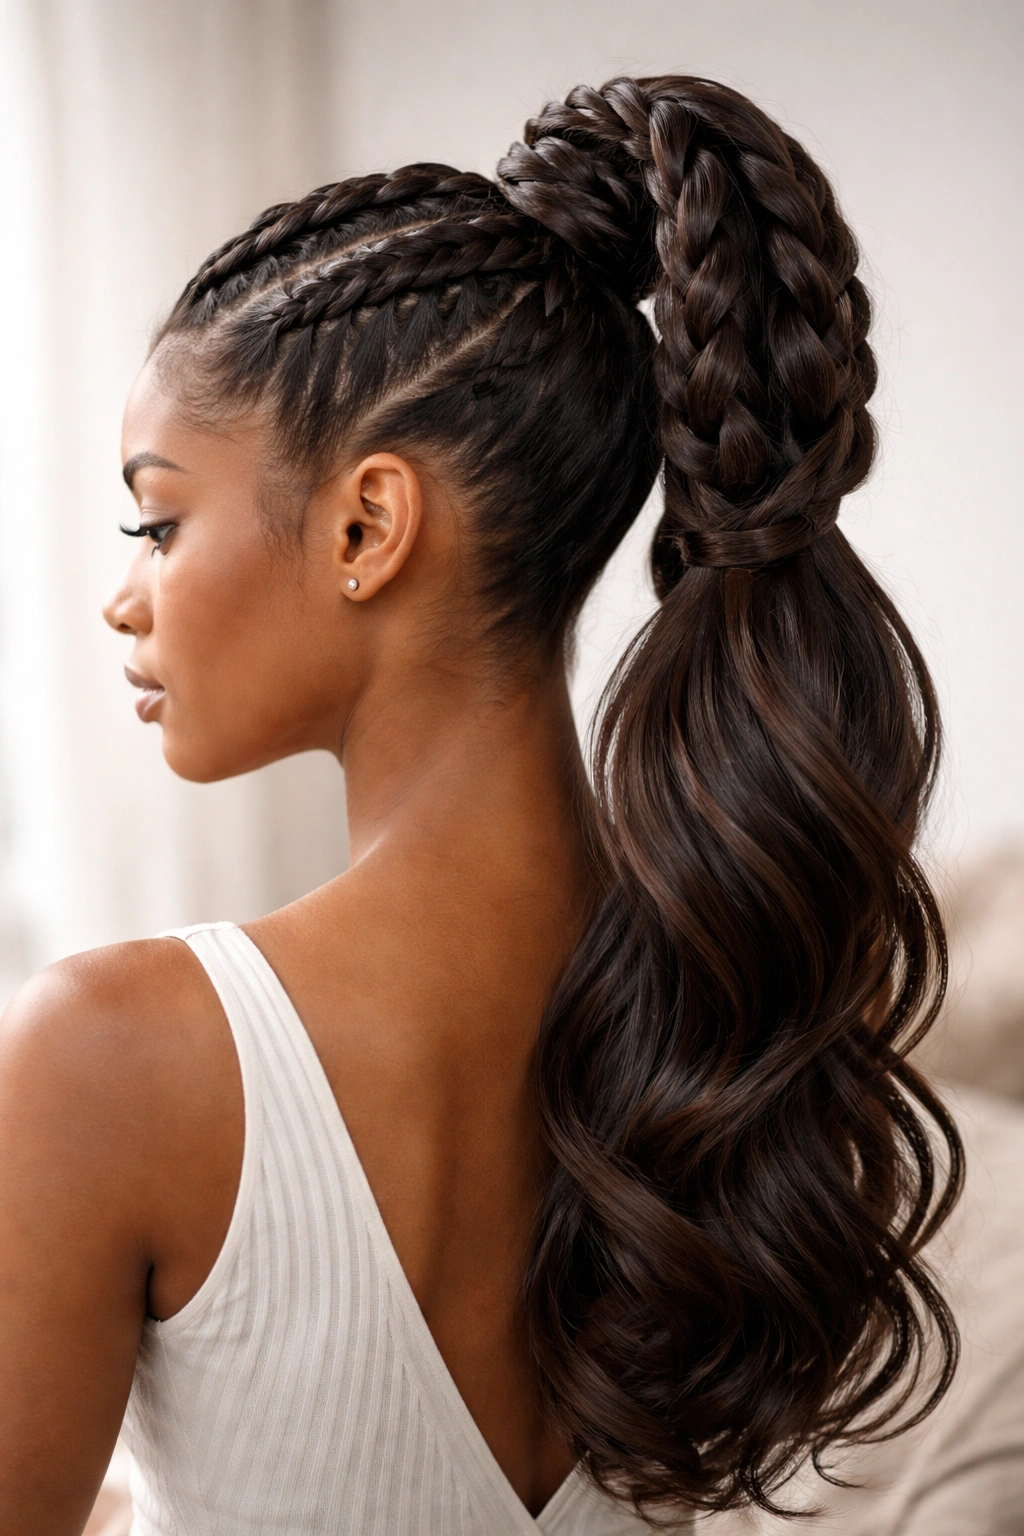
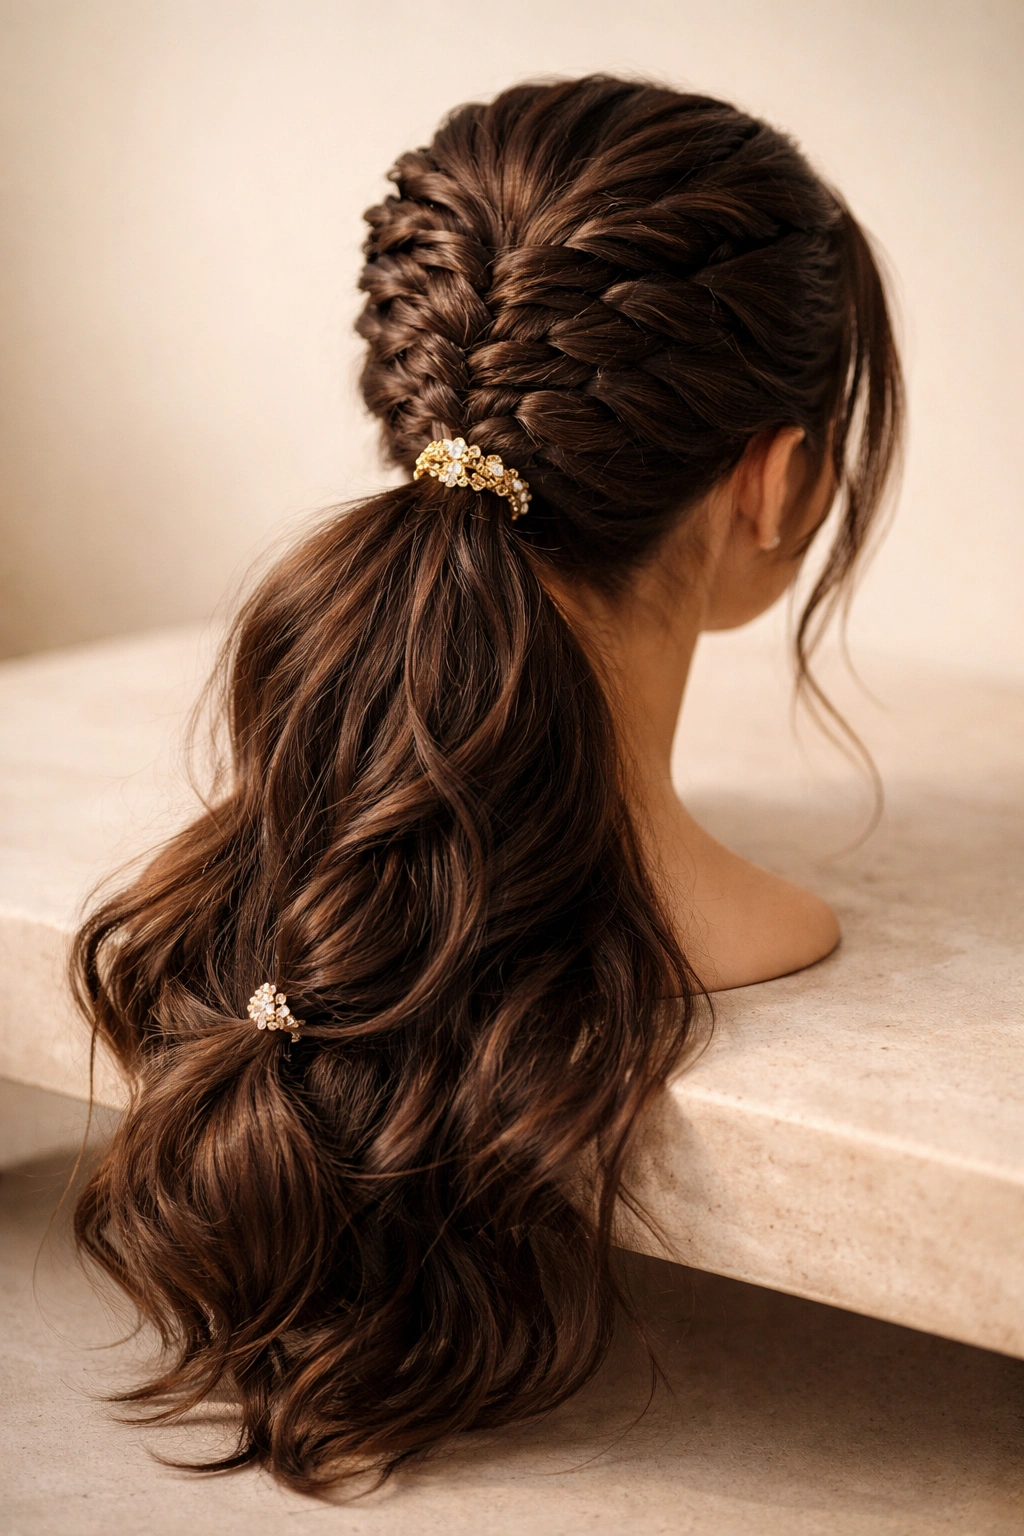
5. The Bridesmaid-Worthy Butterfly Braid Ponytail
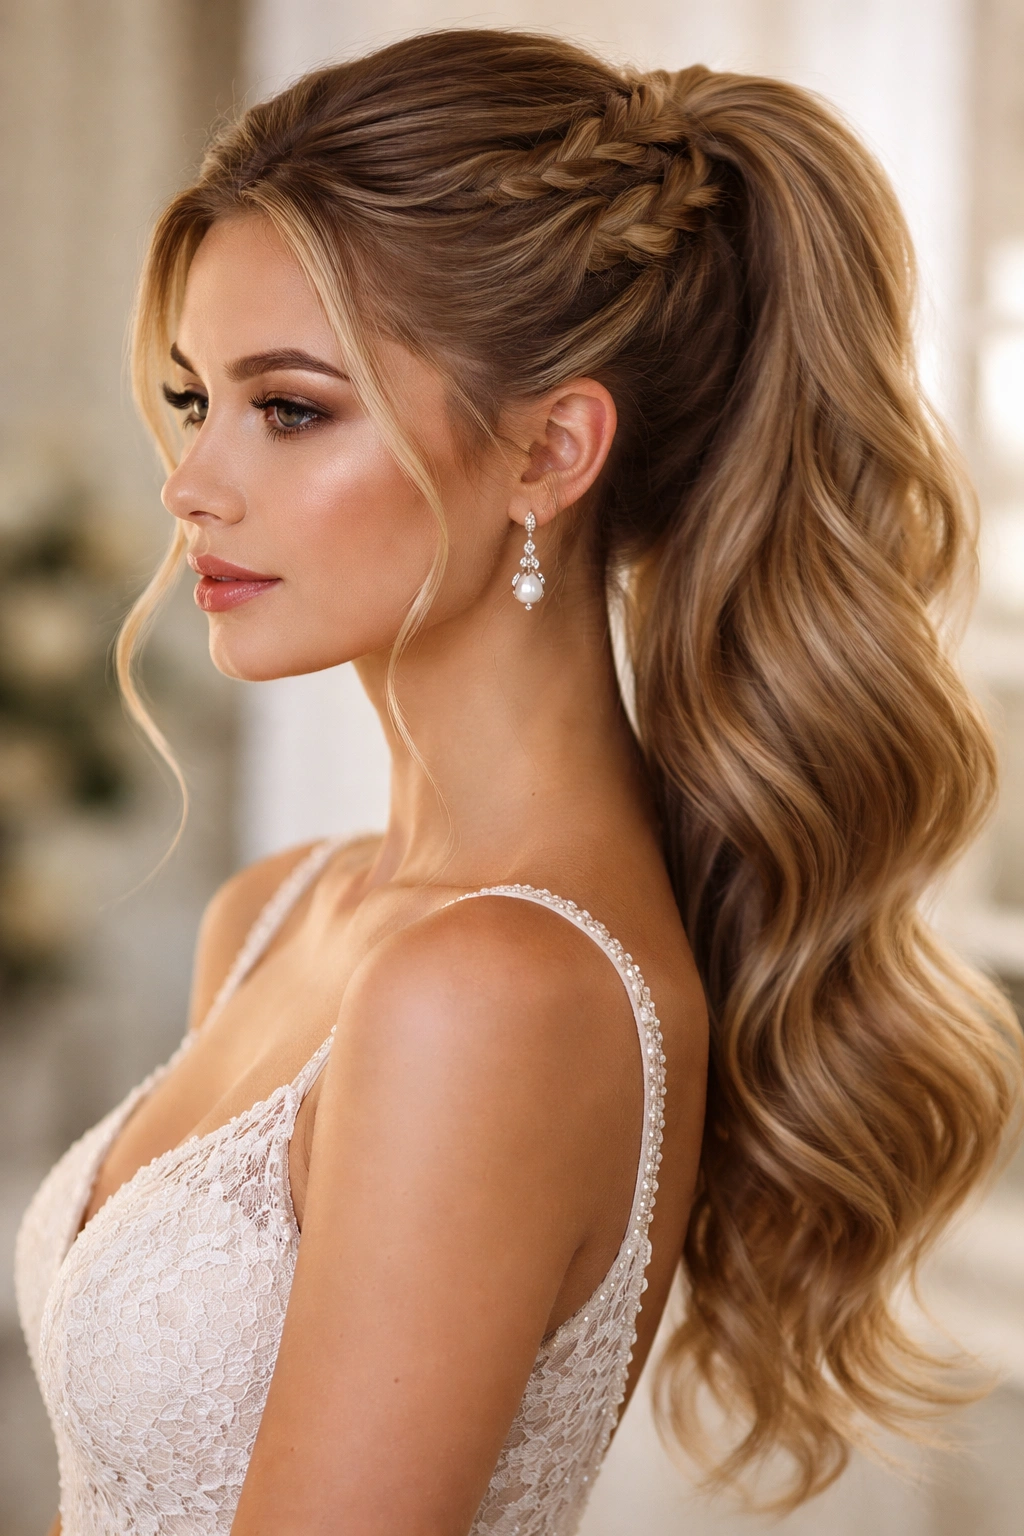
This version takes the romantic butterfly braid and makes it absolutely wedding-ready. We’re talking strategic volume at the crown, a lower gathered ponytail with height, and intentional flyaway pieces that frame your face without looking accidental. The difference between “pretty casual” and “I’m honored to be in your wedding” is mostly about intention and polish.
Why Wedding Hair Follows Different Rules
Event hairstyles need to last through hours of movement, emotion, heat, and proximity to lots of other humans. Your butterfly braid needs to be genuinely secure (not just look secure), your flyaways need to be intentional and secured with something that actually holds, and your ponytail needs enough height that it doesn’t deflate by the reception. The style should look fresh in photos, still look good when people are standing close to you, and hold up if you move your head or hug someone.
Creating Event-Level Polish
- Blow-dry your hair with a volumizing mousse applied to damp roots
- Tease the crown gently to build lasting height—this is non-negotiable
- Smooth the teased section with the top layer of hair so it looks intentional, not messy
- Create your butterfly braid with medium-thickness sections for definition without heaviness
- Secure the braid end with a small elastic, then gather the full ponytail significantly lower
- Use a color-matched elastic or a decorative tie to secure the ponytail
- Lightly mist flyaway pieces with flexible hold hairspray
- Optional: weave a delicate ribbon through the braid or add a hair comb as an accessory
Worth knowing: Schedule your hair trial with the same person doing your wedding day hair. Small differences in braiding style, tension, and technique dramatically affect how the final style photographs and how long it lasts. Your trial gives you a chance to problem-solve before the actual event.
6. The Sleek Side Butterfly Braid Ponytail

Shift the entire composition by moving your butterfly braid to the side. Instead of a center crown braid, gather your hair slightly off-center and braid from that angle, creating asymmetrical visual interest. This version works for people who prefer their hair completely off one shoulder or who want a more modern, fashion-forward take on the traditional butterfly braid.
Why Asymmetry Changes Everything
Side braids immediately read as more intentional and style-conscious than centered versions. They’re flattering on virtually every face shape because they create visual movement and can frame your features asymmetrically (which is more naturally flattering than perfect symmetry). The side position also means your braid is immediately visible from the front and side angles—it becomes a defining element of your whole look rather than something visible mainly from behind.
Executing the Perfect Side Braid
- Brush hair and determine which side feels more natural (usually the side opposite your part grows-out)
- Start your butterfly braid about 2-3 inches off-center at the crown, pulling slightly toward that side
- Angle the braid as you work so it follows the curve of your head toward that side
- Keep the braiding sections even and tension consistent—asymmetrical positioning doesn’t mean sloppy braiding
- Complete the braid and secure it, then gather remaining hair into a lower ponytail on that same side
- The ponytail should sit lower than a centered version to balance the off-center braid
- Consider letting a piece of hair on the opposite side of your face fall naturally
- Use bobby pins to secure the piece subtly—you want it to look like it happened naturally
Pro tip: Side braids photograph beautifully from angles slightly to the side of your face (about 45 degrees). If you’re taking photos or attending an event where photos matter, remember this angle flatters the style most.
7. The Thick Two-Strand Butterfly Braid Ponytail
For a different texture and visual effect entirely, create a butterfly braid using a two-strand twisted technique instead of the traditional three-strand method. This creates a finer, more delicate pattern that reads as more intricate without actually being harder to execute. Two-strand braids have a different movement and flow—they wrap more loosely and create elegant curves.
What Two-Strand Braids Actually Offer
Two-strand braids are sometimes overlooked because people assume they’re “basic,” but they offer a distinct aesthetic that three-strand braids simply don’t replicate. The pattern is more linear, the texture is finer, and they have an almost woven appearance. Two-strand butterfly braids work especially well with finer hair textures because they don’t require as much volume to look substantial. They also tend to hold longer because the twist mechanism is slightly tighter than braiding.
The Two-Strand Butterfly Method
- Divide your braiding section into two equal parts
- Cross the right section over the left, then twist the left around the right in a continuous motion
- Keep sections even as you work—a two-strand pattern is less forgiving of size inconsistencies than three-strand
- Continue twisting the entire length, maintaining even tension
- The finished pattern should look like a delicate rope with clear, defined spirals
- Secure the end with a small elastic and gather remaining hair into the ponytail
- Gently tease the twists to create slight separation and texture if desired
- Pin any flyaway pieces and secure with flexible hairspray
Worth knowing: Two-strand braids or twists that are slightly undone read as more romantic than pulled-tight versions. If you’re going for effortless, deliberately loosen the twists after securing them.
8. The High-Volume Butterfly Braid Ponytail
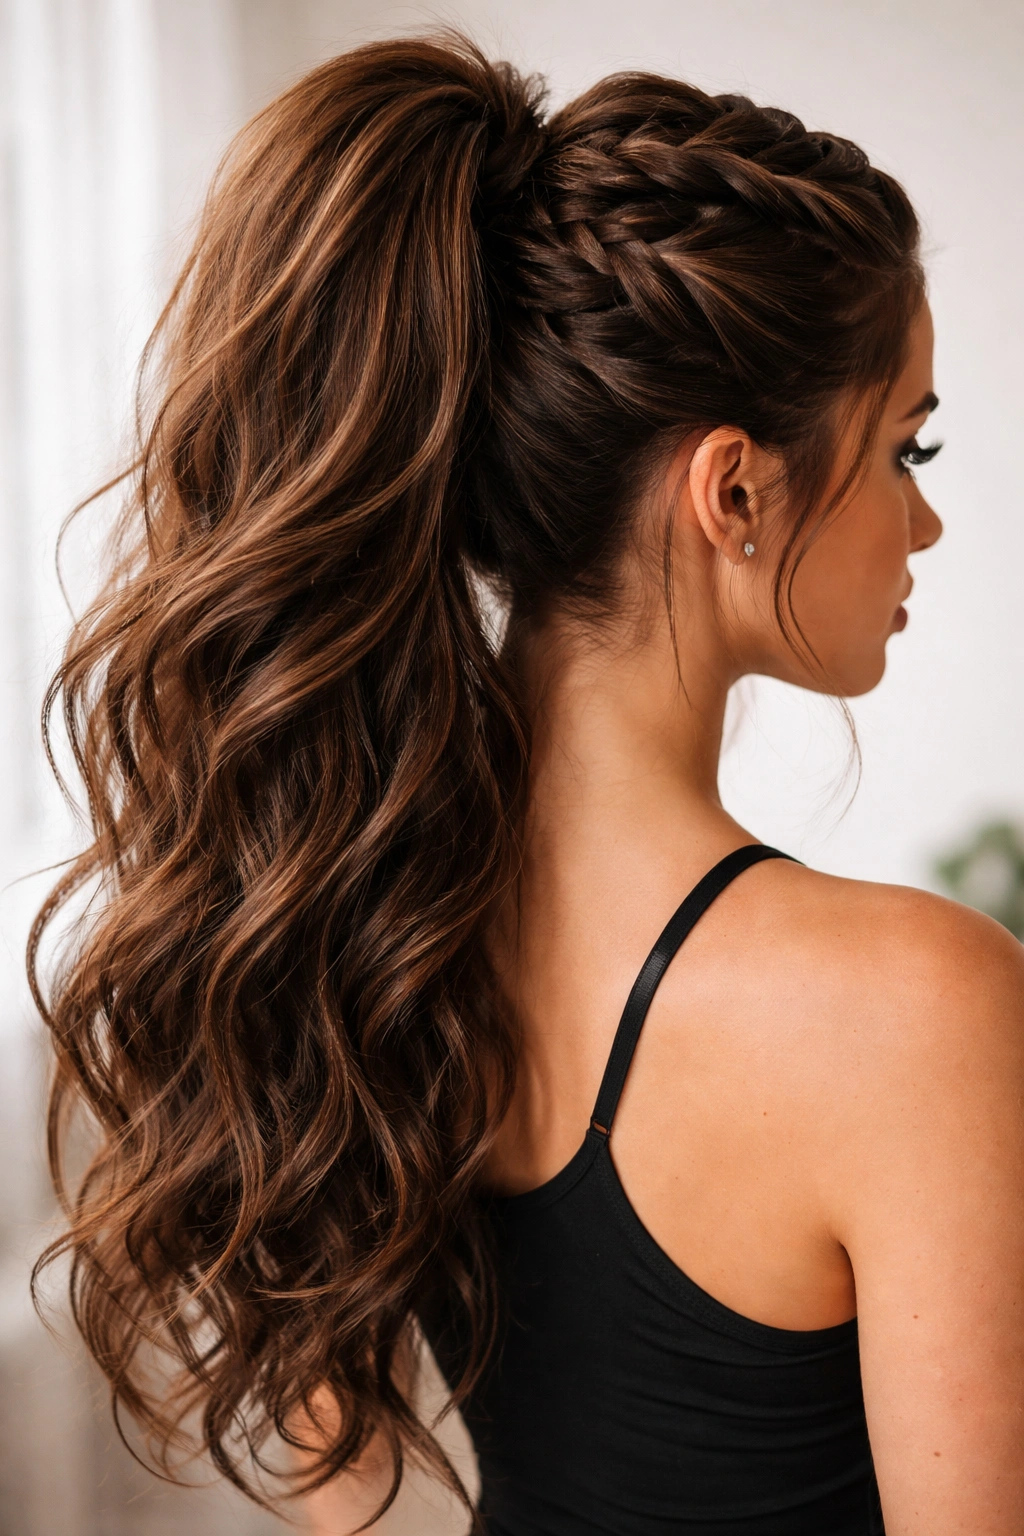
Maximize volume at the crown and through the length of your ponytail by adding texture before braiding and teasing strategically throughout. This version works when you want your style to make a statement, need height for face-framing, or simply love the way a voluminous ponytail looks and moves. The butterfly braid acts as an anchor for all that volume rather than being the primary focus.
Building Sustainable Volume
Volume isn’t just about how your hair looks initially—it’s about how it holds throughout the day. Strategic teasing, the right products, and proper sectioning create volume that lasts. Your butterfly braid should be tight enough to hold all that body without looking stiff. The ponytail itself should be teased, smoothed on the exterior, and styled in a way that maintains movement and dimension.
Creating Long-Lasting Volume
- Apply a volumizing mousse to damp roots and blow-dry with your head flipped upside down
- Once dry, flip back and gently tease the crown and mid-crown area with a fine-tooth teasing brush
- Smooth the surface layer of hair over the teased section—you want height without visible bumps
- Create your butterfly braid using medium-thickness sections, keeping it relatively tight
- Tease the ponytail’s base right where the elastic sits to anchor everything and add fullness
- Smooth the outer layer of the ponytail to look polished while keeping volume underneath
- Use bobby pins to secure any section that seems like it might shift
- Lock everything in place with flexible volumizing hairspray, not a heavy hold formula
Pro tip: Flip your head upside down when spritzing hairspray on volume-boosted hair. Let it dry in that position for 30 seconds. This sets the volume better than spraying and immediately flipping your head upright.
9. The Half-Up Butterfly Braid Ponytail
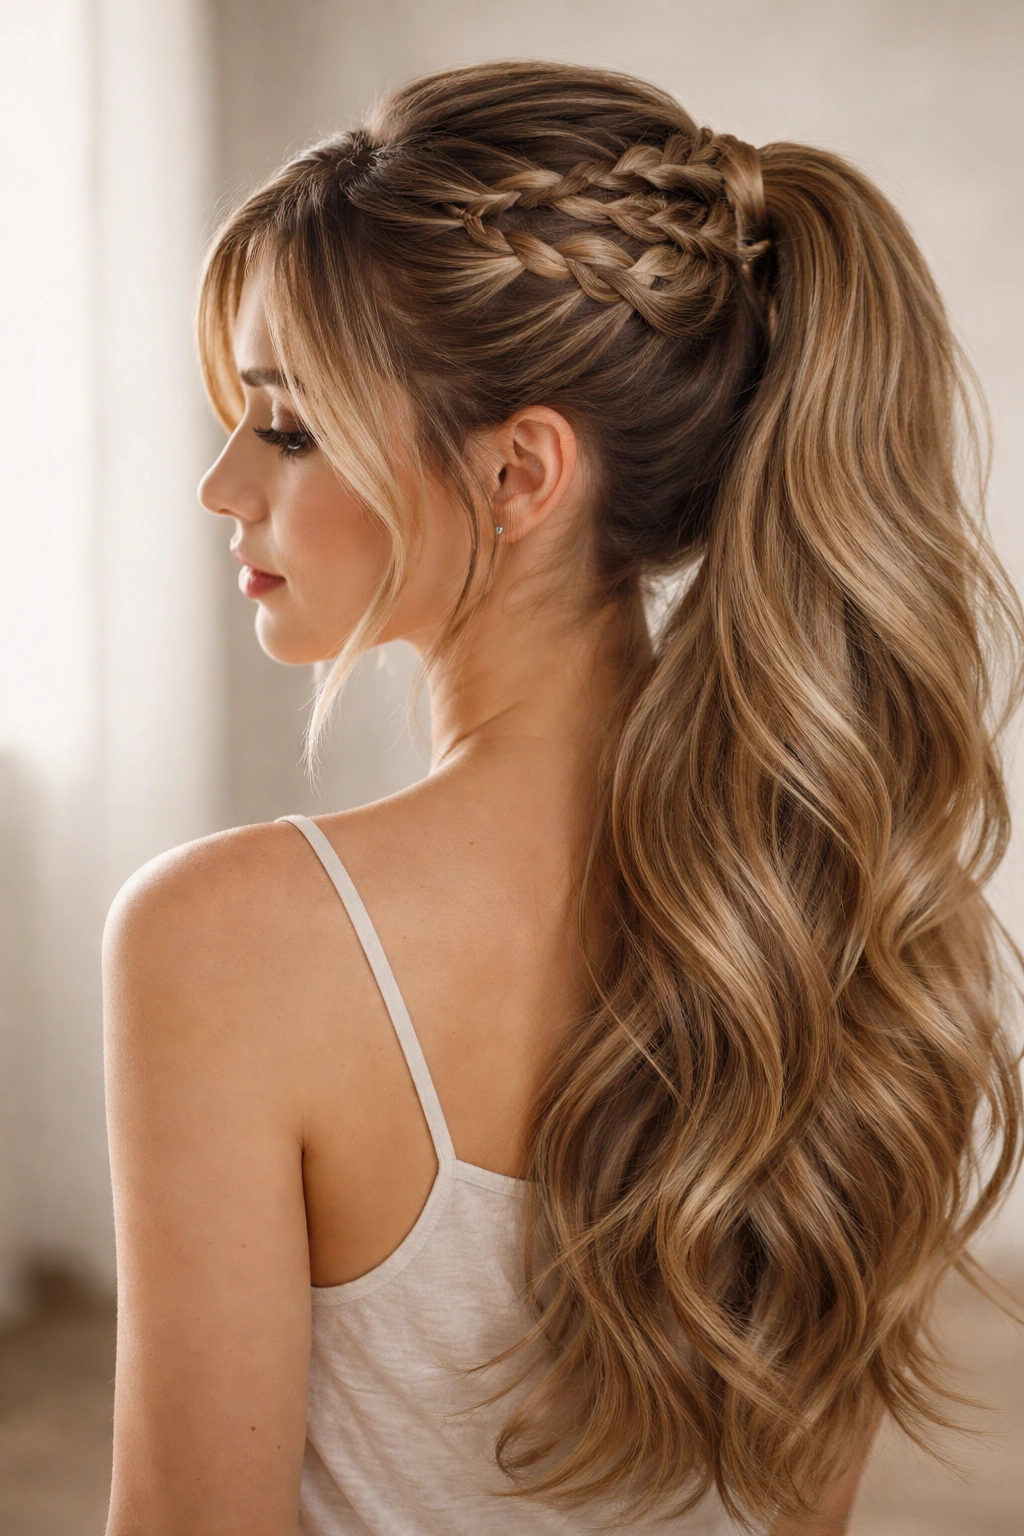
For a style that bridges the gap between down hair and a full ponytail, create a butterfly braid starting at the crown and gather only the top portion of your hair into a ponytail, leaving the bottom half down. This works beautifully when you want versatility—you get the visual interest of the braid plus the flow and ease of wearing your hair partially down. It’s an excellent style for transitional weather or when you want your hair off your neck but not fully styled.
Why Half-Up Reads Completely Different
Half-up styles are deceptively difficult to execute well, but when they work, they look effortless and charming. The butterfly braid draws attention upward while the down portion adds movement and length perception. This style suits many face shapes and works with straight, wavy, or curly hair. It’s also wonderfully practical—you get the hair-off-your-neck benefits of a ponytail with the softness of down hair.
Building the Perfect Half-Up Balance
- Determine your braid starting point—usually about 2-3 inches back from your hairline at the crown
- Create your butterfly braid using hair from approximately the upper third of your head
- As you braid, be intentional about which hair you’re incorporating and which you’re leaving out
- Secure the braid’s end with a small elastic, then gather the hair from the braid and some additional hair from the back into a half-up ponytail
- The ponytail should sit at or slightly above ear level
- Leave the bottom half of your hair completely down and smooth it or add waves as desired
- Make sure the down portion has enough volume and texture to look intentional, not just “undone”
- Use bobby pins to secure the half-up ponytail if needed, making sure pins don’t show
Insider note: This style works exceptionally well if you have a lot of hair length. The proportion between the gathered and down sections should feel balanced—if your hair is shorter, less of it will hang down, which is fine, just be aware of the proportions.
10. The Decorated Festival Butterfly Braid Ponytail
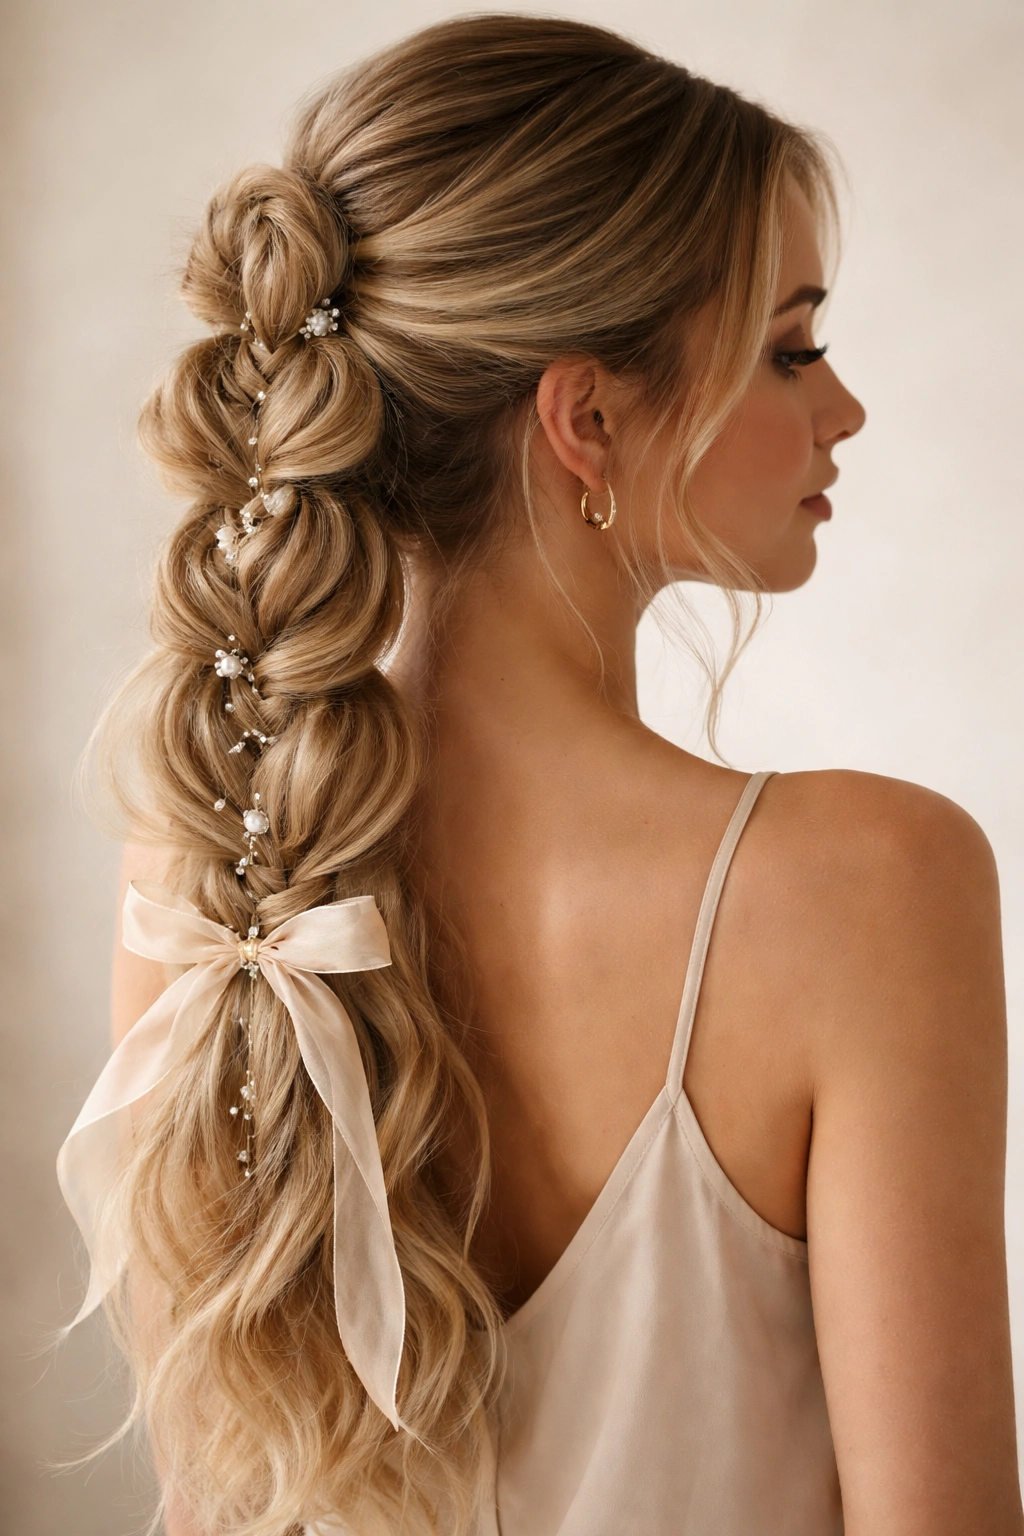
Elevate your butterfly braid ponytail with accessories, ribbons, gems, or metallic elements that turn it into a full statement style. This version works for festivals, special occasions, creative events, or anywhere you want your hair to be genuinely spectacular. The butterfly braid becomes the foundation for artistic expression and accessory play.
Why Accessories Transform Everything
The right accessories don’t make a style look “overdone”—they make it look intentional and creative. A delicate thread woven through your butterfly braid, small gems placed strategically, or a silk ribbon wrapped around your ponytail doesn’t clutter the look; it elevates it. The key is choosing accessories that complement your natural coloring, your outfit, and the occasion. You’re not just adding stuff; you’re creating visual harmony.
Accessory Integration Techniques
- Weave a thin ribbon or thread through your butterfly braid before securing it—thread it through alternating braid sections for visual interest
- Add small crystal or metallic hair cuffs along the length of your braid, spaced evenly
- Secure tiny flowers or greenery into the braid’s sections for a garden-inspired look
- Wrap a silk or satin ribbon around the hair tie securing your ponytail
- Thread gold, silver, or colored string through the braid and let it wrap around your head for a bohemian effect
- Attach hair jewelry or claw clips that coordinate with your outfit to the side of your ponytail
- Consider temporary hair chalk or color spray if your event justifies it
- Secure all accessories firmly—you don’t want anything slipping mid-event
Worth knowing: If you’re adding flowers or delicate accessories, secure them last, right before you’re heading out. Flowers especially can wilt or crush if they’re in your hair for too long before you actually need to look amazing.
Final Thoughts
The butterfly braid ponytail isn’t just one style—it’s genuinely ten (or more) completely different looks depending on how you execute it. The same braiding technique reads as polished and professional when sleek, romantic and soft when undone, bold and graphic when textured, and artistic and creative when accessorized. What makes this style so powerful is that it works for any occasion, any hair type, any skill level, and any aesthetic preference you have.
The thing that separates someone who can do a butterfly braid from someone who masters it is understanding that the braid itself is just the beginning. Everything before the braid—your hair’s texture, volume, and condition—and everything after—how you gather the ponytail, which pieces you leave out, what accessories you choose—transforms the entire vibe. Once you get comfortable with the basic braiding technique, spend time experimenting with these variations. You’ll find versions that feel uniquely like you.