Black women with curly hair have some of the most stunning styling options available, and ponytails are a seriously underrated way to showcase those gorgeous curls. Whether you’re managing your natural texture, wearing protective styles, or simply looking for a practical yet polished look, the right ponytail can transform your entire vibe while keeping your hair secure and healthy. The key is finding styles that work with your curl pattern rather than against it, that celebrate volume and texture instead of fighting it, and that keep your edges and hairline protected without constant tension.
The beauty of curly-haired ponytails is their incredible versatility. You can go sleek and structured, textured and bouncy, high and statement-making, or low and romantic. You can incorporate braids, twists, accessories, or just pure curl power. Unlike straighter hair types that might look limp with certain ponytail placements, curly hair naturally creates dimension and movement that make even simple styles feel intentional and stylish. The challenge isn’t finding what works—it’s knowing which of the endless possibilities will suit your specific curl pattern, lifestyle, and what you’re trying to achieve on any given day.
This guide walks through 12 ponytail styles specifically designed to look incredible on curly-haired Black women, with real details about how to execute each one, what products and techniques work best, and which hair types and occasions each style suits. These aren’t generic ponytail ideas—they’re specific styles that take your curls seriously and actually work.
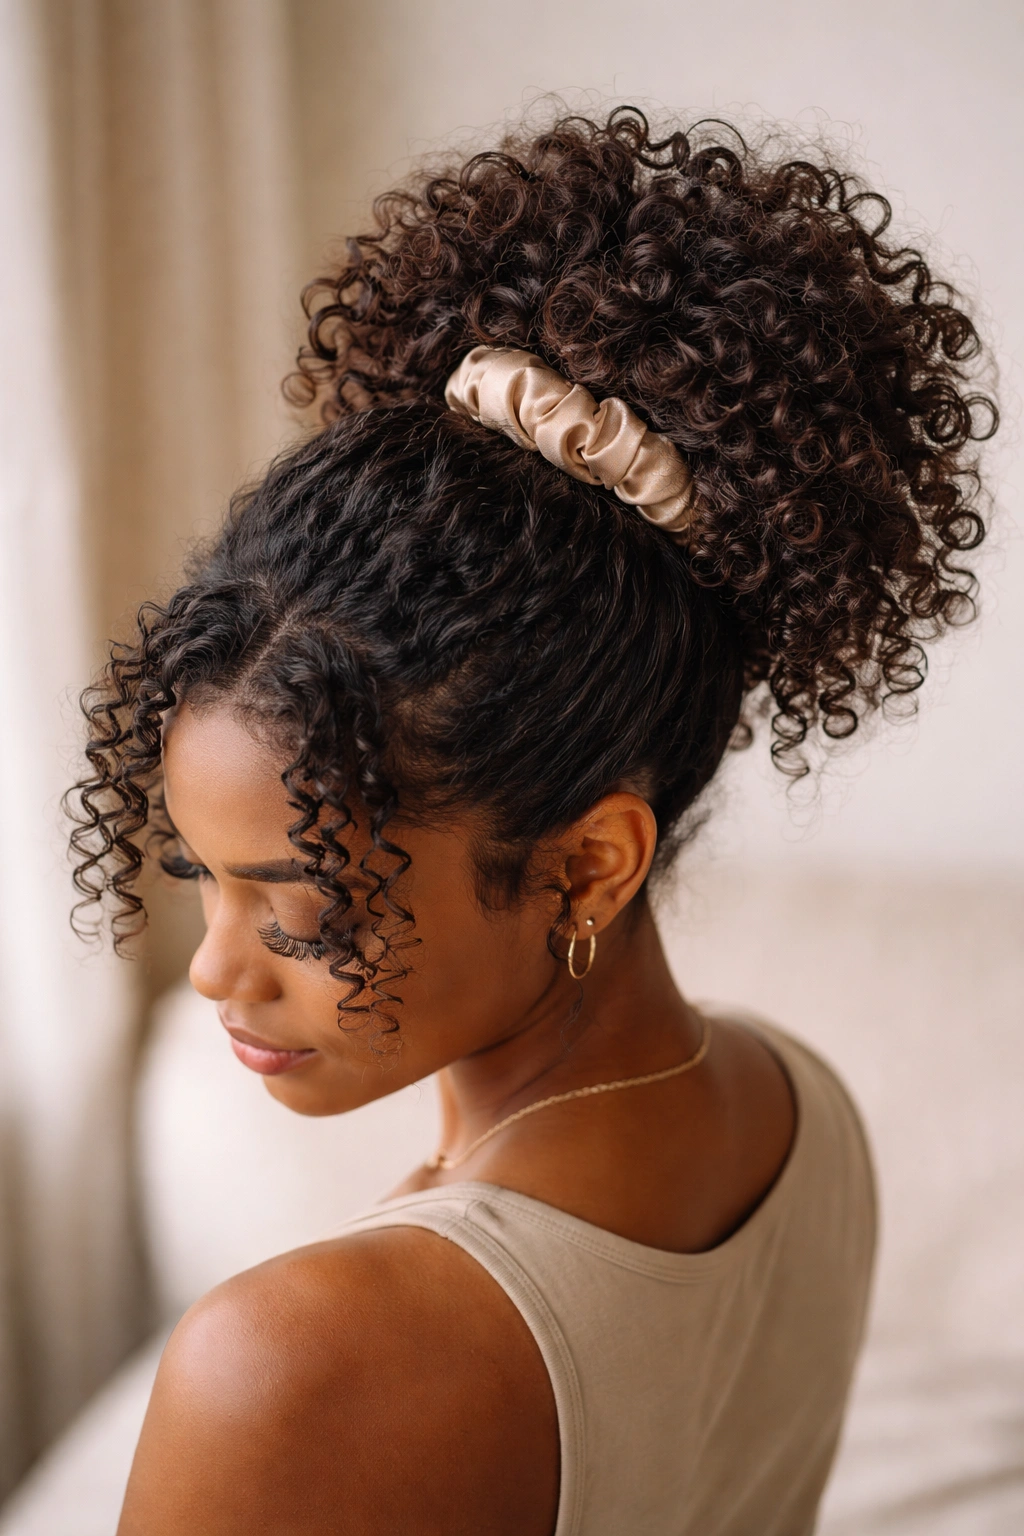
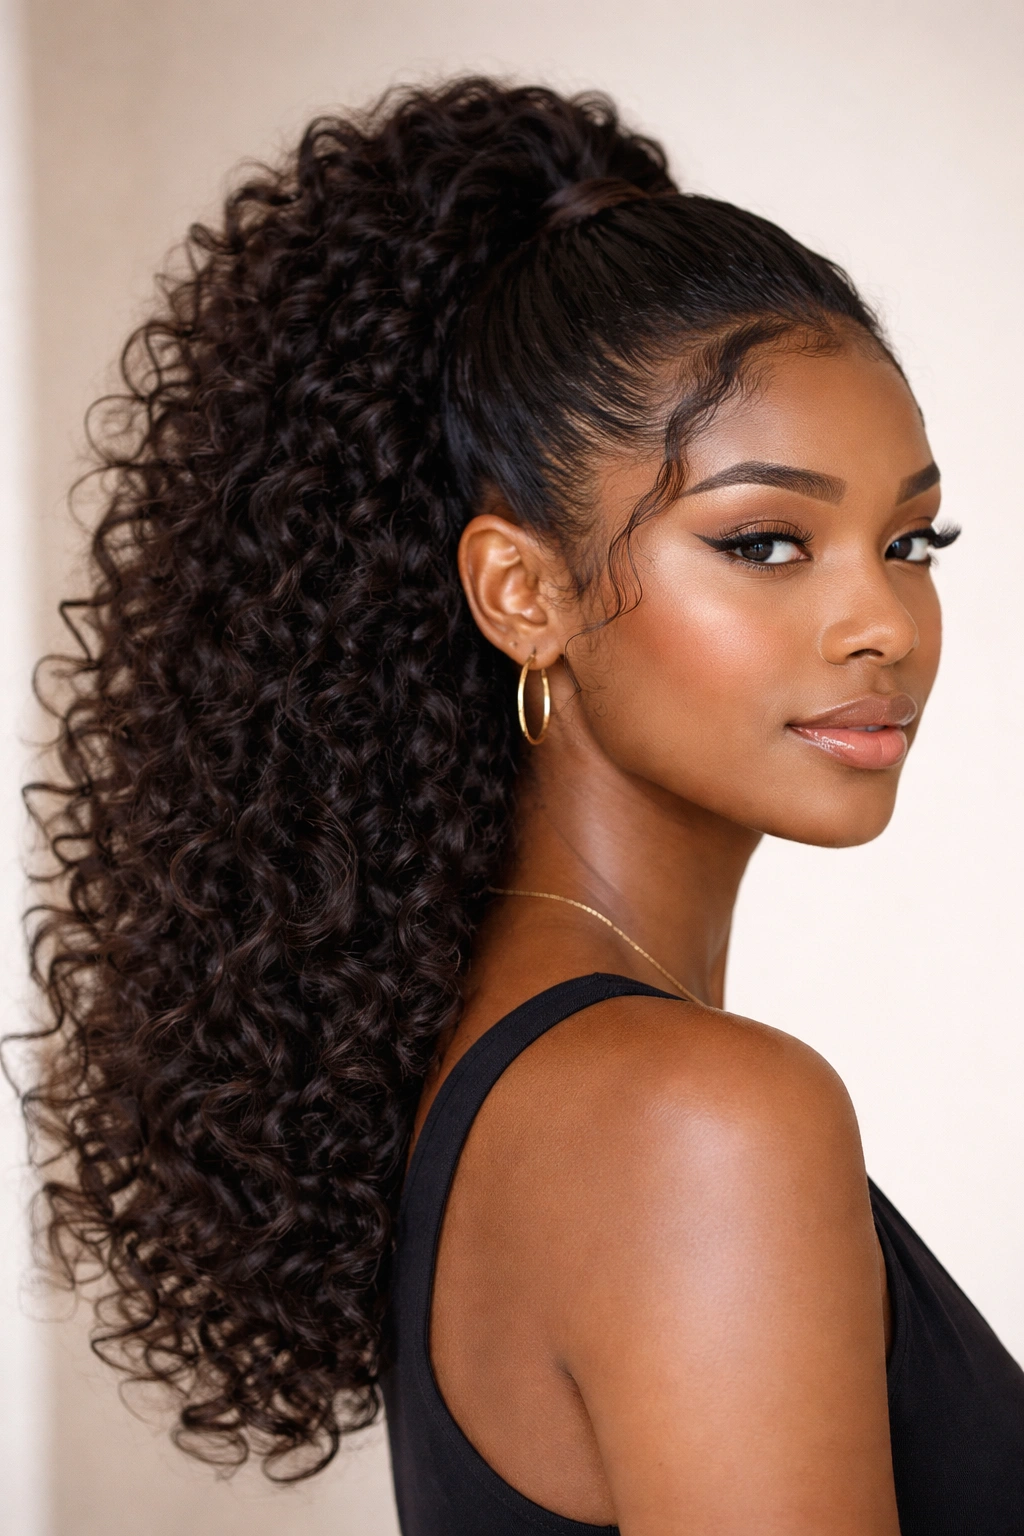
1. The High Curly Puff Ponytail
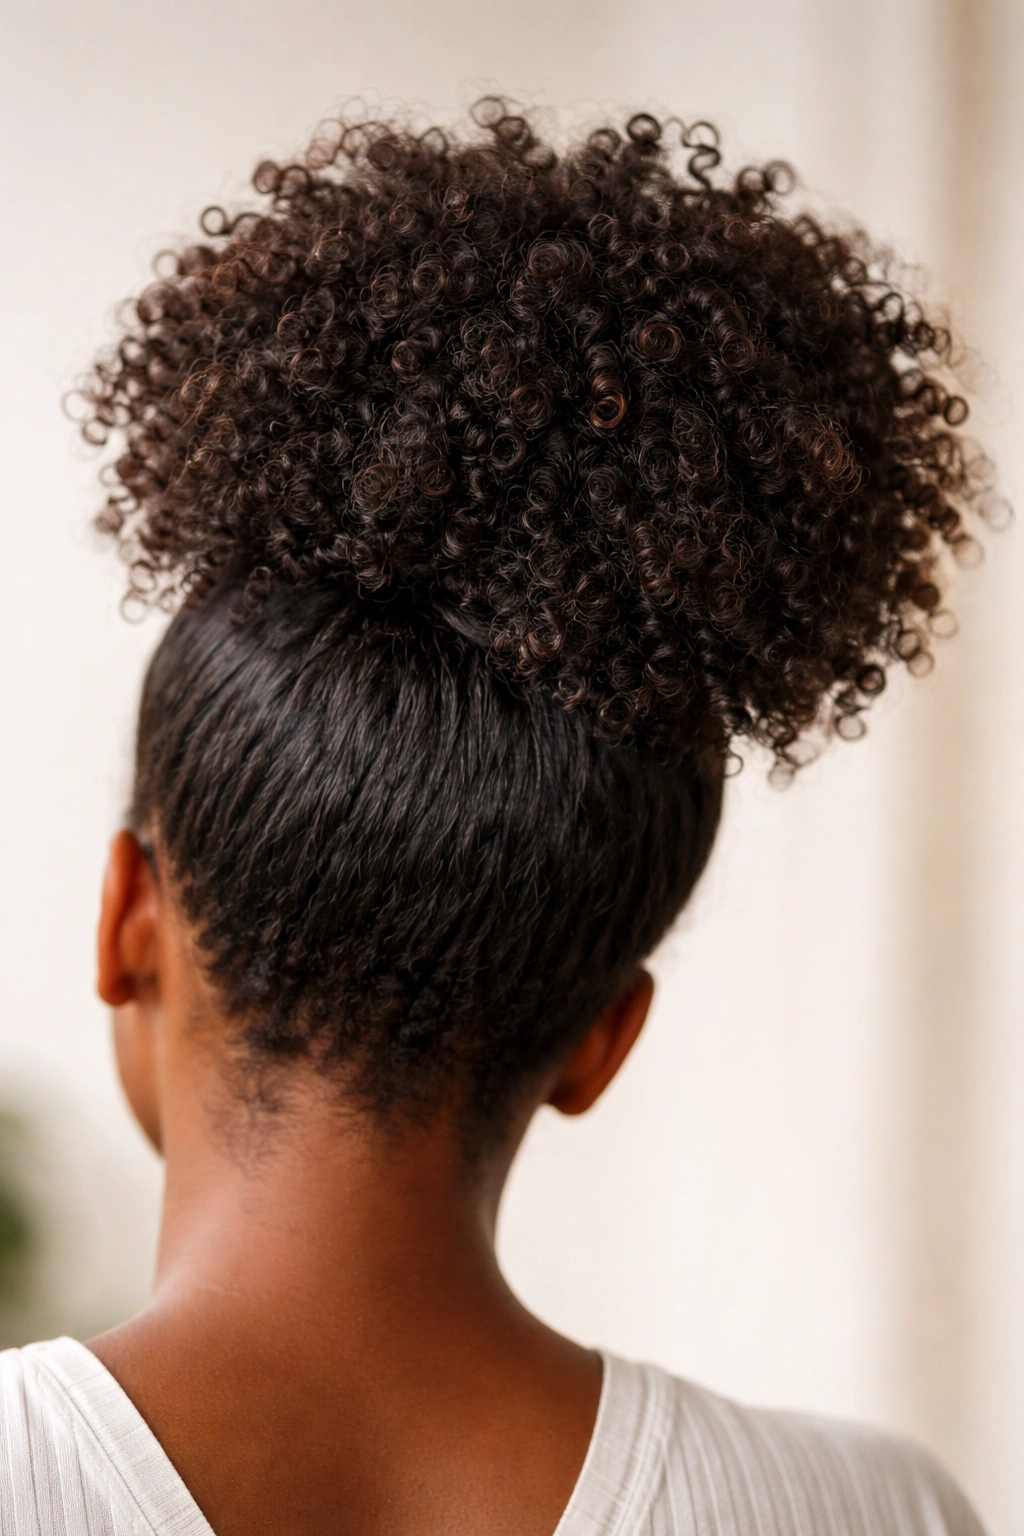
The high curly puff ponytail is the foundation of curly-hair styling and for good reason—it’s basically a celebration of your natural curl pattern gathered at the crown. Rather than smoothing everything into a tight sleek pony, you’re gathering your curls at the top of your head and letting them spring out in all their glory, creating maximum volume and a look that’s both undeniably chic and completely effortless-looking. This style works beautifully whether your curls are loose waves, tight coils, or somewhere in between.
Why It Works for Curly Hair
The high puff ponytail works so well for curls because it stops you from fighting your natural texture. Instead of trying to smooth and control everything, you’re leaning into what your hair already wants to do. The gathered base creates a clean, polished look that transitions into wild, beautiful volume, which is honestly the perfect balance. The height also adds instant elegance and elongates your face and neck, making it work for everything from casual to dressed-up occasions.
How to Create the Perfect High Puff
- Start with freshly moisturized curls (use a leave-in conditioner and curl cream to define and control frizz)
- Apply a light gel or mousse to your edges to smooth your hairline if desired
- Flip your head upside down and gather hair at the very crown of your head—going higher creates more volume
- Use a silk or satin scrunchie (never elastic that damages your curls) to secure the ponytail base
- Once secured, gently fluff and arrange your curls so they radiate outward rather than falling flat
- You can use your fingers or a wide-tooth comb to gently separate and define curls
- Finish with a light hairspray to hold the shape without crunching your curls
Pro tip: If your puff feels too thin or you want maximum volume, try a hair puff or volumizing product specifically designed for curly hair—brands like Carol’s Daughter and SheaMoisture make excellent options that add body without weighing curls down.
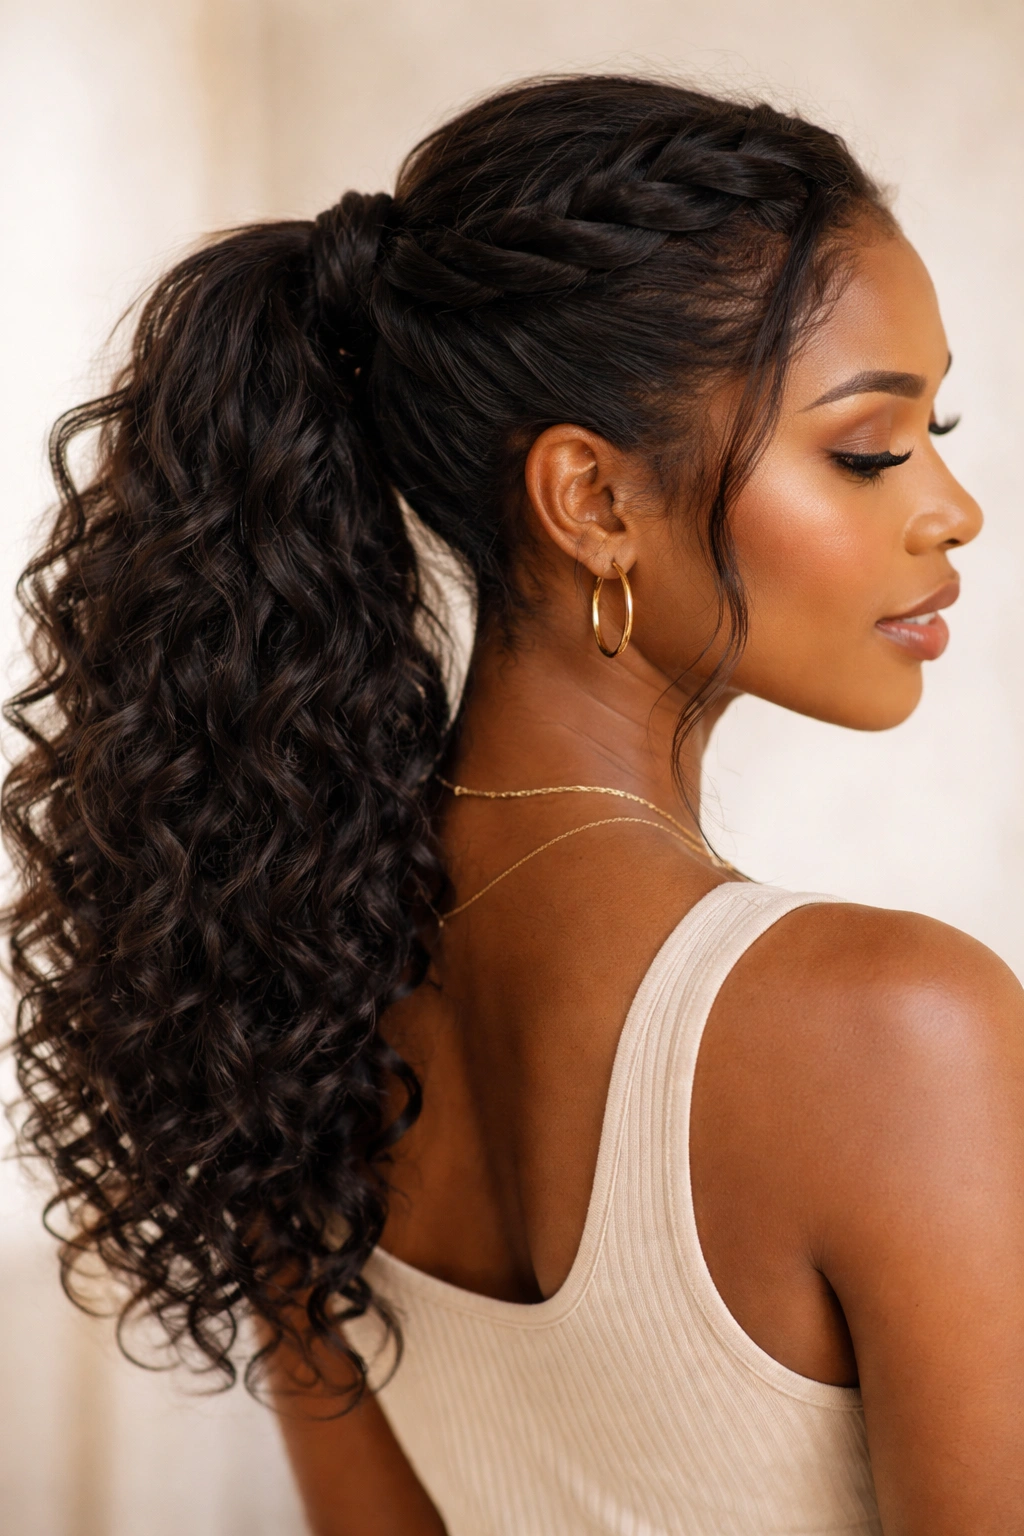
2. The Braided Crown Ponytail
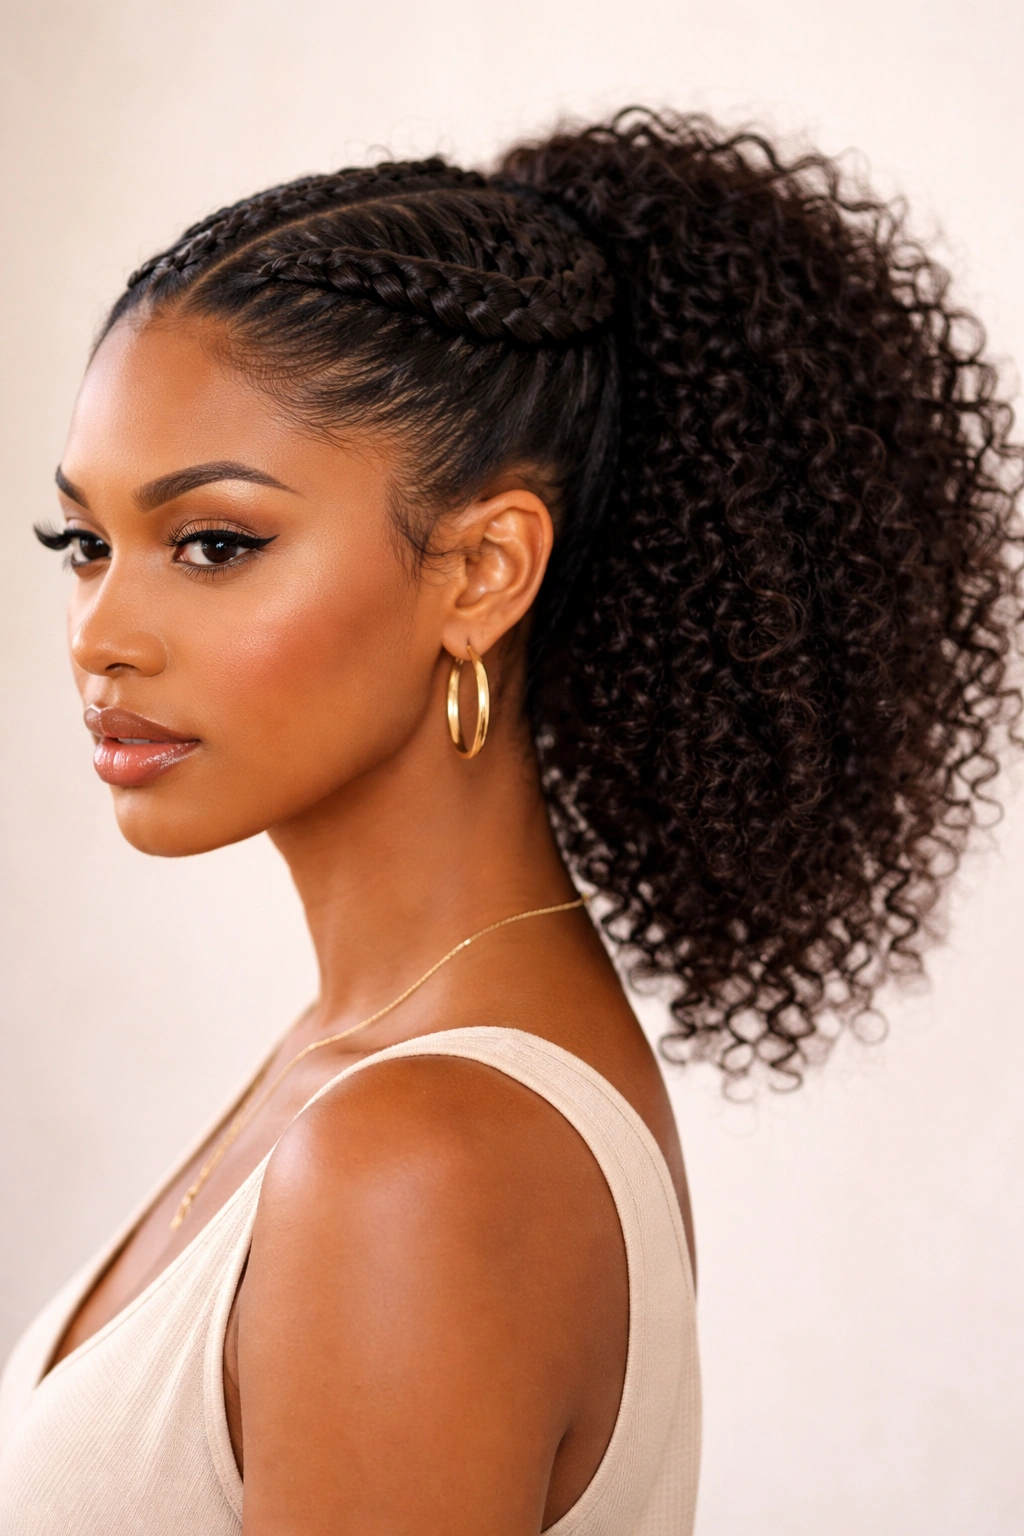
The braided crown ponytail combines intricate detail with the ease of a gathered pony, creating a style that looks intentional and Instagram-worthy while still being protective and practical. You’re essentially creating a halo braid (or sometimes just one or two braids) that frames your face and feeds into a ponytail base, giving you the best of both worlds—detailed styling up top and effortless texture below.
Why This Style Stands Out
Braided crown ponytails give you an elevated, finished look while actually protecting your hairline from tension since the braids distribute weight more evenly than pulling all your hair into one tight elastic. The braids also create a beautiful visual transition from your face to the fuller ponytail texture below, which flatters most face shapes. It’s polished enough for work or special occasions but textured enough that it doesn’t sacrifice the beauty of your natural curls.
What You Need to Know
- Start with at least two-strand or three-strand braids (cornrows work beautifully too if you prefer that texture)
- You can braid one section on each side of your head or create a full crown braid wrapping around the back
- Braid loosely enough that you’re not creating tension points that stress your hair
- Feed the braids into a ponytail gathered at the base of the crown or slightly lower, depending on your preference
- Leave out some face-framing curls if desired for softness, or tuck everything in for a more defined look
- The beautiful thing about curly hair is that your curls will soften the braids’ edges, making everything look cohesive and romantic
Worth knowing: Overnight, you can re-wet just the braided section and re-braid if needed, but the curls in your ponytail should last several days if you refresh them with a spray bottle of water and curl cream.
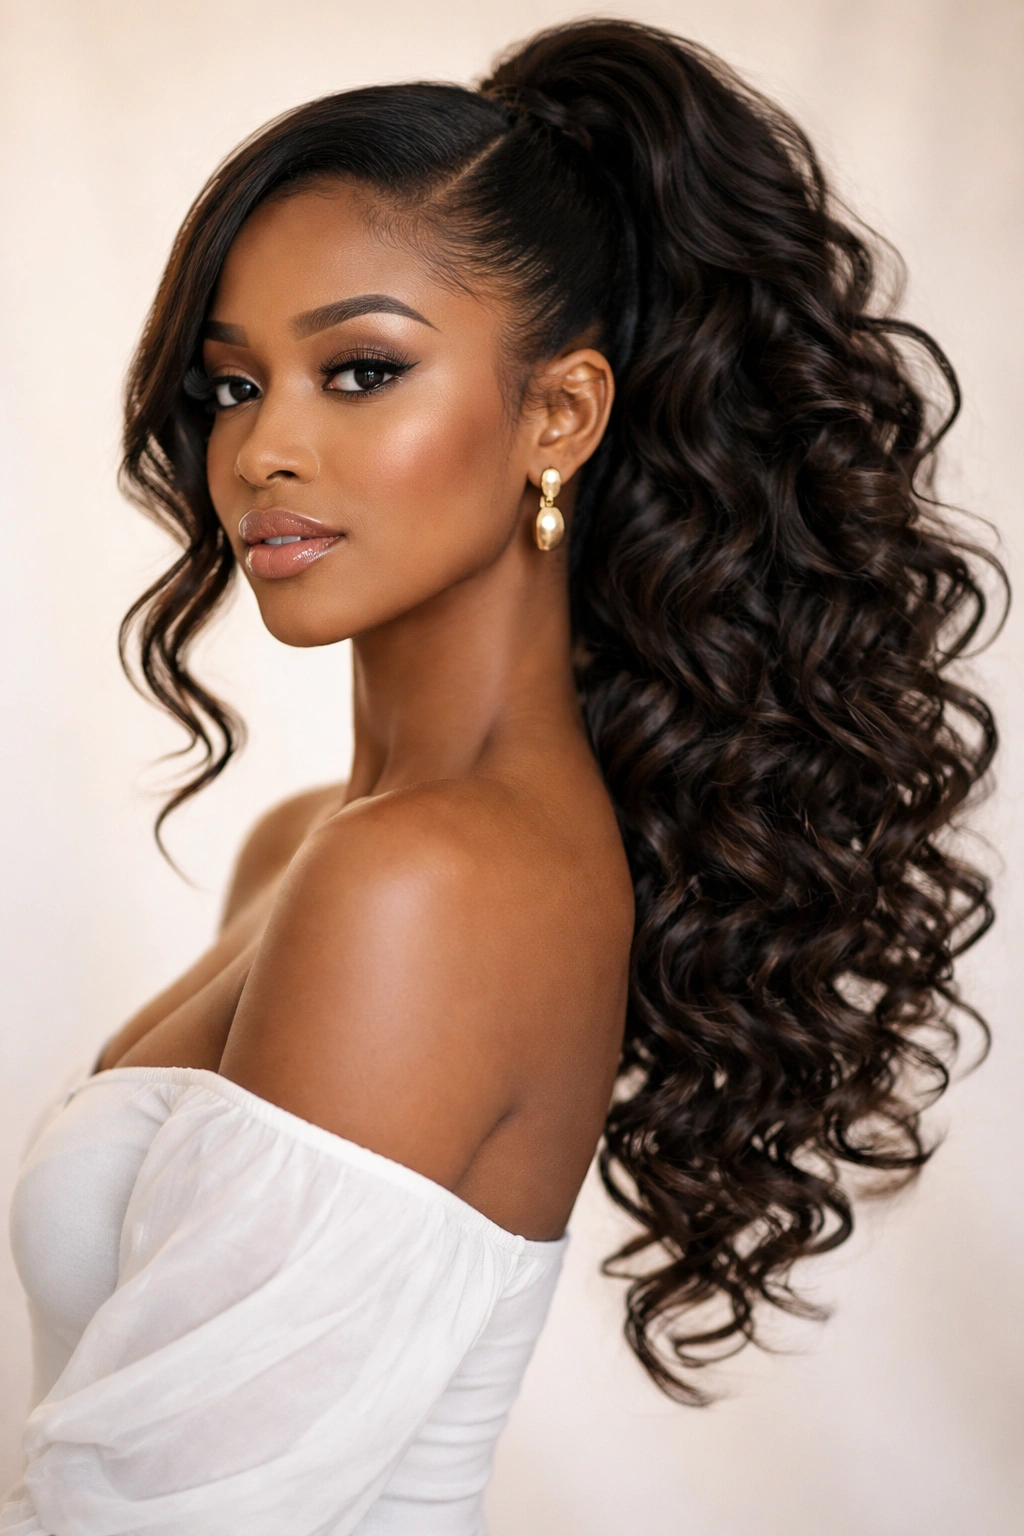
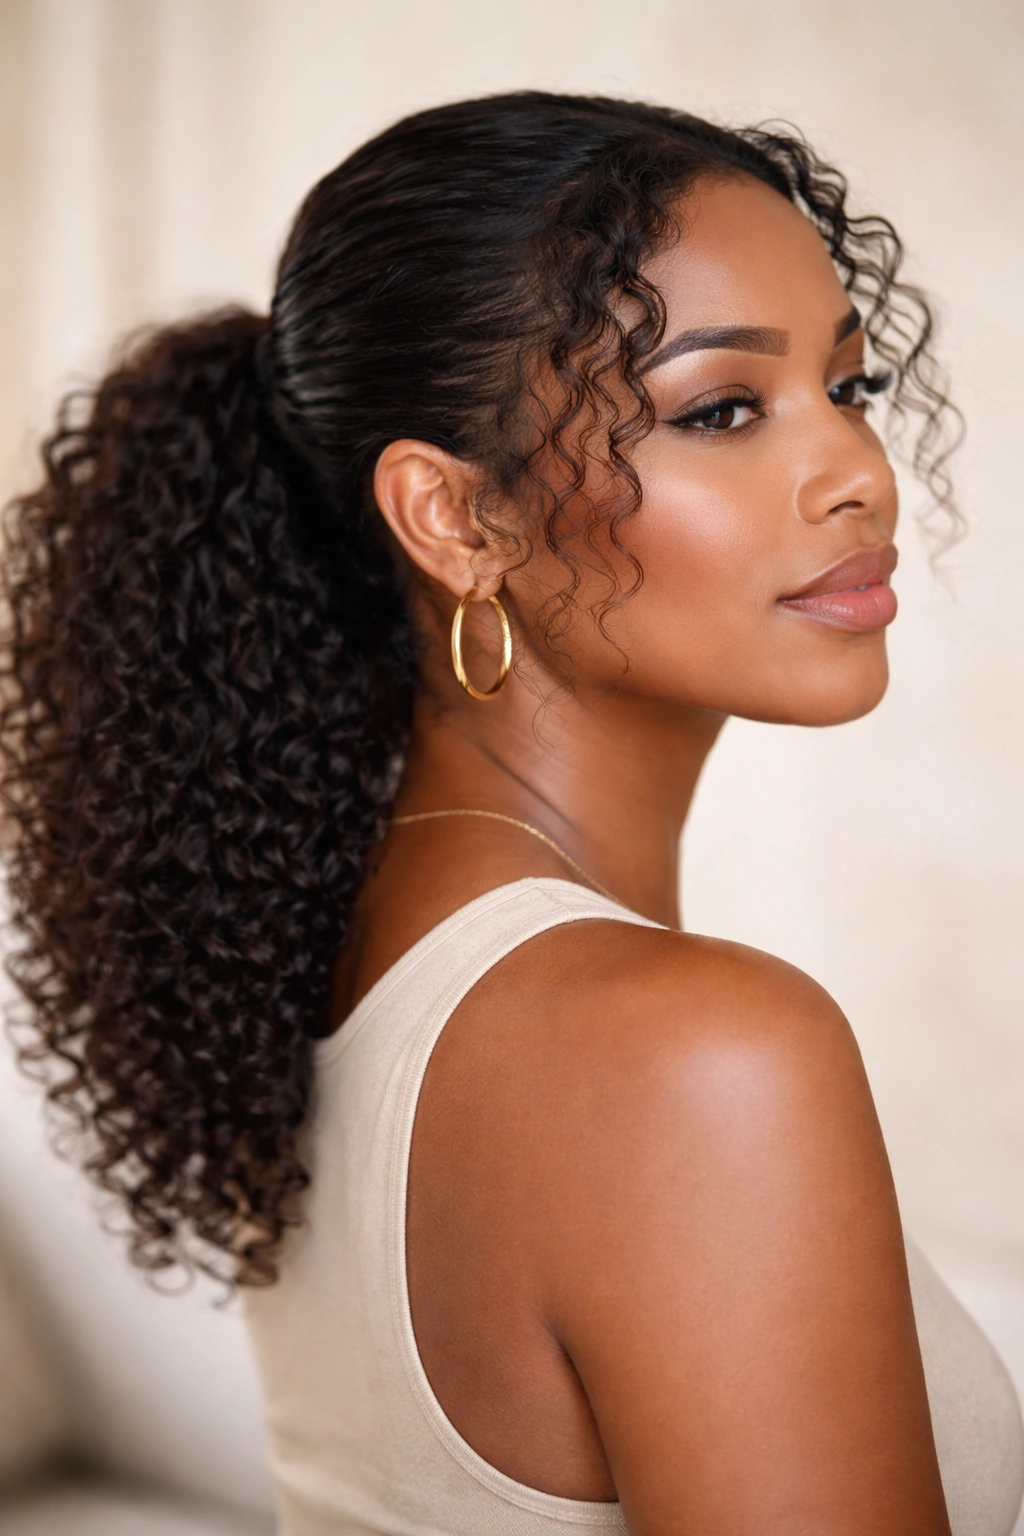
3. The Sleek Low Ponytail with Textured Ends
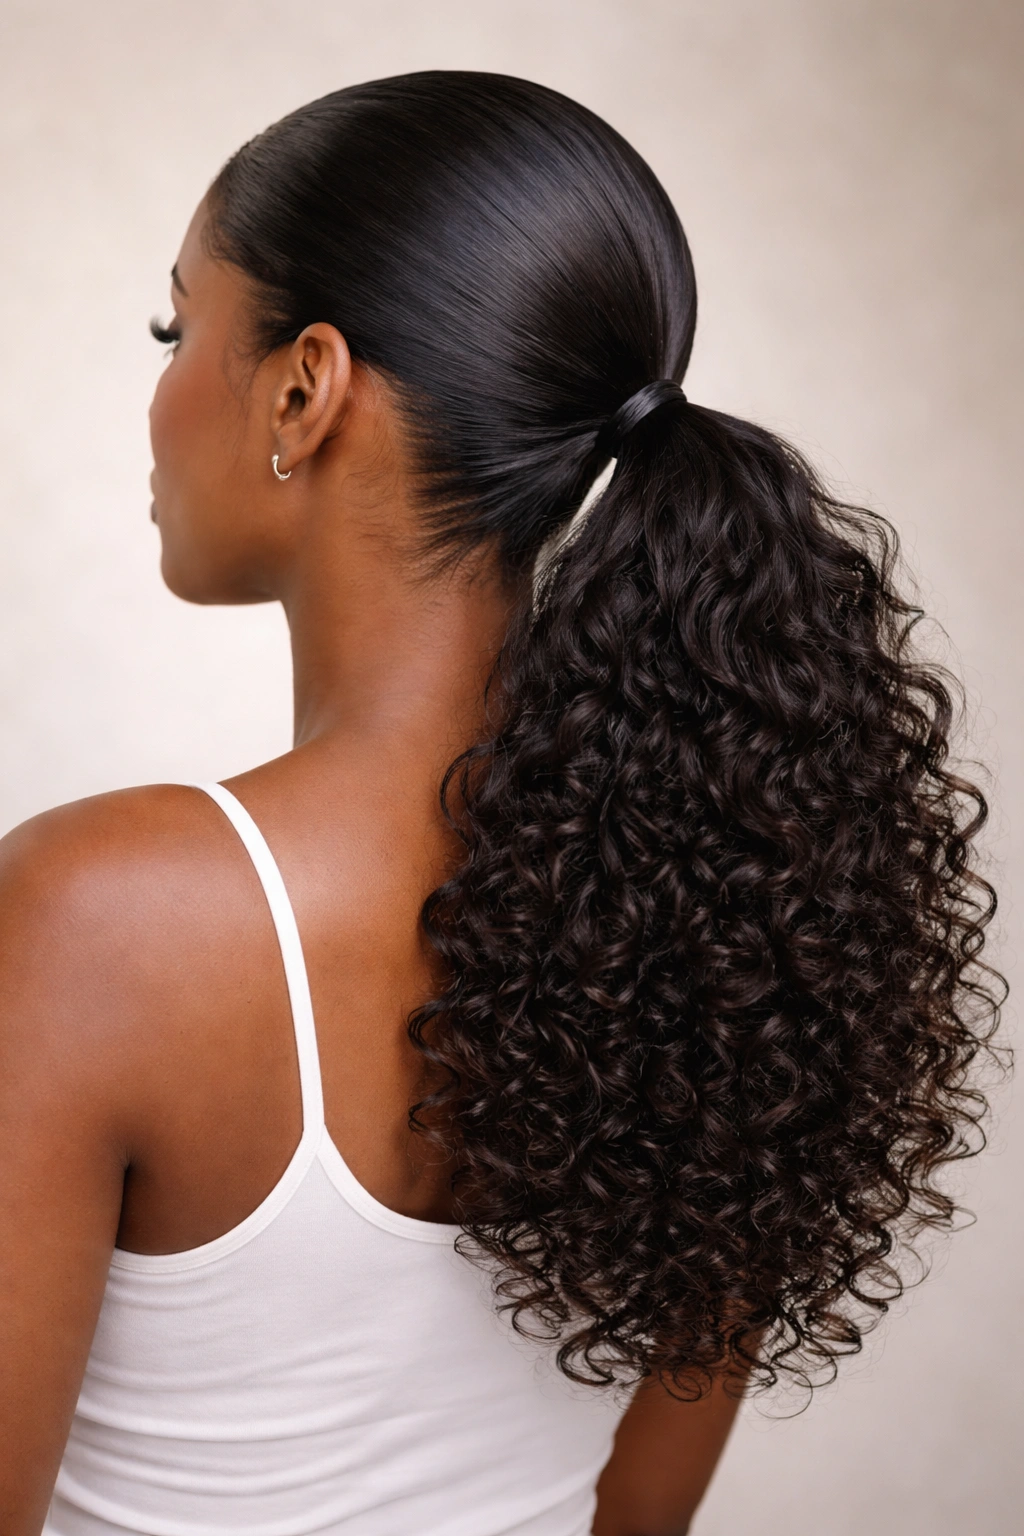
A sleek low ponytail keeps everything smooth and controlled from your hairline down to the base of your pony, while your curls are left loose and full at the ends. This hybrid approach gives you sophistication up top and texture down below—it’s the style for when you want to look polished without abandoning your natural curls entirely. It works beautifully for work settings, dates, or any time you want a more refined vibe.
How It Balances Control and Texture
The sleekness comes from smoothing your hair from roots to the ponytail base, which you can do with a fine-tooth comb and a smoothing gel or lightweight cream. This creates a clean, intentional look that reads as put-together and professional. But because you’re leaving your curls loose below the elastic, you get softness and movement that keeps the style from feeling too severe. It’s the perfect style for someone who wants control without completely flattening their natural texture.
Steps to Get This Right
- Apply a smoothing cream or gel to slightly damp hair
- Use a fine-tooth comb to brush your hair back gently but firmly into a low ponytail at the nape of your neck
- Secure with a satin scrunchie or elastic
- Release your curls from the elastic band—they’ll spring out with texture and definition
- You can use a curling cream or refresh spray on the loose curls to enhance definition
- Consider adding a decorative claw clip, silk scarf wrap, or gold cuff around the base for polish
- If frizz happens (humidity is real), smooth it with a tiny bit of edge control, not all over
Insider note: If your curls feel a bit flat from being tucked under the smoothed section, spritz the loose curls with water mixed with a tiny bit of leave-in conditioner and scrunch them up gently to refresh the curl pattern.
4. The Twisted Bubble Ponytail
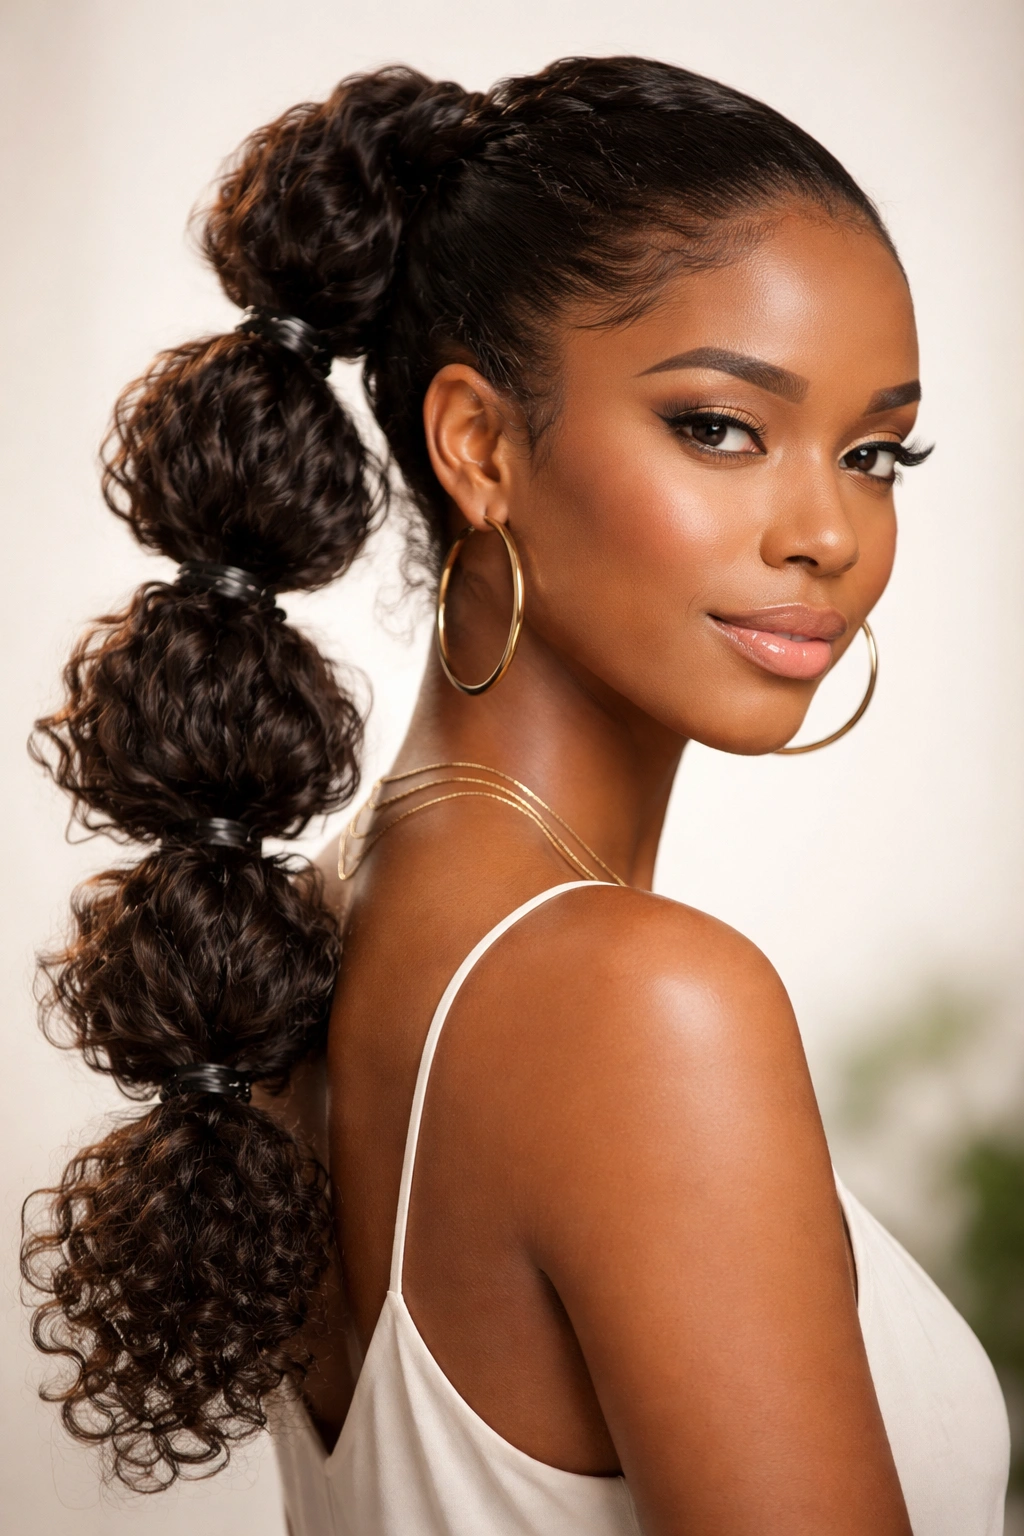
The twisted bubble ponytail is fun, youthful, and creates an eye-catching silhouette by dividing your ponytail into sections and tying them off with small elastics, creating bubble-like segments. It’s more involved than a basic pony but totally worth it because the result is so visually interesting and the twisted sections add texture and dimension that plain curls can’t quite match on their own.
Why Curly Hair Makes This Style Pop
Curly hair is made for this style because each bubble naturally holds texture and volume. Even if you’re using thinner sections, the curl pattern creates fullness between each elastic, so the bubbles look plump and intentional rather than stringy or thin. The twisted sections also interact beautifully with your natural curl pattern, creating layers of texture that straight hair wouldn’t have.
How to Build Your Bubble Pony
- Gather your hair into a basic high or mid-height ponytail and secure it loosely
- Section your ponytail into 3–5 equal parts (fewer sections = bigger bubbles; more sections = detailed, textured look)
- Working from the base of the ponytail upward, twist each section roughly 2–3 inches of hair
- Secure the twisted section with a small clear elastic
- Twist the next section of hair and repeat until you reach the ends
- Gently pull out each bubble slightly to increase volume and show off the texture
- You can curl the loose ends with a curling iron for extra pizzazz, or leave them curly and natural
- Finish with light hairspray to hold the bubbles’ shape
Pro tip: Use small satin-lined claw clips instead of elastics if you want the bubble effect without the tight bands—it looks slightly different but is easier to undo and less damaging to your curls.
5. The Pineapple Ponytail (Protective Overnight Style)
The pineapple ponytail is technically a protective sleeping method that works as an actual ponytail style too. You’re gathering your curls loosely at the crown with a silk scrunchie before bed to preserve your curl pattern, but you can also wear this style out during the day—it’s casual, comfortable, and keeps your ends protected. It’s perfect for preserving a fresh style day-to-day without restyling from scratch.
Why It’s Essential for Curl Care
This style is called a pineapple because of the way your curls gather at the top—it looks like a pineapple shape. Sleeping this way means your curls aren’t getting crushed against a pillow, which prevents frizz and flattening. But it’s also just a genuinely cute way to gather your hair casually. The loose gathering (never tight) distributes weight evenly and doesn’t create stress on your hairline or edges.
The Right Way to Pineapple
- Use a silk or satin scrunchie—never regular elastics (they create creases and break curls)
- Flip your head upside down and loosely gather your curls at the crown
- The scrunchie should be snug enough to hold everything in place but loose enough that you can fit a finger under it
- Your curls should be able to move and spring naturally, not compressed tightly
- Sleep on a silk or satin pillowcase to reduce friction even further
- In the morning, release the pineapple gently and refresh curls with a spray bottle and some leave-in conditioner if needed
- You can also wear this style out—it’s undeniably cute and reads as intentionally casual rather than unfinished
Worth knowing: A pineapple with a silk bonnet over it at night is the ultimate curl-preservation combo. The bonnet keeps the pineapple secure while you sleep and adds an extra layer of friction prevention.
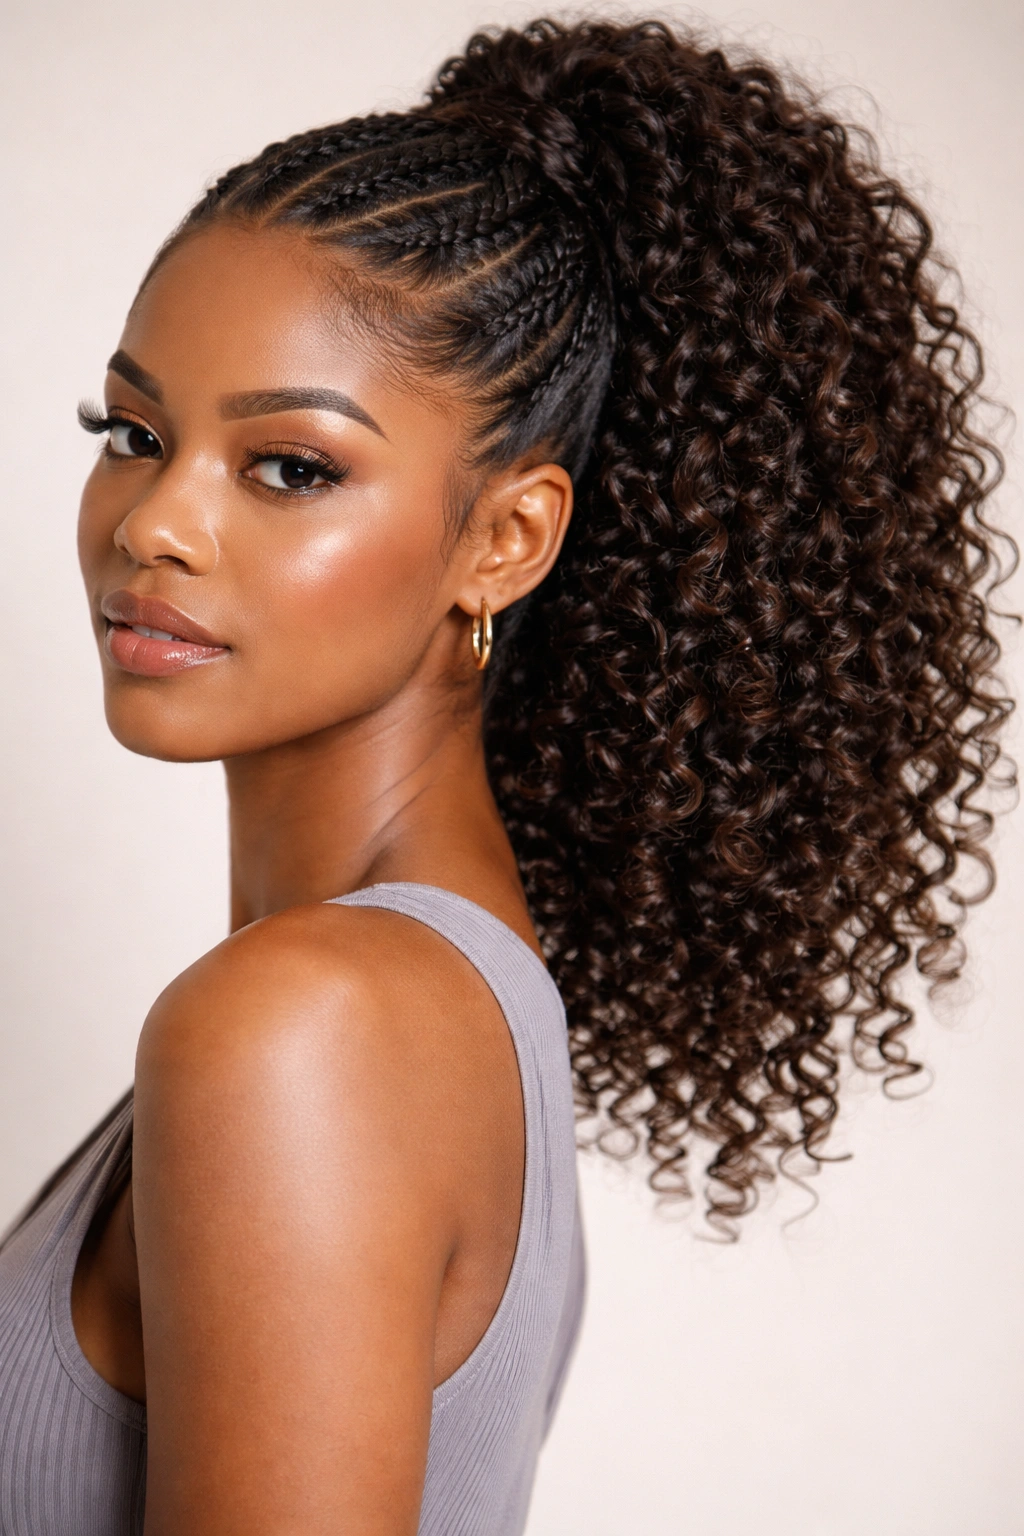
6. The Cornrow-Into-Curls Ponytail
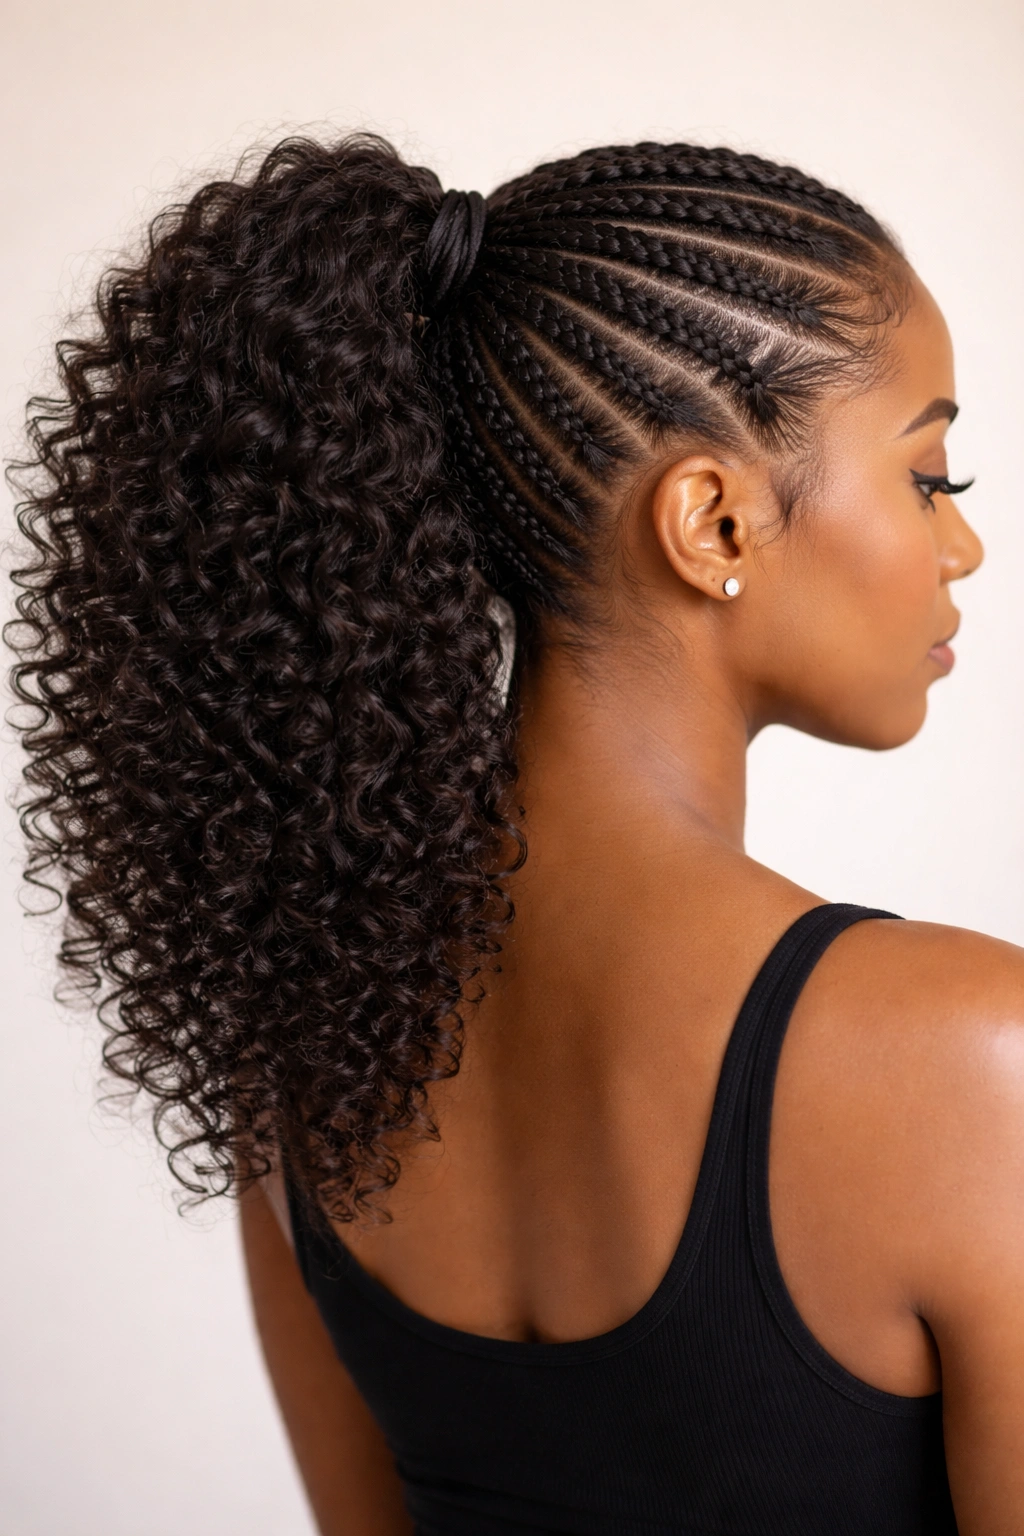
Cornrows that feed directly into a ponytail offer the best of protective styling and texture. You’re braiding from your hairline back toward the crown, then releasing your curls into a gathered ponytail, creating a style that’s defined and intricate up top but wildly textured and voluminous at the ends. It’s undeniably stylish and also genuinely protective for your edges and hairline.
Why This Hybrid Works So Well
Cornrows distribute tension evenly across your scalp, so you’re not pulling all your weight through one elastic at the base of your neck. Your edges get a break, which is crucial for long-term hair health. The braided section creates a finished, intentional look that makes your curls below feel purposeful rather than accidental. It’s a sophisticated style that works for professional settings, casual days, or nights out.
How to Execute This Style
- Create cornrows (usually 2–4 depending on the volume of your hair) that run from your hairline toward the back of your head
- Braid loosely—tight cornrows are beautiful but can create tension alopecia with repeated styling
- Once you reach the back of your head, release your curls and gather them into a ponytail with the ends of your cornrows
- You can leave all your curls loose below the tie, or braid or twist them further for more control
- Secure with a satin scrunchie to prevent creasing and breakage
- The natural softness of your curls will blend beautifully with the braided texture
Pro tip: Loosening your cornrows slightly after you’ve tied your ponytail makes them look less tight and more effortless, plus it feels more comfortable to wear for extended periods.
7. The Faux Hawk Ponytail
The faux hawk ponytail creates height and drama by styling your ponytail so it stands up or sticks out more prominently, often with the sides smoothed or braided close to your head. It’s bold, fashion-forward, and honestly just fun to wear. This is the style when you want to make a statement and lean into the personality of your curls rather than toning them down.
What Makes This Style Bold
A faux hawk ponytail uses the natural volume of your curls to create drama and visual interest. By pulling your hair toward the center and letting your curls expand outward or upward, you create a silhouette that’s impossible to ignore. The smoothed or braided sides add contrast, making the texture of your ponytail stand out even more. It’s modern, edgy, and genuinely cool-looking.
Creating Your Faux Hawk Pony
- Style your curls with your usual products and allow them to dry or air dry
- Smooth or braid the sides of your head (you can do two side braids, two smoothed sections, or one on each side)
- Gather your hair at the crown and pull it into a high ponytail, tightening it securely
- Flip your head upside down and gently tease or fluff the ponytail section to create maximum height and volume
- Use your fingers to lift the curls upward and outward to create that hawk-like silhouette
- Smooth the sides with edge control or light gel so they don’t fly away
- Finish with hairspray focused on the ponytail section
Real talk: This style demands confidence, but curly hair naturally gives you the texture to pull it off beautifully. Wear it when you’re feeling bold.
8. The Side Ponytail with Cascading Curls
A side ponytail gathers your hair to one side of your head rather than the center or back, creating an asymmetrical, romantic look. With curly hair, the curls cascade down one side of your body, creating movement and softness. It’s a style that works for dates, special occasions, or any time you want to feel feminine and polished without being overly formal.
Why Side Ponytails Suit Curly Hair
Curly hair in a side ponytail creates a waterfall effect—your curls literally cascade and bounce, which is visually stunning. The asymmetry is flattering because it shows off the shape of your face and creates visual interest. It’s also surprisingly comfortable because you’re not pulling hair straight back; the side positioning means less tension on your hairline and a more relaxed, effortless feel even though the style is actually quite refined.
How to Style a Perfect Side Pony
- Determine which side you want your ponytail on (usually the opposite side of your naturally deeper part, though this is entirely personal)
- Brush your hair gently with a wide-tooth comb or paddle brush to smooth it slightly
- Gather your hair toward that side of your head, positioning the ponytail base somewhere between your ear and the back of your neck
- Use a satin scrunchie to secure it—you want it snug enough to hold but not so tight that curls can’t move
- Release your curls and arrange them so they cascade down that side of your body
- You can leave your curls fully loose, or lightly curl them with a curling iron for added definition
- Add a decorative clip, scarf tie, or piece of jewelry to elevate the look
Worth knowing: If you’re worried about your ponytail slipping out of its side position throughout the day, use a tiny bit of lightweight gel at the roots to keep everything in place without weighing curls down.
9. The Twisted Crown Ponytail
Twisted crown ponytails are essentially loose twists that wrap around your head and feed into a ponytail at the back. They’re more relaxed than braids but create more definition than just a plain gathered pony. This style sits right in the middle of effortless and intentional—it looks styled without feeling stiff or overly done.
Why Twists Are Perfect for Curly Texture
Twists naturally complement curly hair because they echo the spiral nature of your curl pattern. When you twist sections of curly hair, the curls integrate into the twist, creating interesting texture rather than a smooth, uniform braid. The result is a style that looks cohesive with your natural curl pattern rather than fighting against it.
Steps to Create Twisted Crown Magic
- Section your hair into 2–4 sections depending on the look you want (two sections = simpler, more casual; four sections = more detailed and intricate)
- Start with one section at the front of your head and create a two-strand or three-strand twist moving toward the back
- Keep the twist loose enough that your curls can still be visible and textured
- Once you reach the back of your head, release that twisted section and start your next one
- Repeat until all sections are twisted and positioned across the crown
- Gather all your twisted sections plus any remaining loose hair into a ponytail
- Secure with a satin scrunchie and gently separate and fluff your twists so they look intentionally textured rather than neat and tight
Pro tip: Doing this style on second-day hair (hair that’s a day or two old and already has some texture) actually looks better because your twists hold their shape more easily.
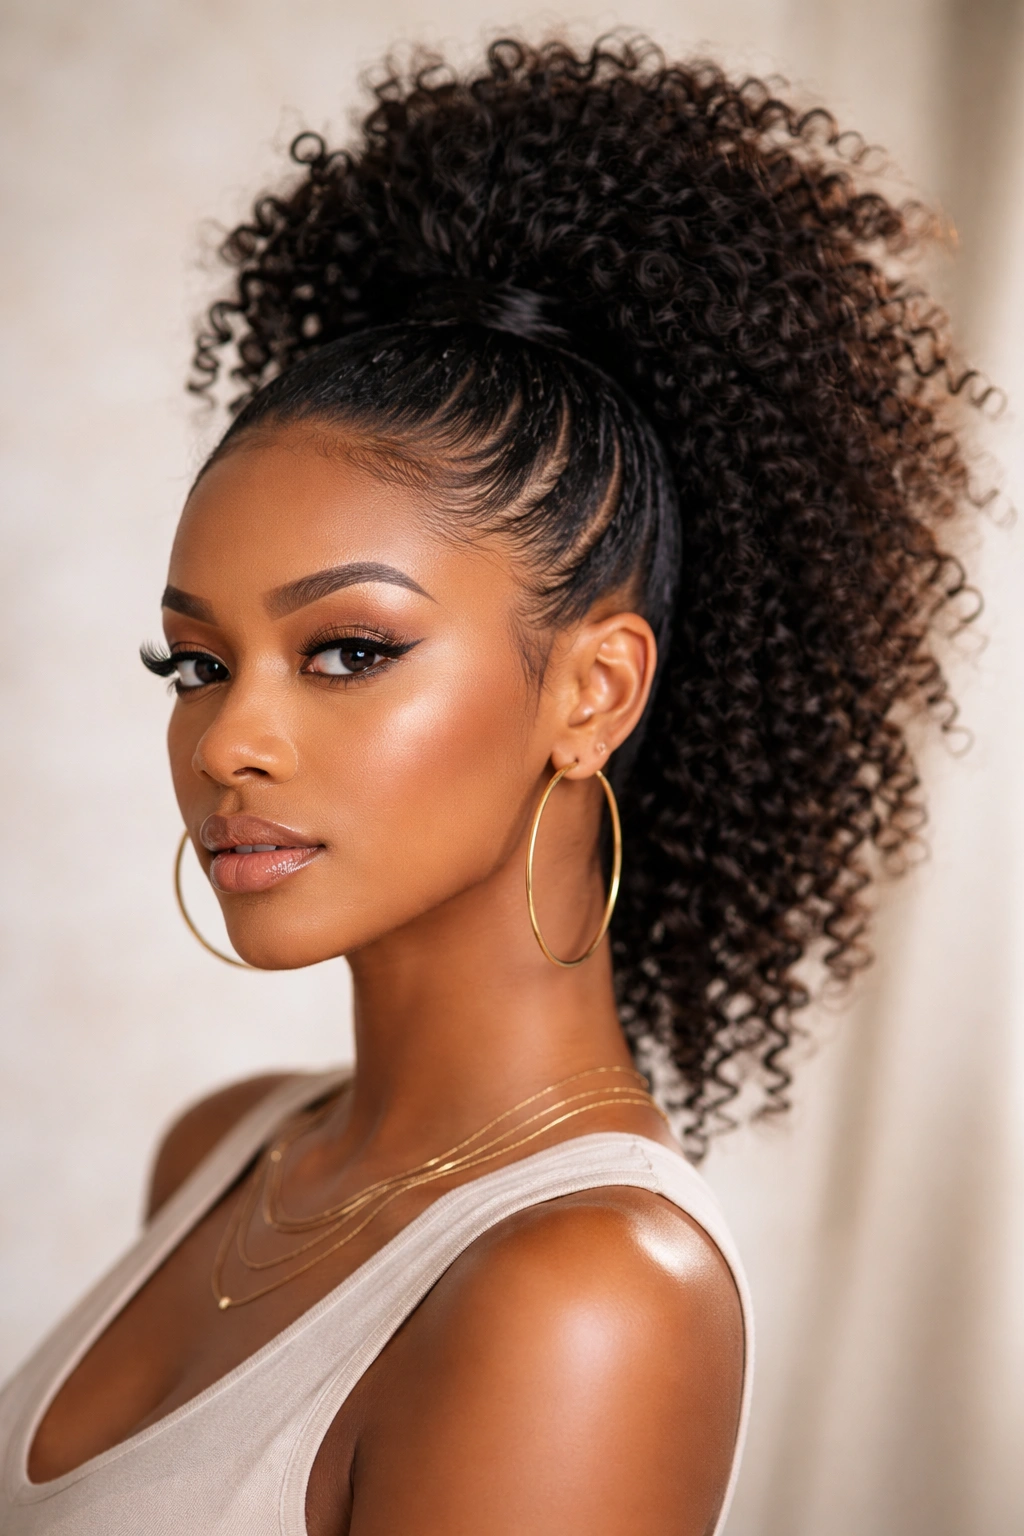
10. The Sleek Top Curly Bottom Ponytail
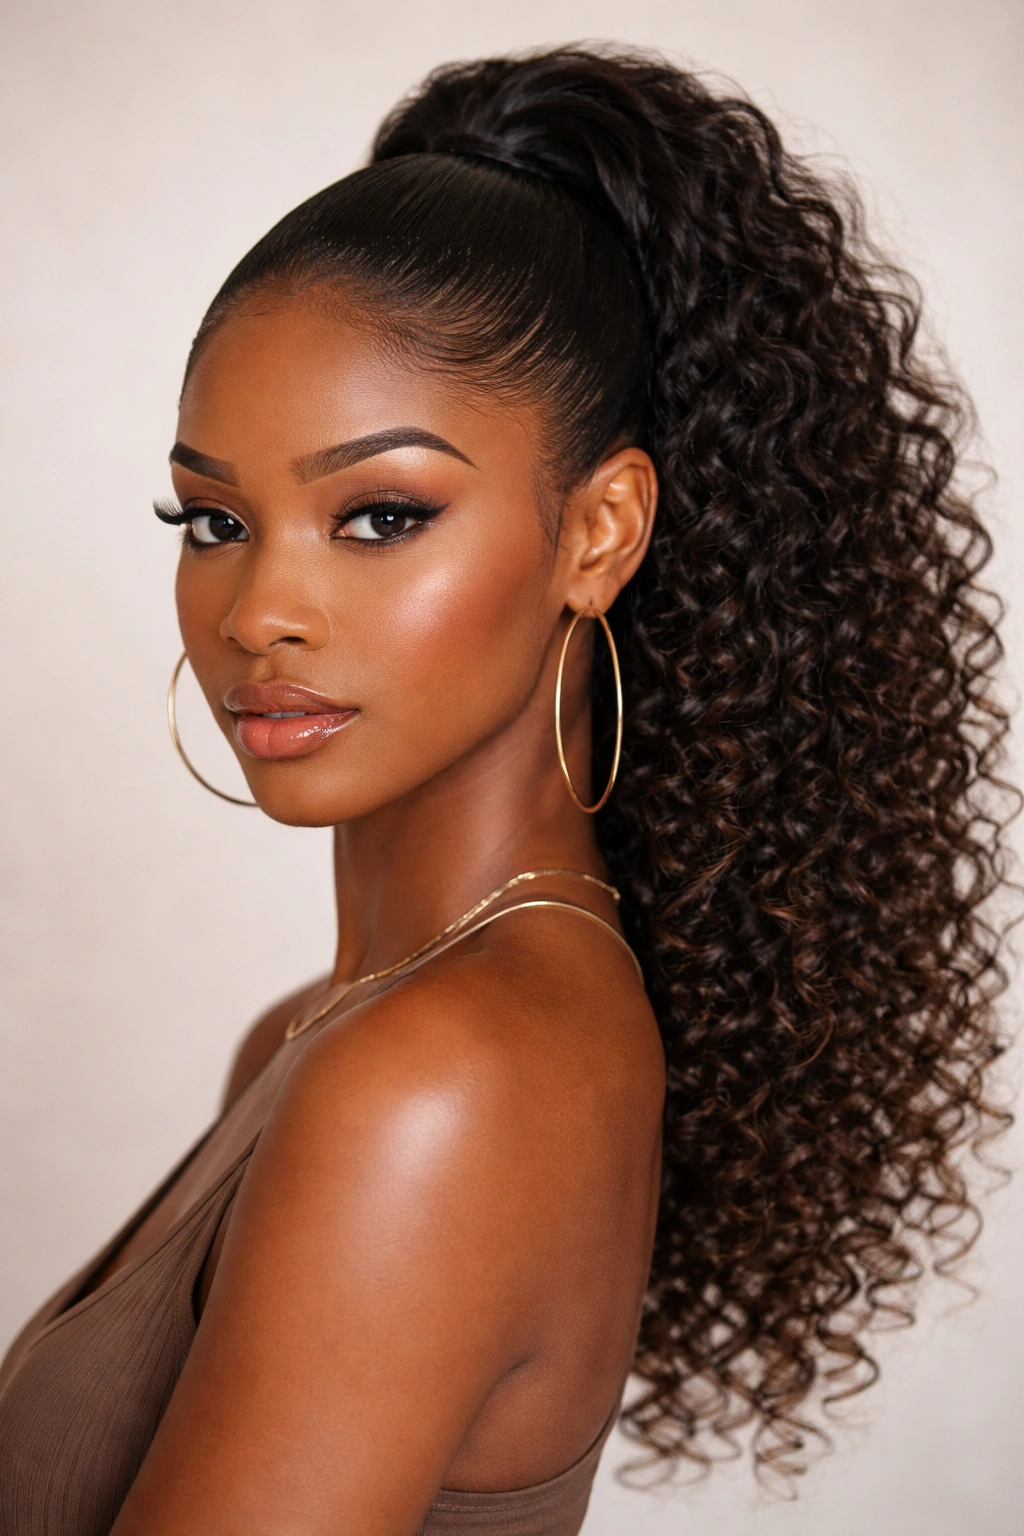
This style takes smoothness and texture to an extreme, creating a stark contrast between a tightly gelled top section and wild, unstructured curls below. It’s edgy, modern, and honestly quite chic. You’re essentially creating two different textures in one style—structured control at the roots and pure curl energy at the ends.
Why This Contrast Is So Striking
The visual contrast between sleek and textured is powerful and eye-catching. By smoothing everything from your hairline to your ponytail base with a firming gel or edge control, you create a clean, almost minimalist top half. Then below the elastic, your curls are completely free and voluminous, creating maximum visual impact. It’s a style that says you know exactly what you’re doing and you’re doing it intentionally.
How to Achieve Maximum Contrast
- Apply a smoothing cream or firm-hold gel to damp hair
- Use a fine-tooth comb or brush to smooth your hair back very firmly and carefully
- Gather your hair into a tight, high ponytail and secure it firmly with a sturdy elastic
- The base should feel completely smooth with no bumps or loose pieces
- Now release your curls completely—they’ll spring out in maximum volume and texture
- Use a curl-defining cream on the loose ponytail section to enhance and shape your curls
- The contrast between the sleek top and textured bottom is the whole point of this style
- Consider adding a metallic clip or geometric hair accessory to emphasize the dividing line
Worth knowing: This style works best when you have a significant amount of hair and well-defined curls that will spring up dramatically when released. If your curls are looser, the contrast won’t be as striking.
11. The Half-Up Curl Ponytail
A half-up style gathers the top half of your hair into a ponytail while leaving the bottom half loose, creating a balanced look that’s more casual than a full ponytail but more intentional than just wearing your hair down. It’s the perfect everyday style—practical, cute, and genuinely easy to do.
Why Half-Up Is Underrated for Curly Hair
Half-up ponytails are perfect for curly hair because they keep hair out of your face without committing to a full updo. They’re great for second or third-day curls when your curls are still defined but you want them off your face. The style also lets you show off the length and texture of your curls while still being practical for work, exercise, or any activity where you need some hair management.
How to Build a Great Half-Up
- Flip your head upside down and section off the top half of your hair (imagine a line from ear to ear across the top of your head)
- Gather just the top section and secure it with a satin scrunchie at the crown
- Flip your head back up and fluff the ponytail section
- Let the bottom half of your curls fall naturally
- You can leave your bottom curls completely loose, or add curls with a curling iron if they need refreshing
- Consider adding face-framing pieces by gently releasing a curl on each side of your face
- Add a clip, scarf, or bow at the base of the ponytail for a finished look
Pro tip: This is the perfect style for wearing with a fun headwrap or headband across the back—the accessory pulls the style together and adds visual interest without requiring much effort.
12. The Upside-Down Braid-Out Ponytail
For this style, you create braids while your hair is wet, let them dry completely (overnight is ideal), release the braids to create a braid-out texture, and then gather all that defined, textured hair into a ponytail. It’s a style that requires planning ahead but delivers incredible results with minimal effort on styling day. Your curls will be incredibly defined, bouncy, and beautiful.
Why Braid-Outs Are the Secret Weapon
A braid-out creates a curl pattern that’s more defined and elongated than your natural curl pattern because the braid essentially stretches your curls while they dry. When you release the braids, you get curls that are bigger, bouncier, and more uniform than if you just air-dried your curls naturally. Gathering a braid-out into a ponytail means all that definition stays intact, and you get maximum volume and shine.
How to Create a Braid-Out Pony
- Braid your hair while it’s freshly washed and conditioned (do 2–6 braids depending on the curl definition you want)
- Braid loosely enough that the braids aren’t too tight around your hair
- Apply your regular styling products (leave-in conditioner, curl cream, gel) to each braid
- Allow your hair to dry completely—overnight is ideal, but 8+ hours works too
- Carefully unravel each braid by gently separating the strands with your fingers
- Use a wide-tooth comb gently if you need to, or just finger-comb to avoid disrupting the curl pattern
- Once all braids are released, gather your beautiful, defined, wavy curls into a ponytail
- Secure with a satin scrunchie and gently fluff to show off all that texture
Real talk: A braid-out ponytail takes advance planning, but the payoff is genuinely worth it. Your curls will look salon-quality and feel incredibly soft and bouncy.
Final Thoughts
The right ponytail for your curly hair isn’t about finding a universal “best” style—it’s about finding what works for your specific curl pattern, lifestyle, and mood on any given day. Maybe you’re a high-puff person most days but love a sleek low pony for work. Maybe braided styles are your go-to because they keep your edges protected and look undeniably polished. Maybe you prefer letting your curls loose with a simple side ponytail because it feels most like you.
The gorgeous thing about having curly hair is that almost every one of these styles works better because of your natural texture. Your curls create volume, movement, and visual interest that straighter hair types have to work to achieve. That’s not just a styling advantage—it’s a reminder that your natural texture is actually the star of the show, not something to fight against.
Start with whichever style speaks to you most, practice it a few times to find your technique, and then branch out. Keep silky scrunchies on hand, invest in good curl products that actually work for your specific curl pattern, and remember that the best ponytail is the one that makes you feel confident and comfortable. Your curls are stunning no matter how you style them.