Mid-height ponytails have become a staple in the hairstyling world, and for good reason. They offer the perfect balance between keeping hair off your face and maintaining volume and dimension throughout the style. For Black women specifically, mid-height ponytails are incredibly versatile—they work with natural textures, relaxed hair, braids, and protective styles alike. Whether you’re heading to the office, the gym, or a special event, a well-executed mid-height ponytail can be polished, playful, or both.
What makes mid-height ponytails so appealing is their versatility and accessibility. Unlike high ponytails that can look harsh or overly casual, and unlike low ponytails that can feel dated or too formal, mid-height styles hit a sweet spot. They’re flattering on different face shapes, work with varying hair lengths, and can be dressed up or down depending on how you style them. The placement—typically at the crown or just slightly above the center of the back of the head—creates a naturally elegant silhouette while still allowing your hairline and facial features to remain visible.
The styling possibilities within the mid-height category are genuinely endless. You can add braids, weave them with texture, incorporate hair accessories, leave out face-framing sections, or wrap the base for added polish. Black women have been innovating ponytail styles for generations, and mid-height variations showcase creativity while remaining practical for everyday wear. Whether you’re working with 4C coils, silky textures, or anything in between, you’ll find a mid-height style that suits your hair type, personal aesthetic, and lifestyle.
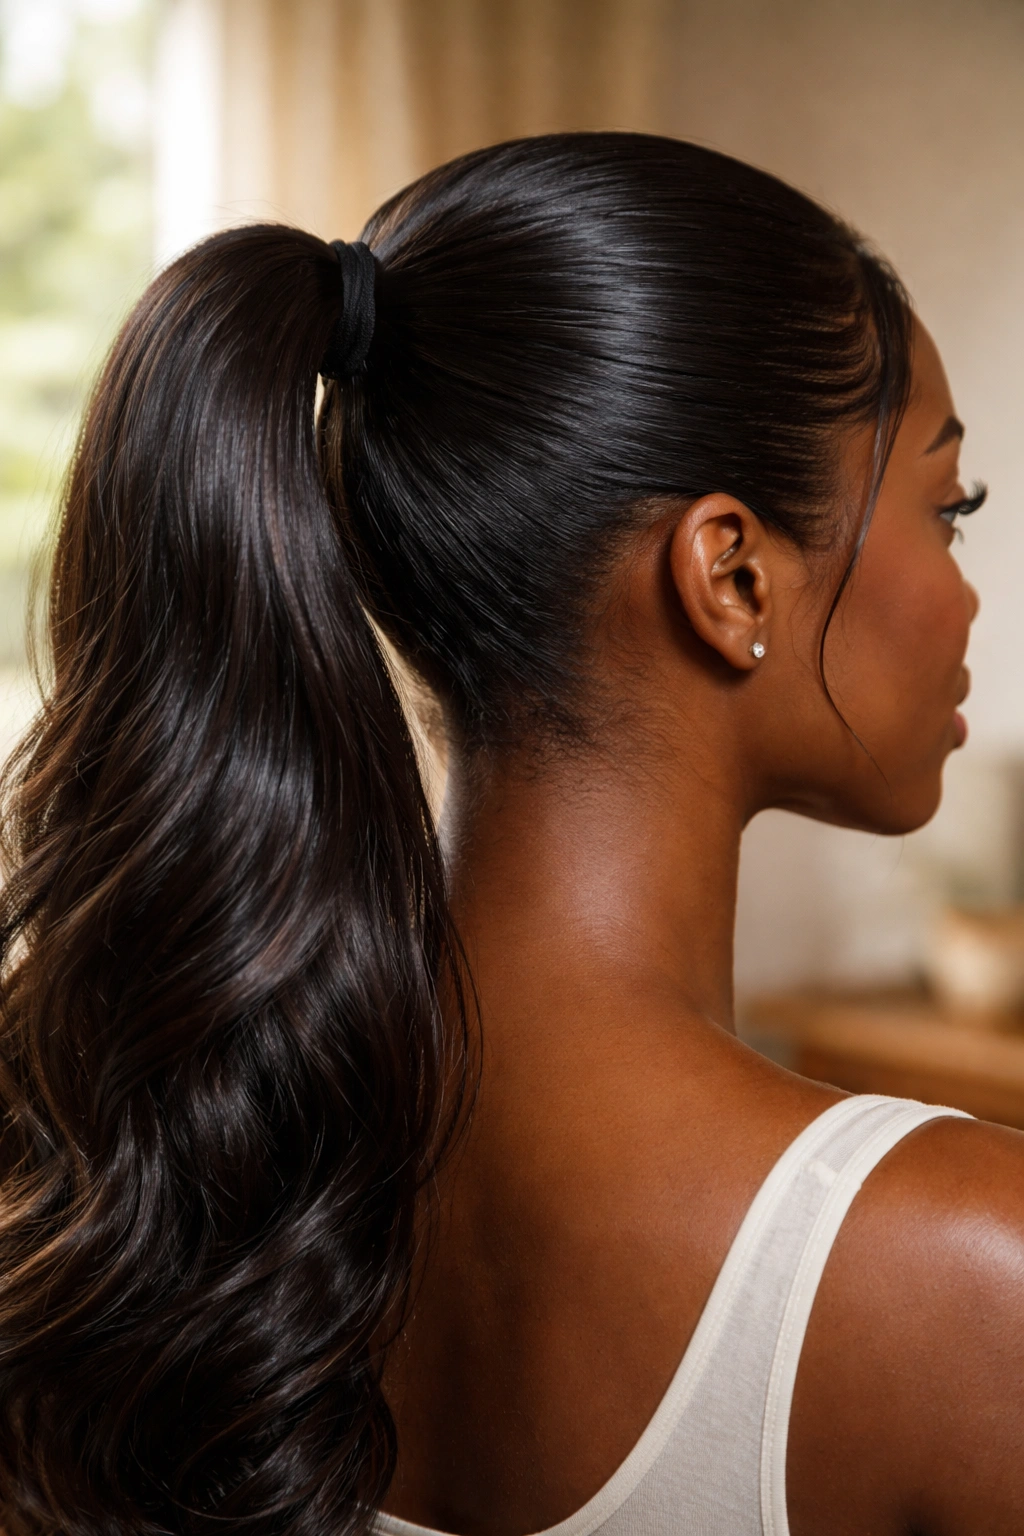
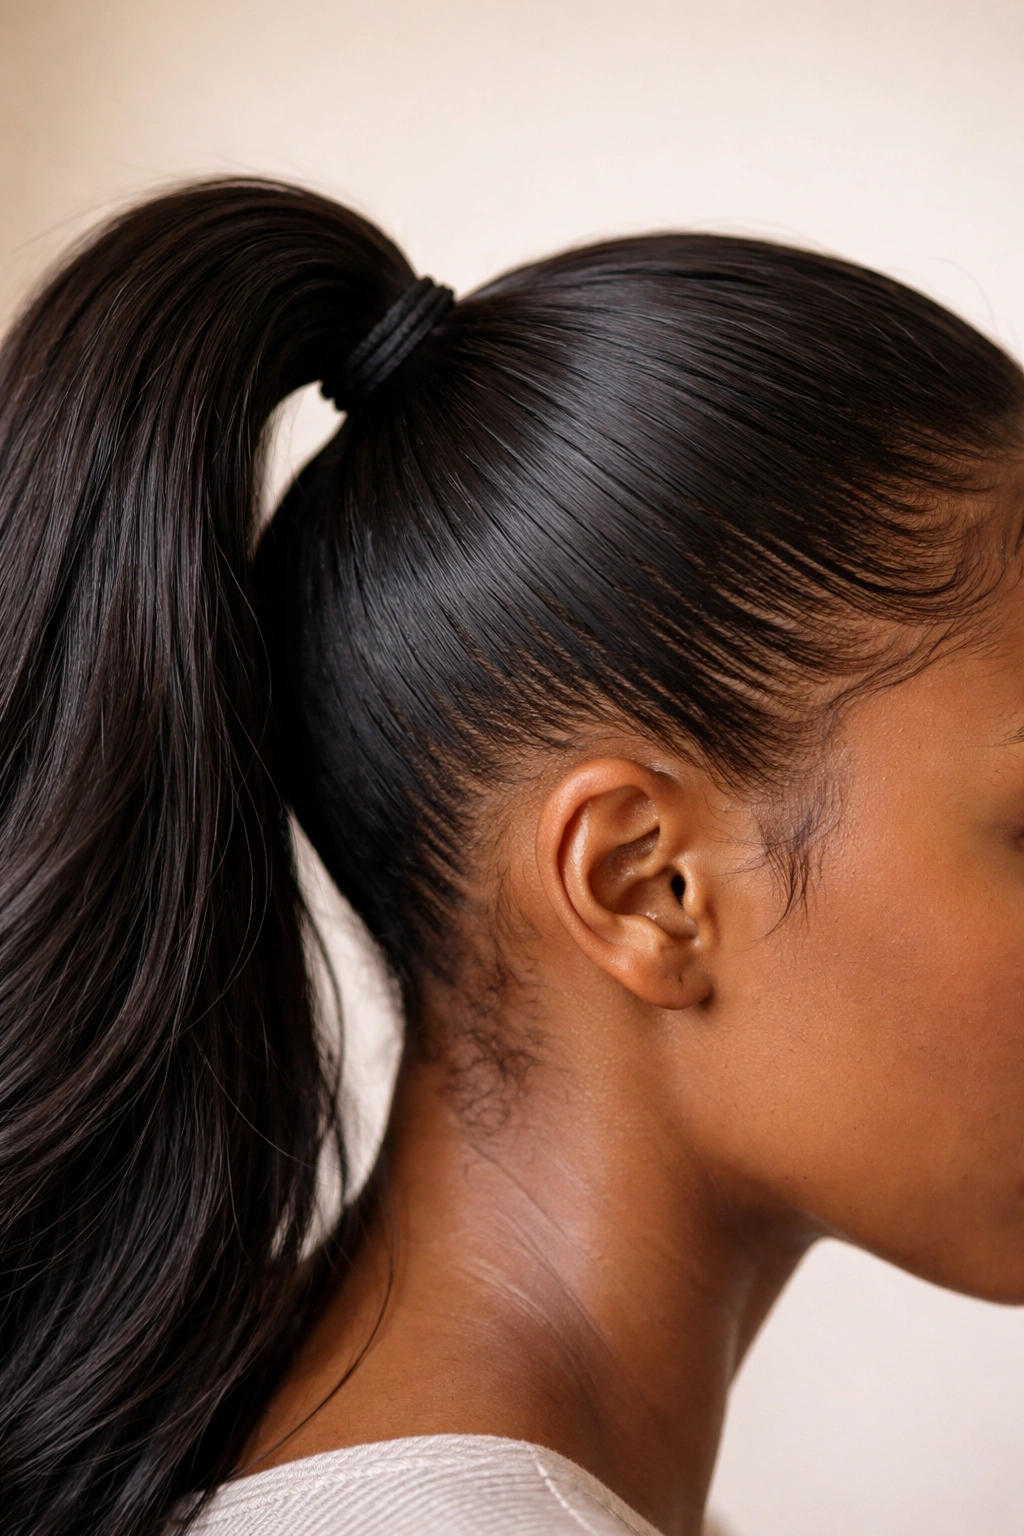
1. The Classic Sleek Mid-Height Ponytail
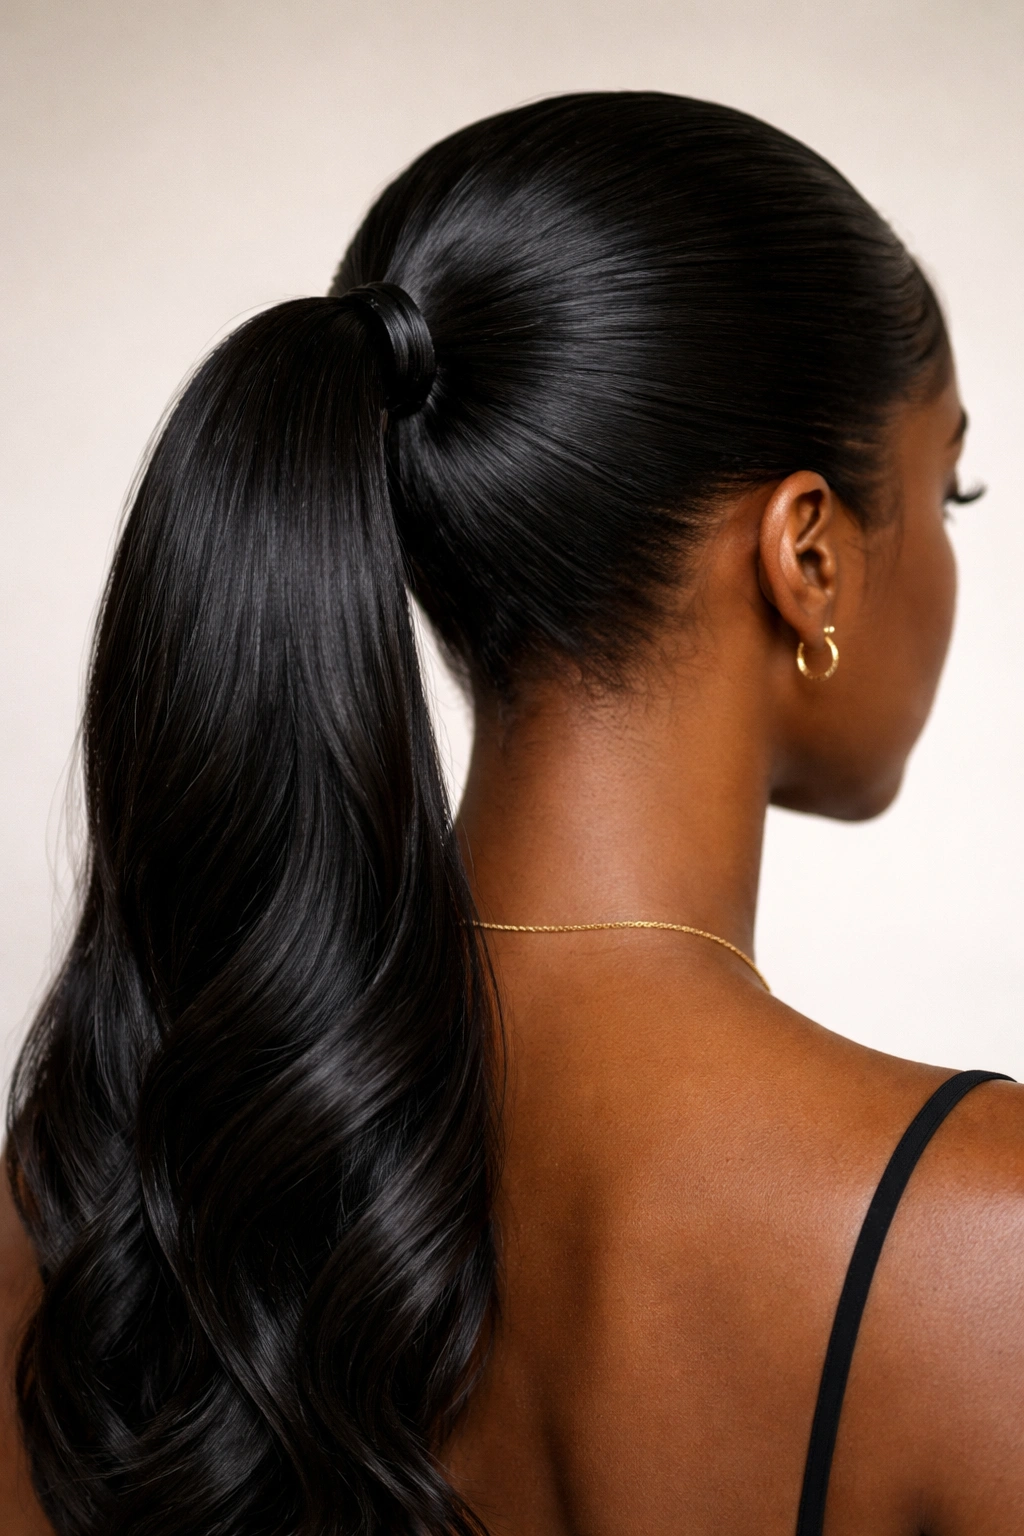
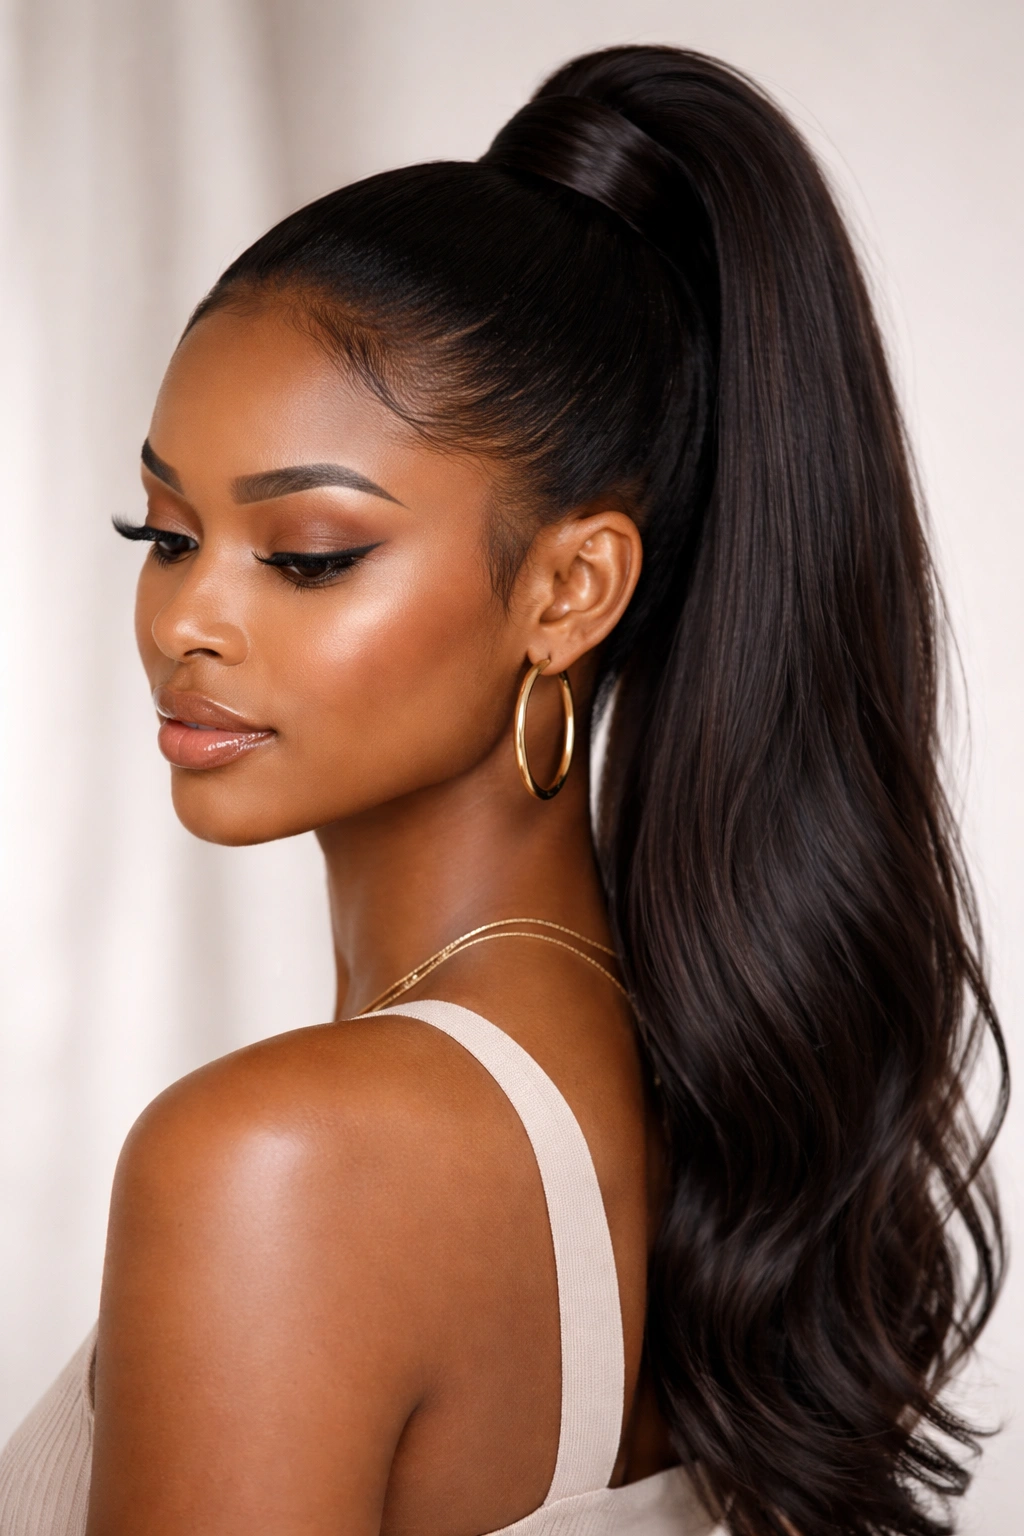
This is the foundation style—the one that works for nearly every occasion and hair type. A classic sleek mid-height ponytail pulls hair straight back from the hairline and smooths it into a clean, refined shape at the crown. The key to nailing this look lies in the execution: the hair needs to be moisturized and detangled thoroughly before you even begin gathering it into the elastic. Using a fine-toothed comb or a brush designed for textured hair, you’ll smooth the hair back section by section, working from the front hairline toward the crown.
Why This Style is Foundational
The sleek mid-height ponytail works because it’s timelessly elegant and requires nothing more than basic styling tools. It suits professional settings, casual outings, and can even transition into evening wear with the addition of a few strategically placed bobby pins or hair jewelry. For Black women with natural or coily hair, this style also serves as a protective option that keeps hair secure and moisturized while maintaining a polished appearance throughout the day.
How to Perfect the Finish
- Apply a smoothing serum or edge control to tame flyaways along the hairline and sides
- Use a fine-tooth comb to create a perfectly straight part down the center or to one side before gathering the ponytail
- Secure the ponytail with a quality elastic that won’t snag or break your hair—silk or satin-coated options are ideal
- Wrap a small section of hair around the elastic’s base to hide it and create a more finished look
- Apply additional edge control to any baby hairs around the face for an ultra-polished finish
Pro tip: Start with moisturized, detangled hair and apply your smoothing products to damp (not soaking wet) hair. This helps the products distribute evenly and gives you better control as you style.
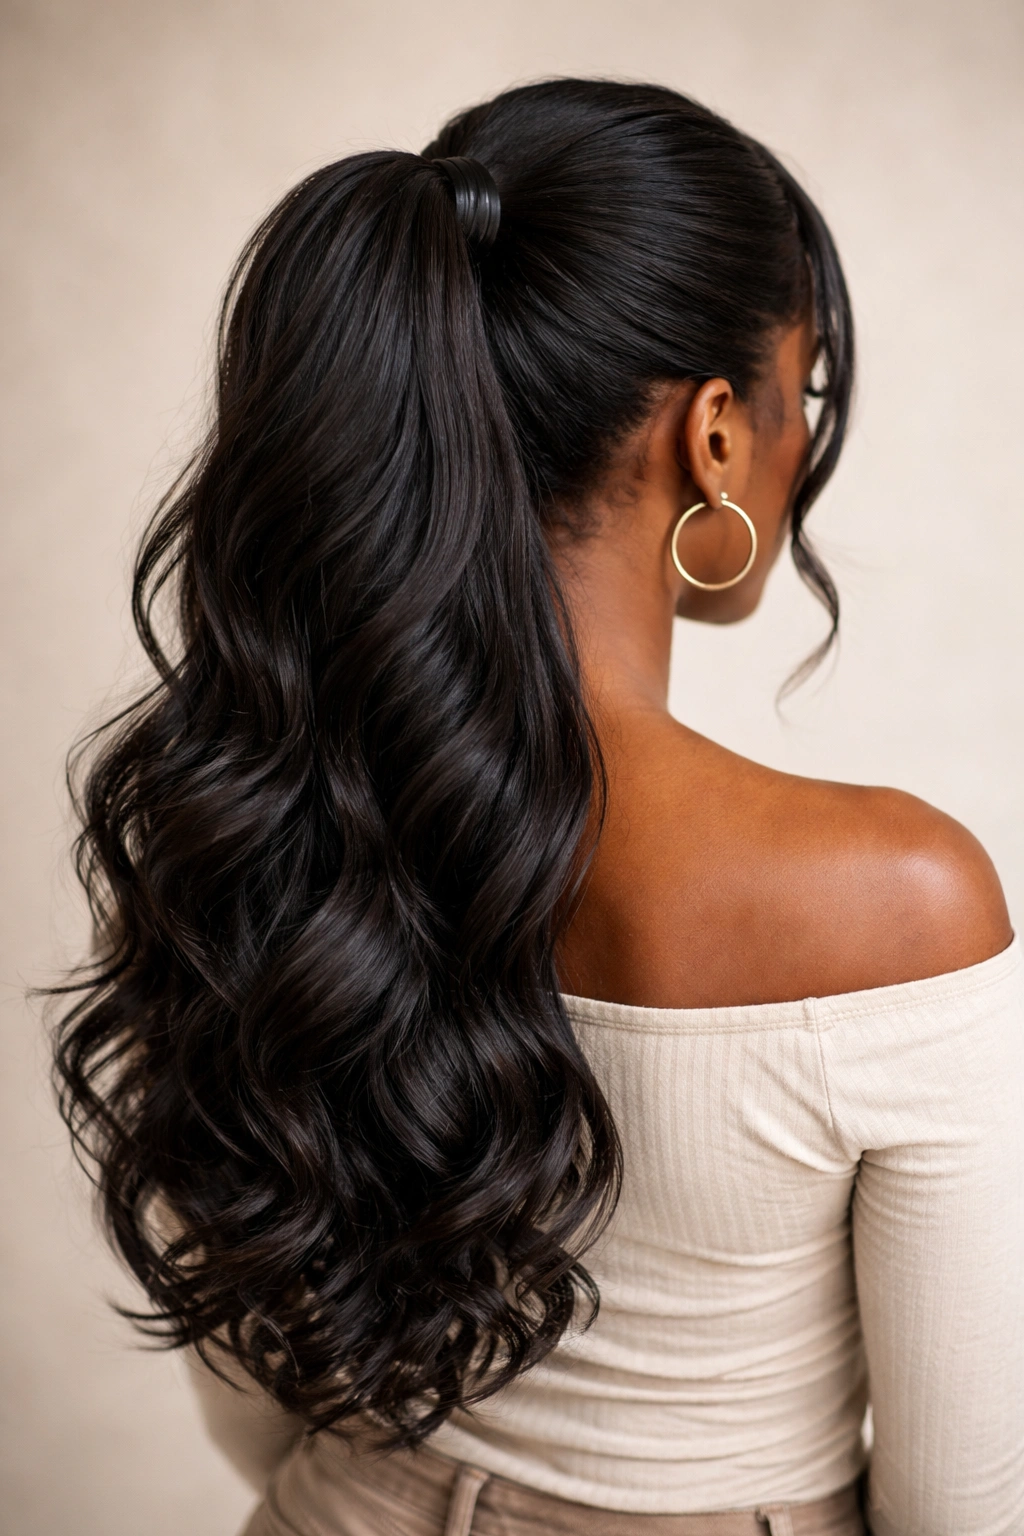
2. The Textured Mid-Height Ponytail With Volume
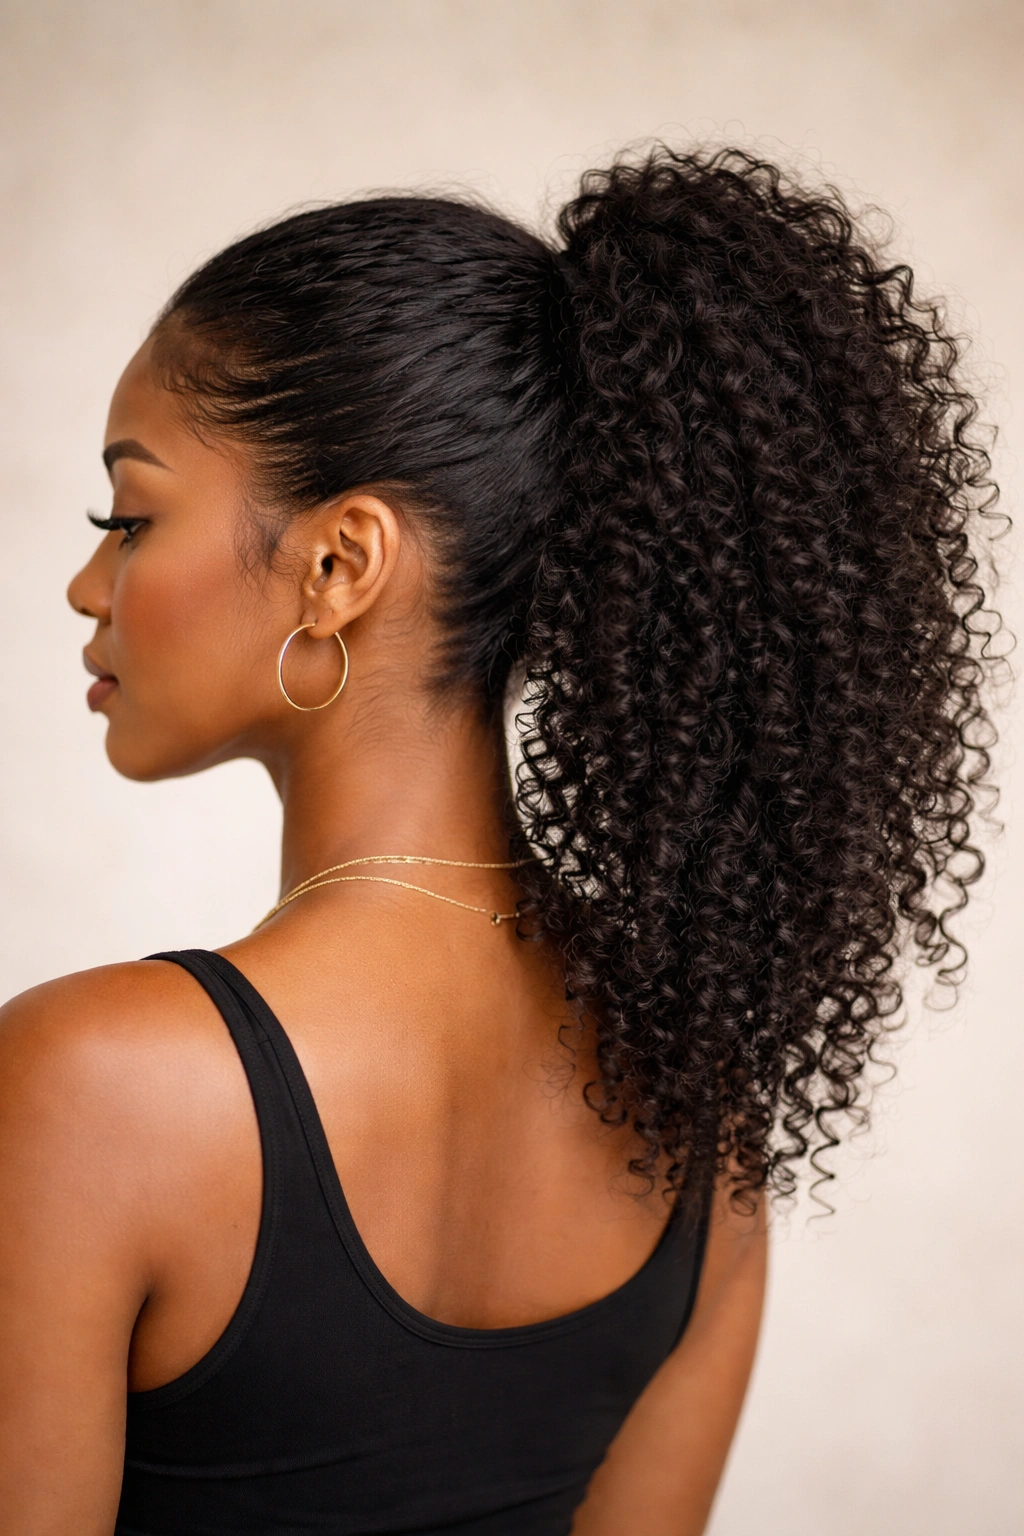
Instead of smoothing every strand, this style celebrates texture and maintains the natural volume of your hair. Rather than using heavy smoothing serums, you’ll use lightweight moisturizers and perhaps a curl-defining cream that enhances your natural pattern without flattening it. The ponytail sits at the same mid-height position, but the hair maintains its natural coils, waves, or kinks, creating a fuller, more dynamic look that’s especially striking on thicker hair types.
Building the Look With Texture Intact
This approach is particularly popular because it requires less manipulation, which means less potential for breakage and damage to your edges and hairline. You’ll gather the hair into a ponytail at the mid-height point, but instead of smoothing it completely, you’ll focus on securing it firmly while letting the texture of each section remain visible. This style pairs beautifully with natural hair in its curly, coily, or kinky state, and it also works wonderfully with locs or braided textures.
Styling Elements That Enhance Texture
- Use a moisture-rich cream or leave-in conditioner instead of heavy serums to maintain definition
- Flip your head upside down before gathering the ponytail to add volume at the crown
- Consider applying the moisturizer to your hands and scrunching it into your hair rather than combing it through
- Use a satin or silk scrunchie that grips firmly without requiring an extra-tight elastic
- Let a few face-framing pieces fall loose around your hairline for a softer, more intentional look
- Spritz the finished ponytail lightly with a texture spray to enhance definition and reduce frizz
Worth knowing: Textured ponytails often look even better on day two or three of styling, after the curl pattern has fully set and any moisture has balanced throughout your strands.
3. The Feed-In Braid Ponytail
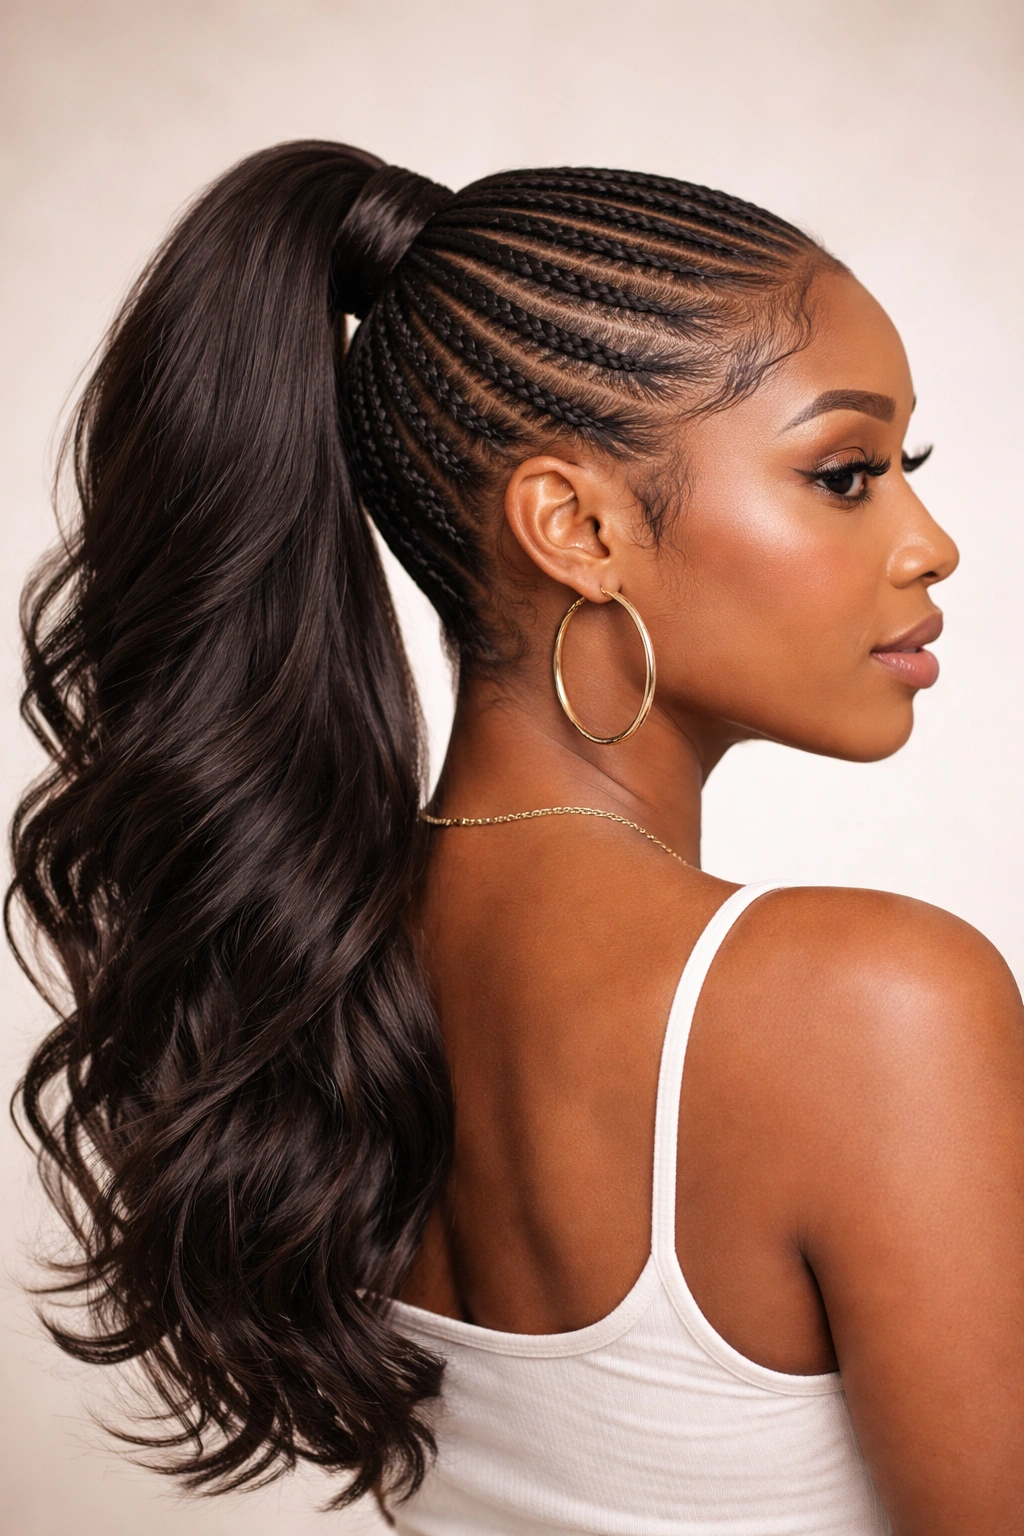
This style combines protective braiding with the sleekness of a ponytail by incorporating small feed-in braids along the sides and back of the head that lead directly into the ponytail base. The braids are thin and delicate, typically created using the three-strand or cornrow technique, and they feed strands of hair into a larger braid or directly into the ponytail gathering point. This creates a seamless transition from braided sections to the flowing ponytail below.
The Technical Execution
Creating feed-in braids requires practice and patience, but once you understand the concept, it becomes addictive because the results are so striking. You’ll start at one side of the head, typically near the temple, and create a small braid that gradually incorporates more hair as you move backward toward the crown. The braid feeds into the main ponytail section, creating visual interest and additional hold without adding bulk to the actual ponytail base.
Customizing Your Feed-In Pattern
- Start with two braids on either side for a balanced, symmetrical look
- Try a single braid on one side for an asymmetrical, fashion-forward appearance
- Extend the braids all the way around the back of the head for maximum drama and security
- Keep braids thin and delicate for a refined look, or make them thicker for a bolder statement
- Use matching or contrasting hair (extensions) in the braids for added visual interest
- Wrap the base of the ponytail with a small section of hair to conceal the elastic and create polish
Insider note: The tighter you tension your feed-in braids, the longer they’ll hold their shape. But be careful not to braid so tightly that you’re creating uncomfortable tension on your scalp—your comfort matters just as much as the aesthetics.
4. The Curled and Coiled Mid-Height Ponytail
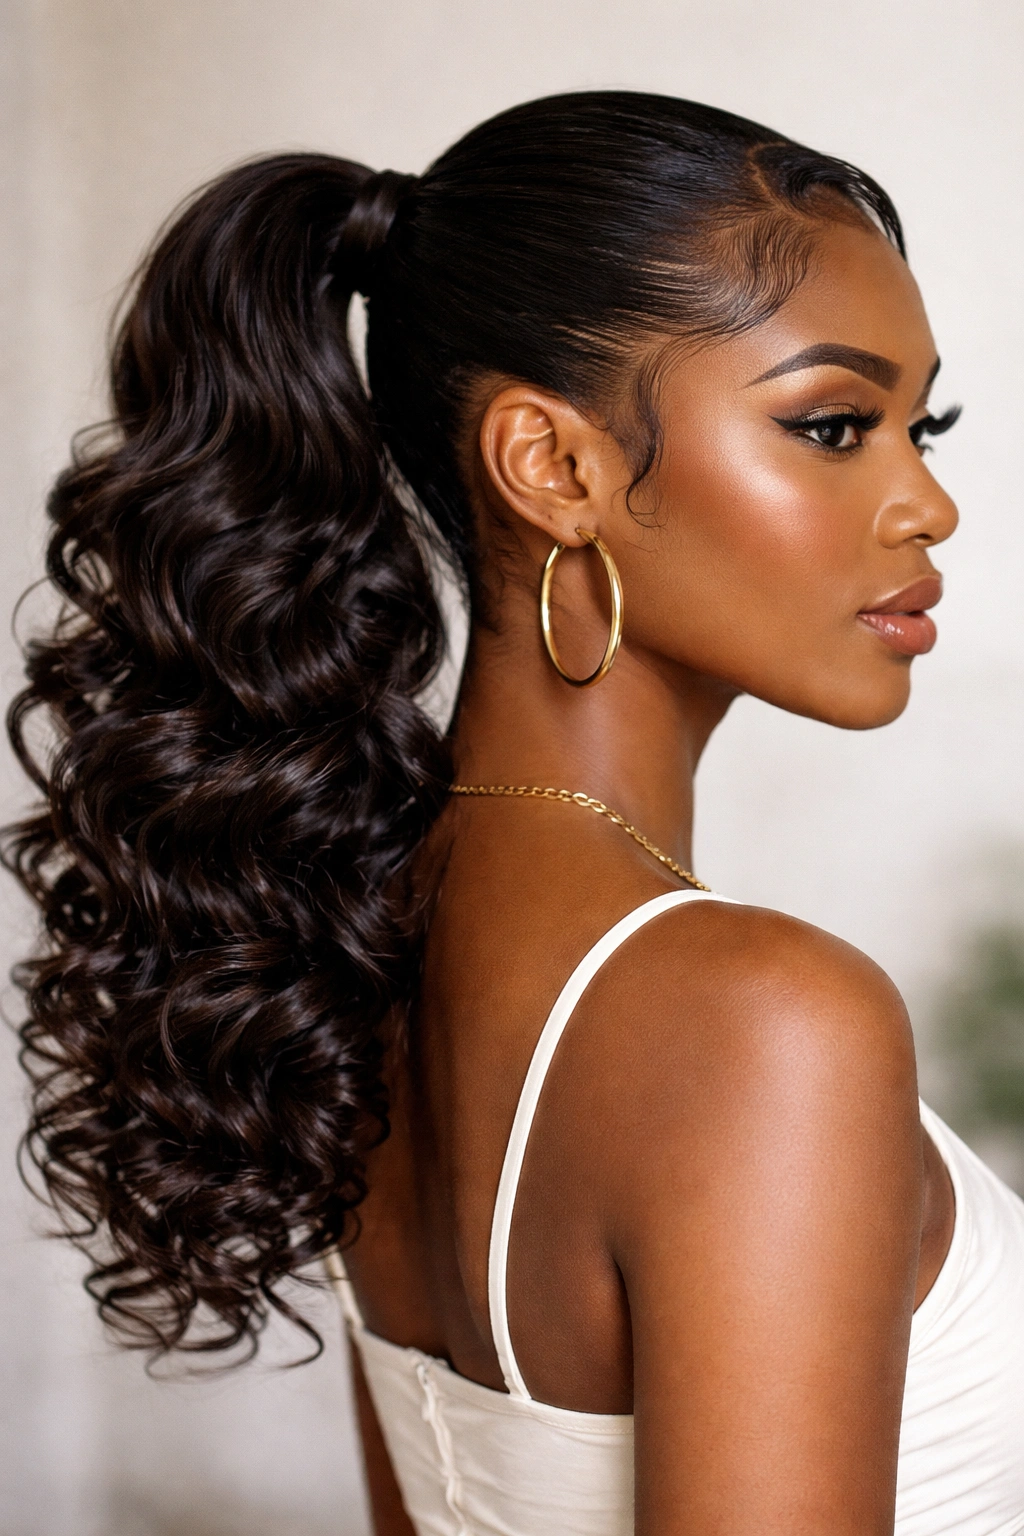
This style takes a textured ponytail one step further by adding intentional curls or coils throughout the length of the gathered hair. You’ll create the ponytail at mid-height, and then use a curling tool (a curling iron, spiral tool, or even twists and perm rods) to add defined curls or coils throughout the ponytail section. The result is an undeniably elegant look with movement and dimension that catches light beautifully.
Creating Defined Curls in Your Ponytail
The key to gorgeous curls is starting with moisturized hair and using proper heat protection. Divide the ponytail into sections, then wrap each section around your curling barrel and hold for 5-10 seconds depending on your tool and desired tightness. The barrel size determines the final curl size—a thinner barrel creates tighter, more spiral-like curls, while a larger barrel creates loose waves. Alternating the direction you wrap each section creates a more natural, flowing appearance.
Tools and Techniques for Success
- Use a 1.25-inch to 1.5-inch curling iron barrel for classic, defined curls on most hair types
- Apply a heat protectant spray before curling to minimize damage
- Curl away from your face for flattering dimension, or alternate directions for a more voluminous effect
- Allow curls to cool completely before running your fingers through them (this sets the shape)
- Use a curl-defining spray or light hairspray to maintain the curl pattern throughout the day
- Separate curls gently with your fingers rather than a comb to maintain the curl formation
Pro tip: Curled ponytails photograph beautifully and work especially well for events, date nights, or anytime you want to feel extra polished. The curls also help disguise second-day hair texture and refresh the overall look.
5. The Half-Up, Half-Down Mid-Height Style
This style blurs the line between wearing your hair down and putting it up—you gather the top portion of your hair (roughly from the mid-scalp upward) into a ponytail at the mid-height point, while leaving the bottom section of hair completely down. This creates the visual appearance of a mid-height ponytail while still allowing you to showcase the length and style of your full hair. It’s an excellent option if you want to keep hair away from your face without fully committing to an updo.
Balancing Volume and Proportion
The half-up, half-down style works best when the proportions are balanced—you want enough hair in the gathered section to create a clear ponytail, but not so much that the loose bottom section looks skimpy or uneven. Typically, you’ll gather hair from roughly ear level up, creating a ponytail that sits at the top-middle of your head. The loose section below should have visible volume and body so the overall effect feels intentional rather than accidental.
Styling Methods for Maximum Impact
- Create the gathered section by parting hair horizontally from ear to ear across the crown
- Backcomb or tease the gathered section gently before securing for added volume and hold
- Use a decorative elastic, claw clip, or hair scarf to secure the gathered section
- Curl or style the loose bottom section separately for a more polished, multi-dimensional look
- Leave a few face-framing pieces loose around your hairline for softness and dimension
- Consider adding a hair accessory to the gathered section’s base for extra visual interest
Worth knowing: This style works wonderfully for transitioning between hairstyles—you can wear it half-up one day and convert it to a full ponytail the next by gathering the remaining loose hair.
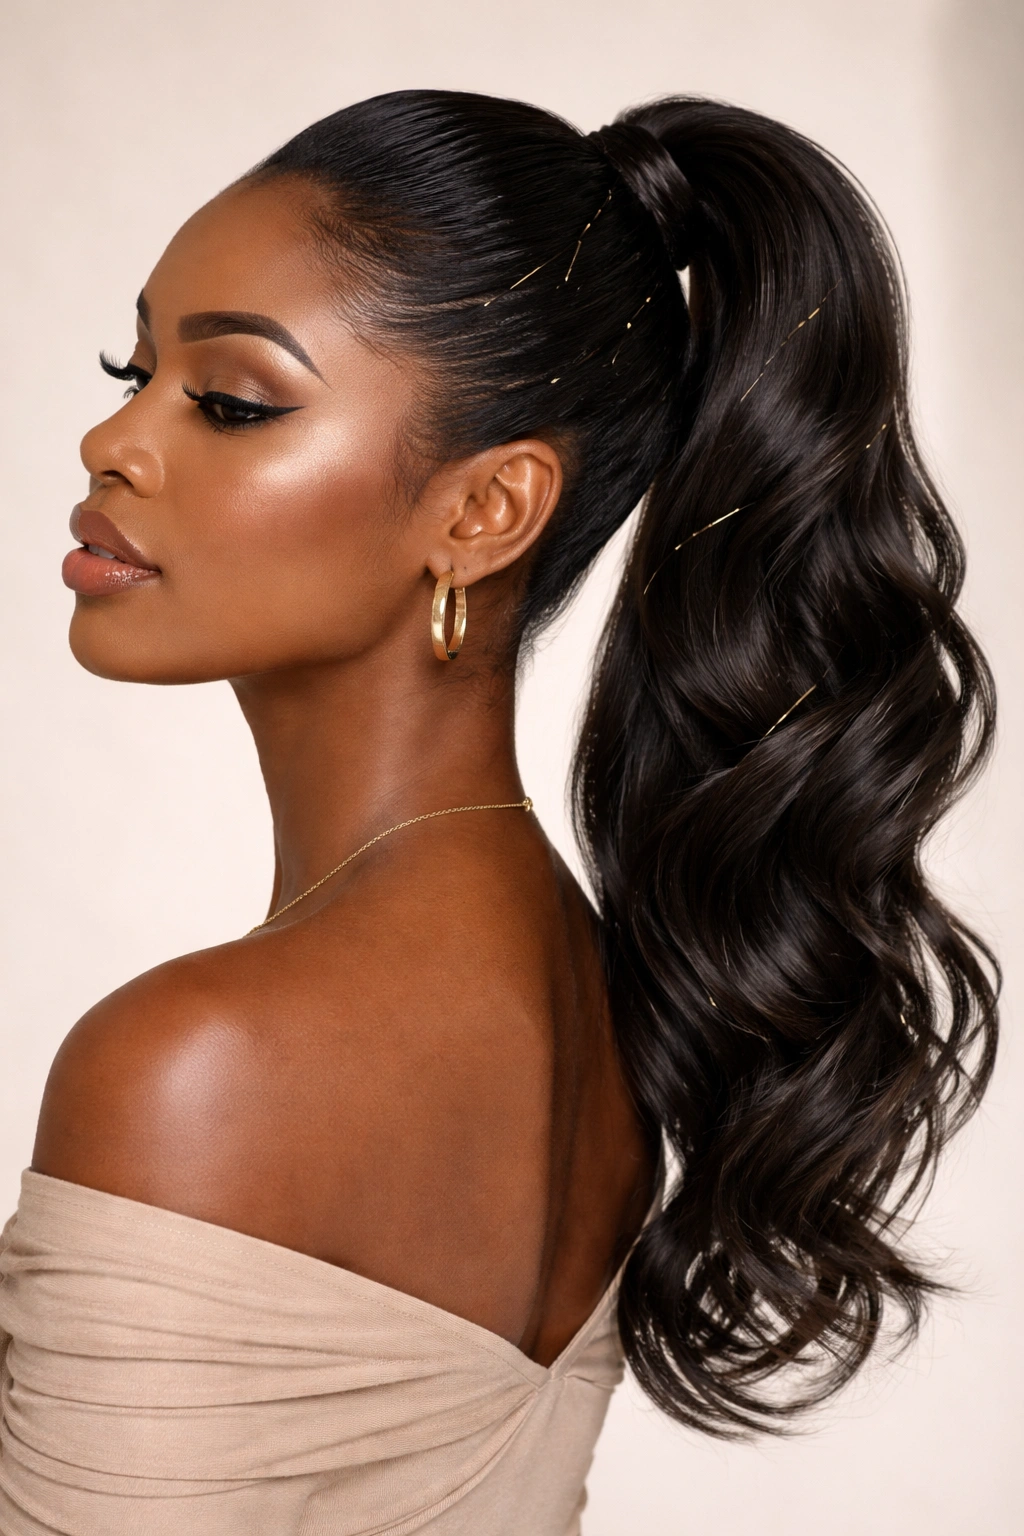
6. The Wrapped and Adorned Mid-Height Ponytail
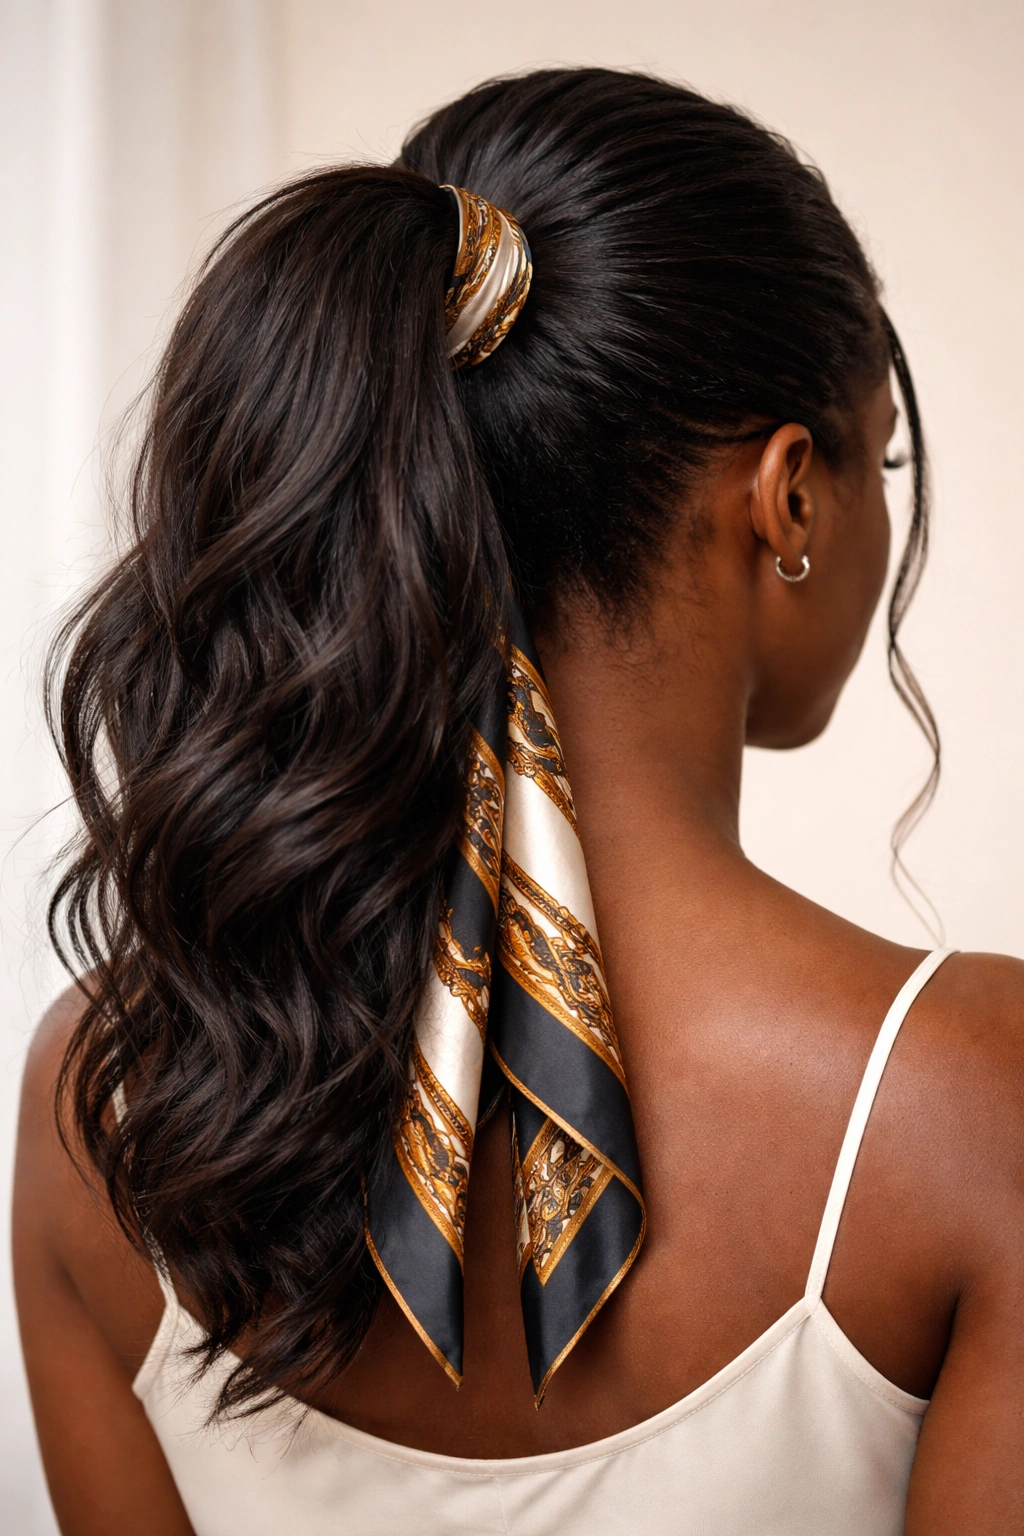
This style takes a basic mid-height ponytail and elevates it with intentional wrapping and accessories. After securing your ponytail at mid-height, you’ll wrap a decorative element around the base—this could be a section of your own hair, a silk scarf, a metallic cord, a ribbon, or even a chain. The wrapping serves both a functional purpose (it creates a more polished, finished appearance and covers the elastic) and an aesthetic one (it adds visual interest and personality to your style).
Wrapping Techniques for Different Effects
The simplest wrapping method involves taking a small section of hair from your ponytail, wrapping it tightly around the elastic at the base, and securing it with bobby pins underneath. For a more decorative approach, you might wrap a silk scarf or ribbon around the base instead, creating a colorful or textured accent. The wrapping becomes a focal point, so choosing materials and colors that complement your outfit or skin tone makes a real difference in the overall impact.
Accessory Options for Added Flair
- Wrap silk scarves in coordinating colors for an elegant, intentional look
- Use metallic cords, chains, or beaded strands for a more glamorous feel
- Thread decorative hair clips, cuffs, or rings around the base of the ponytail
- Add a large brooch or decorative pin to the wrapped base for vintage-inspired elegance
- Use your own hair wrapped around the elastic with a baby hair clip holding it in place for a seamless look
- Layer multiple wrapping elements for a truly personalized, unique style
Pro tip: Wrapping your ponytail base serves a practical purpose too—it helps hold the ponytail in place longer because the wrapping adds friction, preventing the elastic from slipping down throughout the day.
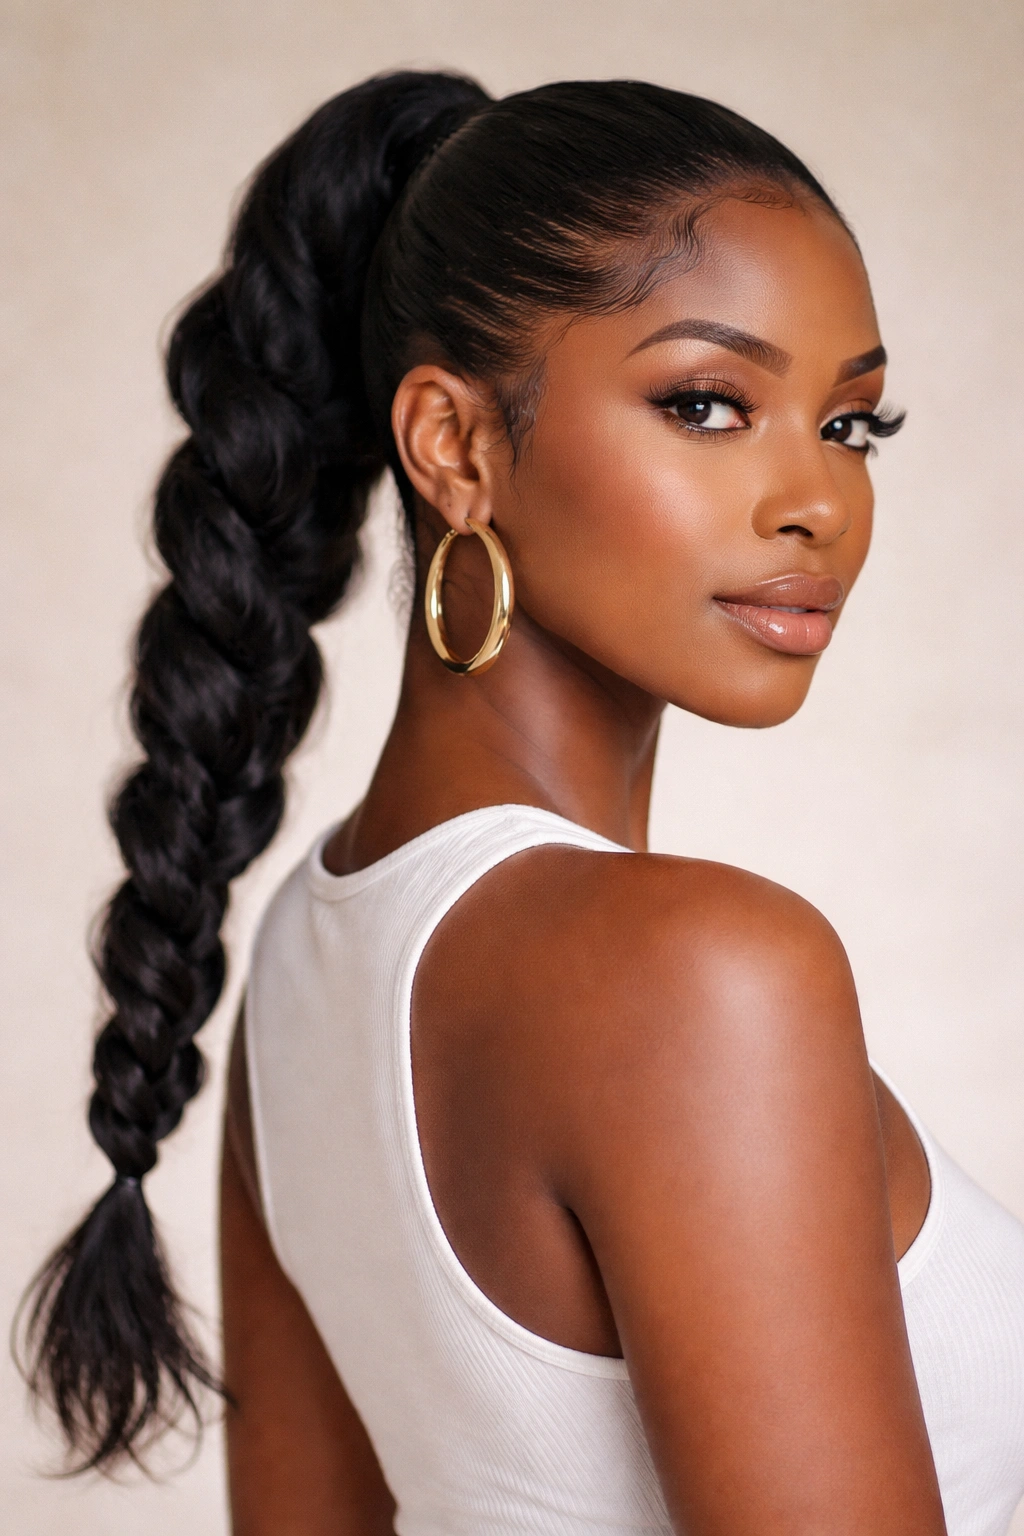
7. The Braided Ponytail Tail
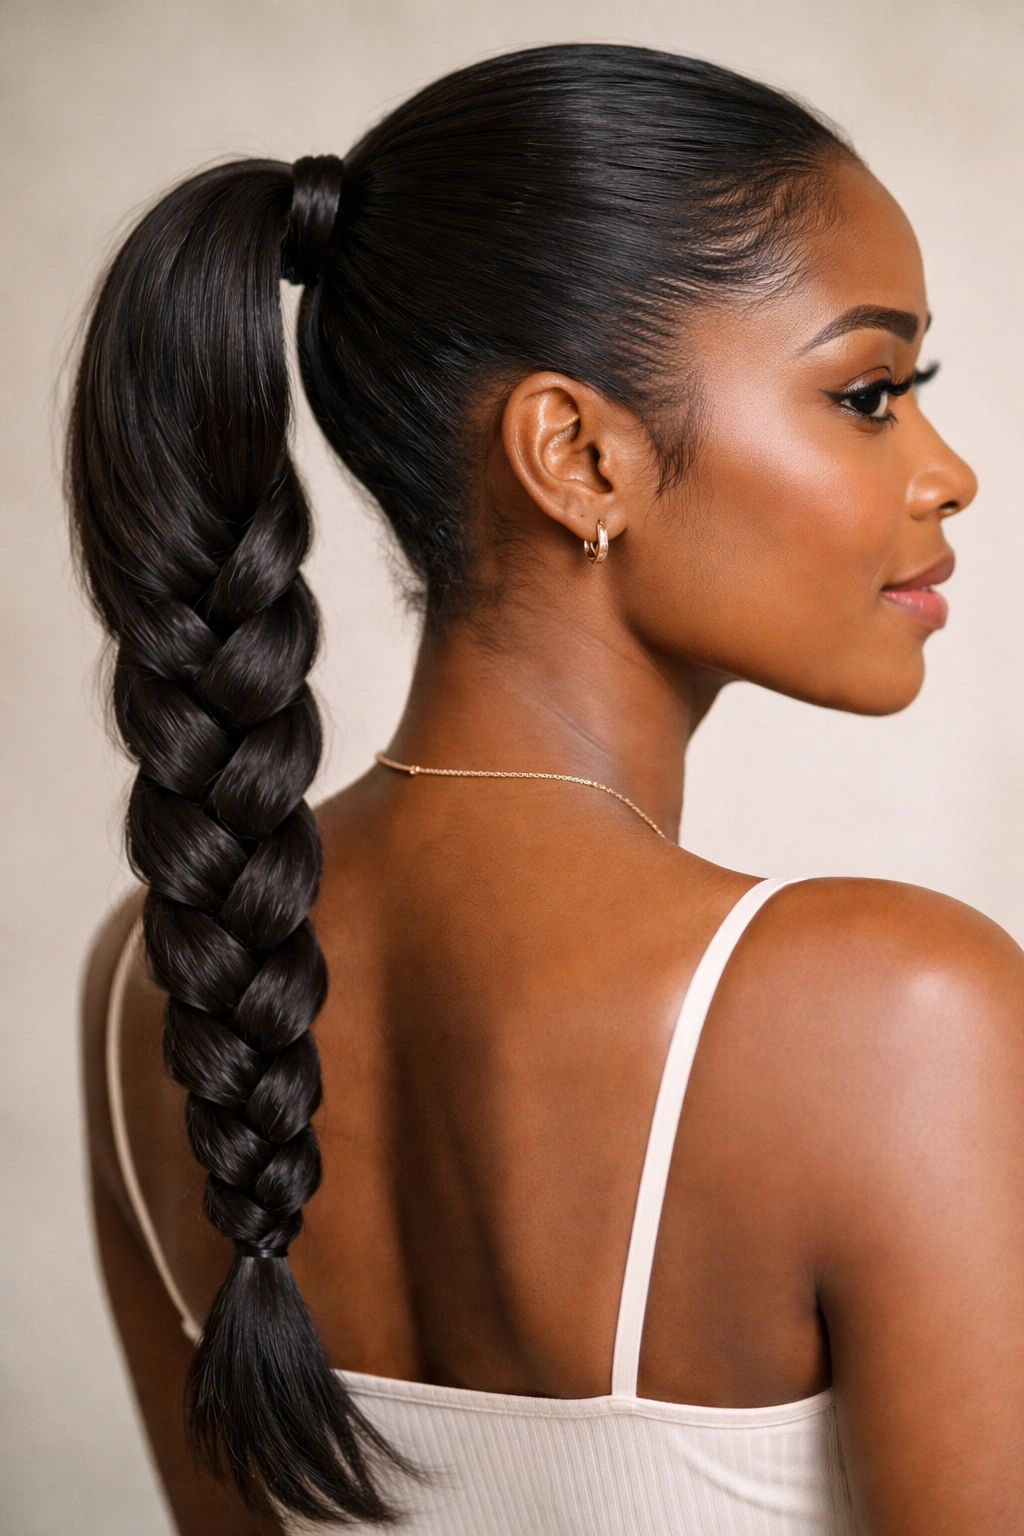
In this style, you’ll create a standard mid-height ponytail, and then divide the ponytail section itself into three parts and braid it from the base all the way down to the ends. This creates a beautifully cohesive look where the braided texture is a focal point rather than just a side detail. The braid can be a simple three-strand braid, a Dutch braid (which appears to sit on top of the hair for added dimension), or even a fishtail braid for a more intricate appearance.
Braiding the Ponytail Itself
The advantage of braiding the ponytail rather than the hair leading into it is that you have complete control over the braid’s tightness and placement. You’re working with hair that’s already gathered and secured, so there’s less risk of losing sections or creating uneven braiding. Start at the base of the secured ponytail and braid down to the ends, securing the braid with a small elastic. For added interest, you can leave the last few inches unbraided for texture contrast.
Variations on the Braided Ponytail
- Create a single three-strand braid for classic elegance
- Divide the ponytail into two sections and create two smaller braids for a more delicate appearance
- Use a Dutch braid that sits on top of the hair for added dimension and visual interest
- Try a fishtail braid for a more intricate, fashion-forward look
- Leave the first few inches of the ponytail unbraided before starting the braid for visual transition
- Wrap the braid base with a complementary color or metallic element for added polish
Worth knowing: Braided ponytails can last longer than simple ponytails because the braid’s structure creates additional grip and prevents the hair from slipping out of the elastic as easily.
8. The Twisted Mid-Height Ponytail
Instead of a braid, this style incorporates twists into the mid-height ponytail for a different texture and visual effect. You’ll create the mid-height ponytail, and then divide it into two sections that you’ll twist together from the base down, or create multiple twisted sections throughout the ponytail. Twists create a elegant spiral pattern and work beautifully on textured hair that naturally holds the twisted shape.
Creating Twists for Maximum Hold
To create a two-strand twist, divide your ponytail into two equal sections. Cross one section over the other, then cross the other section back over the first, continuing this alternating pattern all the way down the length of your ponytail. The result is a beautiful spiral pattern that’s less structured than a braid but creates clear visual texture and dimension. You can keep the twist tight for a more dramatic effect or loose for a more relaxed, romantic appearance.
Styling Variations Using Twists
- Create a single two-strand twist from top to bottom for elegance
- Divide the ponytail into multiple sections and create several smaller twists for added interest
- Wrap two twists around each other for a more complex, intertwined effect
- Use contrasting hair extensions in your twists for color dimension
- Twist sections loosely and wrap around the base of the ponytail to create a twisted-up updo effect
- Combine twists with braids in different sections of the same ponytail for texture variation
Pro tip: Twists hold their shape beautifully on textured and natural hair, and they often look even better on day two when the twist pattern has fully set and become more defined.
9. The Sleek High-Pony With Mid-Height Crown
This is a clever optical trick that creates the appearance of a mid-height ponytail while actually gathering hair from a higher position on the head. The difference is in how you style the gathered section—instead of letting all the hair fall straight down, you’ll smooth the top portion down over the area where the elastic sits, creating a covering effect that makes the ponytail appear lower than it actually is. This technique adds volume at the crown while maintaining a sleek, polished appearance.
The Technique Behind the Illusion
The key to this style is understanding that the visual perception of where your ponytail sits depends on what viewers see, not necessarily where you’ve secured it. By gathering hair from a higher point (which creates better hold and volume at the crown) and then smoothing a section down over the elastic, you visually lower the ponytail’s appearance while maintaining the security of a high-ponytail placement. This is especially useful for people with fine hair or softer textures that don’t hold a traditional mid-height ponytail as securely.
Creating the Covering Effect
- Gather your ponytail from a slightly higher position than true mid-height (roughly mid-to-upper crown)
- Secure it tightly with a quality elastic
- Take a small section of hair from the gathered ponytail and smooth it down over the elastic
- Pin this covering section in place with bobby pins hidden underneath the smoothed hair
- Apply smoothing serum to create a polished, sleek finish
- You’ve now created the visual appearance of a mid-height ponytail with the security of a higher placement
Worth knowing: This technique is particularly useful for people with softer hair textures or fine hair that might slip out of a true mid-height ponytail throughout the day. The higher gathering point and the weight of the covering section keep everything secure and in place.
10. The Voluminous Textured Pony With Face-Framing Pieces
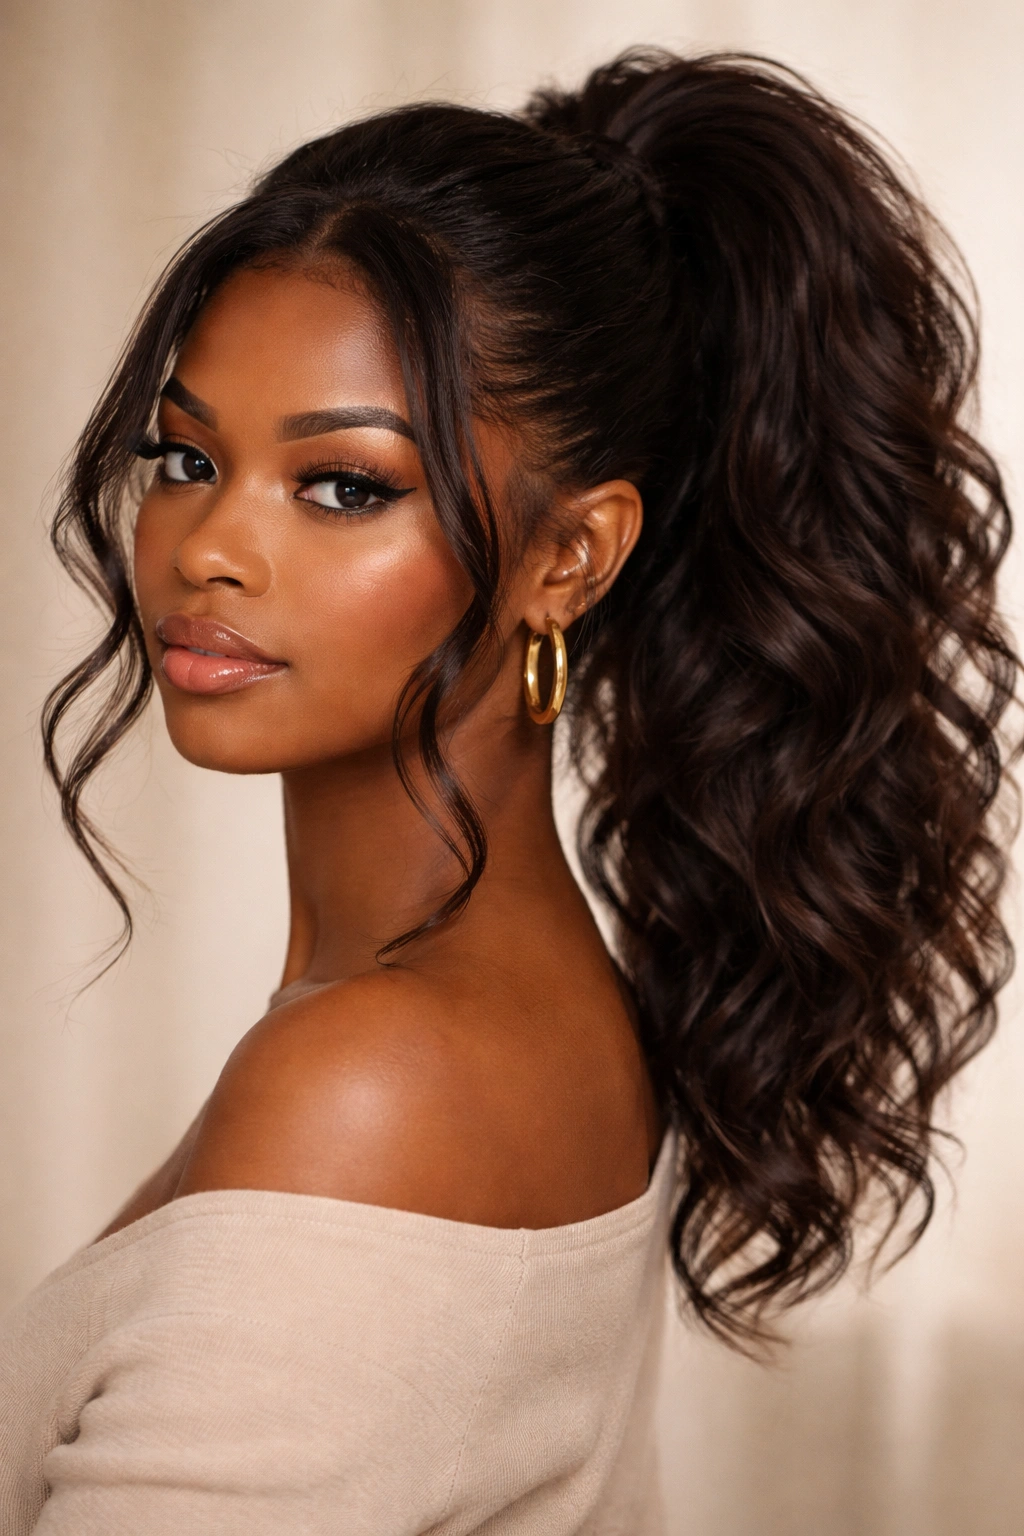
This style prioritizes volume and softness by creating a mid-height ponytail with intentionally loose, face-framing pieces that break up the sleekness and add dimension. You’ll gather the bulk of your hair into a ponytail at mid-height, but you’ll deliberately leave sections of hair loose around your face, temples, and along the sides. These loose pieces can be styled into soft curls, waves, or twisted spirals that frame your features beautifully.
Strategically Leaving Hair Out for Dimension
The art of this style lies in choosing which pieces to leave out and how to style them. You might leave two or three thicker sections on either side of your face, a few thinner pieces throughout, or even a more dramatic framing that extends from ear to ear. The loose pieces should be long enough to reach at least your collarbone—shorter pieces look accidental rather than intentional. Once they’re out, you can style them separately from the main ponytail using curling tools, braiding, or twisting for added texture.
Building Softness Into a Secured Style
- Gather the majority of your hair into a secure mid-height ponytail
- Leave thicker sections on either side near your temples
- Consider leaving a thinner section or two along the back of your ears
- Style the loose pieces separately—curl them, braid them, or twist them
- The face-framing pieces should move independently from the secured ponytail
- Apply different styling products to the loose pieces versus the main ponytail for defined contrast
- Use bobby pins to tuck and shape the loose pieces as needed throughout the day
Insider note: This style works beautifully for softening a sharp face shape and is especially flattering for formal events or professional settings where you want to appear polished but approachable.
11. The Curved and Sculpted Mid-Height Ponytail
This advanced styling technique creates intentional curves and sculptural shapes within the ponytail by strategically placing bobby pins and creating gentle lifts at specific points. Rather than a simple straight ponytail, the hair is curved outward or inward at select points, creating a three-dimensional, architectural quality. This style requires patience and the right tools, but the result is genuinely show-stopping and works beautifully for special events.
Creating Intentional Curves and Lifts
To create curves in your ponytail, you’ll secure the main ponytail at mid-height and then work with smaller sections. Take a section of hair from the ponytail, gently curve it upward or outward, and secure it with bobby pins placed strategically to hold that curve in place. Repeat this process at intervals throughout the length of the ponytail, creating multiple curves that flow in the same direction or alternate directions. The bobby pins should be placed close to the scalp where they’re less visible.
Techniques for Sculptural Shaping
- Create soft, outward curves by pinning ponytail sections away from the head
- Make inward curves by pinning sections back toward the scalp
- Alternate curves upward and downward for a wave-like effect
- Use multiple bobby pins per curve to ensure the shape holds throughout the day
- Incorporate twisted or braided sections within the curves for added texture
- Tease or backcomb the curved sections gently to help hold their shape
- Apply a flexible-hold hairspray to set the curves in place
Pro tip: Practice this style beforehand if you’re planning to wear it for an important event. It takes time to master, but once you understand the technique, you can create variations that are truly unique and memorable.
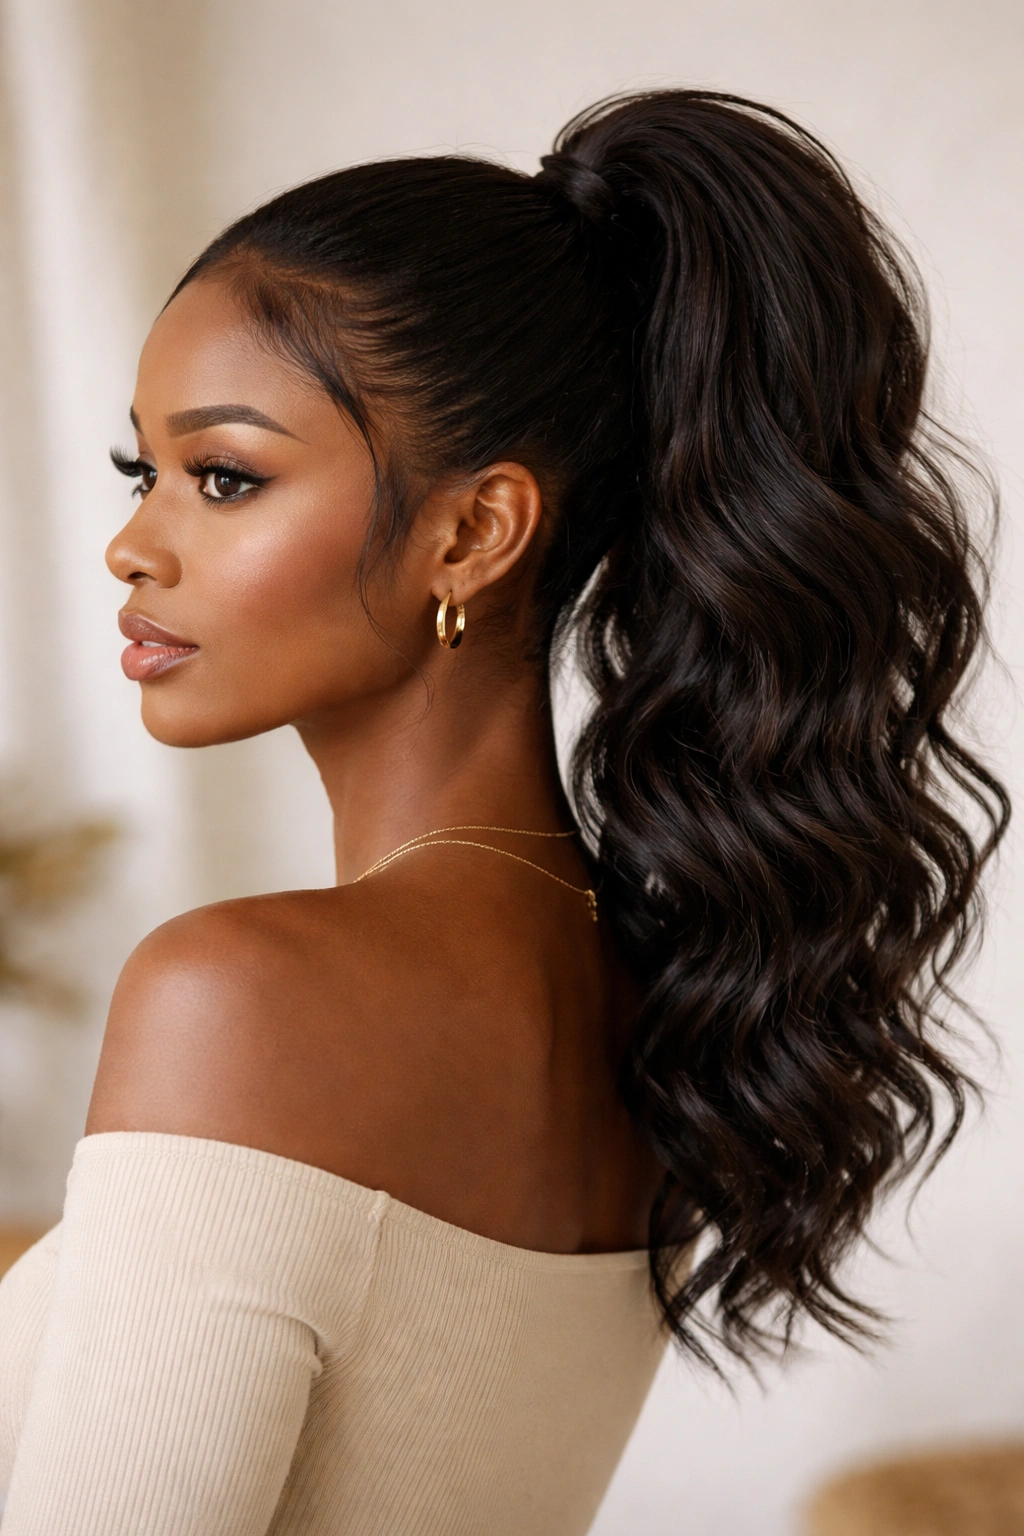
12. The Sleek Mid-Height Ponytail With Extended Closure Curls
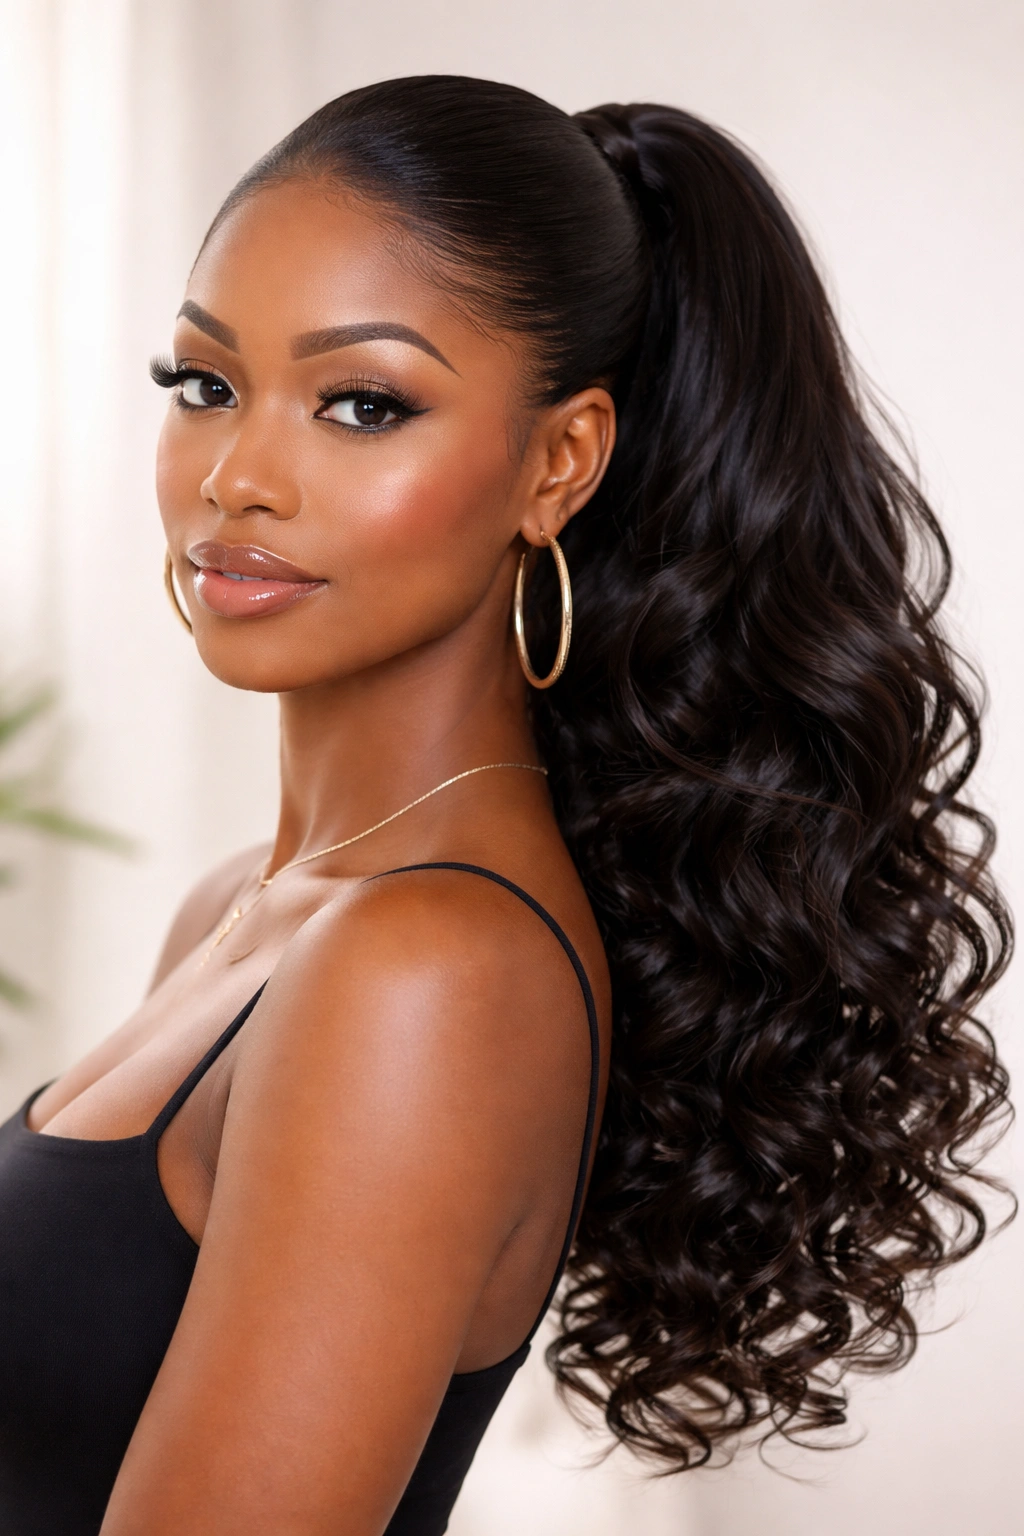
This final style is a gorgeous hybrid that combines the sleekness of a perfectly smooth mid-height ponytail with the glamour of extended, luscious curls created with protective styling hair or extensions. You’ll gather your hair into a sleek, smooth mid-height ponytail, and then attach hair extensions or closure hair that’s styled into bouncy, defined curls to the base of your ponytail. The result is a statement-making style that offers protective benefits while looking undeniably luxurious.
Working With Extensions and Closures for Volume
Using extensions or synthetic hair attached to your ponytail base allows you to create volume and length without putting all the stress on your natural hair. The extensions are typically sewn, glued, or clipped to the elastic at the base of your ponytail, then styled into curls. This approach is popular for protective styling because the bulk of the volume and length comes from the extensions rather than from your own hair, which remains protected beneath the style.
Creating Stunning Extended-Hair Curls
- Gather your natural hair into a sleek, smooth mid-height ponytail
- Select high-quality hair extensions or closure hair in a matching or complementary color
- Attach the extensions securely to the elastic at the ponytail base
- Divide the extended hair into sections and curl each section with a large-barrel curling iron
- Aim for loose, bouncy waves rather than tight curls for a more luxurious appearance
- Wrap the base of the ponytail with a silk scarf, cord, or decorative element to cover attachment points
- Apply curl-defining spray to keep the curls bouncy and fresh-looking throughout the day
- Consider getting the extensions professionally installed and styled if you’re new to this technique
Worth knowing: This style can last several weeks with proper care, making it an excellent option for anyone wanting to minimize daily styling while maintaining a glamorous appearance. Just remember to care for both your natural hair and the extensions to keep everything healthy.
Styling Tips for Longevity and Hair Health
Regardless of which mid-height ponytail style you choose, a few universal principles will help your style last longer and keep your hair healthier. Always start with thoroughly moisturized, detangled hair—dry, tangled hair won’t cooperate and is more prone to breakage. Use quality hair elastics that won’t snag or break your strands; silk or satin-coated options are infinitely better than standard rubber bands. Apply edge control and smoothing products to damp hair for the best results, and allow products to dry before final styling.
Protect your hair at night by either loosening your ponytail slightly before sleep or wrapping your entire head and ponytail in a silk or satin scarf or bonnet. This prevents friction against your pillowcase, which can cause frizz and breakage. Vary which side you part your hair and switch the location of your ponytail regularly—styling in the same exact spot daily can create tension alopecia (hair loss caused by constant pulling in one area). If you’re using any heat styling tools, always apply heat protectant spray first, and avoid using the same heat setting every single time.
Common Mistakes to Avoid
The most frequent ponytail styling mistake is gathering hair too tightly, especially near the hairline and edges. Tight ponytails might feel secure, but they actually cause more breakage and damage over time than a moderately tight style. Your ponytail should feel snug but not painful—if you feel constant tension or mild headache, it’s too tight. Another common mistake is using low-quality elastics that snag and break hair, or using old, damaged elastics that lose their grip. Replace your elastics regularly and always choose satin or silk-coated options for textured hair.
Many people also skip the moisturizing step and try to style dry hair, which leads to frizz, flyaways, and breakage. Taking two minutes to lightly mist your hair with water or apply a light moisturizer before styling makes an enormous difference in how your finished style looks and how long it lasts. Finally, avoid re-styling your ponytail constantly throughout the day—every time you undo and redo it, you’re creating additional friction and stress on your hair. Style once and commit to it; your hair will thank you.
Final Thoughts
Mid-height ponytails offer Black women a versatile, accessible, and genuinely beautiful styling option that works for nearly any occasion, hair type, and personal aesthetic. Whether you choose a sleek, polished look or a voluminous, textured style, a braided variation or a curled creation, the key is understanding the fundamentals and then making choices that suit your hair’s unique needs and your personal style. The styles covered here represent just some of the possibilities—once you master a few basic techniques, you’ll find endless ways to customize and personalize your ponytails.
The most important aspect of any ponytail style is that it serves you and your hair health, not the other way around. A gorgeous style that causes breakage, damage, or constant discomfort isn’t worth it. Start with quality products, use proper technique, listen to what your hair needs, and vary your styling regularly. Your ponytail is an extension of your self-care routine, so treat it with the intentionality and care it deserves.