Black women have an incredible range of styling options, and low braided ponytails represent one of the most versatile, protective, and genuinely beautiful choices available. Whether you’re looking for something sleek and professional, playful and textured, or intricate and show-stopping, a low braided ponytail can deliver. The magic of this style lies in its flexibility — it works with virtually every hair texture, from loose waves to tight coils, and it bridges the gap between casual everyday wear and polished special-occasion looks.
What makes low braided ponytails particularly appealing is how they protect your ends while still looking intentional and put-together. Unlike high ponytails that can create tension and stress on your hairline, low styles keep weight distributed across the back of your head, reducing breakage and allowing your hair to thrive. They’re also genuinely practical — they keep hair off your face and neck without the harsh tension of pulled-tight styles, and they work equally well whether you’re heading to the office, the gym, or out for an evening.
The styles I’m sharing here all showcase the creative possibilities within the low braided ponytail realm. Each one brings something different to the table, whether it’s the technical complexity of the braid pattern, the way it interacts with your natural texture, or the overall aesthetic it creates. Real talk: not every style will work for every occasion or hair type, but that’s exactly why seeing the full range is so valuable. You’ll find the ones that genuinely fit your lifestyle, your hair, and the look you’re going for.
1. The Classic Three-Strand Braided Ponytail
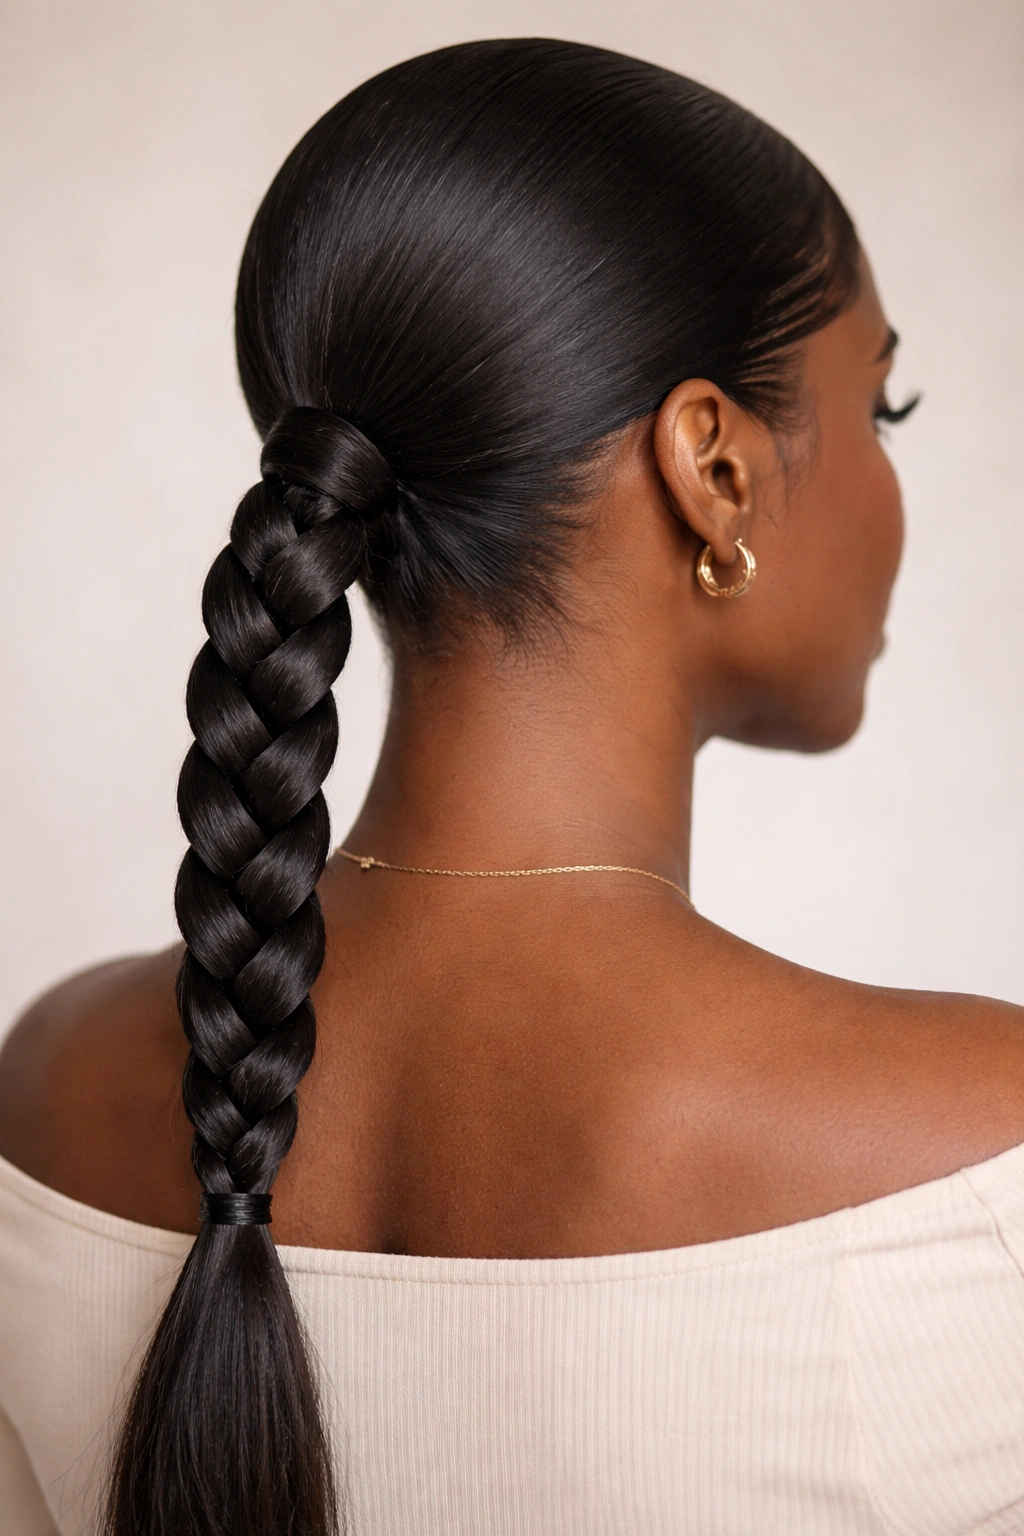
This is where elegant simplicity truly shines. A three-strand braided ponytail is timeless precisely because it works beautifully in virtually every context — it’s professional enough for a boardroom, polished enough for a date, and casual enough for a weekend errand run. The style starts with hair gathered into a low ponytail, then the ponytail itself is braided from root to tip, creating a cohesive, finished look that feels intentional without being fussy.
Why It Works for Every Occasion
The three-strand braid is classic for a reason — it’s flattering, it elongates the nape of your neck, and it creates clean, defined lines that photograph beautifully. Because the braid is relatively tight and structured, it holds its shape throughout the day without looking messy or undone. The style also works across all hair textures. If you have coily or textured hair, the braid shows off the dimension and movement of your natural texture while keeping everything organized and neat. If your hair is straighter, the braid appears smooth and polished.
Styling and Maintenance Tips
- Braid tightness matters: Braid snugly enough that the style holds shape, but not so tight that you feel pulling or tension at your hairline. You should be able to slip a finger under the braid at your scalp without resistance.
- Smooth the front hairline: Before braiding, use a fine-tooth comb and a light styling gel to smooth any baby hairs or flyaways around your face. This creates a seamless transition from your hairline to the braid.
- Braid wet or damp hair: The braid will hold better and look cleaner if you braid while your hair is slightly damp. Completely dry hair can be more resistant and harder to control.
- This style lasts 3-4 days if you sleep carefully and don’t subject it to excess friction. A silk bonnet or pillowcase helps preserve the braid overnight.
Pro tip: Add a small accent — a delicate gold cuff, a wrapped thread, or a jeweled hair clip near the base — and the simple three-strand immediately feels intentional and elevated.
2. The Two-Strand Twisted Low Ponytail
If you love the look of braids but find traditional three-strand braiding tedious or prefer something with a softer, more textured appearance, a two-strand twist is your answer. Instead of weaving three sections of hair over and under each other, you’re simply twisting two sections around each other. The result is a style that looks intricate and beautiful but requires far fewer hand movements and less precision than a full braid.
What Makes It Different
Two-strand twists create an almost rope-like texture that’s visually interesting and has a slightly softer, less structured look than three-strand braids. They’re also faster to create — once you understand the motion, you can twist a ponytail in about half the time a braid would take. The twists are also more forgiving if your hands get tired during styling or if your braid isn’t perfectly even. Slight irregularities in two-strand twists actually add to the organic, intentional aesthetic.
Quick Facts About Two-Strand Twists
- Twists work beautifully with coily and textured hair, where they blend seamlessly with your natural texture
- The style creates a finer visual line than braids, making it feel more delicate and feminine
- Two-strand twists are less likely to show frizz or flyaways than braids, because the twisted structure is less rigid
- You can create looser, more relaxed twists for a casual vibe or tighter twists for a more polished appearance
- This style typically lasts 3-5 days depending on how tightly you’ve twisted and how well you protect it at night
Insider note: If you want the twist to last longer, lightly mist it with a light hairspray after completing it — this helps lock the twist structure in place without making your hair feel stiff or crunchy.
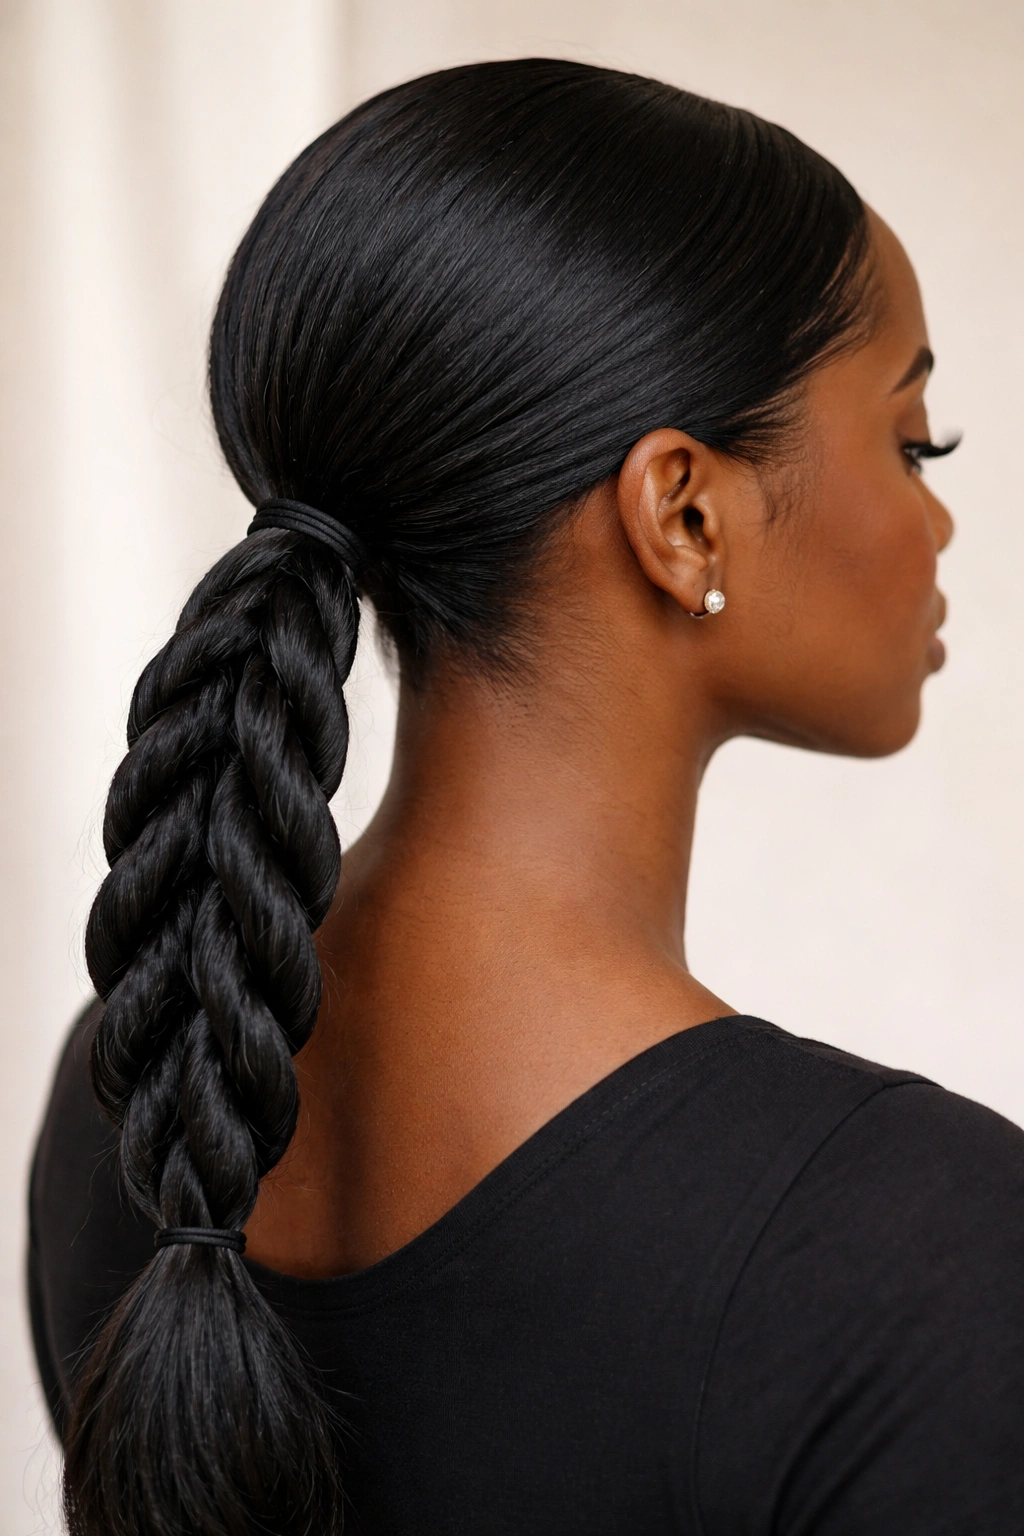
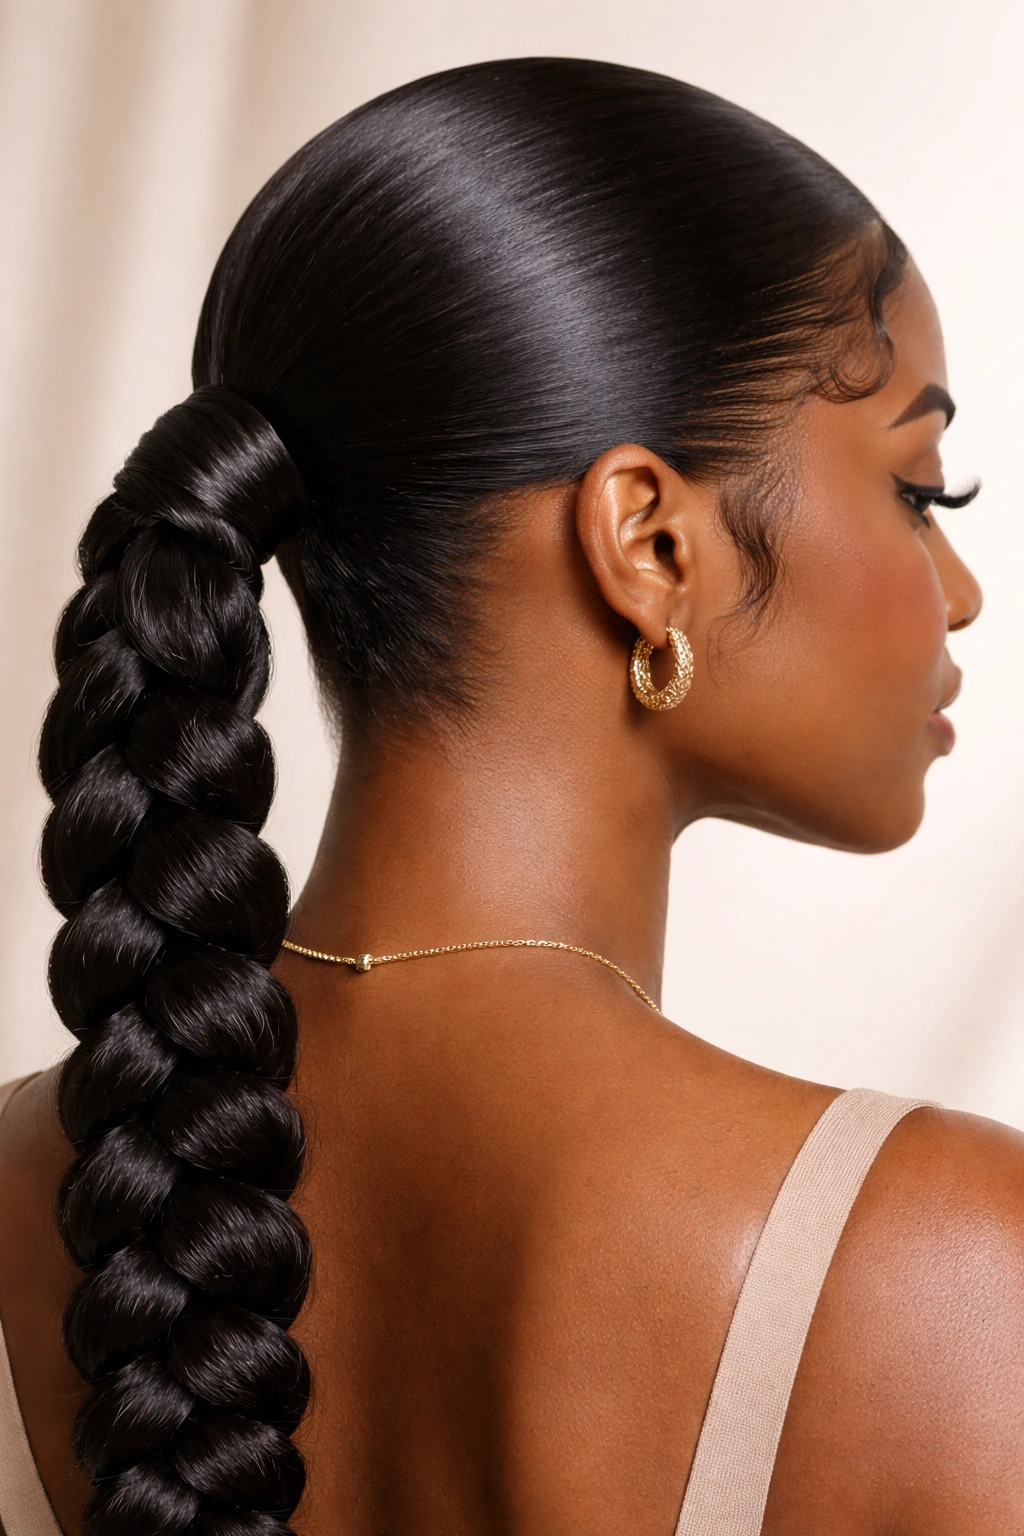
3. The Rope Twist Low Ponytail

A rope twist is a single, unified twisted structure that looks more dramatic and polished than a simple two-strand twist. You create it by dividing your ponytail into two sections, then twisting each section individually in the same direction until they’re both tightly coiled, then twisting those two coiled sections around each other in the opposite direction. The result is a rope-like braid that looks intricately layered and feels more intentional than a standard braid.
Why This Style Commands Attention
Rope twists have a dimensional, almost sculptural quality that catches the light beautifully and photographs wonderfully. Because you’re working with pre-twisted sections, the rope structure is more defined and shows more visual complexity than a two-strand twist alone. The style feels elevated without requiring significantly more skill — if you can create two-strand twists, you can create rope twists. It’s just one additional step.
How to Get It Right
- Start with section definition: Divide your ponytail into two clean, even sections. Uneven sections will result in a lopsided rope.
- Twist consistently: Twist each section in the same direction (both clockwise or both counterclockwise) until they’re tightly coiled and won’t unwind on their own.
- Reverse the direction for the final twist: Now twist your two coiled sections around each other in the opposite direction. If you twisted each section clockwise, twist the rope counterclockwise.
- Secure the base well: A small elastic covered with a matching hair tie or thread keeps the rope from unraveling.
- This style lasts 4-5 days with proper care, making it a great choice for mid-week styling.
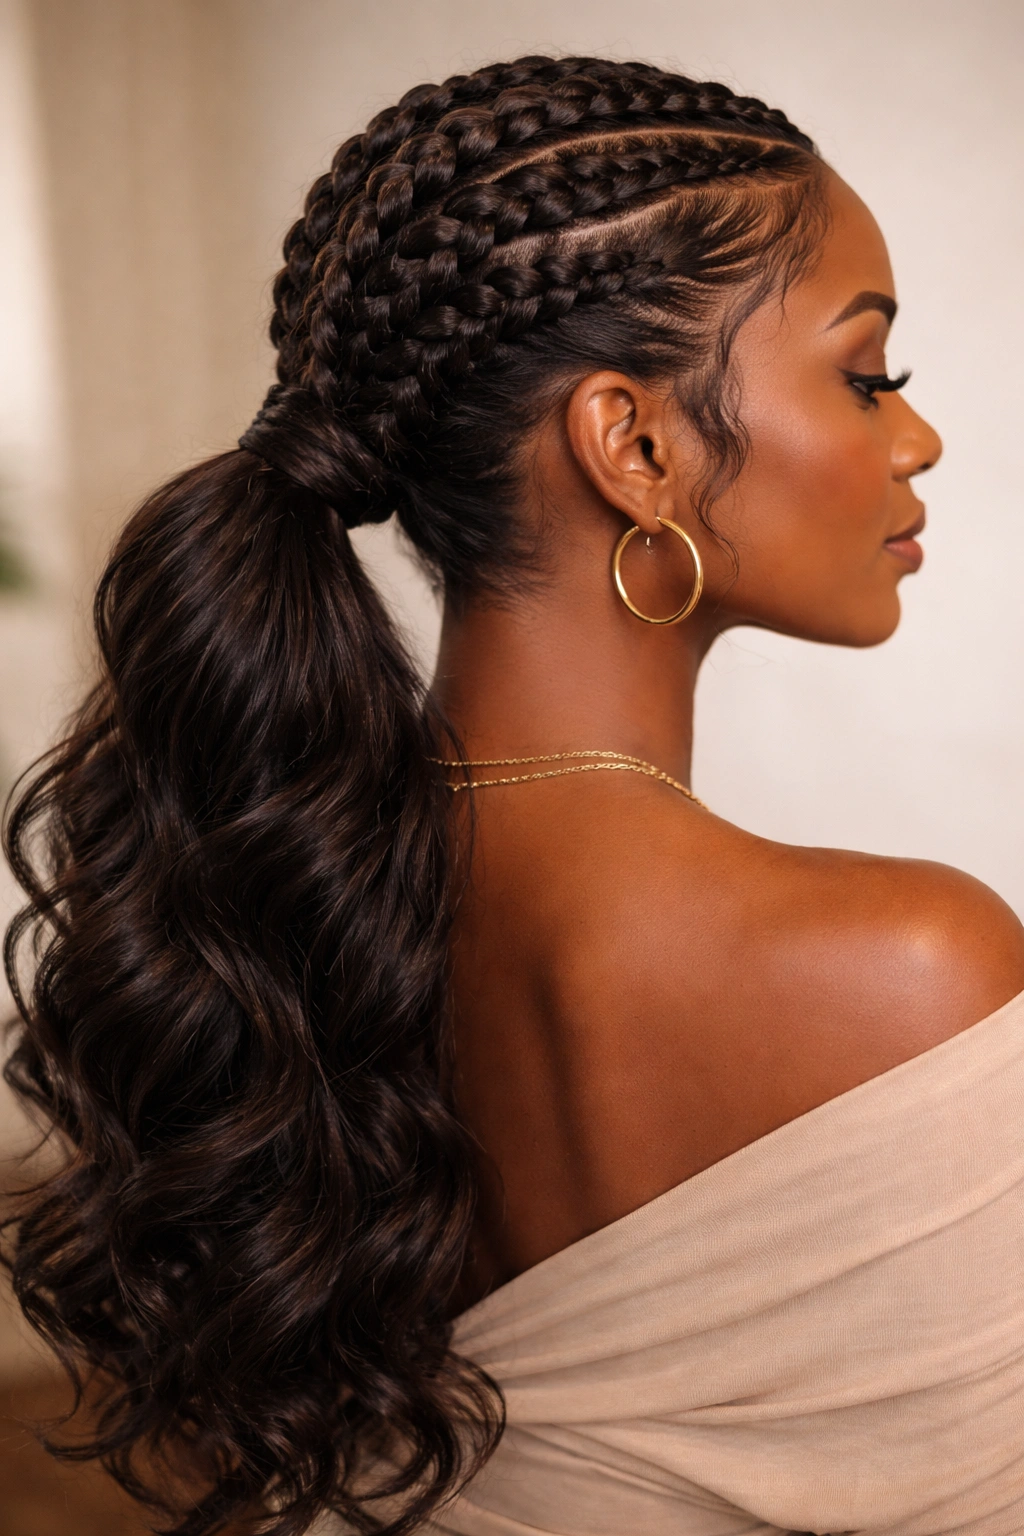
4. The Fulani-Inspired Braided Ponytail with Front Braids
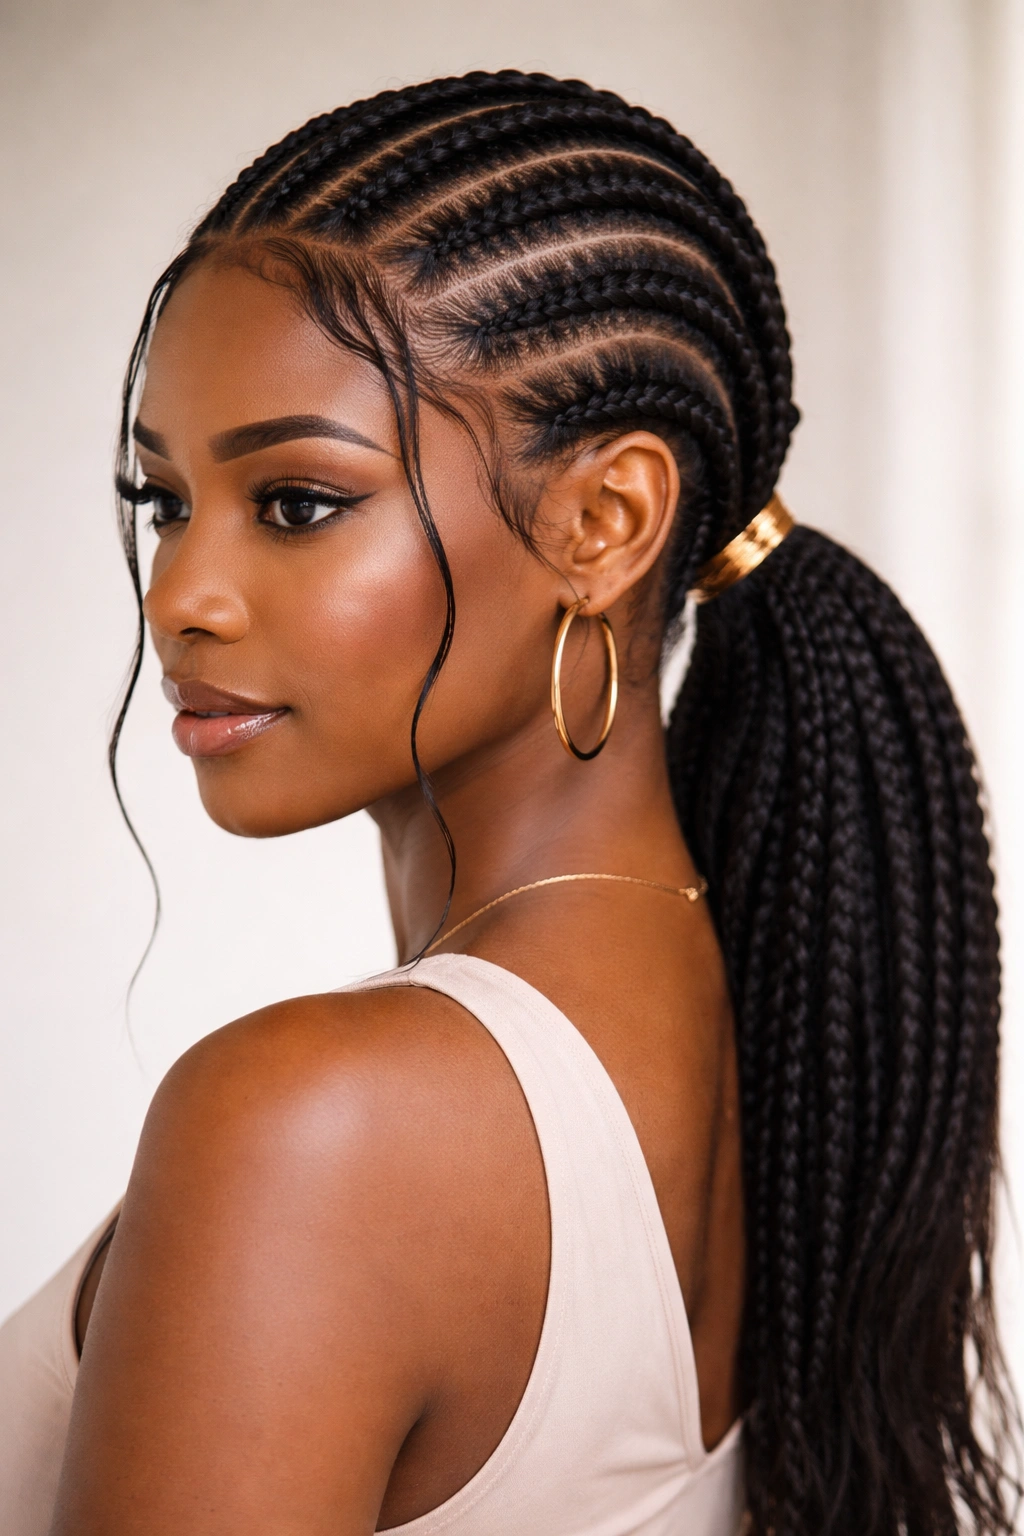
This style brings cultural richness and visual drama to the low ponytail format. Drawing inspiration from traditional Fulani braiding patterns, you create thin, neat braids from the front hairline on both sides of your face that curve back toward a low ponytail at the nape of your neck. The front braids add movement, character, and a distinctly beautiful aesthetic that feels personal and intentional.
The Cultural and Visual Appeal
Fulani braiding has deep roots in West African traditions, and incorporating these patterns into modern styling is a beautiful way to celebrate and honor that heritage. Visually, the style is stunning because the front braids frame your face while the low ponytail keeps the focus soft and wearable. You’re not pulling everything back tightly — instead, you’re creating movement and dimension across your whole head. The contrast between the neat front braids and whatever style you choose for the main ponytail (it can be a three-strand braid, a twisted style, or even just a sleek ponytail) creates interesting visual balance.
Styling Considerations
- Front braid placement: Start the front braids at your temple or just above your ear, and angle them gently back toward the ponytail base. They should feel like they’re framing your face, not pulling your hairline.
- Braid thickness: Thin, neat braids look more intentional and elegant than thick braids. Aim for braids that are roughly pencil-width or slightly thinner.
- Accent options: Gold or silver cuffs on the front braids, wrapped thread, or small beads add visual interest and can make this style feel even more polished.
- Duration: With careful sleeping and protection, this style lasts 5-7 days, making it a great choice if you want something that looks fresh but doesn’t require daily styling.
Worth knowing: Make sure the front braids are secure enough that they won’t slip out, especially if you have very fine hair or your hair is freshly washed. A lightweight gel applied to the braids as you create them helps everything stay neat and intact.
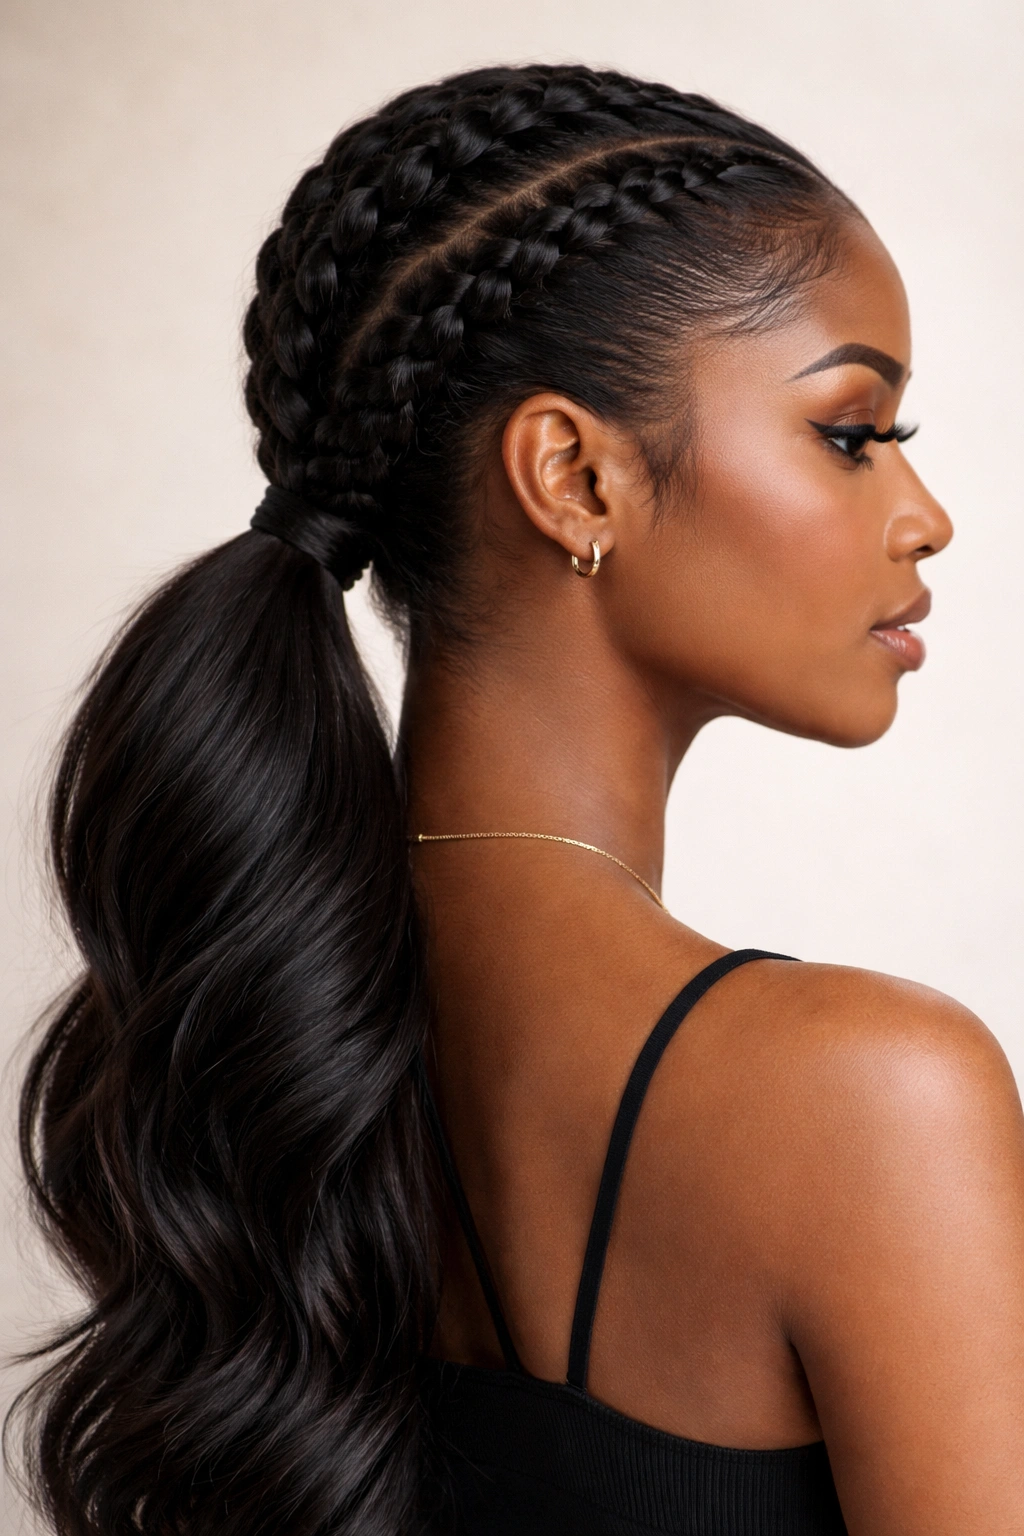
5. The Cornrowed Low Ponytail with Fade
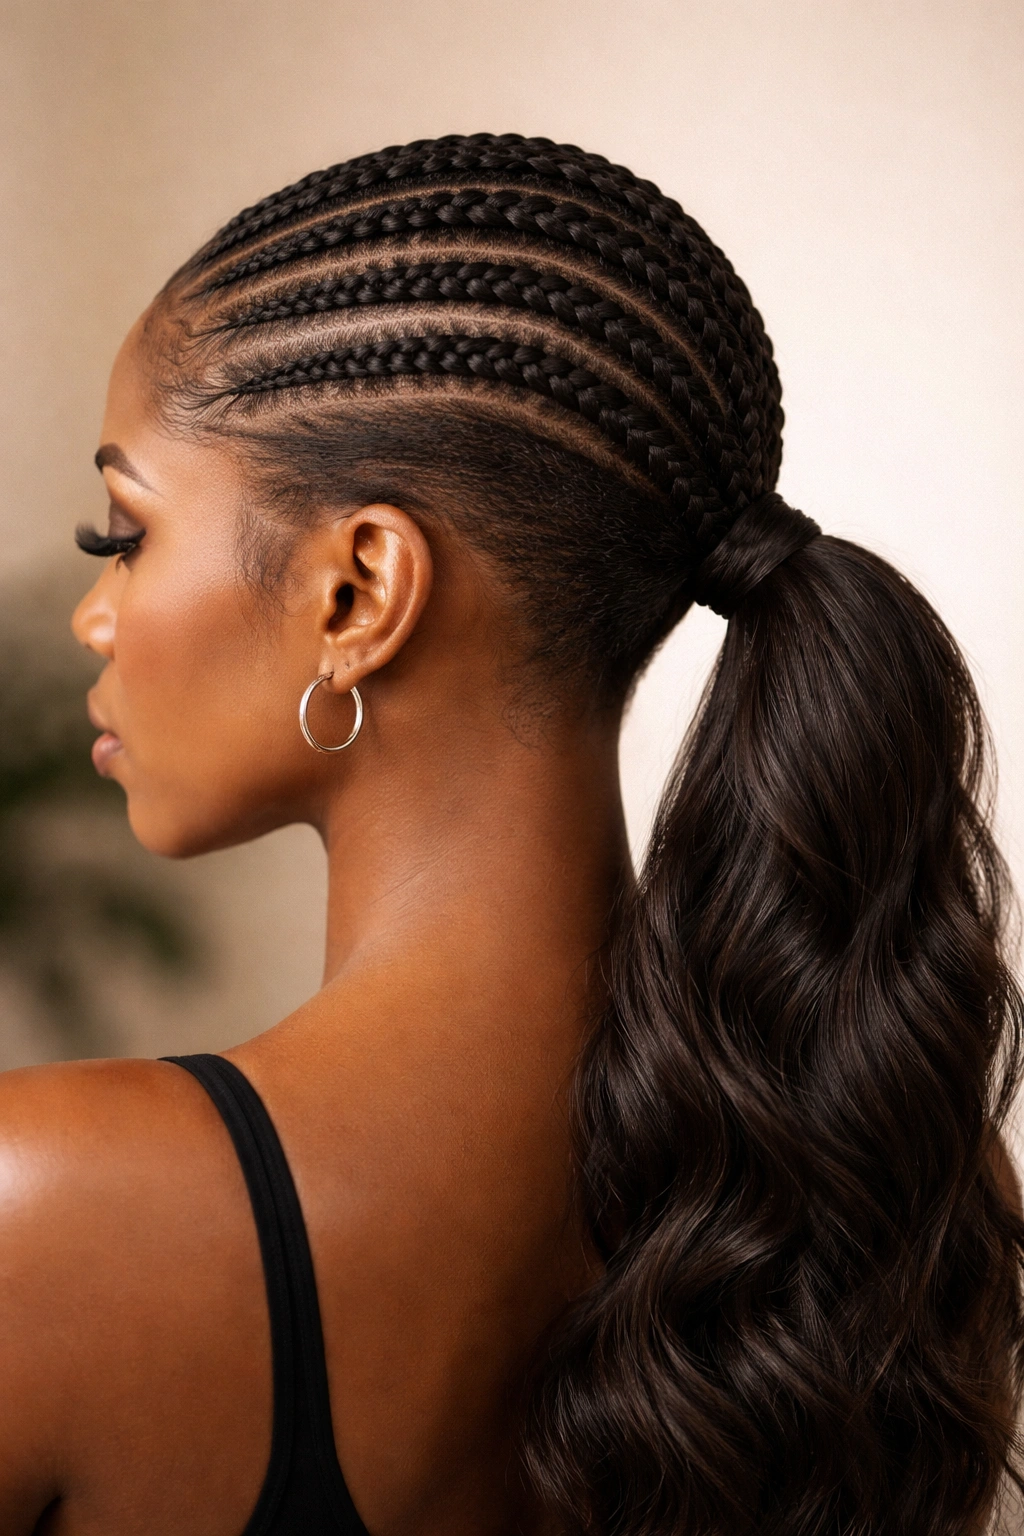
This style combines the protective benefits of cornrows with the elegance of a low ponytail. You create several cornrows (typically three to five, depending on your hair thickness) that run from your hairline back toward the crown, then gather them together into a low ponytail at the nape. The cornrows add texture and visual interest on top of your head while keeping hair off your face, and the gradient from the neat cornrows down to the full ponytail creates a really sophisticated look.
Why Cornrows Elevate the Low Ponytail
Cornrows are one of the most protective braiding styles available — they distribute tension evenly across your scalp and allow your hair to thrive underneath while looking intentional and beautiful on top. When you combine cornrows with a low ponytail, you’re getting maximum protection for the hair closest to your scalp (where you’re most vulnerable to breakage) while creating a polished, thought-out aesthetic. The style is also incredibly practical — the cornrows stay neat for a long time, so you’re not constantly fussing with your hair.
Creating the Fade Effect
- Cornrow placement: Start your cornrows at your hairline and run them straight back toward the crown. Space them evenly — three rows work well for most heads, but you might do four or five if you have very thick hair or prefer a fuller cornrowed area.
- Tension balance: Cornrows need to be snug enough to hold their shape but not so tight that your scalp feels tender. You should be able to move your scalp slightly when you touch it.
- The fade: As your cornrows reach the back of your head and transition into the ponytail, let them gradually loosen and blend into the main body of hair. This creates a natural fade rather than an abrupt transition.
- Ponytail options: The ponytail itself can be braided, twisted, or left as is depending on your preference and the occasion.
- Longevity: This style easily lasts 7-10 days, making it excellent if you prefer low-maintenance styling.
6. The Goddess Braid Low Ponytail
A goddess braid is a larger, looser, more romantic-looking braid that incorporates sections of hair as it runs down your head, similar to a French braid but with a softer, more relaxed aesthetic. When you create a goddess braid ponytail, you run one (or sometimes two) goddess braids from the top of your head down to the back, where they feed into a low ponytail. The result is dreamy, feminine, and surprisingly easy to create.
The Romantic Appeal
Goddess braids have an intentional, put-together quality that reads as effortlessly beautiful. They’re larger and looser than traditional braids, so they incorporate more volume and create a fuller, more textured appearance. This style works particularly beautifully with textured or coily hair because the natural texture of your hair shows through the braid, creating dimension and movement. On straighter hair, goddess braids read as smooth and sleek while still maintaining that soft, romantic quality.
How to Create It
- Start at the crown: Begin your goddess braid at or near the crown of your head, in the center or slightly off to one side.
- Incorporate sections as you braid: As you braid down the back of your head, pick up small sections of hair from each side, similar to how you’d create a French braid. This is what gives goddess braids their characteristic fuller appearance.
- Keep it loose: Don’t pull too tightly as you braid. Goddess braids are meant to look soft and slightly undone. If you braid too snugly, you lose the aesthetic.
- Feed into the ponytail: As you reach the back of your head, transition the braid into the low ponytail base. The braid and ponytail should feel like one continuous element.
- Gentle texture: If you want extra dimension, gently pull at the edges of the braid after you’ve completed it to loosen it slightly and create a slightly fuller appearance.
Pro tip: Goddess braids photograph beautifully and hold up well to movement, making this style perfect if you’re going out dancing or doing anything active where you want your hair to look effortless and pretty.
7. The Dutch Braid Low Ponytail
Where a French braid sits on top of your hair, a Dutch braid dips underneath, creating a more three-dimensional, sculptural appearance. A Dutch braid low ponytail features one or two Dutch braids running down the back of your head and feeding into a low ponytail. The result is a style that looks intricate and interesting from every angle — not just from the front.
The Technical Sophistication
Dutch braids require the same basic skill as French braids, but they create a visibly different effect that feels more modern and fashion-forward. Because the braid dips underneath rather than sitting on top, it creates shadows and depth that make the style look more complex than it actually is. This is the style to choose if you want something that looks genuinely intricate and shows off your styling skill, but doesn’t actually require hours of work.
Styling Tips for Dutch Braids
- Section your hair first: Decide whether you want one Dutch braid down the center back or two Dutch braids running down either side. One braid down the middle is sleek and modern; two braids is more textured and playful.
- Start higher on your head: Begin your Dutch braid at the crown or slightly higher so you have enough length to braid all the way down to your low ponytail base.
- Keep consistent tension: Dutch braids are slightly more visible than French braids (because they’re underneath), so uneven tension shows more obviously. Aim for consistency throughout.
- Feed smoothly into the ponytail: The transition from braid to ponytail should feel organic. Don’t create a sudden break between them.
- Duration: Dutch braids last 5-7 days with proper care and protection, making them an excellent mid-week style.
8. The Curved Braid Low Ponytail
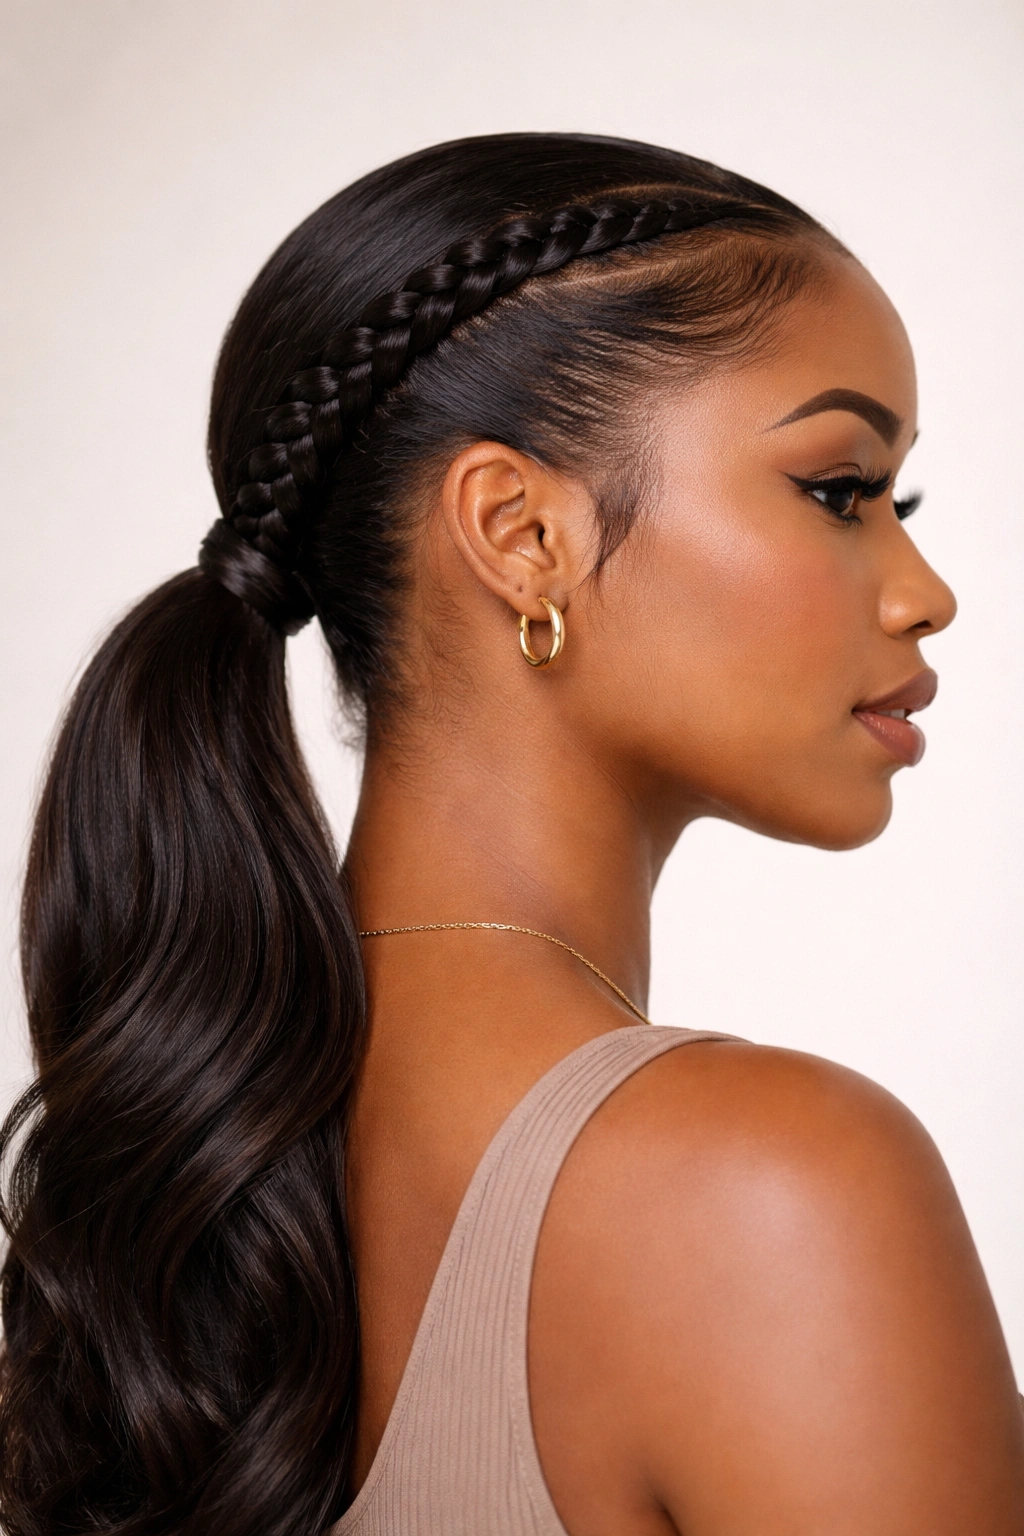
Instead of braiding straight down the back of your head, a curved braid follows the natural contour of your head, arcing gently from one side to the other as it travels down. You might start a curved braid at your temple, follow the curve of your head as it goes back, and end at the opposite side of your nape. The result is a style that feels organic, flattering, and like it was custom-designed for your unique head shape.
Why Curved Braids Feel Custom
Curved braids adapt to the natural shape of your head in a way that straight braids don’t. They’re also visually interesting because they create asymmetry and movement. A curved braid reads as more artistic and intentional than a straight braid, while still being relatively straightforward to create once you understand the basic concept. The curve also has a subtle flattering effect — it can make your face feel softer and rounder, or more sculpted and angular, depending on exactly where you place the curve.
Creating the Curve
- Plan your path: Before you start braiding, mentally trace the path your braid will follow. Will it curve from left to right, right to left, or follow a subtle S-curve down the back?
- Adjust your anchor point: Start your braid slightly off-center so you have room to curve naturally. If you’re curving from left to right, start slightly to the left.
- Adjust as you go: As you braid, pick up hair in a way that follows your planned curve. You’re essentially doing a French or Dutch braid, but with the picking-up slightly offset to create the curve.
- The ponytail base: Your curved braid should naturally lead to a low ponytail at the nape or slightly off to one side.
- This style lasts 5-6 days with care, and it photographs beautifully from multiple angles.
Insider tip: Curved braids work especially well if you’re planning to take photos or video, because the curve creates interesting visual dimension from every angle.
9. The Bubble Ponytail with Braided Sections
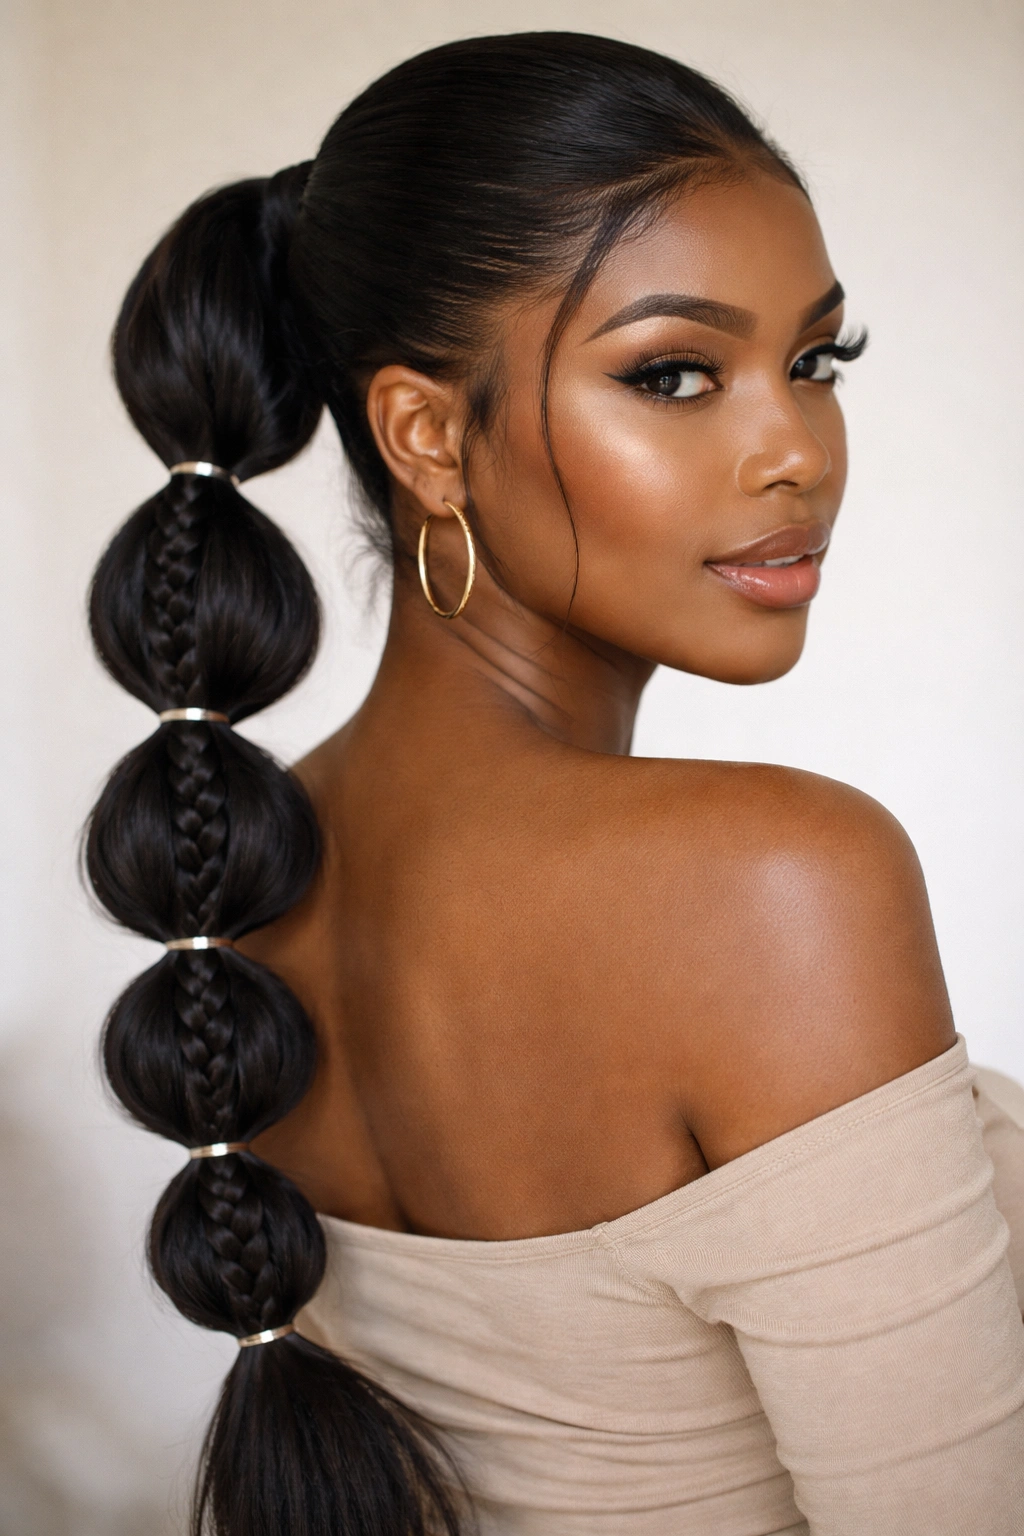
A bubble ponytail uses multiple elastics spaced down the length of your ponytail to create puffed-out sections that look playful and textured. When you add braiding between the bubbles or incorporate braided sections into the overall style, you get a look that’s creative, modern, and genuinely fun. You might braid the top section of your ponytail, create a bubble, then braid the next section, and repeat down the length.
The Playful Appeal
Bubble ponytails feel youthful and creative without looking unprofessional. This is the style to choose when you want something that makes a statement and shows personality. Adding braided sections between the bubbles elevates the style from simple and playful to intricate and intentional. The contrast between the braided sections and the fluffy bubble sections creates visual interest and movement.
How to Build It
- Start with a low ponytail: Gather your hair into a secure low ponytail with a small elastic.
- Braid the first section: Take the first few inches of your ponytail and create a small three-strand or two-strand braid.
- Secure and puff: Once your braid reaches a few inches down, secure it with another small elastic. Gently pull out at the braid edges to make it fuller, then fluff out the unbraid section below the elastic to create a bubble.
- Repeat: Braid the next section, secure it, fluff out the next bubble. Continue this pattern all the way down.
- Variation: You can also do the reverse — create bubbles first, then braid the sections between bubbles.
- Duration: This style lasts 3-4 days depending on how tightly you’ve secured the elastics and how much fluffing you do during the day.
Worth knowing: Use small, clear elastics that blend with your hair color — they’re less visible than larger or contrasting elastics and keep the focus on the braiding and texture rather than on the hair ties themselves.
10. The Crotchet Braids Low Ponytail

Crotchet braids (also spelled crochet braids) are a protective styling technique where you use a crotchet hook to pull pre-braided synthetic hair (or sometimes your own hair) through your natural hair to create intricate, full braids. A crotchet braid low ponytail involves using this technique to create a full, voluminous braided style that feeds into a low ponytail. The result is a style with maximum fullness and protection that looks professionally done and lasts an incredibly long time.
The Protective Power
Crotchet braids are one of the most protective styling options available because your natural hair is completely enclosed and covered, minimizing friction and breakage. When you style them into a low ponytail configuration, you’re getting maximum protection while still achieving a look that feels polished and put-together. This is an excellent option if you’re actively growing your hair, recovering from breakage, or simply want a style that requires minimal daily manipulation.
What You Need to Know
- Professional installation: Many people prefer to have crotchet braids installed by a professional braider, though it’s possible to do them yourself with practice and the right tools.
- Synthetic vs. human hair: You can use pre-braided synthetic hair for a more affordable, fuller look, or human hair for a more natural appearance and versatility in styling. Synthetic works well for bold colors and textures.
- Duration and maintenance: Crotchet braid ponytails can last 4-8 weeks depending on how well you care for them and how quickly your natural hair grows. Maintenance involves keeping your scalp clean and moisturized underneath, and protecting the style while you sleep.
- Styling options: Once installed, you can style the braids into a low ponytail, high ponytail, bun, or leave them loose depending on your preference.
- Cost consideration: Professional installation and the cost of materials make crotchet braids a more expensive styling option, but the longevity and minimal daily styling make up for the initial investment.
Pro tip: When protecting crotchet braids at night, use a silk or satin bonnet and avoid sleeping directly on the braids if possible. This extends their lifespan and keeps them looking fresh.
Final Thoughts
The beauty of low braided ponytails lies in their genuine versatility — there’s genuinely a style here for every hair type, every occasion, and every level of styling skill. Whether you’re drawn to the timeless simplicity of a three-strand braid, the protective benefits of cornrows, or the creative flair of curved braids and bubble ponytails, you have options that will work beautifully with your natural hair and your lifestyle.
What matters most is choosing a style that doesn’t just look beautiful but feels good — one that doesn’t create tension on your hairline, that allows your hair to breathe and thrive, and that fits into your routine in a sustainable way. A style you’ll actually wear is infinitely better than a style that photographs perfectly but leaves your hair stressed and your scalp sore.
The styles here also aren’t fixed — think of them as starting points. You can absolutely combine elements (add front Fulani-inspired braids to a Dutch braid ponytail, for instance) or adapt them based on your hair texture, thickness, and personal aesthetic. The goal is to find what makes you feel confident, beautiful, and like yourself. That’s when a hairstyle truly becomes your style.