Ponytails are one of the most versatile styling options for natural hair—they offer protection, simplicity, and the chance to show off your texture in ways that feel both polished and effortlessly chic. Whether you’re working with coils, curls, waves, or a gorgeous mix of textures, a well-executed ponytail can be your go-to style for everything from busy weekdays to special occasions. The key is understanding how to gather and secure your natural hair in ways that celebrate what you’ve got while keeping everything in place without tension or breakage.
Natural hair ponytails are different from ponytails on straight hair—your curl pattern, shrinkage, and the way your hair holds shape all play a role in how you approach them. The right technique can mean the difference between a style that holds beautifully all day and one that falls flat by noon. Throughout this guide, you’ll discover 15 distinct ponytail styles that work specifically with natural hair’s unique properties, from sleek and defined to textured and voluminous.
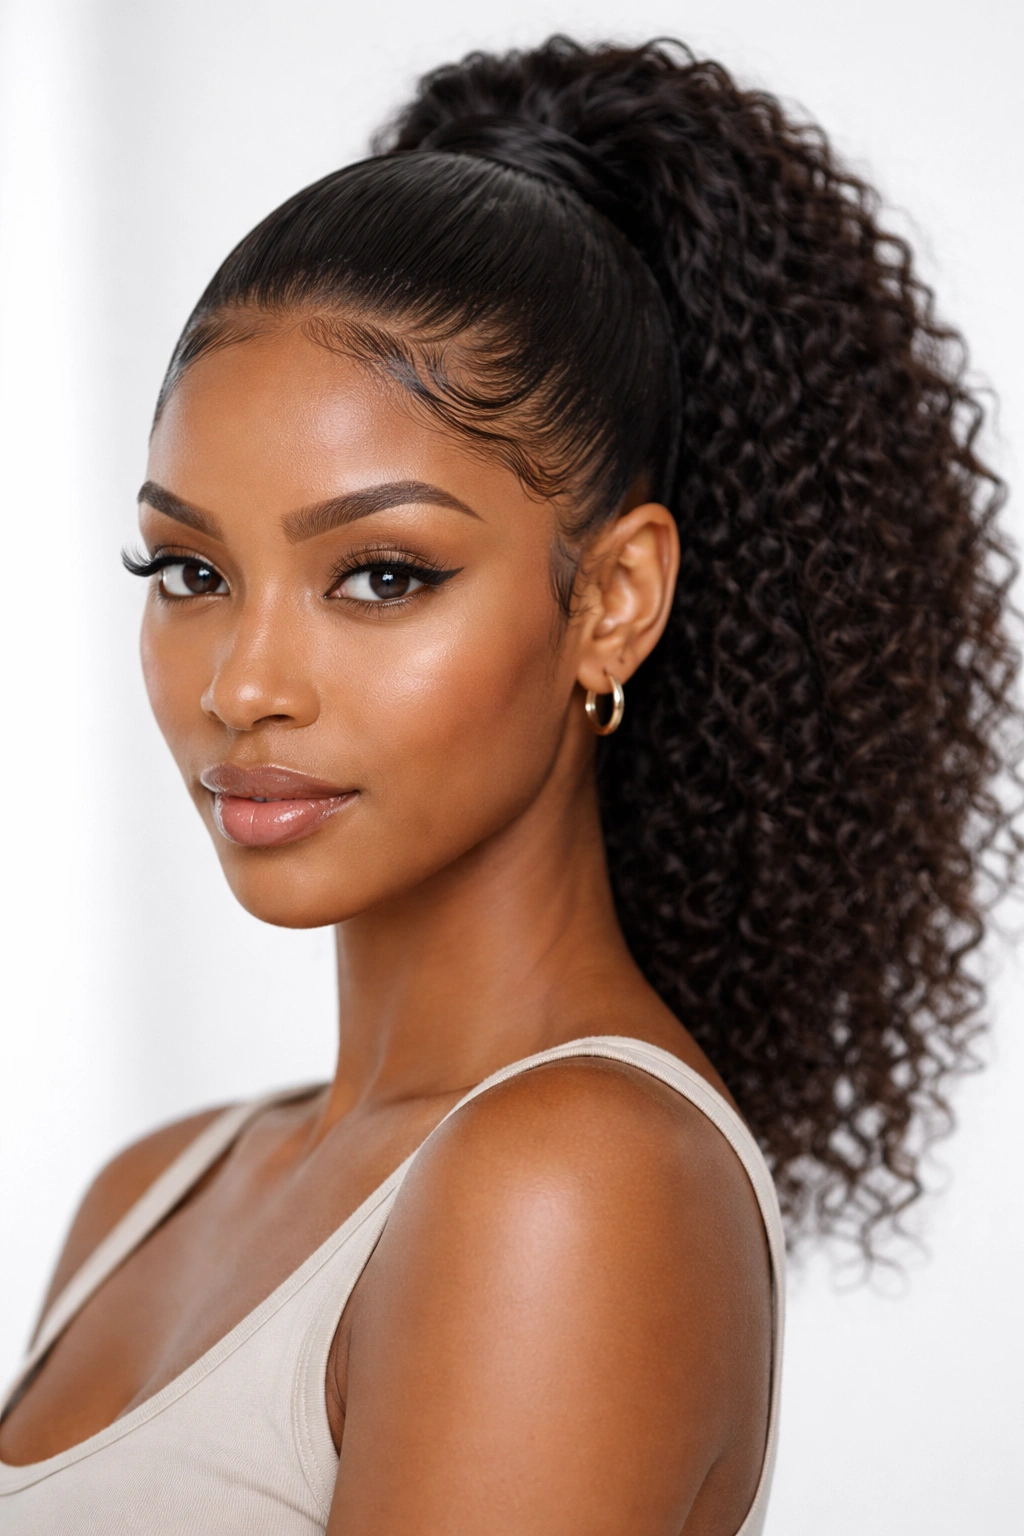
1. High Pony with Full Volume
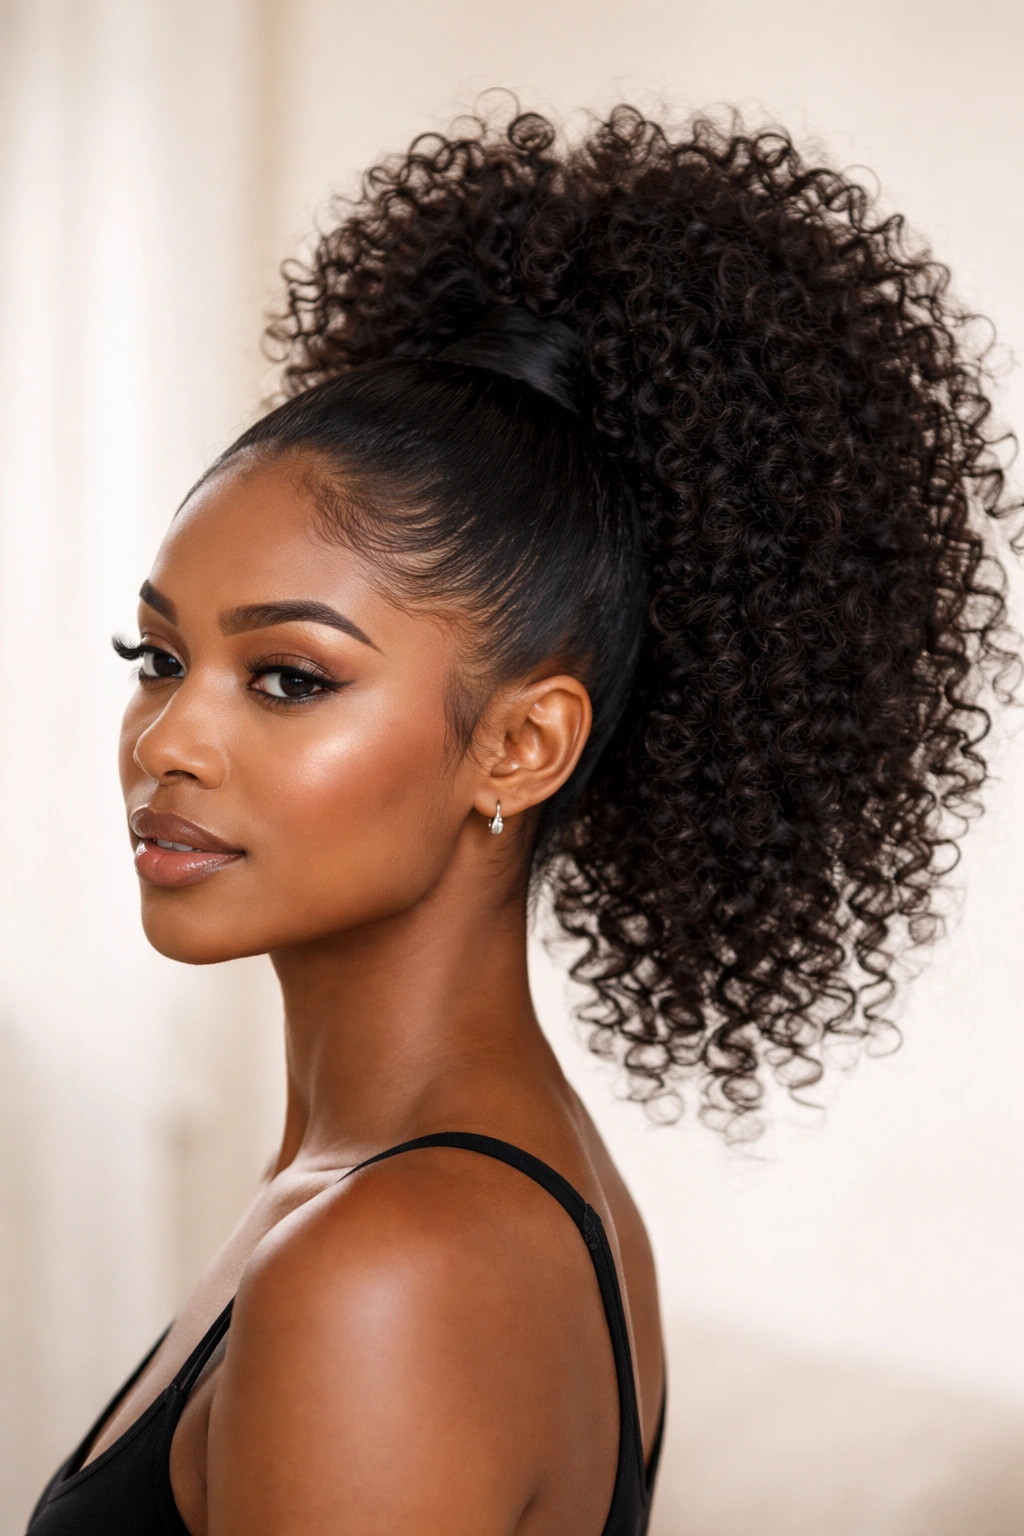
The high ponytail is a classic that never goes out of style, and when you nail it with natural hair, it becomes an absolute powerhouse look. This style sits at the crown or just slightly back from your hairline, drawing attention upward and creating a sleek, elongated silhouette that works whether your hair is freshly washed or a few days into your wash cycle.
Why This Works for Natural Texture
The high placement takes advantage of your natural shrinkage—instead of fighting it, you’re using it as a feature. When you gather coily or curly hair at the crown, it creates a bold, defined shape that reads as intentional and confident. The volume naturally concentrated at the back of your head creates a balanced, flattering proportion that works for virtually every face shape.
How to Execute This Look Perfectly
- Prep your hair with a leave-in conditioner and light oil to make manipulation easier and smoother
- Part your hair down the middle or sweep it back, depending on which flatters your face
- Use your fingers or a wide-tooth comb to smooth any frizz around your hairline
- Gather hair at the crown and secure with a smooth elastic or a silk-lined hair tie to prevent breakage
- Fluff out the pony at the base to create visible texture and volume
- Pro tip: If you’ve got some straight hair mixed in with curly sections, the high placement helps showcase the natural contrast and creates visual interest that a lower pony might flatten.
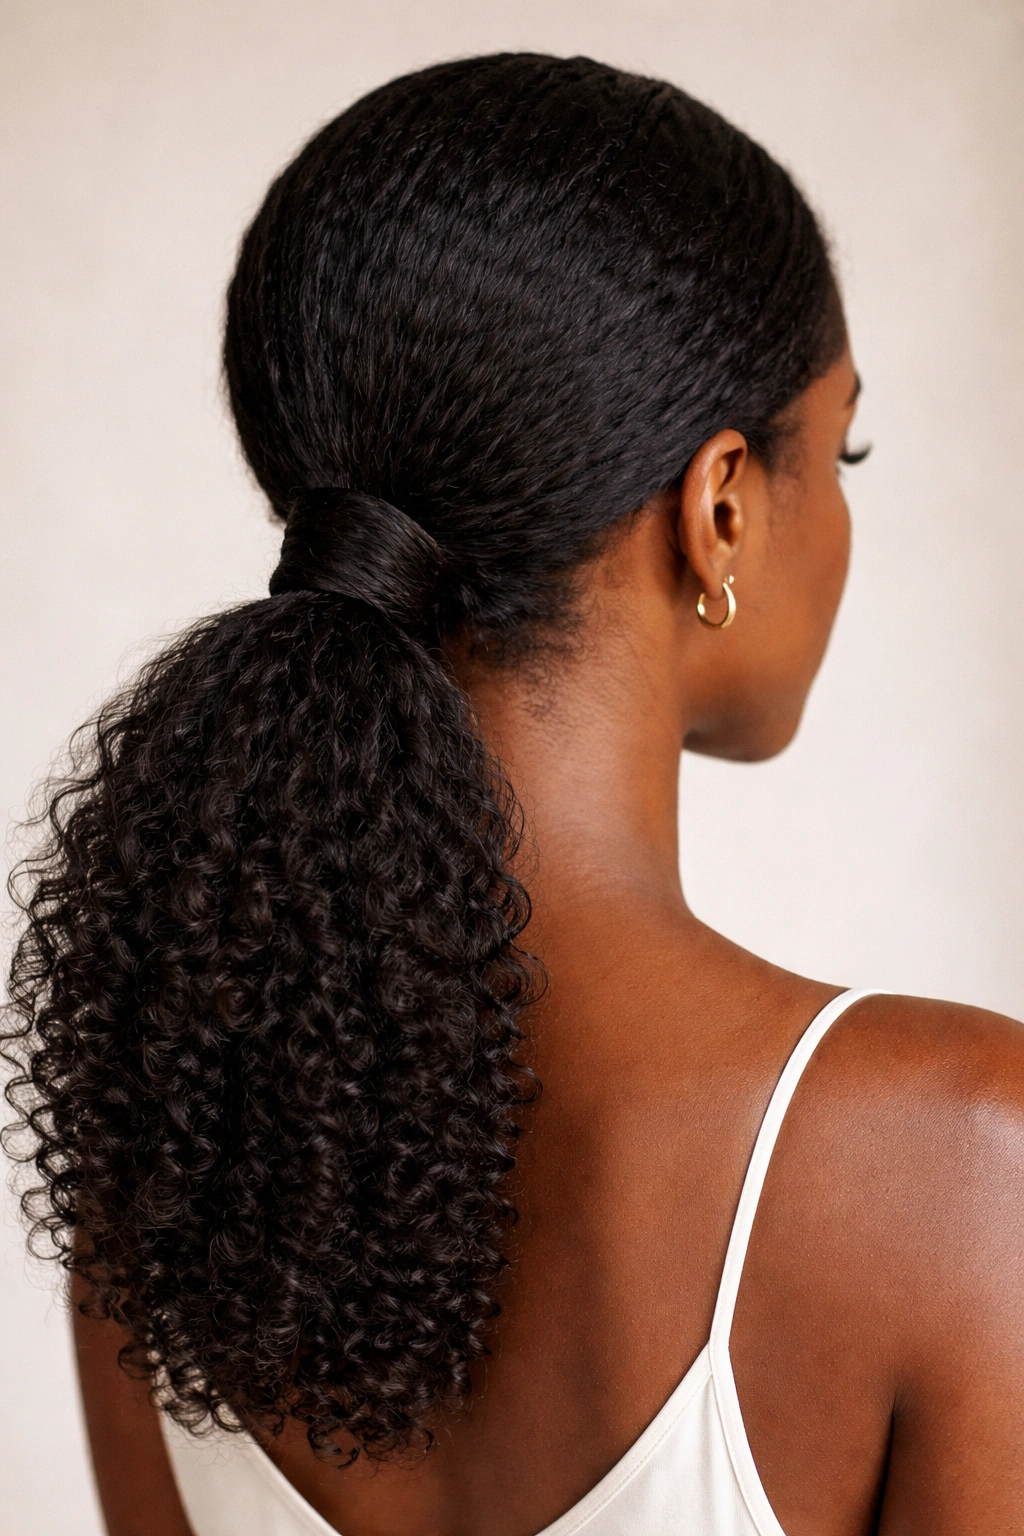
2. Low Ponytail with a Wrap
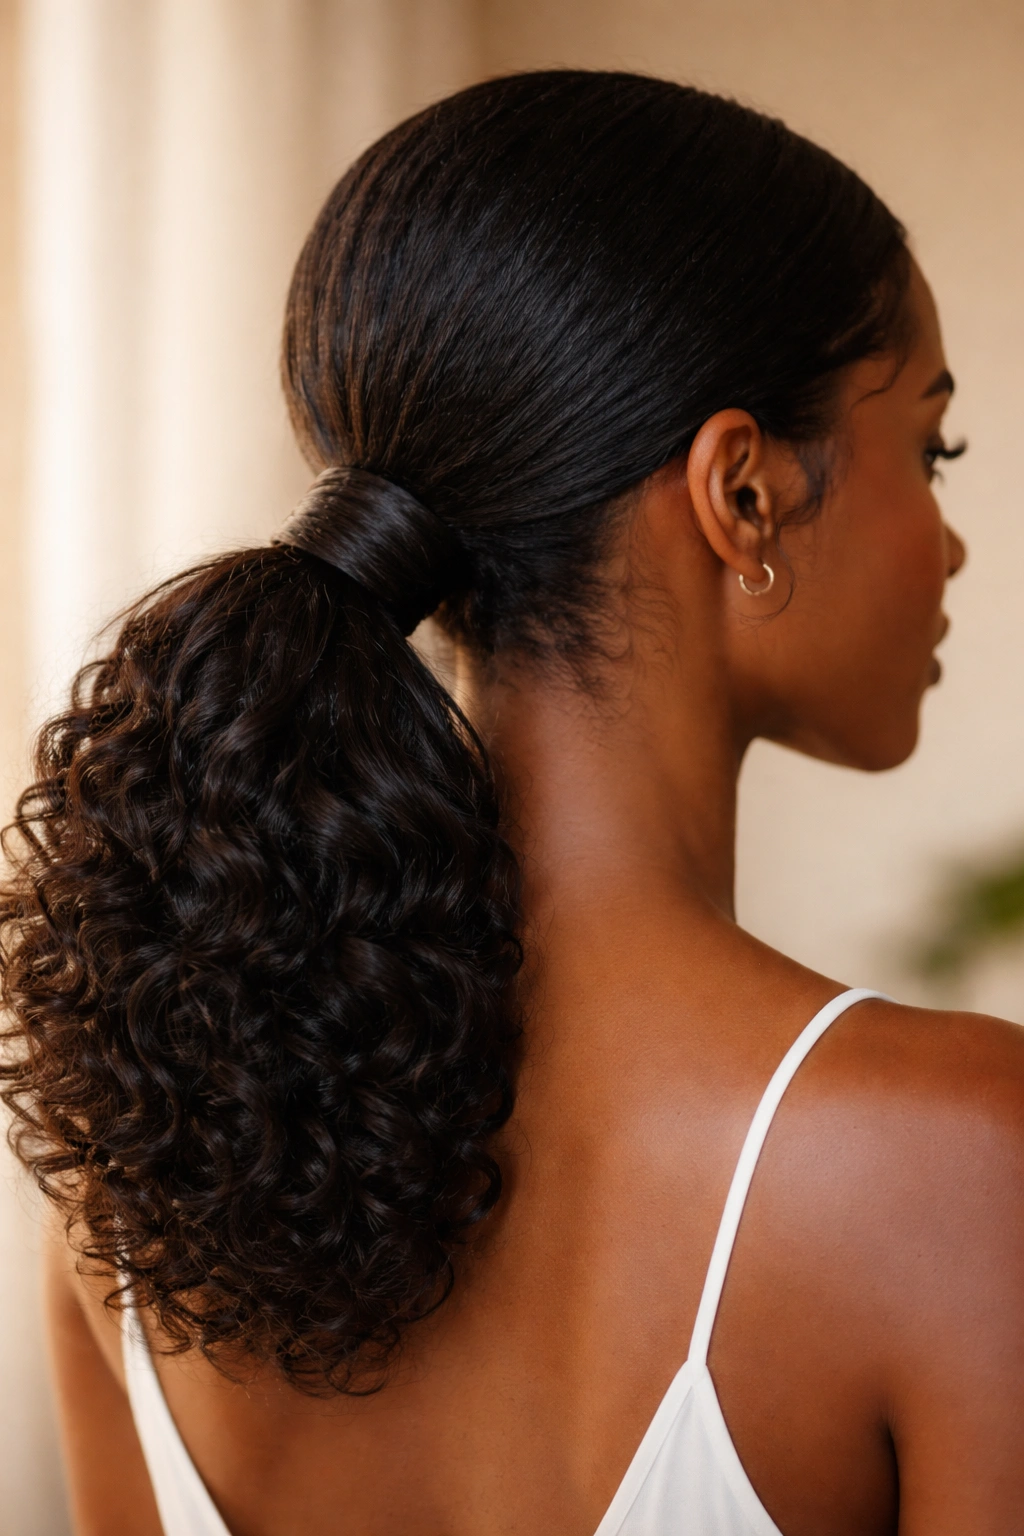
A low ponytail sits at the nape of your neck and instantly feels more refined and polished—it’s the style you reach for when you want to look put-together without actually spending hours styling. Adding a wrap—either using hair from the ponytail itself or a coordinating fabric or thread—transforms it into something with extra dimension and intentionality.
Why This Placement Works
Low ponytails actually feel easier to maintain throughout the day because the weight is distributed lower on your head, and there’s less tension at your hairline. For natural hair, this means less daily stress on your edges and a style that can genuinely last through your entire work week without feeling uncomfortable. The lower position also creates an elegant frame for your face and neck.
Wrap Options and Application
- Use a small section of your own hair from the pony to create a smooth wrap around the base
- Or try wrapping with embroidery floss, thin braiding hair, or fabric strips for a more decorative look
- If using thread or fabric, wrap it tightly around the base multiple times and tuck the ends underneath
- Leave 1-2 inches of the ponytail loose and unwrapped at the bottom so texture can flow freely
- The wrap should sit right at the point where you’ve secured the elastic for a finished, intentional appearance
- Worth knowing: A wrap does more than look good—it also reinforces the elastic, making your ponytail more secure and longer-lasting.
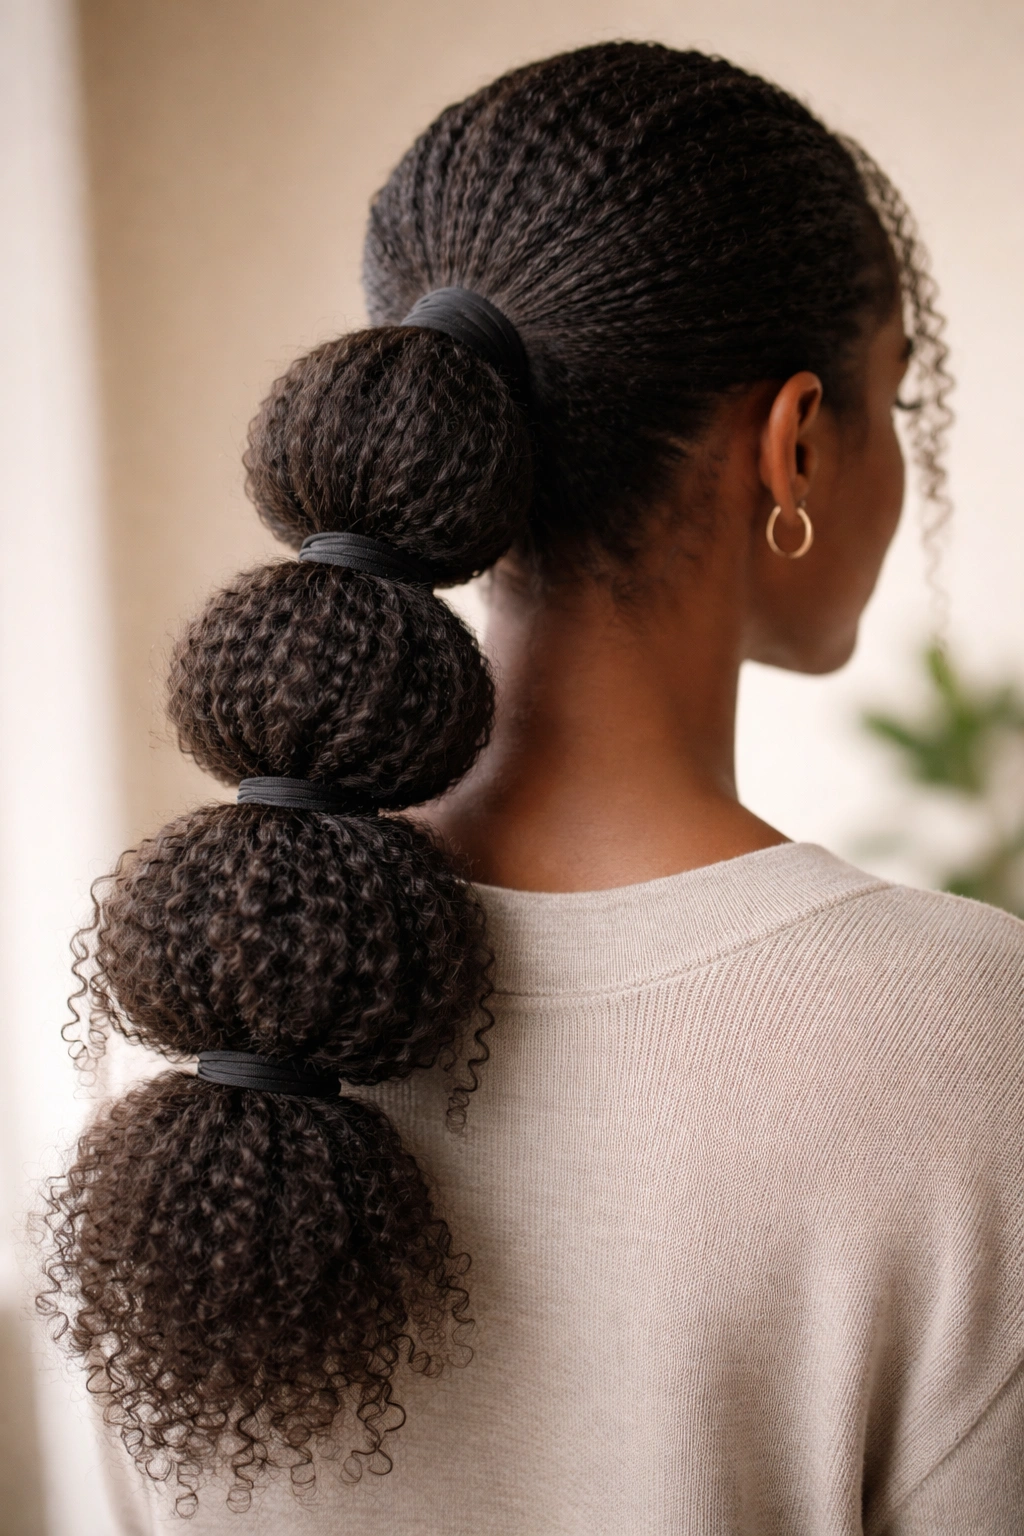
3. Bubble Ponytail
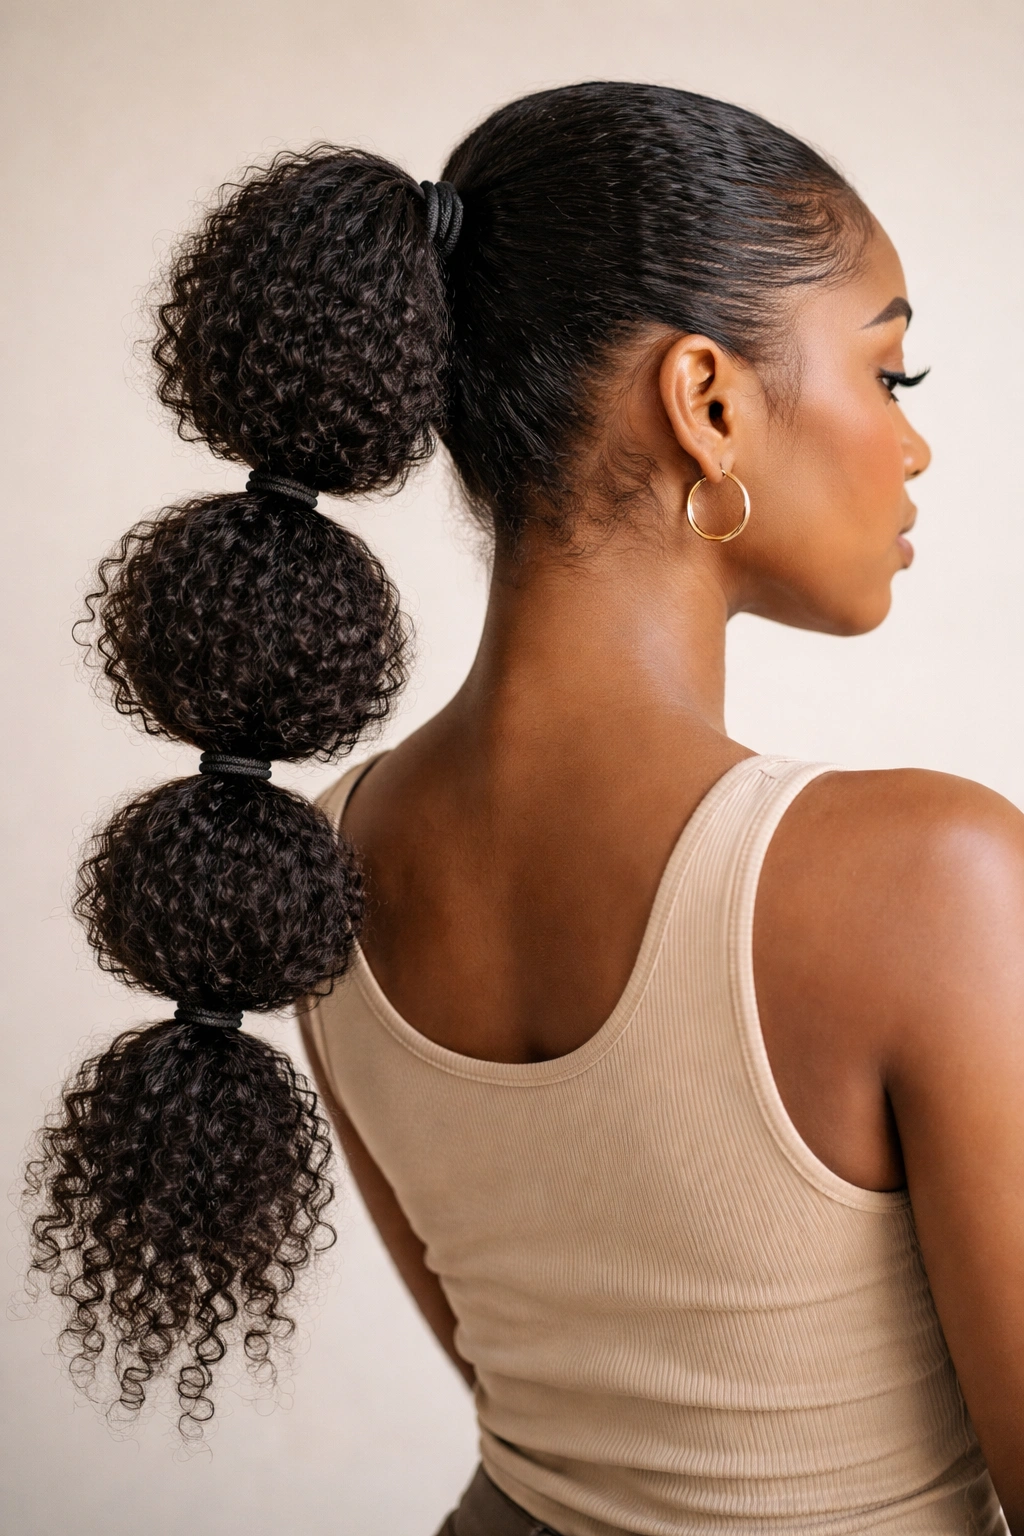
The bubble ponytail creates visually distinct sections that look almost like stacked bubbles running down the length of your pony, and it’s become increasingly popular because it feels modern and playful while still looking carefully styled. Each bubble is created by securing the ponytail at multiple points with elastics, and the texture in between puffs out.
Why Natural Hair Creates Better Bubbles
Curly and coily hair naturally wants to expand and take up space, which is exactly what you need for a bubble ponytail to pop visually. Straight hair sometimes needs styling products or heat to create that puffed-out effect, but your natural texture does a lot of the work for you. The contrast between the tighter sections (where the elastics are) and the fuller sections (between them) feels intentional and dimensional.
Creating Defined, Even Bubbles
- Start with a smooth, gathered ponytail and secure with a clear elastic
- Measure approximately 2-3 inches down from the first elastic and add a second elastic, making sure to catch all the hair
- Gently pull and fluff the hair between each elastic so it poofs outward
- Continue down the entire length of your ponytail, spacing elastics evenly
- Use your fingers to shape each bubble so they’re roughly the same size
- For added texture, you can lightly separate the curls within each bubble section
- Pro tip: This works especially well if you’ve stretched your hair slightly before styling—the elongation makes the bubble sections more visible and dramatic.
4. Sleek Braided Wrap
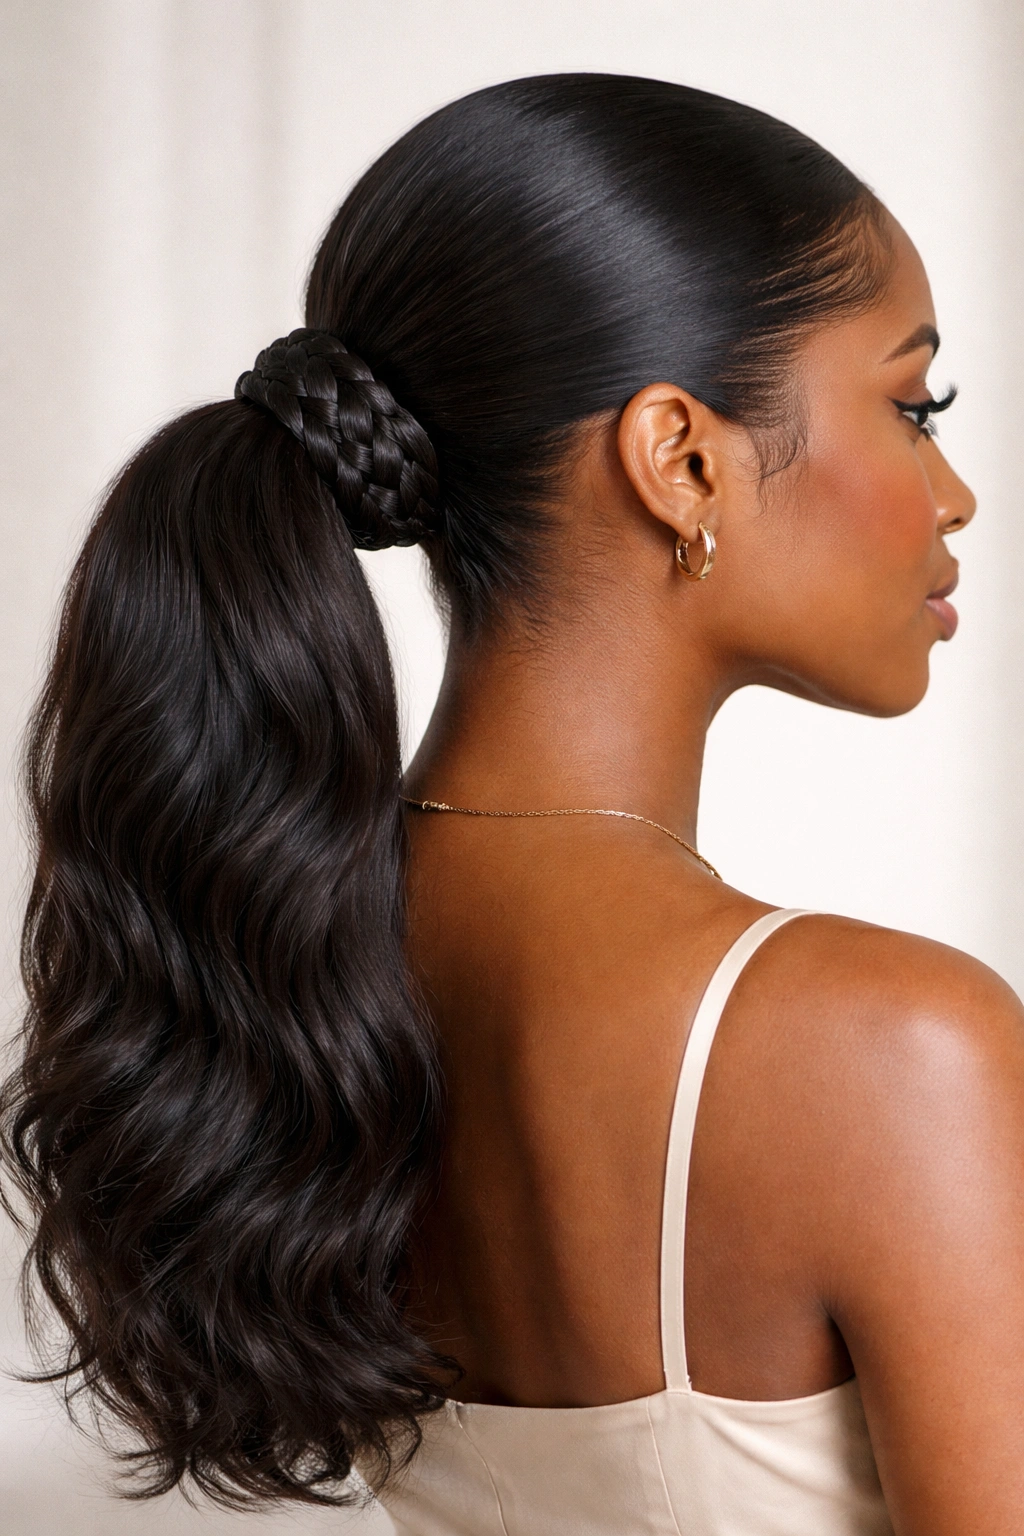
This style combines the sleekness of a defined edge with the texture of a braid, creating a sophisticated look that feels both protective and intentional. The braid wraps around the base of your ponytail, drawing the eye to the nape and creating beautiful visual movement.
The Sophistication Factor
What makes this style stand out is that it feels like you’ve put thought and care into your appearance without looking overly complicated. The braid incorporates texture, while the ponytail itself stays smooth and controlled. This contrast is what makes it work so well for natural hair—you get to show off both your ability to manipulate your hair and your appreciation for defined edges.
Step-by-Step Execution
- Gather your hair into a low ponytail and secure with an elastic
- Take a small section of hair from one side of the ponytail base and begin a three-strand braid
- Braid around the circumference of the ponytail base, incorporating only the hair at the base (not creating a new braid from the crown)
- Continue until the braid comes full circle and meets where it started
- Secure the braid end with a small elastic and tuck it underneath the main ponytail
- Use gel or a styling cream on any flyaways to keep the braid and edges looking clean
- Insider note: This style actually feels more secure throughout the day because the braid reinforces the base and distributes the weight more evenly.
5. Textured Top Knot Pony
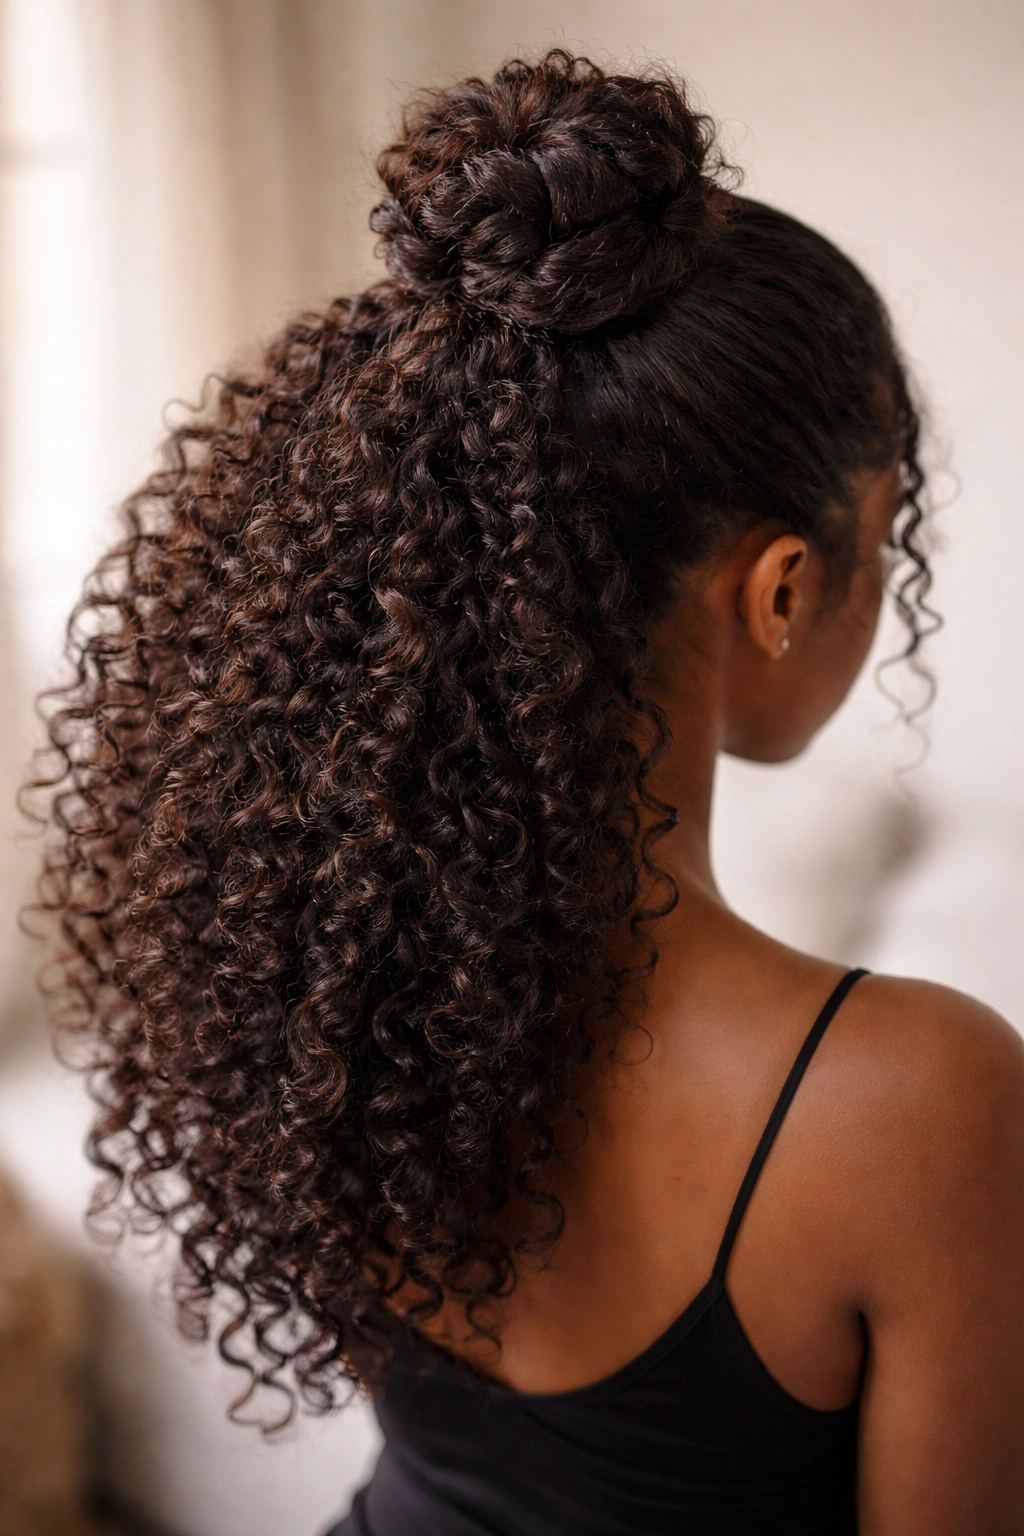
A top knot pony is where you gather your hair at the very crown and fold it on itself to create a knot shape, letting the remaining length flow down as a ponytail. It’s a hybrid that combines the visual interest of an updo with the practicality and versatility of a pony.
Why This Creates Visual Drama
The knot at the crown naturally showcases your curl pattern and texture in a concentrated area, which draws immediate attention and interest. Because you’re folding and gathering the hair rather than smoothing it, the knot captures dimension and movement that a sleek high pony wouldn’t. It’s a style that reads as intentional and artistic without requiring any heat tools or chemical straightening.
Creating a Balanced Knot
- Gather hair at the crown and secure loosely with a hair tie (don’t pull too tight yet)
- Create an opening at the top of the secured ponytail and pull the rest of the ponytail through that opening, folding it back on itself
- Adjust the knot so it sits at the crown in a balanced, visually pleasing way
- Let the remaining length hang freely as a second-level ponytail beneath the knot
- Add a second elastic where the knot ends to secure the structure
- Fluff and separate the curls in the knot section to show off the texture fully
- Real talk: This takes a bit of practice to get the proportions right, but once you nail it, it becomes a go-to that feels special but isn’t particularly high-maintenance.
6. Twist-Out Ponytail
If you love the defined texture of a twist-out, why not incorporate it directly into your ponytail? This style combines the defined curl pattern you get from twisting with the neatness of a gathered pony, creating something that feels both relaxed and carefully styled.
How Twists Enhance the Pony
Twisted sections create more controlled, defined curls than loose natural hair, which means your ponytail has more shape and structure built into it. The twist-out gives you curl definition without needing to use tight braids or artificial texture—you’re simply using a styling technique you probably already love. When you gather twist-out hair into a pony, those defined twists don’t disappear; they create a visually interesting texture throughout the style.
Getting the Most From Your Twist-Out Pony
- Create a twist-out on your hair using your preferred technique (with or without product)
- Allow the twists to fully set and cool before unraveling
- Gently unravel each section to activate your curl pattern
- Let the twists sit for at least 24 hours so the curls fully settle and maximize definition
- Gather your twisted-out hair into your preferred ponytail placement (high, low, side, etc.)
- The individual twist sections will remain somewhat visible within the pony, creating layered texture
- You can refresh this style for several days by misting lightly with water and a leave-in conditioner
- Worth knowing: A twist-out pony actually holds better throughout the week than a regular pony because the texture is already structured from the twisting process.
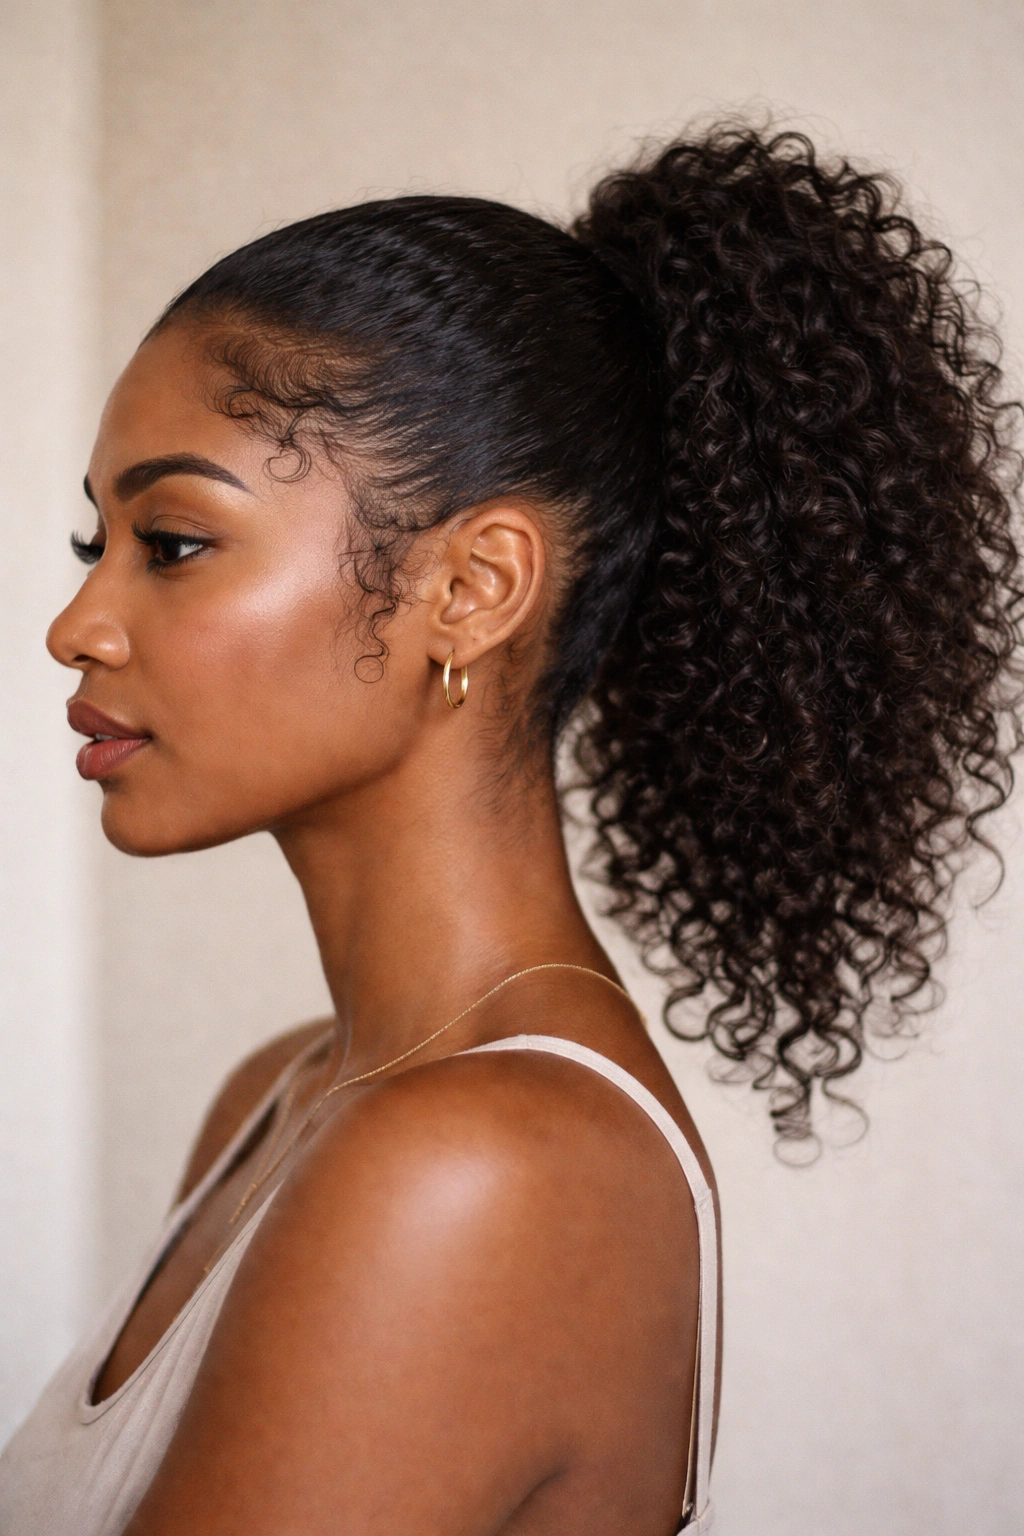
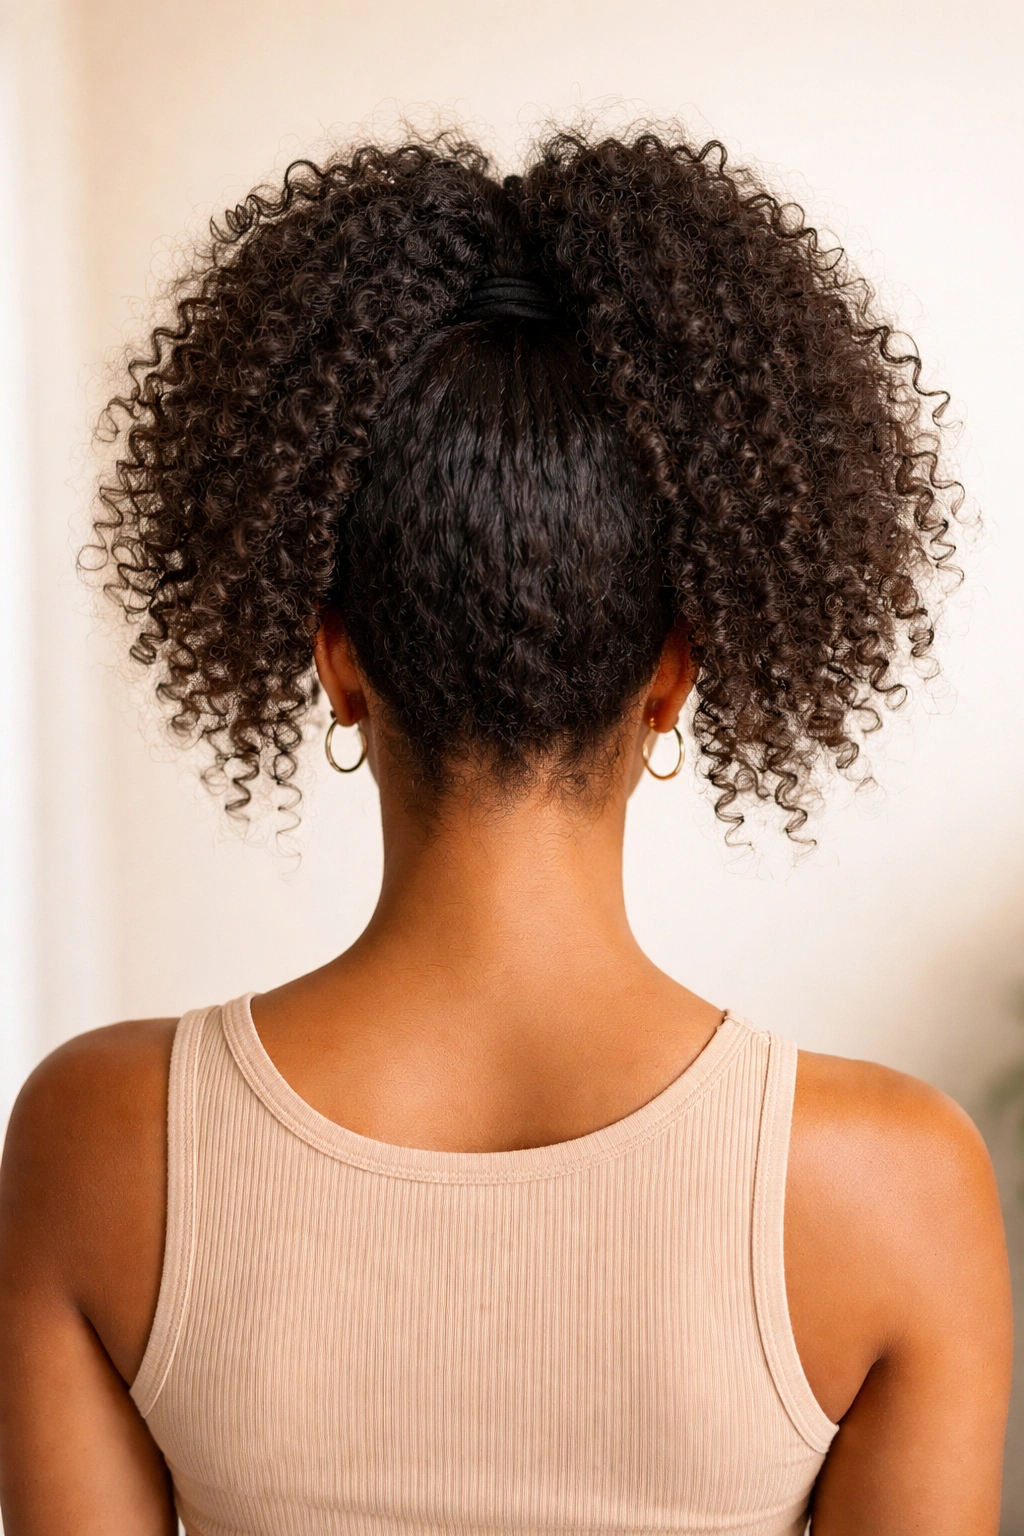
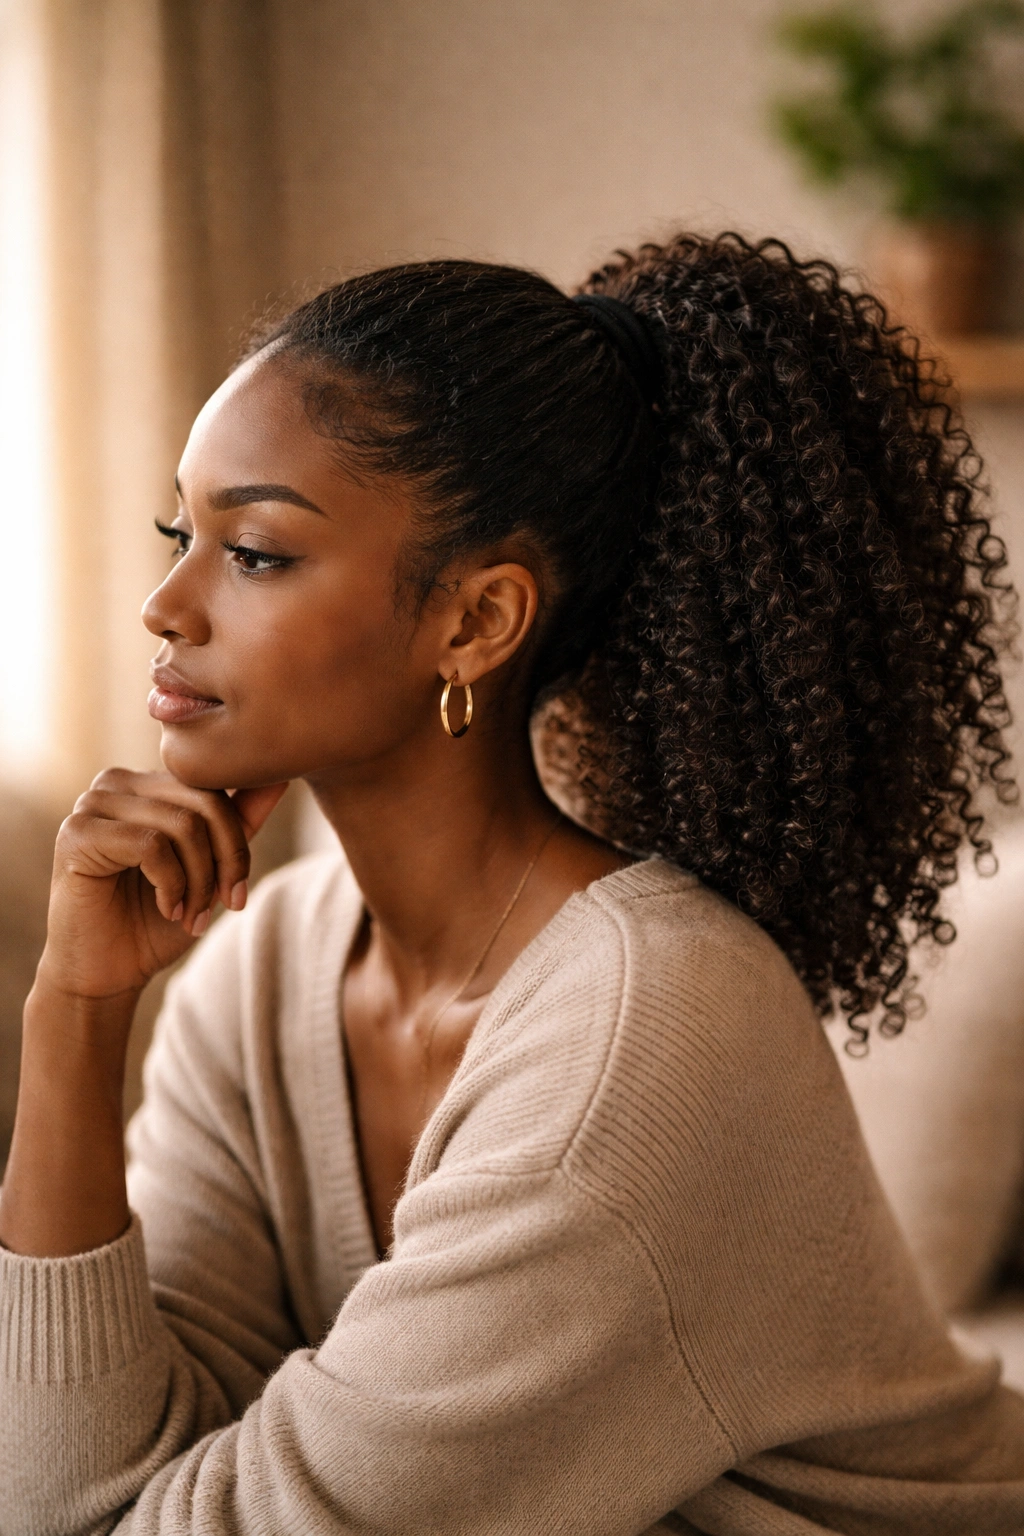
7. High Puff Ponytail
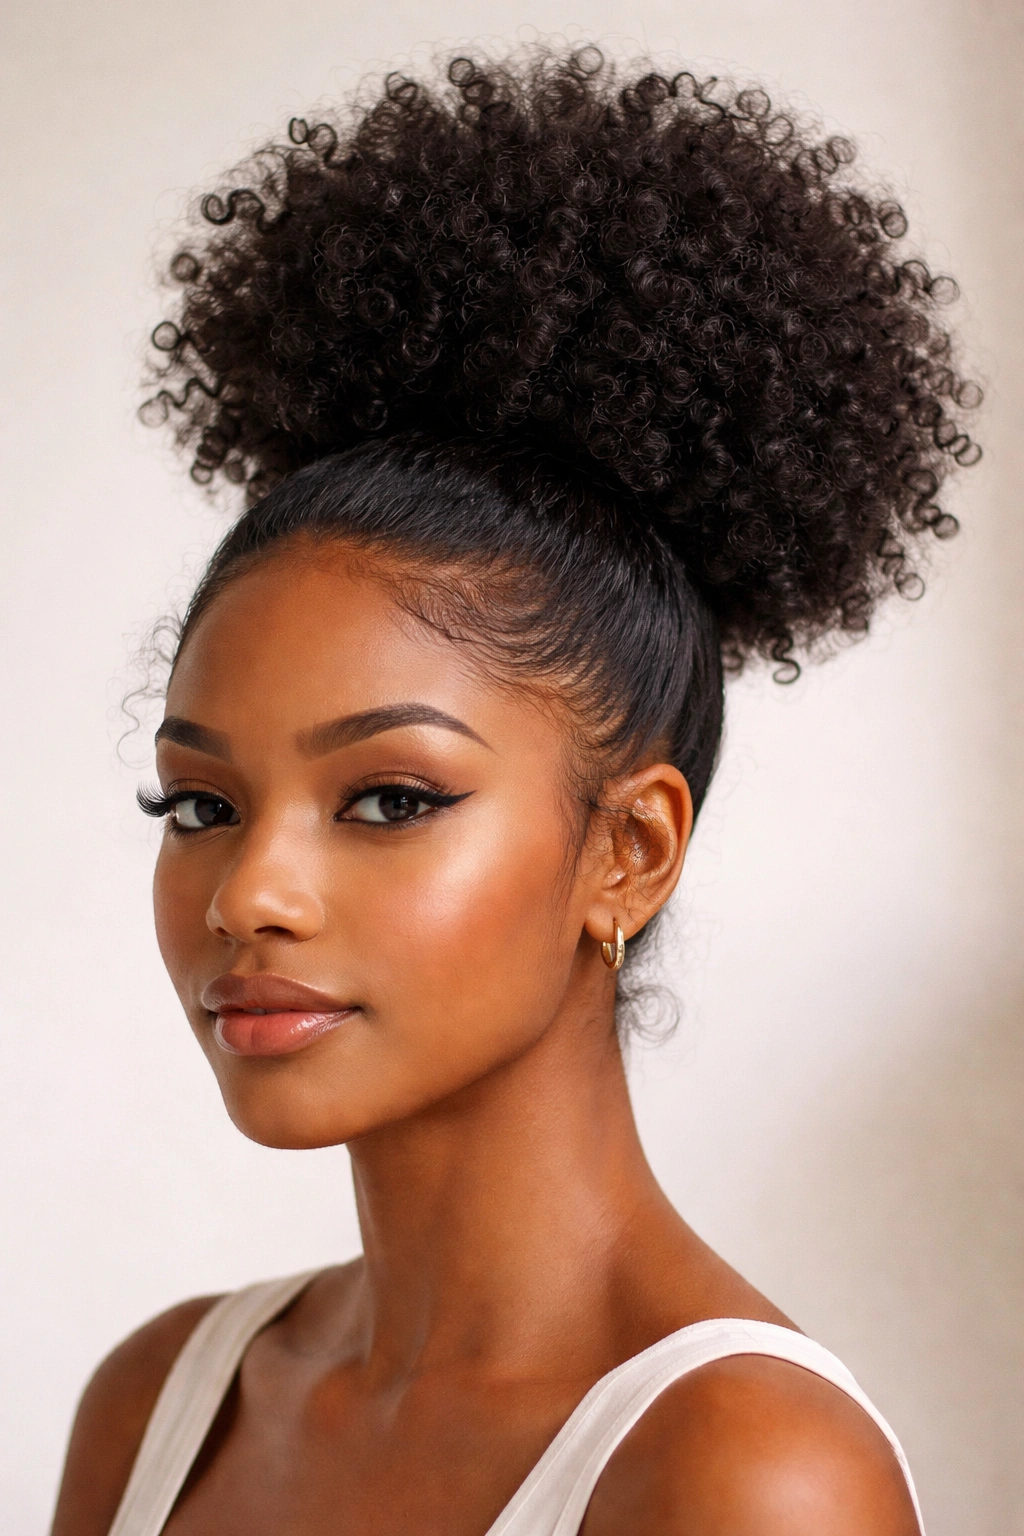
The high puff sits at or above the crown of your head and captures all your hair into a concentrated, rounded shape. It’s the ultimate expression of natural texture—zero smoothing, maximum volume—and it creates a statement-making silhouette that’s both playful and undeniably chic.
Celebrating Maximum Volume
A high puff isn’t trying to be sleek or polished; it’s celebrating the natural volume and texture of your hair exactly as it is. This is the style for days when you want to feel absolutely confident in your texture and aren’t interested in creating clean lines or smooth edges. It works beautifully with tight coils, medium coils, loose waves, or any combination of natural textures.
Creating a Full, Balanced Puff
- Use a gel, mousse, or leave-in conditioner to prep your hair and make gathering easier
- Gather hair at the crown and secure with a stretchy hair tie or scrunchie
- Don’t pull the elastic too tight—you want it secure enough to hold but not so tight it causes tension
- Once gathered, you can gently fluff and shape the puff with your fingers
- Some people like to add a smaller elastic further down to create more rounded definition
- Let your hair texture flow naturally—the puff should look abundant and full, not compressed
- Pro tip: This style looks even better on days 2-3 when your puff has had time to fully express its volume and your curls have more definition.
8. Side Ponytail
A side ponytail gathered toward one side of your head creates an asymmetrical, playful silhouette that instantly feels more interesting than a centered style. It’s an excellent choice if you’re trying to show off one side of your hair or if you simply want something that feels a bit different from your usual routine.
The Visual Interest Factor
Side ponytails feel younger and more dynamic than centered styles, partially because they create movement and draw the eye in a single direction. For natural hair, the side placement means you can gather texture in a way that highlights dimension and movement. It works particularly well if you’ve got variation in your curl pattern—you can position the side pony to emphasize the sections you love most.
Securing a Side Pony Without It Sliding
- Rather than gathering hair directly at the center back, gather it slightly to one side (perhaps an inch or two off-center)
- Use a secure elastic that won’t slip as you move throughout your day
- A silk-lined or padded hair tie reduces friction and helps keep things in place
- You can add a small braid or twisted section on the opposite side of your head and secure it to the ponytail for extra anchoring
- Style your edges or slicked front sections on both sides to balance the asymmetry of the pony placement
- The side pony should feel intentional, not like it accidentally slid to one side
- Insider note: A side pony actually works beautifully with a wrap, especially if you use a contrasting color or metallic thread for the wrap.
9. Wrap-Around or Low-Slung Pony
This style gathers your hair into a ponytail that sits very low—often at the nape of your neck or even below—and creates an elongated, elegant silhouette. It’s the style you choose when you want to look polished and intentional while keeping your face completely open and unframed.
Why the Low Position Works
A very low ponytail removes all weight from the crown and distributes it at the base of your neck, which feels less strenuous for your edges and hairline throughout the day. For natural hair, this also means you can achieve a neat, compact look without needing heavy product or significant manipulation at the hairline. The low position feels inherently sophisticated, like you’ve got everything under control.
Perfecting the Ultra-Low Pony
- Smooth your hair back gently, using your fingers or a soft brush depending on your texture preference
- Gather at the nape of your neck, positioning the elastic as low as you’d like it to sit
- If you want extra polish, you can smooth just the top layer of your ponytail with a small brush and some light product
- Leave the bulk of the pony textured and full while smoothing only the immediate edges
- Add a wrap to define the base and create a more finished appearance
- Consider leaving a few face-framing pieces loose for a softer, less severe look
- Real talk: This style is actually easier to maintain than it looks, especially if you use a satin or silk pillowcase at night.
10. Ponytail With Curly, Textured Edges
Instead of smoothing or geling your edges flat, this style celebrates them as part of your overall design. Your natural hairline texture frames your face and becomes a feature of the style rather than something to tame or hide.
Making Your Edges Part of the Aesthetic
Natural edges are beautiful, and a ponytail that showcases them instead of fighting them feels infinitely more confident and authentic. By letting your edge texture be visible, you’re creating a unified look where every part of your hair is celebrated exactly as it is. This approach actually requires less product and maintenance than trying to smooth everything down.
Styling Curly Edges Intentionally
- After creating your ponytail, take some time to arrange your edge curls so they frame your face nicely
- You can use a light mousse or curl cream on edges if you want definition, but avoid heavy gels that flatten texture
- Allow edges to dry naturally or use a diffuser on your blow dryer for more volume
- Consider creating small spiral curls at your temples by twisting small sections around your finger
- The goal is to look like you made intentional styling choices with your edges, not that you forgot to style them
- These edge curls also serve a protective purpose—they’re not being pulled as tightly as they would be in a fully sleek style
- Worth knowing: This style actually looks better as it sets throughout the day, as your edges have time to fully express their curl pattern.
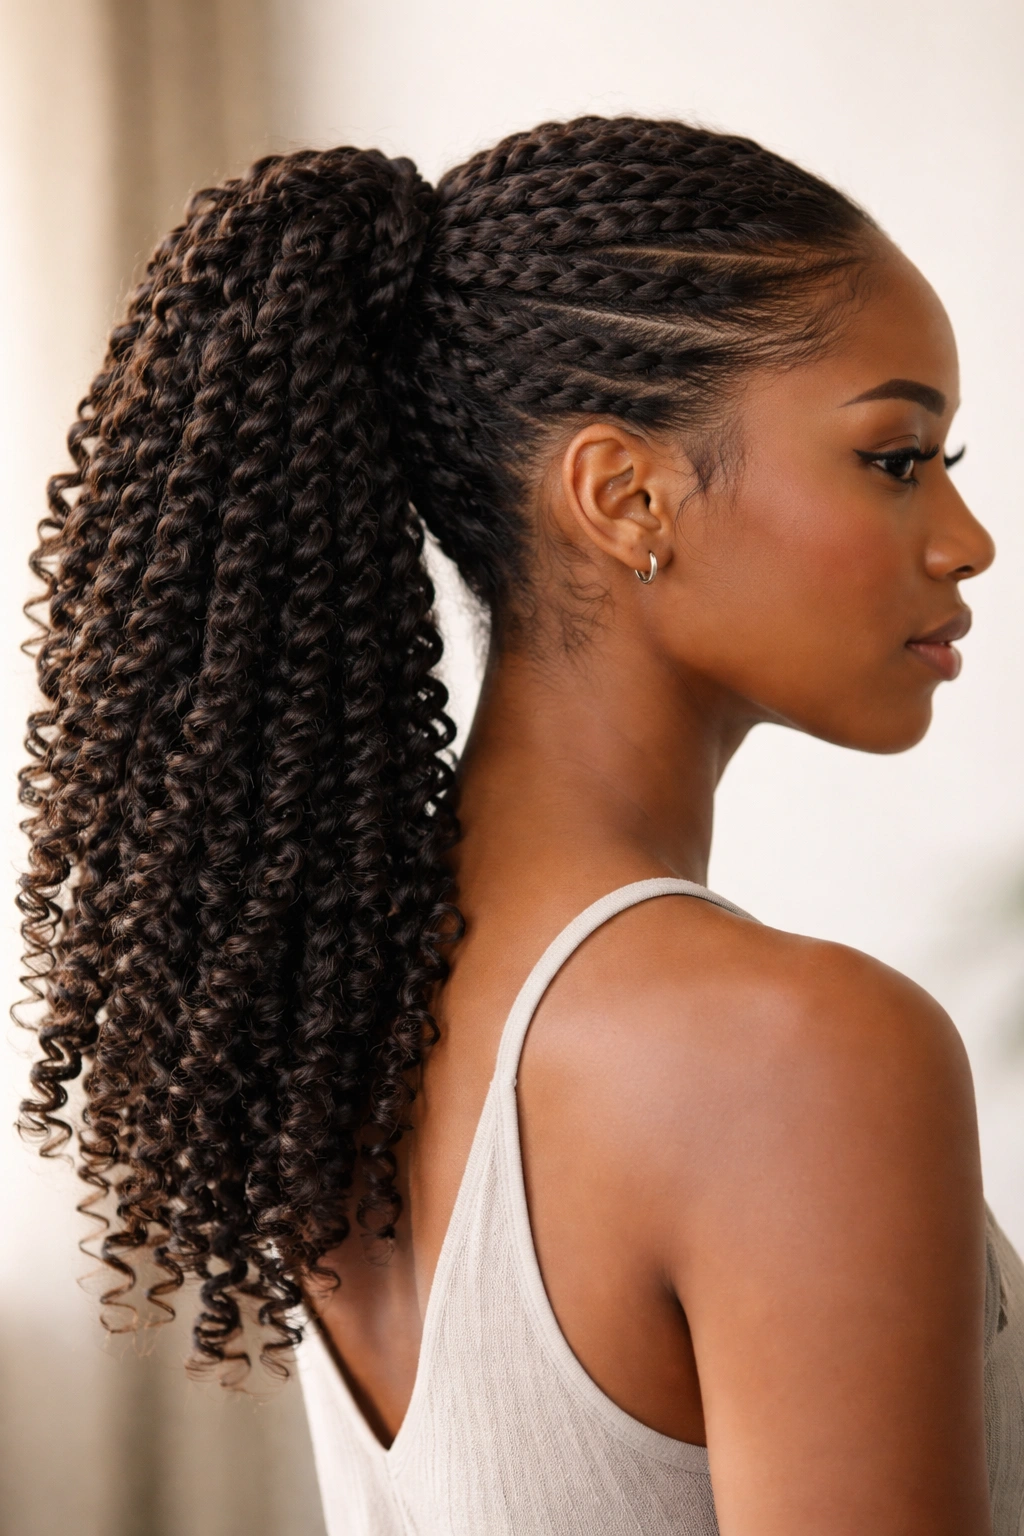
11. Ponytail With Feed-In Braids

This style integrates braids that feed directly into your gathered ponytail, creating a more secure base and adding texture and dimension throughout. The braids act as anchors while also creating visual interest that a plain ponytail wouldn’t have.
How Feed-In Braids Secure Your Style
Braids that feed directly into a ponytail act as reinforcement—they distribute the weight of your hair more evenly and create a more secure foundation. This means your ponytail is less likely to slip or become loose as you move throughout your day. The braids also create beautiful texture that draws the eye and shows you’ve put thoughtful effort into your style.
Creating Feed-In Braids Into Your Pony
- Create a centered part or whatever part placement you prefer for your ponytail
- Starting on one side, take a small section at your hairline and begin a three-strand braid
- As you braid down toward where your ponytail will be, gradually add hair from the surrounding sections—this is the “feed-in” technique
- Continue until the braid reaches your ponytail gathering point
- Repeat on the other side so you have two braids feeding into the center
- Gather all hair (including the braid ends) into your ponytail and secure
- The braids should visually guide the eye toward your ponytail base
- Pro tip: This works especially well for creating a very secure style that can last an entire week without needing refreshing.
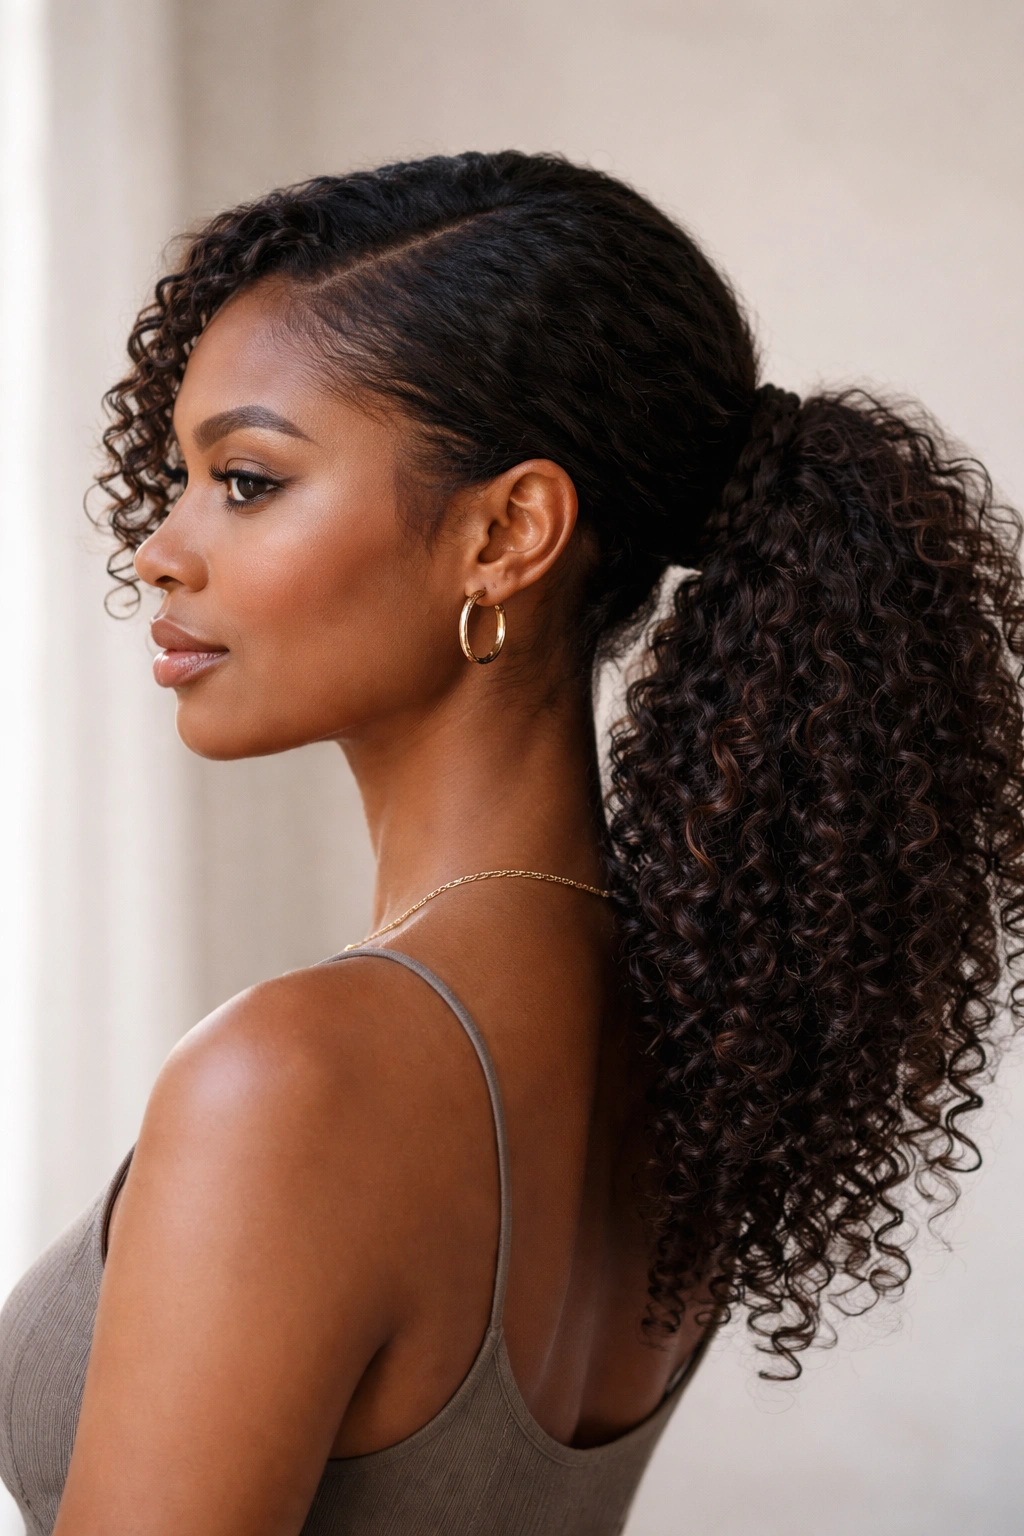
12. Fluffy Middle Ponytail
This style places your ponytail roughly in the middle of the back of your head—not quite high, not quite low—and uses maximum texture and fluff for a rounded, abundant silhouette. It’s playful without being childish, and the placement feels balanced and flattering on most face shapes.
The Goldilocks Placement
A middle ponytail is often the most flattering placement because it’s not as severe as a high pony and not as formal as a low one. For natural hair, the middle position allows you to showcase your texture without feeling like you’re putting on a costume. It’s the perfect sweet spot between casual and intentional.
Building Volume at the Middle
- Gather hair roughly at the midpoint between your crown and the nape of your neck
- Secure with an elastic, but don’t pull so tight that you compress your texture
- Gently lift and fluff your ponytail with your fingers, separating curls to maximize the appearance of volume
- You can lightly backcomb or tease the gathered section before securing if you want extra volume at the base
- The ponytail should puff out from where you’ve gathered it, creating a rounded, abundant shape
- Avoid trying to smooth or control the texture—the fluff is the whole point
- Real talk: This style looks best on day 2 or 3 of your wash cycle, when your curls have fully expanded and settled into their shape.
13. Statement Accessories Ponytail

While the ponytail itself might be fairly simple, the accessories you choose elevate it into something special and intentional. This could mean using a beautiful hair cuff, a statement clip, decorative hair sticks, or any other accessory that makes your style feel personalized and intentional.
How Accessories Transform a Basic Style
A simple gathered ponytail becomes a completely different style when you add the right accessory. The accessory draws the eye, signals that you’ve put thought into your appearance, and allows you to express personality and style through your hair. For natural hair, pairing a basic pony with a bold accessory feels balanced—you’re keeping the style practical while making it visually interesting.
Accessory Ideas That Work Beautifully
- A sleek metal cuff worn just above where your elastic sits creates a modern, minimalist look
- A decorative wooden or metal hair stick woven through your ponytail creates an artistic vibe
- A bold fabric wrap or silk scarf tied around your ponytail base adds color and movement
- Hair clips or claws worn on the outside of your ponytail add unexpected visual interest
- A beaded hair cuff with dangles creates movement and captures light
- Brass rings or hoops worn loosely around the base create metallic shine
- Pro tip: The smaller and more refined your ponytail, the bolder your accessory can be, and vice versa—balance visual weight across your entire head.
14. Gel-Laid Edges Ponytail
This style pairs a neat, polished ponytail with intentionally gelled and laid edges that frame your face beautifully. The contrast between the controlled edges and textured pony creates a sophisticated, high-effort appearance that actually doesn’t require as much work as it looks.
The Power of Defined Edges
Laid edges create an instant look of polish and intentionality, and they frame your face in a way that draws attention upward and toward your features. When paired with a pony, gelled edges balance the style by providing definition at the front while allowing texture at the back. This creates a look that feels both carefully styled and authentically textured.
Creating Smooth, Lasting Laid Edges
- Use a firm-hold gel or edge control product—your edges need to set and stay in place
- Apply the product to small sections at a time, smoothing with a fine-tooth brush or comb
- Brush sections down against your scalp and smooth them back toward where your ponytail gathers
- For extra polish, you can lay edges with small waves or spirals rather than straight-back smoothness
- Use a durag, scarf, or bonnet for 15-30 minutes while the gel sets so your edges hold their shape
- Once set, your laid edges should hold for several days even through daily activities
- Worth knowing: Laid edges actually protect your hairline while looking sleek, since the hair is smooth and experiences less friction.
15. Stacked or Layered Ponytail
A stacked ponytail creates multiple levels or layers of gathering that build visual interest and dimension throughout your pony. Instead of gathering all your hair at once, you gather different sections at slightly different heights, creating a tiered effect that’s both modern and visually striking.
Why Layering Creates Visual Impact
Stacking creates dimension and makes even a relatively simple ponytail look more complex and intentional. The layers catch light differently and create visual depth that a single-level pony might not have. This style works particularly well with natural hair because your texture already has dimension—the stacking just emphasizes it.
Building Your Stacked Pony
- Gather a section of hair from just above your crown and secure with a small elastic
- Directly below that, gather a second section from the hair surrounding the first elastic and secure slightly lower
- Continue gathering sections and stacking elastics down the back of your head until you reach your desired final pony length
- Each successive elastic should be positioned slightly lower and pulled tight enough to showcase the section above it
- The overall effect should look like distinct layers stacked on top of each other
- You can fluff each layer to add even more volume and visual interest
- Different elastics can be the same color for a cohesive look or in contrasting colors for a bolder statement
- Pro tip: This style actually becomes easier to maintain as the days go by, since each layer is secured independently and won’t slip as easily as a single-level pony.
Final Thoughts
Natural hair ponytails are endlessly versatile, and the beauty of finding your favorites is that you’re working with your hair’s natural texture rather than against it. Whether you’re drawn to sleek, defined styles with laid edges or you prefer maximum volume and texture, there’s a ponytail approach that celebrates exactly what you’re working with. The styles that feel most confident and authentic are the ones where you’re not trying to make your hair behave like something it’s not—you’re simply gathering what you’ve got and letting it shine.
The key to longevity with any ponytail is using protective hair ties that don’t create excessive friction, avoiding styles that create constant tension on your edges and hairline, and refreshing your style strategically rather than restyling from scratch every single day. A ponytail you can wear for multiple days with just a quick fluff and refresh in the morning is infinitely more sustainable than one that requires daily manipulation. Most importantly, choose styles that make you feel confident and beautiful, because that’s what transforms a simple ponytail into something genuinely special.