



If you’ve been staring at your go-to messy bun for months wondering how to make it feel fresh without a complete hairstyle overhaul, braids are your secret weapon. A good messy bun already communicates effortless style, but weaving a braid into the mix transforms it from casual to intentional—from “I rolled out of bed like this” to “I actually put thought into this look.” The beauty of combining braids with messy buns is that the messiness gives you permission to keep things imperfect, while the braid adds structure and visual interest.
The thing about braid and bun combinations is that they work across nearly every hair type, length, and texture. Whether your hair is naturally straight, wavy, curly, or thick, there’s a braided messy bun variation that will look stunning on you. Some styles work best with longer hair that reaches your shoulders or beyond, while others actually look more intentional on medium-length hair. The messiness isn’t a flaw you’re covering up—it’s the whole point. Wisps of hair falling around your face, texture, dimension, and that lived-in feel are exactly what make these styles work.
What makes a braid-and-bun combo successful isn’t complicated, but it does require understanding a few core principles. You’re working with contrast: the structure of a braid against the relaxed, undone quality of a messy bun. You’re also working with proportion—where the braid sits on your head, how thick it is, and whether it wraps around the bun or feeds into it. And you’re thinking about movement: where loose strands fall, how the braid frames your face, and whether the overall effect reads as polished or playful.
1. Classic Braid-Wrapped Messy Bun
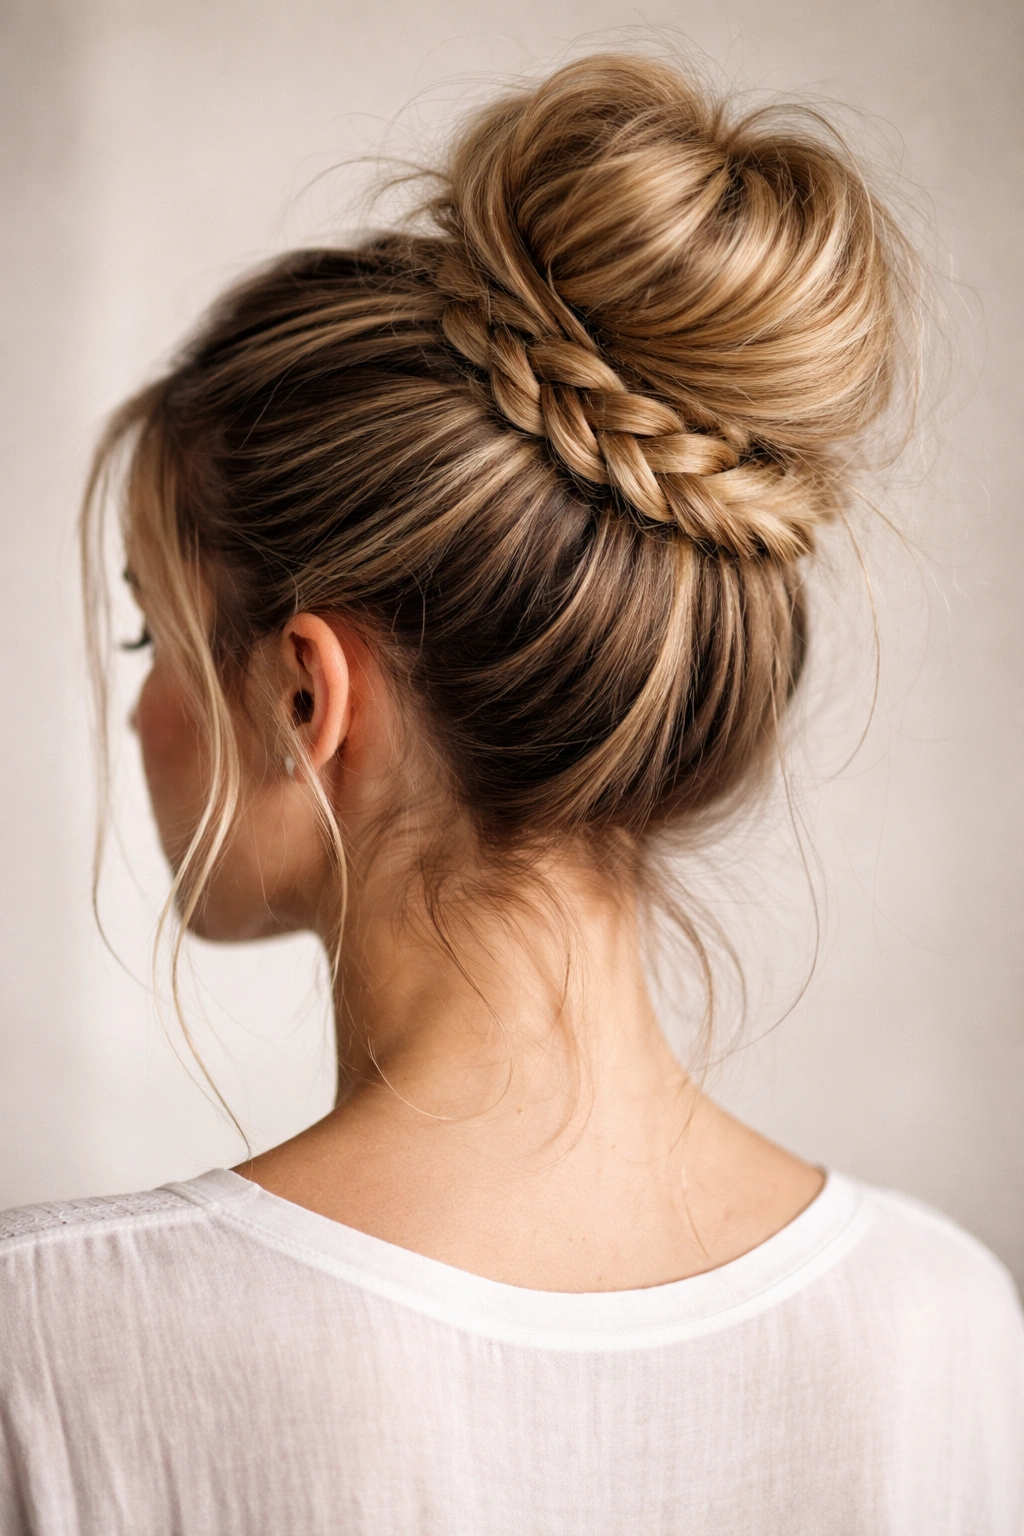
This is the entry point for anyone wanting to combine braids and buns without overthinking it. You’re creating a simple three-strand French braid or regular braid down the back of your head, then wrapping it around the base of your messy bun like you’re tying it all together. The effect is exactly what it sounds like—a finished, intentional frame for an otherwise undone knot of hair.
How to Create the Look
Start by gathering your hair into a high or mid-height ponytail at the crown or slightly off-center. Don’t smooth everything down—this isn’t the time for perfection. Separate a thin section from one side of the ponytail and begin braiding downward. A three-strand braid works perfectly for this because it’s substantial enough to notice but not so chunky that it overwhelms your bun. As you braid, aim for a relaxed tension. Too-tight braids look severe, and you’re going for soft and livable.
Once you’ve braided down the length of your ponytail, secure the braid with a small elastic. Now twist your remaining hair into a bun shape and pin it. Take that braid and wrap it around the base of your bun, securing it with bobby pins as you go. The braid becomes a visual anchor point that says “this bun has a plan.”
Why This Works for Most People
The wrapped braid adds polish without requiring perfect execution. If your bun is slightly lopsided or some strands are coming loose, the braid draws attention upward and adds purposeful texture. This style reads as put-together on work days but casual enough for weekends. It’s the messy bun that actually looks like you meant to do it.
Quick Styling Tips
- Backcomb your hair gently before twisting into the bun to add texture and grip
- Weave the braid around the bun in a spiral rather than a single wrap for more visual interest
- Loosen the braid slightly after securing it by gently pulling on the sides of each strand
2. Double Dutch Braid Messy Bun
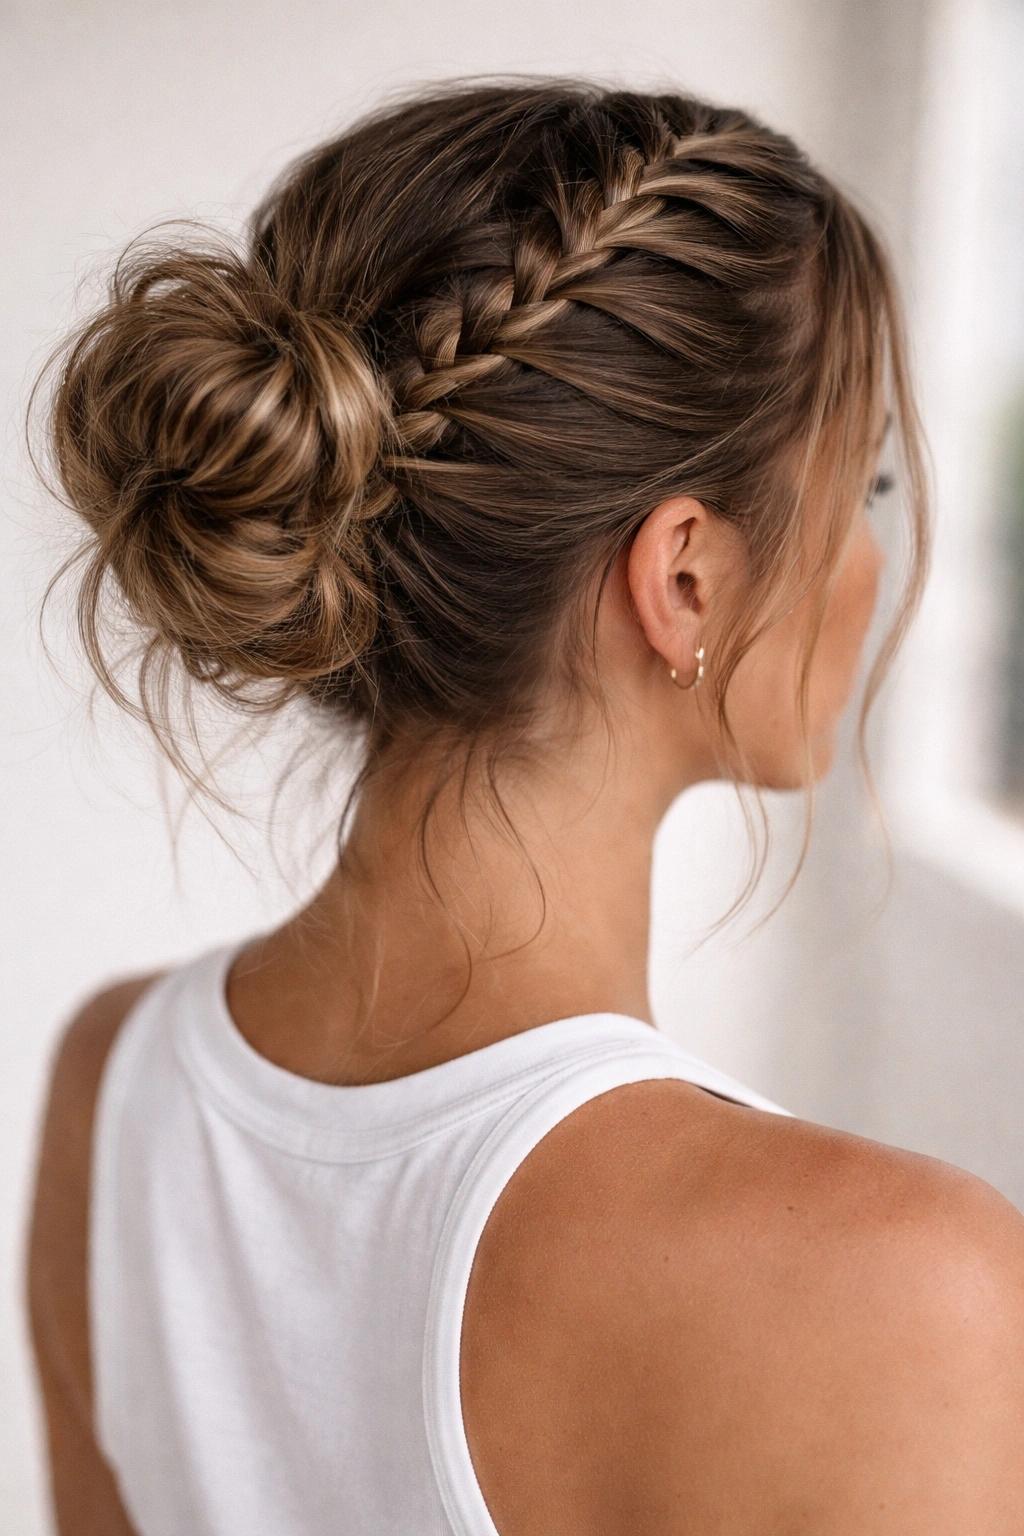
Double Dutch braids (also called boxer braids) run parallel down the back of your head, and when they feed into a messy bun, they create a distinctly sporty, intentional aesthetic. This style reads more polished than a single braid and works beautifully if you have naturally wavy or textured hair that holds shape.
The Technique That Makes It Work
Section your hair down the middle from your forehead to the nape of your neck. On one side, start a Dutch braid (braiding under instead of over for that raised, dimensional effect) at your temple. On the other side, start your second Dutch braid. Braid each side down toward the back of your head, aiming for them to meet where your bun will be.
Once both braids reach the back, secure them loosely with small elastics. Gather all your remaining hair—including the ends of the braids—into your hands and twist or fold it into a textured bun shape. Use bobby pins to anchor everything. The braids should frame the outer edges of your bun, creating a structured foundation.
What Makes This Special
Double Dutch braids are inherently striking. They command attention and give you high-style energy while still reading as casual enough for everyday wear. The parallel lines create balance on your head and frame your face beautifully. If you have an oblong face shape, this style is particularly flattering because the braids add width.
Pro Tips for Success
- Braid slightly loose if your hair is fine or straight; tighter if your hair is thick or curly
- Use a sea salt spray or texturizing spray before braiding to help the braids grip and hold longer
- Don’t hide those braids—style them as the stars of the show by keeping the bun looser
3. Halo Braid Messy Bun
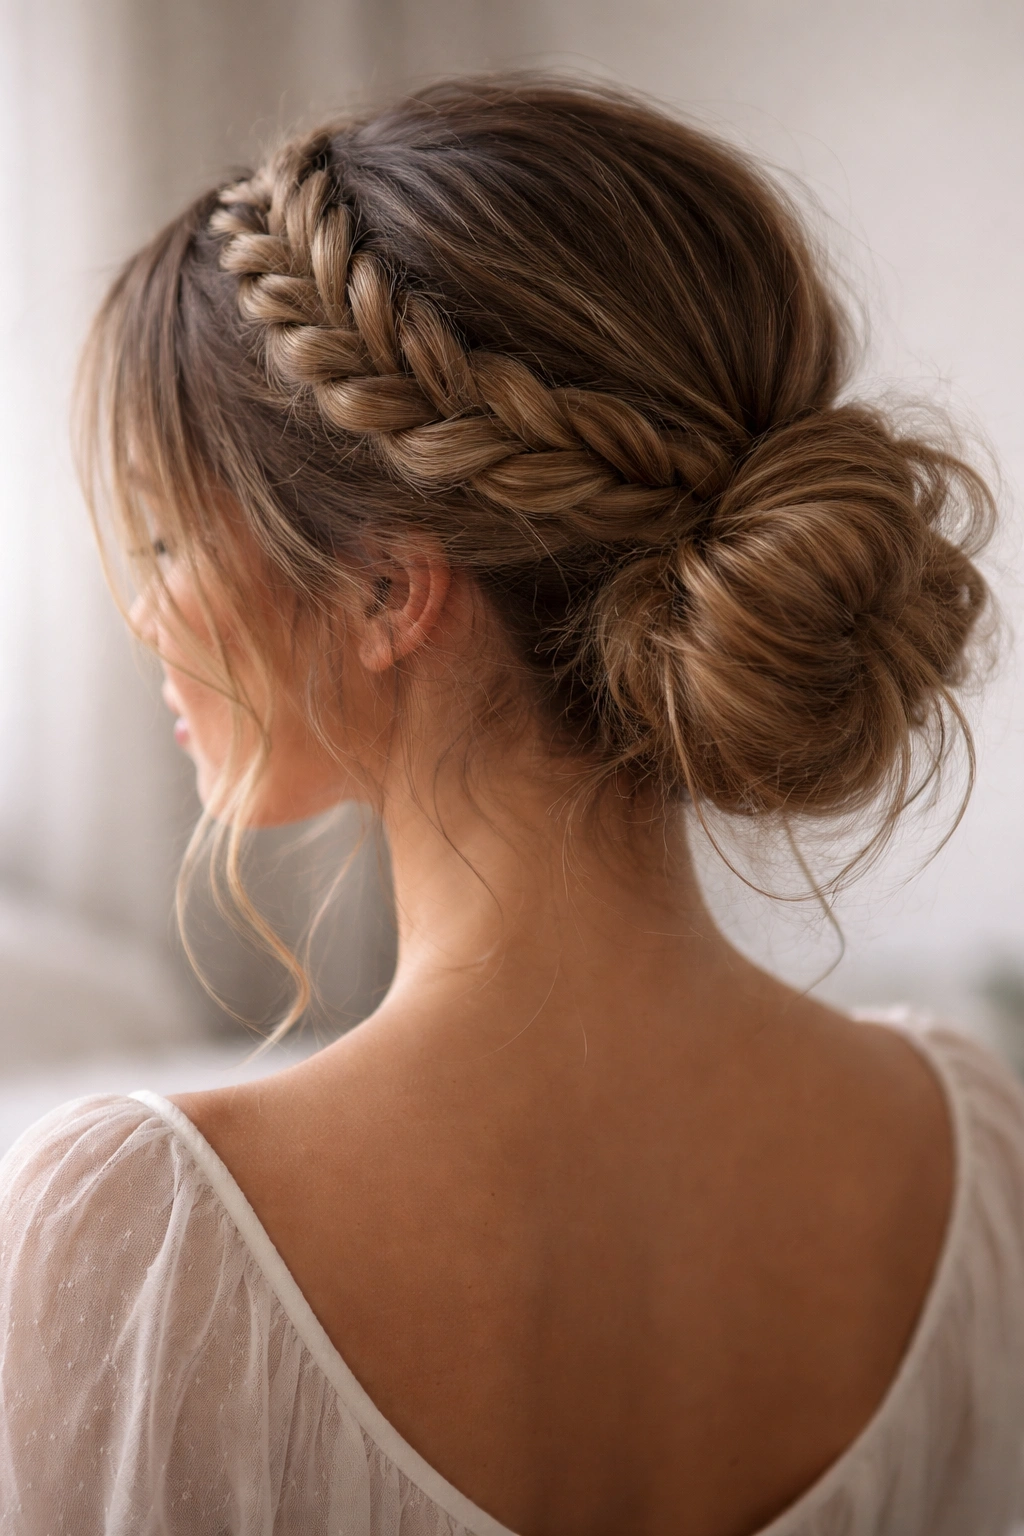
A halo braid circles your entire head like a crown, and when you add a messy bun underneath, you’ve created a soft, romantic look that reads surprisingly formal while still feeling undone. This style is particularly stunning if you have volume naturally or you’re willing to add a little backcombing.
Building the Halo
Start with two small sections of hair at your temples. Begin a Dutch braid on one side, working it around the back of your head toward the other side. Your goal is to create a braid that circles your crown like a tiara. This takes practice—you’re working in a circular pattern rather than straight lines—so don’t get discouraged if your first attempt isn’t perfect.
Once your braid circles completely around your head and you’ve pinned it, gather the remaining hair into a loose, textured bun at the nape of your neck or slightly higher. The contrast between the structured halo and the relaxed bun creates visual depth and personality. You’ll have two distinct textures working together.
Why Halos Are So Flattering
Halo braids draw attention upward and create an instantly polished silhouette. They frame your face softly and work across most face shapes. This style works especially well if you want to look intentional without looking overdone—it reads as thoughtful styling, not desperate effort.
Tricks for a Smooth Halo
- Use bobby pins that match your hair color so they disappear into the braid
- Practice the motion a few times without actually braiding first to understand the path
- Pin your bun slightly lower than you normally would so the halo has room to shine
4. Side Braid Wrapped Messy Bun
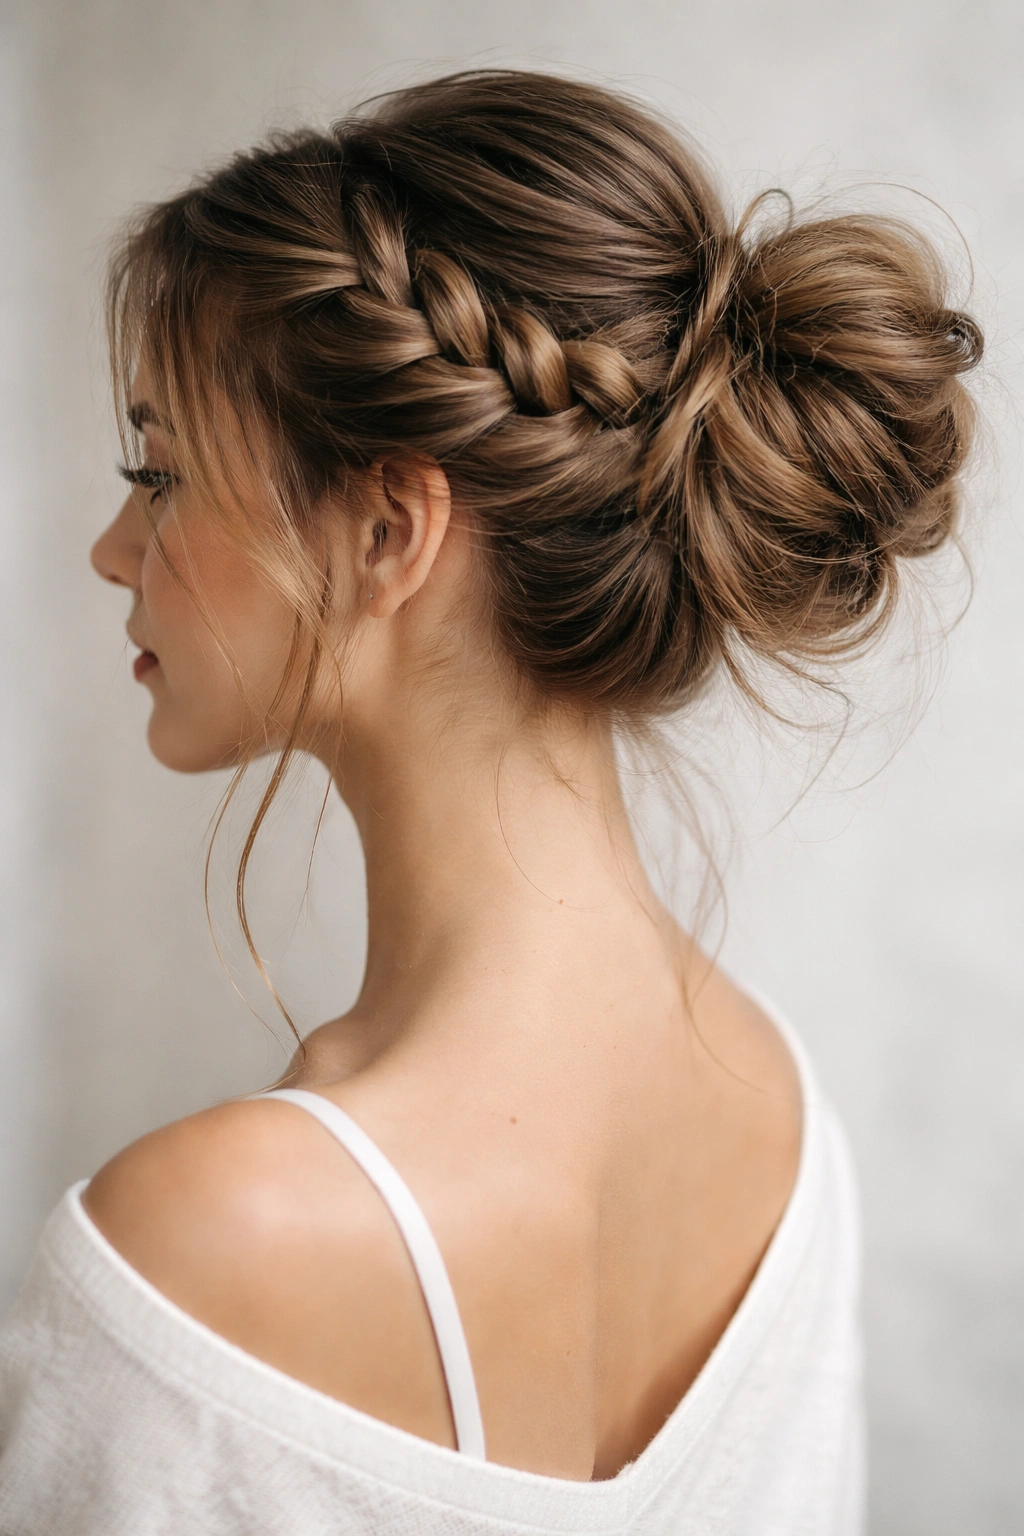
Instead of a centered bun, gather your hair to one side and weave a thick side braid that wraps around it. This asymmetrical approach works beautifully if you want to show off one side of your face or if you’re just tired of centered styles.
The Asymmetrical Approach
Create your messy bun slightly off to one side—left or right, whichever you prefer. From the opposite side of your head, start a thick three-strand braid and work it toward your bun. This braid becomes a visual anchor that draws the eye across your head and makes the lopsided bun feel intentional rather than accidental.
The side positioning means your hair frames one side of your face more dramatically, which is great if you want to highlight good bone structure, an undercut, or earrings. It also adds movement and dimension to your profile.
Why Asymmetrical Styles Photograph Well
Side-braided buns are incredibly photogenic. The asymmetry is more interesting visually than perfect symmetry, and it reads as editorial and modern. This style is perfect for photos, dates, or any time you want to look like you put genuine thought into your appearance.
Styling Notes
- Looser, wavier hair works best for this style—sleek, straight hair can look slightly severe asymmetrical
- Consider your natural hair texture; if you have curls, they’ll enhance the side braid beautifully
- Leave some wisps around your face on the side where the bun sits for softness
5. Fishtail Braid Messy Bun
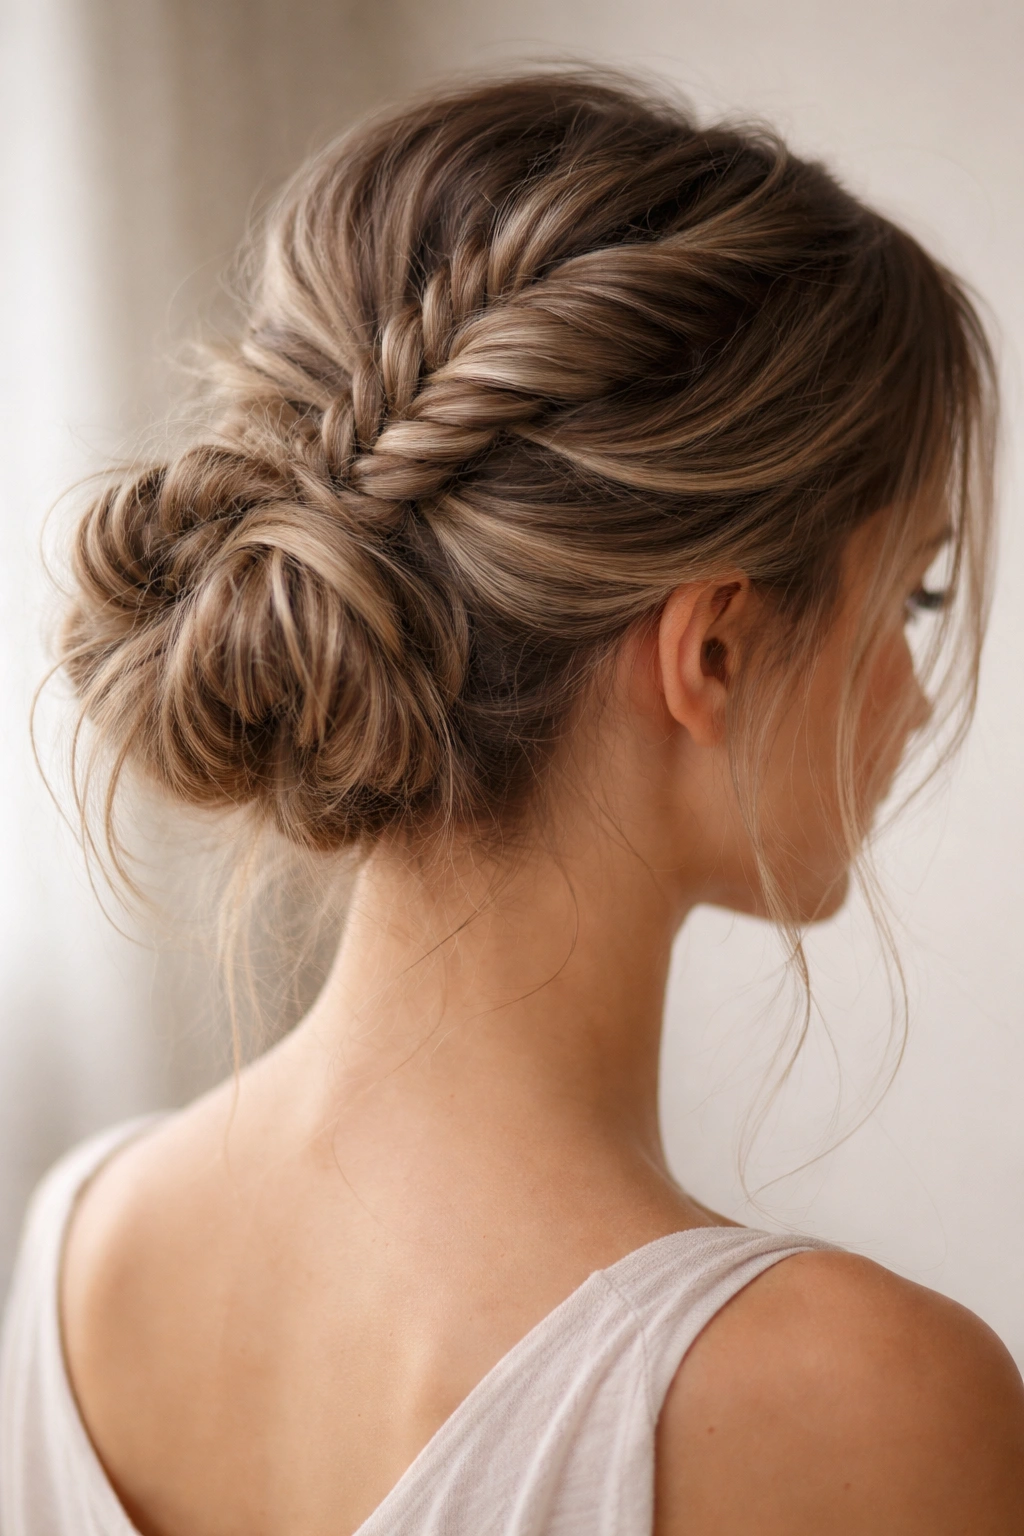
Fishtail braids create delicate, intricate texture with a gentle weaving pattern. When combined with a messy bun, they add visual interest and sophistication without looking overly formal or fussy.
Creating a Fishtail That Feeds Into a Bun
A fishtail braid uses only two sections of hair instead of three, creating that signature woven look. Start your fishtail braid at the crown, working downward. Rather than securing it fully at the bottom, gather your fishtail braid and the remaining hair together and fold everything into a bun. The fishtail should trail along the top or back of your bun, creating a decorative element.
The beauty of fishtail braids is that they look more intricate than they actually are. The weaving pattern creates the illusion of complexity, which makes your bun look more intentionally styled than it might otherwise.
The Visual Impact
Fishtail braids are particularly lovely if you have medium to long hair with some natural texture or waves. They catch light beautifully and create movement even when you’re standing still. The braid-to-bun transition feels seamless because both elements have that soft, relaxed quality.
Making It Last
- Fishtail braids naturally loosen slightly as you wear them, so start with slightly tighter tension than you normally would
- Gently pull on the sides of the fishtail to puff it out and make it look fuller and more textured
- This style holds beautifully throughout the day without needing much touch-up
6. Crown Braid Messy Bun
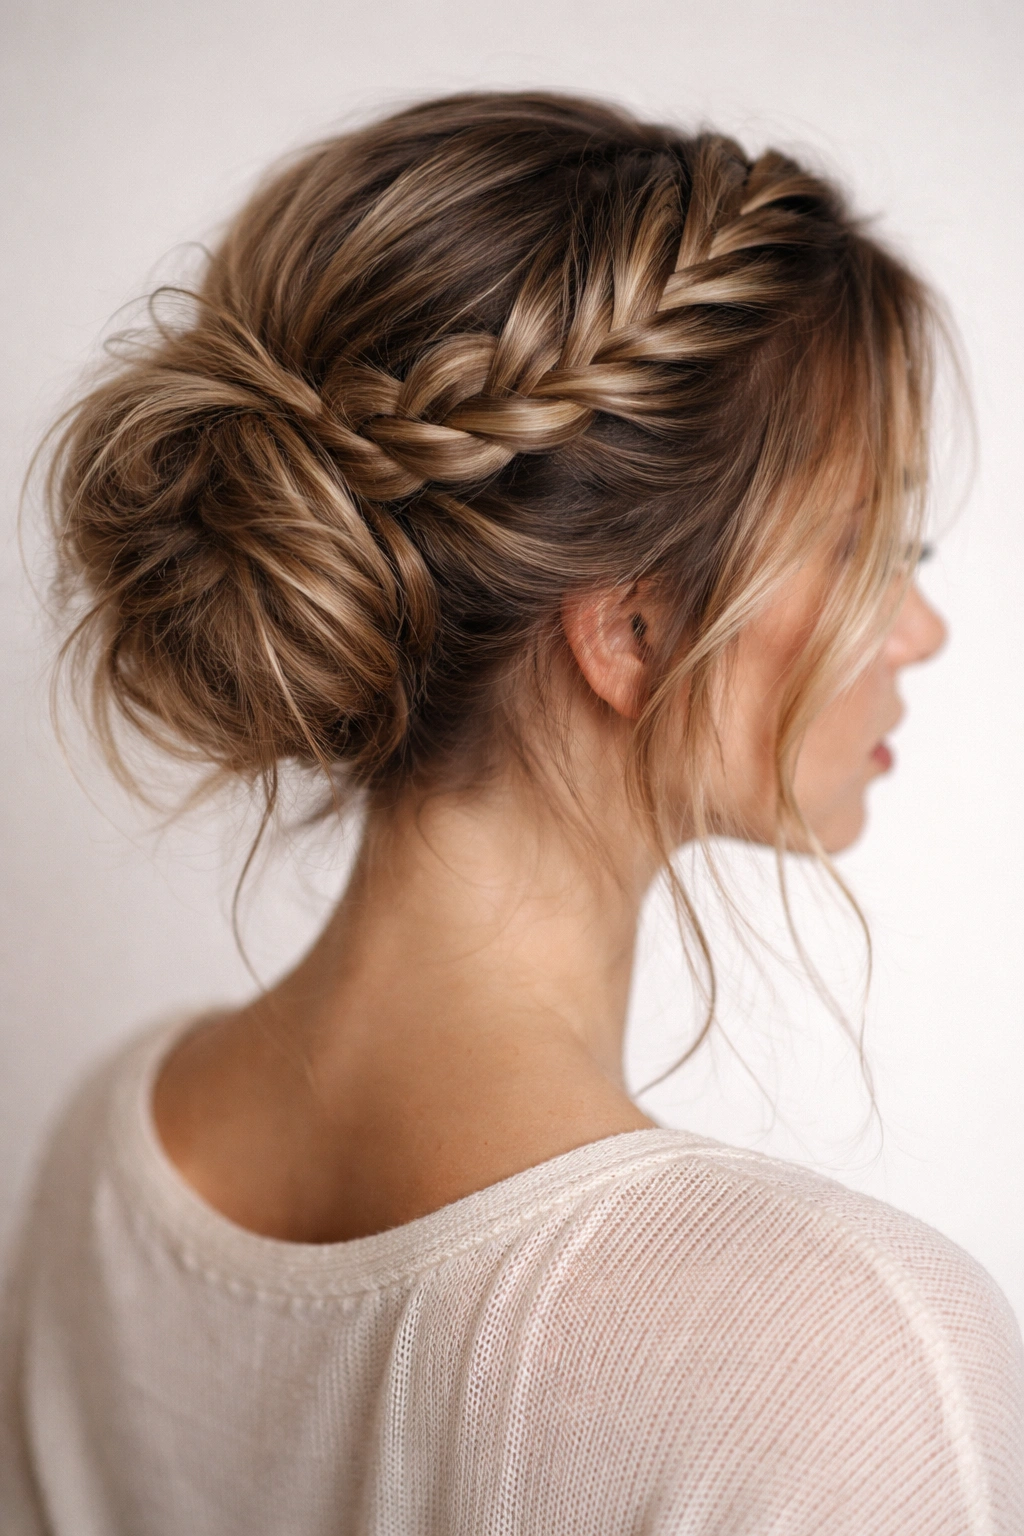
A crown braid sits at the very top of your head, running from one side to the other, with a messy bun tucked underneath. This creates visual height and draws attention to your face, making it especially flattering for heart-shaped faces or anyone wanting to add dimension to their crown.
Constructing the Crown
Start on one side of your head near your ear. Create a Dutch or French braid that runs across the back of your head to the opposite ear. This braid should sit higher than your messy bun will be. Once you’ve completed the crown braid, secure it loosely with a bobby pin on the far side.
Gather the remaining hair underneath into a relaxed bun that sits lower, usually at the nape of your neck. The crown braid becomes a visual focal point, and the lower bun balances your proportions.
Who This Flatters Most
Crown braids add height, which is universally flattering. If you have a longer face, the horizontal line of the crown braid helps balance your proportions. If you have a rounder face, the upward movement draws attention to your eyes and cheekbones. This style gives you instant elegance.
Execution Tips
- Make sure your crown braid is slightly loose so hair pieces don’t pull uncomfortably
- Tease gently at your crown before braiding to give yourself something grippy to work with
- Use bobby pins strategically to anchor the braid where it meets your bun
7. Twisted Braid Messy Bun
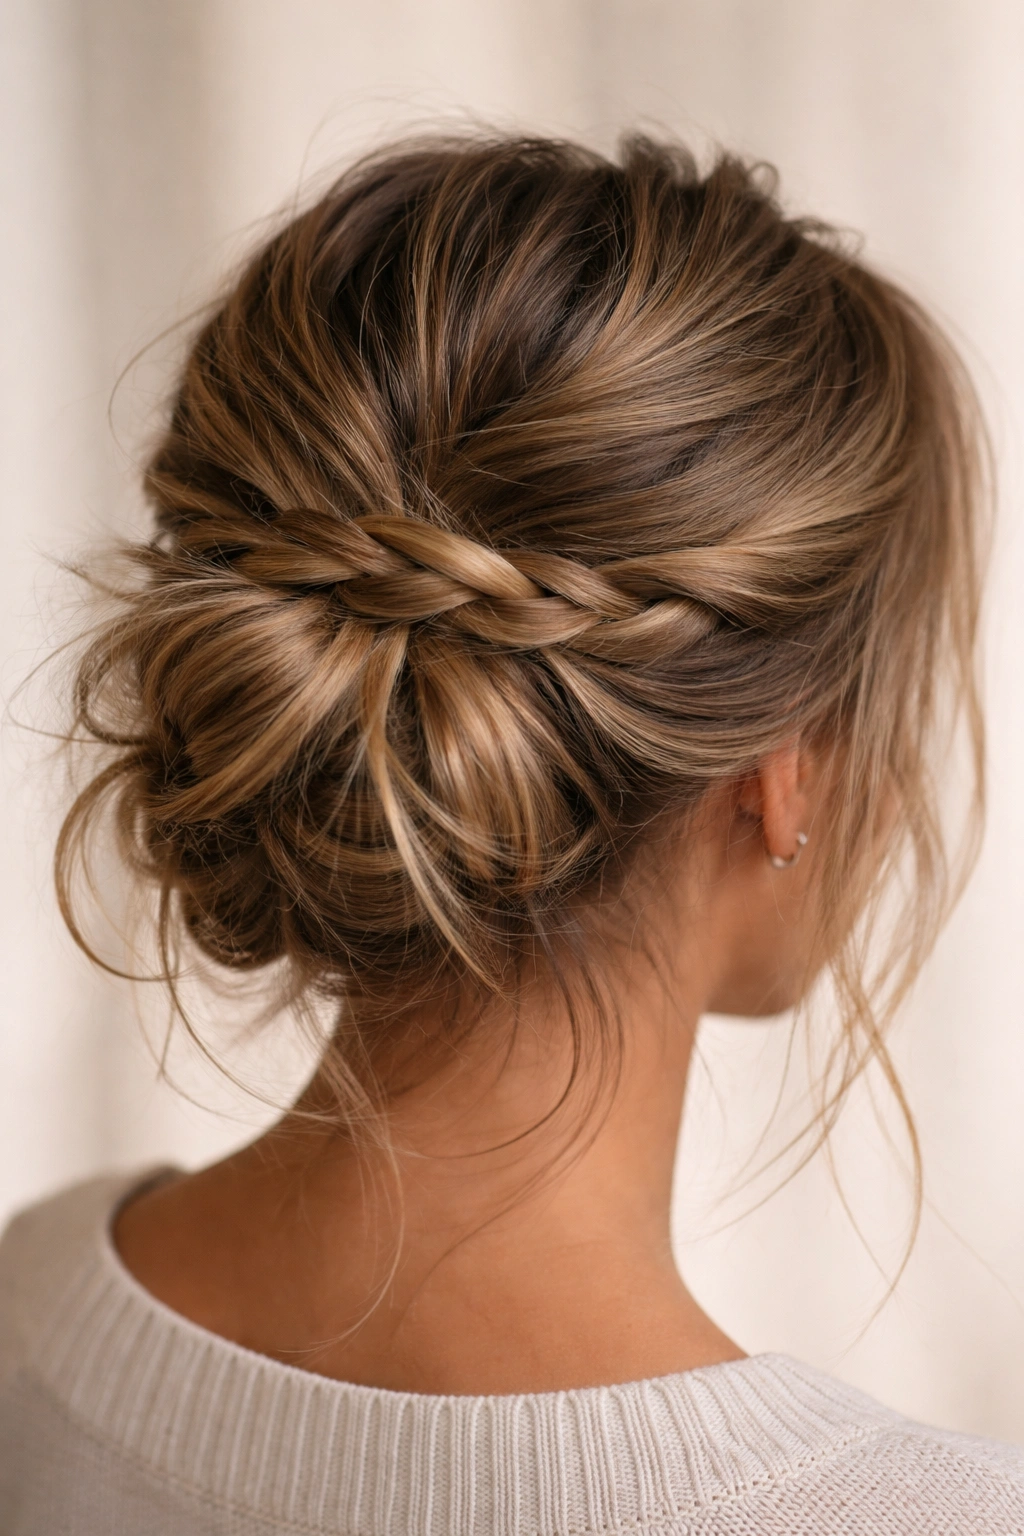
Instead of a traditional three-strand braid, create a twisted effect by taking two sections of hair and wrapping them around each other. Twisted braids are surprisingly quick to do and create elegant, dimensional texture against a messy bun.
The Two-Strand Twist Technique
Section off a portion of hair that you want to braid. Divide it into two thick strands. Wrap the right strand under the left, then wrap the left strand under the right. Continue this alternating under-wrap pattern down the length of your section. It moves faster than a three-strand braid and creates a different visual texture.
Once your twist is complete, either wrap it around your bun or tuck it into the base of the bun for a hidden decorative element. The twist creates subtle dimension without the formal feeling of a traditional braid.
Why Twists Work With Messy Buns
Twists feel softer and more organic than braids. They’re less structured, which makes them pair perfectly with the relaxed vibe of a messy bun. The combination reads as effortlessly polished—you’re clearly making an effort, but you’re not overworking it.
Quick Tricks
- Twist slightly loose for a flowing, feminine effect
- Do multiple thin twists for a more decorated look rather than one thick twist
- Twist and wrap immediately after braiding while your hair is still warm from your fingers
8. Half-Up Braid Messy Bun
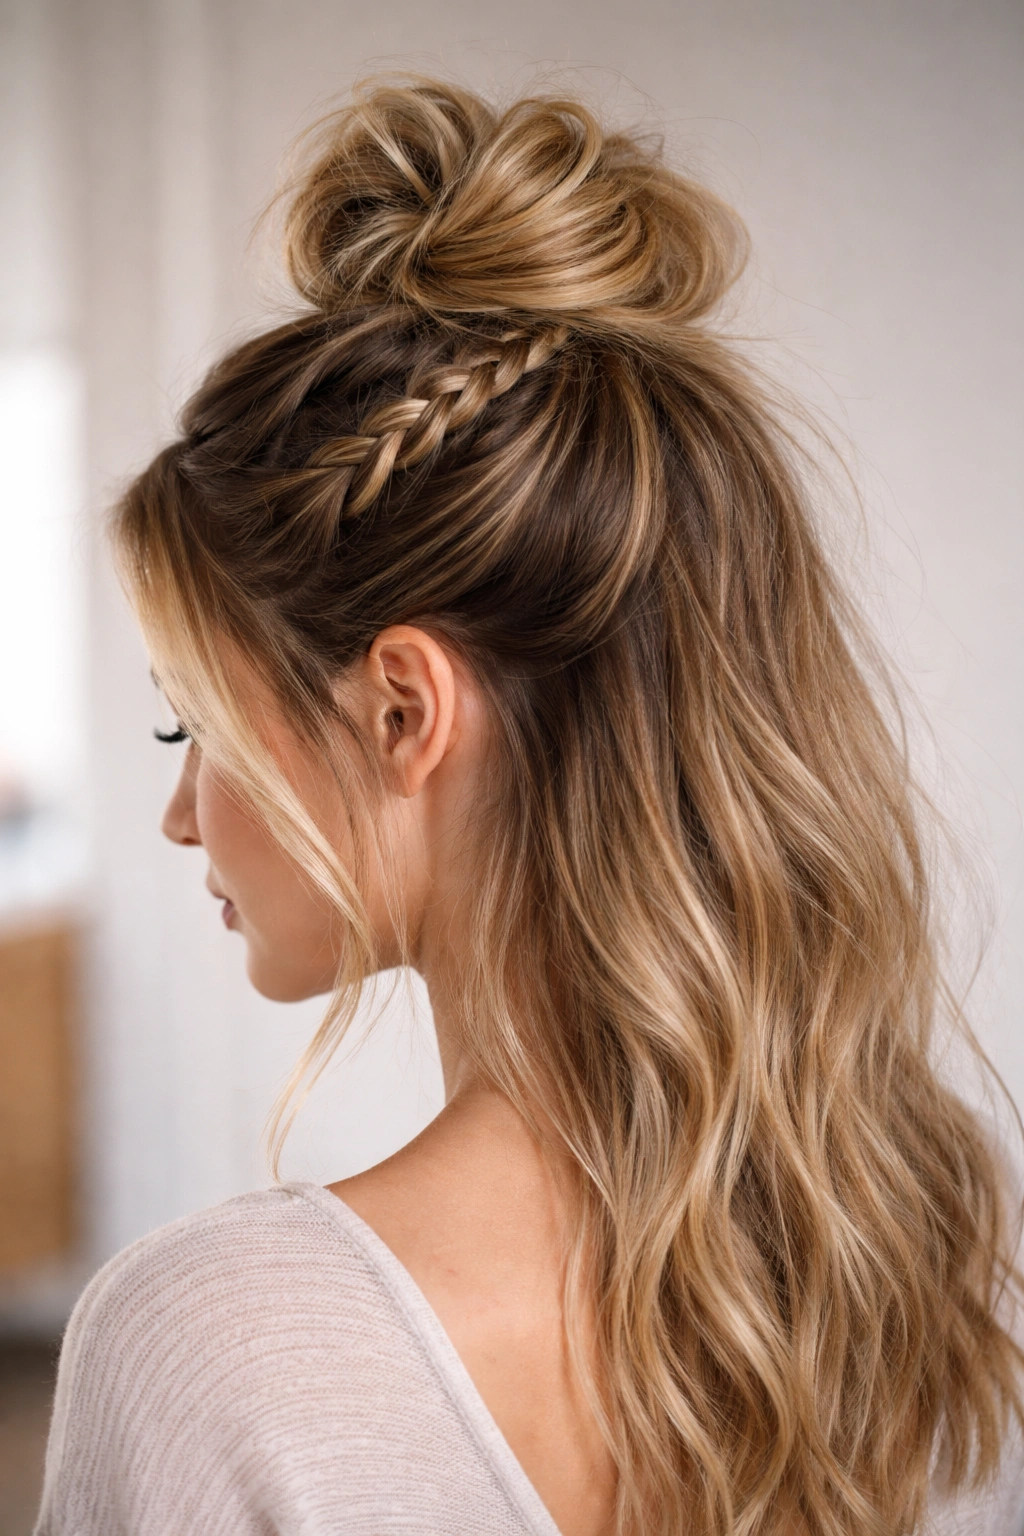
A half-up, half-down style with a braid element and a messy bun creates volume and movement while keeping hair off your face. This works beautifully if you want to show off length while looking put-together.
The Half-Up Half-Down Approach
Take hair from your temples and crown, creating a section at the top of your head. From one temple, braid across toward the opposite side, or create two smaller braids that meet at the center. At the crown, gather these braids with a section of top hair and twist or fold them into a small messy bun that sits at the crown.
The lower half of your hair stays down, adding fullness and movement. You’ve framed your face with the braids and bun while showing off length and texture below.
Styling This For Maximum Impact
Half-up styles look best when there’s significant texture difference between the upper bun area and the lower loose hair. Curl or wave the bottom section to enhance that contrast. The half-up portion should look intentionally messy, not like you just half-finished a style.
Best for Certain Hair Types
This works beautifully on straight to wavy hair. If you have naturally curly or textured hair, the contrast between the neat braids on top and the voluminous texture below is absolutely stunning. The looseness of the curls makes the style feel even more effortless.
9. Boho Braid Messy Bun
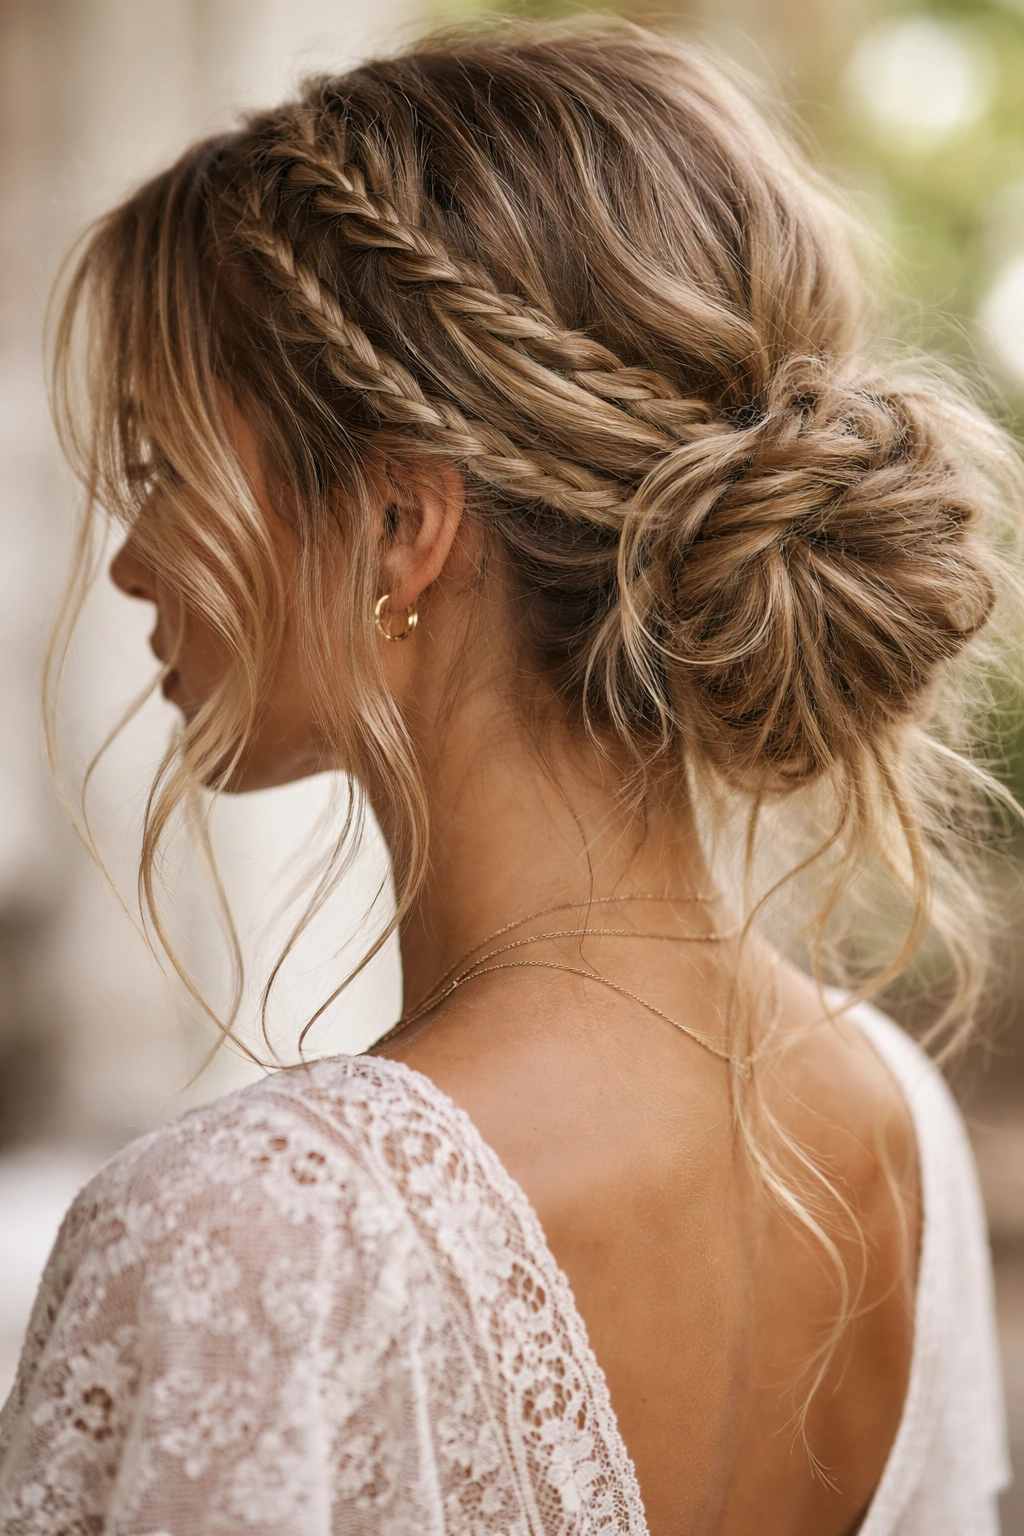
Boho styling celebrates texture, looseness, and an overall romantic vibe. A boho braid messy bun combines multiple thin braids, loose waves, and strategic wisps for a style that looks like you got dressed in a cabin without a mirror.
Creating Boho Texture
The secret to boho styling is layering different elements. Start with naturally wavy or textured hair (or create waves with a curling iron). Create 2-3 thin braids scattered throughout your hair rather than one prominent braid. Gather everything loosely into a bun that sits lower on your head, allowing plenty of wisps to fall around your face and neck.
The goal is controlled chaos—it should look undone, but in a very intentional way. Every wisp and braid should be placed with purpose, even though the overall effect reads as accidental.
The Boho Attitude
Boho is about celebrating your natural texture and movement. If you have frizz or flyaways, stop fighting them—they’re part of the aesthetic. Use a light texture spray or sea salt spray to enhance the undone feeling rather than trying to tame everything into submission.
Boho Styling Essentials
- Incorporate small braids near your face for a delicate, feminine touch
- Leave longer, fuller wisps around your face rather than tucking everything into the bun
- Use bobby pins strategically but let some hair look genuinely loose
10. Waterfall Braid Messy Bun
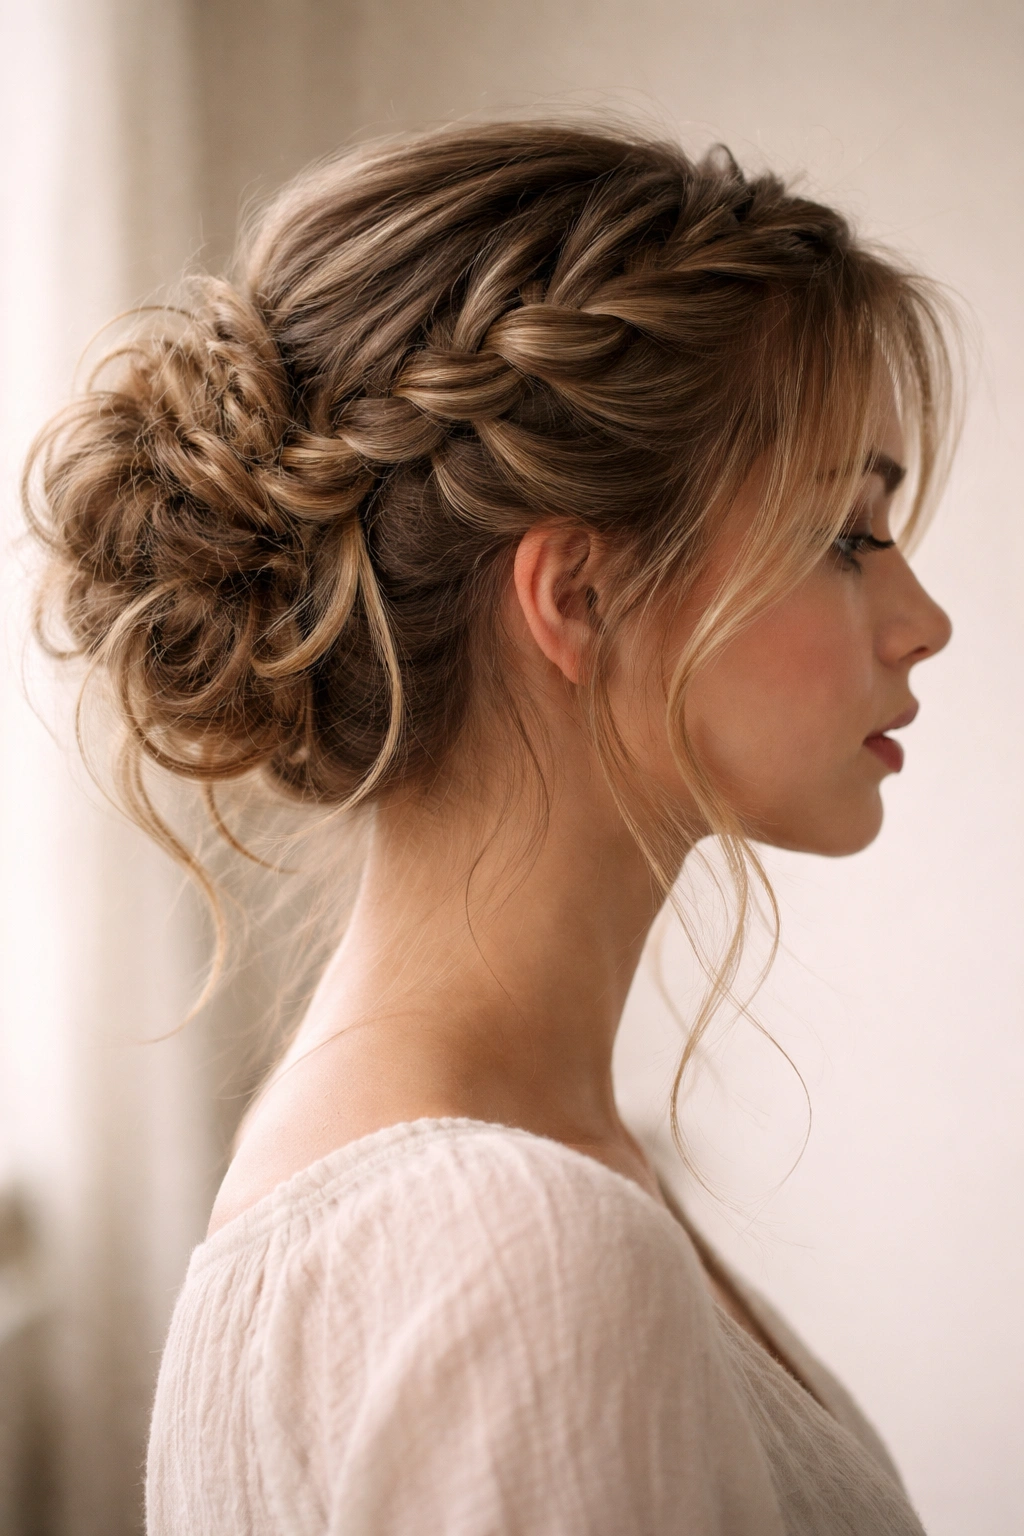
A waterfall braid creates a cascading effect where strands literally fall from the braid like water—perfect for a messy bun where you want some hair to escape intentionally.
The Waterfall Technique
Start a French or Dutch braid at one temple. As you braid, drop certain sections of hair to fall freely while you pick up new sections to continue braiding. This creates that waterfall effect—some hair woven into the braid structure while other sections flow freely.
Guide your waterfall braid around toward the back of your head where your bun will be. Once you’ve created your waterfall effect, gather the remaining hair and those dropped sections into a textured bun. The fallen strands become part of your bun’s undone aesthetic.
Why This Looks So Romantic
Waterfall braids are inherently feminine and sophisticated. They show off length, create movement, and add interest to a basic bun. The technique looks more complicated than it is, which means you appear more put-together than you actually worked.
Execution Pointers
- Waterfall braids work best on hair that’s at least shoulder length
- Loosen the braid slightly after braiding to enhance the cascading effect
- Use bobby pins to secure your bun, not your waterfall—let those sections fall naturally
11. French Braid Into Messy Bun
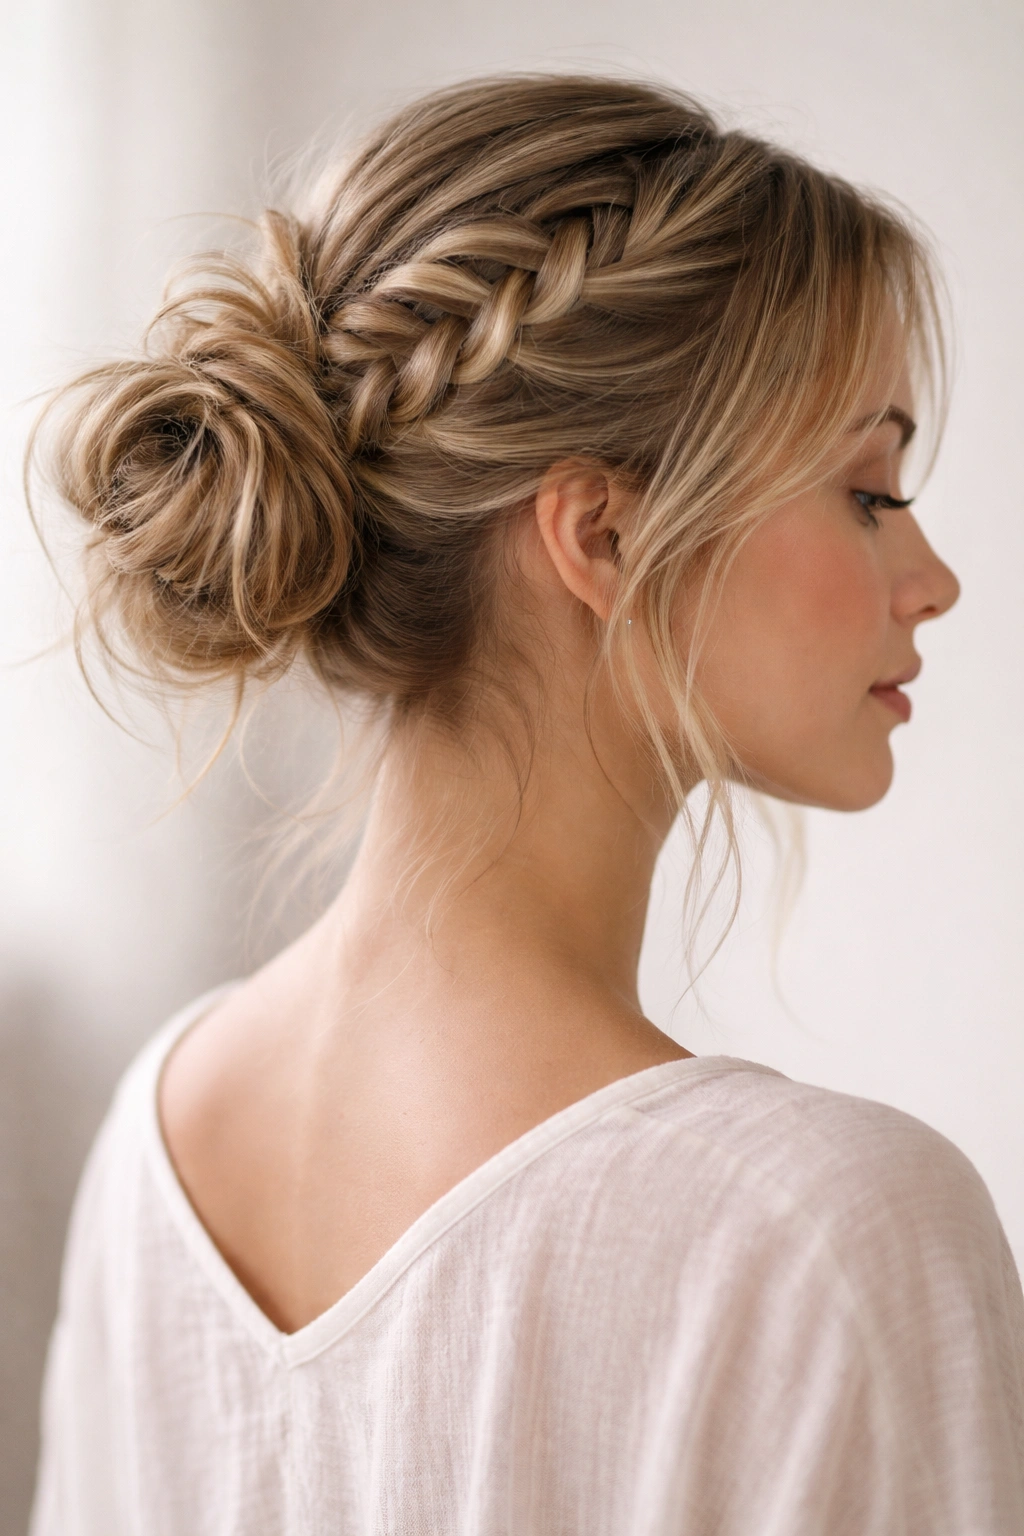
The most classic combination: a French braid that works its way down toward your nape, where the remaining hair becomes your bun. This is the original messy bun with a braid, and it remains one of the most versatile and flattering options.
The Traditional Execution
Start at your crown and create a French braid by adding hair from your scalp as you work downward. Braid down toward the nape of your neck. Once you reach the lower portion of your hair, secure the braid loosely. Gather the braid ends with the remaining hair below and twist or fold everything into a bun.
The beauty of this style is its simplicity and how adaptable it is. Depending on where you stop your French braid, how tight you make your bun, and how much you loosen everything afterward, you can create entirely different looks.
Why It Works Every Single Time
French braids are flattering on virtually every face shape because they frame your face gently while adding height at your crown. The braid-to-bun transition looks intentional and elegant. This is the go-to style when you want to look pulled together without overthinking your hair.
Variations on the Classic
- Start your French braid slightly off-center for asymmetry
- Create two French braids if you have thick hair
- Loosen the braid dramatically after securing for an almost undone effect
12. Multi-Strand Braid Messy Bun
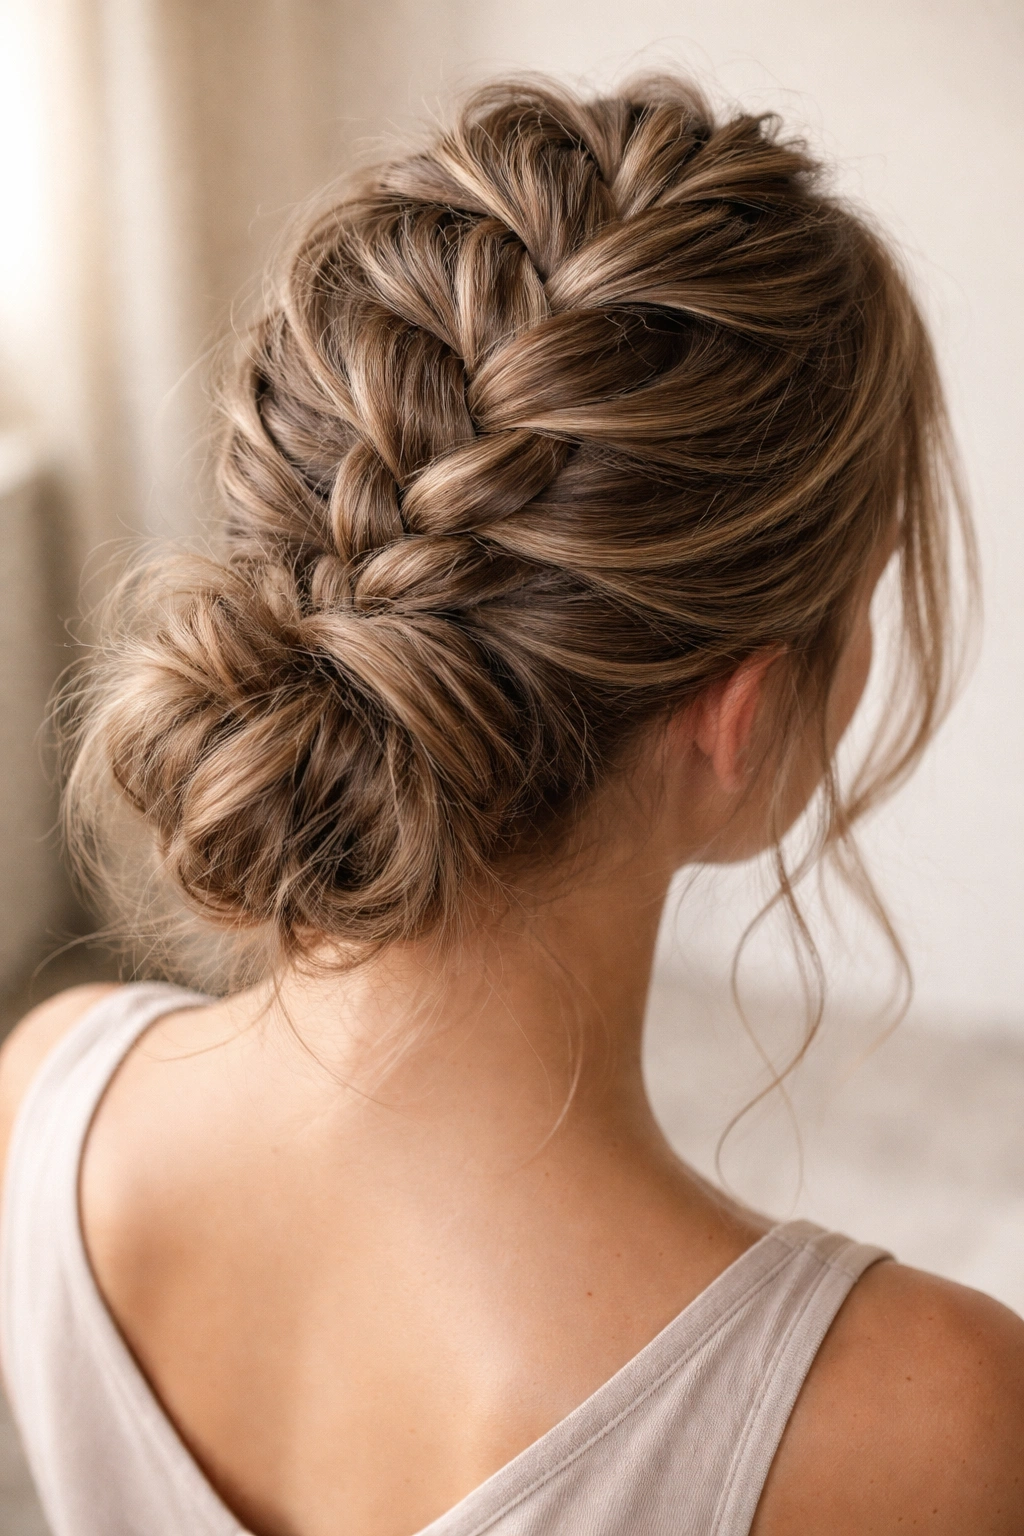
Instead of working with three or four strands, a multi-strand braid uses five or more sections, creating intricate, densely textured braiding that feeds beautifully into a messy bun.
The Multi-Strand Approach
Multi-strand braids are actually simpler than they sound once you understand the pattern. With five strands, you’re typically following a consistent over-and-under pattern. The more strands you use, the more texture and dimension you create. Start your multi-strand braid at the crown or temples and work it toward the back of your head.
Once you’ve braided down to the lower portion of your hair, secure the braid loosely and gather everything into your bun. The intricate braiding creates a focal point that makes even a loose, imperfect bun look intentional and styled.
When to Choose Multi-Strand
These braids take longer than basic three-strand braids, but they’re worth the effort if you have thick hair or if you want maximum visual impact. They photograph beautifully and look distinctly more elevated than simple braids. If you’re willing to put in a few extra minutes, multi-strand braids reward you with striking results.
Tips for Success
- Start with five strands if you’re new to multi-strand braiding
- Number your strands mentally to keep the pattern straight
- Loosen the braid after securing to create fullness and texture
- This style holds beautifully all day without needing adjustment
Final Thoughts
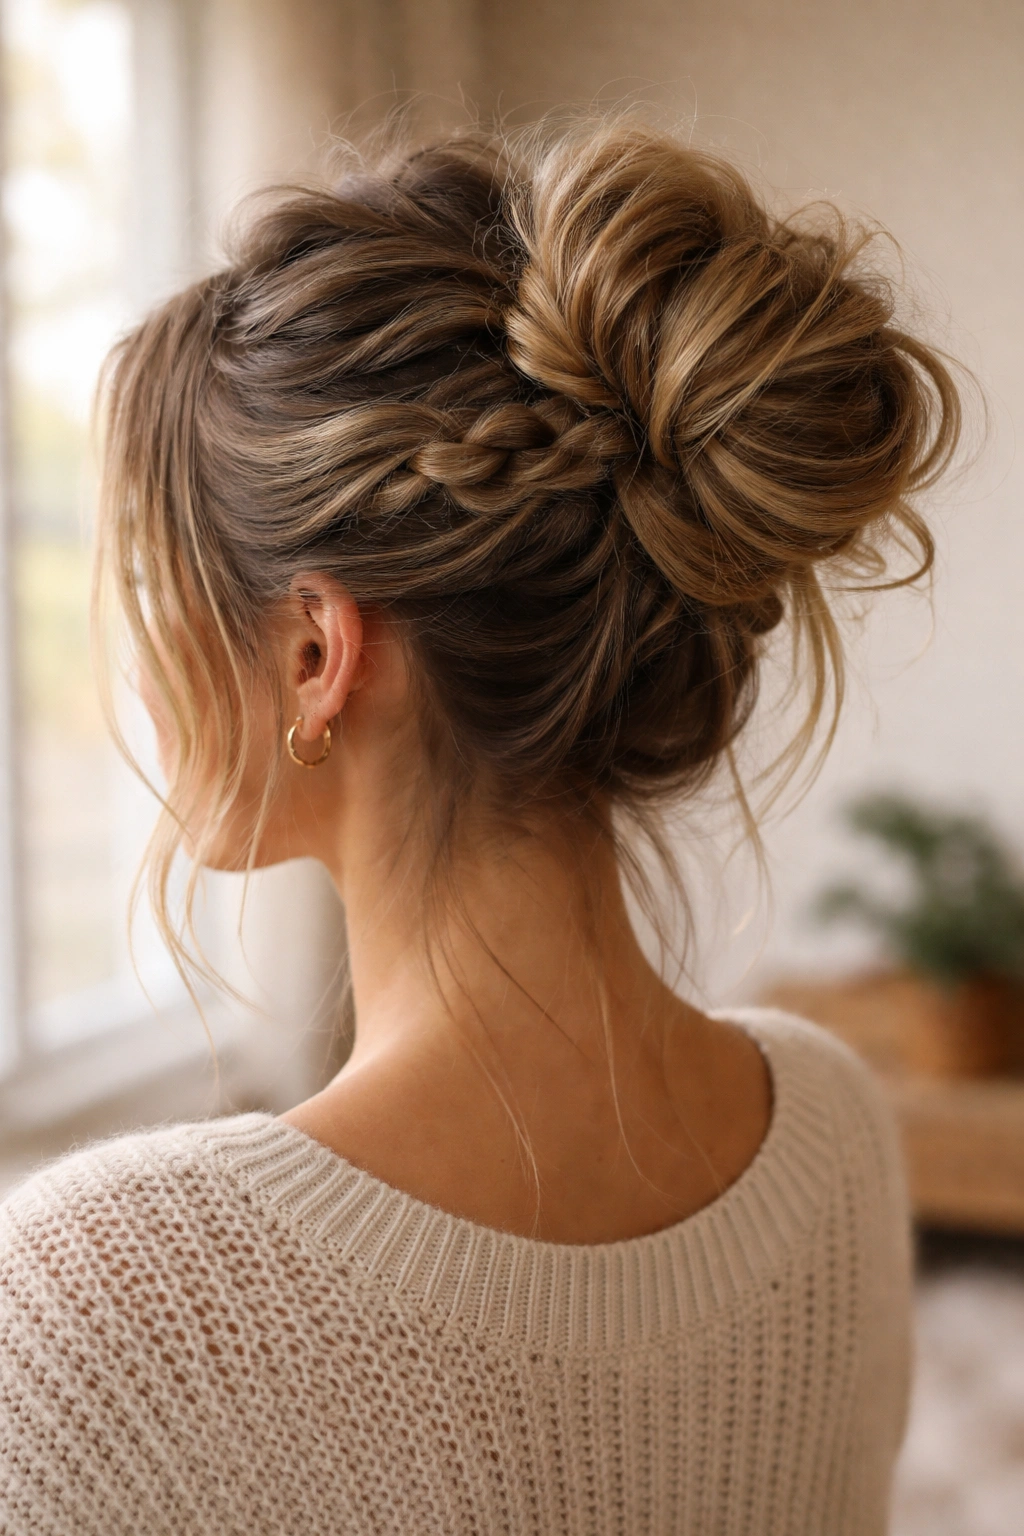
The combination of braids and messy buns works because each element does something different. Your braid brings structure, intention, and visual interest. Your messy bun brings softness, movement, and that effortless appeal that makes any hairstyle actually wearable on real human beings with real schedules. Together, they create something that looks like you put genuine effort in without demanding perfection.
The best part about these twelve styles is that they’re infinitely adaptable. Your hair texture, length, face shape, and personal style will influence which versions feel most natural to you, and that’s exactly how it should be. A style that feels great is a style you’ll actually wear, and that’s what matters more than following any set of rules.
Start with whichever style speaks to you most strongly, practice it a few times when you’re not rushed, and then play with variations. Tighten your braids or loosen them. Change where your bun sits. Add more wisps or tuck more hair away. The whole point of messy bun styling is that there’s no single “right” version. Your version—the one that makes you feel confident and comfortable—is the right one.
