



Low braided messy buns have become the go-to hairstyle for anyone who wants to look effortlessly put-together without spending an hour in front of the mirror. Whether you’re heading to work, running errands, or going out for a casual dinner, this combination of braids and undone texture strikes the perfect balance between polished and relaxed. The beauty of low braided messy buns is that they work on virtually any hair type and length, they keep your hair secure all day long, and they give you that coveted “I didn’t try too hard” vibe that’s genuinely hard to pull off with a regular ponytail.
What makes these styles so versatile is the endless way you can twist, braid, and texture your hair before securing it into a bun. A simple two-strand twist creates a completely different look than a Dutch braid, which looks nothing like a French braid wrapped around the base. Add in the option to pancake your braids for extra volume, tease your hair at the crown, or leave face-framing pieces loose, and suddenly you’ve got dozens of variations from just one basic technique.
The best part? Low braided messy buns work whether you’re starting with freshly washed hair, second-day texture, or hair that hasn’t seen a brush in three days. In fact, a little texture and grip actually makes the braiding easier and helps the bun stay put without slipping. If you’ve been intimidated by bun styles in the past, these techniques will change your mind. They’re genuinely more forgiving than they look.
1. Classic Twisted Low Bun
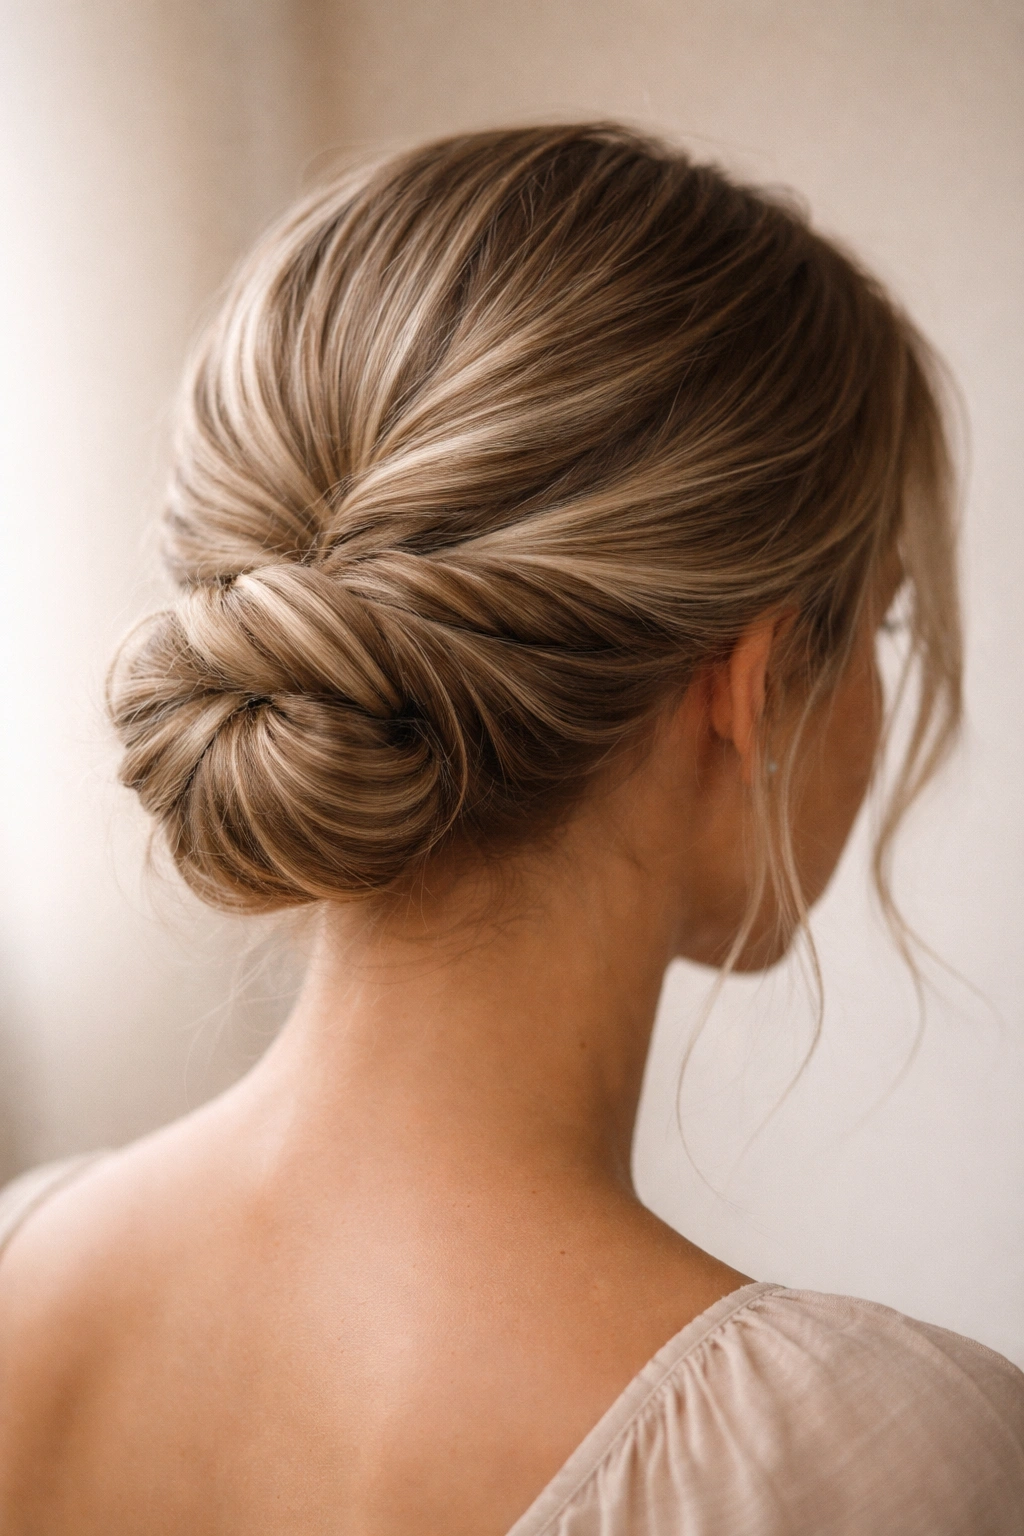
The twisted low bun is the gateway into braided messy bun territory—it looks elegant and intricate, but it’s actually one of the easiest techniques you can master. Instead of weaving a full braid, you’re simply creating a two-strand twist from the crown down to the nape of your neck, then wrapping that twist into a loose bun at the base.
Why It Works So Well
A two-strand twist is fundamentally easier than a three-strand braid because you’re only managing two sections of hair at a time, which means there’s less to juggle and fewer opportunities to drop a section. The twist creates beautiful texture that reads as intentional and styled, even though you barely spent any effort. Because you’re working with just two strands, the final result naturally has a bit of movement and looseness—the “messy” part happens almost on its own without you having to artificially tease or unravel anything.
How to Create the Perfect Twisted Low Bun
- Start by applying a light texturizing spray or dry shampoo to damp hair and letting it air dry, or work with second-day hair that has natural grip
- Flip your head upside down and gently backcomb or tease the crown area to create a foundation that holds
- Flip back upright and use a fine-tooth comb to smooth the teased section into a polished top while keeping the texture underneath
- Divide a section at your crown into two equal strands and twist them around each other, pulling each twist gently to create a thicker, fuller appearance
- Continue twisting all the way down to the nape of your neck, adding small sections of loose hair as you go to incorporate everything
- Wrap the twisted section into a low, loose bun at the base of your neck and secure with bobby pins
- Pull a few small pieces around your face and loosen the bun slightly by gently tugging at the twisted sections
Pro tip: The tighter you twist initially, the fuller and more voluminous the final bun will be—don’t be afraid to pull hard during the twisting process.
2. Dutch Braid Messy Bun
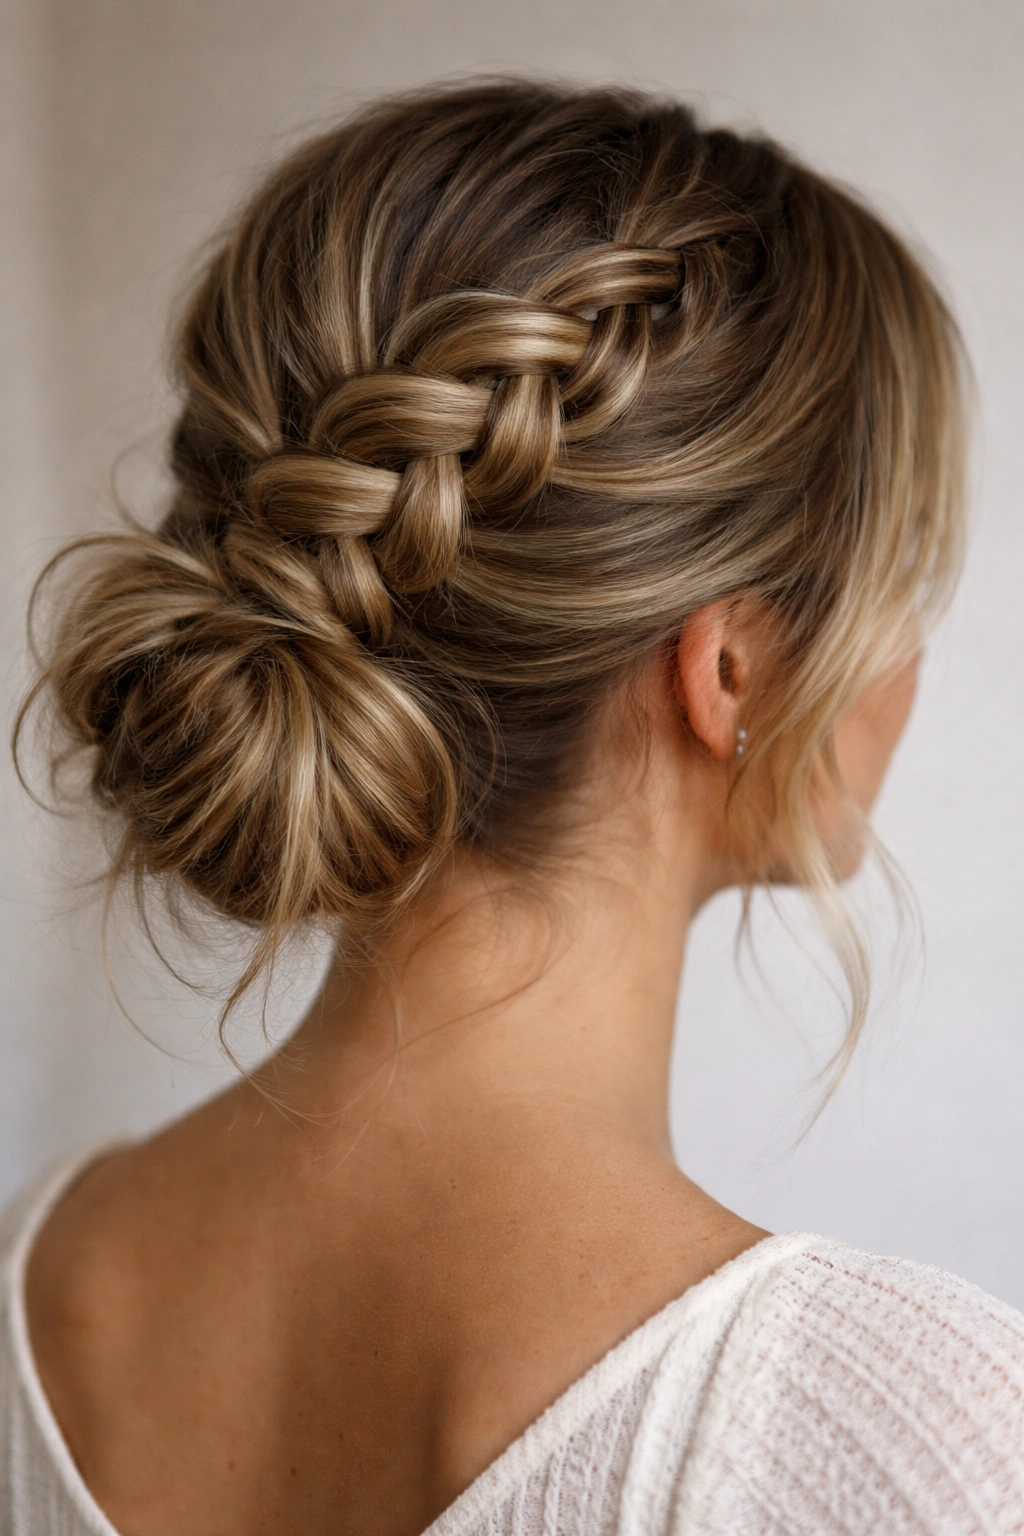
A Dutch braid is essentially a French braid but done in reverse—instead of crossing strands over each other, you’re crossing them underneath, which creates a braid that sits on top of your hair and pops visually. When you anchor a Dutch braid into a low messy bun, you get a hairstyle that looks dramatic and intentional from every angle.
What Makes Dutch Braids Stand Out
Dutch braids catch the light differently than regular braids because they sit proud on the scalp rather than nestling into your hair. This means the braid is always visible and reads as a distinct design element rather than just a way to keep your hair contained. The underneath-cross method also creates more texture and dimension in the braid itself, which automatically makes it look messier and more interesting than a tighter French braid would.
Creating a Dutch Braid Messy Bun
- Start with damp or textured hair and apply a light texturizing product for grip
- Create a deep side part on one side and tease the crown gently for volume
- Take a section at the crown and divide it into three strands
- Cross the right strand under the middle, then cross the left strand under the new middle
- Continue this underneath-cross pattern down the back of your head, adding hair as you go
- Braid until you reach the nape, then gather the remaining loose hair along with the braid end into a low ponytail
- Wrap the ponytail into a messy bun and secure with bobby pins
- Pancake the Dutch braid by gently pulling the edges outward to make it wider and fuller
Worth knowing: Dutch braids look best on the second or third day after washing, when your hair has enough natural grip to hold the braid structure without sliding.
3. French Braid Wrapped Bun
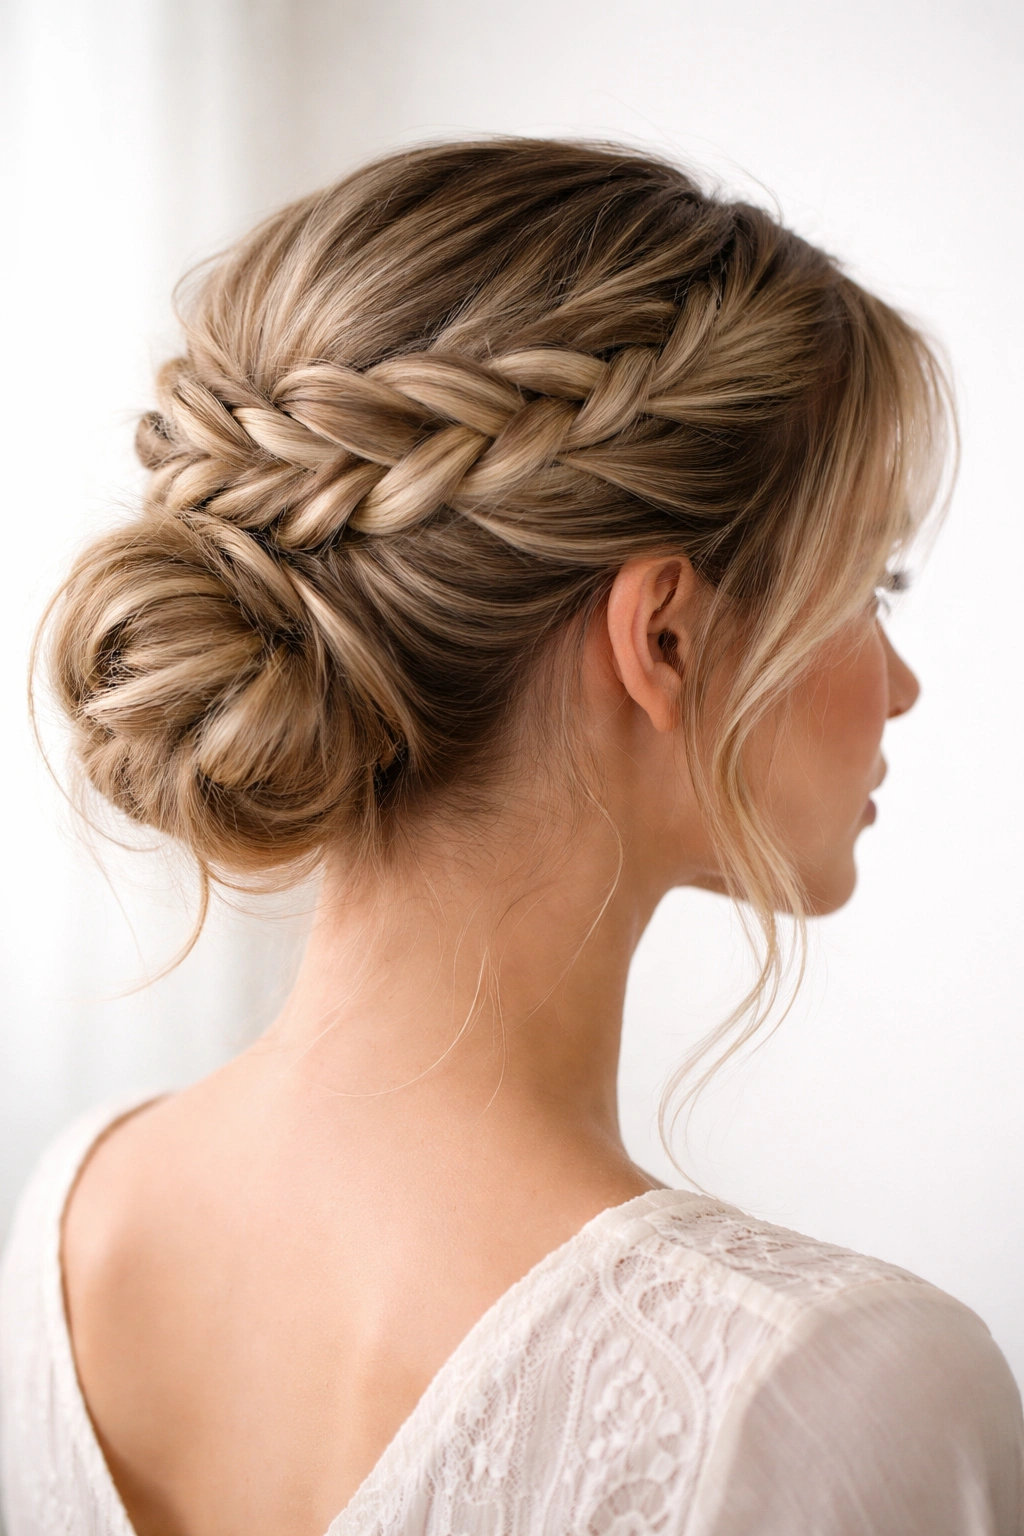
This style takes the classic French braid and puts a twist on the traditional method. Instead of braiding straight down the back of your head and securing the ends, you’ll braid in a spiral or curved pattern that naturally wraps around the crown and leads directly into your bun base. It’s a bit more advanced than a straight-back braid, but the payoff is a completely unique, almost crown-like effect.
Why This Style Commands Attention
A wrapped French braid creates the illusion of an intricate updo without requiring advanced skills or tons of bobby pins. Because the braid is following a curved path rather than a straight one, it naturally creates visual interest and looks intentional in a way that a standard braid-to-bun doesn’t. The wrapping also means the bun sits in a slightly different position than a traditional low bun, which gives you a fresh silhouette even if you’ve worn buns a thousand times before.
Step-by-Step Guide to the Wrapped Braid
- Apply texturizing spray or mousse to damp hair and let it dry to create grip
- Create a deep side part and tease the crown area generously
- Start the French braid at the deeper side of the part, taking a small three-strand section
- Begin braiding and adding hair in a gentle curve rather than a straight line down the back
- As you move toward the center back, gradually angle your braid path so it’s spiraling or wrapping slightly
- Continue braiding until all your hair is incorporated, then gather the braid end with any remaining loose hair
- Twist or loosely braid the final section and wrap it into a bun at the base of your neck
- Secure with bobby pins and gently pancake the wrapped braid to add volume and dimension
Insider note: If you can’t quite master the curved braiding path, you can braid straight down and then manually curve the finished braid around your head before securing—it’s not cheating, it’s problem-solving.
4. Fishtail Braided Bun
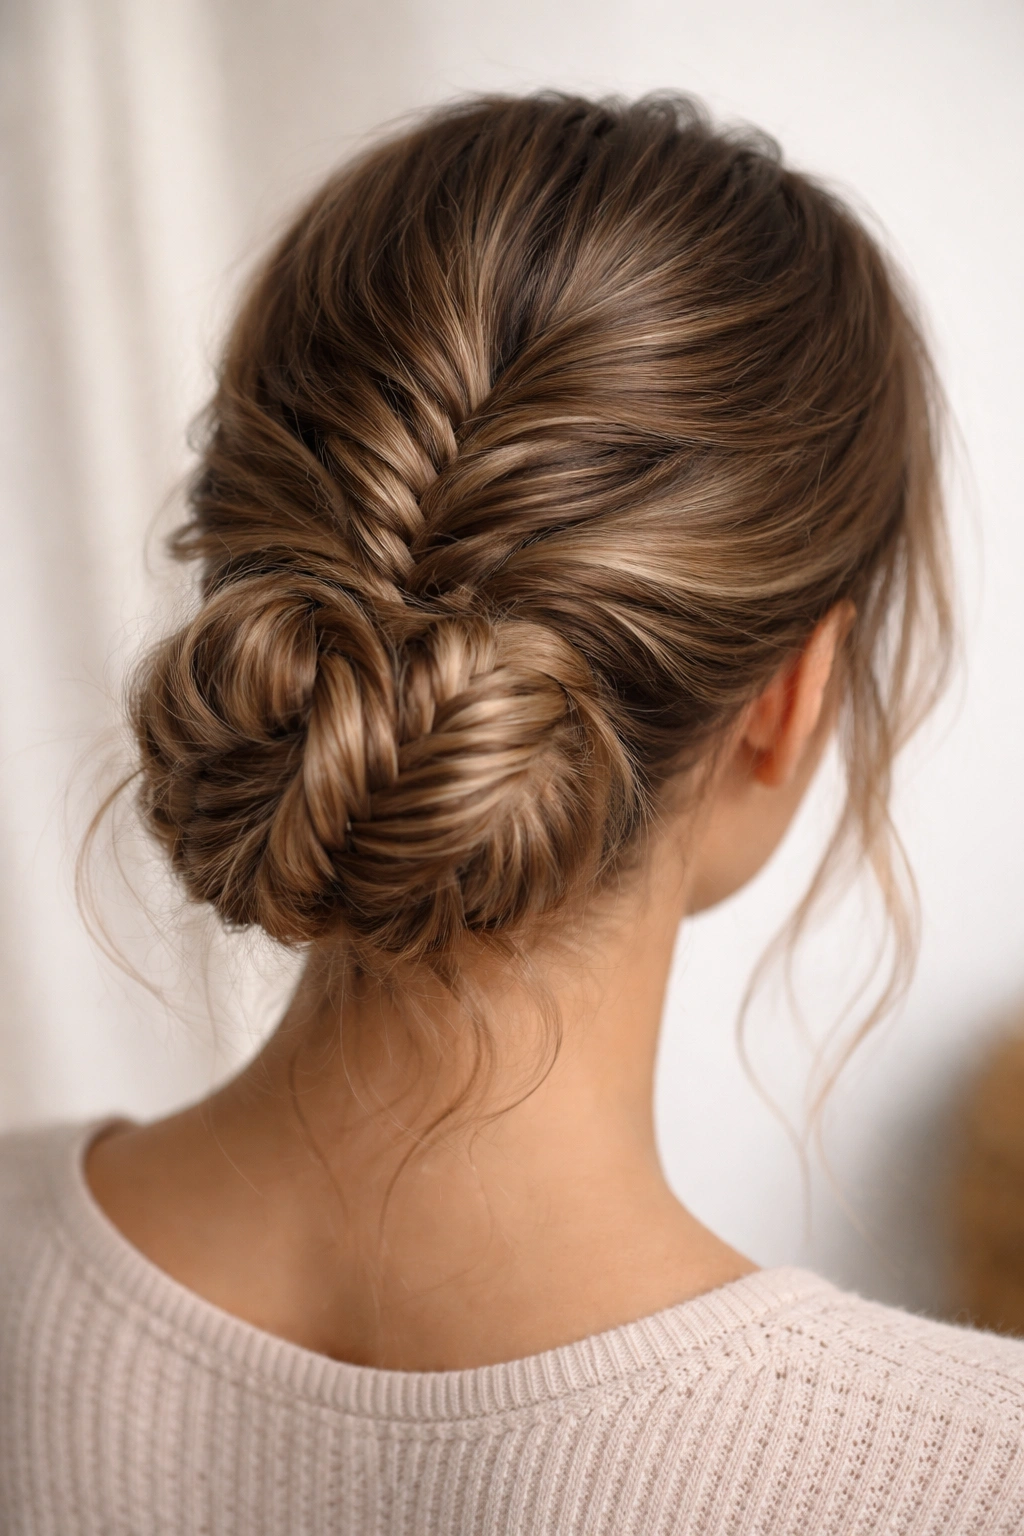
The fishtail braid uses a completely different technique than traditional three-strand braiding. Instead of three sections, you’re working with just two thick sections and tiny pieces pulled from the inside of each section, creating an intricate woven pattern that looks infinitely more complex than it actually is. When you wrap a fishtail braid into a low messy bun, it creates an almost lacy, feminine texture that’s absolutely stunning.
The Surprising Ease of Fishtail Braids
Fishtail braids intimidate a lot of people because they look complicated, but they’re actually easier to keep tight and controlled than regular braids because you’re only manipulating two sections at a time. The “pulling small pieces” motion is almost meditative once you get the rhythm down. Because fishtail braids are naturally voluminous and textured, they barely require any pancaking or loosening—they come out of the braid looking purposefully undone.
How to Braid and Bun Your Fishtail
- Start with second-day or textured hair (fishtails work best when there’s some grip)
- Apply dry shampoo to the roots and massage it in for extra volume and texture
- Divide your hair into a low ponytail and divide that ponytail into two thick sections
- Take a tiny piece from the inside of the right section and cross it over to join the left section
- Take a tiny piece from the inside of the left section and cross it over to join the right section
- Continue this alternating pattern, keeping your sections relatively thick for a full, lush braid
- Once all hair is incorporated, secure the fishtail braid with a small elastic
- Wrap the braided tail into a low bun and secure with bobby pins
- You can leave the braid as-is, or gently pull the edges to create a fuller, pancaked version
Pro tip: The smaller the pieces you pull, the more intricate and delicate your fishtail will look—but larger pieces create a bolder, chunkier version that’s equally gorgeous and honestly easier to execute.
5. Rope Braid Messy Bun
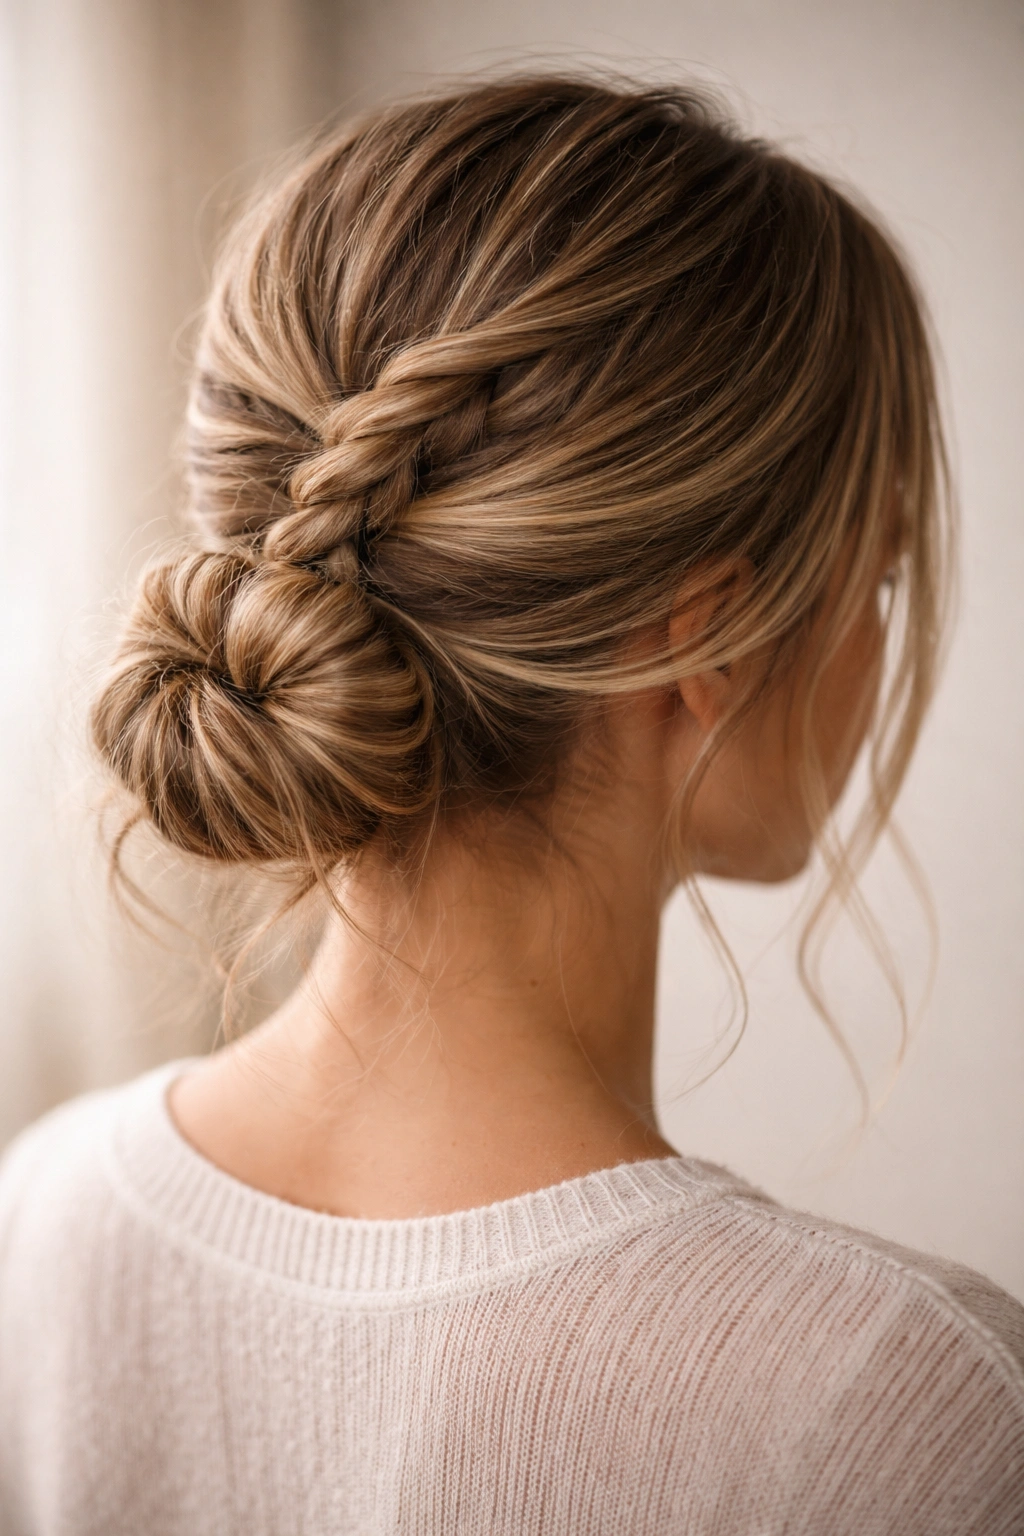
A rope braid is technically not a braid at all—it’s two strands twisted together tightly, which creates a different texture and effect than traditional braiding. Rope braids are sturdy, they hold incredibly well throughout the day, and they create a visual pattern that reads as totally distinct from any other braid style. When you use a rope braid as the base for your messy bun, you get a hairstyle that’s both secure and uniquely textured.
Why Rope Braids Are Underrated
Most people stick to traditional three-strand braids and never venture into rope braid territory, which means this is an easy way to create a hairstyle that looks fresh and different from what you see most people wearing. Rope braids are also genuinely easier to keep tight throughout the day because the two-strand twist is more compact than a three-strand braid. They’re perfect for anyone who finds traditional braiding tedious or difficult.
Creating a Rope Braid Messy Bun
- Work with damp or textured hair and apply a light styling cream or mousse for grip
- Brush your hair back smoothly and divide a section at the crown into two thick strands
- Twist each strand tightly in the same direction (both clockwise or both counterclockwise)
- Wrap one twisted strand around the other, allowing them to naturally spiral together
- Continue twisting and wrapping until you reach the nape of your neck
- Gather the rope braid along with any remaining loose hair into a low ponytail
- Twist or gently braid the final section and wrap everything into a messy bun at the base
- Secure with bobby pins and gently loosen the rope by pulling sections outward
Worth knowing: Rope braids need to be twisted tightly during the creation process, but they’ll naturally loosen and relax over the course of the day, giving you that perfectly messy effect by evening.
6. Milkmaid Braided Bun
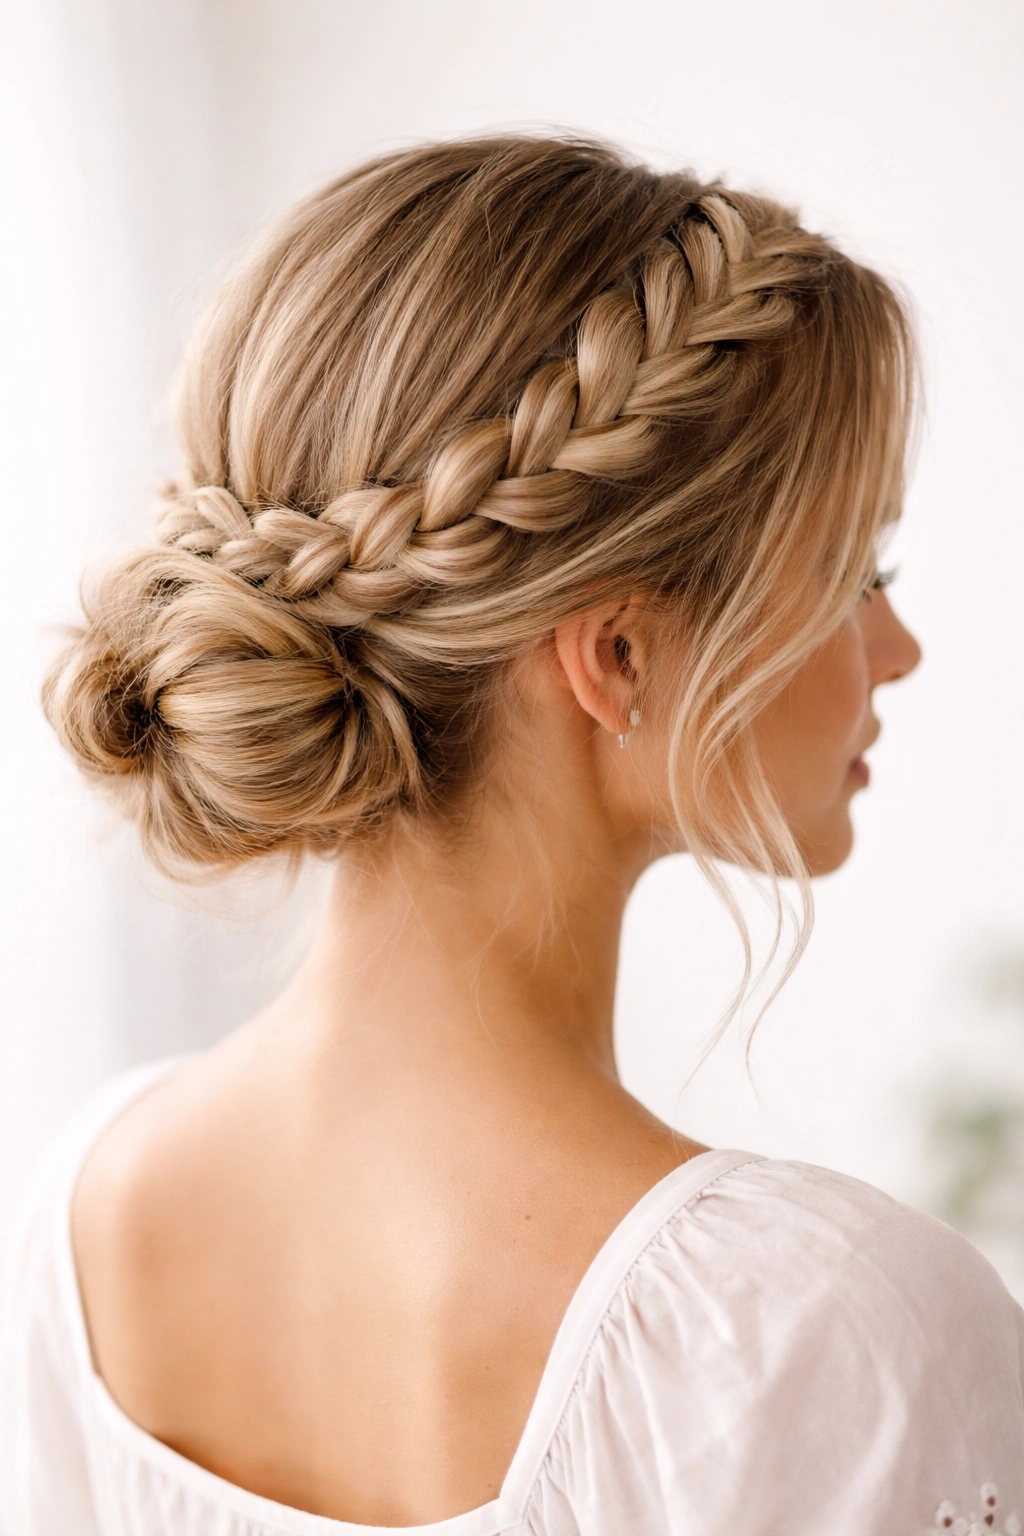
The milkmaid braid is a romantic, playful style where you create two French braids starting from opposite sides of your head, then wrap them around the crown like a halo before dropping them into a low bun. It’s inspired by traditional European braiding and creates a whimsical, almost ethereal effect that works beautifully when anchored by a messy low bun.
The Romance of Milkmaid Styling
This style has an inherent charm that works for dressier occasions or casual days alike—it automatically elevates whatever you’re wearing because it reads as intentional and slightly fancy. The two-braid structure means you get double the visual interest of a single braid, but because they’re wrapping around rather than all going to the back, it creates a totally different silhouette than traditional low braids. The milkmaid effect works especially well if you have some face-framing pieces or waves—it draws attention to your face in the most flattering way.
Step-by-Step Milkmaid Bun Creation
- Start with damp or textured hair and apply a texturizing spray
- Create a deep side part and tease the crown area for volume
- Start a French braid on the deeper side of the part, taking a section from near your ear
- Braid diagonally upward and across the crown, adding hair as you go
- Braid until you reach the opposite side of your head, then secure the end loosely
- Repeat the process on the other side, creating a second braid that mirrors the first
- Wrap both braids around the crown like a halo, pinning them in place with bobby pins
- Gather all remaining hair and any loose braid ends into a low ponytail at the nape
- Wrap the ponytail into a messy bun and secure everything together
Pro tip: Leave face-framing pieces down on both sides before you start braiding—the soft wisps around your face add movement and balance to the structured milkmaid effect.
7. Half-Braided Low Bun
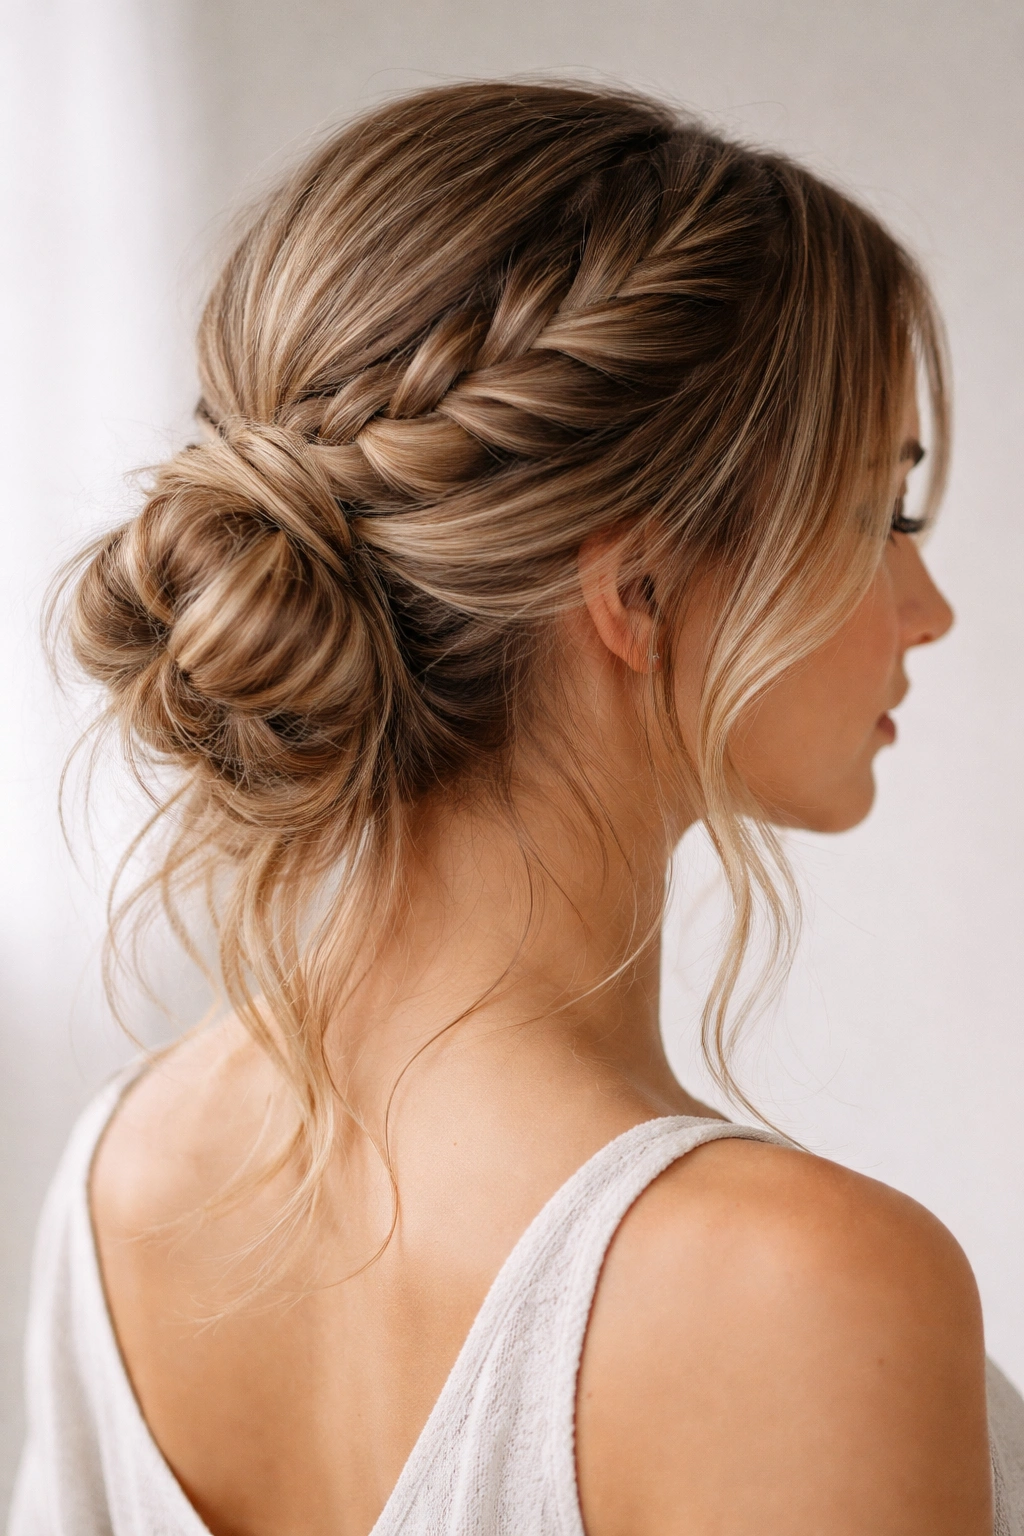
The half-braided bun splits the difference between a fully braided style and a simple twisted bun. You’re braiding only the top half of your hair, leaving the bottom section loose until you gather everything into a bun. This creates a style that’s polished enough for work or dressier occasions but still maintains that effortlessly undone vibe.
Why Half-Braiding Works
This approach gives you more visual interest than a simple bun without requiring you to braid your entire head of hair—it’s genuinely less work while looking like you put in significantly more effort. The contrast between the structured braid on top and the loose, textured bottom section creates natural movement and dimension. It’s also the perfect style for anyone who finds full-head braiding intimidating because you’re only managing half the hair.
Building Your Half-Braided Bun
- Apply texture spray or dry shampoo to your roots and tousle gently
- Tease the crown area to create a base for the braid to sit on
- Smooth the teased section and take a three-strand section at the top
- Create a French braid starting at the crown, adding hair as you descend
- Braid until you reach about mid-head level (roughly halfway down your head)
- Secure the braid end loosely and leave the remaining bottom section loose
- Gather the braid along with all the loose bottom hair into a low ponytail at the nape
- Wrap everything into a messy bun and secure with bobby pins
- Gently loosen the braid and any bun sections by tugging at the edges
Insider note: The exact point where you stop braiding can change the whole vibe—stopping higher up creates a more delicate look, while braiding further down makes it bolder and more dramatic.
8. Pancaked Braid Messy Bun
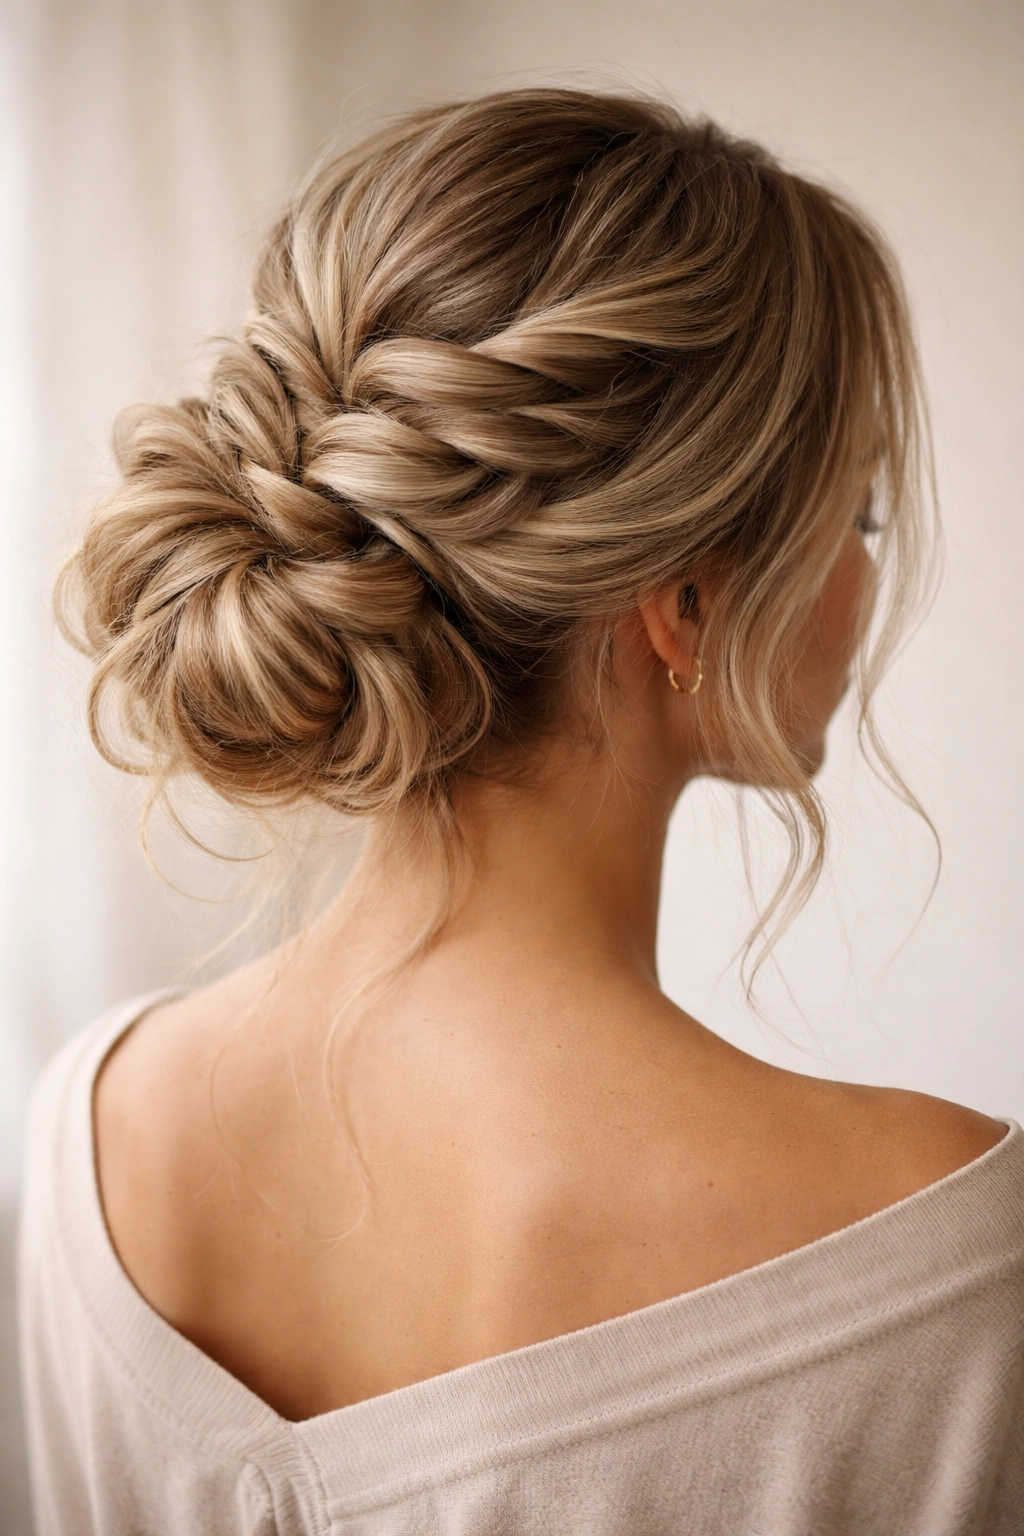
Pancaking is the technique of gently pulling the edges of a finished braid outward to make it fluffier, wider, and more voluminous. When you apply pancaking to a messy bun, you’re essentially creating a braid-based bun that looks triple its original size while maintaining that deliberately undone aesthetic. This is the ultimate choice if you want maximum impact and visual drama.
The Drama of Pancaked Braids
Pancaking transforms any regular braid into something that looks almost impossibly full and textured. Because you’re pulling the braid apart rather than braiding tighter, you create more surface area and dimension, which catches the light beautifully and reads as intentionally styled rather than accidentally messy. Pancaked buns work especially well on finer hair because the pancaking creates the illusion of much more volume than you actually have.
Creating the Ultimate Pancaked Braid Bun
- Work with textured or second-day hair (fresh hair is too slippery for effective pancaking)
- Create a French braid down the back of your head, braiding fairly loosely from the start
- Once you’ve incorporated all your hair and reached the nape, secure the braid end
- Gather the braid tail with any remaining loose hair and secure into a low ponytail
- Wrap the ponytail into a loose bun shape and secure with bobby pins
- Starting from the bottom of the braid, gently pull each outer edge of the braid outward
- Work your way up the entire braid, pancaking as you go
- Pancake the edges of the bun itself by gently pulling and fluffing the wrapped sections
- Tease any flat areas with a fine-tooth comb for additional texture and hold
Worth knowing: Pancaking works best if you braid loosely from the very beginning—if your braid is too tight, the pancaking will look unnatural and the braid won’t hold its fluffed shape throughout the day.
Final Thoughts
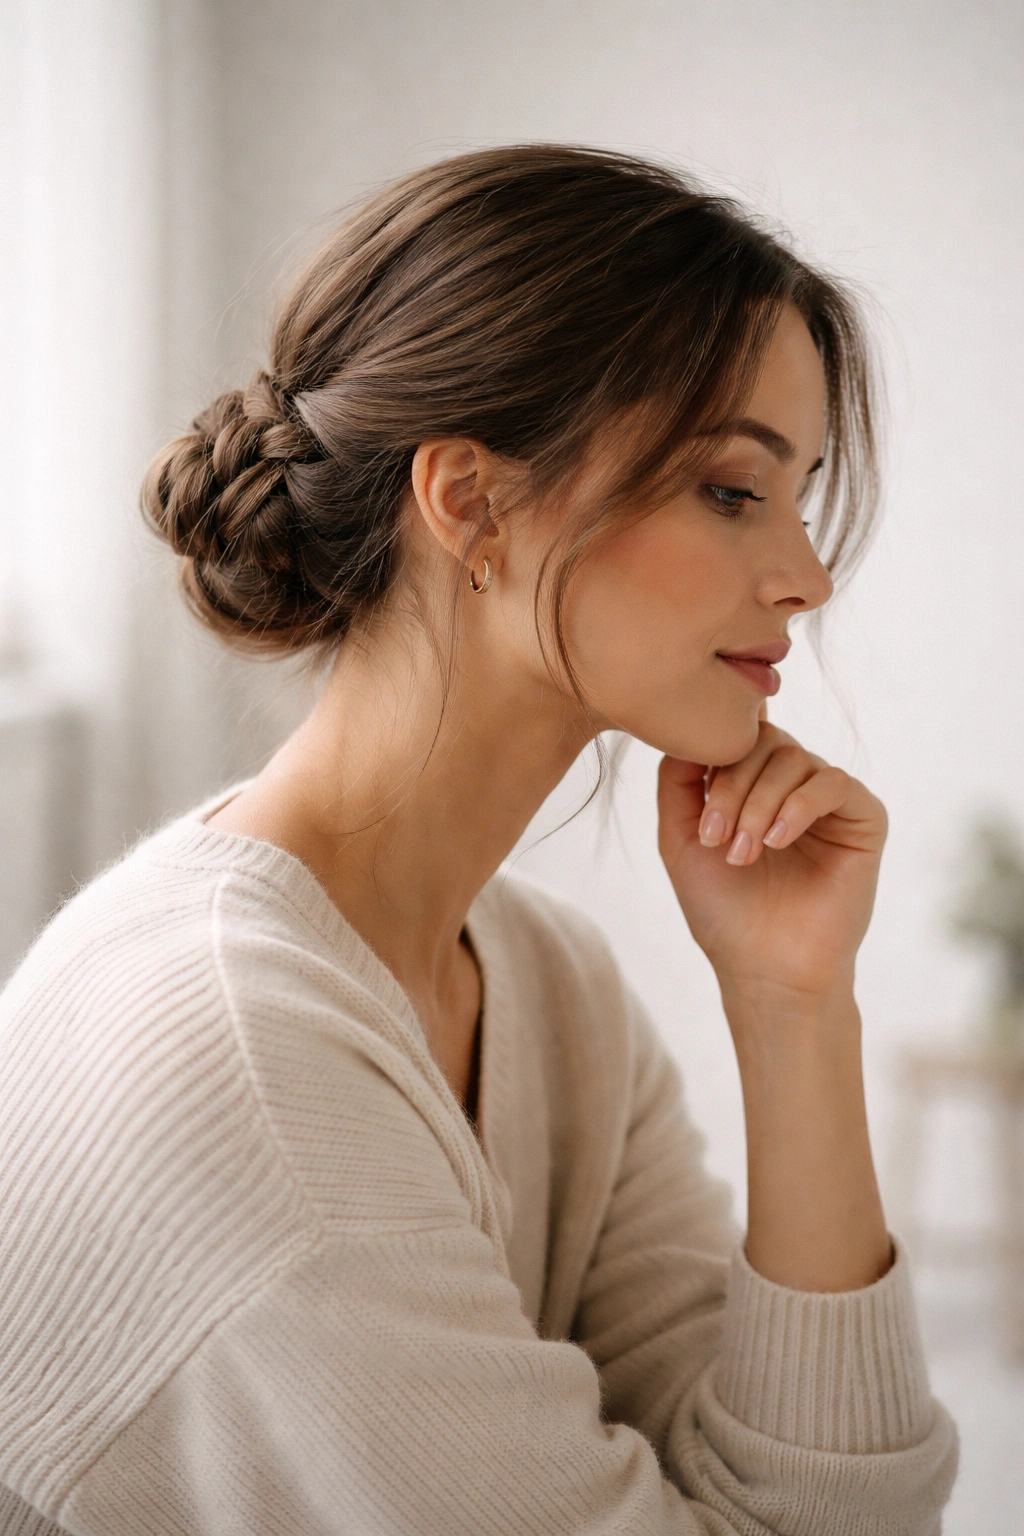
The real secret to mastering low braided messy buns is understanding that “messy” doesn’t mean sloppy or unfinished—it means intentional texture and movement that reads as effortless. Each of these eight styles gives you a different way to create that balance between polished and relaxed, whether you’re choosing the simplicity of a twisted bun, the drama of pancaked braids, or the romance of a milkmaid style.
The more you practice these techniques, the faster they become. What takes thirty minutes the first time you try it will take ten minutes once you’ve done it a few times. Your hands will learn the motions, your fingers will develop the muscle memory, and suddenly you’ll be creating intricate-looking buns without even thinking about it.
Pick one style that speaks to you and commit to practicing it for a week or two. Take a few bobby pins, pull your hair back, and spend five minutes attempting the technique every morning before you rush out the door. By the end of that week, you’ll have unlocked a hairstyle you can wear confidently for years to come—and you’ll probably be ready to move on to mastering the next one.
