Low ponytails have become the unofficial crown jewel of modern wedding hairstyles—elegant, wearable, and endlessly adaptable to any wedding aesthetic, from intimate garden ceremonies to grand black-tie celebrations. Unlike high ponytails that can feel playful or sporty, a well-executed low ponytail sits somewhere between romantic and refined, flattering virtually every face shape and hair texture while requiring far less maintenance than an elaborate updo. The magic of a wedding-worthy low ponytail lies in the details: how you position it, what you do with the tail, whether you add texture, incorporate accessories, or frame the face with intentional pieces.
What makes low ponytails so perfect for weddings is their versatility across the entire day. You can start with a polished version for the ceremony when you want every eye on the couple, then gently loosen and texturize it for the reception when you’re dancing and celebrating. They work beautifully with veils, headpieces, and delicate jewelry without competing for attention on your head. A low ponytail is also genuinely comfortable to wear for hours—you’re not dealing with the tension and headaches that come with tightly pulled updos, but you’re also not wrestling with flyaways or having your hair in your face during the ceremony.
Whether you’re a wedding guest searching for the perfect guest-of-honor hairstyle, a bridesmaid wanting to complement the bridal vision, or a bride considering alternatives to a traditional updo, the following styles offer proven solutions that photograph beautifully, stay put through dancing and crying happy tears, and make you feel genuinely confident.
1. The Classic Low Ponytail with Volume and Texture
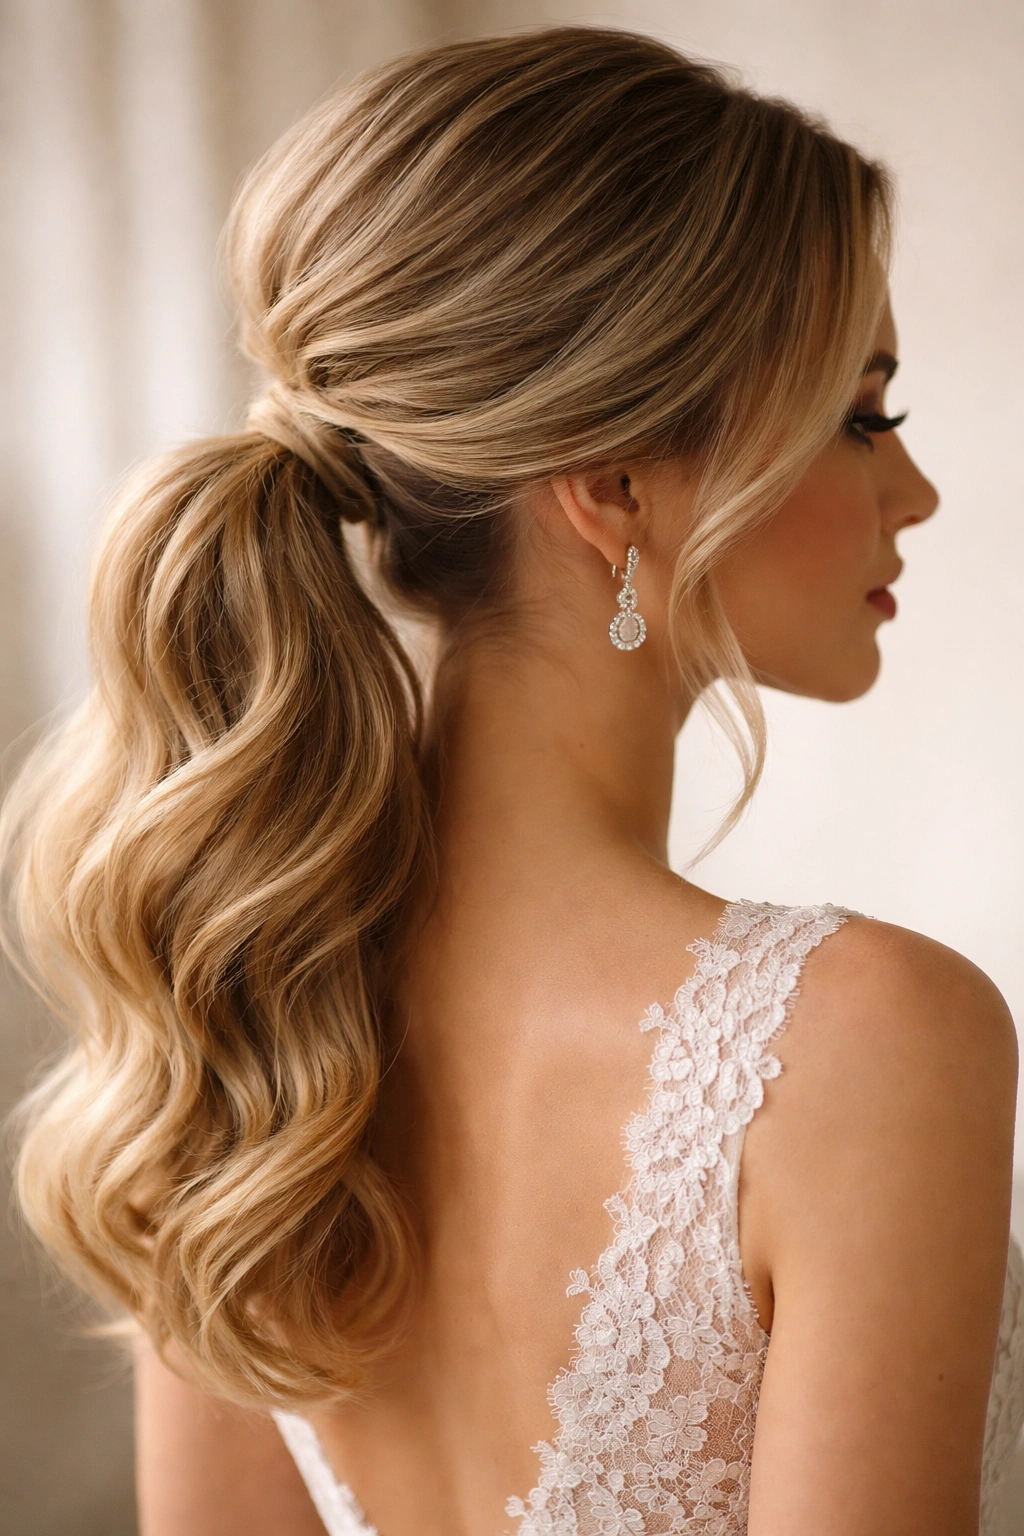
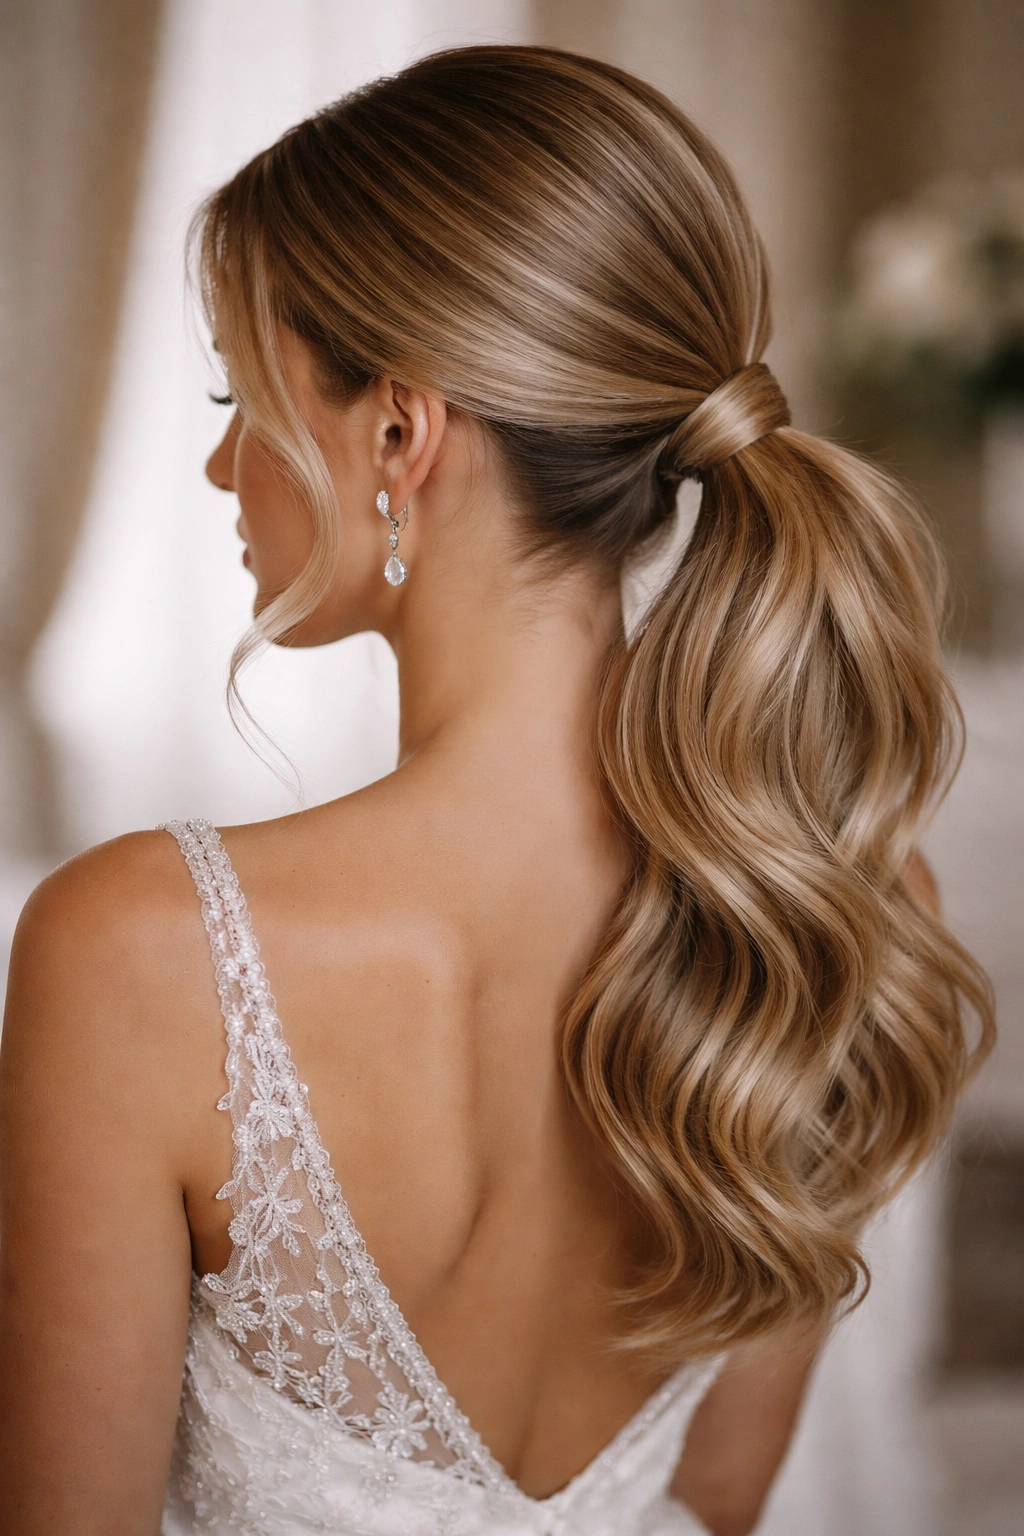
This is the foundation style that works for virtually everyone—sleek at the roots where it’s pulled back, but with intentional texture and movement throughout the ponytail itself. Start by blow-drying your hair with a round brush to create smooth, voluminous roots, then use a curling iron to add soft waves or texture throughout before securing into the ponytail. The key is positioning: gather your hair lower than you’d wear a casual ponytail, roughly level with your chin or slightly below, so it reads as intentionally sophisticated rather than simply pulled back.
Why This Works for Weddings
This style reads as put-together without looking severely pulled or overly styled, which photographs beautifully in both candid shots and formal portraits. The textured tail moves naturally when you walk and dance, creating that effortless-elegance feeling that’s so desirable for weddings. It also forgives minor imperfections—a slightly less-than-perfect curl or a tiny piece escaping from the elastic reads as romantic rather than messy.
How to Perfect This Look
- Use a flexible elastic band (like a silk scrunchie or soft hair tie) rather than a thin rubber band, which can crease and damage hair and looks less refined
- Secure the ponytail, then gently pull a few face-framing pieces loose around your hairline for softness
- Consider concealing the elastic by wrapping a small section of hair around the base and pinning it underneath—this takes 30 seconds and makes the style look significantly more polished
- Finish with a light-hold hairspray so the waves maintain their shape without looking stiff or shellacked
Pro tip: Do a full test run at least one week before the wedding. Wash your hair the day before to give it time to settle and become less slippery, making it easier to work with and less prone to sliding down throughout the event.
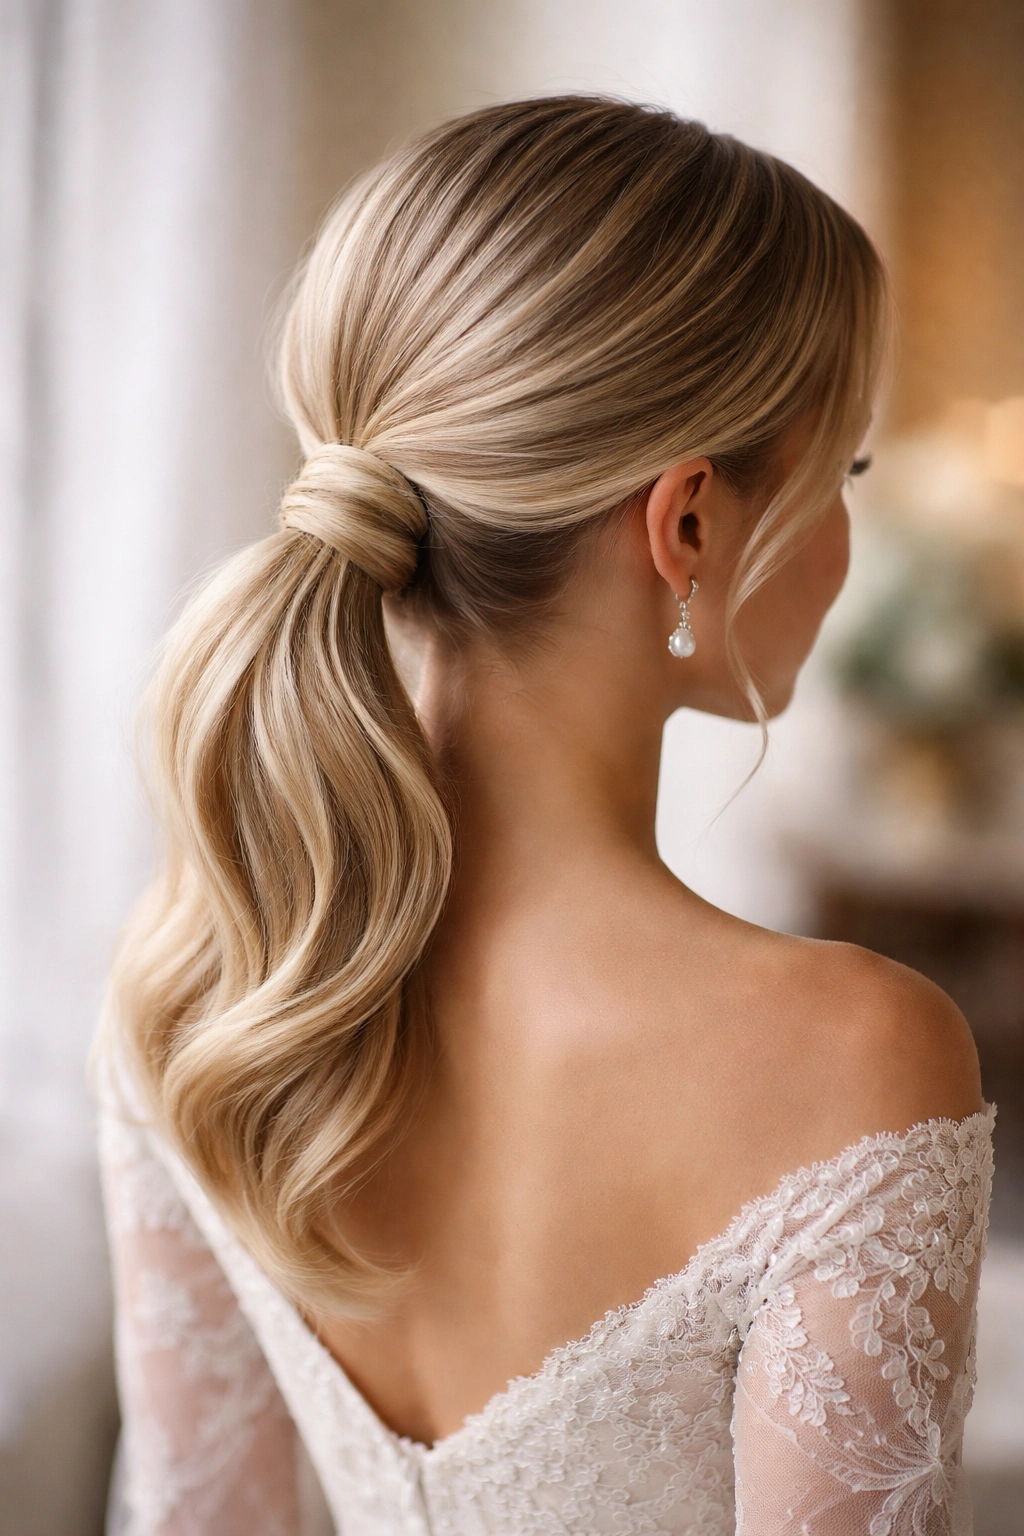
2. The Sleek and Polished Low Ponytail

For a more formal, editorial aesthetic, a sleek low ponytail offers the opposite energy—smooth, refined, and intentionally minimalist. This requires genuinely smooth hair from scalp to tail, which means blow-drying with a paddle brush or flat iron, then using a gel or pomade to tame any flyaways or frizz. The ponytail sits low, usually at the nape of the neck, and the hair in the tail itself should be straight or only very subtly textured.
The Elegance of Simplicity
A sleek ponytail has an almost architectural quality that photographs gorgeously in formal settings and pairs beautifully with statement jewelry, a structured wedding dress, or a bold lip. This style also works particularly well if you have naturally straight hair or if you’re planning to wear your hair down most of the time and only want to pull it back for specific parts of the wedding (like the ceremony).
Making It Stay Sleek All Day
- Use a smoothing serum or anti-frizz cream before blow-drying to create a polished base
- A fine-tooth comb helps create a genuinely smooth ponytail without bumps or texture
- Finish with a medium-to-strong hold hairspray applied with short bursts rather than one long spray—this prevents that wet, glossy appearance
- Keep bobby pins matching your hair color and secure any flyaways individually rather than trying to smooth everything with product, which can look heavy
Worth knowing: Sleek styles show every imperfection, so if your hair is prone to frizz or you live in a humid climate, consider a dry shampoo or texturizing spray applied before the event—the slight grip helps the style hold through the day.
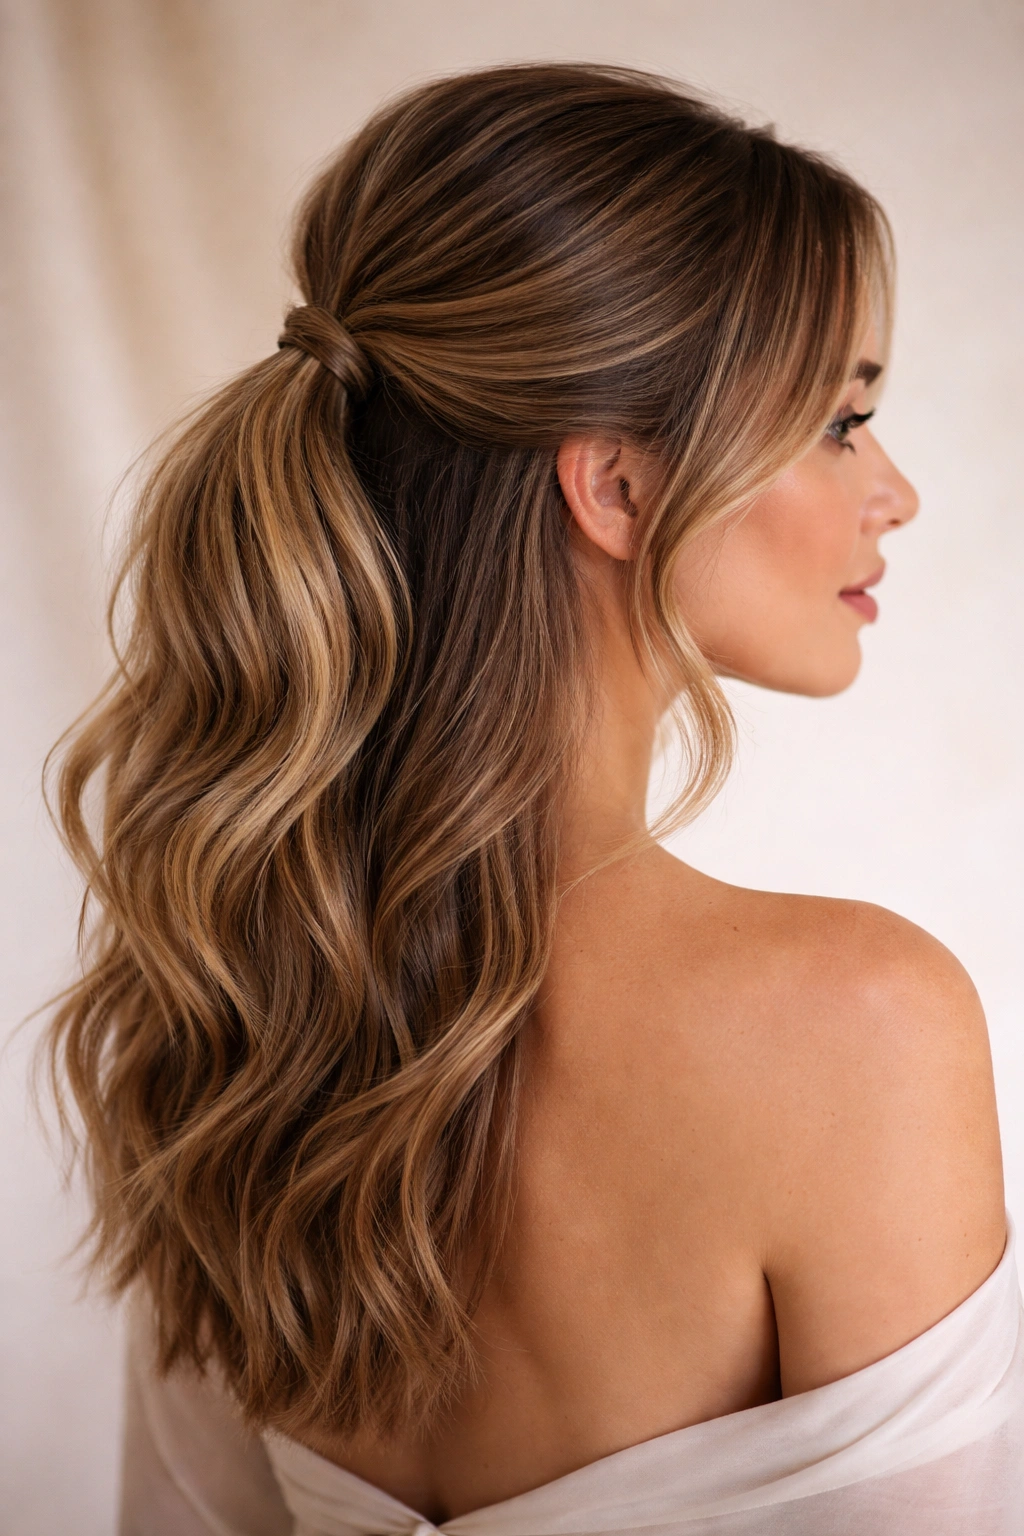
3. The Romantic Low Ponytail with Face-Framing Pieces
This version deliberately lets pieces escape or frames the face with intentional strands, creating a softer, more romantic silhouette while still keeping your hair off your shoulders and neck. Start with textured waves throughout, then secure the ponytail loosely, and pull out thicker pieces around the face—near the ears, along the cheekbones, and at the nape of the neck.
Creating the Right Level of Romance
The number and thickness of face-framing pieces determines whether the style reads romantic or simply undone. For weddings, aim for 2-3 distinct pieces per side, each about half to three-quarters of an inch thick, rather than dozens of tiny wisps. This creates intentional softness without reading as if your hair is falling down.
Securing Without Damage
- Use bobby pins matched to your hair color, hidden underneath the framing pieces so they’re invisible from the front
- Light-hold hairspray keeps the face-framing pieces from sticking to your skin throughout the day, especially if you’re outdoors or dancing
- Don’t pull the ponytail too tightly—tension actually causes those face-framing pieces to migrate toward the secured ponytail, defeating the purpose
Insider note: Ask your hairstylist to intentionally cut or schedule a trim a few days before the wedding to create some shorter pieces around your face if you don’t naturally have them. This prevents the look from reading as “my hairstyle is falling apart” and gives you intentional texture to work with.
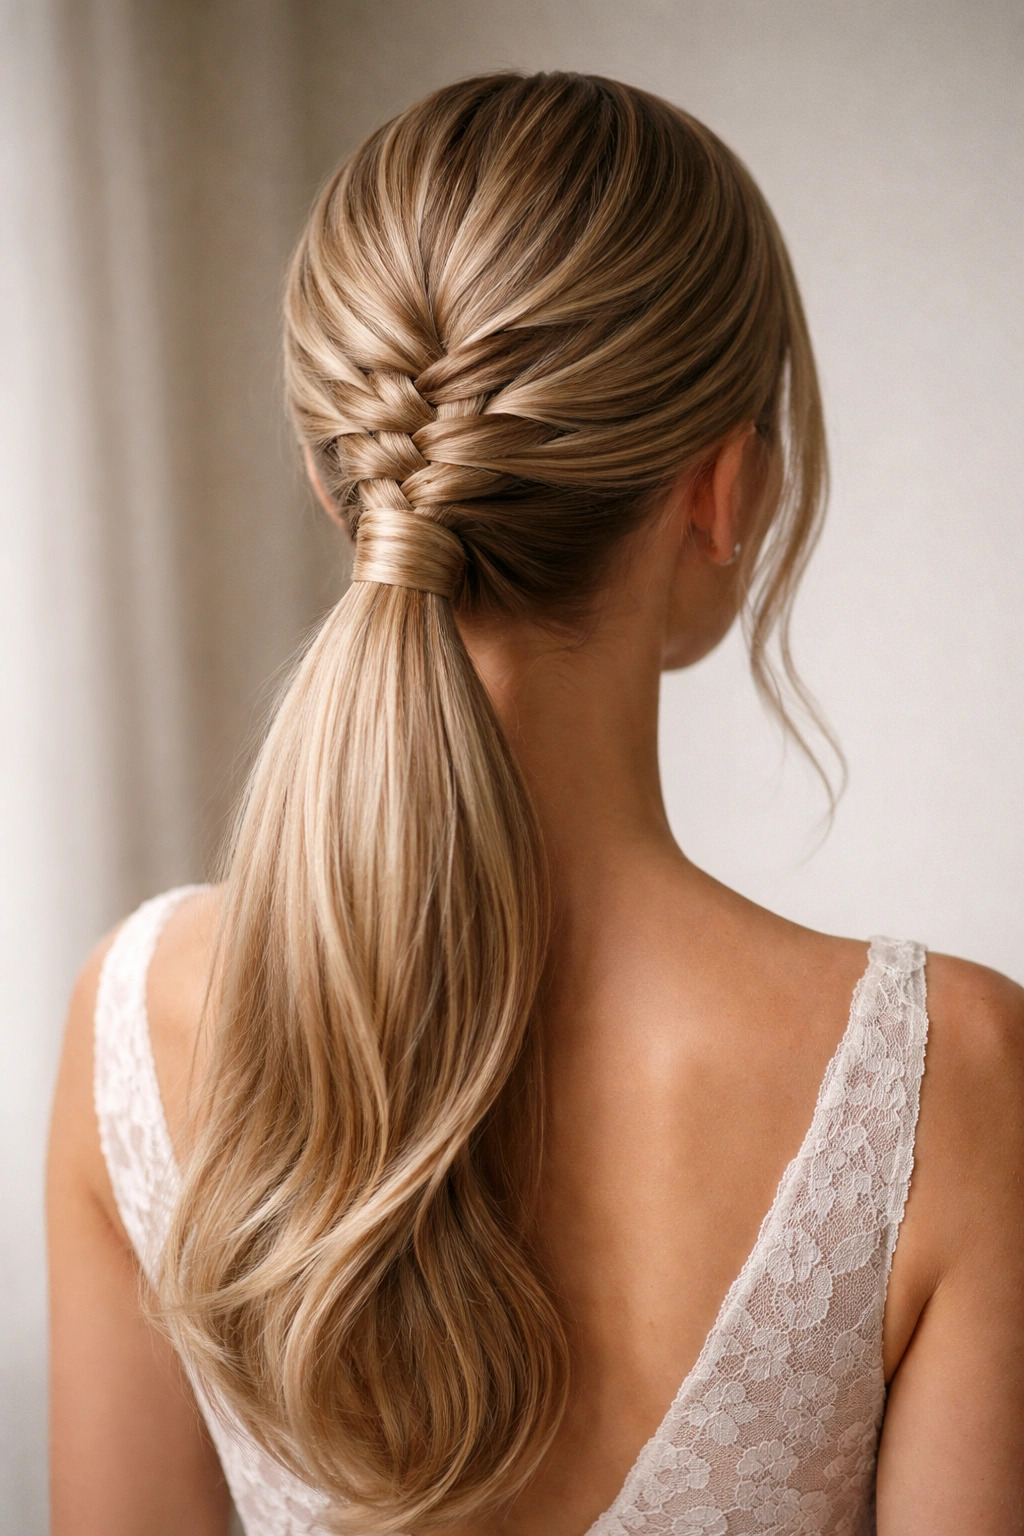
4. The Braided Low Ponytail
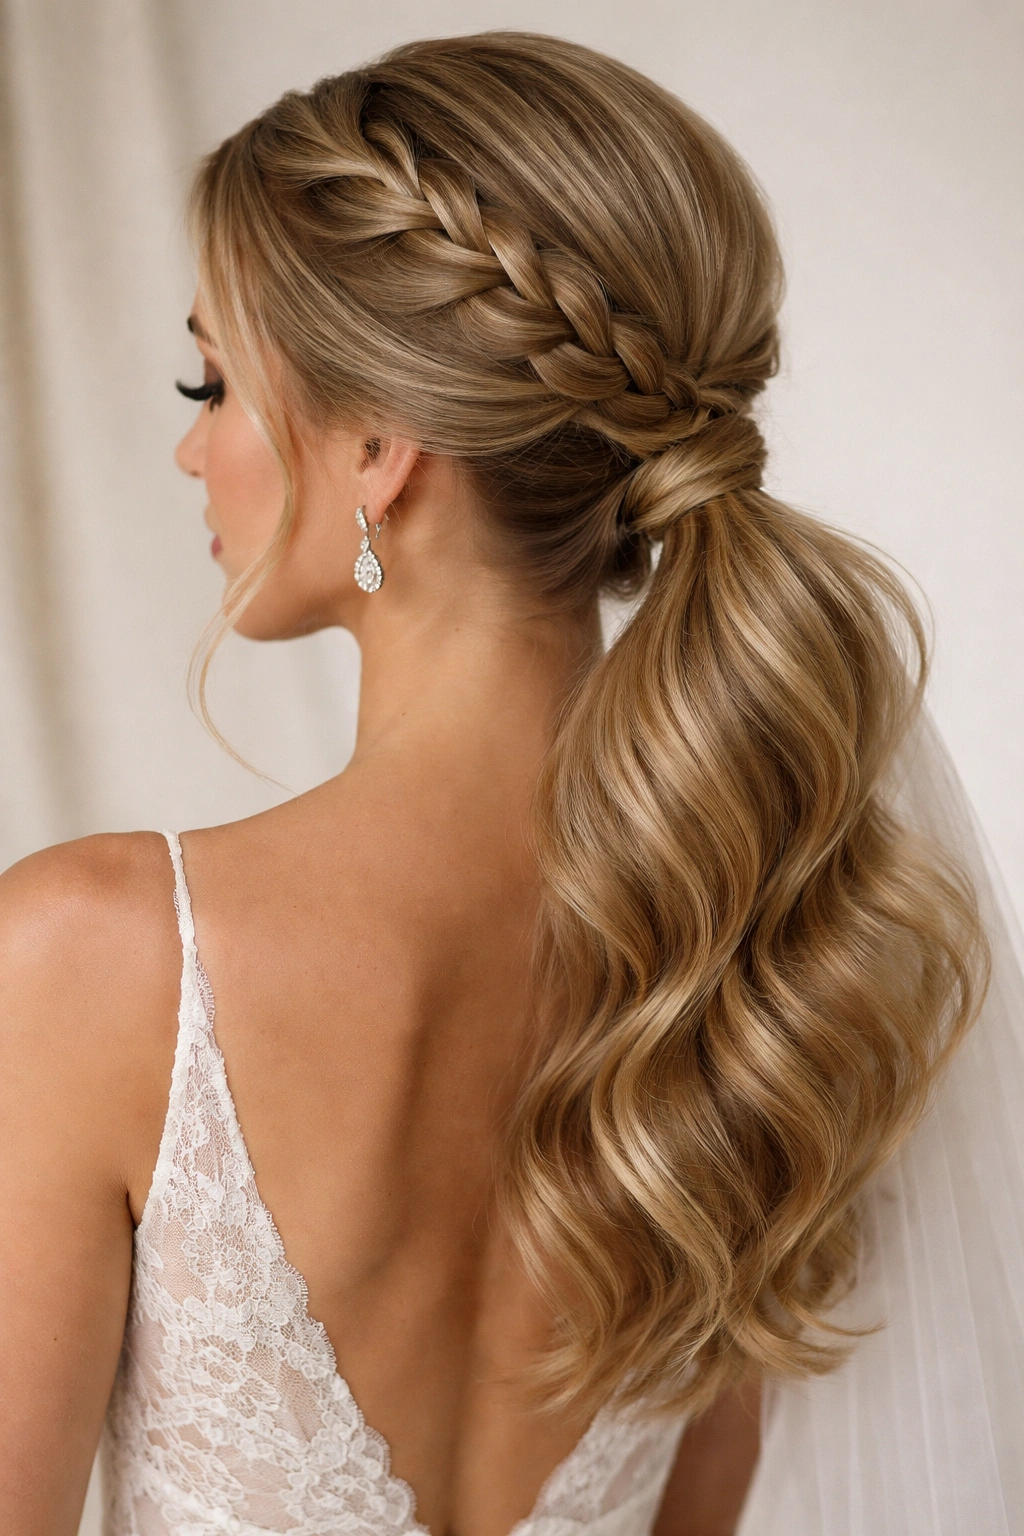
Incorporating one or more braids into a low ponytail adds visual interest, texture, and an inherently romantic quality that reads beautifully in photographs and feels special enough for a formal event. The most wearable approach for a wedding is a single Dutch or French braid that begins at the crown and flows into the ponytail, or two thin braids that frame the face before being incorporated into the tail.
Why Braids Elevate a Ponytail
A braid transforms a simple low ponytail from straightforward to thoughtfully styled without requiring an entirely different skill set if you can already braid. The braid also naturally creates texture and visual fullness, so you don’t need to curl your entire head—the braid itself becomes the focal point. Braided styles also hold up remarkably well throughout a long wedding day; the braiding itself acts as a structure that prevents the style from loosening or falling flat.
Techniques That Work for Weddings
- A single center braid (Dutch or French) that begins at the crown and flows into a loose, textured ponytail reads intentional and romantic
- Two thin braids, one on each side, swept back and incorporated into a low ponytail creates a feminine, delicate aesthetic
- A braid woven through the ponytail itself (after it’s already secured) adds detail without requiring different braiding skills
- Loose, slightly undone braids photograph more beautifully and feel more comfortable than tightly woven ones
Pro tip: Practice your braid style multiple times beforehand because braids are difficult to redo mid-event if they don’t turn out as planned. Film yourself or take photos of your practice runs so you can see how the style looks from all angles.
5. The Low Ponytail with Decorative Accessories
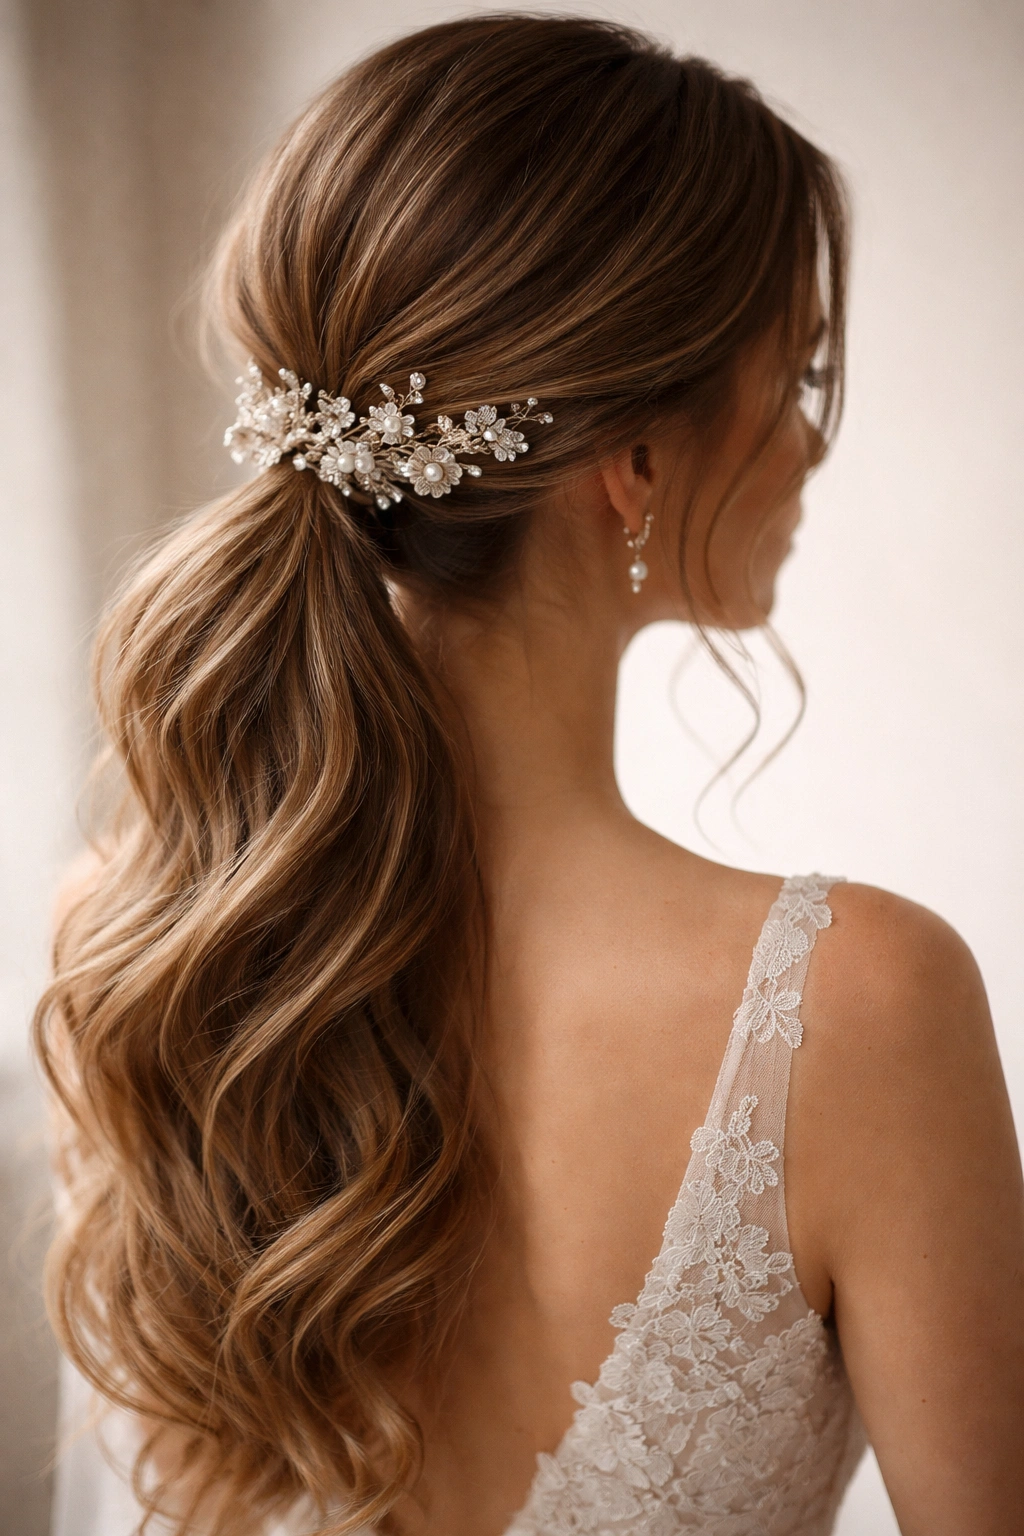
A pearl-adorned hair comb, a delicate barrette, a vintage hair clip, or even fresh flowers woven into the base of a low ponytail transforms a simple style into something that feels intentional and special without requiring complex techniques. This approach is particularly beautiful for brides who want to incorporate meaningful jewelry or accessories into their hairstyle.
Choosing Accessories That Read Bridal
The right accessory should complement your dress and overall aesthetic without feeling like costume jewelry or looking out of place. For weddings, opt for genuine materials—real pearls, actual gold or silver, fresh flowers or high-quality faux botanicals—rather than rhinestone-heavy pieces unless your entire wedding aesthetic is sparkly and glamorous. The accessory should also be substantial enough to be visible in photographs without being so heavy that it slides down throughout the day.
Placement That Works
- A comb placed at the base of the ponytail (where the elastic is) secures beautifully and looks intentional
- A clip placed slightly to one side of the ponytail reads more fashion-forward than centered
- Fresh flowers tucked into the base or woven into the first few inches of the ponytail tail create an ethereal, garden-party vibe
- A single statement piece usually reads more elegant than multiple competing accessories in the same area
Real talk: If you’re using fresh flowers, request them from your florist or have your hairstylist source them, as grocery-store flowers often wilt quickly. Secure them with floral wire so they stay exactly where you position them, and have your hairstylist pin them in place so they don’t slide down during the event.
6. The Twisted Low Ponytail

A twisted low ponytail offers all the elegance of a braid with a softer, slightly less formal appearance. Instead of interweaving sections, you’re twisting two sections of hair together, which creates a rope-like texture that’s simpler to execute but equally visually interesting. You can create twists that begin at the crown and flow into the ponytail, or twist the ponytail itself after it’s secured.
Why Twists Read as Effortlessly Elegant
Twists are inherently flattering because they’re simple enough to look unforced but detailed enough to feel special. They work beautifully with both sleek and textured hair, they’re forgiving of slightly imperfect execution (which is why they’re ideal for a DIY wedding day), and they photograph beautifully from every angle. A twisted style also tends to read slightly less formal than a braid, which can be perfect if you want to feel elegant but not overdone.
Creating Twists That Stay Secure
- Twist two equal sections of hair together tightly, then gently loosen the twist slightly to create texture and softness without unraveling
- Secure the twist at the base with bobby pins placed perpendicular to the twist direction, which prevents it from unwinding
- If you’re twisting the entire ponytail, work in sections (twist 3-4 inches, secure with a tiny elastic, twist the next section, etc.) rather than trying to twist the entire tail at once
- A light hold hairspray keeps twists secure throughout the day without making them look stiff
Worth knowing: Unlike braids, twists benefit from being slightly looser and more textured rather than pulled tightly, which actually makes them easier to execute if you’re not a braiding expert.
7. The Half-Up, Half-Down Low Ponytail
This hybrid style keeps some hair down for fullness and softness while pulling the top half back into a low ponytail or secured with a comb or clip. This works beautifully if you want the romance of down hair with the practicality of keeping hair off your face and neck. The style requires enough length that you have significant hair hanging down (generally shoulder length or longer), but it’s enormously flattering and feels effortless.
The Appeal of a Half-Up Style
A half-up, half-down approach gives you the visual impact of down hair without the practical challenges of having hair in your face during the ceremony or while eating and dancing. It also photographs beautifully because you get texture and volume from both the pulled-back section and the cascading length. This style works particularly well if your wedding dress has beautiful back detail that you want to show off—the down hair frames the dress beautifully.
Execution That Works
- Start with textured waves throughout your entire head, not just the down portion
- Pull back the top half (from ear to ear across the crown) and secure it with an elastic, clip, or decorative comb at the back of your head
- Release some face-framing pieces from the pulled-back section for softness
- Tease the crown area slightly before pulling back to create volume and a flattering shape
Pro tip: The transition between pulled-back and down hair shows in photographs, so make sure the pulled-back section is smooth and intentional rather than accidentally bumpy.
8. The Low Ponytail with Textured Waves and Movement

This style emphasizes waves and texture throughout both the pulled-back section and the ponytail tail, creating a look that’s full of movement and photographs beautifully. The key is intentional, varied waves rather than uniform curls—some waves should be tighter, some looser, creating dimension and natural-looking texture that moves when you walk.
Creating Waves That Last All Day
- Use a 1.5-inch curling iron and wrap sections of hair around it for 3-4 seconds, then release
- Vary the direction you wrap each section (alternating which way the curl wraps) to create natural movement rather than uniform ringlets
- Allow curls to cool completely before brushing them out—this sets the wave and makes it last significantly longer
- Brush through the curls very gently with a paddle brush or wide-tooth comb once they’re completely cool, breaking up the curls into soft waves
Maintaining Waves Through the Event
- Use a texture spray or light-hold hairspray before curling to give the waves grip and longevity
- Avoid applying product after curling, which can make waves look frizzy or weighed down
- If you’ll be outdoors or in a humid environment, consider a stronger hold hairspray or anti-frizz serum applied very sparingly
Insider note: The day before your wedding, do a test run of curling and waving your hair, then sleep on it. In the morning, you’ll see how the waves settle and last, which tells you whether you need to adjust your curling technique or product choices.
9. The Bubble Ponytail
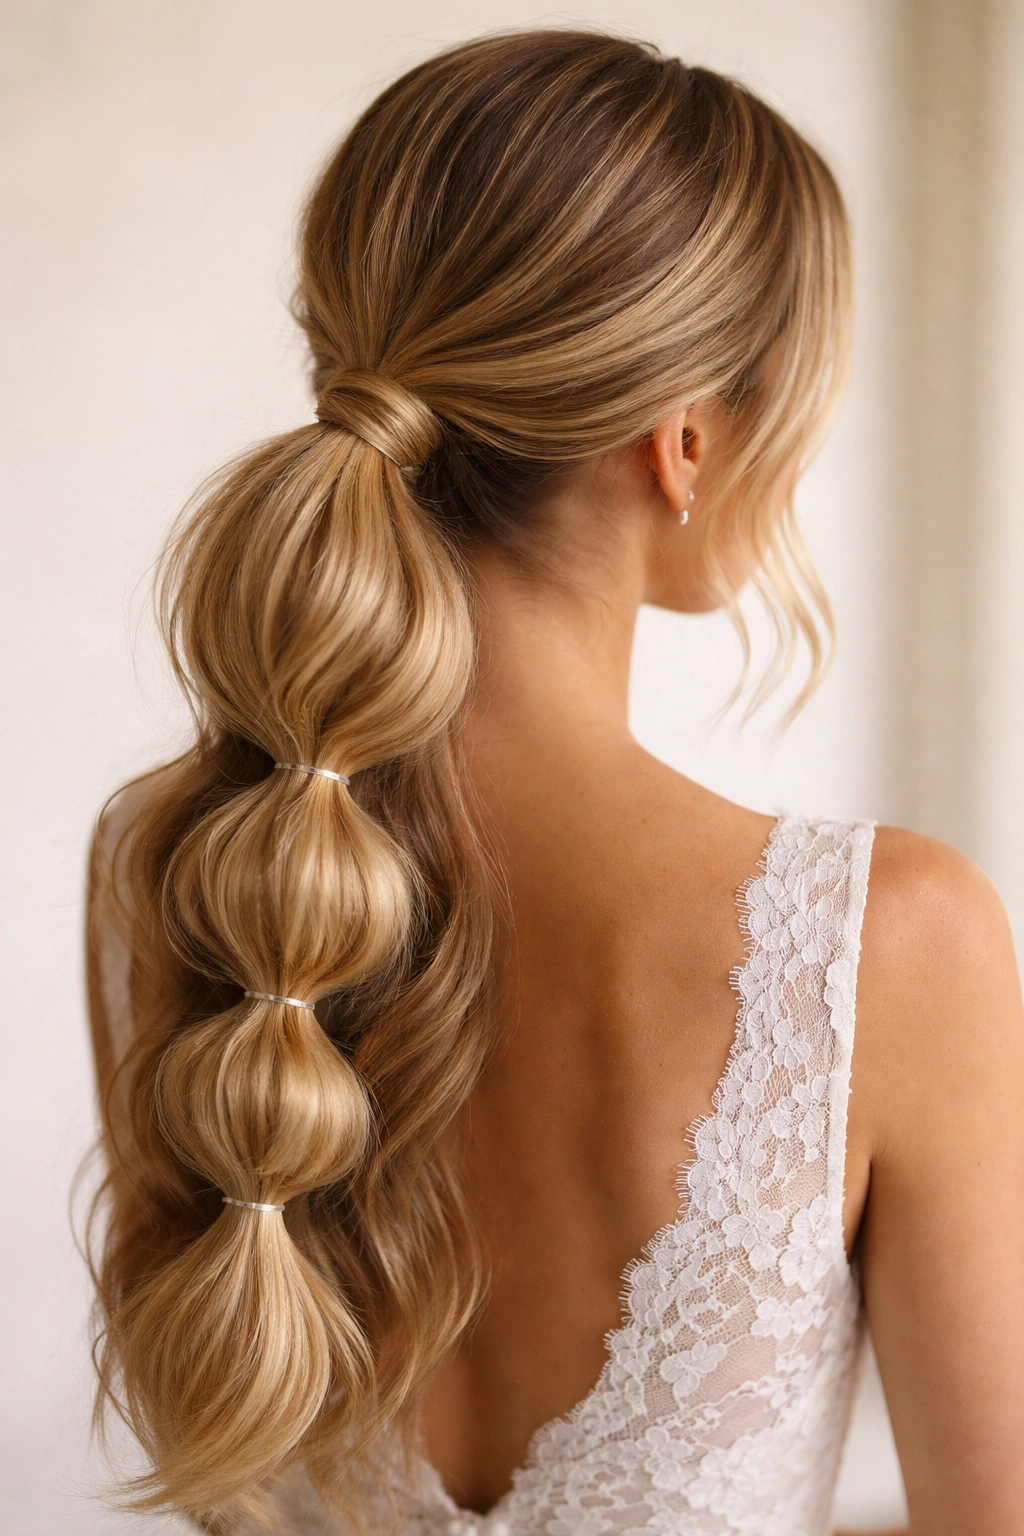
A bubble ponytail (also called a stacked ponytail or segmented ponytail) creates the illusion of multiple mini ponytails stacked on top of each other, forming a textured, dimensional look that’s visually interesting and surprisingly easy to execute. You secure a low ponytail, then use additional small elastics to cinch the tail at intervals, creating bubble-like sections of hair between each elastic.
Why Bubble Ponytails Work for Weddings
This style is inherently fun and eye-catching without being overly casual or playful. The segments create texture and fullness that photographs beautifully, and the style holds up exceptionally well throughout a long event because each segment is individually secured. It’s also surprisingly flattering—the segments and texture create visual interest that draws the eye, making it a wonderful choice if you want a statement hairstyle that still feels wearable.
Creating Defined, Beautiful Bubbles
- Secure your initial low ponytail with an elastic
- Place a second elastic about 2-3 inches down the ponytail tail and gently pull the section between the two elastics outward, creating a bubble shape
- Repeat this process, spacing elastics 2-3 inches apart, down the entire length of the tail
- After creating all the bubbles, gently tease each bubble section to create texture and fullness
Worth knowing: The number of bubbles (usually 3-5) depends on the length of your hair. Longer hair accommodates more bubbles and looks more dramatic; shorter ponytails might have only 2-3 bubbles, which is equally beautiful but creates a different proportional effect.
10. The Low Ponytail with an Upswept Tail or Mini Bun
Instead of leaving the ponytail hanging straight down, gather the tail and wrap or pin it upward, creating a soft, compact shape at the base of the ponytail. This can be a full mini bun (where you twist or fold the entire tail back on itself and secure it), or a partial upswept where just the ends are tucked up. This approach gives you the sophistication of an updo with the relative simplicity of a ponytail.
The Visual Impact of an Upswept Style
This variation works beautifully if you want something more formal than a traditional ponytail but don’t want the full commitment of an intricate updo. The style shows off your neck and shoulders, which photographs beautifully and feels elegant. It also keeps all your hair secured and controlled throughout the day, with no risk of pieces escaping or needing touch-ups.
Techniques for a Polished Upswept Tail
- Create texture and waves throughout your hair before securing the initial ponytail
- Pull the ponytail tail up and to the side, then twist it and wrap it around itself, securing with bobby pins
- For a mini bun effect, create a very loose bun with the tail, allowing wispy pieces to escape for softness
- Secure everything with bobby pins matched to your hair color, placed perpendicular to the direction of the twist
Pro tip: This style is easier if you have thick hair or hair that’s textured, as slippery, fine hair can slide out of the upswept position. If you have fine hair, use a light texture spray on the tail before twisting it upward to give it grip.
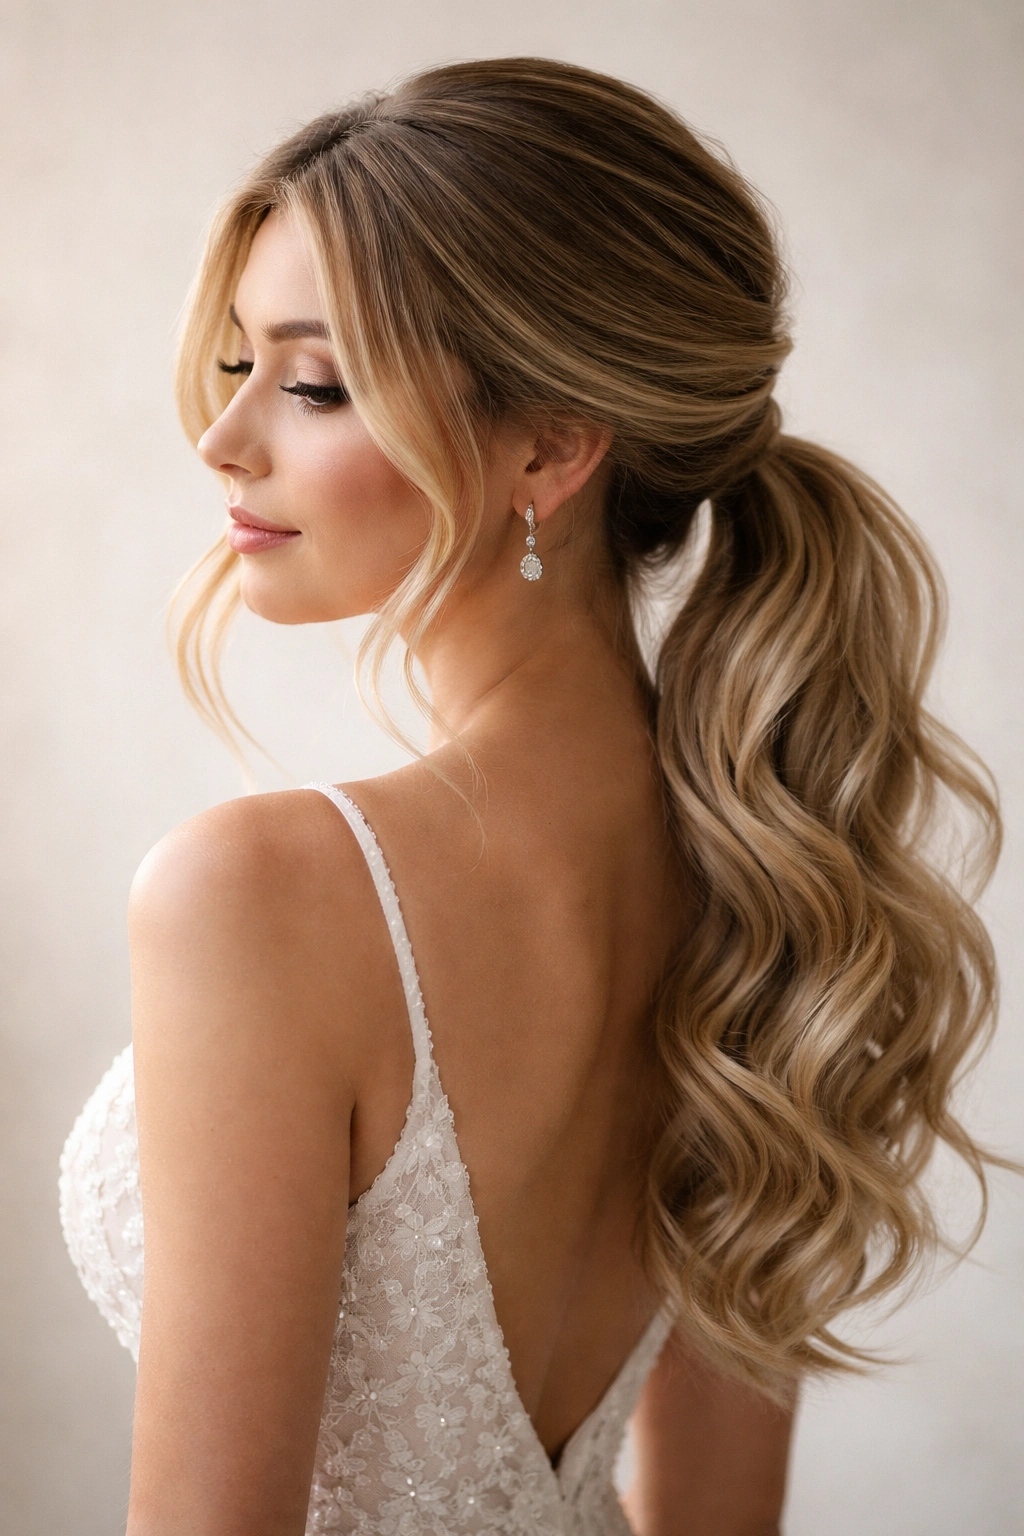
11. The Romantic Low Ponytail with Soft Curls and Movement
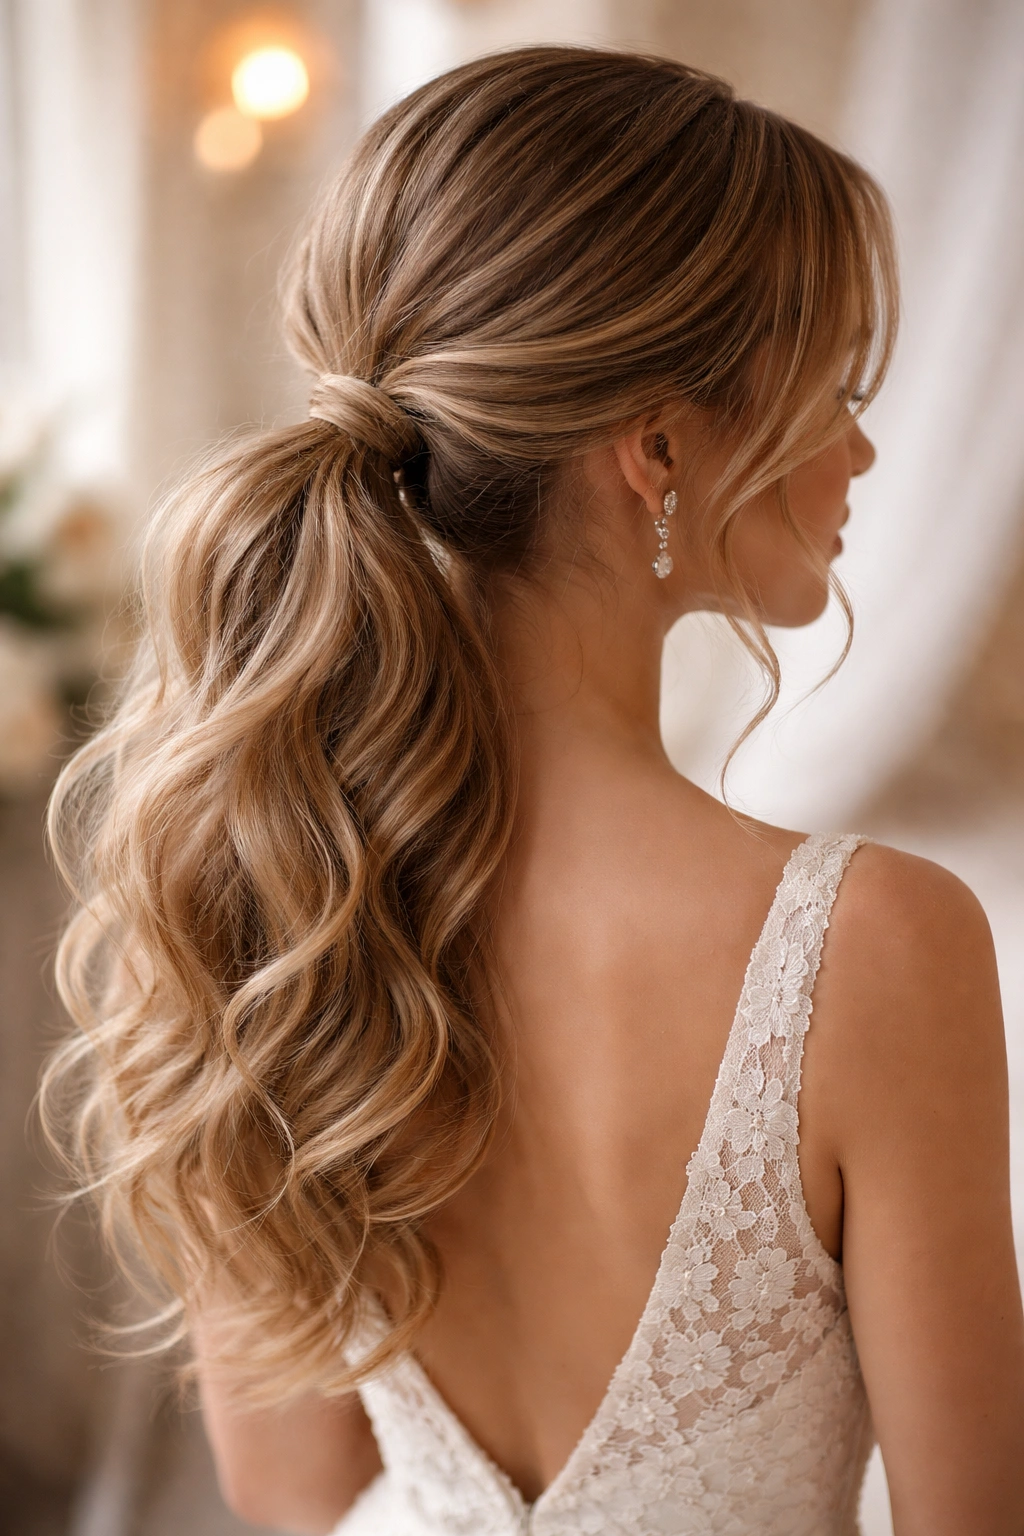
This style combines everything romantic: textured waves, an intentionally soft ponytail (not too tightly pulled), face-framing pieces, and curls or waves that cascade throughout the tail. The overall effect is dreamy and ethereal, perfect for brides or wedding guests who want to feel genuinely romantic and feminine.
Building Layers of Softness
Start with larger, looser waves created with a curling iron, then gently brush through them to create soft texture. Pull back the top half into a low ponytail, leaving face-framing pieces loose. Create additional waves throughout the ponytail tail itself so that every section of hair has movement and texture. The key is layering softness—textured roots, textured ponytail base, face-framing pieces, and textured tail all work together to create an effect that’s cohesive and intentionally romantic rather than accidentally disheveled.
Maintaining Romantic Movement All Day
- Use a flexible elastic that won’t crease or damage hair, so if you need to loosen or readjust the ponytail, it still looks beautiful
- Avoid over-spraying with product, which makes soft waves look stiff and heavy
- Gently finger-comb through curls once or twice during the event to refresh the texture without completely unraveling the waves
Real talk: Romantic, soft styles require more maintenance throughout the event than sleek or structured styles. Plan for a quick touch-up (finger-combing, gently reshaping face-framing pieces, a quick spritz of texture spray) in the bathroom once during the reception.
12. The Sleek Braided Low Ponytail with a Polished Finish
This is the intersection of structure and refinement—a tightly woven braid (Dutch or French, beginning at the crown) that flows into a sleek low ponytail, creating a style that’s simultaneously detailed and polished. This works beautifully if you have thick hair or naturally straight hair that holds a braid well, and it photographs like a professional bridal style without requiring an elaborate updo.
Why This Style Reads Bridal
A braided low ponytail has the sophistication and intentionality of a full updo without the complexity. The braid creates structure and visual interest, while the low ponytail keeps the style wearable and comfortable. This style also holds up remarkably well throughout a long event because the braid itself acts as an anchor, preventing slippage or loosening.
Executing a Polished Braided Low Ponytail
- Begin the braid at the crown using a Dutch braid (braiding under rather than over, which creates a raised, dimensional braid)
- Pull the braid tightly enough to look intentional and polished, but not so tightly that you risk a headache or hair breakage by the end of the night
- Allow the braid to flow naturally into the low ponytail base rather than forcing a sharp transition
- Conceal the elastic at the base by wrapping a small section of hair around it and securing with a bobby pin
- Finish with a medium-hold hairspray to keep everything smooth and polished
Worth knowing: Braids are easier to execute on hair that’s been blow-dried the day before (called second-day hair) rather than freshly washed hair, which tends to be slippery and difficult to work with. If you’re washing your hair the morning of the event, use a dry shampoo or texturizing spray afterward to give the braid grip.
Final Thoughts
A low ponytail offers the perfect balance for weddings—structured enough that you feel put-together and polished, but comfortable and wearable enough that you can forget about your hair and focus on celebrating. The variety of styles in this guide means you can find a version that matches your personal aesthetic, your hair type, and the specific vibe of the wedding you’re attending. Whether you choose something romantic and textured, sleek and architectural, or embellished with braids and accessories, a well-executed low ponytail is an elevated choice that photographs beautifully and keeps you feeling confident from the ceremony through the last dance of the reception.
The most important step is doing a full practice run at least one week before the event. Style your hair exactly as you plan to wear it, sleep on it, and see how it looks and feels the next morning. This test run reveals whether your chosen style actually holds the way you want it to, whether it’s comfortable for hours of wear, and whether the products and techniques you’re using create the effect you’re envisioning. Small adjustments made during a practice run—tightening a section, adjusting where face-framing pieces fall, changing your product choices—translate to a significantly more polished final result on the actual wedding day.