A low ponytail has an undeniable charm that higher styles simply can’t match. There’s something sophisticated about the way a sleek, polished low pony sits just at the nape of your neck, especially when it’s finished with intention and care. It’s the kind of hairstyle that works whether you’re heading to a client meeting, a dinner date, or just running errands—it reads as effortlessly put-together in a way that makes you look like you’ve actually put thought into your appearance, even on days when you’re mostly running on coffee and good intentions.
The beauty of the low ponytail is that it’s far more versatile than people realize. Sure, everyone knows the basic sleek version, but that’s just the starting point. Low ponytails can be textured or smooth, playful or polished, adorned with ribbons or left entirely minimal. They can incorporate braids, twisted sections, face-framing pieces, or a combination of techniques that elevate the style from ordinary to genuinely striking. The key is understanding which variation suits your hair texture, face shape, and the message you want to send with your appearance.
What makes a low ponytail truly “put together” isn’t complexity—it’s precision and attention to detail. It’s the difference between looking like you threw your hair back and looking like you’re wearing an intentional style. A few strategic pieces of technique, the right products, and knowing which variation plays to your strengths transforms the low ponytail from a casual default into something genuinely polished. Let’s explore twelve versions that deliver that elevated, considered look every single time.
1. The Sleek and Shiny Low Pony
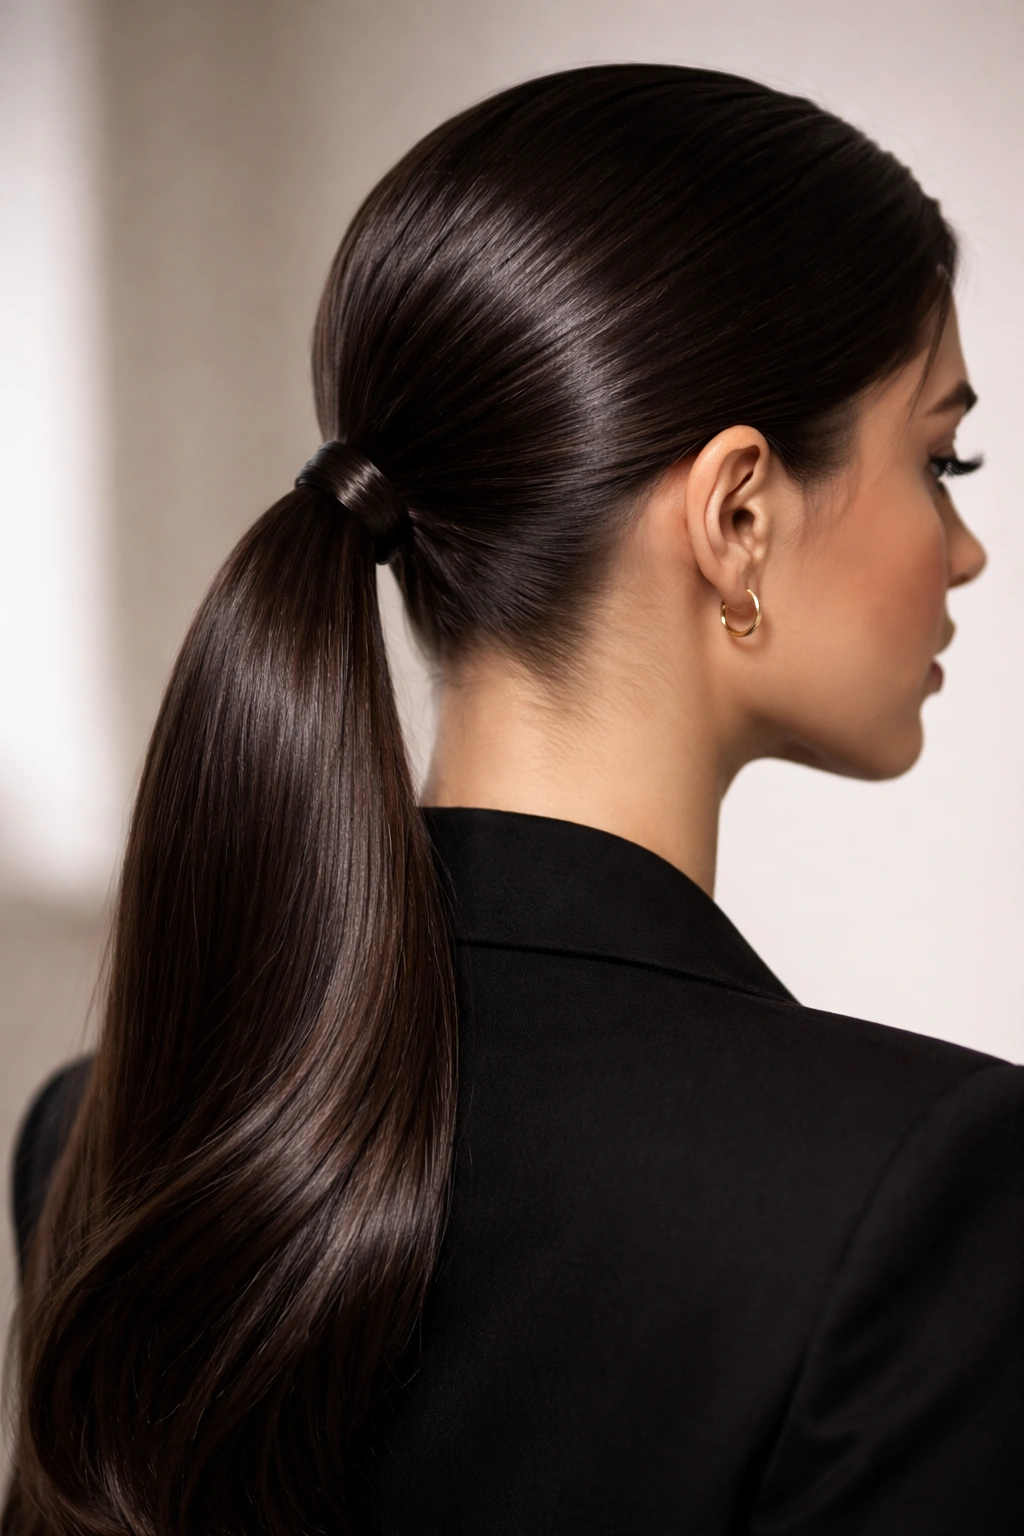
The classic sleek low ponytail is the foundation that all other low pony styles build upon, and when it’s done right, it’s absolutely unbeatable for a truly polished appearance. This version relies on perfectly smooth hair pulled back into a tight, refined pony positioned at the base of your skull, with zero flyaways and a high-shine finish that catches the light beautifully.
How to Achieve That Glossy Smoothness
Start with damp hair and apply a smoothing serum or anti-frizz cream from mid-length to ends, focusing on the areas you’ll pull back. Blow-dry your hair completely straight using a paddle brush, keeping tension and smoothness throughout. Once dry, apply a small amount of pomade or gel to a fine-tooth comb and run it through your hair, especially around your hairline and any baby hairs. Pull your hair back into a tight low ponytail at the base of your skull, securing it with a clear elastic or a small hair tie. The trick is making sure the base is absolutely secure—a loose pony doesn’t read as polished, it reads as unintentional.
Pro Styling Secrets
Use a boar bristle brush when blow-drying to enhance shine and smoothness naturally. After securing your ponytail, apply a tiny drop of shine spray or serum to your hands and smooth it over the pony itself and any flyaways around your hairline. For extra grip and hold, spritz the secured pony with a light hairspray—this prevents slippage throughout the day without making it look stiff or sprayed. This style works beautifully with a sleek part down the middle or a deep side part, and it suits almost every hair type if you use the right smoothing products for your texture.
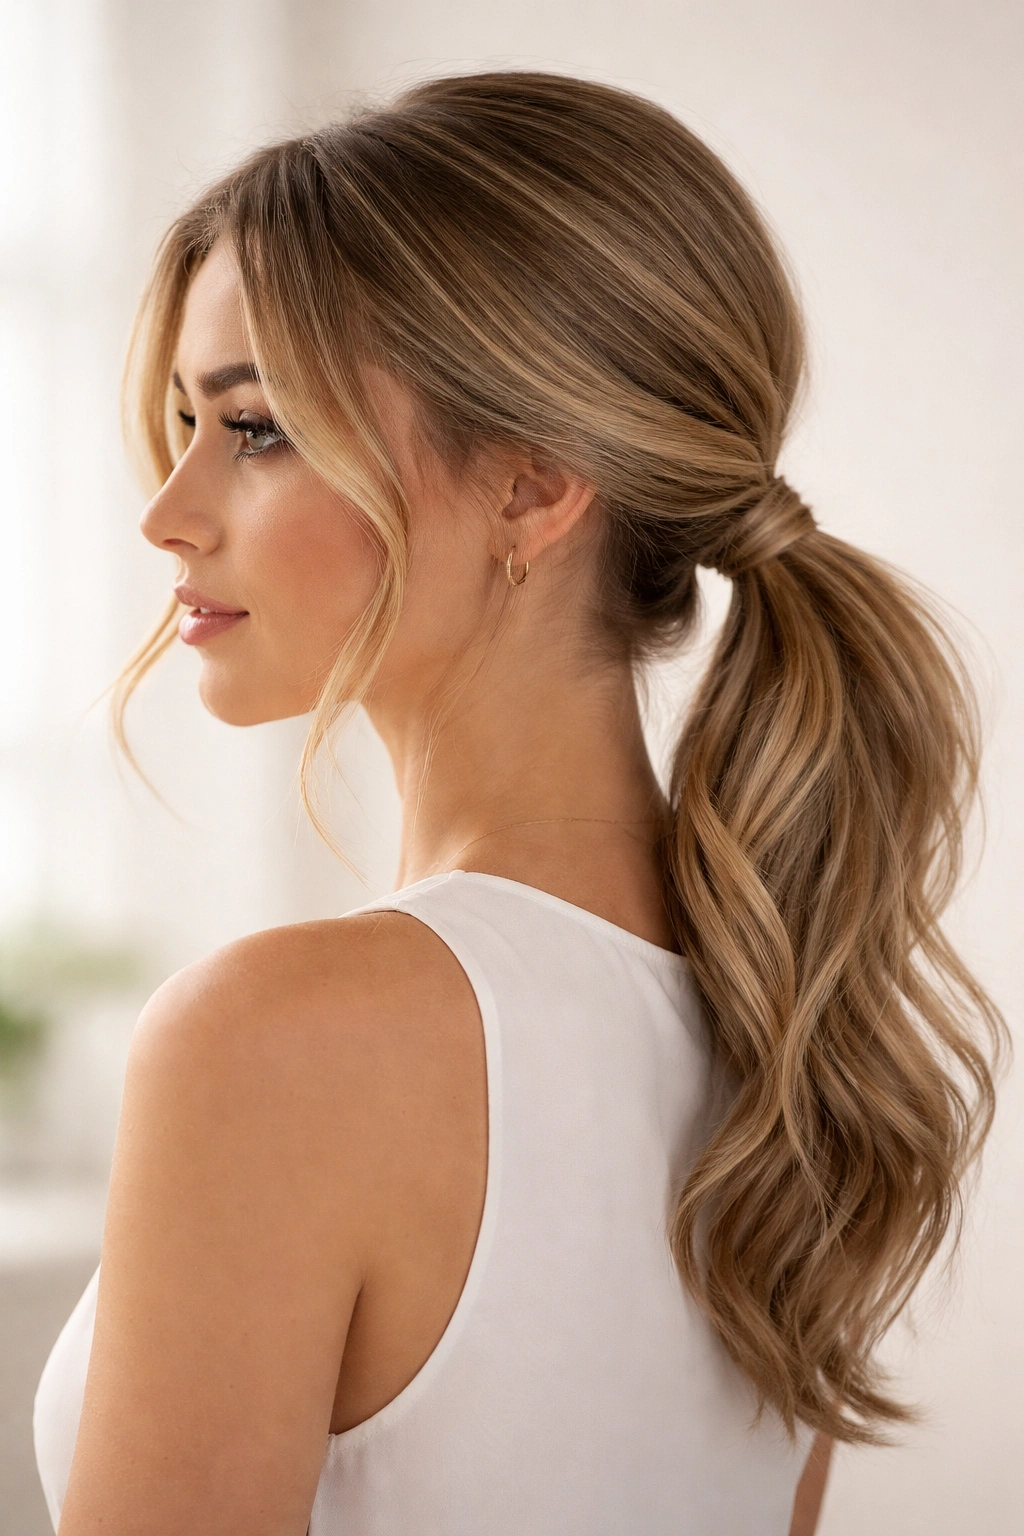
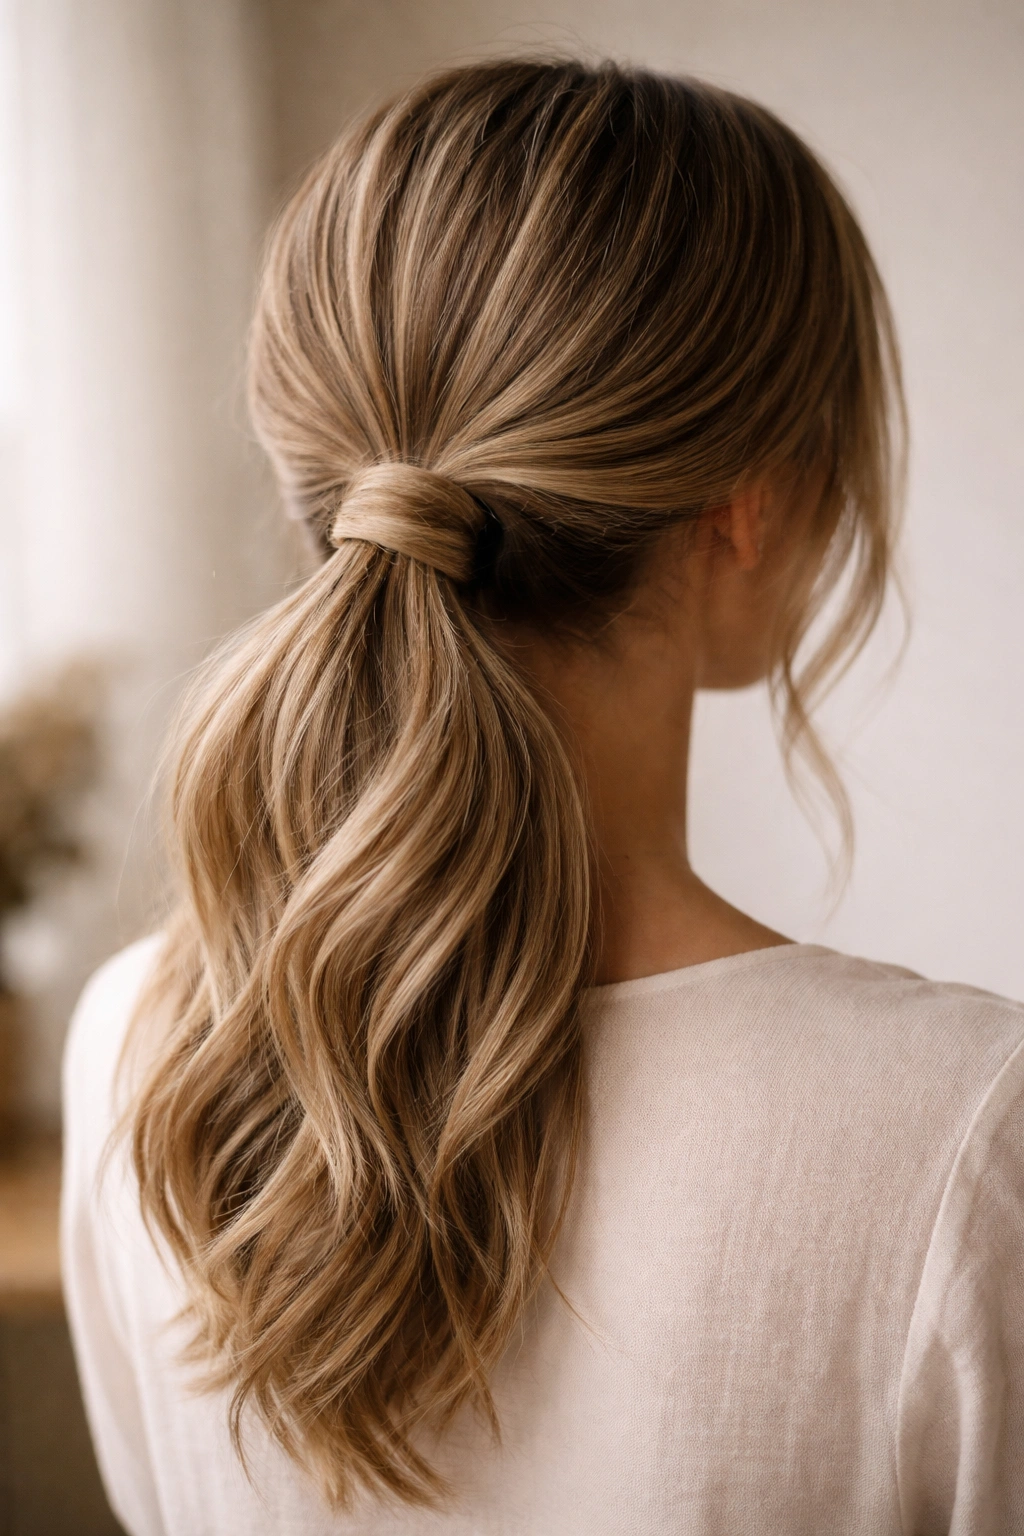
2. The Textured Low Pony with Waves
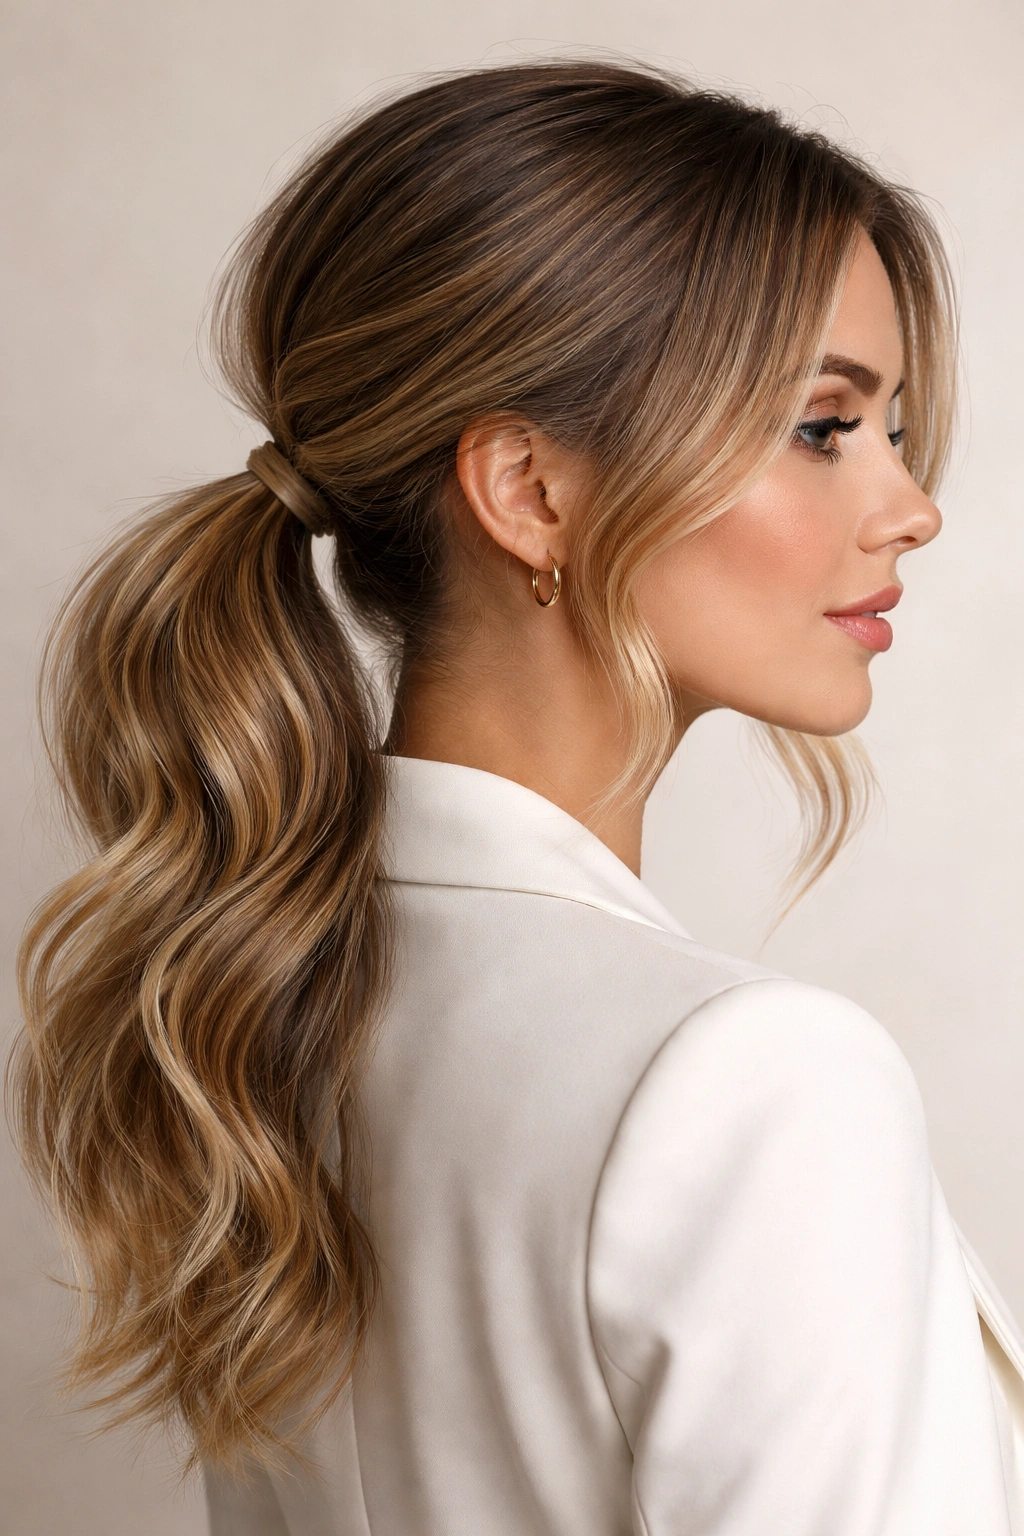
This version keeps the refinement of a low ponytail while adding movement and dimension through waves, giving you an approach that feels both polished and relaxed. The waves make the style feel current and romantic without sacrificing the clean, put-together silhouette that makes low ponies so appealing for professional or formal settings.
Building Texture Into Your Style
Start with your hair at least slightly damp or use a texturizing spray on dry hair. If you’re working with damp hair, divide it into sections and use a curling iron (1.25 to 1.5 inches in barrel size) to create loose waves throughout. The key is varying the direction—curl some sections away from your face, some toward it, and some in the opposite direction to the section next to it. This randomness creates the illusion of natural movement rather than a processed wave set. Once all your waves are set, gently run your fingers through your hair to soften and separate the curls slightly.
Pulling Back Textured Hair Intentionally
Gather your hair at the base of your skull, but instead of pulling it tight and slick, allow some of the textured strands to fall loosely into the ponytail. You’re looking for a balance between the structured pull of a ponytail and the softness of those waves. Secure with an elastic, then take a small section of hair from the underside of your pony and wrap it around the base to cover the elastic and add dimension. Finish with a light texture spray to enhance the waves without weighing them down. This style photographs beautifully and is particularly flattering for longer face shapes because the waves add width.
3. The Twisted Low Pony with Wrapped Base

Adding a twisted section that wraps around your head before joining your ponytail elevates the entire look with a technique that’s surprisingly simple to master but looks intricate and intentional. This version combines structure with softness, giving you a style that’s visibly more considered than a basic pony but still achievable in about five minutes once you practice it.
Executing the Twisted Foundation
Start with your hair smooth (use a smoothing cream if you need it). Take a section of hair from one side of your part and begin twisting it away from your face, moving toward the back of your head at ear level. As you twist, you’re not pulling the hair tight—you’re creating a gentle, loose twisted rope. Pin this twisted section in place at the back of your head with a bobby pin, tucking the end into where your ponytail will sit. Repeat on the other side if you’d like symmetry, or do just one twisted section for an asymmetrical approach.
Finishing the Look
Once both twisted sections are pinned at the back, gather all your hair (including those twisted sections) into a low ponytail and secure it. Now take a small piece of hair from the underside of your pony and wrap it around the base several times, pinning it underneath to hide the elastic completely. The twisted sections will be visible around the back of your head, creating a crown-like effect that reads as polished and intentional. This style suits wavy or textured hair particularly well because the texture helps the twists hold without needing tight tension.
4. The Sleek Slicked-Back Pony with Faux Fringe
This version works by slicking your entire head back tightly—including the front sections that normally frame your face—creating an ultra-modern, almost architectural look that’s extremely polished. The “faux fringe” comes from pulling a small section of hair from underneath your ponytail and laying it across your forehead, creating the illusion of a front section without actually cutting bangs.
The Slicked-Back Technique
This style requires commitment to sleekness, so start with a strong hold gel or pomade. Brush your hair straight back from your forehead, applying the gel as you go to ensure everything stays in place with zero flyaways. Use a fine-tooth comb to smooth everything down tightly. For maximum hold, blow-dry the slicked section with a brush to seal the gel and create a smooth, polished surface. Gather everything into a low, centered ponytail at the nape of your neck.
Adding the Faux Fringe Element
Once your ponytail is secured, take a small section of hair from underneath it (this is why you need good tension when securing the pony—it needs to be tight enough to hold this section in place while you work with it). Bring this section up and forward across your forehead, positioning it as if it were a front piece or subtle fringe. Pin it underneath to hold it in place. The effect is striking and modern, especially with a deep side part created before you slick everything back. This style is dramatic and definitely reads as intentional and thought-through, making it excellent for occasions where you want to make a statement.
5. The Braided Low Pony

Incorporating a braid into your ponytail adds complexity and visual interest without requiring technical skill—a simple three-strand braid is all you need to completely transform the sophistication level of your look. This version works beautifully for both casual and professional settings because braids naturally suggest effort and care.
Building Your Braid Foundation
You have several options here. The most straightforward approach is to create a Dutch braid (braiding away from your face) that runs from one side of your head to the back, then gathers that braid along with the rest of your hair into a low ponytail. Start the braid at your temple and braid toward the back of your head, incorporating hair as you go so the braid grows and becomes integrated with your pony. Alternatively, you can create a simple three-strand braid using your entire ponytail once it’s secured—this creates a braided pony that hangs down rather than wrapping around your head.
Styling Your Braided Pony
For a more polished look, use a smoothing product before braiding to keep flyaways minimal and edges clean. After creating your braid, gently pull the edges slightly to make the braid look fuller and more textured—this technique, called “pancaking” the braid, makes even a loose braid look intentional and interesting. Finish with a light hairspray to hold everything in place without creating a stiff, overly structured appearance. A braided low pony reads as refined and creative, and it’s one of the most versatile styles for different occasions—it works equally well at the office, at a casual dinner, or for a more formal event.
6. The Half-Up, Half-Down Low Pony
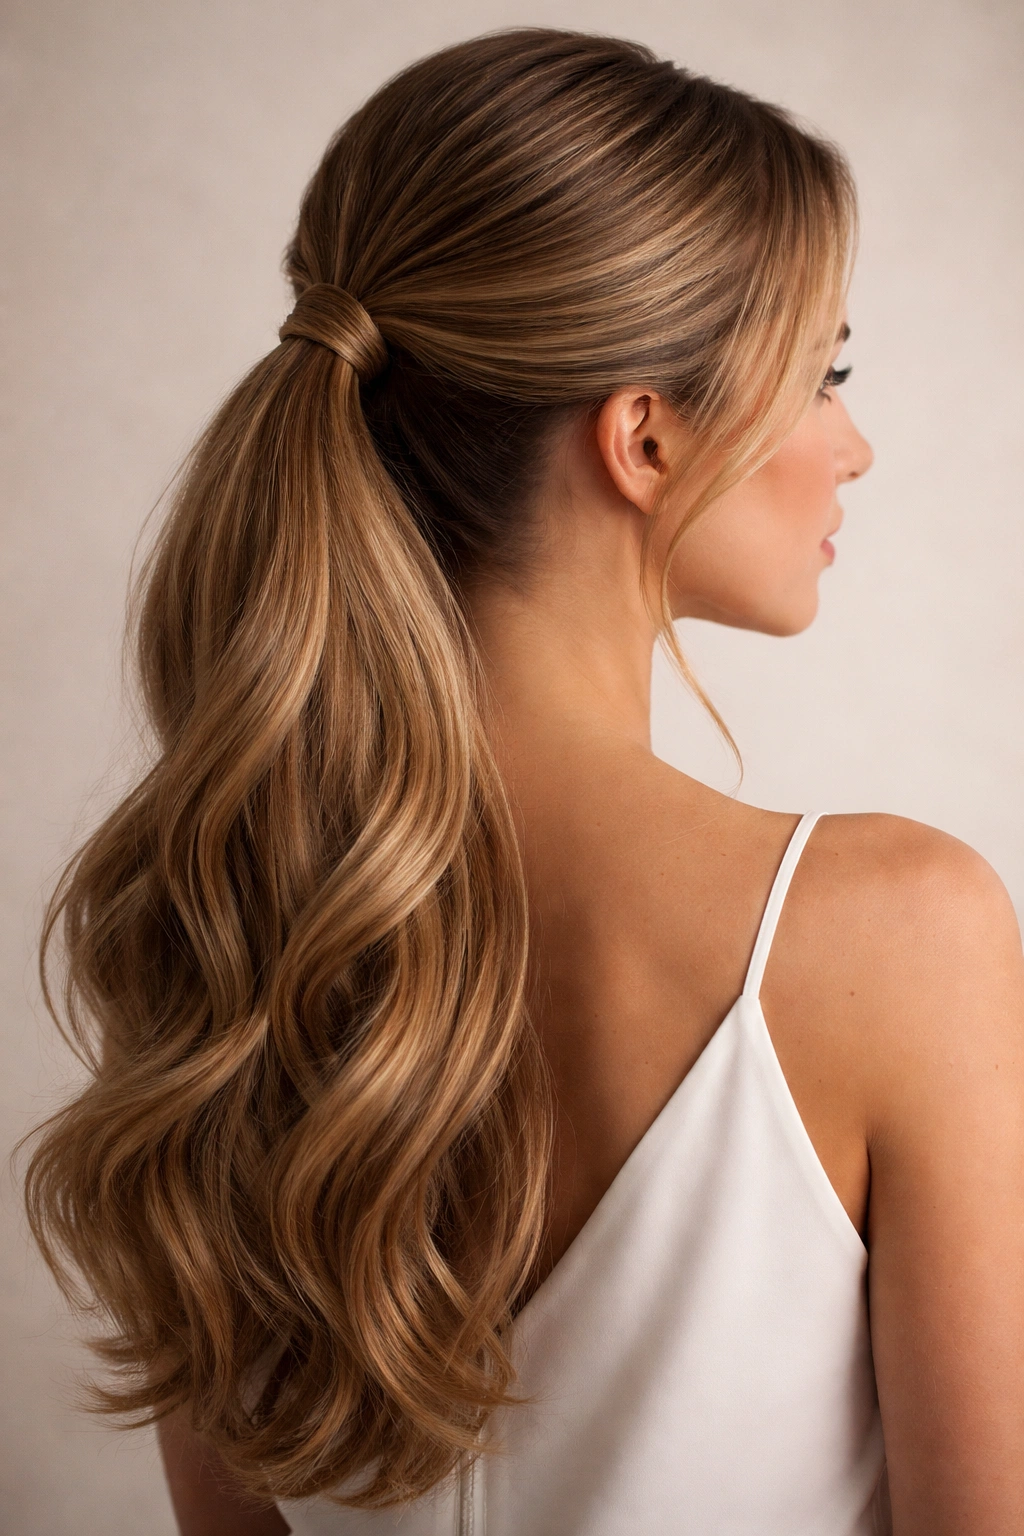
This variation takes the concept of a low ponytail and loosens it dramatically—you’re only securing the top half or upper third of your hair into a pony, leaving most of your length down for a softer, more relaxed silhouette. Despite being more informal than a full ponytail, when executed with intention, it looks polished and romantic rather than accidental.
The Key to Half-Up Proportion
Take hair from roughly ear level up to your crown, leaving everything below ear level completely down. You’re creating a section that’s about the width of your head from ear to ear. Smooth this section slightly, then gather it at the back of your crown (higher than a full ponytail) and secure it with a small elastic. The sections of hair you leave down should be face-framing and full-length, creating a soft frame around your face and neck.
Elevating the Half-Up
To make this feel more intentional and polished, add a secondary element. Try twisting the two sections on either side before gathering them into the pony, creating a twisted frame for your face. Or, take a small section from the ponytail itself and wrap it around the base to cover the elastic and add visual interest. Blow-dry or curl your down-hair in waves to add softness and movement—this prevents the style from looking too casual or unfinished. Adding face-framing layers of texture is crucial; without them, the style can read as indecisive rather than intentionally romantic.
7. The Velvet Ribbon Low Pony
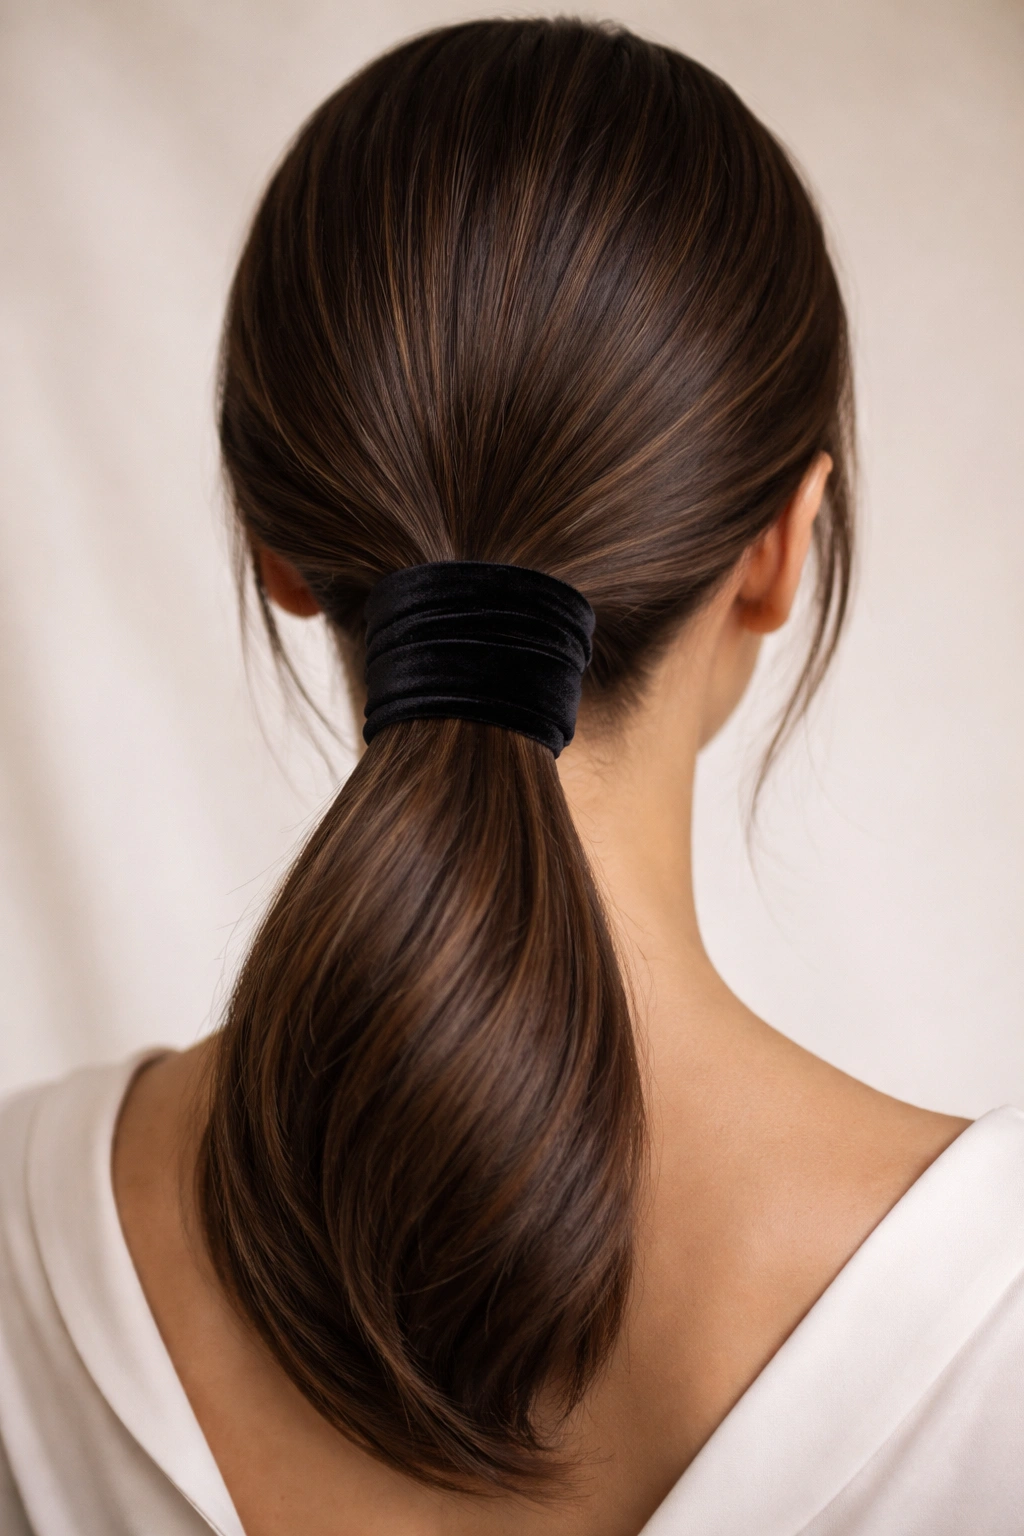
Adding a velvet ribbon to your low ponytail introduces a touch of texture and visual interest that immediately elevates the style from simple to intentional. This approach is particularly striking because ribbon adds luxury and sophistication while requiring almost zero additional technical skill.
Selecting and Positioning Your Ribbon
Choose a velvet ribbon in a color that complements your overall look—deep jewel tones work beautifully for formal occasions, while softer, muted colors feel more casual and everyday-friendly. Create your low ponytail first using your preferred method (smooth, textured, braided, twisted—ribbon works with any base). Cut a length of ribbon roughly two to three times the circumference of your ponytail.
The Wrapping Technique
Position the center of the ribbon at the base of your ponytail and wrap it around the elastic, layering the ribbon over itself as you go around. You’re creating a band of wrapped ribbon that completely covers your elastic and adds depth and dimension to the base of your pony. Secure the ribbon ends with a bobby pin tucked underneath so it’s invisible. The velvet texture catches light beautifully and adds a luxurious, finished quality to your style. This works especially well with sleek, smooth ponytails because the contrast between the sleekness of your hair and the plush texture of velvet is visually striking.
8. The Low Pony with a Pearl or Metal Cuff
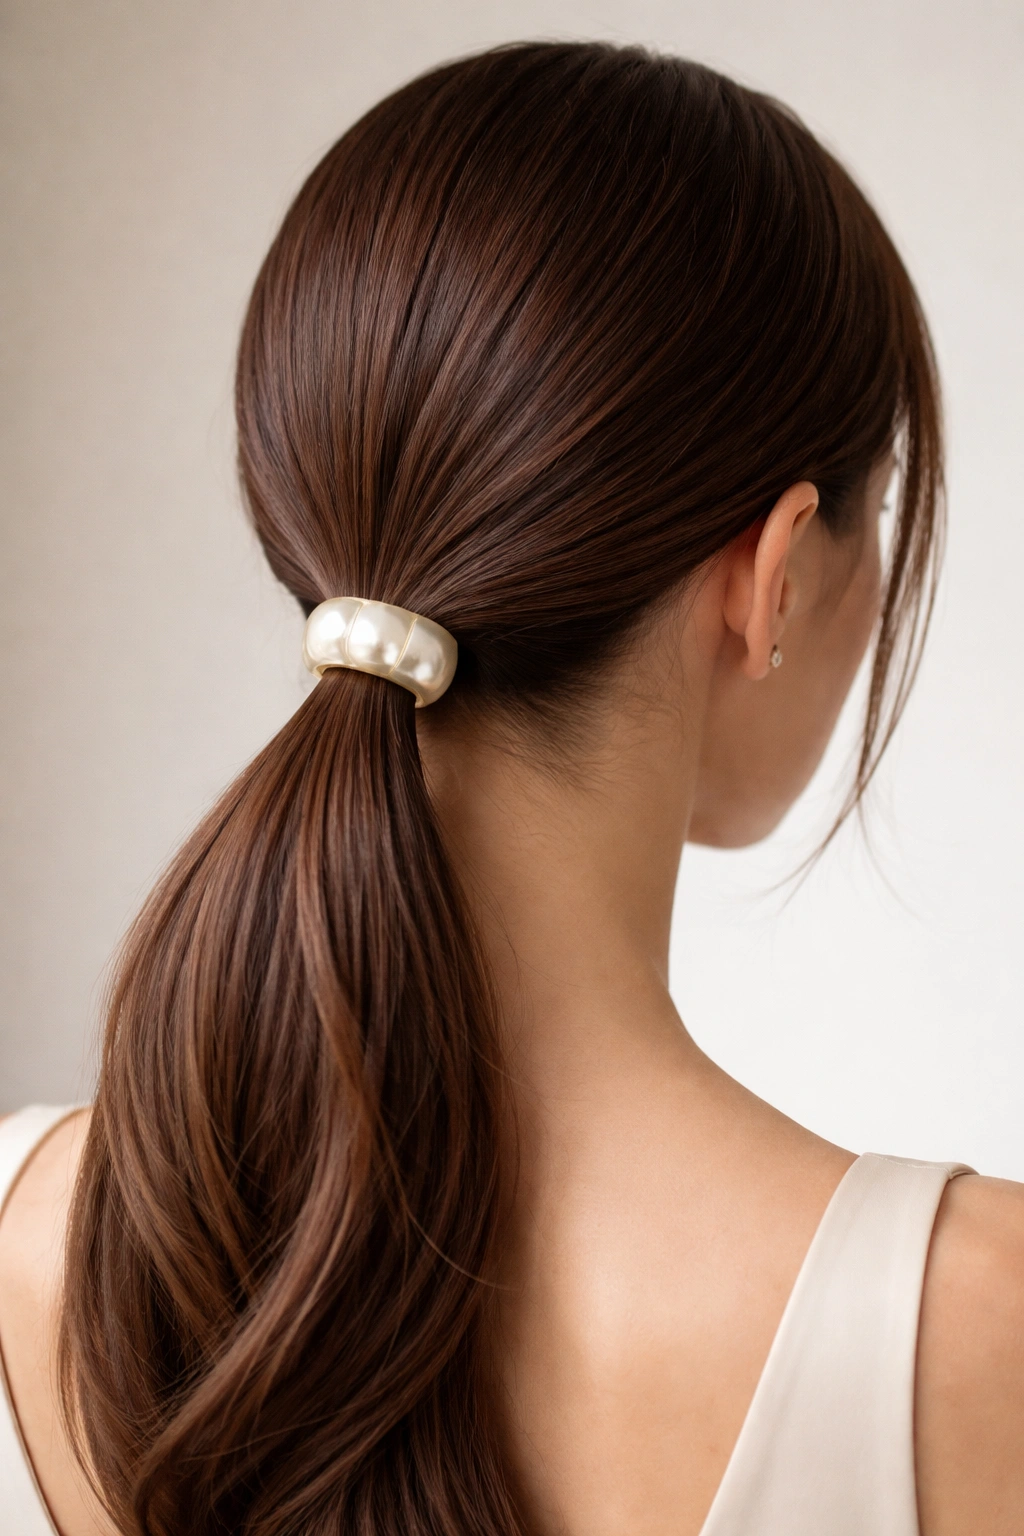
This minimalist approach to elevation relies on a single beautiful accessory—a pearl cuff, metal cuff, or decorative clip positioned at the base of your ponytail. The right accessory can make even a simple low pony feel entirely polished and intentional, which is why this method is so effective.
Choosing the Right Cuff or Clip
Look for pieces that feel substantial but not bulky—a cuff should sit close to your hair, not hang loosely around it. Pearl cuffs add elegance and vintage appeal, while sleek metal cuffs offer modern sophistication. Gold cuffs warm up most hair tones, while silver or gunmetal creates a more cool-toned, contemporary effect. The key is choosing something that either complements your everyday jewelry palette or makes a intentional statement piece that becomes part of your overall styling.
Installation and Impact
Create your low ponytail using your preferred method, and position your cuff or clip at the base. If your cuff has a clasp, wrap your ponytail through it and secure the clasp. If it’s a clip or open cuff, position it around the base of your pony so it sits evenly. The beauty of this approach is that the accessory does all the visual heavy lifting—you don’t need complex braiding or wrapping; the piece itself communicates intention and care. Pair this with extremely smooth, sleek hair for maximum impact, or use it with textured hair for a more relaxed, modern vibe.
9. The Twisted Ponytail with Undone Strands
This version combines the polish of a structured ponytail with the softness of face-framing pieces, creating balance and dimension. By intentionally leaving a few twisted strands free around your face, you avoid the severity that sometimes comes with fully pulled-back styles while maintaining that put-together quality.
Creating Intentional Wispy Layers
Start with hair that’s smooth or slightly wavy. Before securing your main ponytail, take two small sections from the front of your hair—one on each side, roughly at temple level. Twist these sections loosely as you move them toward the back of your head, stopping about three-quarters of the way back but not securing them yet. Now gather the bulk of your hair (everything except these two twisted front pieces) into a low ponytail and secure it.
Finishing the Face-Framing
Once your pony is secured, wrap one of your twisted side sections around the base of the ponytail and pin it underneath. Do the same with the other twisted section on the opposite side. The effect is face-framing twisted pieces that create softness and dimension, but because they’re pinned down, the style still reads as structured and intentional rather than accidental. This approach is particularly flattering for angular face shapes because the twisted pieces soften your features, and it works beautifully for both professional and casual occasions.
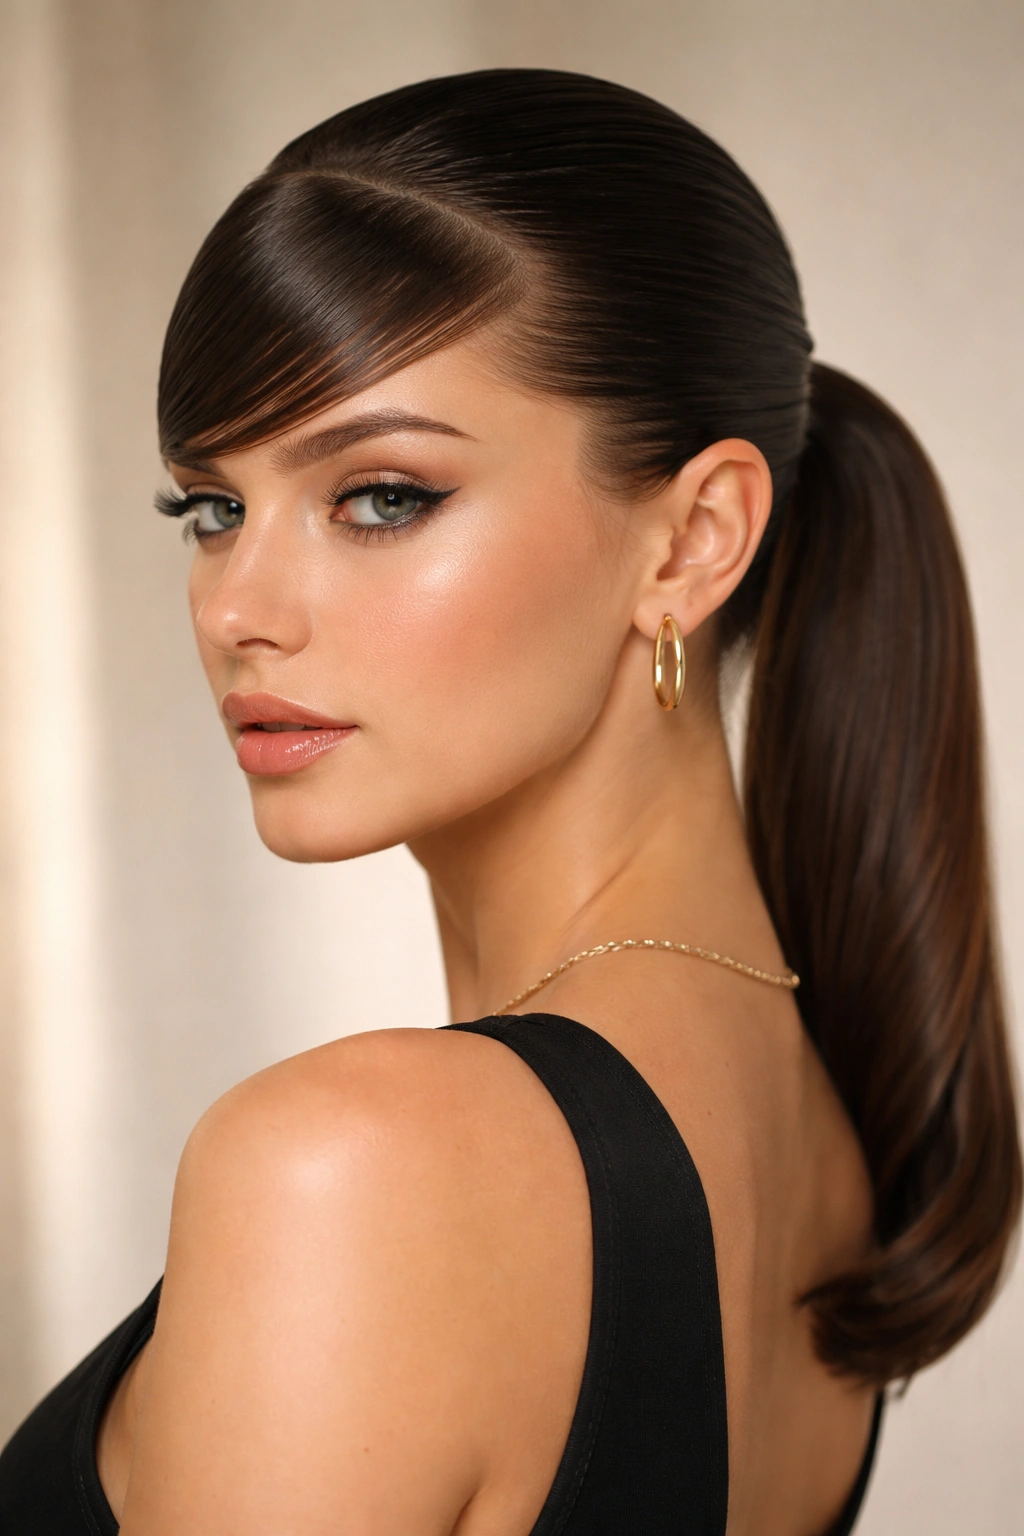
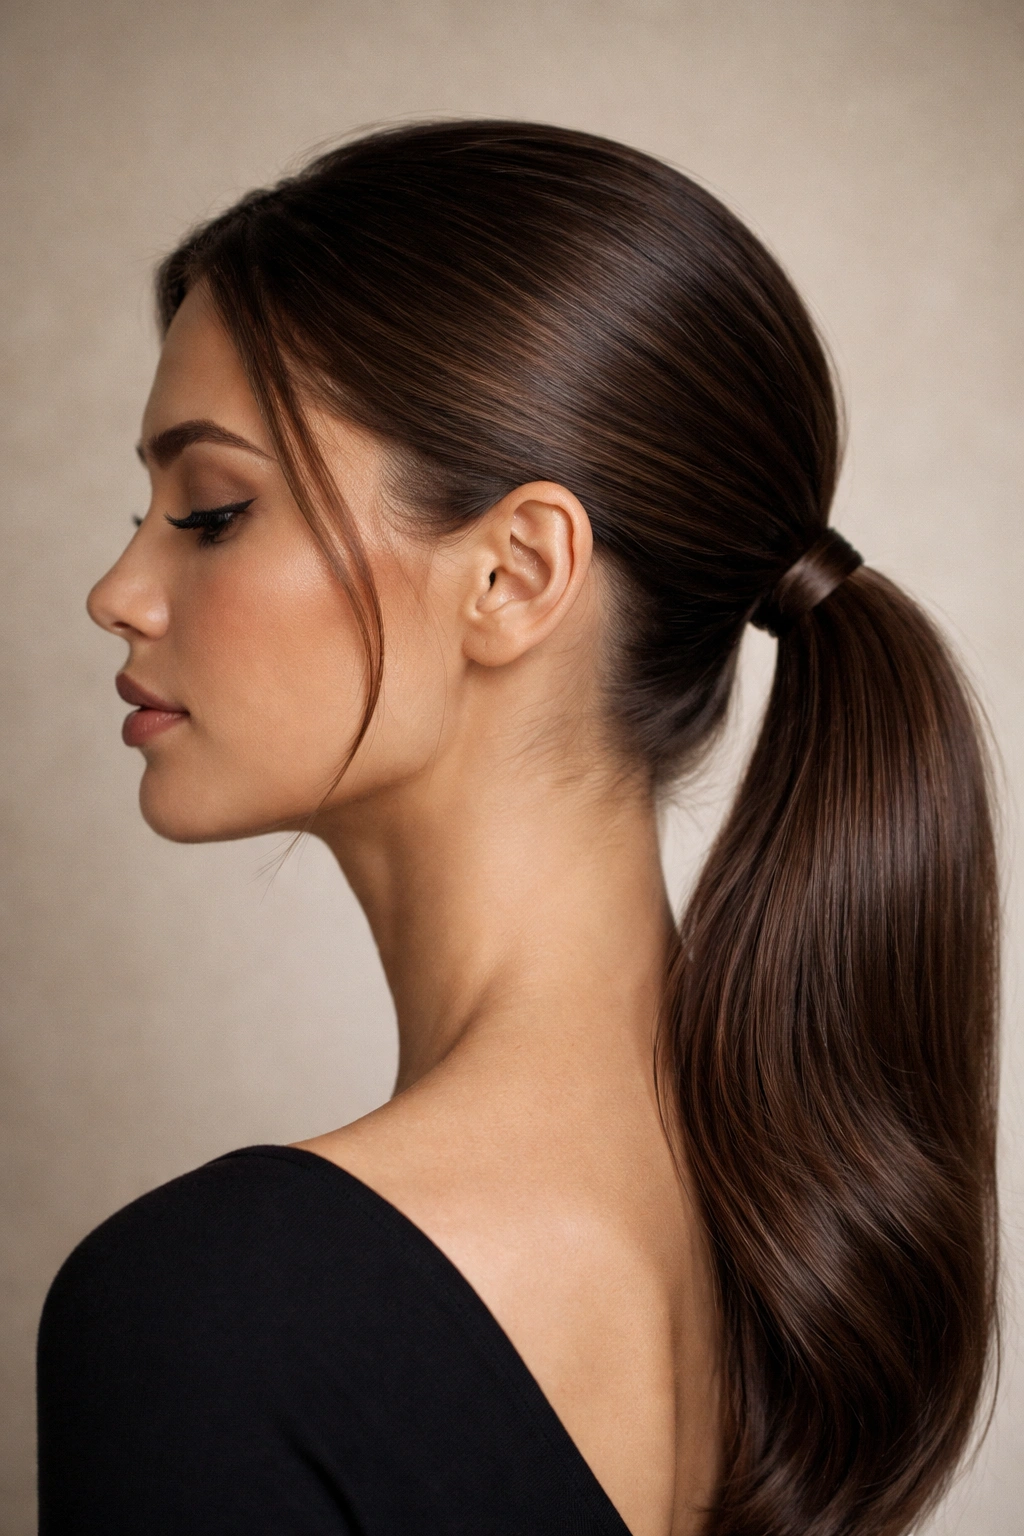
10. The Smooth Low Pony with a Deep Side Part
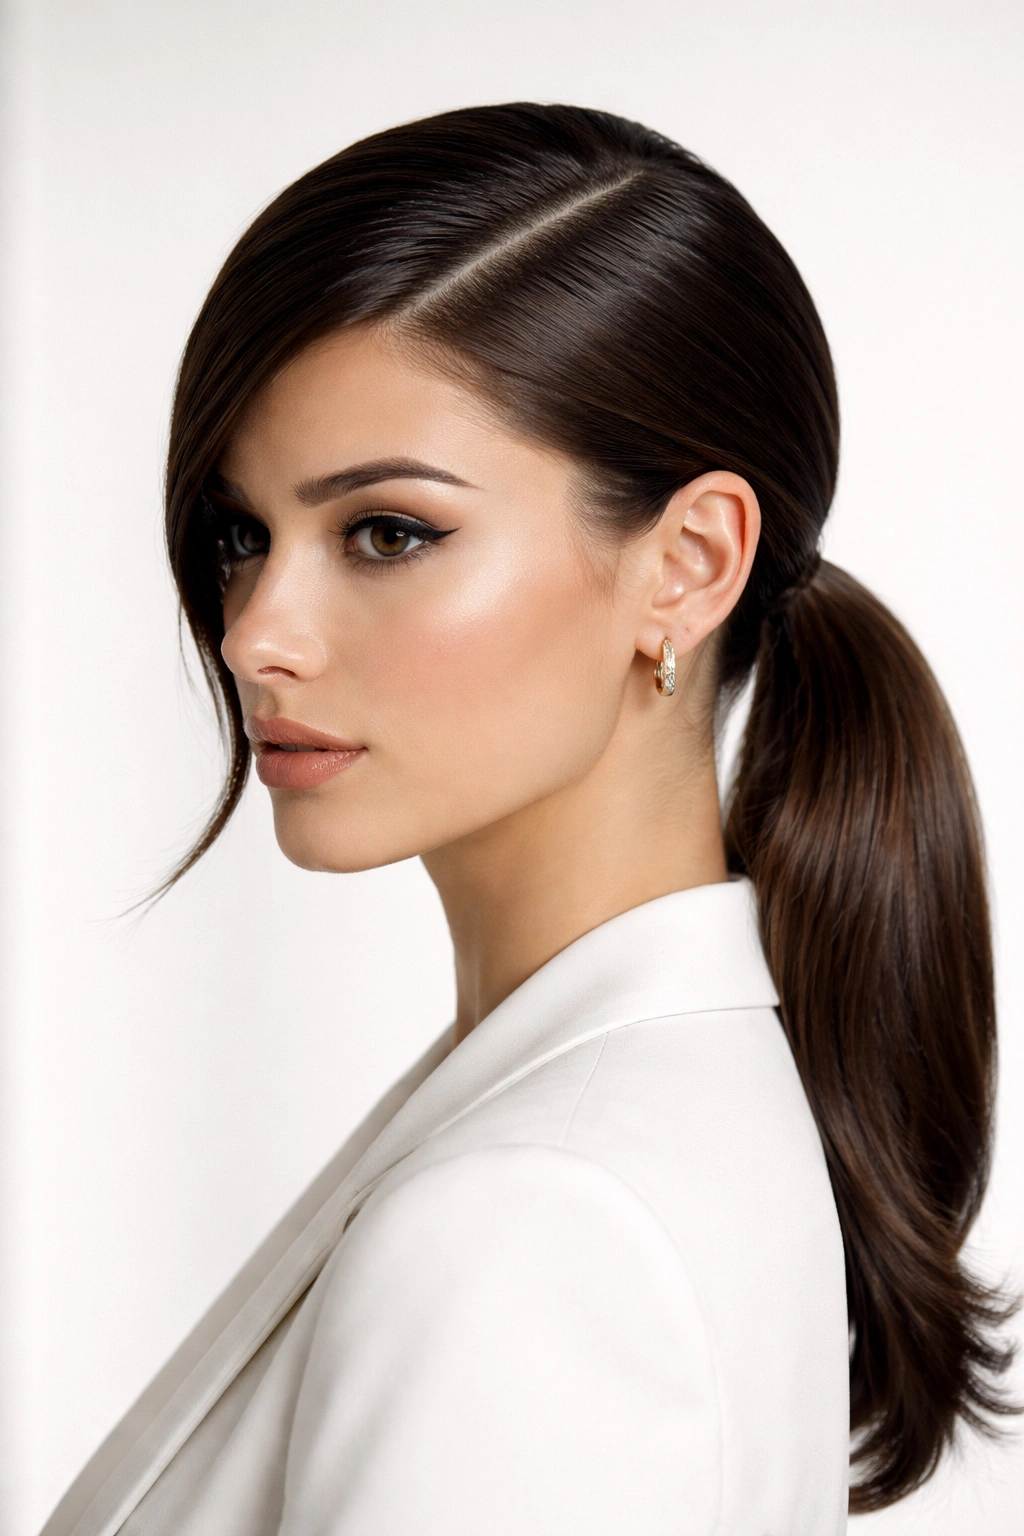
The depth and definition created by a genuinely deep side part transforms a basic low ponytail into something visually striking. This version relies on the power of proportion and symmetry—when your part is deep enough, it creates an asymmetrical visual that feels modern and intentional.
Creating a True Deep Side Part
Instead of creating a centered or subtle side part, you’re moving your part dramatically to one side—imagine pulling your part from approximately the middle of one eyebrow all the way across your head to the opposite side of your nape. This creates a large section of hair on one side and a much smaller section on the other. Blow-dry your hair with your head tilted slightly toward the smaller-part side to encourage your hair to fall dramatically to the larger-part side.
Securing the Statement Part
Once your part is established and your hair is smooth, pull everything back into a low ponytail positioned at the nape of your neck. The deep part will be immediately visible and create a striking frame for your face. Apply a smoothing serum or lightweight gel to emphasize the cleanliness of your part line—you want that part to read as intentional and sharp, not fuzzy or accidental. This style is particularly flattering for showing off your face and bone structure, and it works beautifully with sleek ponytails but can also work with textured ones if you create the deep part before adding texture.
11. The Looped Low Pony with Texture
Instead of letting your ponytail hang straight down, this version creates a loop or loops with your hair, positioning it horizontally at the base of your skull. It’s a playful but still polished take on the low ponytail that adds dimension and visual interest without requiring multiple hair ties or complex braiding.
Creating the Loop Structure
Secure your hair into a low ponytail slightly higher than you normally would—about two to three inches above where you’d typically position a standard low pony. Instead of leaving the ponytail hanging freely, fold it up toward the base and secure the ends into a second, hidden elastic positioned underneath the first one. The result is a loop or bulge of hair creating dimension at the back of your neck, with the lengths hidden behind this loop.
Styling for Polish
The key to making this look intentional rather than accident-like is texture and precision. Create waves or curls in your hair before looping it, so the loop itself has dimension and movement. Pancake the looped section slightly to make it fuller and more visually interesting. Wrap a small section from inside the loop around the base to cover your elastics and add additional visual interest. This style is particularly flattering for showing off the nape of your neck and works beautifully with jewelry or for occasions where you want a hairstyle that’s distinctly different from typical ponytails.
12. The Sleek Low Pony with a Contrasting Hair Texture Clip
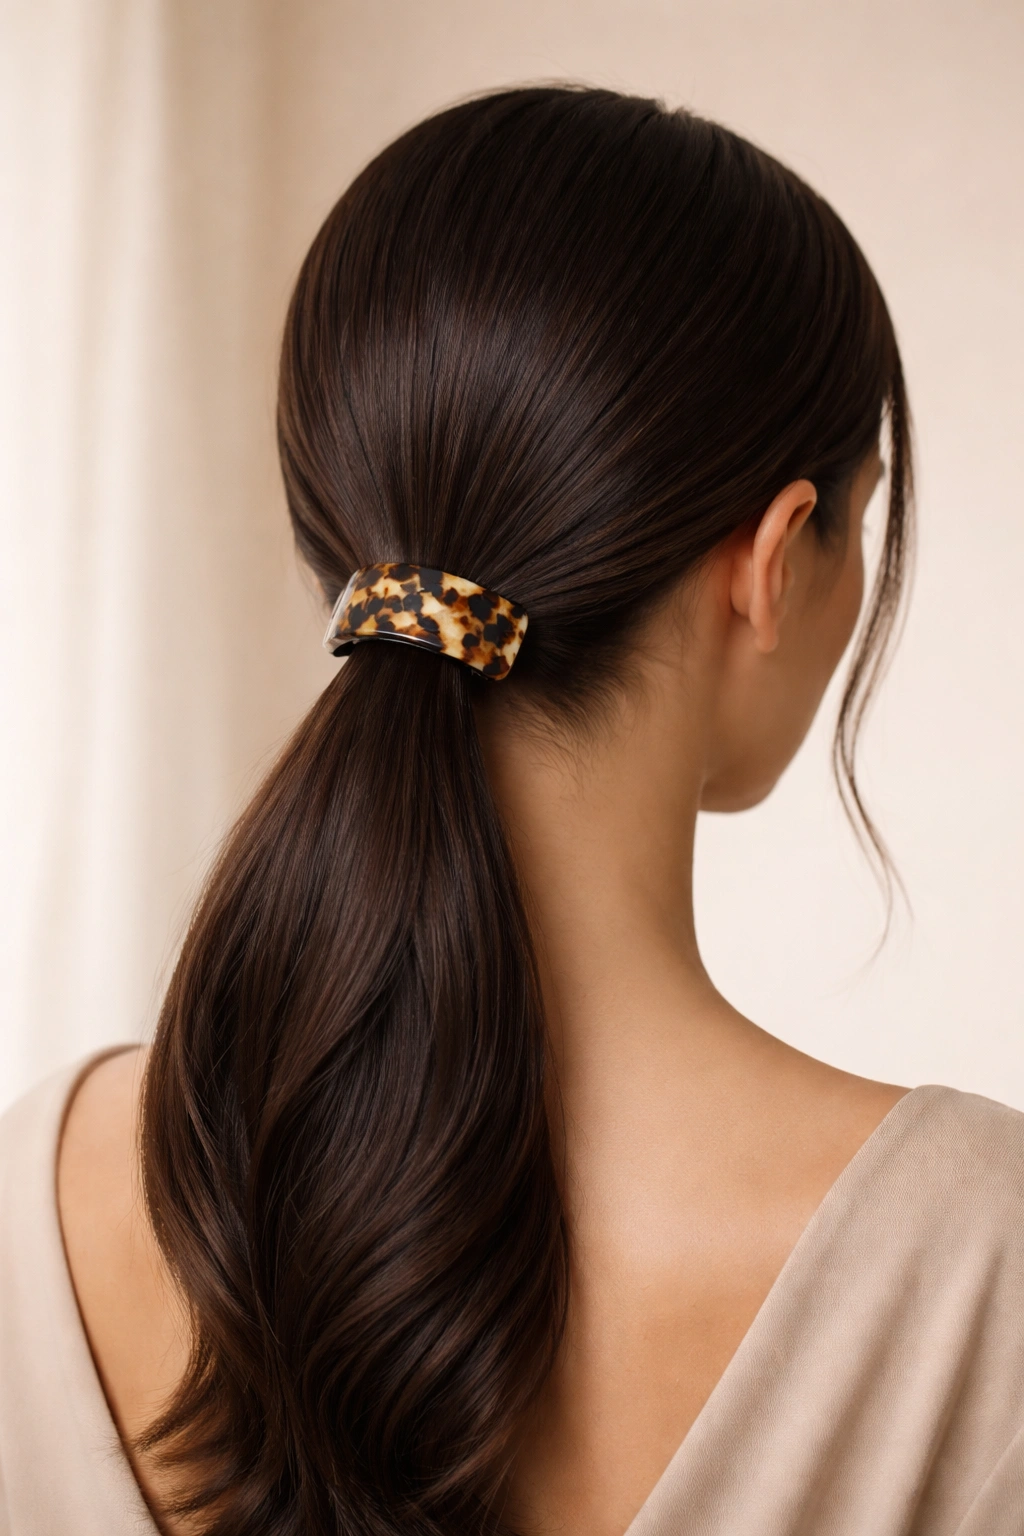
This final variation adds one more layer of sophistication by incorporating a textured clip or hair piece that contrasts with your smooth ponytail. Think tortoiseshell, wood grain, or a metallic clip positioned at the base of your pony, creating visual contrast and polish.
Pairing Textures and Materials
The most striking versions of this style pair a completely smooth, sleek ponytail with a clip that has visible texture or pattern. A sleek black ponytail with a tortoiseshell clip, for example, creates an elegant contrast. A smooth platinum ponytail with a warm gold cuff creates temperature contrast. The clip becomes a jewelry-like statement that prevents your style from reading as too minimal or severe.
Installation and Final Details
Create your low ponytail using your preferred smoothing and securing method. Position your textured clip or piece at the base, ensuring it sits evenly and securely. If it’s a hair clip, you may need to part your ponytail slightly to thread the clip through or position it prominently. The beauty of this approach is that you’re letting your chosen accessory be the star—your hair does the structural work, and the clip provides the polish and personality. This works beautifully for professional settings, dates, or any occasion where you want to feel put-together and intentional. The contrast between smooth hair and a beautifully textured accessory reads as sophisticated and editorial rather than overdone.
Final Thoughts
The truth about low ponytails is that they only look effortless when they’re actually intentional. The difference between a careless pony and a genuinely polished one comes down to precision in securing, attention to detail in your base (whether that’s smoothness, texture, or strategic twisted sections), and thoughtfulness in your finishing touches. Whether you’re drawn to sleek simplicity or prefer adding complexity through braids and ribbons, the key is executing whichever version you choose with care and consistency.
The real power of these twelve variations is that you can rotate through them depending on your occasion, your time availability, and your mood. Some days call for the architectural polish of a slicked-back pony; other days suit the soft romanticism of twisted front pieces. The ability to shift between these approaches—all still clearly low ponytails, all still reading as put-together—means you’ll never feel like you’re defaulting to the same style, even when you’re reaching for something you can create in minutes. Once you master a few of these techniques, you’ll find that a low ponytail becomes your most valuable styling tool, not because it’s easy, but because it’s endlessly adaptable to exactly the version of polished you need to be.