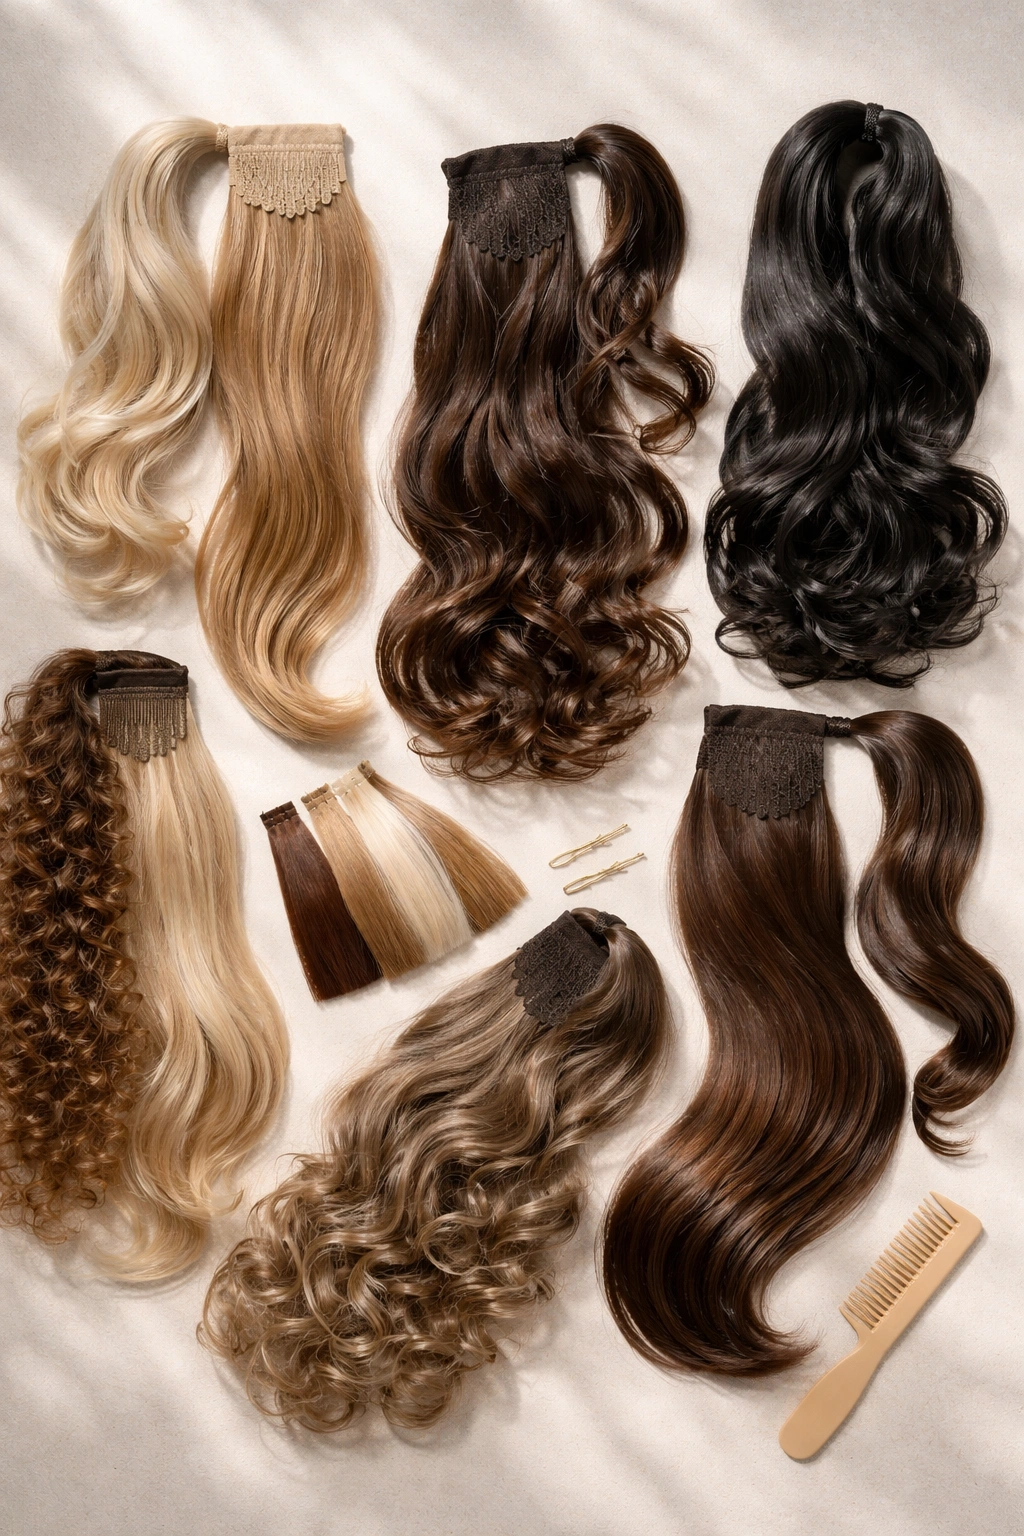
A quality ponytail shouldn’t require you to sacrifice length, volume, or style options. Whether you’re dealing with fine, thin, or short hair—or you simply want to protect your natural strands from daily styling stress—faux ponytails offer a realistic, damage-free solution that looks incredibly natural when chosen and applied correctly. The secret isn’t finding something that looks fake; it’s understanding the different construction methods, hair textures, and blending techniques that make a ponytail indistinguishable from your real hair.
Modern faux ponytail technology has evolved dramatically. You’re no longer limited to obvious synthetic pieces that feel stiff or look plasticky. Today’s options include human hair extensions, innovative clip-in systems, and hybrid styles that combine your natural hair with strategically placed pieces to create volume, length, and movement that feels entirely authentic. The key is matching the piece to your hair type, color, and texture, then learning the specific styling technique that makes each type look seamless.
Beyond aesthetics, faux ponytails serve a practical purpose. They reduce daily manipulation of your natural hair, decrease breakage from tight styling, and allow you to experiment with different looks without committing to permanent changes. You can switch from a sleek, straight ponytail to a voluminous curled version to a textured braid style—all using different pieces without touching your actual hair. That flexibility, combined with the confidence of knowing your real hair stays protected, makes faux ponytails a smart choice for anyone who wants beautiful hair without the damage.
1. Clip-In Ponytail Extensions
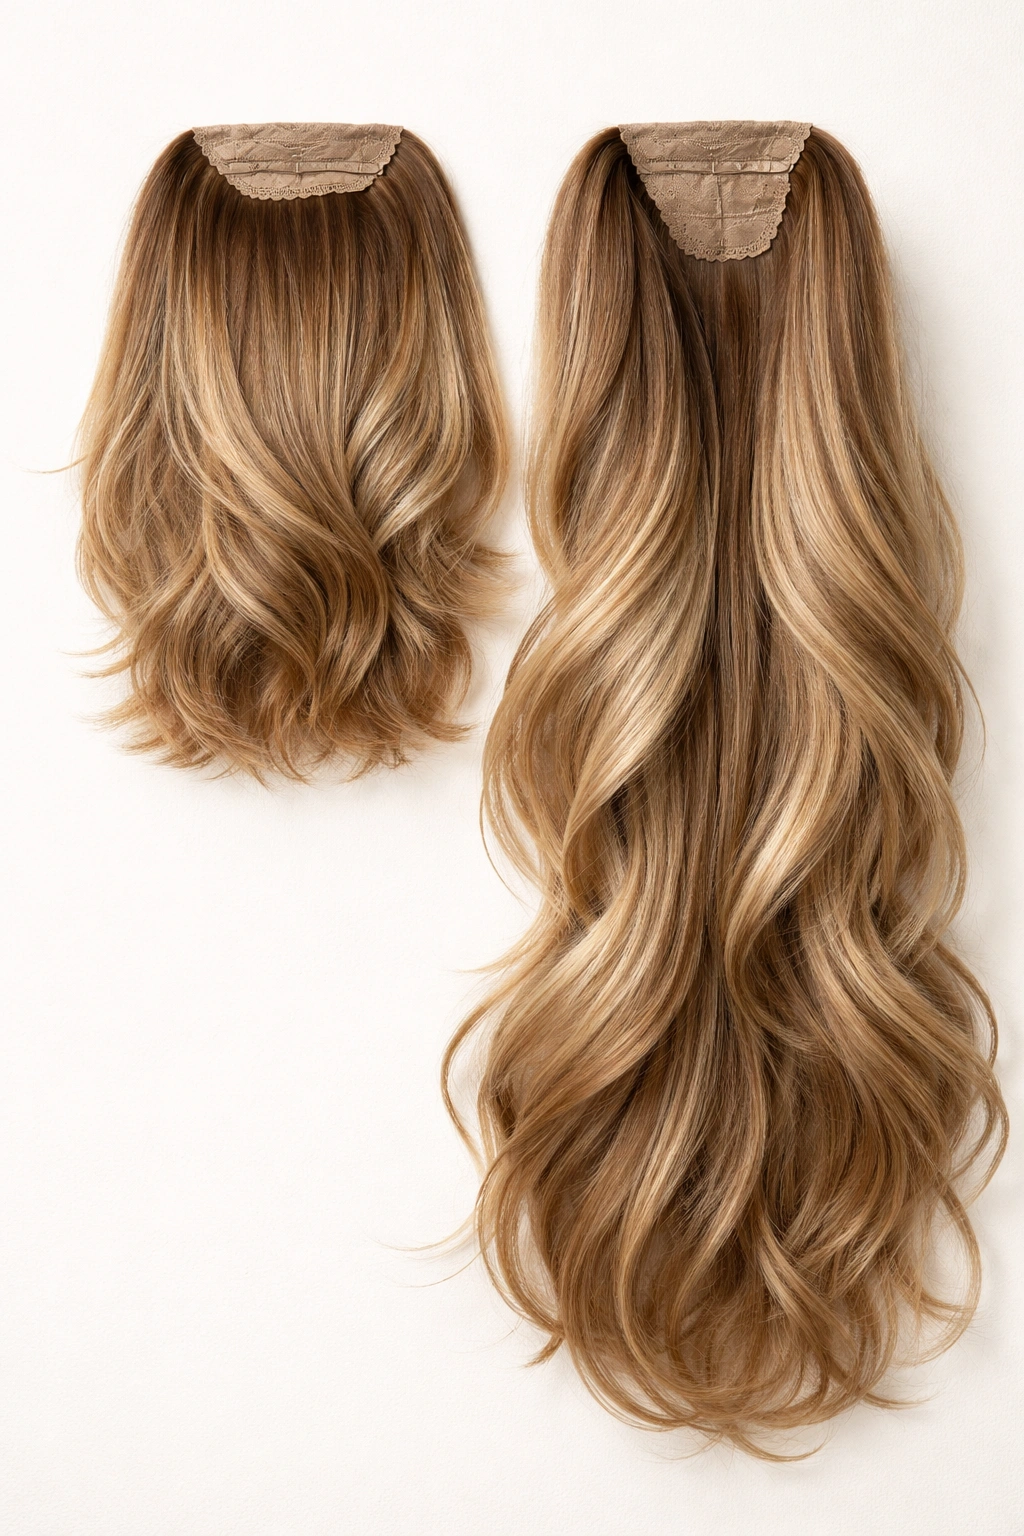
Clip-in ponytails are the fastest, easiest introduction to faux hair. These pieces attach to your natural hair using small snap clips woven into your hair’s base layer, typically near the crown or mid-back depending on where you want the ponytail to sit. The attachment process takes less than two minutes once you’ve positioned the clips correctly, and you can remove them immediately without any damage or residue. They’re ideal if you want the option to switch between wearing a ponytail and wearing your hair down throughout the same day.
Why They Look So Convincing
The illusion works because clip-ins blend your natural hair with the added piece at the roots. When your own hair frames the base of the ponytail, observers see your natural hair texture and color blending seamlessly into the extension. The clips themselves stay hidden under a thin layer of your hair—invisible to anyone looking at you. Quality human hair clip-ins match real hair’s movement, shine, and response to humidity, so the ponytail behaves exactly like a natural one would.
How to Choose and Wear Them
- Hair texture match is critical: Your clip-in’s texture should match your natural hair texture. If you have wavy natural hair and choose a straight piece, the transition from your roots to the extension becomes obvious. Curly to curly, straight to straight, and wavy to wavy create seamless blends.
- Color matching requires precision: Hold potential pieces next to your hair in natural light. Indoor lighting distorts perceived color, and a piece that matches in a store may look noticeably lighter or darker at home. Invest time in getting the shade exact—even a half-shade difference disrupts the illusion.
- Weight distribution prevents slippage: Clip-in ponytails work best when your natural hair is texturized slightly with a texture spray or dry shampoo before clipping. Smooth, slippery hair causes clips to shift throughout the day. A light mist of texture spray at your roots gives the clips grip without weighing hair down.
- Removal prevents tangling: Unclip extensions at night and store them properly. Sleeping with clips in can tangle both your natural hair and the extension, creating maintenance headaches.
Pro tip: Keep your clip-in ponytail in a silk drawstring bag between uses. Silk prevents the piece from tangling and losing shine, and the bag protects it from dust and product buildup. This extends the lifespan of quality extensions significantly.
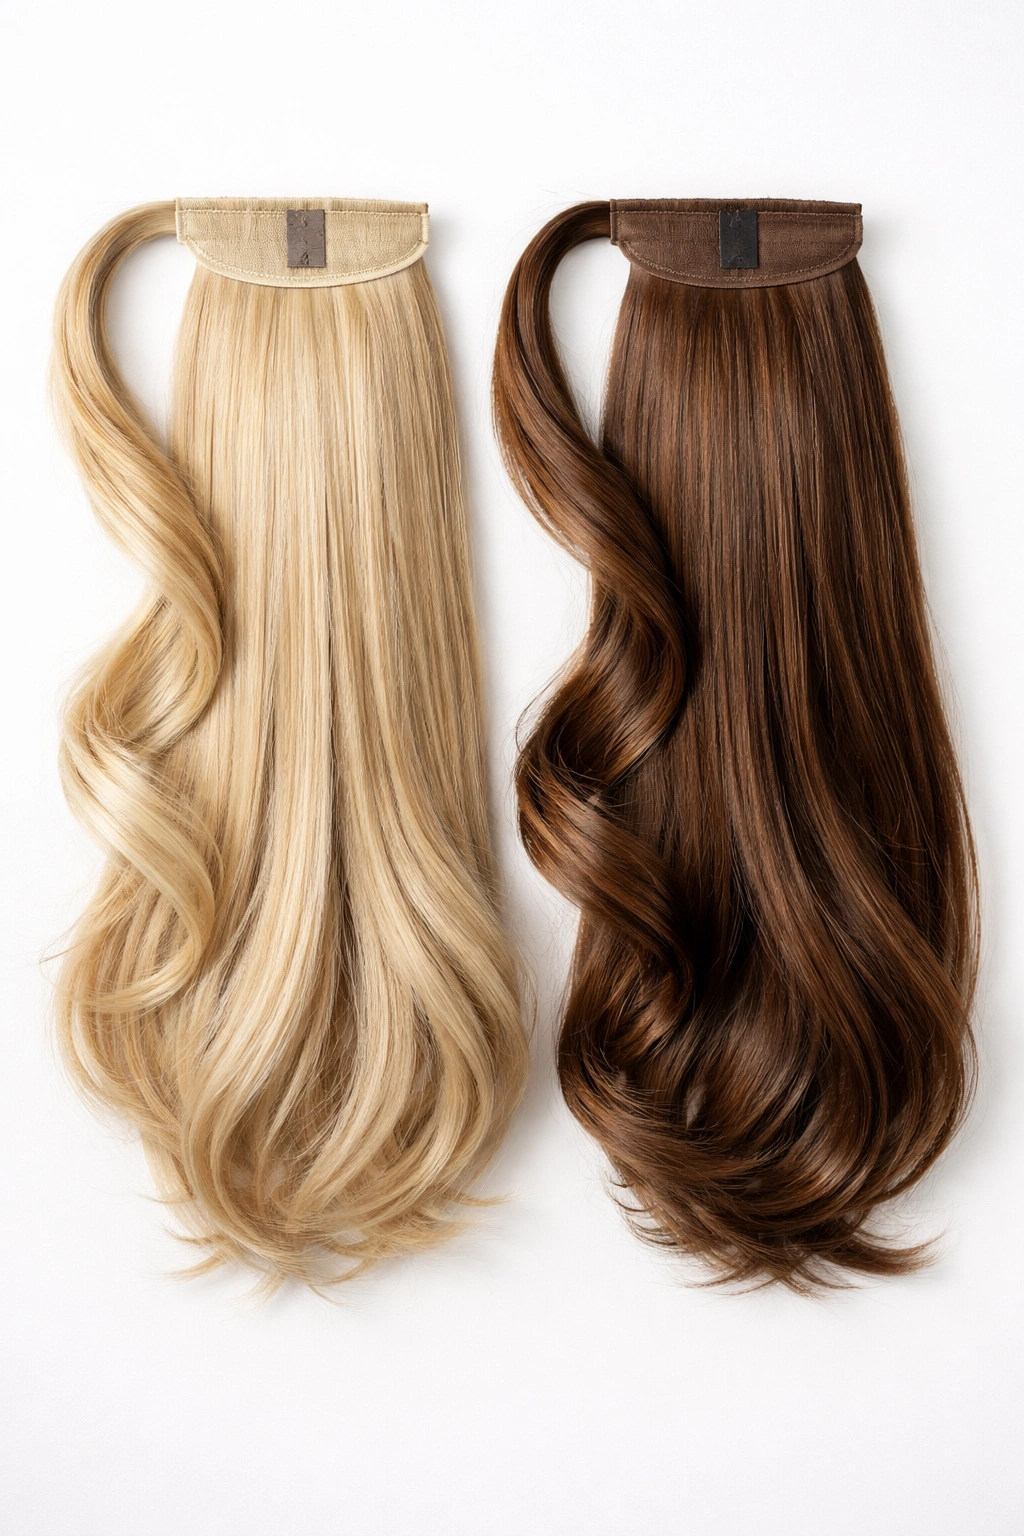
2. Synthetic Hair Ponytail Pieces
Synthetic ponytails are constructed from laboratory-created fibers engineered to mimic real hair’s appearance and movement. Modern synthetic fibers are dramatically more realistic than older versions, with textures that include natural-looking cuticle patterns and subtle color variations. These pieces arrive pre-styled, meaning you get that perfect curl or wave pattern permanently built in—it won’t drop or change shape from styling.
What Makes Synthetic Hair Believable Today
Contemporary synthetic hair reflects light similarly to real hair, moves fluidly, and feels less plasticky than previous generations. High-quality synthetic pieces are constructed with individual fiber strands rather than solid fibers, creating visual depth and dimension. The surface texture catches light naturally instead of creating that flat, shiny “helmet hair” appearance that gave synthetic hair a bad reputation. When you choose the right color and texture, most people won’t consciously think twice about whether it’s real.
Best Uses and Practical Advantages
- Perfect for defined curls and waves: Synthetic hair holds curl patterns permanently. If you want bouncy ringlets or perfect beach waves without daily curling, synthetic is ideal because you get that texture every single time.
- Colored and multi-tonal options abound: Synthetic hair accepts dyes differently than human hair, so manufacturers create bold colors, ombre effects, and intricate highlights that look vibrant and dimensional in ways that cost thousands in a salon.
- Low-maintenance styling needs: You don’t blow-dry or heat-style synthetic pieces. Shake out the ponytail when you put it on, and it’s ready. This makes it perfect for active days when you don’t want to spend time styling.
- Budget-friendly compared to human hair: Quality synthetic pieces cost less than half what equivalent human hair pieces cost, making it accessible to try different styles and colors without major investment.
Worth knowing: Synthetic hair can’t be restyled with heat. If you want the option to straighten curls or add waves, you need human hair. Synthetic is great when you love the pre-set style and want consistency, but it limits flexibility if you’re someone who changes your styling often.
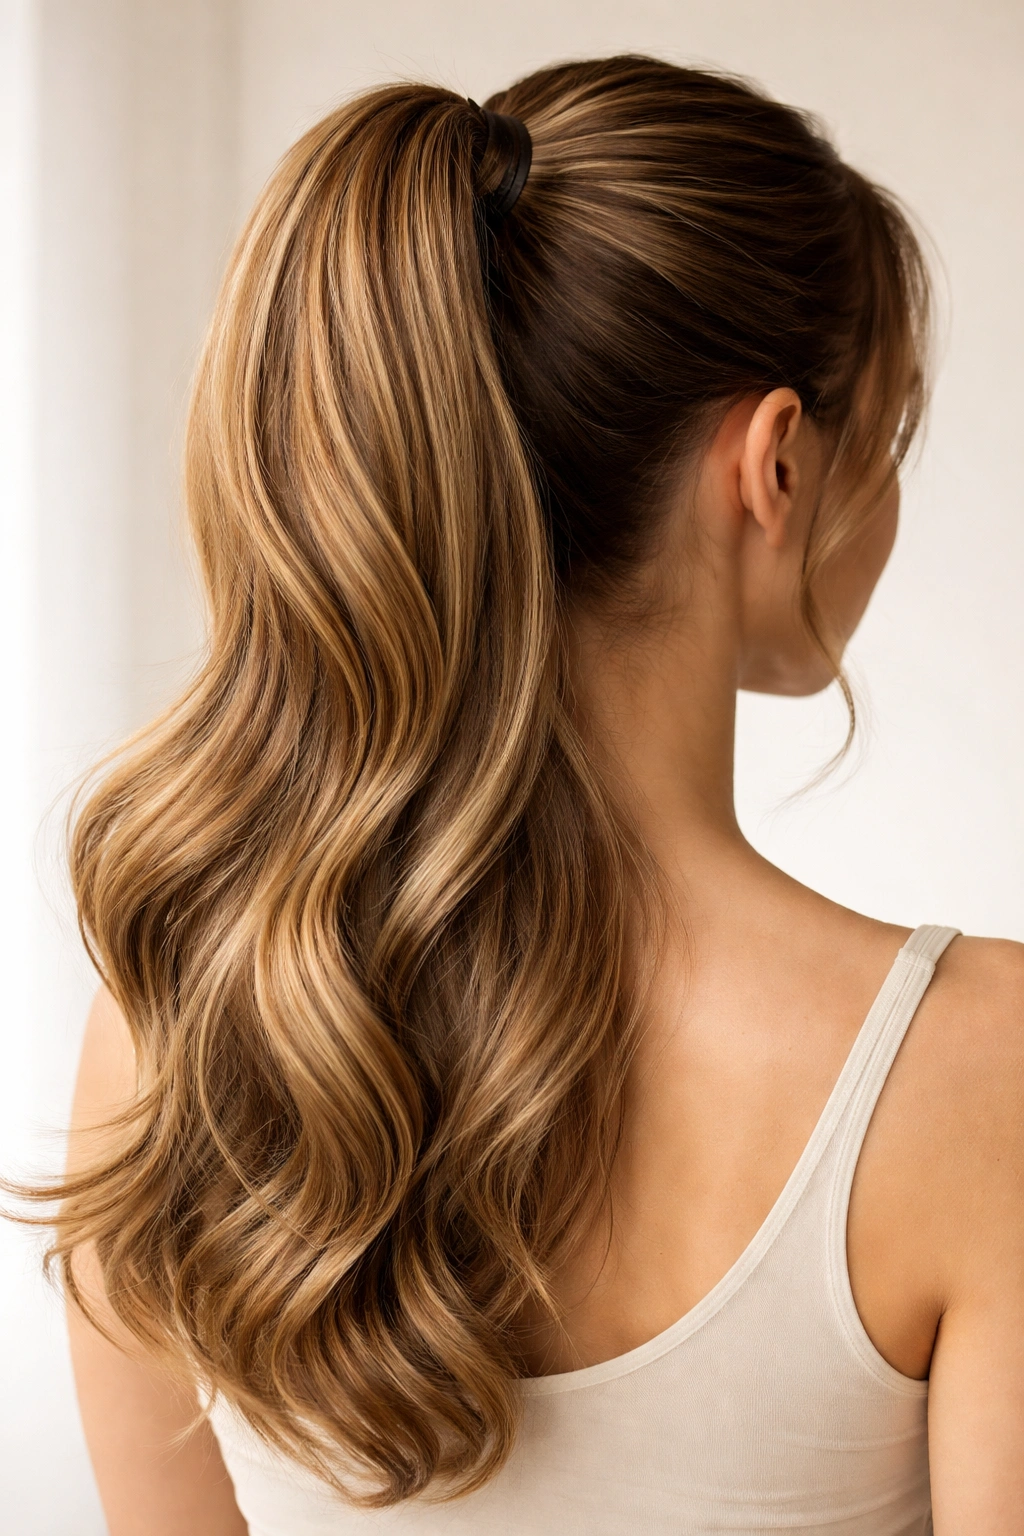
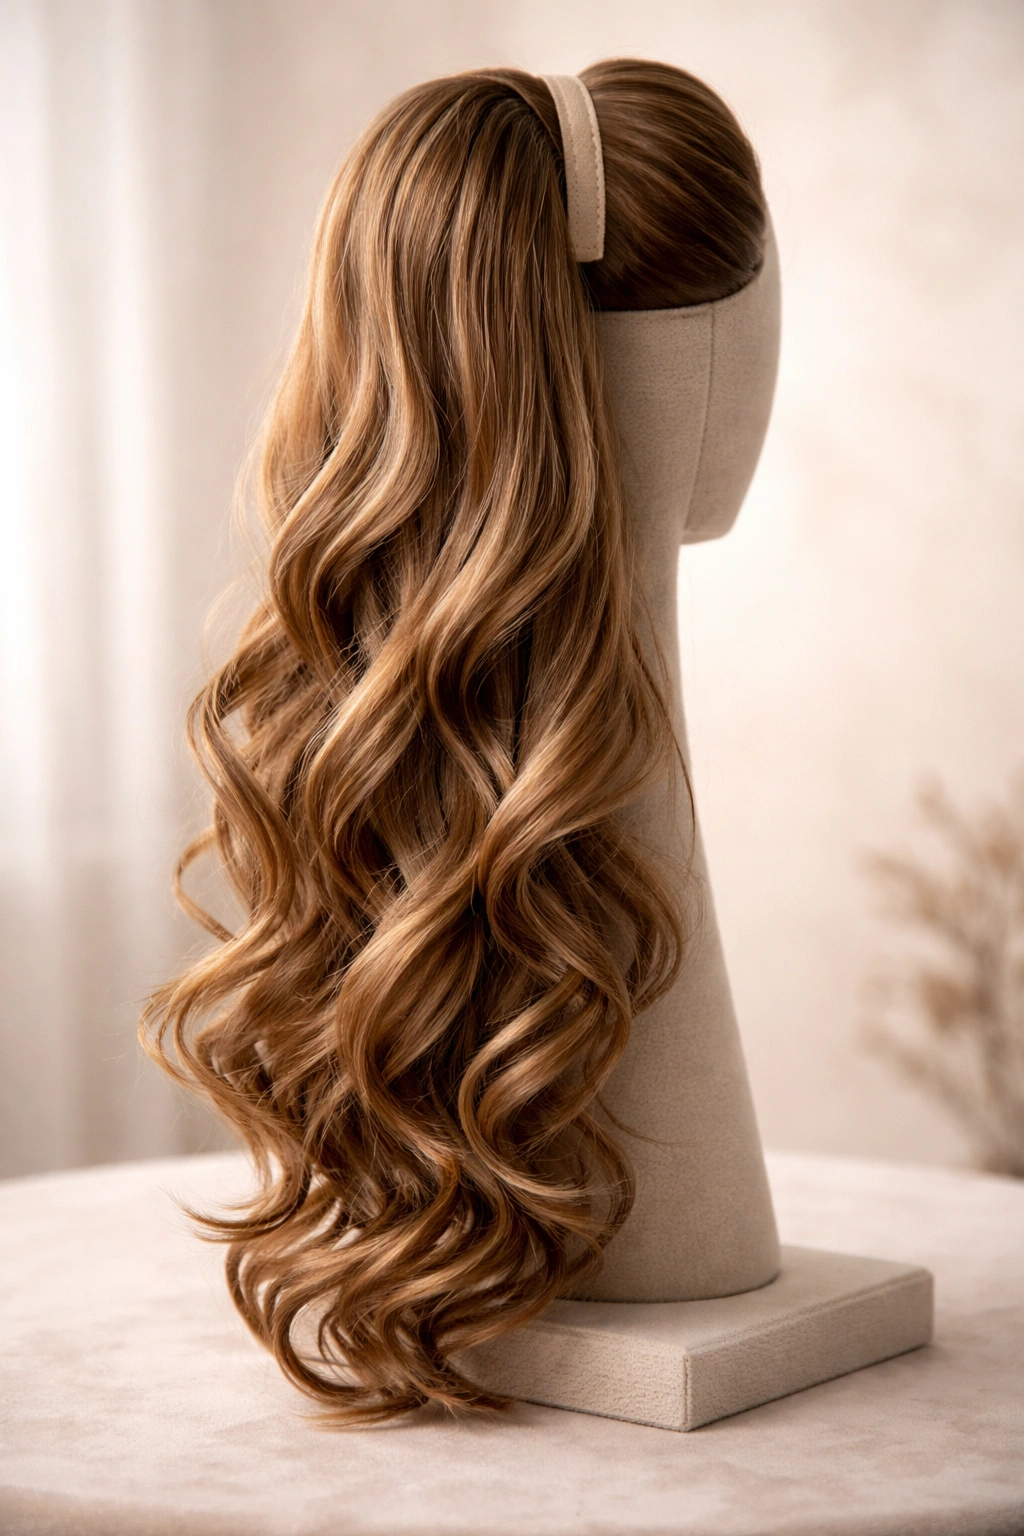
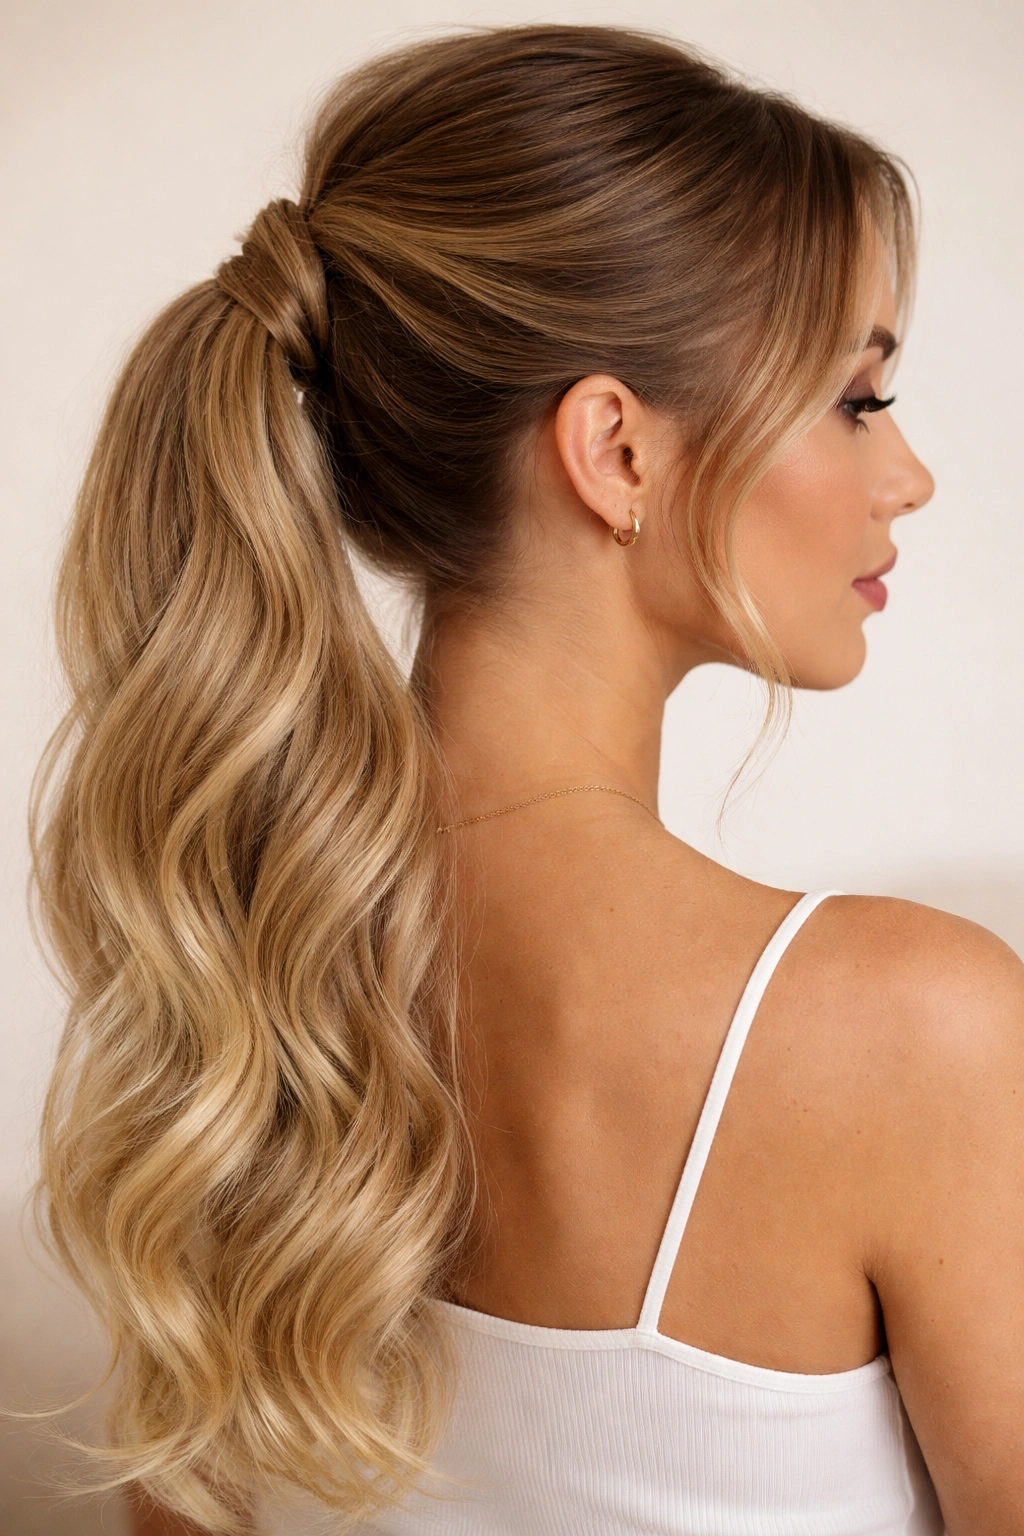
3. Human Hair Wrap-Around Ponytails
Wrap-around ponytails are constructed from real human hair hand-tied to a base, then shaped into a ponytail form that you wrap around your own hair’s base like a cuff. This design is genius for blending because the wrap-around portion covers the point where your natural hair meets the extension, hiding any color or texture differences. The piece sits right at your hair’s elastic, creating a seamless transition that looks entirely natural.
Why Wrap-Arounds Create the Most Seamless Look
The wrapping section of hair literally conceals the attachment point. When observers look at your ponytail, they see your real hair emerging from the scalp, then your hair blending into the wrap-around piece, which covers where the addition occurs. There’s no visible clip, no obvious line of demarcation, and no visible elastic if you choose a piece with matching colored hair wrapped around the base. It’s the most forgiving construction method if you’re concerned about the attachment being visible.
How to Apply and Style Wrap-Around Pieces
- Gather your natural hair into a ponytail first: Use an elastic that matches your hair color for a seamless look. Secure it at the height you want your ponytail to sit (high crown, mid-back, or low nape).
- Wrap the extension around your elastic: Take the wrap-around ponytail and position it so the wrapped section covers your elastic completely. Secure it by wrapping a small strand of your natural hair or the extension’s own hair around the base, then clip or tie it in place. This creates the illusion that the entire ponytail is your real hair.
- Blend and fluff: Gently flip your head to shake out the combined ponytail. The wrapping section should blend so seamlessly with your natural hair that the joining point disappears.
- Heat-styling is safe with human hair: You can curl, straighten, or wave wrap-around ponytails using heat tools, which makes them versatile for different looks on different days.
Insider note: Wrap-arounds work best when your natural hair density is moderate to thick. If you have very fine or thin hair, the wrap section can look thick and obvious in contrast. For fine hair, clip-ins or a different construction method creates a more balanced look.
4. Bubble Ponytails with Added Extensions
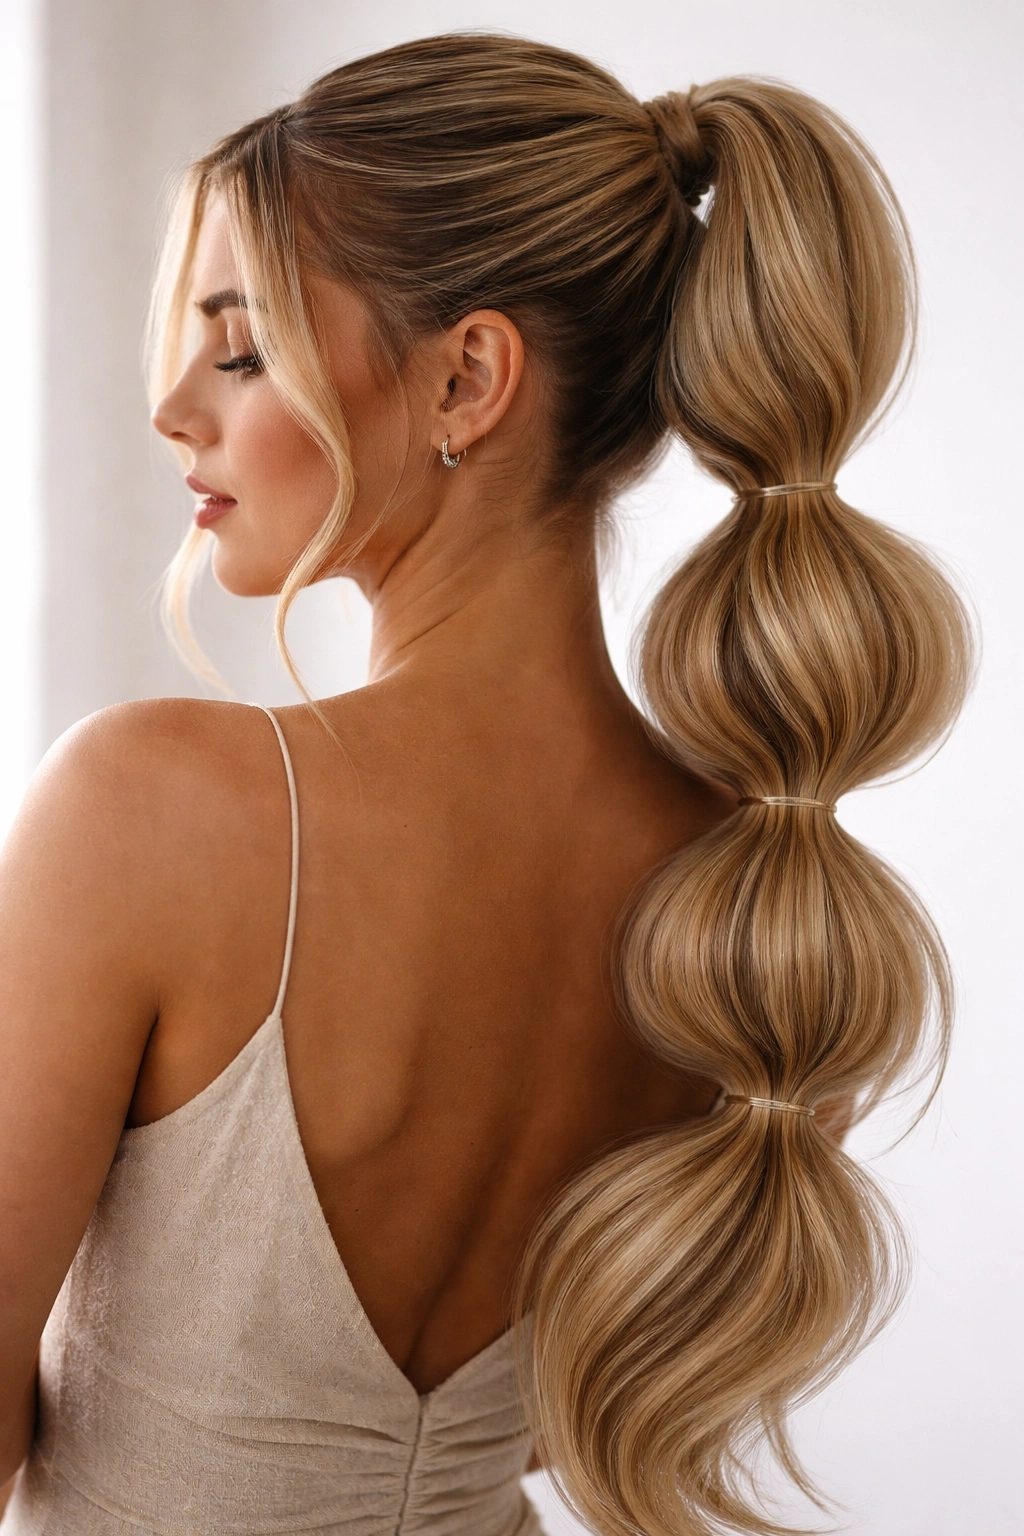
Bubble ponytails are naturally full of textured volume—they use multiple elastic bands spaced down the length to create segmented, puffy sections. When you add a faux ponytail piece to a bubble style, you’re combining the theatrical texture of the bubble effect with the fullness and dimension of an extension. This hybrid approach creates a playful, eye-catching style that reads as entirely intentional and polished.
How the Bubble Effect Disguises Joins
The segmented structure of a bubble ponytail creates visual breaks and texture variations along the length. These breaks naturally disguise where your real hair ends and the extension begins, because the eye is already tracking the texture changes and volume shifts throughout the style. The layers and puffiness of each segment mean there’s no single point where a seam becomes obvious. It’s a smart style choice if seamless blending feels challenging with your hair type.
Creating Convincing Bubble Ponytails with Extensions
- Start with textured real hair: Use a texture spray or dry shampoo on your natural hair before styling. This creates grip between your hair and the elastics, preventing slippage and keeping segments defined.
- Section and band strategically: Divide your ponytail into 4-6 segments depending on desired effect. Space bands about 1.5 to 2 inches apart. Fluff each section outward to create the bubble effect before attaching the extension.
- Attach the extension after fluffing: Add your ponytail piece to the bottom elastic of your last bubble section. This placement means the extension begins where your final segment ends, creating a natural continuation.
- Match texture and density: Your extension should have similar body and movement to your natural hair’s bubbled texture. A flat, sleek extension attached to a bubbly natural ponytail creates obvious contrast.
Pro tip: Refresh bubble ponytails midday by gently pulling on the base of each segment to increase the bubble effect. This revitalizes the texture and makes the style look freshly done, which also refreshes how the blending looks.
5. Twisted Faux Ponytail with Hairpieces
Twisting your natural hair before attaching a ponytail extension creates texture and visual interest that makes blending nearly effortless. A two-strand twist wraps around the base of where your ponytail sits, and you attach the extension at the bottom of the twist. This method works because the twisted texture of your real hair transitions into the extension without a harsh line—it’s a gradual progression from one texture to another.
Why Twisting Camouflages the Join Point
Twisted hair has a helical structure that’s visually complex. When an observer looks at a twisted base ponytail, they see the intertwined pattern of your natural hair, then that pattern continues into or transitions into the extension. The twisted structure itself creates enough visual detail and texture variation that any seam between real and faux hair becomes nearly invisible. It’s particularly effective if you have curly or textured hair naturally, because twists complement and enhance that texture pattern.
Technique for Creating Twisted Base Ponytails
- Smooth your natural ponytail first: Brush your hair into a clean, smooth ponytail at your desired height. Use a fine-tooth comb to remove tangles so your twist will look neat and defined.
- Create two-strand twists around the base: Take your ponytail and divide it into two sections. Twist the two sections around each other, working from the top of your elastic down toward the length. You can create one large twist or multiple smaller twists depending on the look you want.
- Secure the twist temporarily: Use a clear elastic or bobby pin to hold the twist in place while you attach your extension.
- Attach the extension at the twist’s end: Position your ponytail piece so it begins where your twist ends, creating a seamless flow from twisted real hair into the extension. If using a clip-in, position the clip at the base of the twist for maximum camouflage.
- Release the temporary elastic: Once your extension is secure, you can remove the temporary elastic, and the twist naturally flows into the ponytail piece.
Worth knowing: This technique works beautifully with curly or textured hair but can look a bit theatrical with very straight hair. If you have straight hair and want a twist-base look, consider adding a little texture to your ponytail before twisting to make the style feel more cohesive.
6. Double-Layered Extension Ponytails
Double-layered ponytails use two different hairpieces working together to create extreme volume and a multi-dimensional effect. Typically, you attach a shorter, lighter piece at mid-length and a longer, fuller piece underneath, or you use two pieces of the same length but different textures. The layering creates depth, movement, and an illusion of extraordinary thickness that feels luxurious and glamorous.
How Layering Creates Convincing Density
When observers look at a well-constructed double-layered ponytail, they see multiple dimensions of hair at different lengths and angles. This multi-depth effect mimics how naturally thick, healthy hair moves and falls. A single extension can sometimes look flat or one-dimensional, but two pieces layered strategically create the kind of volume and movement that reads as authentic thick hair. The layers also mean there’s more visual complexity, making it harder for anyone to pinpoint exactly where faux hair begins and real hair ends.
Constructing Effective Double-Layered Ponytails
- Choose complementary pieces: Your two extensions should have similar color and texture but can vary in length or thickness. A light underneath layer with a denser top layer creates a balanced, natural proportion.
- Attach the longer or denser piece first: Position your first extension at the base of your natural ponytail, securing it with a clip-in or wrap-around method.
- Add the second piece above or beside: Your second piece should attach slightly higher, so the first piece is visible underneath when the ponytail moves. This creates the layering effect.
- Blend the layers gently: Flip your head and let both pieces fall naturally. The weight of two pieces together creates beautiful movement and makes blending automatic—the layers move differently and catch light differently in ways that hide seams.
- Tease or texturize strategically: Adding a little texture or teasing to one of the layers increases volume and makes blending more forgiving. Texture creates visual noise that hides attachment points.
Pro tip: Use pieces of slightly different textures in a double-layer setup. Pair straight with wavy, or smooth with slightly curled. The textural difference creates visual interest and makes the combined ponytail look more intentional and dimensional than using two identical pieces.
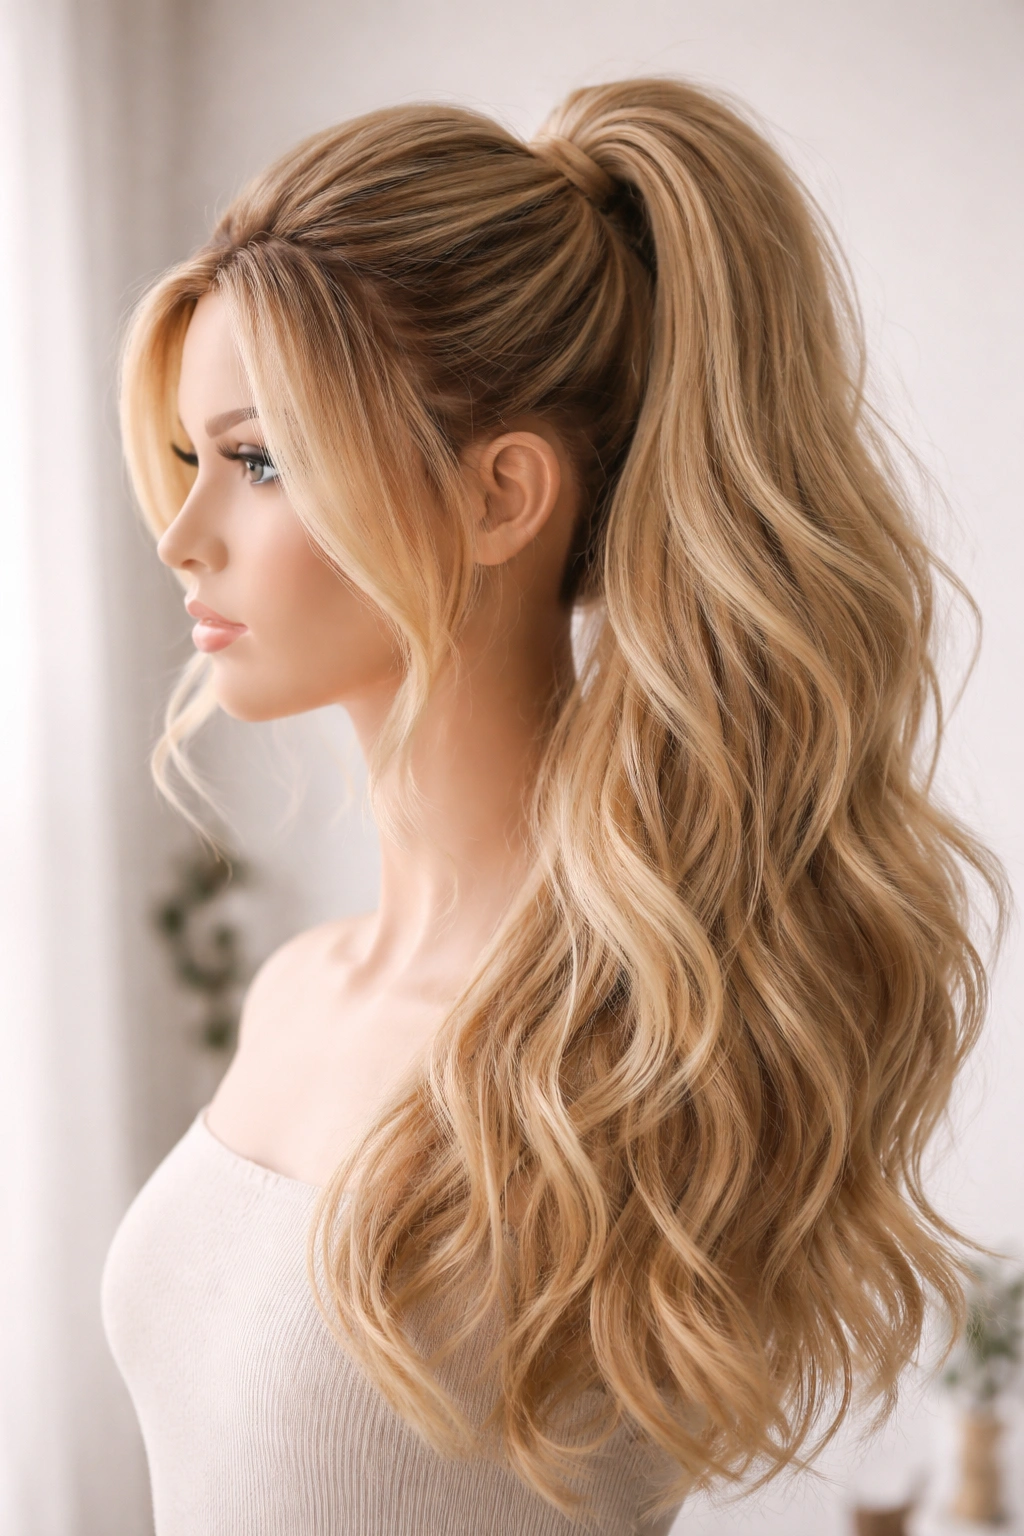
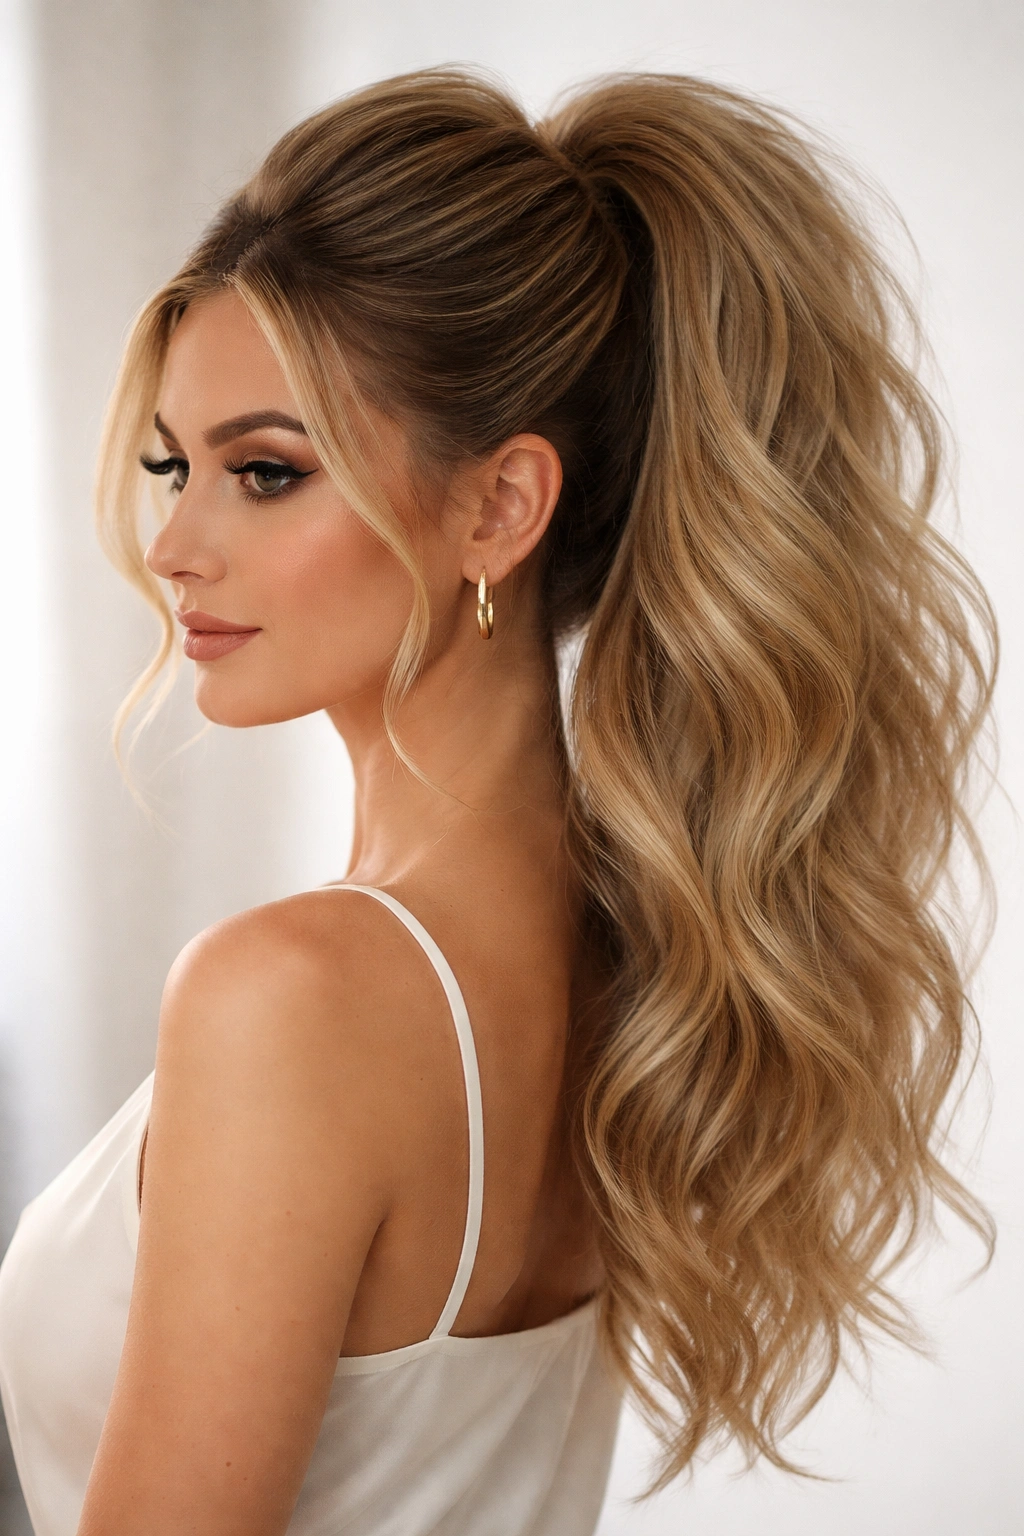
7. Voluminous Curled Faux Ponytails
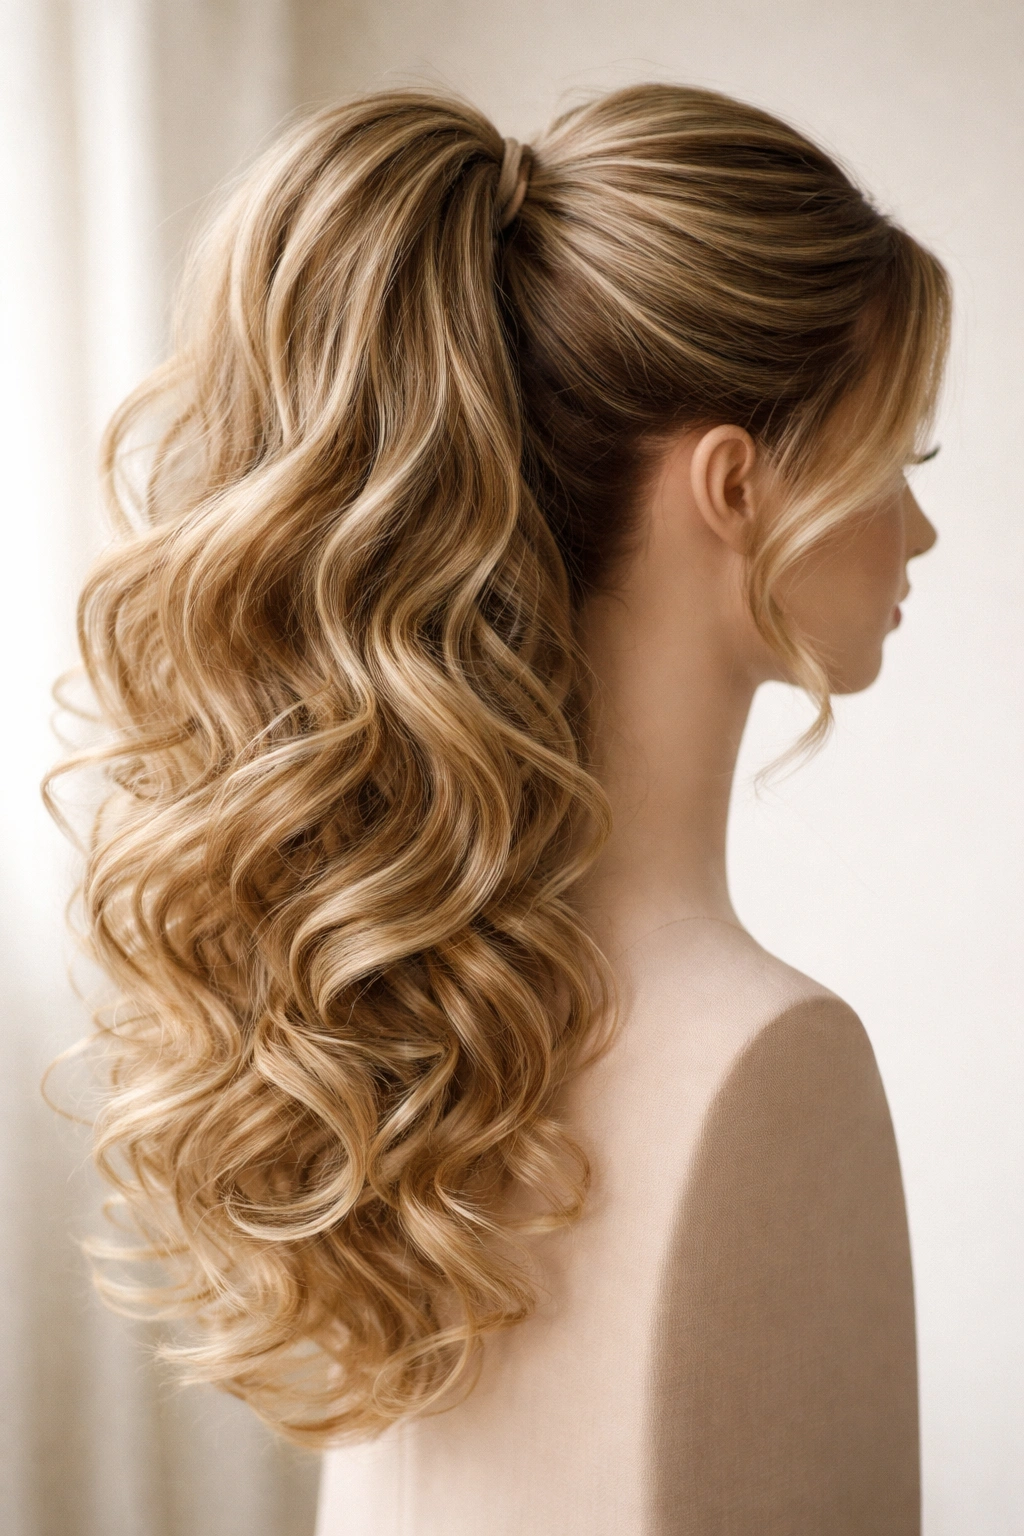
Curled faux ponytails are designed with loose waves, ringlets, or coiled curls throughout their length, creating a style that’s full of movement and inherent volume. The curl pattern itself takes up space and creates texture that makes the ponytail look naturally thick. Even if the extension contains the same total amount of hair as a straight piece, the curls make it appear significantly fuller and more glamorous.
Why Curls Disguise Where Real Hair Ends
Curled hair is visually busy—each curl catches light differently, and the undulating surface creates optical complexity. When you pair curled faux hair with your natural hair (especially if your natural hair is also textured or wavy), the transition becomes nearly invisible. Curls roll and move in ways that make straight seams impossible to detect. A curl hides attachment points in a way that sleek straight hair simply cannot, which is why curled ponytails feel less “fake” to most observers.
Styling and Maintaining Curled Extensions
- Match your natural curl pattern: If you have straight hair and choose a heavily curled extension, the contrast becomes obvious. Choose curl patterns that align with your natural texture—curly to curly, wavy to wavy, creating harmony rather than contrast.
- Refresh curls between uses: Curled extensions can loosen or flatten over time. Spritz the ponytail lightly with water, scrunch gently to re-form the curls, and allow to air-dry. For synthetic pieces, this refresh takes just 10-15 minutes.
- Tousle the ponytail when you put it on: Don’t simply clip in or wrap around a curled extension without moving it. Gently pull, tousle, and rearrange the curls so they look naturally bouncy rather than compressed from storage.
- Use curl-friendly products: If you’re using human hair curled extensions, apply a light curl cream or anti-frizz serum to maintain curl definition and prevent frizz. For synthetic, avoid oils which can damage the fibers.
Worth knowing: Heavily curled ponytails work best in casual, fun, or glamorous settings. They’re beautiful for going out or special occasions, but might feel over-the-top for everyday office wear unless you work in a creative industry where bold texture is welcomed.
8. Straight Silk-Look Faux Ponytails
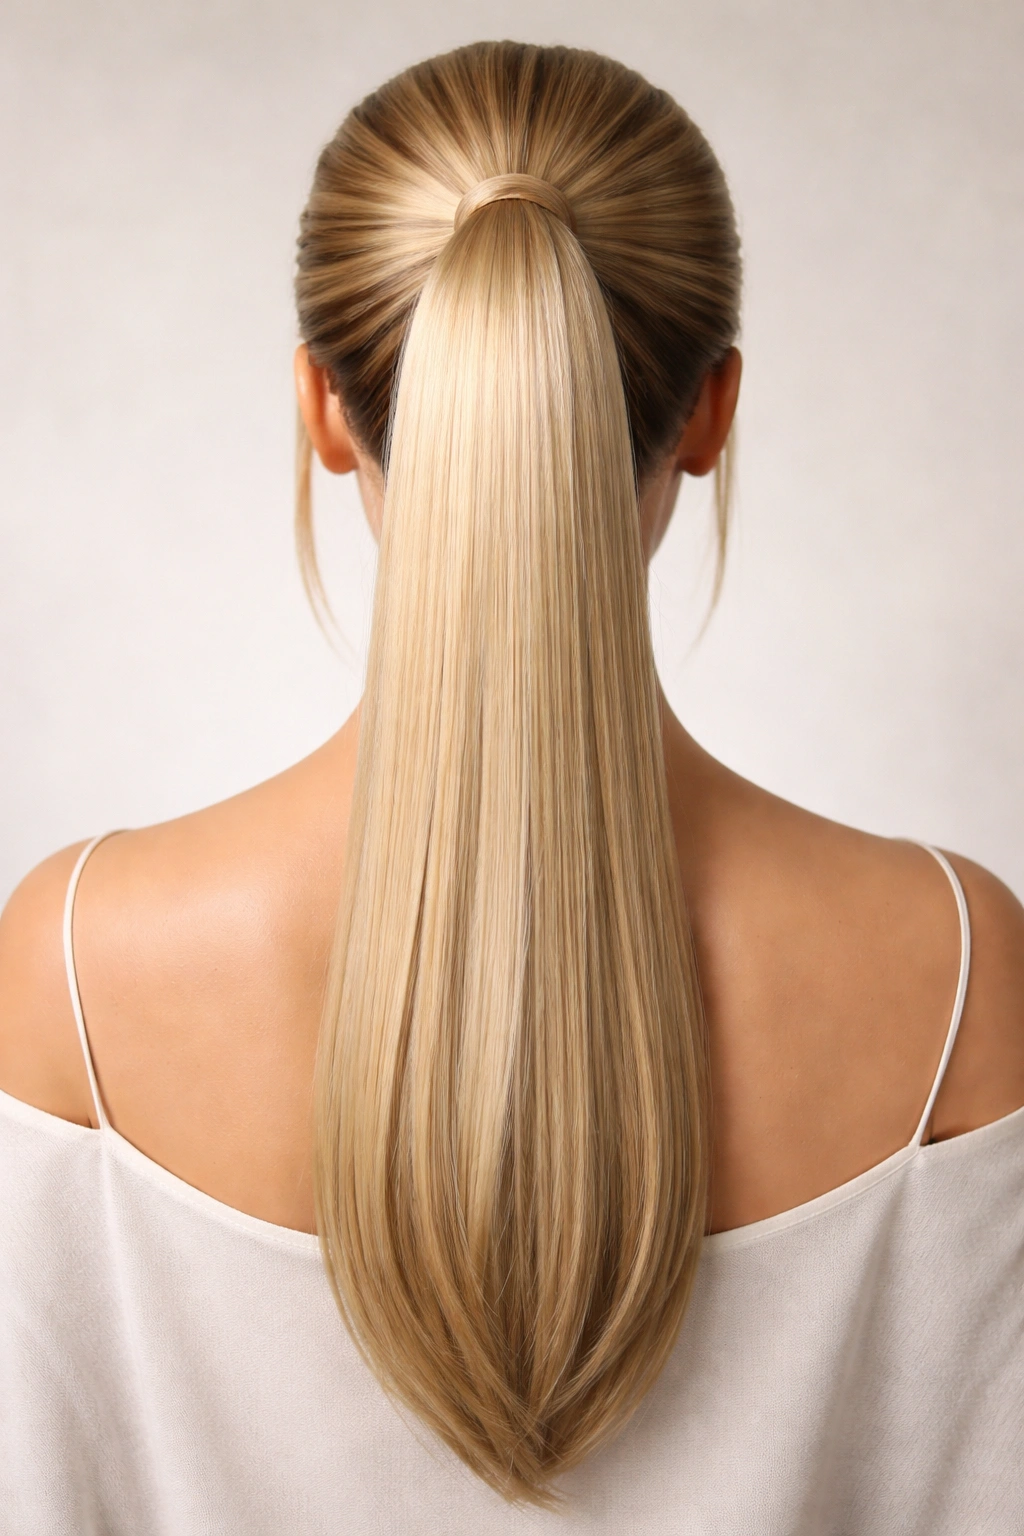
Straight ponytails with a silk-like finish create a sleek, polished, sophisticated aesthetic. These pieces are constructed from hair that’s been smoothed and processed to have an almost luminous shine—they catch light beautifully and look incredibly shiny and healthy. The sleekness makes them perfect for professional settings, formal events, or anyone who loves the look of long, thick, ultra-straight hair.
Achieving Realistic Smoothness and Shine
The challenge with straight ponytails is that they’re less forgiving about seams and texture transitions—a straight extension attached to straight natural hair creates a very obvious line if colors or textures don’t match perfectly. High-quality straight extensions solve this by having a subtle micro-texture that mimics real hair’s surface rather than looking plasticky. The shine comes from the hair’s cuticle alignment and coating, which should mimic real healthy hair’s natural luminosity rather than looking artificially shiny.
Application and Styling for Straight Pieces
- Ensure perfect color matching: Straight ponytails show every shade variation. Hold potential pieces next to your hair in natural sunlight. Indoors, color appears different, but outdoors you see exactly how the match will look in real life.
- Use smoothing products before attaching: Apply a light smoothing serum or anti-frizz spray to your natural ponytail before attaching the extension. This creates a unified surface finish so your real hair and the extension have the same sheen level.
- Keep your natural ponytail immaculate: Flyaways or frizz in your real hair become obvious against smooth extensions. Brush your natural ponytail smooth, use a fine-tooth comb to catch stray hairs, and apply a tiny bit of edge control or smoothing balm to any loose pieces.
- Avoid stacking clips visibly: If using clip-in straight ponytails, make sure clips are positioned under a layer of your hair, completely hidden. Visible clips disrupt the sleek aesthetic instantly.
Insider note: Straight ponytails look most natural when they’re long enough to move substantially. Very short straight pieces can look stiff or artificial because there’s not enough length for natural movement and flow. Aim for at least 14-16 inches of length to create convincing movement.
9. Textured Braided Extension Ponytails
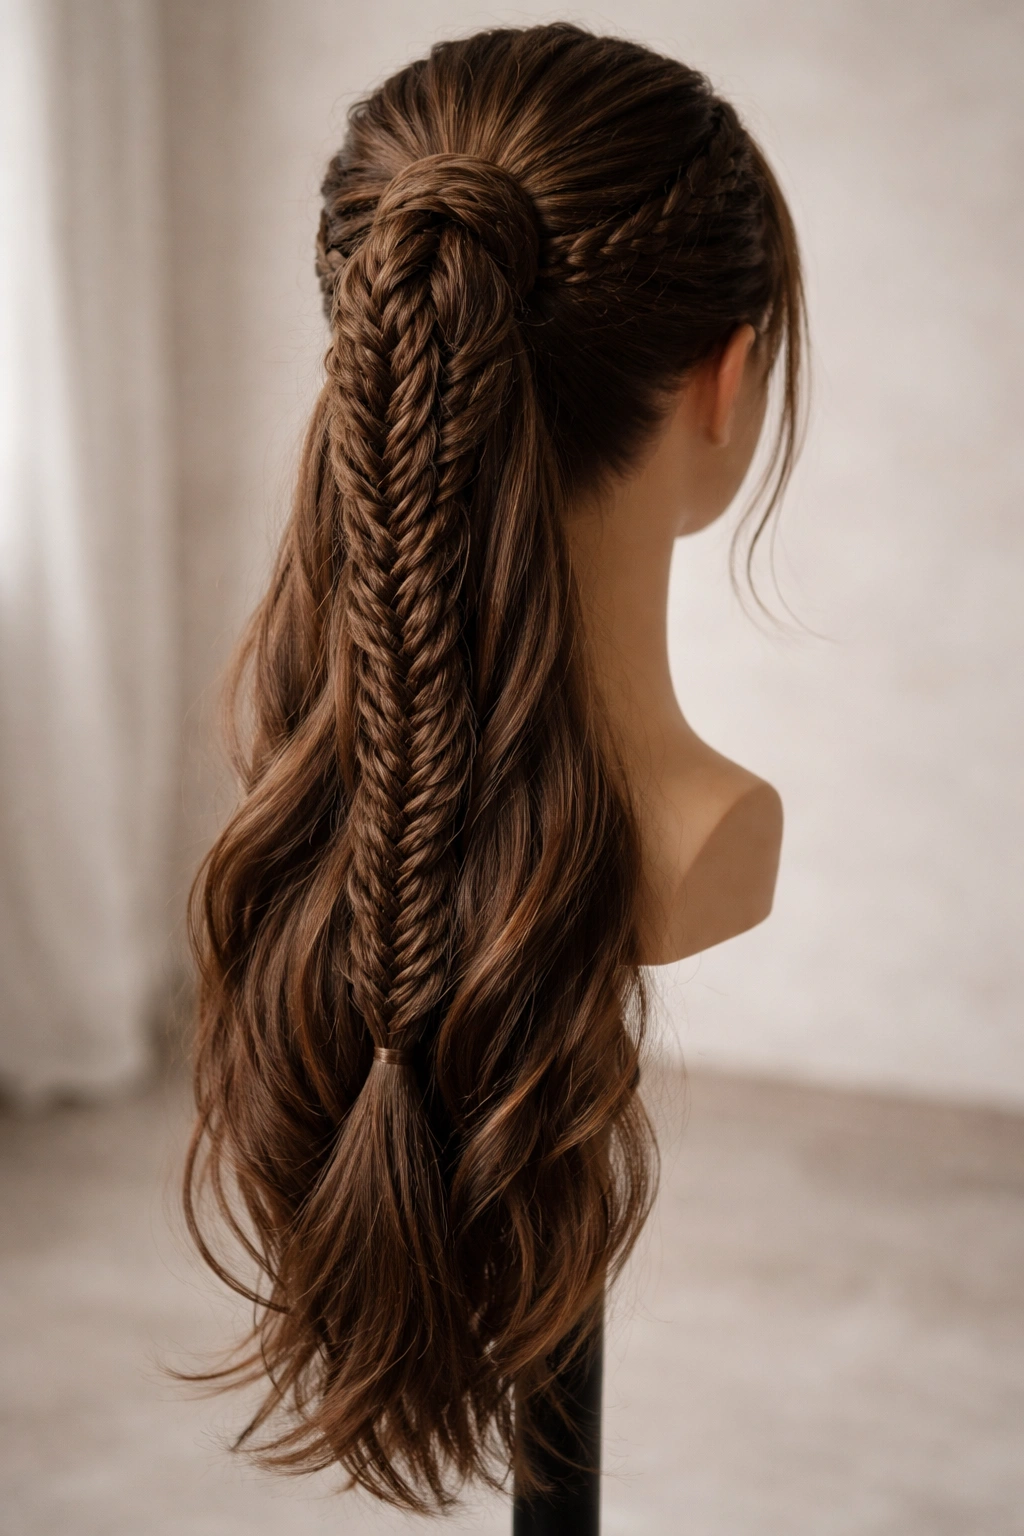
Braided ponytails feature intentional braiding throughout the length—French braids, fishtail braids, Dutch braids, or combination braid patterns woven into the extension. This style is practical and beautiful, combining the protective, pulled-back nature of braids with the fullness and drama of extensions. The braiding adds intricate detail that makes a ponytail look deliberate and designed rather than simply attached.
How Braids Make Blending Effortless
Braided extensions are genius for hiding seams because the braided pattern itself creates visual complexity and texture variation. When a braid transitions from your real hair to the extension, the braided structure ensures there’s no obvious flat line where they meet. Instead, the interweaving pattern continues seamlessly, making it nearly impossible to detect where the real braid ends and the faux piece begins. Braids also create a pulled-together aesthetic that feels intentionally styled rather than hastily assembled.
Creating Convincing Braided Ponytails
- Braid your natural hair first: Start with a French braid, Dutch braid, or combination pattern using your real hair. Braid from the crown down to the base of where your ponytail will sit, securing with an elastic.
- Choose a matching braided piece or braid the extension: Your extension should either come pre-braided (which is ideal), or you should braid it before attaching. If you’re braiding the extension yourself, do this before clipping or wrapping it in, as it’s much easier to handle.
- Transition from real braid to faux braid: Attach your braided extension directly to the bottom of your natural braid. The two braids flowing together should look like one continuous braid.
- Ensure texture compatibility: Your natural hair’s texture should roughly match the extension’s. A fine, delicate natural braid paired with thick, chunky braided extensions looks mismatched. Aim for similar visual weight and scale in the braiding pattern.
- Secure all ends: Make sure the bottom elastic of your braid is tight and secure. Loose braids come unraveled, and unraveling on a braid made partly of real and partly of faux hair looks messy.
Pro tip: Three-strand braids are most forgiving for blending because they’re straightforward and symmetrical. Intricate patterns like fishtails are beautiful but require more precision to keep the transition seamless.
10. Sleek Low Faux Ponytails
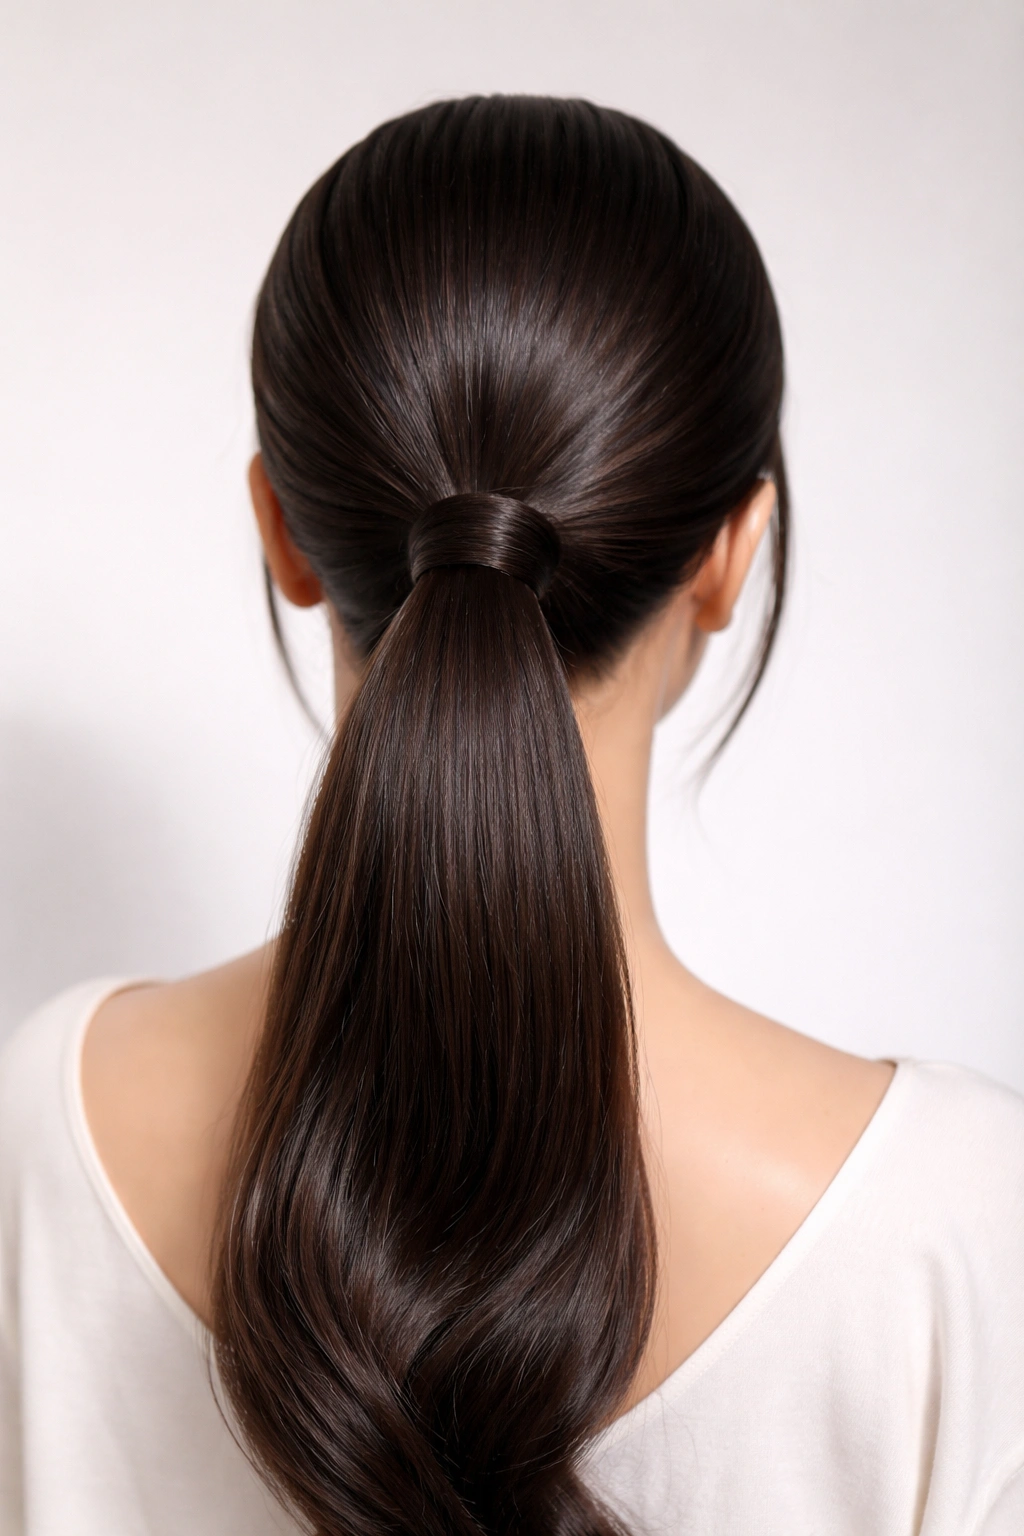
Sleek low ponytails positioned at the nape of the neck create an elegant, minimalist aesthetic that feels modern and refined. Low placement is forgiving for blending because the ponytail sits lower on the head where it’s less likely to be examined closely. The sleekness of this style demands precision in execution, but when done right, it looks incredibly polished and professional.
Why Low Placement Works for Faux Hair
A low ponytail sits below the crown and back of the head, meaning most people view it from angles where seams are naturally camouflaged. The angle of observation from most directions hides the attachment point. Additionally, low ponytails often use a wrap-around construction or a clip-in placed low on the head, both of which hide the joining mechanism through clever placement. The simplicity of a low, sleek style also means there’s less visual chaos to distract from any imperfection—which means execution has to be perfect, but when it is, the result is flawless.
Achieving Sleek, Seamless Low Ponytails
- Polish your natural hair smooth: Brush thoroughly, use a fine-tooth comb, and apply a smoothing serum. Any texture or frizz in your natural hair becomes obvious in a sleek style.
- Position your ponytail very low: Gather hair at the nape, not at the crown. This placement automatically hides the attachment point because hair falls over it from above.
- Use a matching hair-colored elastic: An elastic that matches your hair color disappears visually. A contrasting elastic—like using a black elastic with blonde hair—creates an obvious line.
- Secure the extension tightly: A loose low ponytail that shifts reveals the attachment point. Secure your extension firmly so it sits exactly where you positioned it throughout the day.
- Apply minimal styling products: Sleek styles look best with minimal product. Use light smoothing serum or a tiny bit of edge control only where needed, avoiding product buildup that makes hair look heavy or false.
Worth knowing: Sleek low ponytails look best on those with at least a moderate amount of natural hair density. If you have very fine or thin hair, a low ponytail can look sparse even with extensions added. Consider a slightly higher placement or opting for a textured style that accommodates finer hair better.
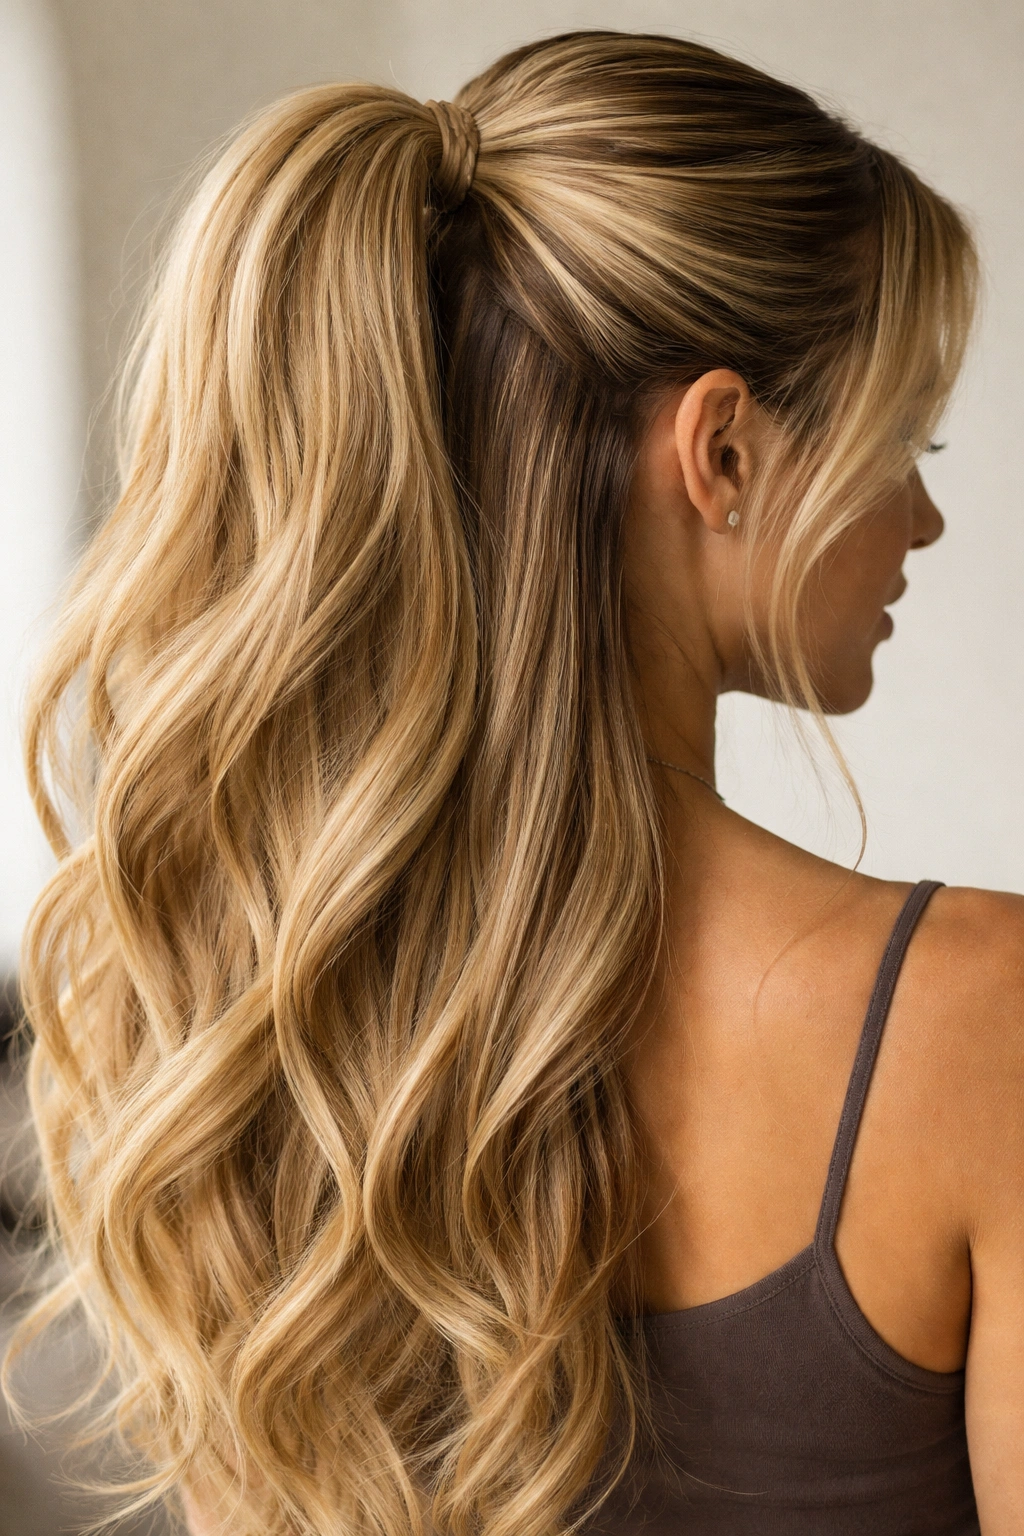
11. Half-Up Faux Ponytail Hybrids
Half-up styles blend your real hair worn down with a ponytail addition, creating a romantic, layered look that’s less severe than a full ponytail. You secure the upper half of your hair into a ponytail, then attach a faux ponytail piece to add length and volume while keeping your natural hair visible and framing your face. This hybrid approach is forgiving because you’re showcasing your real hair prominently while using the faux piece to enhance volume and length.
Why Half-Up Styles Make Blending Automatic
In a half-up style, your real hair is the star—it frames your face and flows down your back visibly. The faux ponytail piece adds drama and fullness to the gathered portion without completely replacing your natural hair’s presence. Because your real hair is so visible, observers naturally focus on your authentic hair, making them less likely to scrutinize the faux portion. The hybrid nature also means there’s inherently texture variation (real hair + faux hair) which creates visual complexity that hides seams.
Constructing Half-Up Ponytail Hybrids
- Gather just the upper half into a ponytail: Section your hair from your temples back, creating a panel of hair that flows down your back. Secure the gathered upper portion with an elastic.
- Attach the faux ponytail to your gathered section: Clip in or wrap around your ponytail piece right at the elastic of your upper-half ponytail. This creates an invisible join—the gathered real hair of your upper half blends seamlessly with the faux piece.
- Fluff your lower loose hair: Let your real hair’s bottom half fall naturally. Flip your head, rough up that loose section, and arrange it so it looks full and romantic.
- Balance the proportions: Your loose hair and your ponytail section should feel balanced in terms of visual weight. If your loose hair is very full and your ponytail is thin, it looks odd. Use extensions thick enough to match the visual density of your loose hair.
Pro tip: Half-up styles look particularly good when your faux ponytail has slightly different texture or wave than your loose real hair. The contrast between your natural loose hair and the ponytail piece becomes a style feature rather than a blending problem.
12. Colored Accent Faux Ponytails
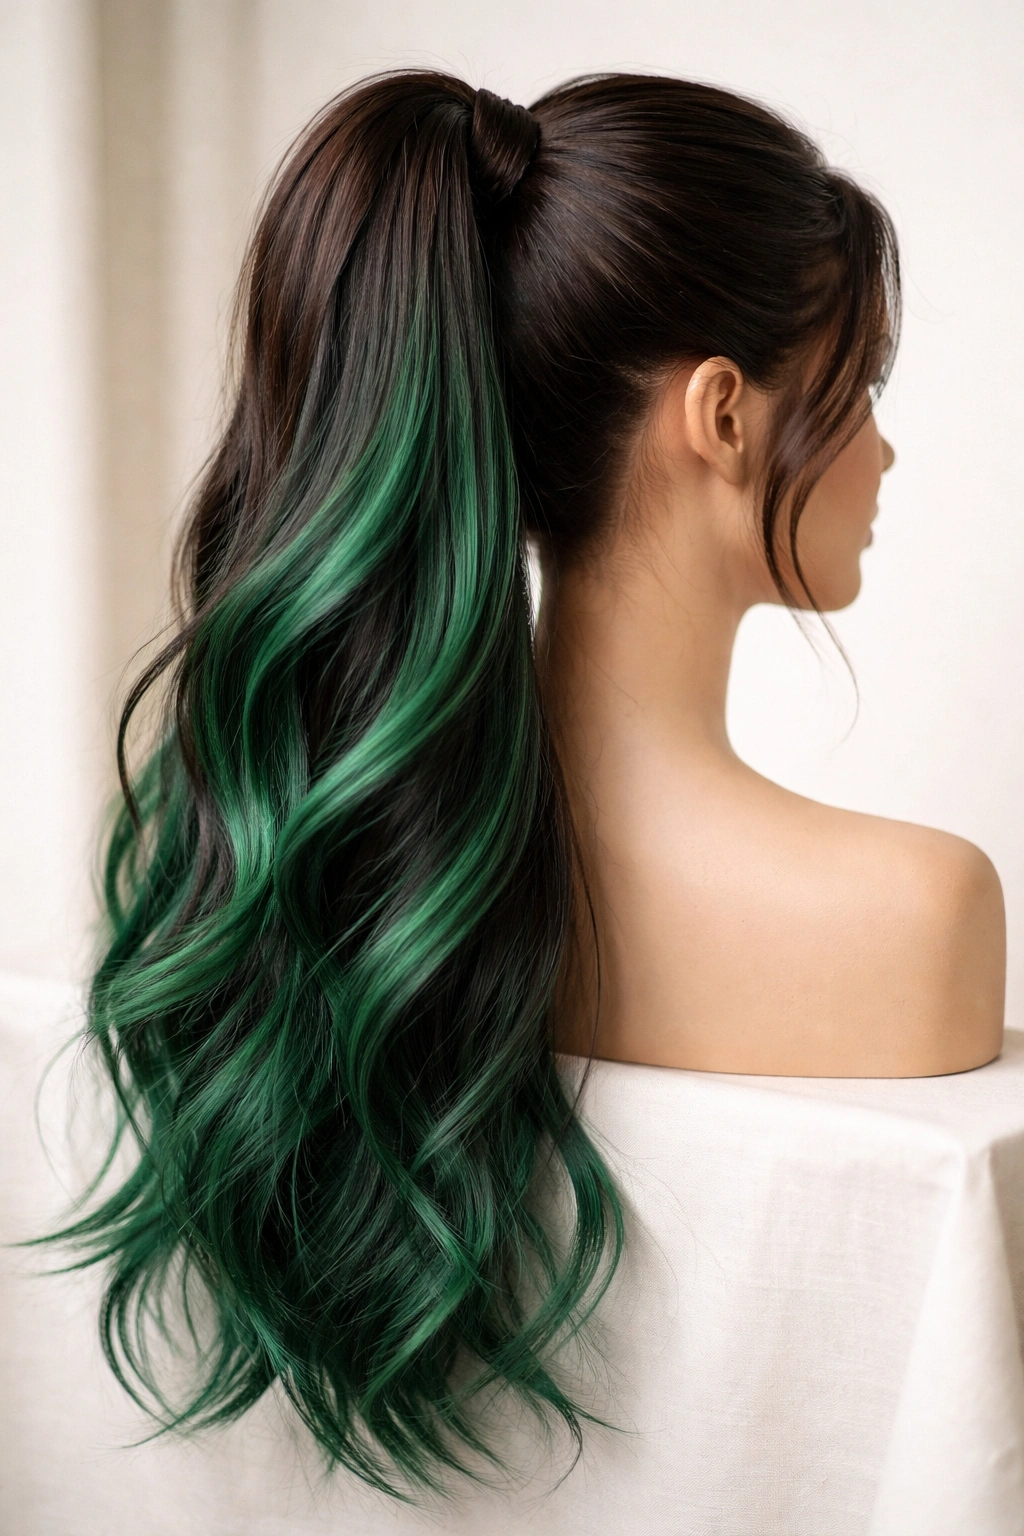
Colored accent ponytails introduce a pop of color—maybe a vibrant jewel tone, a pastel shade, a bold metallic, or a warm balayage effect—while keeping your actual hair its natural color. These pieces let you experiment with hair color without any commitment or damage to your real hair. The “faux” nature is intentional and celebrated rather than hidden—these pieces are meant to stand out as a fashion statement.
Making Colored Pieces Feel Intentional and Wearable
The key to wearing colored faux ponytails without looking costume-y is ensuring the color complements your skin tone and fits the overall aesthetic you’re building. A purple ponytail can look editorial and cool on the right person in the right context, or it can look costumey on someone else. Think about whether the color harmonizes with your complexion, your regular color palette, and the settings where you’ll wear it. Jewel tones (emerald, sapphire, amethyst) tend to feel more sophisticated and wearable than neon or pastels, though all of those can work in appropriate contexts.
Styling and Wearing Colored Accent Pieces
- Ensure contrast with your natural hair: Colored pieces work best when they contrast noticeably with your real hair color. Blonde hair with a jewel-tone ponytail creates beautiful contrast. Very dark hair with a dark-colored extension is less striking unless the colored piece is a metallic or shimmery shade.
- Keep your natural hair simple: When wearing a bold-colored ponytail, keep your natural hair’s styling simple. A sleek ponytail base with a colored piece attached reads as intentional. Complicated braiding or multiple styling elements with colored hair can look overwhelming.
- Pair with coordinated makeup or clothing: A colored ponytail is a statement piece. Support it with makeup and outfit choices that feel cohesive. A purple ponytail looks striking with berry-toned makeup, for example.
- Consider the occasion: Colored ponytails work beautifully for festivals, parties, creative workplaces, or nights out. They might feel too bold for corporate offices or formal events depending on your environment’s culture.
Worth knowing: Synthetic hair holds colored pigment permanently, while human hair colored extensions can fade with washing and sun exposure. If you want your colored piece to remain vibrant for extended periods, synthetic is the better choice. Human hair colored pieces benefit from color-safe products and gentle handling.
13. Messy Bun Faux Ponytails
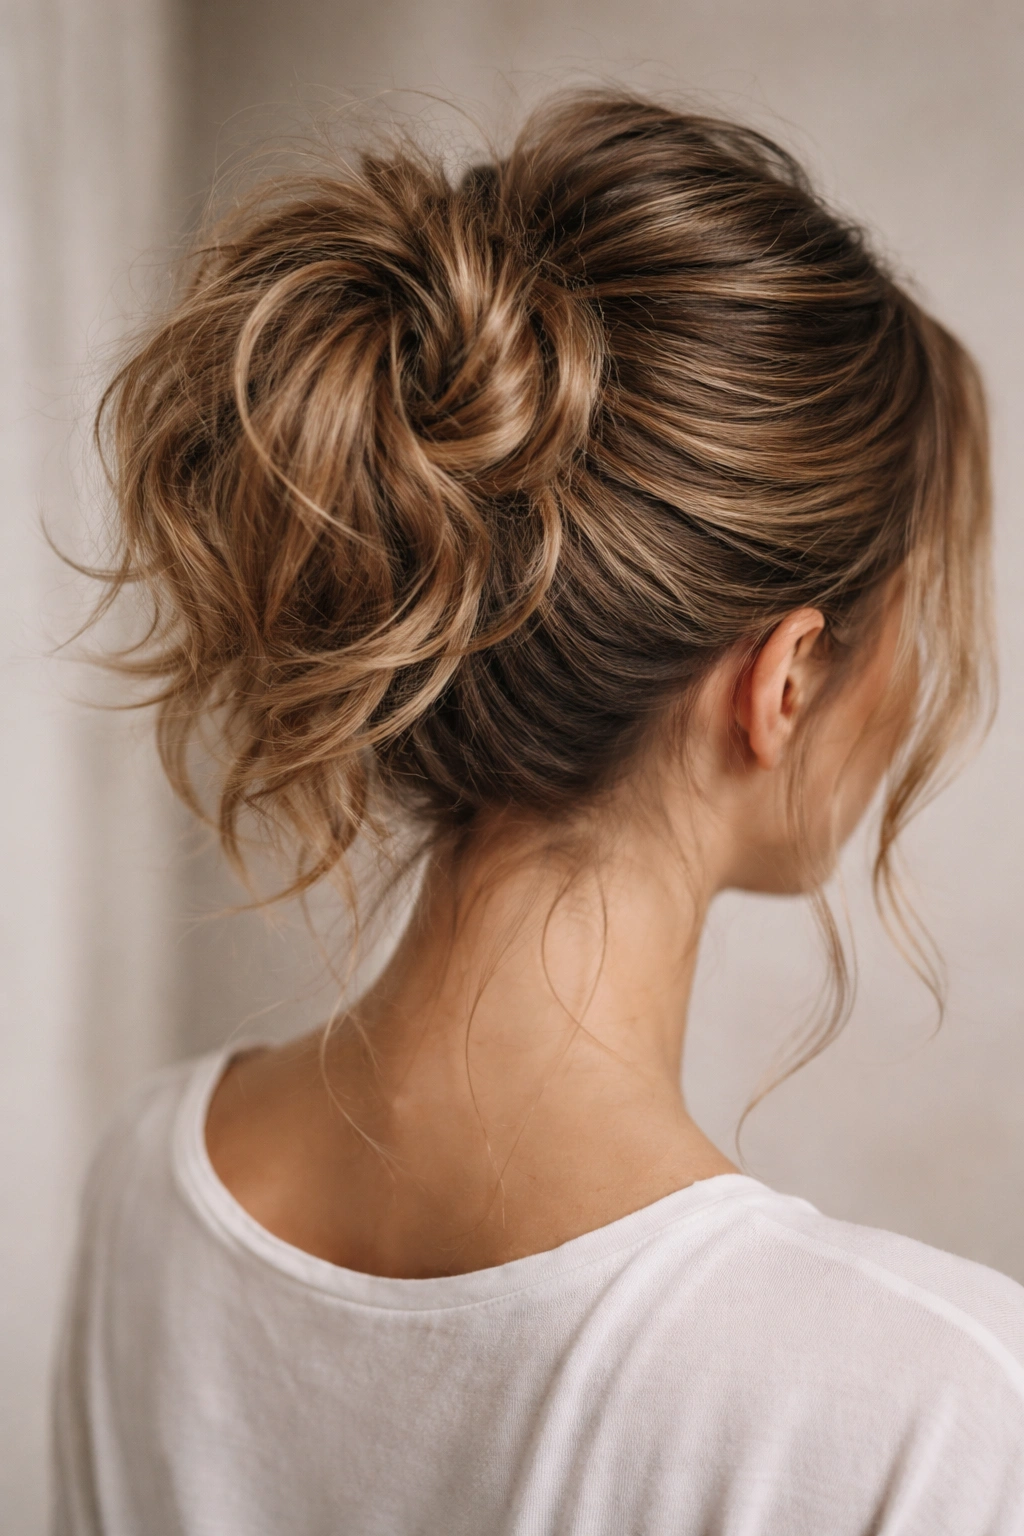
Messy bun ponytails flip the traditional ponytail concept by taking a faux hair piece and styling it into a relaxed, undone bun rather than a traditional straight ponytail. The beauty of this style is that “messy” is literally built into the aesthetic—a few stray hairs, uneven texture, and slight dishevelment are features, not flaws. This makes messy buns incredibly forgiving for blending and attachment because the intentional imperfection camouflages any joining points.
Why Messy Equals Seamless Blending
Messy buns are intentionally textured and imperfect, which means any imperfection in how the faux hair blends with your real hair becomes part of the aesthetic rather than a visible flaw. Small gaps, texture variations, and visible elastics or clips all read as intentional styling choices in a messy bun context. This is one of the most forgiving styles for using faux hair because you’re not trying to create a seamless illusion—you’re celebrating texture and a gathered, undone vibe.
Creating Convincing Messy Bun Styles with Extensions
- Start with textured real hair: Use a dry shampoo, texture spray, or ocean salt spray on your natural hair before styling. Texture makes everything look fuller and hides attachment points beautifully.
- Gather into a loose, high ponytail: Position your ponytail at the crown, higher than a formal bun. Keep it looser than you would for a sleek style—don’t pull it tight.
- Attach your faux ponytail piece: Clip in or wrap your extension around the base of your gathered ponytail. The attachment can be less perfectly hidden than in other styles because the messiness of the final bun will disguise any visible clips or wraps.
- Twist or coil the combined ponytail into a bun: Take your real hair plus the attached extension, and twist it around itself to create a bun shape. Secure with bobby pins, leaving a few pieces to fall around your face and neck.
- Strategically mess it up: Pull out a few sections to create a lived-in, romantic look. Gently tousle the bun so it looks full and undone rather than tightly wound.
Insider note: Messy buns work beautifully with curly or wavy faux hair because the texture already feels intentionally styled. Straight faux ponytails in a messy bun can sometimes look like you’re trying to hide something rather than celebrating a style choice.
14. High-Volume Teased Faux Ponytails
High-volume teased ponytails use backcombing or teasing techniques on both your real hair and the attached faux piece to create maximum fullness and height at the crown. Teasing creates texture throughout the ponytail, adding volume without adding more hair. When combined with a quality faux piece, teased styles look incredibly thick and luxurious. The teasing also creates enough visual texture to camouflage seams between real and faux hair.
How Teasing Maximizes Volume and Hides Seams
Teasing creates a textured, bumpy surface that catches light in multiple directions. This visual complexity means the eye can’t easily track where one hair type ends and another begins. The increased volume from teasing also means both your real hair and the extension stand out more dramatically, creating an impressive overall effect. A teased ponytail looks so full that observers assume it’s natural thick hair rather than scrutinizing whether it’s one piece or multiple pieces.
Technique for Creating Convincing Teased Ponytails
- Tease your natural ponytail base: Create your ponytail first, then systematically tease it using a fine-tooth comb or teasing brush. Tease in sections from ends toward roots, creating texture throughout. Don’t rough it up so much that it looks damaged—aim for intentional fullness, not chaos.
- Smooth the outer layer: After teasing, gently smooth the outer layer of your ponytail with the comb, creating a polished exterior while maintaining teased fullness underneath. This prevents the style from looking messy rather than voluminous.
- Attach your faux ponytail to the teased base: The textured base makes a perfect anchoring point for your extension. Clip in or wrap around the teased ponytail.
- Tease the extension as well: If your extension has some texture naturally, you can enhance it with gentle teasing at the roots where it joins your real hair. This creates a seamless texture transition.
- Use texturizing products: Apply a light dry shampoo or texture spray to enhance the teasing effect and add grip. This helps your teased layers hold throughout the day.
Pro tip: Teased ponytails look best when you’re going out or for special occasions—they require some setup time and might feel like “trying too hard” for everyday wear. Save this technique for events where you want maximum impact.
15. Seamless Blend Ponytails with Base Extensions
Seamless blend ponytails use a base layer of extensions clipped directly to your scalp, then attach a second ponytail piece to those base extensions. The genius of this method is that the base extensions integrate throughout your hair, creating a custom fullness foundation. Your natural hair then blends throughout that foundation rather than existing as a separate entity joined to faux hair. This layered approach creates the most naturally-looking ponytail because blending happens at multiple points rather than one single junction.
Why Layered Base Extensions Create Maximum Realism
When a base layer of extensions is integrated into your hair from the scalp down, they become virtually indistinguishable from your real hair. Your natural hair grows around and mingles with the base extensions, creating a unified whole. Then when you attach your ponytail piece to this already-unified hair-extension combination, the join feels much less obvious. It’s like the difference between joining two separate pieces versus attaching something to a surface that’s already been enhanced and modified.
Building Your Seamless Blend System
- Start with a quality clip-in base layer: Choose a base extension that matches your hair color perfectly and provides fullness where you naturally lack it. Clip these in near your roots, distributed across your scalp.
- Blend your natural hair with the base extensions: Run your fingers through your hair to mingle your real hair with the base extensions. They should feel integrated, not layered on top.
- Create your ponytail from the blended combination: Gather your real hair plus the base extensions into a ponytail at your desired height. This creates a much fuller ponytail base than using just your natural hair alone.
- Attach your ponytail piece to this enhanced base: Add your main ponytail extension to this already-enhanced ponytail. Because the base is so full and blended with your real hair, the ponytail piece attaches to hair that looks naturally thick.
- Style the final result: Flip and arrange so everything flows naturally. The multiple layers of integration mean fewer visible seams or obvious joins.
Worth knowing: The seamless blend method requires investment in two pieces—base extensions and a ponytail piece—making it more expensive upfront than a single piece. However, it delivers the most realistic result and is the choice of professionals styling for photographs and video. If you want ponytails that absolutely look real in every lighting condition and angle, this is the method that delivers.
Key Takeaways
The beauty of faux ponytails is that they’ve evolved into genuinely realistic options covering nearly every aesthetic and practical need. Whether you prioritize ease of application (clip-ins), longevity (human hair pieces), styling flexibility (heat-resistant options), or visual impact (colored or textured pieces), there’s a faux ponytail method designed for your specific goals.
The most convincing faux ponytails share certain qualities: they match your hair color precisely, align with your natural hair texture and pattern, use quality construction that mimics real hair’s movement and shine, and employ smart blending techniques that hide attachment points. Pay equal attention to the piece itself and to how you prepare and style your natural hair—a premium extension attached to disheveled, unprepped hair looks inferior to a mid-range piece attached to sleek, well-prepared hair.
Start with the application method that excites you most. If you love ease and flexibility, begin with clip-ins. If you want the most natural result long-term, invest in human hair wrap-arounds or base extension systems. If you want to experiment with bold color or texture, synthetic pieces offer incredible options at accessible price points. There’s no single “best” faux ponytail—there’s only the one that fits your hair type, lifestyle, budget, and styling preferences perfectly.