If you’re looking for a hairstyle that combines edge, sophistication, and that undeniable sleek factor, high cornrow ponytails are exactly what you need. There’s something about the way cornrows frame the face while pulling everything up into a polished, structured ponytail that just works—whether you’re heading to the office, a special event, or just want to feel put-together on an everyday basis.
The beauty of this style is its versatility. You can go for thick, bold cornrows or keep them thin and delicate. You can add extensions for dramatic height and volume, or work with your natural hair for a more understated look. You can play with the placement—cornrows running straight back, swooping to the side, or creating geometric patterns across the crown. The sleek ponytail at the top can be smooth and polished, textured with curls, or wrapped with additional hair for definition. What ties all these variations together is that intentional, high-impact aesthetic that makes cornrow ponytails such a go-to style.
The staying power is incredible, too. Once your cornrows are installed and your ponytail is set, you’re looking at a style that can last for weeks with minimal daily maintenance—just a light mist of water or edge control in the morning, and you’re ready. This makes them perfect if you’re looking for a protective style that keeps your hair safe while still looking absolutely stunning.
Let’s explore twelve different ways to wear high cornrow ponytails, each with its own personality and purpose.
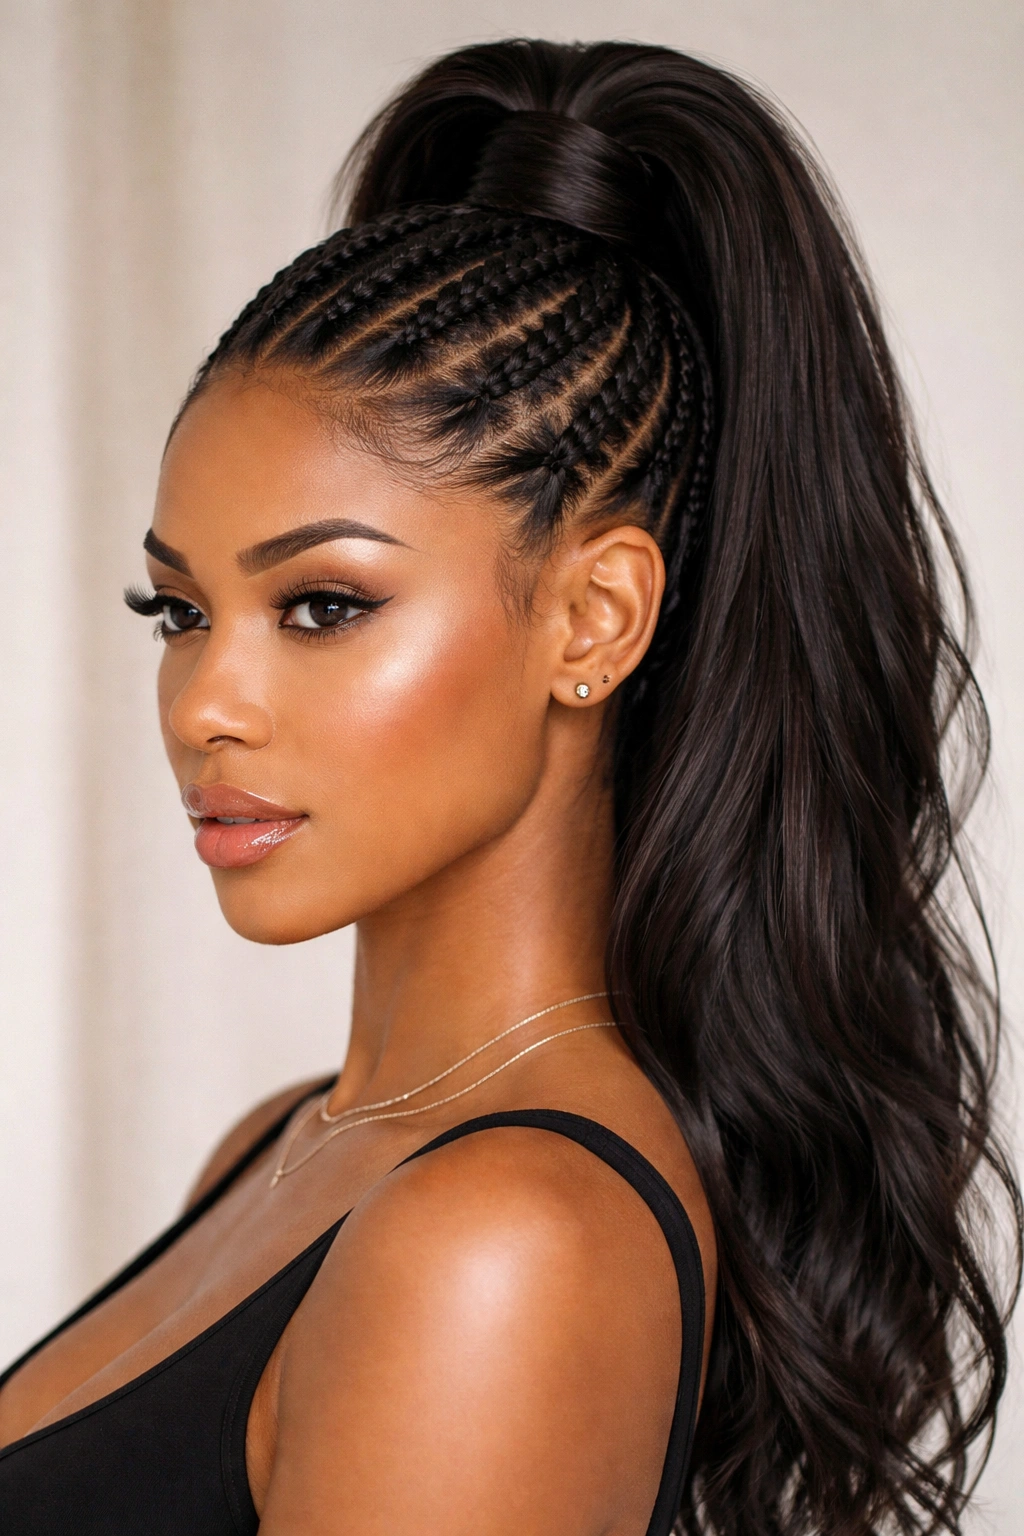
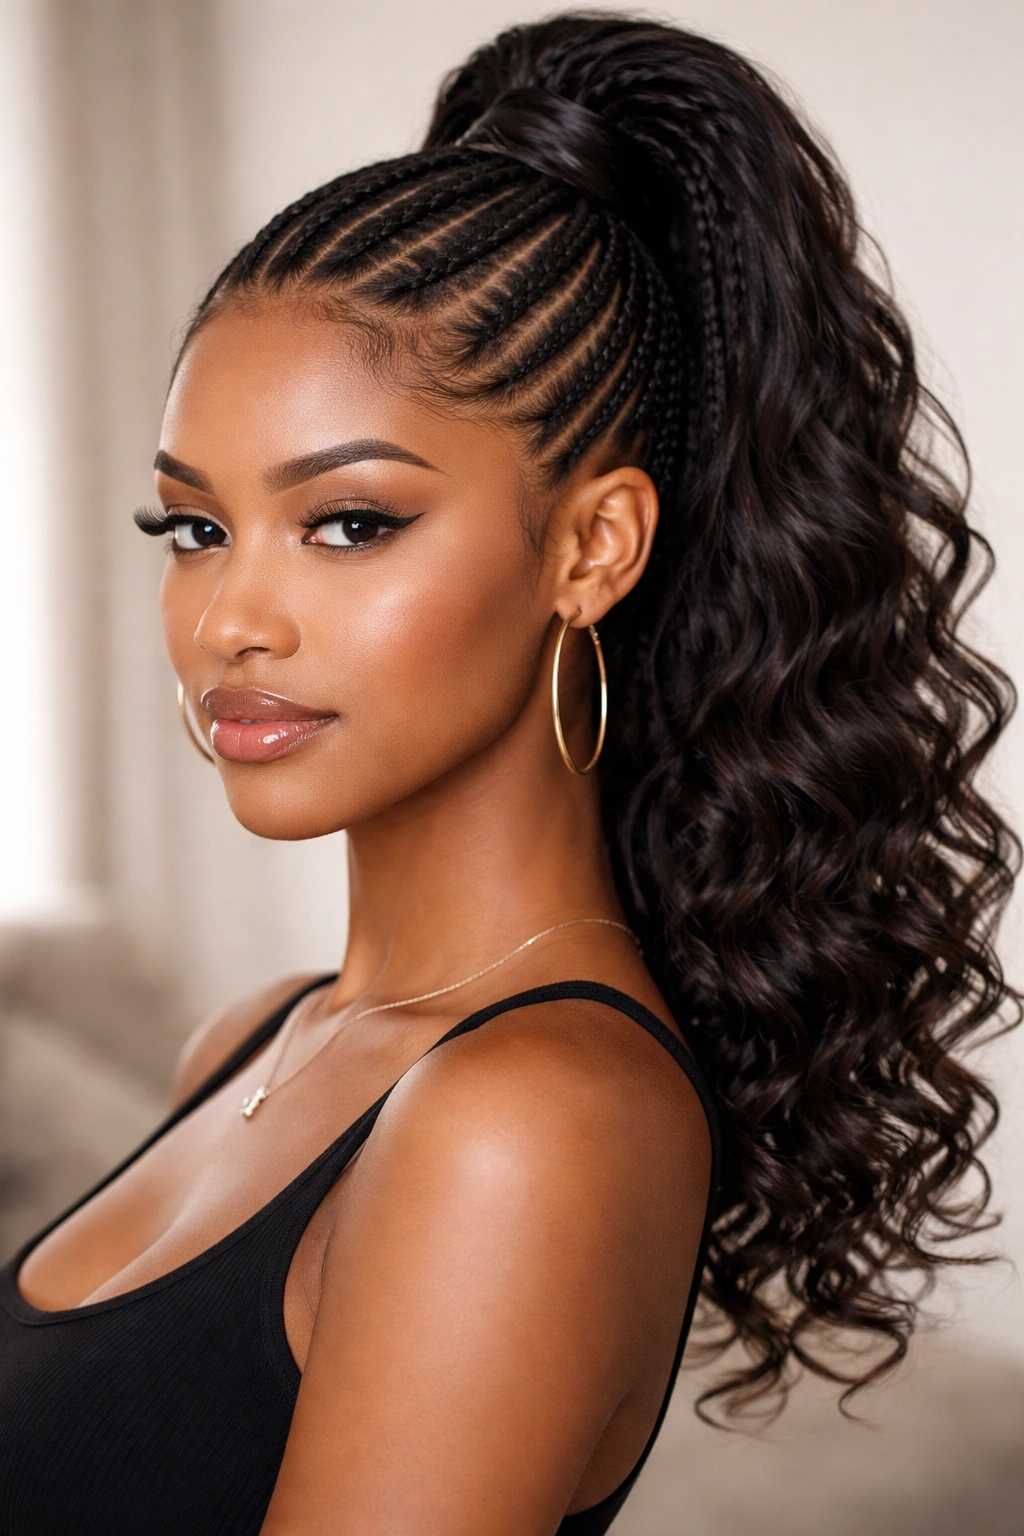
1. High Cornrows with Center Part and Sleek Ponytail
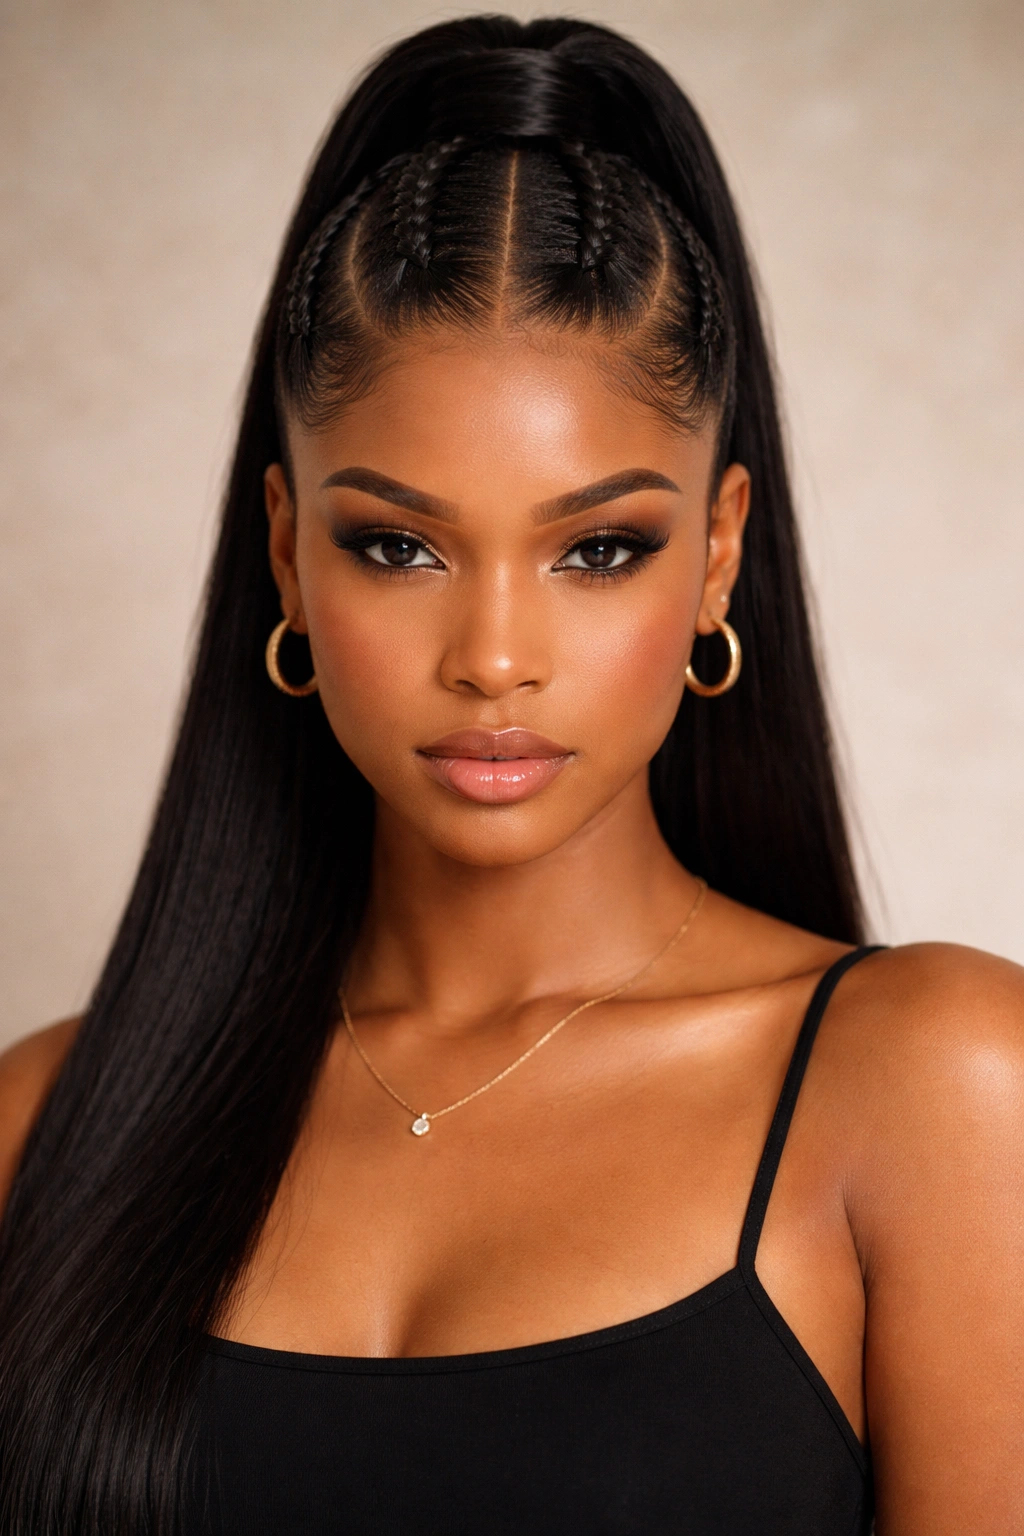
This is the classic, versatile version that works for nearly any face shape and occasion. Two thick cornrows start at your center part and run straight back toward the crown, where they meet and feed into a sleek, high ponytail.
Why This Style Commands Attention
The center part creates perfect symmetry and elongates the face beautifully. Cornrows that track straight back emphasize height and create clean, defined lines that feel intentional and polished. The symmetry also makes it easier to style and maintain—your edges lay evenly on both sides, and the ponytail sits centered on the crown for maximum visual impact.
How to Get It Right
- Start with freshly washed, conditioned hair or hair that’s been refreshed within a day or two—clean hair holds cornrows better and they’ll look crisper
- Use a rattail comb to section your center part as straight as possible; this precision shows in the final result
- Make your cornrows about ½ inch to ¾ inch thick for a balanced, feminine look—thick enough to make a statement, but not so thick that they overtake your face
- Braid straight back to the crown, keeping tension consistent so the rows sit evenly and don’t veer to one side
- Gather your natural hair at the crown into a high ponytail, and secure with a covered elastic band that matches your hair color
- Smooth the ponytail with edge control and a fine-tooth comb for that signature sleek finish
Pro tip: If you want your ponytail to have more volume, tease the gathered hair gently at the base before securing—you’ll get lift and fullness without it looking messy.
2. Double-Sided Cornrows Converging Into a High Puff
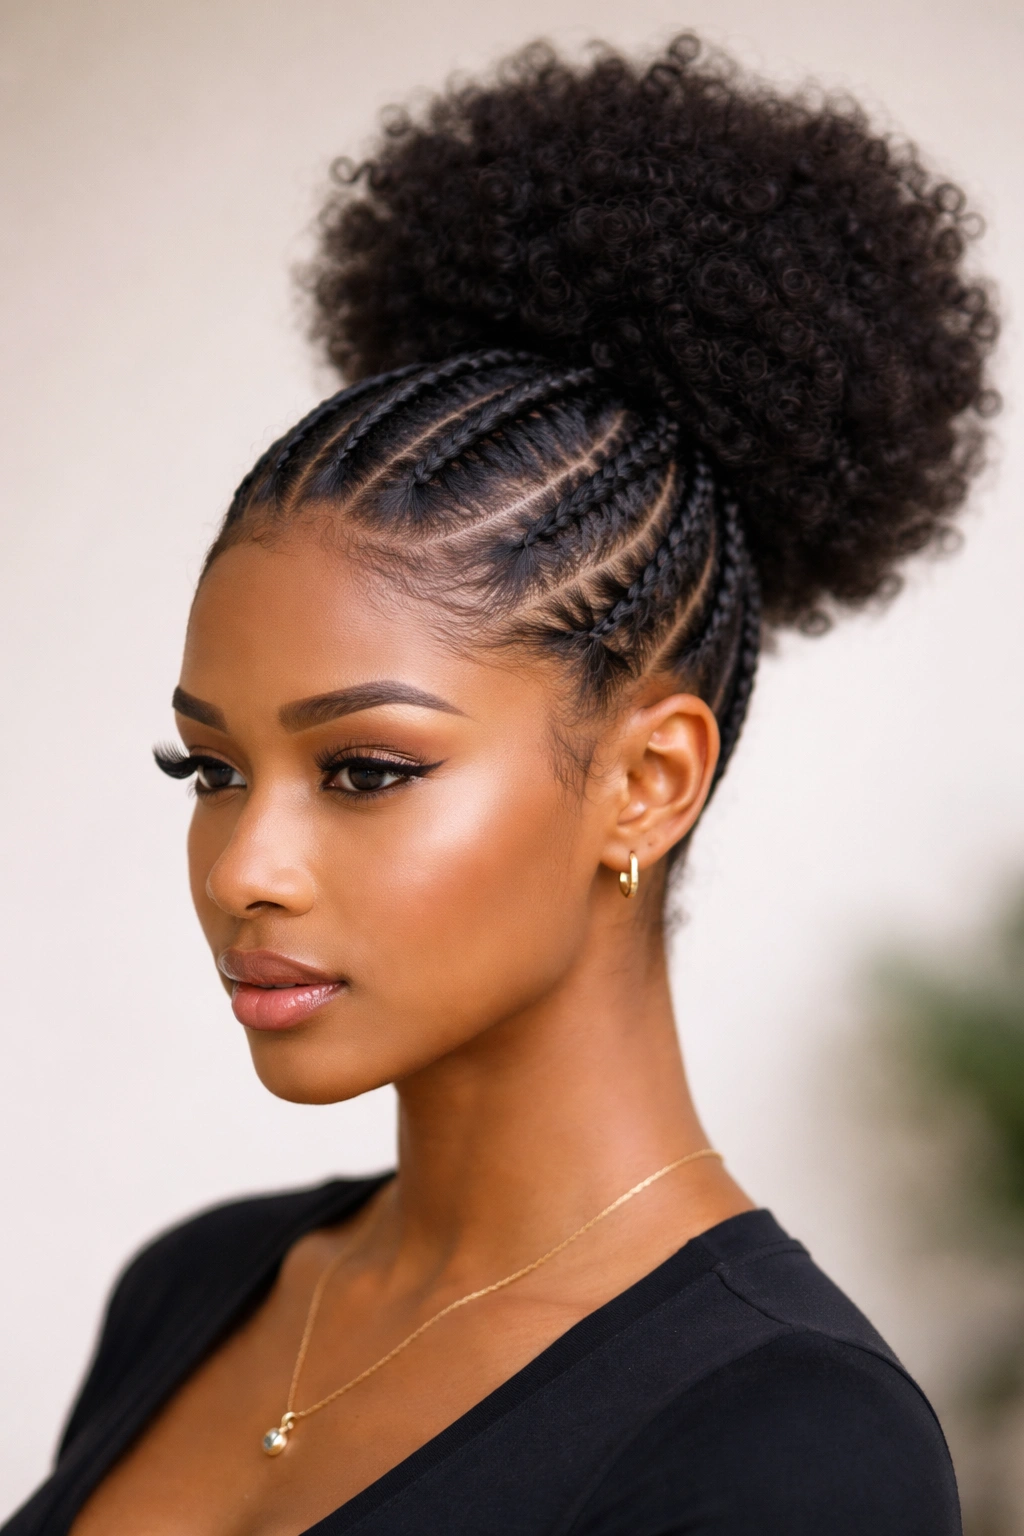
Instead of straight-back cornrows that meet at a single ponytail, this style sends them on slightly different paths that create dimension and visual interest. The cornrows come from each side and angle inward, meeting at the back where they feed into a high, voluminous puff.
The Geometry of This Style
The angled approach of the cornrows creates an illusion of width at the crown and draws the eye upward. When they converge, they naturally funnel into a gathered puff that feels lifted and three-dimensional. This style is particularly flattering if you have a longer face shape—the width created by the angled cornrows balances the proportions beautifully.
Installation Tips for Maximum Impact
- Partition your hair into four sections: two front sections (one on each side of the part) and two back sections
- Braid the front sections with a slight outward angle first, so they curve around your temples and avoid pulling at sensitive hairline areas
- Braid the back sections with an inward angle, so they naturally curve toward the center and meet at the crown
- When gathering the ponytail, place it slightly higher than center—a true crown placement—so the puff has room to sit full and rounded
- Add a scrunchie with a bit of padding or use a hair tie with a built-in volumizer to create that puff shape
- Fluff and shape the puff by gently teasing and separating the hair sections to make it as round and full as possible
Worth knowing: This style works beautifully with hair accessories—a metallic cuff, a decorative scrunchie, or even a statement hair clip can elevate the look instantly.
3. Thick Diagonal Cornrows Into a Twisted Ponytail
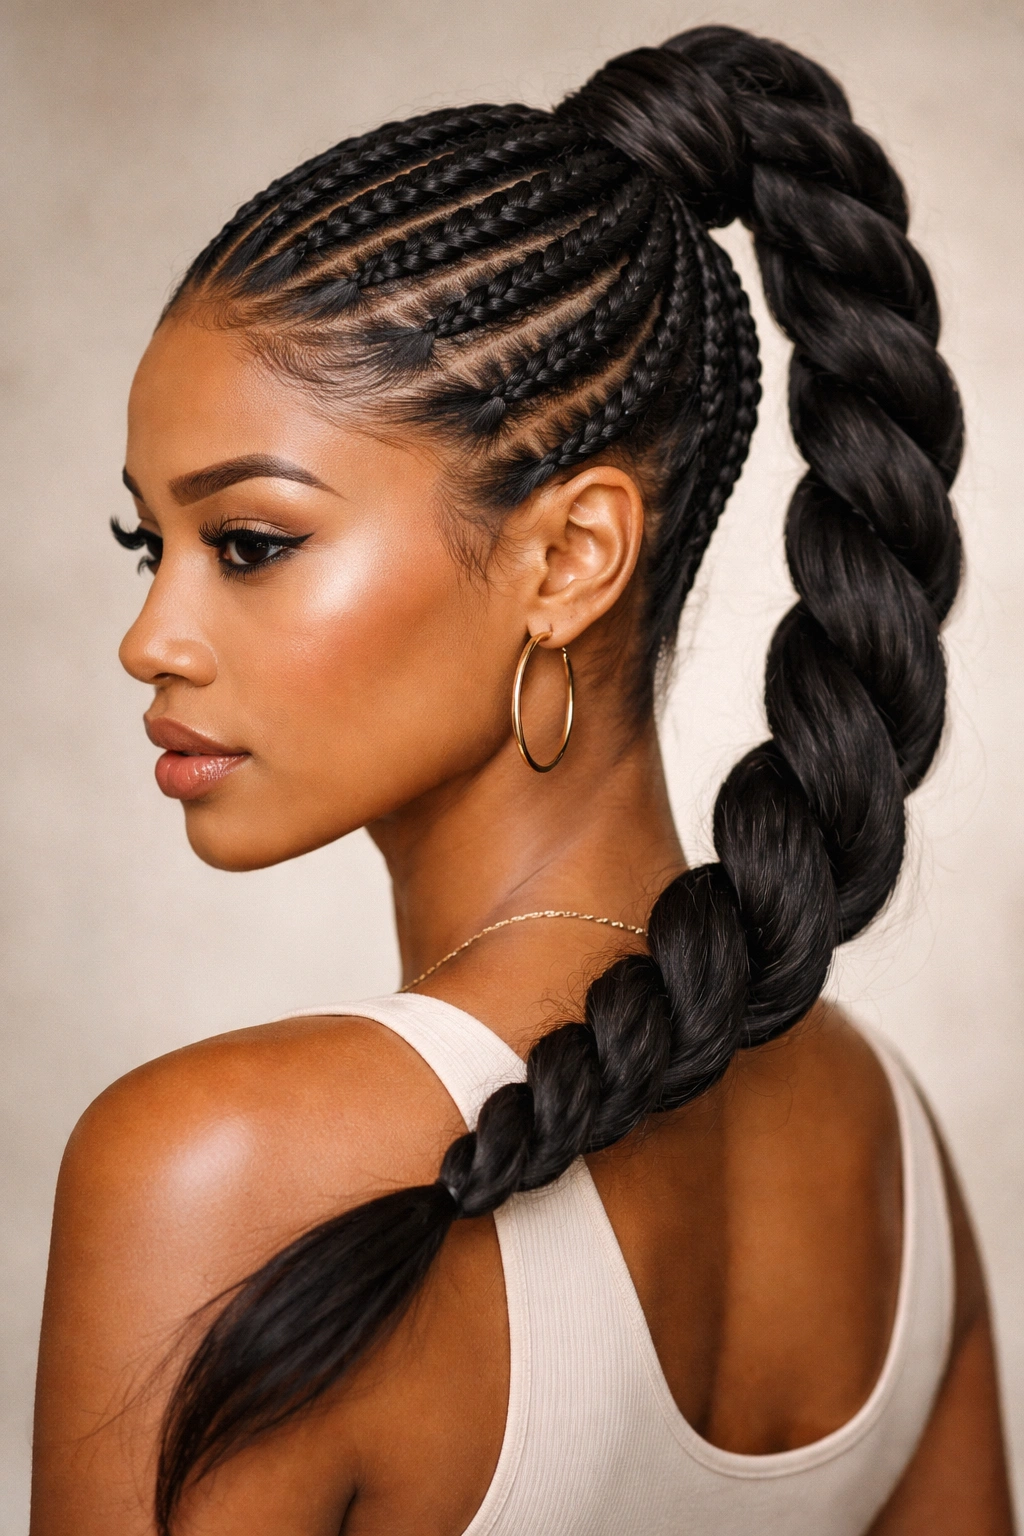
For a style with real character and movement, try diagonal cornrows that run from one side of the head to the other before gathering into a twisted, rope-like ponytail. This creates asymmetry and visual dynamism that feels modern and intentional.
Why Diagonals Change the Game
Diagonal cornrows create an optical flow that’s completely different from straight-back rows. They guide the eye across the head in a sweeping motion, which is incredibly flattering and adds sophistication. The twisted ponytail reinforces this movement and keeps the style from feeling too structured—it’s polished but with an edge.
How to Execute This Successfully
- Begin your first cornrow at one temple area and braid diagonally toward the opposite side of the crown—you’re creating a line that sweeps across the back of the head
- Braid your second cornrow on the other side, mirroring the diagonal path so both rows create a balanced X or zigzag pattern
- Keep each cornrow fairly thick (about ¾ inch to 1 inch) so the diagonal path is visually prominent and easy to follow
- Gather all your hair at the crown into a high ponytail, but instead of leaving it smooth and sleek, twist it—section the ponytail into two parts and twist them around each other like a rope
- Secure the twist with bobby pins woven through it, so the twist holds its shape all day
- Finish with a light hairspray to keep the twist intact and prevent flyaways
Pro tip: A twisted ponytail photographs beautifully—the texture and dimension show up in photos way better than a smooth ponytail does, so this is a great choice if you’re documenting your style.
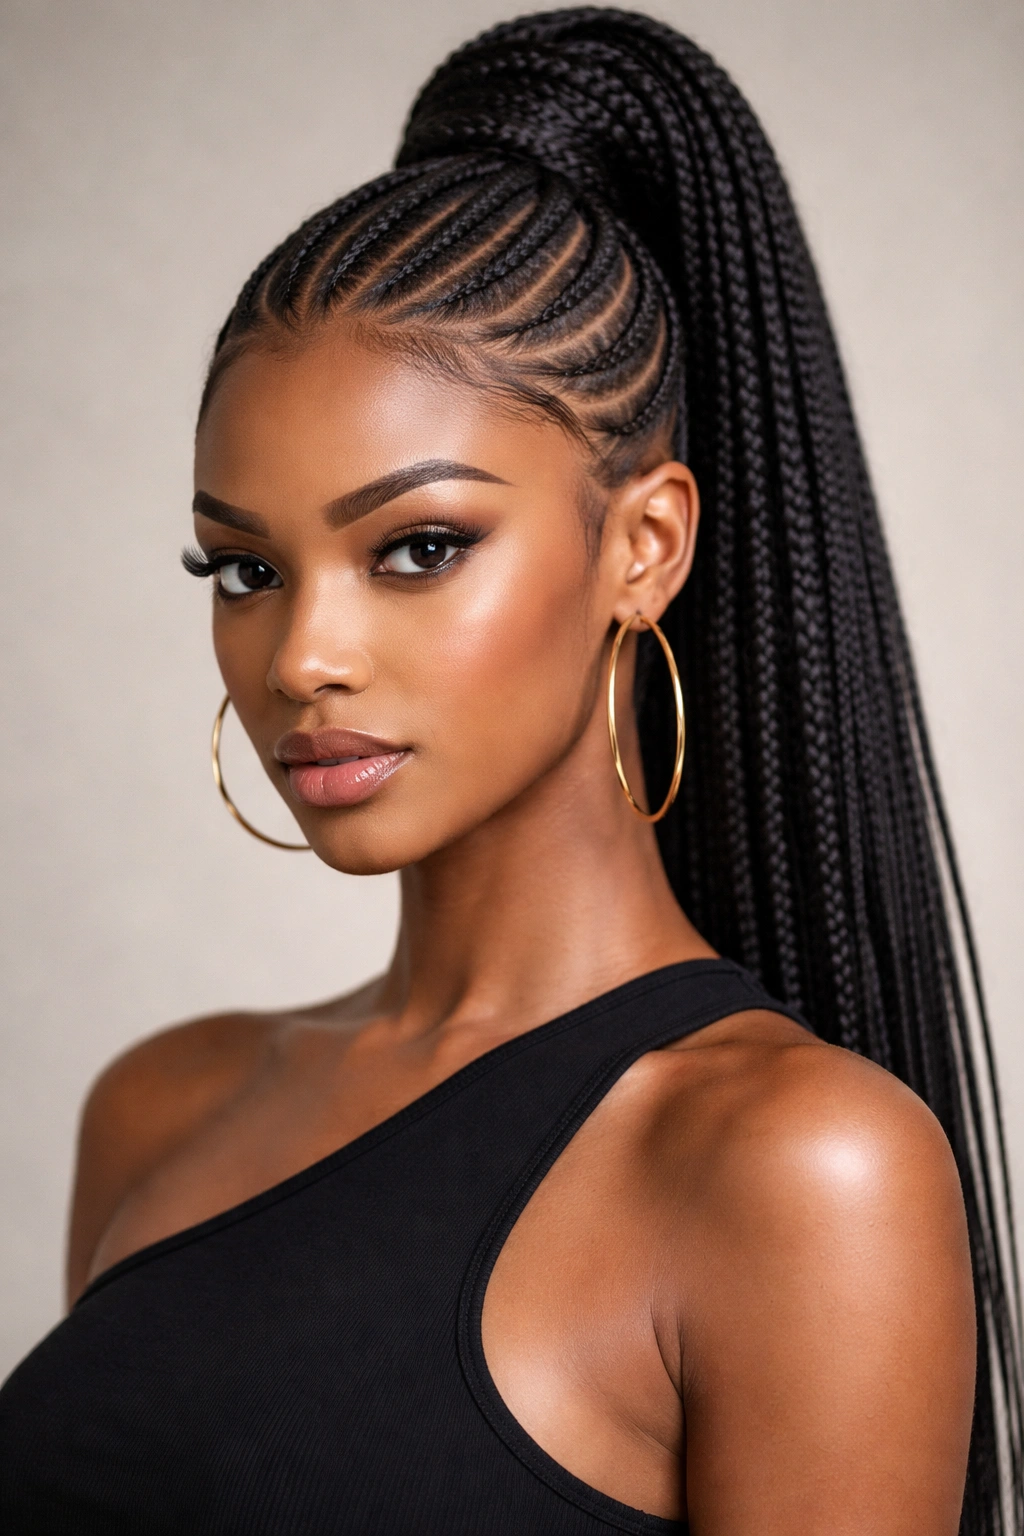
4. Cornrows with Feed-In Extensions for Extra Height
If you want serious height and volume in your ponytail but your natural hair might not provide that on its own, feed-in extensions are the answer. Straight cornrows built with extensions create a thick base, and when you gather that into a high ponytail, you get dramatic lift and impact.
Building with Extensions Without Damage
Feed-in extensions mean you’re taking small sections of your natural hair and braiding them together with extension hair gradually as you go—you’re not weaving extension hair into massive chunks of your natural hair all at once. This method is gentler on your edges and scalp because the tension is distributed across more hair.
The Technical Breakdown
- Start at your hairline with a small section of your natural hair—about the size of a pencil tip
- Take an even smaller section of your extension hair and begin braiding it together with your natural hair right from the start
- As you move back along your scalp, gradually add more extension hair to your braid, creating thickness without sudden bulk
- Continue this technique all the way back to the crown, building two symmetrical cornrows
- When you reach the crown, you’ll have beautiful thick cornrows that look intentional and professional
- Gather everything into a high ponytail—the extensions will give you volume that lasts weeks without sagging or losing shape
- Style the ponytail section however you like—keep it sleek, add curls to the ends, wrap it with thread or yarn, or leave it straight
Worth knowing: Extensions do require more careful maintenance than natural hair alone—moisturize regularly, protect them at night with a silk pillowcase or bonnet, and avoid excessive heat unless your extensions are heat-resistant. The trade-off is that your style will look fuller and more dramatic for far longer.
5. Side Cornrows Pulling Into a High Crown Ponytail
Instead of starting at the center or sides, imagine cornrows that originate at one side of your head and travel across and back, collecting hair as they go before gathering into a high ponytail. This creates an asymmetrical look that’s undeniably sophisticated.
The Visual Effect
Side cornrows create movement and draw attention toward one side of your face and neck. This is particularly flattering if you have features you want to highlight—a defined jawline, cheekbones, or you simply prefer one side of your profile. The asymmetry also feels more fashion-forward than perfectly centered styles, giving you that “I woke up like this but make it intentional” vibe.
Styling for the Best Results
- Section your hair so one side has slightly more volume than the other
- Start your first cornrow at your temple on the dominant side, using a thicker section than you normally would
- Braid it at a slight angle toward the back of the head, picking up hair as you go so the braid gets thicker as it moves back
- You can add a second cornrow on the same side if you want, or keep it as a single statement braid
- Gather your hair into a high ponytail, making sure to include all the hair from your cornrows
- Smooth down your edges on the side that’s visible—since you’re not centering the style, your edges on one side will be more prominent
- Consider adding a scarf or headwrap to frame the uncovered side of your head for an even more polished look
Pro tip: This style actually looks more polished if you don’t make it perfectly symmetrical—let one side be fuller, bolder, and more visible while the other side is more subtle. It reads as intentional styling rather than an accident.
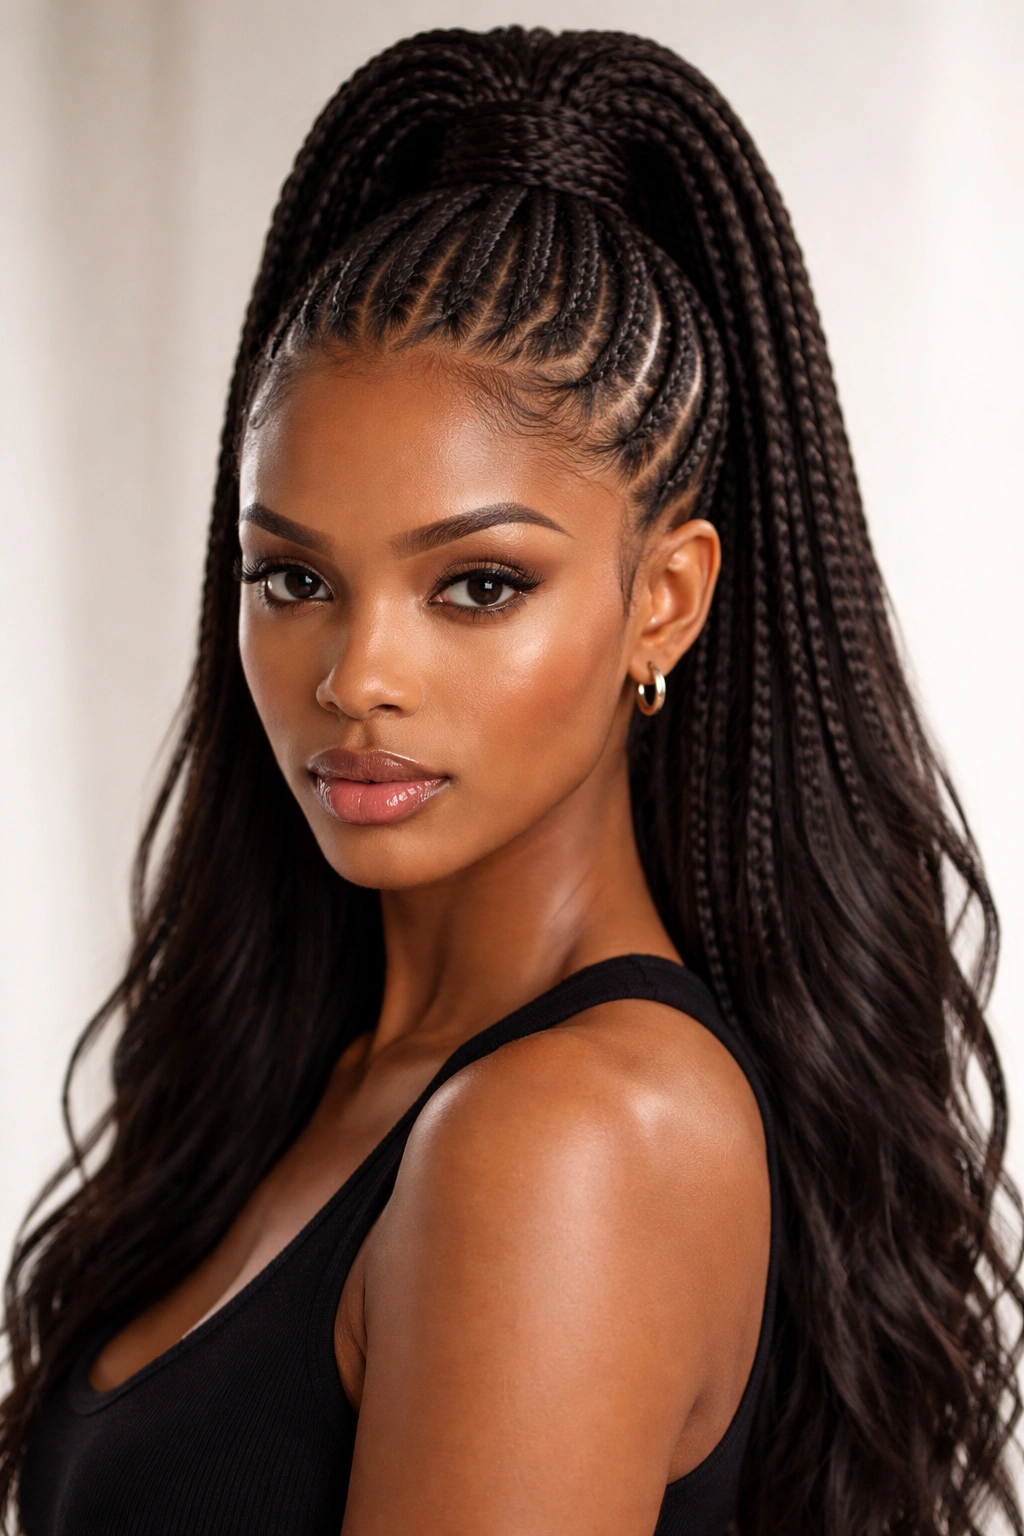
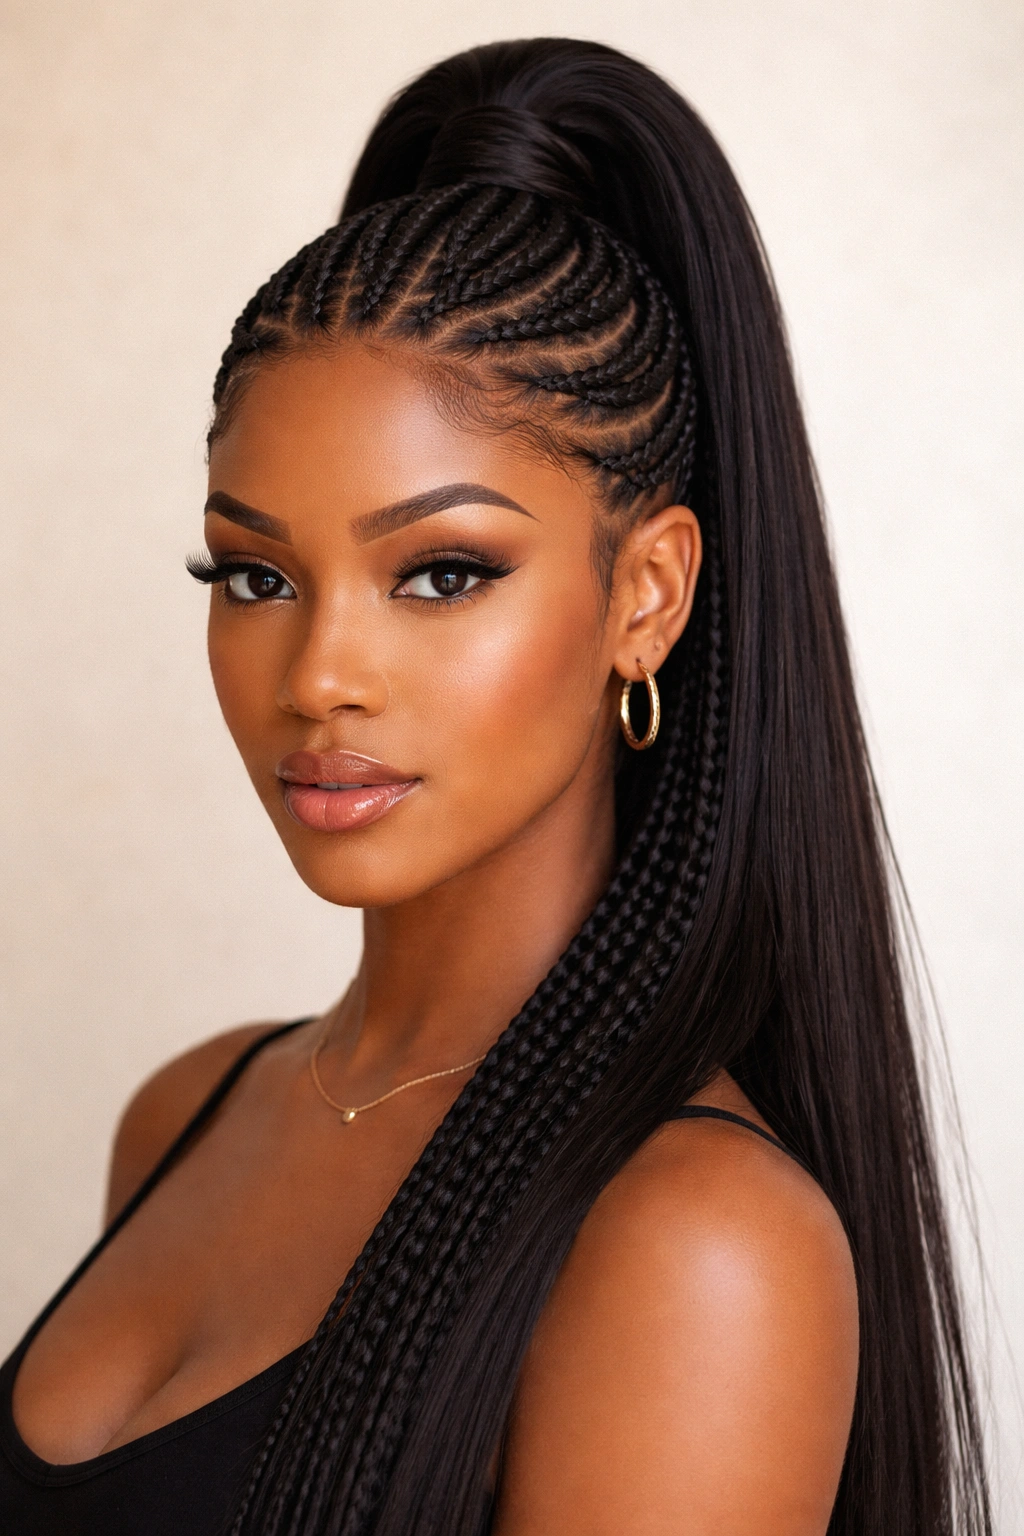
6. Multiple Thin Cornrows Gathered in a High Bun
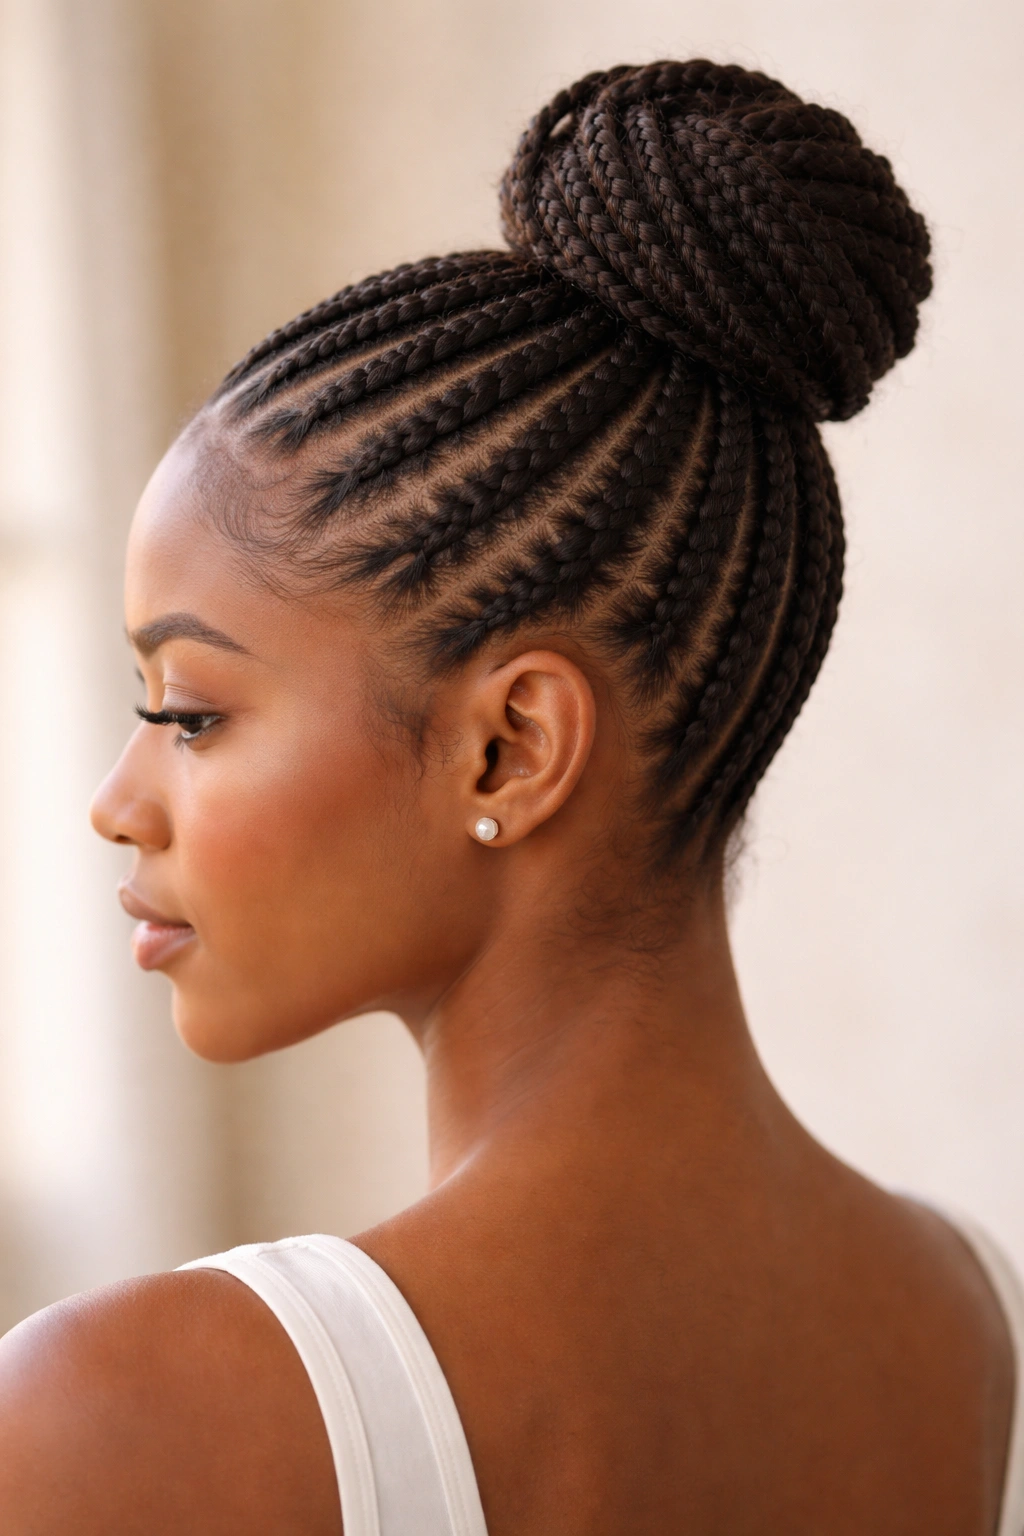
For an intricate, detailed aesthetic, create five, six, or even seven thin cornrows across your scalp, all running straight back and gathering together into a tight, rounded high bun. This creates a look that’s both bohemian and refined.
Why More Rows Create More Impact
Thin cornrows create a delicate, detailed appearance that draws the eye to the intricacy of the braiding. When you gather multiple thin rows together into a bun, you create dimension and texture—it doesn’t read as one solid blob, but as an intentional collection of beautiful braids. The style feels both protective and incredibly polished.
The Installation Process
- Create a center part and section your scalp into 5-7 equal parts, depending on how fine or thick your hair is
- Make your cornrows thin—about ¼ inch to ½ inch wide—so they’re delicate and detailed
- Braid them straight back from your hairline to your crown, keeping them as even in thickness as possible
- Gather all the braided hair at the crown into a high ponytail
- Twist the ponytail or roll it around itself to create a bun shape, then secure with bobby pins
- Tuck the ends under neatly so the bun looks clean and finished
- Use edge control to smooth any baby hairs around your hairline and make the overall look seamless
Worth knowing: Thin cornrows take longer to install than thicker ones, so plan extra time or expect to pay more at a salon if someone else is doing this for you. The payoff is a style that looks intricate and intentional—this isn’t a five-minute style, and it shows in the artistry.
7. Cornrows with Shaved Sides and Elevated Ponytail
Push your style into bold territory by shaving the sides of your head completely and creating cornrows only along the center of your scalp, gathering them into a high ponytail. This creates maximum contrast and makes a serious statement.
The Impact of Negative Space
Shaved sides completely change the proportions of your face and head. Your features become the focus, and the cornrows become a sculptural element rather than covering your entire scalp. The high ponytail, by contrast, feels even taller and more dramatic because there’s nothing on the sides to compete with it. This style is bold, so it only works if you’re genuinely ready to own it.
Making This Work
- Plan ahead—shaved sides require commitment because you’ll need regular touch-ups as hair grows in
- Shave clean, geometric patterns on your sides, or go for a simple, smooth shave all the way around
- Create two to four cornrows down the center of your head, from your hairline to the crown
- Make these cornrows substantial—¾ inch to 1 inch thick—so they have presence and weight
- Gather them into a high ponytail and secure firmly so nothing shifts throughout the day
- Keep your edges extremely sharp and groomed—with so much exposed scalp, every line shows
- Maintain your fade or shaved side regularly to keep the look intentional and polished
Pro tip: This style looks incredible with a sleek, smooth ponytail and bold edge control. The contrast between the sharp geometry of your shaved sides and the smooth sleekness of your ponytail is what makes this style work.
8. Asymmetrical Cornrows to One-Sided High Ponytail
Create three or four cornrows on one side of your head only, running from your hairline to the crown at various angles, then gather everything—braided and unbraided hair alike—into a high ponytail that sits off to one side. This creates a look that’s unconventional and incredibly chic.
The Modern Edge of Asymmetry
Asymmetrical styles feel current and fashion-forward. By putting all your cornrows on one side, you’re creating a visual focal point while leaving the other side of your head softer and less structured. The off-center ponytail reinforces this asymmetry and keeps the style from feeling unfinished—it’s clearly intentional.
How to Build This Look
- Section only half of your head (or one side more heavily than the other) into areas for cornrows
- Create your cornrows with varied angles—some might run more horizontally, others more diagonally—to create visual interest
- Keep these cornrows on the medium to thick side so they have presence and don’t disappear into the ponytail
- Gather all your hair—both the braided sections and the unbraided sections—into a ponytail that sits to the braided side of your head
- This ponytail will be quite full because it’s incorporating hair from the entire head, just gathered off-center
- Secure with a strong elastic and smooth with edge control
- Style the ponytail however you like—curled, straightened, twisted, wrapped with thread—and let the unbraided side of your head curve naturally
Worth knowing: Asymmetrical styles require confident hair texture and good moisture because the unbraided side will show more texture than the braided side. Make sure your hair is in good condition before committing to this look.
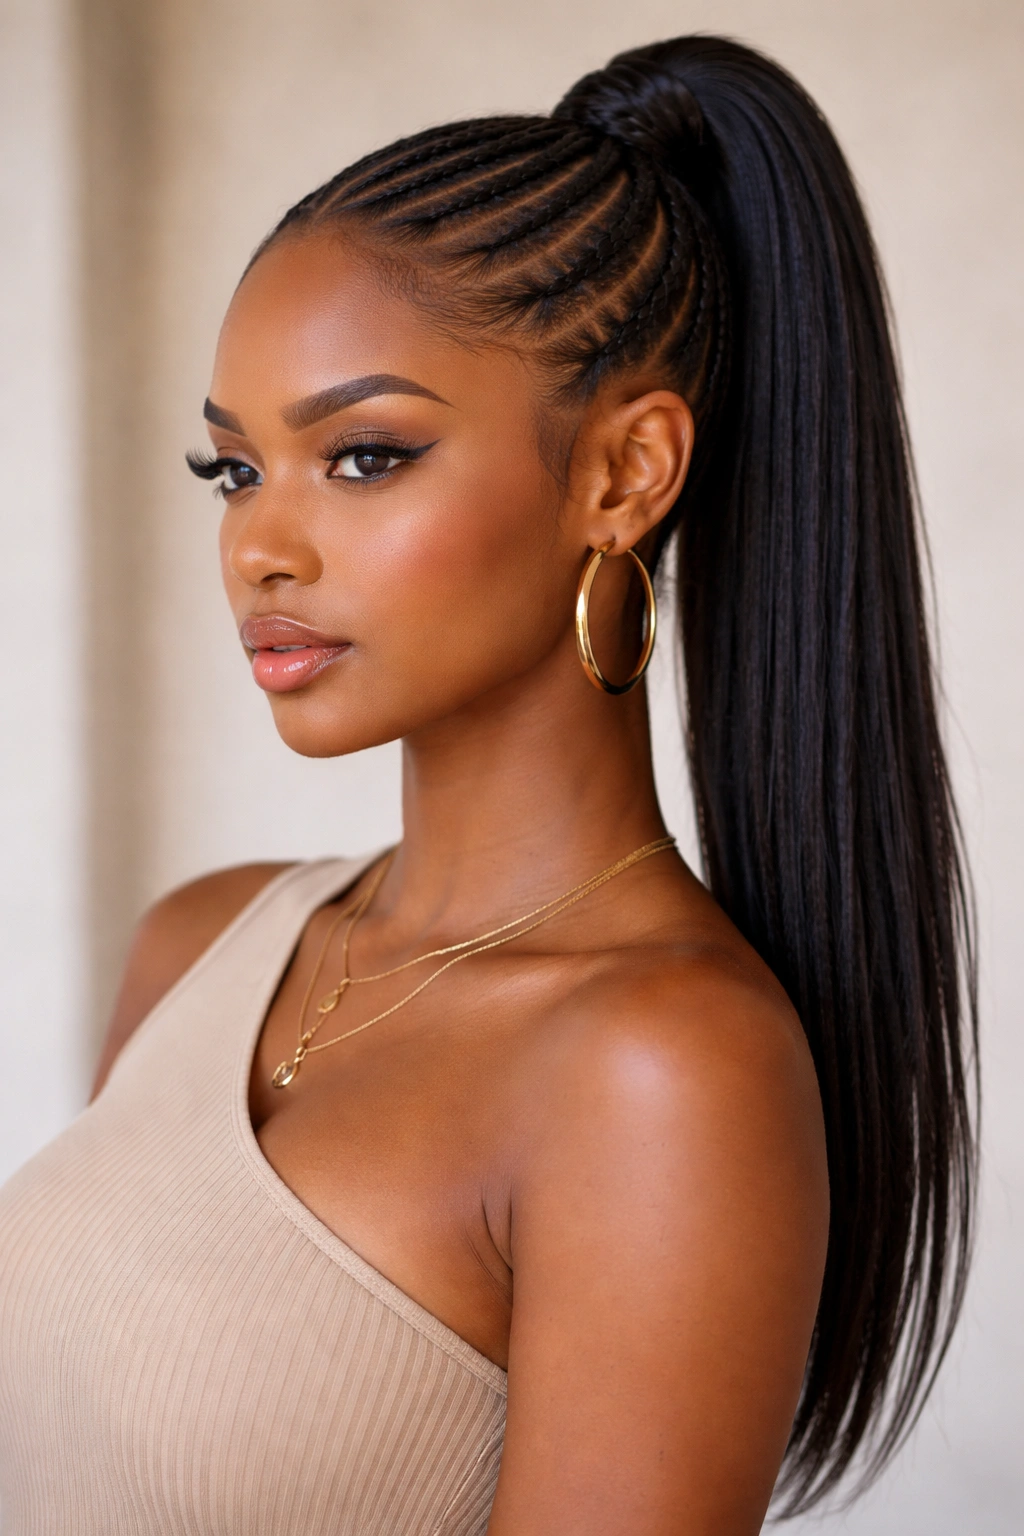
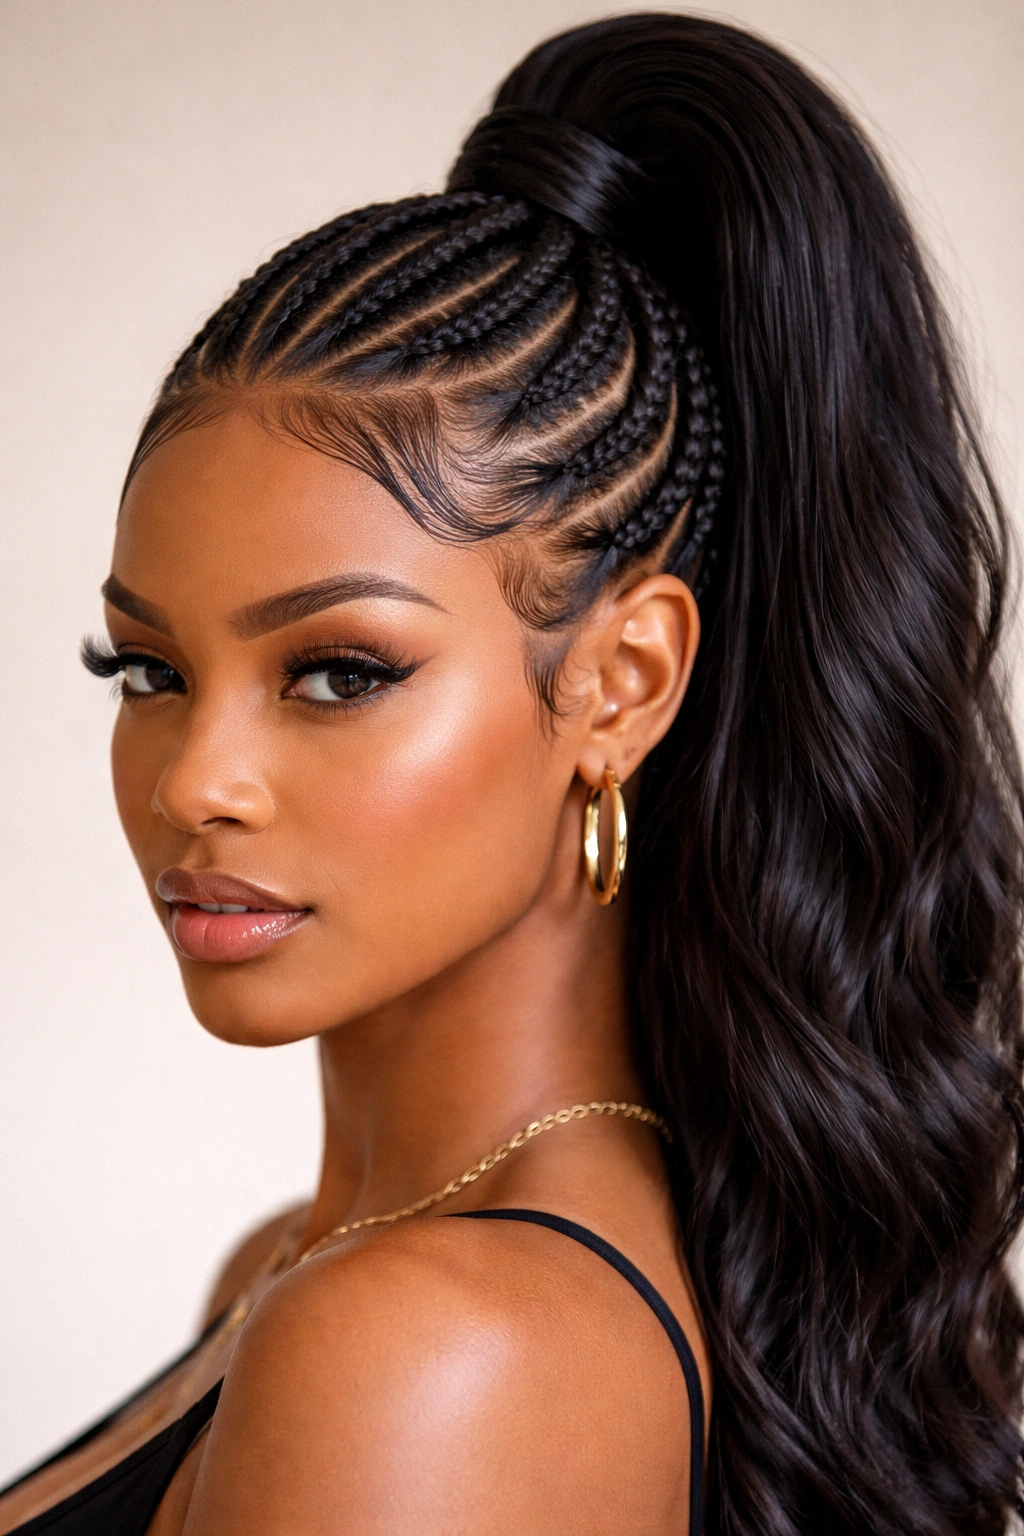
9. Cornrows with Curled Ends in a High Ponytail
Create sleek cornrows running straight back to the crown, gather them into a high ponytail, and then curl the ends of the ponytail for a style that’s professional yet playful. This gives you the polished effect of cornrows with the softness and movement of curls.
Balancing Structure and Softness
The cornrows create that sleek, put-together base that reads as intentional and professional. The curled ends of the ponytail add femininity and movement—it’s the perfect balance between edge and softness. This style works beautifully for work settings, events, or anytime you want to feel polished but not overly severe.
Creating This Combination
- Braid clean, crisp cornrows straight back to the crown—focus on making them sit smoothly against your scalp with no bumps or loose pieces
- Gather your hair into a high ponytail and secure with a covered elastic band
- Section the ponytail into manageable pieces (usually 4-6 sections depending on density)
- Use a curling iron or wand to curl each section—wrap the hair around the barrel and hold for a few seconds, then release
- Curl all sections in the same direction (all away from your face or all toward your face) for a cohesive look
- Gently separate and finger-comb the curls slightly to create a soft, natural wave rather than tight spirals
- Finish with a light hairspray to hold the curls without making them crunchy
Pro tip: Curls hold better and look bouncier if you curl your hair when it’s completely dry, and if you let the curls cool slightly before touching them. The coolness helps set the shape so it lasts longer.
10. Braided Wrap-Around Cornrows with Sleek High Ponytail
For intricate detail, create cornrows that wrap around your head—starting at one ear, traveling across the back, and finishing near the other ear—while shorter cornrows or sections feed into a sleek high ponytail at the crown. This creates a halo effect that’s absolutely stunning.
The Crown-and-Frame Effect
When cornrows wrap around your head, they literally frame your face like a crown. This placement is incredibly flattering because it draws attention to your features while creating a sense of height and polish. The high ponytail in the center completes the regal feeling—you look like you’re ready for anything from a board meeting to a special event.
How to Achieve This
- Create a center or side part, depending on your preference
- Start your first cornrow at one temple area and braid diagonally back and around, almost like you’re creating a frame or wreath around the back of your head
- Create a second row that mirrors the first on the other side
- These wrap-around rows should end near the opposite ear or meet at the back of your head
- Down the center of your scalp, create one or two straighter cornrows that run from your hairline to your crown
- Gather all the hair at the crown into a high, sleek ponytail
- The wrap-around cornrows create a frame around the back of your head, while the central cornrows feed into the ponytail
Worth knowing: This style requires pretty skilled hands or an experienced stylist—the angles and wrapping need precision, or it won’t have the intended effect. If you’re doing this yourself, practice the cornrow technique first or book an appointment with someone who specializes in detailed braiding.
11. Cornrows with Laid Edge Design and High Pony
Take your cornrow game to the next level by creating an intentional edge pattern with your laid edges—using edge control, a soft brush, and precision—before gathering your cornrows into a high ponytail. This elevates the entire style and shows that you’ve put thought and care into every detail.
Why Edges Matter
Laid edges are the finishing touch that separates a good hairstyle from a truly polished one. When your edges are smooth, sculpted, and intentional, the entire style reads as more professional and put-together. With high cornrow ponytails, perfect edges also frame your face and draw attention upward to the ponytail, creating a cohesive, complete look.
The Technique for Sharp Edges
- Start with clean, moisturized hair—dry hair breaks when you try to lay it, and you’ll end up with damage and breakage
- Section your edges carefully—the pieces closest to your hairline that you want to lay
- Apply edge control generously but not excessively to these sections (you want control, not product buildup)
- Use a soft toothbrush, a wave brush, or a specialized edge control brush to brush the hair in the direction you want it to lay
- Brush in smooth, consistent motions, following the natural direction of your hairline
- Create patterns if you’re comfortable—zigzags, waves, or geometric designs that complement your cornrows
- Pin or clip these edges while the product dries so they set in the shape you’ve created
- Finish with a light hairspray or edge control to hold throughout the day
- Create your cornrows, ensuring they don’t disturb your laid edges
- Gather into a high ponytail, and your edges will frame the entire style beautifully
Pro tip: Laid edges hold best if you keep them protected at night—use a silk pillowcase or bonnet so you’re not rubbing them against cotton fabric that will undo your work.
12. Cornrows Fading Into Loose Waves in a High Ponytail
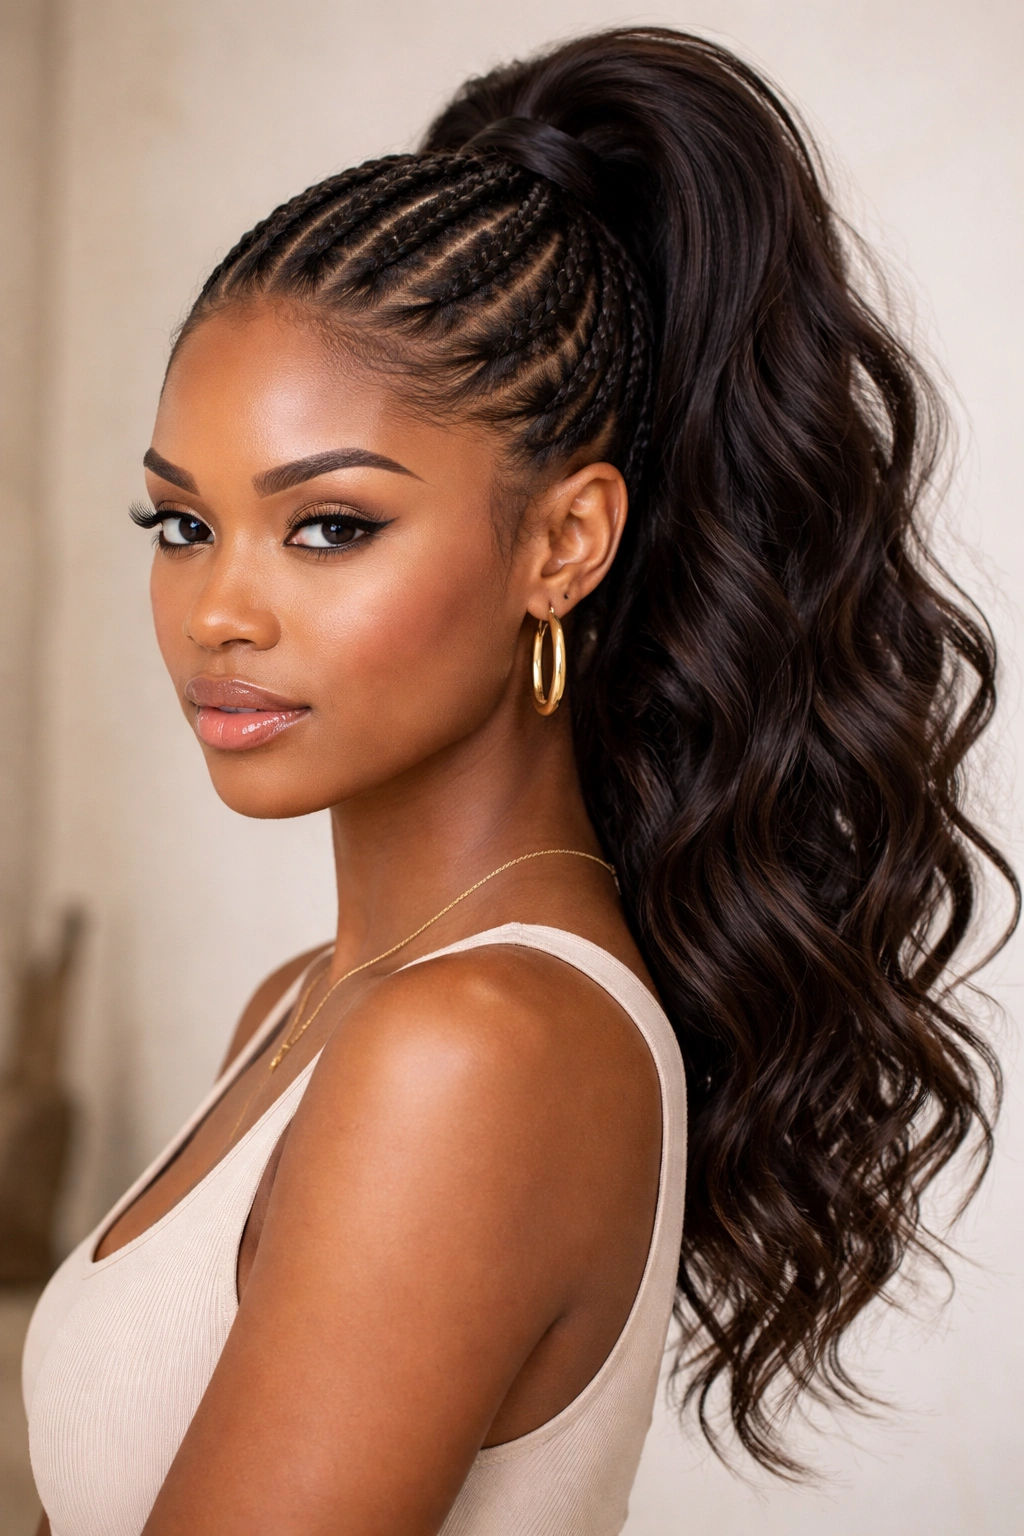
For a softer, more relaxed aesthetic, create defined cornrows at your scalp that fade into loose, undefined waves as they travel back, then gather everything into a high ponytail. This style bridges the gap between structured and soft, polished and effortless.
The Best of Both Worlds
This style gives you the sleek, intentional look of cornrows where it matters most—at your hairline and crown—while allowing your hair to relax and be more natural as it moves back. The result feels less severe than fully braided cornrows but more intentional than hair that’s completely loose. It’s sophisticated without being stiff.
How to Create This Gradient Effect
- Create your cornrows as usual, starting at your hairline and braiding with precision and tension
- When you reach the middle or back of your scalp (roughly halfway or two-thirds of the way back), gradually loosen your tension and begin releasing small sections of braided hair
- Stop braiding formally and instead just gather the remaining hair loosely—not fully braided, but not completely loose either
- This creates a gradient effect where the braids fade into waves
- Gather everything at the crown into a high ponytail
- Gently shake out and separate the wave sections so they have movement and don’t look matted or compressed
- You can leave the ponytail loose and wavy to match the rest of the style, or smooth it for contrast
Worth knowing: This style requires more maintenance than fully braided cornrows because the wave sections will need refreshing. You might wake up with some sections pressed flat or reshaped differently. A light spritz with water or a wave-refreshing product, plus some gentle finger combing, usually sets things right, but plan for that daily maintenance.
Final Thoughts

High cornrow ponytails are the kind of style that delivers on both counts—they’re protective, practical, and low-maintenance enough to wear for weeks, but they also look undeniably stunning and put-together. The incredible range of variations means you can match this style to your personality, face shape, hair type, and the occasion.
Whether you’re drawn to the symmetry and elegance of center-parted cornrows, the edge and statement of shaved sides, or the intricate detail of multiple thin rows, there’s a cornrow ponytail style that’s exactly right for you. The key is clean installation, proper maintenance, and confidence wearing it. Keep your edges sharp, moisturize your scalp and hair regularly, and protect your style at night. When you do, you’ll get weeks of effortless beauty from a single installation.
The versatility also means you can switch up your ponytail styling—keep it sleek one week, curl it the next, wrap it with thread or yarn the week after. Your base cornrows stay the same, but the overall look transforms. That kind of flexibility is why cornrow ponytails have remained a go-to style across generations and continues to evolve as people find new creative ways to wear them. Try one of these twelve approaches and see which becomes your signature style.