



Layered haircuts have a reputation for requiring high-maintenance styling routines and professional blow-outs. The truth? Many of the most flattering layered styles actually become easier to style when you understand how the cut works and what products work best with it. The key is choosing the right layered cut for your hair type, texture, and daily routine — and then learning the two or three techniques that make it look intentional in minutes rather than hours.
The fastest layered styles share a common trait: they work with your hair’s natural texture instead of against it. Whether your hair is thick and coarse, fine and straight, or somewhere in between, there’s a layered cut designed to look polished with minimal effort. The difference between a style that looks choppy and undone versus one that looks deliberately modern often comes down to understanding the cut’s architecture and using the right styling approach.
What makes a layered haircut quick to style is knowing exactly where the layers fall, how they interact with each other, and which products enhance rather than fight the cut’s natural movement. A good layered cut does half the work for you — the remaining half is just knowing which styling tool (or even no tool at all) works best. This guide covers twelve of the most time-efficient layered styles, complete with specific styling techniques that get you from bed to ready in five minutes or less.
1. Modern Shag
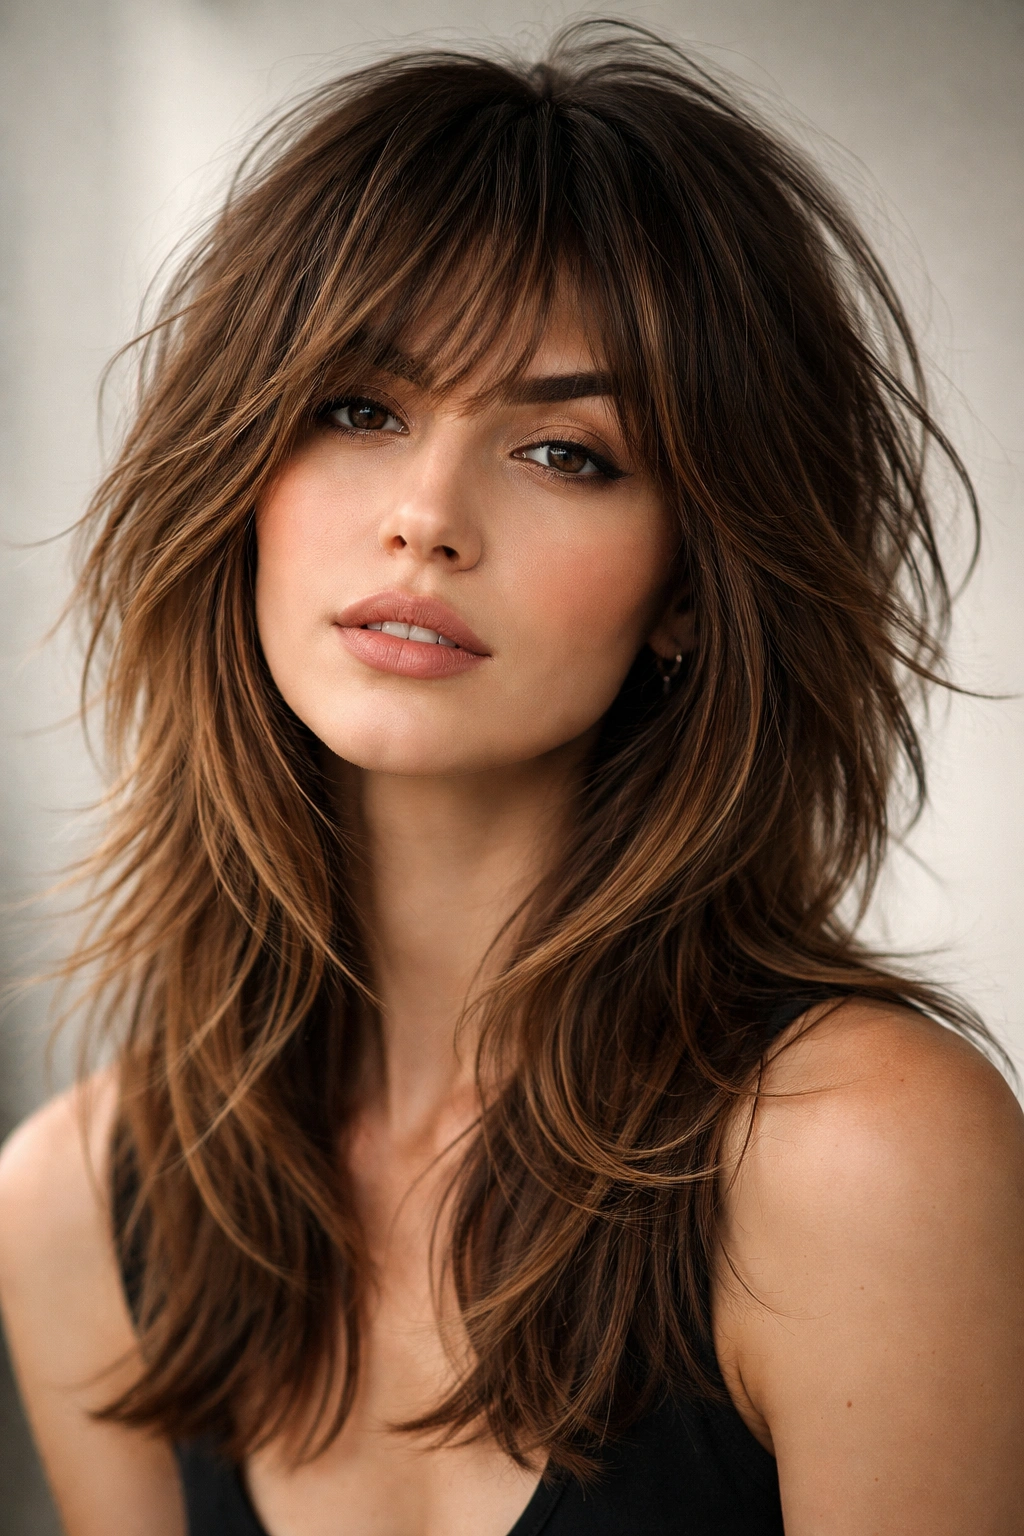
The modern shag isn’t the feathered 1970s version — it’s a sharp, intentional take on layering that works beautifully for people who want movement without looking overly tousled. A true shag features shorter layers on top that create volume and texture, medium layers through the mid-section, and longer pieces underneath that ground the style. The beauty is that every layer moves independently, so the cut actually camouflages imperfect styling.
Why a Shag Works for Quick Styling
A shag’s built-in texture means you can skip the blow-dryer entirely on many days. The disparate lengths work together to create the illusion of intentional messiness, which means “bedhead” actually reads as deliberate styling rather than rushed. You’re not fighting against the cut’s structure — you’re embracing it. The shorter layers on top naturally create height and volume without requiring a round brush or clip-section blow-drying technique.
How to Style It in Five Minutes
- Apply a sea salt spray or texturizing mist to damp roots and run your fingers through while the product is still wet
- Flip your head upside down and rough-dry with just your hands and fingers (no brush) for 2-3 minutes — the goal is to separate layers, not create smooth sections
- Flip back upright, tousle with your hands one more time, and add a light texture powder to the roots if your hair is fine
- Optional: run a texturizing cream through the ends for definition and to enhance the choppy effect
The point is that you’re not trying to create polished waves or smooth sections — you’re emphasizing the shag’s choppy, lived-in architecture.
2. Textured Bob with Layers
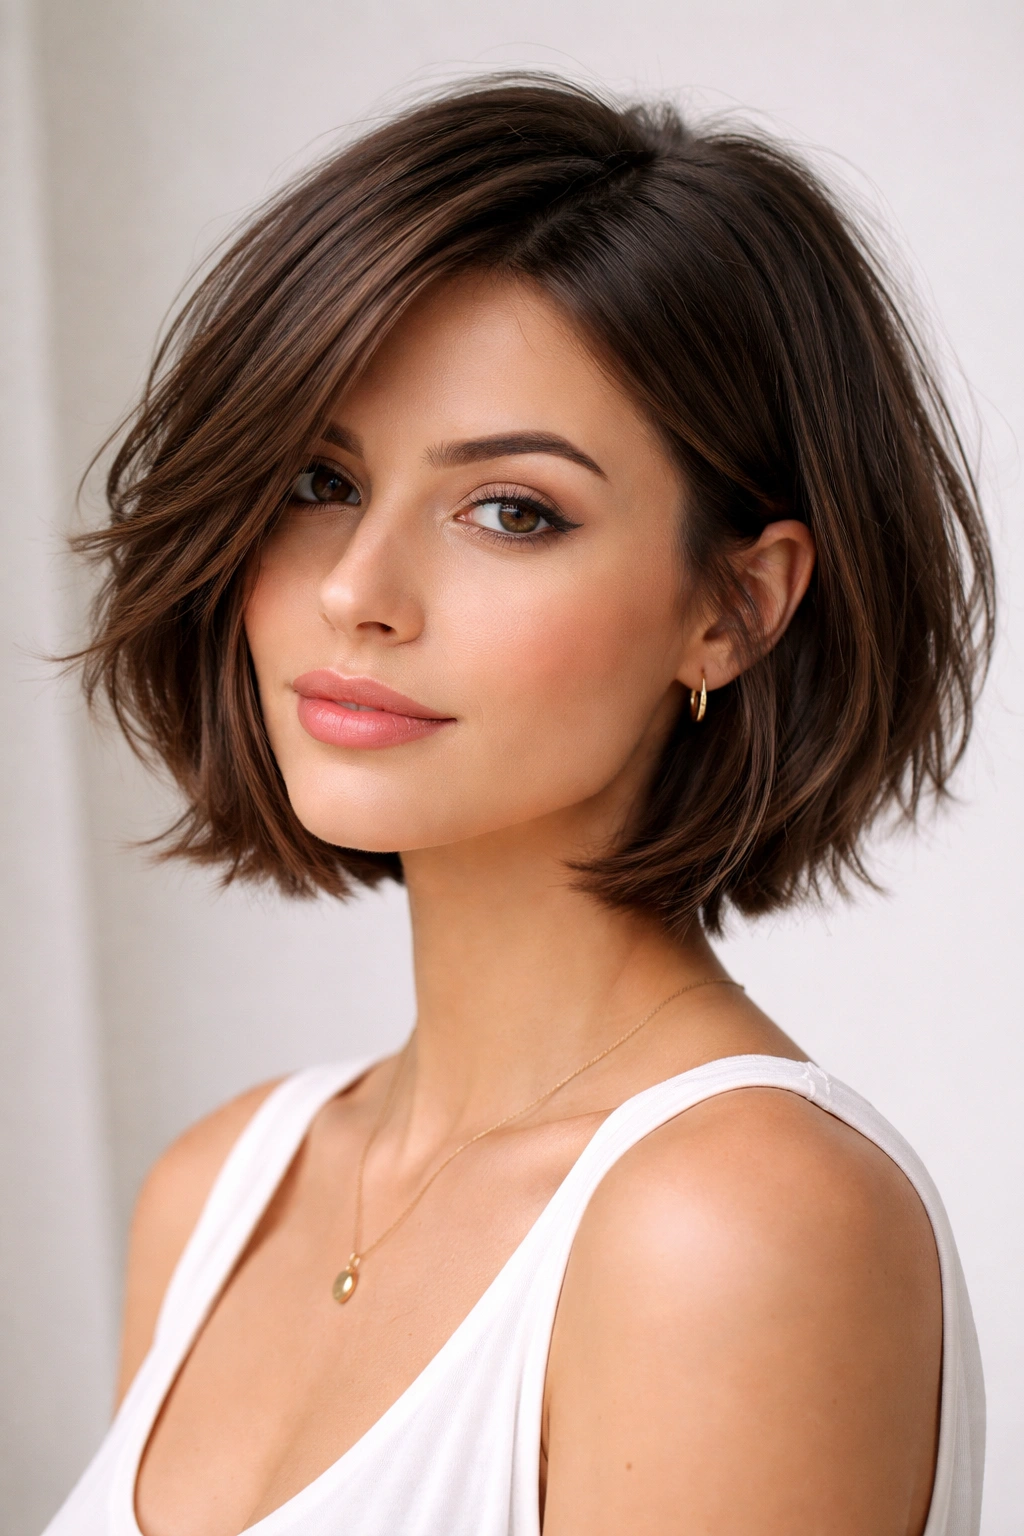
A textured bob keeps the classic bob’s clean, chin-length silhouette while adding internal layers that create movement and prevent the blunt, heavy feeling that frustrates many people with straight, fine, or thin hair. Layers here aren’t obvious stacked sections — they’re subtle cuts throughout the interior that allow the bob to move like separate pieces rather than one solid block of hair.
What Makes This Cut Different
The external shape remains a sleek, defined bob line, but the internal structure is completely different. Each layer is graduated slightly differently, creating a soft, piecey texture throughout rather than dramatic length variations. This is perfect for people who love the idea of a bob but find that solid bobs make their hair look thinner or fall flat. The layers give visual and textural fullness without requiring the hair to be thick or naturally voluminous.
Styling Method for Maximum Speed
- Rough-dry with a blow-dryer and your fingers while applying a volumizing mousse to the roots
- Once mostly dry, take a straightening iron or flat iron and run it through sections at a slight angle, twisting slightly at the ends to create texture rather than sleek smoothness
- Work in product like a lightweight cream or shine spray to enhance the texture and separation between layers
- Tousle with fingers and you’re done — the interior layers do most of the visual work
3. Choppy Pixie-to-Bob Transition
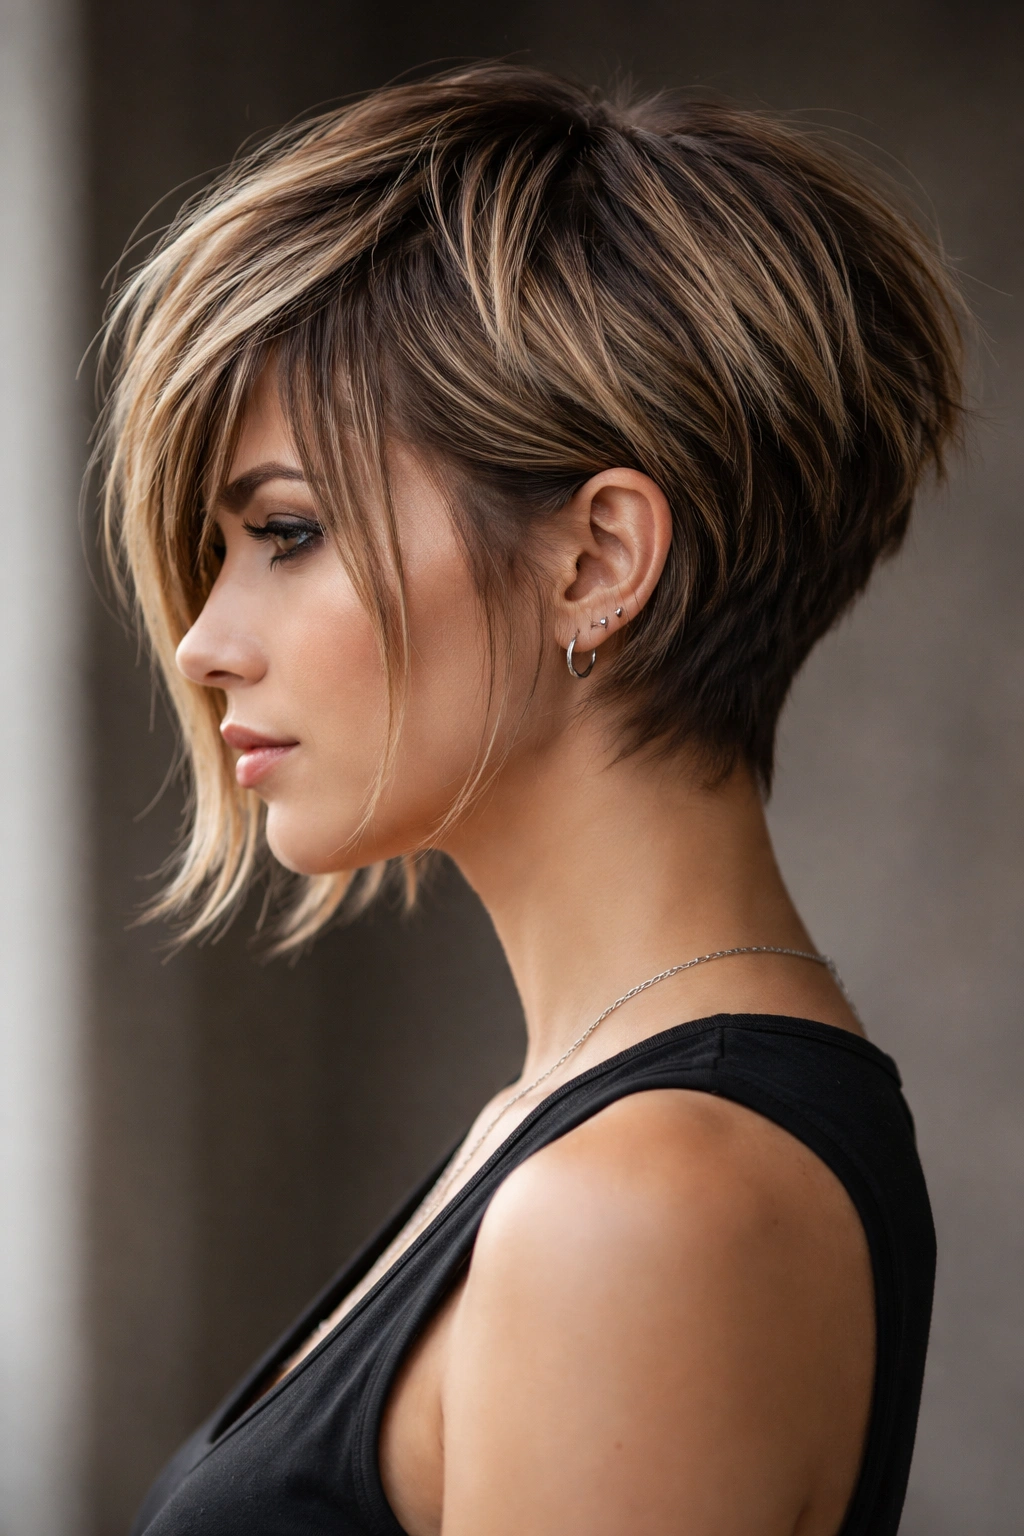
This cut blends a cropped pixie length in the back and sides with longer, face-framing layers in the front that extend to chin length or slightly longer. It’s an undercut-adjacent style that looks edgy and fashion-forward while being surprisingly versatile and easy to style. You can wear it sleek, tousled, tucked behind your ears, or with the front pieces down — same cut, multiple looks.
Why It’s So Fast to Style
Because the back and sides are short and textured, they essentially dry and style themselves. The longer front sections are the focus, and they’re light enough to air-dry or quick-dry without needing intensive blow-drying. There are so few hair layers to style that you’re really just managing a small amount of hair on top and the longer front pieces — everything else falls into place.
Five-Minute Technique
- Roughly dry the back and sides with your fingers or a blow-dryer — don’t worry about perfection, texture is the goal
- Use a product like dry shampoo spray or texturizing spray on the longer front section while still damp
- Blow-dry the front pieces on medium heat, using your fingers to direct them where you want them and create piecey separation
- Add a small amount of styling cream or light pomade through the ends of the front pieces for definition and movement
- Done — the short sides don’t need any further styling
4. Long Layers with Feathered Ends
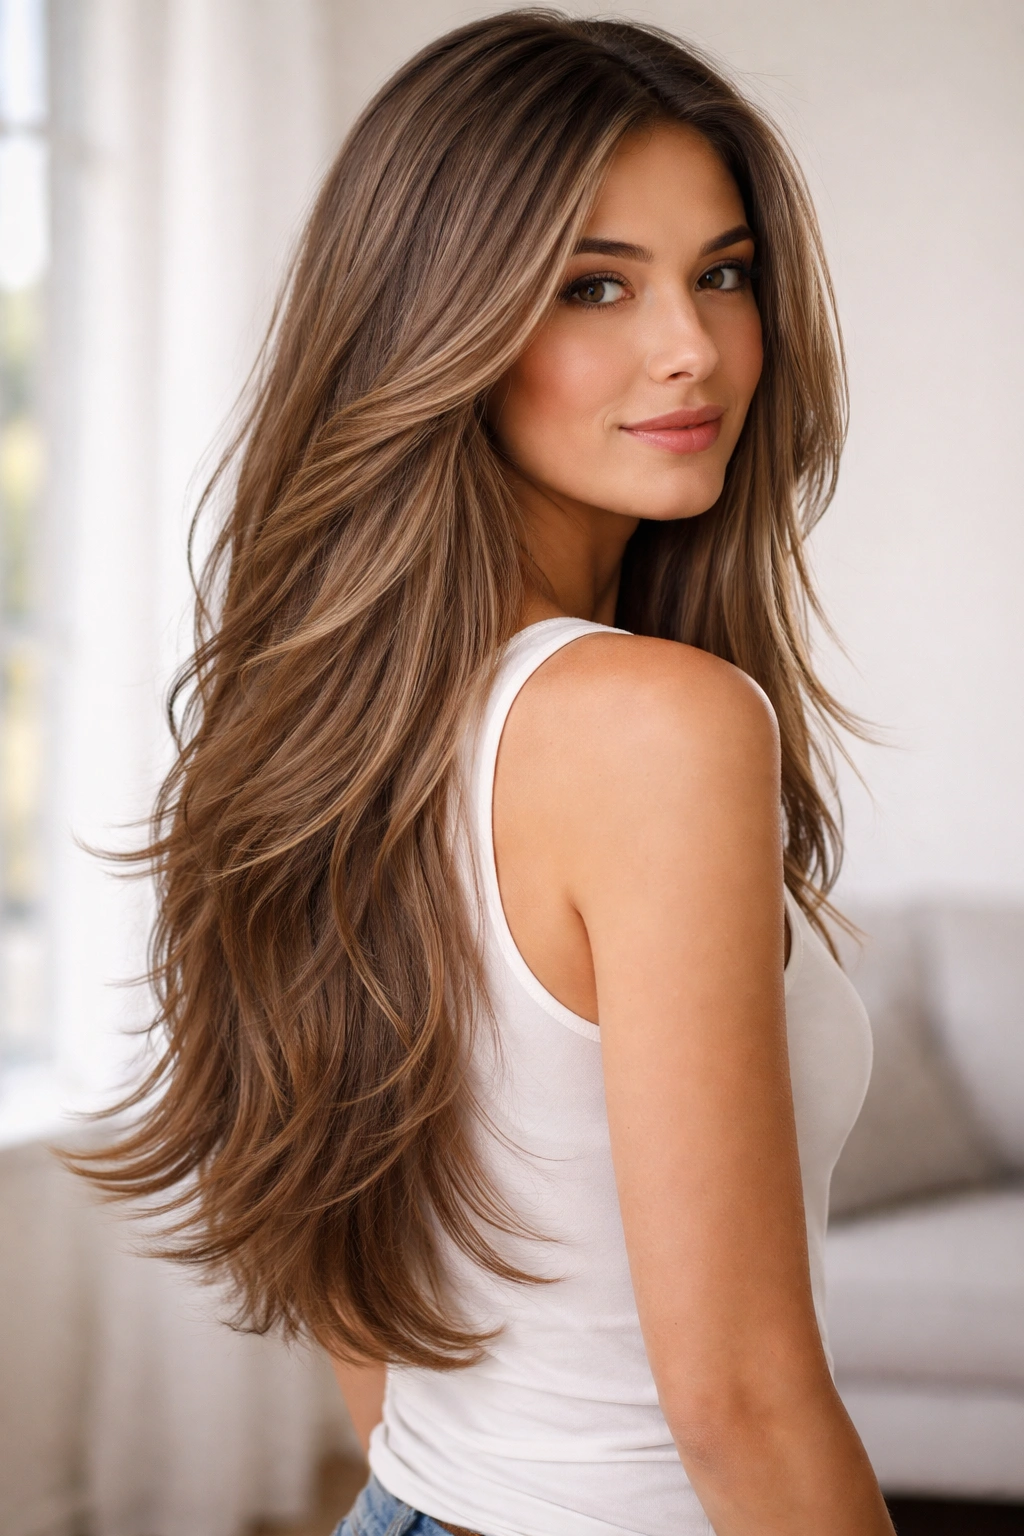
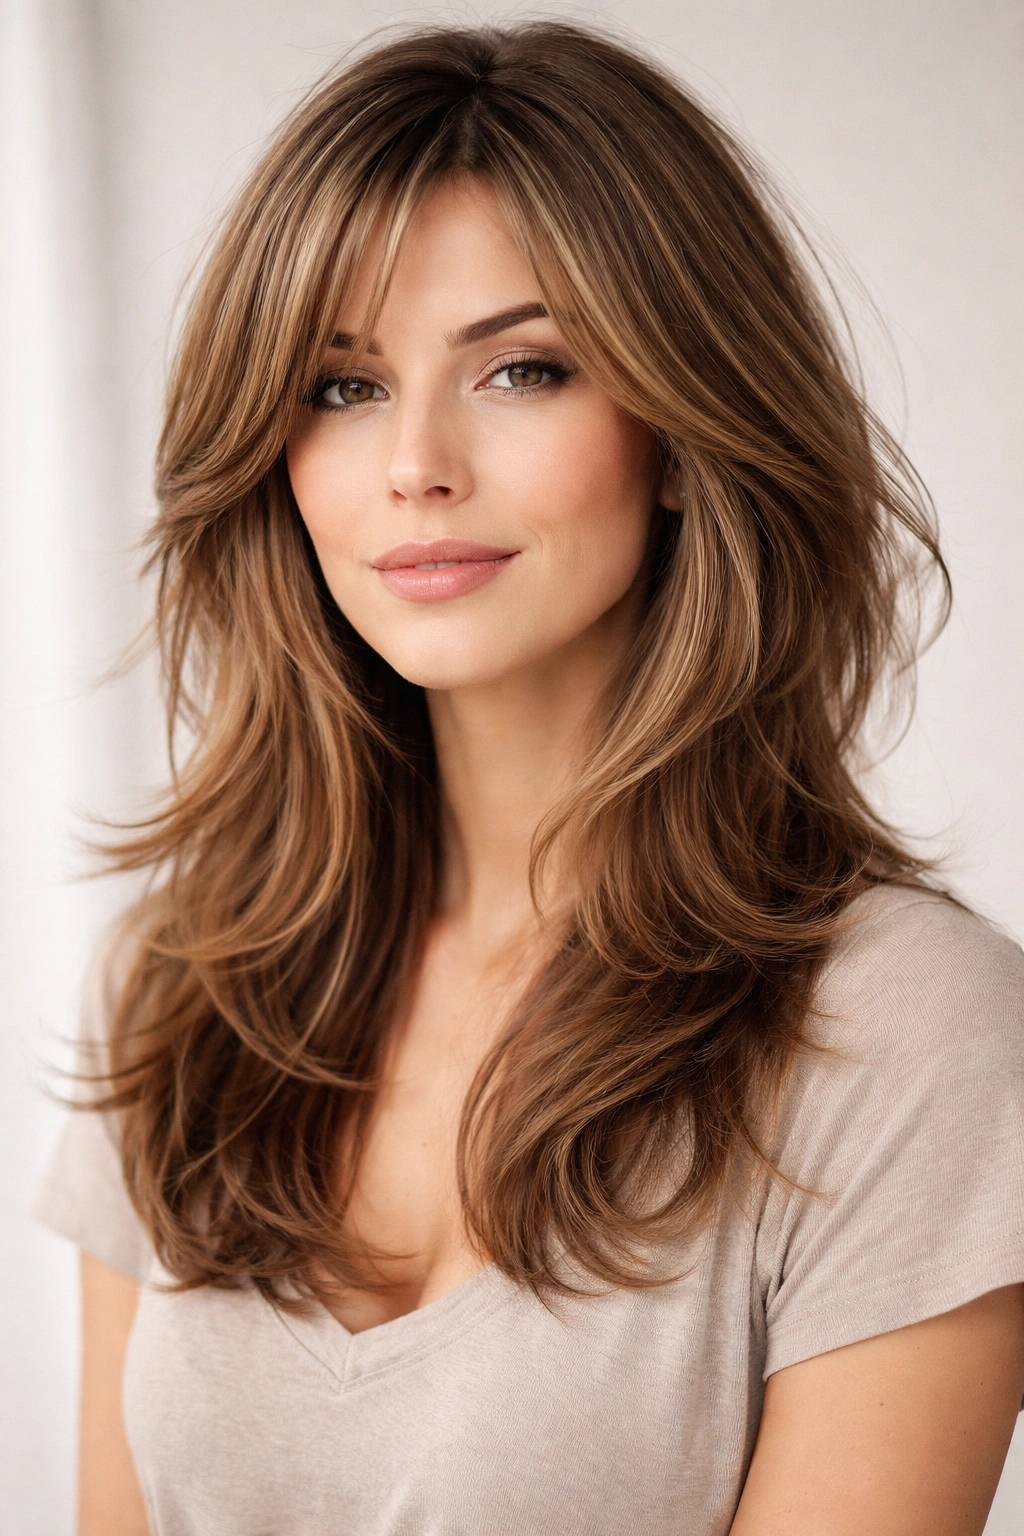
This is the quintessential long-hair layered cut: mid-back-length or longer with subtle layers throughout that create movement and prevent the “heavy” feeling that uncut long hair can have. Feathered ends mean the layers are cut at an angle rather than blunt, so the ends have a softer, more textured appearance. This works beautifully for both thick and fine hair because the layers reduce bulk while the feathering softens the overall look.
The Appeal for Time-Conscious Styling
Feathered layers look intentional and polished even when styled minimally. You can air-dry this cut and it looks deliberate. You can use a blow-dryer, and it looks polished. You can leave it down or pull it up into a bun or ponytail, and the layers give the overall shape dimension even when it’s gathered. It’s the rare long haircut that actually gets easier to manage as it grows longer because the layers prevent matted, flat sections.
Quick Styling Approach
- Apply a leave-in conditioner or lightweight styling oil to damp hair, focusing on the mid-lengths and ends where feathering happens
- Air-dry if you have time (it will look soft and lived-in), or blow-dry on medium heat using just your fingers to guide sections and create soft waves
- Rough up the hair at the roots with a dry shampoo spray or texture powder to add volume and prevent a flat appearance
- Run your fingers through the ends one more time to separate the feathered layers and enhance the intentional texture
This style barely requires intervention — the cut does the heavy lifting.
5. Blunt Bangs with Soft Layers
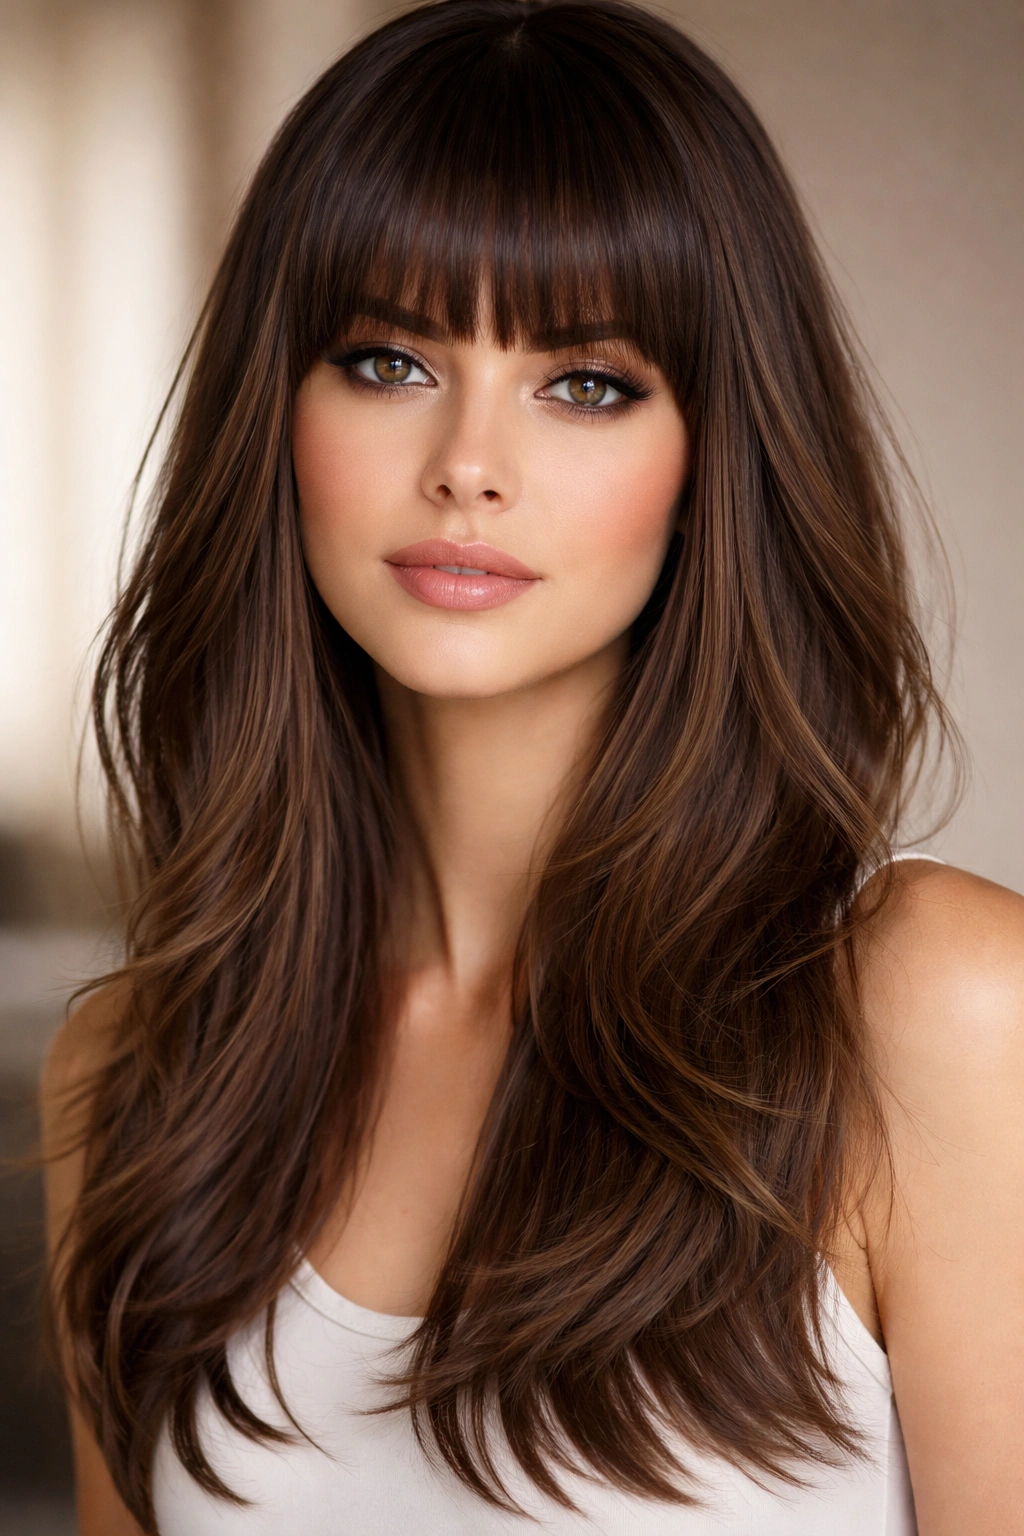
Short, blunt bangs create a striking frame and a modern, purposeful look, while the body of the hair (chin-length or longer) features soft, subtle layers that contrast with the bangs’ sharpness. This combination is striking and surprisingly practical: the bangs force you to blow-dry the front anyway, and once you’ve done that, the soft layers in the back are already mostly done.
Why This Pairing Works for Speed
Blunt bangs require more regular styling than longer bangs, but that’s a trade you’re making intentionally for the look. The good news is that once your bangs are styled, the rest of your hair doesn’t need much because those soft layers move on their own. You’re not balancing a delicate overall silhouette — you’ve got a strong focal point (the bangs) that does work for the entire style, freeing up the rest of the hair to be simpler.
Styling Breakdown
- Blow-dry the bangs first with a round brush, using volumizing mousse at the roots for lift and curve
- Blow-dry the back and sides with just your fingers or a flat paddle brush, not worrying about perfection — the soft layers will create movement naturally
- Apply a texturizing cream or light pomade to the ends of the longer layers to enhance separation
- Do a final check on the bangs to ensure they’re sitting where you want them — they’re the statement piece, so they’re worth the extra second
6. Collarbone Layers
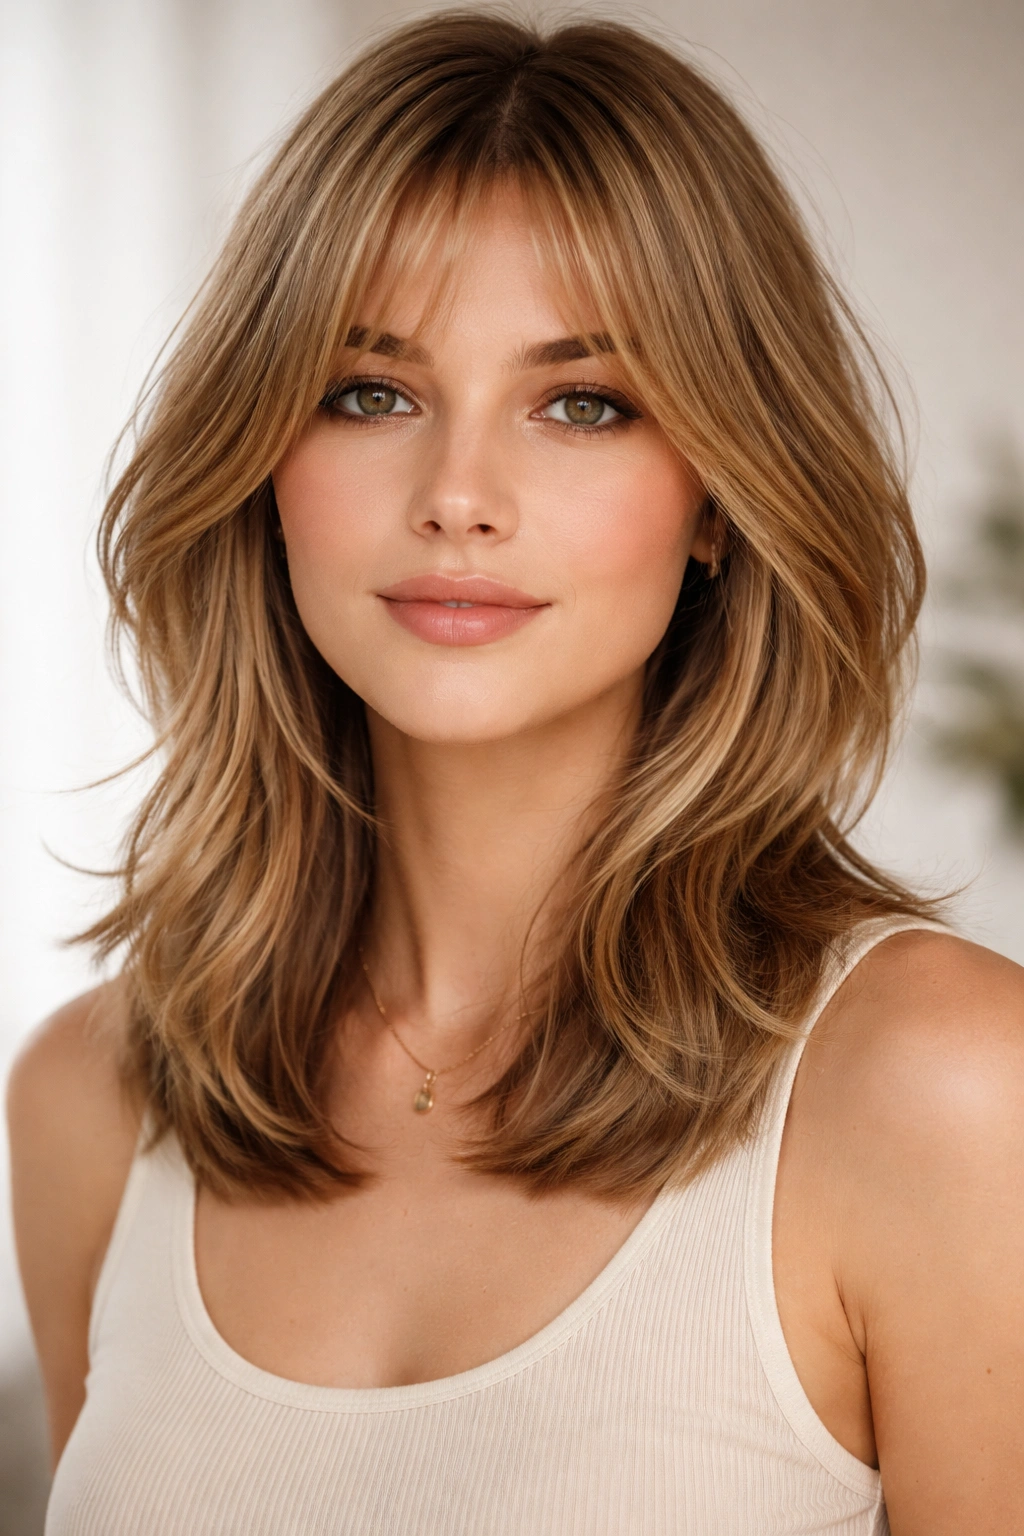
This cut lands at collarbone length with layers throughout that create a piecey, textured silhouette without being choppy or dramatic. It’s one of the most universally flattering lengths because it sits right at the angle of the jaw and collarbone, creating a balanced visual proportion for most face shapes. The layers prevent the solid, heavy feeling that a blunt collarbone-length cut can have.
The Styling Advantage
At collarbone length, you’re at the sweet spot where the hair is long enough to pull back if you want but short enough to dry quickly and style easily. Layers here mean the style looks intentional whether you wear it down or up. You can curl the ends slightly, tousle them, straighten them, or leave them alone — the layers give you flexibility. The length is also practical because it’s below the shoulders, so it doesn’t constantly brush your shoulders and neck, but it’s above mid-back, so it dries and styles fast.
Five-Minute Technique
- Blow-dry while damp with a volumizing mousse applied to roots and mid-lengths, using your fingers to create soft waves or just direct the layers as they dry
- Once dry, run a straightening iron through sections to smooth them, twisting slightly at the ends to enhance the piecey texture
- Apply a smoothing serum or shine spray to the ends and mid-lengths — this also helps separate the layers visually
- Tousle gently with your fingers to enhance the piece-y effect and create soft, touchable texture
7. Face-Framing Layers
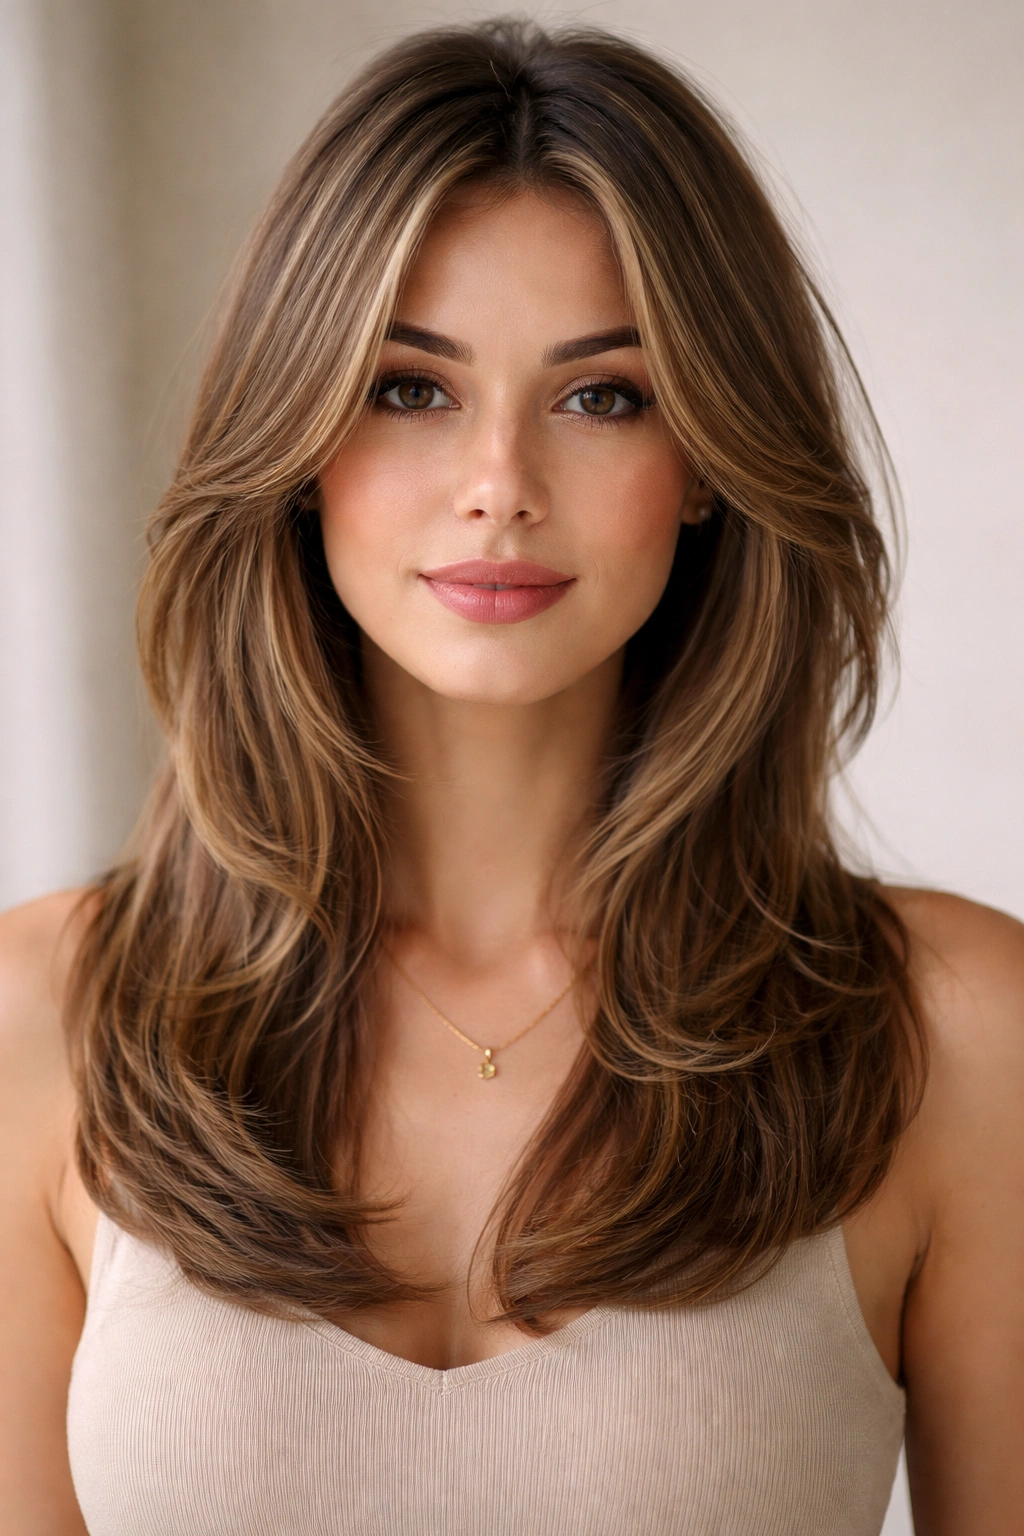
Face-framing layers are shorter layers that begin at the ears or cheekbones and frame the face, creating movement and definition around the features. The rest of the hair (back and lower portions) is longer and relatively blunt. This creates the maximum visual focus on the face and eyes while keeping the overall length flexible. It works at any length — long hair with face-framing layers, medium hair with face-framing layers, short hair with subtle face-framing layers.
Why Face-Framing Is Quick to Style
The framing layers do the visual work of the entire style. Because they’re shorter and positioned to move around the face, they create the impression of intentional styling even when they’re minimally styled. The longer back sections are low-priority for styling because the focus is on the face anyway. You can honestly focus 80% of your styling effort on the front face-framing pieces and let the back layer itself.
Styling Approach
- Apply a texturizing spray or sea salt spray to damp hair, focusing on the face-framing sections
- Blow-dry with a round brush or just your fingers, concentrating on directing the shorter face-framing layers to move away from the face or curve softly around it
- Rough-dry the back quickly without worrying about precision — nobody’s looking at it as closely as the front
- Add a tiny bit of lightweight styling cream or texture powder to the face-framing pieces to enhance their separation and movement
- That’s it — your style is complete because the framing pieces carry the entire look
8. Choppy Crop
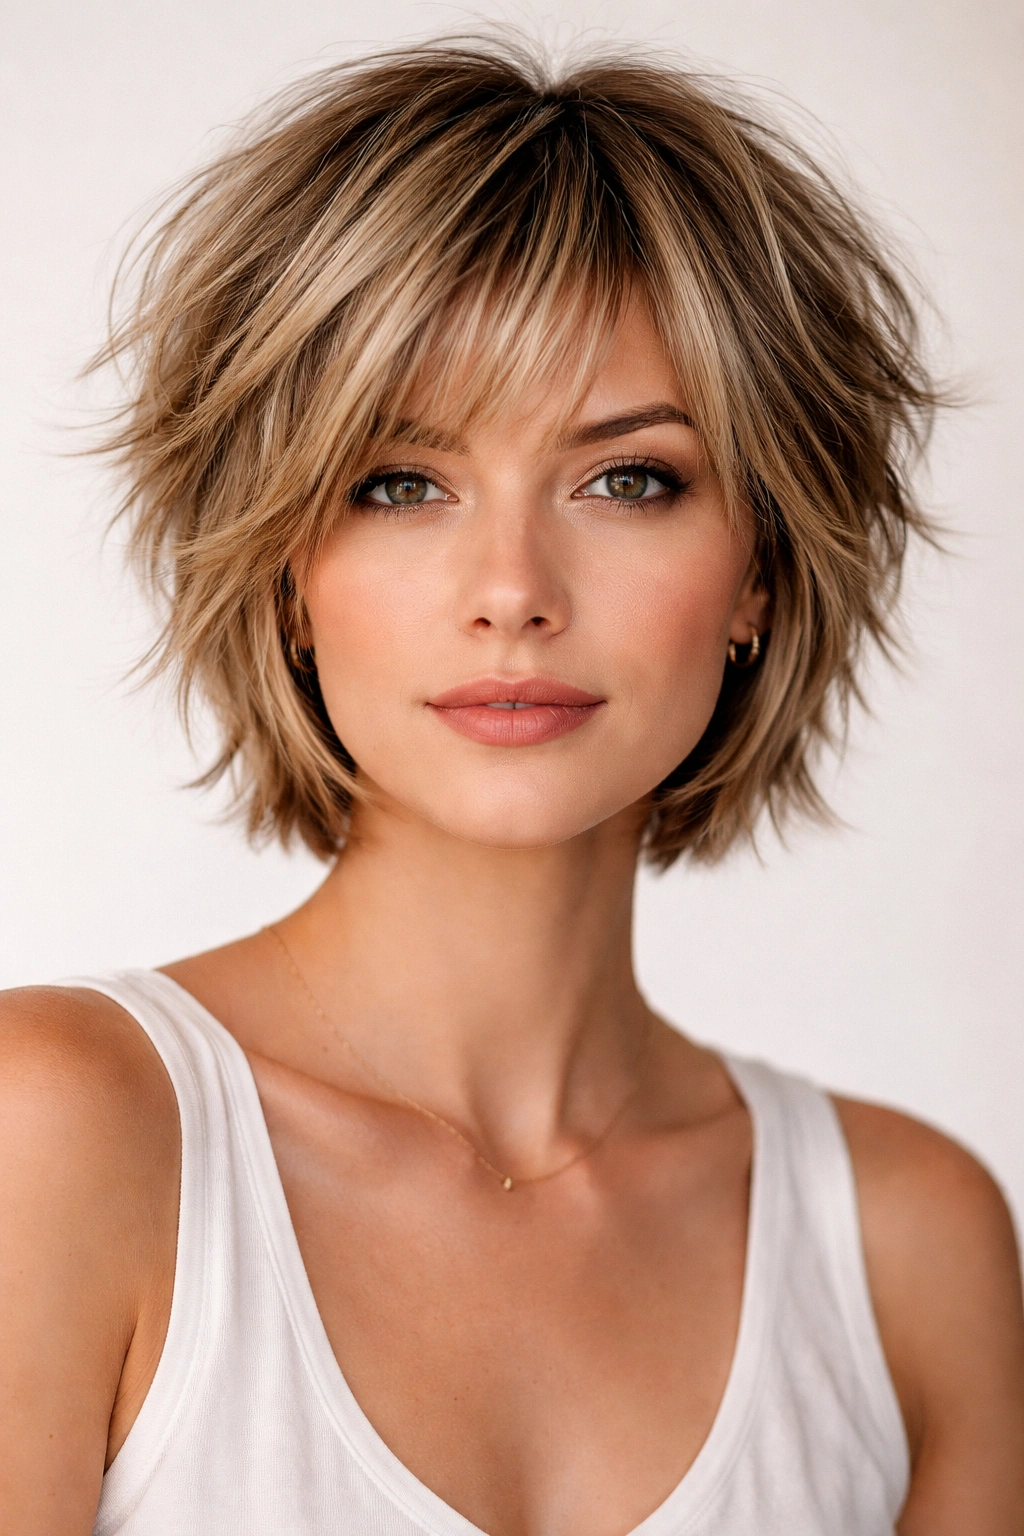
A choppy crop is a short, textured style with layers throughout that create a piecey, intentionally undone appearance. Lengths vary from ear-length in some sections to possibly chin-length in front, but the overall vibe is textured rather than sleek. This is the ultimate low-maintenance style because there’s simply not much hair to style, and the layers are cut to look best when they’re tousled rather than smoothed down.
The Appeal for Minimal Styling
With a choppy crop, you’re working with maybe two inches of hair at the longest. That means drying time is minimal, product use is minimal, and the tools you need are minimal or nonexistent. The cut is designed to look better when you don’t blow-dry it smooth — it’s supposed to look a bit wild and textured. Air-drying or rough-drying with just your fingers is often the preferred approach because it lets the choppy layers do their thing.
Super-Fast Styling
- Apply a dry texture spray or dry shampoo to your hair while damp or dry — this adds grip and enhances the choppy texture
- Rough-dry with your fingers and the air if you have time, or just skip the blow-dryer entirely
- Run your fingers through the hair a few times to separate the layers and ensure nothing is matted down
- Optional: add a tiny dab of styling cream or dry pomade to emphasize individual pieces if you want more definition
- Honestly, this style looks good because it looks like you barely styled it
9. Butterfly Layers
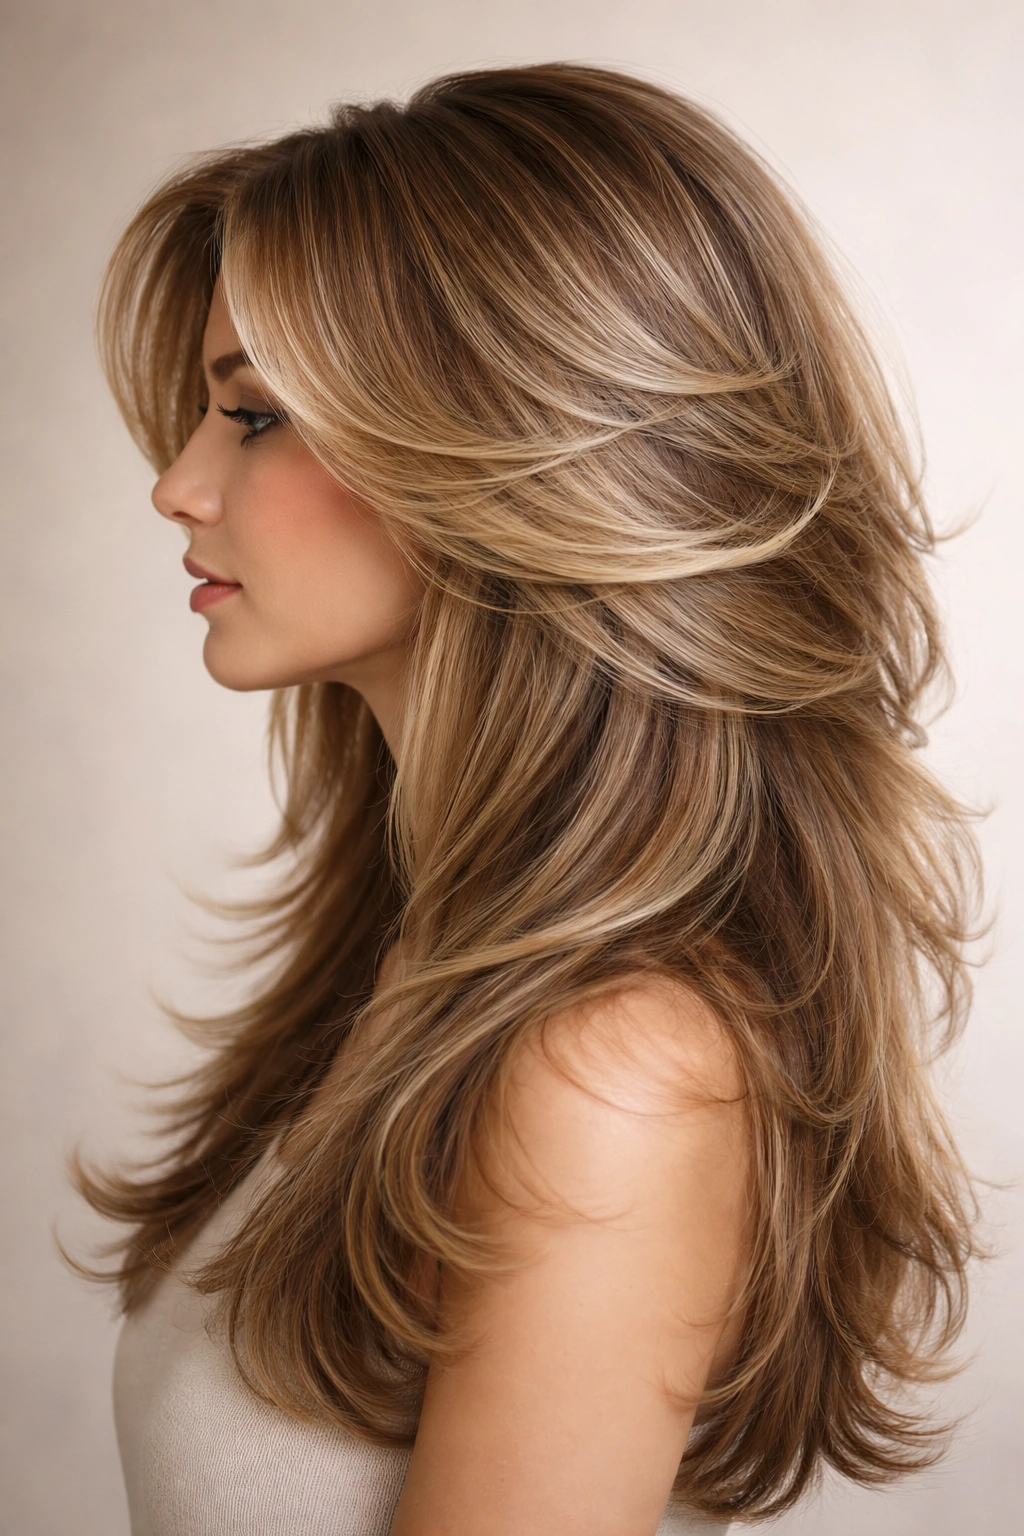
Butterfly layers are a specific layering technique where the shortest layers sit on top of the head (creating volume) and gradually get longer as you move down the back and sides, creating a wing-like or butterfly-shaped silhouette when viewed from the side. This creates maximum volume on top without requiring naturally thick hair. The layers are graduated rather than choppy, so the effect is polished rather than messy.
Why It Works for Quick Styling
Butterfly layers are cut to create height and volume as a structural feature, not something you have to blow-dry into existence. The shorter top layers naturally fall in a way that suggests volume, and the graduated longer pieces below help support and frame that shape. You’re using the cut’s geometry rather than fighting it. The layers also move independently, so imperfect styling reads as intentional texture rather than bedhead.
Styling Strategy
- Apply a volumizing mousse to damp roots and mid-lengths
- Blow-dry while flipping your head upside down, running your fingers through to direct the shorter top layers upward and create height
- Flip right-side up and blow-dry the longer pieces, using a round brush or just your fingers to create soft waves
- Add a lightweight texture spray to the roots and mid-lengths to maintain volume
- The shorter layers on top should look slightly separated and textured, with the longer pieces creating movement below
10. Wispy Layers for Fine Hair
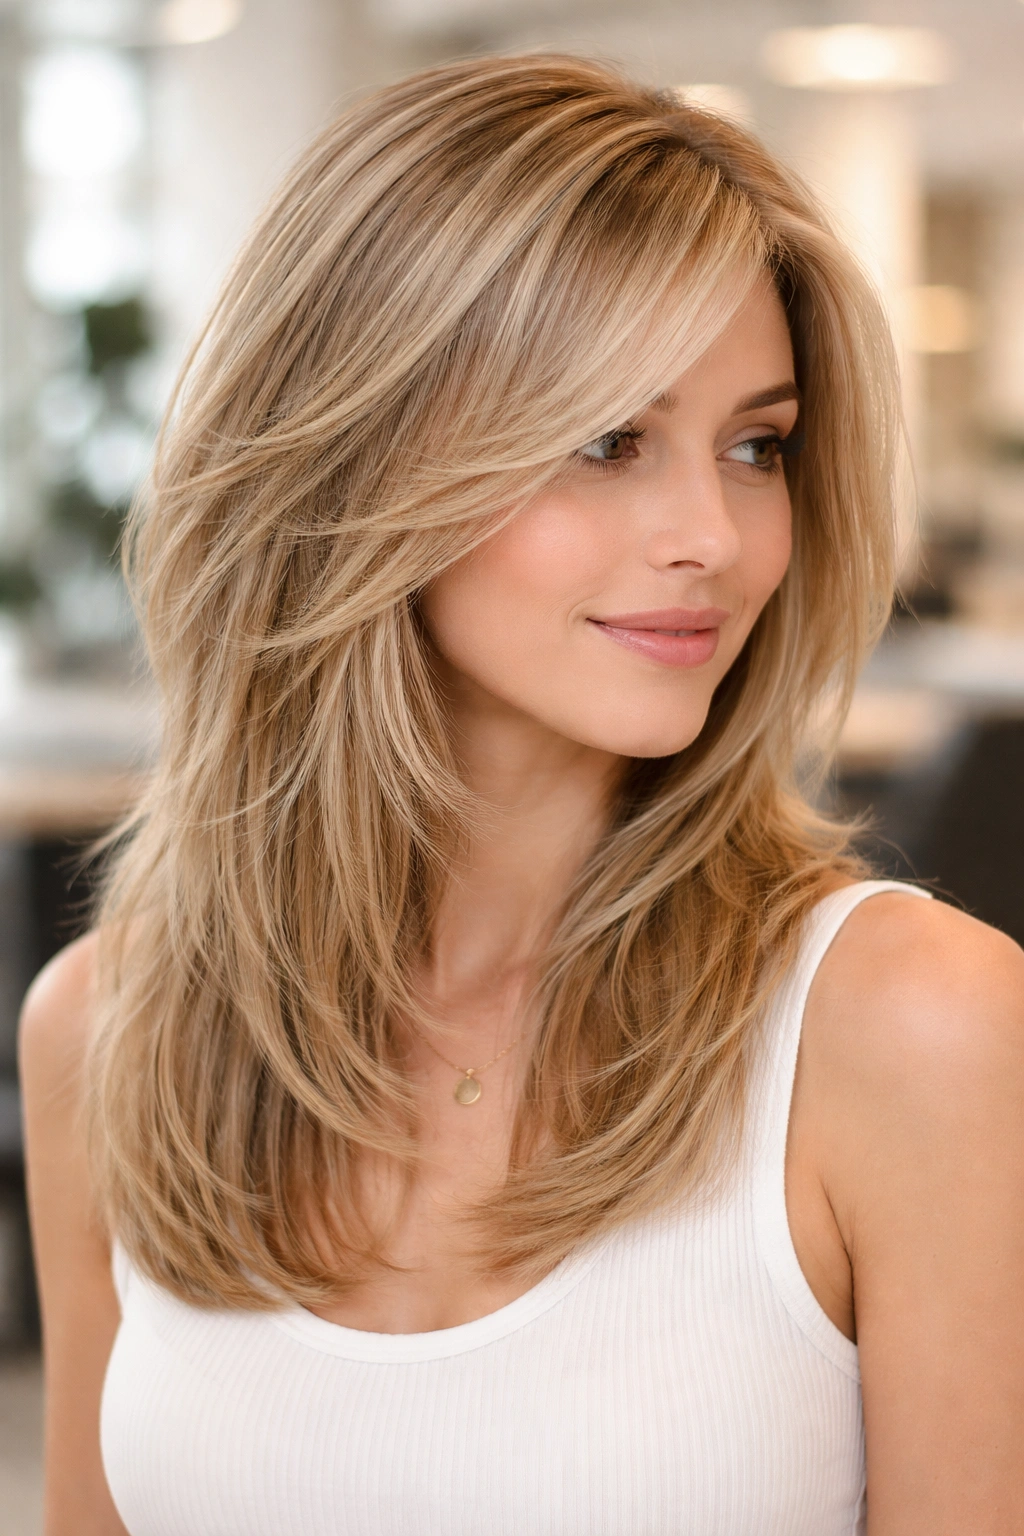
Fine hair often gets weighed down by traditional layering, so wispy layers are a smarter approach: the layers are very subtle and closely spaced rather than dramatic sections. This creates movement and texture without creating obvious gaps or thin-looking areas. The cut also includes strategic shorter pieces around the face and crown to create the illusion of volume. It’s the opposite of choppy — it’s precise, subtle, and designed specifically for fine-hair concerns.
The Fine-Hair Advantage
Wispy layers work with fine hair’s natural tendency to separate and move. Instead of fighting that tendency, the cut is designed around it. The close spacing of layers means the hair doesn’t look sparse, and the strategic placement of shorter pieces creates fullness where you need it (crown, face-frame) without adding weight. Fine hair needs layers to look like anything other than flat, but it can’t handle dramatic layers — wispy layers are the Goldilocks zone.
Styling for Fine Hair
- Use a volumizing dry shampoo or texture spray on damp hair, focusing on roots and mid-lengths
- Blow-dry on medium heat using a volumizing mousse in the roots — avoid heavy products that will weigh fine hair down
- Use a fine-tooth comb or your fingers (never a brush) to gently separate the wispy layers while the hair is still slightly damp
- Add a volumizing powder or root spray to the crown and roots once fully dry
- The goal is separated, delicate texture that looks full without looking thick — wispy layers make this achievable for fine hair
11. Disconnected Layers
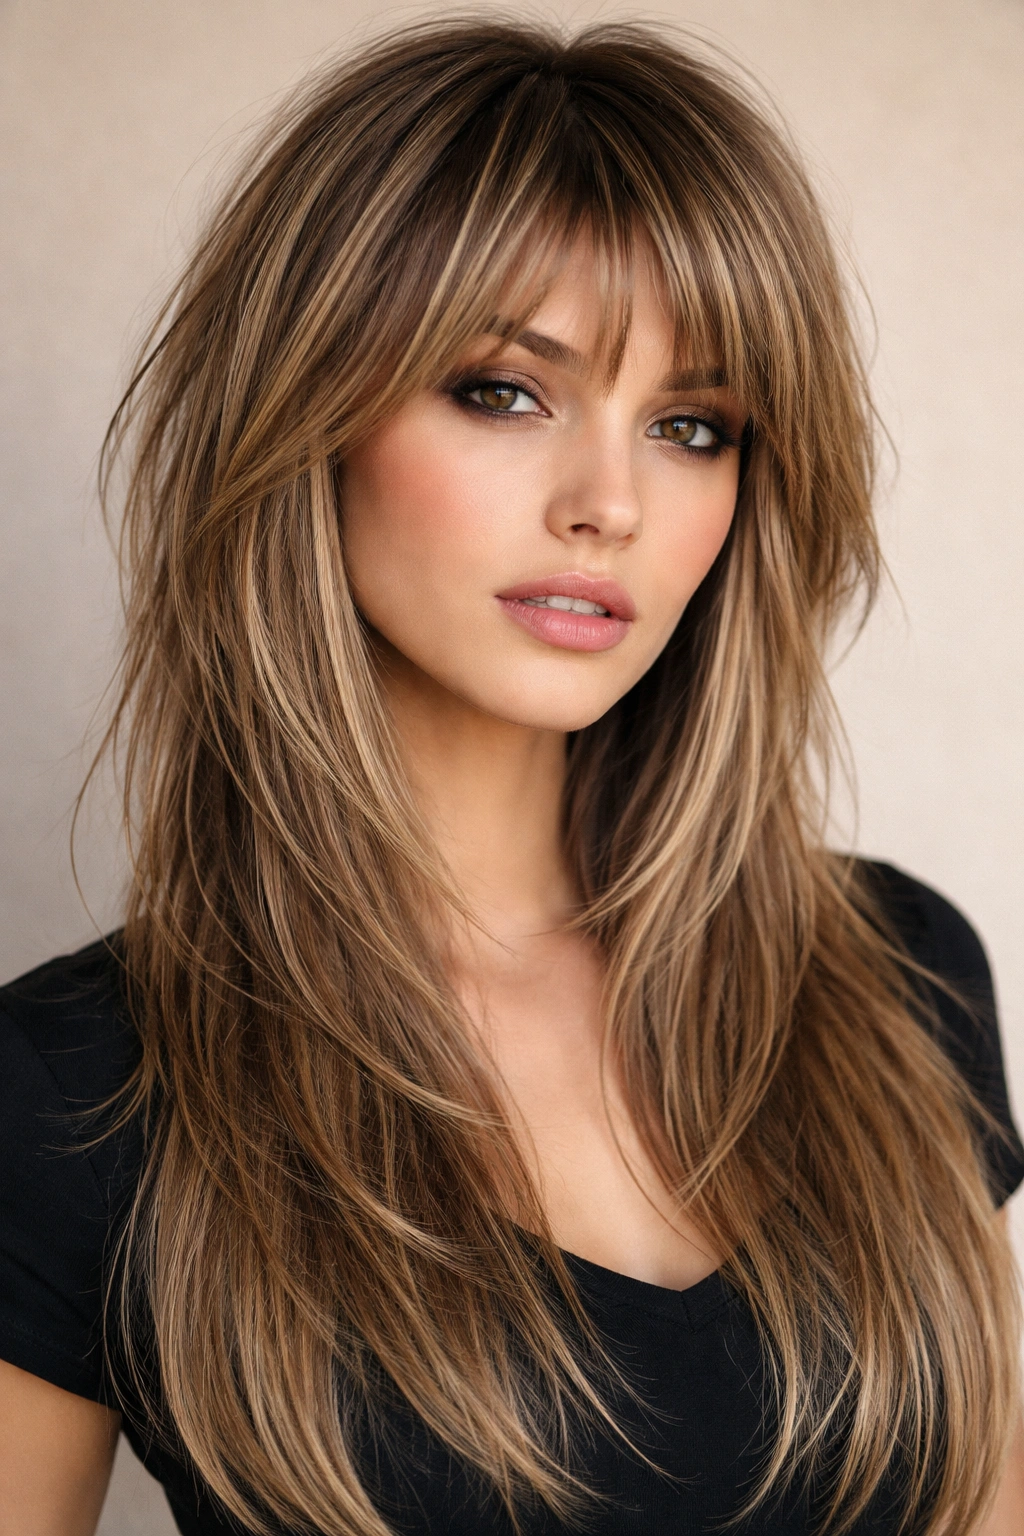
Disconnected layers create contrast between separate sections of hair — typically shorter, textured layers on top that don’t blend smoothly into longer hair below. Rather than a graduated, flowing transition, the layers are intentionally distinct. This creates a bold, fashion-forward look that reads as deliberately edgy. The shorter layers often have a choppy, textured quality while the longer underneath sections are sleeker.
Why Disconnected Works Practically
Disconnected layers actually simplify styling because you’re styling two semi-independent sections rather than one blended whole. The shorter top section is textured and tousled — quick and easy. The longer bottom section can be straighter, wavier, or sleeker depending on the look you want. They don’t have to match perfectly or blend seamlessly, which removes a lot of styling complexity. The disconnect itself is the point, so imperfect transitions are actually correct.
Styling Approach
- Blow-dry the shorter top layers with a texturizing spray, using your fingers to create piecey separation and emphasize the disconnection
- Blow-dry the longer layers below, either straight or with waves depending on your preference — a paddle brush or round brush works here
- The goal is for the top to look textured and somewhat tousled while the bottom is smoother or wavier — the contrast is the style
- Add a smoothing serum to the longer bottom section if you’re going straight, or texture cream if you’re emphasizing waves
- The top layers should look intentionally choppy; the bottom should look intentionally sleek or soft — that contrast is everything
12. Bixie (Bob-Pixie Hybrid)
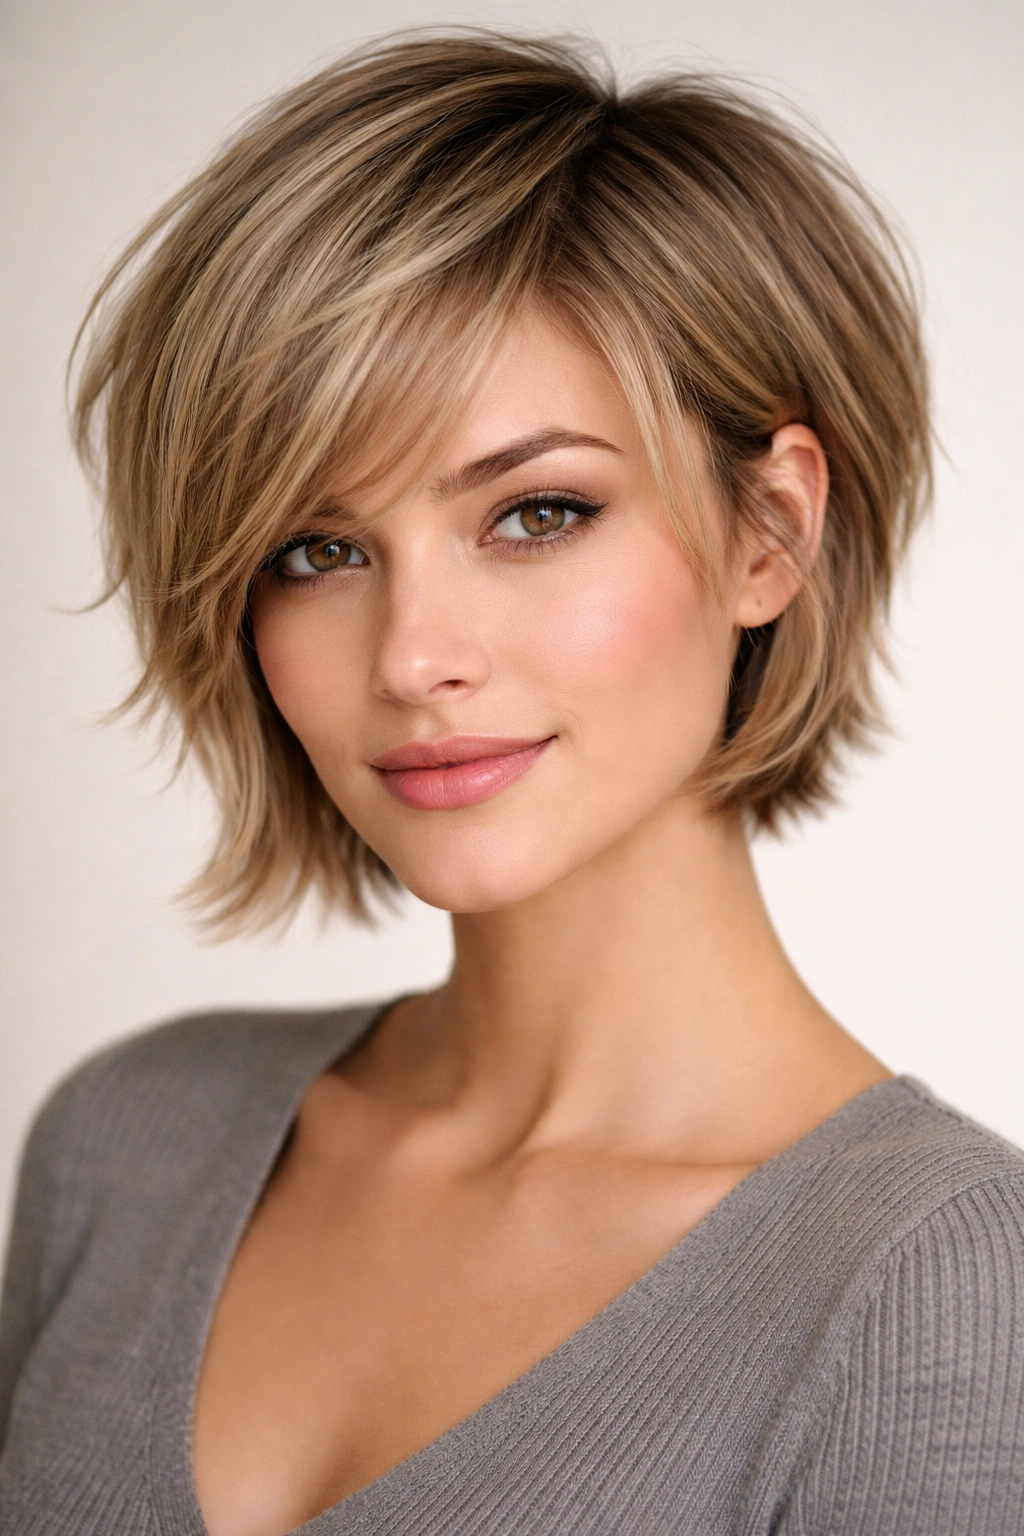
A bixie combines the short, cropped structure of a pixie with the volume and face-framing quality of a layered bob. It’s typically chin-length or slightly shorter with layers throughout, shorter on the sides and back, and slightly longer in front. It’s got the edge of a pixie and the flattery of a bob, with the styling demands somewhere in between — easier than most bobs, slightly more intentional than a pixie alone.
The Practical Appeal
A bixie is versatile enough to style multiple ways. You can wear it smooth and polished, or tousled and textured. You can tuck it behind your ears or let it fall around your face. You can style it with a blow-dryer for waves, or rough-dry it for texture. The layering means that even minimal styling looks intentional. It’s also at that magical length where it’s definitely short (low-maintenance), but not so short that you feel like you have to style it a specific way every day.
Five-Minute Styling Routine
- Apply a volumizing mousse or texturizing spray to damp roots
- Blow-dry with a round brush, creating soft curves and movement around the face and through the layers
- Tousle with your fingers while the hair is still slightly warm to enhance the texture
- Add a small amount of styling cream or light pomade to separate the layers and enhance movement
- You can go sleeker or more textured depending on the day, but either way, the style is complete in under five minutes because of the strategic layering
Final Thoughts
The fastest-to-style haircuts share one common trait: they’re cut in a way that works with your hair’s natural texture and behavior rather than against it. A layered cut that’s poorly matched to your hair type will always require more styling, more product, and more effort. The cuts described here work because they’re designed so that even minimal effort produces a polished, intentional-looking result.
The second piece of the puzzle is using the right styling products and techniques. Most of these cuts don’t actually require a blow-dryer, round brush, or straightener — they just require understanding how the layers move and applying one or two targeted products that enhance the cut’s natural structure. Sea salt spray, texture powder, volumizing mousse, styling cream — these are the tools that make five-minute styling possible, not elaborate heat-styling routines.
The truth about layered haircuts and time is that the best ones look effortless, which actually means less time spent styling, not more. Once you find the cut that matches your hair and your lifestyle, the styling time decreases dramatically because you’re not fighting the cut — you’re simply enhancing what’s already there. That’s the real promise of a great layered style.
