If you have curly hair, you already know that finding a protective style that looks polished, feels comfortable, and actually protects your natural texture is harder than it should be. Weave ponytails offer that sweet spot where you get the length, volume, and versatility you want without sacrificing your curl pattern or spending hours on styling every single day. The beauty of weave ponytails for curly hair is that they work with your texture instead of against it—you can add length, experiment with different curl patterns, and create styles that range from sleek and professional to bold and eye-catching.
What makes weave ponytails particularly appealing for curly-haired folks is their flexibility. Whether you’re dealing with tight coils, loose waves, or that unpredictable combination of both, weave blends seamlessly with curly hair in ways that other protective styles sometimes struggle with. You can match your weave texture to your natural hair, or intentionally mix and match for a statement look. The ponytail keeps everything contained and low-manipulation, which means your edges stay healthy and your natural hair underneath gets the break it needs.
The styling possibilities are genuinely endless. You can go from a sleek high pony for work to a textured, bubble-style pony for the weekend. You can add accessories, combine braiding techniques with the weave, or keep it simple and let the curl pattern do all the talking. The key is knowing which styles work best with your specific curl type and lifestyle, and that’s exactly what this guide covers.
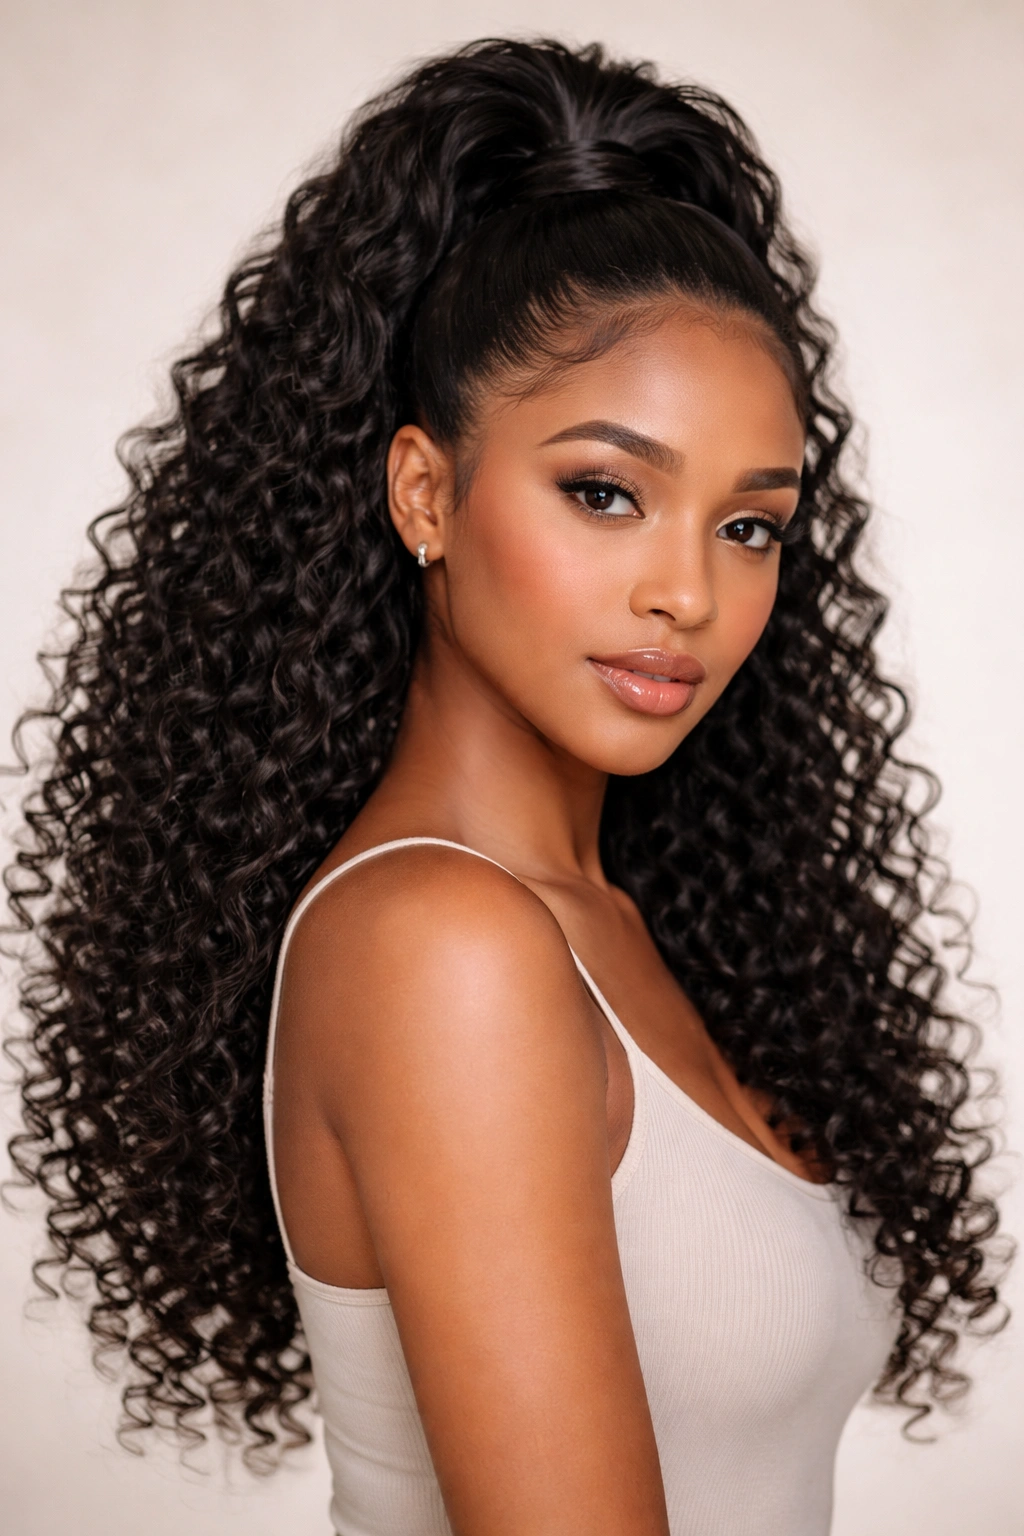
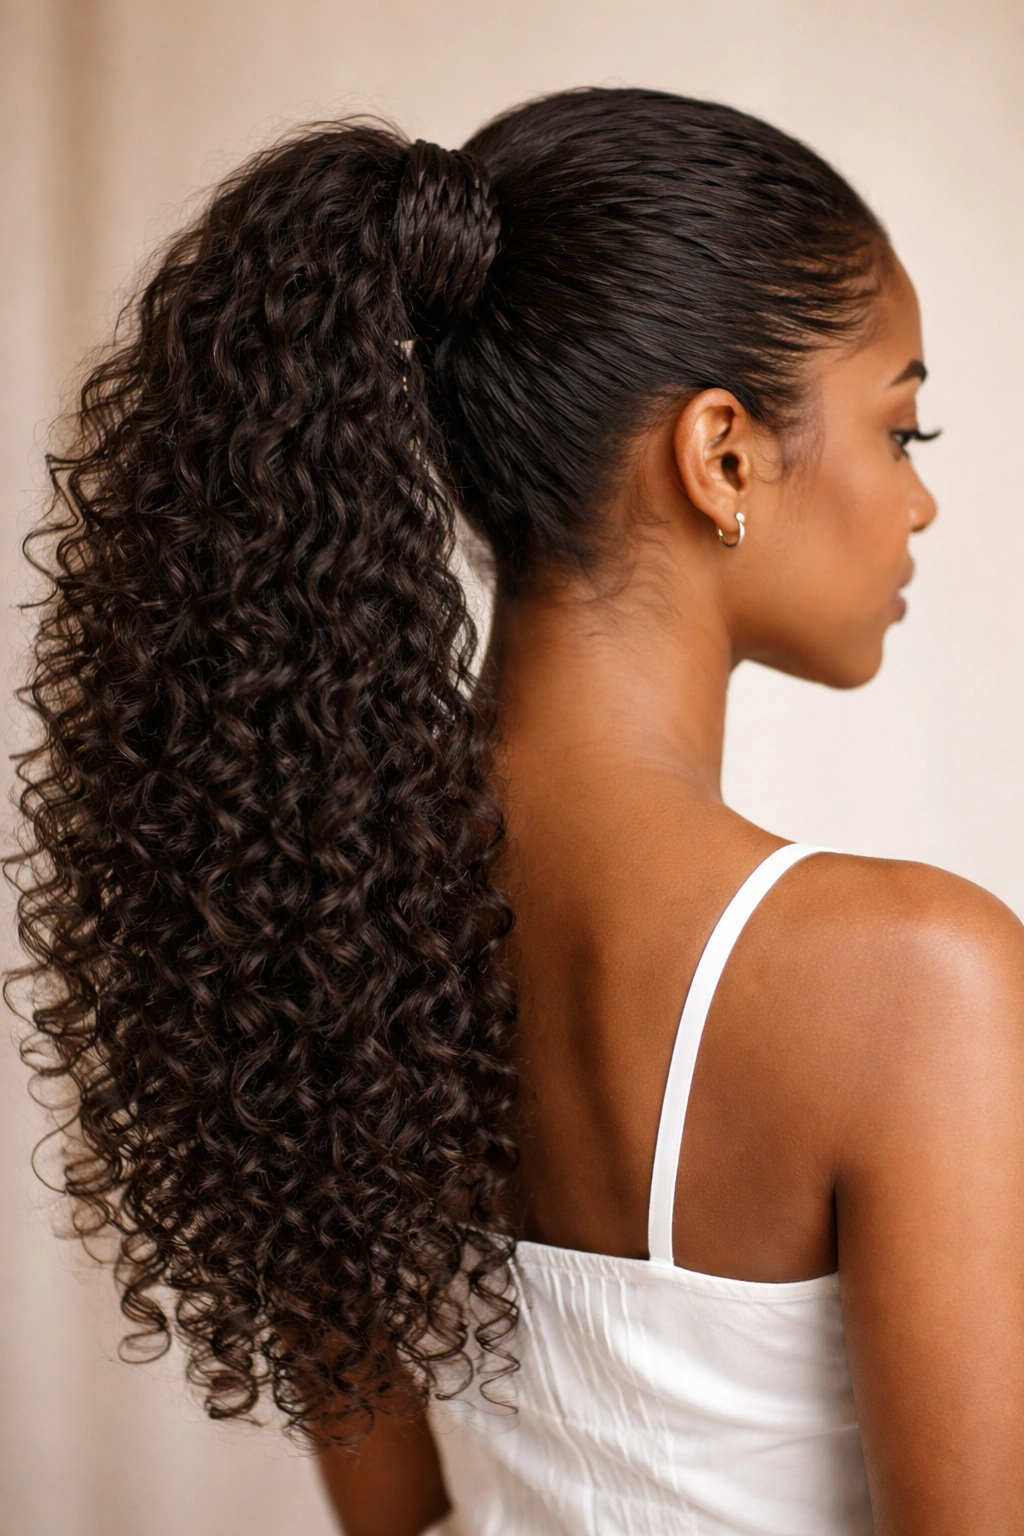
1. High Sleek Weave Ponytail
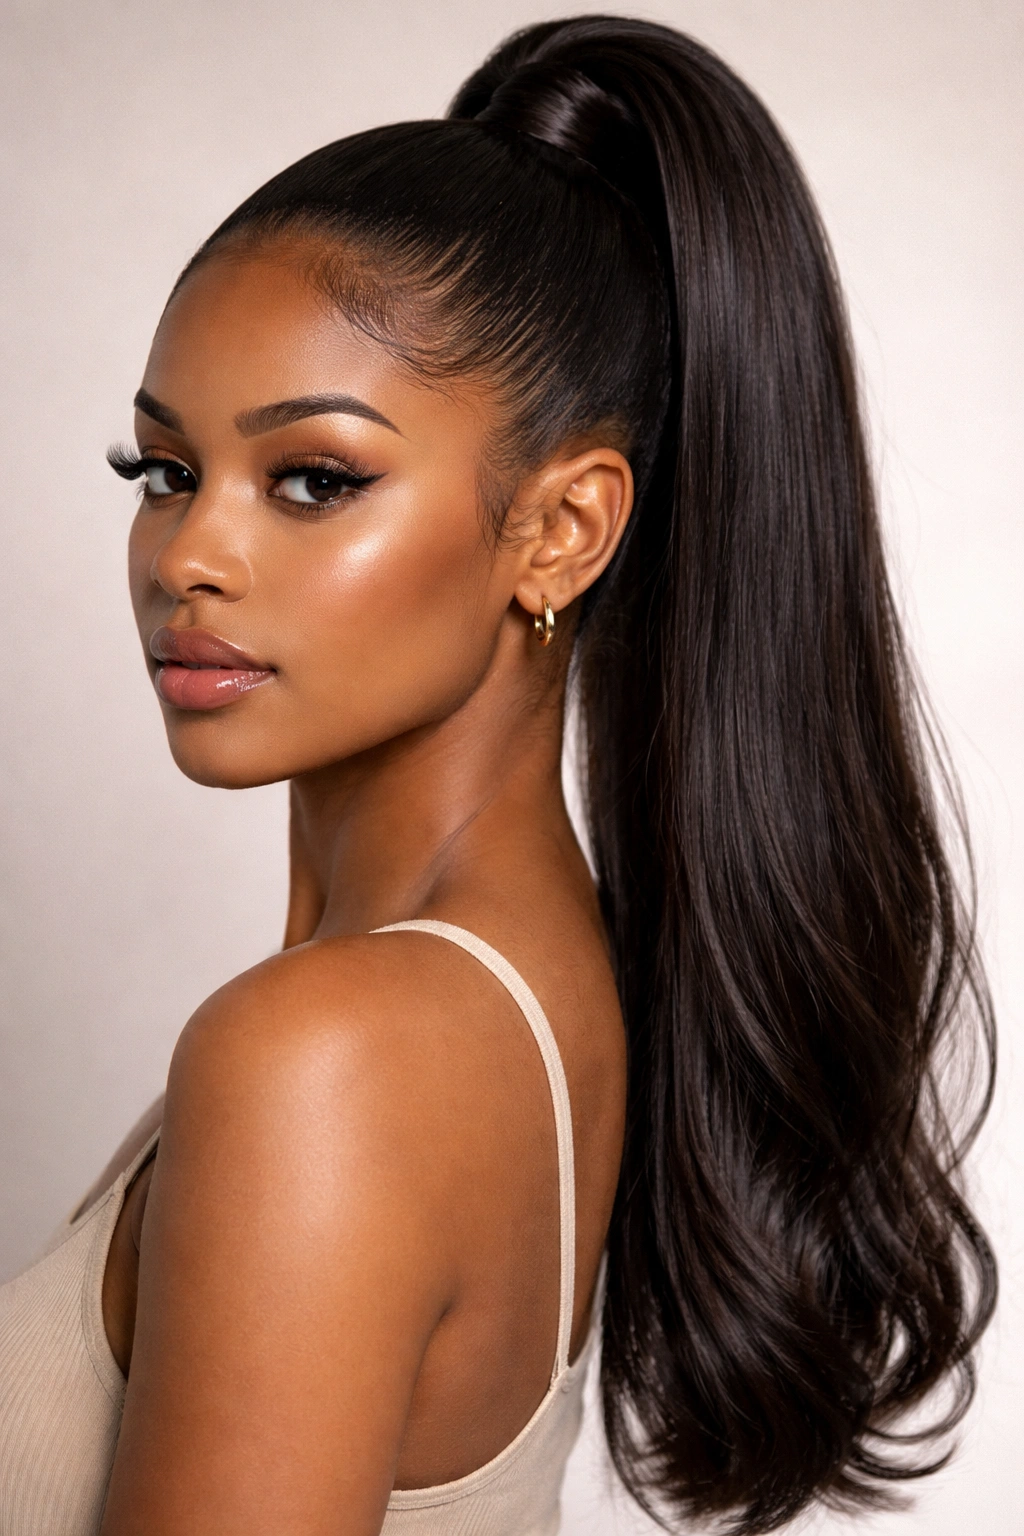
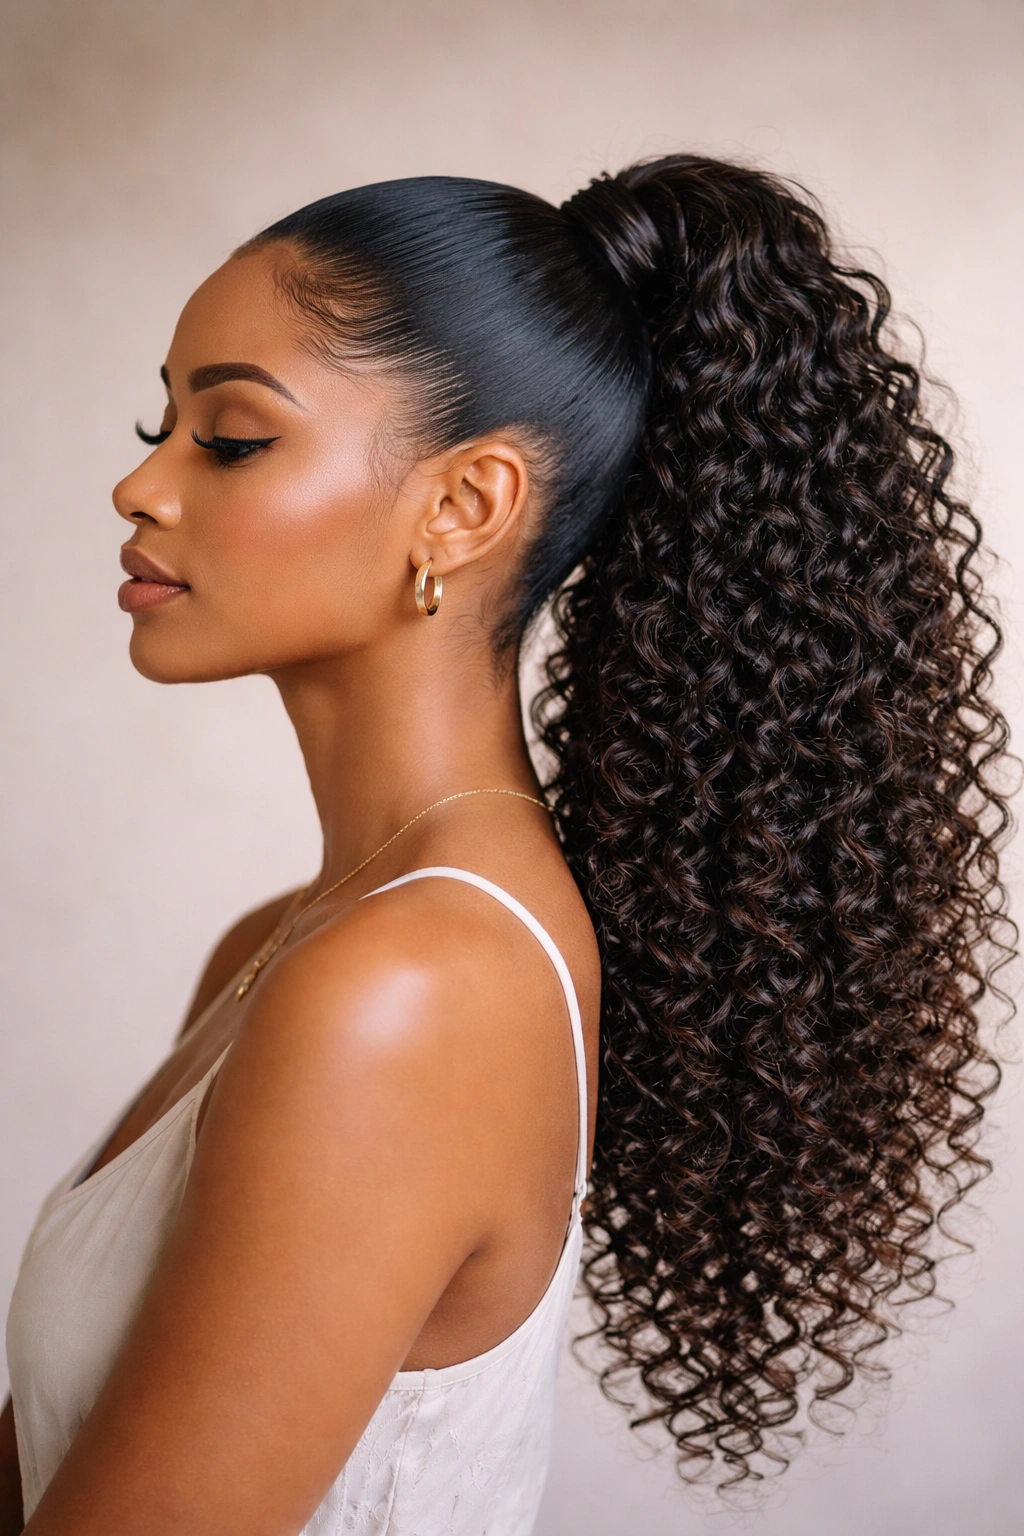
This is the go-to style when you need to look polished and professional while keeping your curls protected. You pull the weave up high and tight, creating that elevated ponytail silhouette that works for everything from corporate offices to formal events. The sleekness comes from smoothing your baby hairs down and often using edge control, while the weave itself can be straight, wavy, or curly—your choice depends on the vibe you’re after.
Why This Works Best for Curly Hair
The high placement creates maximum lift and volume without relying on your natural hair to do all the heavy work. Your curls stay protected underneath, while the style itself looks intentional and refined. This is particularly great if you’re dealing with shrinkage or uneven curl patterns, because the weave covers what you want hidden and gives you clean, visible edges.
How to Get the Look
- Start with your natural hair in a protective base—this could be cornrows, box braids, or twists depending on how long you want to wear the ponytail and how much manipulation you want to avoid
- Apply edge control to your hairline and smooth your baby hairs down with a toothbrush or spoolie
- Attach the weave ponytail bundle securely at the crown, making sure it’s anchored to your base and not pulling on your edges
- Use a brush or comb to smooth the weave and create that polished finish
- Finish with a light hairspray to keep everything in place without creating buildup
Pro tip: If you’re wearing this style for more than a week or two, use lightweight products on your edges—heavy creams can cause buildup and potentially lead to traction alopecia over time.
2. Textured Bubble Weave Ponytail
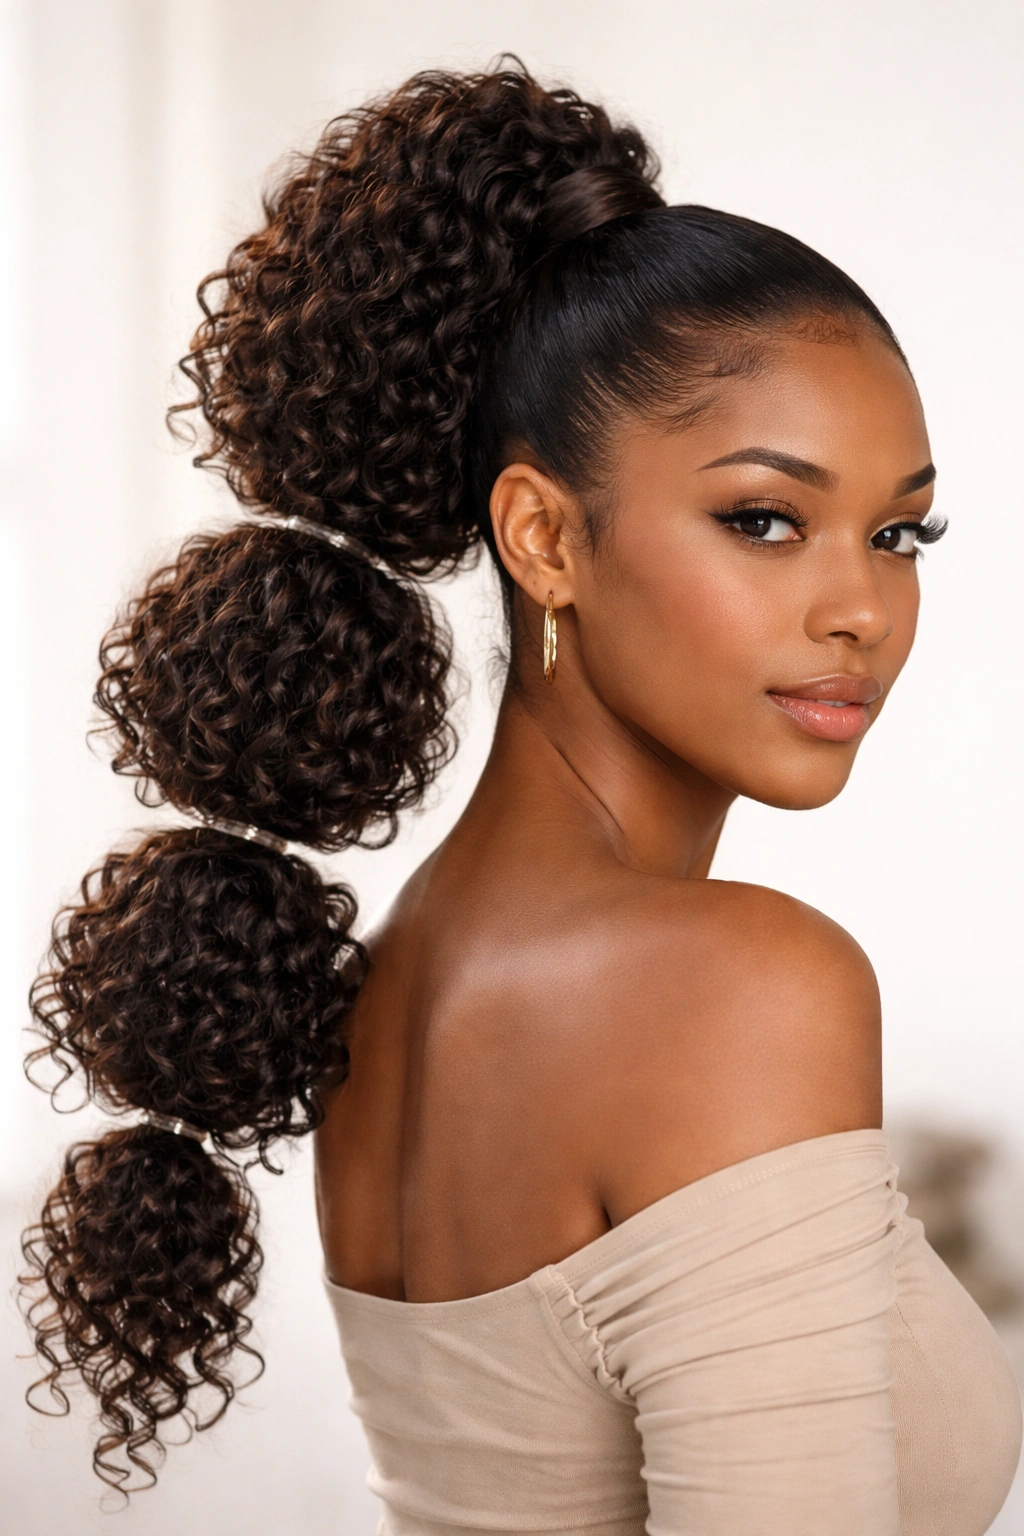
Bubble ponytails have that playful, dimensional look where you section the ponytail into distinct “bubbles” using clear elastic bands or decorative bands, creating visual separation and making the style feel fuller and more interesting. With a textured or curly weave, those bubbles really pop because the curl pattern within each section becomes more visible and defined. It’s edgy and fun without requiring any braiding skills.
What Makes This Style Stand Out
The bubble effect naturally works better with textured weave than with straight weave, because you’re actually playing up the texture rather than trying to smooth it down. Each bubble catches light differently and creates depth. If you’re using a curly or coily weave, the bubbles almost create their own hairstyle—they’re not just visual separators, they’re actually showcasing the curl pattern.
Building the Bubble Effect
- Gather your weave into a high or mid-level ponytail and secure it at the base
- Take a clear elastic or decorative band and wrap it around the ponytail about 2-3 inches down from where you secured it
- Gently pull the section above that band backward to create a “bubble” that poofs out
- Repeat this process down the entire length of the ponytail, spacing the bubbles evenly
- If you want extra dimension, gently fan out each bubble after you’ve created it to make it appear fuller
Optional embellishment: Add gold rings, beads, or colored bands to make each bubble its own statement—this turns the style into something really special for nights out or events.
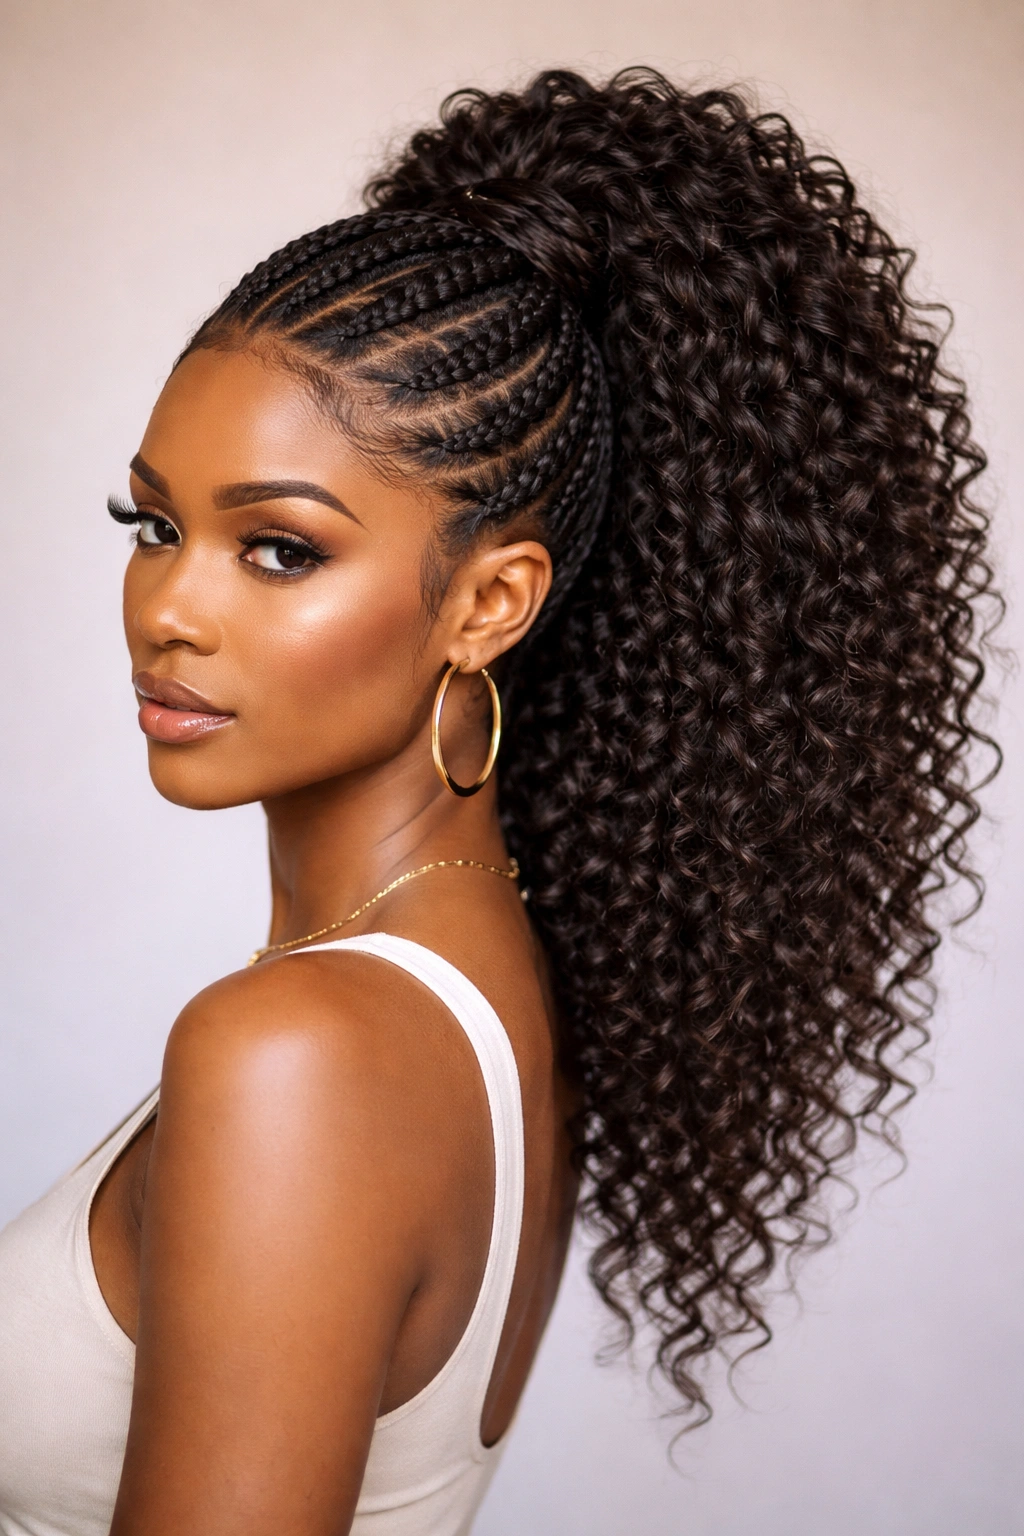
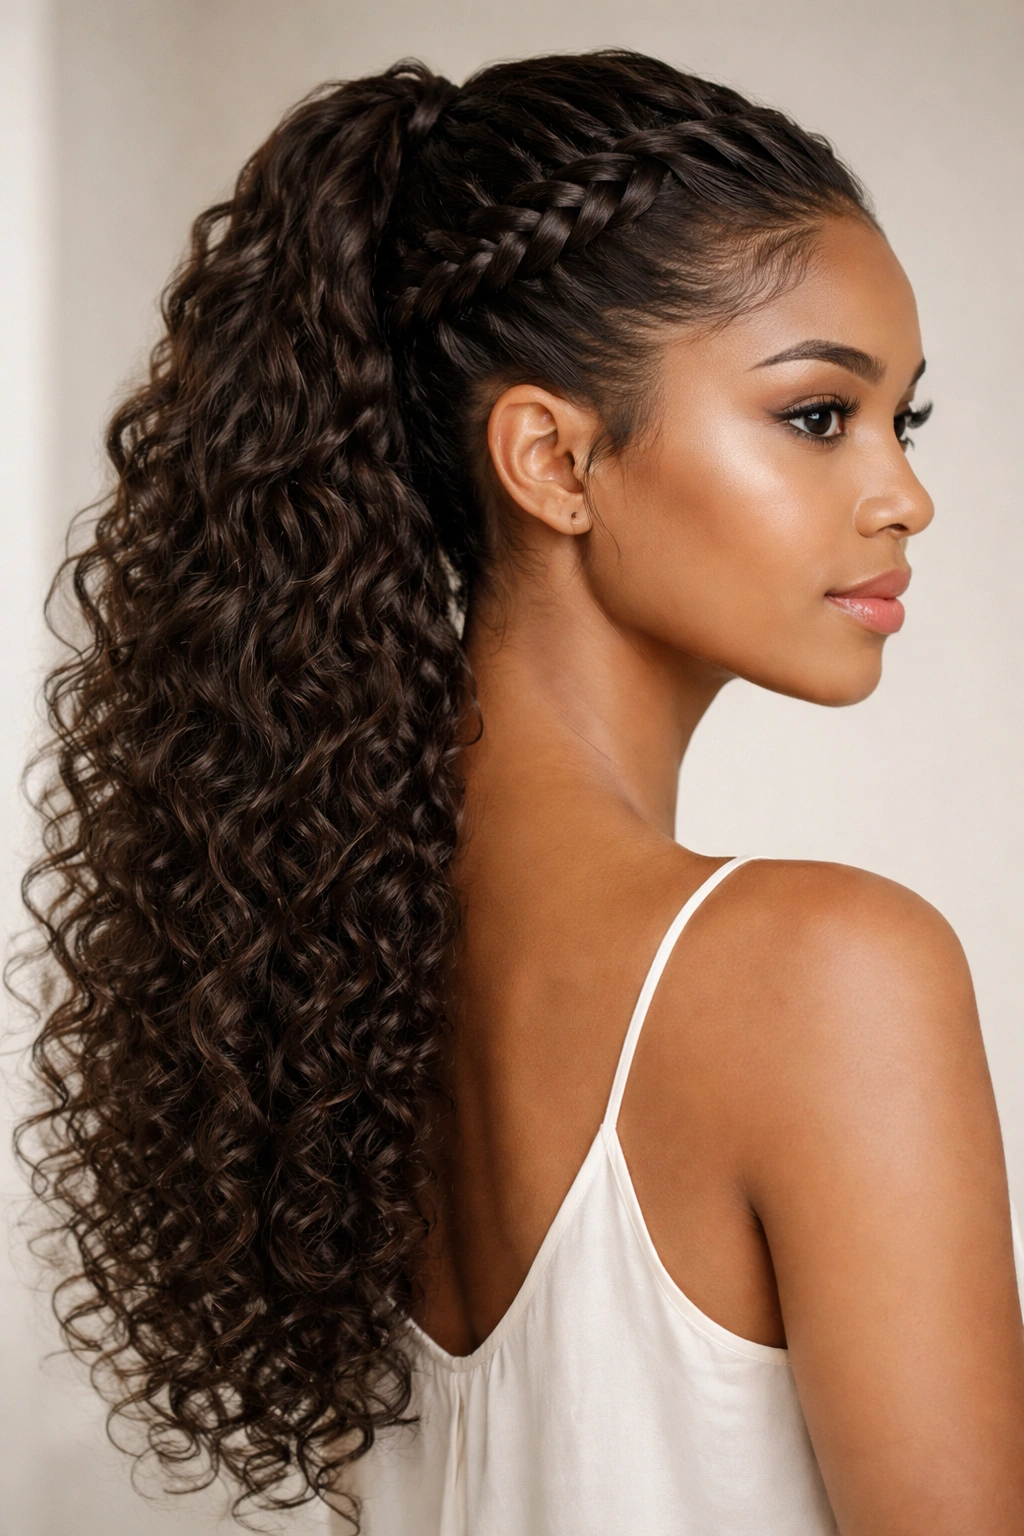
3. Feed-In Braided Weave Ponytail
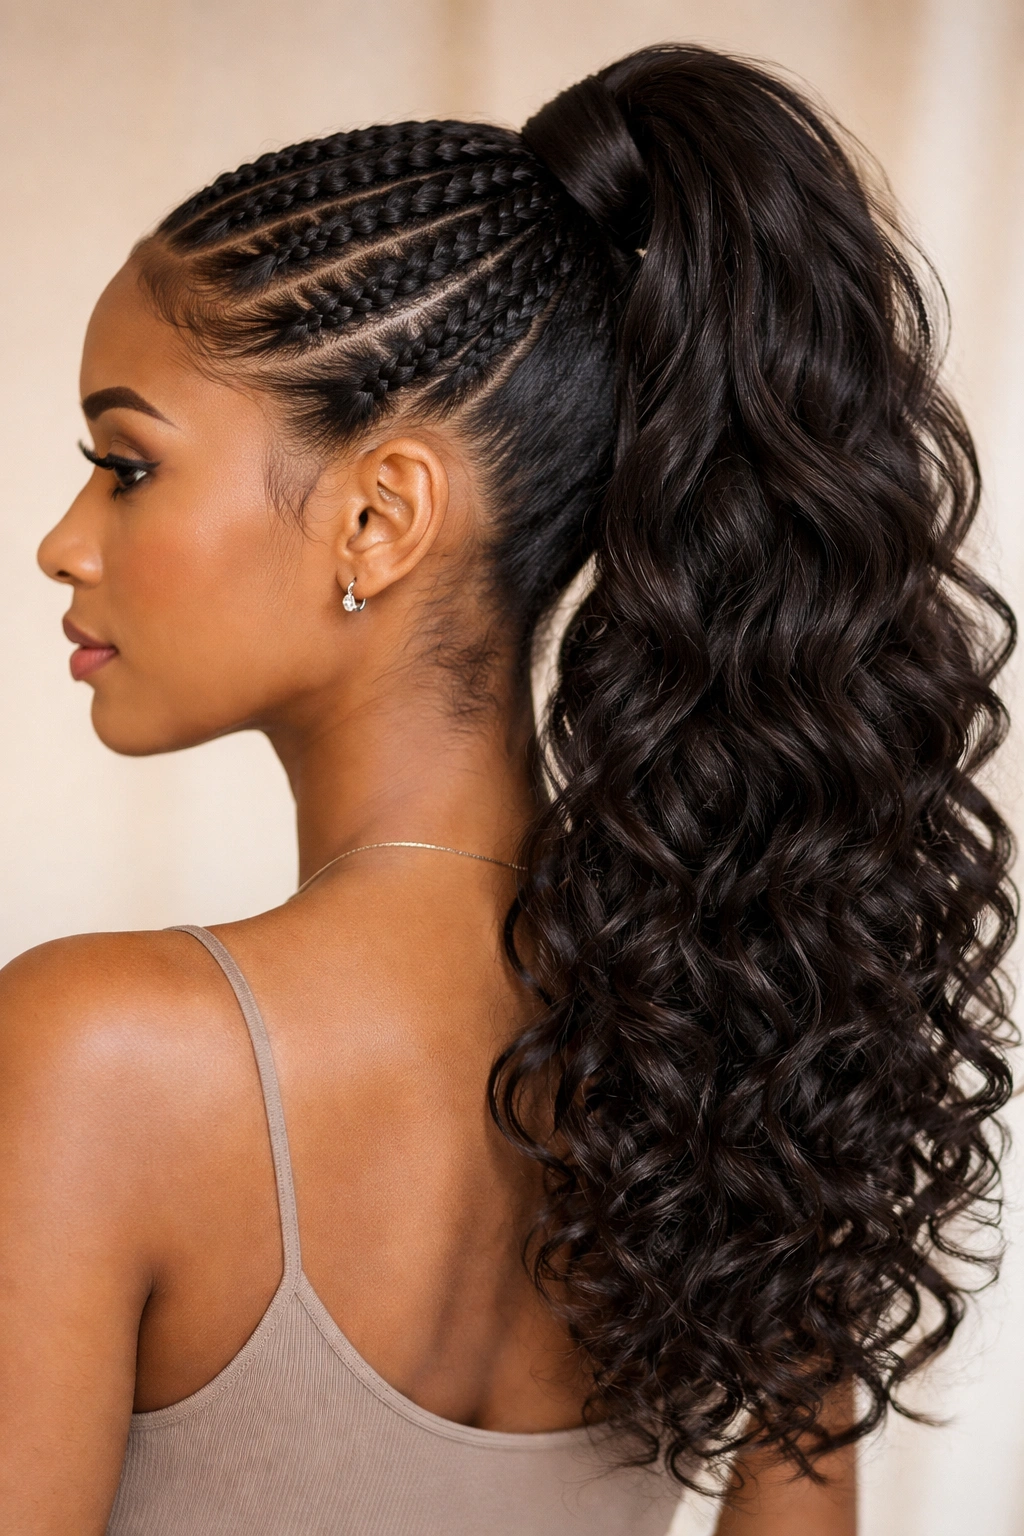
This style combines the protective qualities of braiding with the length and volume of weave. You create feed-in braids (or cornrows, depending on your preference) that lead up to the crown, then attach your weave ponytail where the braids end. The braids give your edges a break from tension while still creating a cohesive, intentional look. It’s sophisticated and shows off your styling skills.
How Braiding Protects Your Curl Pattern
When you braid your natural hair and feed in weave hair, your curls stay completely tucked away and unexposed. They’re not being pulled, brushed, or manipulated. The feed-in technique is gentler than traditional cornrows because you’re distributing the tension more evenly across your scalp. Over the 4-6 weeks you can wear this style, your natural curls get serious recovery time.
Creating the Braided Base
- Start with clean, moisturized hair and detangle thoroughly
- Section your hair into 2-4 large cornrow sections (depending on how thick you want the braids and how much hair you have)
- Begin braiding from your edges and gradually feed in your weave hair as you work toward the crown—this creates that seamless blend where your natural hair transitions into weave
- Once your braids reach the crown, secure them together and attach your weave ponytail at that point
- Use the same weave texture as your braids for continuity, or mix textures intentionally for contrast
Worth knowing: This style takes longer to install (typically 3-4 hours), but it’s incredibly low-maintenance once it’s in. You can literally just tie it up at night and wake up with gorgeous waves or curls.
4. Curly Weave Ponytail with Statement Accessories
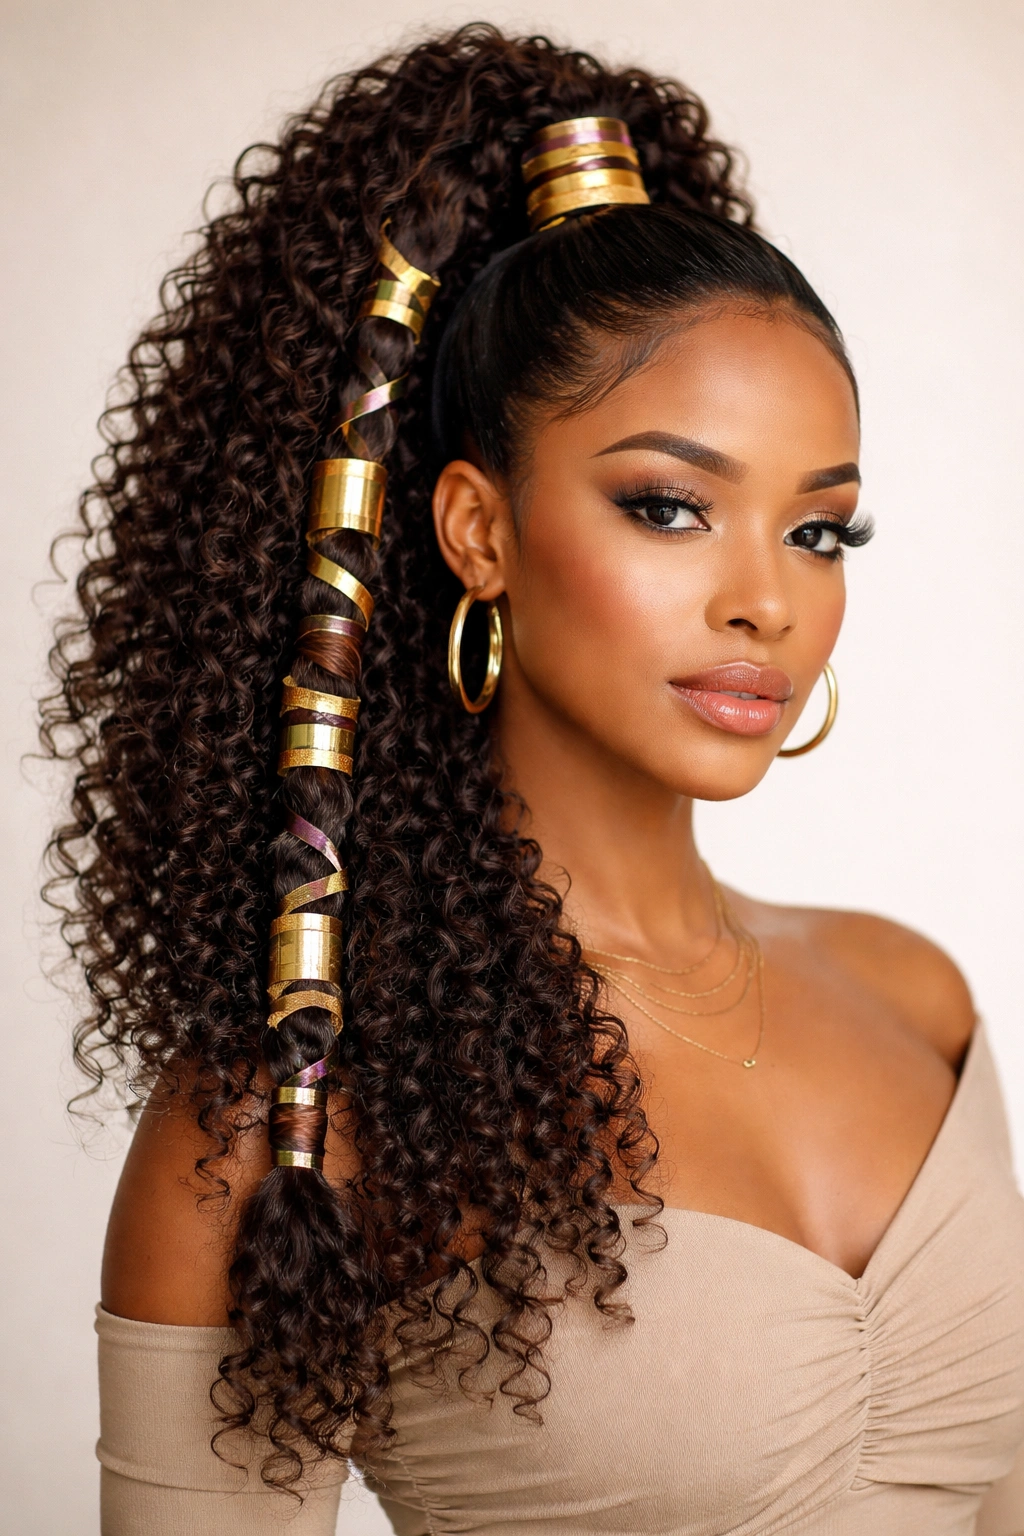
When you match your weave texture to your natural curls—or even go curlier than your natural texture—and then add bold accessories, you create something that feels completely intentional and fashion-forward. Think gold cuffs, oversized hair clips, colored string wraps, decorative bands, or even small charms woven into the weave. The curly texture is already interesting on its own, but accessories take it from everyday protective style to “I woke up like this but also I have an eye for style.”
Choosing the Right Accessories for Curly Weave
The beauty of a textured weave is that it can handle bold accessories without looking overdone. Metallic cuffs reflect light beautifully against curls. Translucent or colorful acrylic bands look modern. String wraps in contrasting colors create geometric interest. You want accessories that complement the texture rather than fight against it—something sleek and smooth accessories might look stark against curls, but chunky or geometric ones create visual harmony.
Style Combination Ideas
- Gold or silver metal cuffs positioned at intervals down the ponytail
- Colored hair string wrapped around the base where your natural hair meets the weave
- Oversized claw clips or geometric hair clips securing a bubble ponytail version
- Decorative bands every 2-3 inches creating a segmented look
- Small charms or beads threaded directly into the weave for a bohemian feel
Insider note: Change your accessories weekly instead of keeping the same ones in the whole time you’re wearing the style—it’s a quick way to make it feel fresh without taking the whole thing down and redoing it.
5. Half-Up Weave Ponytail
This style gives you the best of both worlds: you’re showing off the length and volume of your weave while also displaying your natural curls. You take a section from the crown or sides, pull it back, and create a half-up ponytail with weave, leaving the rest of your hair down. It’s feminine, versatile, and works for practically every setting from casual to dressy.
Why Half-Up Works for Protective Styling
The half-up style is technically a protective style, but it feels less “styled” and more natural because you’re leaving most of your hair down. This makes it an excellent choice if you’re transitioning, if you have some reluctance about fully protective styles, or if you just want something that feels effortless. Your natural curls frame your face while the weave handles the back section, creating dimension and visual interest.
Building the Half-Up Ponytail
- Take a section of hair from your crown or temples on each side—the amount depends on how much of your hair you want in the ponytail (typically 1-2 inches on each side)
- Braid, twist, or leave these sections smooth—whichever matches your vibe
- Gather these sections at the back of your head and secure them together
- Attach your weave ponytail to where you’ve secured your natural hair
- Leave the rest of your hair down, and let your natural curls frame your face and back
Real talk: If you’re using this as a protective style, be mindful about friction where your natural curls meet the weave. Sleep on a silk or satin pillowcase to minimize breakage and frizz where the two textures meet.
6. Low Twisted Weave Ponytail
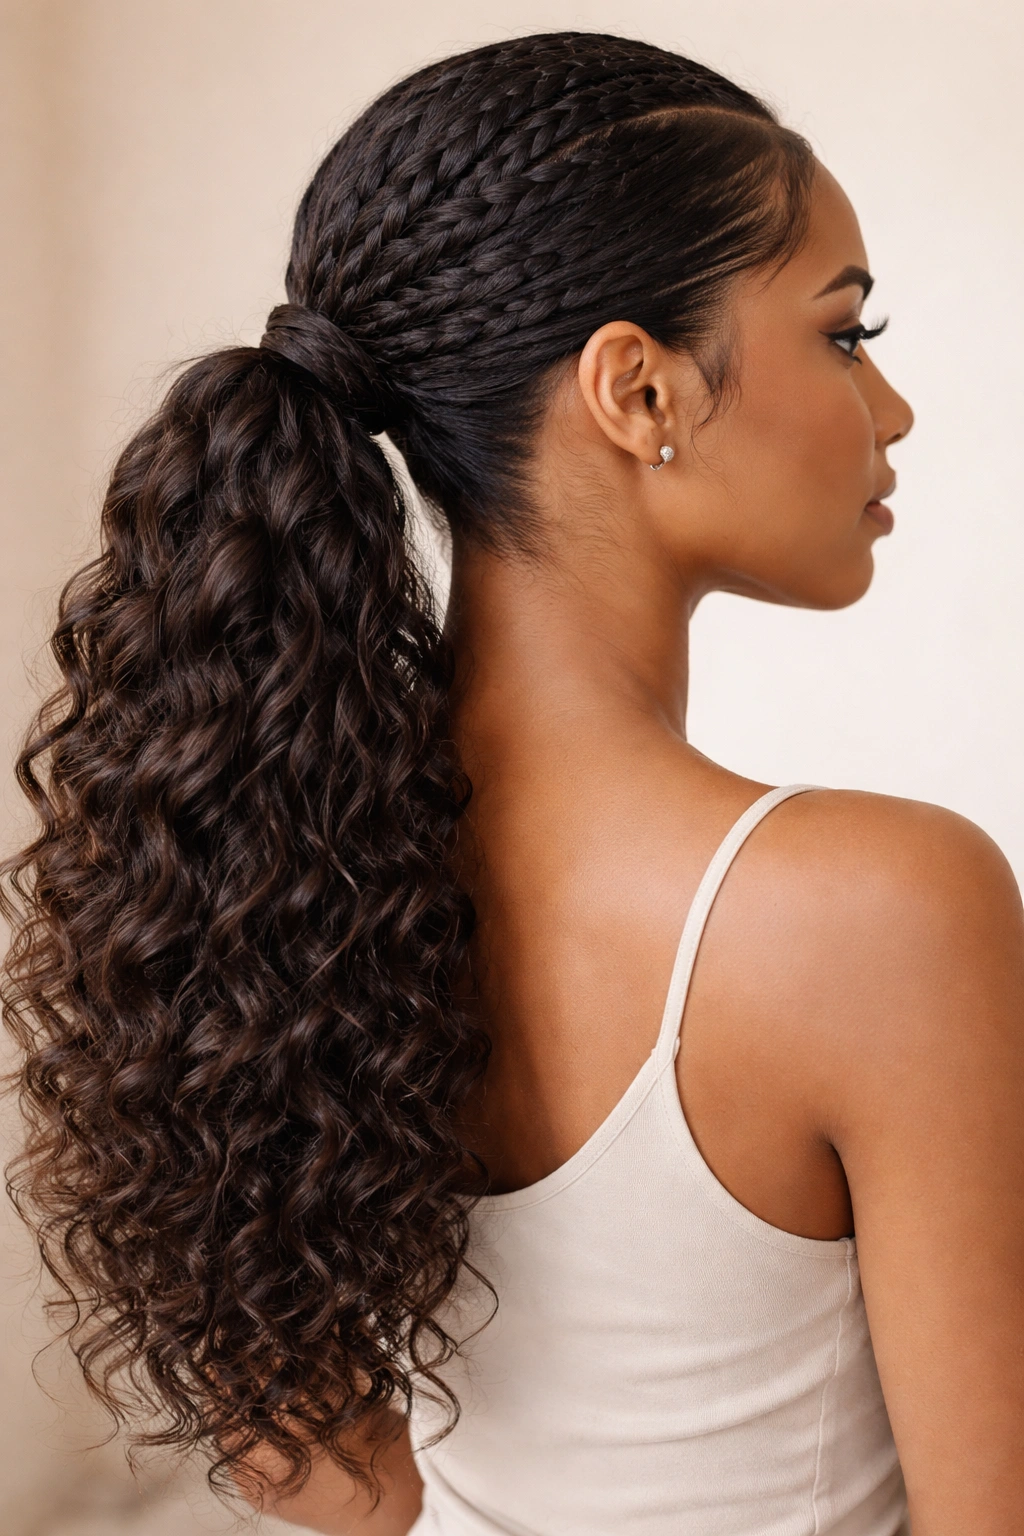
The low ponytail is classic for a reason—it’s elegant, it works with almost any outfit, and it’s comfortable enough to wear all day. When you add twists, you create texture and visual interest without the more formal look of braids. A low twisted weave ponytail reads as polished and intentional while still feeling relaxed and wearable. You twist your natural hair as it goes back, gradually incorporating the weave as you build toward the placement point.
The Psychology of the Low Ponytail
There’s something about a low ponytail that automatically reads as more mature and refined than a high one. It opens up your face, it’s less severe, and it has this effortlessly elegant quality. For curly hair, the low placement also means less tension on your hairline—the weight of the ponytail isn’t pulling as aggressively on your edges, which is important for long-term scalp health.
Twisting Into the Base
- Start with moisturized, detangled hair
- Take two sections from your crown area and begin twisting them together as you work toward the back of your head
- As you twist, gradually feed in your weave hair, incorporating it smoothly into the twist
- Continue twisting down to where you want your ponytail to sit (typically just above your nape)
- Secure all the twists together and attach your weave ponytail at that point
- Pull the twists slightly to create dimension and make them appear fuller
Optional detail: You can create multiple twisted sections that all meet at the ponytail point, or create one or two thicker twists depending on the thickness and density of your hair.
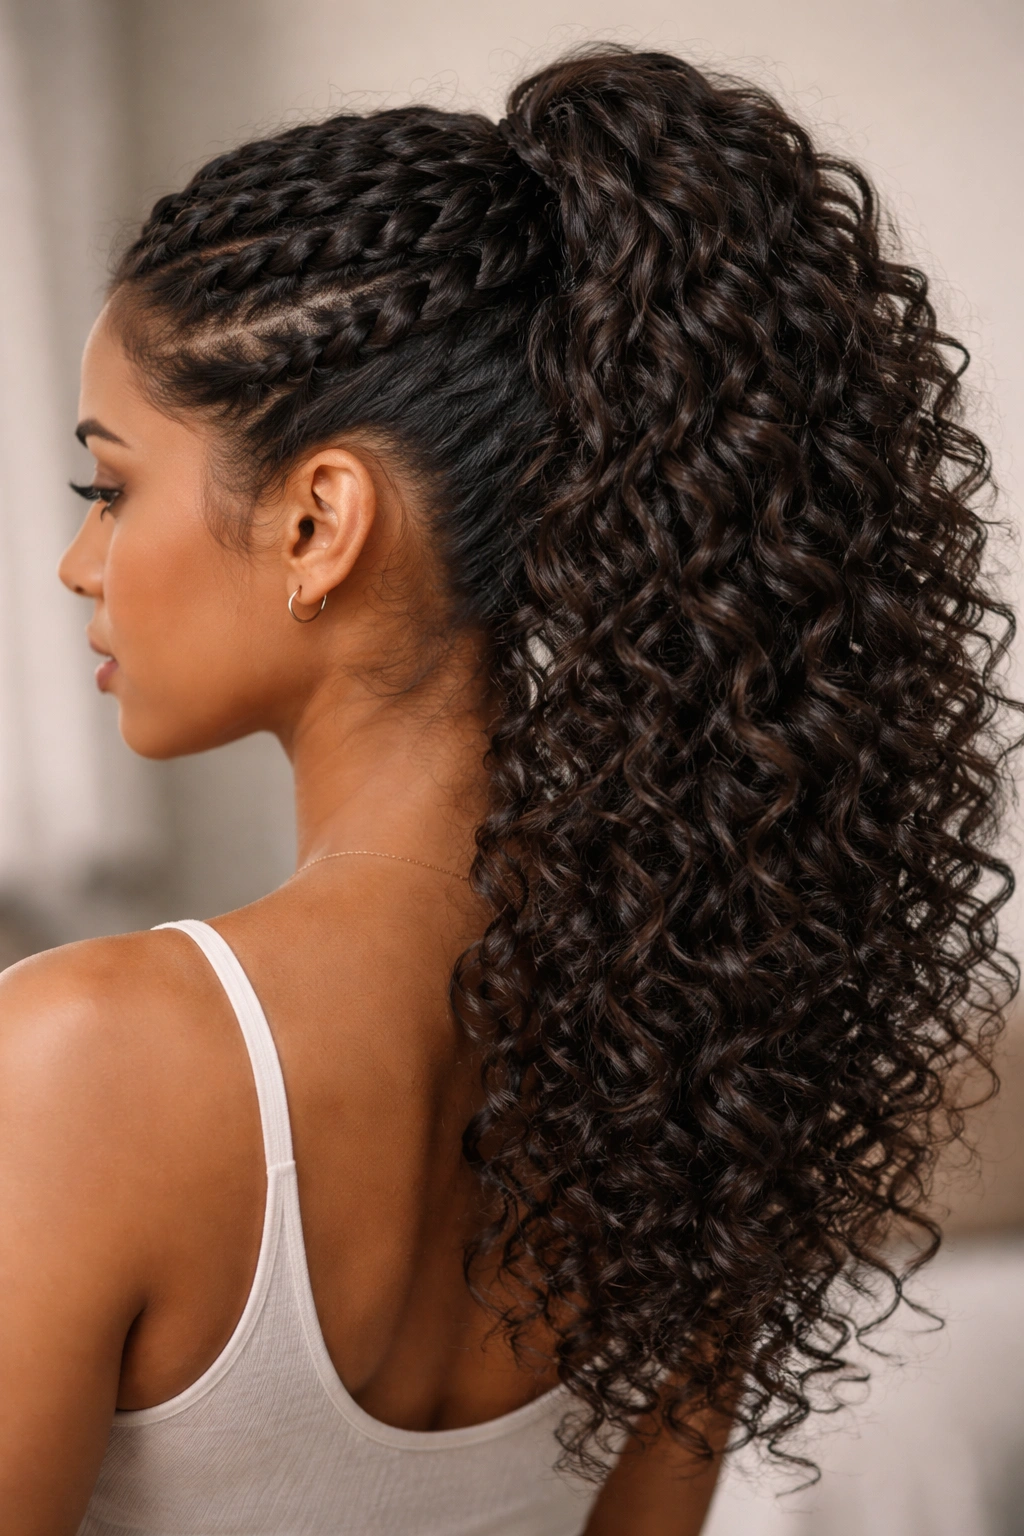
7. Voluminous Crown Weave Ponytail
If you want maximum volume and you love the drama of a full, lush ponytail, this is your style. You create a crown of texture at the top of your head—through braiding, twisting, or gathering—and then attach a thick bundle of weave at the crown point. The result is a ponytail that looks impossibly full, sits high, and catches everyone’s attention. This works beautifully with curly or coily weave, which adds to the visual volume.
Creating Maximum Volume at the Crown
Volume at the crown requires both your natural hair and the weave to work together. If you start with braids or twists that create texture and dimension at the crown, that foundation makes everything that follows look fuller. Then when you attach thick weave with texture, you’re layering volume on top of volume. The visual effect is genuinely striking without being overdone.
Building the Crown Base
- Create 4-6 cornrows or thick twists that all converge at your crown
- Make sure these braids or twists are positioned to create fullness rather than lying flat—slight angles matter
- At the crown point, gather all your braids together securely
- Attach a generous bundle of weave (a full 100-120 grams rather than a light 60-80 grams)
- Gently pick out or separate the weave to increase its perceived volume
- Smooth your baby hairs and use edge control to define the crown area
Pro tip: When you pick out textured weave, you’re literally separating the fibers to make them appear fuller and fluffier. Work from the bottom of the bundle upward, using your fingers or a fine-tooth comb to gently separate the sections without creating frizz.
8. Side-Swept Weave Ponytail
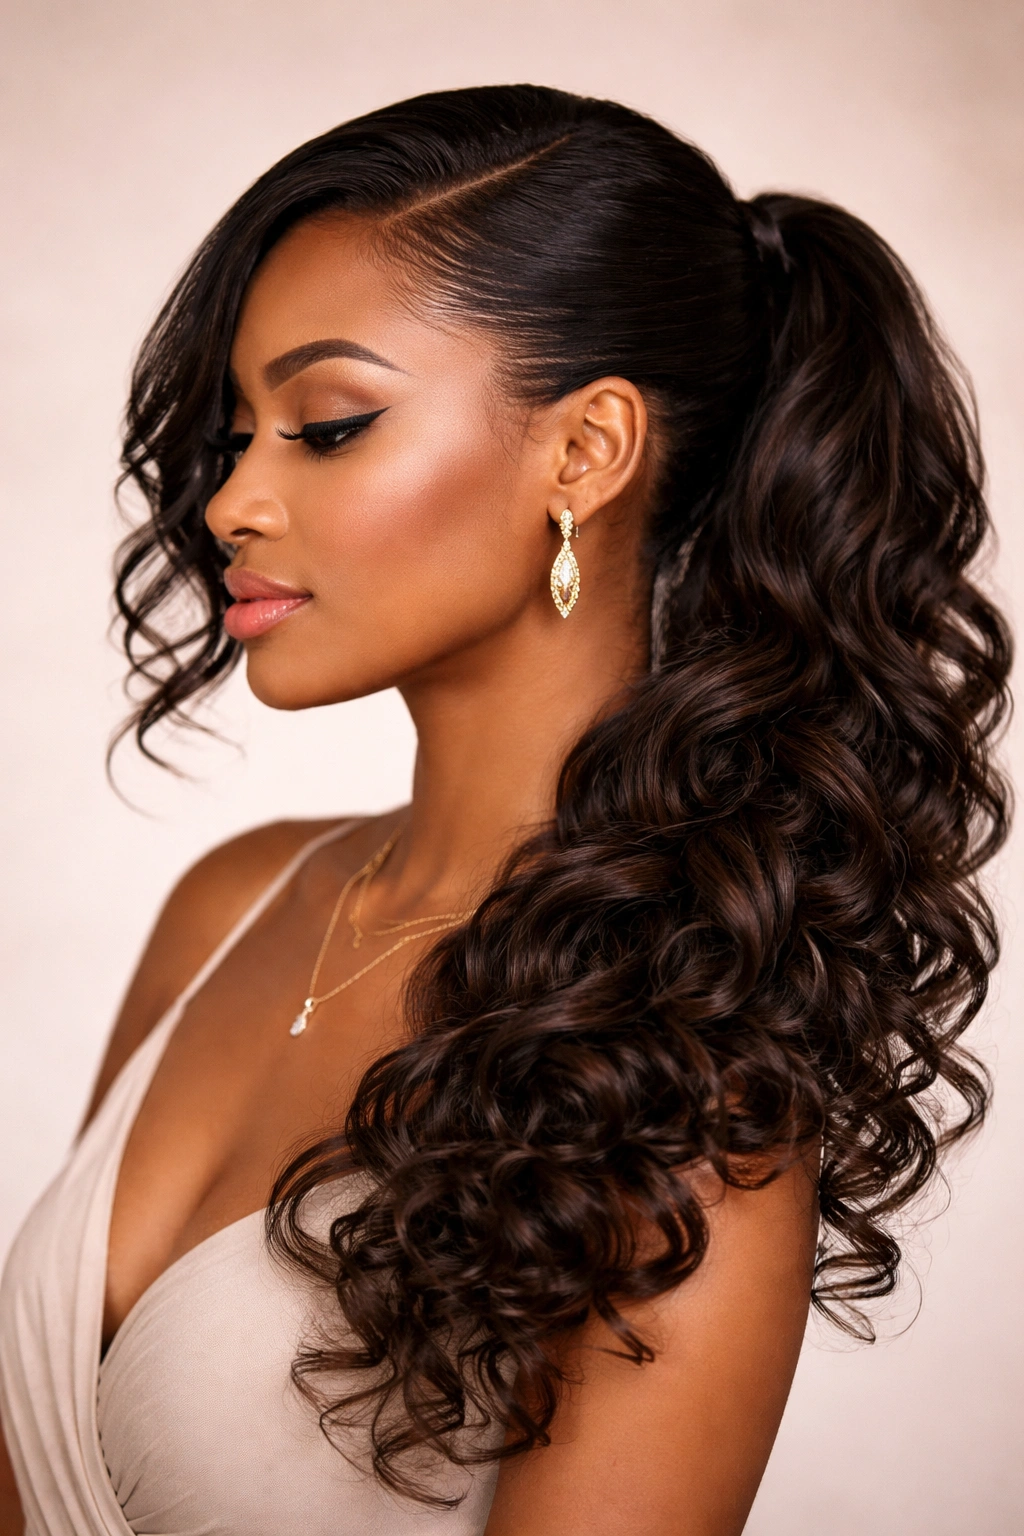
A side-swept ponytail is all about asymmetry and movement. Instead of centering your ponytail at the back of your head, you gather everything to one side—usually one shoulder. It’s a romantic, softer look than a centered ponytail, and it photographs beautifully. With curly or textured weave, the side-sweep creates this gorgeous cascading effect that draws the eye and feels intentional rather than accidental.
Why Side-Swept Works With Curly Texture
The natural movement of curls combined with the side placement creates a genuinely flattering look. Rather than the fullness being centered directly at the back of your head, the curves and texture of your weave curls follow the line of your shoulder. It’s feminine without being overly girly, and it works for everything from casual hangouts to date nights.
Positioning the Side-Swept Ponytail
- Decide which side you want your ponytail on (it’s often more flattering on the side that matches your face shape, but honestly, go with whatever feels right to you)
- Starting from the crown on the opposite side of your head, gather your hair diagonally toward the side where you want the ponytail
- You can braid, twist, or simply gather as you go—smooth or textured, both work beautifully
- Secure all your sections together at the side (approximately at ear level or slightly lower)
- Attach your weave ponytail and let it cascade down that side of your body
- Use a loose curly texture weave to play up the romantic movement
Real talk: If you have longer hair, side-swept ponytails create less tension on your edges because the weight isn’t pulling straight back on your hairline. This is one of the more comfortable protective style options for wearing long-term.
9. Braided Wrap Weave Ponytail
This style takes your standard weave ponytail and wraps a thick braid around the base where your natural hair meets the weave. It’s an incredibly polished, finished look—the braid acts like a crown around the ponytail, creating dimension and covering the seam where two textures meet. It requires a bit more styling time, but the payoff is totally worth it, especially if you’re dealing with a visible point where your natural texture transitions to weave.
Why the Braided Wrap Matters
Beyond just looking finished and intentional, the braid wrap serves a practical purpose. It disguises the joining point, it protects that vulnerable area where your natural hair is most likely to break, and it creates visual interest that makes the style feel more elevated. You’re not just wearing a ponytail—you’re wearing a styled, accessorized version of a ponytail.
Creating the Wrap Braid
- First, secure your base (however you’ve chosen to base your hair—cornrows, twists, or a simple ponytail)
- Attach your weave ponytail at the crown
- Take a small section of weave from your ponytail (or use matching loose hair if your bundle didn’t come with extra)
- Create a thick three-strand braid using this section
- Wrap the braid around the base of your ponytail, pinning it securely with bobby pins that match your weave color
- Tuck any loose ends beneath the wrap for a seamless finish
- This wrap can be loose and relaxed or tight and structured—style it to match your vibe
Worth knowing: This style is easiest to create the day after you’ve installed your weave, once everything has settled slightly and you’re not fighting with fresh tension.
10. Curly Weave Ponytail with Shaved Sides
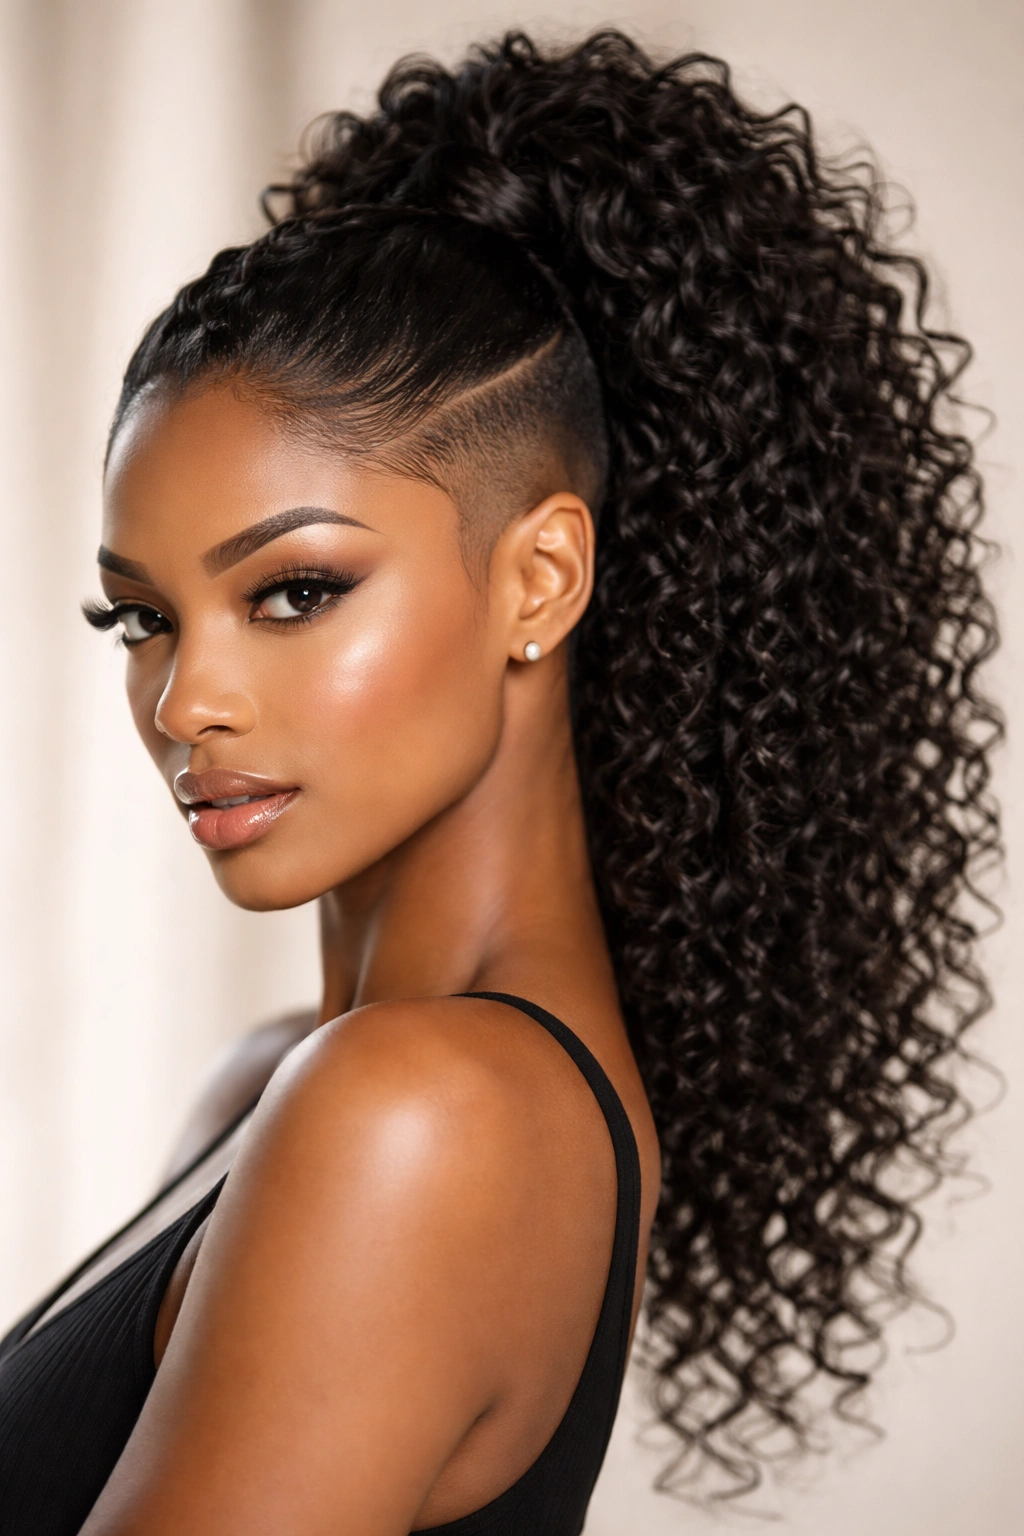
This is the bold, statement-making version of a weave ponytail. You pair a full, lush, curly weave ponytail with shaved or closely cropped sides and back. The contrast between the volume of the ponytail and the clean lines of the shave is genuinely striking. This look says you’re confident, you have an eye for fashion, and you’re not interested in blending in. It photographs beautifully and feels edgy and modern.
The Confidence Factor of This Style
Shaved sides with a full weave ponytail is a statement. You’re choosing deliberate contrast and clean lines. This works exceptionally well for curly hair because your natural curls (combined with the weave) provide softness and femininity, while the shaved sides add edge and structure. Together, they create a really compelling aesthetic that’s both strong and soft.
Installing With Shaved Sides
- If you’re getting your sides professionally shaved, do this before you install your weave
- Your natural hair that remains (typically the crown and front-to-mid section) will be the base for your ponytail
- Create your protective base in your natural hair at the crown, then attach your weave ponytail there
- The shaved sides will be visible from certain angles, creating that striking contrast
- Maintain the shave every 2-3 weeks, depending on how quickly your hair grows and how clean you want the lines to stay
Insider note: This style is particularly flattering if you have a longer face shape, as it adds visual width at the sides. It’s also extremely low-manipulation for the parts of your hair that are shaved, giving those areas serious recovery time.
11. Twisted Crown Weave Ponytail
The twisted crown is similar to braiding but feels softer and more fluid. You create thick twists that form a crown around the top of your head, and they all converge at the crown point where you attach your weave ponytail. The twists create texture and dimension, and the overall effect is romantic and intricate without being overly complicated. With curly weave, the texture of your twists beautifully complements the texture of your ponytail.
Building the Twisted Crown
- Section your hair into 3-4 large sections from the front (temples or forehead) around the sides to the back of your crown
- Start twisting each section, beginning from your hairline and working toward the crown
- Make sure your twists follow a path that creates a crown effect—they should feel like they’re framing your face and head rather than just going straight back
- As you twist, gradually incorporate weave hair to build dimension and thickness
- When all your twists meet at the crown, gather them together and secure them
- Attach your weave ponytail at that central gathering point
Real talk: Twisted styles tend to feel softer and less severe than braided styles, even when they’re equally intricate. If you’re someone who feels self-conscious about protective styles or just prefers a softer look, this might feel more natural to you than a braided version.
12. Waterfall Braid Weave Ponytail
The waterfall braid is an advanced braiding technique that creates an effect of hair cascading down (hence “waterfall”). When you combine it with a weave ponytail, you get something genuinely special. The braid creates a beautiful base where your natural hair flows into the weave seamlessly, and the result looks far more complicated and intentional than it actually is. This is the style that makes people stop you and ask where you got your hair done.
What Makes the Waterfall Technique Special
A waterfall braid works by braiding three strands but continuously dropping one strand out and picking up new hair from your scalp. It creates this effect of hair flowing over the top of the braid, hence the waterfall name. When you end this braid at a ponytail attachment point and connect it to weave, the transition looks completely natural and intentional.
Creating the Waterfall Effect
- Start a three-strand braid at one temple or side of your head
- Braid normally for a few stitches (a stitch is one complete over-under-over motion)
- Drop your bottom strand and pick up a new piece of hair from your scalp right below where you’re braiding
- Continue the braid, repeating this drop-and-pickup pattern as you work your way back across your head
- As you reach your crown or the point where you want your ponytail, incorporate your weave hair into the braid
- Secure the braid and attach your weave ponytail at the point where the braid ends
- Gently stretch the braid to increase its volume and create dimension
Optional style: You can create multiple waterfall braids that all converge at one ponytail point, or just one dramatic waterfall braid that leads into your ponytail—both are gorgeous.
Final Thoughts
Weave ponytails are genuinely one of the most versatile and protective styling options available for curly hair, and the 12 styles above barely scratch the surface of what’s possible. The key is understanding your own hair—your curl pattern, your scalp sensitivity, your texture preferences—and then choosing a style that aligns with both your protective styling goals and your aesthetic. Some of these styles are quick weekend options, while others require more installation time but deliver low-manipulation wear that lasts for weeks.
The most important thing to remember is that your protective style should actually protect your hair. That means your base shouldn’t be uncomfortably tight, your attachment points shouldn’t be tugging on your edges, and you should be moisturizing your natural hair underneath throughout the entire time you’re wearing the style. A beautiful ponytail only counts if your curls stay healthy underneath.
Take the time to experiment with different styles, different weave textures, and different accessories until you find what makes you feel confident. Weave ponytails are supposed to be fun—they’re a break from your daily styling routine, they give your natural curls space to recover, and they let you explore different aesthetics without committing to a permanent change. Wear them proudly.