A ponytail is one of the most versatile and practical hairstyles you can wear—quick to style, flattering on most face shapes, and endlessly customizable depending on your mood and the occasion. Whether you’re rushing out the door or spending an hour getting ready, there’s a ponytail style that works for your lifestyle and personality. The beauty of this hairstyle is that it goes far beyond the basic high or low ponytail you threw together in fifth grade. With a few simple techniques and some creative tweaking, you can transform a simple ponytail into something polished, interesting, and genuinely beautiful.
What makes ponytails so appealing is how they adapt to different settings. You can wear a sleek, structured version to the office, a messy, undone style on the weekend, or an intricate braided version for brunch with friends. The same basic hairstyle framework becomes fresh and new depending on how you approach it. This isn’t about complicated techniques that require professional training—it’s about understanding different ways to gather, texture, and finish your ponytail so it matches exactly what you’re doing that day.
The real game-changer with ponytail styling is recognizing that how you create the base matters just as much as how you style it. Whether you tease for volume, keep things sleek, braid a section, or twist strands before securing creates a completely different aesthetic. Add in different heights (high, mid-level, low), different textures (straight, wavy, curly), and different finishing touches, and suddenly you have an enormous toolkit of looks you can create with virtually any hair type and length.
1. The Sleek Low Ponytail
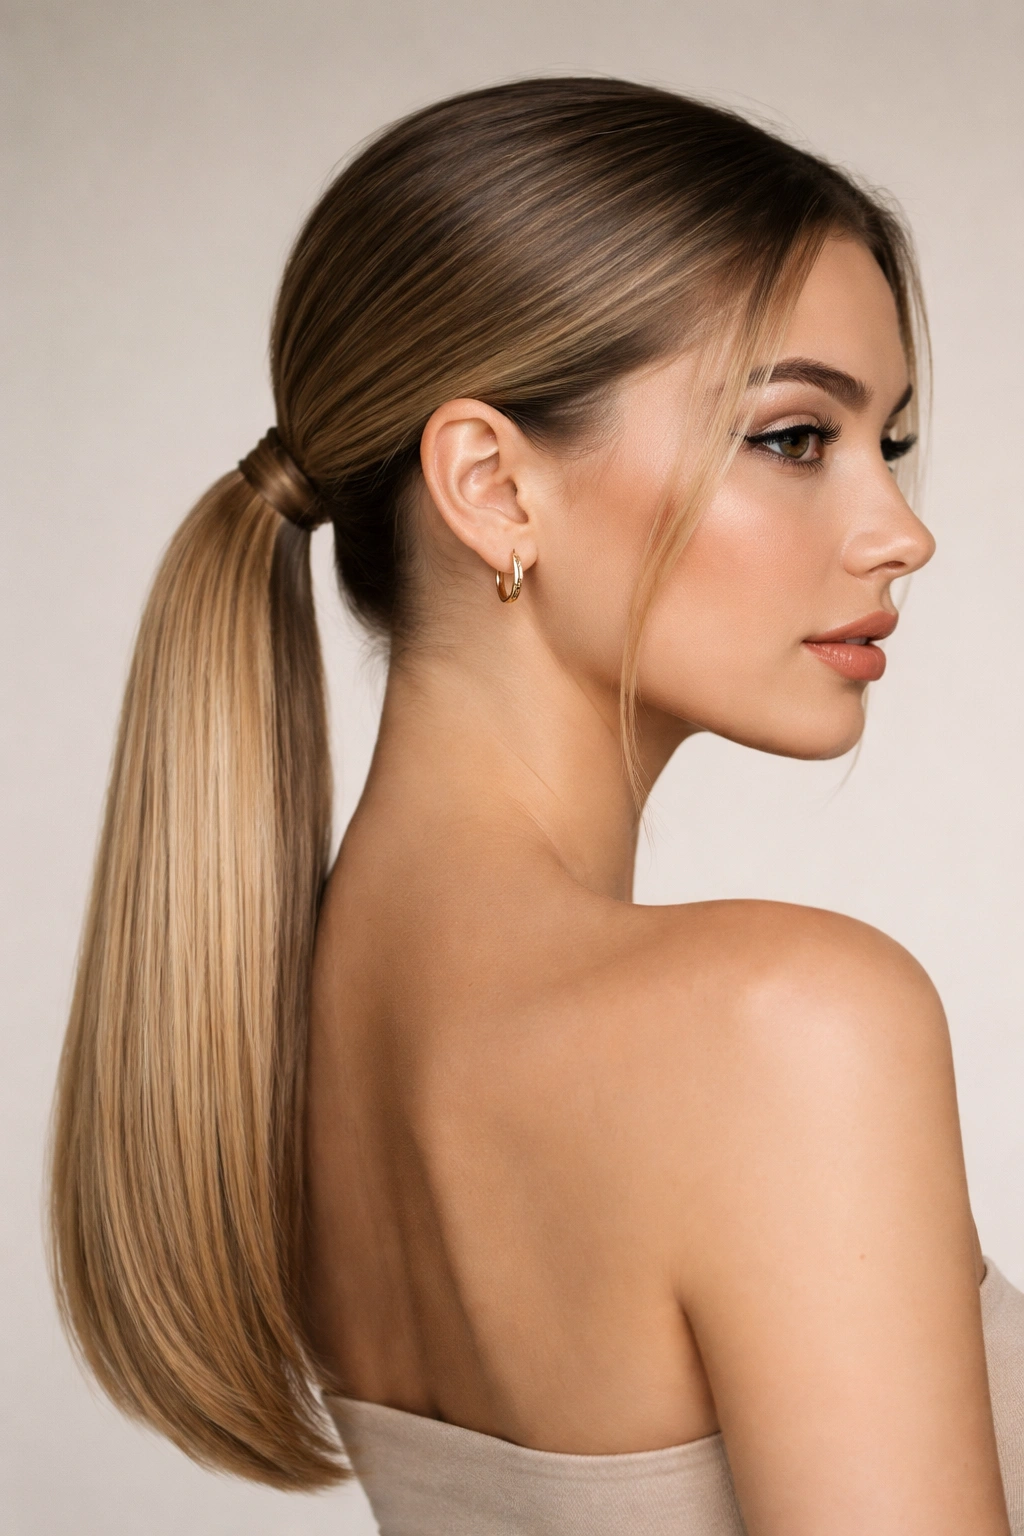
The sleek low ponytail is the definition of understated elegance. It sits closer to the nape of your neck, creating a refined silhouette that works everywhere from the office to a dinner date. The key to nailing this style is having genuinely smooth hair, which requires proper preparation and the right products.
How to Create the Perfect Sleek Base
Start by applying a smoothing serum or lightweight gel to damp hair, then blow-dry completely. The blow-dry step is crucial—any leftover moisture will cause frizz and ruin the sleek effect. Use a paddle brush to smooth each section as you dry, directing the hair down toward the roots to encourage straight texture. Once dry, run a flat iron over your hair if you need extra smoothness, focusing especially on the sections that frame your face. These face-framing pieces are what the eye lands on first, so they need to be particularly smooth and polished.
Securing Without Bumps
Gather your hair low at the back of your neck, about 2 inches above where your hairline ends. Use a fine-tooth comb to smooth any flyaways as you gather, and keep the base tight. Choose a thin elastic in a color that matches your hair—this makes a huge difference in how polished the style looks. Wrap a small section of hair around the base of the ponytail to conceal the elastic: take a thin strand from the ponytail itself, wrap it tightly around the elastic, and pin it underneath where it won’t show.
Finishing Touches That Matter
Apply a tiny amount of smoothing cream to the hairline and use your comb to neaten any strays. A light hairspray over the entire style keeps everything in place without making it look stiff or product-heavy. This ponytail works beautifully when paired with a deep side part or a clean center part.
2. The High Voluminous Ponytail

If the sleek low ponytail is about refinement, the high voluminous ponytail is about presence and energy. This style sits at the crown of your head and features full, textured, bouncy volume throughout—it’s the difference between looking tired and looking like you just stepped out of a salon.
Building Volume From the Roots
The magic of a voluminous ponytail starts at the scalp. Blow-dry your hair completely, then flip your head upside down and blow-dry again—this encourages lift at the roots. While your hair is still warm, flip right-side up and tease the crown section gently with a fine-tooth teasing brush. You’re not going for a rat’s nest; you’re creating a cushioning texture underneath that’ll support volume without looking messy.
Creating Fullness Throughout the Length
Before gathering your ponytail, use a curling iron to add soft waves or loose curls throughout the length of your hair. The texture catches light beautifully and prevents that sad, flat look a smooth high ponytail can sometimes have. Make sure you tease lightly at the ponytail base as well to add volume right where the elastic sits—this creates the appearance of even more hair.
The High Placement for Maximum Impact
Gather your hair high—think crown of your head, not just above your ears. It should feel higher than feels comfortable at first. Secure with an elastic, then gently pull a few face-framing pieces free for softness. To add even more volume, take the finished ponytail and gently backcomb just the outer layer, then run your brush over the surface to smooth while keeping the texture underneath.
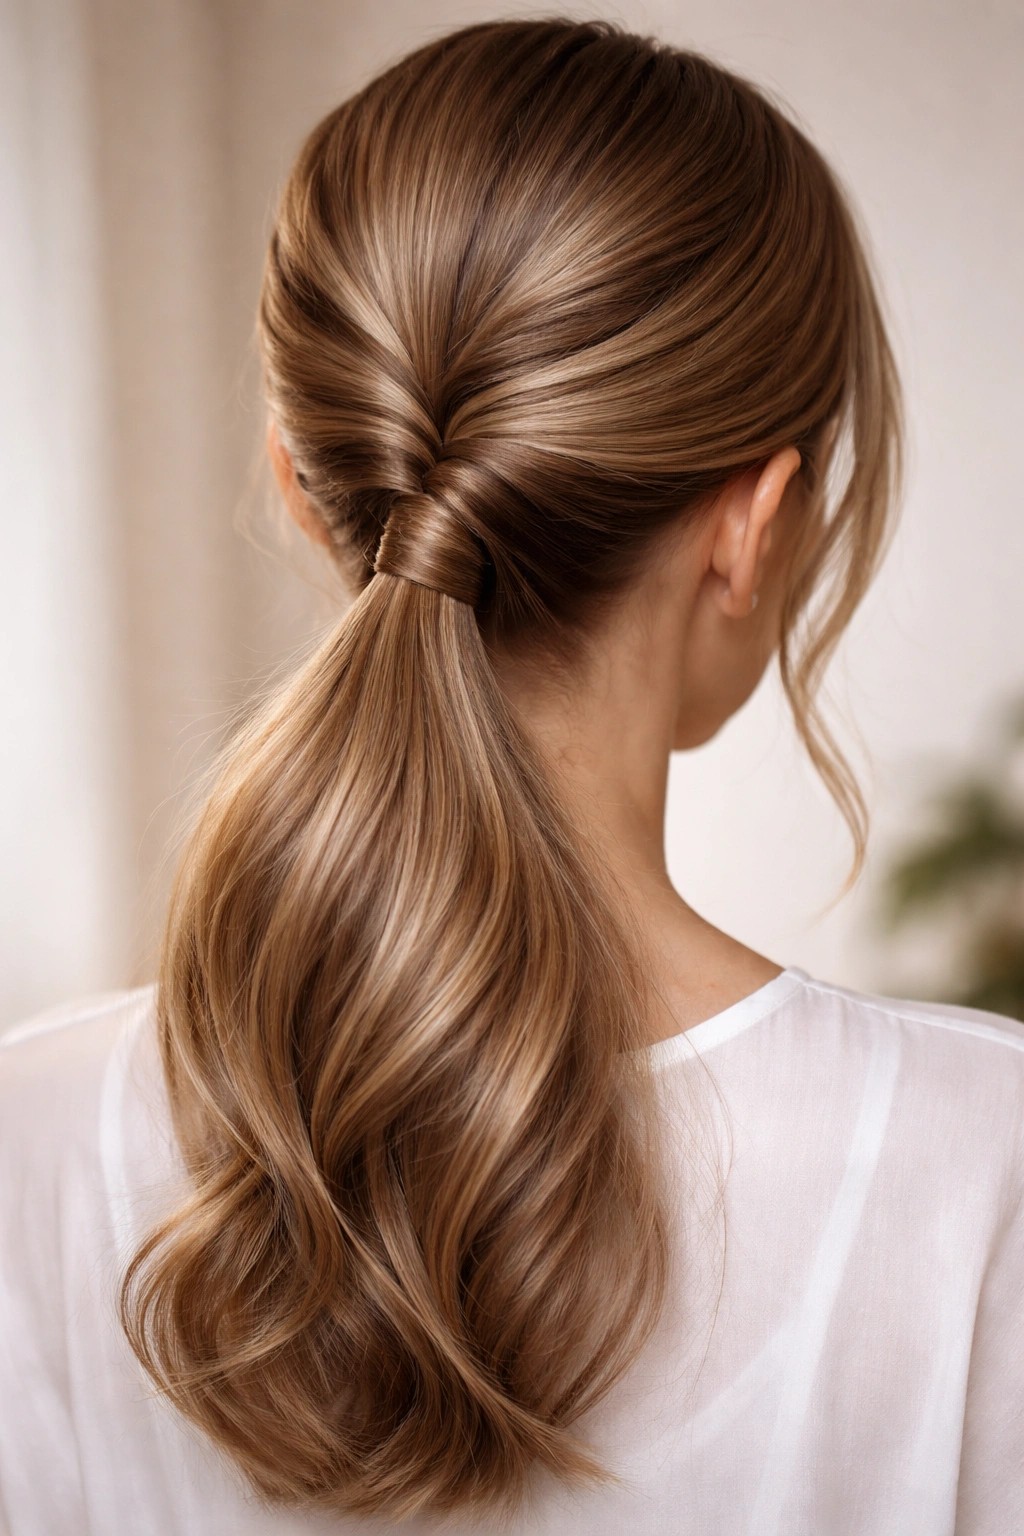
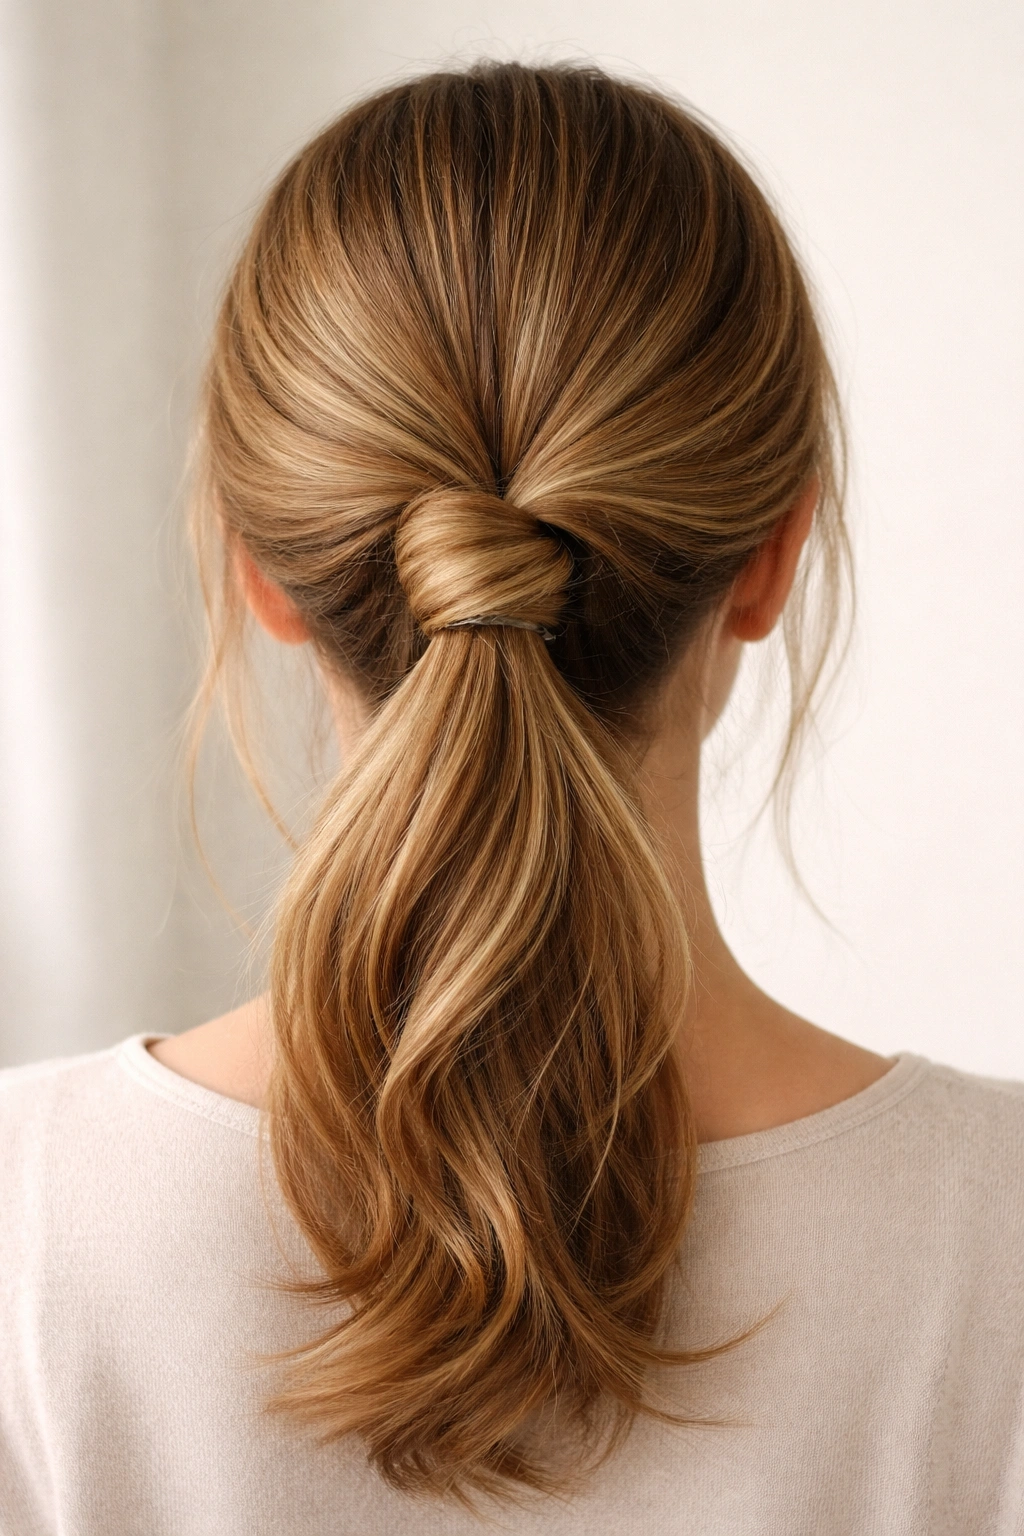
3. The Twisted Half-Up Ponytail
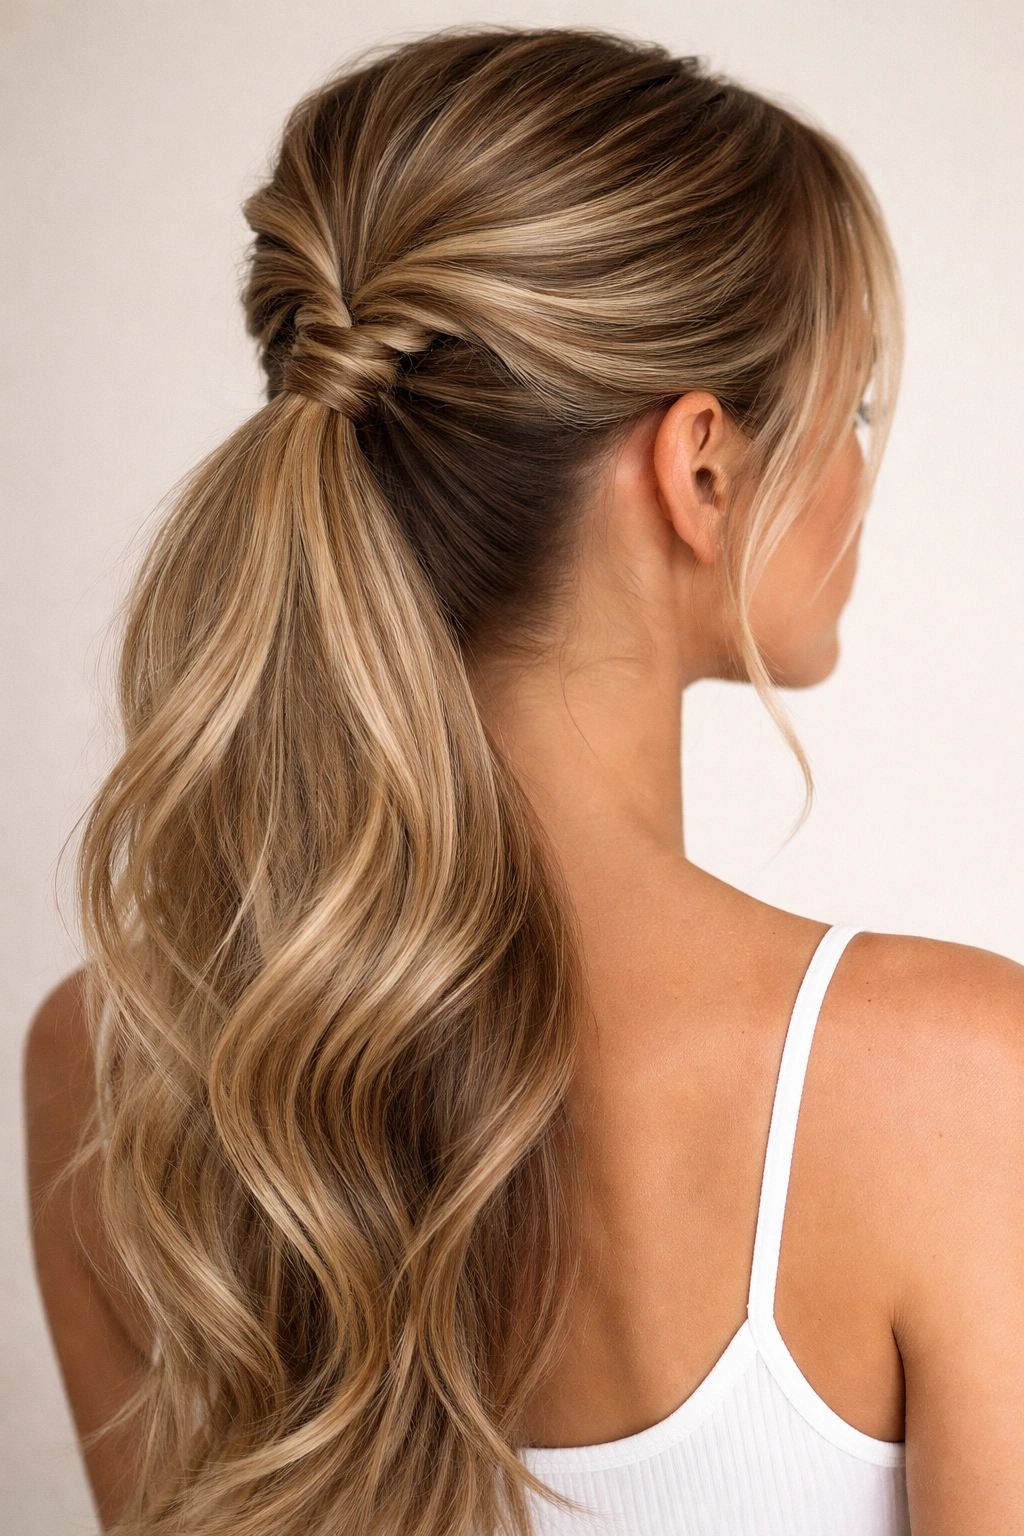
The half-up ponytail offers the best of both worlds: the style and polish of a ponytail with the softness and movement of down hair. Adding twists transforms it from basic to visually interesting without requiring any special skills or complicated techniques.
Selecting the Right Amount of Hair
The proportion matters here. Take roughly half your hair, measured from the top of your head—think the top half of a vertical line from forehead to nape. This amount gives you enough hair to create something that looks intentional without completely changing your overall silhouette.
The Twist Technique That Works
Split this top section in half with a center part. Take the right section and twist it tightly toward the back of your head, keeping the twist relatively close to your scalp. Do the same with the left section, twisting it toward the back in the same direction. This creates two parallel spirals of hair. Where they meet at the back of your head, gather both twisted sections along with the bottom half of your hair into a ponytail. The twists wrap around the back of your head and create instant visual interest while feeling incredibly put-together.
Variations for Different Effects
If you want a looser, more romantic version, twist more slowly and loosely. If you want graphic drama, twist tightly and pull the twists slightly for width. You can also twist in opposite directions if you want the twists to spiral around each other, though the same-direction twists create a cleaner look. Leave a few small face-framing pieces free before twisting for a softer, less formal appearance.
4. The Messy Bun-Ponytail Hybrid
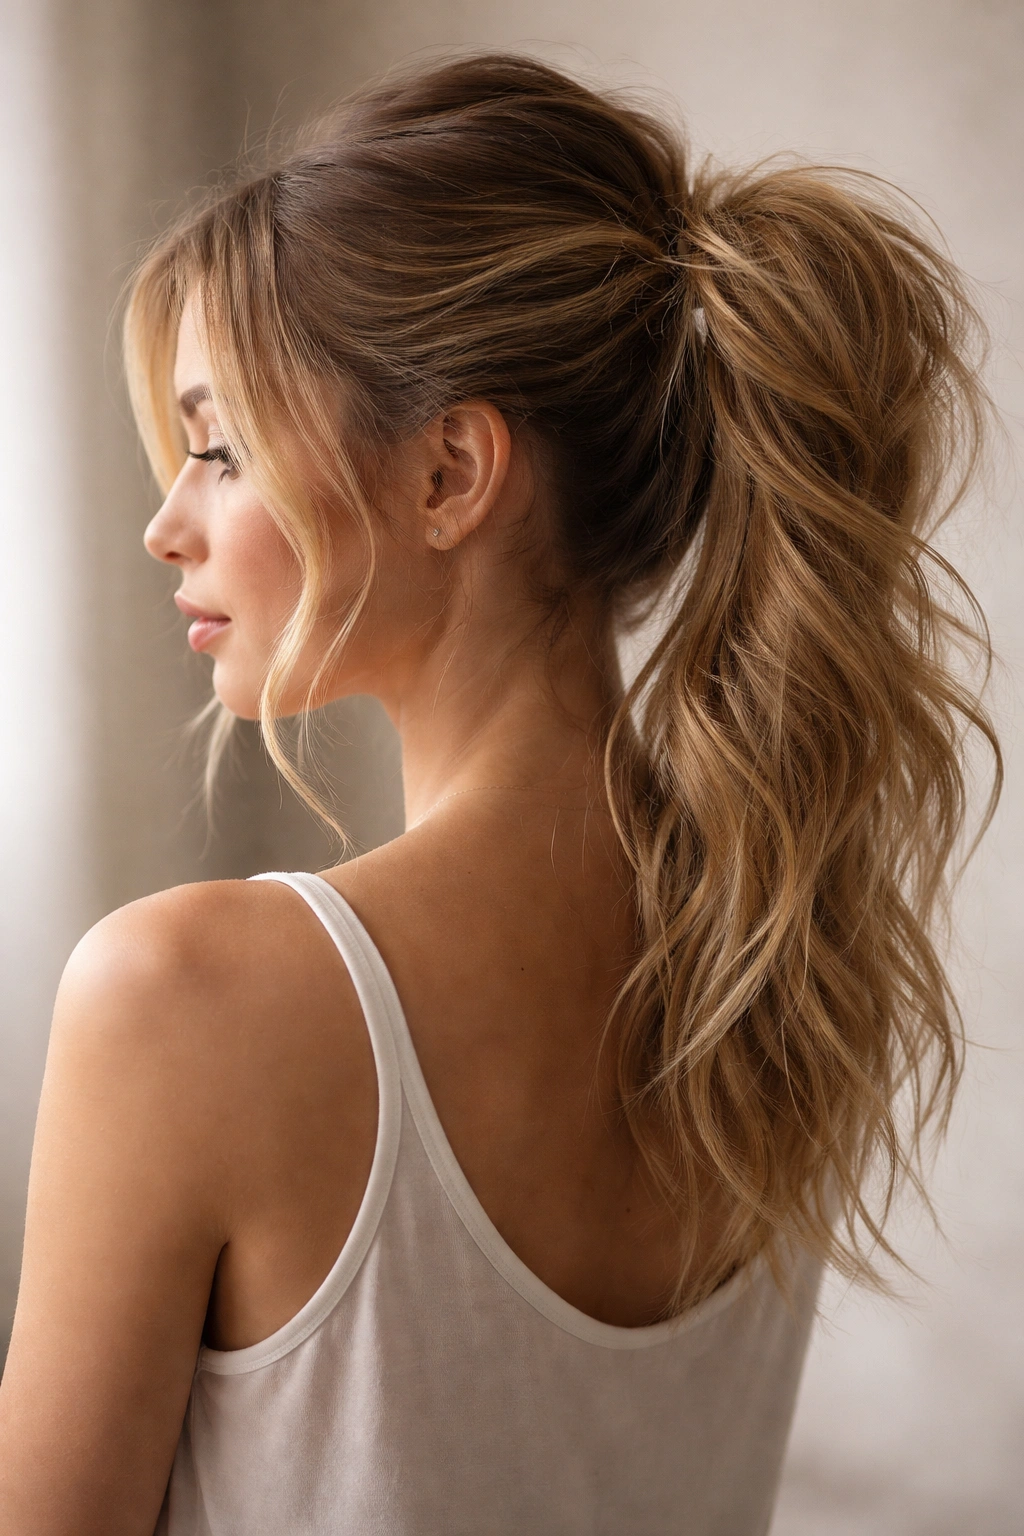
This style feels effortlessly put-together while still being genuinely undone. It’s a ponytail gathered up into itself, creating volume and texture that reads as intentional rather than like you just rolled out of bed (even though the styling process is genuinely simple).
Creating Intentional Texture
Start with second-day hair or spray sea salt texture spray into clean hair—you want grip and texture, not smoothness. Flip your head over and scrunch texture into the roots, flipping back up while your hair is still moving. This base is important because it’s what’ll allow your ponytail to hold volume without slipping throughout the day.
The Gather and Ruffle Technique
Pull your hair into a mid-height ponytail and secure with an elastic. Now here’s the key: gently pull and ruffle sections of the ponytail outward, working your way around the base. You’re essentially making the ponytail look slightly undone by loosening small sections all around it. Once you’ve ruffled the sides, gently backcomb the outer layer of the ponytail itself for subtle texture and dimension.
Finalizing the Look
Flip your finished ponytail up and gently backcomb underneath to create a subtle cushion of volume, then flip back down. This creates the illusion of a much fuller ponytail. Smooth the outer layer lightly with your brush so it doesn’t look unkempt, but keep the texture visible. A light hairspray holds everything in place. The finished look should appear like you pulled your hair back in thirty seconds while still looking intentional and styled.
5. The Braided Wrap Ponytail

A simple three-strand braid wrapped around the base of a ponytail instantly elevates the style from basic to special, but it requires no advanced braiding skills—just the fundamental technique everyone learns as a kid.
Selecting Hair for the Braid
Gather your main ponytail at whatever height you prefer, and secure it loosely with an elastic. Now, unclip a thin section from underneath at the ponytail base—about an inch wide. This small section is what you’ll braid and wrap. The smaller this section, the more delicate and interesting the finished detail looks.
Creating the Braid and Wrap
Divide this thin section into three strands and create a traditional three-strand braid moving around the base of the ponytail. Keep the braid tight and relatively flat against the ponytail base. Once you’ve wrapped all the way around and returned to where you started, pin the braid end underneath where it won’t show. The braid should completely conceal your elastic, creating a polished, finished appearance.
Optional Texture Additions
For extra interest, gently pull the edges of the braid slightly outward after wrapping to soften it—this creates a fuller, more textured appearance. If you want the braid to be more prominent, take a slightly thicker section of hair for your braid. You can also create a Dutch braid (braiding away from the scalp rather than toward it) for a more graphic appearance.
6. The Bubble Ponytail
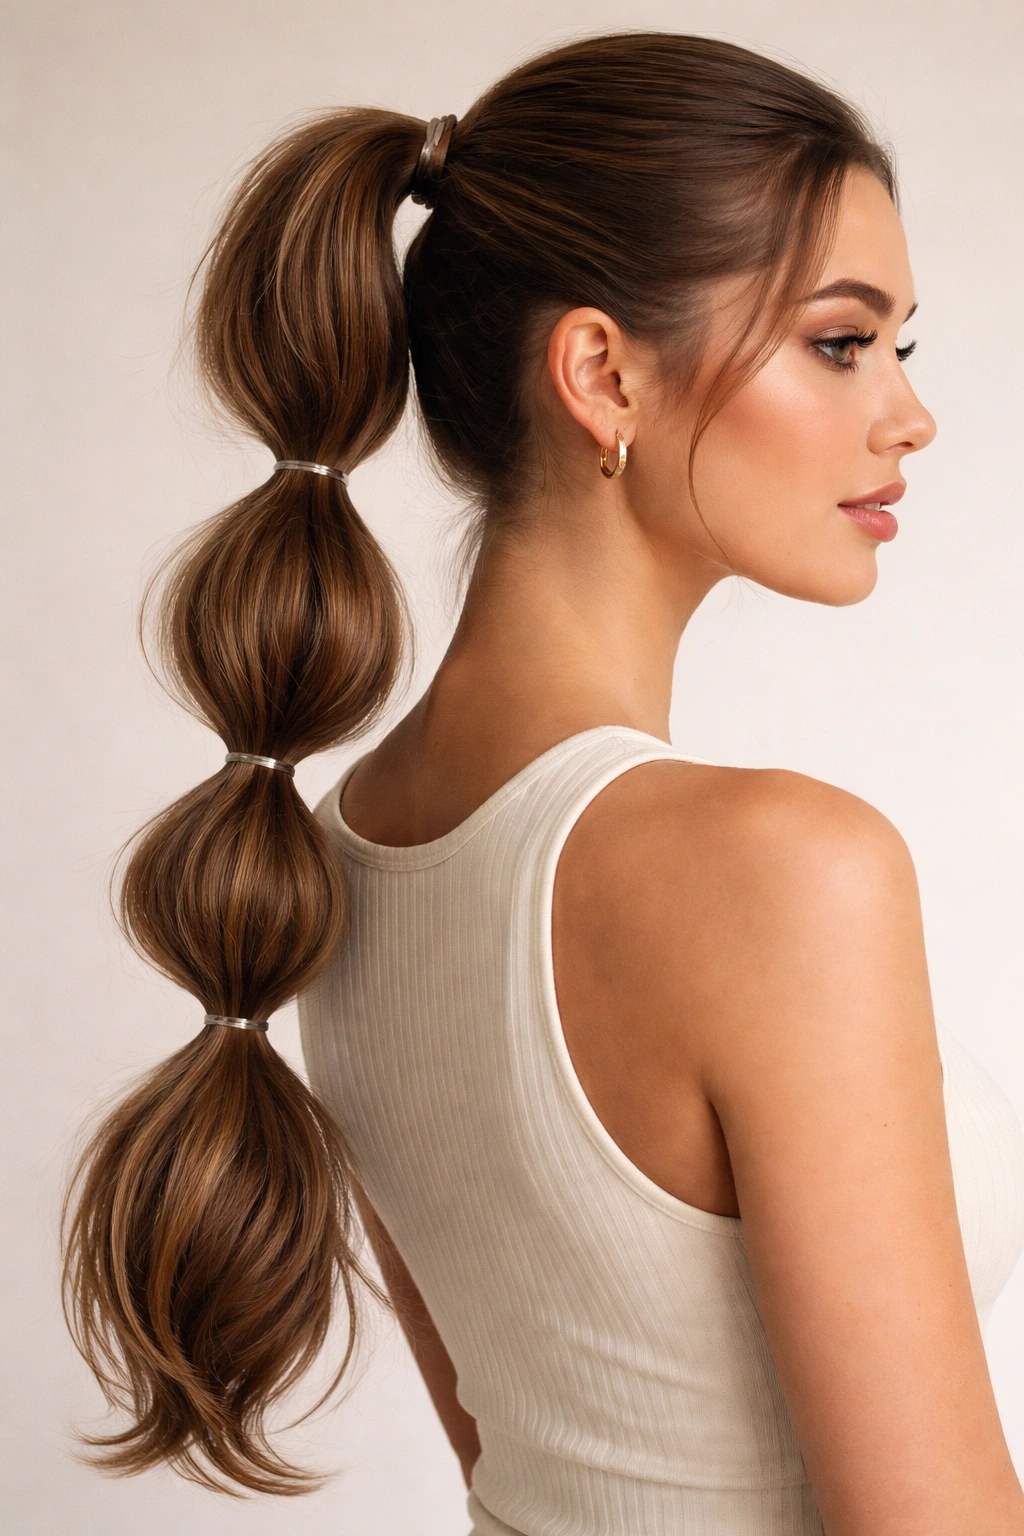
The bubble ponytail is undeniably fun, visually striking, and works beautifully on all hair types and textures. It’s essentially a series of sections stacked on top of each other, each one defined by its own elastic, creating a segmented bubble effect down the length of the ponytail.
Planning Your Bubble Sections
Create a standard ponytail and secure it with an elastic. Now, map out where your bubbles will go. Plan on sections roughly 2-3 inches apart—this size is substantial enough that each bubble reads clearly without the style looking gimmicky. The number of bubbles depends on your hair length, but 4-5 bubbles is typical for mid-length to longer hair.
Creating Definition Between Sections
About 2 inches below your first elastic, place another elastic around the ponytail, incorporating just the ponytail itself (not any new hair). Now, gently pull upward on the ponytail section between the two elastics, fluffing it outward to create a bubble shape. Repeat this process down the length of the ponytail: elastic, pull and fluff, elastic, pull and fluff. Each bubble should stick out noticeably from the one below it.
Styling Variations
For a sleeker version, keep the bubbles tight and controlled. For a playful version, fluff them more dramatically. You can also braid each bubble section before securing the next elastic for extra texture. This style works particularly well with colored elastics that contrast with your hair, creating a graphic, intentional look.
7. The Sleek High Ponytail With Face-Framing Pieces
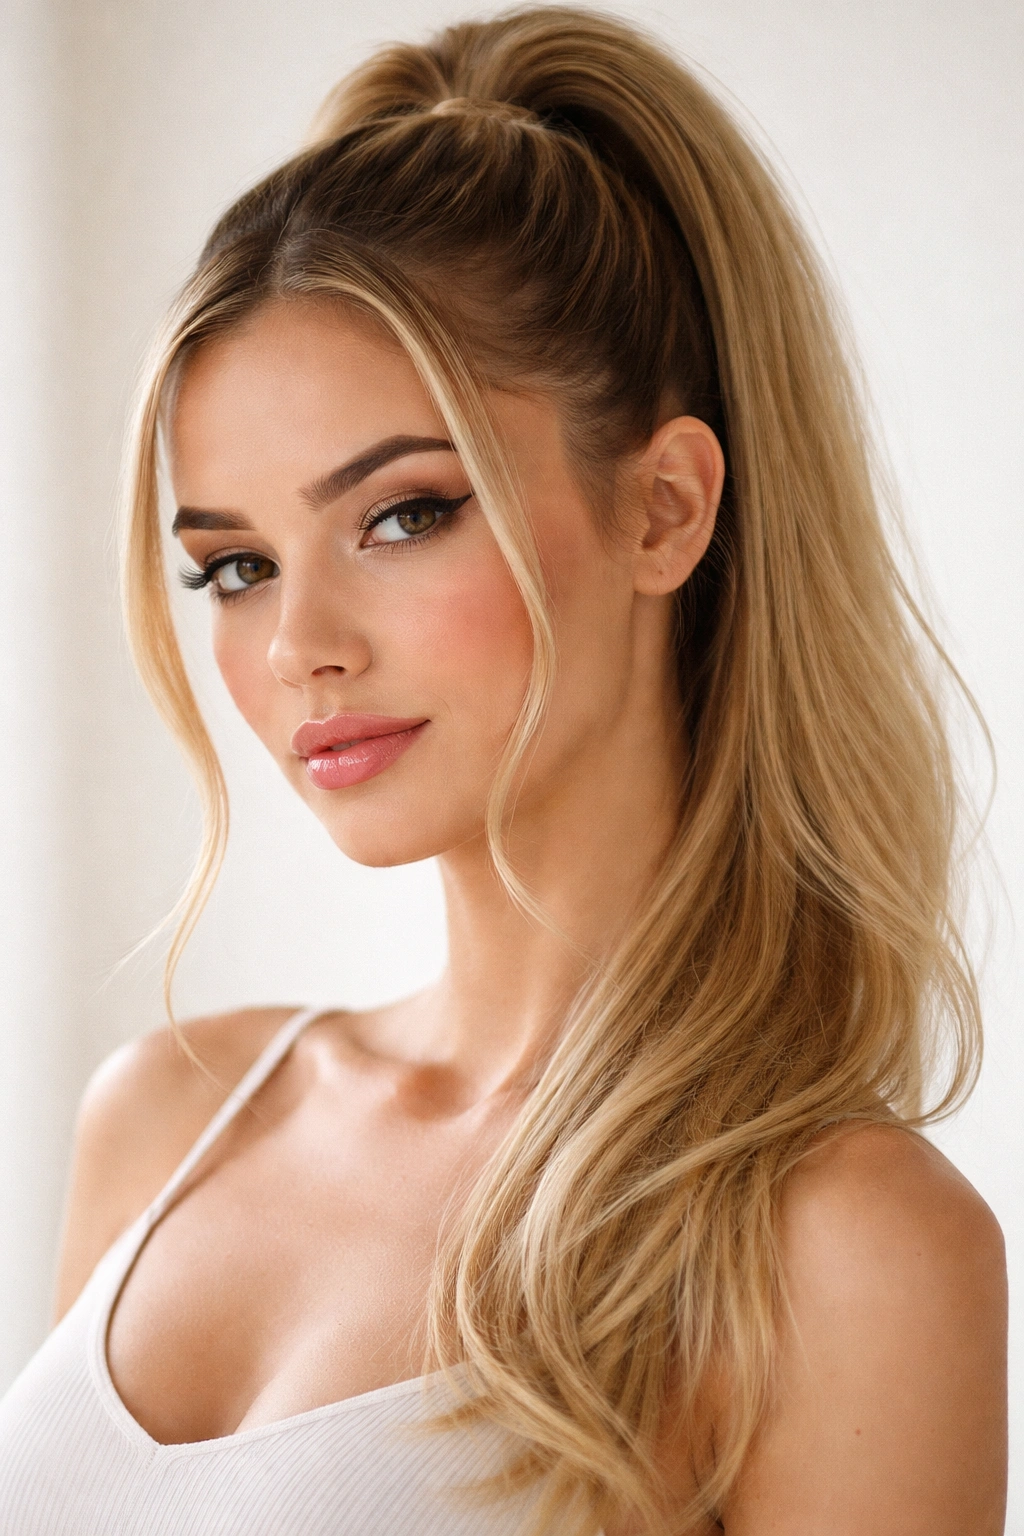
This is the power ponytail—polished, intentional, and flattering. It sits high on your head and features wispy pieces left free around your face, creating softness against a structured overall style.
Creating Smooth, Clean Sections
Apply smoothing serum to damp hair and blow-dry completely straight. Create a deep side part on whichever side flatters your face most. From the front of this part, release two small face-framing pieces—one on each side of your face. These should start at roughly temple height and be maybe an inch wide each.
The High Gather
Brush all remaining hair back and smooth it into a high ponytail, gathering at the very crown of your head. Use a fine-tooth comb to smooth as you gather, creating a clean, bubble-free base. Secure with a thin elastic in a matching color. Wrap a small section of ponytail hair around the base to conceal the elastic, pinning it underneath.
Styling the Face-Framing Pieces
Take your left face-framing piece and curl it loosely away from your face with a curling iron. Do the same with the right piece, curling it in the same direction for consistency. These soft waves create a striking contrast against your sleek ponytail and the structured style flatters most face shapes beautifully.
8. The Textured Low Ponytail
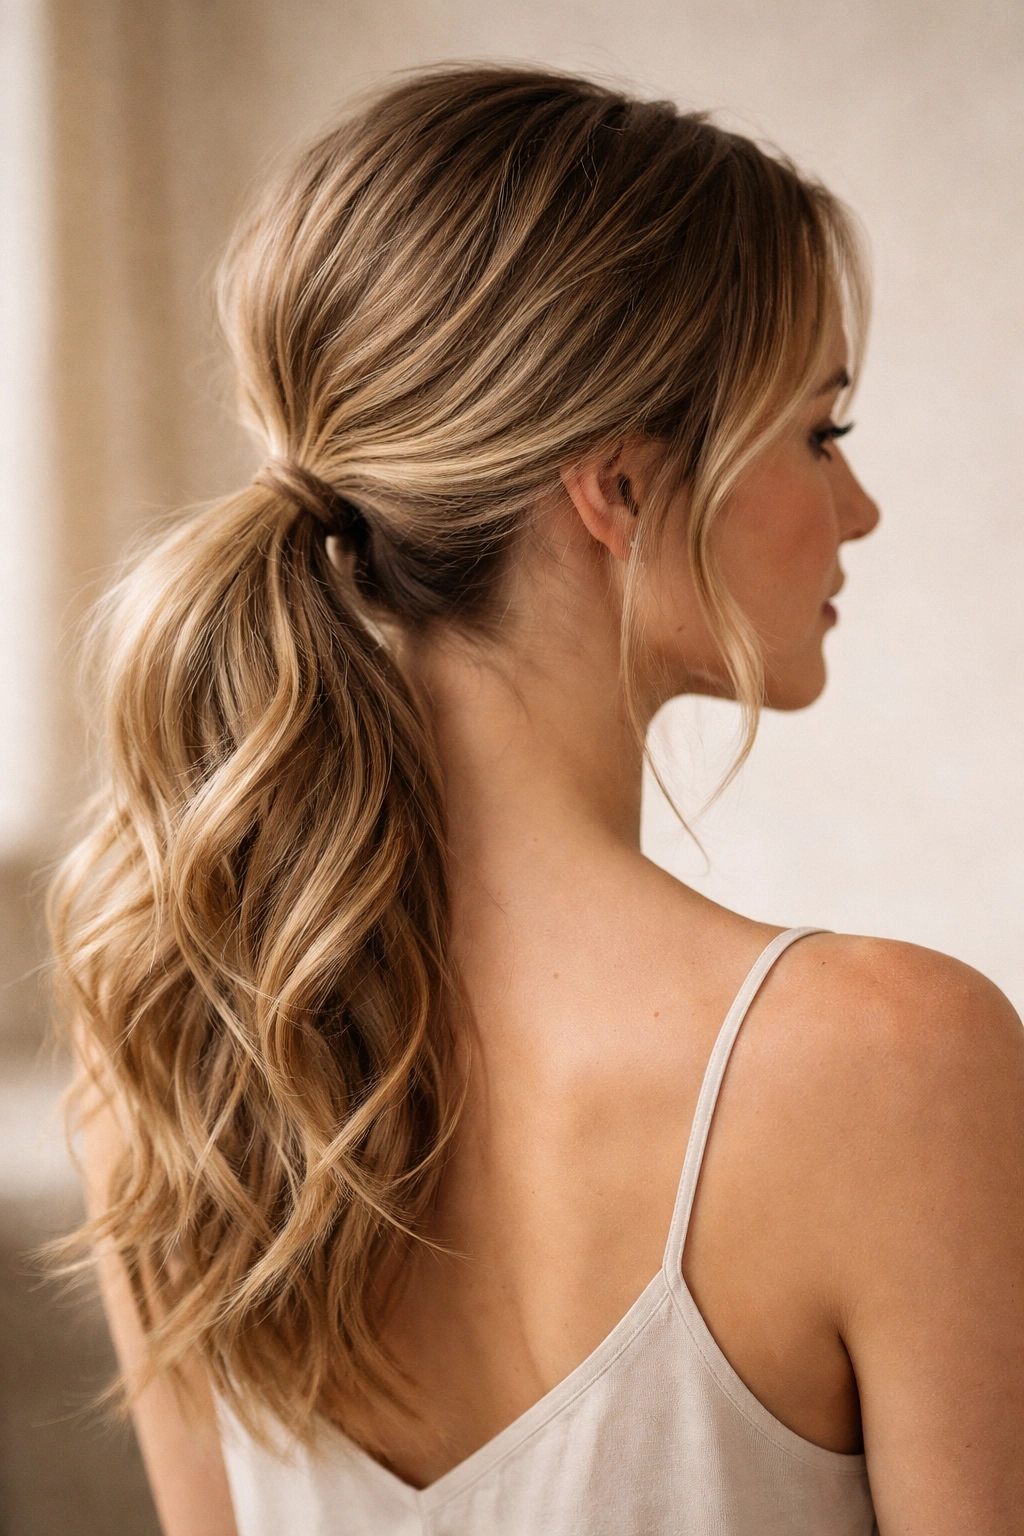
This style combines the polish of a low ponytail with the softness of texture, creating something that feels intentional and interesting rather than severe. It’s perfect when you want structured elegance with a touch of ease.
Building Subtle Texture Throughout
Apply a texturizing product to damp roots and blow-dry completely. Using a 1.25-inch curling iron, curl random sections throughout your hair away from your face, working in no particular pattern. You’re not creating uniform waves; you’re adding scattered texture that’ll catch light and create dimension. Flip your head and curl some underneath sections as well.
Gathering With Subtle Smoothing
Once your texture is set, lightly smooth the outer layer of your hair with a brush while keeping the internal texture intact. This creates a polished appearance while maintaining movement. Gather your hair into a low ponytail and secure with an elastic. Using a fine-tooth comb, gently comb the outer layer smooth while leaving texture in the interior.
Finishing Details
Wrap a thin strand of hair around the base elastic to conceal it. You can leave the texture throughout the ponytail as-is, or gently backcomb the outer layer of the ponytail itself for added subtle dimension. A light hairspray holds everything without making it look stiff.
9. The Braided Ponytail With Loose Ends

This style features a braid that leads into a ponytail, combining the detail of a braid with the simplicity and elegance of a ponytail. It’s more interesting than a basic braid, more polished than a basic ponytail, and surprisingly easy to execute.
Starting Your Dutch Braid
Create a Dutch braid (braiding away from the scalp for an outward-facing appearance) starting at your crown and moving straight down the back of your head. This braid should be roughly in the center of your head. Make it tighter rather than loose—you want it to look intentional and defined.
Transitioning to the Ponytail
About halfway down your hair length (or wherever looks proportional to your hair length), stop braiding. Instead of continuing the braid down to the ends, release the remaining hair and gather all of it—the braid section plus all the unbraided hair—into a ponytail at the point where you stopped braiding. The braid becomes the top portion, and loose hair becomes the bottom portion, creating a two-part visual effect.
Styling the Loose Section
Secure your ponytail with an elastic, then add texture to the loose section—either soft waves with a curling iron or gentle backcombing for a more textured appearance. You can also wrap a small braid around the base of the ponytail for polish. This style works beautifully with the braid as a graphic detail that draws the eye while the loose ponytail section maintains softness.
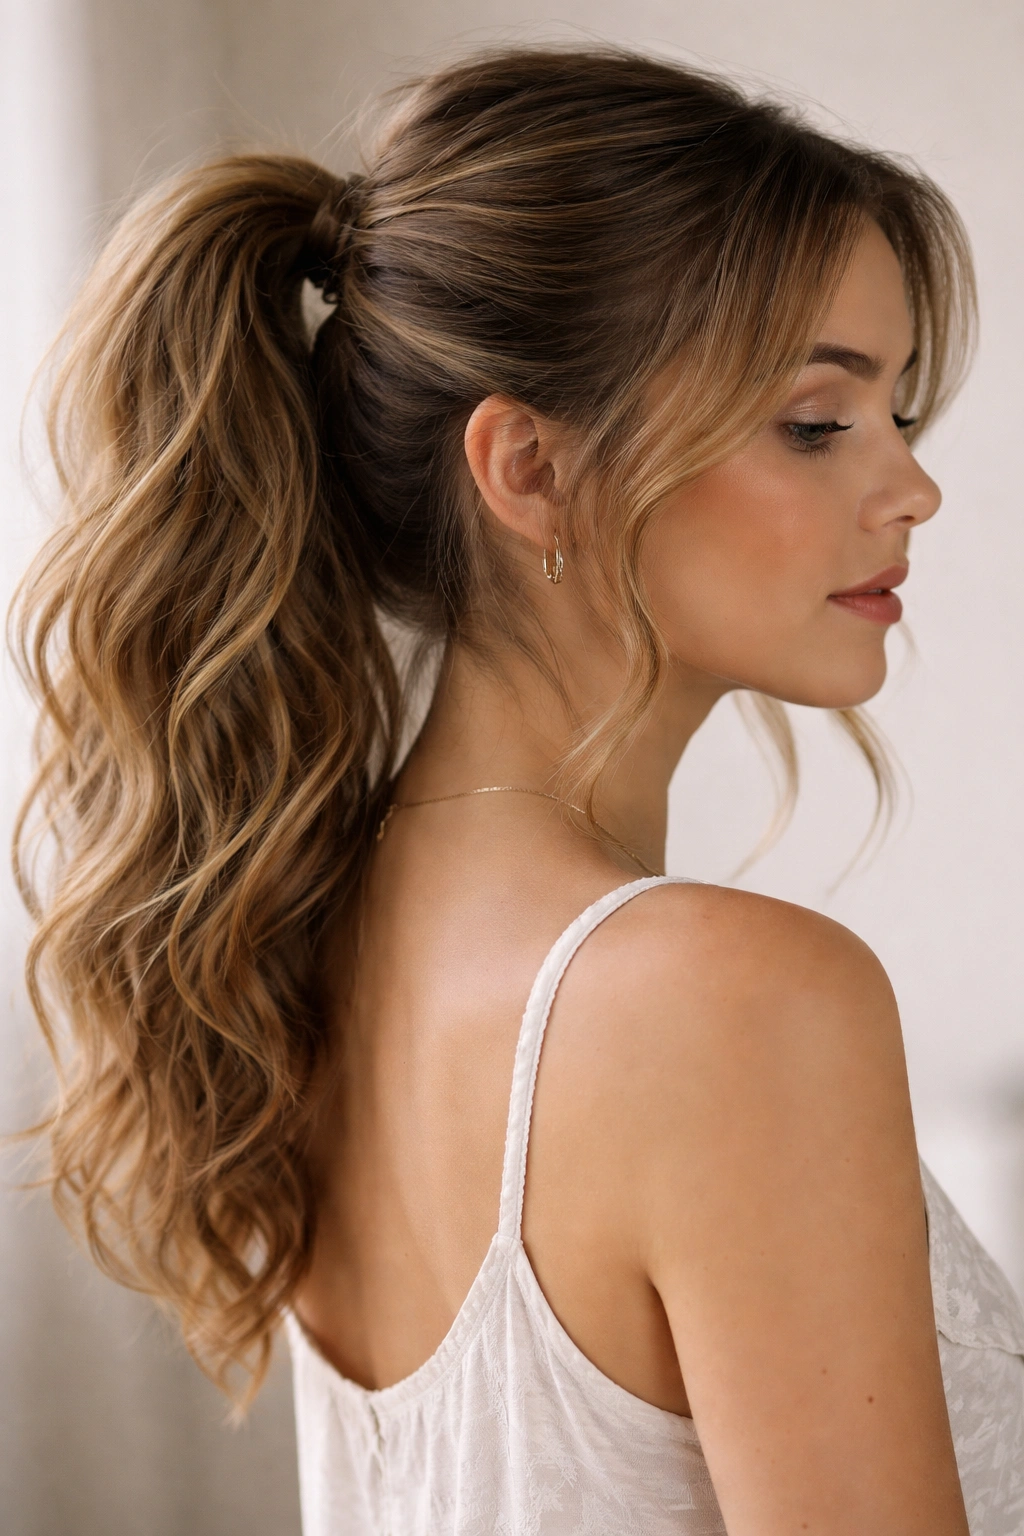
10. The Side Ponytail With Volume
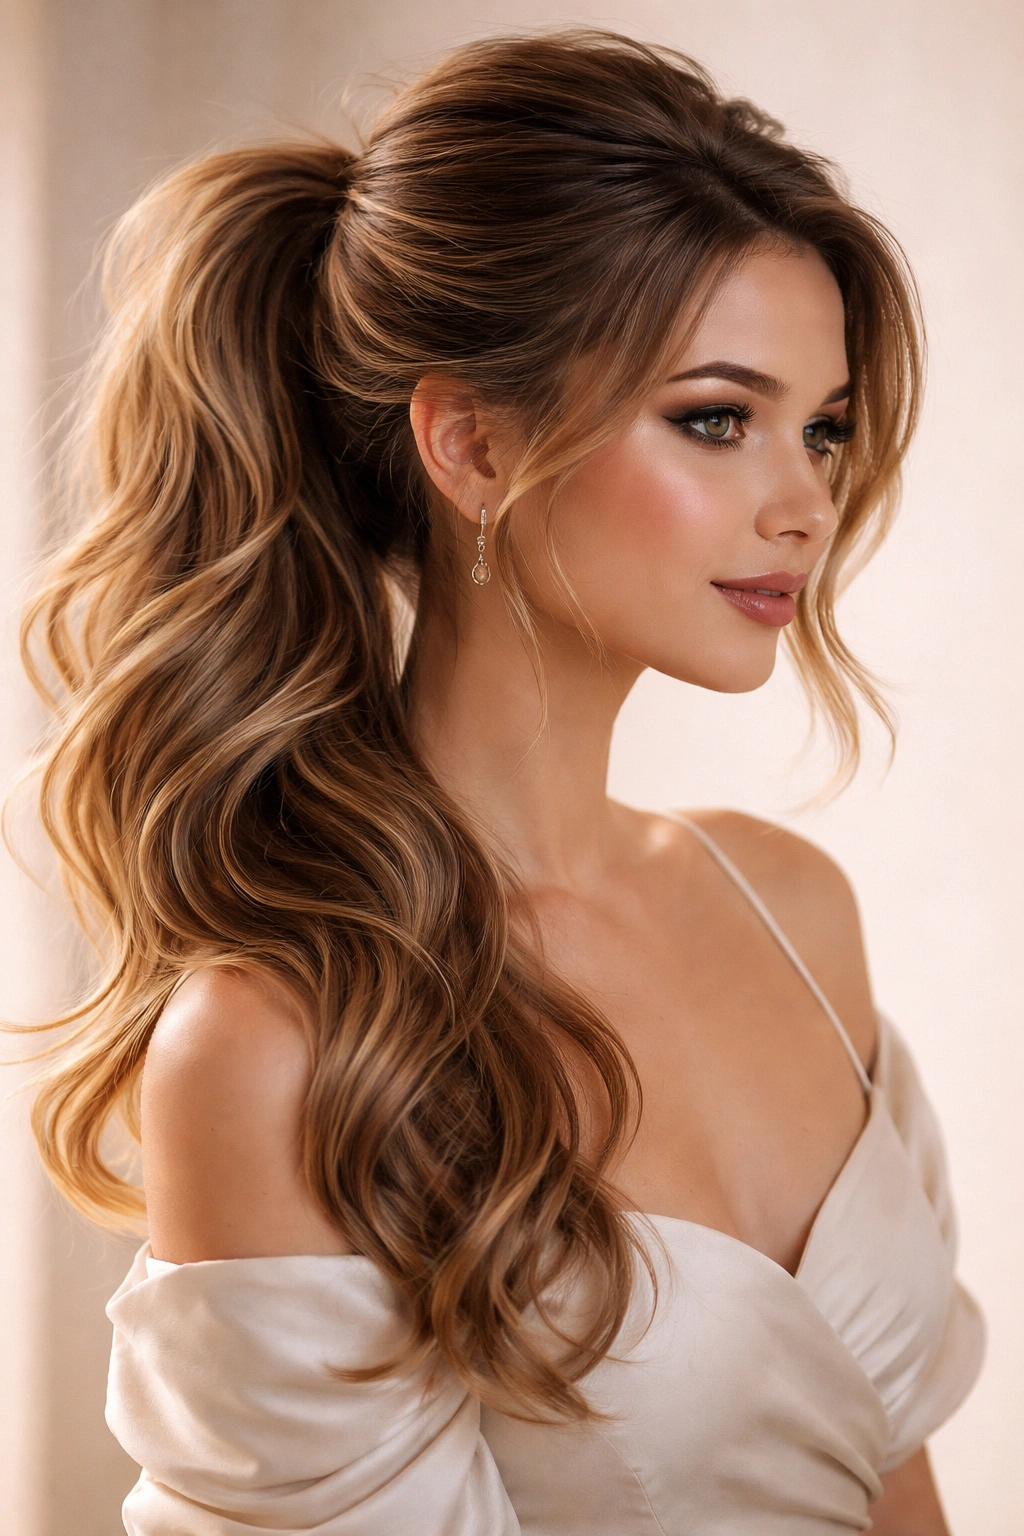
The side ponytail is instantly romantic and flattering, and adding volume transforms it from delicate to dramatic. This style works beautifully for occasions ranging from casual to dressed-up.
Building Volume at the Roots
Blow-dry your hair with your head flipped upside down for root lift. While still warm, flip upright and gently tease the crown with a fine-tooth teasing brush. You’re creating a cushioning texture that supports the weight of hair as it falls to the side.
Creating Side Placement and Movement
Use a curling iron to add soft waves or curls throughout your hair, focusing especially on the section that’ll make up your ponytail. These waves create movement and prevent the ponytail from looking flat. Create a deep side part on the opposite side from where your ponytail will sit. This asymmetry enhances the romantic feeling of the side ponytail.
Gathering and Securing
Gather your hair toward the side where you created your part, positioning the ponytail roughly at ear height (or slightly lower). Gently pull upward on the gathered hair to accentuate volume, then secure with an elastic. Pull a few small pieces free around your face for softness. You can wrap hair around the elastic base, or leave the elastic visible if it’s decorative or metallic.
11. The Sleek Slicked-Back Ponytail
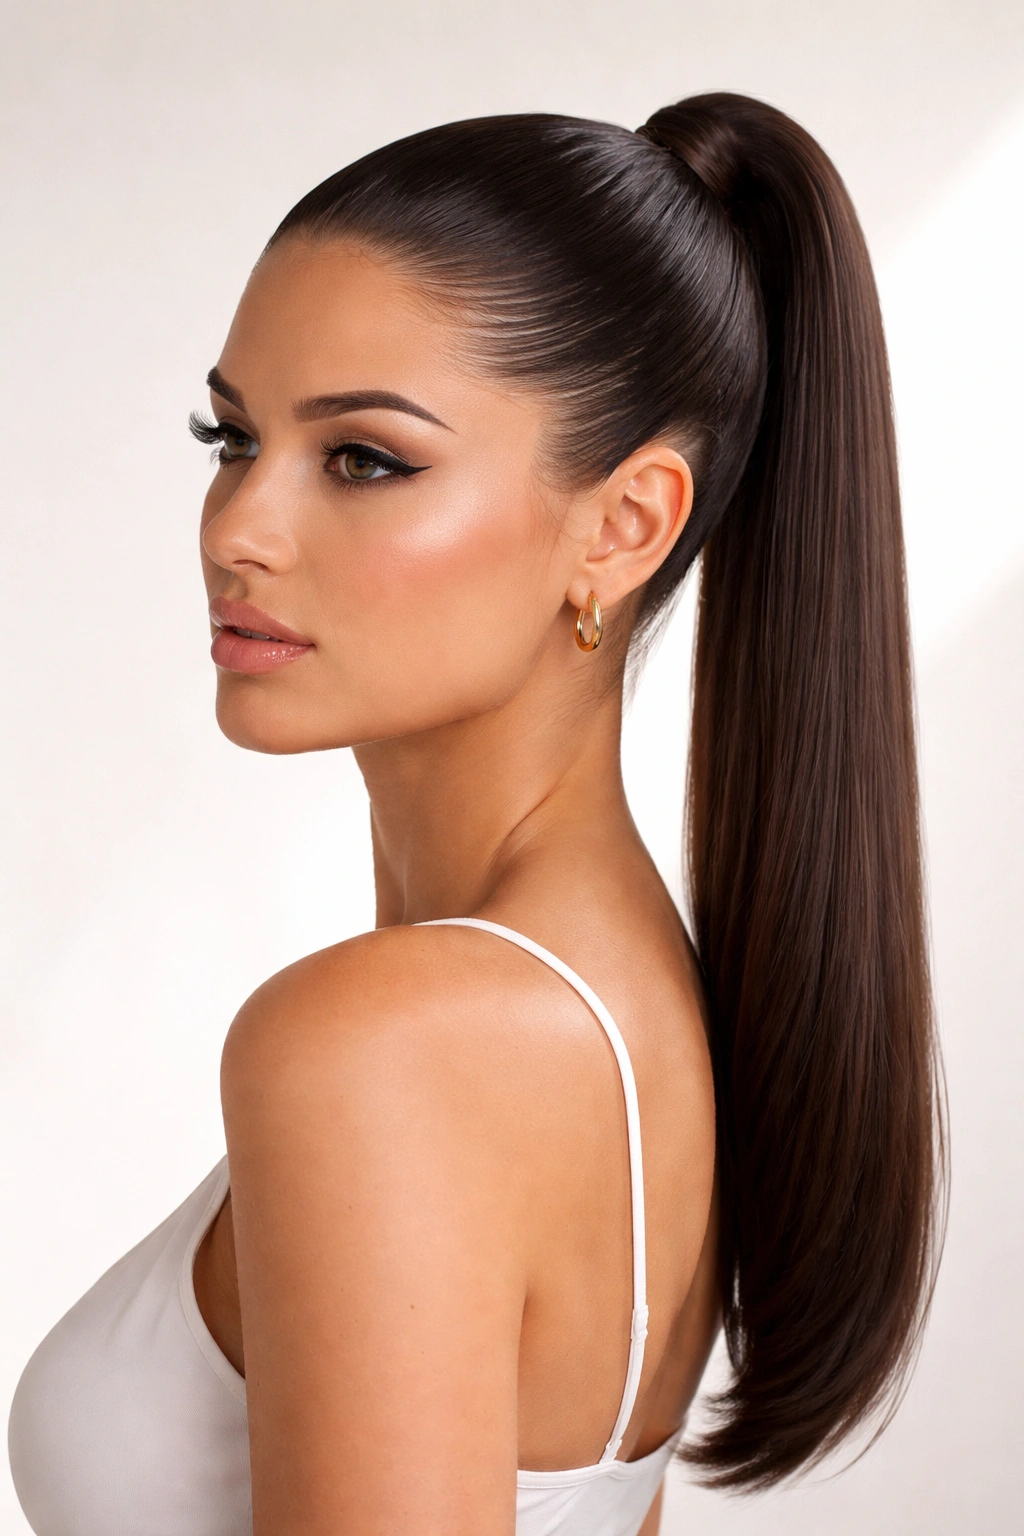
This is a bold, graphic style that reads as modern and intentional. It requires some commitment to smoothing products and technique, but the result is undeniably striking and works on virtually all hair types.
Creating Extreme Smoothness
Apply a strong-hold smoothing gel to damp hair and blow-dry completely straight. While the hair is still warm, run a flat iron over every section, including underneath layers and the hairline. This step is non-negotiable—any texture or wave will ruin the effect. Once completely smooth and cool, apply another layer of smoothing gel and use a fine-tooth comb to smooth everything back against your head.
The Slicked-Back Technique
Using the comb and more gel, smooth your hair straight back against your scalp, ensuring no bumps or pieces stick out. This should feel uncomfortably tight at first—that tightness is what creates the graphic slicked-back appearance. Gather at your preferred height and secure with a clear elastic or a metallic elastic if you want a more intentional look.
Finishing the Look
Apply a tiny amount of gel to your hairline to keep any flyaways completely smooth. A strong-hold hairspray finishes the style and ensures it lasts all day. This ponytail looks incredibly chic paired with a clean center part or slightly off-center part. It’s particularly striking worn low at the nape of your neck.
12. The Curly Voluminous Ponytail
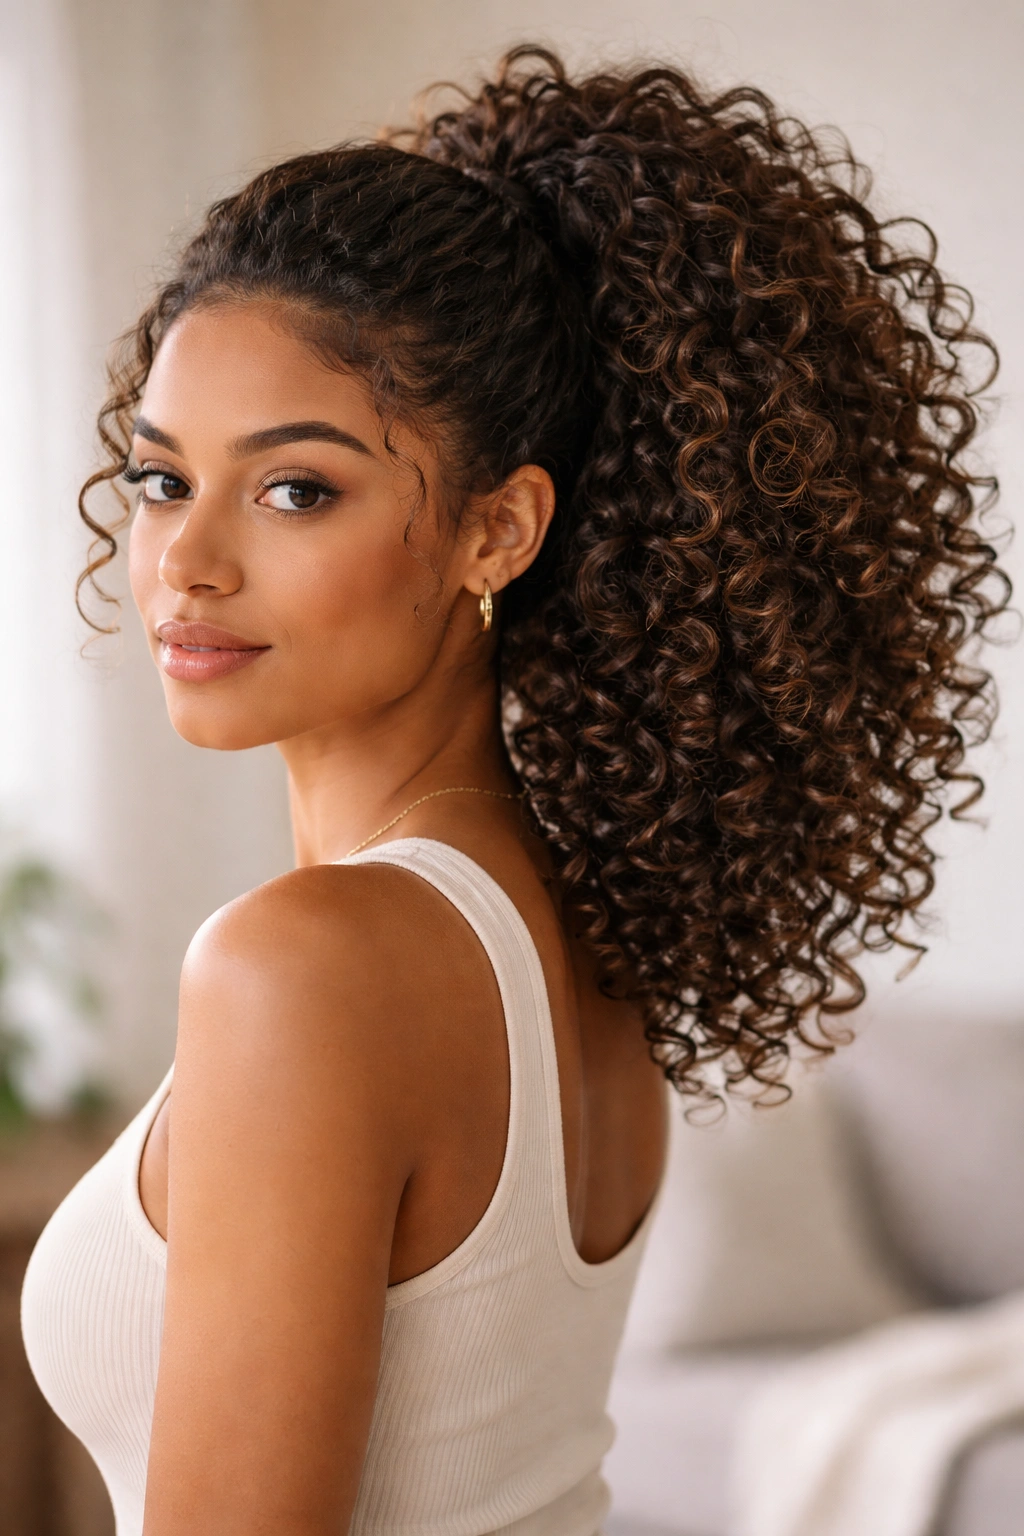
If you have naturally curly or textured hair, or if you’ve created curls or waves, a voluminous ponytail showcases texture beautifully. This style celebrates your curl pattern rather than fighting against it.
Embracing Your Texture
Apply a curl-defining product or mousse to damp hair and blow-dry completely or air-dry. Work with your natural curl pattern rather than trying to create uniform waves. Once dry, gently scrunch and separate curls with your fingers rather than combing, which can disrupt your curl pattern and create frizz.
Creating a Gathered Effect With Volume
Gather your curls into a ponytail at your preferred height, but don’t pull tight. Instead, secure loosely and then gently pull and fluff curls outward from the base, creating a fuller, rounder appearance. The goal is looking like a generous bunch of curls, not a tight, sleek ponytail. You’re letting the texture do the work.
Protecting Your Curls
Use a fabric-covered elastic rather than metal, which can cause breakage and frizz. You can also use a silk hair tie or scrunchie, which is gentler on curls. Once your ponytail is secured, flip your head gently and scrunch underneath the ponytail base with your hands to create additional volume. A light hold hairspray or curl refresher spray keeps everything looking fresh.
13. The Elegant Double-Twisted Ponytail
This style features two separate twists that intertwine as they move toward the back of your head, creating visual complexity and interest while remaining simple to execute.
Creating Your Two Twists
Part your hair down the center with a fine-tooth comb. Take your right front section and twist it tightly toward the back of your head, keeping it close to your scalp. Do the same with your left front section, twisting it toward the back in the same direction. As these two parallel twists move toward the back, they should gradually move closer to each other.
The Intertwining Effect
Where the two twists meet, allow them to gently intertwine as they continue toward the nape of your neck. You can create this effect by crossing one twist over the other and continuing the movement. Once both twists reach the back, gather them along with any remaining hair into a single ponytail and secure with an elastic.
Styling Variations
For a more graphic appearance, create tight, defined twists. For a softer, more romantic version, twist loosely and gently pull the twists outward for width. You can wrap one of the twists around the base of the final ponytail for a finished appearance, or leave both twists visible as part of the style.
14. The Textured Mid-Height Ponytail
The mid-height ponytail offers a perfect balance—it’s higher than a low ponytail but less dramatic than a high one. Adding texture creates a style that works for virtually any situation, from casual to moderately dressed up.
Building Texture Strategically
Apply texturizing spray to damp roots and blow-dry. Using a 1.5-inch curling iron, curl random sections of hair away from your face. Focus on curling the sections that’ll be visible around your face and the section that’ll make up your ponytail itself. You don’t need to curl every piece—selective curling creates more interesting dimension than uniform waves.
The Mid-Height Gather
Create a side part and gather your hair at mid-level, roughly level with the tops of your ears or slightly lower. Gently smooth the outer layer with a brush while keeping internal texture intact. Secure with an elastic in a matching color. This height is flattering on most face shapes and allows face-framing softness from both your part and any pieces you’ve textured.
Adding Dimension at the Base
After securing, wrap a thin strand of hair around the base to conceal the elastic. You can also gently backcomb the surface layer of the ponytail for subtle added dimension. Leave a few small pieces completely free around your face for softness. This style reads as deliberately styled without looking overly formal or done-up.
15. The Looped Ponytail (The Pretzel Tail)
This playful style creates a looped or knotted effect that’s visually interesting and surprisingly easy to create. It adds texture and shape to your ponytail while requiring no additional tools beyond a hair tie.
Gathering Your Base
Create a standard ponytail and secure it with an elastic, leaving a few inches of hair at the ends. You need enough tail length to create a loop, so make sure your ponytail isn’t extremely long or extremely short. Mid-length tails work best.
Creating the Loop
Take your ponytail tail and fold it up and back toward your head, creating a loop. Secure this loop to the base of your ponytail with a second elastic, working it around both the original ponytail base and the new loop you’ve created. You should now have a knotted or looped appearance where the ponytail doubles back on itself.
Styling the Finished Ends
Any remaining tail below the second elastic can be left to hang straight, curled with a curling iron for softness, or hidden underneath the loop by tucking it under. You can tease and fluff the loop for a fuller, more textured appearance, or keep it smooth and sleek. This style works beautifully with face-framing pieces left free and reads as playful and youthful without being childish.
Final Thoughts
The wonderful truth about ponytails is that they’re infinitely customizable based on your mood, the occasion, your hair texture, and the time you have available. A simple ponytail becomes a completely different style depending on whether you add twists, texture, braids, volume, or a looped detail. The fundamental technique remains the same—you’re gathering hair and securing it—but the variations are essentially endless.
The best ponytail style is the one that feels authentic to you and works with your hair type and lifestyle. If you have fine hair, a voluminous style might require additional texture from styling tools. If you have thick, curly hair, a sleek style requires more product and technique. If you’re rushing out the door, a messy, textured version might be more realistic than a slicked-back style that requires constant smoothing.
Start by experimenting with one or two styles that appeal to you most. Once you’ve mastered the basic technique, you’ll find it takes just minutes to create something polished and intentional. Before long, you’ll have a repertoire of ponytail styles you can pull together without thinking, and you’ll never feel limited to a single basic look again.