Curly hair and school days seem to be on a collision course, don’t they? You’re trying to keep up with morning routines, stay comfortable through a full day of classes, and look put-together—all while managing curls that have their own agenda. The good news? Some of the easiest, most stunning hairstyles thrive on curly hair, especially when you work with your natural texture instead of fighting it.
The key is understanding that curly hair doesn’t need to be complicated or time-consuming. In fact, styles that would look flat and boring on straight hair come alive with dimension, movement, and personality when you’ve got curls. The challenge isn’t creating the style—it’s choosing one that’ll hold up through classes, lunch, and after-school activities without demanding constant touch-ups.
What makes a school hairstyle actually work for curly hair? It needs to be fast enough to fit into a realistic morning routine (most of these take under 10 minutes), secure enough to last the whole day without falling apart, and flexible enough to look good whether your curls are super defined or a bit of a blend. The styles below all meet those criteria—they’re designed by people who’ve lived with curly hair and understand what actually sticks around until dismissal bell.
1. High Curly Bun
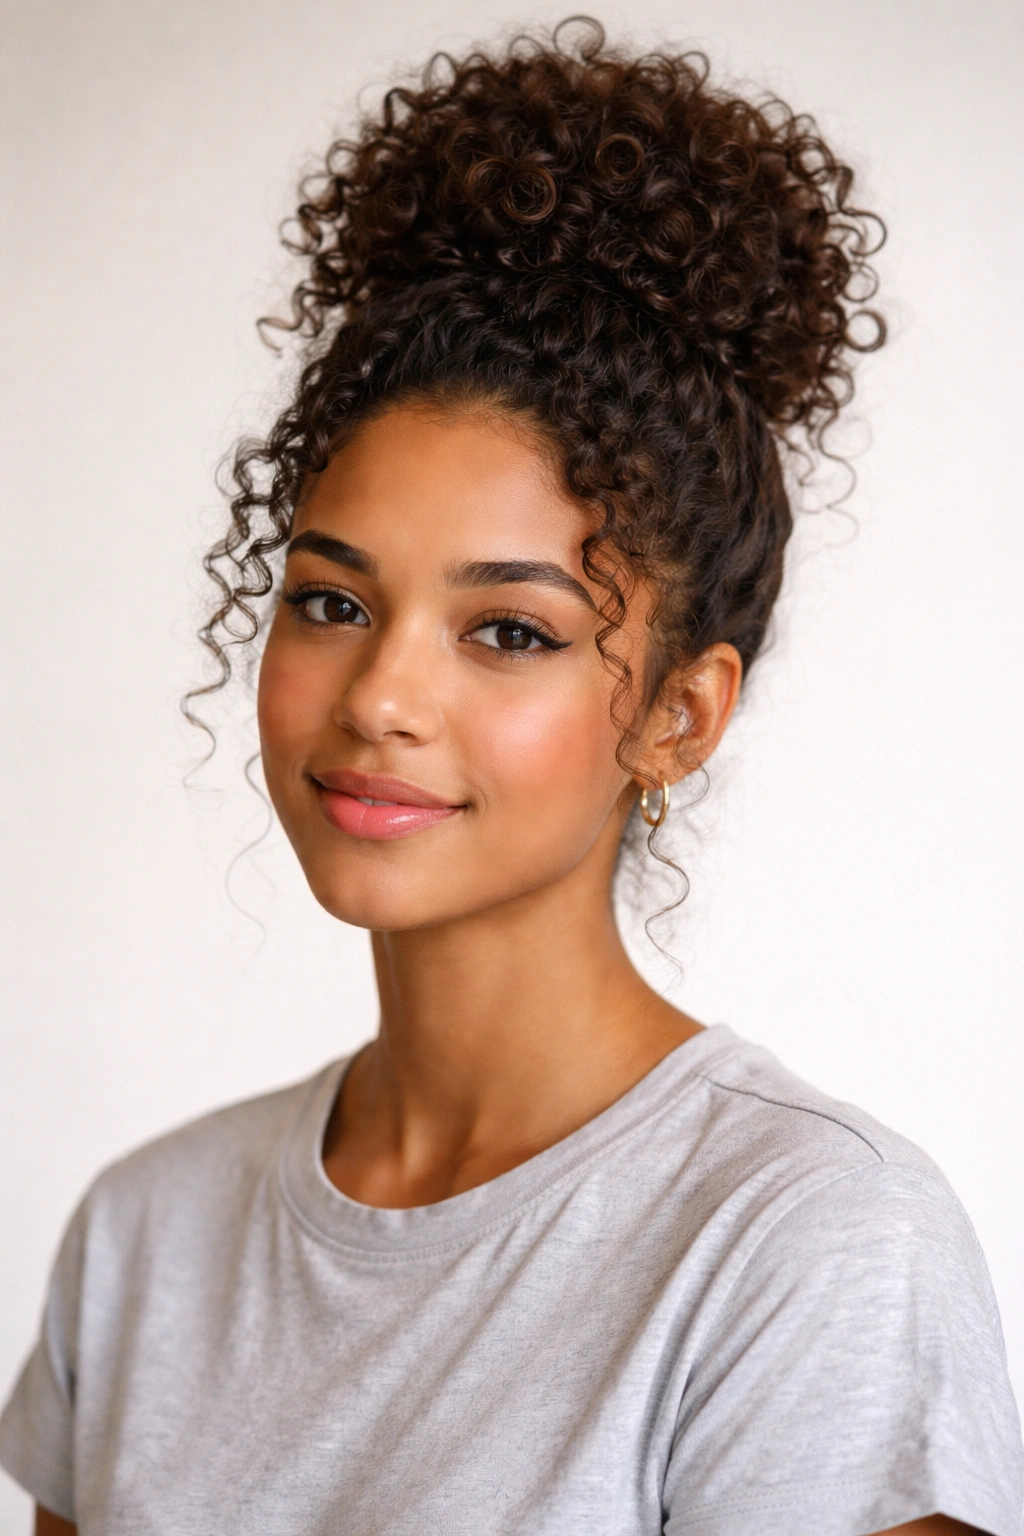
The high bun is the reliable workhorse of curly-haired students everywhere. When you pile curls up on top of your head, you’re creating instant volume and visual interest without any styling effort beyond securing them in place. The beauty of this style is that it works whether your curls are freshly-washed and bouncy or a day or two old and settled.
Why It’s Perfect for School
A high bun keeps curls completely off your face and neck, which means no annoying strands sticking to your cheeks during focus time, and you stay noticeably cooler throughout the day. Because it’s pulling hair away from your shoulders, you’ll find it’s one of the few styles that actually lets you concentrate on your classwork instead of managing flyaways. The style also automatically looks polished and put-together—teachers and peers perceive it as intentional grooming, even though you literally just twisted curls and secured them with a hair tie.
How to Create This Look
- Start with dry or slightly damp curls and apply a light hold mousse or curl cream if your curls tend to frizz
- Flip your head forward and gather all your hair at the crown using your fingers
- Twist the gathered curls around the base of your ponytail to form a coil
- Secure with bobby pins tucked horizontally into the bun structure to anchor it from multiple angles
- Use a second hair tie or clip to lock everything in place
- Gently tease loose a few face-framing curls if you want softness around your features
Time to create: 5-7 minutes | Hold duration: Lasts all day without slipping | Best for: All curl types and lengths shoulder-length and longer
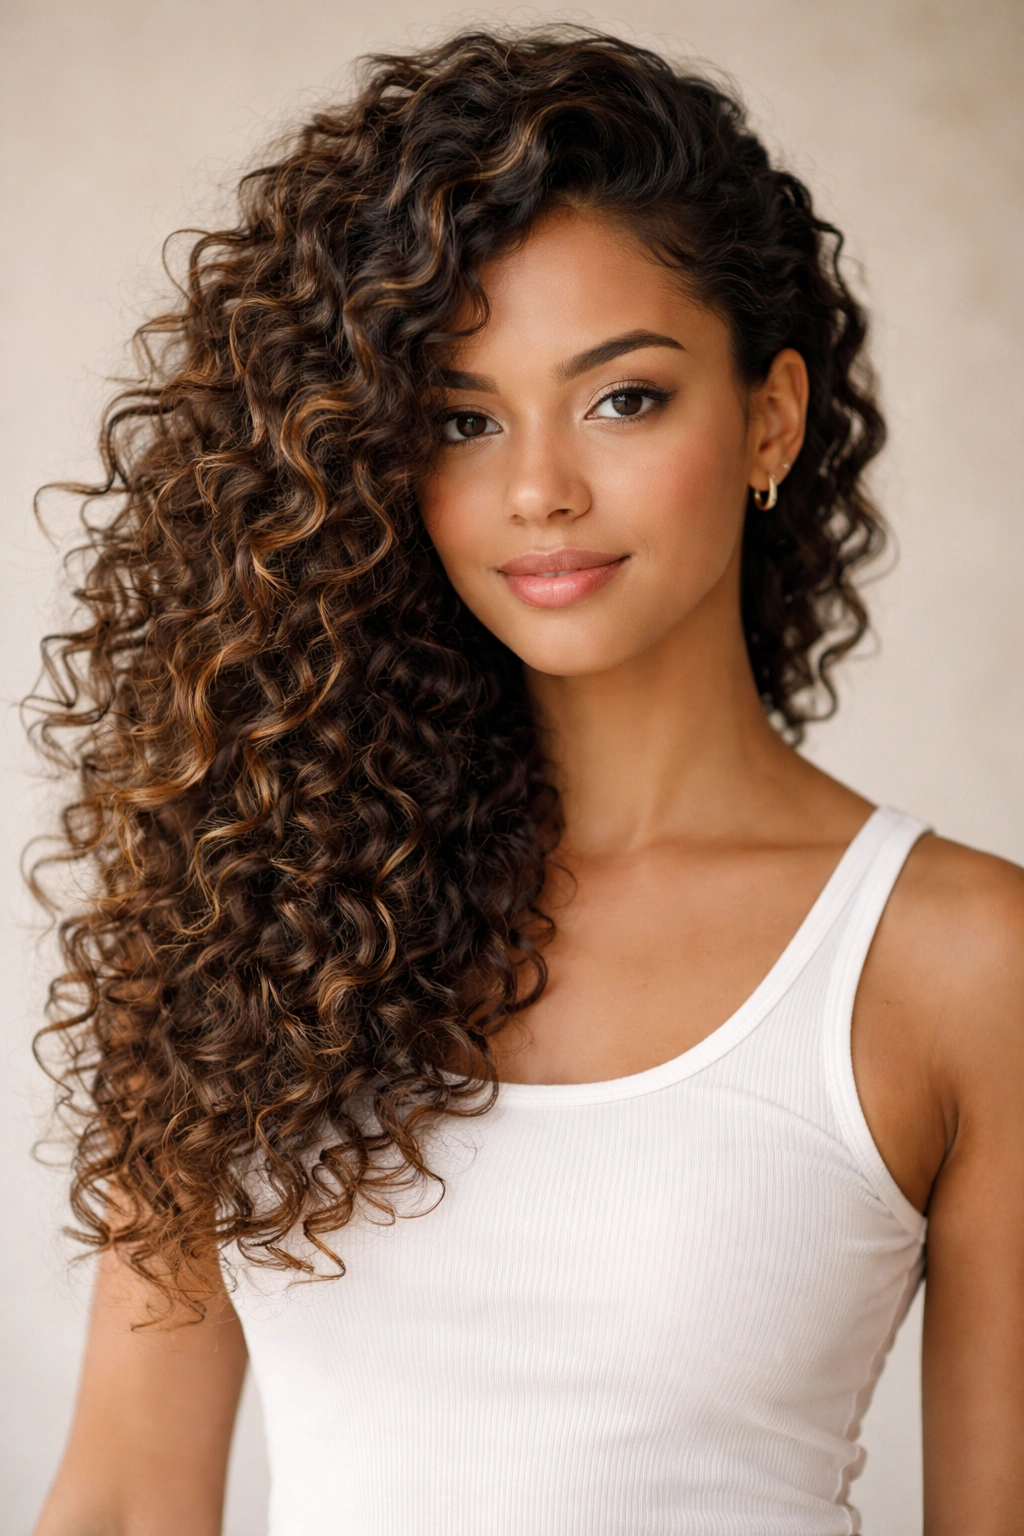
2. Twisted Half-Up Style
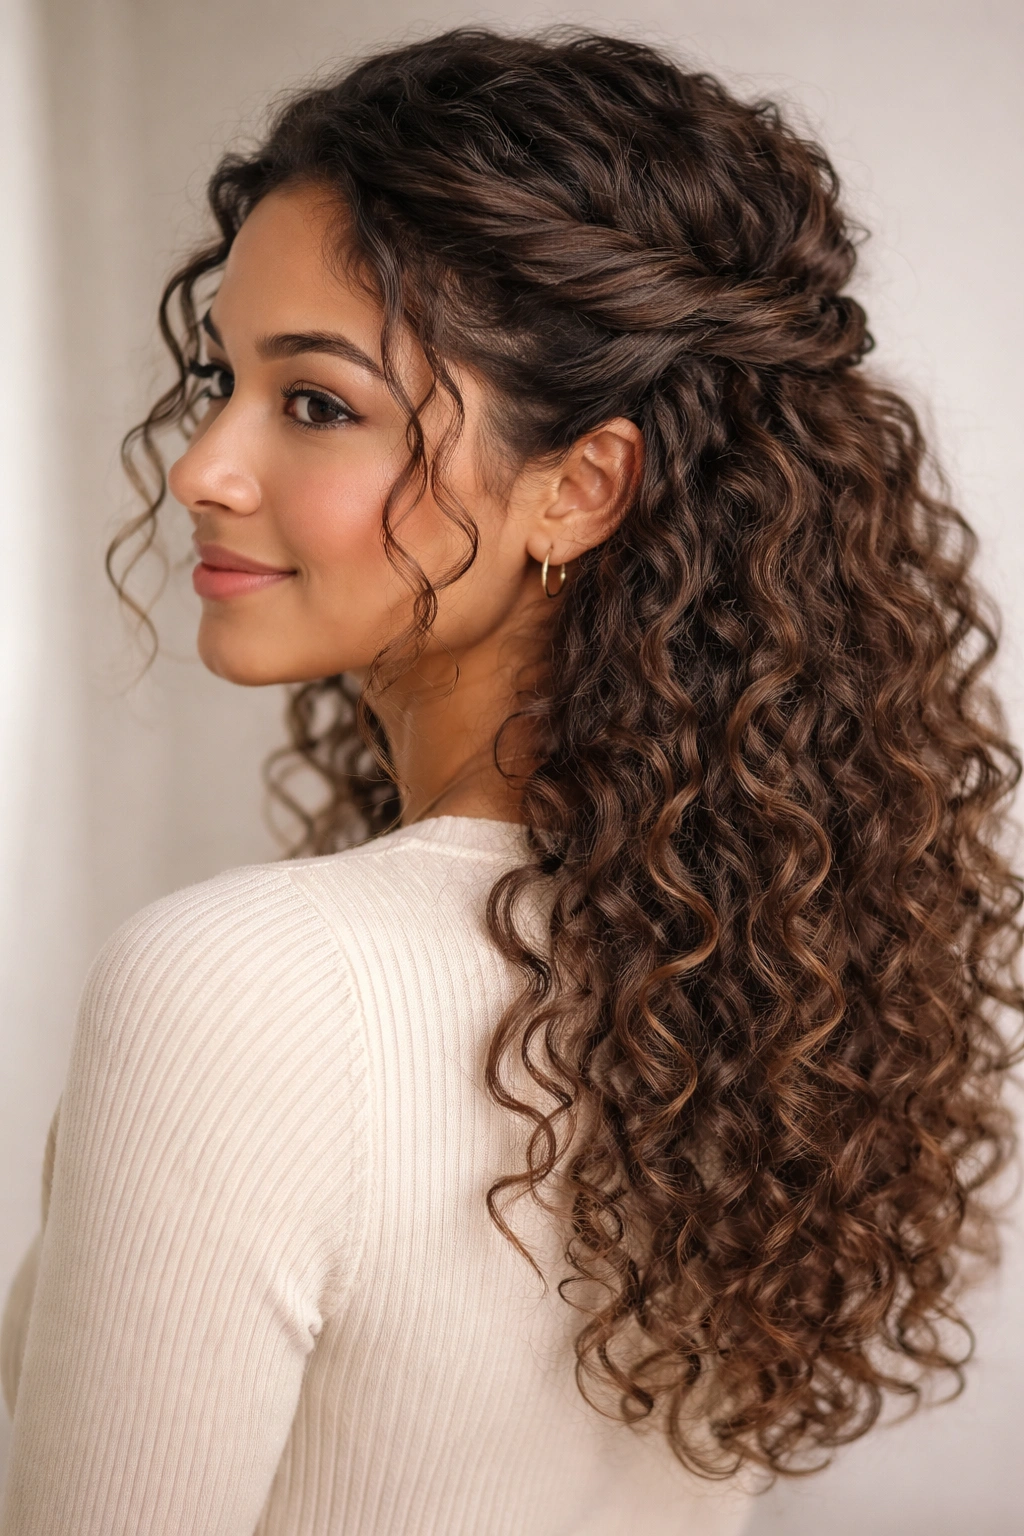
This style sits perfectly between “I just woke up” and “I spent an hour on my hair”—it’s deliberately undone enough to look effortless while still being intentional and structured. By twisting two sections and pinning them together at the back, you’re creating a focal point without requiring bobby pins throughout your whole head.
What Makes This Different
The twisted half-up works because it controls volume at the crown and sides while letting the majority of your curls flow freely down your back and shoulders. This means you get the practical benefit of lifted hair off your face plus the aesthetic payoff of showing off your curl definition. Unlike tight half-up styles that can flatten or stress your curls, these gentle twists follow the natural movement of your hair.
Step-by-Step Process
- Take a small section of hair from one side of your head near the temple
- Twist it loosely away from your face, allowing curls to overlap and weave naturally—don’t aim for a tight, spiral twist
- Bring this twisted section to the back of your head and secure it with a bobby pin
- Repeat on the other side, twisting the second section and pinning it to meet the first
- You can either leave the two sections separate or combine them into a small twist cluster at the back
Pro tip: If your twists feel too loose and are slipping throughout the day, lightly mist them with a flexible-hold hairspray before pinning. This adds just enough grip without creating stiffness.
3. Defined Ponytail
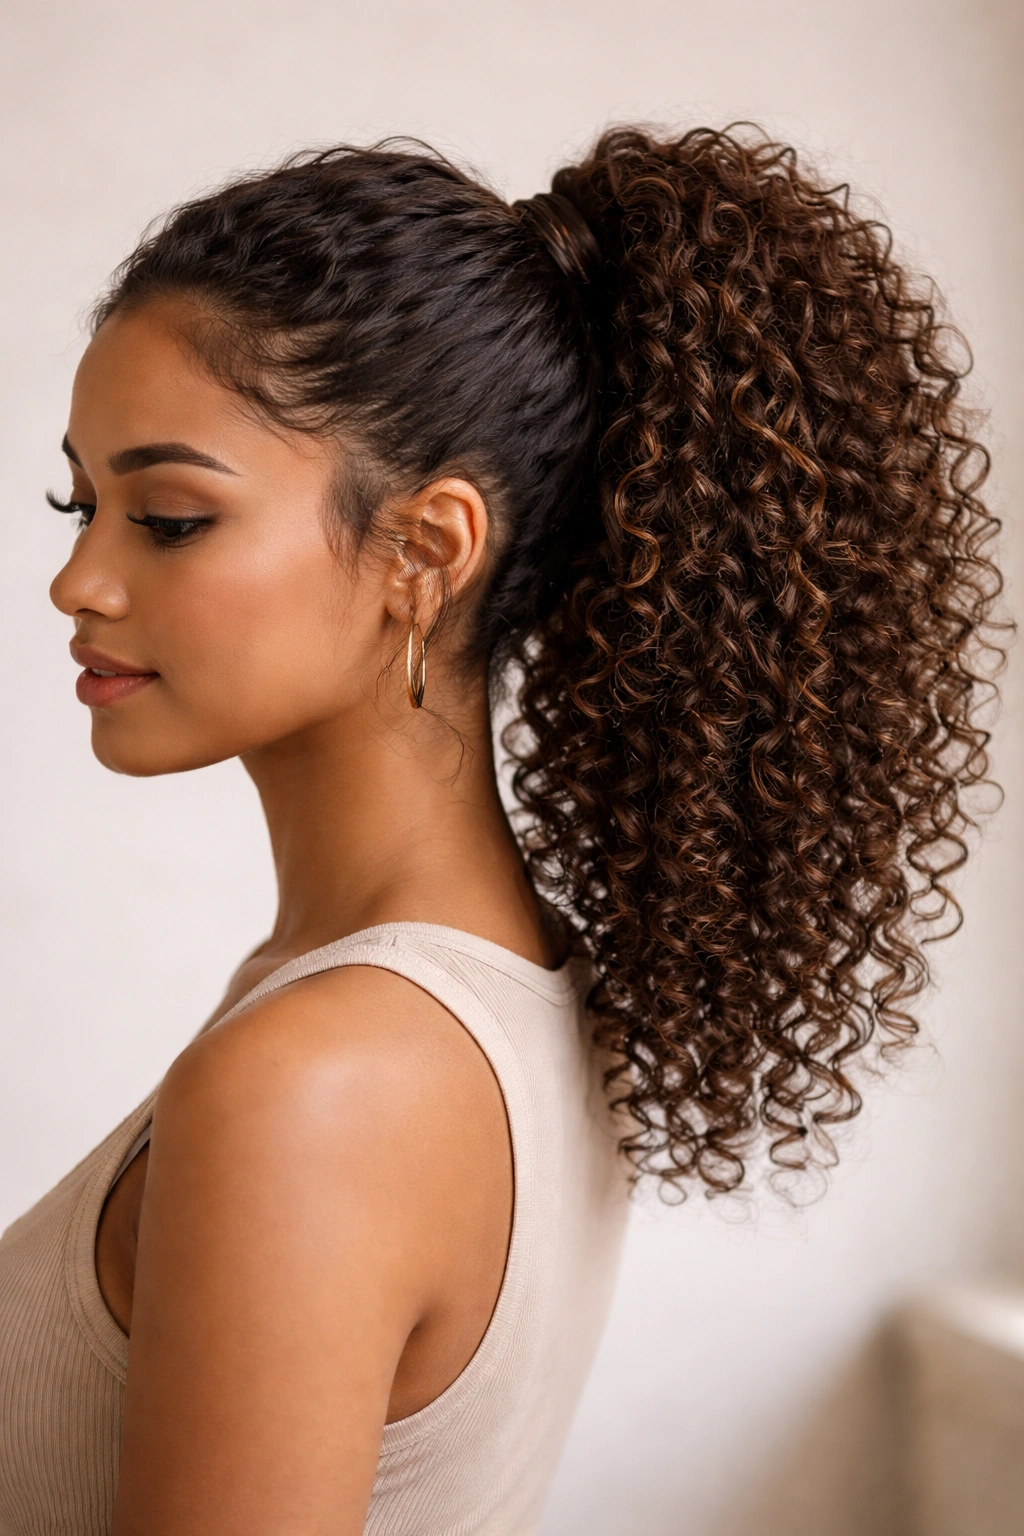
A ponytail should be a no-brainer for school, but it only works beautifully if you’re intentional about how you gather and secure it. The difference between a ponytail that looks polished versus one that looks haphazard comes down to taking 30 extra seconds to define your curls before tying.
Creating Definition That Lasts
Before gathering your hair into a ponytail, apply a lightweight curl-defining gel or mousse to your curls and scrunch them gently upward with your hands. This step activates the natural curl pattern and prevents the ponytail from looking fuzzy or undefined once it’s secured. If you skip this, all your curls blend together into one undefined mass, which defeats the whole point of having texture to work with.
Building the Ponytail
- Apply curl-defining product throughout your curls and let it dry for 1-2 minutes
- Flip your head upside down and gather all your hair at the height where you want your ponytail
- Flip back upright and secure with a sturdy elastic band
- Once secured, take a small section of hair from the ponytail itself and wrap it around the elastic to hide it, pinning the wrapped section underneath
- Use your fingers to gently separate and fluff the curls in the ponytail for maximum dimension
Best height placement: Mid-back looks professional for school, while high ponytails add athletic energy if you have sports or active classes | Hold duration: 7-8 hours before slight slipping | Frizz control: Use a lightweight anti-frizz serum on the flyaways around your face
4. Curly Space Buns
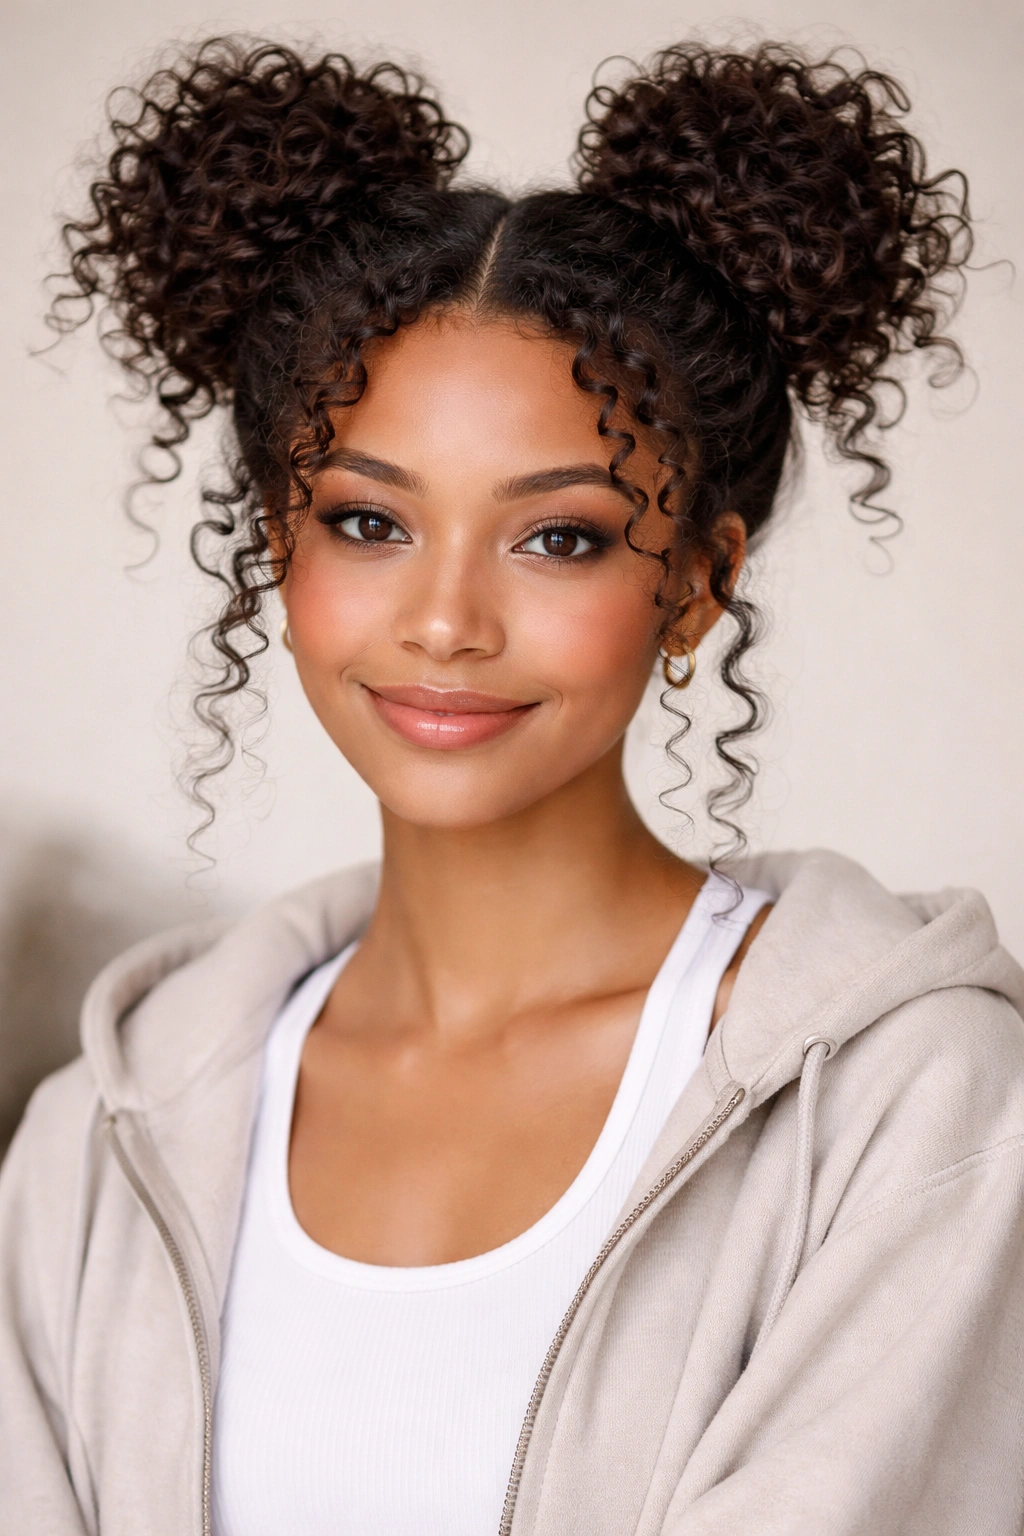
Space buns walk the line between playful and polished, which makes them absolutely ideal for school. They look youthful and fun without being inappropriate for a classroom, and they’re one of the few styles where visible texture and slight imperfection actually enhance the aesthetic.
Why Curly Hair Makes Space Buns Look Better
Straight-haired students often struggle with space buns looking flat or sad, but curly hair naturally gives these buns fullness and visual interest. Your curls create dimension that makes the buns look intentionally textured and dimensional rather than smooth and one-note. Plus, the weight and heaviness of curly hair means these buns actually sit securely on your head without slipping or sliding throughout the day.
Construction Method
- Part your hair down the middle from forehead to nape
- Gather one side into a high ponytail position and secure it with a hair tie
- Repeat on the other side
- Twist each ponytail loosely and wrap it around its base to create a bun shape
- Pin each bun in place with 2-3 bobby pins positioned horizontally for maximum hold
- Leave some curls loose around the buns or tuck everything in—both work depending on your mood
Variation: Create smaller, tighter buns for a more sophisticated look, or go bigger and looser for a fun, relaxed vibe | Styling product: A medium-hold mousse applied to damp hair helps the buns maintain their shape | Face-framing: Pull a few curls loose around your face for softness, or keep it completely tucked for a bold, clean look
5. Side-Swept Curls
This style is deceptively simple—you’re literally sweeping all your hair to one side and securing it—but the result looks far more intentional and polished than the effort suggests. Side-swept styles work beautifully for curly hair because the curls naturally create depth and interest on whichever side you’re emphasizing.
The Mechanics of Sweeping Curls Over
Unlike sleek, straight hair that just falls to one side, curly hair creates a sculptural quality when swept. The curls mound and layer, creating a soft but substantial presence that frames one side of your face while leaving the other side completely clean and open. This asymmetry is actually really flattering and keeps your style looking intentional rather than accidental.
How to Achieve This
- Start with dry, defined curls
- Flip your head to the side you want the curls to sweep toward
- Gather all your hair with your fingers, letting it cascade over that shoulder
- Secure everything with a elastic band positioned at ear level on the sweep side, or pin it discreetly with bobby pins if you prefer it invisible
- Gently separate and fluff the curls to increase the visual impact
- Smooth any flyaways with a light smoothing serum or anti-frizz cream
Side to choose: Sweeping hair to your right side typically frames the left side of your face, which many people find more flattering | Best curl pattern: This style shines with medium to loose curls; very tight coils work too but create a different aesthetic | Longevity: Expect this style to hold for about 6 hours before the curl weight pulls the sweep position down
6. Braided Crown
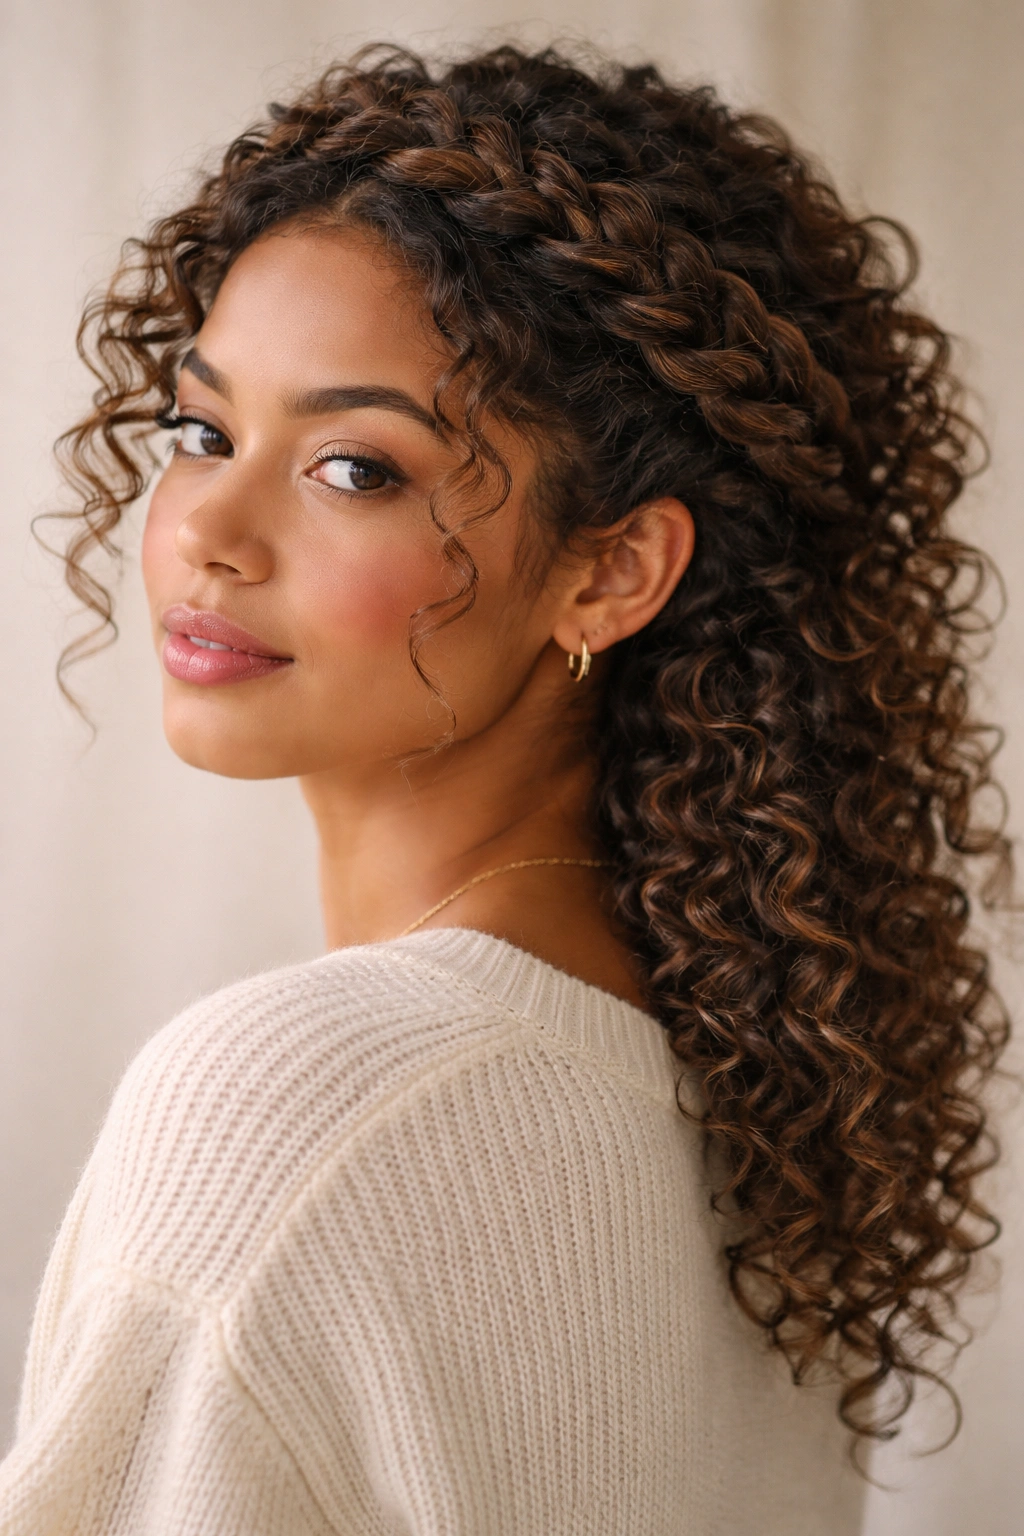
A braided crown takes your curly hair and creates a sophisticated style that looks like you spent considerably more time on it than you actually did. The key is understanding that you’re not aiming for a tight, French-braid perfection—loose, textured braids suit curly hair far better and look intentionally modern rather than trying-too-hard.
Why Loose Braids Work for Curls
Tight braids pull your curls into tension and flatten them, which defeats the entire purpose of having curl texture. Instead, braid loosely, letting individual curls poke out and create a dimensional, relaxed look. This casual braiding style actually looks more intentional and flattering than a perfect, tight braid would, and it’s genuinely easier to execute because you’re not fighting your curl pattern.
Creating the Crown
- Part your hair to one side
- Start a loose braid at one temple, braiding gently and letting curls naturally escape
- Bring the braid around the back of your head, positioning it like a crown
- Continue braiding to the opposite temple
- Secure the braid end with a small elastic band and tuck it behind your ear
- Gently pull the braided sections slightly to loosen and fluff them further
- Smooth any flyaways around your face with a light finishing serum
Variation: Create two smaller braids instead of one large one, positioning them symmetrically for a more playful look | Texture: Apply a light curl-enhancing product before braiding to keep your curls defined rather than frizzy | Timing: This style is best created on day-two or day-three curls that have settled slightly; freshly-washed bouncy curls can look too voluminous for a sleek braid
7. Layered Half-Pony
The layered half-pony is sophisticated enough for presentations and casual enough for regular classes. The key difference between this and a standard half-up is that you’re creating section layers that build visual interest and texture, rather than just grabbing a simple chunk of hair.
Building Dimension with Layers
By taking multiple smaller sections and securing them separately before combining them, you create a style that looks far more intentional and complex than it actually is. Each layer catches light differently and creates depth that makes your curls look even more dimensional. This technique works especially well for thick, curly hair that can sometimes look one-dimensional when pulled into a simple ponytail.
Section-by-Section Method
- Take a small section from the upper crown area and secure it with a small elastic
- Take another section slightly below and behind the first, and secure it separately
- Repeat with a third section, positioning it lower
- Combine all three secured sections into one larger ponytail at the back and secure with a final elastic
- Gently tease and separate the curls in each section to create a full, dimensional look
- You should see distinct layers that build from crown to nape
Styling: Apply a medium-hold mousse to damp hair before styling to help sections maintain their shape throughout the day | Best for: Medium to long hair, shoulder length and longer | Professional level: This style reads as put-together for any occasion from regular classes to school presentations
8. Curl-Defining Gel Slick Back
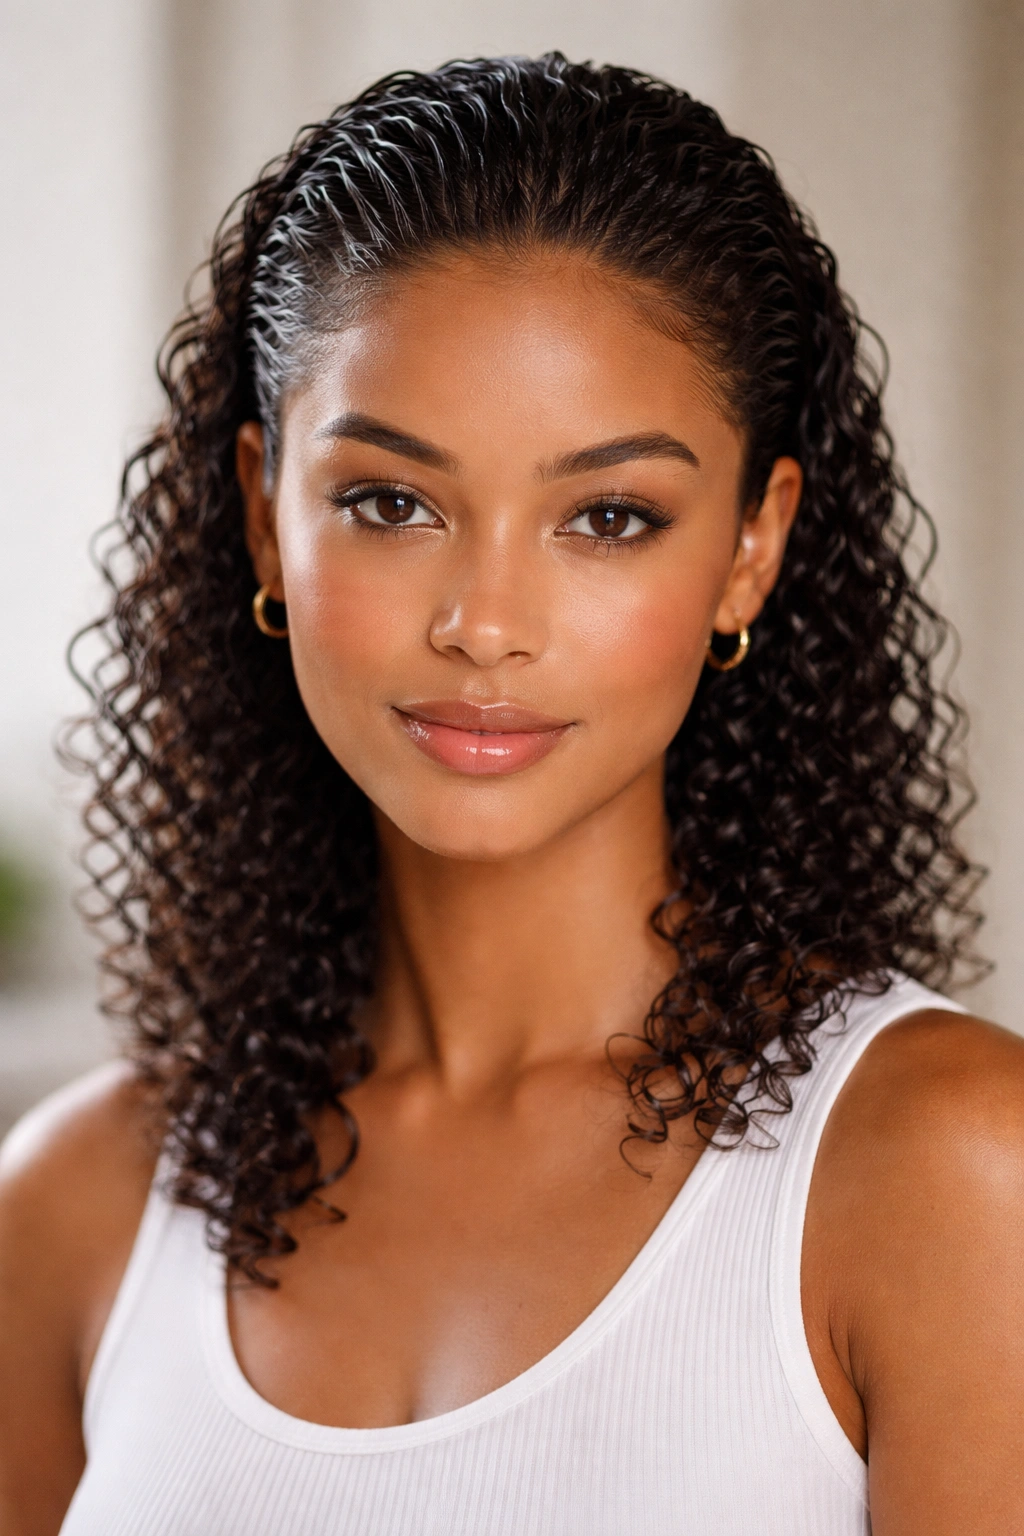
Sometimes the simplest approach is the most effective. By applying a slightly heavier-hold gel to your curls and smoothing them back away from your face, you create a polished, modern style that takes about three minutes and lasts all day. This works best when you lean into intentional shine and definition rather than fighting for a smooth, sleek look that curly hair naturally resists.
The “Slick” Approach for Curls
The traditional slicked-back style relies on smoothing, but curly hair’s strength lies in definition, not smoothness. Instead of fighting your curl pattern, apply a curl-defining gel that adds hold and shine while actually enhancing your curl definition. The result is a style that looks purposefully textured, not like you’re trying to force your curls into a straight-hair mold.
Application Process
- Apply a medium-to-heavy hold curl gel throughout your damp curls
- Run your fingers through your curls to distribute the gel evenly
- Gently sweep all your hair back and away from your face using your hands (no brush needed)
- Allow the gel to dry naturally or use a blow dryer on low heat for 2-3 minutes
- Once dry, your curls should feel defined and hold their shape firmly
- The style maintains definition without requiring flyaway control throughout the day
Gel choice: Look for gels specifically formulated for curly or textured hair; they tend to define rather than just create shell-like stiffness | Face-frame option: Leave just a few small curls loose around your temples for a slightly softer, less severe look | Hold duration: This style easily holds for an entire school day without needing touch-ups, and curls actually look better as the day goes on as the gel continues setting
9. Twisted Low Bun
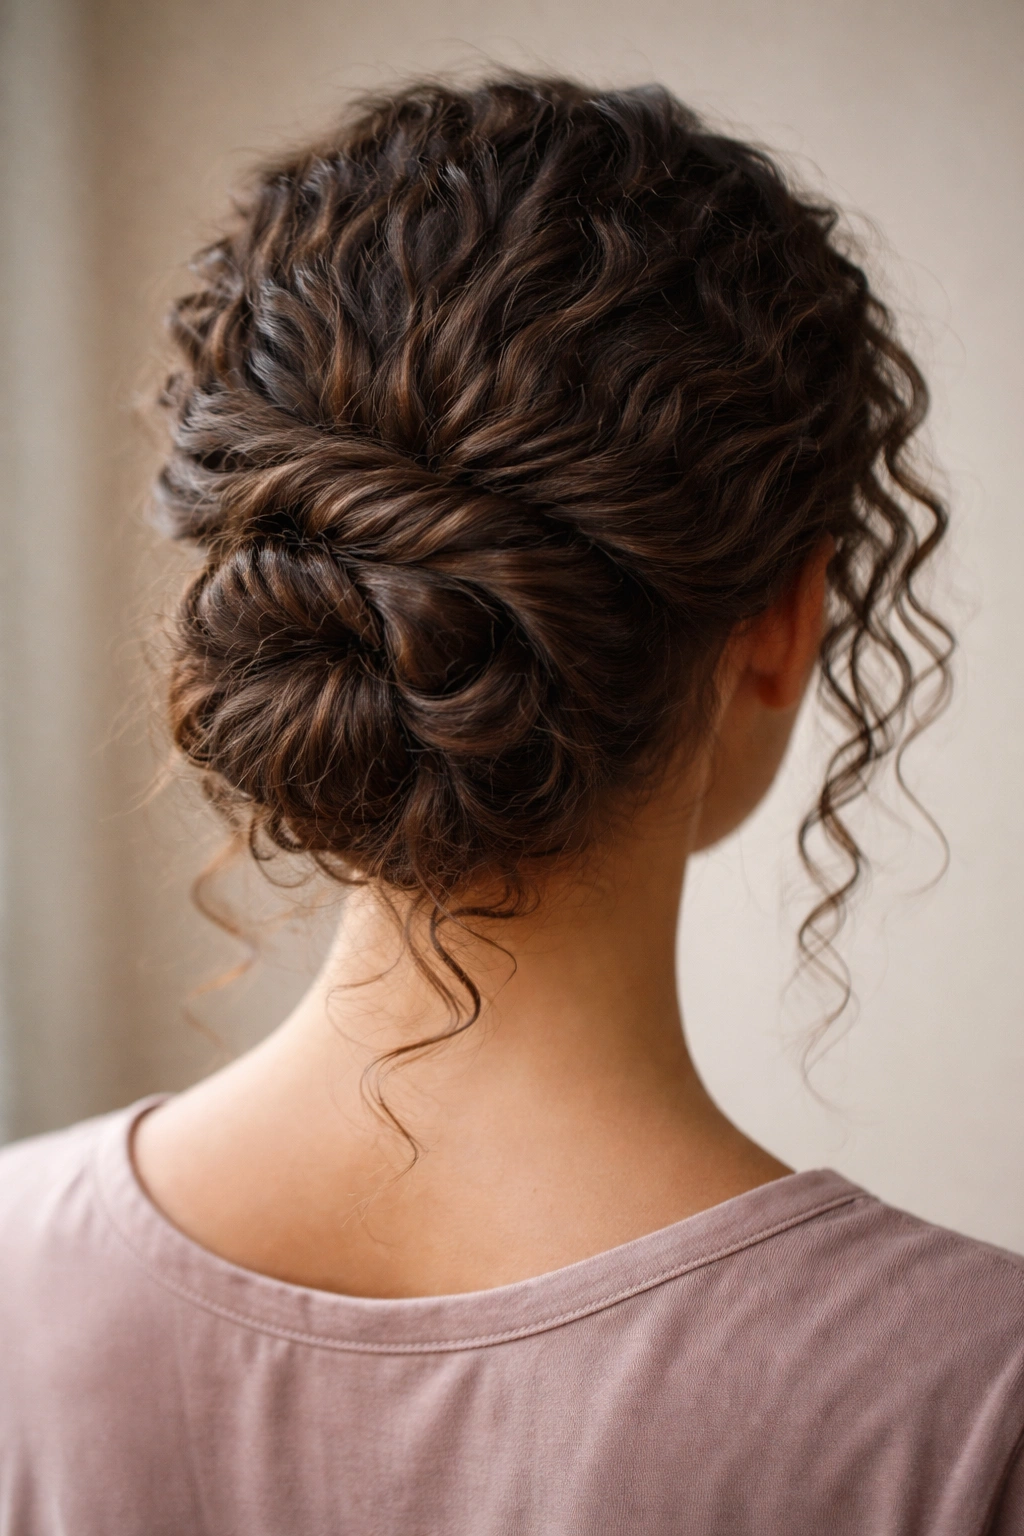
The low bun feels more sophisticated and mature than a high bun, making it an excellent choice when you want your hairstyle to project a bit more polish or seriousness. Twisted into the bun rather than slicked back creates a soft, romantic quality that still feels appropriately school-friendly.
Why Low Twists into Buns Work
Low buns tend to feel sophisticated because they’re slightly more restraint and less playful than high buns. By twisting your curls before wrapping them into a bun, you’re creating a defined structure that holds much better than a simple gathered bun would. The twisting also creates visual texture that makes the bun look intentional and designed rather than just “hair piled up.”
Execution Steps
- Flip your head forward and gather all your hair at the nape of your neck
- Twist all the gathered hair away from you, creating a loose spiral
- Wrap the twisted section around the base of your ponytail to form a bun
- Pin the bun in place using 3-4 bobby pins positioned horizontally through the twist structure
- Smooth the top section with a light anti-frizz serum for a polished appearance
- Leave a few short curls loose around your nape if you prefer softness, or tuck everything in for formality
Variation: Create two separate twists and wrap them around each other before pinning for added visual texture | Best curl type: This works beautifully for all curl patterns, but especially flatters tighter curls where the twist structure becomes more visually prominent | Occasion-appropriate: Wear this for regular school days, but also for presentations, photos, or school events where you want a more formal appearance
10. Curly Pigtails
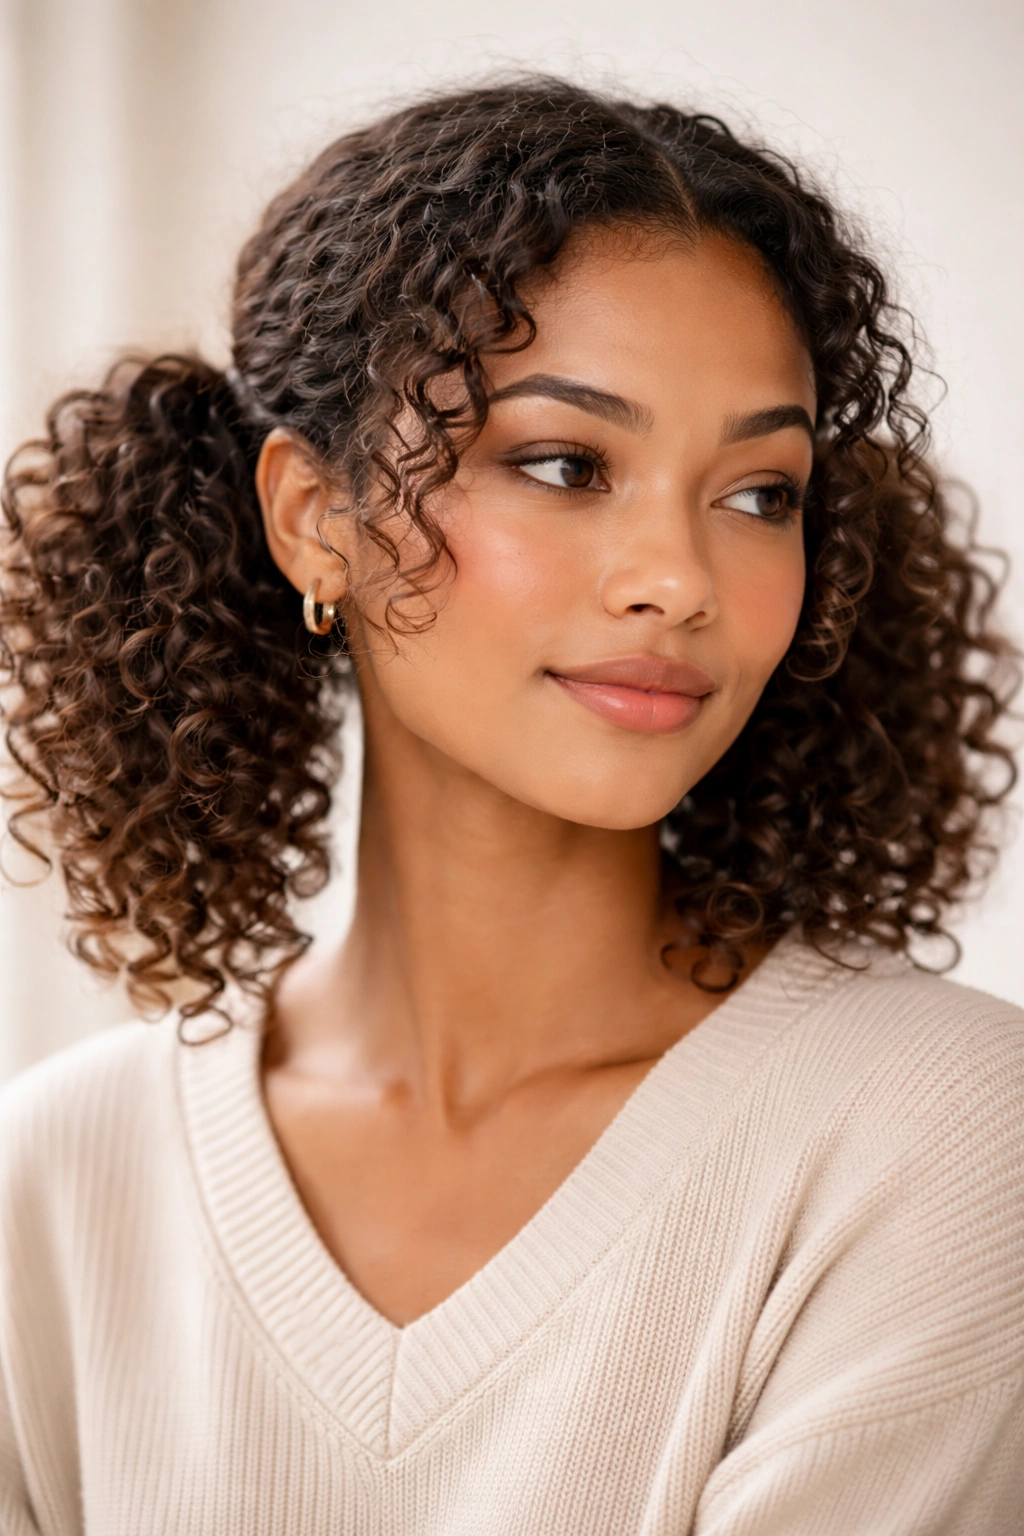
Pigtails get an unfair reputation for being babyish, but they’re actually a stylish, functional choice when you’ve got curly hair. The key to making them look modern and school-appropriate is creating them at the right height and letting your curls show off their texture rather than trying to make them look neat and uniform.
Styling Pigtails for Maturity
Position pigtails at ear level or slightly lower rather than high on the crown, and let your curls flow naturally rather than gathering them tightly. This placement and approach automatically elevates the vibe from “little kid” to “intentionally playful.” The curls create texture and dimension that make pigtails look deliberately styled rather than requiring cuteness to work.
Creation Method
- Part your hair down the middle
- Gather one side into a ponytail positioned just behind your ear
- Secure with a hair tie and wrap a small section of the ponytail around the elastic to hide it
- Repeat on the other side
- Gently separate and fluff the curls in each pigtail for maximum texture
- Leave face-framing pieces loose if desired, or keep everything tucked back for a cleaner look
Height placement: Mid-ear looks more mature and school-appropriate than crown-level | Tail texture: Let the curls in the tails flow loosely rather than gathering everything tightly; the volume and movement are what make this style work | Variations: Try incorporating a thin braid into each pigtail for added interest, or use decorative clips at the base of each ponytail for personality
11. Twist-and-Pin Updo
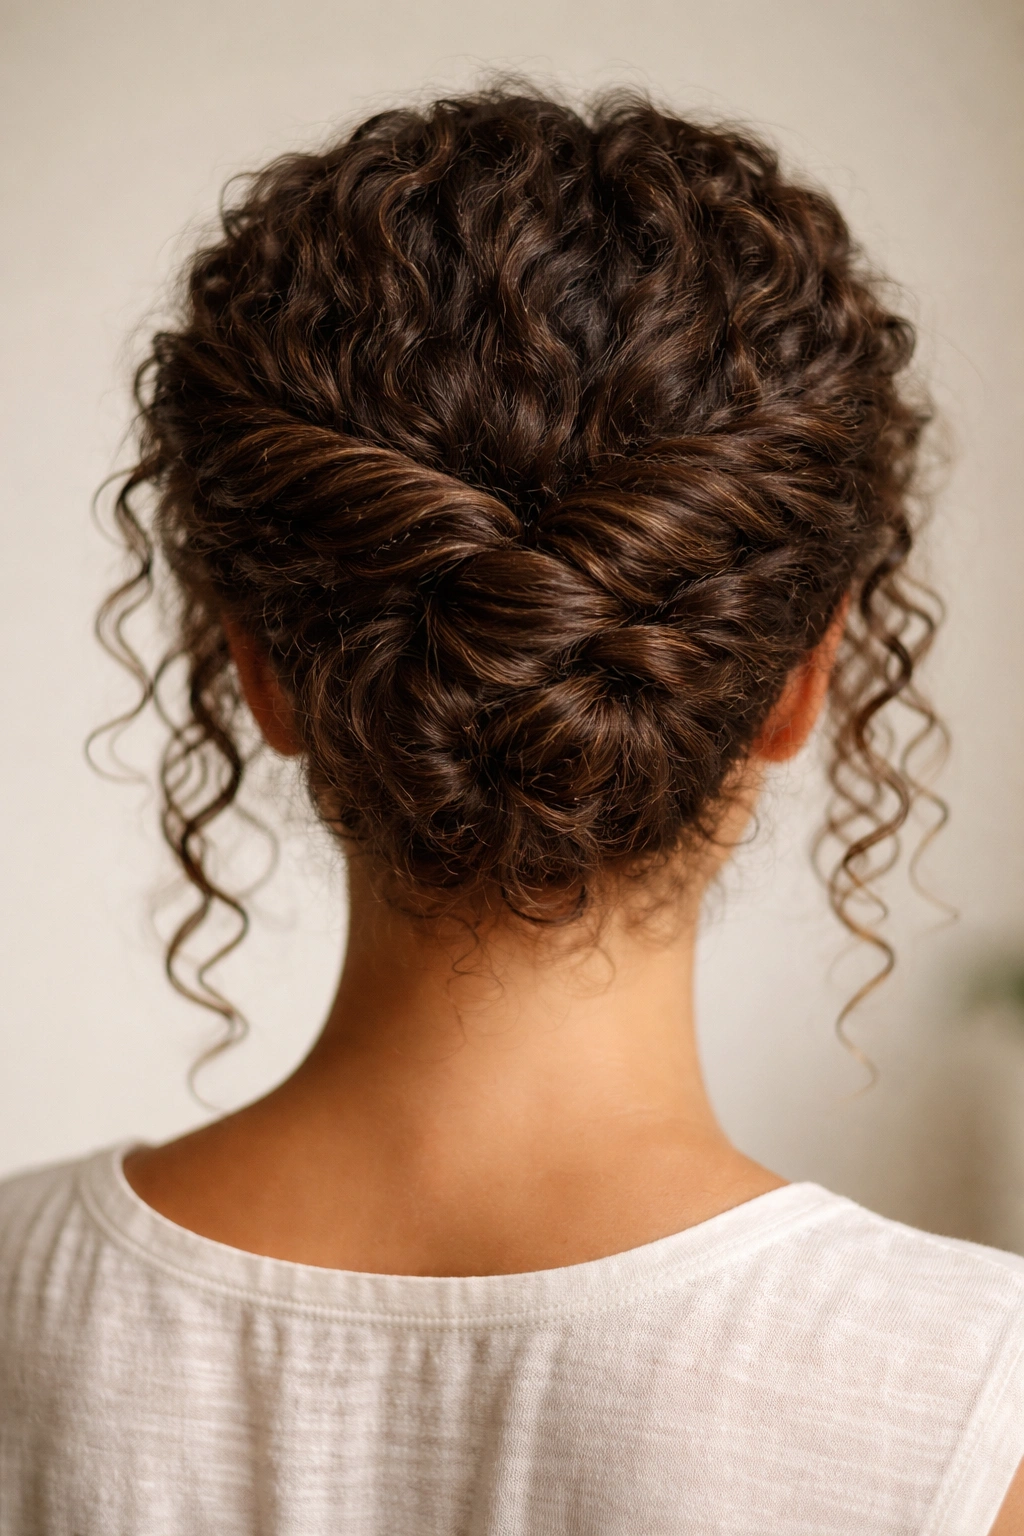
This is the style for days when you want something secure, intentional, and a bit more complex-looking without actually requiring complex technique. By creating two twisted sections and pinning them into an updo, you’ve created the illusion of a carefully constructed style while working with your natural curl texture.
The Power of Simple Twists
Rather than trying to create elaborate braids or intricate patterns, work with the simplicity of twists. Twists automatically look textured and intentional when created with curly hair, and they’re far less likely to slip or loosen throughout the day compared to other updos. Two simple twists positioned strategically can look like a carefully considered style.
Building the Updo
- Take a section from one side of your head and twist it gently, allowing curls to naturally escape
- Bring this twist to the back of your head and pin it in place
- Create a second twist from the opposite side
- Cross the second twist over or under the first, then pin it
- Take any remaining hair and tuck it under the twist structure, securing with additional pins
- Gently adjust the positioning of the twists to create an intentional, balanced look
- Separate and fluff any curls for added dimension
Complexity level: This looks far more complicated than it actually is, which makes it perfect for school presentations or photos | Security: Use 4-5 bobby pins distributed throughout to ensure the style holds through active movement and changes in position | Best achieved: On day-two curls that have set and are less prone to frizz; freshly-washed curls can be slightly less predictable
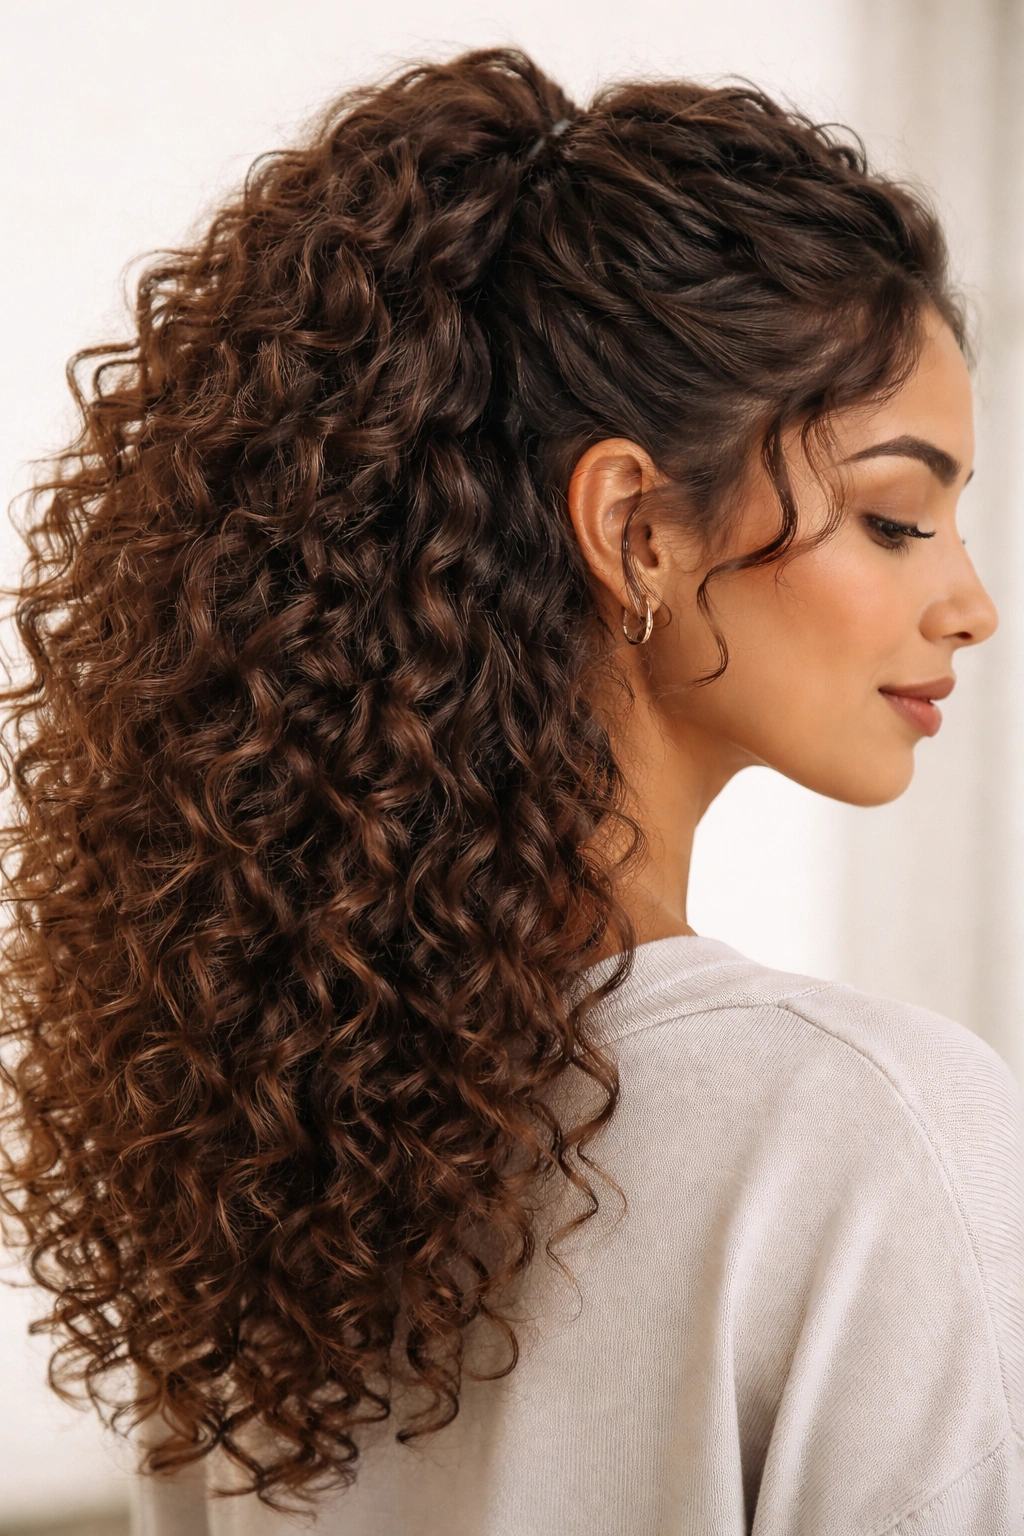
12. Bouncy High Ponytail
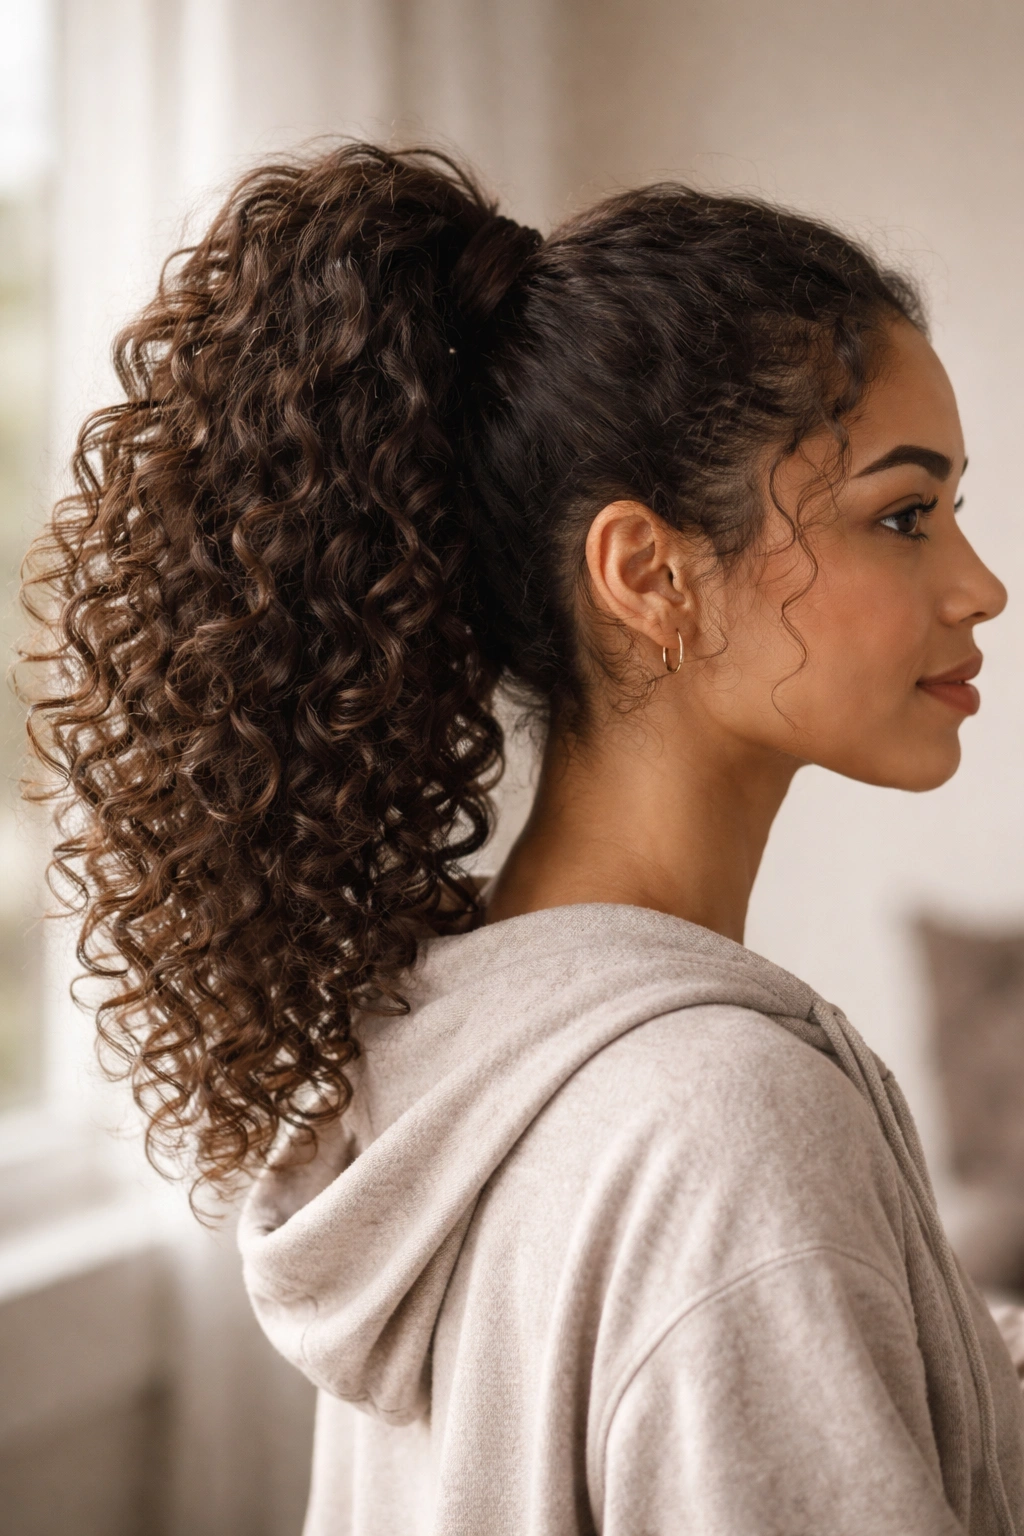
The high ponytail is the iconic curly-hair style for good reason—it’s fast, it’s secure, and it looks youthful and energetic without trying too hard. The secret to making it look bouncy and styled rather than just “hair pulled up” is how you gather and secure it, plus what you do with the elastic.
Achieving That Bouncy Quality
Bouncy high ponytails require volume at the crown, which means you need to gather your hair in a way that creates lift rather than pulling it sleek and flat. Use a slightly heavier hand when gathering, creating intentional volume, and secure it with a covered elastic that looks intentional rather than purely functional.
Ponytail Construction
- Flip your head upside down to create natural lift and volume at the crown
- While flipped, gather all your hair with your fingers at the high point on your head
- Flip your head back upright, and the gathered hair naturally sits high and voluminous
- Secure with an elastic band designed to blend with your hair color
- Wrap a small section of hair from the ponytail around the elastic to hide it, pinning underneath
- Use your fingers to gently separate and fluff the curls in the ponytail for maximum bounce and dimension
- A light texturizing spray applied to the crown before flipping adds even more intentional volume
Energy level: This style reads as active and youthful, making it perfect for school days when you’re balancing classes, extracurriculars, and movement | Longevity: A high ponytail on curly hair typically holds beautifully for 8+ hours without significant slipping or loosening | Versatility: Works equally well pulled sleek for a more polished look or left textured and bouncy for a relaxed vibe
Final Thoughts
The real secret to making curly-hair school hairstyles work isn’t about finding complicated techniques or expensive products—it’s about understanding that your curls are an asset, not a problem to solve. Every single one of these styles leverages what curly hair naturally does: create volume, texture, and dimension without requiring much effort.
What makes a hairstyle truly work for school isn’t how complicated it looks, but whether it’ll actually stay secure through your entire day without demanding touch-ups or causing you stress. These 12 options all meet that standard because they work with your natural curl pattern instead of fighting it. Your curls are already doing most of the work; you’re just organizing them intentionally.
The morning before school, pick one of these styles and commit to the five to ten minutes it takes to execute. The payoff is a full day of a hairstyle that looks purposeful and polished, keeps your curls off your face when you need them out of the way, and honestly looks better as the day progresses. That’s the magic of styling curly hair—it gets better, not worse, as time goes on.