



Curly afro hair with a medium length is the perfect canvas for stunning, versatile styles that showcase your natural texture while offering genuine styling flexibility. Medium length—roughly chin-length to shoulder-length—sits in that sweet spot where you have enough hair to create dimensional, sculptural looks, but not so much that styling becomes a time-consuming endurance test. Whether you’re looking to switch up your everyday aesthetic, prepare for an event, or simply give your hair a break from manipulation while keeping it styled, medium-length curly afro styles deliver major impact with manageable effort.
The beauty of styling medium curly hair lies in how quickly your curls can transform. A style that took twenty minutes to create this week might look entirely different next week—fuller, tighter, bouncier, or softer—depending on how your curls have settled and relaxed. This isn’t a flaw; it’s a feature. You essentially get multiple looks from a single style application, which means your styling investments work harder for you.
What matters most when choosing a style for medium curly hair is understanding your curl pattern, your hair’s moisture level, and your lifestyle. Are you looking for a style you can refresh every morning, or one that holds for a full week? Do you have fine, delicate curls that need gentler handling, or robust coils that can handle more tension and manipulation? The styles below span different techniques, hold times, and difficulty levels—so whether you’re a styling novice or someone who’s been perfecting braids and twists for years, you’ll find options that work for your curl type and your routine.
1. The Twist-Out
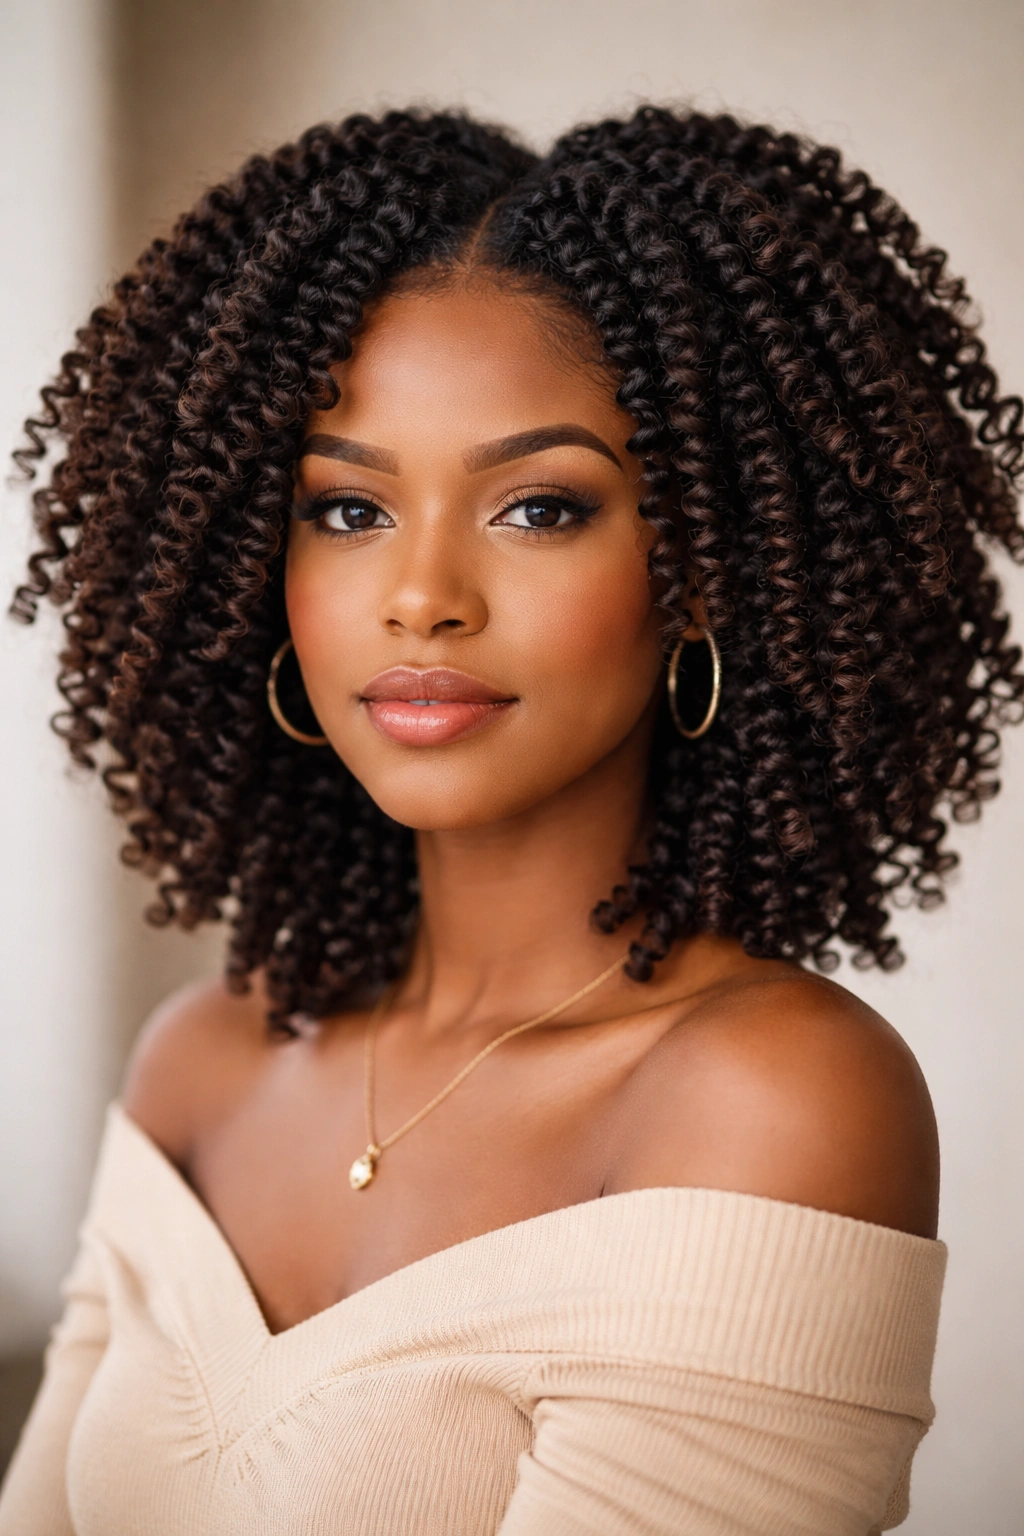
The twist-out stands as one of the most beloved curly afro styles, and for medium hair it creates defined, bouncy curls with a natural appearance that looks intentional but never overdone. This style works by loosely twisting damp or wet hair around itself, allowing the curls to set overnight or over several days, then unraveling those twists to reveal soft, elongated curls with incredible definition and volume at the roots.
Why Twist-Outs Deliver Maximum Definition
The magic of a twist-out happens because the two-strand twist technique creates a spiral path that your curls naturally follow as they dry. The tighter you twist, the more defined and coiled your final curls will be; looser twists create softer, wavy patterns. For medium hair, this means you can control the final aesthetic entirely—sleek and polished curls for a professional setting, or loose, romantic waves for something softer and more relaxed. The style also eliminates frizz because your curls are already in their final shape before you unravel them, so you’re not fighting against your hair’s natural patterns.
How to Create Long-Lasting Twist-Outs
- Start with damp hair: Apply leave-in conditioner and curl cream to damp (not soaking wet) hair for easier twisting and better moisture retention during the setting period
- Section strategically: Divide your hair into 8-12 sections depending on your curl density; fewer sections create bolder curls, more sections create finer definition
- Twist firmly from roots to ends: Hold tension throughout the twist to ensure even curl formation and prevent loose, undefined sections
- Allow 6-24 hours of setting time: Overnight is standard, but for maximum definition and longevity, allow your twists to air dry completely before unraveling
- Unravel gently from the bottom: Start at the ends and work upward, gently separating curls with your fingers rather than a comb, which can disturb the curl pattern and cause frizz
Pro tip: Apply your styling products while your hair is still dripping wet, then use a microfiber towel or t-shirt to gently remove excess water before twisting. This balance keeps your hair moist enough to absorb product but not so wet that it takes forever to dry.
2. The Bantu Knots
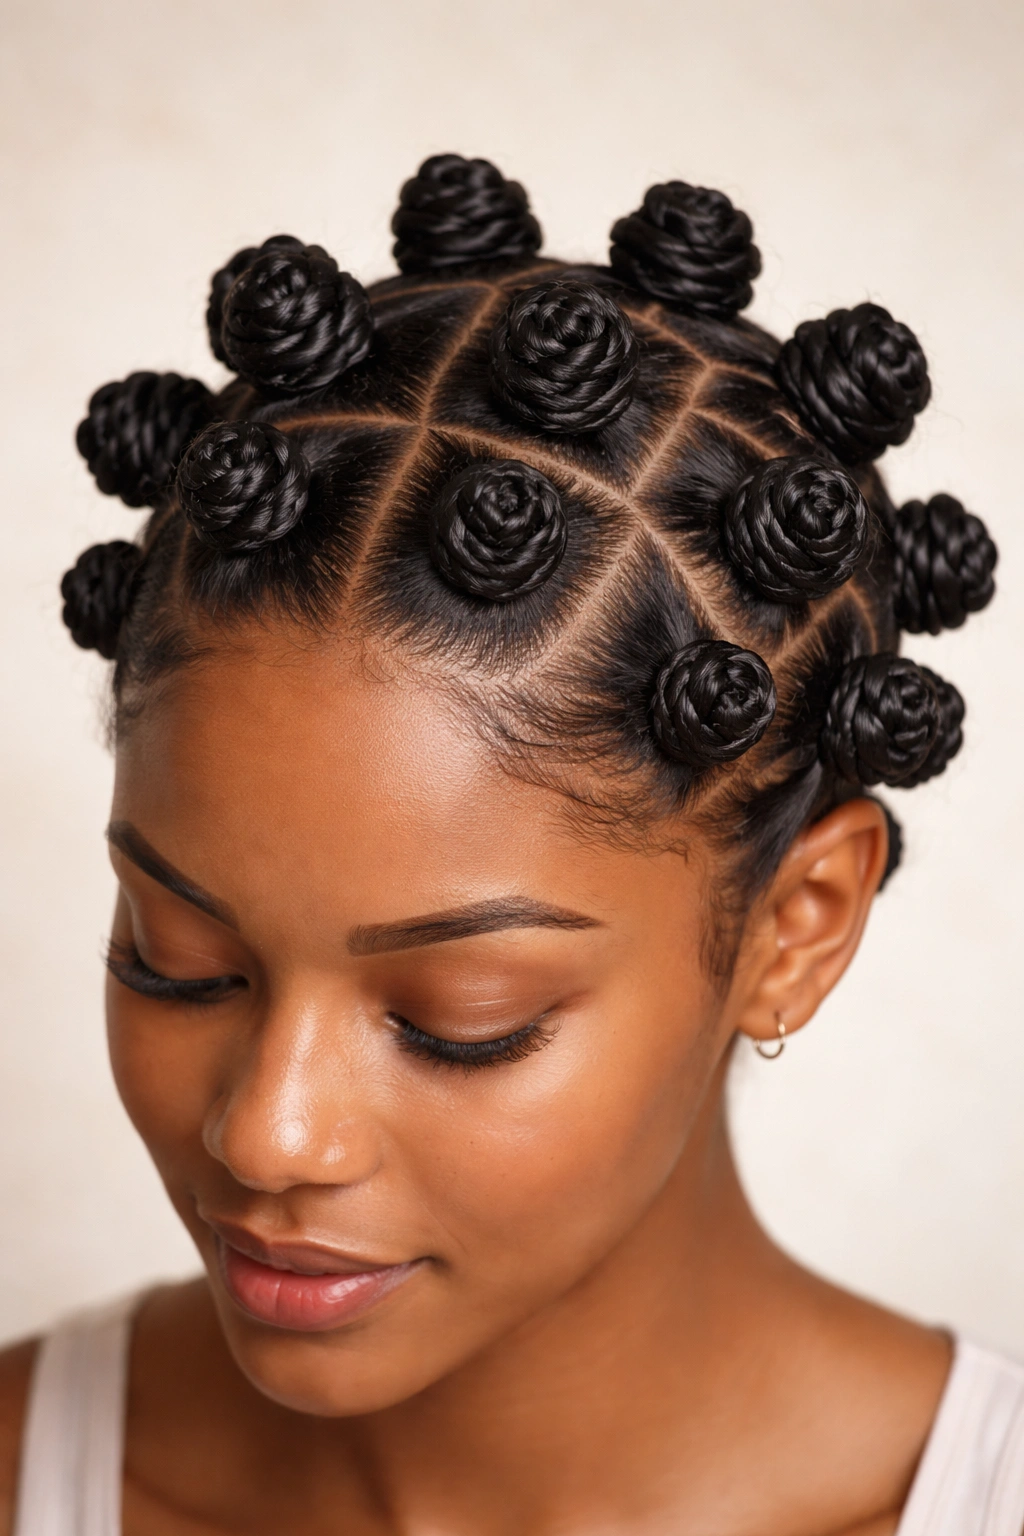
Bantu knots are a protective style with a twist—literally. Originating from traditional Zulu hairstyling, these small, sculptural knots are wrapped around themselves to create defined coils that unravel into springy, uniform curls. For medium-length curly hair, Bantu knots offer the bonus of creating gorgeous curls while you sleep or go about your week, with no commitment to wearing the knots themselves (though many people rock them as a style, too).
The Protective Styling Power of Bantu Knots
Bantu knots protect your hair because once you’ve twisted and wrapped them, your individual strands are held securely in place, eliminating friction, snagging, and the daily manipulation that can cause breakage. The wrapping also creates tension that encourages curl formation, so your curls actually set more beautifully than they might from a loose twist-out alone. For medium hair, this tension is especially valuable because it prevents the sagging and stretching that sometimes happens with longer styles, keeping your curls lifted and bouncy all the way through.
Creating Defined Curls From Bantu Knots
- Use small to medium-sized sections: For uniform, defined curls, keep your sections consistent in size; medium sections work well for medium-length hair
- Apply curl cream before wrapping: Coat each section thoroughly with a gel or curl cream that provides hold without flaking or crunchiness
- Twist tightly, then wrap around the base: Create a two-strand twist, then wrap it around itself to form a knot, tucking the ends underneath to secure
- Keep knots pulled up and away from the scalp: Tension throughout the style encourages better curl formation and prevents looseness at the roots
- Allow at least 6-8 hours of setting time: Overnight is ideal, but 8 hours minimum ensures your curls are fully set before unraveling
Worth knowing: Bantu knots often look best when left in for 2-3 days before unraveling, giving the curls time to fully form and settle. The longer they stay in, the more defined your resulting curls will be.
3. The Coils
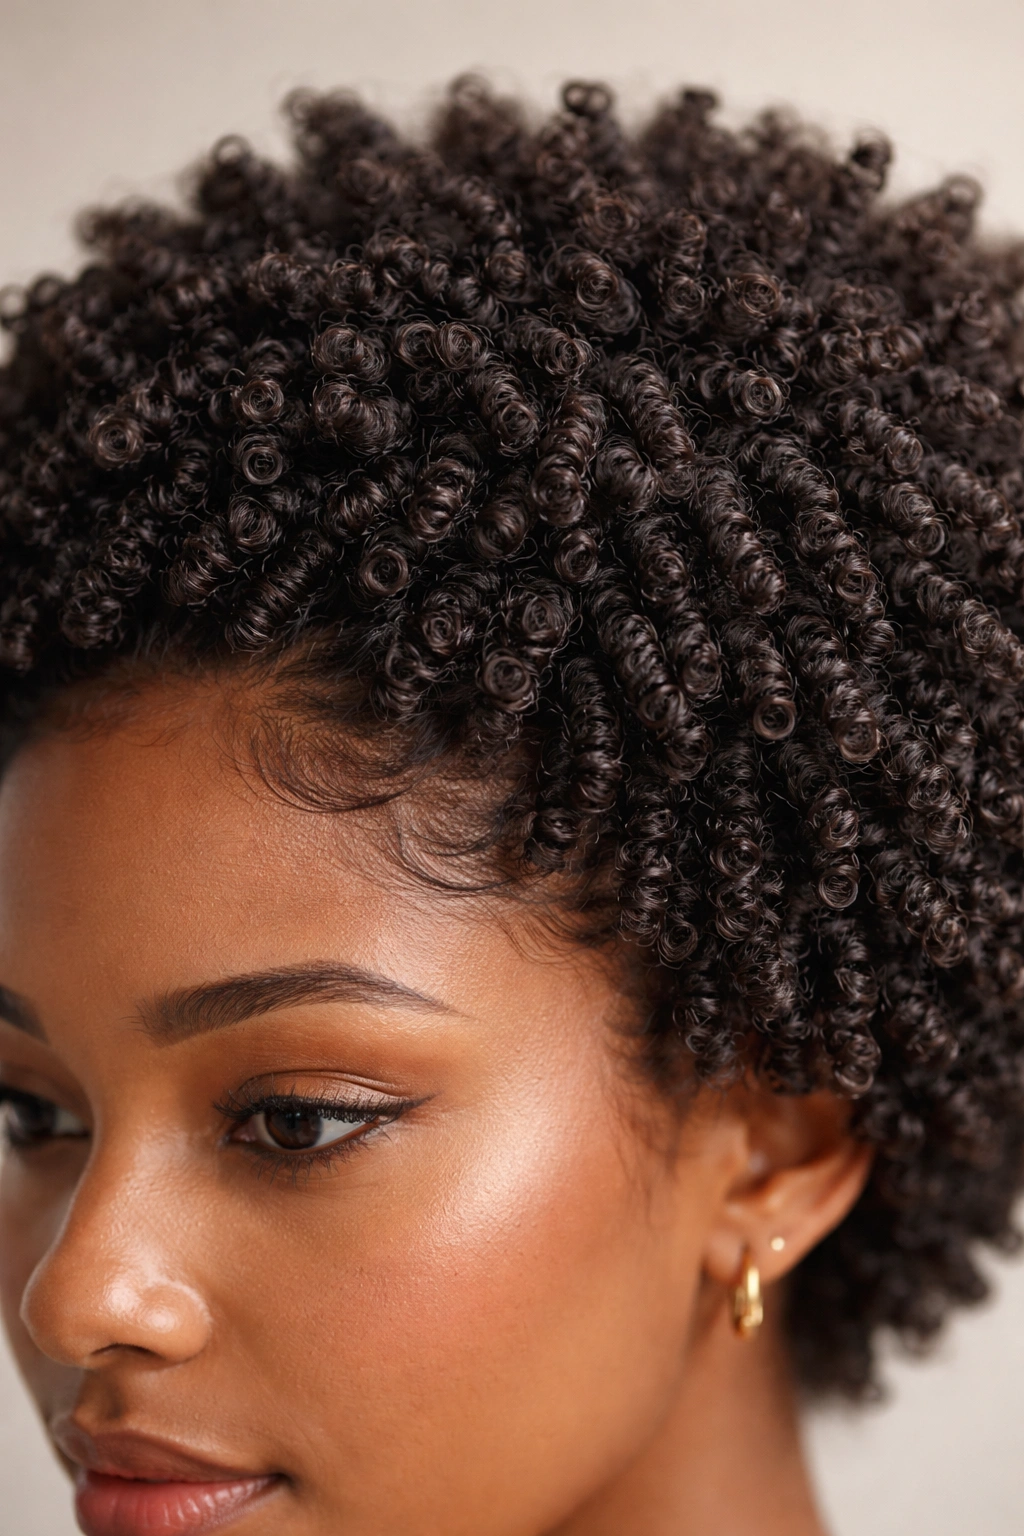
Coils are individual, springy loops that sit close to your scalp, creating a compact, textured aesthetic that celebrates the natural beauty of tightly coiled hair. This style involves wrapping small sections of hair around a tool—like a crochet hook, a coil rod, or even your finger—and then allowing the hair to set in that coiled shape. For medium-length curly hair, coils offer incredible versatility: you can create uniform coils for a polished look, or vary your coil size for a more dynamic, textured appearance.
Why Coils Work Beautifully on Medium Hair
Coils on medium hair create a visually striking profile because the curls sit close to your head without the elongation that longer hair would provide, making the coiled texture the focal point of your style. The compact nature of coils also means your hair looks fuller and more voluminous, even if your curl density is moderate. Because medium-length coils dry relatively quickly (compared to longer hair), you don’t have to wait an extended time for the style to fully set, making coils a practical choice for people with limited time.
Achieving Salon-Quality Coils at Home
- Start with very clean, damp hair: Coils show every spec of product buildup, so use a clarifying shampoo 1-2 weeks before coiling to remove any residue
- Apply lightweight curl cream: Heavy creams can weigh down coils, especially on medium-length hair; choose a gel or cream-gel hybrid that provides hold without thickness
- Wrap each section around your chosen tool with tension: Whether using a rod, hook, or your finger, maintain consistent tension throughout the wrap to ensure even coil formation
- Leave in for at least 48 hours: Coils need time to fully set; rushed timelines result in looseness and less definition
- Avoid touching or manipulating the coils while they set: Every time you touch them, you risk disrupting the pattern and creating frizz or undefined sections
Pro tip: Use a bonnet or hair wrap while sleeping to protect your coils from flattening on one side and ensure they dry evenly. This one habit significantly improves the symmetry and definition of your finished style.
4. The Perm Rod Curls
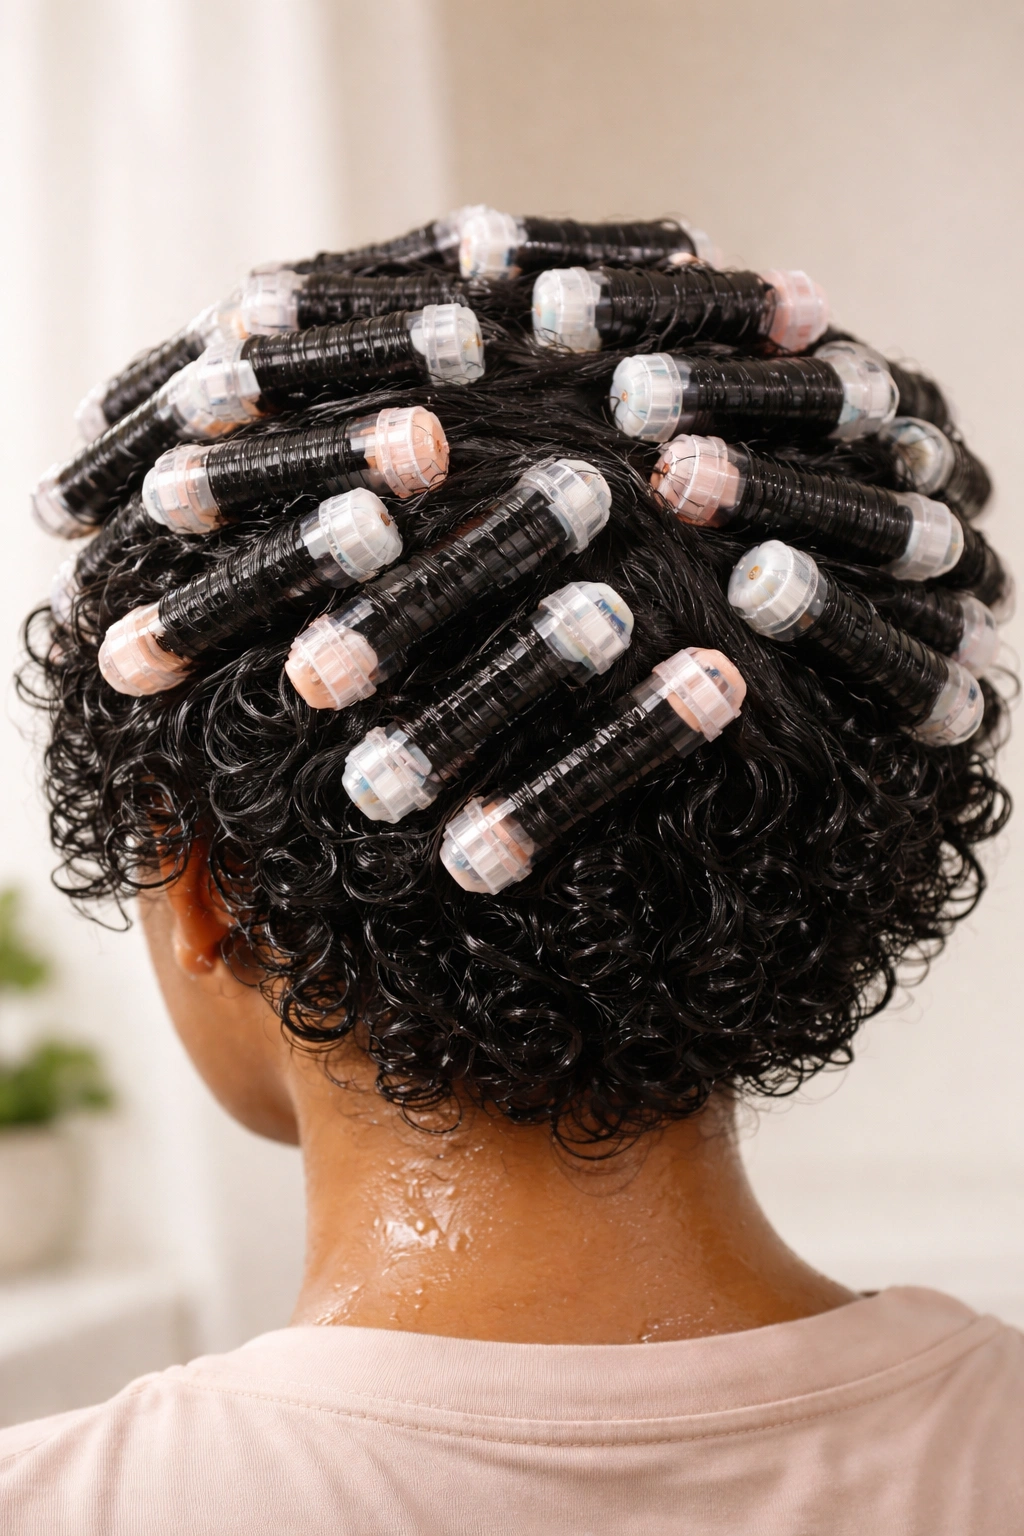
Perm rods—also called curling rods or flexi-rods—are flexible tools that you wrap damp hair around to create uniform, bouncy curls without heat. For medium-length curly afro hair, perm rods offer the advantage of controlling exactly how defined and springy your curls will be: smaller rods create tighter, more defined curls; larger rods create loose, romantic waves. The curls typically hold for 5-10 days depending on your curl pattern and how well you care for the style.
The Science Behind Perm Rod Curls
Perm rods work by setting your hair’s shape while wet, allowing the protein structure in your hair (the disulfide bonds) to form around the rod’s shape as everything dries. The result is a curl that holds its form because your hair has literally been trained into that shape, not just styled there temporarily. For medium hair, this means you get genuine bounce and spring—your curls don’t gradually droop or lose definition over the course of a few days the way some other set styles do. The style can last so long because the curl shape is reinforced each time you refresh with moisture.
Rolling Hair Onto Perm Rods Like a Pro
- Choose rod sizes strategically: Use smaller rods (¾ inch or less) for tighter definition, medium rods (¾ to 1¼ inch) for bouncy curls, and larger rods (1½ inch and up) for loose waves
- Apply leave-in conditioner and light gel: Coat each section thoroughly but not heavily; perm rod curls can look dry and crunchy if you use too much product
- Roll hair smoothly from ends to roots: Tension matters—too loose and your curls will drop, too tight and you’ll have breakage; aim for firm but gentle
- Roll vertically for maximum volume: Rolling away from your face and upward toward your crown creates a lifted, youthful appearance
- Allow full air drying before removing rods: For medium hair, this typically takes 12-24 hours; removing rods before hair is completely dry causes the curls to drop and lose definition
Worth knowing: Perm rods give you the most uniform, salon-quality curls of any set style. If you want your curls to look intentionally styled and polished rather than naturally textured, perm rods deliver that aesthetic consistently.
5. The Braidout
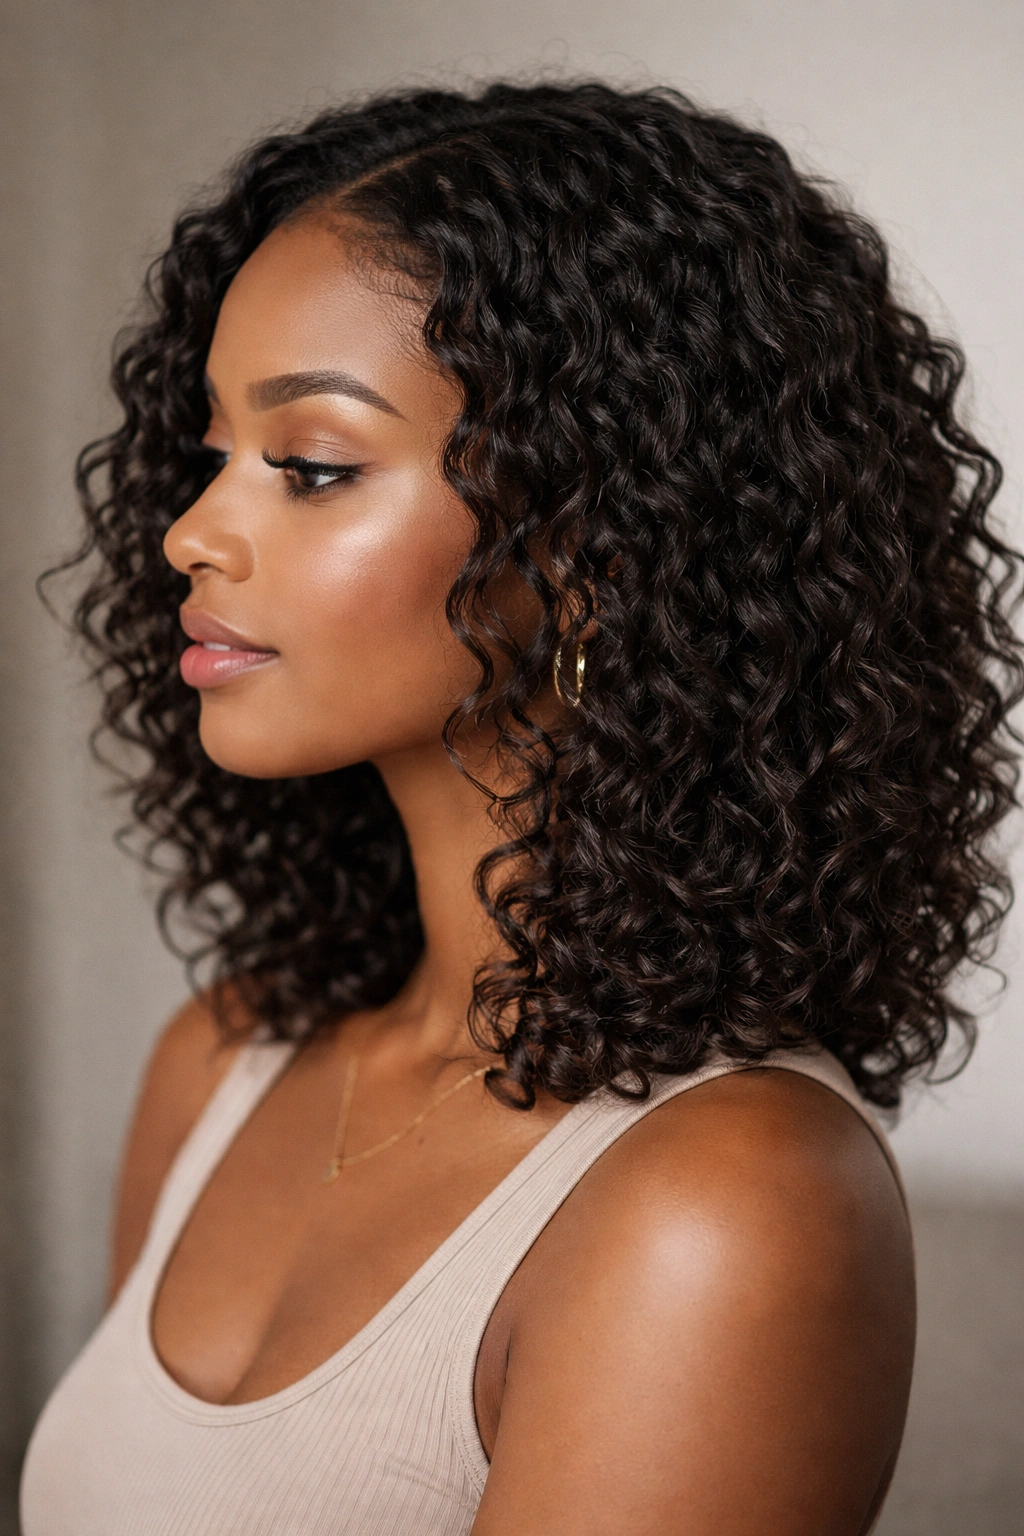
A braidout is the braided cousin of the twist-out—instead of twisting your hair, you braid it, then unbraid to reveal wavy, textured curls with a distinctly soft, undefined aesthetic. For medium-length curly hair, braidouts create beautiful, natural-looking waves that work for professional settings, casual days, or any occasion where you want curls that look effortless rather than sculpted. The style holds beautifully for 5-7 days and actually improves between days one and three as the waves relax and soften.
Why Braidouts Create Softer Waves Than Twists
Braids distribute tension differently than twists because the three-strand structure creates a flatter, more elongated wave pattern rather than the tight spiral of a two-strand twist. This produces waves instead of coils—a subtle but meaningful difference in final aesthetic. For medium hair, this means you get movement and dimension without the tight definition of a twist-out or the coiled texture of Bantu knots. Braidouts are also faster to install than twists, making them practical if you’re short on time but still want a polished, multi-day style.
Braiding Your Hair for Maximum Wave Impact
- Section hair into 6-10 braids depending on desired wave size: More braids create finer waves, fewer braids create bolder, more dramatic waves
- Braid from roots to ends with even tension: Uneven tension creates waves that are tighter in some areas and looser in others, resulting in a messy rather than intentional look
- Use a lightweight curl cream or gel: Heavy products can weigh down the waves and make them fall flat; you want enough hold to maintain shape without weight
- Braid damp (not soaking wet) hair: If hair is too wet, drying takes forever; if it’s too dry, the waves won’t set properly and you’ll just get crimped texture
- Leave braids in for at least 12-24 hours: Overnight is the minimum, but 24 hours ensures waves are fully formed and will hold through multiple days
Pro tip: Install your braidout in the evening and wear a bonnet overnight. By morning, your waves are fully set, and you can unravel them immediately and wear the style right away without waiting for it to dry further.
6. The Two-Strand Twist
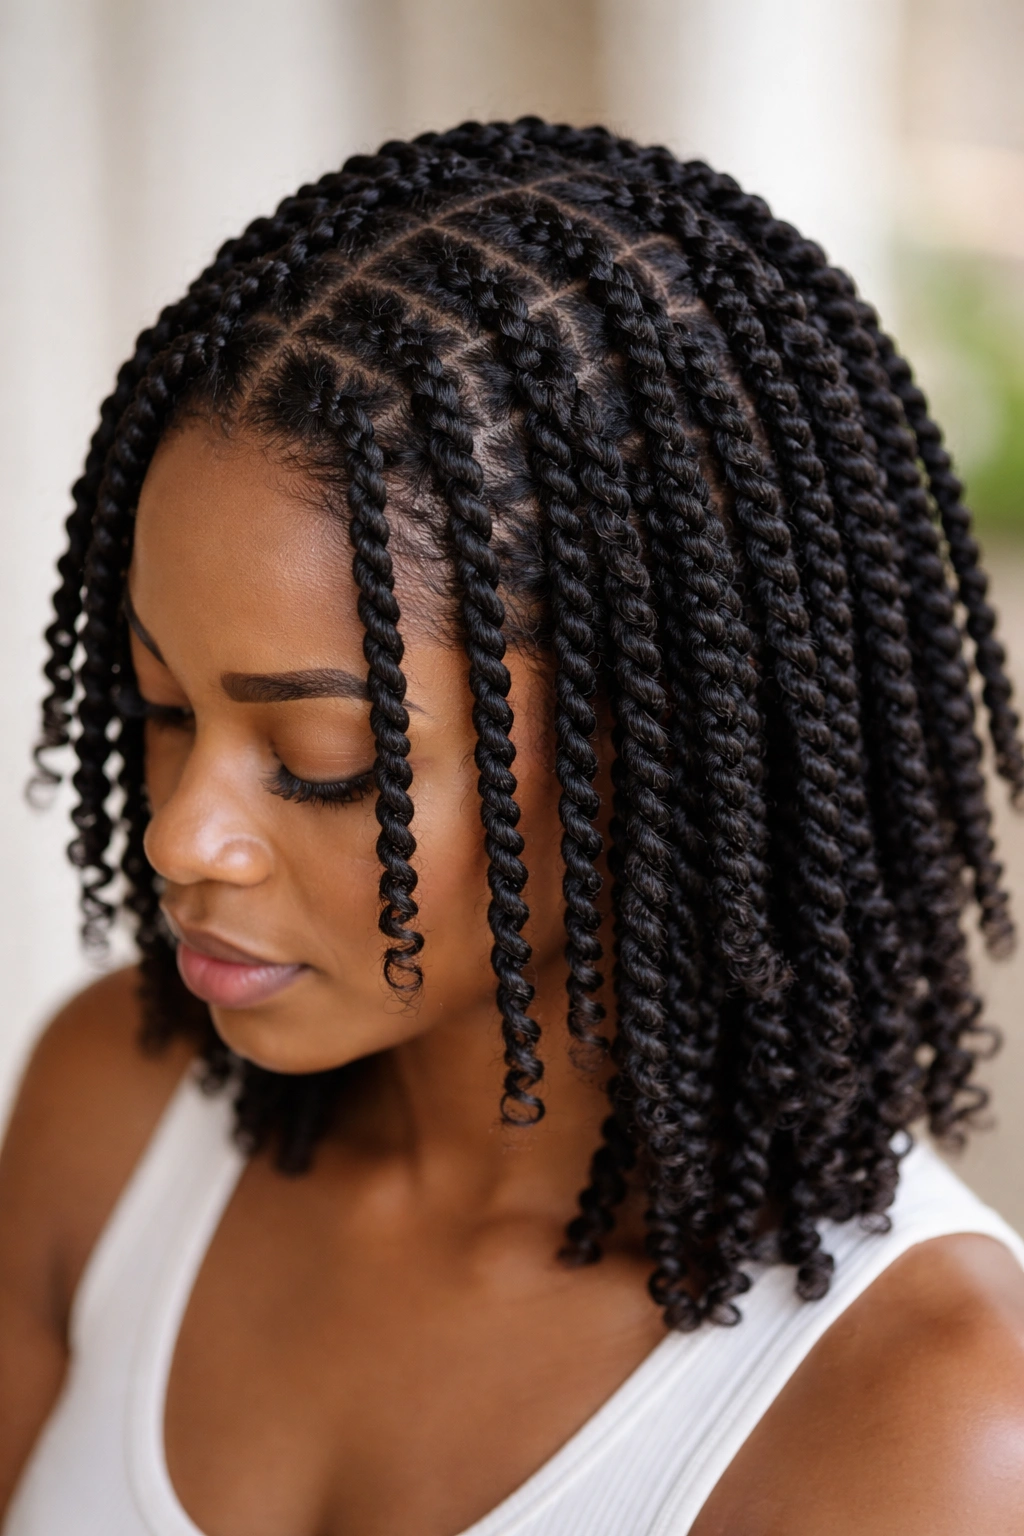
The two-strand twist is a foundational protective style where you twist two sections of hair around each other from roots to ends, creating a ropelike strand that’s both beautiful on its own and an excellent base for further styling. For medium-length curly hair, two-strand twists offer incredible versatility: wear them as-is for a polished protective style, unravel them for defined curls, pin them up for an elegant updo, or refresh them with water and product to extend the style indefinitely.
Two-Strand Twists as Both Style and Foundation
What makes two-strand twists so valuable is that they work on multiple levels—they’re a complete style in themselves, appropriate for work or social settings, but they’re also the foundation for at least three other styles (twist-outs, refreshed twists that last weeks, and twisted updos). For medium hair, you can install twists in about 3-5 hours depending on the number of twists and your experience level, and they’ll look good immediately without any setting time. This immediate payoff makes them perfect for someone who needs a style today, not a style that requires overnight drying.
Installing Twists That Look Intentional and Polished
- Start with clean, moisturized hair: Twists show product buildup and dryness more visibly than other styles, so deep condition 2-3 days before twisting
- Section hair into even-sized sections: Consistency in section size creates a cohesive, intentional appearance; uneven sections look accidental
- Twist firmly from roots to ends: Tension throughout prevents loose, undefined sections and ensures twists look polished rather than messy
- Apply curl cream and edge control: Use edge control on your hairline twists to keep them sleek and defined, and apply curl cream to each section before twisting for moisture and hold
- Keep twists uniform in size: Pick a starting thickness and stick with it throughout your entire head; mixing sizes looks unintentional
Worth knowing: Two-strand twists look better on the third or fourth day than they do on day one, as the twists relax slightly and the definition softens into a more natural appearance. If you install them on a Friday, they’ll look absolutely stunning by Monday.
7. The Crochet Curls
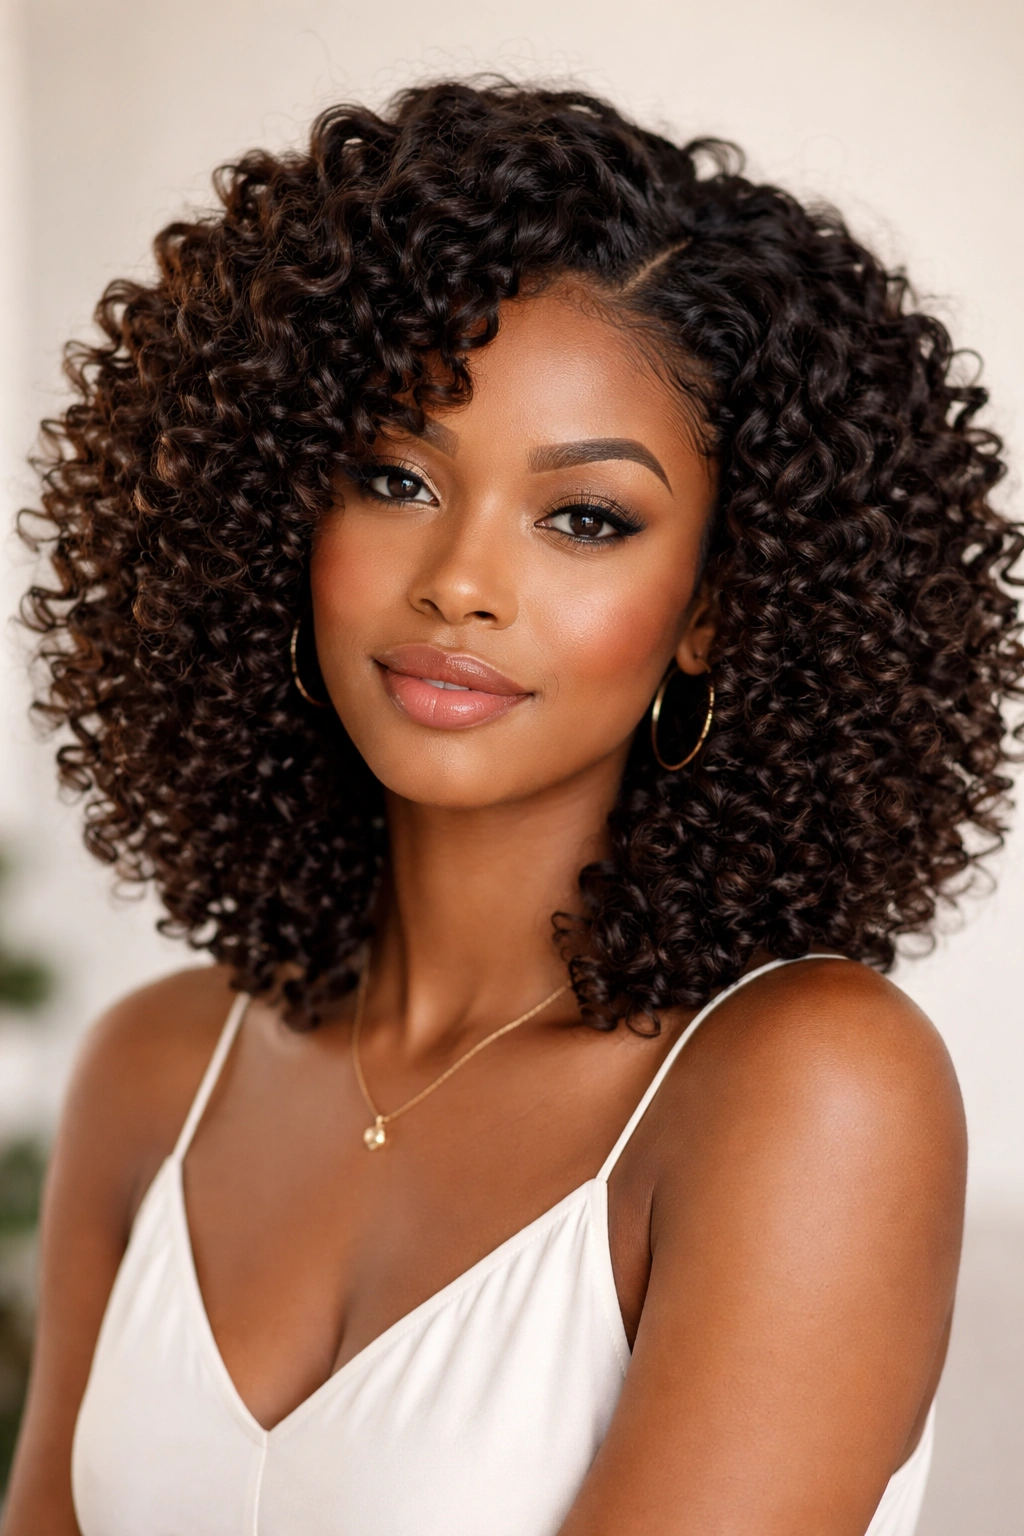
Crochet curls involve using a crochet hook to attach pre-made curly hair extensions into your braided base, creating voluminous, bouncy curls instantly. While this style does involve extensions (unlike many other styles on this list), it’s worth including because it offers something unique: the ability to dramatically increase volume and curl definition while still protecting your natural hair underneath. For medium-length curly hair, crochet curls can give you the appearance of thick, luxurious, shoulder-grazing or longer curls without the commitment or manipulation of actually growing your hair out.
How Crochet Curls Protect While Transforming
Crochet curls protect your natural hair because once you’ve installed the extensions, your natural hair is braided underneath and not manipulated for weeks. The extensions bear the weight and take the stress that would otherwise fall on your natural strands. For someone with medium-length hair who wants the look of longer curls but doesn’t want to wait months for growth, crochet curls deliver that transformation immediately. The extensions also dry faster than actual hair length would, so styling time is actually less than it would be with natural curls of equivalent length.
The Crochet Curl Installation and Care Process
- Braid your natural hair into a flat or cornrow base: These braids need to be tight enough to hold the weight of extensions but not so tight that they cause tension alopecia
- Choose curly extension hair that matches your curl pattern: Hair that’s visually similar to your natural texture blends more seamlessly than obviously different extensions
- Use a crochet hook to loop extensions through the braids: Insert the hook under each braid section and pull the extension hair through, securing as you go
- Take down and rebraid every 4-6 weeks: Leaving crochet curls in for longer risks matting at the roots and potential damage to your natural hair
- Refresh curls with mousse or curl cream every 2-3 days: Extensions dry out faster than natural hair, so regular refreshing keeps them looking bouncy and soft
Pro tip: Use a silk or satin pillowcase and wrap your curls in a bonnet at night to prevent frizz and extend the fresh look of your crochet curls between refreshes.
8. The Flexi-Rods
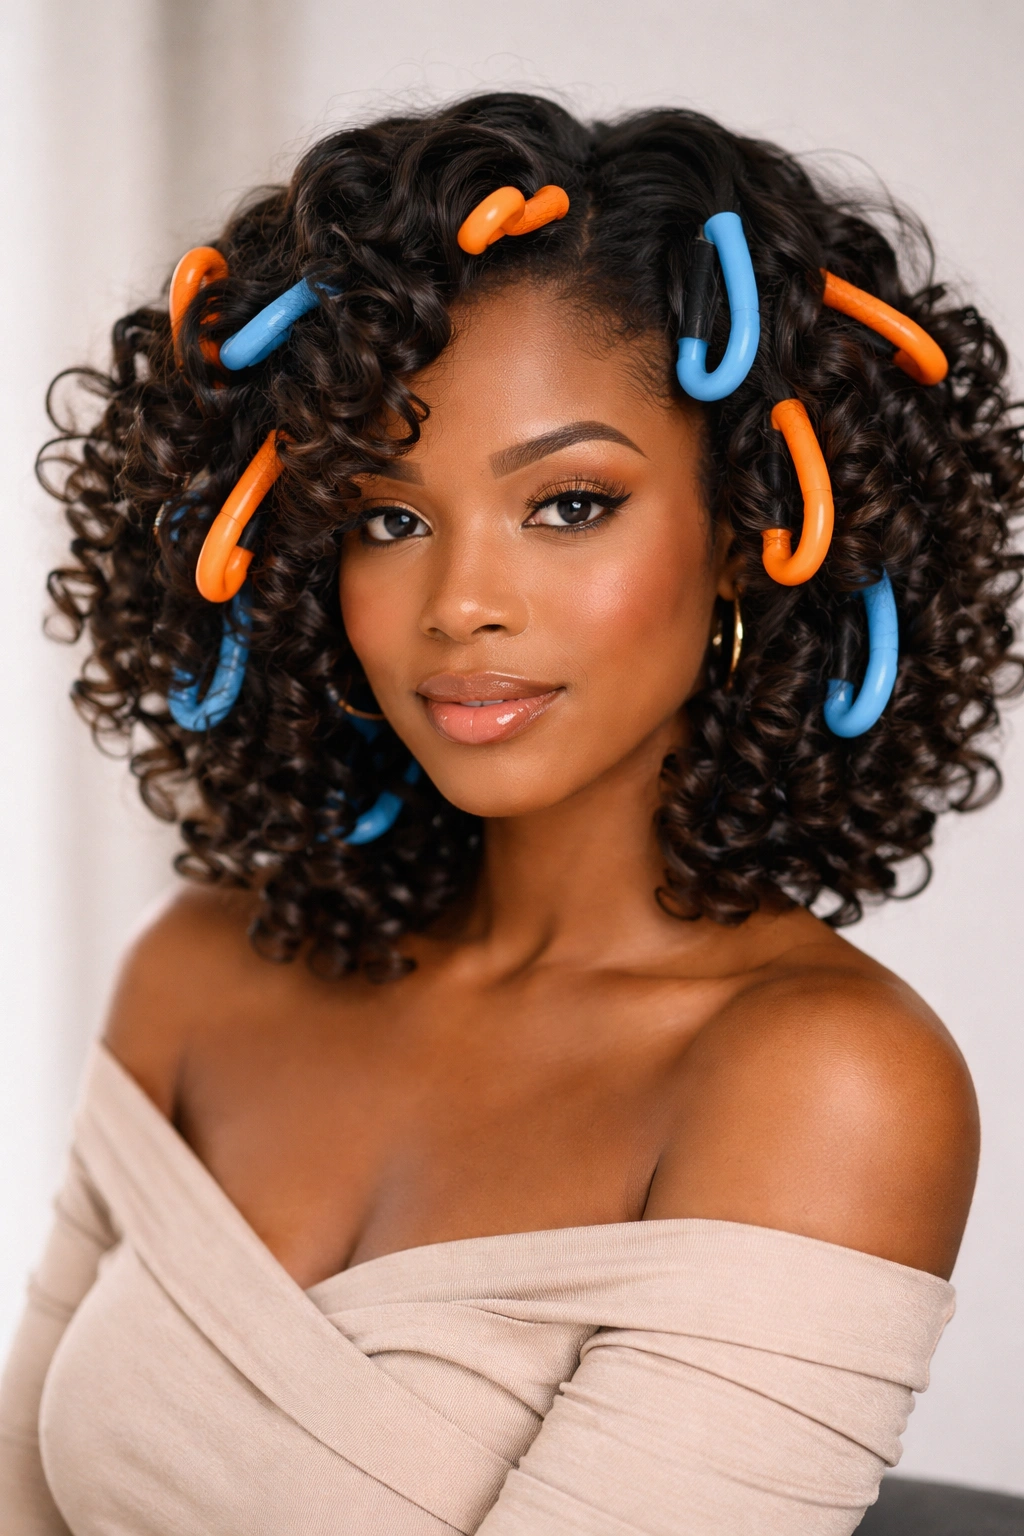
Flexi-rods—flexible rubber rods that bend into a U shape—create smooth, rounded curls that are looser and more voluminous than perm rods, giving a distinct aesthetic that’s somewhere between perm-rod curls and natural curls. For medium-length curly hair, flexi-rods are particularly flattering because they create an open curl that shows off your hair’s natural shine and dimension while providing gentle hold. The curls typically last 7-10 days and actually develop more character as they age, often looking better on days 3-5 than they do immediately after setting.
Why Flexi-Rods Create Such Soft, Voluminous Curls
The flexibility of flexi-rods means they don’t grip your hair as tightly as rigid perm rods do, so the curls they create are naturally looser and less structured. This creates a more romantic, undone aesthetic—your curls have movement and airiness rather than the tight, uniform look of perm rods. For medium hair, this matters because loose curls photograph beautifully, they move naturally when you walk or turn your head, and they read as effortlessly styled rather than deliberately engineered. The slight looseness also means these curls won’t look droopy by day five or six the way some tighter sets do.
Rolling and Setting Flexi-Rods Like a Pro
- Use medium to large flexi-rods: Small rods defeat the purpose of flexi-rods (they create tight definition like perm rods); go bigger for the soft, voluminous aesthetic that makes this style special
- Roll hair from ends toward roots with light tension: You want the rod to hold your hair’s shape, not compress it; too much tension creates tight, frizzy curls
- Apply mousse or a light curl cream before rolling: Heavier gels can weigh down the soft curls; mousse provides hold without the stiffness or crunchiness
- Leave rods in for at least 18-24 hours for full setting: Flexi-rods take slightly longer to set than perm rods because the flexibility means less initial grip on the hair
- Remove rods gently by bending and sliding rather than pulling: Yanking rods out can disrupt your curl pattern; bend the rod and gently slide your curls off
Worth knowing: Flexi-rods work best if you wrap your head in a bonnet after rolling and let gravity help set the curls overnight. The vertical position combined with the bonnet creates the most beautiful, voluminous results.
9. The Passion Twists
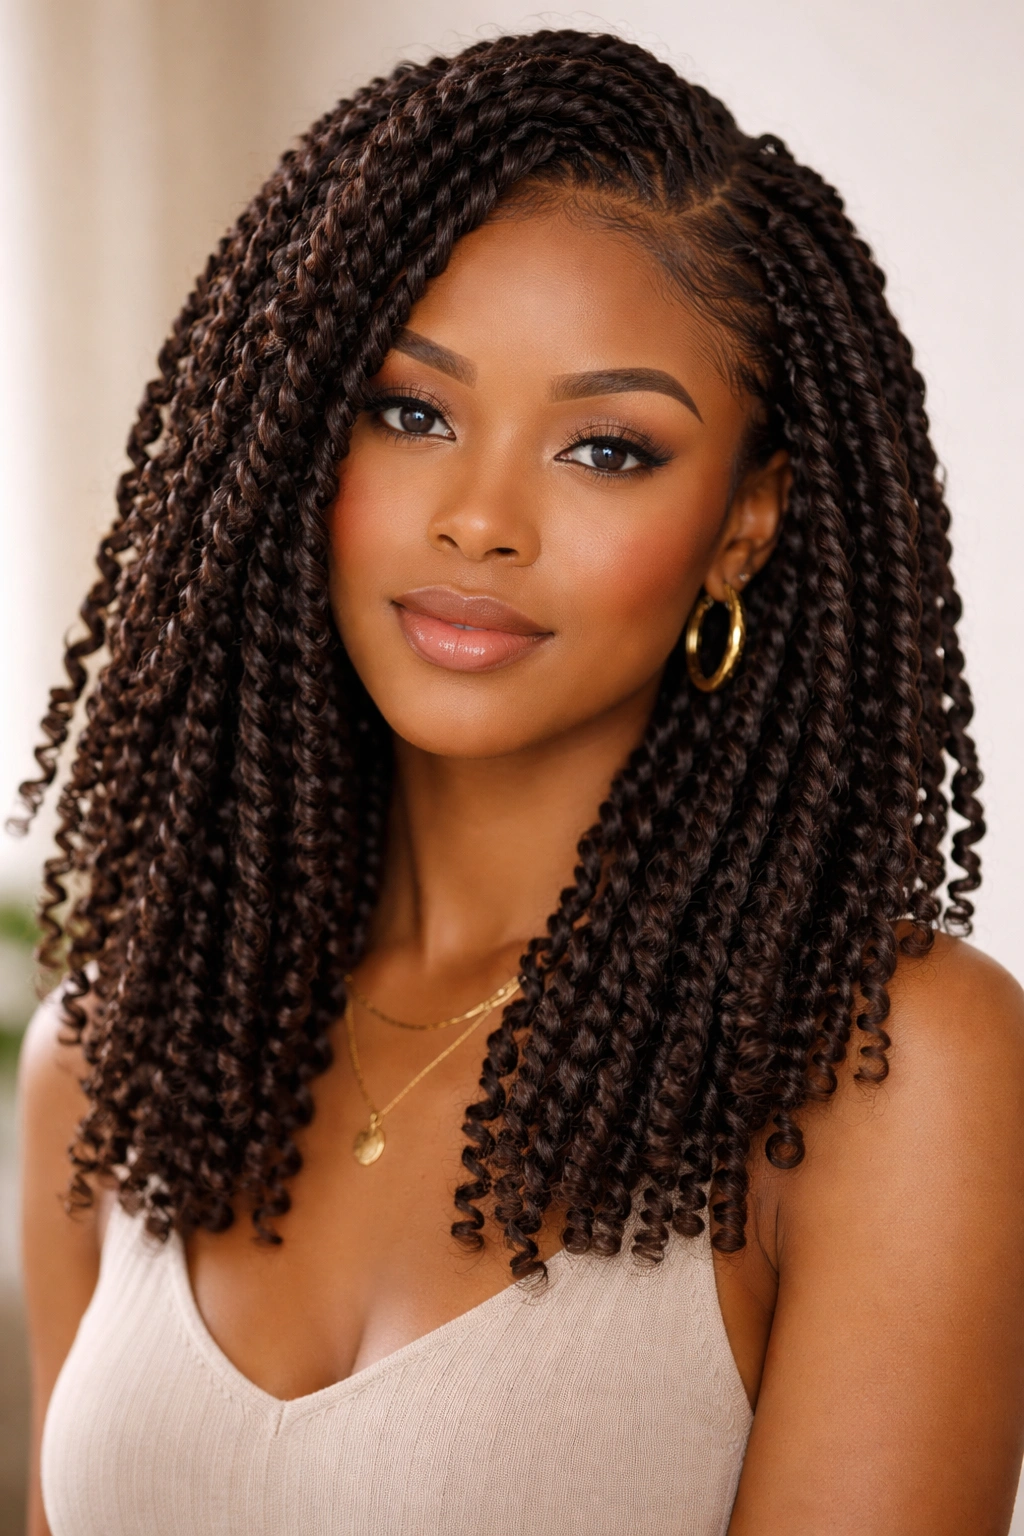
Passion twists combine the protective qualities of box braids with a softer, more refined aesthetic—they’re pre-twisted hair extensions that you crochet into your braided natural hair base, creating long, thin, twisted curls that look intentional and elegant. For medium-length natural hair, passion twists offer the instant lengthening and volume of other protective styles with an aesthetic that’s distinctly modern and chic. They typically last 4-6 weeks before you need to take them down and rebraid, making them a mid-length commitment.
The Appeal of Passion Twists for Medium Curly Hair
Passion twists are less visually heavy than box braids because the twists are thinner and the curl pattern creates movement, so they feel lighter on the head and look less severe. For medium natural hair that you want to protect while also looking polished and put-together, passion twists hit a perfect sweet spot—they’re undeniably protective styling, but they’re also genuinely beautiful and wearable for any setting. The twists also dry much faster than untwisted extensions, so maintenance is genuinely simpler than with looser protective styles.
Getting Passion Twists That Look Salon-Quality
- Start with clean, dry hair: Passion twists show product buildup and oil more visibly than looser styles, so clarify before installation
- Have your braider cornrow or flatbraid your entire head: The base is crucial; loose or uneven braids will result in passion twists that don’t look intentional
- Choose pre-twisted extension hair: Some people use Marley hair and twist it themselves, but pre-twisted hair typically looks more refined and uniform
- Have your edges laid and smoothed: Passion twists show your hairline clearly, so make sure your edges are handled with care and edge control for a polished finish
- Take them down after 4-6 weeks: Going longer risks matting, mold in the braids, and damage to your natural hair from the braids staying too tight
Pro tip: Sleep with your passion twists in a protective style—either braided together loosely or in a high pineapple—to prevent frizz and maintain the neat appearance throughout the duration of wear.
10. The Faux Locs
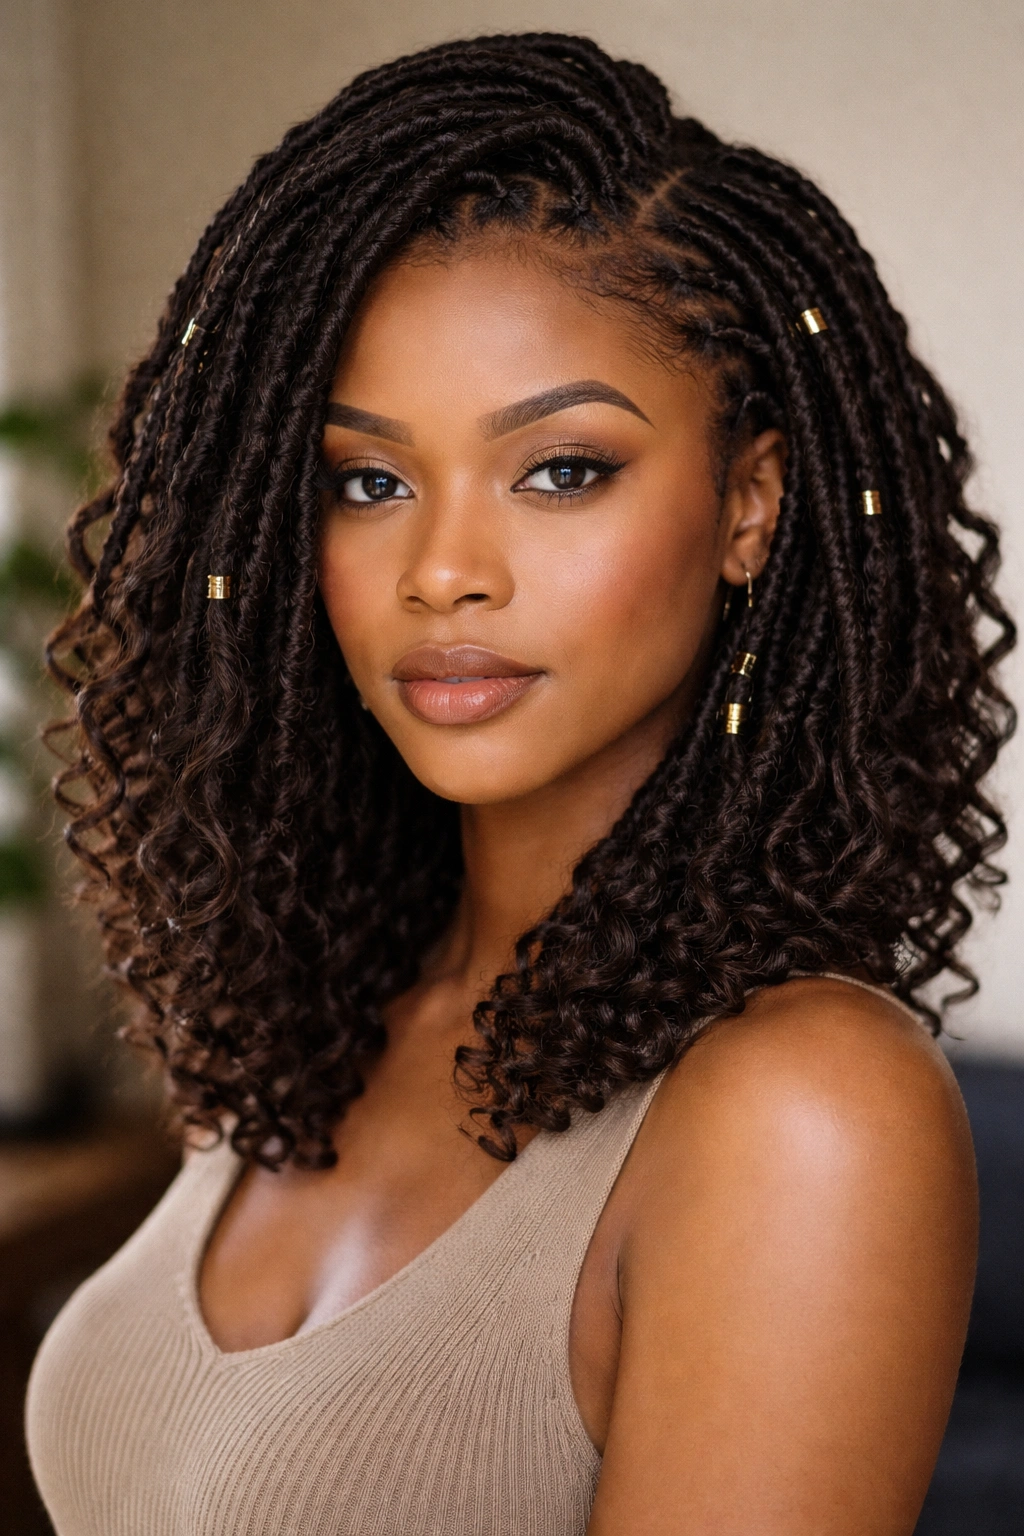
Faux locs are a protective style that mimics the appearance of locs without the permanent commitment—you braid your natural hair, wrap extension hair around it, and the result looks like intentional locs that you can take down whenever you choose. For medium-length curly hair, faux locs offer a statement aesthetic that’s bold, beautiful, and undeniably protective. They typically last 4-8 weeks depending on how well you maintain them, and they can be refreshed rather than completely taken down and redone, extending their lifespan even further.
Why Faux Locs Are Both Protective and Stunning
Faux locs protect your natural hair completely because your natural strands are braided at the base and largely untouched once the loc is created. The extension hair bears the weight and takes the styling stress. At the same time, faux locs make a visual statement—they’re not a subtle style, and many people find that powerful aesthetic deeply beautiful and culturally significant. For medium natural hair, faux locs create the appearance of much longer, thicker hair, which is transformative, and they actually move and flow because they’re not permanently locked together like real locs are.
Installing Faux Locs That Look Intentional
- Braid your hair into two-strand braids or cornrows: Your base is crucial; messy braids create messy-looking locs
- Choose loc extension hair in your curl pattern: Curly locs blend seamlessly and look more intentional than straight or loosely textured extensions
- Wrap extensions around your natural braids tightly: The wrapping is what creates the “loc” appearance; loose wrapping looks sloppy
- Use edge control on your hairline and throughout: Faux locs show your entire hairline, so it needs to be polished and intentional
- Refresh every 3-4 weeks: Roots will show growth and may look loose; refresh by wrapping loose areas and tightening the base
Worth knowing: Faux locs look better the second and third week than they do immediately after installation, as everything settles and the style relaxes into a more natural-looking appearance. Plan important events for week 2 or 3, not day one.
11. The Flat Twists
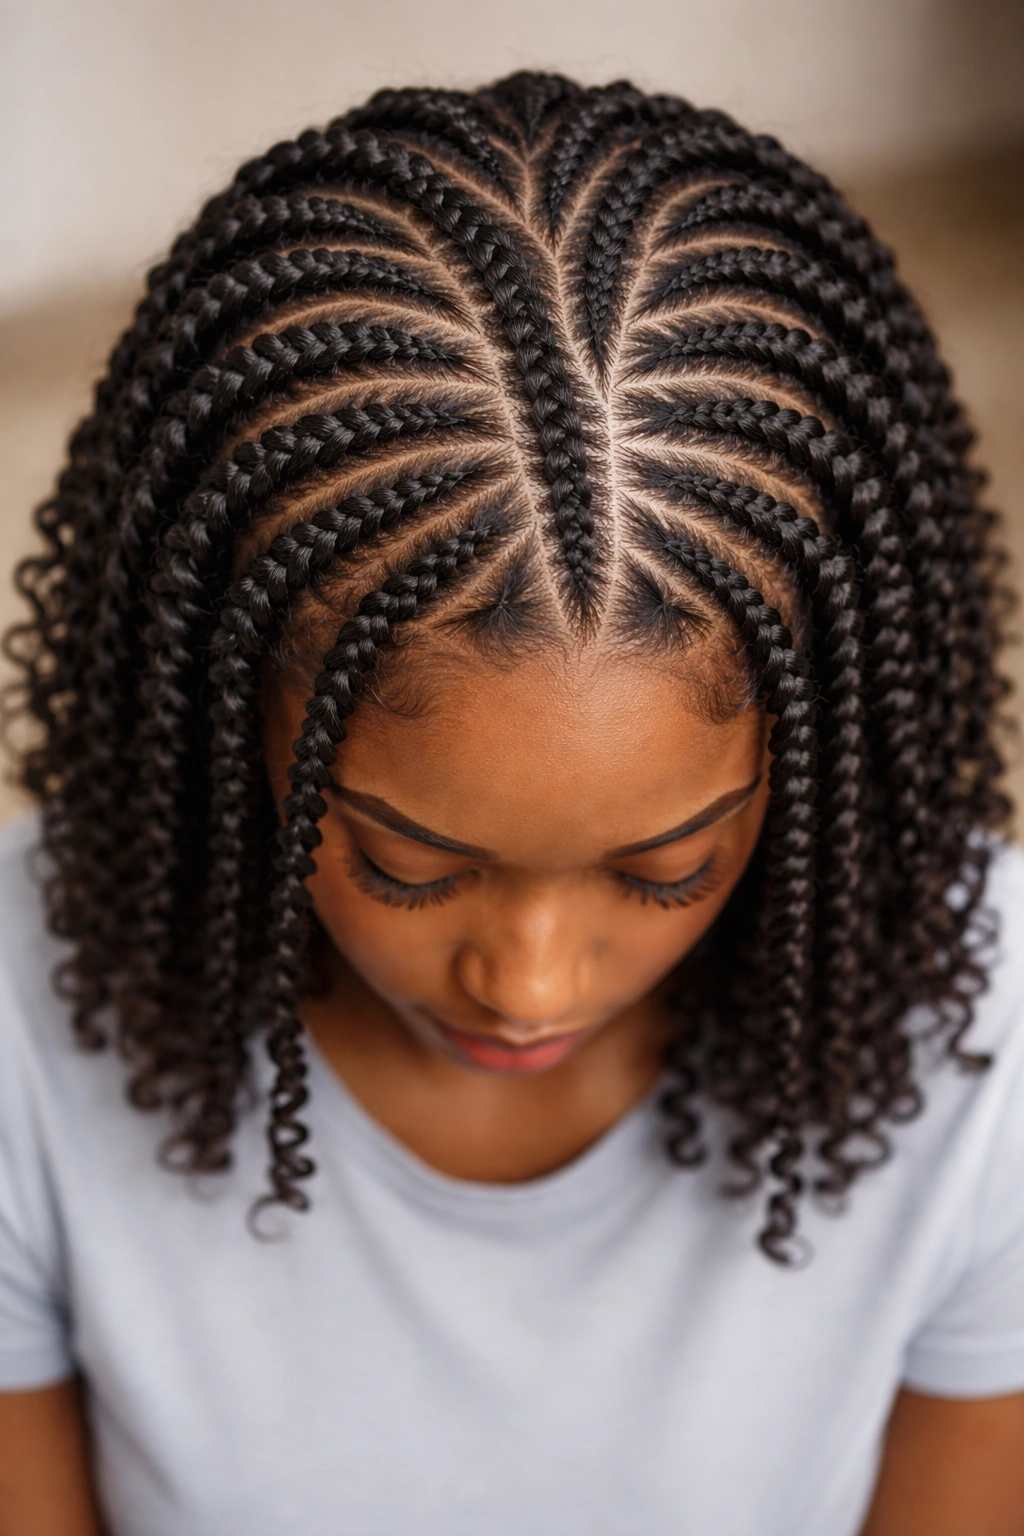
Flat twists are two-strand twists created on the scalp rather than hanging freely—you twist two sections of hair against the head, creating flat, geometric patterns that are simultaneously protective and visually stunning. For medium-length curly hair, flat twists offer the bonus of being easy to hide (you can tuck them under other hair if needed), flexible for styling (you can pin them up, let them hang, or combine them with loose hair), and genuinely beautiful without any setup time or overnight drying.
The Versatility of Flat Twists on Medium Hair
Flat twists are more versatile than regular two-strand twists because once you’ve flat-twisted your entire head, you have complete freedom with styling—you can wear them down, flip your head upside down to create volume, pin them into an updo, tuck them away under a wig or bonnet, or combine them with other hair for a mixed texture. For medium-length hair, this flexibility is huge because you can create multiple looks from a single base style. Flat twists also work beautifully as a transition style—you can flat-twist your hair, leave the twists in for several days, then untwist for beautiful defined curls when you want to switch things up.
Creating Flat Twists That Look Polished and Intentional
- Start at the hairline and twist toward the back of your head: This creates a flattering pattern that frames your face and adds lift at the crown
- Keep twists flat against the scalp by twisting snugly: Too loose and they won’t look intentional; too tight and you risk tension alopecia
- Create geometric patterns: Straight lines, zig-zags, or curved sections—intentional pattern looks more polished than random placement
- Use edge control on your hairline and throughout: Every visible part of a flat twist style needs to look intentional, so don’t skip this step
- Apply curl cream and a light-hold gel: Flat twists actually hold better than you’d expect, so you don’t need a heavy product for them to look polished
Pro tip: If you want defined curls after flat twisting, leave the twists in for at least 18-24 hours before untwisting. The longer they sit, the more defined your curls will be when you unravel them.
12. The Wave Pattern
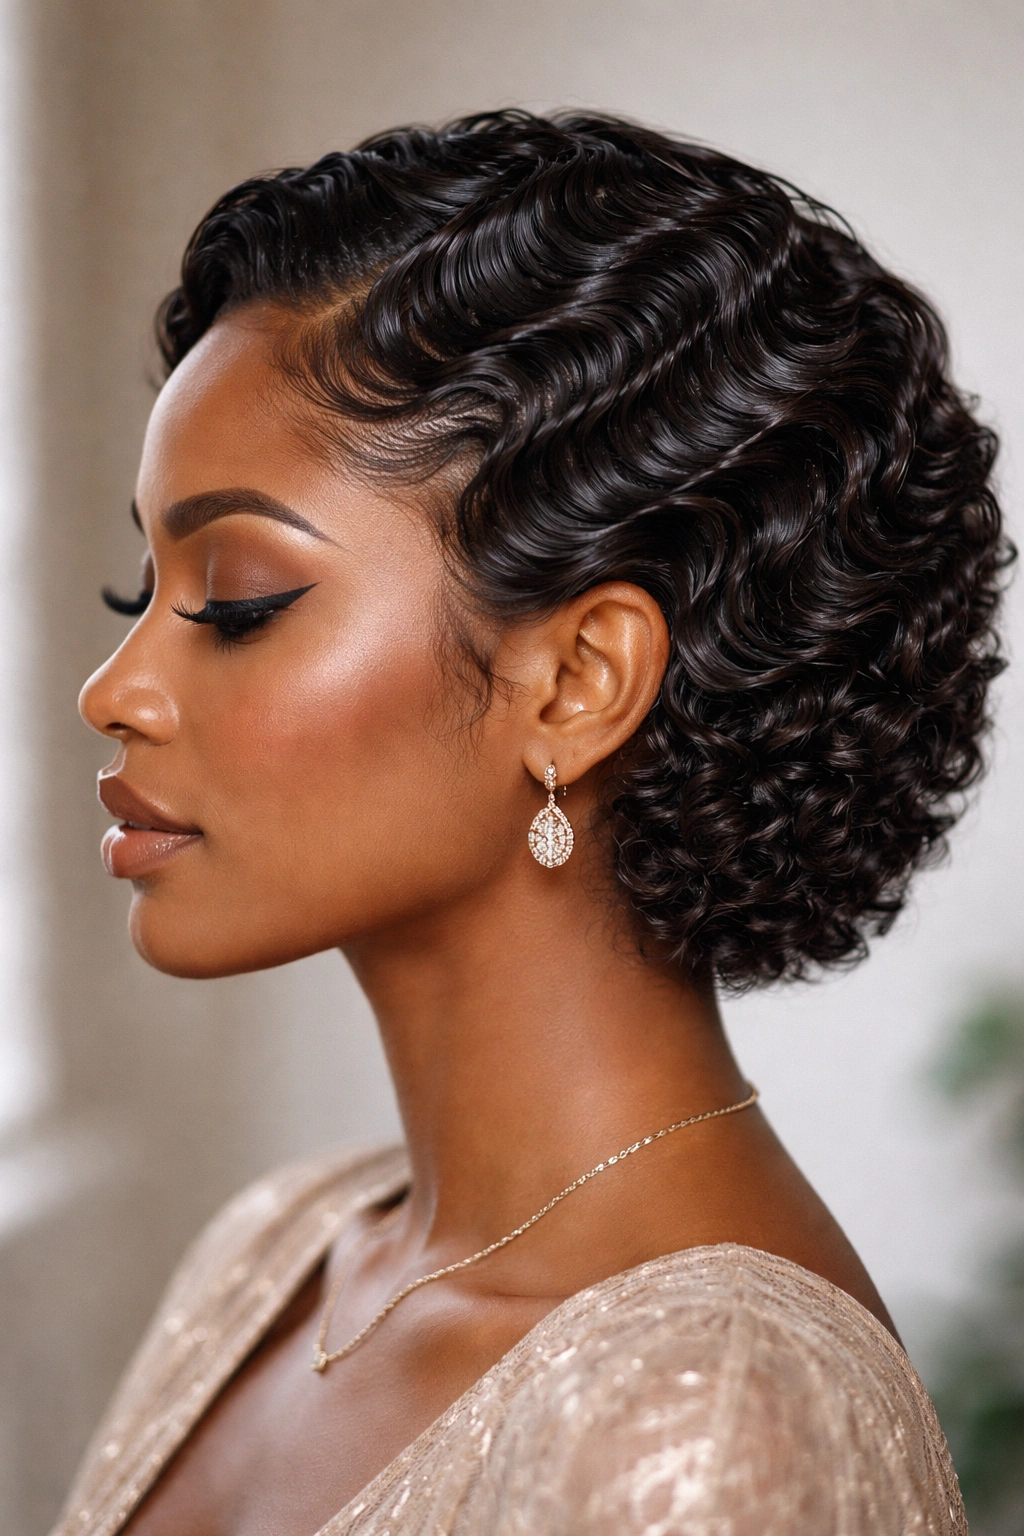
A wave pattern—also called a wave set or finger waves—creates dimensional, sculptural waves that sit close to your scalp and travel down the length of your hair, creating a vintage-inspired aesthetic that’s both elegant and undeniably striking. For medium-length curly hair, a wave pattern works by using your fingers, a comb, or setting lotion to guide your natural curls into a curved, directional pattern that holds as it dries. This style creates incredible dimension and movement and typically holds for 3-5 days depending on humidity and how much you manipulate it.
Why Wave Patterns Create Such Dimensional, Striking Curls
Wave patterns leverage your hair’s natural curl pattern but direct it intentionally, creating dimension that a loose curly style wouldn’t have. The curved pattern also catches light differently than straight curls, making your hair look shinier and more lustrous. For medium hair, wave patterns are particularly flattering because they create the appearance of volume and height without actually requiring more hair—it’s an optical illusion created by the directional curves. The style also reads as undeniably polished and intentional, making it appropriate for professional settings or special events.
Setting a Wave Pattern That Holds All Week
- Start with damp, product-coated hair: Apply a leave-in conditioner and a setting gel or mousse to damp hair; soaking wet hair takes too long to dry, completely dry hair won’t accept the wave pattern
- Use your fingers or a comb to create curved sections: Follow your natural curl pattern but guide it into deliberate waves; pushing against the curl pattern creates frizz, so work with what you have
- Direct waves in the same direction down your head: This creates visual flow and movement; waves going in different directions look unintentional
- Allow several hours of air drying or use a bonnet dryer: Completely dry hair holds the wave pattern indefinitely; damp hair will relax and lose the pattern
- Avoid touching or running your fingers through the waves while drying: Every touch disrupts the pattern; hands-off drying creates the cleanest, most defined waves
Worth knowing: Wave patterns look absolutely stunning on day two or three after installation, as the waves relax slightly and become softer and more organic-looking. The first day can look a bit too sculpted; give it a day to settle into its best version.
Styling Tips for Medium Curly Hair
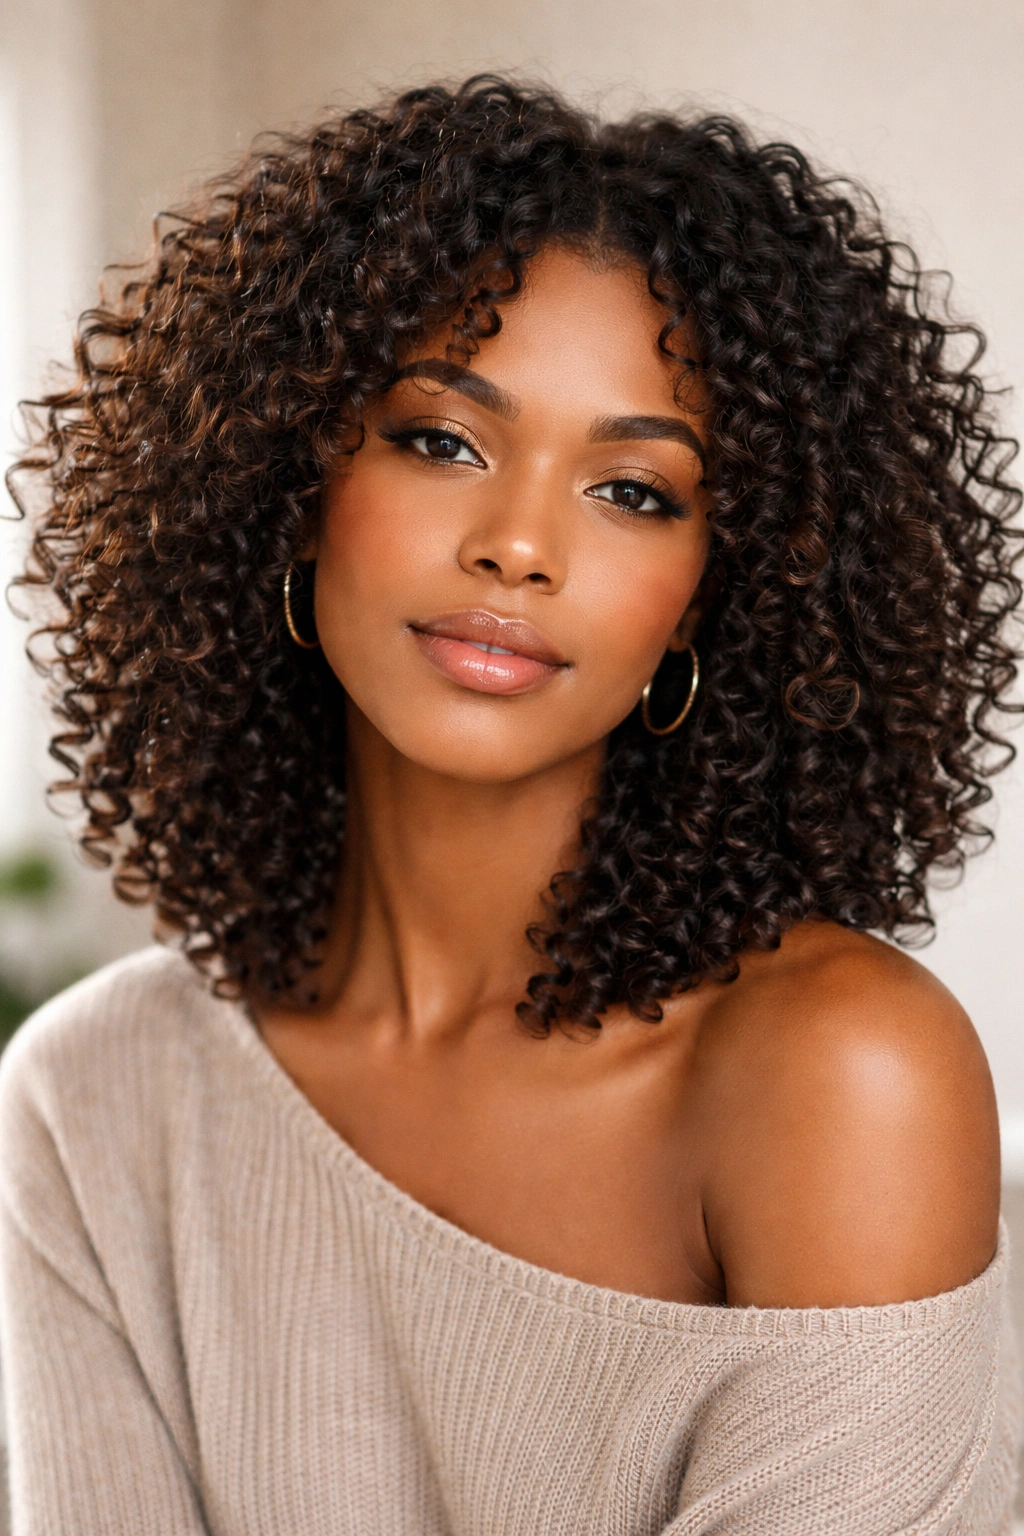
Medium-length curly hair has unique needs that differ from both short curls and longer hair. Your curls have enough length to show dimension but not so much that weight pulls them down, which means you can experiment freely with styling without worrying about your curls drooping by day three or four. One of the biggest advantages of medium length is that you can switch styles frequently without damaging your hair—you have enough hair to protect, but short enough that styling doesn’t require a massive time commitment.
Moisture is non-negotiable for every single one of these styles. Curly hair naturally loses moisture faster than straight hair because moisture has to travel along a spiral path rather than a straight line, so product placement is crucial. Apply leave-in conditioner and curl products to soaking wet or damp hair—not dry hair—so your curls can actually absorb and hold onto moisture. A good rule: if your hair isn’t shiny and hydrated immediately after applying products, it won’t be hydrated later.
The difference between a style that lasts three days and a style that lasts ten days is often as simple as sleeping protectively. A bonnet, a silk scarf, or even a silk pillowcase makes a dramatic difference in how long your style holds and how much frizz develops. Your curls are more fragile at night than during the day because you’re sleeping on them, so protective sleep is essential. This single habit will extend your style lifespan by several days and improve the quality of your curls noticeably.
Maintaining and Refreshing Your Curly Style

The secret to making any of these styles last longer is learning to refresh rather than recreate. By day three or four, your style might have lost some definition or picked up some frizz, but that doesn’t mean you need to start over. A quick refresh with water and lightweight product—either a curl refresher spray, mousse, or a diluted leave-in conditioner—can restore your style to 90% of its fresh appearance in ten minutes.
When refreshing, focus on the areas that need it most: usually the edges, the top, and anywhere you’ve been sleeping on one side. Mist those sections with water until they’re damp, apply a light product, and either finger-coil or smooth them into shape. You don’t need to recreate your entire style; you’re just reviving the areas that have relaxed or picked up frizz.
Knowing when to take a style down is equally important as maintaining it. Most styles can safely last 5-7 days, some up to 10, but leaving them in too long causes matting, mold in braided bases, and unnecessary stress on your natural hair. Don’t get emotionally attached to a style past its expiration date—taking it down a few days early prevents damage and means your next style starts from a stronger, healthier foundation.
Final Thoughts
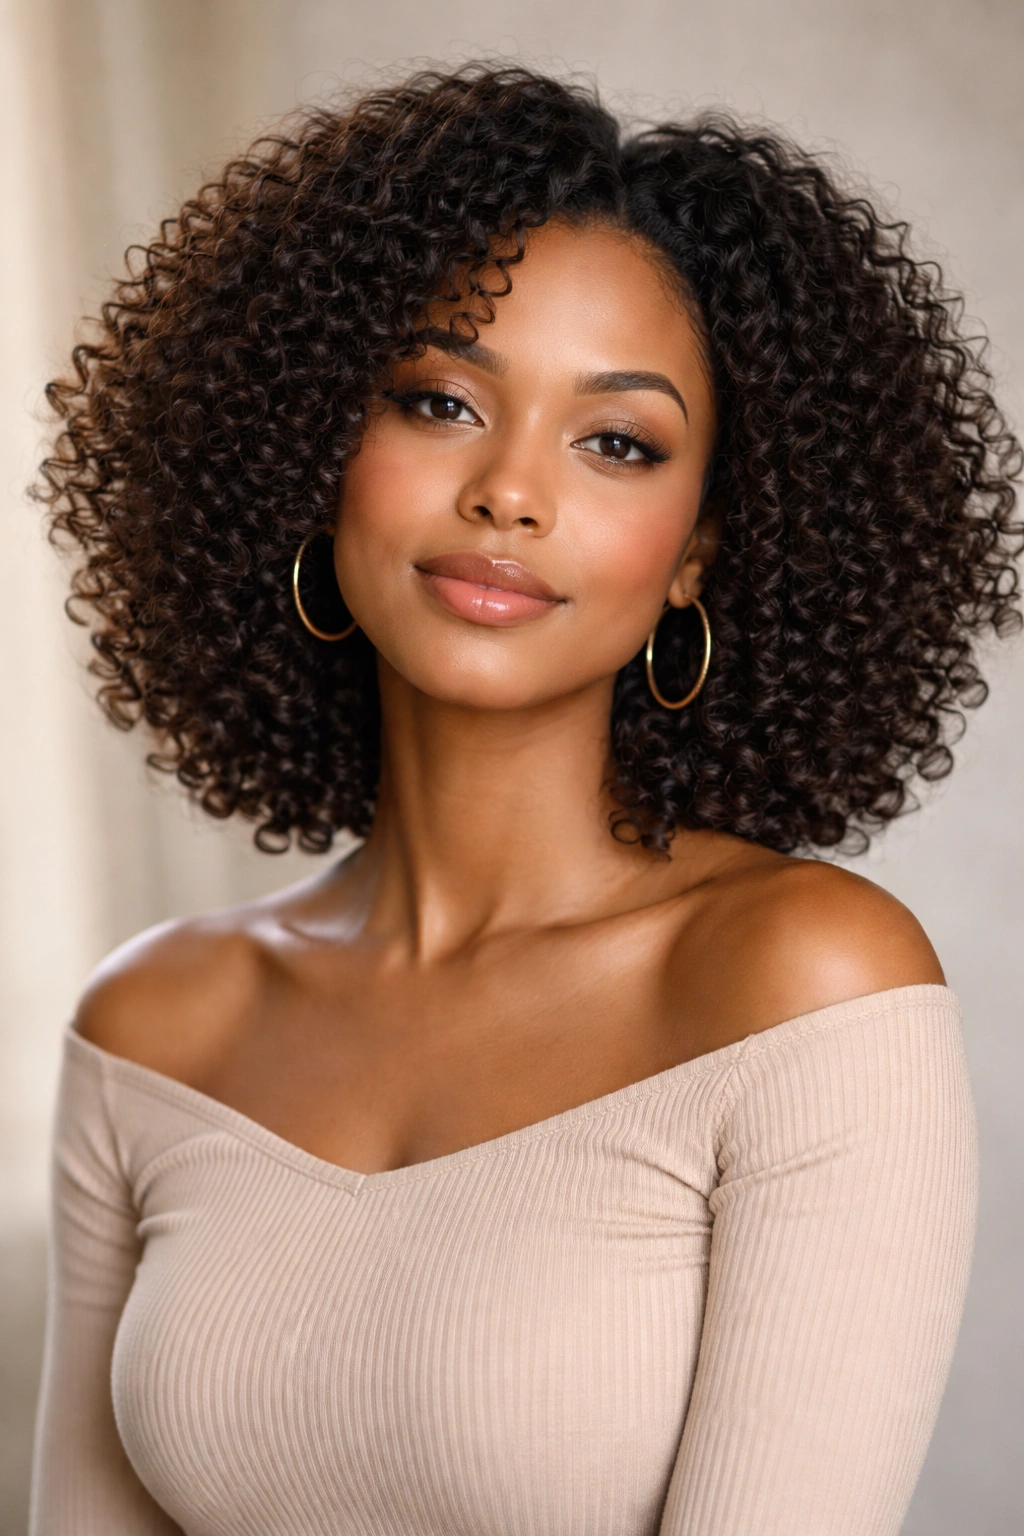
The variety of styles available for medium-length curly afro hair is genuinely stunning, and what works for you depends entirely on your lifestyle, your hair’s specific texture and density, and how much styling time you realistically have. If you love having a fresh, different style every few days, stick with twist-outs and braidouts. If you prefer low-manipulation protective styles that last weeks, dive into faux locs or passion twists. If you want the immediate payoff of a polished style without any setting time, flat twists and regular two-strand twists deliver that instantly.
The absolute best approach is to experiment. Try one or two styles from this list, see how they perform on your specific hair, and use that information to guide your next choice. Your hair’s response to humidity, how long styles actually hold on your texture, and which techniques feel most manageable for you personally—that’s information you can only gather through genuine experimentation. Don’t be discouraged if your first twist-out isn’t perfect or your first time installing flat twists takes forever. Every single style improves dramatically with practice, and your hands-on experience will teach you far more than any article ever could.
The bottom line is that medium-length curly hair is versatile, forgiving, and genuinely fun to style. You have enough hair to create beautiful, dimensional, visually striking looks, but short enough that you can change your mind without a major commitment. Use that freedom. Try the styles that excite you. Take care of your hair’s moisture and health while you’re wearing them. And most importantly, remember that every single style serves a purpose—some protect, some celebrate, some refresh your aesthetic, and some are just pure play. Your curls are worth all of it.
