



Getting ready in the morning when you have afro-textured hair doesn’t have to mean waking up an hour earlier or sacrificing your style for convenience. The misconception that quick hairstyles mean boring or minimal-effort looks couldn’t be further from the truth — with the right techniques and a little strategic planning the night before, you can create polished, protective, and genuinely beautiful styles in 15 to 30 minutes flat.
The key is understanding which styles work with your hair’s natural texture rather than against it, and which protective methods actually save you time in the long run. Whether you’re working with tightly coiled 4C hair, springy 3C curls, or anything in between, there are multiple styling options that look intentional and put-together while respecting the time constraints of a busy morning. Many of these styles also double as protective styles, meaning they keep your hair tucked away safely while allowing you to style with speed.
What makes a style truly “quick” for afro hair isn’t just about speed — it’s about realistic expectations and smart preparation. Some of these looks require 10 minutes of hands-on time in the morning; others require 15 to 20 minutes if you’re doing them from scratch. A few of the best time-savers involve prep work the night before, which we’ll break down for each style. The goal is getting out the door feeling confident and polished, not stressed about your hair.
1. Pineapple Ponytail With Defined Edges
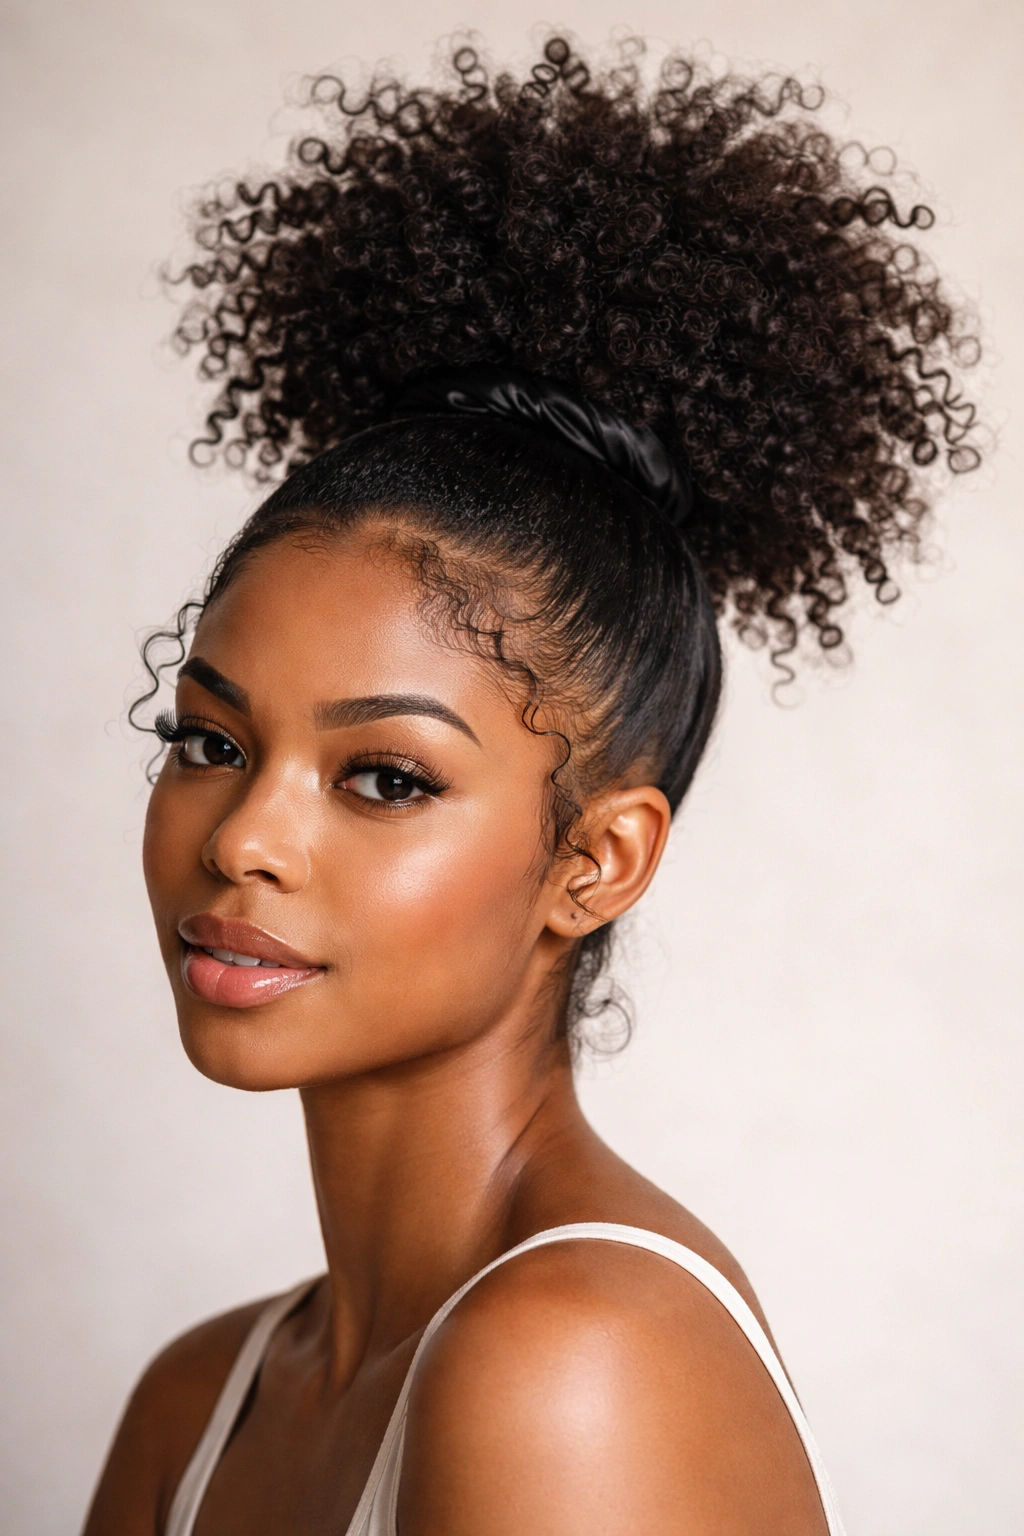
The pineapple is one of the fastest protective styles you can do, and when you add a high ponytail on top, it becomes a complete, polished look in under five minutes. Start by gathering your hair high on the crown — higher than a typical ponytail — and securing it loosely with a silk or satin-lined elastic. The “pineapple” shape happens naturally as you gather the hair from the crown; you’re not flattening it down but rather lifting it up and back.
What Makes This Quick and Why It Works
This style works because it doesn’t require you to manipulate individual curl patterns. You’re working with your hair’s natural volume and texture rather than trying to style each section precisely. The speed comes from the fact that you’re doing one simple action: gathering and securing. The magic happens because the elevated placement creates immediate visual impact — your styling is done simply by the placement of the ponytail itself, not by intricate sectioning or styling products.
Finishing Touches for Busy Mornings
- Use a fine-tooth comb or edge brush to smooth your baby hairs and hairline into a polished frame — this takes 30 seconds and completely elevates the look from “just woke up” to intentional
- Wrap a silk or satin scarf around the base of the ponytail to hide the elastic and add a finished detail
- Add a decorative hair clip, gold cuff, or hair stick through the base of the ponytail for an extra styling moment that reads as intentional
- If your edges need moisture, apply a lightweight edge control or curl cream to your hairline while the style sets — this multitasks your morning routine
Pro tip: Pineapple your hair before bed the night before, sleep on a silk pillowcase or in a silk bonnet, and you can literally just retighten the elastic in the morning and go. This transforms it from a 5-minute style into a 90-second refresh.
2. Twisted Crown Halo
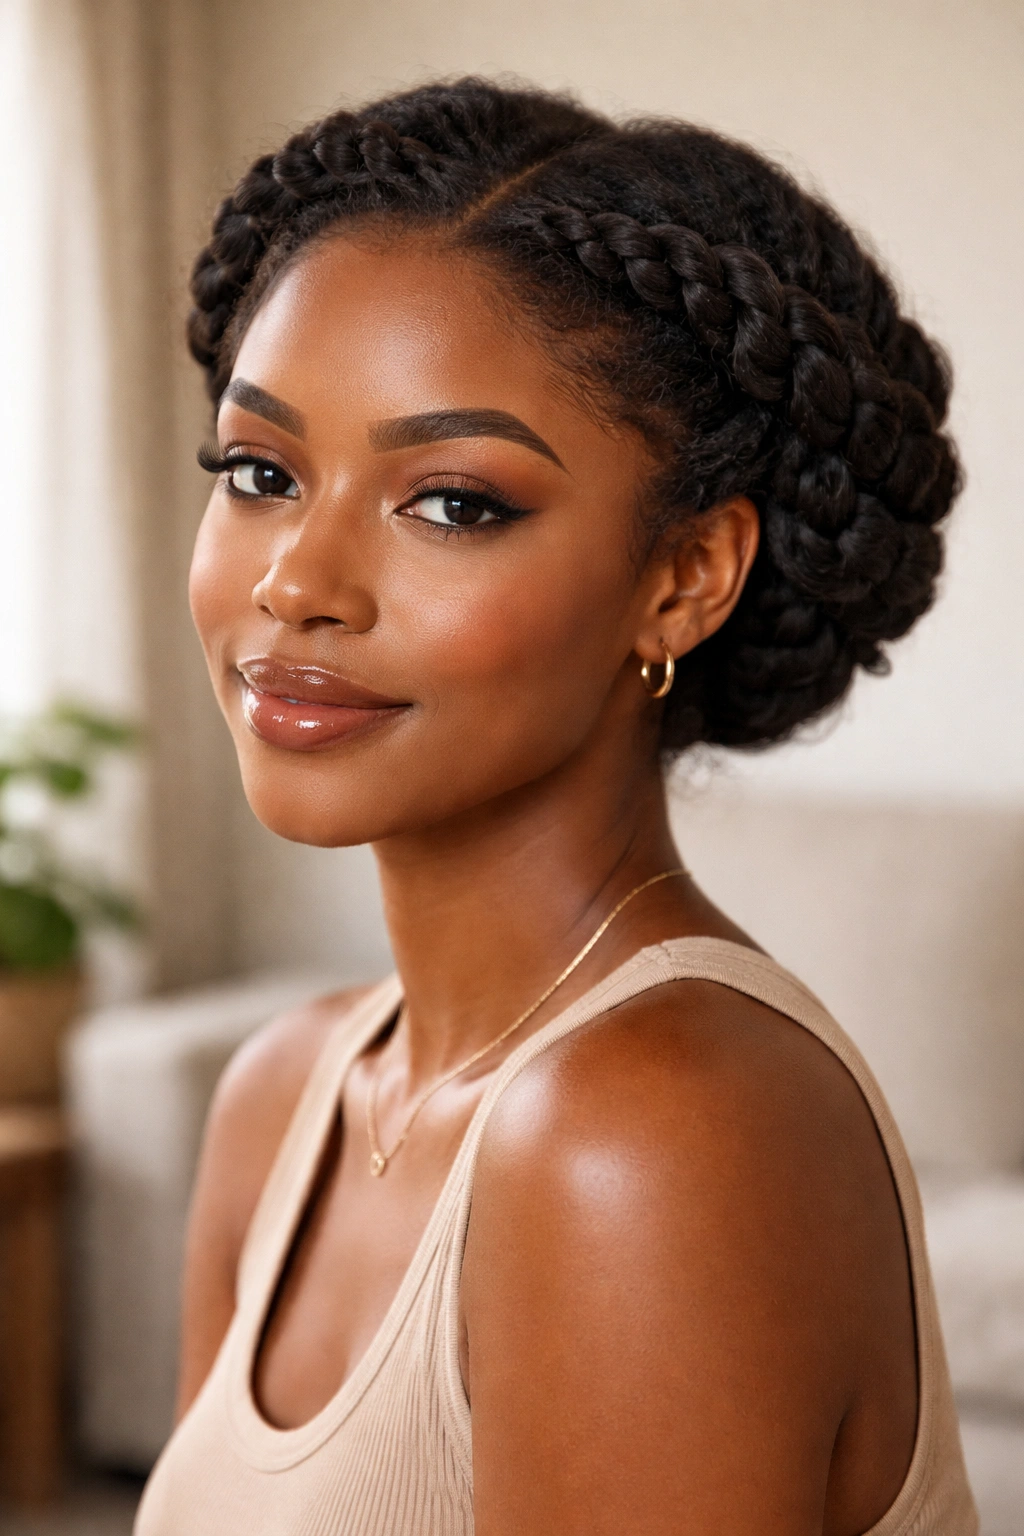
This style wraps two thick twists around the crown of your head like a crown, and despite looking intricate and time-consuming, it takes roughly 15 to 20 minutes from start to finish. Begin on one side by taking a section from your temple area and twist it toward the back of your head, keeping the twist fairly thick and loose. You’re creating a soft, romantic look, not a tight protective style, so let the twist be visibly textured.
Why This Style Reads as Intentional
Even though you’re “just twisting,” the effect is far more polished than the time investment suggests. A twisted crown automatically reads as a styled look because the technique is visible and purposeful. Your hair texture becomes the design element — you’re not hiding your curls; you’re showcasing them in a structured way. The completed crown creates a frame for your face that feels intentional and planned, even if you did it in 20 minutes.
Steps to Make It Fast
- Skip the product step if your hair is already moisturized from the night before — twists work on dry or lightly dampened hair without needing additional styling cream
- Create the first twist on one side, then secure it at the back with bobby pins while you create the matching twist on the other side — this takes the thinking out of placement because you already have one side as reference
- Don’t aim for perfection — slightly loose, visibly textured twists look more modern and take less time to execute than tight, perfectly neat ones
- Use 2-3 bobby pins per twist, tucking them underneath the twist so they’re invisible from the front
Worth knowing: This style holds better if you twist in the direction your hair naturally wants to curl or coil. If you twist against your hair’s pattern, the style unravels faster throughout the day.
3. Sleek High Bun With Geometric Edges
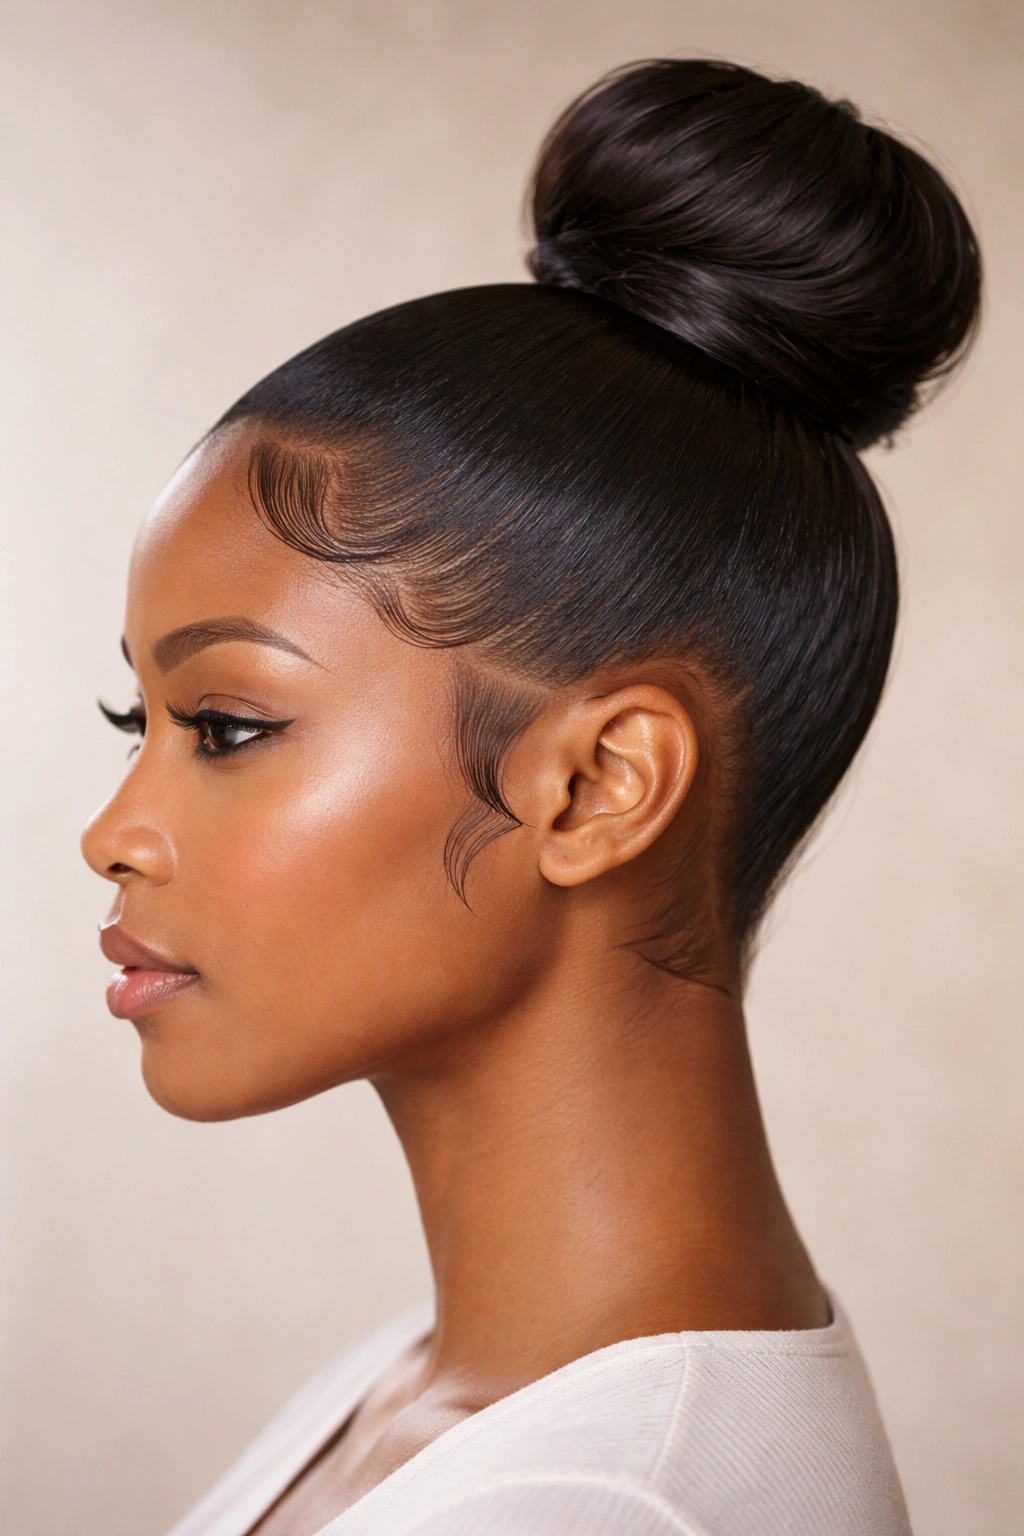
A sleek bun reads as professional and polished instantly, and with the right approach, it takes about 12 to 15 minutes including edge work. This style requires your hair to be either damp or already slightly styled so you can smooth it back. Use a lightweight gel or mousse — not a heavy cream that takes forever to distribute — to smooth your hair back into a high ponytail first.
The Two-Step Secret to Speed
The time-saver is doing this as two distinct steps rather than trying to perfect it all at once. Step one: smooth everything back and secure the ponytail tightly at the crown. Step two: twist the ponytail around the base to form the bun and secure it. Separating these steps means you’re not fumbling with hair while also trying to wrap and pin — you do one thing completely, then move to the next.
Creating Clean Edges Fast
- Use an edge brush or old toothbrush with gel to define your hairline into clean, geometric edges — straight lines at your temples, a defined part if you want one, clean curves at your nape
- The geometric edge detail is what transforms this from “functional” to “intentional styling” — this 2-minute detail completely changes how polished the style appears
- Gel should be applied in thin layers, allowing each to dry slightly before applying the next, rather than one thick application that takes forever to set
- A smoothing cream under the gel, applied to damp hair, makes the gelling process faster because your hair is already conditioned and easier to manipulate
Quick fact: Doing this style on hair that’s at least 24 hours post-wash (not day-of-wash) actually makes it faster because the hair is already settled into its pattern and easier to smooth.
4. Bantu Knots on Top, Loose Below
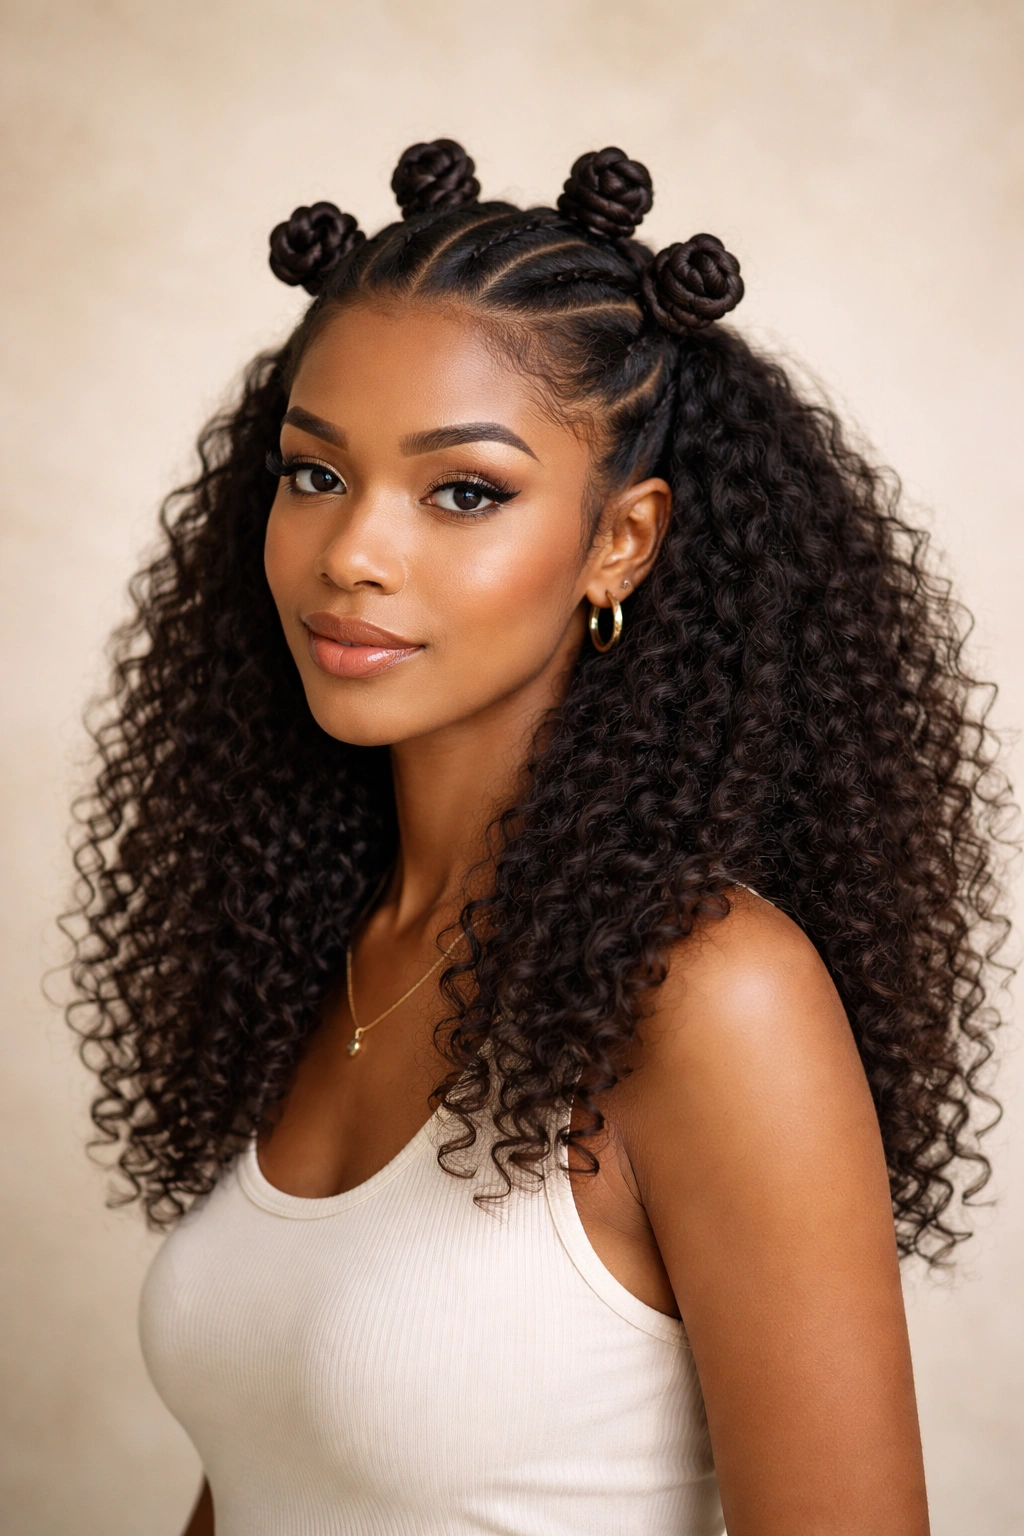
This is a creative hybrid where you create 4 to 6 small Bantu knots on the crown of your head and leave the rest of your hair in its natural texture below. The knots take about 12 to 15 minutes to create and immediately read as styled and intentional, but you’re only styling a portion of your hair, which saves massive time.
Why Partial Styling Saves Time
The psychology of this style is important: your brain registers the knots as “styled,” and the styled portion is at eye level where it draws attention. The unstyle hair below is therefore perceived as part of the intentional design rather than as unstyled hair. You’re getting the visual impact of a fully styled look while only investing time in styling about 30 percent of your hair.
The Fastest Technique
- Section your crown into 4 to 6 roughly equal subsections before you begin — this planning takes 30 seconds and saves time during the actual knot creation because you’re not deciding where to place each knot as you go
- Create each knot by twisting a section of hair around itself until it coils up into a knot shape, then secure it with a bobby pin — you don’t need to wrap it around your finger or anything complicated, just twist and coil
- Leave the knots in place (don’t unravel them), which creates a textured, dimensional look that’s genuinely beautiful and takes zero additional styling time
- The loose hair below can be refreshed with a little water and some finger-combing if needed, or left exactly as it was when you woke up
Insider note: This style looks even better on day-two or day-three hair because the texture is more settled and defined. That means if you style it before bed, you can wake up and just reactivate the curl pattern with water and you’re done.
5. Claw Clip Half-Up With Stacked Rings
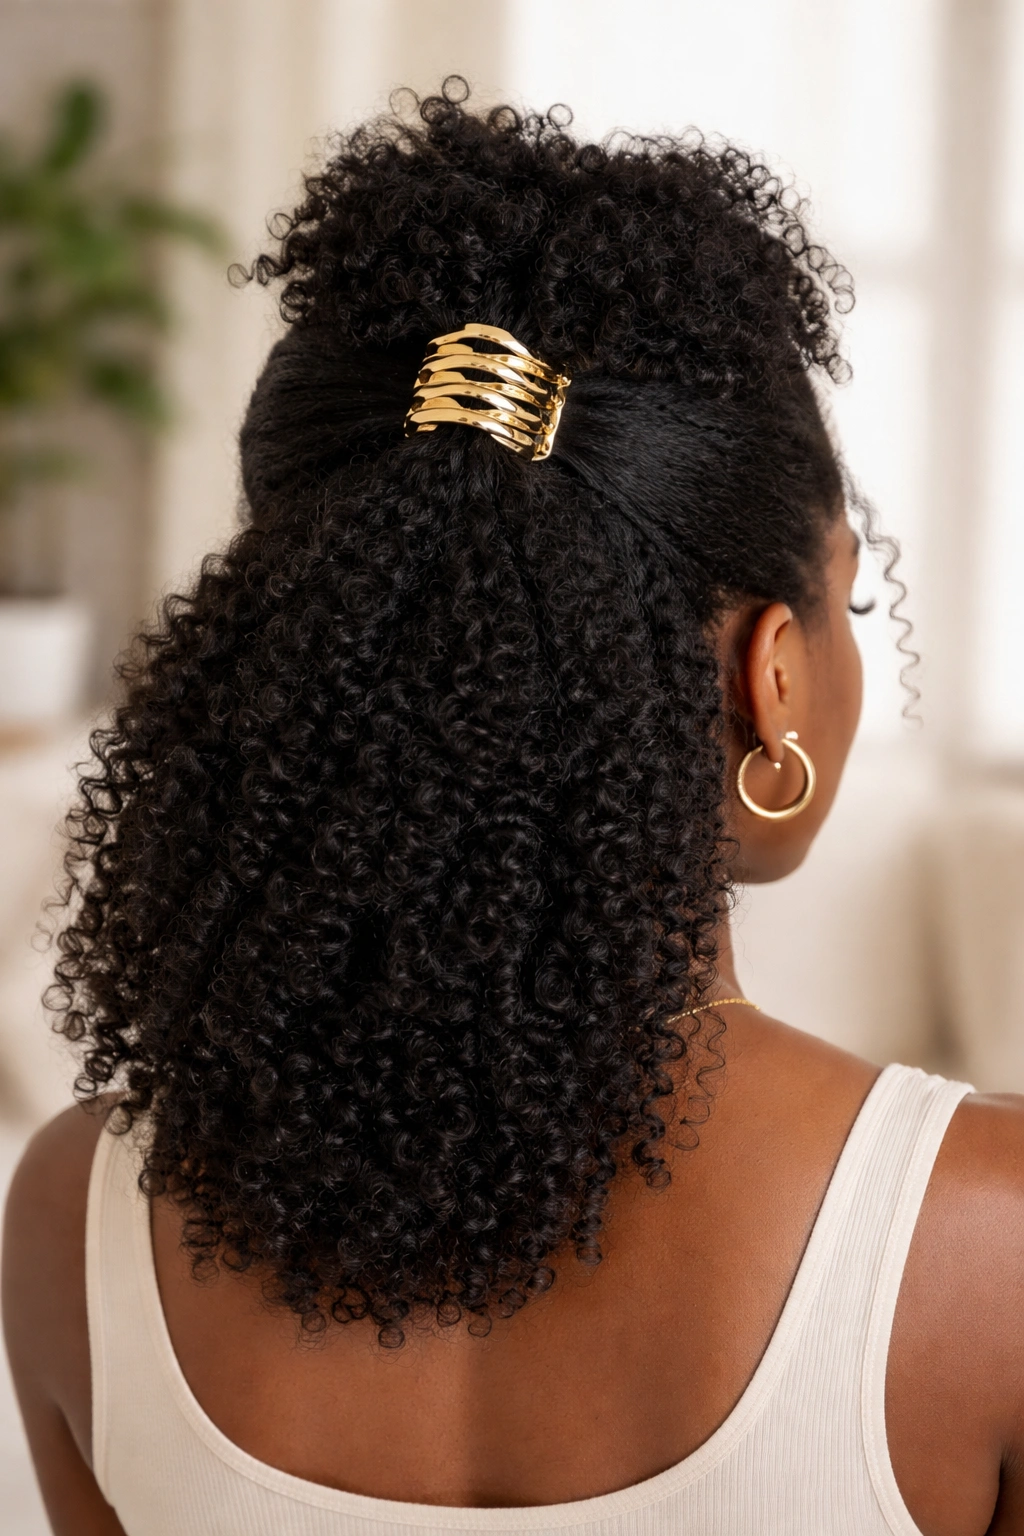
This style is genuinely five minutes from start to finish, making it the fastest option on this list when you’re running late. Gather the top half of your hair back — starting from roughly ear level — and secure it with a claw clip. That’s the whole style. The intentionality comes entirely from your choice of claw clip and how you style the hair underneath it.
The Secret to Making It Look Intentional
The clip itself does the work. A tortoiseshell claw clip, a metallic one, or a textured one doesn’t just hold hair — it becomes the visible focal point of your style. Because the clip is visible and decorative, the entire look reads as styled, even though you literally just gathered and clipped. Pair this with a deeper part on one side or a zigzag part, and you’ve added intentionality without adding time.
Quick Details That Elevate It
- Make sure the claw clip sits about two inches back from your hairline, not at the crown — this placement is more modern and flattering than a centered half-up
- If your hair is slightly frizzy or you want more definition on the loose portion, run a curl-defining cream through the bottom half while the clip is in — this takes 60 seconds and makes the difference between “rushed” and “polished”
- Wear the clip with intention: if you’re using a statement clip, let that be your hair moment and keep the rest minimal — don’t add multiple accessories and overdo it
- The texture of the loose hair below is doing the work, so let your natural curl pattern be visible — don’t try to smooth it out
Pro tip: This style is perfect for second-day or third-day hair because the texture is more defined and holds the clip better. If your hair is freshly washed, dry it a bit and apply a curl cream before clipping.
6. Twisted Senegalese Ponytail
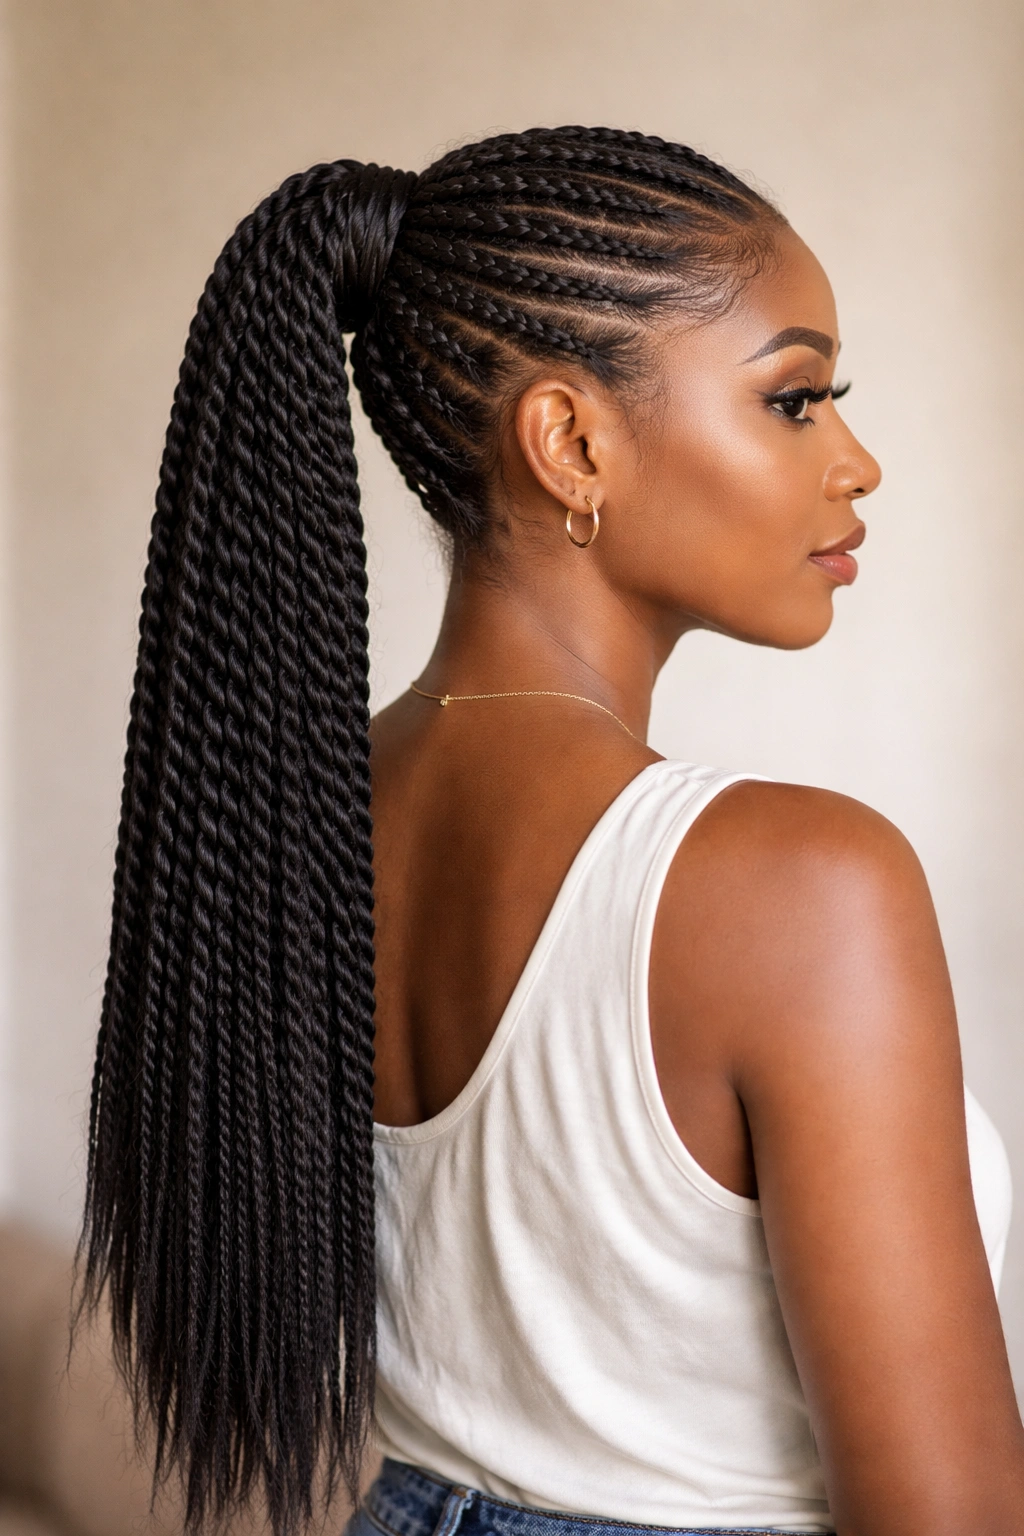
This style involves taking your natural hair and wrapping it with synthetic twists that you can install in about 20 to 25 minutes. Yes, synthetic hair requires installation time in the morning, but once installed, you have a protective style that looks polished and lasts for weeks. The initial time investment is front-loaded, but you’re getting days and weeks of ready-to-go styling.
Installation for Speed
- Pre-stretch and pre-separate your synthetic hair the night before so you’re not doing that step in the morning — this cuts your installation time down significantly
- Use a loose braid or comb coil method rather than a twist method to attach the synthetic hair, as this is faster to execute and just as secure
- Work in sections that take 3 to 4 minutes each rather than trying to do the whole style without a break — this keeps your hands from getting tired and your speed staying consistent
Why This Is Worth Morning Time
Once installed, you have a complete style that requires zero additional work. You wake up, maybe refresh the ponytail placement if needed, add a hair accessory, and you’re done. The 25 minutes you spend installing becomes 30 seconds of total hair styling time for the next 2 to 4 weeks, depending on how well you care for it. This is the ultimate “busy morning” investment because you’re trading a little morning time once for weeks of easy styling.
Maintenance During the Week
- Sleep in a bonnet or on a silk pillowcase to preserve the style and reduce frizz
- Refresh the ponytail placement each morning with a light misting of water if needed
- The synthetic hair holds curl beautifully, so styling is truly just placement, not manipulation
Real talk: This style is ideal if you do it on a weekend morning when you have 25 minutes, not on a weekday when you’re rushed. It’s the “one big investment for weeks of ease” approach.
7. Faux Locs With Gathered Crown
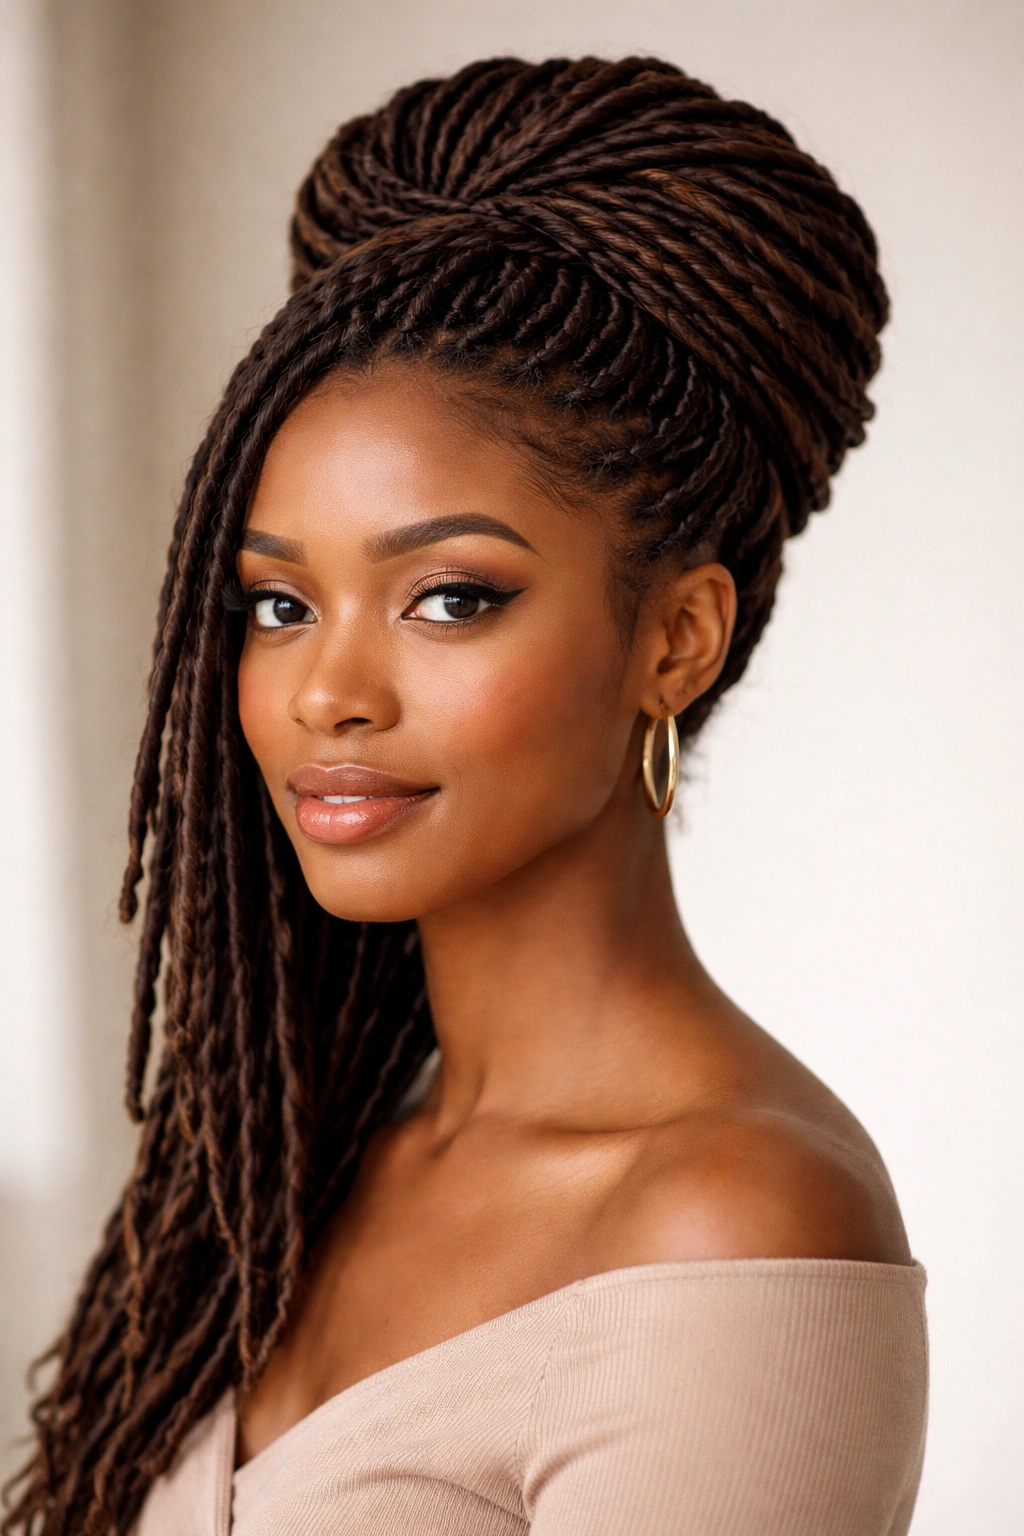
This is similar to the Senegalese ponytail but uses faux loc synthetic hair for a different aesthetic. The installation takes 25 to 30 minutes, but you’re creating a style that looks complex and artistic while being incredibly low-maintenance once done. Install them in a gathered crown style rather than leaving them completely down, which creates a polished, intentional look.
The Aesthetic Advantage
Faux locs have a distinct look that reads as intentionally styled — there’s no way someone thinks you just woke up like this. That intentionality is part of what makes a busy morning work: you’re not competing with “does this look like I tried?” because the style answers that question visually. You look polished because the style itself is polished.
Installation Strategy for Mornings
- Do this style on a weekend or day off, not on a morning when you need to leave for work
- Install them loosely rather than tightly — loose locs are faster to install and more comfortable to sleep in during the week
- Use smaller sections if speed is your priority; fewer, larger locs take less time but look less voluminous
- Gather them at the crown with hair ties or wraps to create the “gathered crown” look, which takes about 5 minutes once the locs are installed
Worth knowing: Faux locs are a protective style, meaning they’re protecting your natural hair while you wear them. This is why they’re worth the upfront installation time — you’re getting multiple benefits simultaneously.
8. Defined Wash-and-Go in Sections
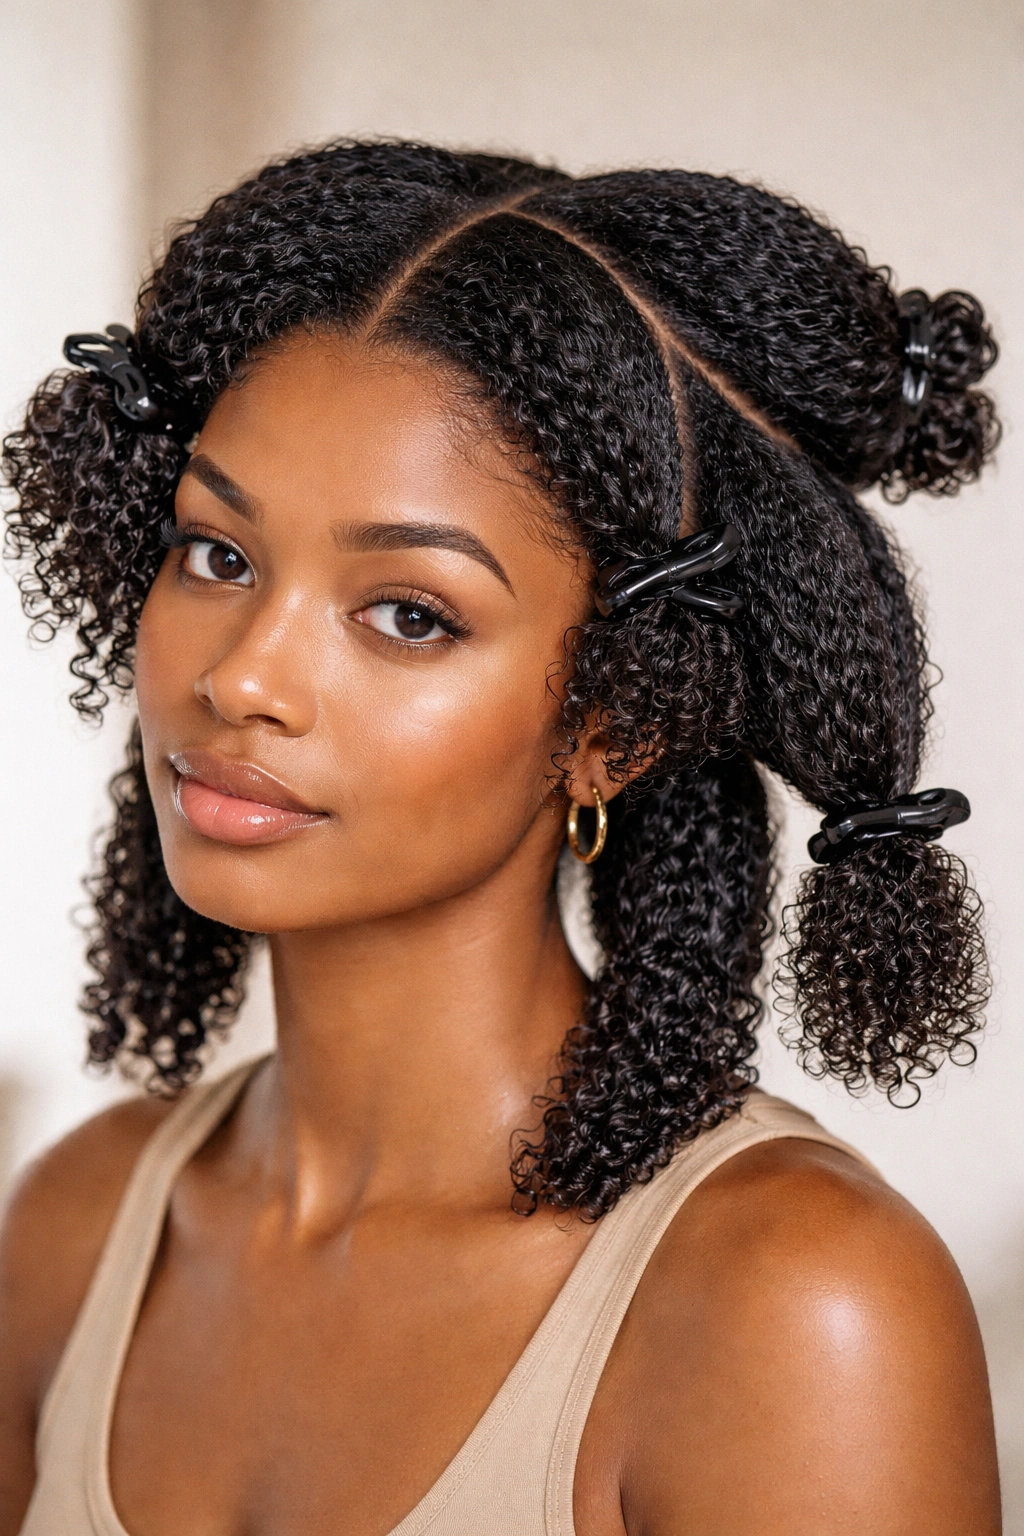
If you do your wash routine the night before and section your hair while it’s damp, you can wake up to pre-defined sections and just separate them in the morning. This takes about 10 to 15 minutes in the morning and gives you the effect of a fully styled wash-and-go without actually doing the full wash-and-go process.
The Night-Before Prep
- Wash your hair and apply your styling cream while it’s very wet
- Divide your hair into 6 to 8 large sections using clips or hair ties
- Allow it to air dry or diffuse dry overnight in those sections
- Sleep on a silk pillowcase or in a silk bonnet to preserve definition
Morning Refresh Strategy
- Remove the clips and gently separate each section at the roots to reactivate the curl pattern
- Spritz lightly with water mixed with a little leave-in conditioner if any sections feel a bit crunchy or lost definition overnight
- Use your fingers, not a comb, to separate curls — this preserves definition and prevents frizz
- This entire step takes about 8 to 10 minutes depending on how much refreshing you need
Quick fact: The drier your hair is when you section it at night, the less time you spend refreshing in the morning. Completely air-dried sections need almost no morning work; damp sections need a little more refreshing.
9. Flat-Twisted Sides With Center Crown
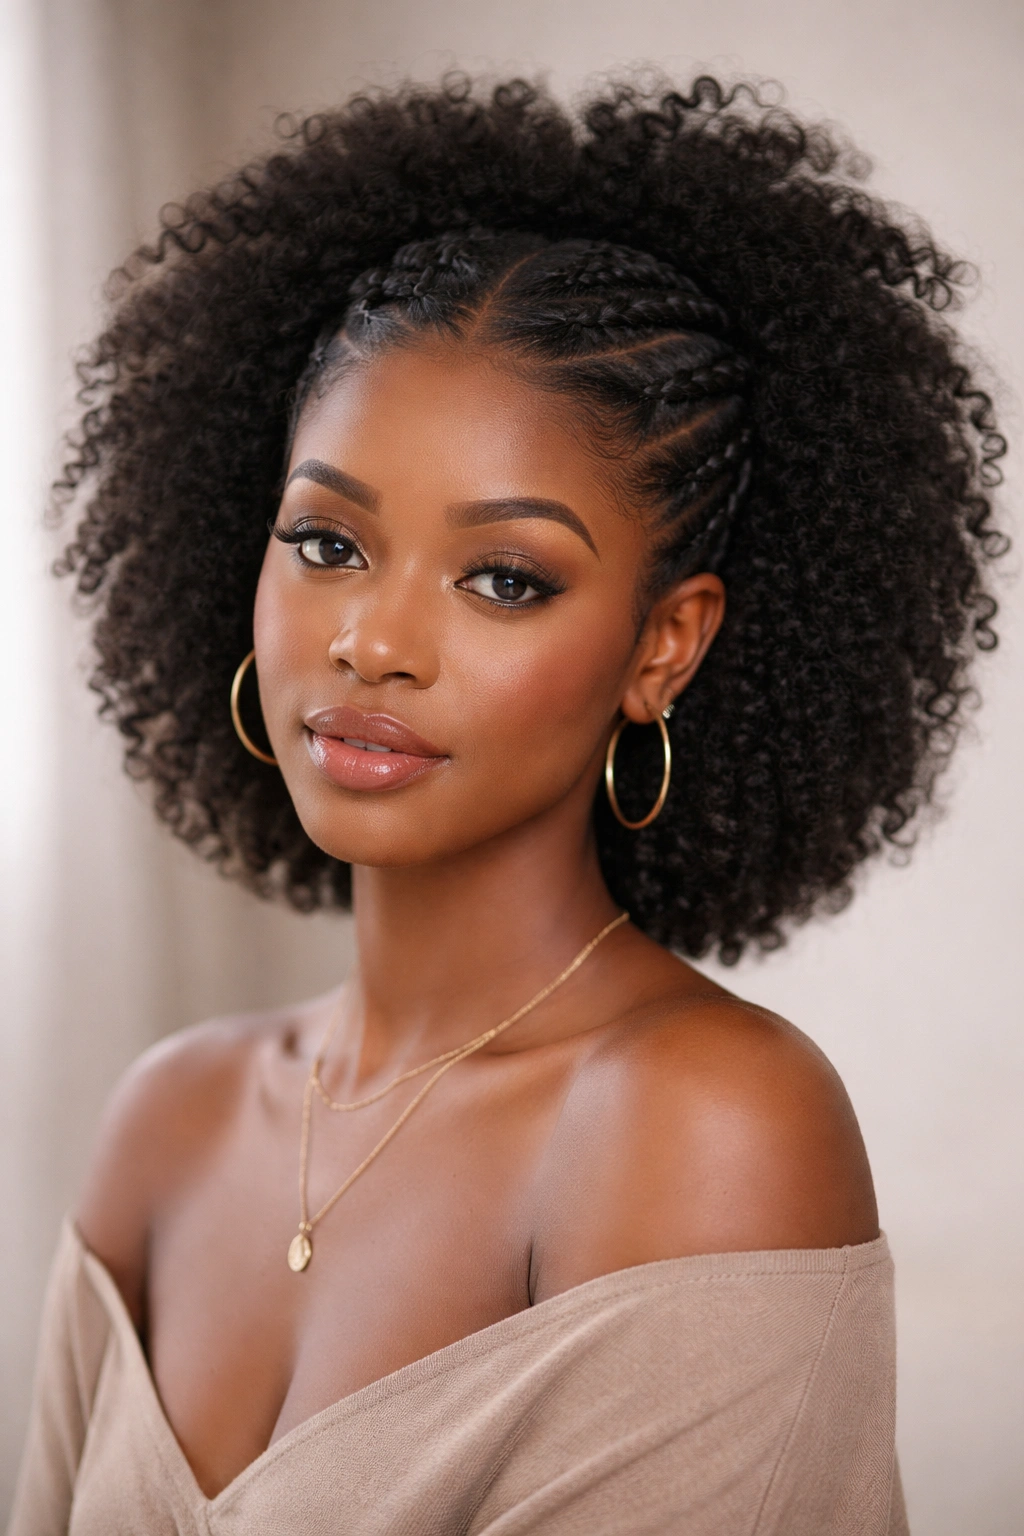
This style involves creating two flat twists along the sides of your head that meet at the back, leaving the crown loose and voluminous. It takes about 15 to 20 minutes and creates immediate visual impact because the structured twists frame your face.
Why Flat Twists Are Faster Than They Seem
Flat twists look intricate but don’t actually require products, heat, or complicated manipulation. You’re taking sections from each side and twisting them with precision, but the twisting motion itself is simple. The visual impact is high because the twists are visible and create geometry against your softer crown, but the actual time investment is lower than it appears.
The Fastest Technique
- Start one flat twist on each side simultaneously — don’t complete one side entirely before starting the other, as this helps you maintain symmetry without measuring
- Twist toward the back of your head at a slight angle rather than straight back — this is more flattering and more modern-looking
- Secure both twists where they meet at the back with bobby pins, then leave the crown completely loose and voluminous
- The contrast between the structured sides and the soft crown is what makes this style visually interesting
Pro tip: If your hair is a bit dry or prone to breakage, apply a lightweight styling oil or leave-in conditioner to your fingers before starting the twists. This makes the twisting smoother and faster because your fingers slide through the hair more easily.
10. Sectioned Coils With Decorative Clips
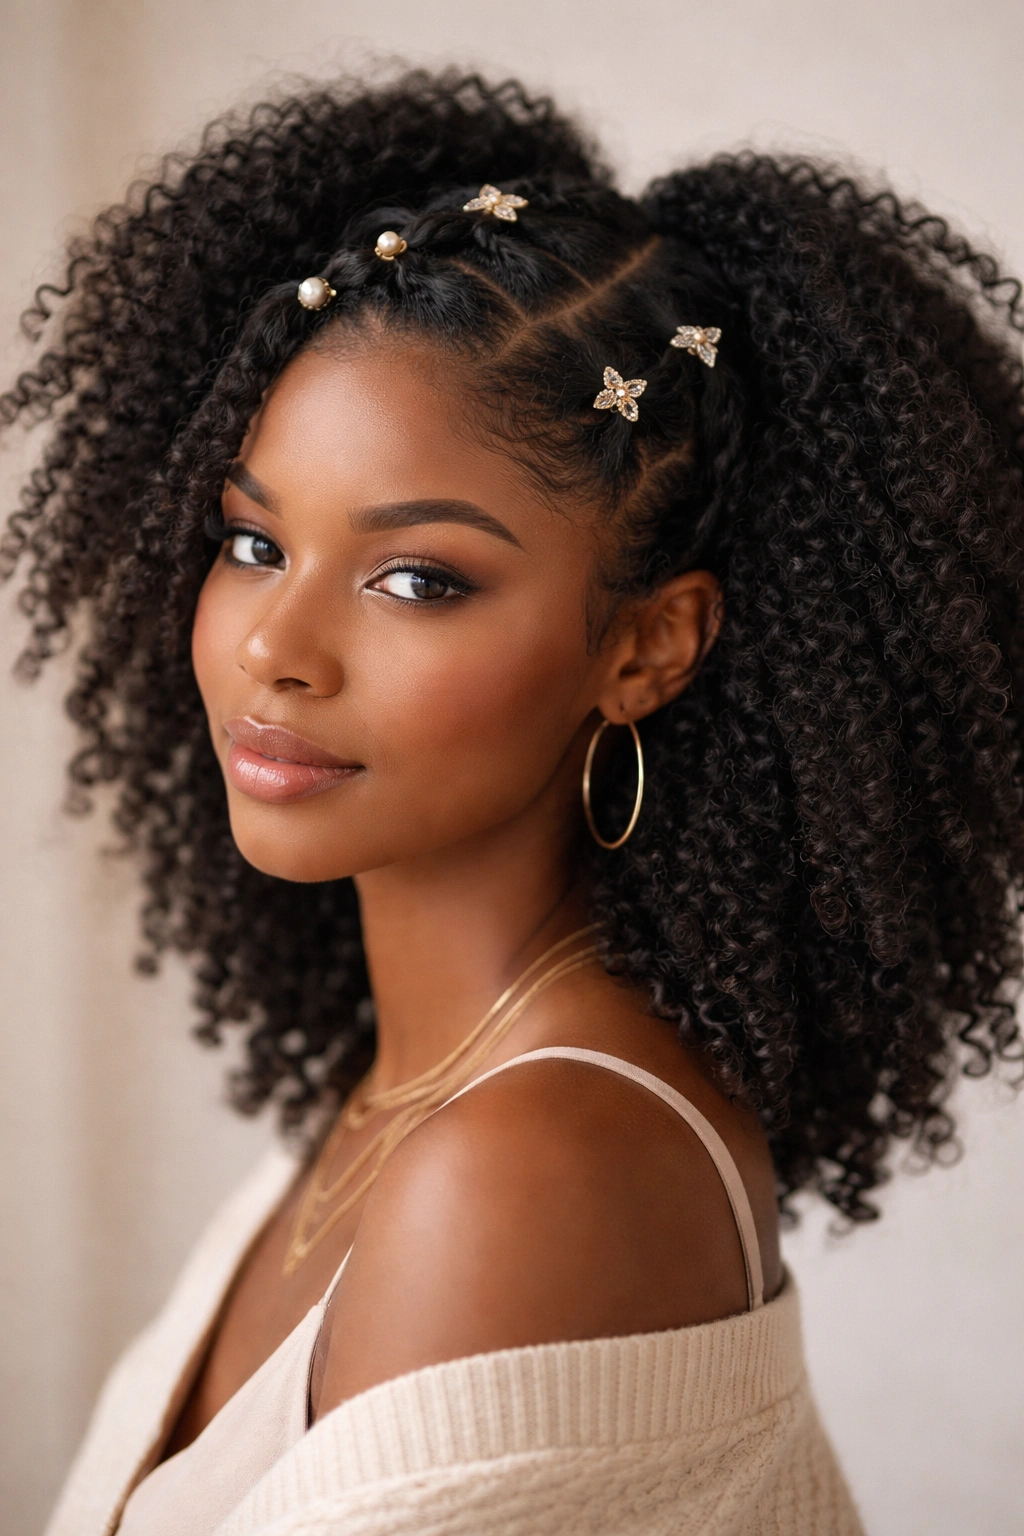
This style involves creating a few sections of defined coils throughout your hair and clipping them in place with decorative clips. You’re not styling your entire head — just 3 to 4 strategic coiled sections — which makes it fast while still reading as intentionally styled.
Why Partial Styling Works Visually
Similar to the Bantu knots style, the psychology here is that styled sections draw the eye and read as intentional styling. If your eye-level sections and around-the-face sections are polished and coiled, the rest of your hair is perceived as part of the design rather than as unstyle. You’re getting 80 percent of the visual impact of a fully styled look with maybe 30 percent of the time investment.
Creating Defined Coils Fast
- Apply a curl-defining cream or gel to a small section at a time — not your whole head
- Coil the section around your finger starting at the roots and working down to the ends
- Clip it in place to hold the coil shape while it dries or sets
- The clip itself becomes a design detail, so choose clips that complement your style intent
Real talk: This works best if you do the coiling while your hair is still slightly damp. Completely dry hair takes longer to coil and holds less definition. If your hair is completely dry, lightly mist it with water first.
11. Puff Ponytail With Undercut Details
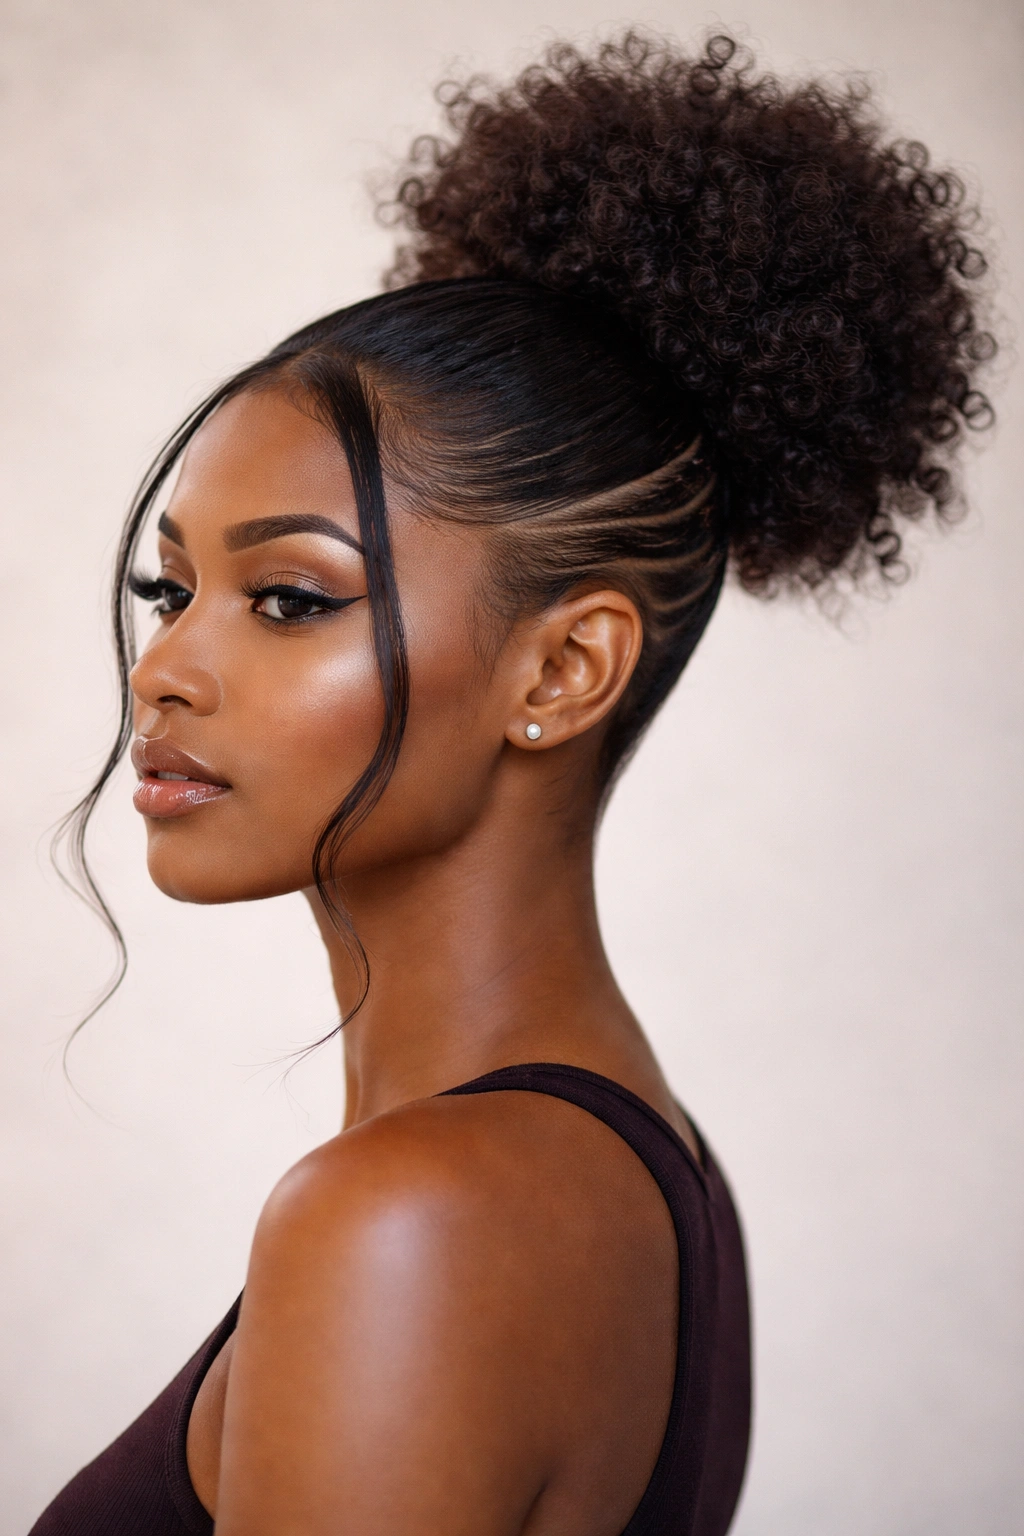
This style gathers your hair into a high or mid-level ponytail but leaves some wispy, shorter pieces around your face for a softer frame. If you have natural undercut details or shaved sections, this style showcases them beautifully. It takes about 10 minutes total.
The Appeal of This Hybrid Style
You’re getting the sleekness and polish of a ponytail combined with the softness of a style that isn’t pulled completely taut. This balance reads as modern and intentional rather than simply functional. The undercut details become a visible design element rather than something hidden.
Execution for Speed
- Gather your hair into a secure ponytail at your preferred height — high for maximum polish, mid-level for a softer effect
- Don’t pull it extremely tight; a slightly looser gathering looks more current and is faster to achieve
- Smooth the top section with a bit of gel for a polished finish, but leave the ponytail itself textured and voluminous
- If you have undercut details, make sure they’re visible and framed by the ponytail placement
Worth knowing: This style works on both freshly washed hair and second-day hair. If anything, second-day hair holds the ponytail better and needs less product to look polished.
12. Wrapped Locs With Gathered Base
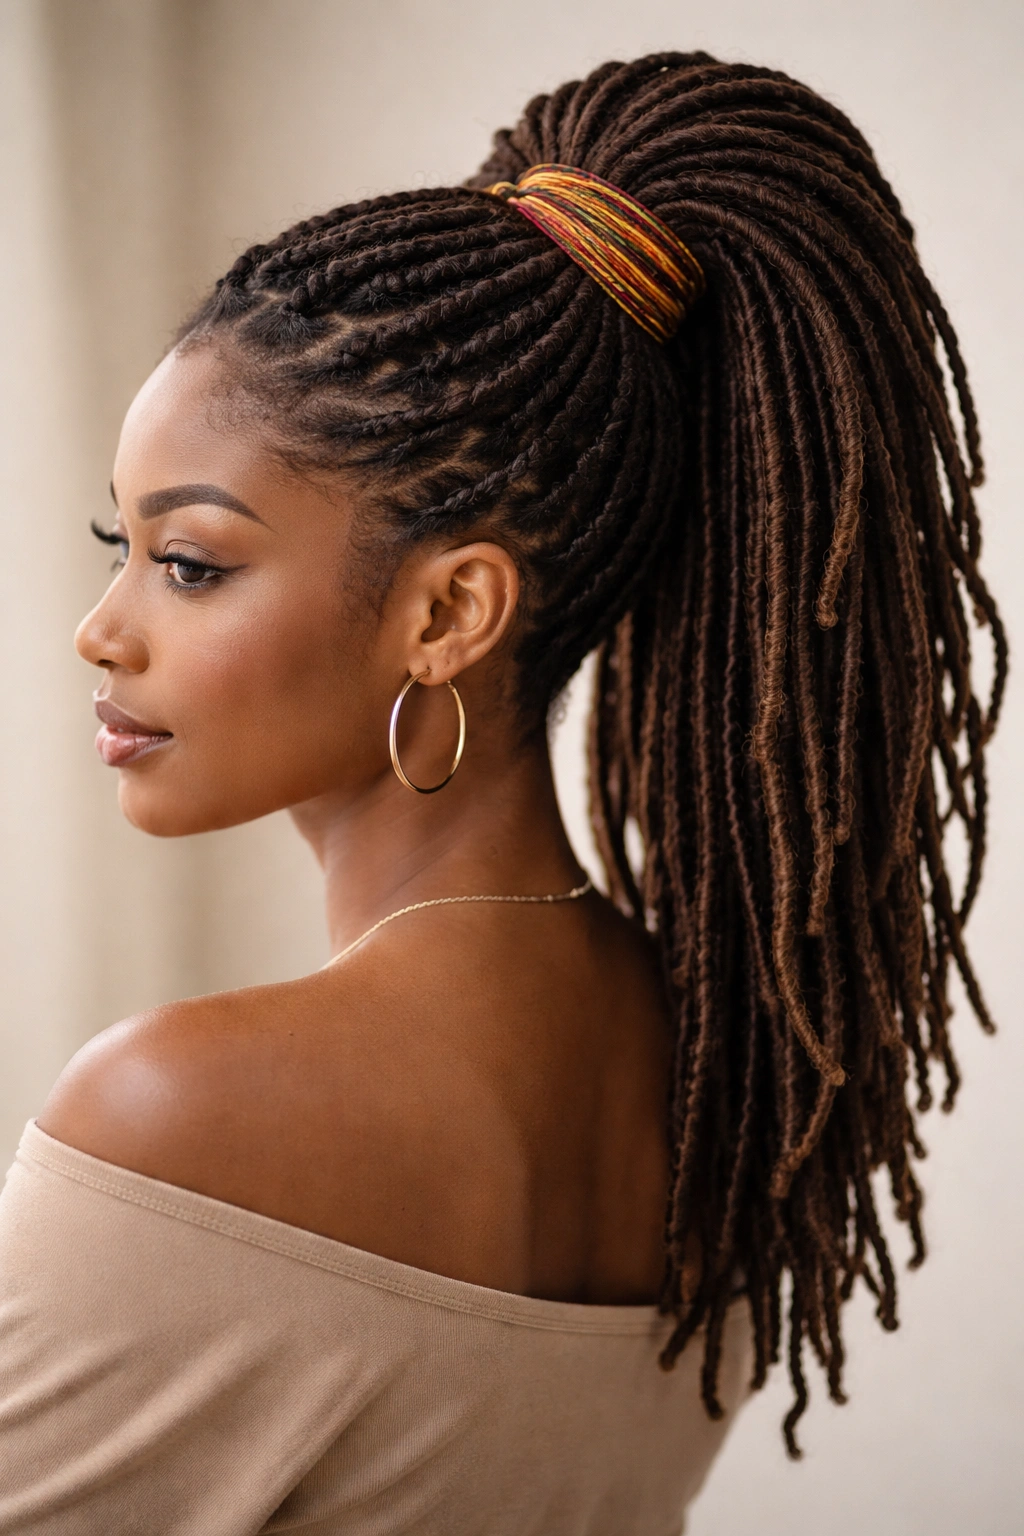
If you have locs or twists already installed, you can create a new style each morning by gathering them at different heights and wrapping the base with colorful thread, yarn, or thin fabric. This takes about 12 to 15 minutes and completely changes the look of your existing protective style.
Why This Is an Ultimate Busy-Morning Solution
Your base style is already done — your locs or twists are there, protected, and looking good. You’re just repositioning them and adding a decorative wrap. This means you can wake up with a protected style in place and then style it differently for different occasions throughout the week without actually creating a new style from scratch.
Quick Wrapping Technique
- Gather your locs to your preferred height or position — high for formal, mid-level for casual, to the side for an asymmetrical look
- Secure the gathered section with elastic or a hair tie
- Wrap colorful thread or thin fabric around the base in a spiral pattern, securing the end by tucking it under the wrapping
- This wrapping takes about 5 to 8 minutes once you have your locs gathered
Pro tip: Pre-cut your wrapping materials the night before so you’re not measuring and cutting in the morning. Just grab the pre-cut piece and wrap.
13. Curled-Out Edges With Minimal Styling
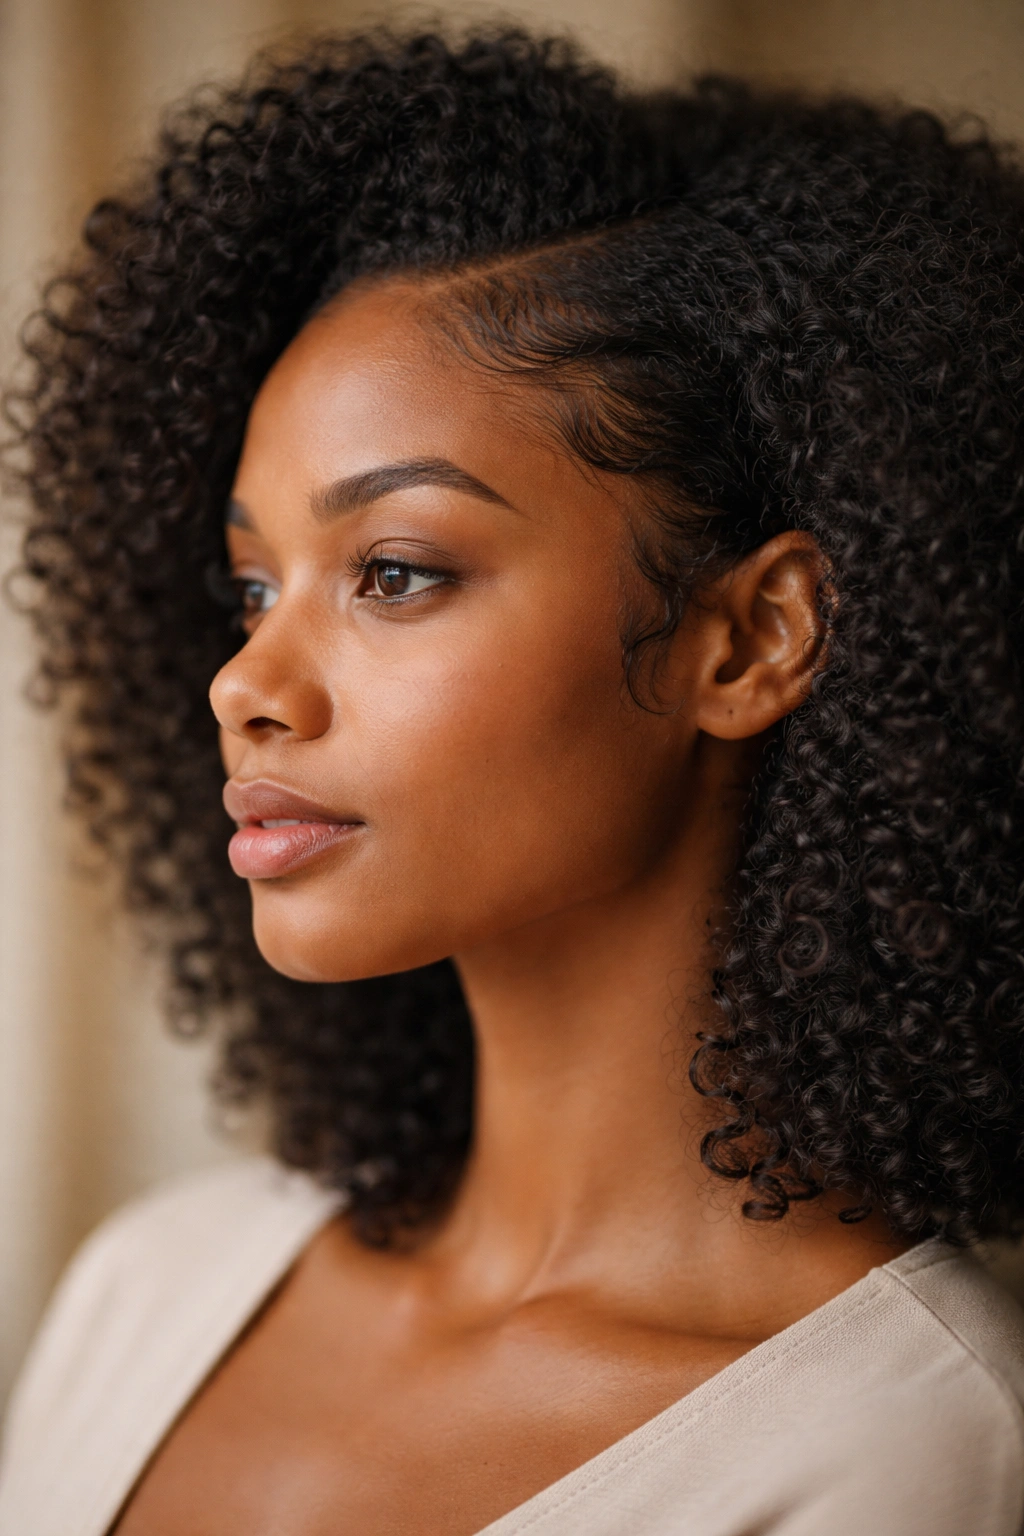
This style involves using a curling iron or flexi-rods to create defined waves or curls just at the perimeter of your hair — your hairline, temples, and nape — while leaving the bulk of your hair in its natural texture. It takes about 15 to 18 minutes but creates a finished, polished look.
Why Edge Styling Transforms Everything
Your hairline and the frame around your face draw the most visual attention. When these areas are polished and intentionally styled, the rest of your hair — even if it’s in a simple texture — reads as part of a complete look rather than as unstyle. You’re using your styling effort where it has the most visual impact.
Fast Edge-Curling Technique
- Use flexi-rods or a 1.25-inch curling iron with a low heat setting to create soft waves at your hairline and temples
- Work in small sections, curling away from your face for a flattering frame
- Allow the curls to cool completely before removing the rods or iron — this sets the curl and means it lasts longer throughout the day
- Brush the curls out slightly with your fingers to create soft waves rather than tight spirals — this is faster than creating perfect individual curls
Quick fact: If you prep your edges the night before with setting lotion and flexi-rods, you can sleep on them and wake up to pre-formed waves. This transforms your morning time from 15 minutes to literally just brushing them out — maybe 2 minutes.
14. Side-Swept Swoop With Decorative Pin
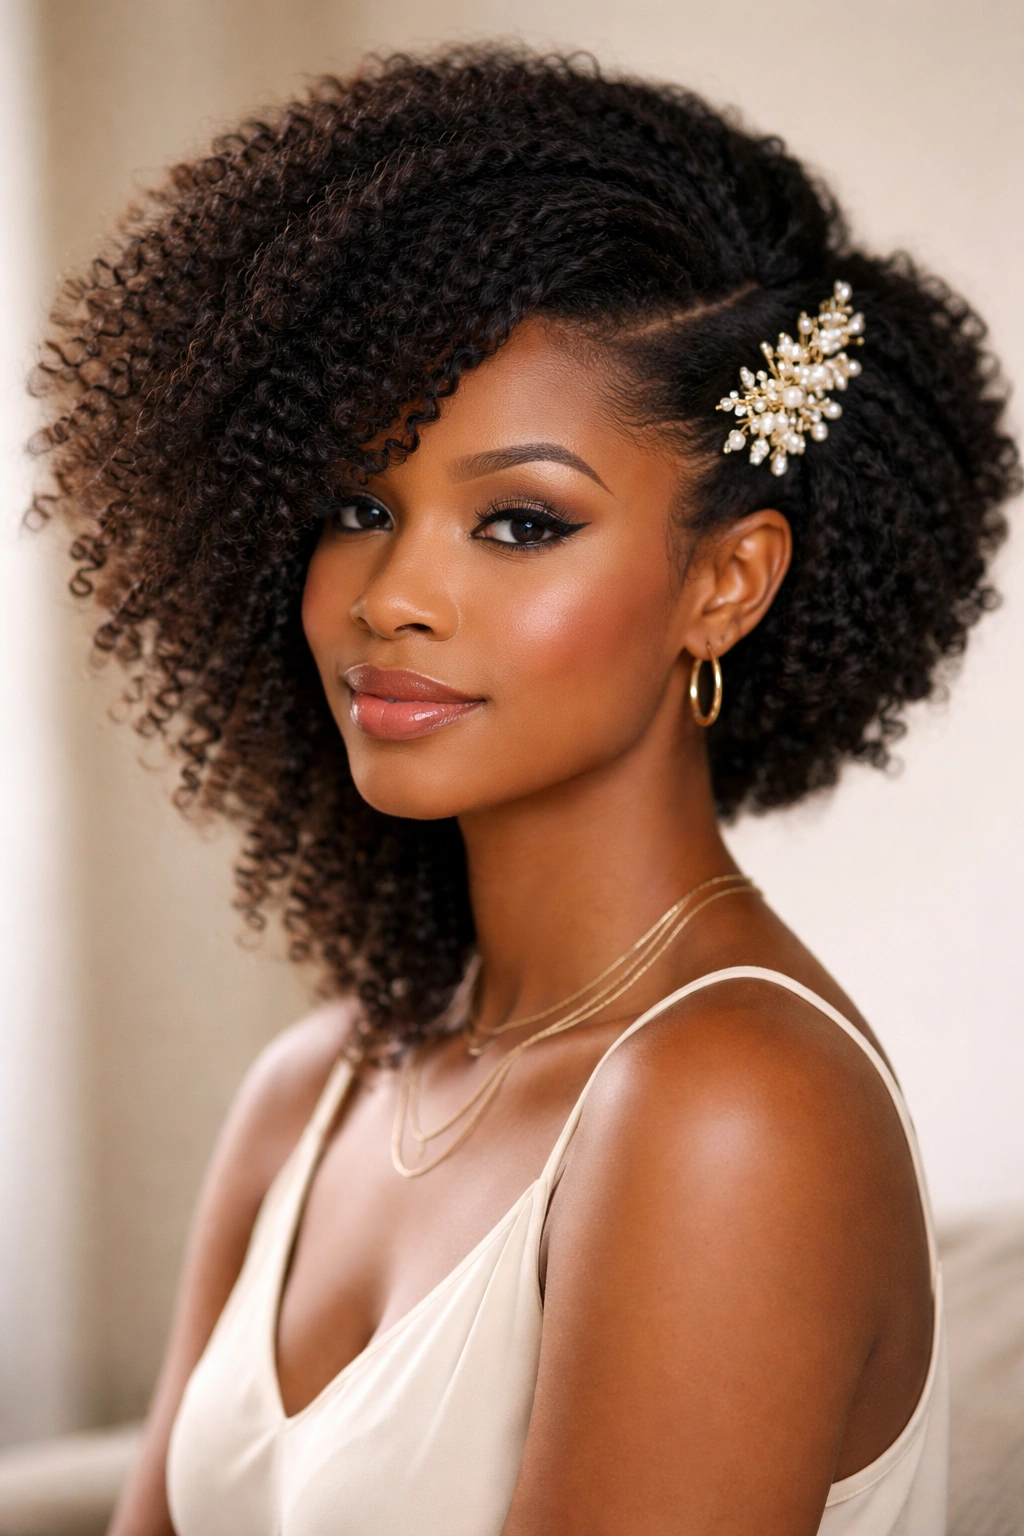
This style involves sweeping a large section of hair from one side to the other and securing it with a decorative pin or comb. It’s deceptively simple but reads as intentionally styled, and it takes about 8 to 10 minutes total.
The Visual Impact of Asymmetry
An asymmetrical style reads as more intentional and modern than a centered, symmetrical one. Even though you’re doing something very simple — sweeping hair to one side — the asymmetry creates the impression of styling and intention. Your brain processes asymmetry as a design choice rather than as accident.
Execution for Maximum Impact
- Start with a deep side part, much deeper than you’d normally wear
- Take a substantial section from the deeper side and sweep it across to the other side, securing it at the back or near the opposite ear with bobby pins or a decorative pin
- Don’t pull it tight; a slightly soft, swooped placement is more flattering and modern than a rigid sweep
- The pin or comb becomes a visible detail, so choose something decorative that coordinates with your outfit or aesthetic
Worth knowing: This style works on pretty much any hair texture and any length, making it universally adaptable. Day-two or day-three hair actually swoops better than freshly washed hair because the texture is more settled.
15. Double-Strand Twists Pinned Into a Style
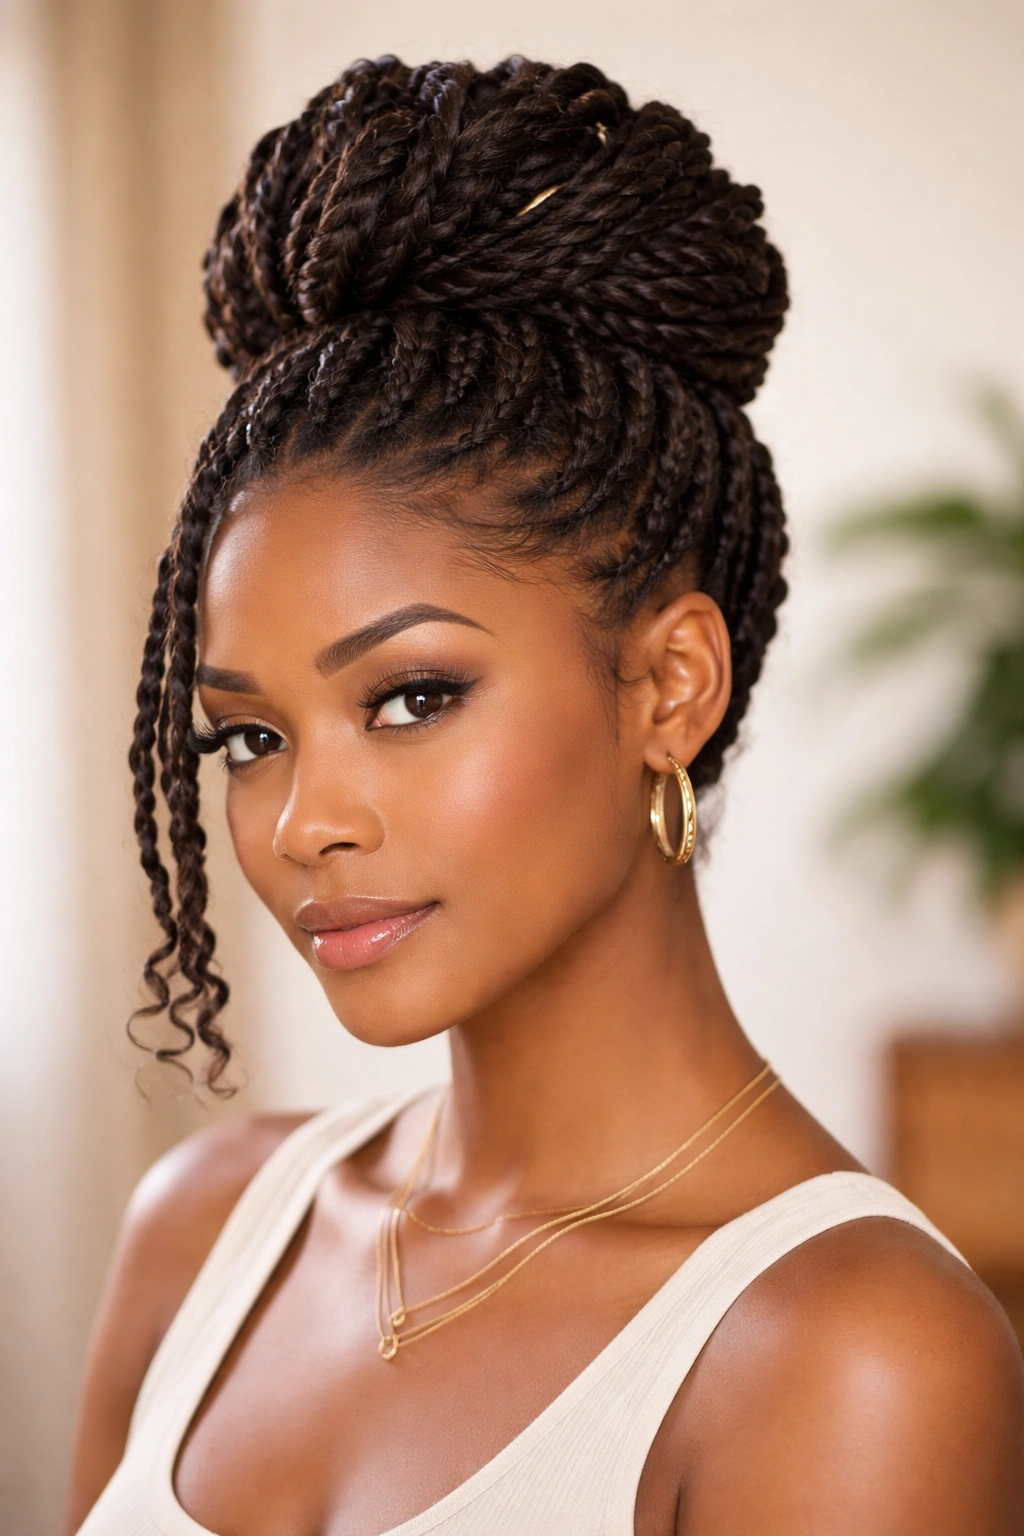
Double-strand twists are a protective style that takes time to install (30 to 45 minutes typically), but once installed, they can be pinned, coiled, or arranged into different looks each morning. This is another “one big investment for days of styling ease” approach.
Why Double-Strand Twists Are Worth Morning Time
Once you have twists installed, you have the freedom to style them differently throughout the week without doing any real styling. You can pin them into a high bun one day, coil them into a crown another day, leave them down the next day — you’re just repositioning and securing them. This flexibility is worth the upfront installation time.
Different Morning Arrangements
- Pin them into a high bun by gathering all twists at the crown and securing with bobby pins — takes about 8 minutes
- Coil them into a crown by wrapping twists around your head and pinning — takes about 10 minutes
- Gather half and secure with a claw clip for a half-up look — takes about 5 minutes
- Leave them completely down for a full style that requires zero morning work
Maintenance and Refreshing
- Sleep in a bonnet or on a silk pillowcase to preserve the twist definition
- Lightly spritz with water if they need refreshing in the morning
- Retwist or touch up loose twists after about 2 to 3 weeks depending on your hair growth
Real talk: If you’re going to install double-strand twists, do it when you have time — on a weekend, your day off, or an evening when you’re not rushing. The installation requires patience and can’t be rushed without compromising the style’s longevity.
Final Thoughts

The reality of having quick, polished hairstyles on busy mornings comes down to two strategies working together: choosing styles that work with your hair’s natural texture rather than against it, and doing strategic prep work the night before. Some of these styles take 5 minutes in the morning because you did 20 minutes of prep the night before. Others take 15 minutes of morning time but give you a protected style that lasts for weeks, eliminating the need for daily styling.
The most important shift is recognizing that “quick” doesn’t mean “minimal.” A quick style can still be intentional, polished, and genuinely beautiful. The speed comes from understanding which design elements matter most visually (edges, placement, visible texture) and which details you can skip without compromising the look. It comes from working with your hair’s natural pattern instead of against it, and from choosing techniques that are actually efficient rather than just feeling like they should be.
Experiment with different styles to find which ones fit your specific hair texture, your morning timeline, and your personal aesthetic. What takes 20 minutes for one person might take 12 for someone else, depending on hair thickness, texture, and how much definition your curls naturally have. The point isn’t to match a specific timeline — it’s to find the styles that make you feel polished and confident, even when you’re moving fast.
