



Locs have become one of the most celebrated and versatile protective styles in the Black beauty world, offering both a way to nurture hair health and express individual creativity. What makes locs particularly special is their ability to transform over time—they’re not a static style but a living journey that evolves month after month. For women, locs open up an incredible range of styling possibilities, from sleek and polished looks perfect for professional settings to bold, sculptural arrangements that turn heads and spark conversations.
Whether you’re considering starting your loc journey or you’re already established in your locs and looking to refresh your look, the versatility might surprise you. Many people assume locs limit styling options, but the truth is the opposite. Once your locs are mature enough to hold styles—typically after 6 to 12 months, depending on the method and your hair texture—you have access to dozens of creative ways to wear them. The styles range from simple everyday looks you can create in minutes to intricate braided arrangements that serve as wearable art.
The beauty of loc styling lies in how they adapt to your lifestyle, mood, and aesthetic. Need something low-maintenance for a busy week? There’s a style for that. Want to make a statement at a special event? Locs can absolutely deliver. Ready to experiment with something completely different tomorrow? Locs give you that freedom without the damage that comes with constant manipulation of loose hair.
1. Classic High Bun with Face-Framing Pieces
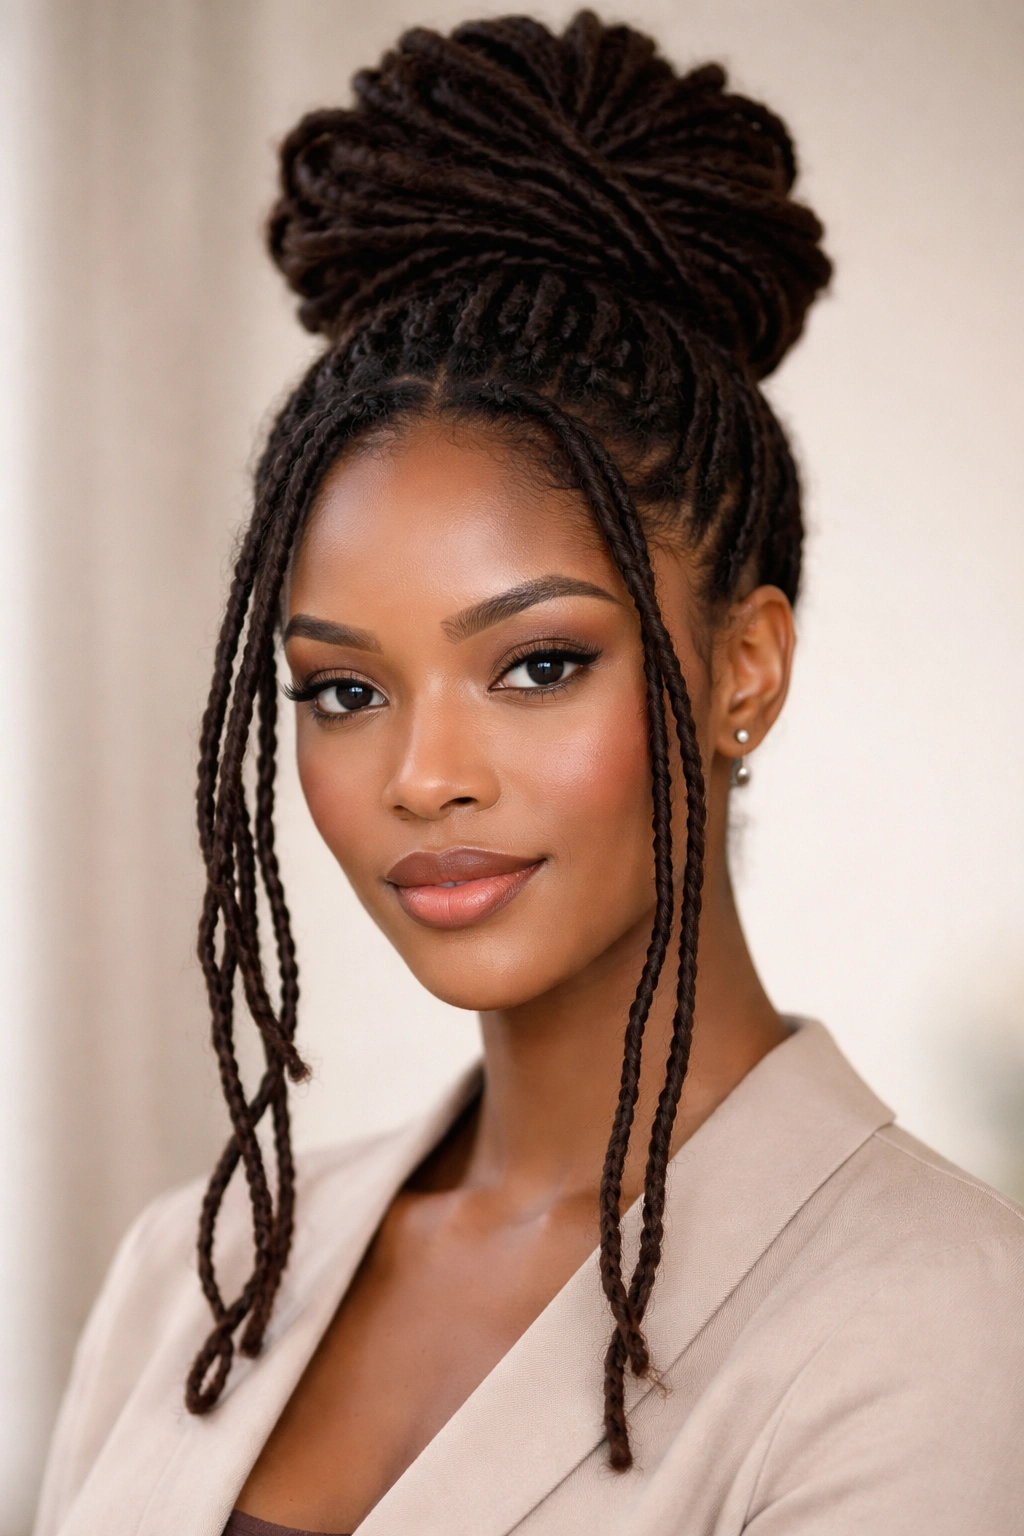
The high bun is the undisputed workhorse of loc styling—practical, polished, and surprisingly elegant despite its simplicity. This style involves gathering your locs toward the crown of your head and securing them with a hair elastic or tie, leaving a few face-framing locs loose around your hairline. The effect is clean and put-together, making it one of the most office-appropriate loc styles you can create.
Why This Style Works for Every Occasion
A high bun strikes the perfect balance between low-maintenance and intentional styling. You can create this look in under five minutes once you get the technique down, yet it reads as polished and deliberate to anyone looking at you. The face-framing pieces are key—they soften the overall look and prevent the style from feeling too severe or severe. Because your locs are already textured, the bun doesn’t need to be perfectly smooth; a little texture and volume actually add to the appeal.
How to Perfect This Look
- Brush or comb your locs smooth and gather them into a high ponytail at the crown, roughly where a high pony would sit
- Secure the base with a strong elastic or wrap a loc around the ponytail base to hold it
- Twist or coil the gathered locs around the base point to form the bun shape, tucking the ends under and securing with bobby pins
- Leave two to four locs loose in front of your ears and around your face, smoothing them down with edge control or gel
- Use a silk or satin scarf to smooth flyaways and define your hairline
Pro tip: Keep a few extra bobby pins on hand and secure the bun from multiple angles—this prevents it from shifting throughout the day, especially if you have thinner locs.
2. Goddess Braids Woven Through Locs
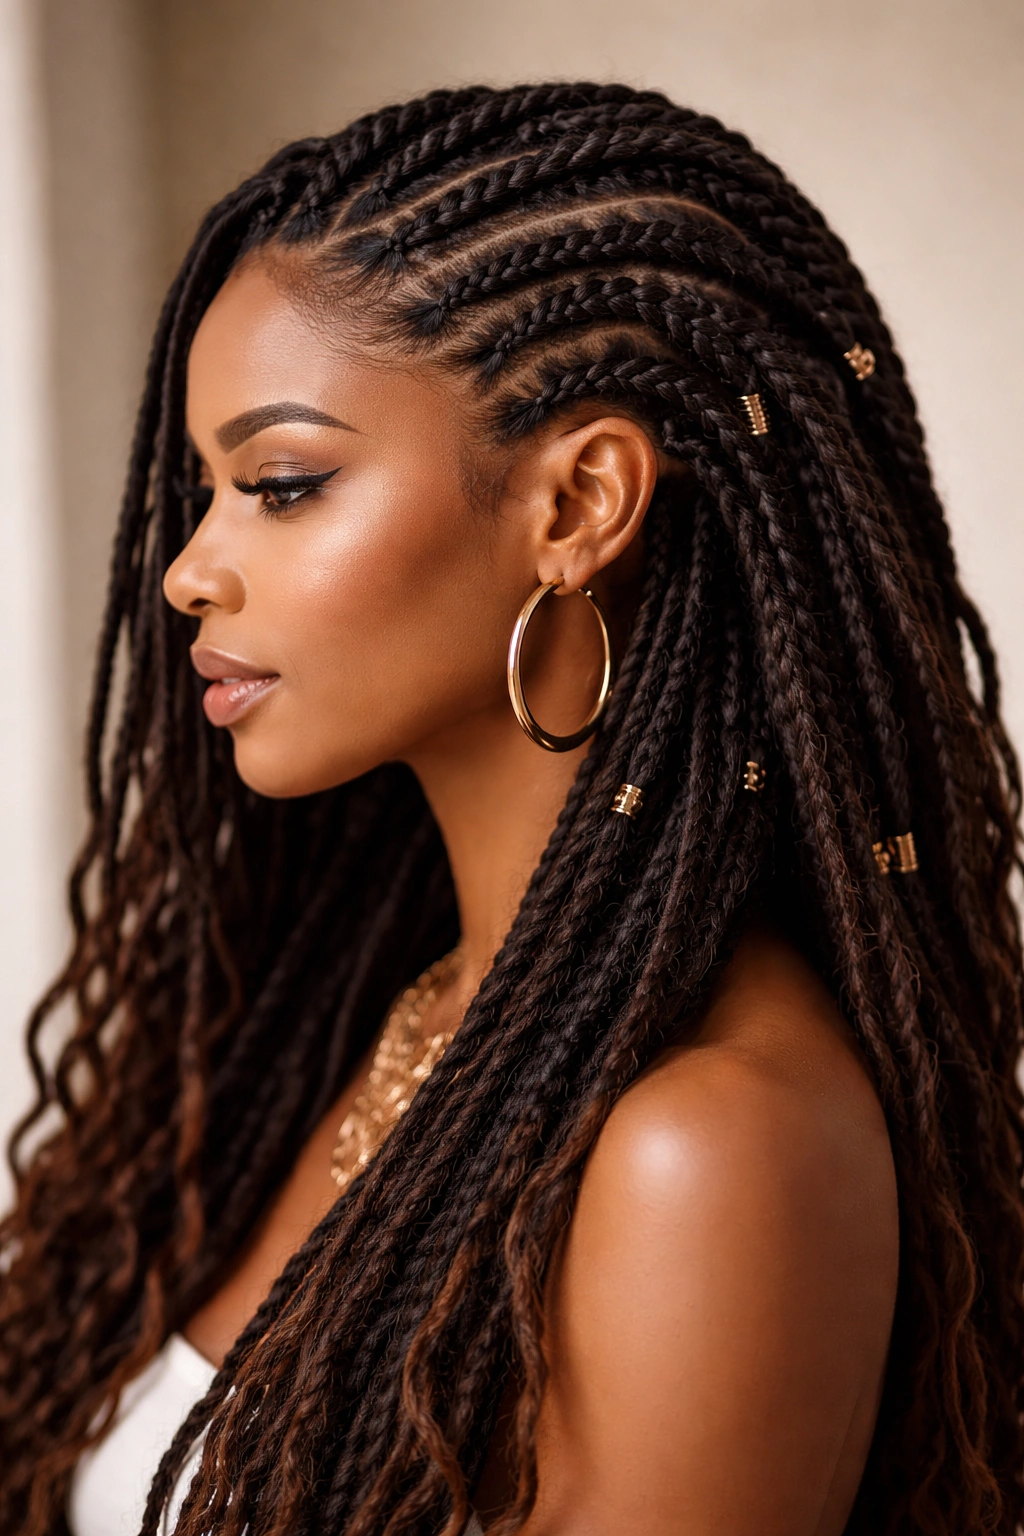
Goddess braids are braids that follow a curved or spiral pattern across the scalp, typically moving from one side of the head to the other. When you weave them through locs, you’re essentially braiding some of your locs together while leaving others loose, creating an intricate, regal look that commands attention. This style requires patience and some practice, but once you master it, you’ll have a signature look that feels both ancient and completely contemporary.
The Appeal of Goddess Braids with Locs
Goddess braids tap into a specific aesthetic—there’s something deeply intentional and artistic about the style. It shows that you’ve taken time with your appearance, and that deliberation translates into confidence. The braids create definition and visual interest where loose locs alone might feel flat. Additionally, because you’re braiding your locs rather than your hair, the braids hold their shape longer and look cleaner than traditional braids would.
Steps to Create Goddess Braids
- Section your locs into three or four distinct groups, depending on how elaborate you want the braids
- Starting at one temple, pick three locs and begin braiding them together, keeping the braid close to the scalp
- As you move along the curve of your head, add additional locs into the braid, just like you would with a traditional cornrow
- Follow a curved or spiral path that feels natural to your head shape—there’s no single “correct” pattern
- Secure the ends with small elastics or by tucking them under and pinning them in place
- Finish with edge control around your hairline for a polished look
Pro tip: Practice this style on a day when you have at least 30 to 45 minutes of unrushed time. Rushing leads to frustration and loose sections that come undone throughout the day.
3. Side-Swept Updo with Twisted Crown
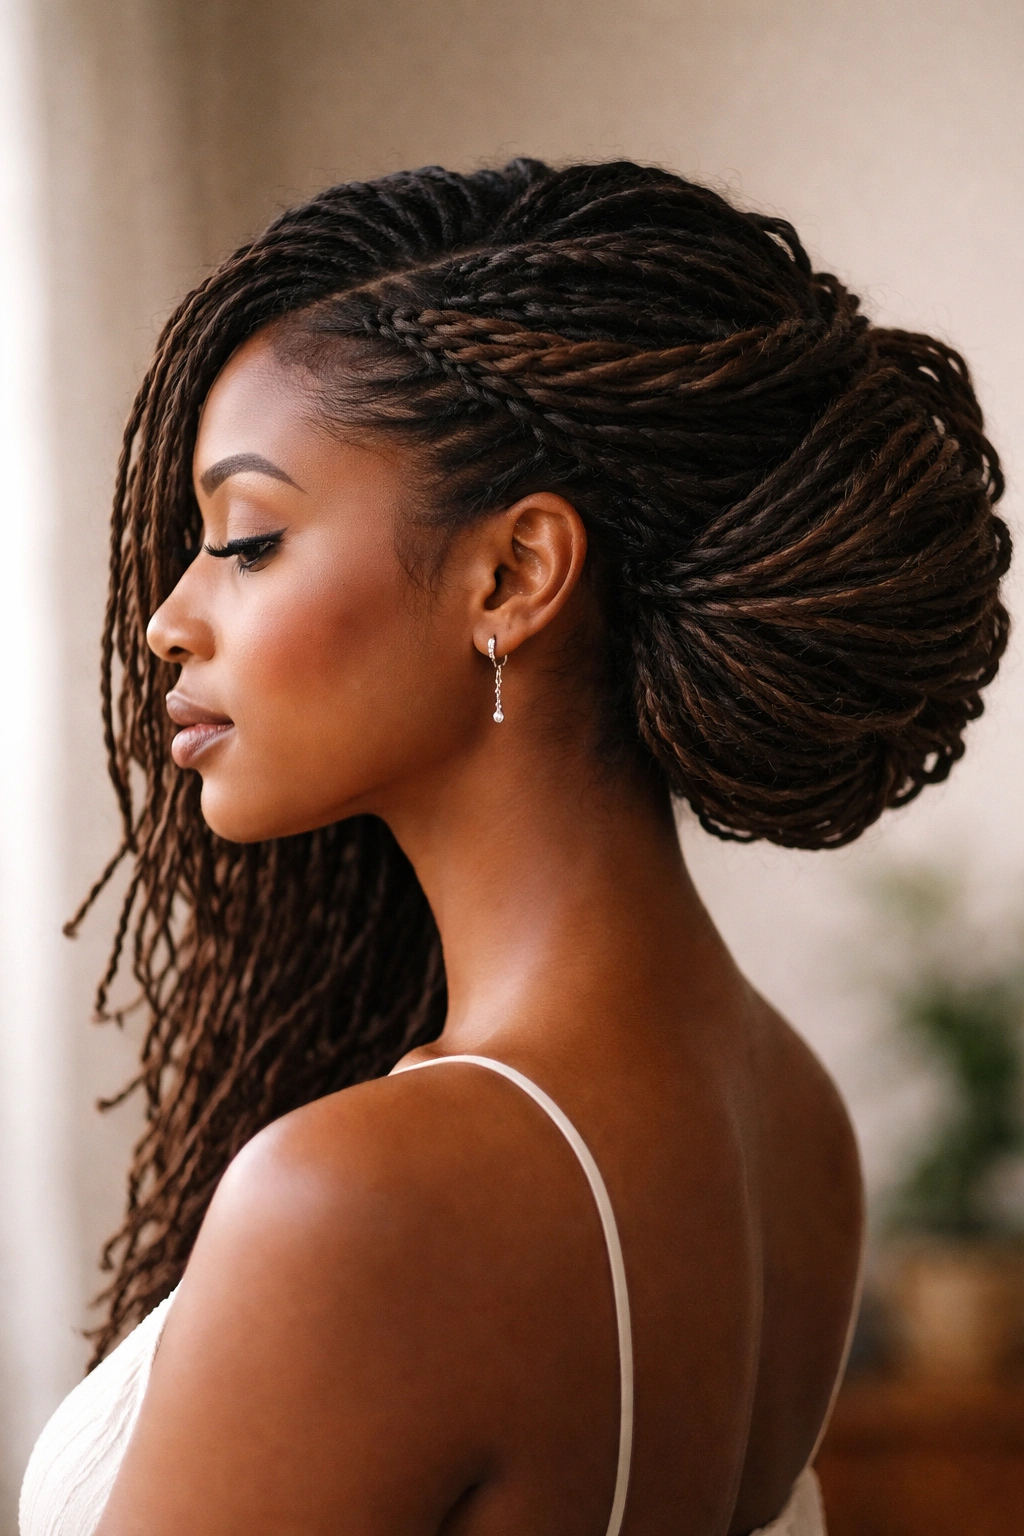
This style combines the sophistication of an updo with the movement and interest of a twisted crown detail. You’re essentially gathering your locs to one side of your head and securing them low, then adding a twisted or braided element that curves around the crown like a halo. It’s elegant enough for formal events but wearable enough for everyday styling with the right accessories.
Why This Style Is Secretly Flattering
The side-swept element creates visual interest and movement, which naturally draws eyes in a flattering way. By gathering your locs to one side, you’re also creating an asymmetrical composition that feels more dynamic than a centered bun. The twisted crown element adds three-dimensionality—it’s not just a flat style against your head; there’s actual sculptural quality to it. This style also works beautifully with locs of varying lengths because the twist and gathering naturally accommodate the slight length differences.
Building Your Side-Swept Updo
- Brush all your locs to one side of your head, typically the side that feels more flattering to your face
- Gather them into a low ponytail on that side, positioning it just below your ear or at the base of your skull
- Secure with a strong elastic or by wrapping a loc around the base
- Take a section of locs from the opposite side and twist them gently, pulling them across the crown toward the gathered ponytail
- Pin the twist in place, securing it to both your natural hairline and to the ponytail base
- Coil the gathered locs into a low bun or leave them as a twisted tail, depending on your preference
- Set with a light hairspray or edge control to keep flyaways minimal
Pro tip: Use bobby pins that match your loc color—they’ll be much less visible than contrasting colors, creating a cleaner overall appearance.
4. Crown of Wrapped Locs
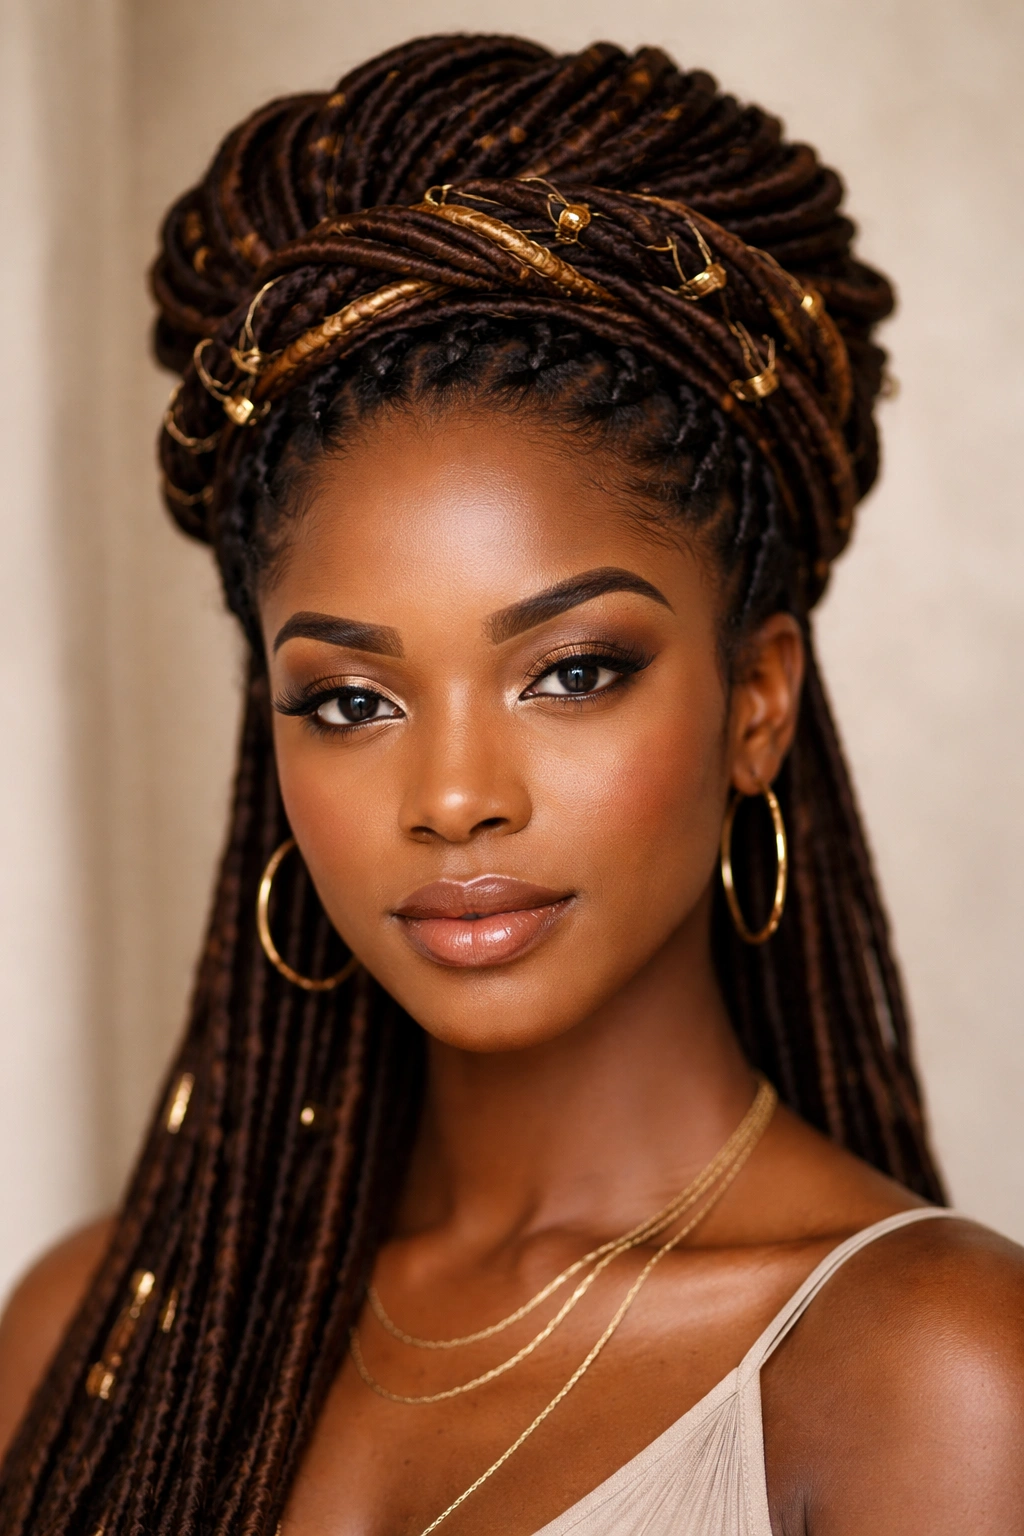
The crown of wrapped locs is pure artistry. This style involves selecting locs from around the front and side of your head and wrapping them around the crown or the back of your head, creating the effect of an ornate, three-dimensional crown. You can incorporate decorative elements like beads, threads, or cuffs into the wrapping for extra visual interest. It’s a style that reads as intentional and artistic—not something most people wake up and throw together.
The Artistic Impact of Wrapped Locs
When you wrap locs around your head, you’re creating a focal point that naturally directs attention upward, toward your face. The wrapped sections add volume and dimension, especially if you’ve incorporated beads or metallic threads. This style also gives you the chance to play with color and texture—you can wrap gold thread, colorful string, or even thin strips of fabric through your locs for a customized effect. It’s the kind of style that works beautifully in photos and draws genuine compliments.
Creating Your Wrapped Crown
- Identify which locs you want to use for your crown—typically those from the front, sides, and back
- Brush these sections smooth and begin wrapping them with your chosen material (thread, thin yarn, or decorative string)
- Wrap tightly but not so tight that you’re creating tension on your scalp, which can cause discomfort or breakage
- As you wrap, curve the locs around your crown or the base of your skull, securing them in place with bobby pins
- Continue until you’ve created the crown effect you envisioned
- Tuck any loose ends underneath and secure with additional pins
Pro tip: If you’re using thread or string, tie it off at the end rather than relying on the wrap alone to hold it in place. A simple knot ensures it won’t unravel throughout the day.
5. Half-Up Bubble Ponytail with Elastics
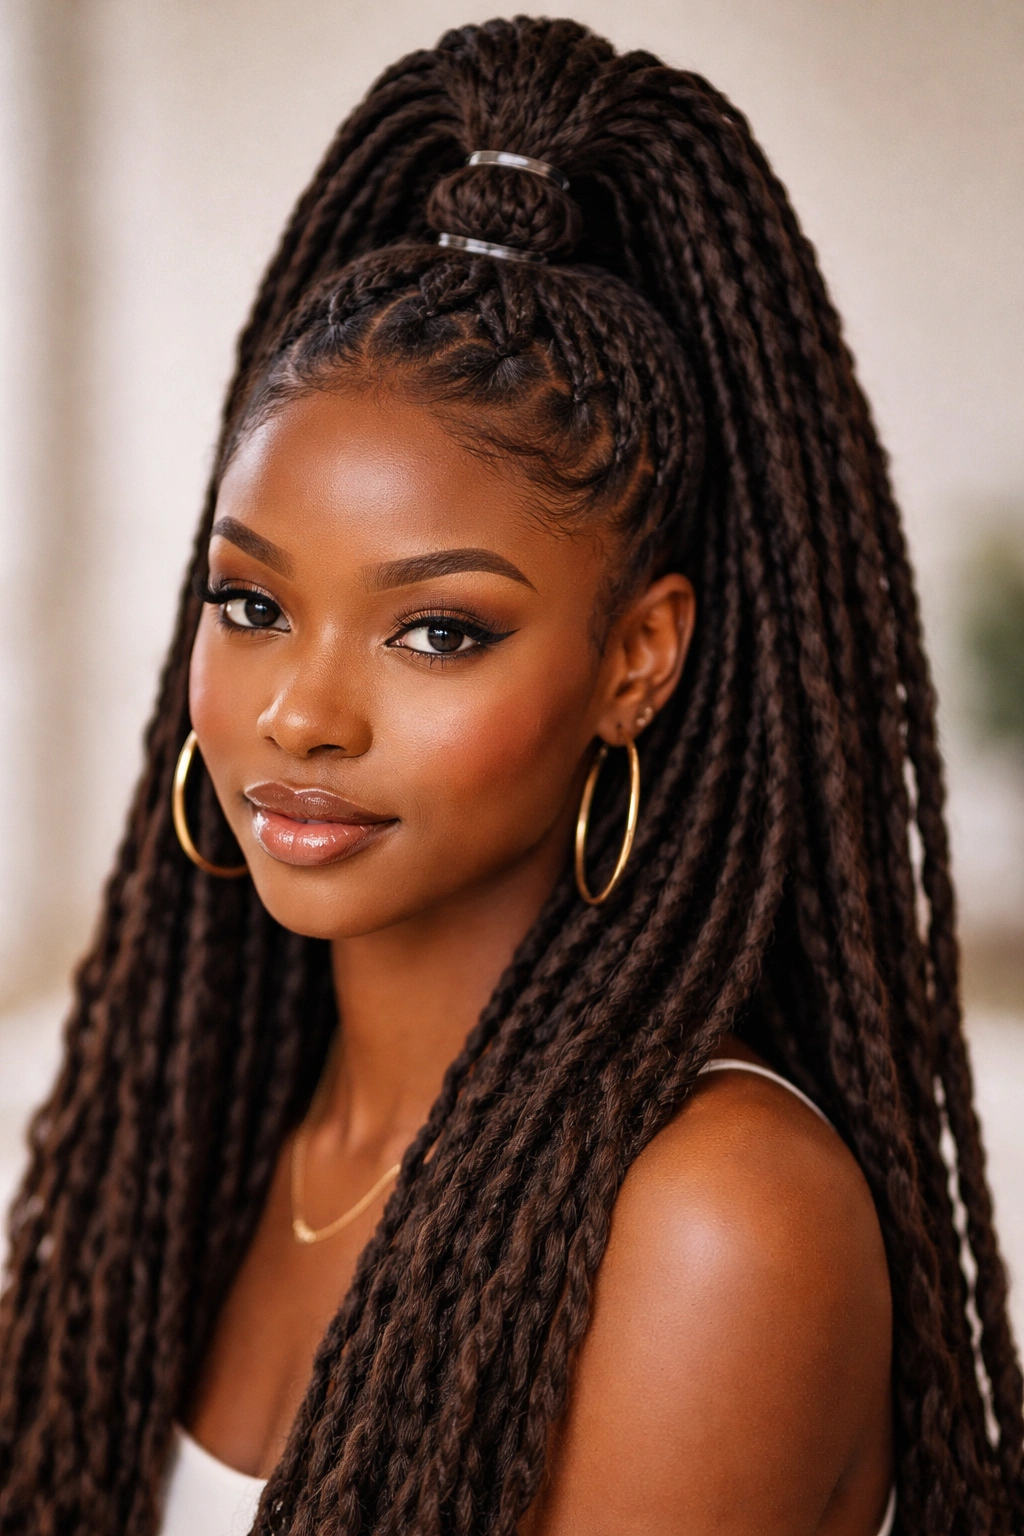
The bubble ponytail has become wildly popular, and for good reason—it’s fun, it photographs beautifully, and it works with virtually any hair type or length. With locs, you create the bubble effect by sectioning a ponytail with multiple elastics, causing the hair between each elastic to puff outward. When you do a half-up version, you’re keeping half your locs down while creating this playful, textured effect with the upper portion.
Why Bubble Ponytails Work With Locs
Because locs are already textured and hold their shape naturally, they create the bubble effect more easily than straight hair does. The result is more pronounced and longer-lasting than you’d get with loose hair. The half-up version strikes a balance between playful and wearable—you’re not committing your entire head to an elaborate style, just the upper portion. This makes it perfect for days when you want a little extra polish without going full updo.
Mastering the Bubble Ponytail Technique
- Gather the upper portion of your locs into a ponytail at the crown, securing with an elastic
- Starting just below the base elastic, wrap another elastic around your ponytail about 2 to 3 inches down
- Gently pull upward on the section of locs between the two elastics, encouraging them to puff outward and create a bubble shape
- Continue adding elastics down the length of your ponytail, spacing them evenly and creating a bubble with each section
- As you work your way down, each bubble should become progressively slightly smaller, creating a tapered effect
- Finish by smoothing flyaways and securing the end with a final elastic
Pro tip: Use clear or colored elastics depending on your preference. Clear elastics are less visible, while matching-color elastics can look intentional and add visual interest.
6. Flat-Twisted Crown Detail
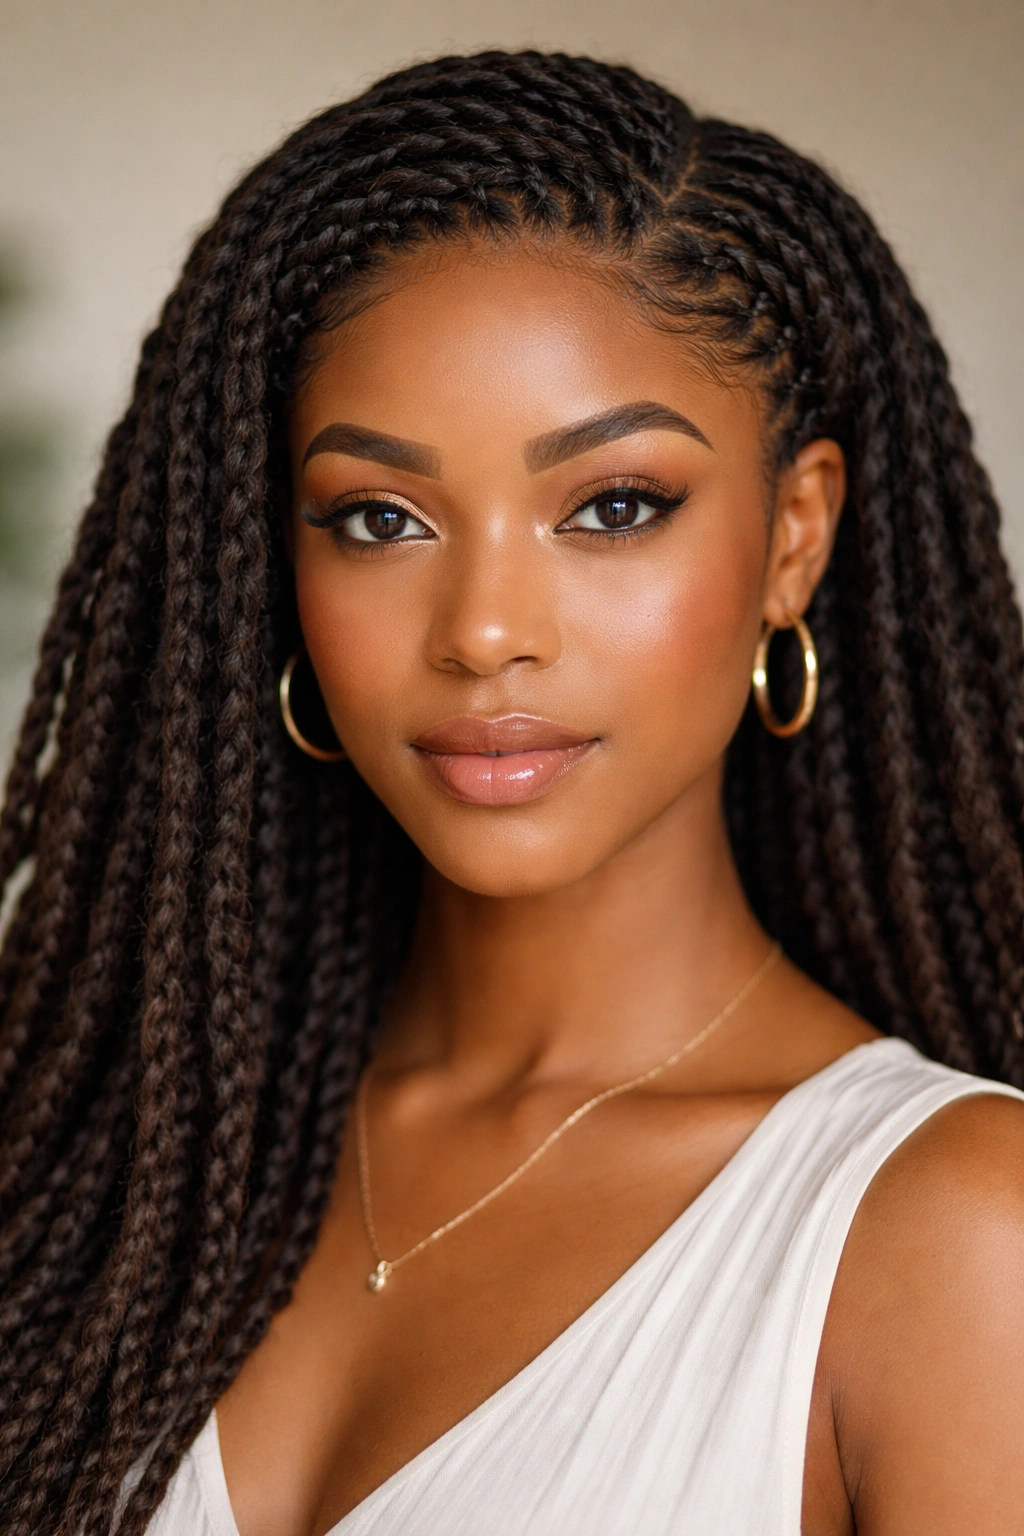
Flat twists are created by twisting two sections of hair together while picking up additional strands from the scalp as you move, similar to a cornrow but with a two-strand twist rather than a three-strand braid. When you incorporate flat twists into a loc style as a crown detail, you’re adding definition and visual texture without requiring the skill level that full braiding might. This style is surprisingly forgiving for beginners while still looking intentional and put-together.
The Elegance of Flat-Twisted Details
Flat twists add movement and visual interest without requiring you to braid or fully style your entire head. You can add just one or two flat twists as accents, or create multiple twists that work together to frame your face or crown your head. The twisted texture contrasts beautifully with loose locs, creating a style that feels both polished and relaxed. Because flat twists follow the natural contours of your head, they’re also more comfortable than some other styles—there’s no tension, and they feel secure without needing tons of pins.
Building Flat Twists Into Your Style
- Section off the locs you want to twist, starting from one side of your head
- Take the first loc in your section and split it into two strands
- Twist these two strands together while picking up an additional loc from your hairline as you move along
- Continue this motion along your scalp, picking up new locs as you go, until you reach your desired endpoint
- Secure the end with a bobby pin or small elastic
- Repeat on the other side if you want symmetrical twists, or create additional twists in a pattern that appeals to you
- Finish with edge control for a polished look
Pro tip: If you’re new to flat twists, practice on a day when you’re not going anywhere. The first few times, the twists might feel loose or uneven, but they’ll improve with repetition.
7. Double Buns with Decorative Cuffs
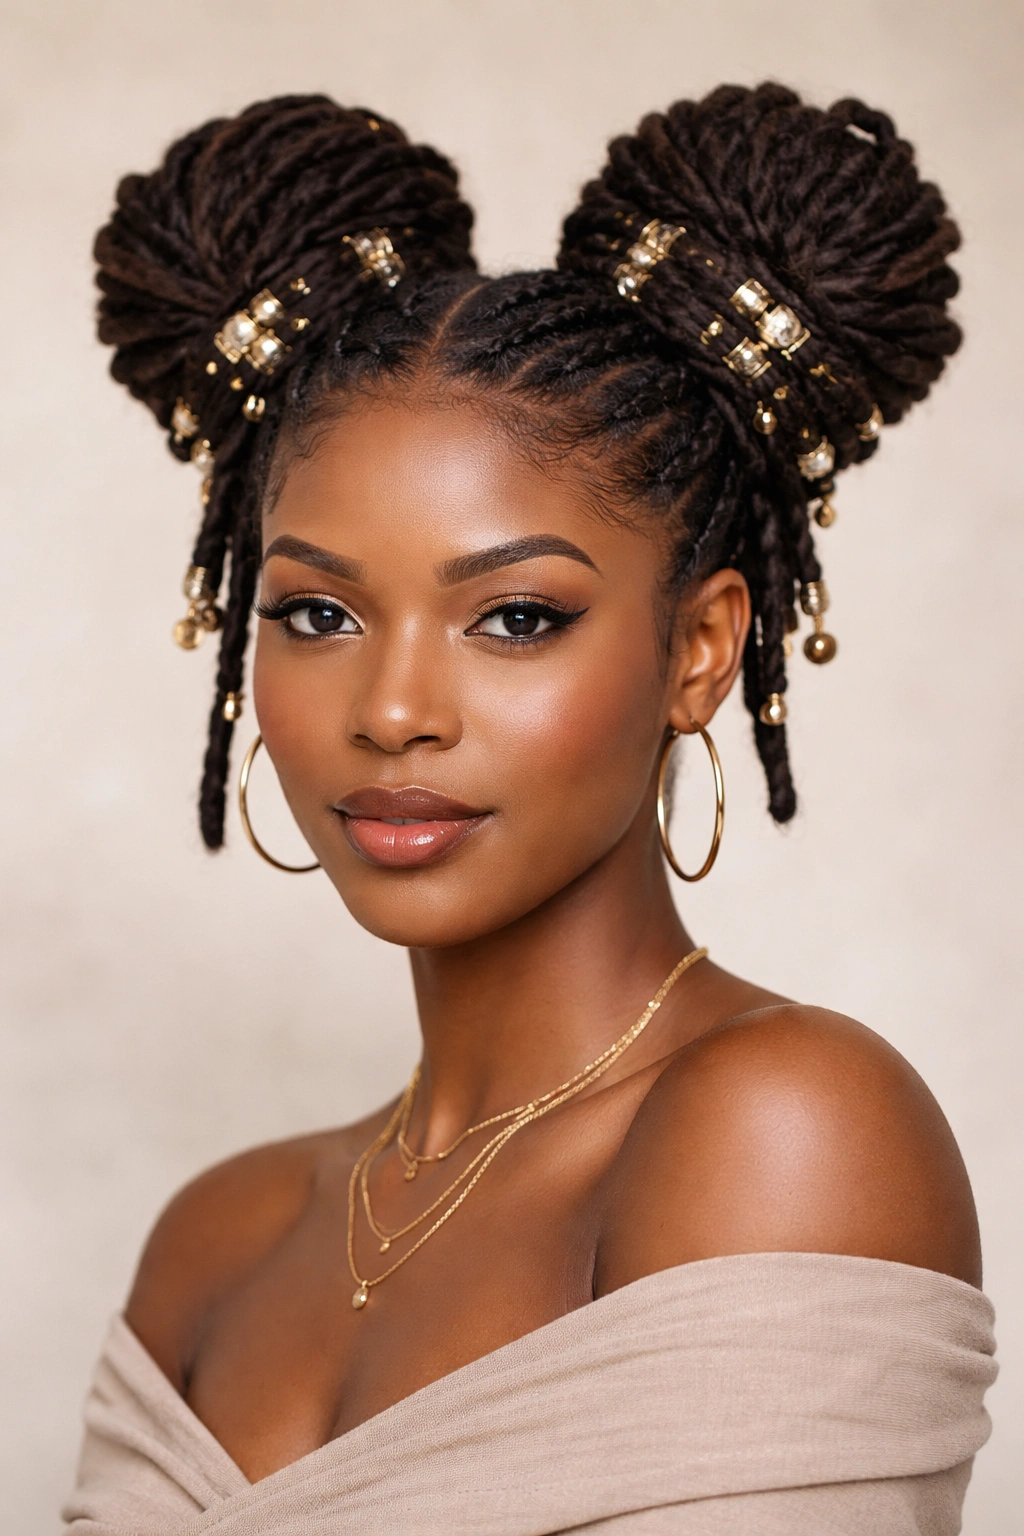
Double buns are inherently playful and youthful, evoking a fun, carefree energy. With locs, you can create two high buns on either side of your crown and embellish them with decorative cuffs, beads, or rings for an elevated version of this style. The cuffs add sophistication and visual interest, transforming what could feel juvenile into something intentional and stylish.
The Playful Sophistication of Double Buns
Double buns let you lean into a fun aesthetic without sacrificing polish or wearability. The addition of decorative cuffs—whether metallic, beaded, or ornamental—elevates the style from casual to intentional. Because locs are naturally thick and textured, they hold bun shapes beautifully without requiring tons of product or pins. The symmetry of double buns also creates balance, which is inherently visually pleasing.
Creating Double Buns with Style
- Part your locs down the middle, dividing your hair into two equal sections
- On one side, gather your locs into a high bun at the temple area, securing with an elastic
- Repeat on the other side, creating a mirror-image bun
- Twist or coil the gathered locs around each base to form compact bun shapes, tucking ends under and pinning in place
- Slide decorative cuffs or rings over each bun, positioning them at the base or middle, depending on the look you want
- Smooth your hairline and any flyaways with edge control
- Consider adding beads or other embellishments to individual locs for extra flair
Pro tip: The height at which you position your buns dramatically changes the vibe. Lower buns feel more mature and professional, while higher buns feel more playful and fun.
8. Loc Updo with Underneath Braid Detailing
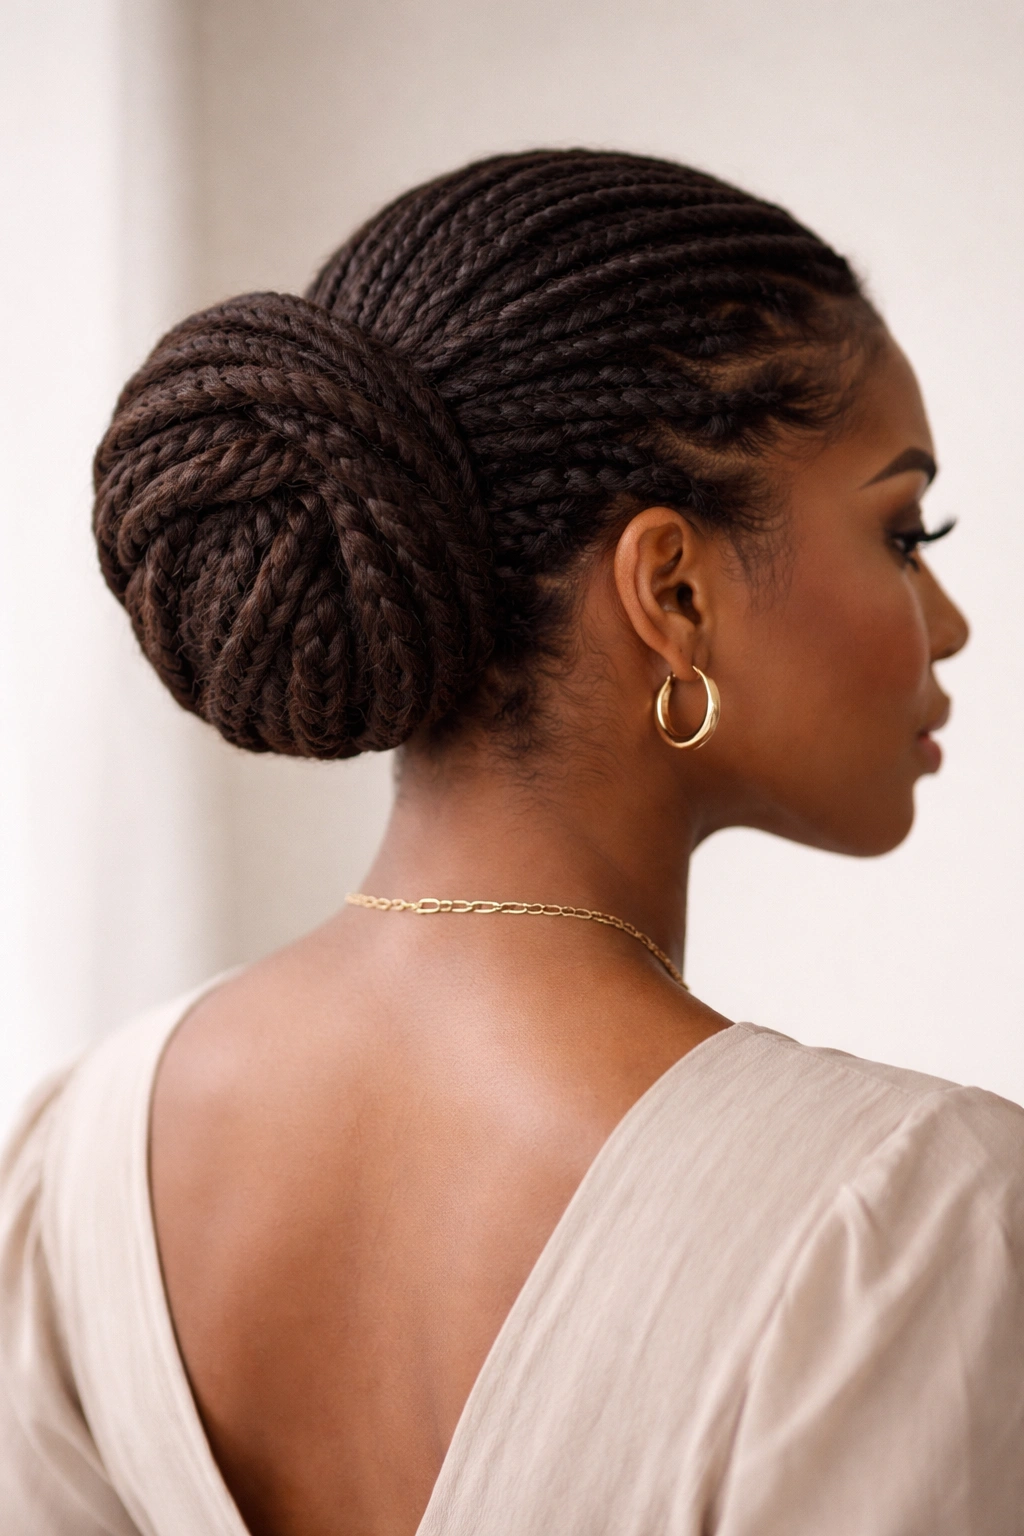
An updo with hidden braid detailing is a style that rewards close inspection—from far away it looks like a simple, elegant updo, but when someone gets closer, they’ll notice the intricate braiding underneath. This style works beautifully for formal events or when you want to look polished without drawing excessive attention. It’s also a wonderful middle ground between low-maintenance and elaborately styled.
Why Hidden Details Create Visual Depth
The magic of this style is that it operates on two levels. At first glance, it’s a simple, professional updo. But the braiding detail adds complexity and intentionality that elevates it beyond basic. This style also creates interesting texture—the braided sections look different from the smoothly gathered sections, adding visual variation. Because the intricate detailing is partially hidden, it feels special and intentional rather than trying too hard.
Building Your Detailed Updo
- Brush all your locs back into a low ponytail at the nape of your neck, securing with an elastic
- Before gathering the ponytail into a bun, select three to four locs from the ponytail and braid them together
- Braid only the middle section of each loc, leaving the roots and ends loose
- Coil the remaining locs around the base to form a bun, tucking the braided sections underneath or around the sides of the bun
- Secure everything with bobby pins, tucking in any loose ends
- Smooth your hairline and set with edge control
Pro tip: This style is perfect if you have even slightly uneven loc lengths, as the gathering and braiding naturally accommodates length variations beautifully.
9. Spiral Wrapped Locs on One Side
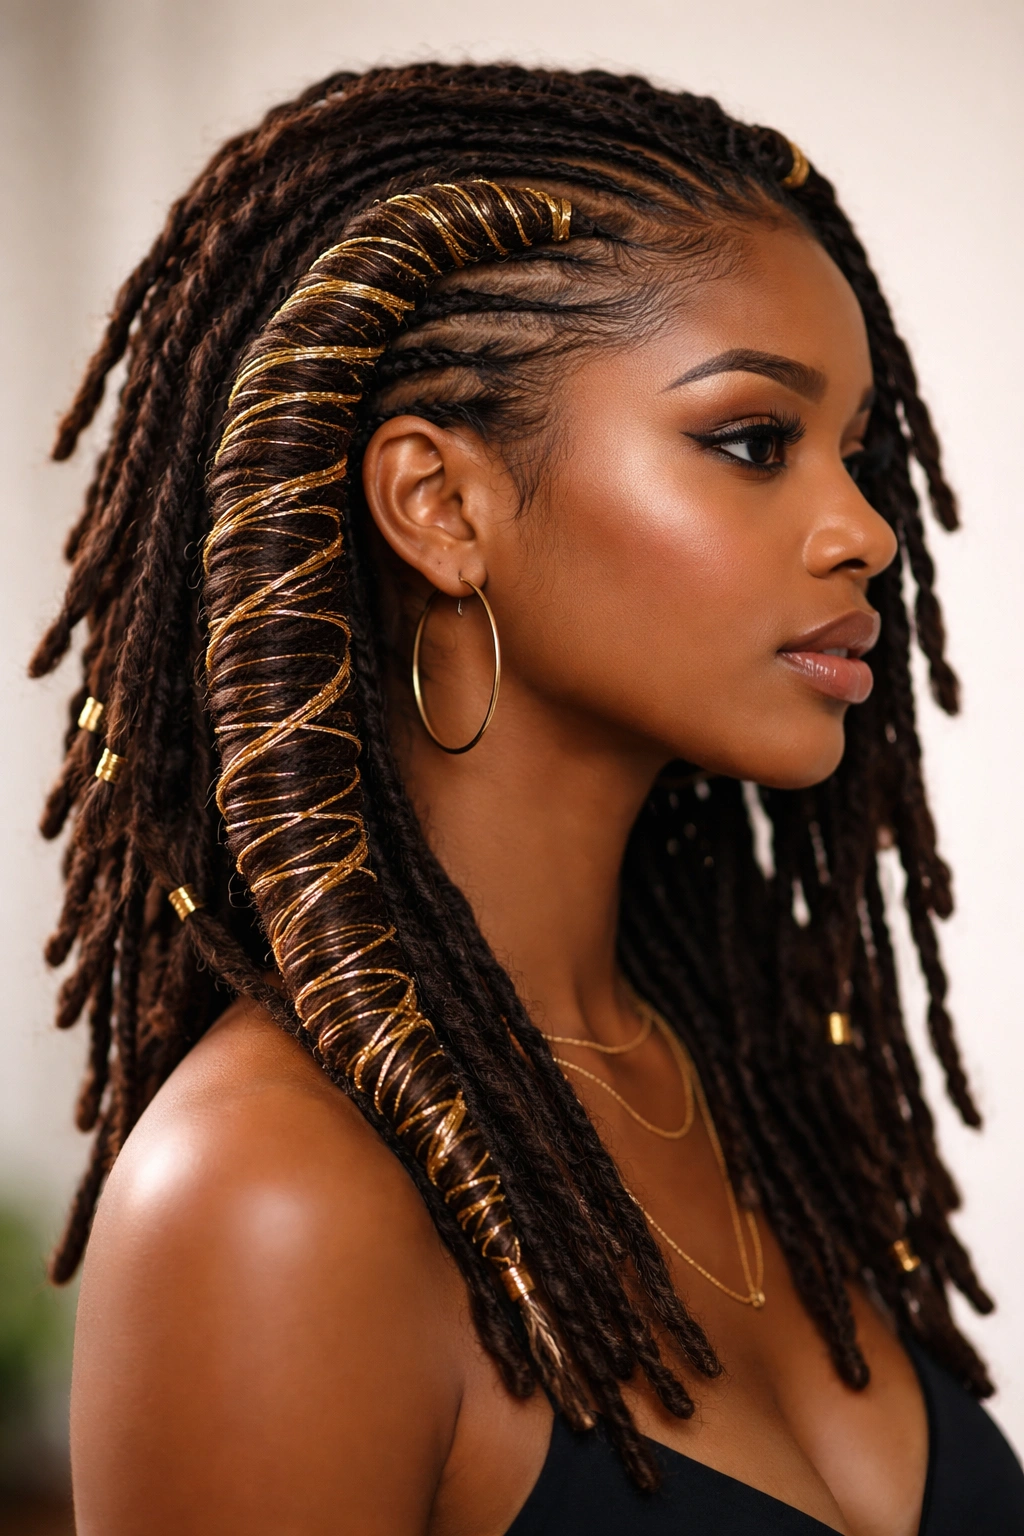
Spiral wrapping involves taking individual locs and wrapping thread, yarn, or thin fabric around them in a spiral pattern, creating a twisted, sculptural look. When you apply this to just one side of your head, you’re creating an asymmetrical style that feels artistic and intentional. This is the kind of style that looks stunning in photos and makes a clear statement about your confidence and creativity.
The Artistic Statement of Spiral Wraps
Spiral-wrapped locs are pure expression—you’re taking an individual element (each loc) and treating it as a canvas for decoration. The spiraling motion creates visual movement and draws the eye along the wrapped sections. You can use metallic threads for glamour, colored yarn for vibrancy, or neutral tones for subtlety. The result is a style that says you’re intentional about your appearance and willing to experiment with bold aesthetics.
Creating Your Spiral Wraps
- Select the locs on one side of your head that you want to wrap—typically the side from temple to ear
- Start with the first loc and wrap your chosen material (thread, yarn, or fabric strips) around it in a spiral motion
- Begin at the root and spiral downward, keeping tension consistent so the wraps stay even
- Tie off the end securely before moving to the next loc
- Continue spiraling additional locs until you’ve created the desired effect
- You can wrap just a section of each loc or wrap all the way to the end, depending on the look you want
- Style the wrapped side over your shoulder or pin it partially up, depending on your preference
Pro tip: Metallic threads photograph especially well and create an immediate elevated effect, making this style perfect if you’re attending an event where photos will be taken.
10. Loc Puff with Loose Locs Down the Back
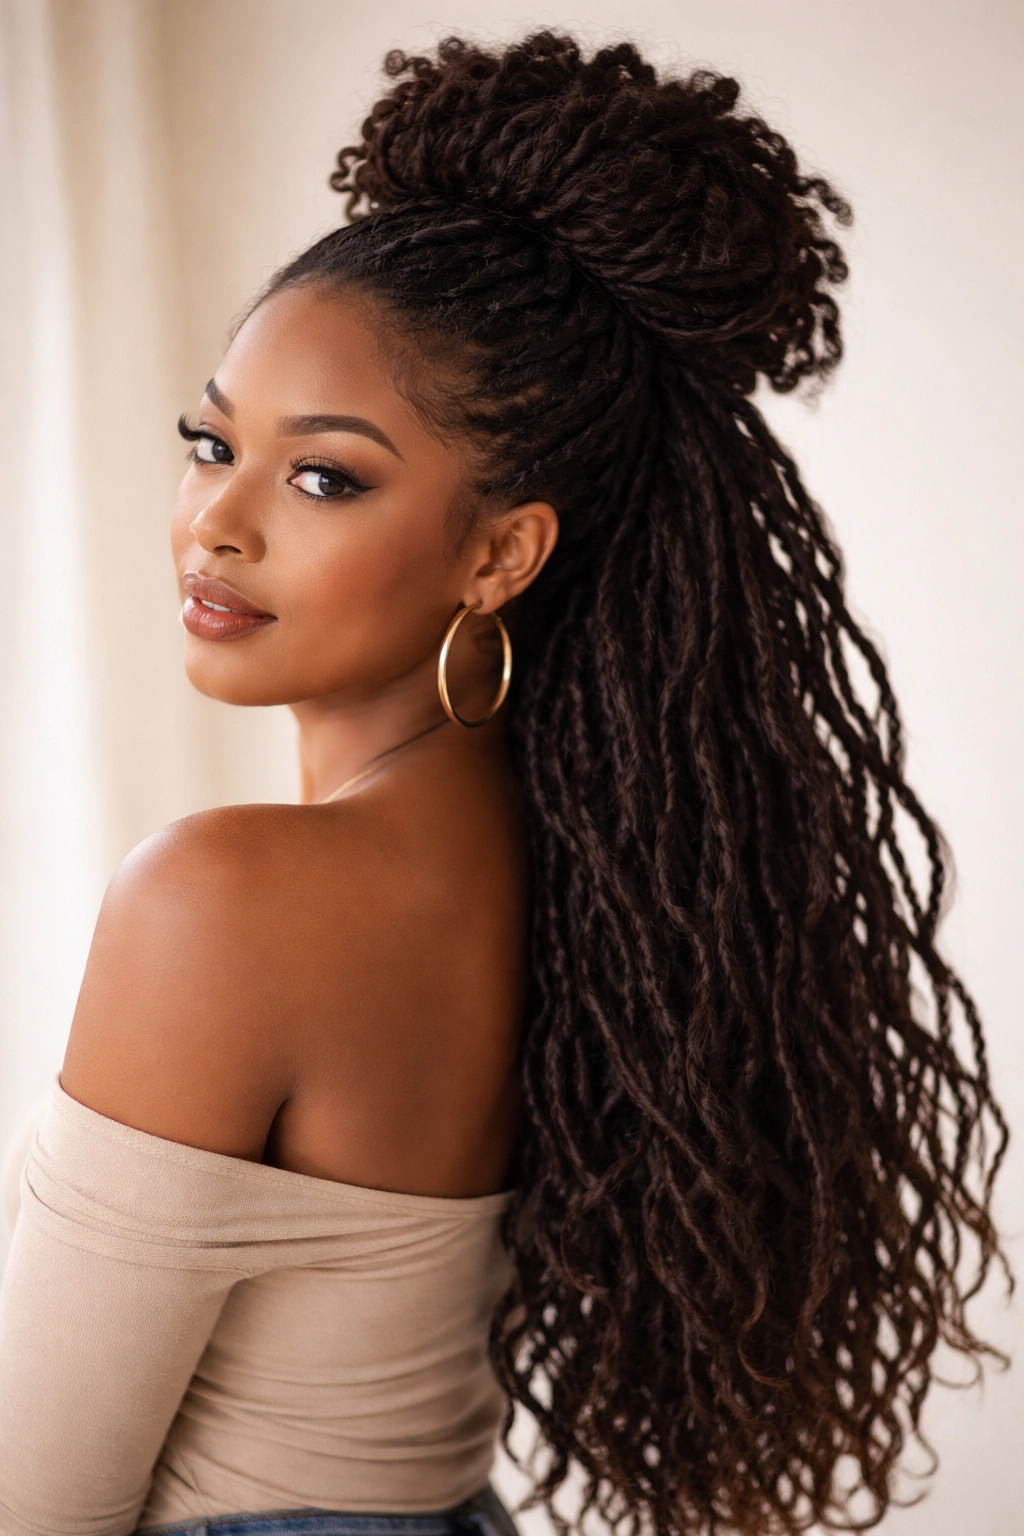
A loc puff is essentially a high ponytail gathered at the crown and fluffed out into a rounded shape—think of it like a high pony that’s been given volume and dimension. When you leave the majority of your locs down the back, you’re creating a style that’s playful and romantic, perfect for casual days or when you want movement and flow. It’s also a great way to style locs if you’re dealing with breakage in certain areas, as you can position the puff to minimize visibility of problem spots.
Why Loc Puffs Feel Both Casual and Intentional
A puff has an inherent playfulness to it, but because it’s deliberately styled and fluffed, it reads as intentional rather than thrown-together. The combination of the gathered crown and the flowing locs down the back creates lovely balance—you’re getting both height and length. This style also provides a nice break from having everything pulled back, offering your hairline a rest day while still keeping hair off your neck and face.
Styling Your Loc Puff
- Gather the locs at your crown—roughly the top third to half of your hair—into a high ponytail
- Secure with a strong elastic that won’t slip, as the weight of your locs will create downward tension
- Gently tease and fluff the gathered section, creating a rounded, voluminous shape
- Use bobby pins inserted horizontally into the puff to hold the shape and add security
- Smooth your hairline and any flyaways with edge control
- Leave the remainder of your locs flowing freely down your back
- Consider adding a decorative hair tie or wrap around the base of the puff for extra visual interest
Pro tip: The higher and rounder you make the puff, the more youthful and playful the style feels. For a more mature, sleek version, make the puff smaller and keep it lower.
11. Side Braid with Locs Pinned Across the Back
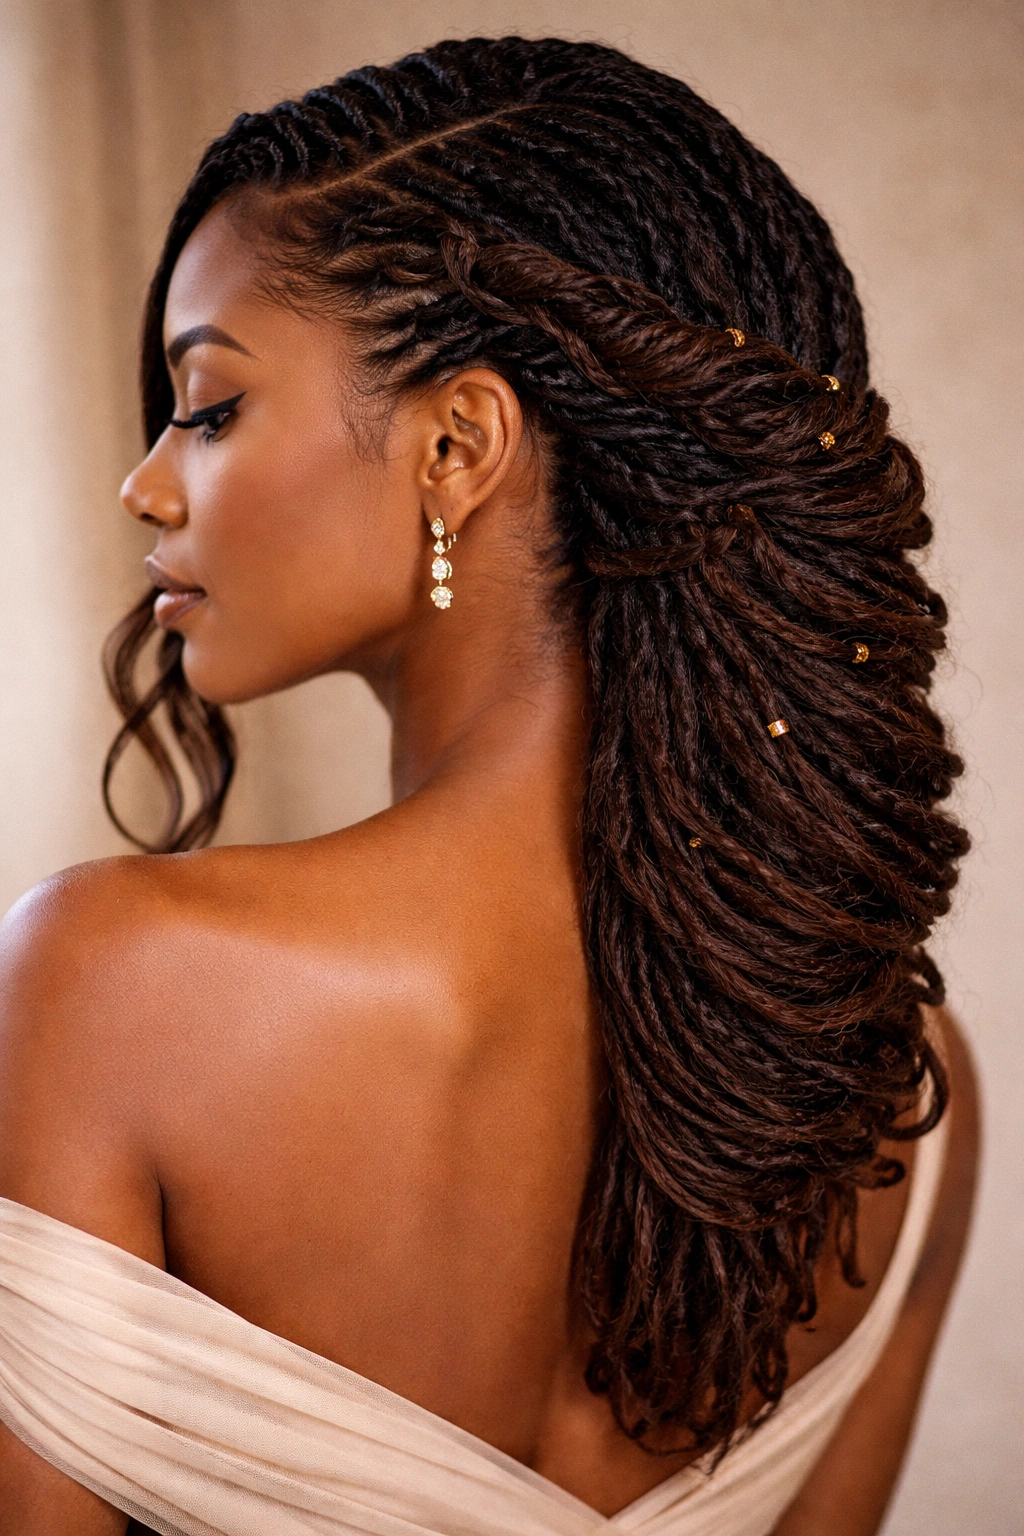
This style involves creating a single braid on one side of your head using your locs, then pinning the braid across the back of your head and securing the remaining locs. It’s similar to a crown braid, but with the braid positioned on the side and flowing diagonally across the back. This style works beautifully for medium to longer locs and creates an elegant, romantic aesthetic that’s perfect for special occasions.
The Elegant Flow of a Side Braid
A side braid draws attention to the braid itself—it’s a focal point that’s impossible to miss. By placing the braid on the side and running it across the back, you’re creating movement and visual interest that follows the contours of your head. This style also has a soft, romantic quality to it, especially if you incorporate any loose or flowing locs that aren’t included in the braid. It reads as intentionally styled without being overly elaborate.
Creating Your Side Braid Across the Back
- Brush all your locs smooth and back away from your face
- Starting at one temple, select three locs and begin braiding them tightly
- Add additional locs to the braid as you move diagonally across the back of your head toward the opposite ear
- Keep adding locs as you work your way across until you reach the far side
- Secure the end of the braid with a small elastic or by tucking it under and pinning it in place
- Leave any remaining locs loose and flowing, or gather them into a low pony at the nape for a more contained look
- Smooth your hairline and set with edge control
Pro tip: This style works beautifully if you have slightly uneven loc lengths, as the flowing section at the back will naturally look fuller and more intentional.
12. Loc Twist-Out Style with Defined Curls
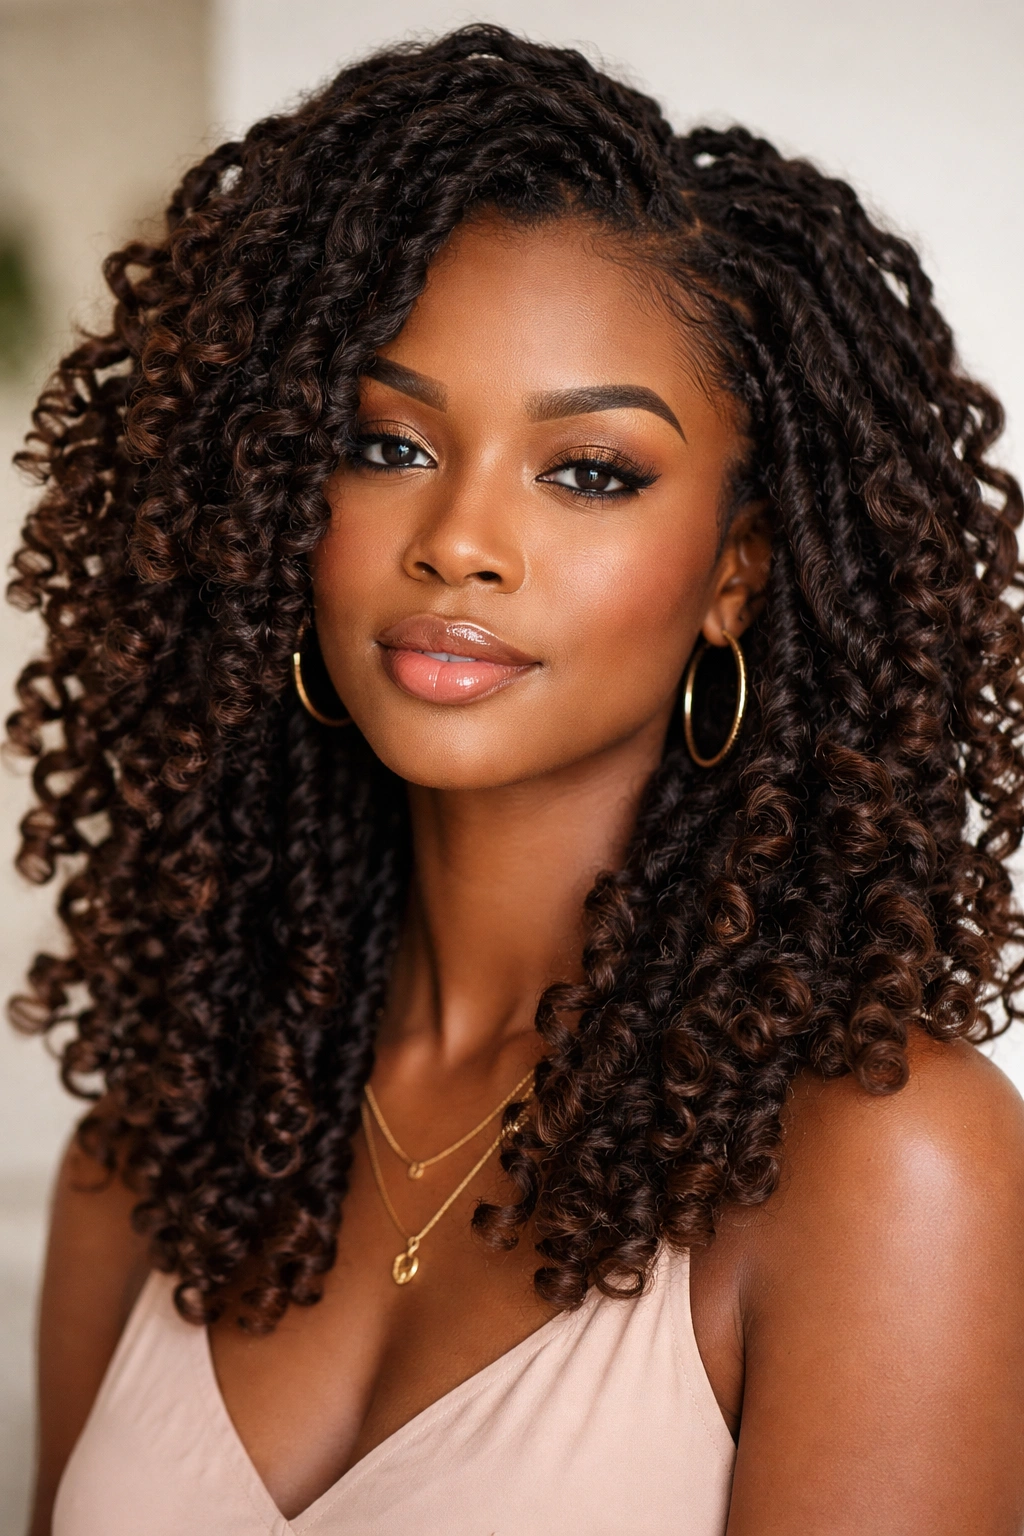
A twist-out with locs creates defined, separated curl patterns if you’ve twisted your locs when they were wet and then unraveled them. This style requires some planning and is more of a temporary variation rather than a set-it-and-forget-it style, but the results are stunning. The defined curls create incredible volume and texture, and the style reads as completely different from your regular locs—it’s like getting a temporary style change without damaging your hair.
The Transformative Power of a Twist-Out
A twist-out essentially doubles the apparent size of your locs by separating them into curl patterns. This creates massive volume and makes a bold statement. The style is perfect for when you want to look dramatically different or when you want to show off the length you’ve been growing. It also works beautifully for special occasions, as the defined curls feel intentional and styled.
Creating Your Loc Twist-Out
- Start with damp locs—mist them with water or work with them fresh from washing
- Section your locs into two to four strands depending on how much separation you want
- Twist each section tightly from root to tip, maintaining consistent tension throughout
- Allow the twists to dry completely—you can air dry, sit under a dryer, or do this overnight
- Once completely dry, unravel each twist gently, starting from the end and working toward the root
- Separate the curl pattern with your fingers, fluffing as you go for maximum volume
- Set with a light curl cream or moisturizer to define the curls and reduce frizz
- This style typically lasts three to seven days depending on how you sleep and your moisture level
Pro tip: Do a twist-out on a day when you have time to let them dry completely. Partially dry locs will unravel unevenly and won’t create the defined curl pattern you’re going for.
Final Thoughts
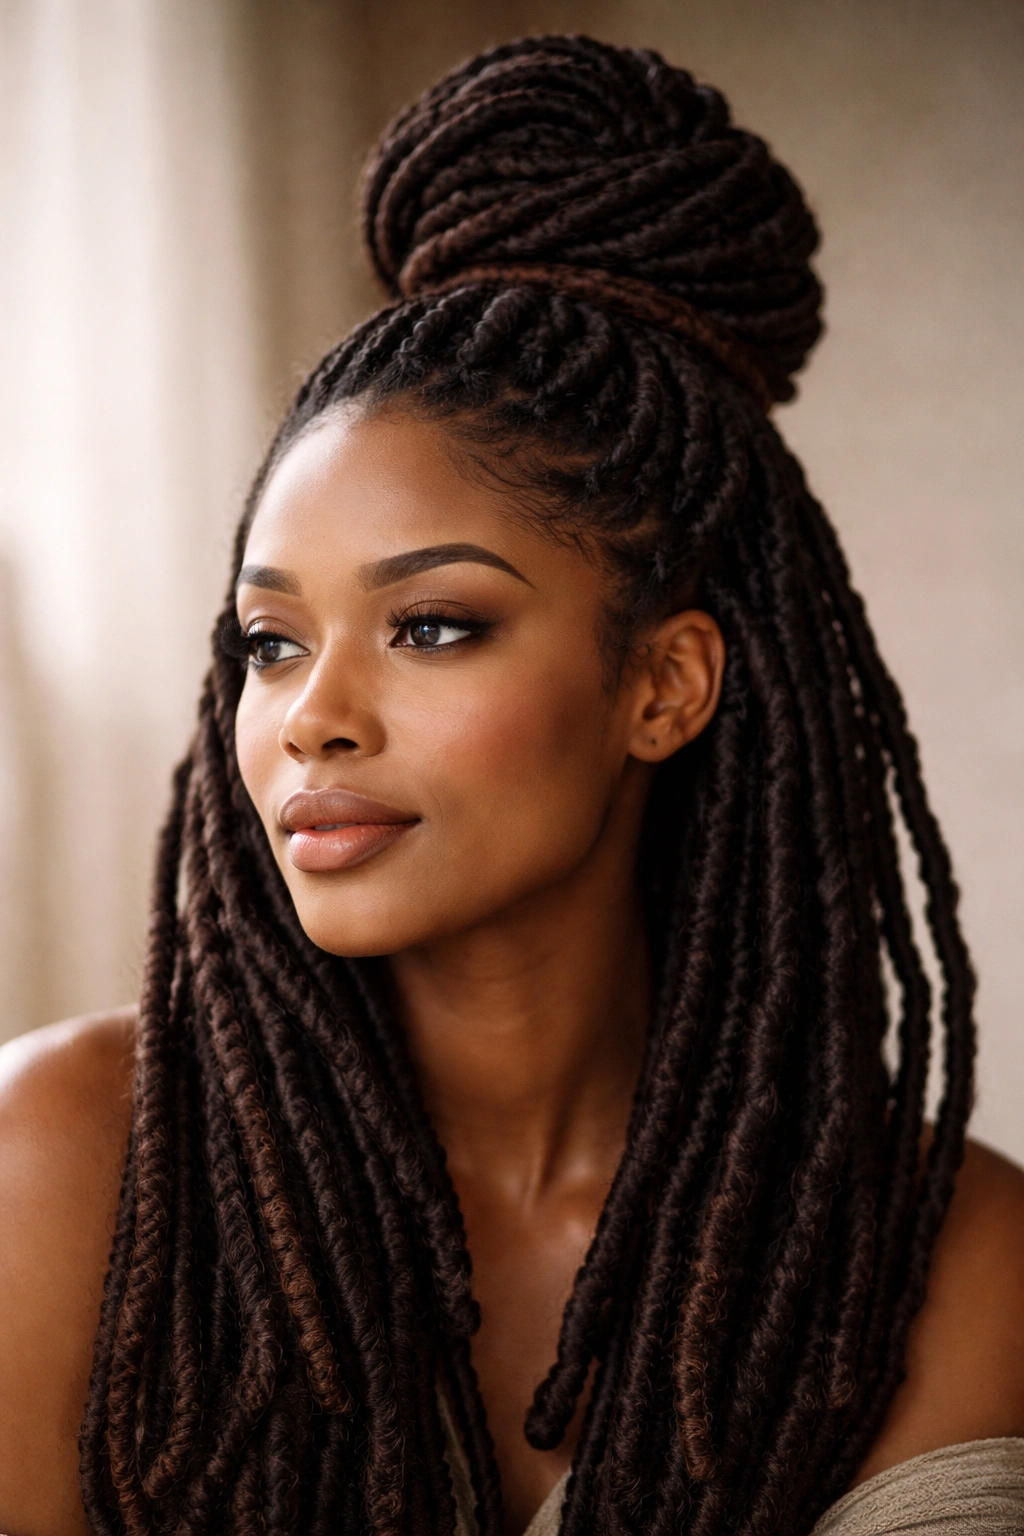
Locs offer a freedom of styling that many other protective styles simply can’t match. From the professional polish of a high bun to the artistic statement of spiral-wrapped sections, there’s genuinely a loc style for every mood, occasion, and expression. What’s remarkable about locs is how they continue to evolve—a style that feels completely fresh today might transform into something entirely different once your locs mature further or grow longer.
The most important thing to remember as you explore these styles is that your locs are an investment in your hair health and a canvas for your creativity. Each of these 12 styles can be customized based on your exact loc length, thickness, and personal aesthetic. Don’t hesitate to combine elements from different styles—wear the wrapped locs with the crown detail, add beads to the bubble ponytail, experiment fearlessly.
Your loc journey is uniquely yours, and that’s the real beauty of this styling option.
