



When you’re rocking natural afro texture, the last thing you want is a hairstyle that flattens your beautiful volume or requires you to compromise your hair health. Twist updos are a game-changer for anyone with springy coils, tight curls, or textured hair who wants a polished look that actually celebrates the natural spring and dimension of their crown—not fights against it. The magic of a twist-based updo is that it works with your hair’s natural texture instead of against it, creating styles that look intentional, sculptural, and genuinely stunning without excessive heat or tension.
What makes twist updos particularly appealing is the versatility. Whether you’re heading to the office, a special event, or just want to switch things up from your everyday style, there’s a twist updo variation that suits both your hair type and your aesthetic. Springy twists have this incredible ability to hold shape while still moving naturally—they don’t go rigid or look artificial the way some updos can on textured hair. You get definition, longevity, and a style that genuinely feels like you.
The techniques you’ll learn here work whether you’re doing two-strand twists, three-strand twists, or even incorporating some flat-twist elements. The key is understanding how to position them, secure them thoughtfully, and add the finishing touches that transform a simple twisted section into a jaw-dropping updo. Let’s dive into eight distinct twist updo styles that give you real options for different occasions, hair lengths, and styling moods.
1. Springy Twist Crown with Center Part
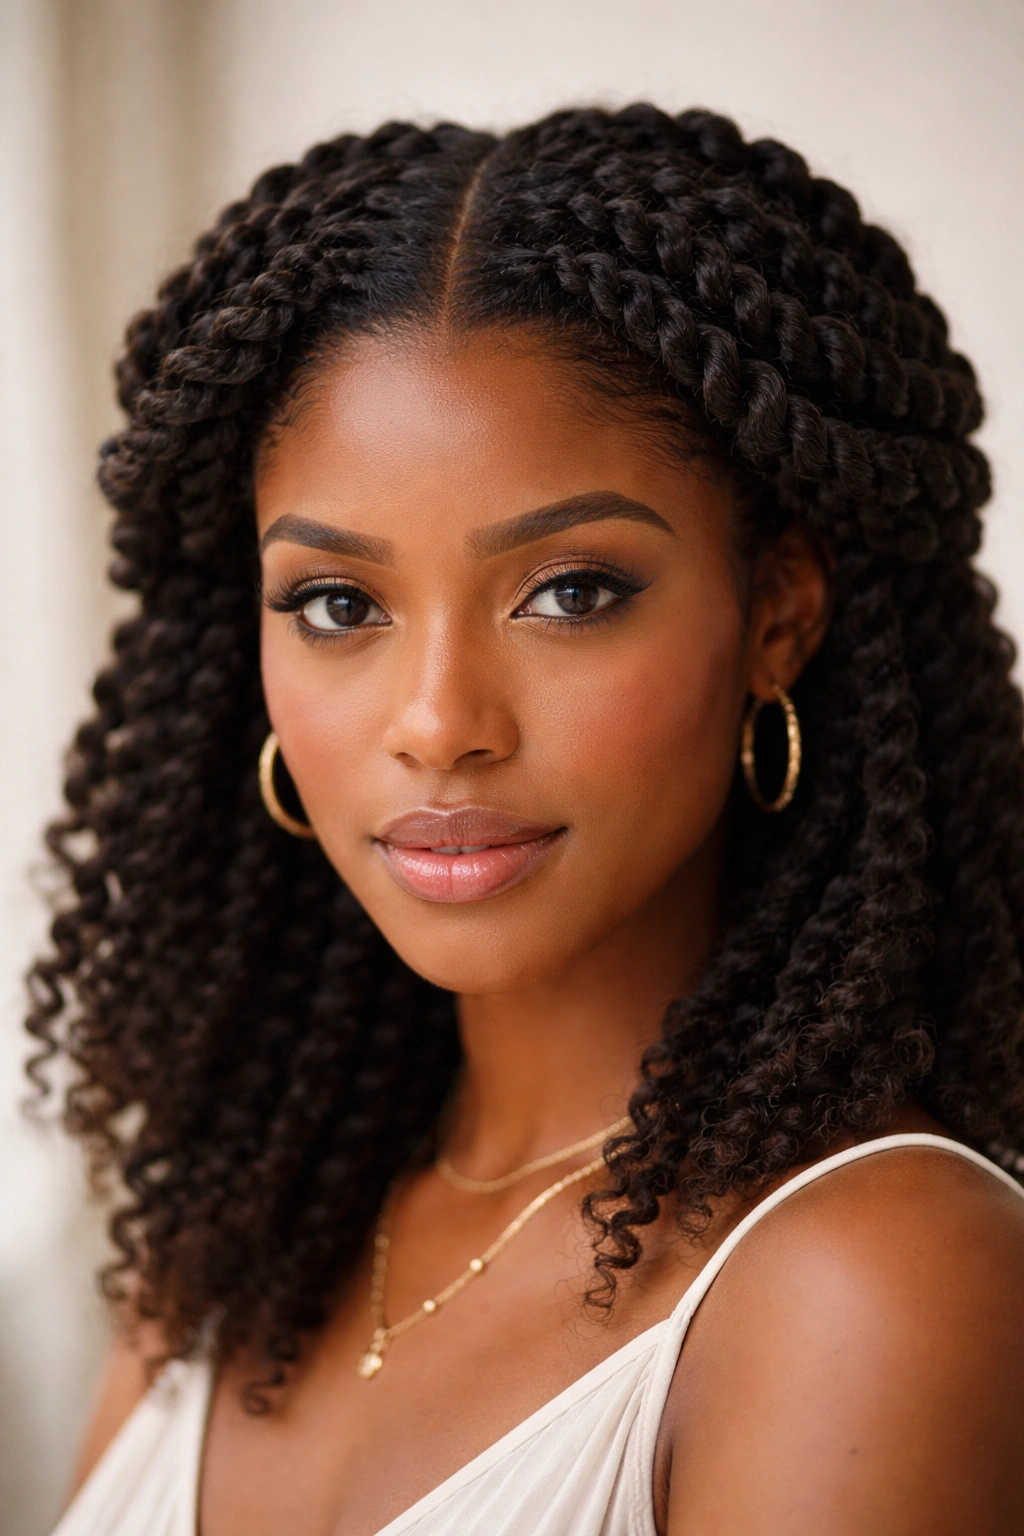
This style is the definition of elegant simplicity—a flowing crown of soft twists that feels both effortless and intentional. The center part creates perfect symmetry, while the twists frame your face and flow around your head like a natural crown that holds all day. It works beautifully at any hair length from shoulder-length to hip-length afro hair, and the springy texture keeps everything looking dimensional rather than flat.
Why This Style Works for You
The crown twist is one of the most forgiving updos because it doesn’t require every single twist to stay perfectly rigid. Your hair’s natural spring actually helps the style hold shape and look full. The twists catch on each other and create their own anchoring system, which means you don’t need heavy products or excessive bobby pins. This style is also protective—your ends are tucked away and your hair isn’t experiencing tension at a single point on your scalp.
How to Create This Crown
- Start with clean, moisturized hair that’s been left to air-dry or blown out gently to encourage spring
- Create a deep center part from your hairline all the way to the nape of your neck
- On one side, take a two-strand twist from your temple area and twist it all the way to the back of your head, positioning it along your crown line
- Repeat on the other side, mirroring the first twist
- Where the two twists meet at the back of your head, tuck and pin them together gently—you want the twists to interlock naturally
- Leave the ends loose if your hair is longer, or coil them up and secure with bobby pins for a fully enclosed look
- Optional: Weave a thin scarf, ribbon, or decorative wire through the twists for extra polish
Pro tip: Do this style on hair that’s 2-3 days post-wash when you have a bit of definition already built into your curls—the twists will grip better and last longer without looking overly constructed.
2. Layered Twisted Bun with Side Sweep
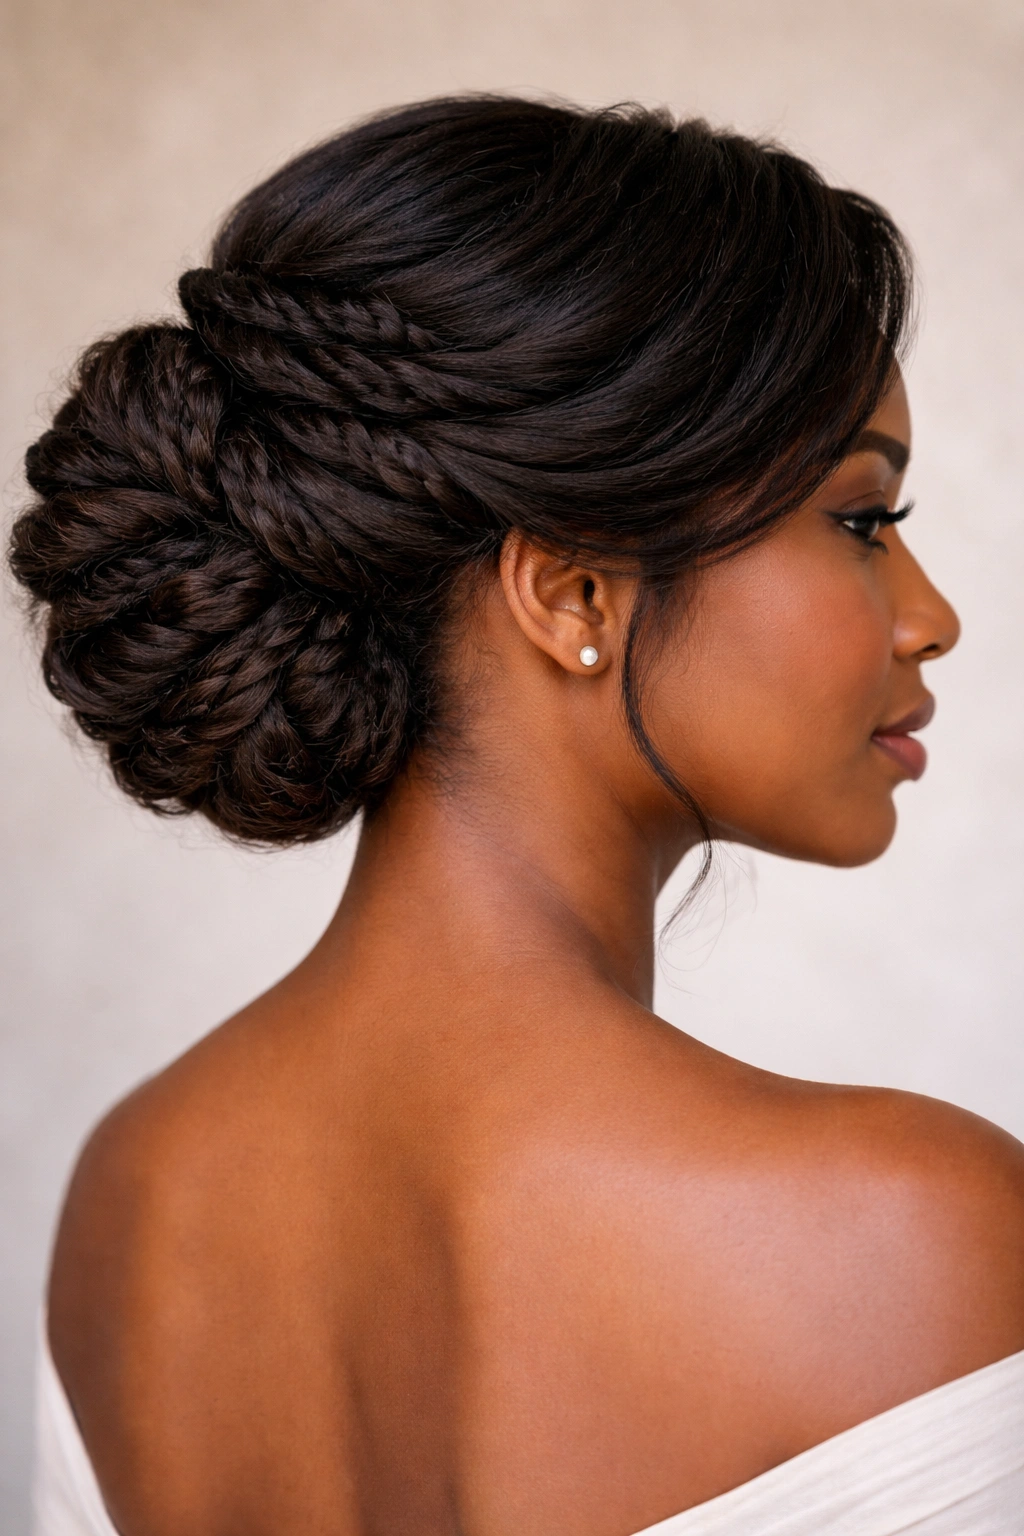
If you want maximum drama with genuine staying power, a layered twisted bun delivers. This style stacks multiple twisted sections on top of each other to create a bun that’s three-dimensional and impressively full. The side-swept construction adds a contemporary edge, while the layers keep the bun from looking flat or heavy—each section of twist creates its own visual texture.
Why Layers Make the Difference
Layering twisted sections is the secret to getting a bun that looks full and intentional on textured hair. Rather than gathering all your hair into one twist and coiling it up, you’re creating distinct twisted strands that coil independently. This means the bun has natural height, movement, and visual interest. It also distributes the weight of your hair across multiple anchoring points, which feels lighter on your scalp and actually holds longer without coming loose.
Step-by-Step Layering Process
- Part your hair on one side—take about 60% toward the side you’re sweeping to
- Create the first two-strand twist from the fuller side, starting at your temple and working toward the back
- Coil this twist into a bun shape at the nape of your neck and secure with bobby pins
- Take a second section of hair just above the first twisted section and create another two-strand twist
- Coil this twist slightly overlapping the first bun and pin it in place
- Repeat with a third twisted section, positioning it at the crown for height
- The bun should have a stacked, sculptural appearance with clear twisted sections visible
Worth knowing: Use flexible bobby pins (the kind with rubber grips) rather than traditional straight pins—they hold twisted styles better and don’t slide out of springy hair.
3. Twisted Halo Updo with Face-Framing
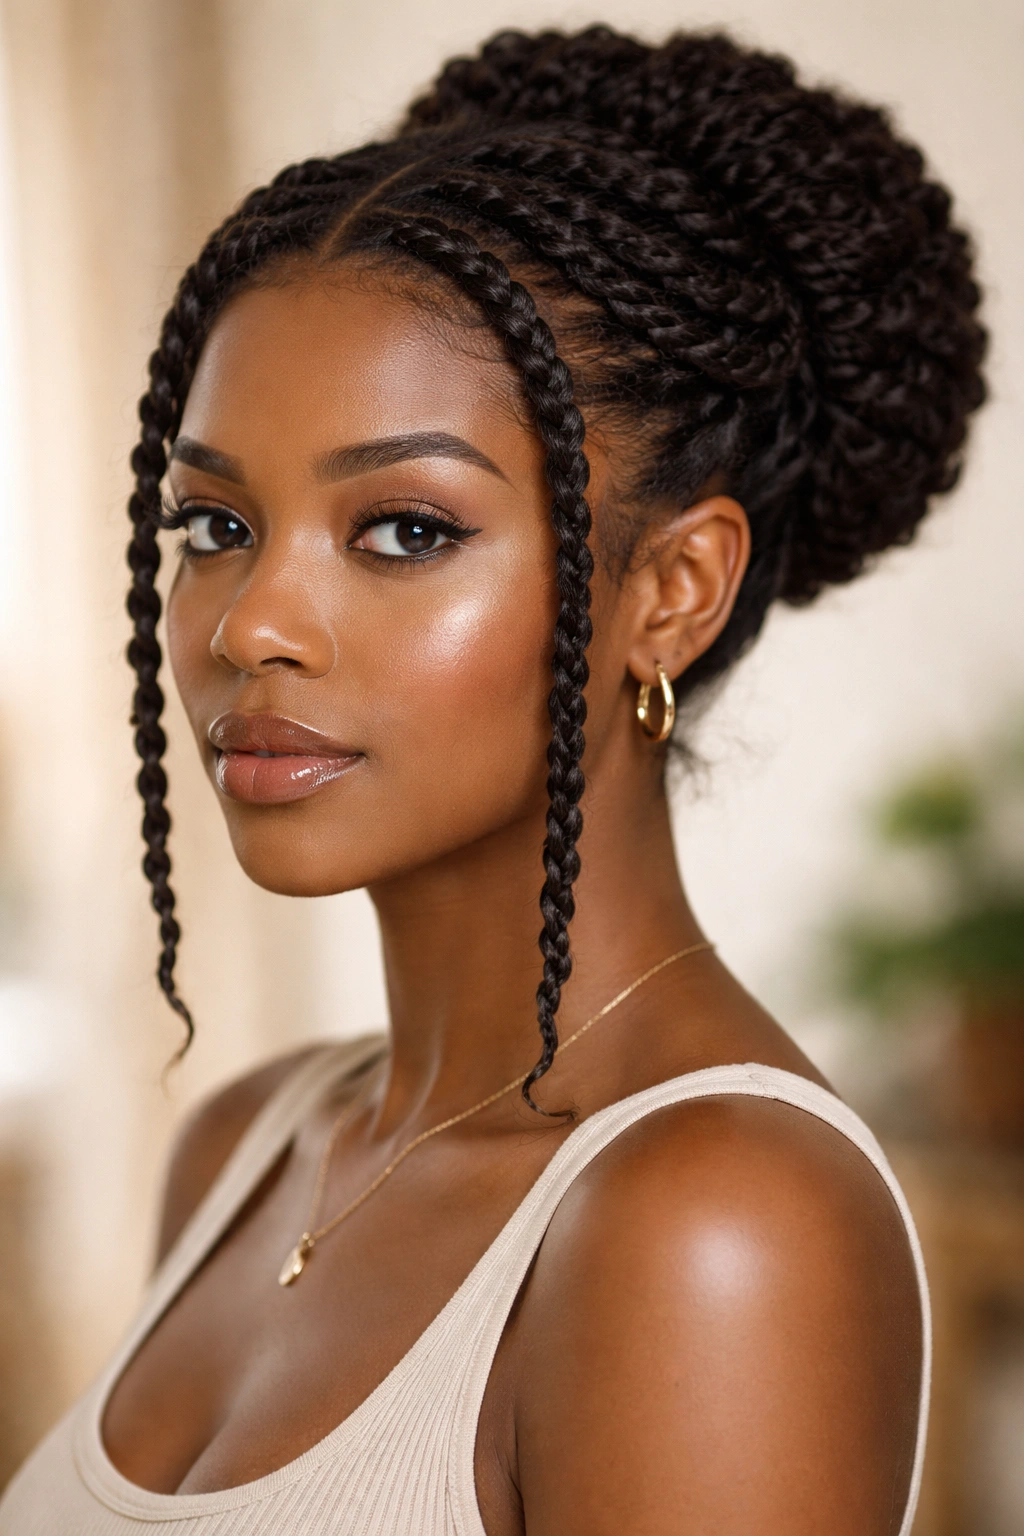
The halo is an eternally chic style, and when you execute it with twists, you get something that feels modern and intentional. Soft twists frame your face while the rest of your hair is secured into a bun or coil at the back, creating a balanced style that’s both protective and beautifully face-forward. This is ideal when you want to show off your features while keeping your hair off your neck.
The Face-Framing Element
With textured hair, face-framing isn’t about creating pieces that fall loose—it’s about positioning springy twists right where they catch light and draw attention to your face. The twists act almost like a natural highlight, creating dimension and movement near your cheeks and temples. Because they’re twisted rather than just loose curls, they stay in place all day without becoming frizzy or falling out of formation. You get the softness of face-framing without sacrificing style durability.
Building Your Halo
- Leave two 1-2 inch sections of hair untwisted at each temple—these will be your face-framing pieces
- Twist everything else into two-strand twists, working your way around your head
- Bring all the twists (except the face-framing pieces) to the back of your head and coil them into a low bun or coil
- Secure everything with bobby pins and a light hold product like a mousse or gel
- Take the face-framing twists and gently wrap them around the base of the bun, creating a halo effect
- Pin the face-framing twists in place, allowing them to curve naturally around your face
Insider note: Mist the finished style with a lightweight refreshing spray (not heavy hold) to enhance the natural shine of your twists without making them look stiff or crunchy.
4. High Twisted Knot with Accessory Detail
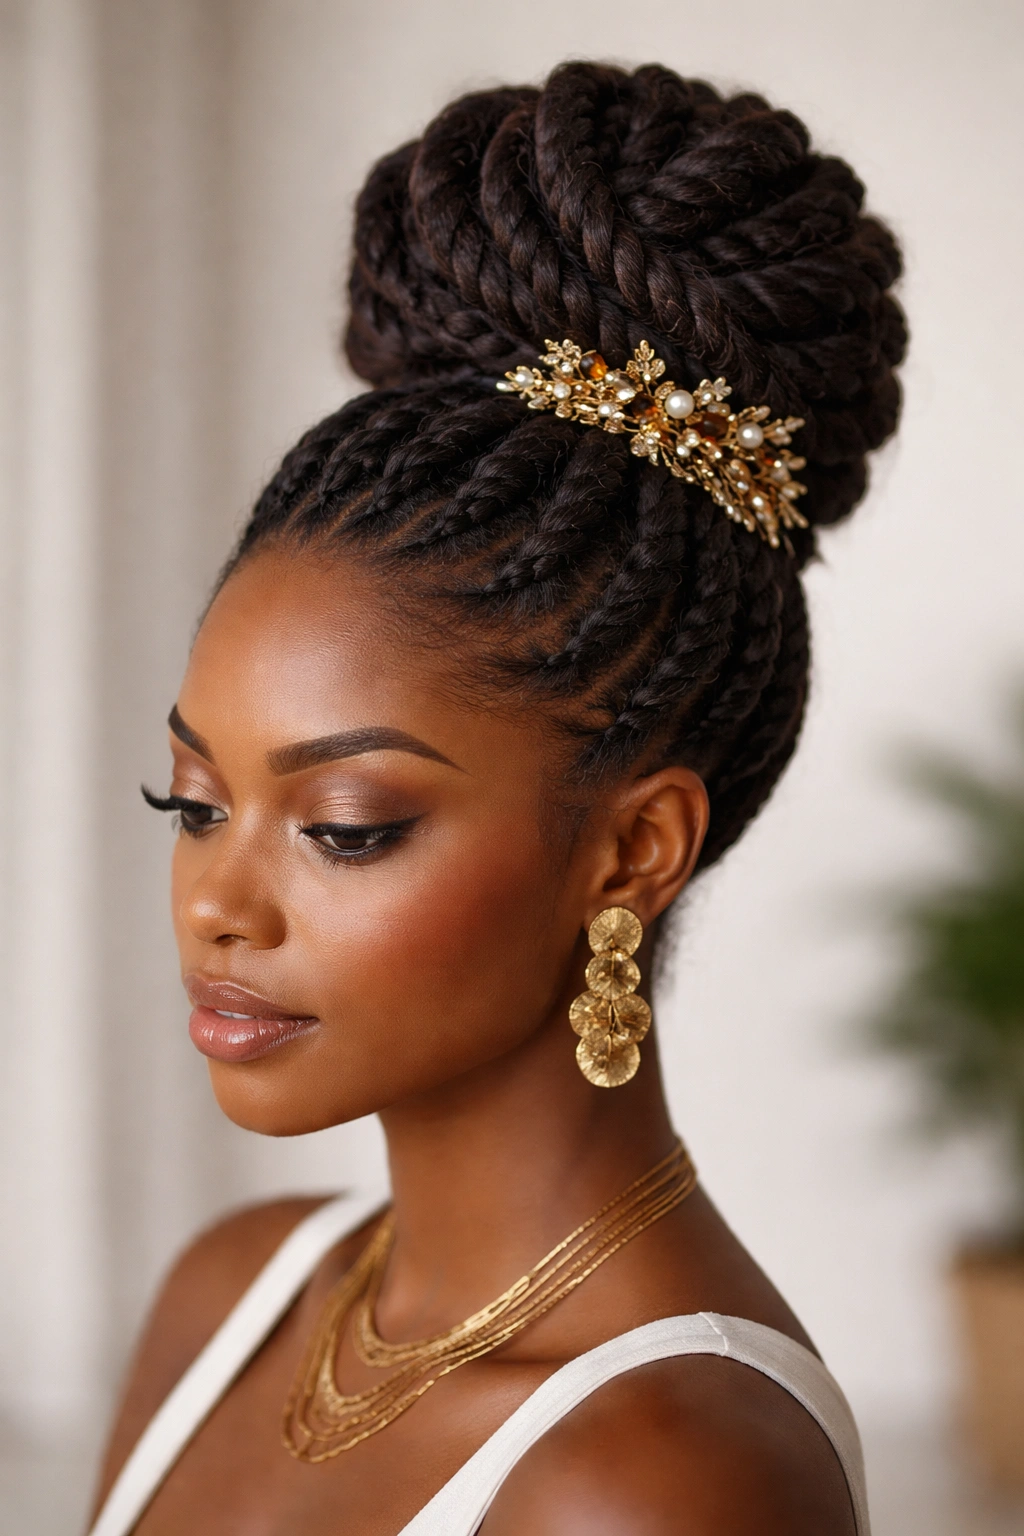
This style is pure drama in the best way. A single high twisted knot (essentially a bun created from one large twist) positioned at your crown commands attention, while an accessory—whether a scarf, cuff, or decorative comb—transforms it into something special occasion-worthy. The height alone makes this style feel sophisticated and intentional, and the simplicity of the construction means it’s actually quite beginner-friendly.
Why High Positioning Creates Impact
Positioning a twisted bun high on your crown isn’t just about aesthetics—it actually changes how your hair looks and feels. A high bun elongates your silhouette, draws attention upward, and takes fuller textured hair and translates it into visual height rather than just width. The twist itself becomes a visible design element at the top of your head, not hidden away, which means your natural texture and the work you put into creating the twists becomes part of the overall look’s appeal.
Creating the High Knot
- Start with hair that has some texture—two to four day hair is ideal
- Create one large two-strand twist starting from the nape of your neck
- Twist all the way up to your crown, positioning the twist vertically
- Once you reach the crown, start coiling the twist into a bun shape
- The bun should sit high and feel anchored to your head—use bobby pins strategically at the base where the twist begins to coil
- Wrap a silk scarf around the base of the bun, tucking the ends in for a polished finish
- Or position a metal cuff, wooden hair stick, or decorative comb through the middle of the bun
Pro tip: Backcomb the underside of your high bun lightly to give it grip—this prevents the bun from sliding or rotating as you move throughout the day.
5. Twisted Topknot with Textured Underside
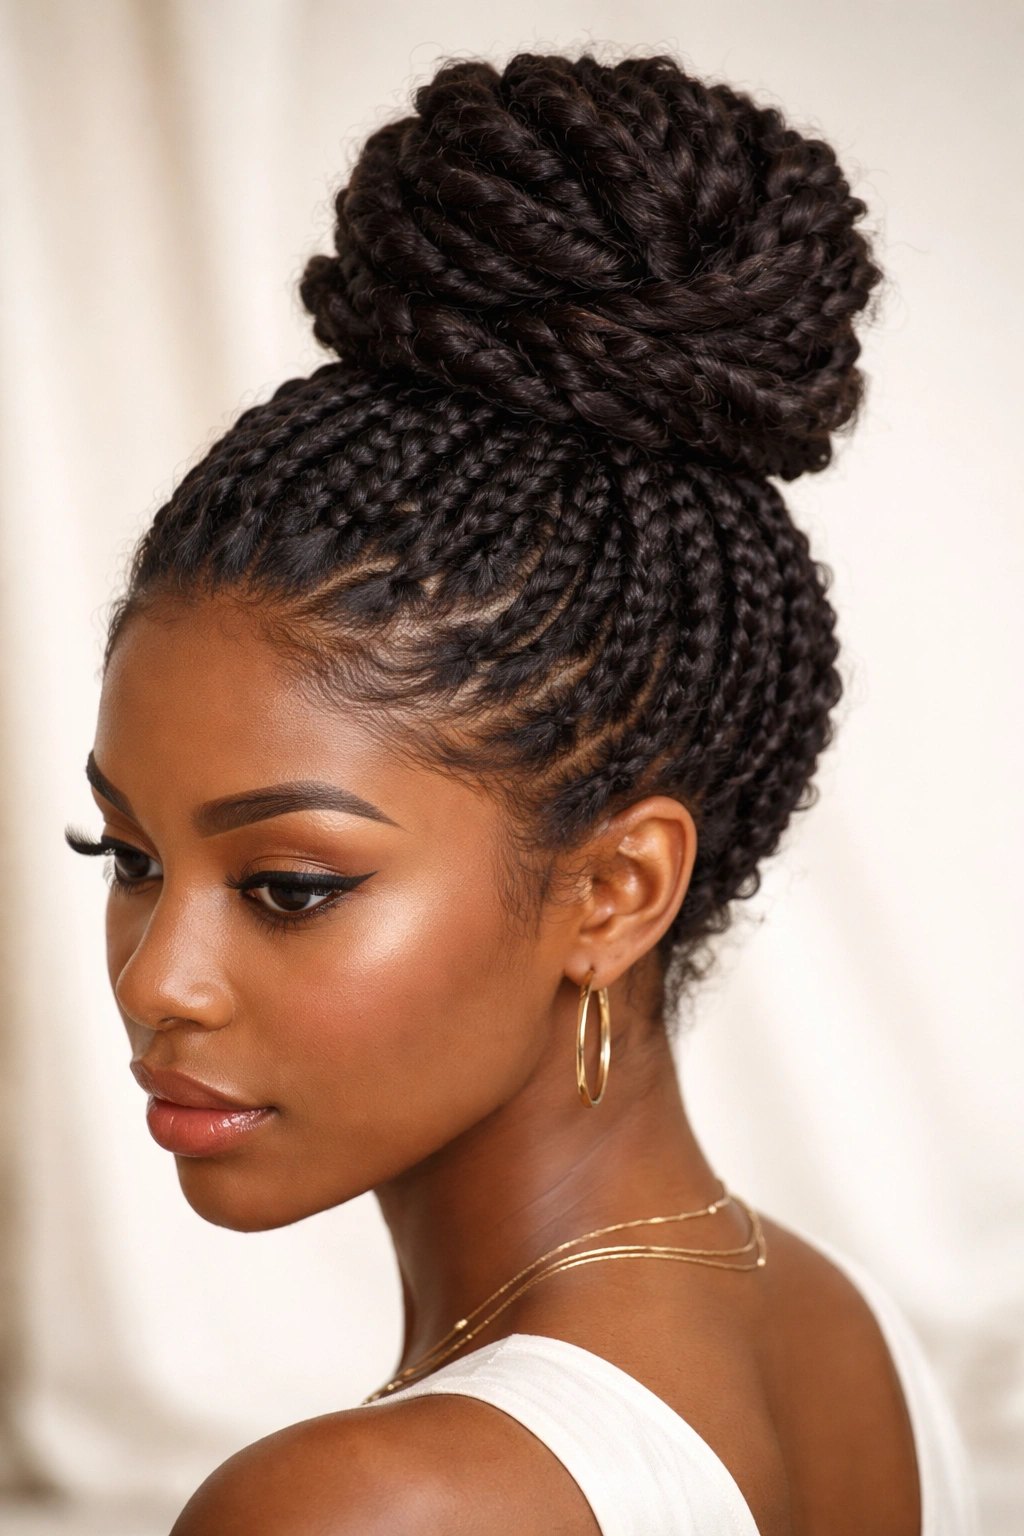
The topknot is having a moment, and with textured hair, you can create one that’s far more interesting than the smooth, tight topknots you see everywhere. The key is letting the underside of your style showcase natural texture—when you pull hair up into the knot, the underneath reveals coils, spirals, and natural curl pattern, creating a beautiful contrast between the defined twists of your knot and the uninhibited texture below.
What Makes the Underside Matter
Most topknot styles don’t pay attention to what’s underneath, but on textured hair, the lower crown area and the nape of your neck are prime real estate for showcasing your natural curl pattern. When you construct your topknot, you’re actually creating a beautiful window to show off the texture that makes your hair unique. Instead of straightening or slicking down that area, you’re leaving it to express itself naturally. This approach feels confident and intentional—you’re not trying to hide anything; you’re celebrating the contrast.
Constructing Your Textured Topknot
- Start with softly defined or air-dried hair to maintain natural texture underneath
- Create a large two-strand twist starting from one side of your head at ear level
- Bring the twist up and around toward the top of your head (creating a spiral path)
- Wrap the twist into a knot at the very crown of your head
- Secure with bobby pins, but don’t pull too tightly—the goal is a relaxed knot that sits confidently
- Leave the hair underneath (around your ears and lower crown) untwisted and natural
- Finish with a flexible headband or scarf tied around the base of the knot for detail
Worth knowing: This style photographs beautifully because the texture underneath creates natural dimension and depth that reads really well on camera.
6. Multi-Strand Twisted Chignon
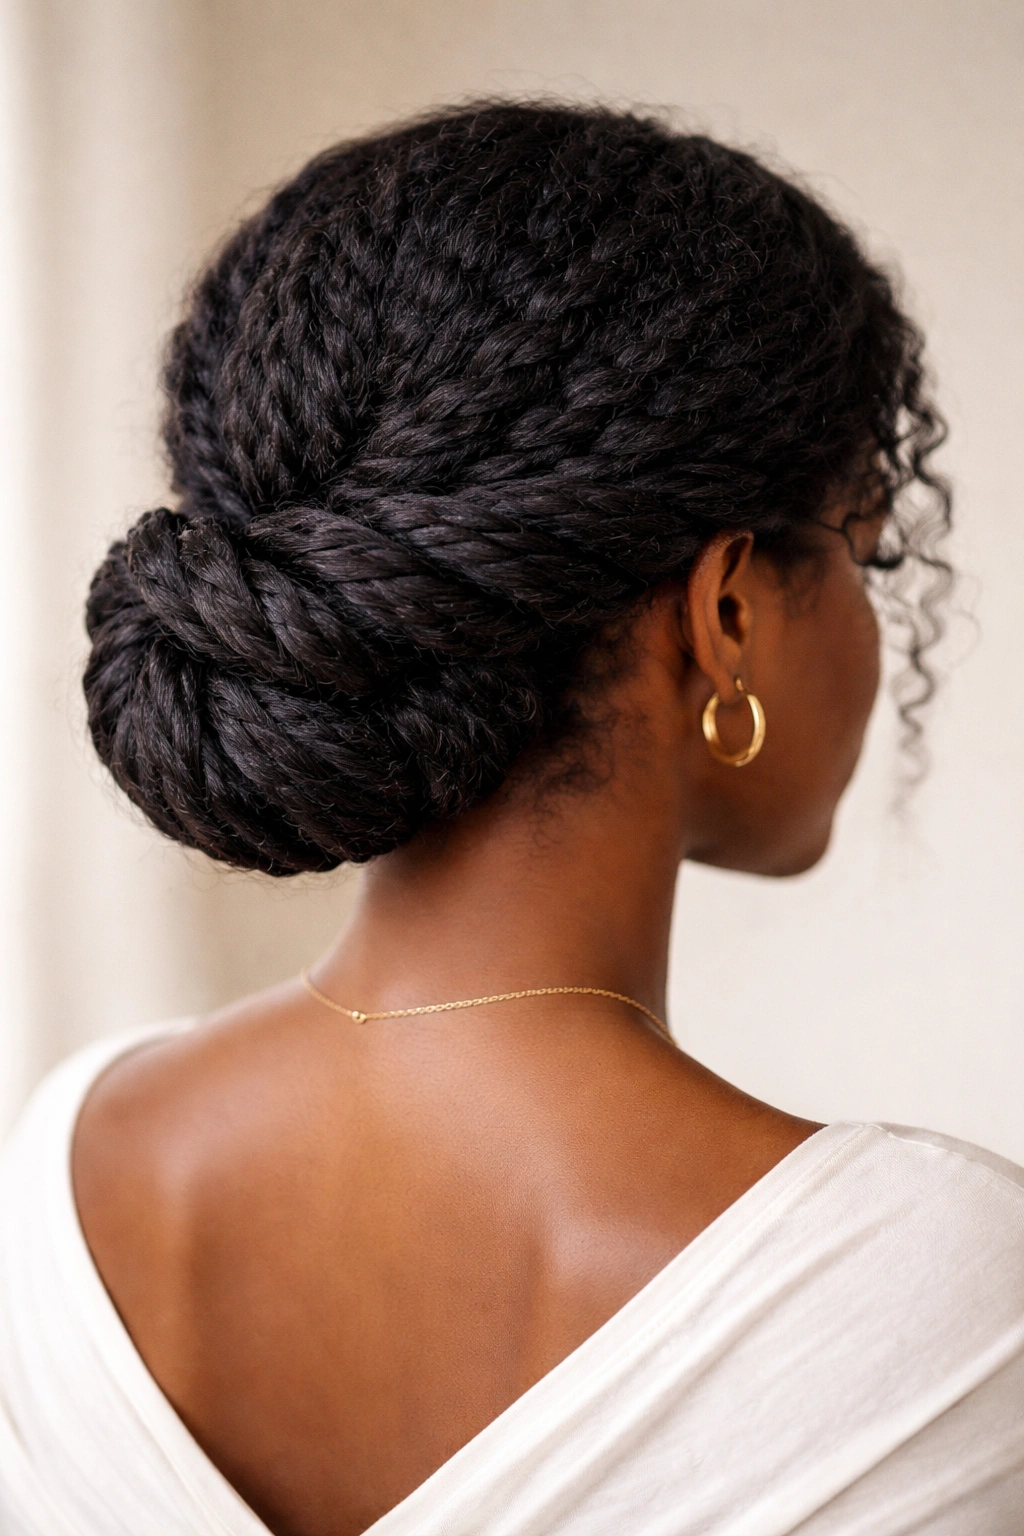
When you want serious elegance, a chignon is your answer. A chignon is essentially a bun positioned low on the back of your neck, and when you create it from multiple twisted strands instead of one single bun, it gains visual interest and textural complexity. This style reads “polished” and “intentional” without requiring salon-level technical skill—it’s genuinely one of the most achievable formal updos.
Why Multi-Strand Works Better
Using multiple twists instead of a single large twist accomplishes two things: it creates a wider, fuller bun shape that has real presence, and it allows each twist to maintain some of its definition rather than getting completely lost in a monolithic bun. Each twist you add to the chignon is like adding another brushstroke to a painting—the overall effect becomes more complex and intentional. Multi-strand chignons also hold better because they distribute weight and tension across multiple anchor points.
Building a Textured Chignon
- Create 3-4 separate two-strand twists, each starting from a different section of your head
- Angle all the twists to converge at the low back of your neck (just at the nape)
- As each twist reaches the nape area, wrap it around and into the cluster of other twists, creating a bundled bun effect
- Secure everything with bobby pins positioned through all the twisted sections
- The bun should look intentionally constructed, with the twisted sections visible and distinct
- Use a hair stick or decorative pin pushed through the center of the chignon for both function and aesthetics
Pro tip: A thin silk scarf wrapped around the chignon adds polish and actually helps keep the whole structure from unraveling—plus it looks intentional and styled.
7. Twisted Half-Up, Half-Down Style
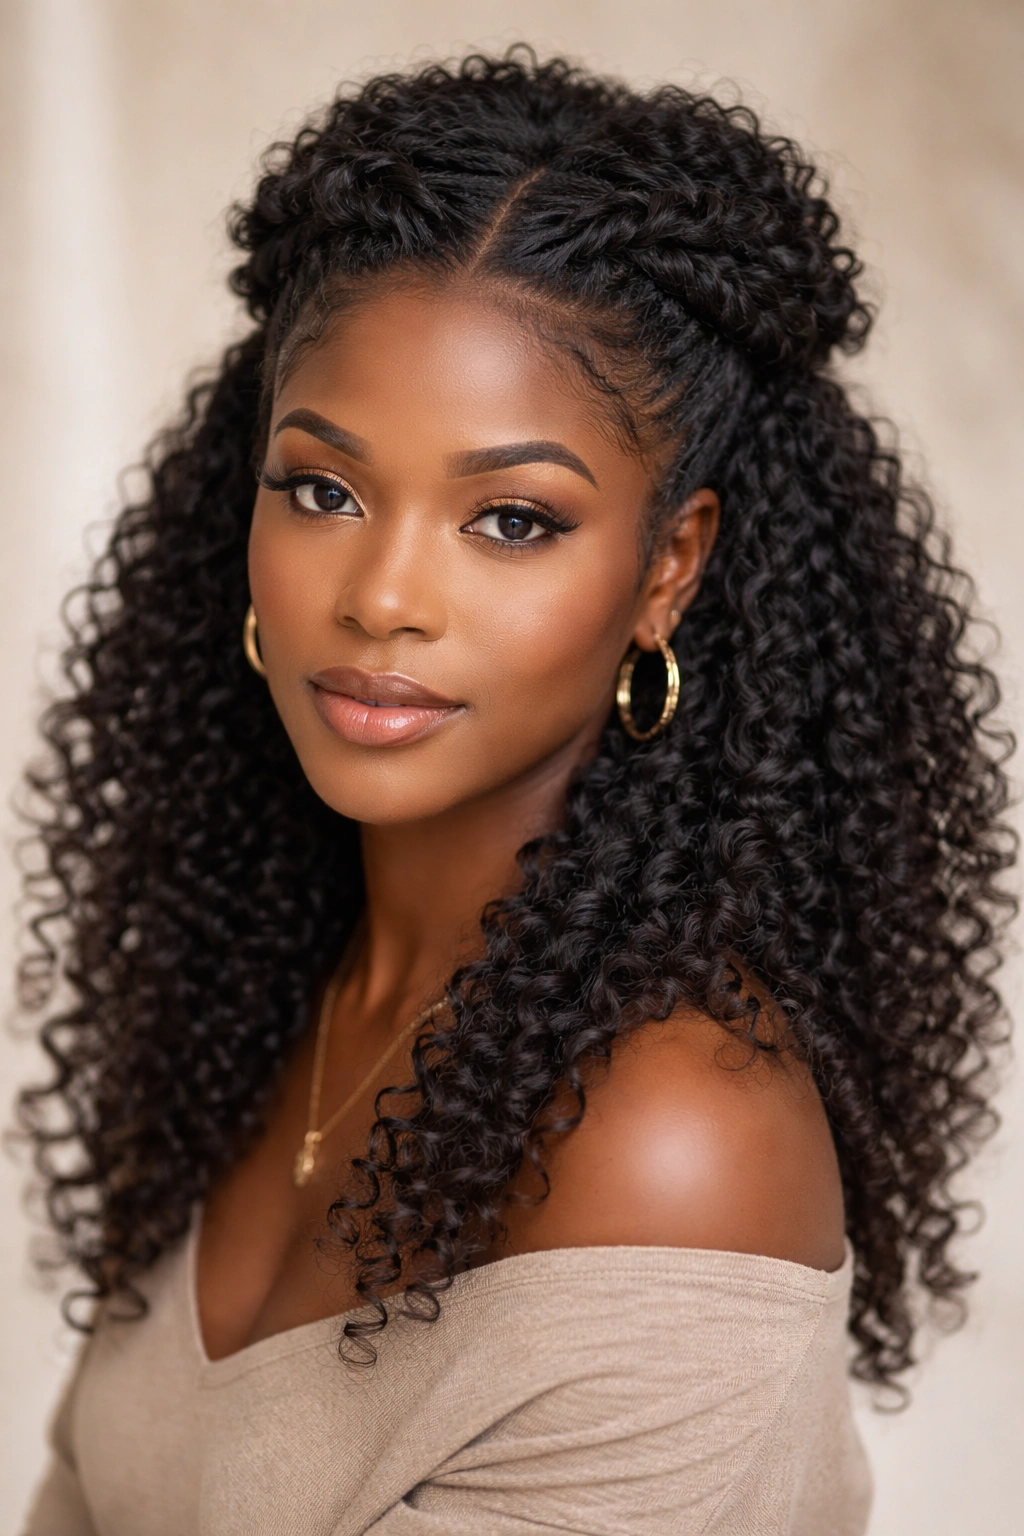
If you’re not ready to fully commit to an updo but want something more intentional than your everyday style, the half-up twist is your answer. This construction takes twists from the crown area and secures them at the back of your head, leaving the bulk of your hair down and free. You get the elegance of an updo with the flexibility and comfort of wearing your hair down—it’s the best of both worlds, and it works for literally any occasion.
The Versatility of Half-Up
Half-up styles are deceptively simple, but they’re powerful. On textured hair, a half-up twist style keeps your upper crown defined and styled while letting your natural curl pattern flow freely below. This creates natural movement and shows off length without requiring you to manage a full head of twisted sections. It’s also incredibly practical—you can do this style in minutes, and it genuinely lasts all day because you’re only securing hair at one point (the back), not distributed across your whole head.
Creating Your Twisted Half-Up
- Take two 2-inch sections of hair from your temples, one from each side
- Twist each section into a two-strand twist, angling them toward the back of your head
- As both twists meet at the back center of your head, wrap them around each other once
- Secure both twists with bobby pins, creating a knotted base at the back of your head
- Leave everything below the securing point to fall naturally with your everyday curl pattern
- Optional: Take a thin scarf and wrap it around the base of the secured twist for embellishment
Insider note: This style is perfect for second or third-day hair because some texture and definition are already built in—it actually holds better when your hair isn’t freshly washed.
8. Stacked Twisted Coils Updo
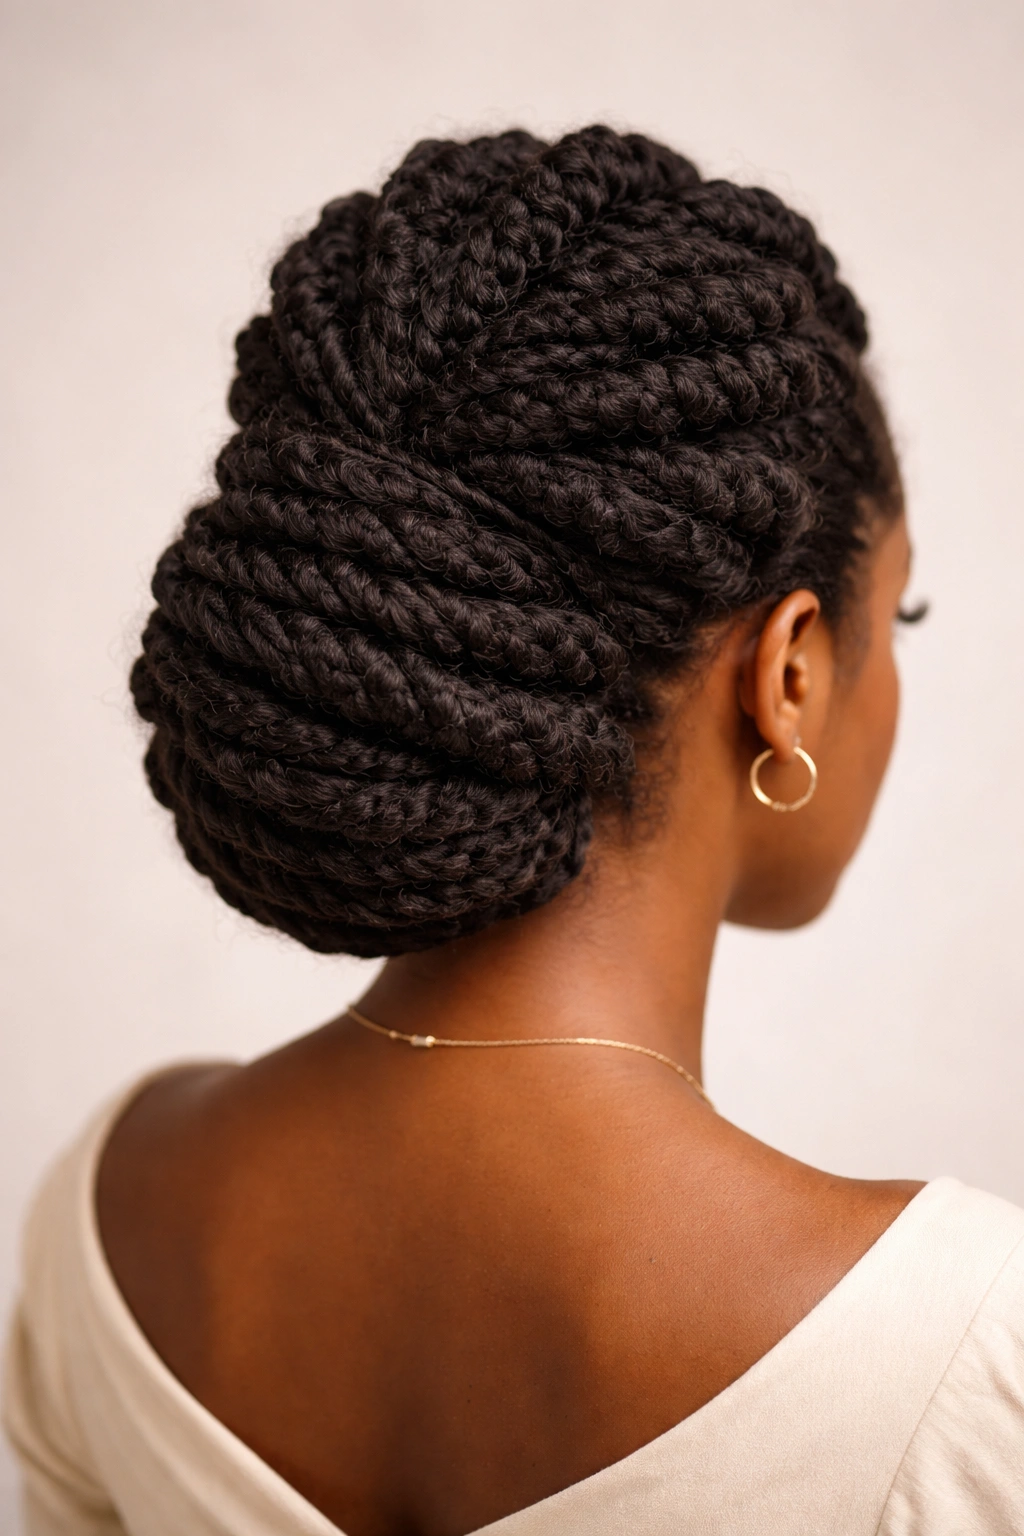
The stacked coil updo takes the idea of layering one step further. Instead of creating twists and then coiling them into a bun, you’re creating distinct, visibly separated coils that stack on top of each other, creating a textured, sculptural effect. This is a style for when you want to make a genuine statement—it’s eye-catching, modern, and celebrates everything beautiful about your natural texture.
The Art of Stacking Coils
Stacking works because each coil maintains its own shape and definition, creating a bun that has real visual structure rather than just being a mass of hair. As each two-strand twist is coiled independently and secured, you can see the twist definition through the coil layers. This visual complexity is what makes the style feel intentional and designed rather than just “hair put up.” It’s also surprisingly stable because the coils interlock with each other, creating natural friction that helps hold everything in place.
Constructing Your Stacked Coil Updo
- Create your first two-strand twist from one side of your head at ear level, working toward the back
- Coil this twist into a tight spiral at the base of your neck and secure with bobby pins
- Create a second two-strand twist from a higher section of that same side of your head
- Coil this twist directly above the first coil, slightly overlapping it
- Repeat this process on the other side of your head, creating a mirror image
- You should end up with four stacked coils—two on each side, meeting at the back
- Fill in any gaps with smaller twisted sections if needed
- The overall effect should be architectural and clearly defined
Worth knowing: This style actually looks better the next day after the coils have settled slightly—the definition becomes even more pronounced, and the style actually holds longer than it does right after you style it.
Final Thoughts
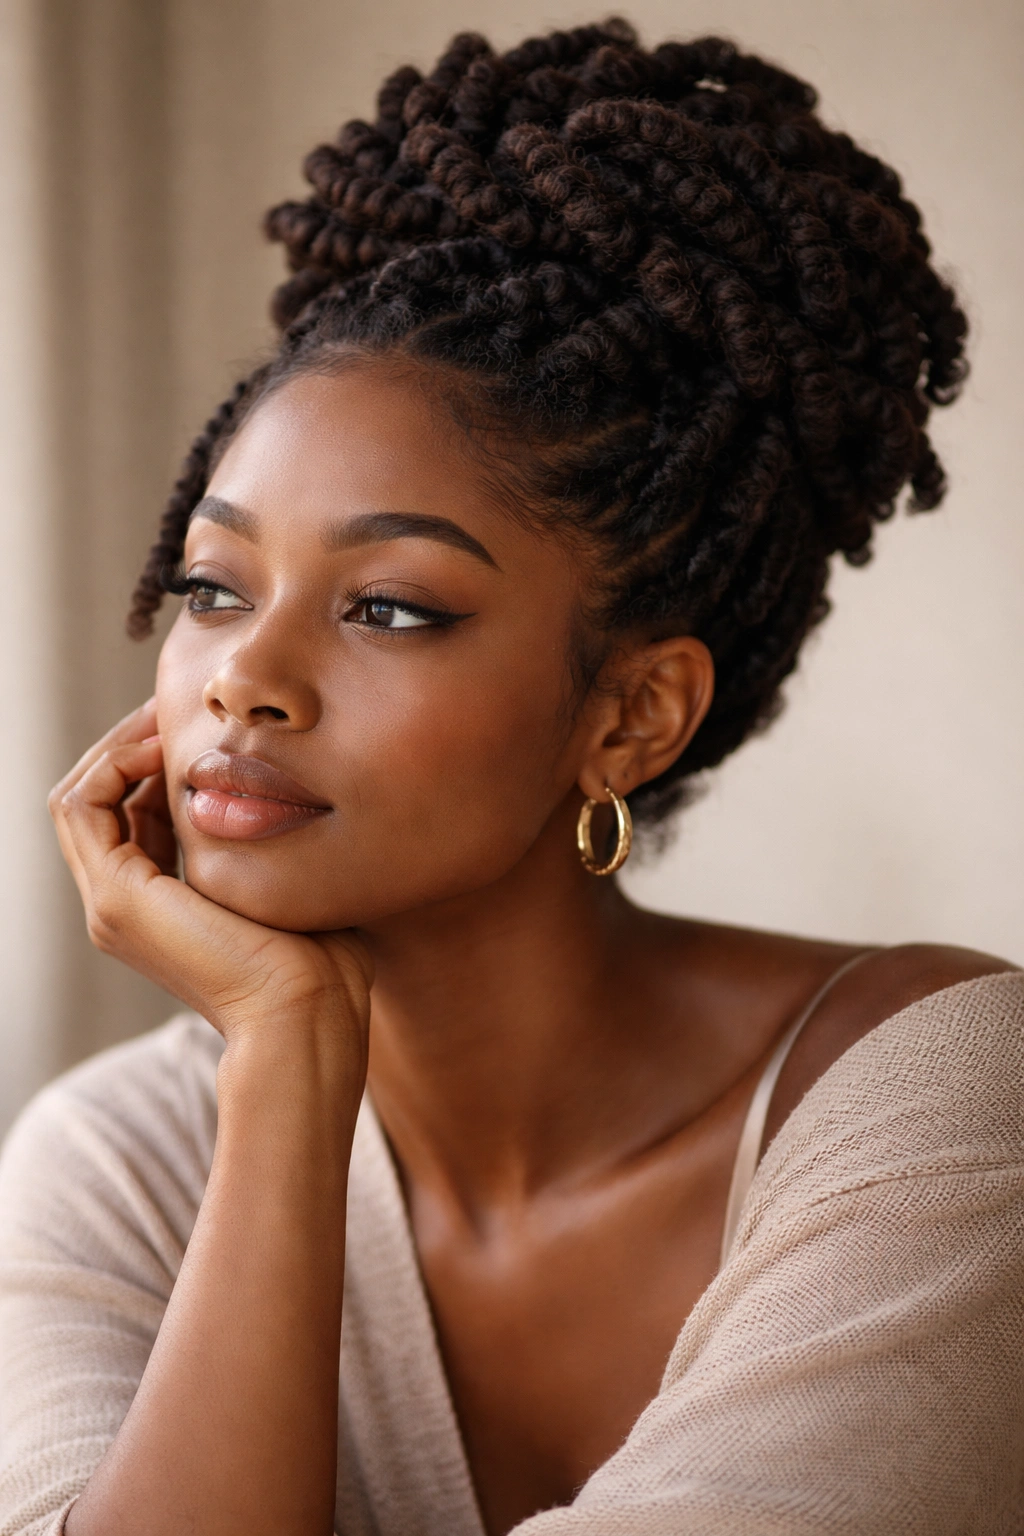
Twist updos are a completely legitimate and genuinely beautiful way to style natural afro hair—they’re not just a protective style or a “second day hair” solution. They’re versatile, skillful, and absolutely worthy of being your go-to for any occasion from casual to formal. The eight styles here cover different moods, different hair lengths, and different styling occasions, which means you can rotate through them and build actual variety into your hair routine.
What makes twist updos particularly powerful is that they work with your hair’s natural texture instead of requiring you to manipulate it into something it’s not. Your hair’s springiness becomes an asset rather than a challenge. The twists catch and grip naturally, the coils hold their shape, and the finished styles actually last longer than updos created on manipulated or straightened hair.
Start with whichever style speaks to you most. If you’re new to twist updos, the side-swept bun or the half-up style are genuinely approachable entry points. If you want to go bold, the stacked coils or the high twisted knot deliver maximum impact. And if you want elegant and timeless, the twisted halo or the chignon will never disappoint. The real victory is that you have options—genuine, beautiful, protective options that celebrate exactly who you are.
