



The afro puff is one of the most versatile and beloved hairstyles in Black beauty culture—and for good reason. It’s protective, it’s chic, it celebrates your natural hair texture, and you can style it in seemingly endless ways depending on your mood, occasion, and hair type. Whether you’re rocking a sleek pulled-back puff for a professional meeting, experimenting with playful double puffs for the weekend, or adding creative twists and braids for extra flair, there’s a puff style that works for your lifestyle.
What makes afro puffs so special is that they go far beyond the basic “throw your hair up” vibe. Each variation has its own personality, its own technique, and its own impact. From the architectural drama of high double puffs to the understated elegance of a single low puff, these styles let you express different sides of yourself while keeping your natural hair protected and manageable. The best part? Most of these styles work whether you’re wearing your hair loose and bouncy, stretched, or textured with product.
The key to pulling off any puff style is understanding what works with your specific hair texture, hair density, and the length you’re working with. A style that looks incredible on thick, shoulder-length hair might need tweaking if you have fine, medium-length strands—and that’s completely okay. The variations and adaptations below will show you how to adjust these foundational styles to work for your hair.
1. High Double Puffs
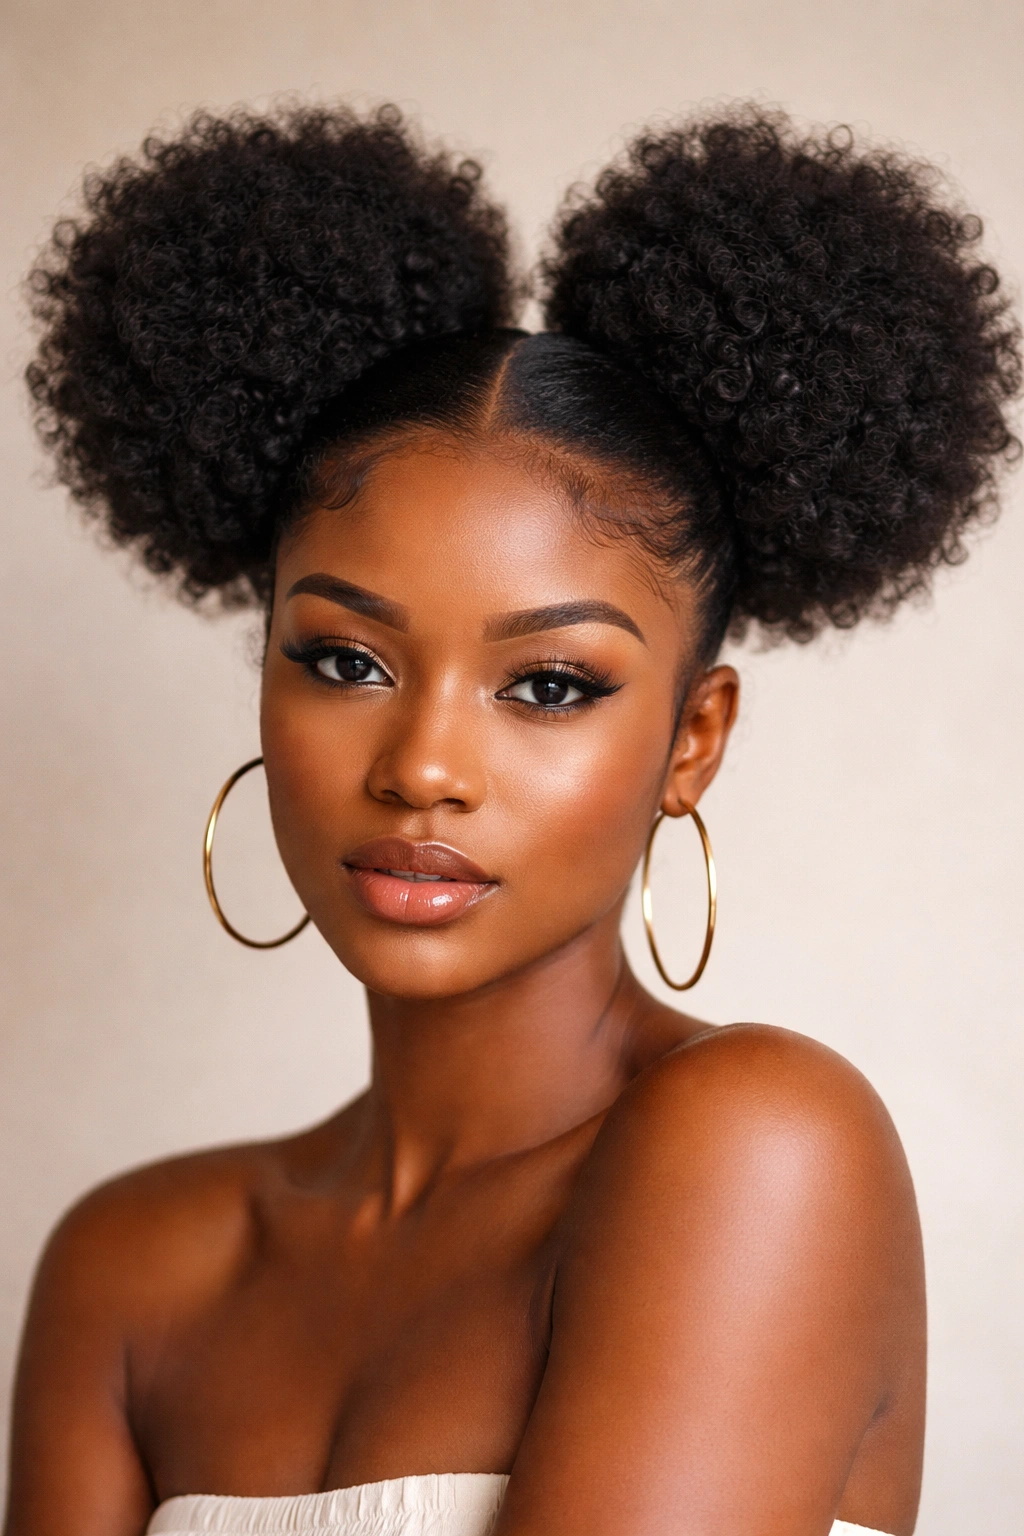
High double puffs are the statement-making choice—youthful, bold, and instantly eye-catching. They sit at the crown of your head, usually at roughly the same height as the top of your ears or slightly higher, creating two symmetrical rounded shapes that frame your face and draw upward attention. This style became iconic in the ’90s and has never really gone out of style because it’s simply that effective.
Why This Style Commands Attention
High double puffs work because they’re architecturally balanced. The symmetry is visually satisfying, and the height adds drama and dimension to your silhouette. They also make a cultural statement—they celebrate Black beauty and natural hair texture unapologetically. From a practical standpoint, double puffs distribute the weight of your hair more evenly than a single puff, which can reduce stress on your edges and scalp. If you like the idea of an updo but want something more playful than a bun, double puffs hit that sweet spot perfectly.
How to Create High Double Puffs
Start with hair that has some texture and grip—freshly washed hair with some product in it, stretched hair, or even hair with a light perm works great for this. Use a fine-tooth comb or brush to create a clean middle part from your forehead straight to the back of your head. Clip one side out of the way. On the unclipped side, use your comb to gather hair at the crown area (not quite at the very top, but high up) and secure it with a hair tie—a coil, elastic band, or metal-free tie all work depending on your preference. The gathered section should feel full and rounded, not thin or pinched.
Smooth the hair at the roots using a toothbrush or soft brush to create definition, then gently lift and fluff the puff outward so it creates that full, rounded shape. Repeat the exact same process on the other side, making sure both puffs are at the same height and roughly the same size. You can leave the puffs as they are, or use the ends to create more texture by teasing them slightly with a comb or brush, or even curling the ends if you want a softer, rounder look.
Pro tip: If you have fine or medium-density hair, using a volumizing mousse or gel before gathering your puffs will give you more fullness and help the style last longer throughout the day.
2. Single High Puff
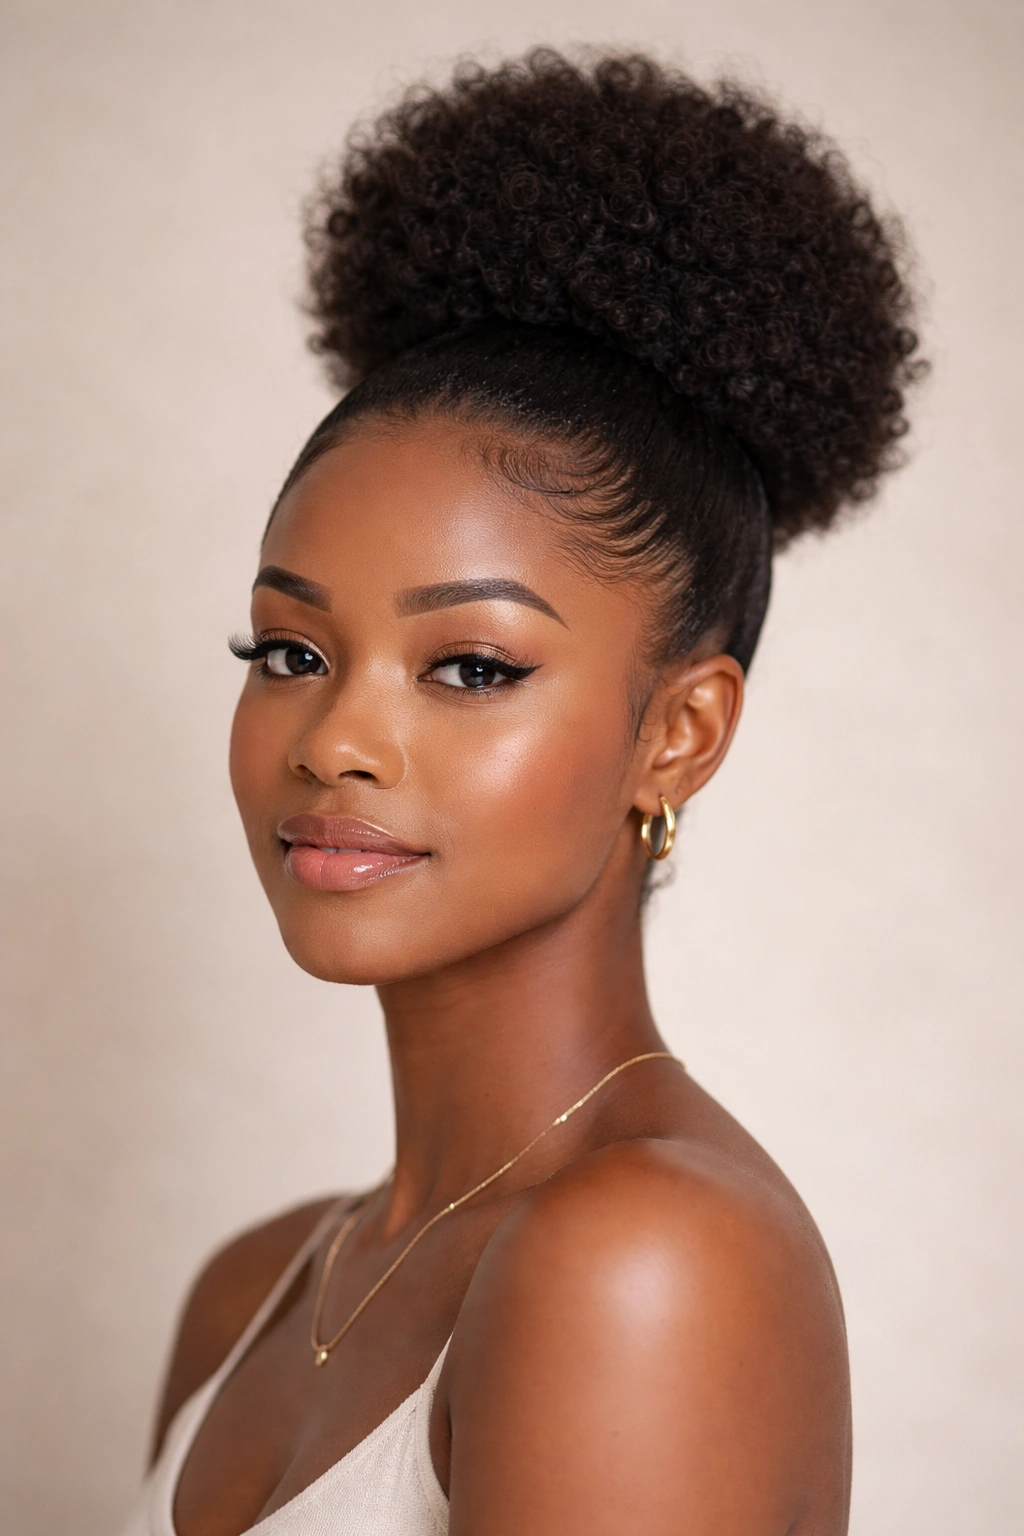
If double puffs feel like too much but you still want something with presence, a single high puff delivers all the sass with a slightly more understated approach. This style gathers all your hair into one rounded mass at the crown, creating a clean, centered focal point. It reads as polished when you want it to, and playful when you style it with the right attitude.
What Makes a Single Puff So Versatile
A single high puff is the middle ground between an everyday look and a statement style. It exposes more of your face and neck than double puffs do, which some people prefer, and it requires less styling time since you’re only working with one section. The single puff also works across more occasions—you can wear it to a formal event, a casual day out, a workout, or even to work depending on how you finish it. Because there’s only one focal point, it draws attention straight up, making it an excellent choice if you want to emphasize your facial features or if you’re wearing a statement earring or necklace.
The Technique Behind a Perfect Single Puff
Part your hair straight down the middle if you want perfect symmetry, or skip the part entirely if you prefer a less structured look. Using a fine-tooth comb, gather all your hair toward the crown area—this should be roughly where the top of your head is most prominent. You want the gathered section to feel full and centered, not pulled to one side. Secure with your tie of choice, making sure the tie is tight enough that the puff won’t slip but not so tight that you feel scalp tension.
The real art here is in the shaping. Once it’s tied, you can manipulate the shape by gently pulling sections of hair out from the base of the tie to create a rounder, fuller appearance. Some people prefer a tall, elongated puff, while others like a shorter, wider one. Neither is wrong—it’s purely about the aesthetic you’re going for. To make the puff feel more intentional and polished, use a toothbrush or fine brush to smooth the hair at the roots, creating a clean base that highlights the puff’s shape.
Worth knowing: The height at which you position your puff changes how the style reads. Higher on the crown = more playful and youthful. Slightly lower (at mid-crown) = more sophisticated and controlled.
3. Side Puff
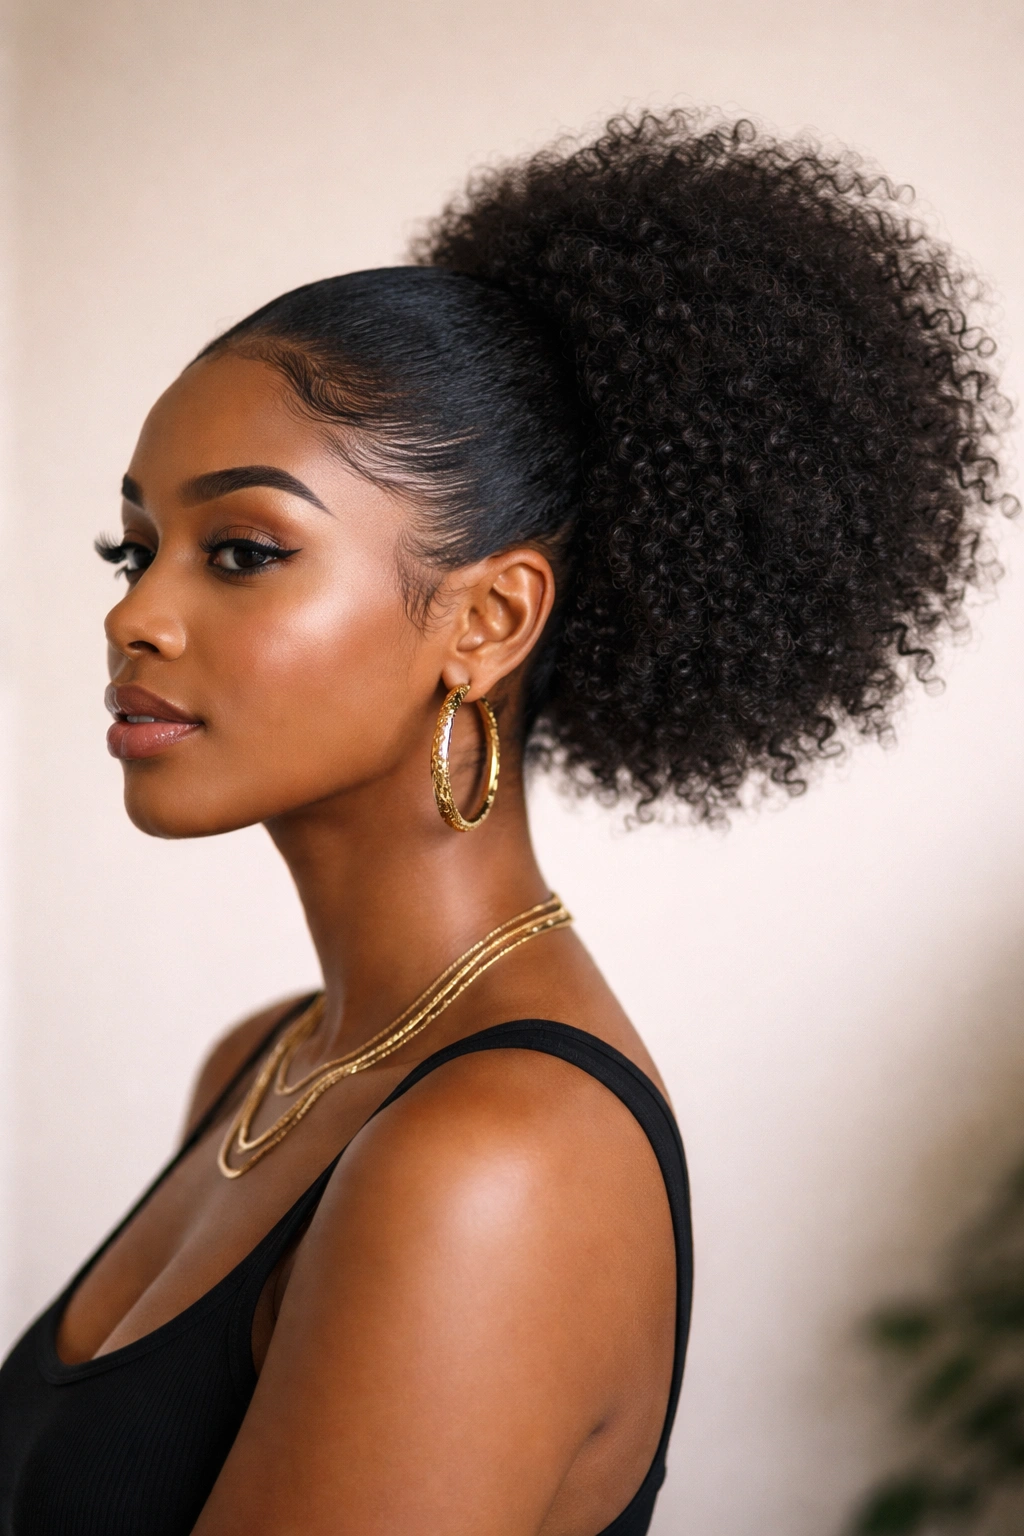
A side puff shifts the entire energy of the look by moving your puff to one side of your head, usually positioned over the ear or slightly above it. This asymmetrical style has an effortlessly cool quality—it looks intentional without seeming like you spent hours perfecting it, even if you actually did.
Why Asymmetry Works
Side puffs are flattering because they can balance face shapes differently than centered styles. If you have a wider face, placing your puff slightly to one side can create visual interest without overwhelming your features. The side puff also lets you show off beautiful profile details—a detailed edge design, an undercut, or a shaved or faded side if you’re rocking that look. From a styling perspective, it’s different enough that people will notice you made an intentional choice, but it’s not so dramatic that it reads as experimental or edgy unless you want it to.
Styling a Side Puff That Actually Stays Put
Decide which side you want your puff on and which side will be left down or swept back. Using a fine-tooth comb, gather hair from the top and sides toward your chosen side, basically angling the section toward that ear or temple area. Secure it with your tie—and this is important—make sure the tie is secure enough that the weight of the puff won’t pull it loose as the day goes on. A puff that slides down your head as the hours pass is a puff that’s lost its magic.
Once it’s tied, shape the puff by gently fluffing sections outward and smoothing the roots. You can leave the rest of your hair down for a romantic, asymmetrical vibe, or you can sweep the other side back and secure it with bobby pins for a more defined look. Some people like to braid the back section before securing it, which adds texture and keeps everything in place even better.
Insider note: If your hair is slippery or fine, use a light hold gel or mousse before gathering your puff section. It’ll give you more grip and help the style survive until evening.
4. Low Puffs (Single or Double)
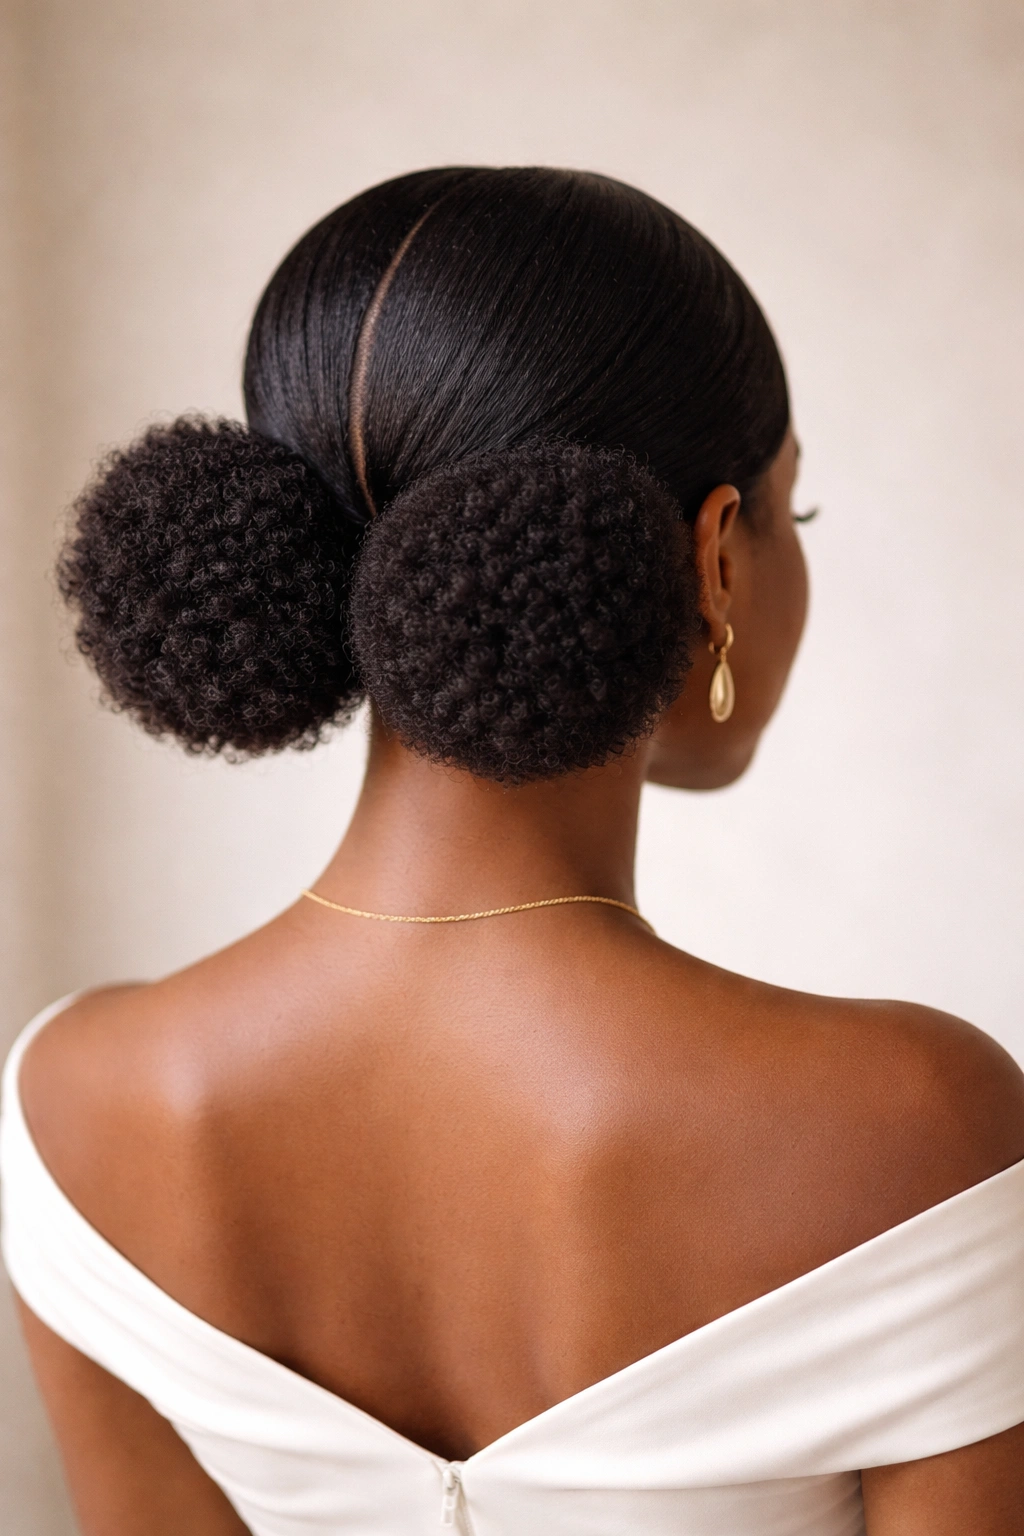
Low puffs sit at the nape of your neck or just above it, creating a sophisticated, understated look that works beautifully in professional settings, on nights out, or anytime you want your style to feel refined. Whether you’re doing a single low puff or double low puffs, this positioning gives an entirely different vibe from high puffs—more polished, more mature, less playful.
The Grown & Sexy Appeal of Low Puffs
Low puffs read as intentional and elegant, which is why they’re becoming increasingly popular in corporate and formal settings. They keep hair off your face and neck (especially helpful in warmer weather), they expose your full face and facial features, and they create a clean silhouette that photographs beautifully. A low puff also works with a broader range of outfit styles—you can wear it with professional blazers, evening dresses, casual jeans, or workout gear.
Creating a Structured Low Puff
For a single low puff, flip your head forward so you’re facing downward, then gather all your hair at the base of your skull—basically the point where your neck meets your head. This positioning is more comfortable for an all-day wear than a high puff because there’s less tension pulling on your edges. Secure your tie and flip your head back upright. Gently shape the puff so it sits smoothly against the back of your head and neck.
For double low puffs, create a clear part down the middle, then gather each side toward its respective low position on either side of the nape. These create a refined, architectural look that’s especially striking if your hair is thick enough to maintain distinct shapes. The key with low puffs is precision in placement—if they’re slightly off-center or uneven, it reads as accidental rather than intentional, so take your time with the positioning.
Real talk: Low puffs are especially comfortable for sleeping if you tie them loosely enough. Many people tie them right before bed and sleep in them, waking up with a ready-to-go style the next day.
5. Space Buns (Double Puffs with Strategic Gaps)
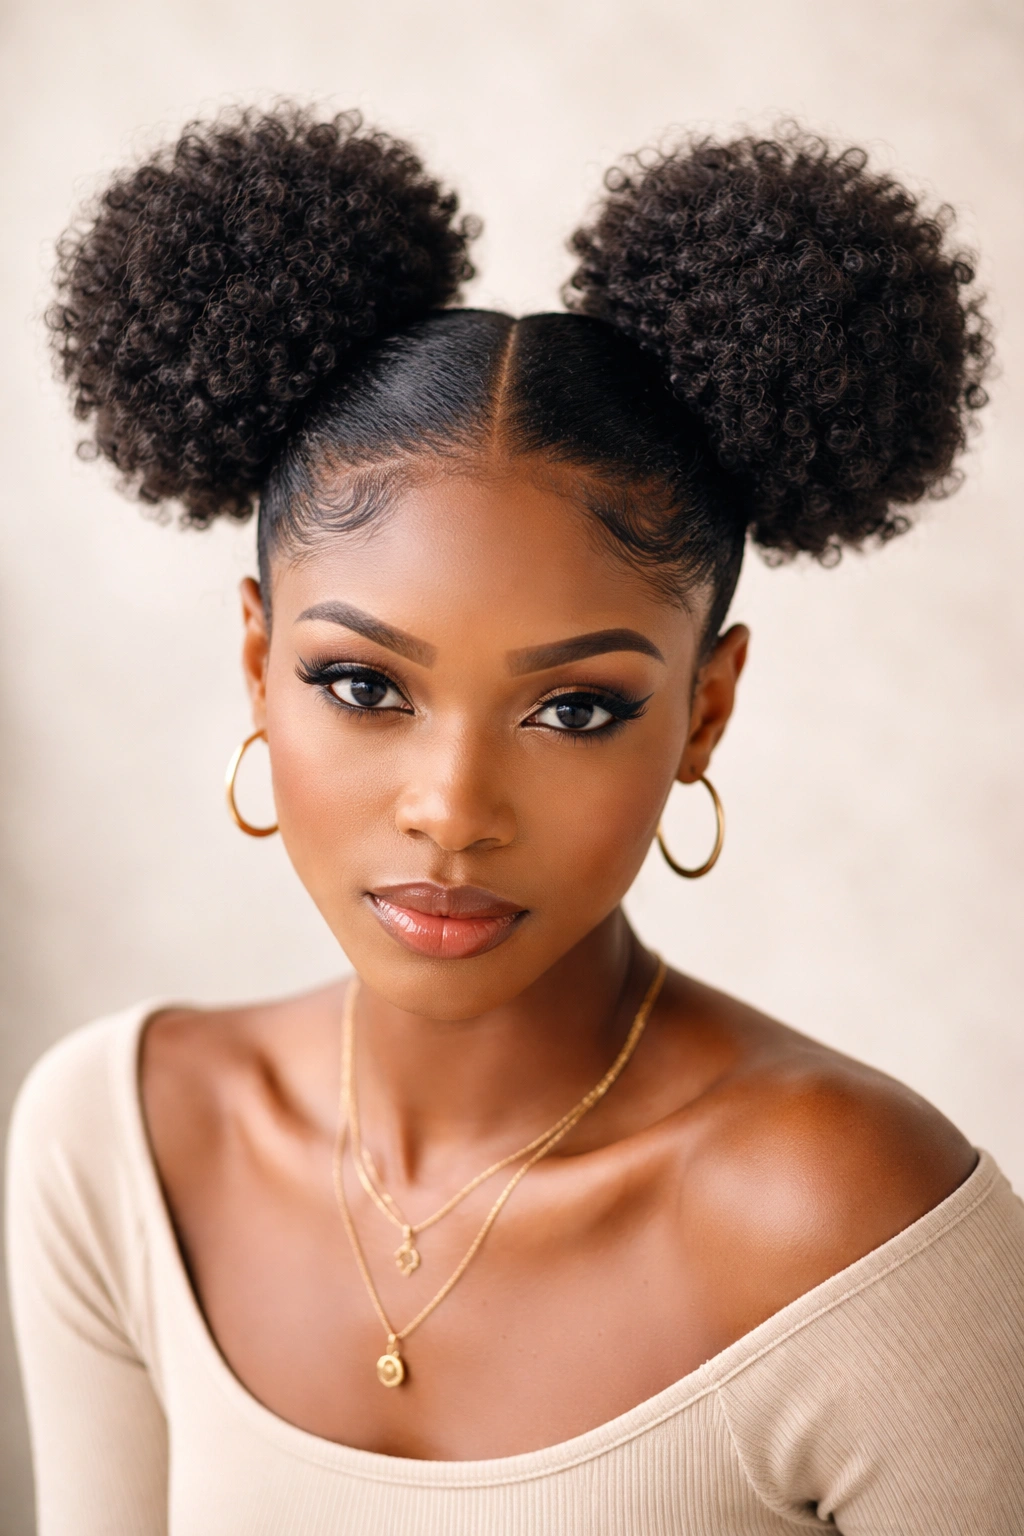
Space buns are high double puffs with one key difference: they’re intentionally separated from each other with visible space—sometimes with a defined strip of visible scalp or parting between them. This style is ultra-modern and playful, with a slightly futuristic edge that appeals to people who want their puffs to feel less natural and more artistic.
The Bold Statement of Separated Puffs
Space buns feel more editorial and fashion-forward than traditional double puffs because of that deliberate gap. It’s a styling choice that says you’re being intentional about your look and willing to take creative risks. The separated puffs also tend to feel lighter and more open than connected double puffs, which some people find more comfortable, especially if they have fine hair or lower density.
The Technique for Perfect Spacing
Instead of parting your hair down the exact middle, part it down the middle but then create an additional part or section that runs horizontally across the crown, creating a clear rectangle or square of space between where your two puffs will sit. Gather one section for the first puff, secure it, then gather the second section and secure it, making sure there’s clear, visible space between the two. The space can be as small as a quarter-inch or as wide as an inch—depending on your hair density and the look you want.
Some people enhance this look by painting a light gel or mousse in that space to define it even more sharply, creating an almost architectural quality to the style. Others leave it more natural. You can also add decorative elements like hair gems, beads, or string to emphasize the gap and make the style even more distinctive.
Pro tip: Space buns photograph incredibly well because the separation creates visual depth and dimension, which is why this style exploded on social media and in fashion photography.
6. Nested Puffs (Puffs Within Puffs)
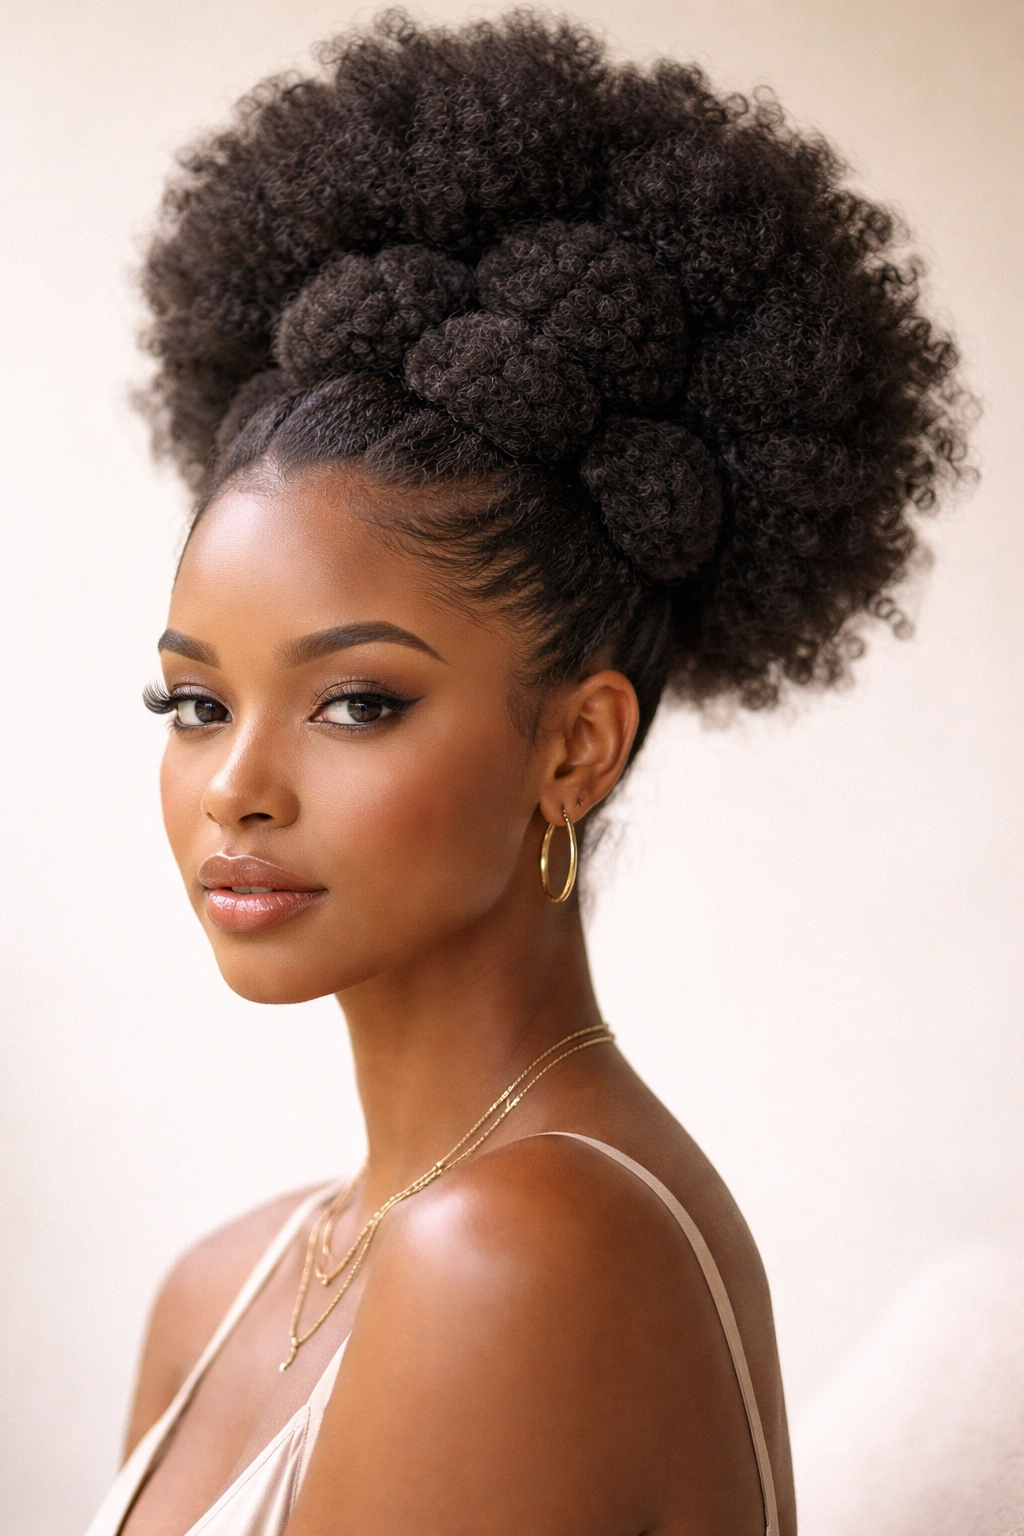
Nested puffs are an advanced styling technique where you create a larger puff and then create smaller puffs from sections of the gathered hair, resulting in a multi-layered, textural effect. This is a style for people who love intricate details and aren’t afraid to spend time perfecting their look. It’s genuinely artistic.
Why Nested Puffs Are a Creative Flex
Nested puffs demonstrate skill and intentionality—they’re clearly not an accidental style. They also create incredible visual depth and texture, making even fine or medium-density hair look fuller and more voluminous than it actually is. The layered effect is eye-catching from every angle, which makes this style perfect for events where you want to be visually memorable, or simply for days when you want to feel like a work of art.
Building Your Nested Puff Structure
Start by creating your base puff—this could be high, low, to the side, or centered, depending on your preference. Once that’s secured, you’re going to work with the gathered hair that sits within and around that base puff. Separate out smaller sections from within the puff and create mini puffs from each section, securing them with smaller hair ties. The mini puffs can radiate outward from the base puff, surround it, or sit in a specific pattern.
Some people create a geometric pattern with their nested puffs, while others go for a more organic, flowing arrangement. You can have three nested puffs, five, seven, or more—whatever creates the effect you’re going for. This style requires patience and decent hair density, so if your hair is particularly fine, you might want to practice on a day when you’re not going anywhere first.
Worth knowing: Nested puffs are stunning when combined with hair gems, beads, or metallic thread woven through the style. Many people use them as a canvas for creative hair accessories.
7. Twisted Puff
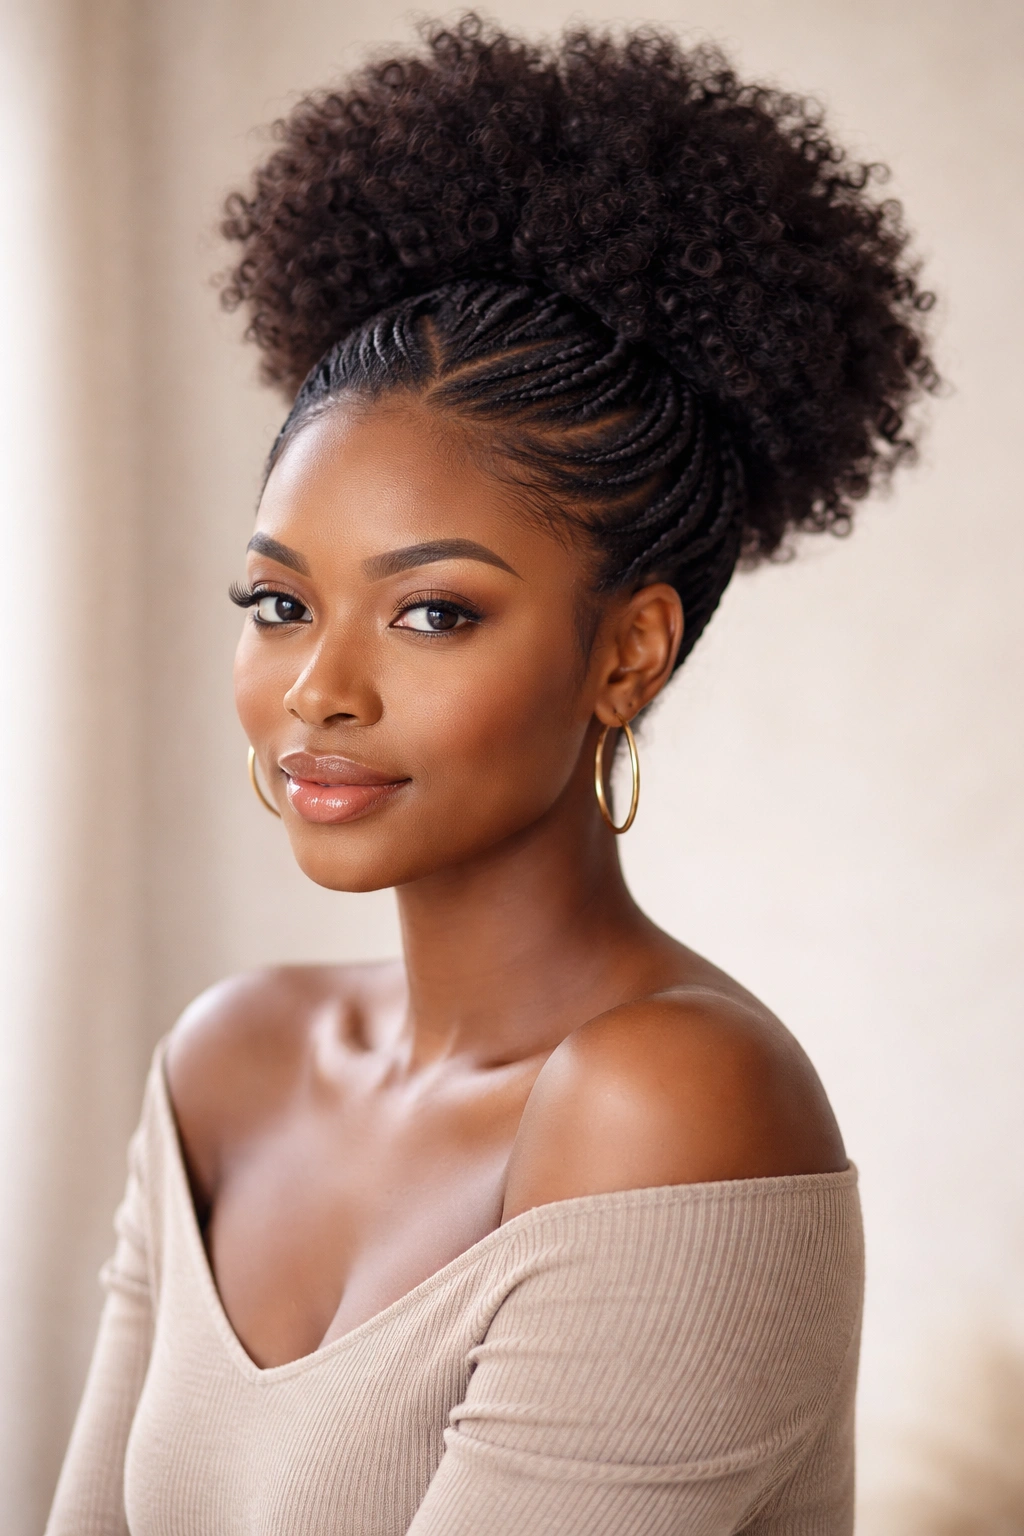
A twisted puff incorporates spiraled or twisted sections of hair into or around your puff, adding texture and visual interest to what might otherwise be a simple style. The twists can frame your puff, spiral around its base, or be incorporated directly into the puff’s construction, creating a sophisticated, multidimensional look.
The Textural Appeal of Twisted Details
Twists add elegance and intentionality to a puff because they show that you’ve put thought and skill into the style. Twisted sections also tend to last longer throughout the day and hold their shape better than loose sections, making this a practical choice if you want your style to survive a full day of activities. The twists create visual lines that draw the eye, making even thin or fine hair appear fuller and more textured.
Creating a Twisted Puff
You can create twists before or after gathering your puff, depending on the effect you want. For twists that frame your puff: Take a section of hair from the front or side, divide it into two strands, and twist them around each other from root to end. Pin the twisted section at the base of your puff so it wraps around or frames it. Repeat with as many sections as you want, creating a halo effect of twists around your puff.
For twists incorporated into the puff itself: Gather sections of hair and twist each one, then fold the twisted sections into your puff area and secure everything together with your tie. This creates a more integrated, complex look. The key is starting with hair that has enough grip and texture to hold twists—freshly washed hair with some product, stretched hair, or slightly damp hair all work well.
Pro tip: Two-strand twists hold longer and look cleaner than finger coils if you want your twisted puff to look polished, while finger coils create a softer, rounder aesthetic.
8. Sleek Puff with Gel-Defined Edges
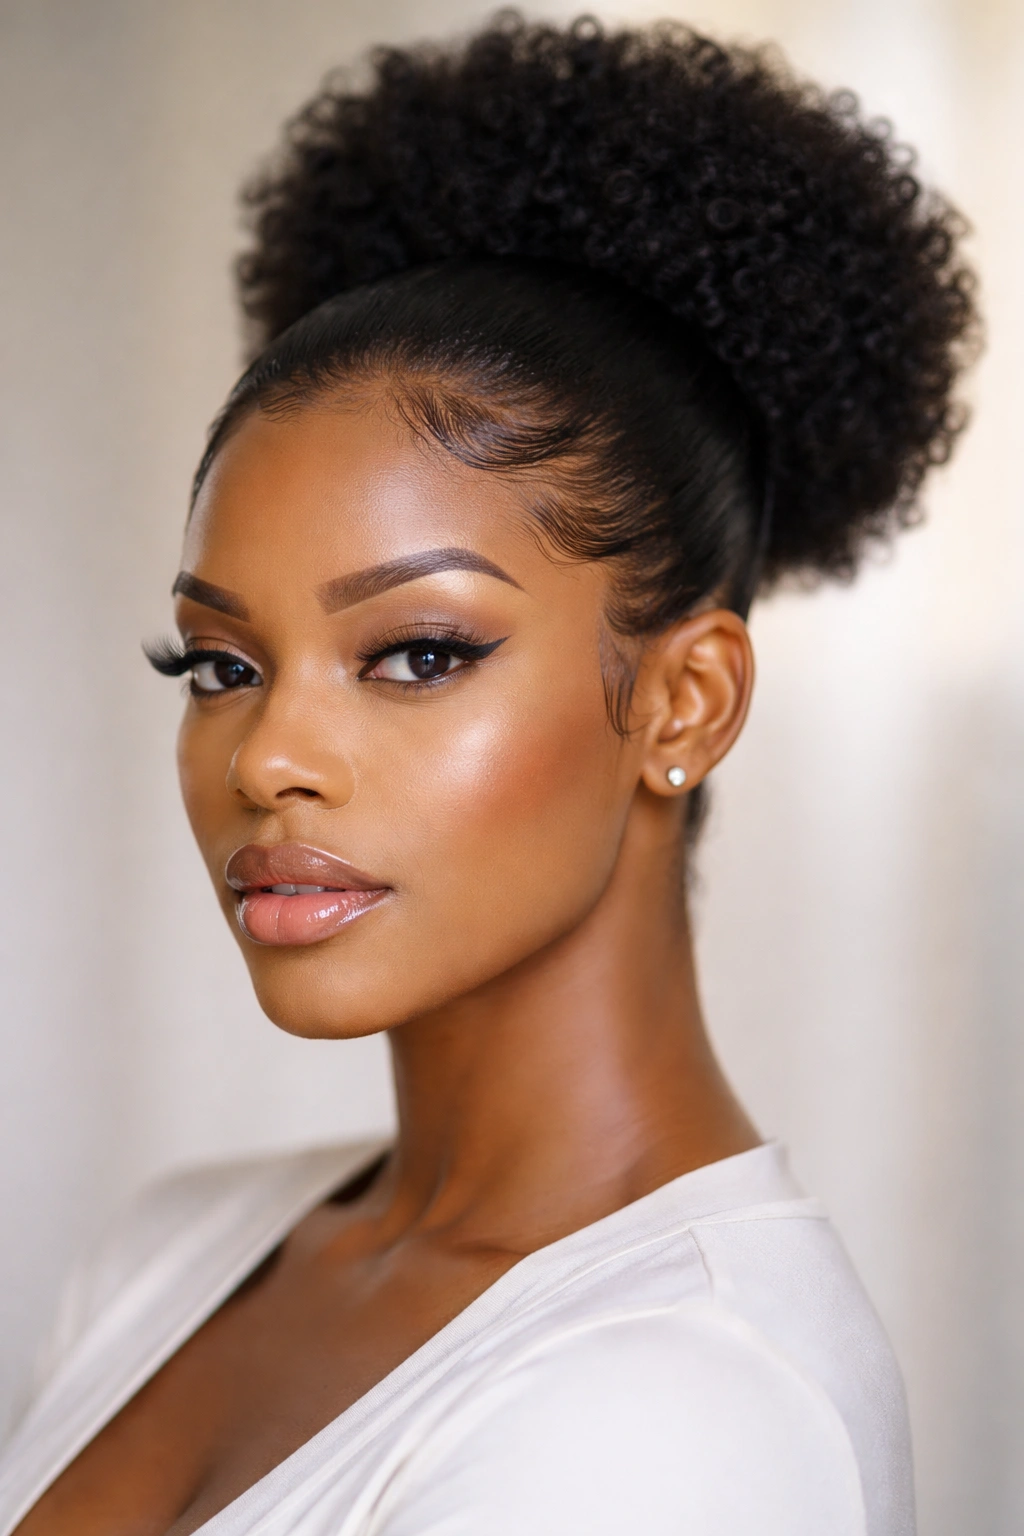
A sleek puff is all about refinement and control. Every hair is smooth and in place, the puff itself has a clean, tight appearance, and most importantly, the edges are sharp and defined with gel. This style reads as intentional, professional, and polished—it’s the puff you wear when you want to make it clear that you take pride in how you present yourself.
Why Sleekness Conveys Sophistication
A sleek puff doesn’t announce itself loudly; instead, it whispers confidence and competence. It works in professional settings, formal events, and anywhere else where grooming and intentionality matter. The gel-defined edges are key—they take a puff from casual to refined, and they show that you’ve paid attention to every detail, including the tiny hairs that frame your face.
Achieving True Sleekness
Start with either stretched hair or hair that’s been blow-dried smooth. Using a fine-tooth comb and a smoothing gel or edge control, comb your hair back from your face and toward where your puff will sit. The key is making each stroke smooth and deliberate, moving in the direction you want the hair to go. Apply your gel or edge control as you go, pressing it down so every flyaway is captured.
Gather your hair into your chosen puff position and secure it tightly—looser ties don’t work here because you need that grip to maintain the sleek appearance. Once it’s tied, use a toothbrush and more edge control to define the perimeter of your puff, creating a sharp line between the smooth base and the rounded puff itself. You can also smooth down individual flyaways around the base with a toothbrush and edge control for an ultra-polished finish.
Insider note: This style works best if you refresh your edges with edge control in the morning and evening, especially if you’re wearing it multiple days in a row.
9. Curly Puff with Braided Detail
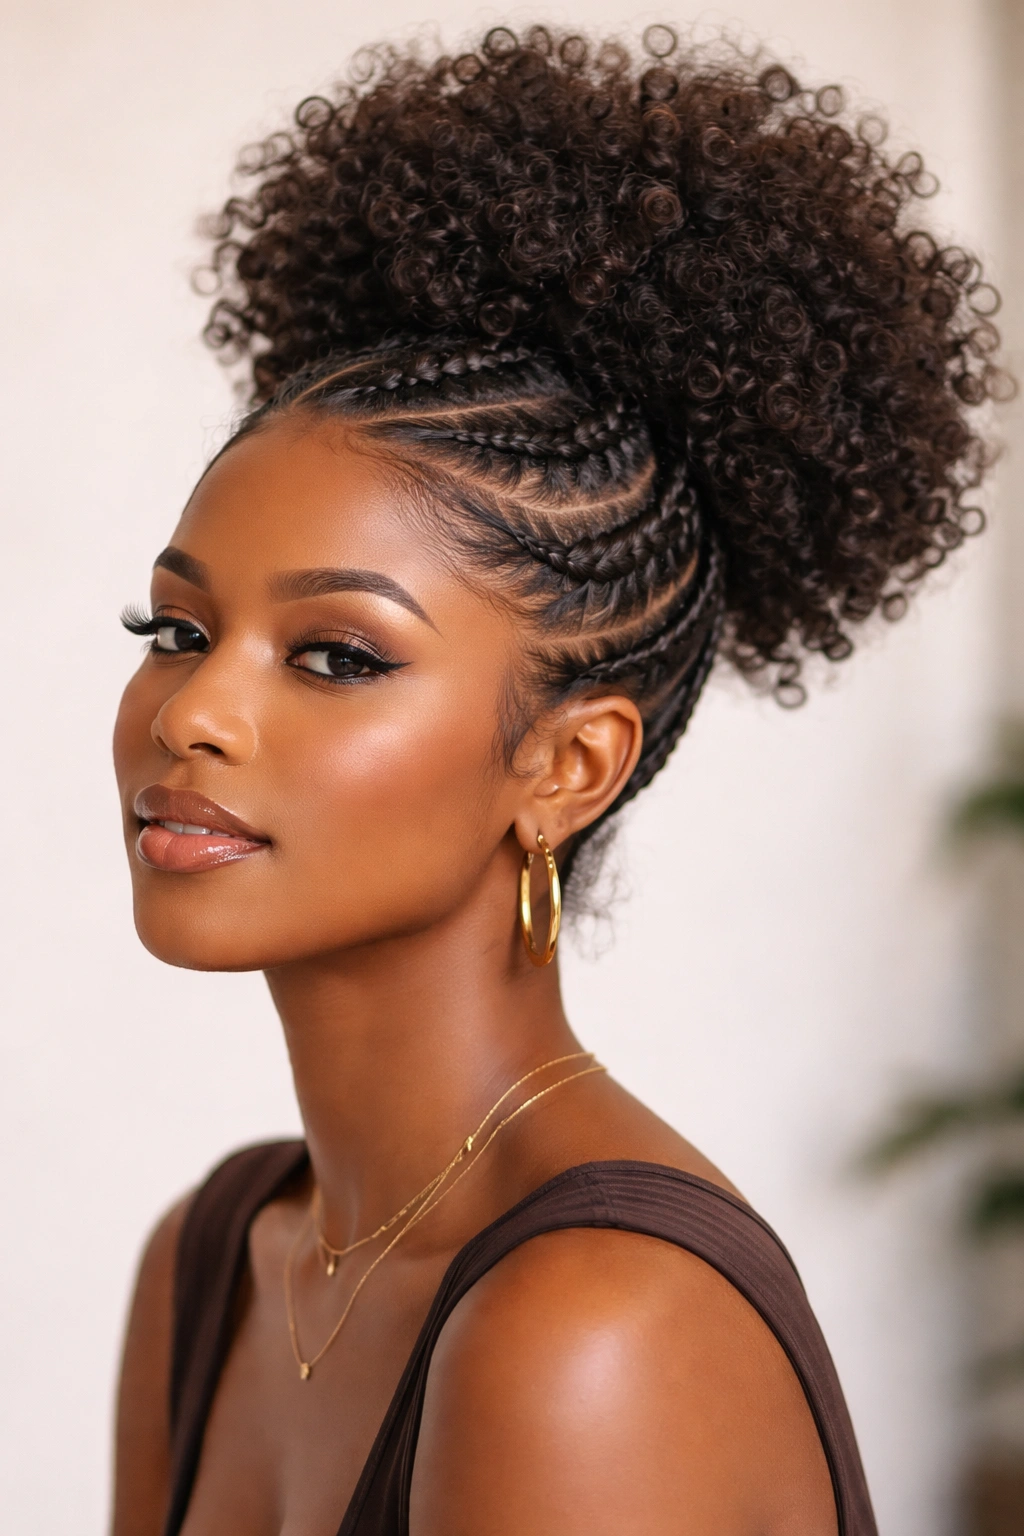
This style combines the fullness and bounce of curly hair with the intentionality of braids. You gather your hair into a puff, but before securing it, you incorporate one or more braids into the puff structure itself—they can spiral around the base, sit underneath, or be woven throughout. The result is a style that’s both romantic and deliberate, casual and artistic.
The Texture Play of Curls and Braids Together
Curls and braids are a match made in beauty heaven. The braids add structure and intentionality while the curls add softness and movement. This combination works especially well if you have naturally curly hair or if you’ve set your hair in curls beforehand. The braids also help contain the curls and keep them from spreading too far, which means your puff maintains its shape longer. There’s also something visually striking about the contrast between the geometric lines of braids and the organic roundness of curls.
Building Your Braided, Curly Puff
If your hair isn’t naturally curly or set in curls, apply a curling mousse or light gel to damp hair and set it in curls using flexi rods, perm rods, or a curling iron. Let the curls set completely. Once you have your curls in place, take a section of hair from the front or side and create a braid—this can be a basic three-strand braid, a Dutch braid, a French braid, or any style you like. Fold or wrap the braid around where your puff will be, pinning it down temporarily.
Now, gather all your hair (including the braided section) into your puff and secure it. The braid becomes part of the puff structure, adding texture and visual interest. You can create multiple braids and incorporate them throughout, creating a more complex look, or stick with a single braid for a simpler effect.
Real talk: This style lasts longest if your curls are set firmly, so don’t skip this step. Loose or partially set curls will deflate and lose their shape as the day goes on.
10. Puff with Bangs (Frontal Hair Left Out)
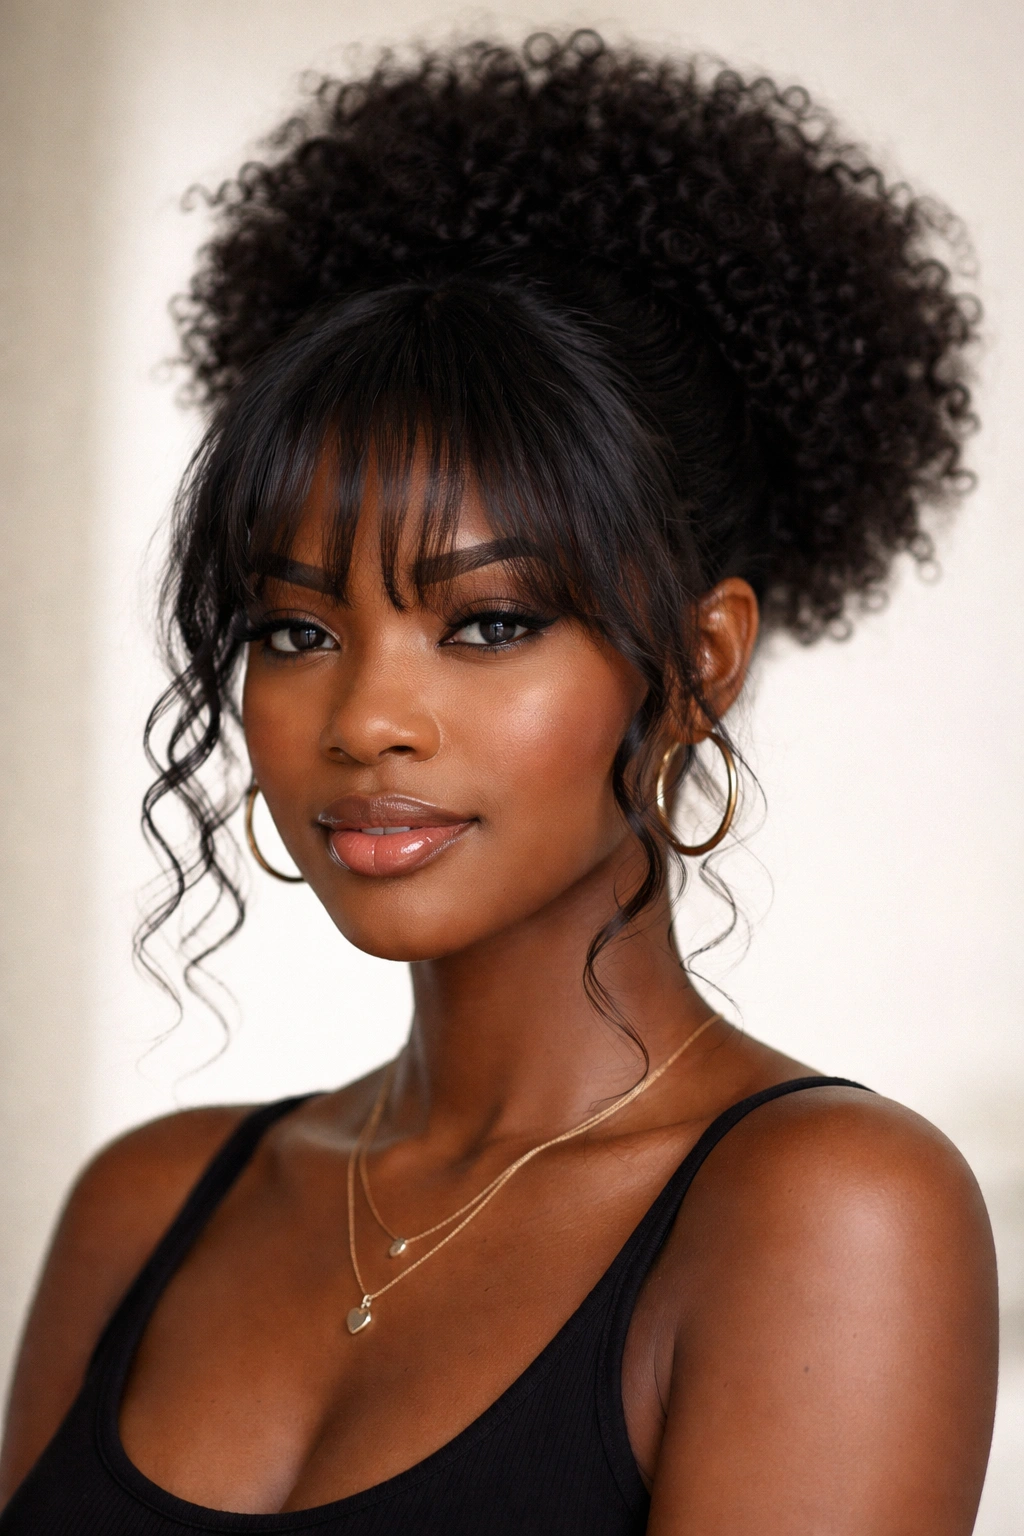
A puff with bangs keeps some hair at the front of your head down and free, creating a style that’s part puff, part down-do. The bangs can be blunt and geometric, soft and wispy, or anything in between, and they frame your face while the puff takes up the back. This is a style for people who love the idea of a puff but aren’t ready to commit to pulling all their hair back.
Why Bangs and Puffs Create Visual Balance
Leaving hair at the front softens the overall look of a puff and creates more balance, especially if you have a longer face or prominent forehead. The bangs draw attention to your face and eyes, while the puff keeps the back and sides neat and controlled. This style also works really well in transition periods when you’re deciding whether you want to fully commit to an updo or not—it gives you the best of both worlds.
Creating a Flattering Puff-and-Bangs Combo
Decide how much hair you want to leave out at the front. This could be just a few face-framing pieces, a full forehead-length bang, or side-swept pieces. Leave those sections out and clip them up temporarily. Gather the rest of your hair into your chosen puff position and secure it. Now release your front sections and style them however you like—you can leave them straight, curl them, braid them, or add a gel-defined edge control look.
The width of your bang and how you style it should complement your puff. If your puff is very full and round, softer bangs balance it out. If you want a more structured look, geometric or blunt bangs create a bolder statement. The key is making sure the puff and bangs feel like one intentional style rather than two random pieces.
Pro tip: This style photographs beautifully because the bangs and puff create different planes and depths, making the whole look feel more dynamic and three-dimensional.
Final Thoughts
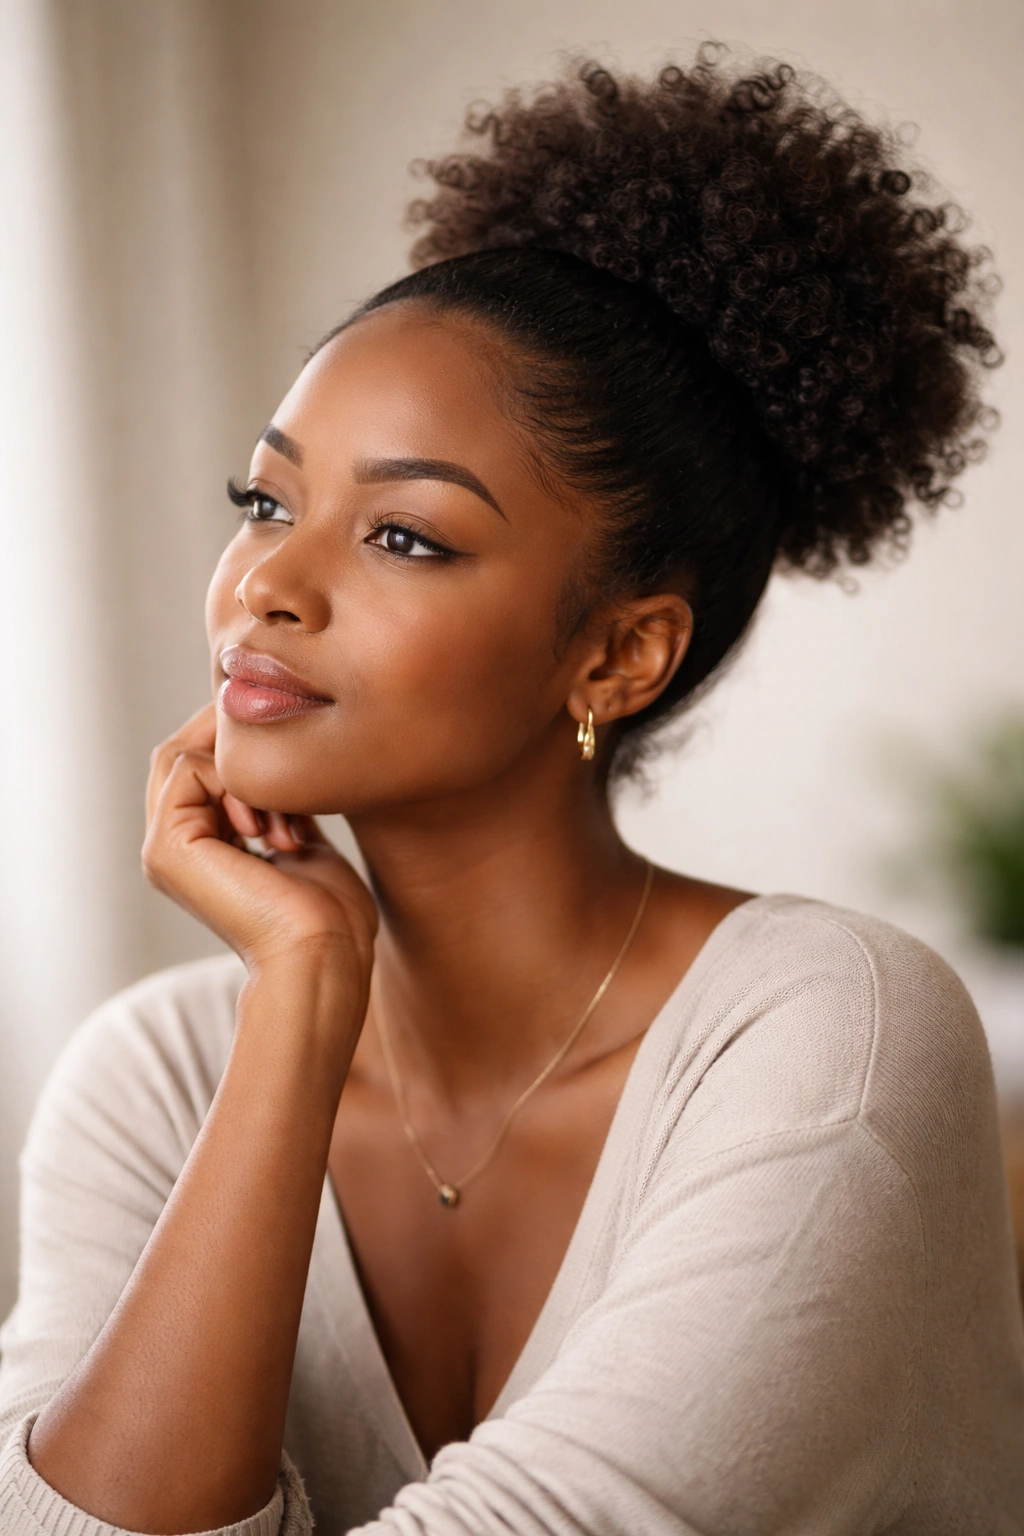
The beauty of afro puffs is that they’re endlessly adaptable—you can adjust, mix, and combine these styles based on your hair type, the occasion, your mood, and what feels right for you on any given day. A style that feels too playful one week might become your favorite power look the next, or a sleek puff might evolve into a twisted puff as your styling skills grow.
What matters most is that you’re choosing styles that make you feel confident and that protect and celebrate your natural hair. Whether you’re rocking high double puffs or a low sleek puff, whether you’re incorporating braids and twists or keeping it simple, you’re making a choice that honors your texture and your culture.
Start with the styles that appeal to you most, practice the techniques without pressure, and give yourself grace as you develop your skills. Your go-to puff style will reveal itself over time—and you might surprise yourself by discovering that you love multiple variations depending on the day. That’s exactly how it should be.
