



Natural hair styling at home doesn’t require expensive salon trips or advanced cosmetology skills — it requires understanding the texture you’re working with and having the right techniques in your back pocket. If you’ve ever felt stuck in a styling rut, cycling through the same two or three looks because everything else feels too intimidating or time-consuming, you’re not alone. The truth is that your natural hair is endlessly versatile, and the styles that look most impressive often come together more easily than you’d think. Whether you’re looking for everyday protective styles that shield your ends while you go about your week, fun weekend looks that let your curl pattern shine, or quick styles you can do in under 20 minutes before heading out the door, there’s something here for every mood, occasion, and skill level.
The 15 styles ahead aren’t arranged by difficulty — they’re arranged to show you a real range of what’s possible when you understand the fundamentals. Some rely on your natural texture alone, while others use tools and techniques you might already have sitting in your bathroom. What ties them all together is that every single one can be done at home without special equipment you don’t already have, and each one works beautifully on natural hair when you approach it with intention. Let’s walk through each one, learn the real tricks that separate a flat, sad version from a stunning one, and help you find your new go-to styles.
1. Wash and Go
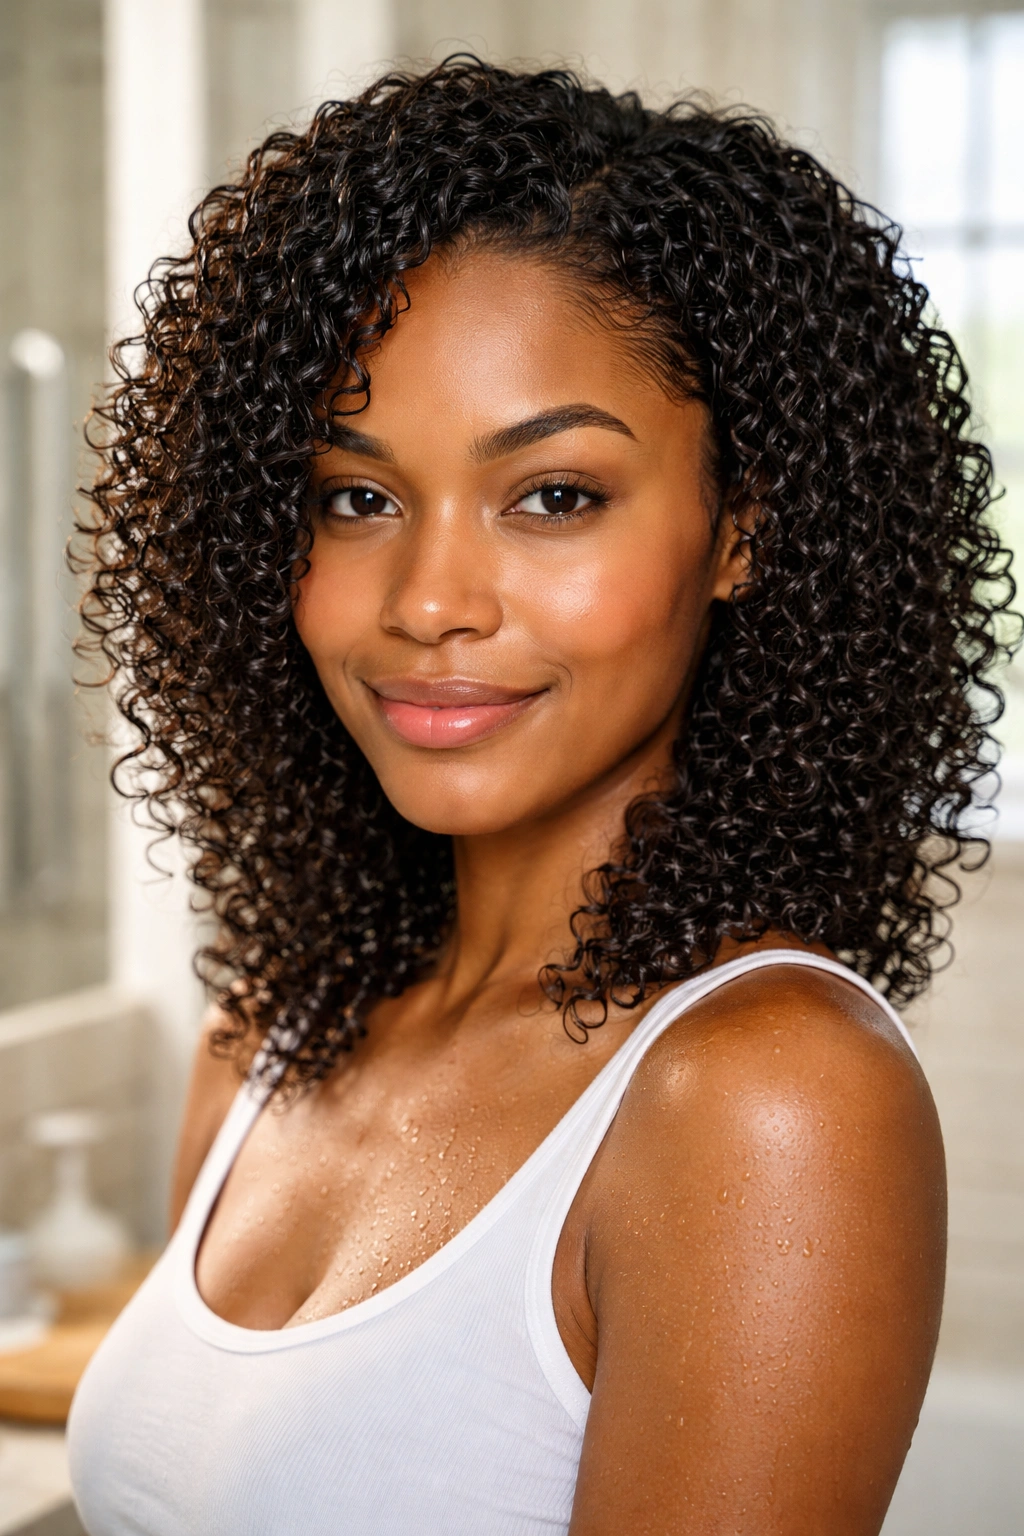
The wash and go is the holy grail for people who want gorgeous definition with absolutely zero styling effort — and yes, it genuinely can look that polished once you nail your formula. This style is exactly what it sounds like: you wash your hair, apply your products in the shower or while wet, and let your curls air-dry or diffuse into their natural pattern without any manipulating, smoothing, or twist-outs. The magic happens in the product layering and the technique you use to apply them.
Why It Works Best for Curl Definition
Your curls naturally want to coil and spiral — they’re literally designed to do this. When you apply lightweight leave-in conditioner and gel while your hair is soaking wet and still clumped together, you’re essentially just enhancing what nature already wants to do. The key is using products that are wet-friendly and that won’t weigh your curls down. Most people fail at wash and gos because they use products that are too heavy or they apply them to hair that’s already too dry. Your curls need the moisture still in them to clump together properly.
Getting the Formula Right
- Use a hydrating leave-in conditioner as your base — this adds moisture without crunch
- Apply a curl-defining gel or cream gel on top while your hair is dripping wet, using the praying hands or scrunching method
- A lightweight oil on top can seal everything, but only a few drops — more is not better
- Styling lotions and curl creams work better than heavy butters for wash and gos
- Water content in your products matters enormously — look for hydrating formulas, not heavy moisturizing ones
Pro tip: Do your wash and go the night before if you can, then refresh with a light spray and scrunch in the morning — your curls will be bouncier and definition will actually improve overnight.
2. Twist-Out
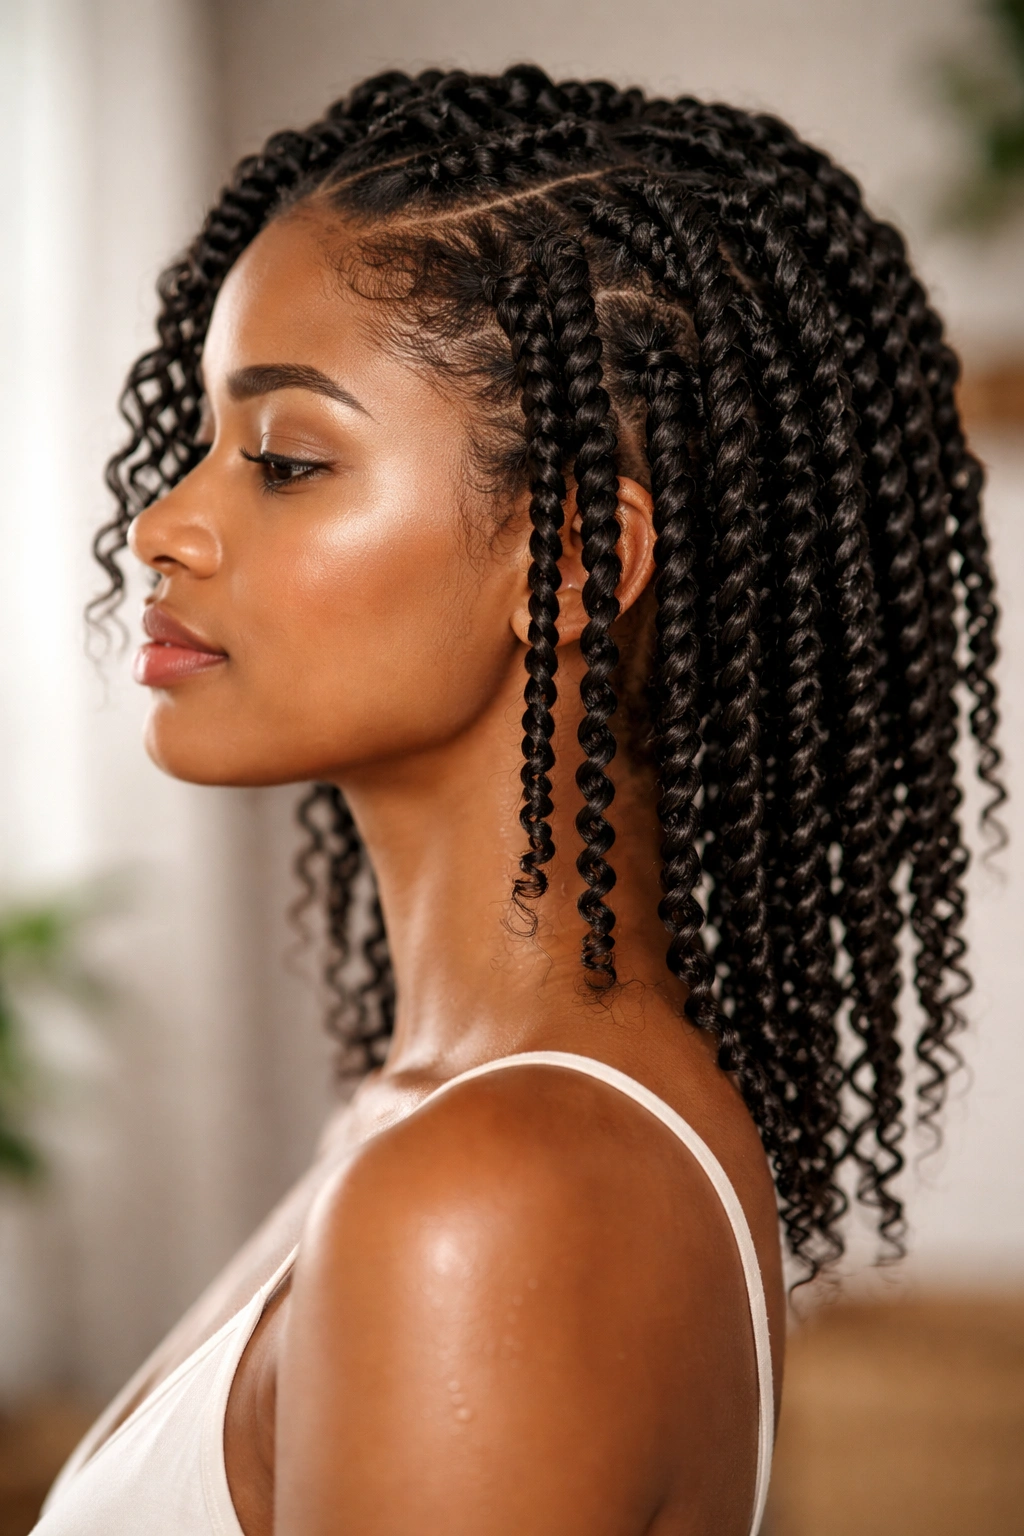
A twist-out gives you softer, more elongated curls with incredible volume and definition that looks intentional and polished. You’re essentially pre-styling your hair while wet, letting it set overnight, then unraveling the twists to reveal beautifully separated curls. This is a game-changer if you like the look of defined curls but find that your natural curl pattern alone gives you tighter spirals than you prefer.
How Twist Structure Creates Better Definition
When you twist sections of hair together, you’re forcing your curl pattern to stretch and elongate as it dries. Those twists hold your hair’s shape as moisture evaporates, so when you unravel them, your curls are already set into a larger, softer pattern. The friction between the two strands in the twist also encourages definition and reduces frizz because your curl edges are sealed down. The size of the twist directly determines the size of your curl pattern — fatter twists create loose waves, thin twists create tighter defined curls.
The Twist-Out Process That Actually Works
- Section damp (not soaking wet) hair into 4-12 sections depending on how many curls you want — fewer sections equals bigger, looser curls
- Apply leave-in and curl gel to each section, smoothing from root to tip so there are no bumps
- Twist each section tightly from root to tip, then wrap the end around your finger to create a coil at the ends
- Let twists air-dry completely or use a diffuser on low heat for 20-30 minutes — do not unravel until 100% dry
- Unravel each twist slowly by gently opening up the twist and separating the two strands, starting from the bottom
- Gently separate curls with your fingers if you want more volume and movement
Worth knowing: The longer your twists stay in, the more defined your curls will be — leaving them in overnight or for 12+ hours beats taking them out in a few hours.
3. Braid-Out
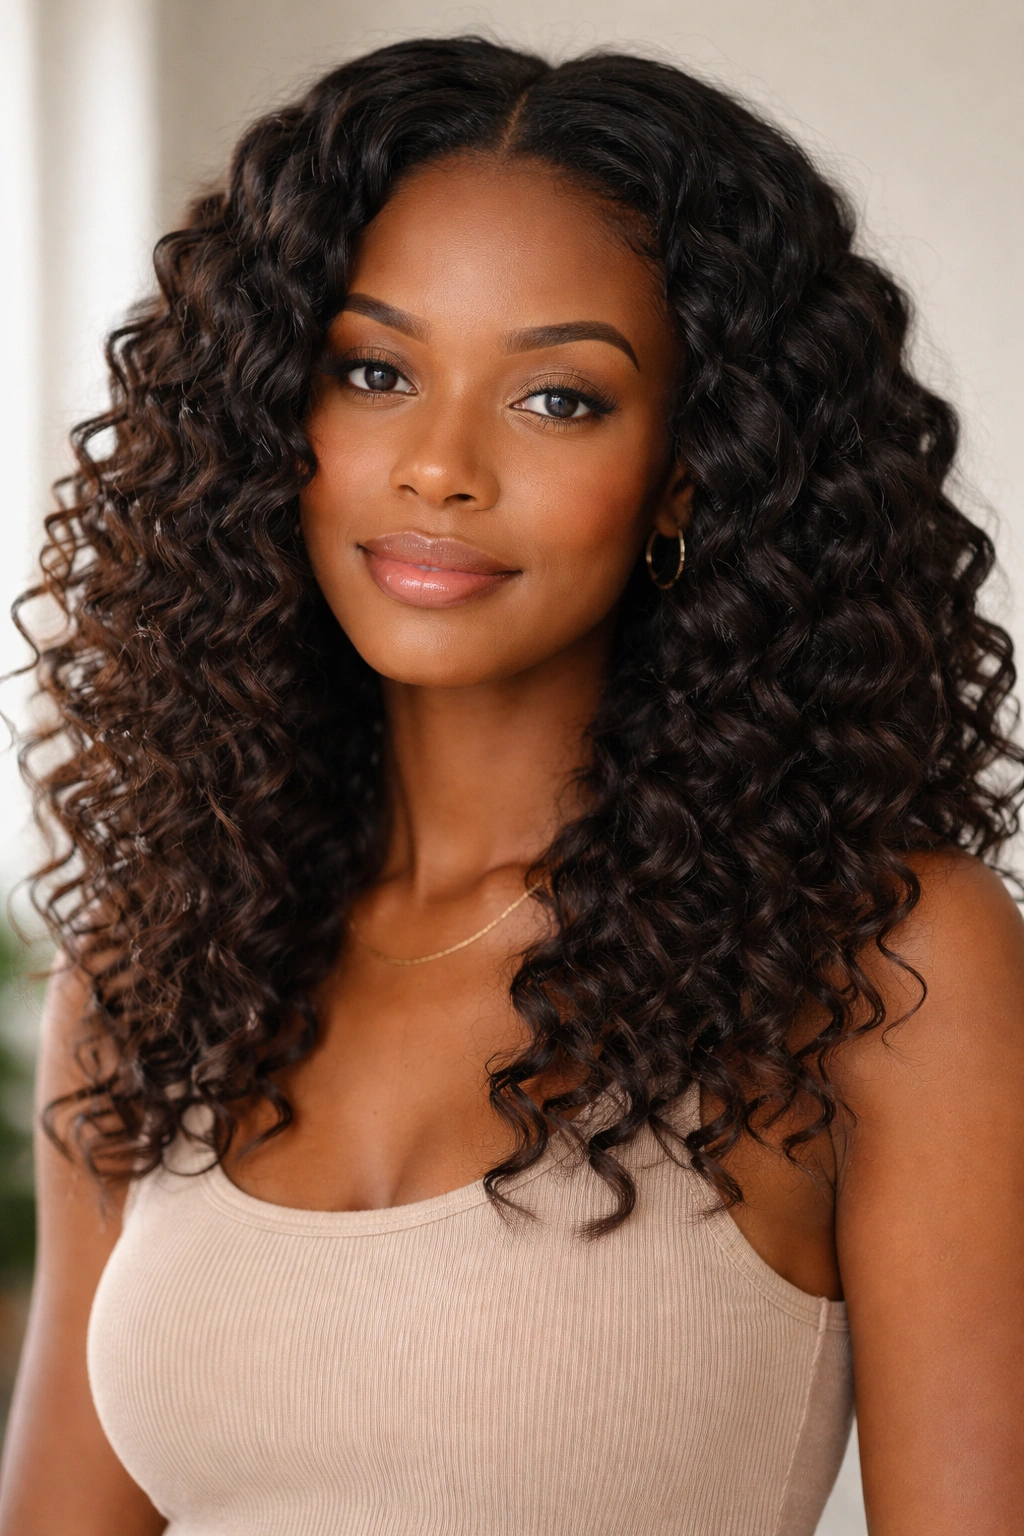
A braid-out is the wider, wavier sibling of a twist-out, and it’s perfect if you want softer waves instead of tight curls. Instead of twisting two sections together, you’re braiding three strands, which creates a different texture that’s fluffier and more voluminous. Braid-outs often look extra when you take them down because the pattern is so distinct and the separation is natural.
Why Braids Create Looser Waves Than Twists
Braiding three strands instead of two means your hair is stretched even more and in different directions as it dries. A braid essentially crimps your hair as it dries, so the larger your braids, the looser the wave pattern will be. The space between braids also matters — tighter braids create tighter waves, loose braids create loose, more dramatic waves. Most people who think braid-outs don’t work are actually using too-tight braids and taking them down while still slightly damp.
The Braid-Out Technique for Maximum Volume
- Detangle your damp hair thoroughly — tangles in braids are a nightmare to undo
- Divide into 4-8 sections (fewer sections mean bigger, looser waves — do this if you want dramatic waves)
- Apply leave-in conditioner and styling cream to each section, ensuring each strand is coated
- Braid each section in a loose, consistent three-strand braid from root to tip
- Secure ends with a rubber band or clip and allow to air-dry completely
- Unravel slowly and gently, separating the braids and fluffing with your fingers for maximum volume
- Shake your head side to side and scrunch curls to encourage lift at the roots
Insider note: Loose, sloppy braids actually look better than tight, perfect ones when you take them down — the imperfections translate to more natural-looking waves.
4. Bantu Knots
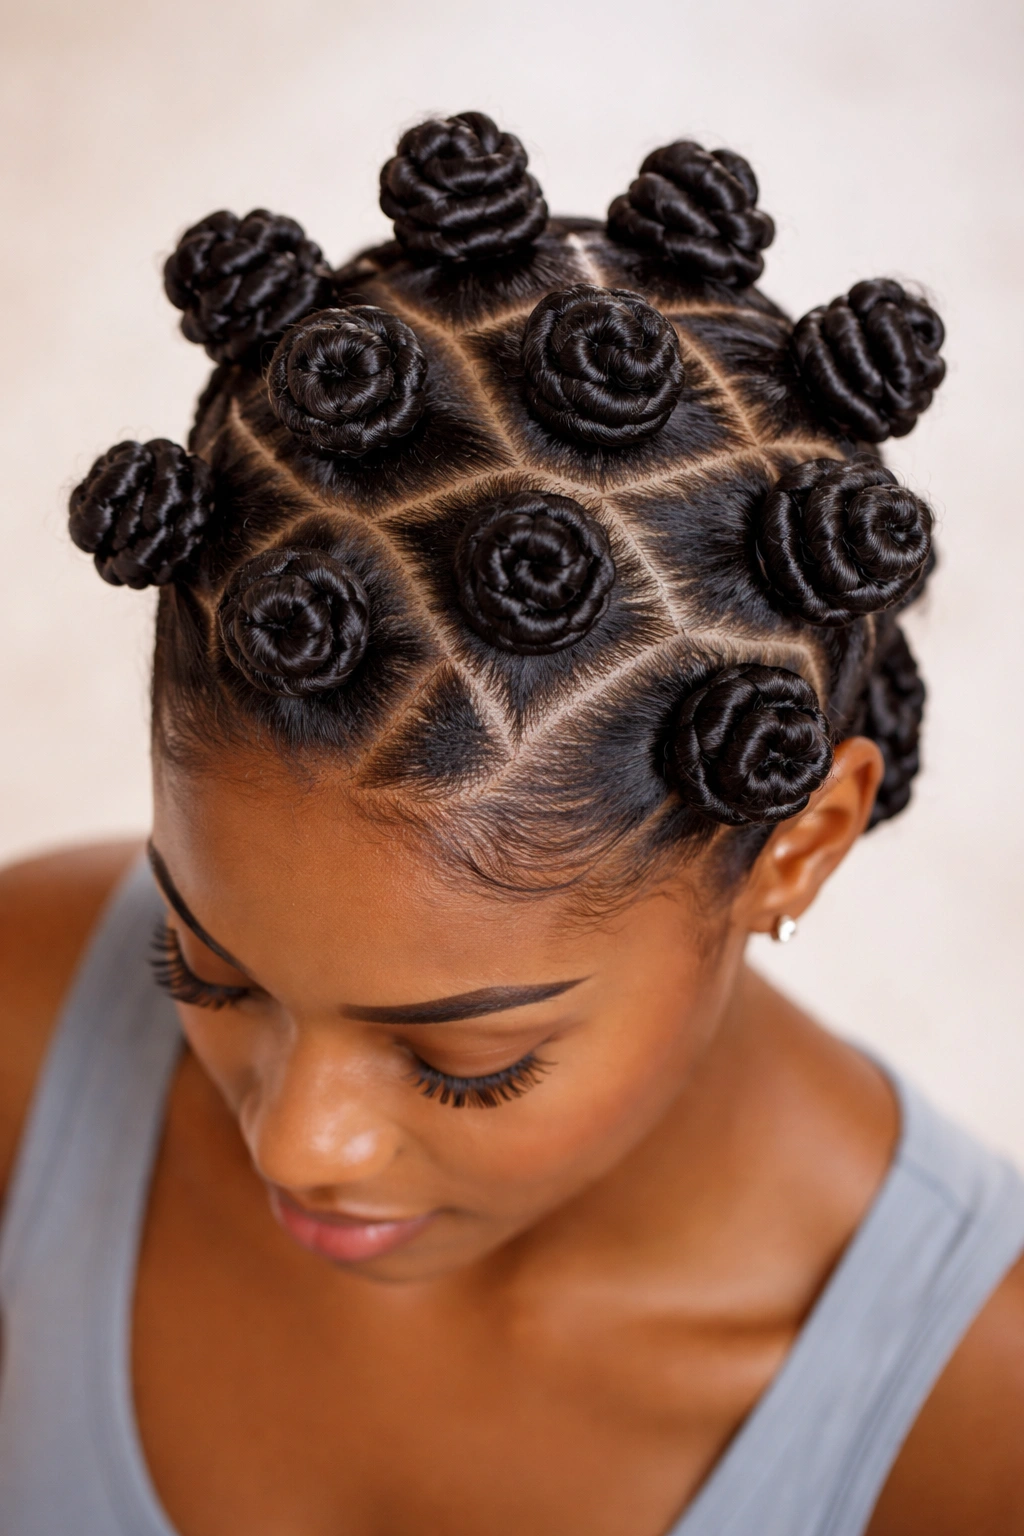
Bantu knots are those perfectly circular, sculptural knots that look stunning in photos and create gorgeous springy curls when you take them down. They’re protective because each section is coiled on itself, which means your ends are tucked away inside each knot. You can wear bantu knots as a style on their own, or take them down after they set for beautiful, defined curls.
The Protective Benefits of Bantu Knots
Your hair ends are delicate and prone to breakage when they’re exposed and handled constantly. Bantu knots tuck those vulnerable ends inside the coil, so they’re protected from friction and air exposure. This makes bantu knots a genuine protective style, not just a cute look. The coiling motion also naturally encourages curl definition as your hair dries, so you get both protection and styling in one step. They’re especially good if you’re trying to retain length while also keeping your hair styled.
How to Create Bantu Knots That Actually Look Polished
- Divide clean, damp hair into 6-20 sections depending on how many knots you want
- Apply leave-in conditioner and gel to the first section, smoothing from root to tip
- Starting at the end of that section, coil the hair tightly around itself, spiraling upward toward your scalp
- Keep coiling until you reach your scalp, then wrap the section around the base to secure the knot
- The end result should be a circular knot sitting against your scalp, with the twisted section forming a sphere
- Repeat for all sections, then allow to air-dry or use a hood dryer
- Gently unravel each knot the next day or after 12+ hours to reveal spiral curls
Pro tip: Smaller, tighter knots create tighter curls; larger, looser knots create waves — choose your knot size based on what curl pattern you want.
5. Two-Strand Twists
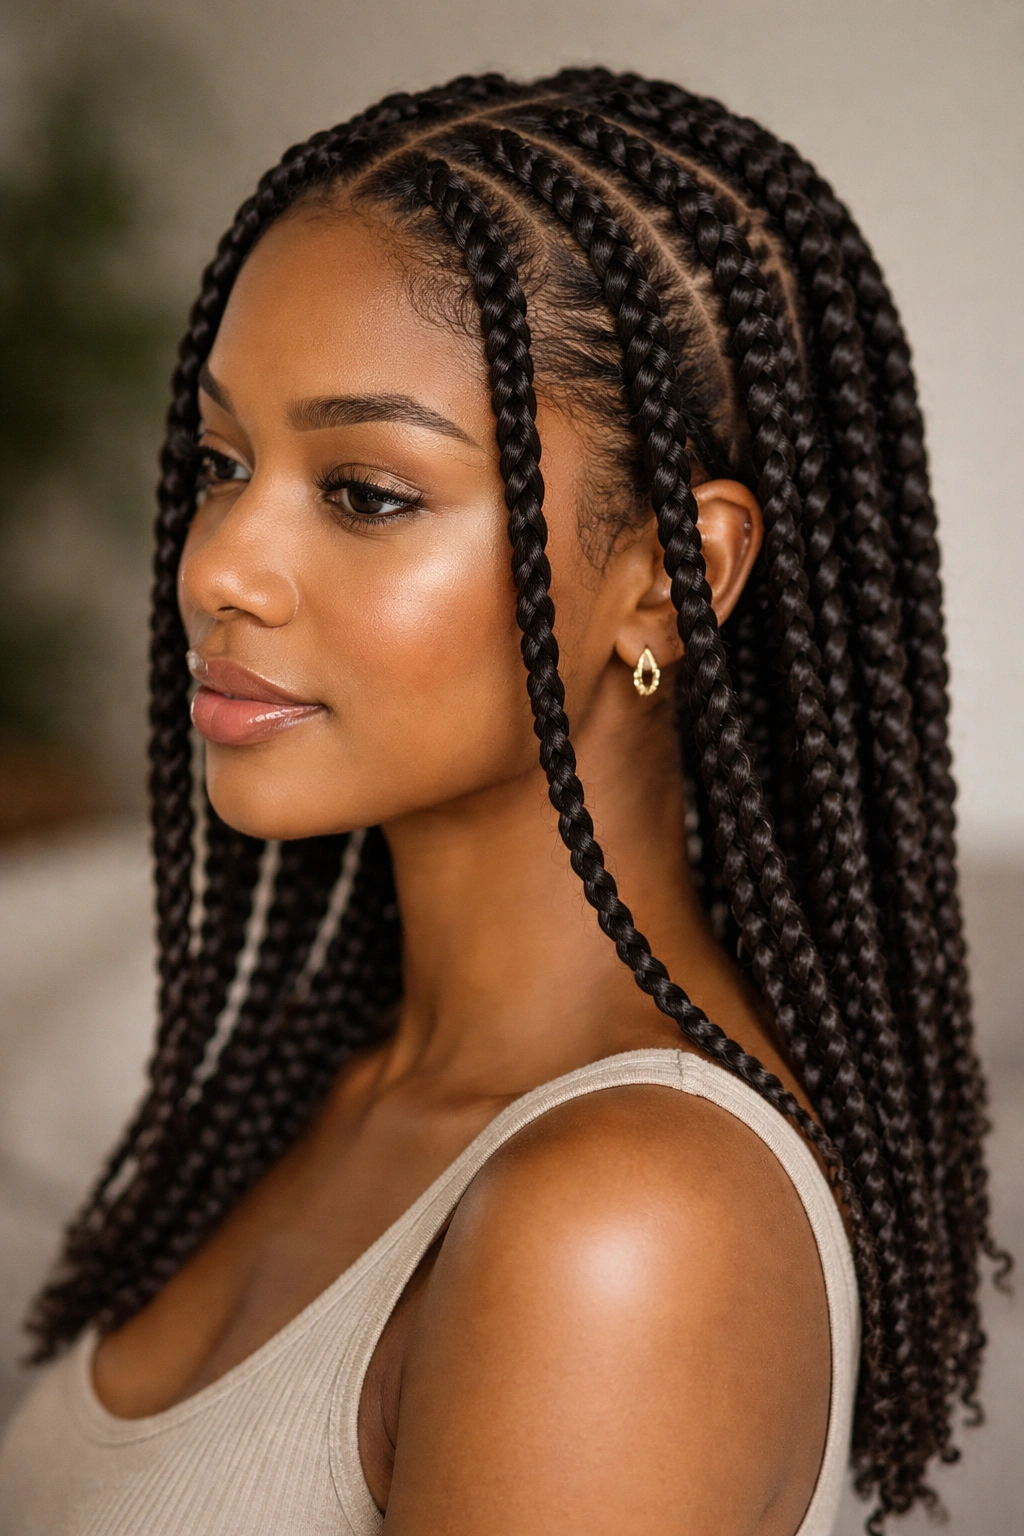
Two-strand twists are the workhorse protective style that somehow always looks intentional and polished. You’re taking two strands and wrapping them around each other, which creates that spiral rope effect. They can stay in for weeks as a protective style, or you can take them down after a few days for a completely different texture — twisted curls. They’re also incredibly customizable in terms of size, direction, and tightness.
Why Twists Are Both Protective and Versatile
Two-strand twists lock each section of hair into a coil, which means your curl edges are sealed and less likely to frizz or break. The texture inside that twist is also protected from handling and friction. When you wear them as a style, you’re getting protection. When you take them down, you get a completely different curl pattern that lasts for several days. This versatility means one protective style gives you multiple looks. Twists also allow your scalp to breathe more than braids do, which is better for your scalp health during longer protective style periods.
Creating Twists That Look Intentional, Not Sloppy
- Section damp (not dripping) hair into 12-30 sections depending on how thick you want each twist
- Apply leave-in conditioner and curl gel to each section, smoothing through completely
- Take the first section and split it into two equal strands
- Wrap those two strands around each other tightly, moving from root to tip and keeping tension consistent
- Once you reach the ends, wrap the final twist around your finger to create a spiral at the tip
- You can leave twists loose and unraveled as a style, or wrap the ends with small rubber bands for a neater look
- Moisturize your twists every few days by spritzing with water and sealing with oil
Worth knowing: Thicker twists look more intentional and last longer without getting fuzzy; thin twists take longer to install but create finer, more delicate results.
6. Faux Hawk
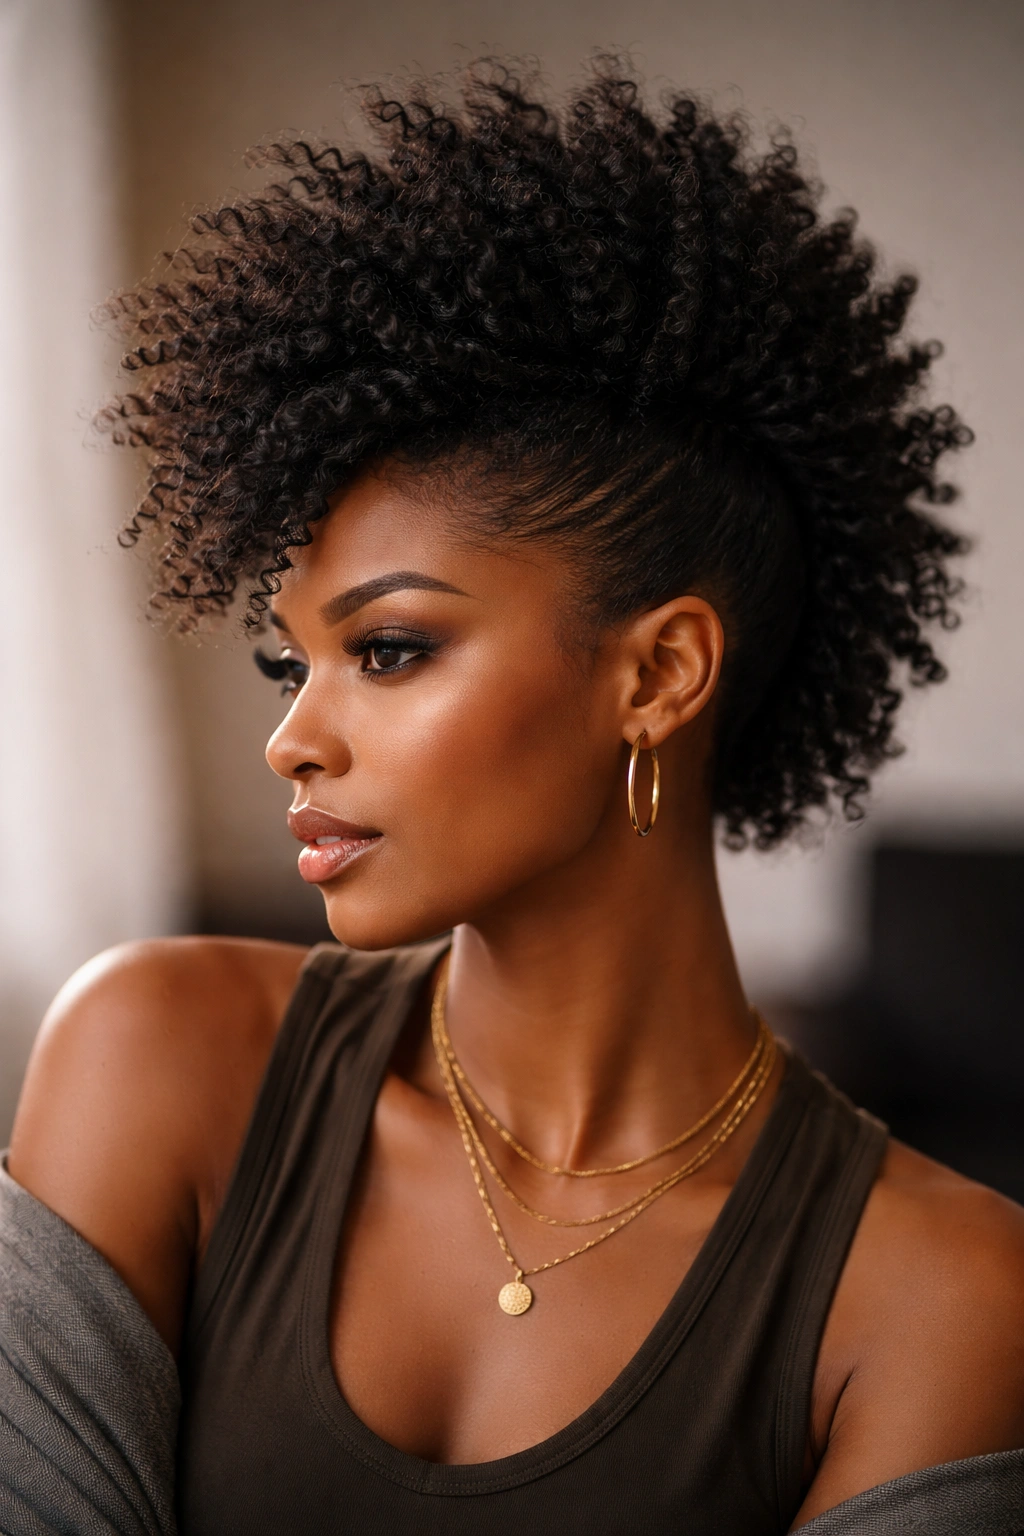
The faux hawk is that stunning style where you gather your hair into a tall, dramatic puff at the top of your head while leaving smaller sections loose on the sides. It looks edgy and confident, but it’s actually just a playful take on a regular puff. The “faux” part means you’re not actually cutting or shaving anything — you’re just arranging your natural hair to create that dramatic silhouette.
Creating the Illusion of Height and Drama
The secret to a faux hawk is understanding how to use the width of your natural hair to create an optical illusion of height. By pulling hair from a narrow strip down the center of your head and gathering it tightly, you create a column of volume. The hair on the sides that you’re leaving out stays close to your head, which makes the center section look even taller and more dramatic by contrast. You’re not using any extra hair or extensions — you’re just strategically arranging what you have.
The Faux Hawk Formula for Maximum Impact
- Create a zigzag or straight part down the center of your head from your forehead to the back of your neck
- Take a thin section from each temple area and secure them loosely with clips or bobby pins — these will stay down on the sides
- Gather the center section of hair into a high puff or ponytail at the crown, using a strong holding gel or mousse
- Use bobby pins to secure the puff and smooth down any flyaways
- Tease the gathered section gently to add height and volume to the top
- Release the side sections and smooth them down close to your head with gel for contrast
- You can wrap the base of the puff with a smaller section of hair to hide the elastic
Pro tip: A faux hawk looks most dramatic when the side sections are very smooth and the center section is very full — maximize that contrast.
7. Puff with Curls
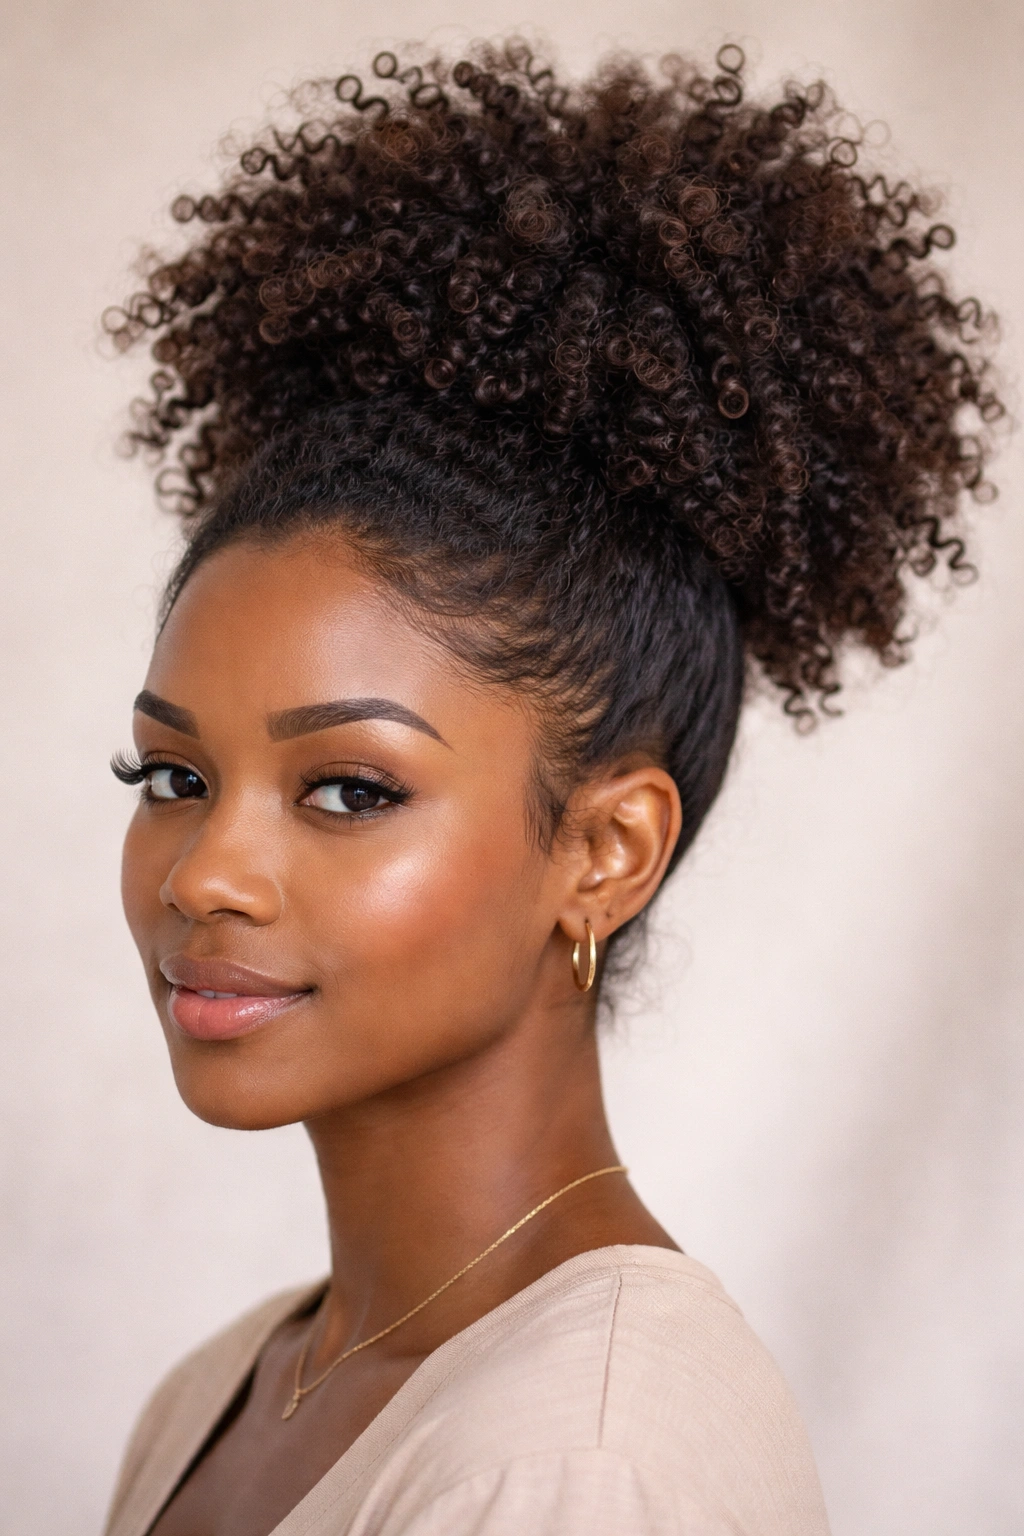
A puff with curls is a high ponytail where instead of sleek, smooth strands, you’re leaving your curls loose and fluffy. It’s the perfect balance between “I’m put-together” and “my curls are doing their natural thing.” You can do this with a wash and go curl pattern, or with curls from a twist-out or braid-out. The key is gathering your hair tightly at the crown while letting all that curl texture fluff up above the elastic.
Why Curls Inside a Puff Look Bigger and More Defined
When you pull hair tightly into a puff, you’re stretching the hair at the base, which creates more lift and volume at the crown. That lifted foundation makes your curl pattern look bouncier and more defined because there’s space for the curls to expand. The elastic acts like a stage, pushing your curls up and out instead of letting them sprawl down your neck. A puff also naturally creates a rounded, full silhouette that makes even loose curls look intentionally styled.
Making a Puff That Stays Put All Day
- Create a clean parting at the crown — you can do a center part, a side part, or just define where your puff will sit
- Brush or smooth your hair straight back toward that point using a soft brush and smoothing cream
- Gather hair tightly into a ponytail at the crown using a strong elastic — the tighter you pull, the higher the puff will sit
- Spray the gathered section with a flexible hold hairspray or edge control to smooth flyaways
- Gently tease the section above the elastic to add height and volume
- Take a small section from the puff and wrap it around the elastic to hide it
- Finish with hairspray to tame flyaways but still show off your curl definition
Worth knowing: Puffs stay tighter and look neater if you do them on second-day or third-day hair instead of freshly washed hair — the texture gives you more grip.
8. Half-Up, Half-Down Puff
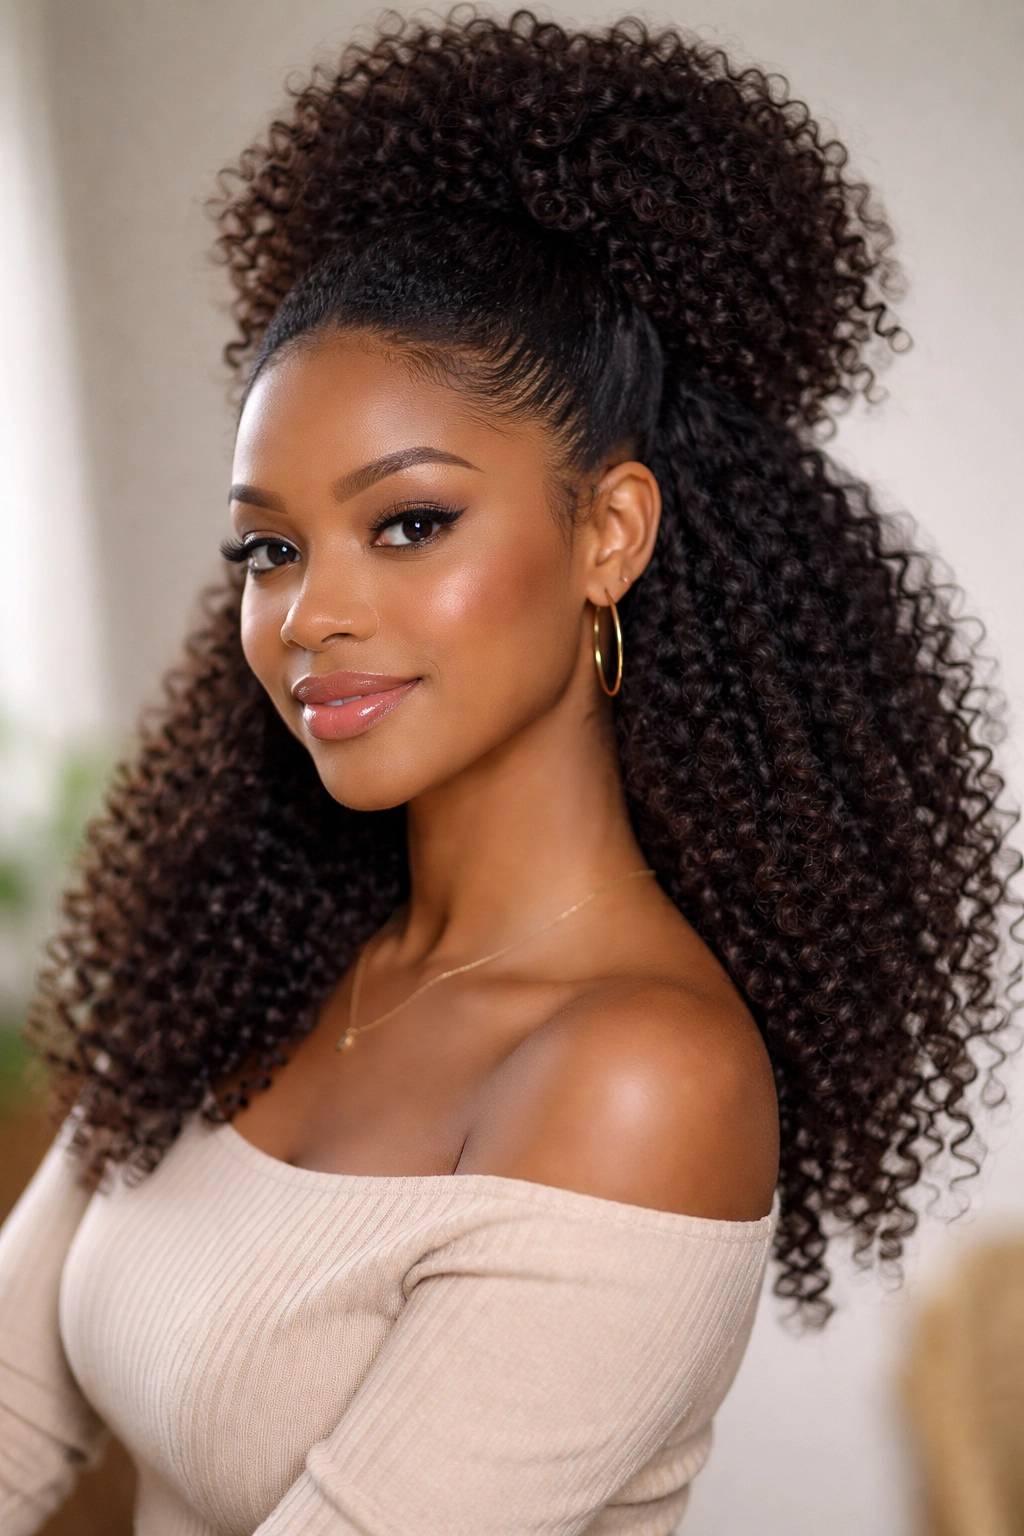
The half-up, half-down puff is that effortlessly chic style where you’re pulling just the top half of your hair back into a puff while leaving the bottom half down. It’s less dramatic than a full puff and shows off more of your curl pattern, while still keeping hair off your face and neck. This is perfect for days when you want a styled look without committing to a full protective style.
Why Half-Ups Work for Both Styling and Practicality
A half-up puff gives you the best of both worlds — you get the polish and practicality of a gathered style without covering up all your curl definition. It’s also perfect for keeping hair off your face and neck during hot weather or workouts, while still showing off the length and texture of your hair. The contrast between the gathered section and the loose section below also creates visual interest and makes even a simple curl pattern look intentional.
Creating a Balanced Half-Up That Looks Intentional
- Create a curved or zigzag parting from ear to ear across the crown of your head
- Gather the top section into a puff at the crown, using the same technique as a full puff
- Make sure you’ve actually grabbed enough hair to create visible volume — a wimpy half-up looks unfinished
- Leave the bottom section completely down and fluffed
- You can braid, twist, or style the gathered section before putting it into the puff for extra texture
- Edge control or smoothing cream on the gathered section creates a polished look
- The contrast works best when the bottom section is fluffy and the top is sleek
Insider note: A half-up works best when you do it on hair that already has some curl definition or texture — a half-up on completely straight hair can look a bit flat.
9. Coils
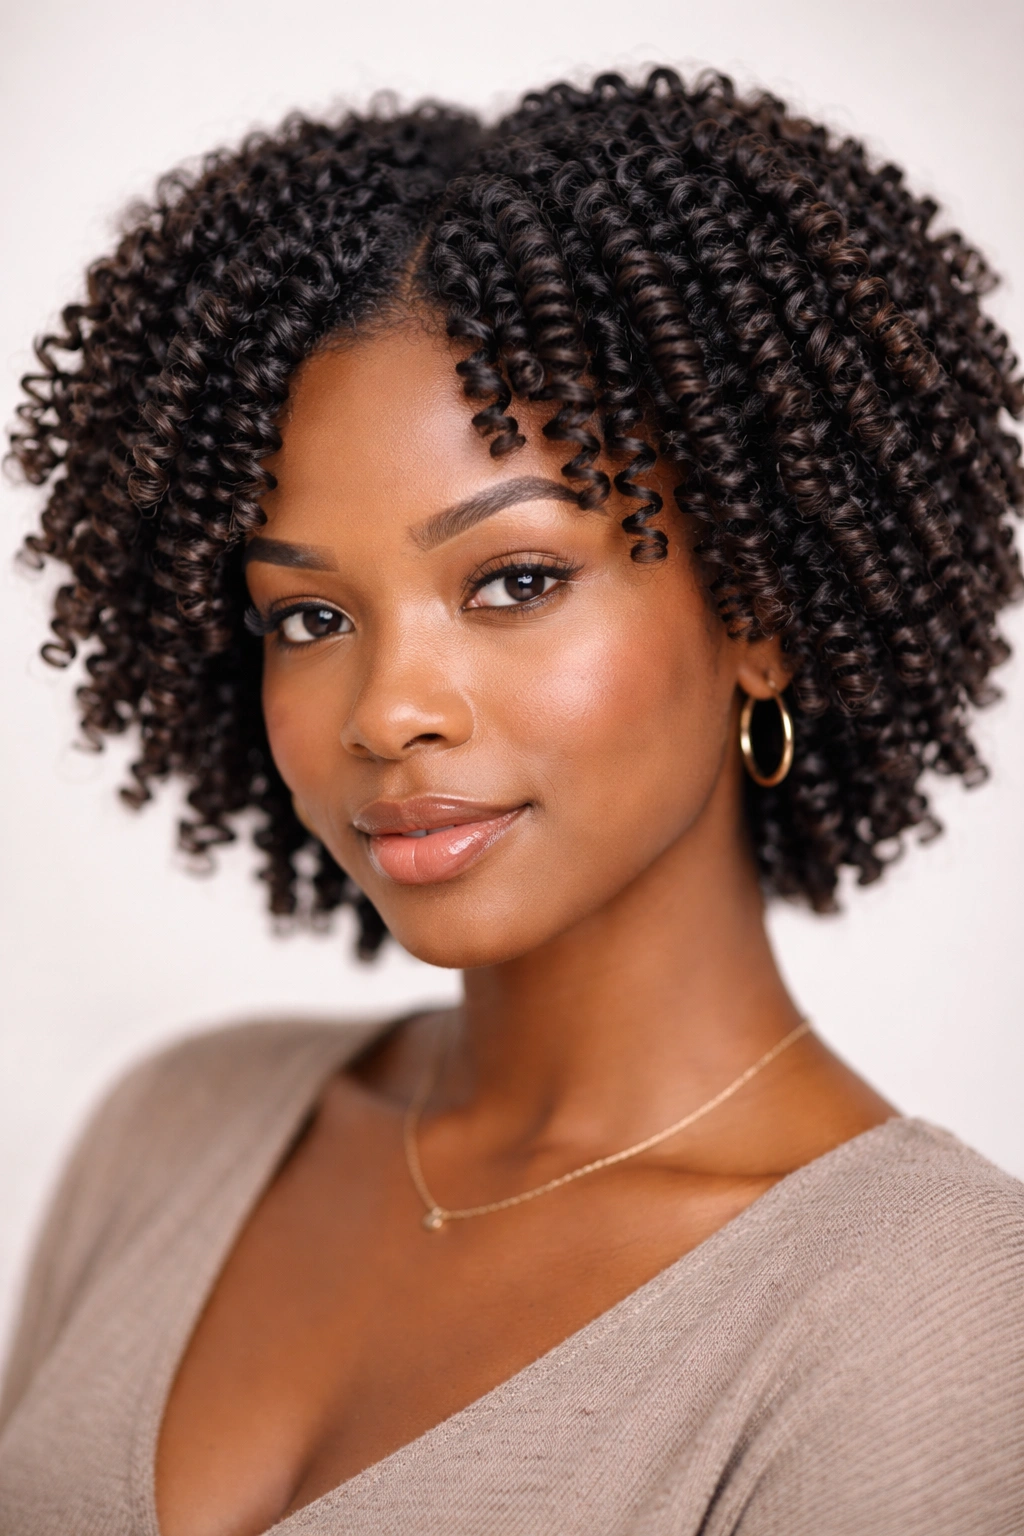
Coils are spiral ringlets that you create by wrapping small sections of hair around a tool, usually a rod or a flexible coiling device. The coils stay in your hair until you decide to take them down, creating a protective style with tons of texture and dimension. When you unravel the coils, you get defined spirals that can last for days. Coiling is especially beautiful on finer textures that sometimes struggle to hold a curl pattern on their own.
How Coiling Creates Lasting Curl Definition
A coil works similarly to a perm in that you’re setting your hair into a curl pattern while it’s wet and letting it dry in that shape. The difference is that a coil is temporary and there are no chemicals involved. By wrapping your hair tightly around a tool, you’re forcing it into a spiral shape as it dries. Fine, loose curl patterns can especially benefit from coiling because you’re creating curl definition that might otherwise be hard to achieve or maintain. The coils also protect your ends while the style is in, and you get multiple styling options once you take them down.
Perfecting the Coil Installation
- Apply leave-in conditioner and gel to small sections of damp hair
- Choose your tool — flexible rods, perm rods, or specialized coiling tools all work
- Starting at the end of the section, wrap the hair tightly around the tool, rolling toward your scalp
- Keep the tension consistent so the coil is even and tight
- Secure the tool so it stays in place while your hair dries
- Allow to air-dry or use a bonnet dryer
- Gently unroll each coil after 12+ hours to reveal a springy spiral
- Separate coils with your fingers for a fuller look
Pro tip: Smaller tools create tighter, bouncier coils; larger tools create loose waves — match your tool size to the curl definition you want.
10. Flexi-Rods
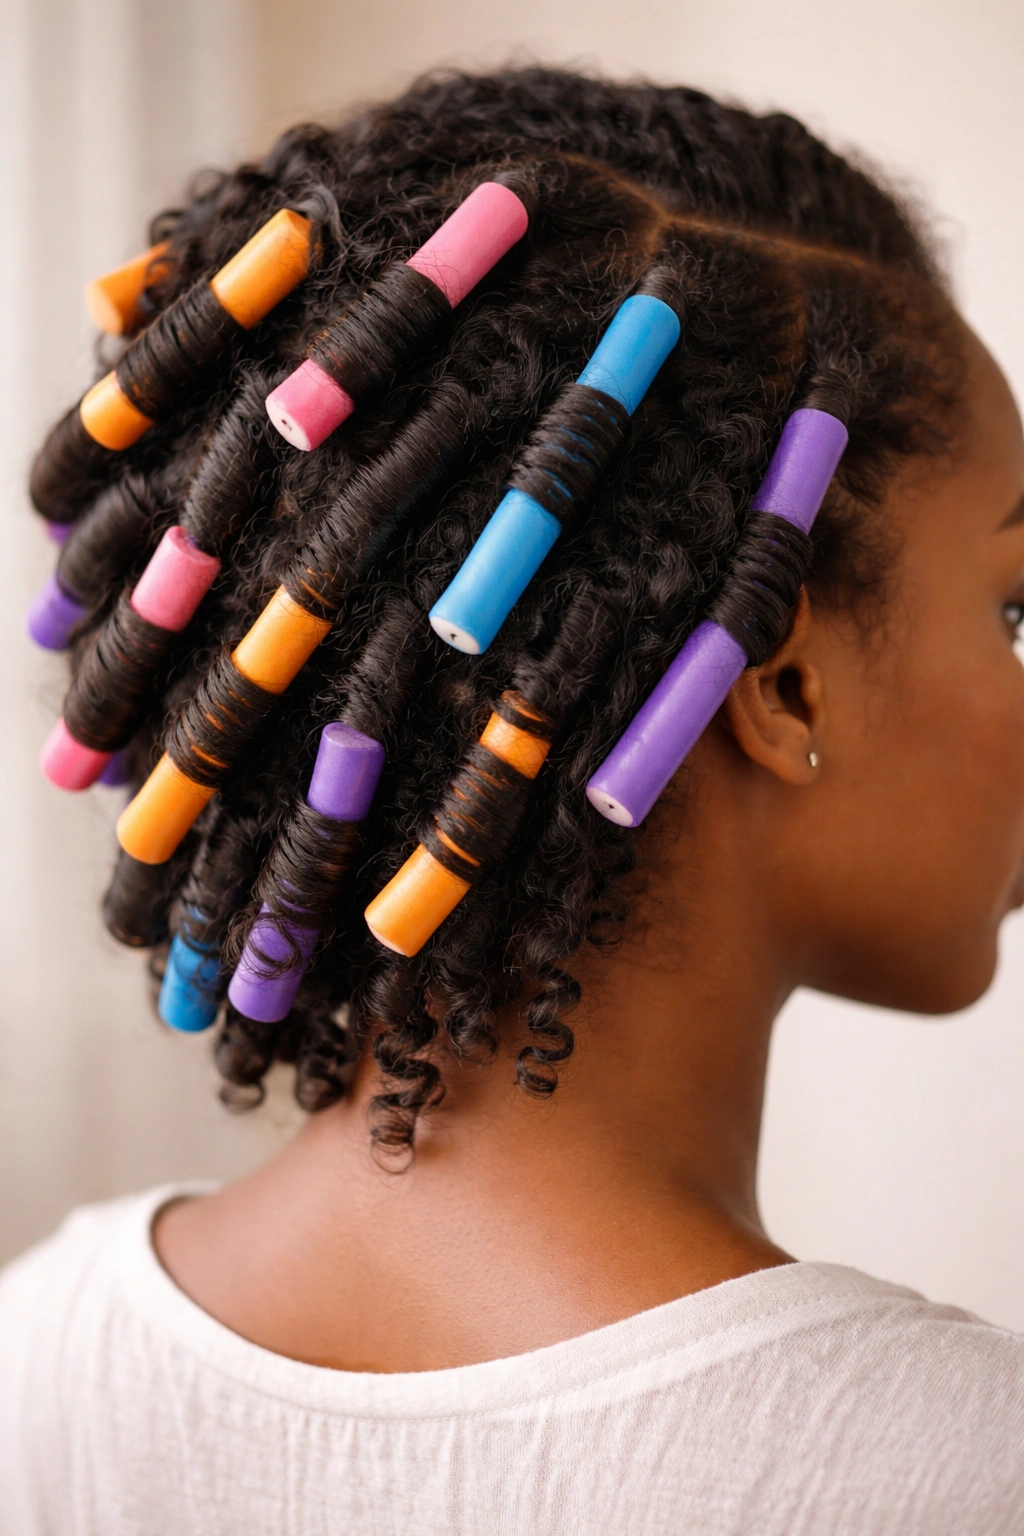
Flexi-rods are those bendy foam rollers that you can bend and mold into any shape — perfect for creating bouncy curls without any heat. You wrap sections of damp hair around the rods, secure them overnight, and wake up to soft curls. They’re especially great for creating consistent curl size across your whole head and for adding volume at the roots. Unlike traditional rollers, flexi-rods are comfortable to sleep on because they’re soft and flexible.
Why Flexi-Rods Create Bouncier, Longer-Lasting Curls
Flexi-rods hold your hair in a cylindrical shape as it dries, which creates smooth, bouncy curls without the frizz that heat styling can cause. Because the rods are flexible, they distribute tension evenly along your hair and don’t create the harsh creases you sometimes get with rigid rollers. The curl size is directly determined by the rod diameter — larger rods create bigger, bouncier waves, and smaller rods create tighter curls. The curls you get from flexi-rods last longer than most other wet-set methods because the rod holds the curl shape so consistently.
Getting Perfectly Set Curls With Flexi-Rods
- Section damp hair into 12-20 sections, depending on how many curls you want
- Apply leave-in conditioner and a lightweight gel to each section
- Take the first section and comb it smooth, removing all tangles
- Wrap the hair around the flexi-rod from the ends upward toward your scalp
- Once you reach your scalp, bend the rod into a circular shape to secure it — the bendable ends lock the rod in place
- Repeat for all sections, then sleep on your rods or allow them to air-dry for 6+ hours
- Gently unwind each rod slowly, starting from the bottom, to reveal your curls
- Finger-separate for volume or leave curls intact for definition
Worth knowing: Sleeping on flexi-rods is surprisingly comfortable because the rods are soft, but a silk pillowcase prevents frizz and helps your curls last longer.
11. Flat Twists
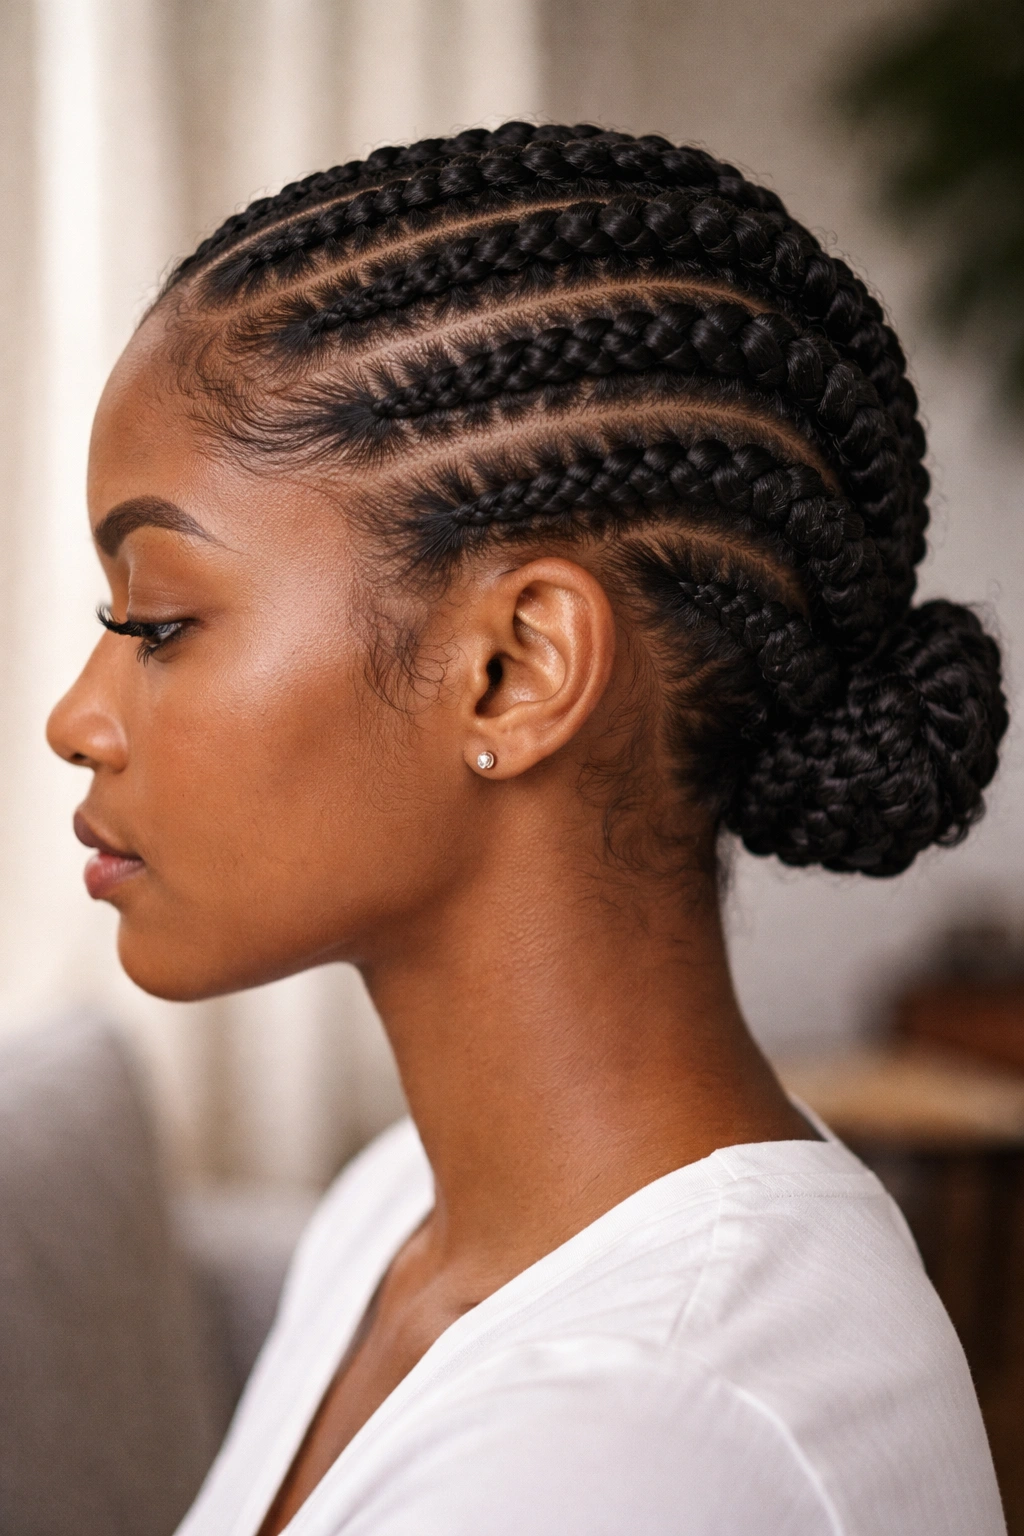
Flat twists are like regular two-strand twists, except you twist them flat against your scalp in the same way you’d do cornrows. This creates a gorgeous, sculptural look where the twist pattern is visible and structured. Flat twists are protective, look intentional, and can be worn for a week or two as a protective style. You can also add decorative elements like beads or wraps to make them even more striking.
Why Flat Twists Are Both Protective and Sculptural
A flat twist locks your hair into a tight coil that hugs your scalp, which means your hair is protected from friction and environmental stress. The structure of a flat twist also means you can create intricate patterns across your head — you’re not limited to straight lines like you are with cornrows. You can do them in a zigzag pattern, in loops, or in any design you want. Visually, they create a stunning textured pattern that looks intentional and polished. The tight structure also means they last longer than loose twists before they get fuzzy.
Creating Flat Twists That Actually Lay Flat
- Section your hair into the pattern you want to follow — straight rows, zigzags, or diagonal lines all work
- Apply leave-in conditioner and gel to the first section, smoothing it down
- Split the section into two strands and begin twisting them around each other while pushing the twist flat against your scalp
- Keep consistent tension so the twist stays flat and doesn’t bulge out from your head
- Continue twisting along the entire length, all the way to the ends
- Secure the end with a small clip, elastic, or by tucking it into an existing twist
- Repeat for all sections, then moisturize every few days
Pro tip: Flat twists look sharpest when they follow a clear pattern across your head — straight lines, zigzags, or curves that create visual interest.
12. Cornrows with Afro
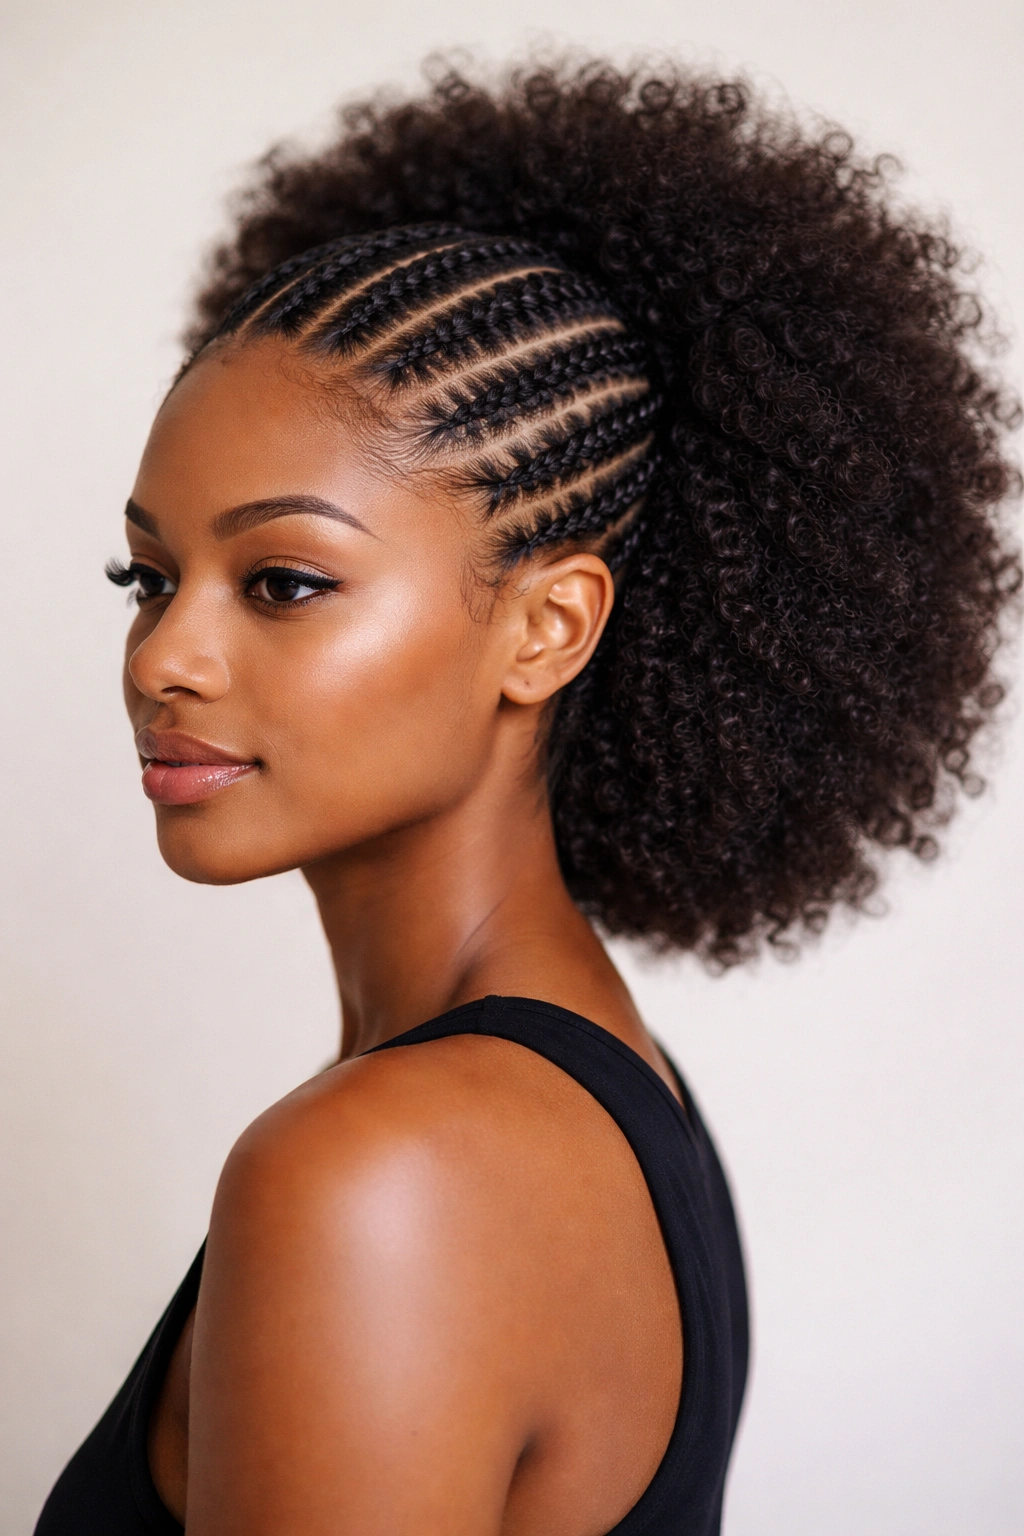
Cornrows with a free afro at the end is that perfect mix of protective and playful — you’re braiding close to your scalp for protection and practicality, but letting your natural curl pattern bounce free at the bottom. This style shows off both the technique of the braids and the beauty of your texture. You can do anywhere from 2-3 braids to a dozen or more, depending on how defined you want them to be.
Why Cornrows Protect While Showing Off Your Texture
Cornrows braid your hair close to the scalp, which means your hair is protected from friction and weather exposure along the length. But because your ends are loose and free, you’re not tucking away your curl pattern — you’re letting it shine. This style is protective without being completely enclosed, so it’s perfect for people who want protection but also want their natural texture visible. The combination also means you get two different textures in one style — the structured look of the braids and the softness of the free curls below.
Installing Cornrows That Look Polished and Even
- Create a clear parting pattern for your braids — straight lines, curved lines, or diagonal all work
- Section damp hair into the strands you’ll need for each braid
- Starting at the top of the first section, take three subsections and begin braiding close to your scalp
- Pick up new hair from the sides as you braid downward, adding each new section into the growing braid
- Continue braiding all the way down until you reach the point where you want the afro to start
- Secure the braids where they end, either with a small elastic or by tucking the ends into the braid itself
- Leave the ends completely loose and fluffy
- Apply leave-in conditioner and curl gel to the loose section and separate for maximum volume
Worth knowing: The tighter and more even your cornrows, the more polished the whole style looks — spend time getting the tension consistent.
13. Comb-Out High Puff
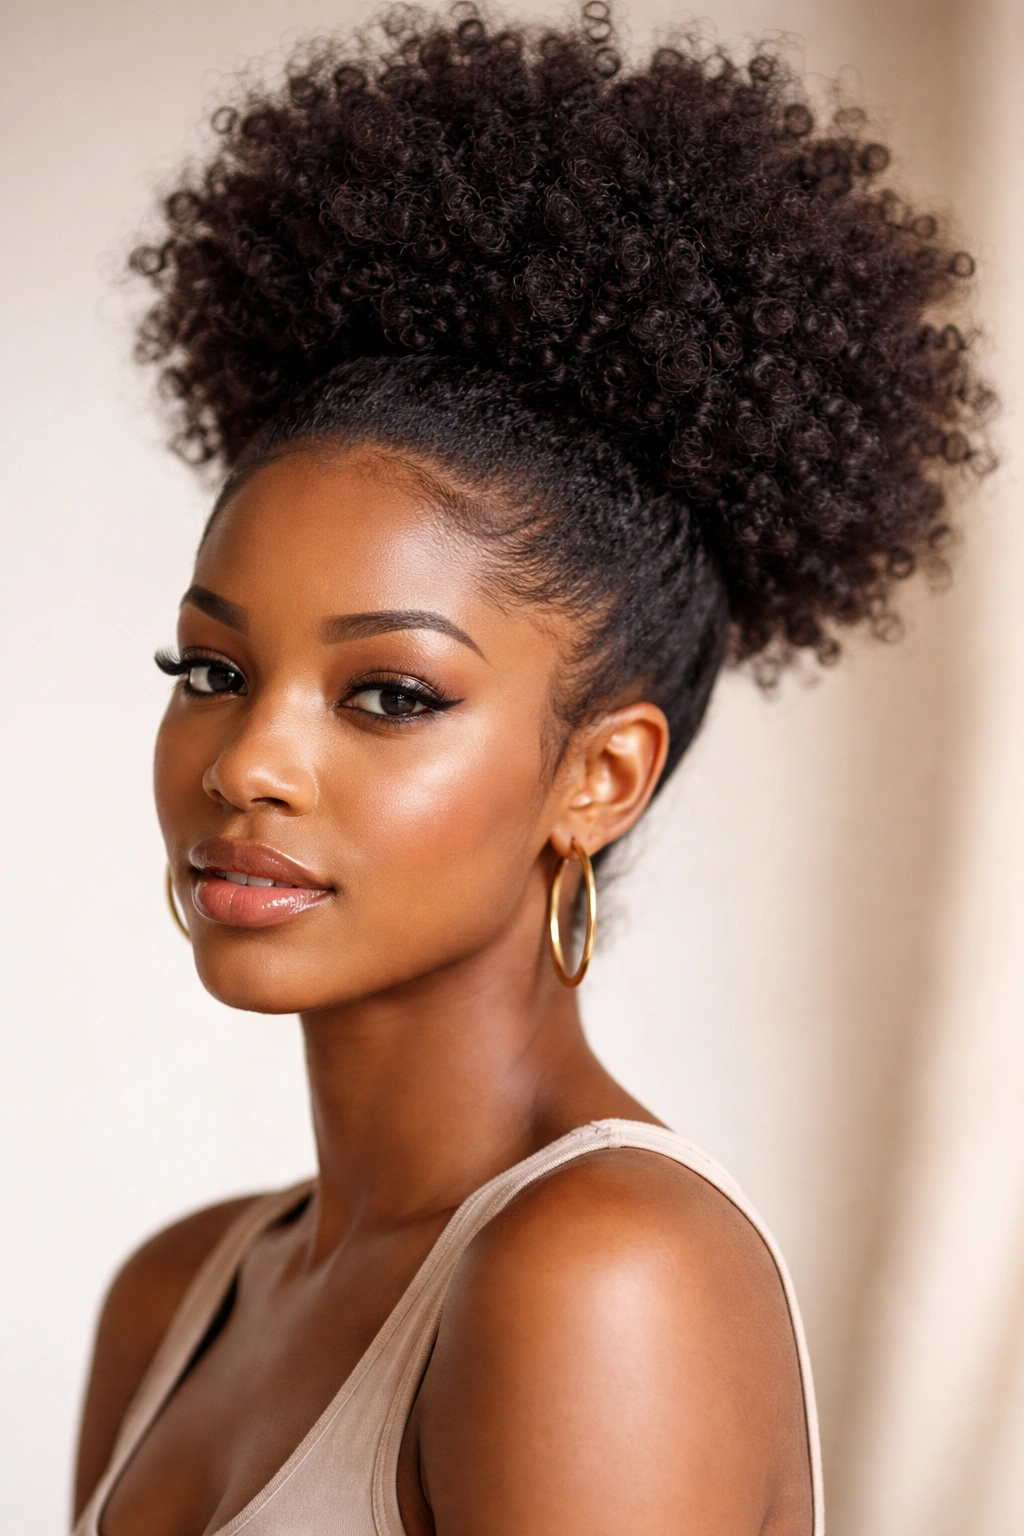
A comb-out high puff is one of the most satisfying styles to create because you’re using a comb to fluff your hair into an incredibly full, voluminous puff at the crown. The comb-out technique separates every curl and coil, creating maximum volume and that effortlessly full look. This style works especially well if you’ve had your hair in twists or braids and you’re taking them down and wanting to redistribute the texture.
Why Combing Out Creates Maximum Volume
When you use a wide-tooth comb to separate and fluff your hair, you’re essentially opening up your curl pattern and creating space between each coil. This space is what makes your hair look fuller and more voluminous. The more thoroughly you comb, the bigger and fluffier your puff becomes. A comb-out is especially effective on hair that’s been stretched in twists or braids, because the stretched hair is primed to expand and create that cloud-like texture when you separate it.
The Comb-Out Technique for Maximum Fullness
- Use a wide-tooth comb on damp or dry hair that’s been in twists, braids, or a wash and go
- Divide your hair into four or five sections to make the combing process more manageable
- Starting at the ends of the first section, comb gently downward to remove tangles, then gradually work your way up toward the roots
- Use an upward combing motion, starting at the roots and combing outward, to create lift and separate curls
- Be gentle — you want to separate coils without breaking hair
- Gather the combed-out section into a high puff at the crown
- Continue with the next section, combing and adding to the puff
- Once all sections are gathered and fluffed, secure the puff with a strong elastic
- Smooth flyaways with edge control and finish with a flexible hold hairspray
Insider note: A comb-out puff looks biggest and fluffiest when you do it on second or third-day hair rather than freshly washed hair — the strands have more texture and don’t separate quite as aggressively.
14. Braided Crown
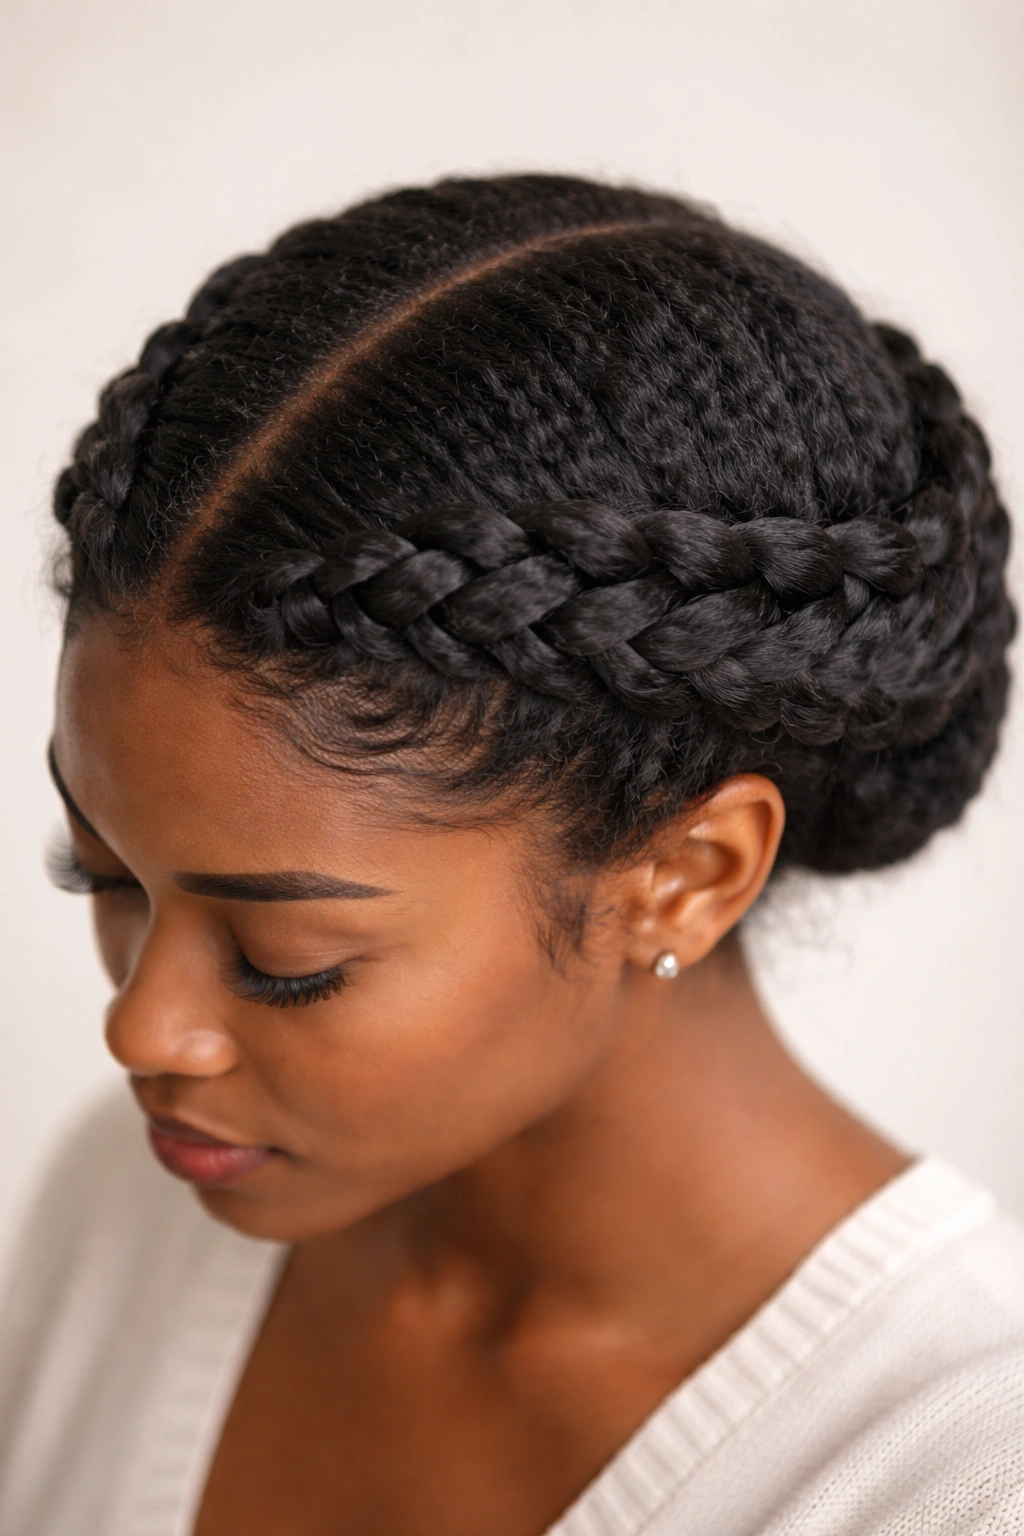
A braided crown is that stunning style where you’re braiding two sections from opposite sides of your head and bringing them together in the back, creating a halo or crown effect. It’s romantic, intentional, and way easier to execute than it looks. You can use regular three-strand braids, dutch braids, or two-strand twists — whatever you’re most comfortable with. This style works on any curl pattern and looks beautiful with loose curls flowing from the crown.
Why Braided Crowns Work as Both Protective and Decorative Styles
A braided crown gathers hair away from your face and keeps it off your shoulders, which is both practical and flattering. Because the braids are woven around your head, they’re relatively protected from friction and environmental stress. But because you’re leaving your hair down in the back, you’re still showing off your texture and length. The overall effect is polished and intentional without being a commitment to a full protective style.
Creating a Braided Crown That Actually Looks Like a Crown
- Create a deep side parting and decide which side you want your braids to start from
- Take a section from your temple on the first side and begin braiding (three-strand, dutch, or two-strand twists all work)
- Braid along your hairline, moving toward the back of your head and following the curve of your scalp
- Start the second braid on the opposite side, making sure both braids will meet in the back
- Braid both sides simultaneously so they meet at the same point in the back
- Secure both braids where they meet using bobby pins and a small elastic, or braid them together into one final braid
- Leave all your hair down and loose in the back, and style it however you want — curls, waves, coils, or a wash and go all work beautifully
- Use hairspray and edge control to smooth any flyaways
Pro tip: A braided crown looks more intentional when the braids are slightly loose and relaxed rather than super tight — it softens the whole look.
15. Straw Sets
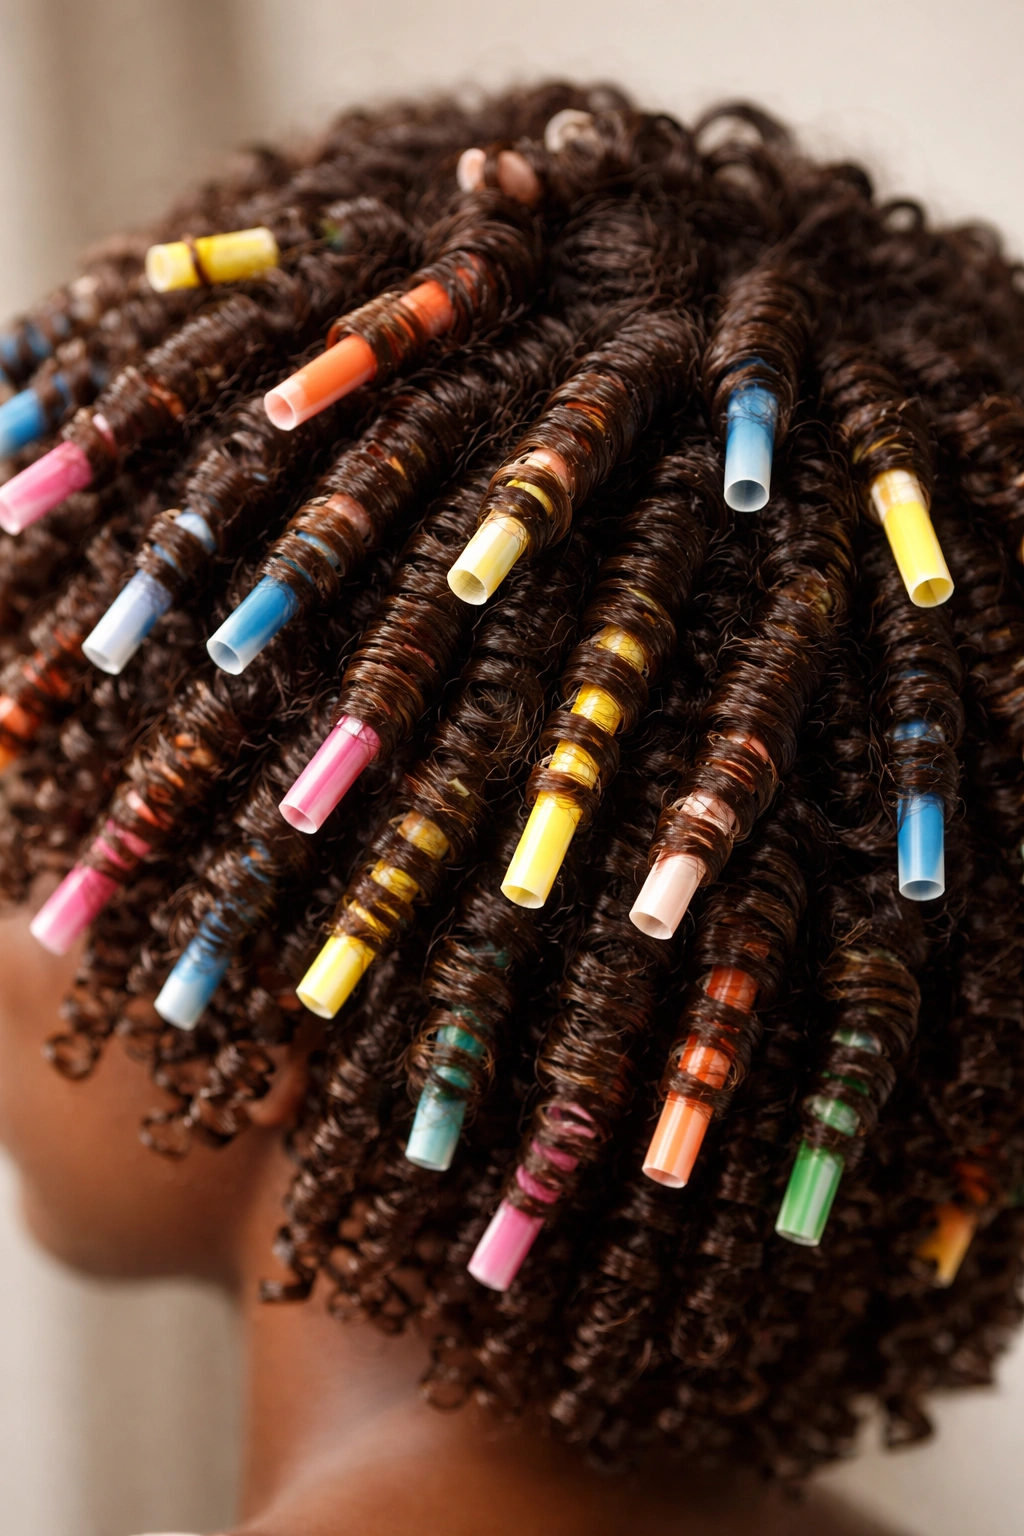
A straw set is a clever, old-school technique where you wrap damp hair around drinking straws, secure the ends, and allow your hair to dry. The straws create perfectly uniform, beautiful spiral curls that last for days. It’s an incredibly affordable method because you literally just need straws you probably have in your kitchen. The curls you get from straw sets are bouncier and more defined than many other methods, and they’re also heat-free and very gentle on your hair.
Why Straw Sets Create Consistently Beautiful Spirals
Straws are the perfect circumference for creating tight, springy curls that dry completely because air can flow through the center of the straw. The uniform cylinder shape means every curl is the same size, which creates a really cohesive, polished look. Straws are also small enough that you get lots of curl definition but large enough that the curls aren’t so tight they look unnatural. The smooth surface of the straw also creates smooth, shiny curls without any crimping or frizz.
How to Do a Straw Set Without Losing Your Mind
- Gather regular drinking straws (plastic straws work, but paper straws are softer and easier to sleep on)
- Section damp hair into as many sections as you want curls — typically 20-30 sections
- Apply leave-in conditioner and a light gel to each section
- Thread the hair through the straw, starting at the end of the strand and pushing upward toward your scalp
- Once the hair is threaded through, you can fold the straw in half and secure both ends with bobby pins, or use flattened clips to hold the straw ends closed
- Allow your hair to dry completely — overnight is ideal, or use a bonnet dryer for 2-3 hours
- Carefully remove the straws by unfolding them or sliding them out
- Gently separate the curls with your fingers for a fuller look
- Finish with hairspray to hold the curls in place
Worth knowing: Smaller straws create tighter curls and larger straws create looser waves — pick your straw size based on the curl definition you want, or mix sizes for dimension.
Final Thoughts
The most important thing to remember about natural hair styling is that consistency and repetition matter infinitely more than perfection. Your first faux hawk probably won’t look as intentional as your tenth one. Your first twist-out might have some fuzzy edges that your third one won’t. That’s not a failure — that’s literally how learning works. You’re building muscle memory, understanding how your specific hair responds to products and techniques, and developing your own style preferences along the way.
Real talk: not every style will work for your hair, and that’s completely fine. Your curl pattern, porosity, density, and the length of your hair all influence which styles will look their absolute best. A fine, loosely curled texture might create stunning coils while tighter spirals struggle to hold definition. A dense, thick texture might look incredible in flat twists while looser waves disappear. Experiment generously and pay attention to what actually looks amazing on you, not what looked amazing on someone else’s hair.
The other thing that changes everything is having good products and keeping your hair moisturized. All the technique in the world can’t create definition if your hair is dry and thirsty. Invest in a solid leave-in conditioner, a gel or cream that works with your texture, and an oil or butter for sealing. Learn your hair’s moisture-protein balance. Get comfortable with refresh techniques that keep your styles fresh for days. These fundamentals make every single style on this list look infinitely better and last infinitely longer. Your natural hair is genuinely stunning, and these 15 styles are just the beginning of what’s possible when you work with your texture instead of against it.
