



There’s something powerful about a woman over 30 who owns her natural hair completely. By this point in life, you’ve likely moved past trends that don’t serve you and gravitated toward what actually makes you feel like yourself — and when it comes to afro hairstyles, that confidence is magnetic. Your afro isn’t a phase or a statement you’re testing out; it’s part of your identity, and you deserve styles that honor that maturity while keeping you feeling fresh, versatile, and absolutely stunning.
The thing is, afro hairstyles for women in their 30s and beyond look different than they do for younger women, not because of any rule, but because your styling needs shift. You’re balancing professional environments, maybe family, definitely less time for fussy upkeep, and a clearer sense of what makes you feel like the best version of yourself. You want styles that deliver impact without demanding an hour at the mirror. You want your natural hair to feel like an asset, not a project.
What makes this moment in your life so ideal for exploring afro hairstyles is that you have the experience and confidence to pull off complexity with ease. You understand your hair’s unique texture, your face shape, your lifestyle demands, and what actually works versus what sounds good in theory. This isn’t your first rodeo with natural hair — you know the difference between hype and reality.
The styles ahead aren’t ranked by popularity; they’re organized to give you a complete toolkit of options, whether you’re after something that commands a room, something low-maintenance for everyday wear, something that protects your hair while looking polished, or something that lets you play with texture and dimension.
1. The Classic Blowout Afro
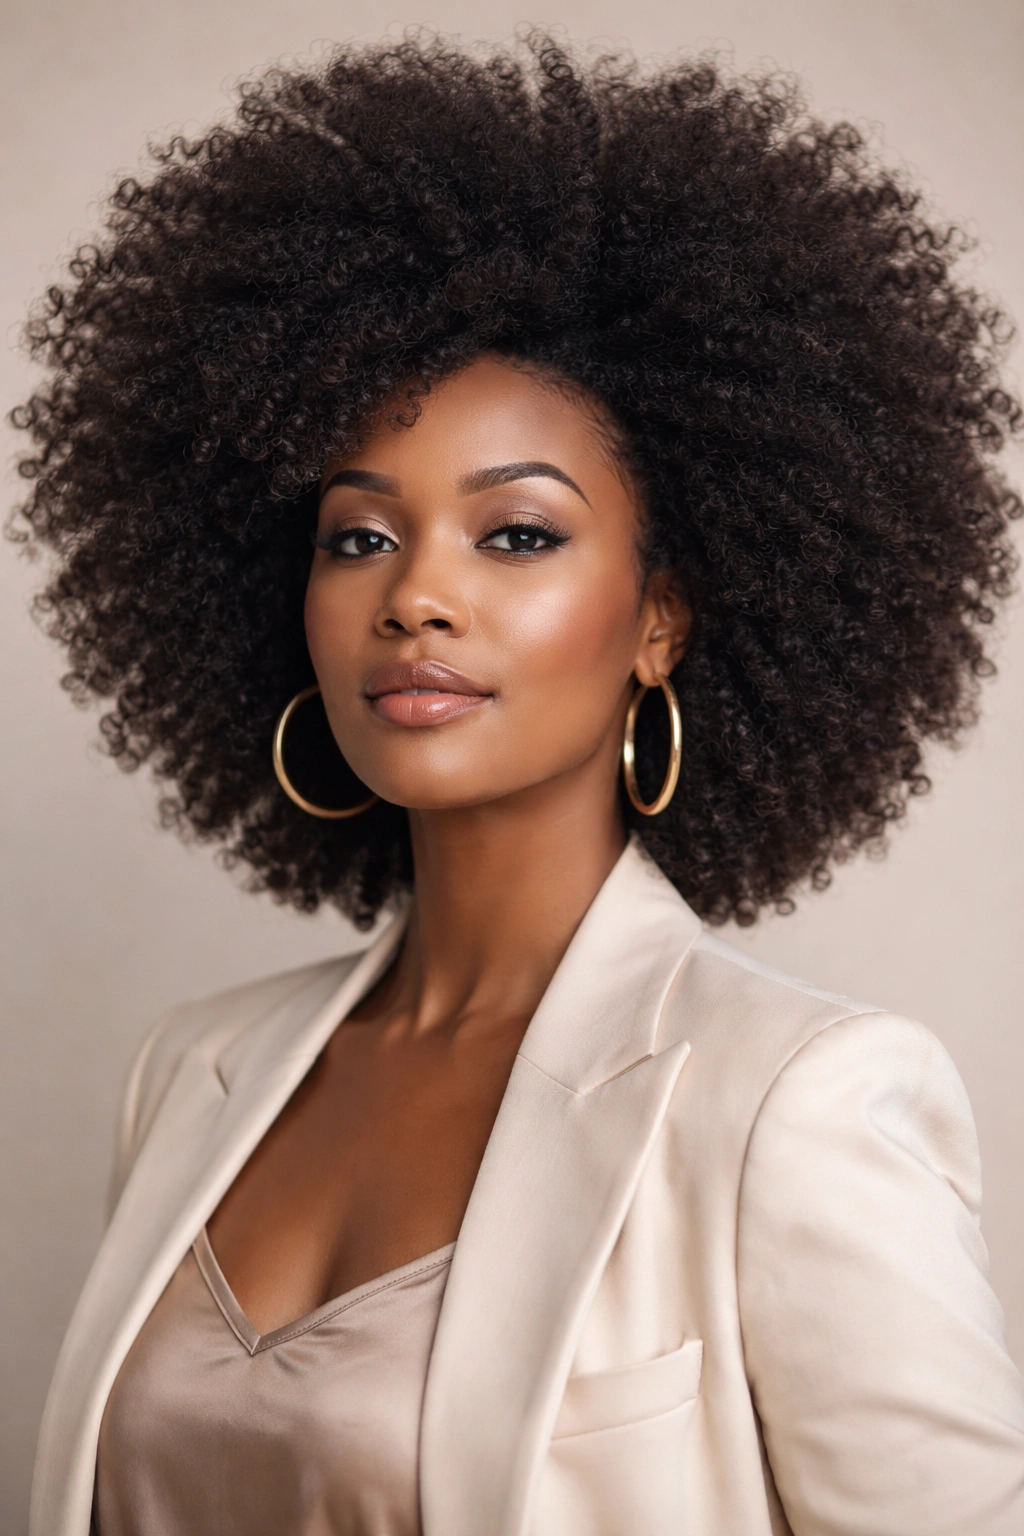
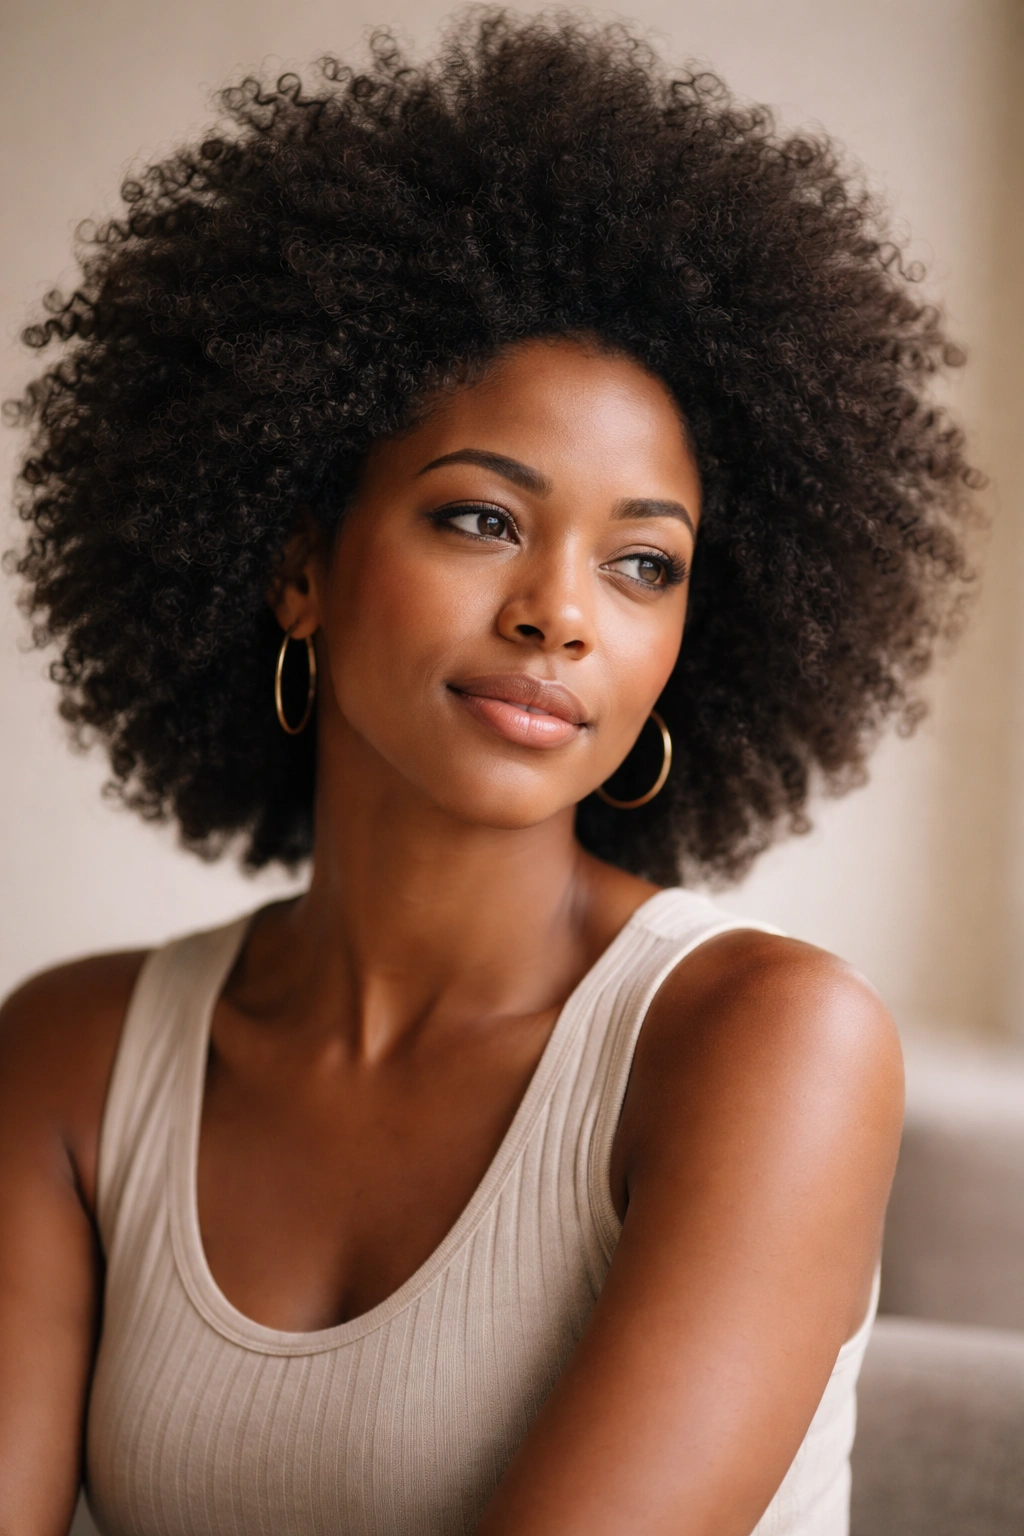
A true blowout afro is the ultimate statement — voluminous, rounded, and unapologetically textured. This isn’t the tightly curled afro of decades past; it’s a modern interpretation where your natural curl pattern is stretched and fluffed into a full, soft silhouette that frames your face beautifully. The volume sits directly from the roots, creating an almost cloud-like halo effect that photographs incredibly well and turns heads in any setting.
Why This Style Rocks for Mature Women
The blowout afro communicates confidence without requiring you to say a word. There’s an elegance to the simplicity — it’s essentially one style that works for multiple occasions, from a casual coffee date to a professional meeting. The stretched texture is less prone to frizz than you’d expect, which means your style can hold for several days with minimal touch-ups. You’re not fighting your natural hair; you’re enhancing what’s already there.
How to Create and Maintain It
- Use a blow dryer on medium heat (not high) paired with a diffuser attachment to avoid damage and frizz
- Apply a lightweight leave-in conditioner and styling cream to damp hair before blow-drying for definition and hold
- Section your hair into quadrants using clips, then blow-dry each section from root to tip, lifting as you go
- Finish with a light hand of product (oil or mousse) smoothed over the top layer for shine without weighing it down
- Sleep on a silk or satin pillowcase or wrap to preserve volume and moisture until your next wash
Pro tip: A blowout afro actually looks better on day 2 or 3 than it does immediately after styling, so don’t stress if it feels a bit flat right after you finish. The texture settles beautifully and becomes even softer.
2. Goddess Locs
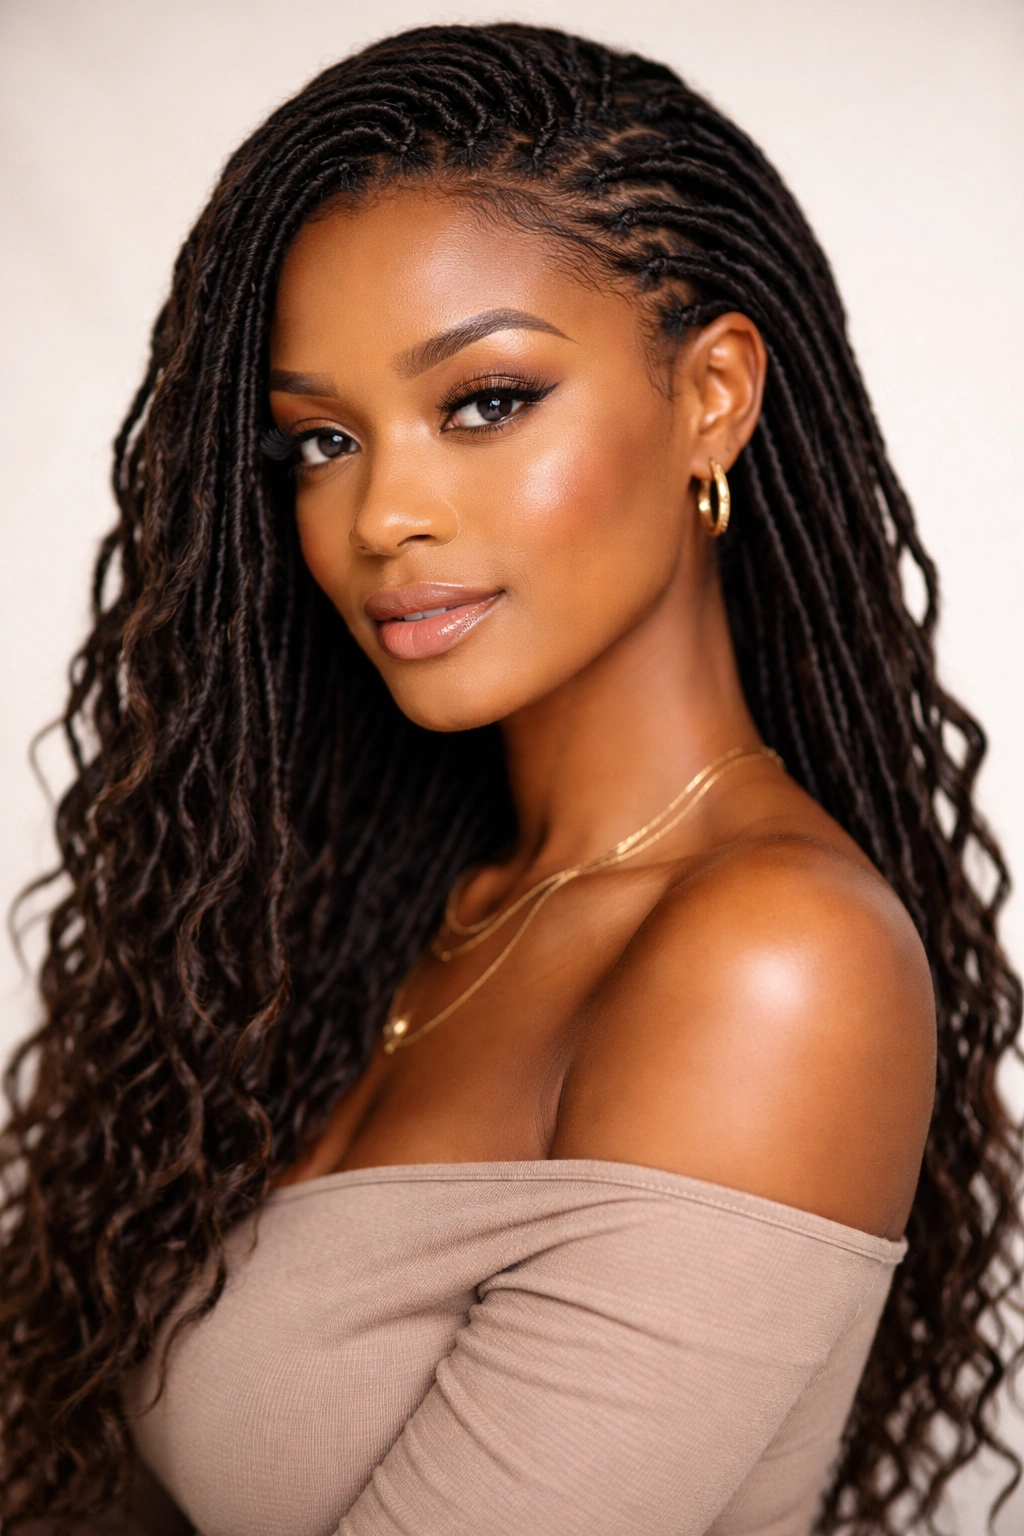
Goddess locs are a protective style with serious visual impact — thicker, smoother locs that sit close to the head and flow into loose, flowing ends. They look like a hybrid between locs and braids, often incorporating metallic cuffs, beads, or wrapped sections for added dimension. The “goddess” aesthetic comes from their elegant, elongated shape and the way they frame the face with a touch of mystique.
Why They’re Perfect for Your 30s and Beyond
Goddess locs offer the longevity and low-maintenance appeal of protective styling without looking overly trendy or temporary. They sit in that sweet spot of looking current without screaming “2024” or any specific year. The style protects your natural hair from daily manipulation and styling stress, which becomes increasingly important as you prioritize hair health over constant style changes. Plus, they’re sophisticated enough for professional settings while still making an artistic statement.
How to Get Them Right
- Book with a loctician who specializes in goddess locs and has a clear portfolio — technique matters significantly for how refined they look
- Expect the appointment to take 4-6 hours depending on your hair length and thickness
- Goddess locs work best on hair that’s at least 4-6 inches long for adequate grip and definition
- Maintain them with regular lightweight shampoos and diluted conditioner rinses every 1-2 weeks
- Retwist or maintain your locs every 6-8 weeks to keep them looking intentional and neat
- You can keep goddess locs for 3-4 months before they need to be redone or taken down
Worth knowing: Goddess locs are not permanent, so you can try this style without committing to traditional locs. This makes them ideal for testing the waters.
3. Sculpted Faux Locs with Definition Gel
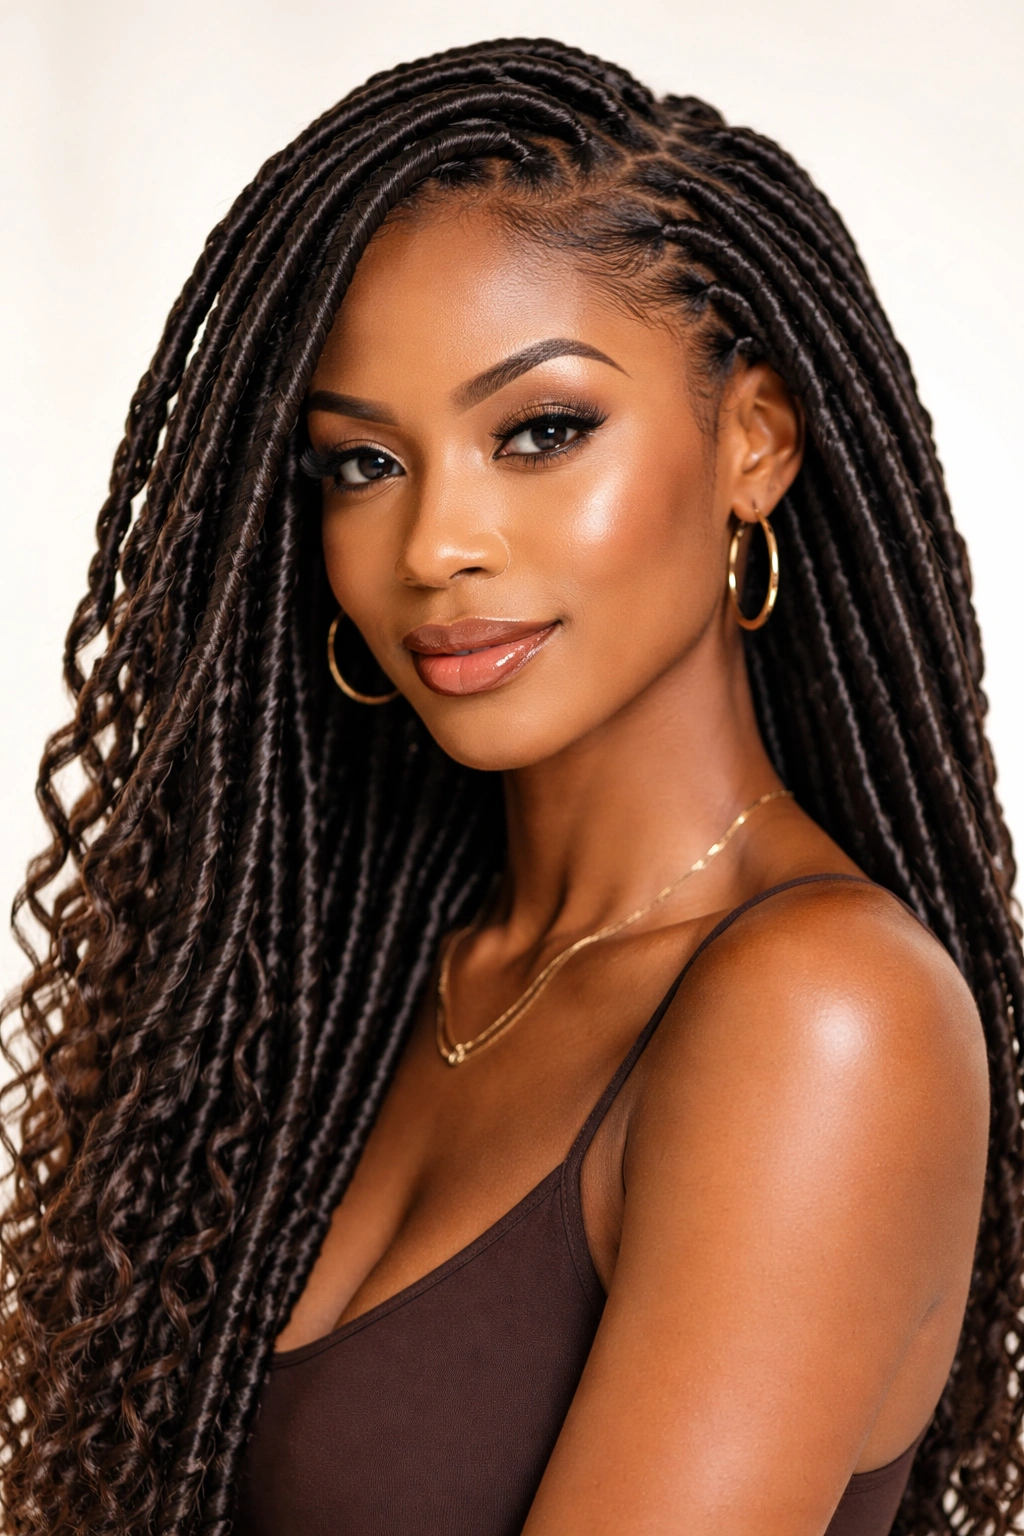
Faux locs are a temporary protective style where individual locs are braided using your natural hair as the foundation, often with added synthetic hair for length and volume. What makes the “sculpted” version different is the intentional use of definition gel or mousse to create clean, separated locs with visible texture and dimension rather than uniform smoothness. This version looks refined and intentional rather than casual.
Why Mature Women Love This Look
Sculpted faux locs deliver versatility that other protective styles can’t match. You can wear them down and full, pull them into a high puff, twist them up into a crown, or style them half-up, half-down depending on your mood and plans. The style reads as sophisticated rather than youthful, especially when you keep the color natural or go with subtle highlights. They protect your hair for 6-8 weeks while you go about your life, and they’re a fraction of the cost of real locs.
Styling and Maintenance Essentials
- Start with clean, moisturized hair that’s been pre-braided tightly at the roots for the smoothest look
- Faux locs can be interlocked at the roots for extra hold, or left as simple braids depending on your preference
- Wrap your locs at night with a silk scarf or sleep in a silk bonnet to prevent frizz and extend the life of the style
- Wash gently every 7-10 days using a diluted shampoo and focusing on the scalp rather than the locs themselves
- Retwist or palm-roll the roots every 2-3 weeks as your natural hair grows and the roots become loose
- Plan for removal to take 4-6 hours, so book your stylist in advance
Real talk: The best version of this style doesn’t look identical day one and day 30. The lived-in, slightly textured version that emerges after a few weeks actually looks more intentional and less costume-y.
4. High Puff with a Sleek Wrap
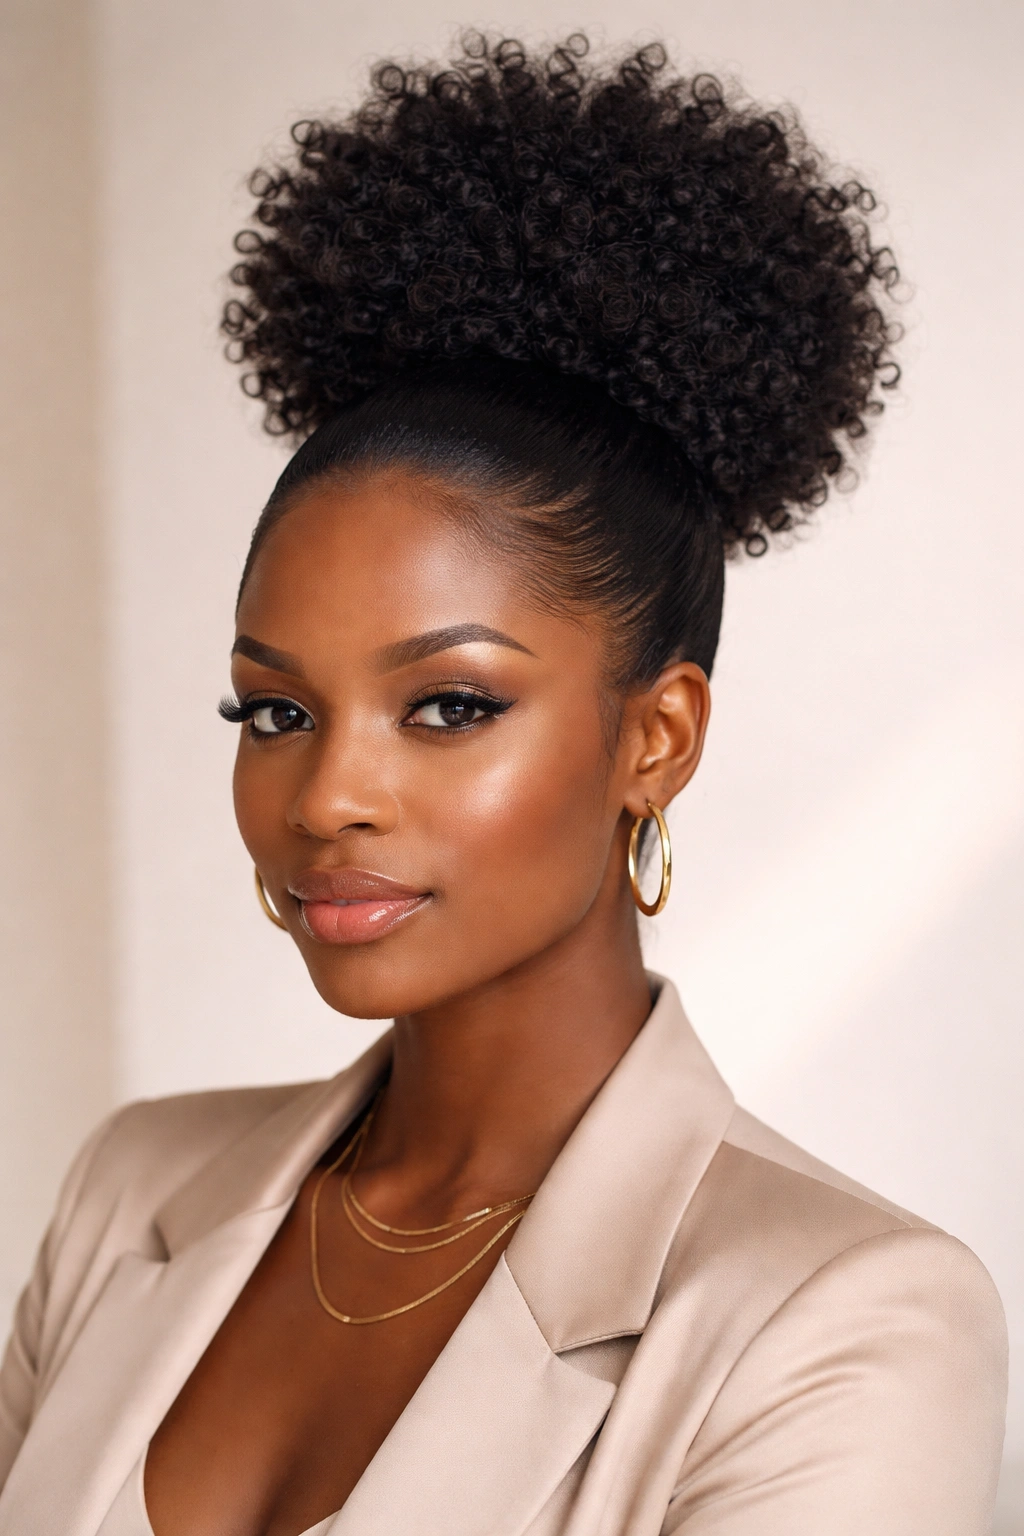
A high puff is a gathered ponytail of natural curls positioned at the crown, and the “sleek wrap” version means the hair leading up to the puff is smoothed down with edge control and possibly wrapped with small sections of hair for a polished, put-together look. This is the elevated version of a casual puff — it reads intentional and styled rather than thrown-together.
What Makes This Work for Women Over 30
A high puff is secretly one of the most versatile styles because it works in casual settings, professional environments, and anywhere in between. The sleek wrap version signals that you’ve taken time with your appearance, which resonates with the maturity and intentionality that define your 30s and beyond. It protects your ends while keeping your natural texture visible, and you can refresh it every few days without starting from scratch.
Techniques for a Polished, Professional Puff
- Apply a smoothing cream or gel to the hairline and brush-back section using a fine-tooth comb, creating a flat, even surface
- Gather the hair at your desired height (crown, back of crown, or high center-back) using a stretchy band or silk scarf
- Create a wrap by taking a small section of hair from the puff itself and winding it around the base to hide the band
- Secure the wrap with bobby pins that match your hair color
- Use edge control on your hairline and baby hairs, then smooth them in place with a soft brush — keep this sleek but not aggressively tight
- Style the puff itself: you can leave it loose and textured, smooth it slightly with light mousse, or even straighten the ends for contrast
Insider note: The most elegant puffs aren’t pulled so tight they look painful. A slight ease in the gathering makes the style look more sophisticated and is infinitely more comfortable.
5. Twist-Out with Defined Coils
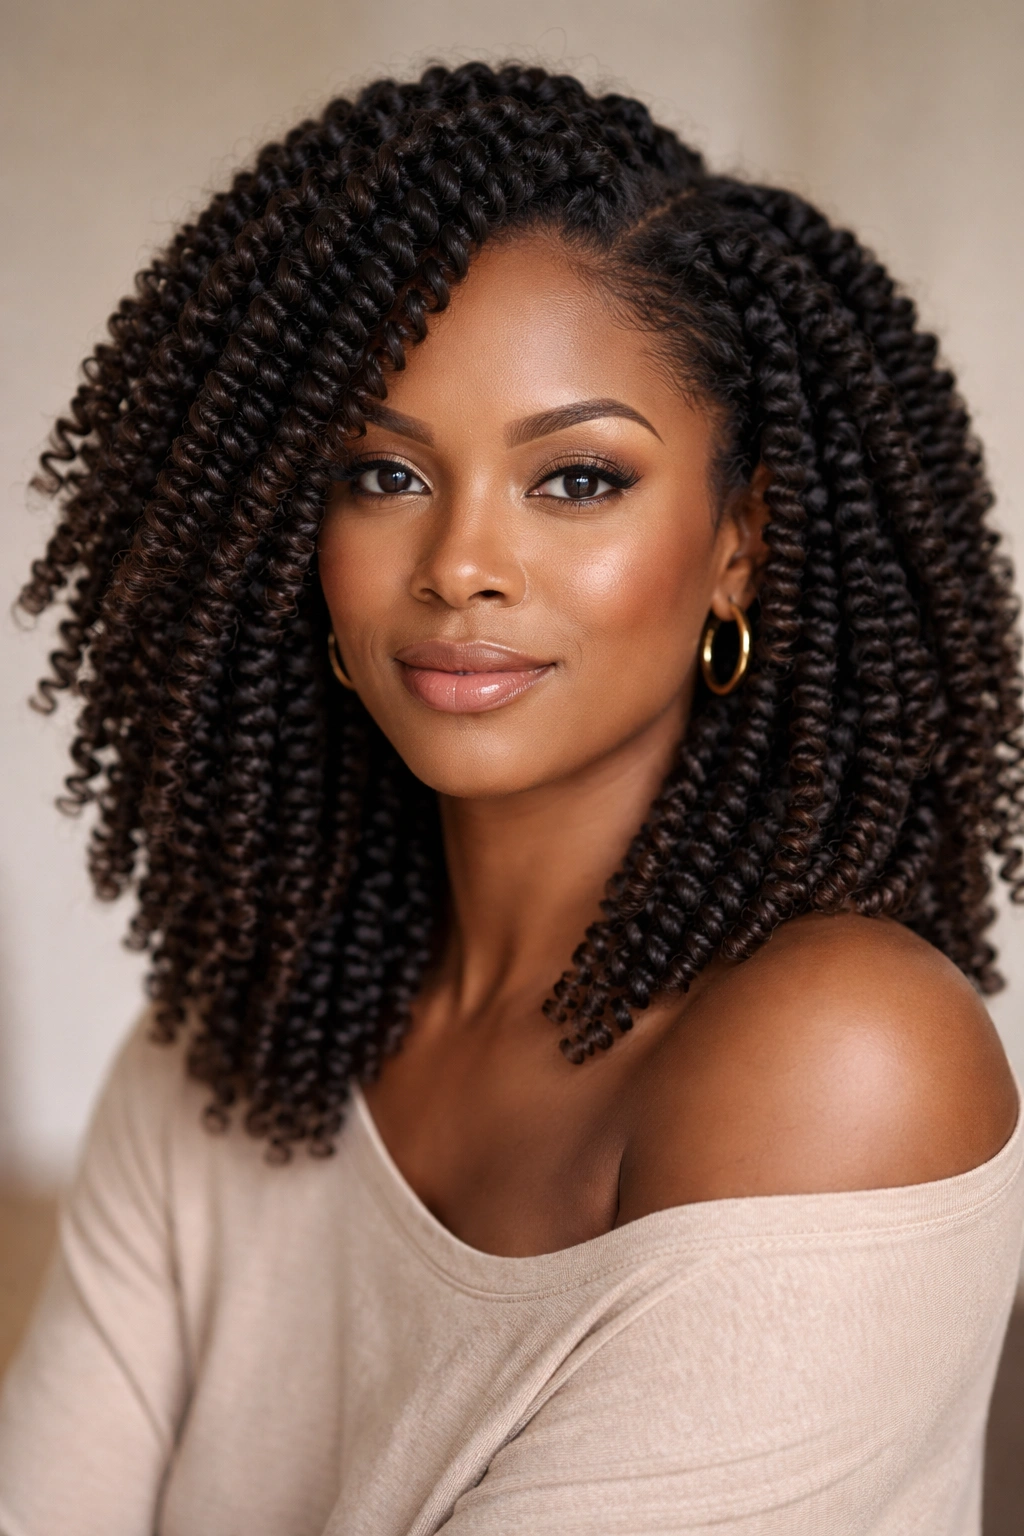
A twist-out is when you section your damp hair, twist each section around itself from root to tip, let it dry completely (ideally overnight or for 6-8 hours), then unravel the twists to reveal elongated coils and waves. The “defined” version uses styling products and technique to maximize the texture and separation between coils rather than letting them blend together into fuzz.
Why This Style Is Timeless for Natural Hair
A twist-out never goes out of style because it works with your hair’s natural texture rather than fighting it. It delivers volume and dimension without manipulation, heat damage, or commitment — you can untwist and start fresh in your next wash cycle if you want to try something different. For women over 30 who understand their hair, a twist-out is often the foundation of multiple other styles, so it’s a skill worth mastering completely.
Getting the Best Definition and Longevity
- Start with thoroughly detangled, damp hair — use a leave-in conditioner and detangling spray to minimize breakage
- Apply a styling cream, gel, or mousse to each section before twisting; the product choice dictates how defined your coils will be
- Twist firmly from root to tip, keeping tension consistent throughout — loose twists unravel more easily than tight ones
- Allow 6-8 hours minimum for the twists to fully set; overnight is ideal if you have time
- Untwist gently in the direction you twisted, starting from the end and working toward the root
- Fluff and separate the coils with your fingers to avoid a crunchy, one-note texture
- A light mist of water-based spray or a spritz of diluted leave-in conditioner refreshes your twist-out on day 2 or 3
Key insight: The way you twist (how tightly, what angle, how you section) directly changes your coil pattern, so experiment to find what creates the texture you actually want.
6. Crown Braids with a Free Puff
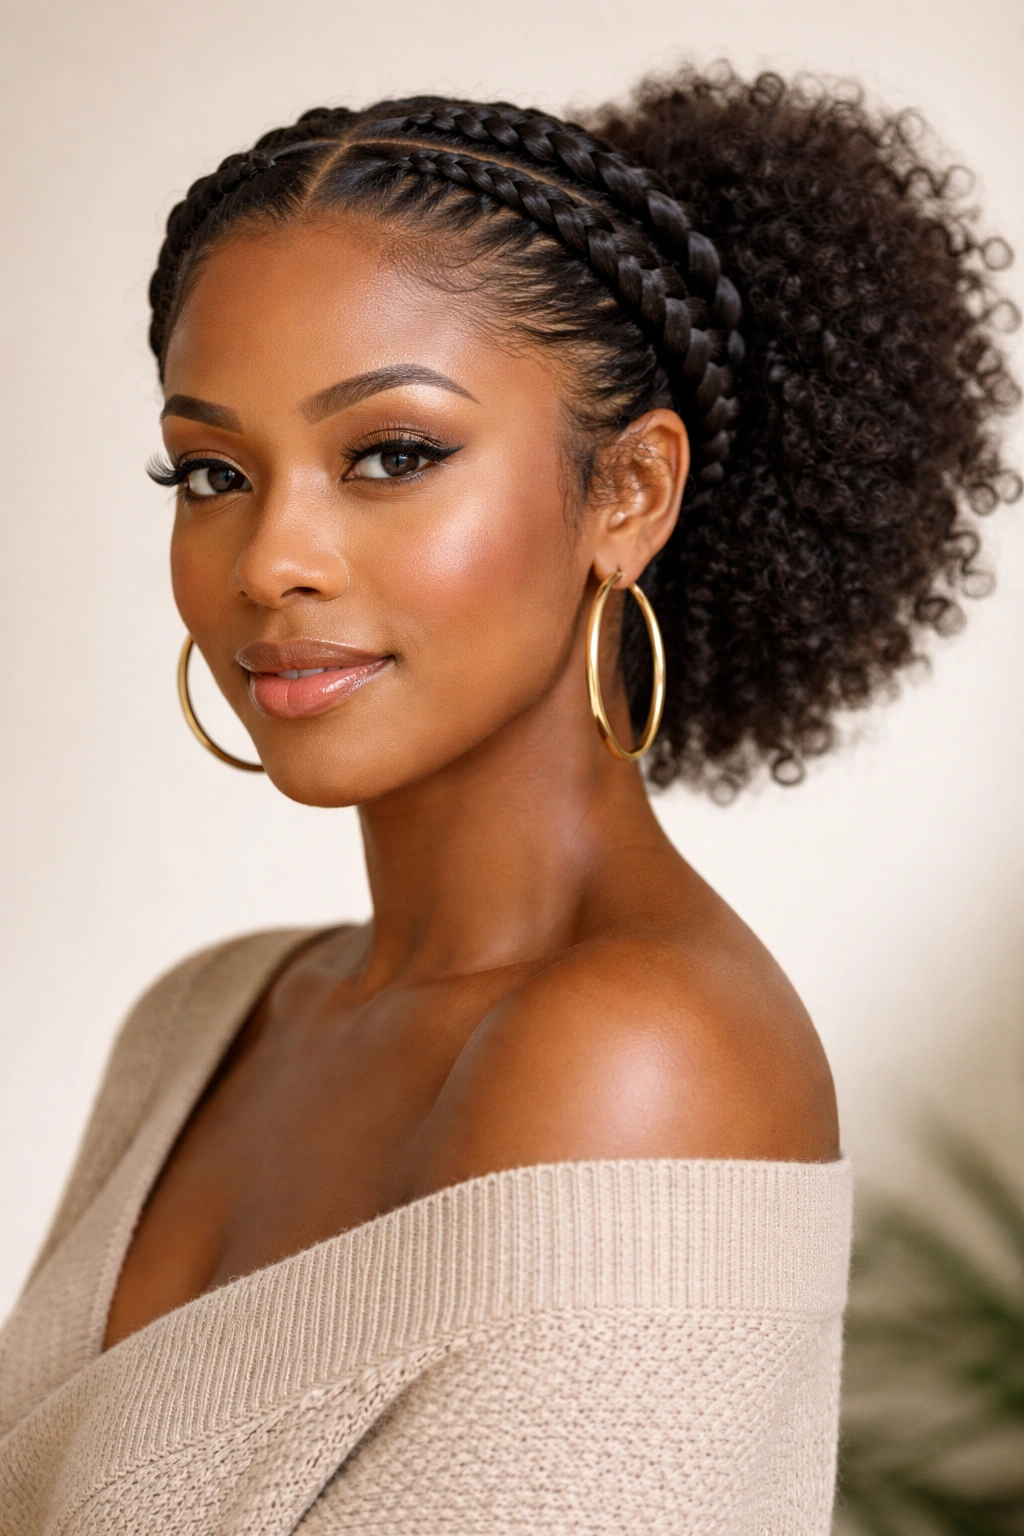
Crown braids are two or more braids that wrap around the head like a halo, with the remaining hair left down or gathered into a puff at the back. This version leaves a puff of natural curls or coils as the focal point, creating an almost regal silhouette that’s both protective and playful.
Why This Style Feels Fresh at Any Age
Crown braids read as thoughtfully styled without looking like you’re trying too hard. The braids protect the edges and top of your hair while allowing your natural texture to be the star. For women over 30, this style hits the intersection of polished and organic — it says you care about your appearance and your hair health equally. It works for date night, professional settings, and weekend outings with equal ease.
How to Braid and Shape Your Crown
- Section your hair into two or three parts along the natural part pattern you prefer
- Braid each section starting from the temple or side, weaving toward the back of the head
- Braids can be tight and neat or loose and textured depending on your preference and the occasion
- Tuck the ends of the braids under the puff section and secure with bobby pins
- Leave a generous section of hair at the crown and back (at least 3-4 inches) to gather into a puff
- Gather the puff loosely with a silk band for a soft, romantic look, or use edge control and a sleek band for a more refined version
- Smooth down flyaways with a light styling cream or edge control for a finished appearance
Pro tip: Crown braids look intentional and finished when they’re slightly textured and imperfect — don’t aim for hairdresser-level neatness. The looseness is what makes them feel effortlessly elegant.
7. Chunky Twist Updo with Exposed Hair
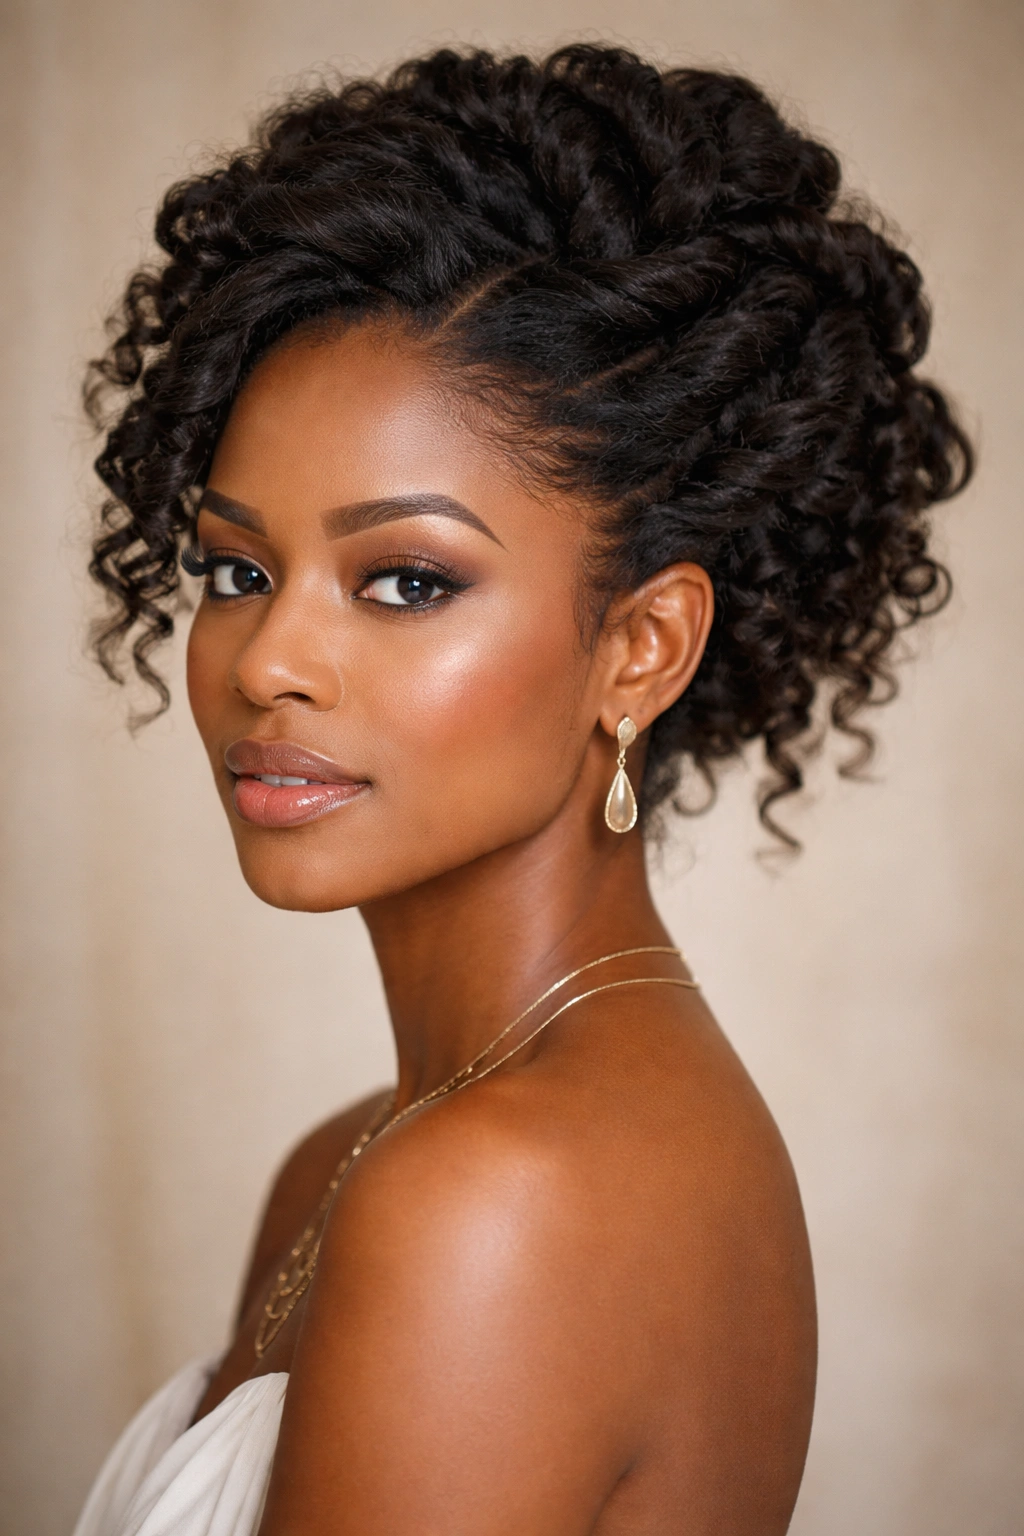
A chunky twist updo involves creating several large, loosely twisted or braided sections and pinning them into an updo at the back or crown, with some of your natural curls left exposed and visible rather than completely contained. This creates a textured, architectural look that’s undeniably chic.
What Makes This Perfect for Sophisticated Occasions
If you have an event coming up and want to look polished without looking like you’re wearing a costume, a chunky twist updo delivers. The exposed curls keep the style from feeling stuffy or overly formal, while the updo structure says you’ve put thought and effort into your appearance. This is the natural-hair equivalent of an elegant twisted bun — professional, refined, and completely appropriate for dinners, weddings, date nights, or professional events.
Creating a Structured Yet Textured Updo
- Section your hair into 3-5 large sections, depending on your desired thickness and how full you want the updo to look
- Apply a styling cream or mousse to each section to add hold and definition
- Twist or loosely braid each section from root to end, twisting with enough tension to hold shape but not so tightly that it looks uncomfortable
- Pin the sections into your desired updo shape — gather them all at the back, spiral them in the crown, or create an asymmetrical arrangement
- Leave some curls or coils hanging loose around the edges and at the nape for softness and textural interest
- Secure everything with bobby pins and finish with a light hairspray or holding mousse
- Add a decorative comb, clip, or hair stick if you want to elevate the style further
Worth knowing: The best version of this style actually sits somewhere between “perfectly polished” and “slightly undone.” That tension is what makes it look sophisticated rather than costume-y.
8. Knotless Box Braids in Jumbo Size
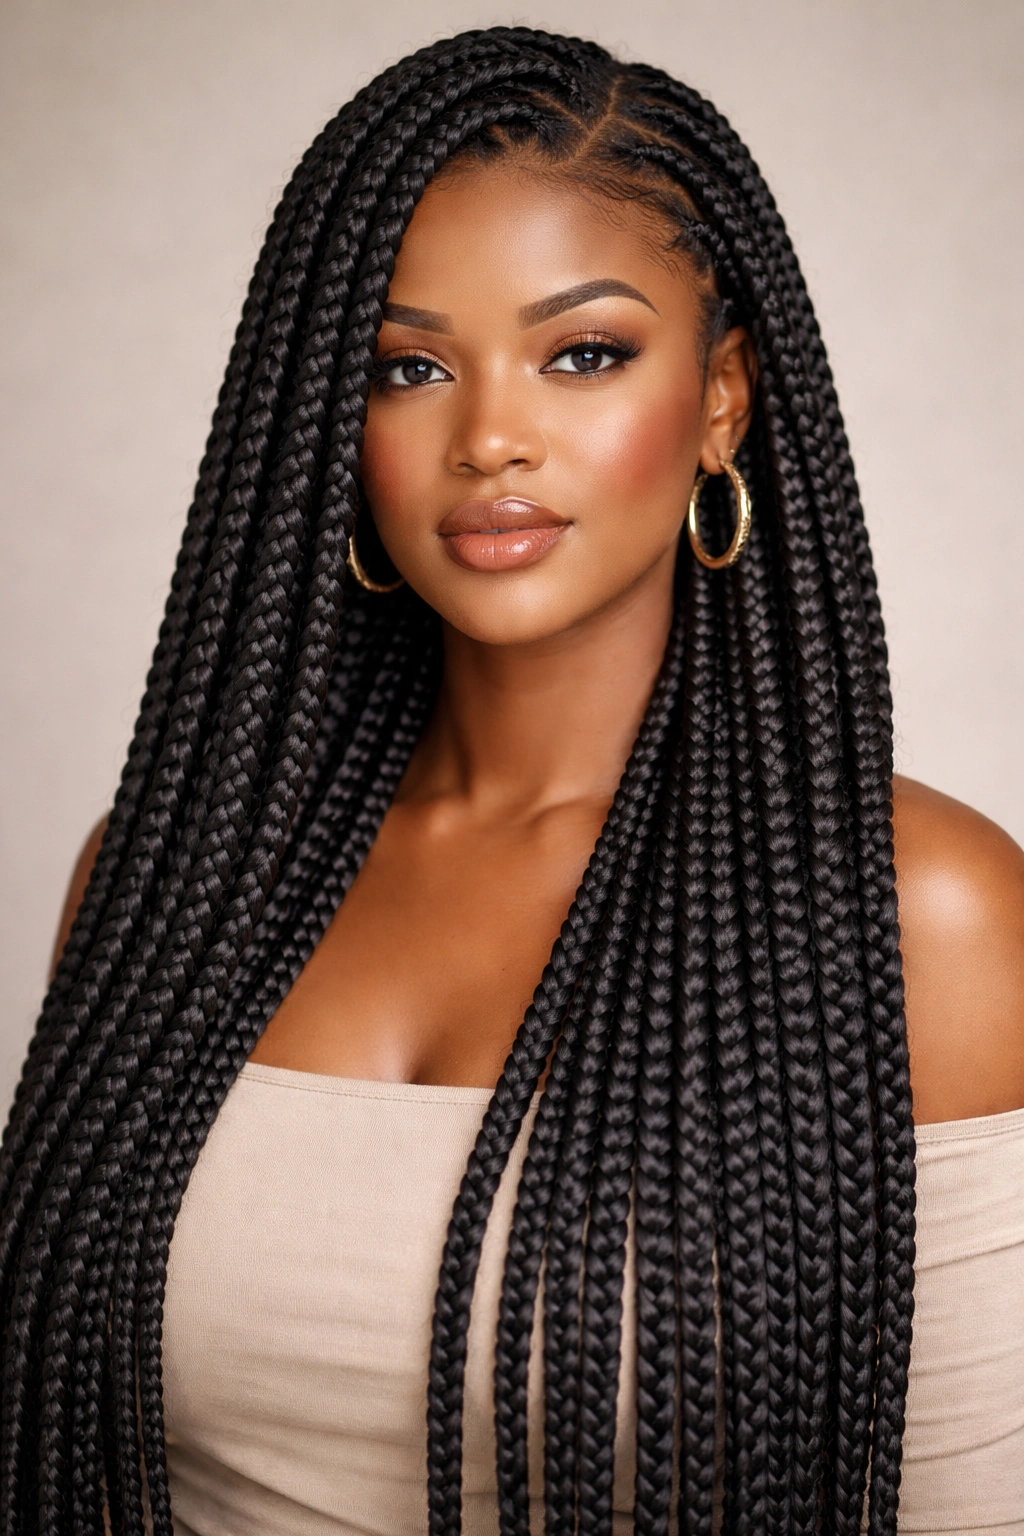
Jumbo knotless box braids are large, individually braided sections that start without the tight knot at the roots — the braiding begins cleanly at the scalp and flows down with a smooth transition. Knotless braids have become the preferred protective style because they’re gentler on the hairline and edges. Jumbo size means fewer braids covering more space, which creates an elegant, modern look.
Why Mature Women Are Choosing Knotless Styles
Knotless box braids represent an evolution in protective styling. They protect your hair just as effectively as traditional braids while being significantly easier on your edges and hairline — something that becomes increasingly important as we age and want to preserve every bit of our hair. The jumbo size reads as a deliberate style choice rather than a protective default, and they can be styled in countless ways depending on your mood and plans.
Getting the Best Results and Longevity
- Book with a stylist experienced in knotless braiding — this is a technique that matters; poor execution shows immediately
- Expect the appointment to take 3-5 hours depending on your hair length and the number of braids you’re getting
- Knotless braids work best when your natural hair is at least 3-4 inches long at the roots for a smooth transition
- Maintain them by washing gently every 10-14 days with diluted shampoo, focusing on the scalp
- Moisturize your scalp and the roots of your natural hair regularly with a lightweight oil or scalp spray
- Sleep on a silk pillowcase or wrap your braids in a silk scarf to preserve shine and reduce frizz
- Plan for these to last 6-8 weeks before you need to take them down or get them redone
Real talk: Jumbo knotless braids aren’t as protective as more densely packed braids, so they’re best for someone whose primary goal is looking stylish while giving their hair a break, not maximum protection.
9. Lemonade Braids with Decorative Elements
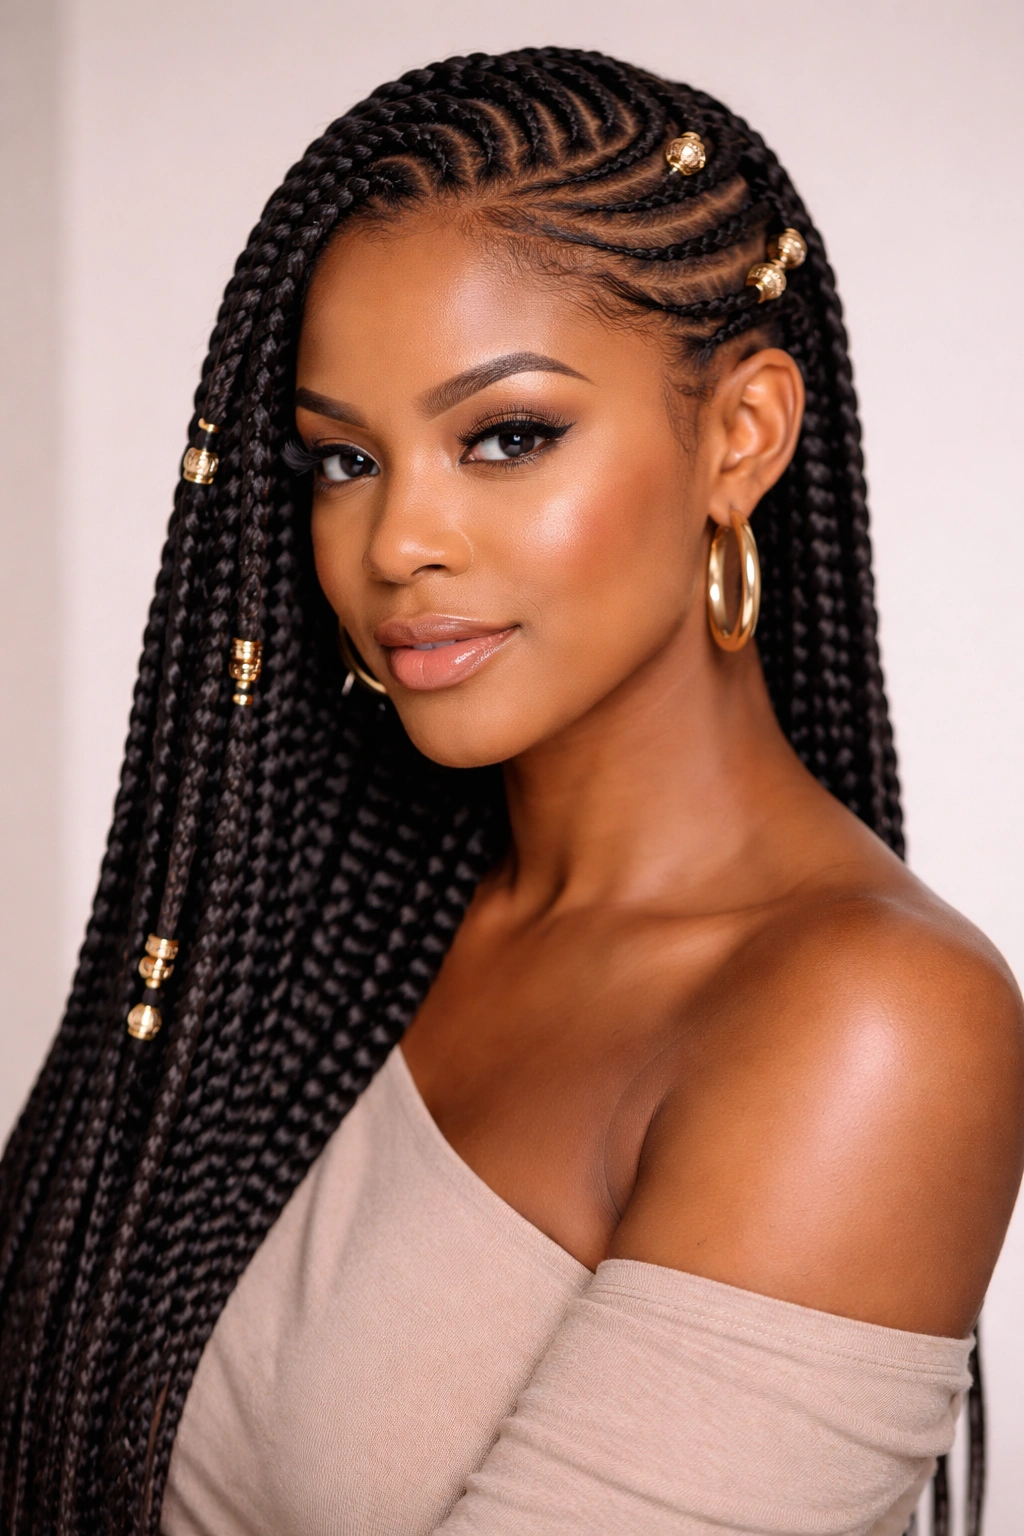
Lemonade braids are two thickly braided plaits that sit on either side of the head and sweep back toward the crown, often in a curved or S-shaped pattern. Decorated versions might include beads, cuffs, hair jewelry, or woven ribbons that add color and visual interest. This protective style has a playful, intentional vibe despite being functional.
Why This Works as a Mature, Polished Choice
Lemonade braids might sound young and trendy, but the key to wearing them with maturity is in the execution and the decorative choices you make. Use metallic cuffs instead of bright plastic beads. Stick with your natural hair color or subtle highlights rather than contrasting colors. Keep the braids thick and substantial rather than intricate and delicate. These choices transform the style from playful into elegant and completely age-appropriate.
Styling for Impact and Longevity
- Have your lemonade braids installed by a professional who understands the technique — the curve and placement matter significantly
- Braids should be smooth and well-defined rather than lumpy or uneven
- Choose decorative elements that coordinate with your skin tone and personal style — gold, silver, and rose gold metals work for most women
- Wrap your braids at night with a silk scarf or bonnet to preserve the shine and reduce frizz
- Wash gently with diluted shampoo every 10-14 days, focusing on your scalp
- Retwist any loose braids at the roots as needed, or have your stylist refresh them at the 4-week mark
- These can last 6-8 weeks, making them ideal for a planned trip or a season of simplified styling
Insider note: The elegance of this style lies in restraint. Fewer, thicker braids with minimal decoration read more sophisticated than many thin braids weighed down with accessories.
10. Soft Waves From a Wave Gel and Finger-Coil Method
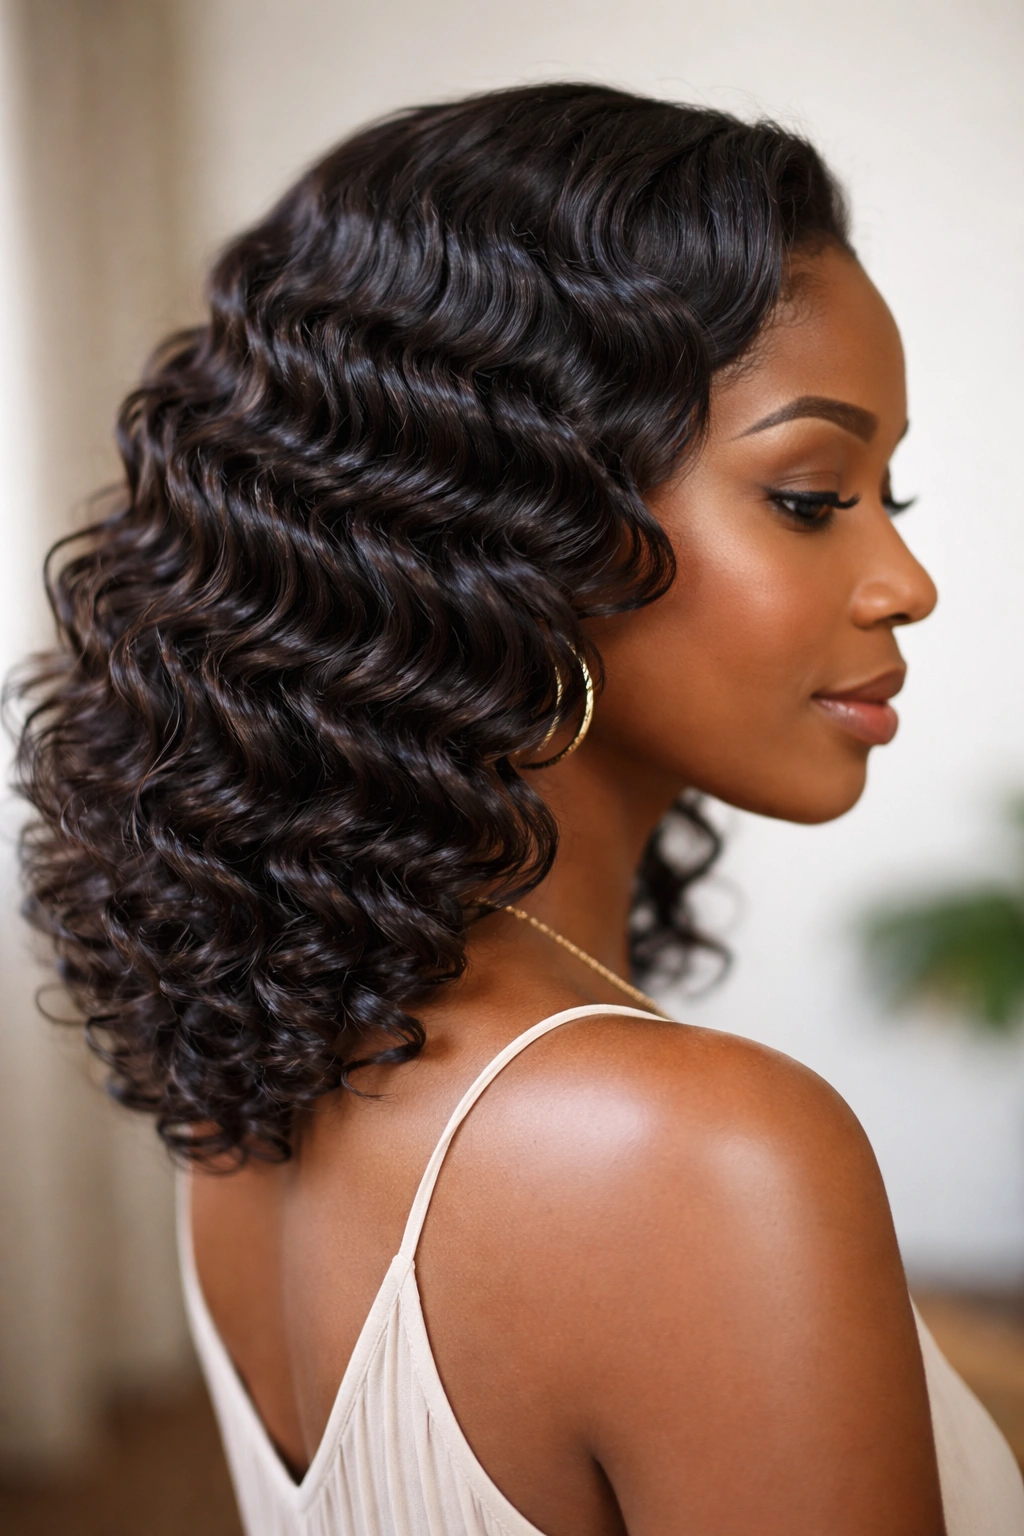
Soft waves are created by applying a lightweight wave gel to sections of your damp hair, then gently coiling each section around your finger (or a pin or rod) and allowing it to dry in that shape. When released, this creates defined but soft waves rather than tight curls. This method celebrates your natural curl pattern while adding intentional texture and dimension.
Why This Low-Manipulation Style Suits the Over-30 Mindset
At this point in your life, you likely have a clear sense of what actually makes you feel beautiful and what’s just busy or fussy. Soft waves hit that middle ground — they’re visibly styled without looking overdone, they take minimal time to create once you understand the technique, and they work for nearly every occasion without modification. This is the kind of style you’ll actually wear regularly because it’s genuinely easy to maintain.
Creating and Refreshing Your Waves
- Start with clean, damp hair and apply a lightweight leave-in conditioner throughout
- Apply a wave gel or light styling cream to small sections (about 2 inches wide)
- Wrap each section gently around your index or middle finger, creating a coil shape
- Hold for a moment, then gently slide your finger out, leaving the coil to set
- Repeat throughout your hair, working in one direction so all waves flow the same way
- Allow 6-8 hours for the gel to fully set — overnight is ideal
- Gently release the coils by unraveling them in the direction they were coiled
- Fluff lightly with your fingers to separate the waves
Pro tip: You don’t need heat to create beautiful waves — this method works because of how the gel holds the shape while your hair dries. Low heat or no heat means healthier hair over time.
11. Sleek Side Part with Curled Ends
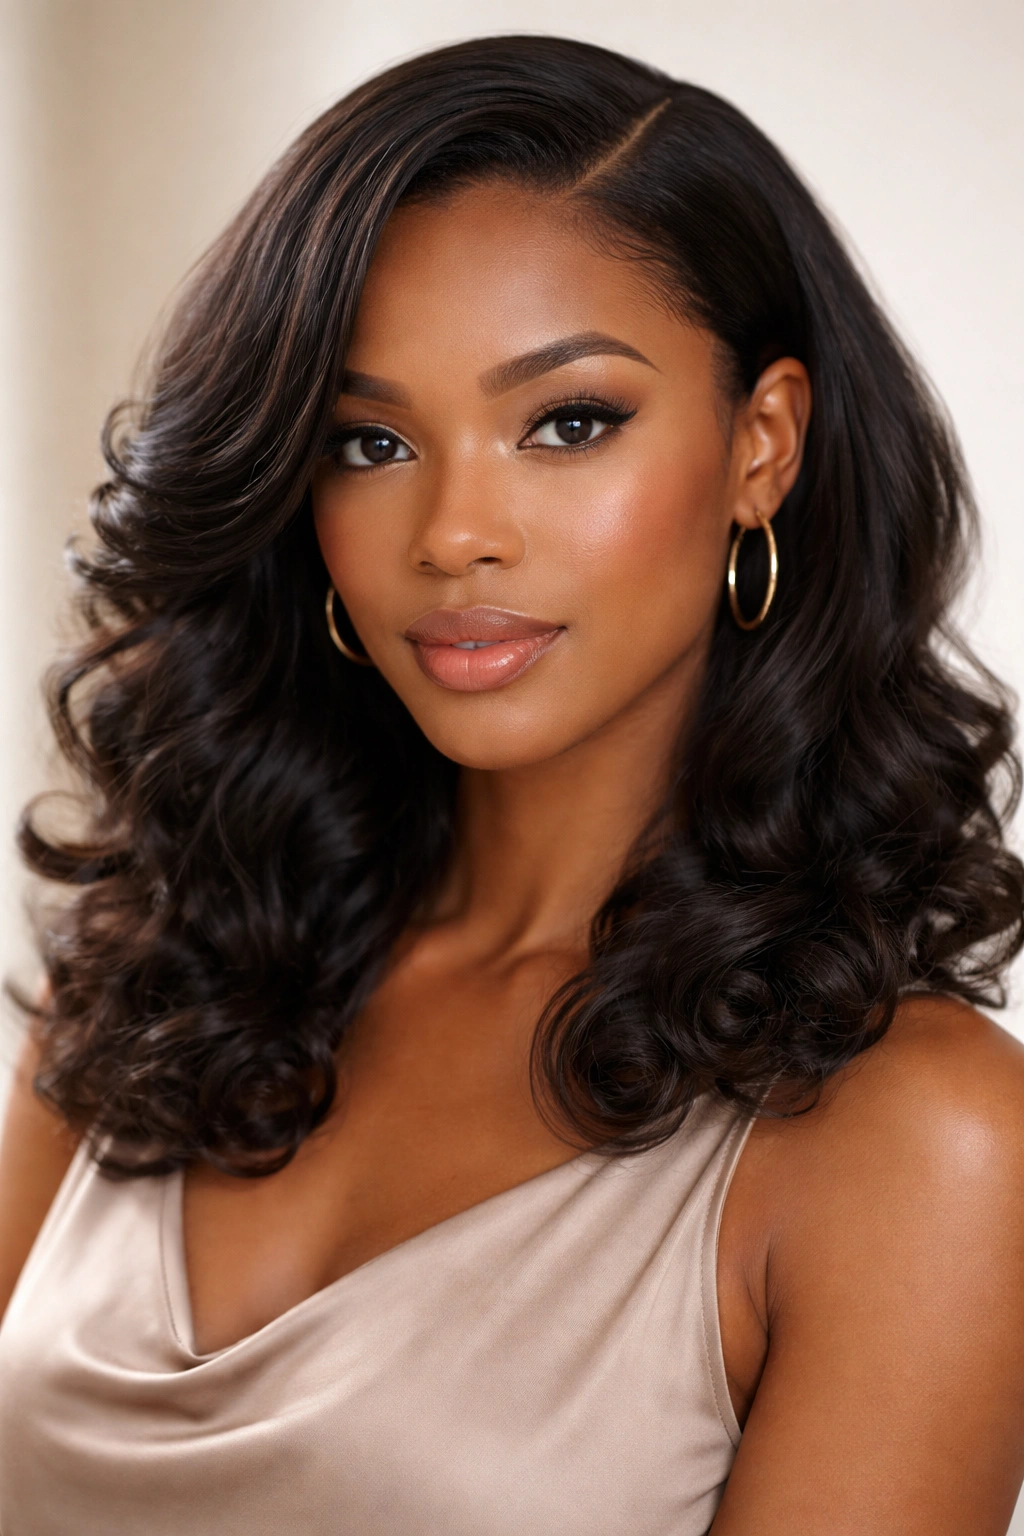
This style starts with a sharp, intentional side part that’s smoothed down with edge control and a fine-tooth comb, while the bulk of your hair is left to display your natural curl pattern. The curl or coil texture is either left as-is or enhanced with a lightweight mousse or gel. It’s simple yet striking.
Why This Effortless-Looking Style Actually Works Beautifully
A sleek side part reads as intentional and finished while requiring minimal actual effort. The juxtaposition of the sharp part against your natural curls creates visual interest — it says you understand proportions and balance. For professional settings, this style is completely appropriate and never reads as “trying too hard.” For casual wear, it’s chic and modern. It’s the kind of style you can do in 5 minutes on a regular day and still look like you got it right.
Technique for a Sharp Part and Polished Look
- Use a rattail comb to create a sharp, clean line from your forehead back along your scalp
- Apply edge control or a smoothing cream to both sides of the part, smoothing the hair away from your face
- Brush or comb the separated sections gently to create a sleek surface
- Leave your curls loose at the crown and back, or apply a light mousse to them for definition without crunch
- The longer your hair, the more dramatically the part will sit, so consider your preference for sharpness
- You can refresh this look daily by simply redefining your part and smoothing the edges
- At night, wrap your hair in a silk scarf or bonnet to preserve the part and protect your curls
Real talk: The sharpness of your part is directly determined by how clean your sectioning is and how much product you use. Less product actually looks better — it should be sleek, not shiny or crunchy.
12. Twisted Crown with Textured Edges
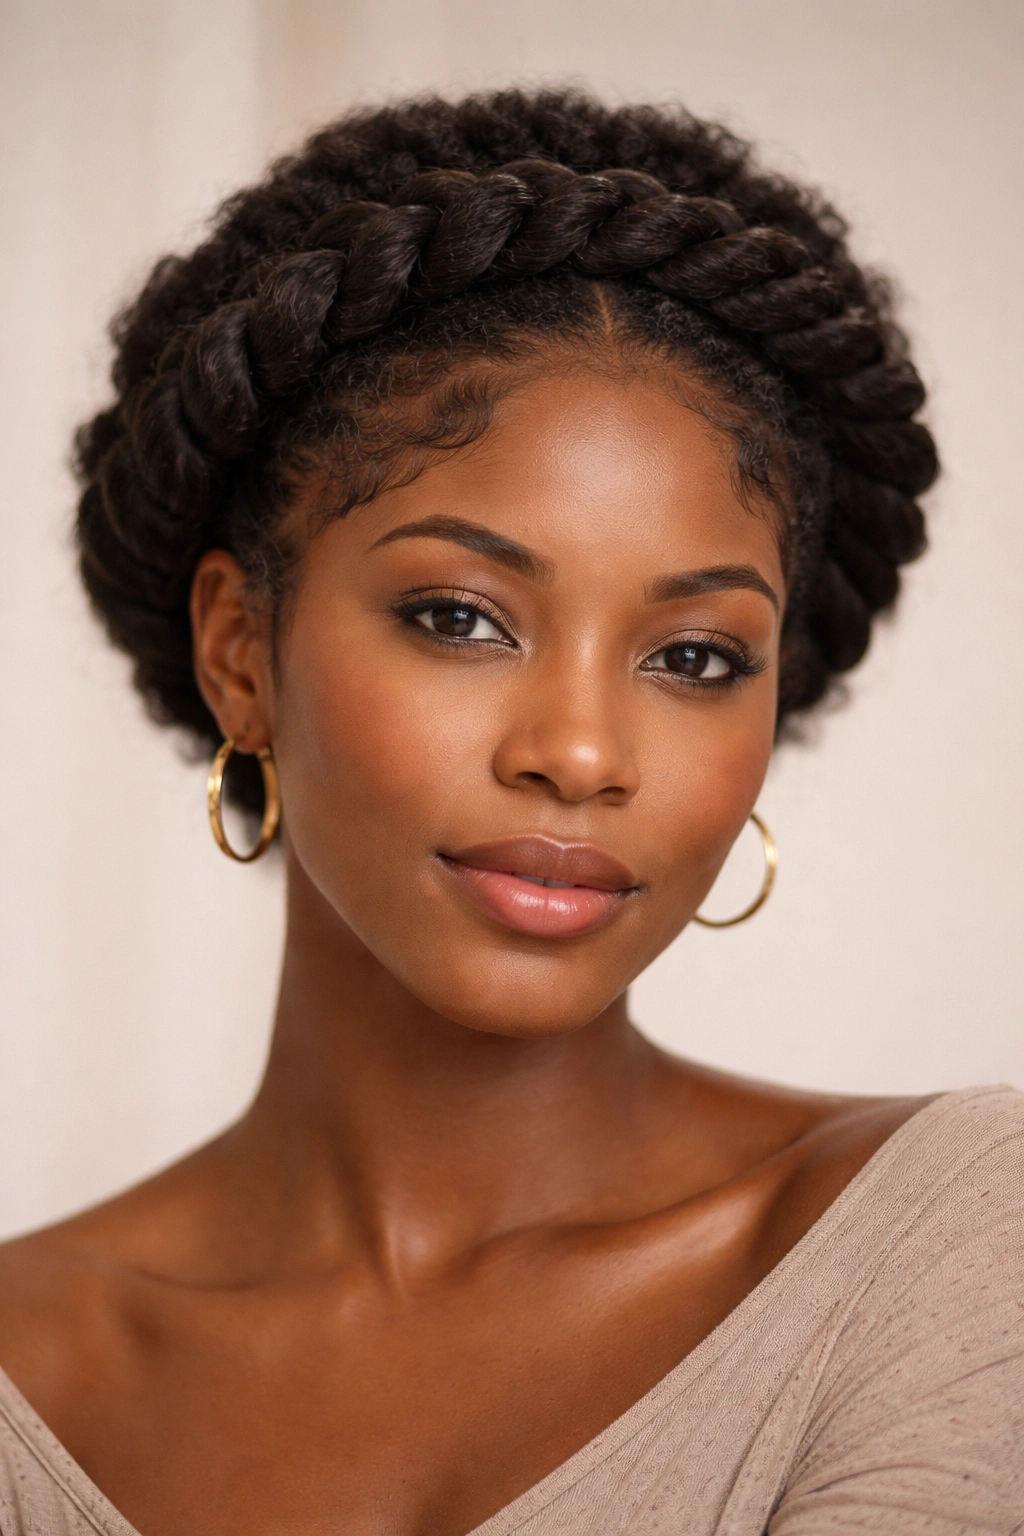
A twisted crown is essentially two large twists that wrap around your head like a crown, with the remaining hair left down to display texture and curls. Unlike crown braids, which are separate and distinct, twisted crowns create a smooth, unified frame around your head. The “textured edges” means your hairline and the edges around the style are left natural and curly rather than slicked down.
Why This Celebrates Your Natural Hair at Its Best
This style beautifully bridges the gap between protective and fully natural. The twists protect the vulnerable crown area while your edges and remaining hair display your authentic texture. It says you’re confident enough to show your natural pattern without needing everything smoothed into submission. For a woman over 30, this is a powerful statement — you’ve moved past the need to control every aspect of your appearance and can celebrate what’s actually there.
Creating the Perfect Crown Twist Setup
- Section your hair into two equal parts down the center of your head from forehead to nape
- Apply a lightweight styling cream or mousse to each section
- Starting at one temple, twist the first section around itself toward the back of your head
- Pin the twist along the back of your head, securing it with bobby pins that match your hair color
- Repeat with the second section on the other side, twisting toward the back and pinning it alongside the first twist
- Leave your natural texture visible at the crown and throughout the remaining hair
- You can leave edges completely natural, or apply a tiny bit of light cream for definition — your choice determines whether the look is relaxed or polished
Worth knowing: Twisted crowns actually look better with a few days of texture and definition rather than immediately after styling. The twists settle and the style develops more personality as the days pass.
Final Thoughts
The best afro hairstyle for your 30s and beyond isn’t the one that looks “right” on Instagram or the one that a stylist tells you will suit you. It’s the style that actually fits into your real life — your job, your schedule, your climate, the amount of time you’re genuinely willing to spend maintaining it, and your actual hair texture and density, not the hair texture from a video you saw online.
Real styling confidence doesn’t come from memorizing techniques; it comes from understanding your own hair so completely that you know exactly which styles will work, which ones need modification, and which ones are beautiful in theory but impractical for you personally. That level of knowledge is something only you can develop about your own hair.
What’s changed by your 30s is that you’re not trying styles to prove a point or test an identity. You’re choosing styles that make you feel like yourself at your best. That’s what makes the difference between a style you wear and a style that actually sticks.
