



Afro twists are having a serious moment, and honestly, they deserve the attention. Whether you’re protecting your natural hair, creating texture and dimension, or just wanting a style that looks polished without requiring daily styling, twists deliver on all fronts. The beautiful thing about twist styles is their versatility — they work on multiple hair types, can be dressed up or worn casually, and they genuinely give your hair a break from manipulation while still looking intentional and gorgeous.
The thing that makes springy twist styles particularly appealing is how they combine the protective benefits of a classic twist with movement and visual interest. Unlike flat twists that hug the scalp, springy twists have bounce and volume. They catch light differently, they feel different when you move, and they photograph beautifully from every angle. Plus, they tend to last longer than looser twist styles because the texture holds better as your hair grows out.
What surprises most people is how much the technique matters when you’re creating twists that stay springy and defined. It’s not just about sectioning your hair and twisting — it’s about tension, how you anchor the twist at the root, what products you’re using, and how you set the style after installation. The right approach can mean the difference between twists that start to unravel by day three and ones that look fresh for weeks.
Let’s walk through eight springy afro twist styles that work across different hair textures, head shapes, and personal style preferences. Each one offers something distinct, and you’ll find options whether you’re looking for something you can install yourself or styles that benefit from professional help.
1. Two-Strand Twists
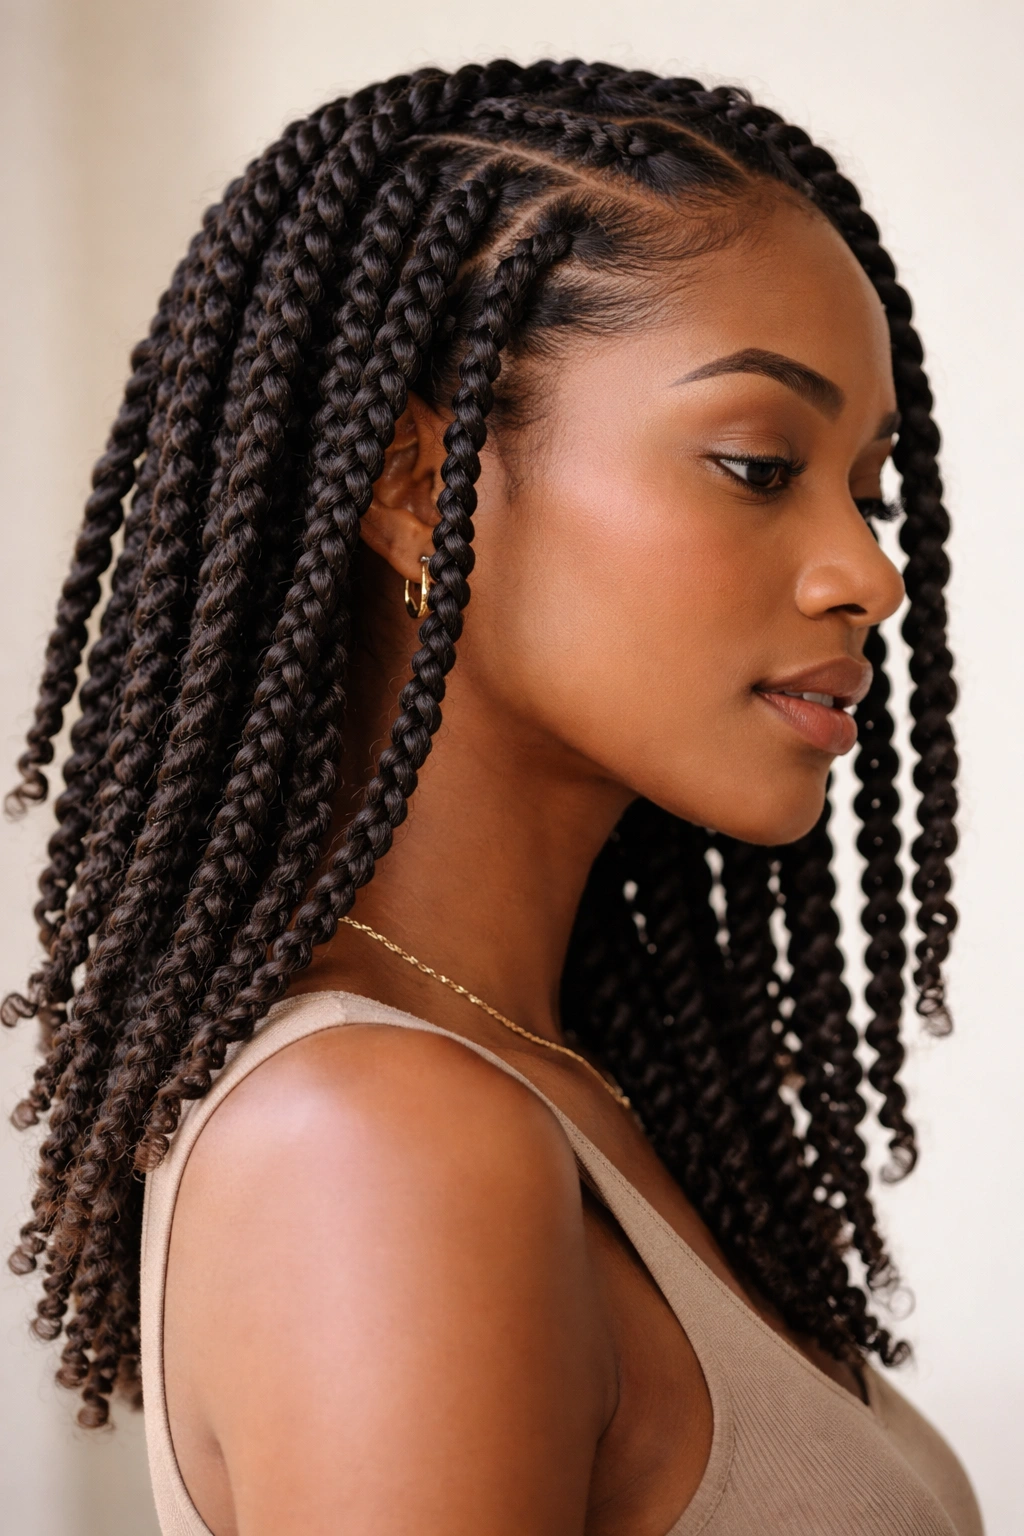
Two-strand twists are the foundation of natural hair styling, and when you execute them correctly, they’re absolutely stunning. The technique involves sectioning your hair into individual pieces and twisting two strands of hair around each other from root to tip. What makes them springy is the tension you maintain while twisting and how you set them afterward — too loose and they unravel, too tight and they look stiff and can cause breakage.
Why They’re a Classic Choice for Springy Definition
Two-strand twists work because they’re genuinely protective while still allowing your hair to breathe. Unlike some other twist styles, they don’t require additional yarn or synthetic hair, so you’re not adding weight or buildup to your natural strands. The spiral created by twisting two strands naturally encourages curl definition and bounce, especially as the style sets and your hair’s natural texture reasserts itself.
What You Need to Know for Maximum Longevity
- Use a styling cream or butter that holds without crunchiness — look for products specifically formulated for twist installation rather than general leave-ins
- Twist with tension at the roots but allow the twists to have slight give as you move down the length — this prevents tension alopecia while maintaining definition
- Seal the ends of each twist by smoothing them with product and a fine-tooth comb or your fingertips to prevent frizz and unraveling
- Two-strand twists can last 4-6 weeks depending on your hair growth pattern and how you sleep (pineapple method, satin pillowcase, or satin bonnet extends their life significantly)
- Retwist the roots every 2-3 weeks as new growth emerges if you want to keep them looking fresh rather than waiting until they fully mature
Pro tip: Mist your twists lightly with a water-based refresh spray every few days and gently re-twist any that are starting to loosen. This keeps them looking intentional and prevents them from collapsing into a matted texture.
2. Senegalese Twists With Natural Hair
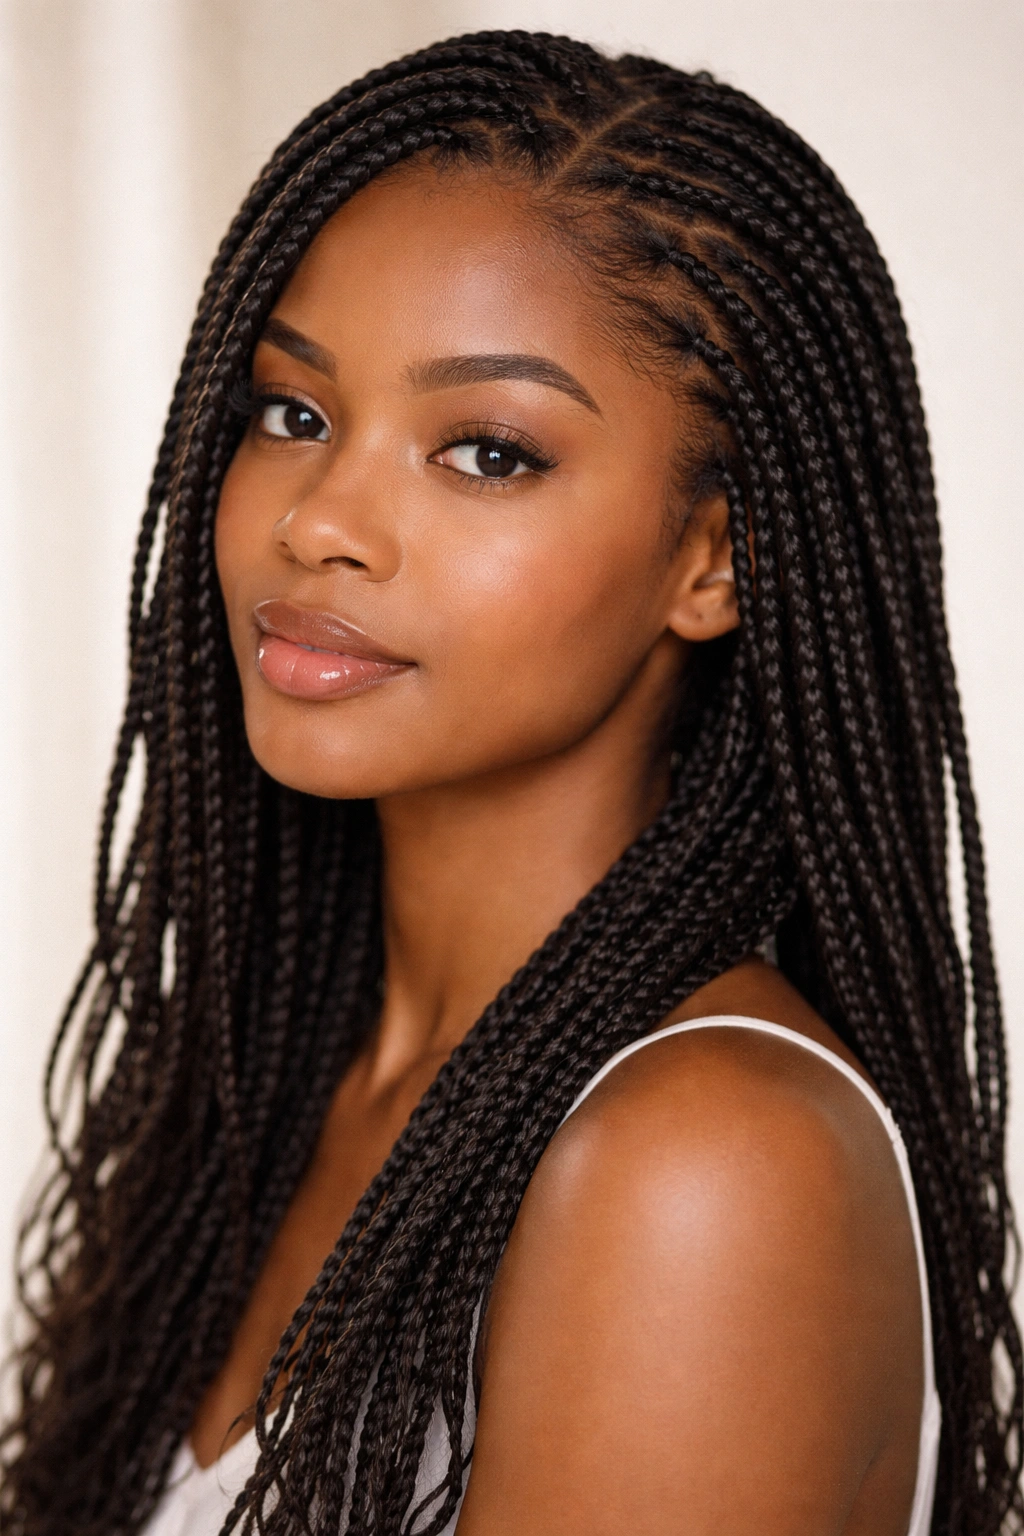
Senegalese twists traditionally use synthetic hair, but creating them with your own natural hair is an increasingly popular approach — it gives you the aesthetic and the protective benefits without the commitment of installed extensions. This style uses thin sections of hair and creates very fine, intricate twists that look delicate but feel substantial when you actually touch them.
The Appeal of Natural-Hair Senegalese Twists
The reason people love this variation is the sophistication factor. Senegalese twists sit somewhere between a regular two-strand twist and a more intricate style — they’re thinner and more numerous, which means more coverage and a fuller appearance overall. The thin, elongated spirals also create a really elegant line, especially when styled into updos, wrapped around the head, or left to hang freely.
Installation and Maintenance Essentials
- Section your hair into very thin, even pieces — think pencil-thin or thinner, which requires patience but makes the final result look refined
- Use a light hold product during installation; heavy creams can weigh down these thinner twists and make them feel limp
- Allow 4-6 hours for the style to set after installation before styling or sleeping on them heavily
- These twists tend to mature beautifully over the first week — they’ll look tighter and more defined as your hair adjusts and the product sets
- They typically last 3-4 weeks before you’ll want to retwist, since the thinner sections unravel faster than thicker twists
- Sleep protection is non-negotiable — use a satin bonnet or pineapple method to prevent overnight frizz
Worth knowing: Senegalese twists with natural hair show off your curl pattern once they’re installed for a few days, creating a gorgeous double texture of the twist itself plus your curl definition underneath.
3. Flat Twists
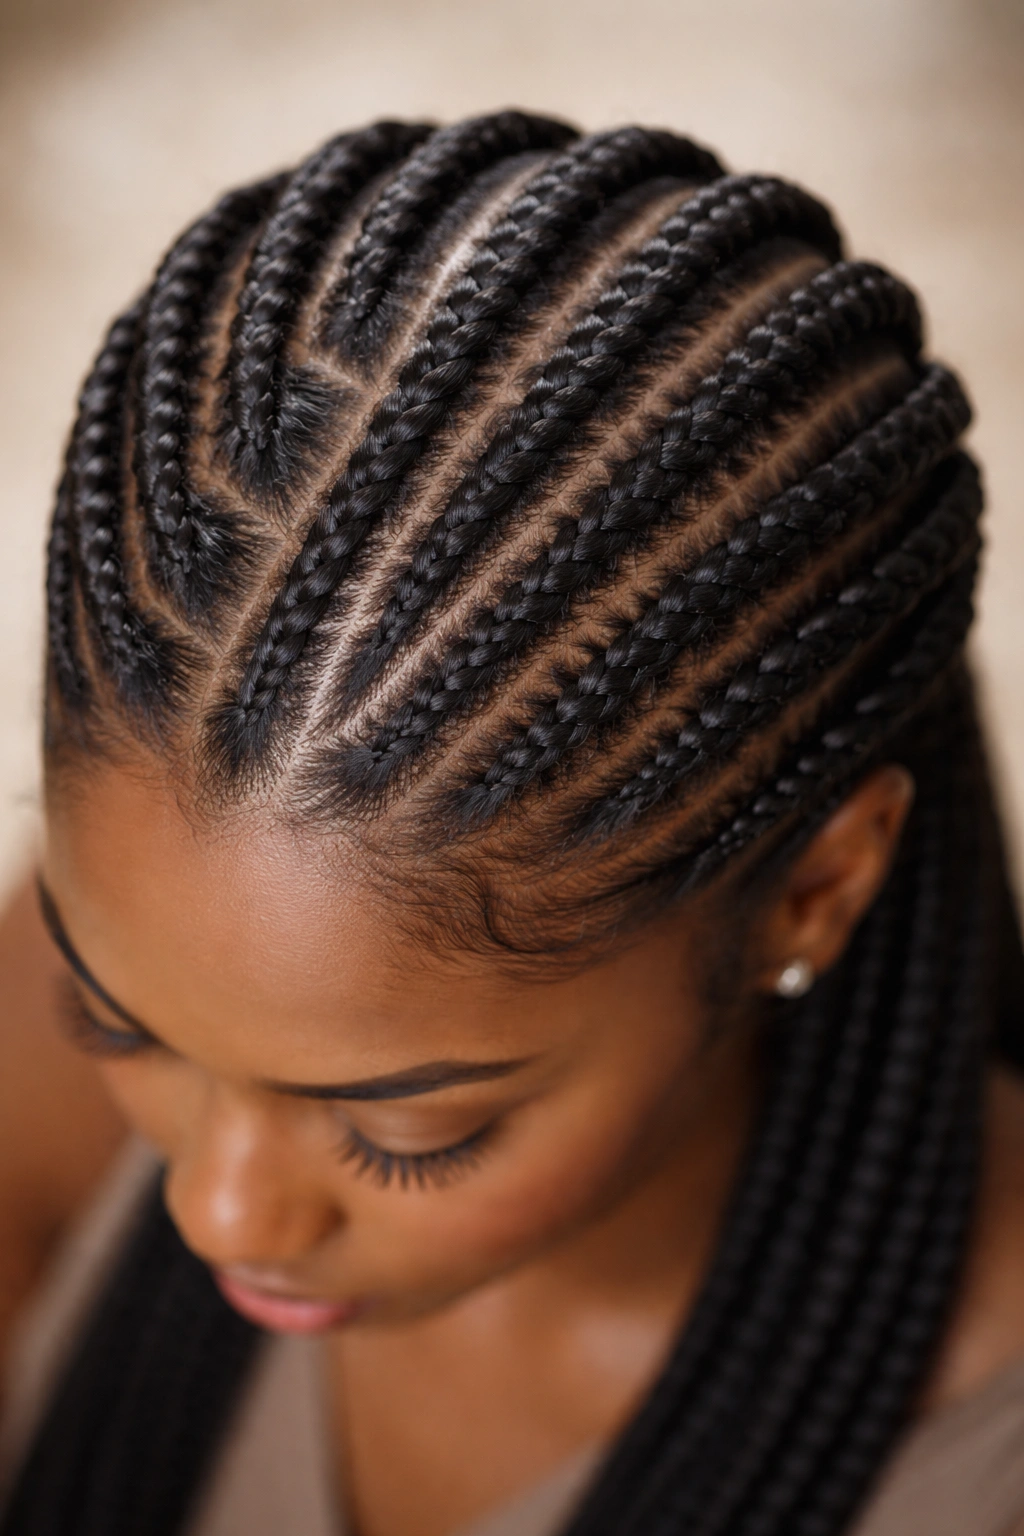
Flat twists are twisted styles that follow along the scalp in structured rows, creating a seamless, woven-looking pattern. They differ from cornrows because they use the two-strand twist technique rather than the three-strand braid technique, which gives them a distinctly different aesthetic and feel. Flat twists are incredibly versatile — they work as a complete protective style, as a partial style (just the front or crown), or as an accent detail in otherwise loose hair.
Why Flat Twists Deliver Visual Impact
The structured, geometric pattern of flat twists creates intentional design on your head. They photograph beautifully, they look polished in both casual and professional settings, and they give you the styling equivalent of a high-effort hairstyle without actually requiring hours of daily maintenance. Once they’re installed, you wash them, refresh them, and they stay looking styled for weeks.
Technical Details That Make Them Last
- Tension is more critical with flat twists than with loose twists — you need enough tension to keep them aligned but not so much that you’re causing scalp pain or tension alopecia
- Create a guide with your parting tool before you start twisting so the rows are even and straight — this takes extra time upfront but prevents you from having to redo sections
- Use a product with hold but not crunch — flat twists need to maintain their shape without looking stiff or feeling hard
- The scalp area of flat twists can dry out faster than loose twists since they’re compressed against the head, so consider a light oil or spray to refresh the roots
- Flat twists typically last 4-6 weeks depending on your hair growth and how well you protect them at night
- You can sleep on flat twists much easier than loose twists, but a satin bonnet still helps preserve their shape
Insider note: Flat twists look particularly springy and dimensional if you use a two-color approach — either two shades of the same color family or a subtle contrasting shade — which creates visual interest without looking overly complicated.
4. Kinky Twists
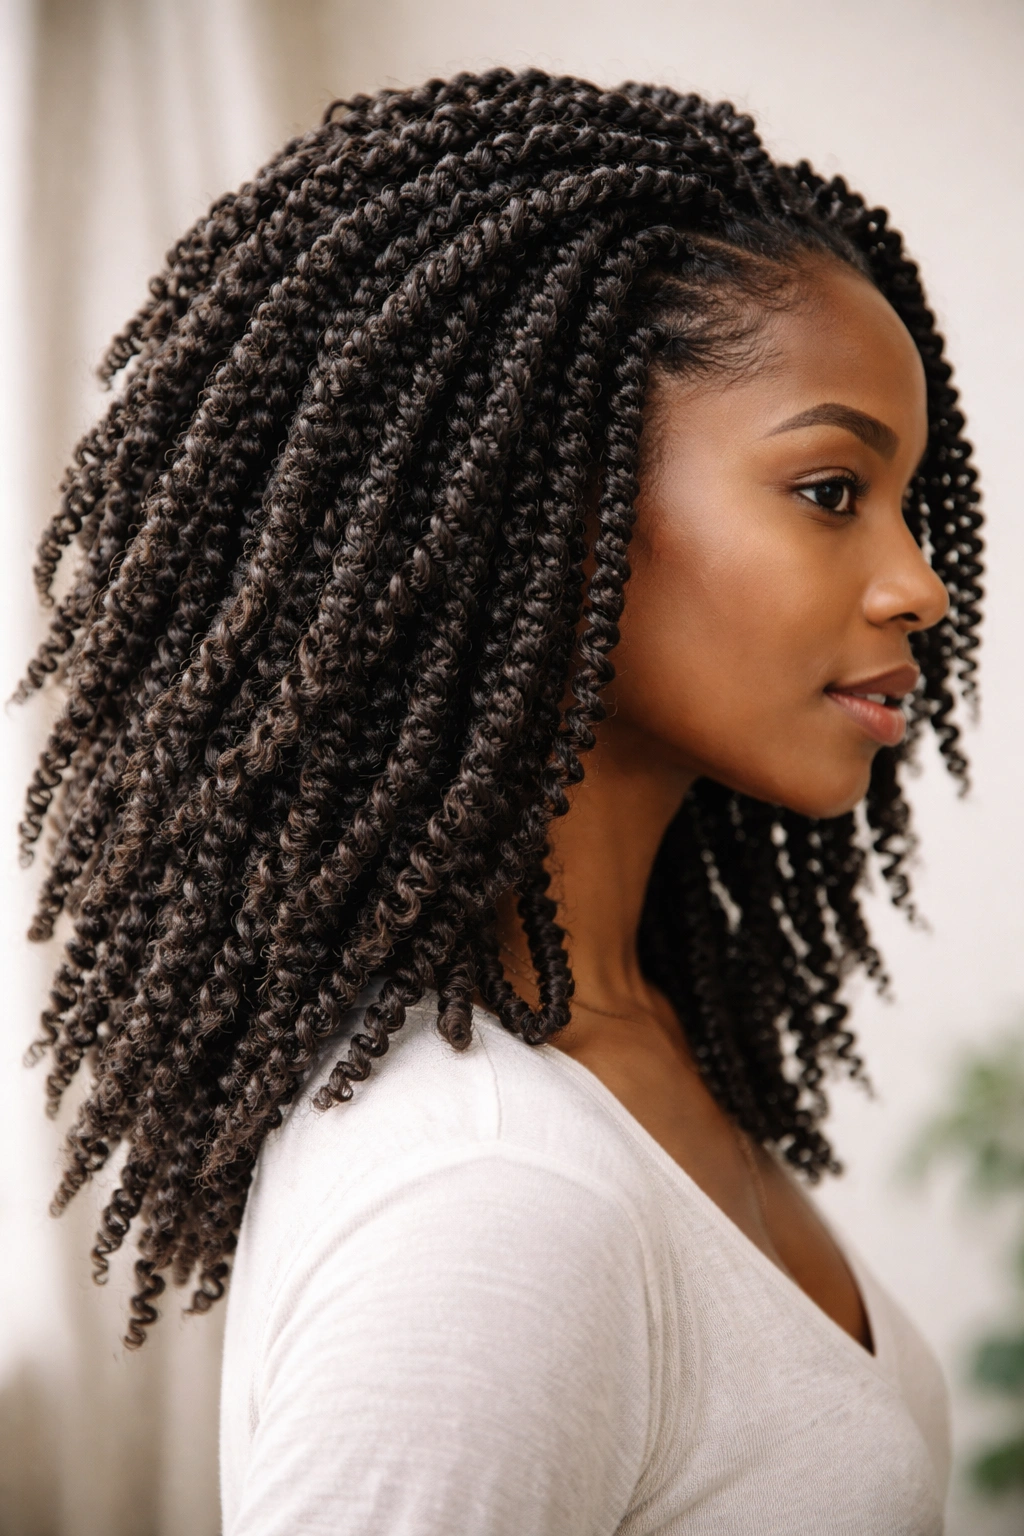
Kinky twists blend your natural hair with a small amount of synthetic kinky-textured hair extension, creating a style that has maximum texture and grip while still incorporating your own hair. The name comes from the kinky texture of the added hair, which is specifically designed to match tightly coiled and coily natural hair textures. This style is particularly popular for people with very dense, tightly coiled hair because it maximizes the natural texture rather than smoothing it.
What Makes Kinky Twists Stand Out
The texture created by kinky twists is unmatched — they look wild and intentional in the most beautiful way. Unlike smoother twists that can eventually flatten, kinky twists maintain that three-dimensional, textured quality throughout their entire lifespan. They also give your hands a break from constant twisting since you’re adding extension hair to work with, which means faster installation and less strain on your own hair.
Important Considerations for Installation and Wear
- Use high-quality kinky-textured hair that actually matches your curl pattern — poorly matched textures look obvious and can be difficult to blend
- The installation process is time-intensive (4-6+ hours typically), so plan accordingly and consider professional installation for your first experience
- Start with a lightweight product during installation; you’re adding extension hair, which is heavier than your hair alone, and too much product amplifies that weight
- Kinky twists tend to gather frizz more readily than other twist styles because of all that texture, so a lightweight frizz-control product becomes your friend
- These twists typically last 6-8 weeks, which is longer than most styles, making them cost-effective despite the longer installation time
- Sleeping on kinky twists requires care — they can take a long time to dry after washing, so plan wash days accordingly
Real talk: Kinky twists are not a beginner DIY style. If you’re considering this, either invest in professional installation or watch multiple detailed video tutorials and be prepared for a learning curve.
5. Yarn Twists
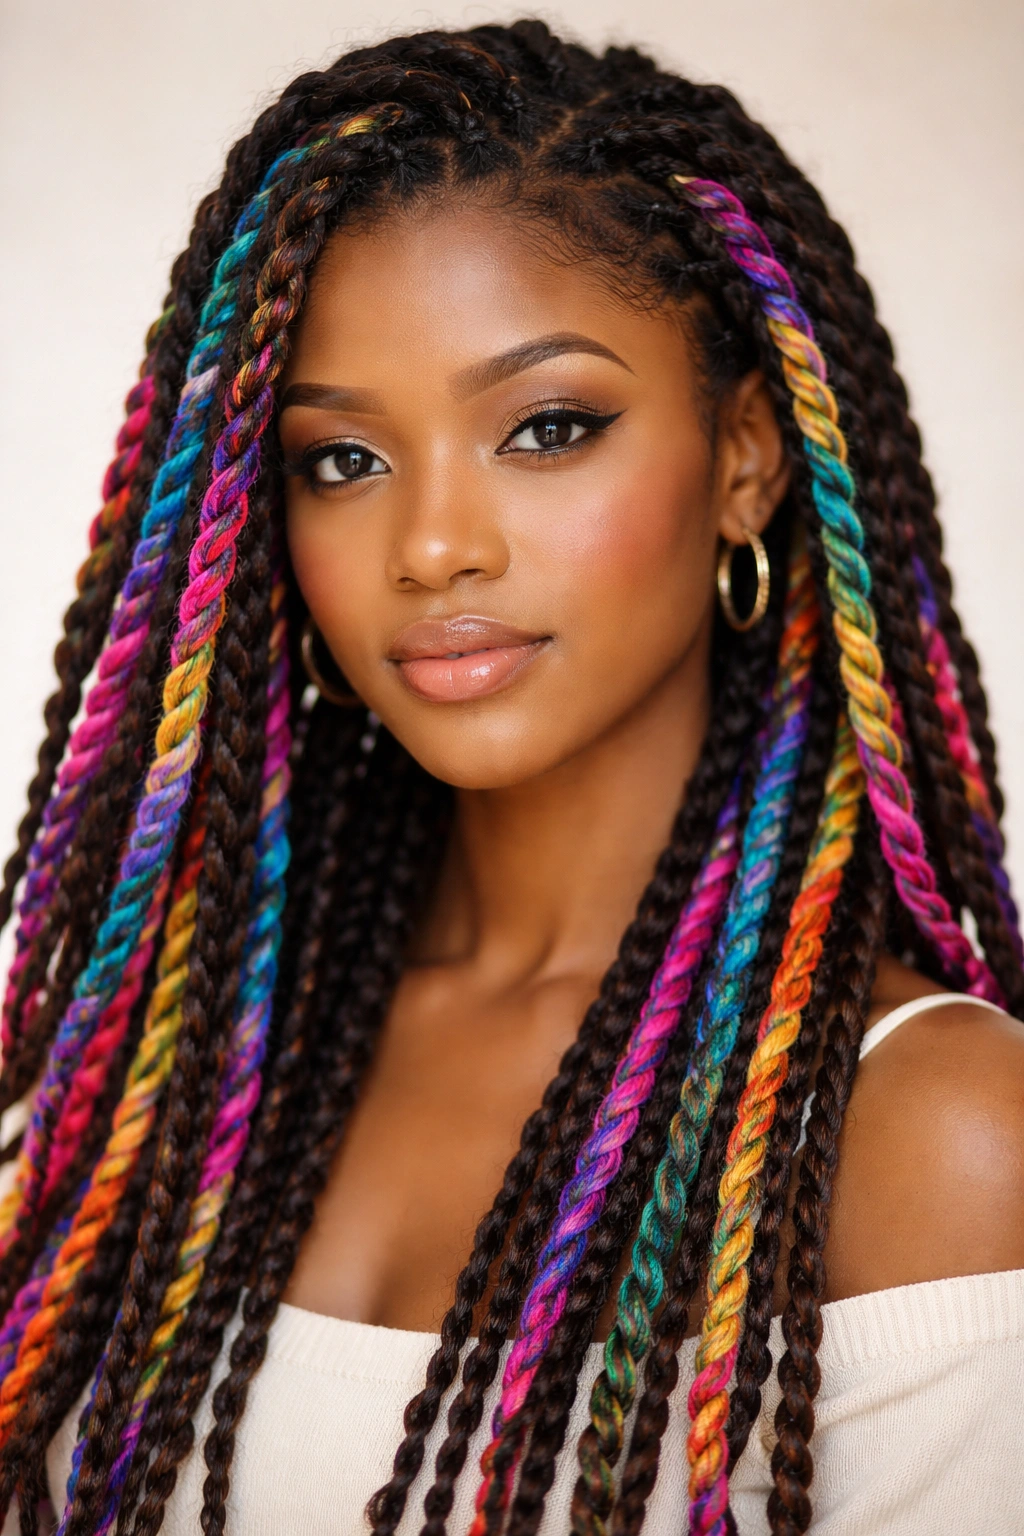
Yarn twists combine your natural hair with actual yarn, creating a lightweight, colorful protective style that’s visually striking and surprisingly versatile. You can choose any yarn color — matching your hair for a subtle effect, going for a bold contrasting shade, or even using multi-colored yarn to create an ombre or gradient effect. The yarn adds bulk and visual interest without the weight of full synthetic hair extensions.
The Visual and Practical Appeal of Yarn Twists
Yarn twists give you total creative freedom with color while protecting your hair. They’re lighter than most other twists that use synthetic hair, which means less tension on your scalp and potentially less stress on your strands. The texture of yarn combined with your natural hair texture creates a unique look that reads as intentional and artistic rather than simply protective.
Installation Process and Care Guidelines
- Section your hair into the thickness you want for your twists — chunky yarn twists take 3-4 hours, finer ones can take 6+ hours
- Wrap the yarn around your twists as you twist, or add yarn after you’ve created the two-strand twist base (both methods work, and many people find the second method easier)
- Choose yarn weight carefully — bulky yarn creates chunkier, heavier twists while thinner yarn gives you more refined, delicate twists
- Yarn doesn’t lock down as firmly as synthetic hair, so these twists have a more lived-in, relaxed quality compared to extension twists, which some people love and others find less structured
- These twists typically last 3-4 weeks before they become too loose and you’ll want to retwist or remove them
- Yarn can absorb product and moisture, so you may need less additional product for hold — test on a few twists before using your standard amount everywhere
Worth noting: Look for yarn specifically marketed as yarn for hair twists or use a yarn that feels soft and won’t create itching against your scalp — cheap, scratchy yarn is genuinely uncomfortable to wear for weeks.
6. Triangular (Triangle) Twists
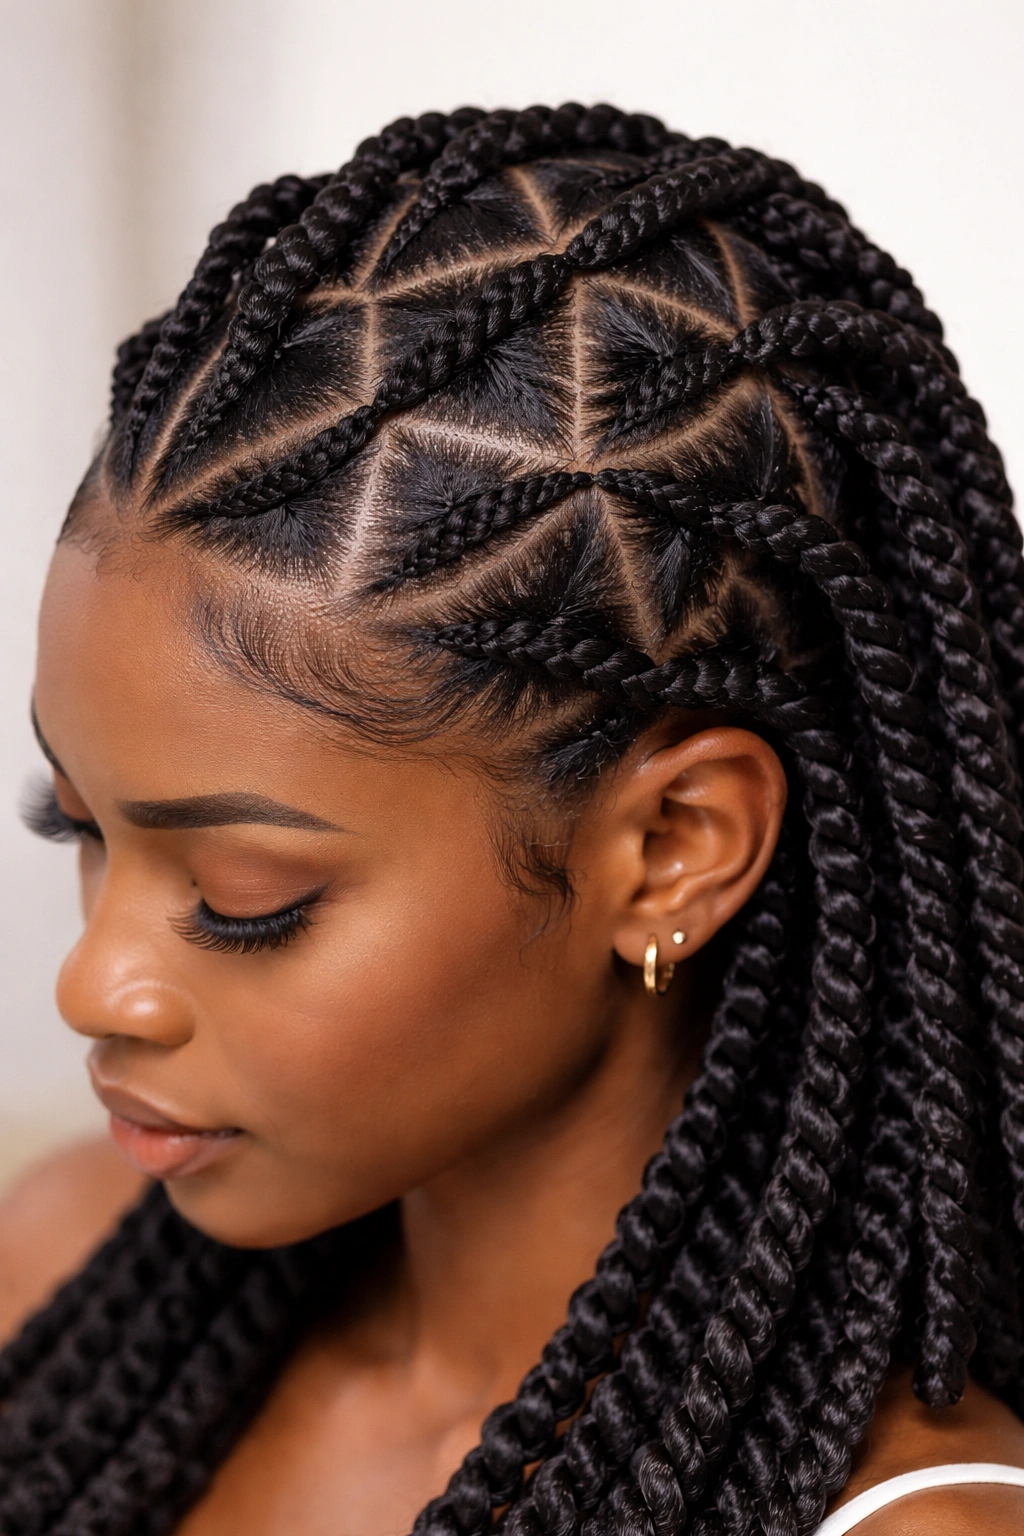
Triangular twists create a geometric, almost architectural look on your head by using the placement of your twists to form triangle patterns across your scalp. Instead of twisting all over the head in rows like flat twists or evenly spacing them like two-strand twists, you deliberately position your twists so they form connected triangular sections. This is an advanced styling technique that requires real planning and execution skill.
Why Triangular Twists Are Worth the Effort
The geometric beauty of this style is genuinely artistic. It’s the kind of styling detail that catches people’s attention because it shows intentionality and skill. Triangular twists also tend to create really interesting styling options — you can wrap them, pin sections up to create a half-up style, or wear them down for full coverage with visual interest.
Execution Tips for This Advanced Style
- Start with a guide using your parting tool to mark out your triangular sections before you begin twisting — this prevents you from getting halfway through and realizing your pattern is off
- Decide whether you want the twists to face a particular direction (all pointing toward a center point, all pointing outward, creating a specific pattern) and commit to that direction throughout
- This style typically requires professional installation or significant experience with twist styling — it’s not a good choice if you’re still learning basic twist techniques
- Triangular twists have the same care requirements as flat twists since many of them are scalp-hugging — they last 4-6 weeks and require consistent nighttime protection
- The pattern will be most obvious when your hair is freshly installed; as they mature and your curls express themselves more, the geometric precision becomes softer but the overall design remains visible
Insider tip: Take clear photos of your finished triangular twists from multiple angles because the pattern changes depending on your viewing angle and how the light hits your hair.
7. Spring Twists (Crochet-Based)
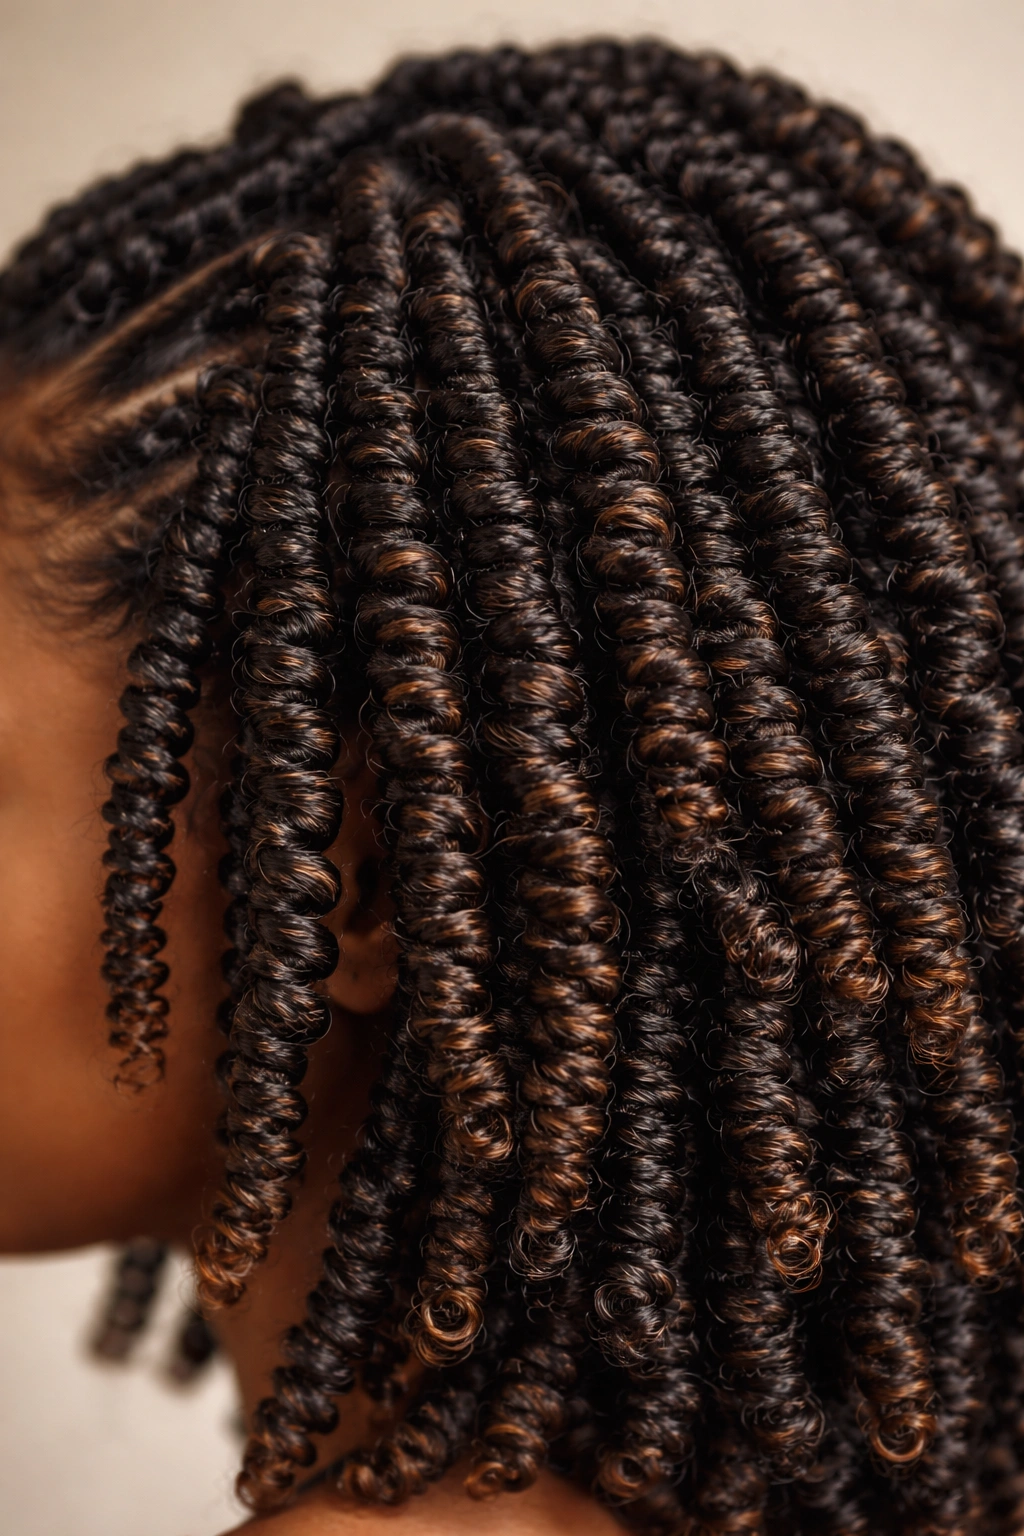
Spring twists specifically refer to twists installed using the crochet method, where your natural hair is used to secure pre-twisted synthetic hair through small loops along your scalp. The result is twists that have amazing spring and bounce — hence the name — and they last significantly longer than most other twist styles. This is a professional installation style that requires specific training and the right tools.
Why Spring Twists Deliver Long-Lasting Results
The crochet installation method is incredibly secure, which means your twists won’t unravel or loosen prematurely. The spring quality comes from the pre-twisted synthetic hair, which maintains its shape and bounce even as your hair grows out underneath. Spring twists typically last 8-12 weeks, making them one of the longest-lasting protective styles available.
What to Expect With Spring Twists
- Installation typically takes 5-8 hours depending on the size and density of the twists you want, so plan accordingly and find a skilled stylist
- These twists are noticeably heavier than most other styles because you’re wearing both your hair and a significant amount of synthetic hair, so scalp sensitivity can be an issue for some people
- Maintenance is minimal — wash, apply lightweight products, and that’s essentially it for weeks
- Your natural hair underneath is well-protected, which is why many people choose this style if they’re trying to grow their hair or give it a break from manipulation
- Water and product absorption is less of an issue with spring twists compared to lighter styles, since the synthetic hair doesn’t hold moisture like your natural hair or yarn would
- Removal requires care and ideally professional help — you’re unraveling the crochet work, not simply untwisting, so rushing the removal process can cause breakage
Important note: Spring twists are a significant investment in both time and money. Make sure you’re working with an experienced stylist and that you’re committing to the full wear time to make it worthwhile.
8. Feed-In Twists
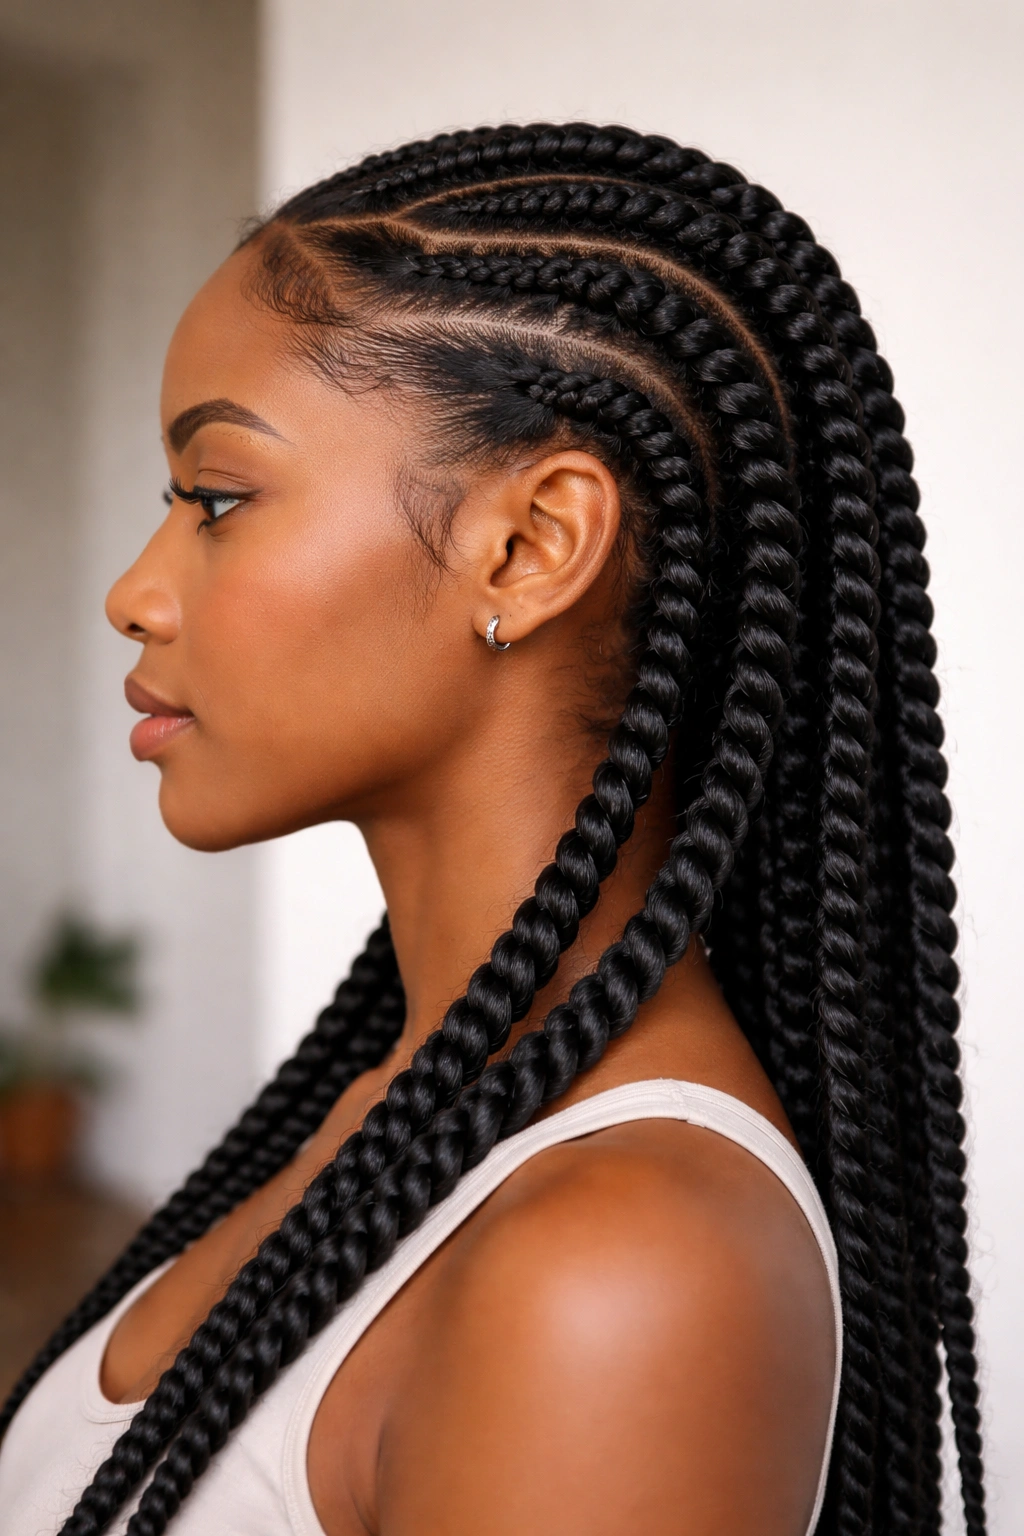
Feed-in twists gradually introduce synthetic hair as you twist, starting with only your natural hair at the roots and adding extension hair as you move down the length of each twist. This creates a smooth transition from your scalp to the heavier, styled portion of the twist, reducing tension at the roots and extending the life of your hair. Feed-in twists have become increasingly popular because they offer protection without the weight and pressure of fully installed twists that use extension hair throughout.
The Protective Advantage of Feed-In Twists
The genius of feed-in twists is how they reduce scalp tension while still giving you the benefit of longer, fuller twists. Starting with your natural hair at the root means minimal tension right at your hairline and scalp, where breakage and thinning are most likely to occur. As you gradually add the extension hair, your hair is already twisted, so the added weight is distributed more evenly than if you installed full extensions all at once.
Installation and Maintenance for Feed-In Twists
- This style is moderately challenging to DIY if you’re experienced with twists; beginners should opt for professional installation
- Installation takes 4-6 hours depending on twist size and density
- The initial styling period is longer than some other twists because you have both your natural hair (which needs to set) and extension hair (which is already set) creating slightly different textures
- These twists mature beautifully over the first week as your natural hair relaxes into the twist pattern
- Feed-in twists last 4-6 weeks typically, though the extension portions often last longer than the rooted portions
- You can retwist just the rooted section rather than redoing the entire twist, which extends the overall lifespan of the style and reduces installation costs over time
Pro tip: Feed-in twists photograph incredibly well because the gradient from thinner roots to fuller lengths creates visual dimension and showcases the technique beautifully. If you’re planning to do these, definitely take some good photos for your own documentation.
Final Thoughts

Choosing a springy twist style really comes down to knowing what you need from a protective style. If you want something you can install at home regularly, two-strand twists and yarn twists are accessible and rewarding. If you’re looking for a style that lasts multiple months with minimal maintenance, spring twists and kinky twists deliver that security and longevity. If you want something that falls somewhere in the middle — professional-level polish with reasonable maintenance — flat twists, feed-in twists, and triangular twists offer those options.
The other thing to genuinely consider is your scalp’s tolerance for tension, your time availability for installation, and your budget. Some of these styles require professional installation and carry a higher cost, while others are budget-friendly if you do them yourself. There’s no universal “best” twist style — the best one for you is the one that protects your hair while fitting into your life realistically.
Start by trying the styles that appeal to you most, whether that’s because of aesthetics, ease of installation, or longevity. Your hair will tell you what it responds well to. You might find yourself cycling through different styles seasonally or based on what your hair needs at different times. That’s exactly how many people approach protective styling — treating it as a toolkit rather than hunting for one perfect style to stick with forever.
