



The ’90s were a golden era for natural hair expression, and that aesthetic is absolutely worth revisiting. During that decade, Black women embraced bold, textured styles that celebrated the beauty of afro hair in all its forms — from intricate braids to voluminous twists to statements-making fades. The best part? These looks work just as well today, and they’re experiencing a genuine resurgence as people rediscover that era’s fearlessness and creativity.
What made ’90s afro styles so iconic wasn’t just the silhouettes — it was the attitude. These styles required commitment, skill, and an unwavering confidence in one’s natural texture. Whether you’re drawn to the nostalgia of that decade or simply love the versatility and boldness those styles offer, recreating ’90s-inspired afro looks gives you a chance to play with texture, color, and shape in ways that feel fresh and intentional. Many of these styles work beautifully as protective styles, keep your hair healthy, and genuinely turn heads.
The styles below are rooted in authentic ’90s aesthetics but work seamlessly in contemporary contexts. Some require professional hands, while others you can master at home with patience and the right products. All of them celebrate natural texture in ways that feel powerful, expressive, and unmistakably rooted in Black beauty culture.
1. Two-Strand Twists With Bold Color
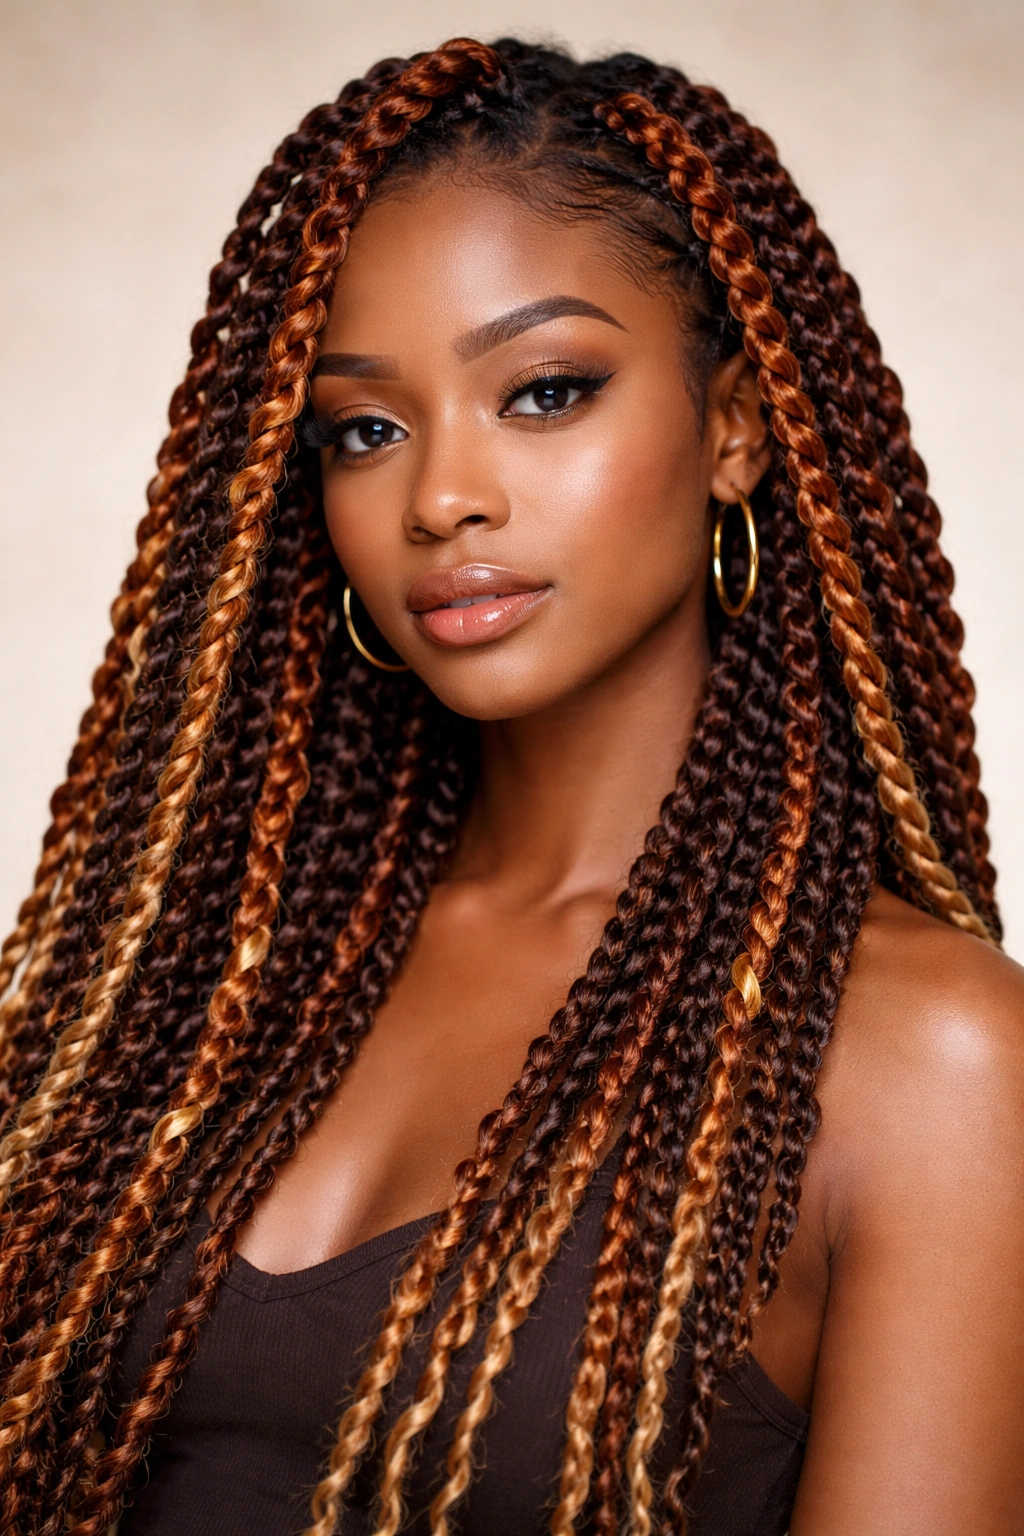
Two-strand twists defined the ’90s, and they remain one of the most versatile and protective styles available. The magic happened when people paired them with striking color — rich copper tones, deep burgundy, vibrant blonde streaks, or contrasting highlights woven throughout. The twists themselves became a canvas for creative expression, especially when dyed hair caught the light.
Why They Dominated That Era
Two-strand twists hit different in the ’90s because they balanced ease with impact. Unlike box braids, which required countless thin plaits, twists were thicker, faster to install, and gave immediate visual drama — especially in color. A head full of twists in a rich bronze or honey-blonde shade made a statement that whispered “intentional” and “confident.”
How to Get This Look
- Install twists using the two-strand method on clean, damp hair with moisturizing product for smoothness
- Use a dedicated twist cream or gel that doesn’t flake when dry — product choice matters enormously for longevity
- For color impact, consider getting individual sections dyed before twisting, or use demi-permanent color that works on textured hair
- Twist width varies from pencil-thin to finger-thick depending on the vibe you want; thicker twists feel more ’90s authentically
- Secure ends with small elastic bands that match your hair color, or seal them with heat for a cleaner finish
Real talk: Twists last 4-6 weeks with proper nighttime care. Sleep on a silk or satin pillowcase, and refresh with a light mist of water and product every few days to keep them defined and prevent frizz.
2. Butterfly Locs
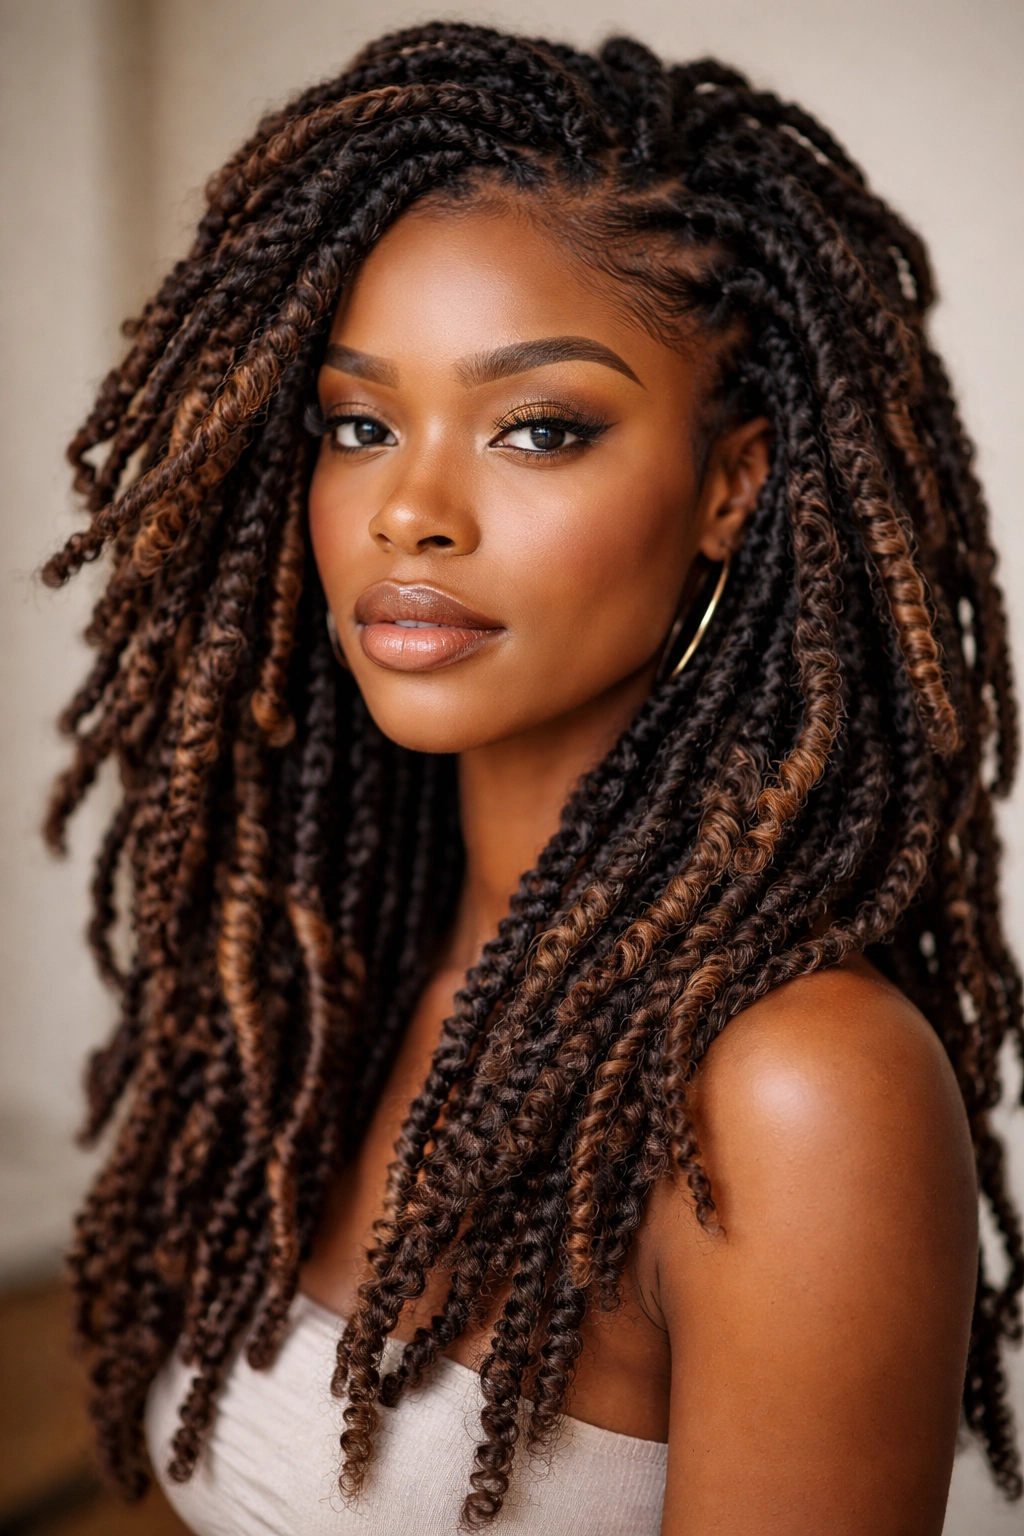
Butterfly locs (also called faux locs) were the ’90s answer to making instant impact without the permanence of actual locs. They captured that free-spirited, textured aesthetic using a wrapping technique that creates a chunky, sculptural look with surprising movement. The best versions had intentional texture throughout, almost like your hair had been naturally locked for years.
What Made Butterfly Locs So ’90s
These locs nailed the “effortlessly textured” vibe that defined the decade. They were thicker than twists, had serious presence, and photographed beautifully. The installation was meditative and the result felt both organic and deliberately styled. They also worked across different hair types and textures, which made them accessible and wildly popular.
Installation and Styling Tips
- Start with clean, moisturized hair and a lightweight holding product that won’t build up
- Wrap each section with yarn, thread, or synthetic hair depending on the thickness and look you want
- The wrapping technique itself creates the texture and holds everything together — it’s not actually locking hair
- Varying the thickness of your sections creates visual interest; the ’90s version often mixed thicker and thinner locs
- You can curl the ends or leave them straight; looping the ends over creates that signature butterfly appearance
- These last 4-8 weeks depending on maintenance and how tightly they’re wrapped initially
Pro tip: Butterfly locs work beautifully with color-dyed yarn or thread woven in, creating depth and visual movement that solid locs don’t achieve.
3. Chunky Braids With Cornrows
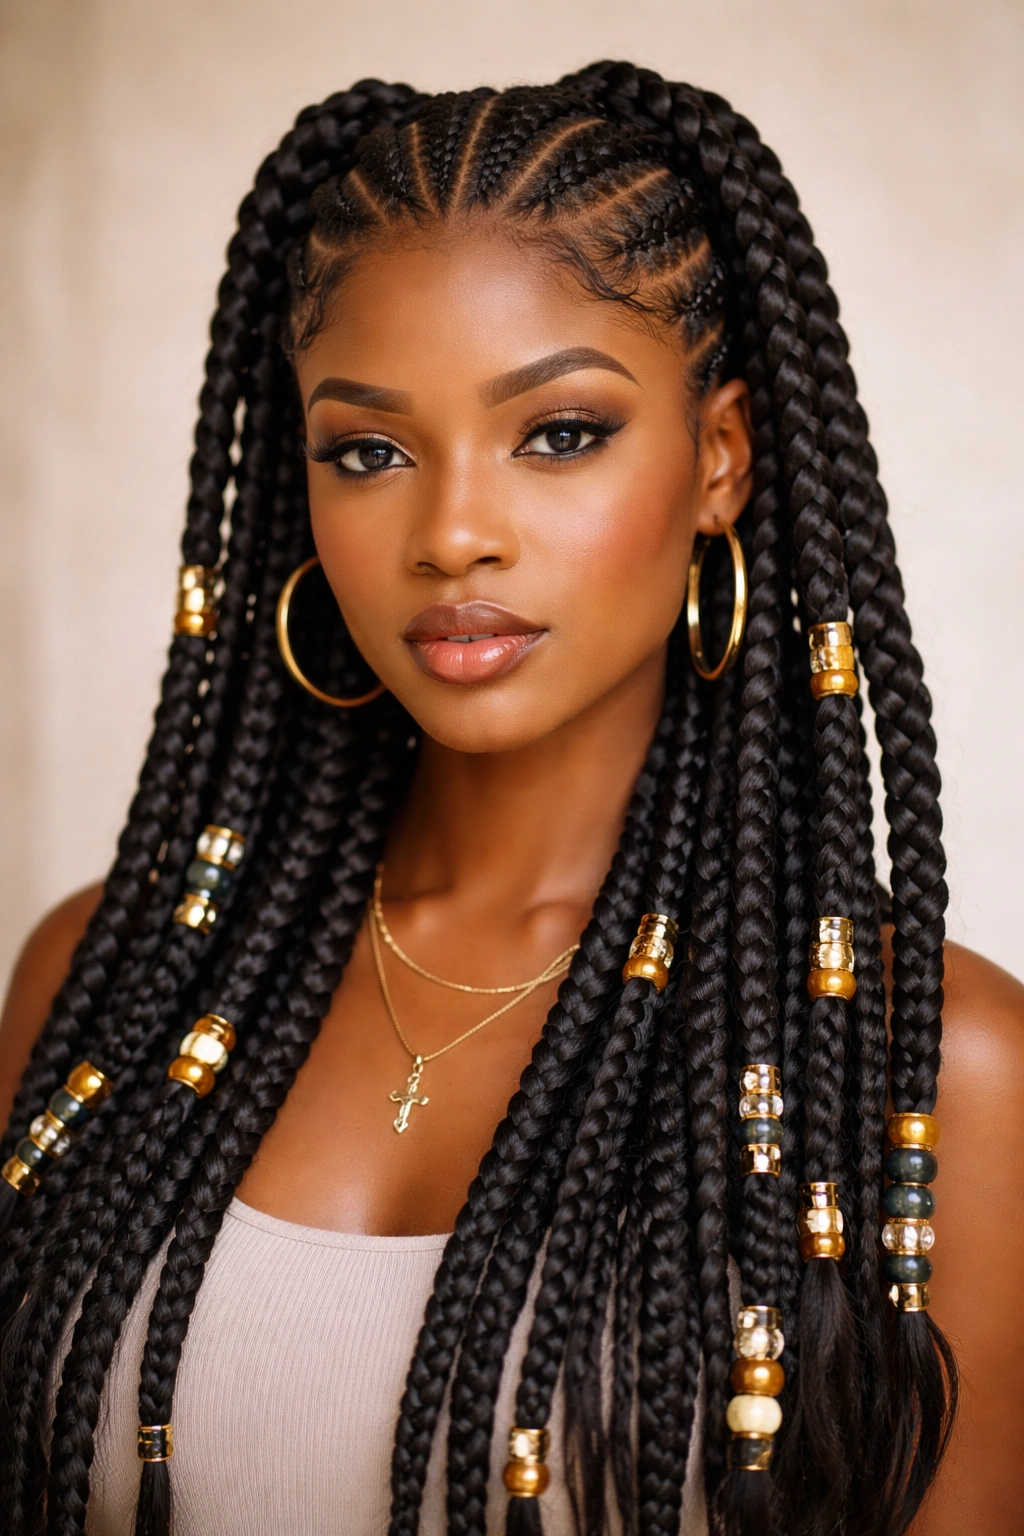
This look combined thick, chunky box braids or Senegalese twists (often reaching hip-length or longer) with cornrows braided close to the scalp. The contrast between the sleek, geometric cornrows and the voluminous hanging braids created serious visual impact. Add colorful beads, rings, or cuffs, and the style became an instant cultural statement.
The Architecture That Made It Work
The genius was in the contrast — tight control at the crown through cornrows, then absolute freedom and movement in the long, thick braids. This wasn’t just a style; it was a statement about embracing both structure and liberation. The hanging braids swayed when you walked, creating an effect that felt alive and intentional.
Creating This Look Yourself
- Cornrow the front sections or crown area in whatever pattern you prefer — straight back, diagonal lines, geometric designs
- Attach braiding hair or yarn to create the thicker braids that hang loose, usually starting where the cornrows end
- Braid those thick sections to the ends and seal them with heat or by wrapping the ends with thread
- Add beads, cuffs, or cowrie shells throughout for authentic ’90s texture
- The length matters — somewhere between shoulder-length and hip-length feels most ’90s authentic
- These braids last 6-8 weeks with proper care and nightly protection
Worth knowing: The weight of longer braids means they require regular scalp cleansing to prevent buildup and keep your natural hair healthy underneath.
4. Micro Braids With Zigzag Parts
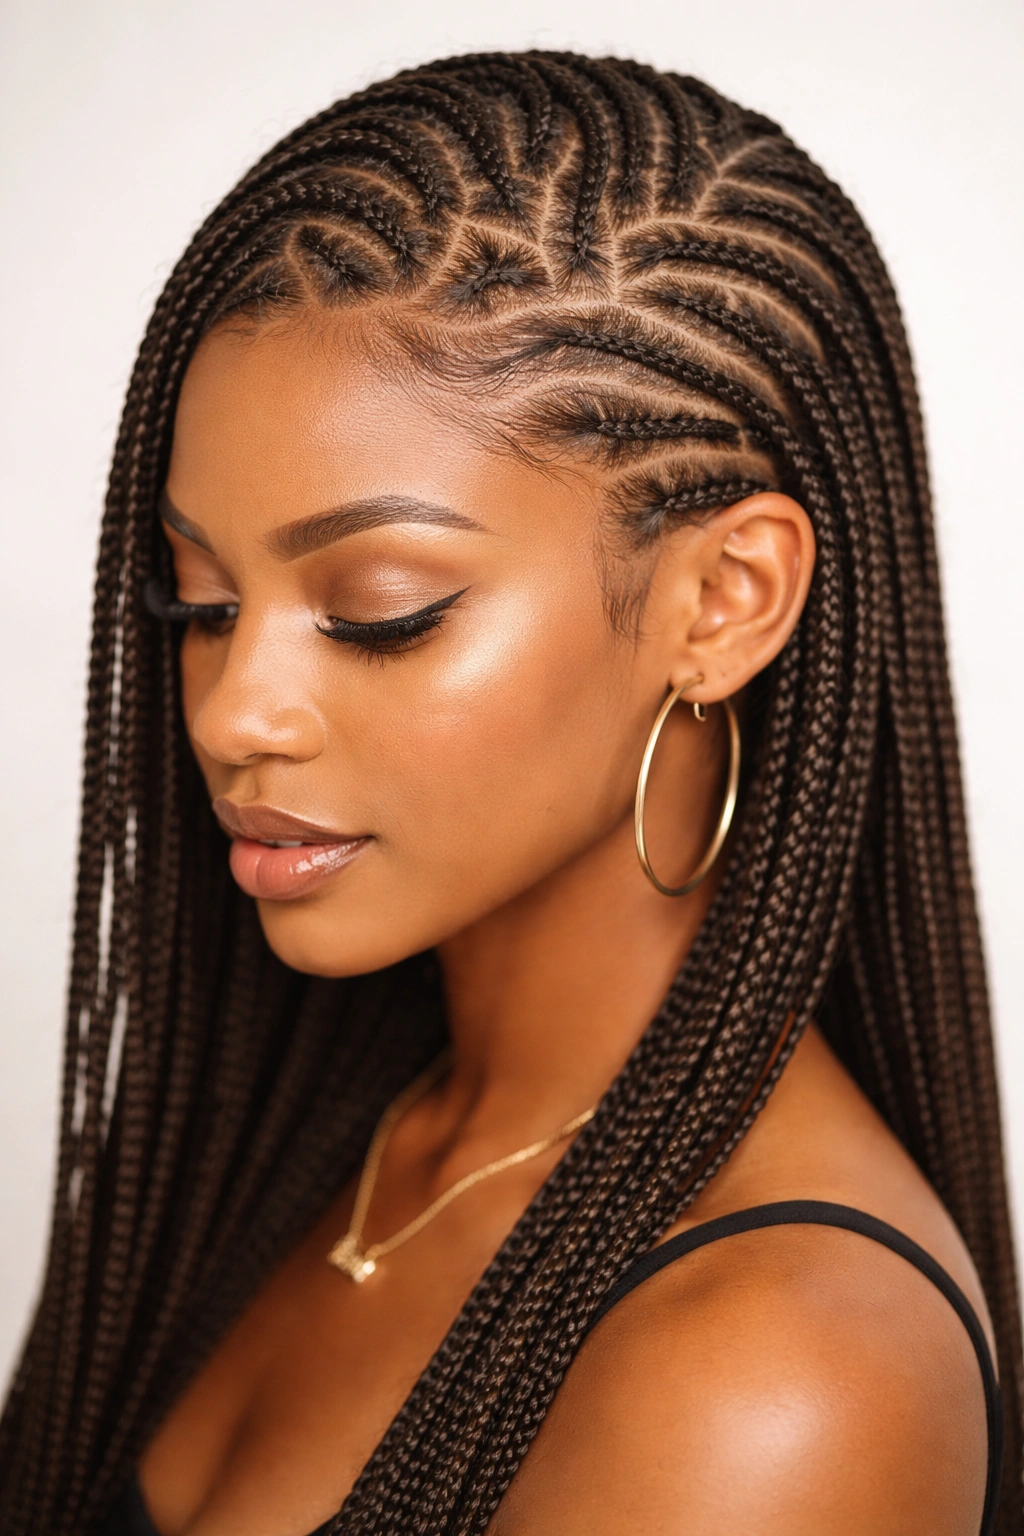
Micro braids were the ’90s obsession, especially when installed with ultra-geometric partings — usually zigzag or checkerboard patterns that required precision and serious patience. The micro braids themselves were incredibly thin, so an entire head of them created serious length and volume. Paired with creative parting patterns, they became wearable art.
Why Precision Mattered So Much
Those zigzag parts weren’t decorative — they were structural and visual. They required planning, mathematical thinking, and skilled hands. When perfectly executed, they transformed your entire scalp into a pattern, making the braids feel more intentional and deliberate. The braids themselves could be styled in multiple ways once they were installed.
Achieving This Style
- Start with a braiding plan — sketch your part pattern on paper if you’re a visual person
- Use cornrows or a braiding tool to create your parts with precision; zigzag parts move diagonally across the head
- Install micro braids in sections following your part pattern; this keeps things organized and prevents mistakes
- Micro braids are small enough to work on textured hair without excessive tension
- These braids can incorporate color-coordinated hair, beads, or remain single-colored for a cleaner look
- Expected lifespan is 4-6 weeks for micro braids; they’re delicate and require gentle handling
Insider note: The most striking versions used ultra-thin braids with high-contrast parting that created optical illusion effects. Some people even used hair-chalk or temporary color on their exposed scalp to enhance the pattern.
5. High-Top Fade With Textured Crown
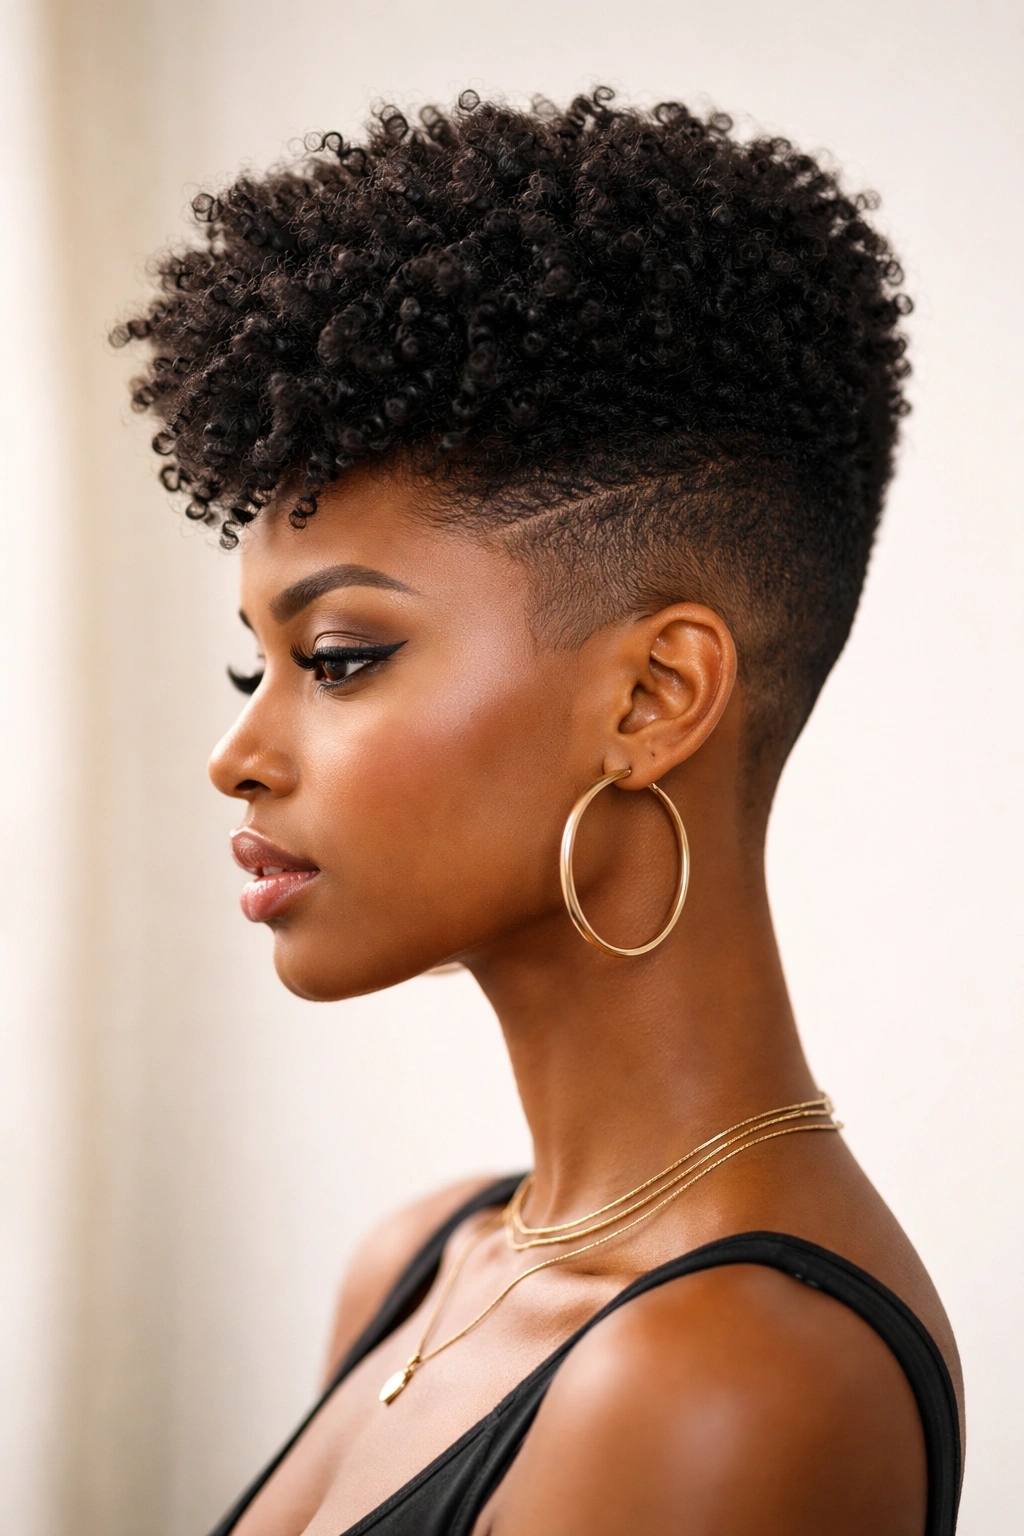
This style borrowed from hip-hop culture, featuring closely faded sides and back with a voluminous, textured crown. Think flat-top fades but softer, with the crown texture varied — sometimes twisted, sometimes braided, sometimes just naturally coiled and picked out. It was a power style that commanded presence.
The Attitude Behind the Cut
High-top fades were bold statements. They required confidence to wear and skill to execute. The contrast between the bare, closely-cut sides and the full crown created an almost sculptural effect. For women especially, this style said “I’m not trying to shrink myself — I’m taking up space.”
How to Execute This Look
- Work with a barber or stylist experienced in textured fades; the technique differs from cutting straight hair
- The fade starts very short (sometimes a line-up with specific designs) and gradually increases in length
- The crown is left longer and can be shaped into virtually anything — coils, twists, a picked-out afro, braided patterns
- Many versions included shaved designs on the sides (lines, geometric shapes, or patterns) for additional visual interest
- The sides typically measure 1-2 mm (a #1 or #1.5 clipper guard), while the crown can be 2-4 inches depending on desired volume
- Maintenance involves getting the fade recut every 2-3 weeks to keep it crisp
Real talk: This style is stunning but requires commitment to regular appointments. The crown grows out quickly, and once the fade starts fading, the effect loses its punch.
6. Locs With Wraps and Ornaments
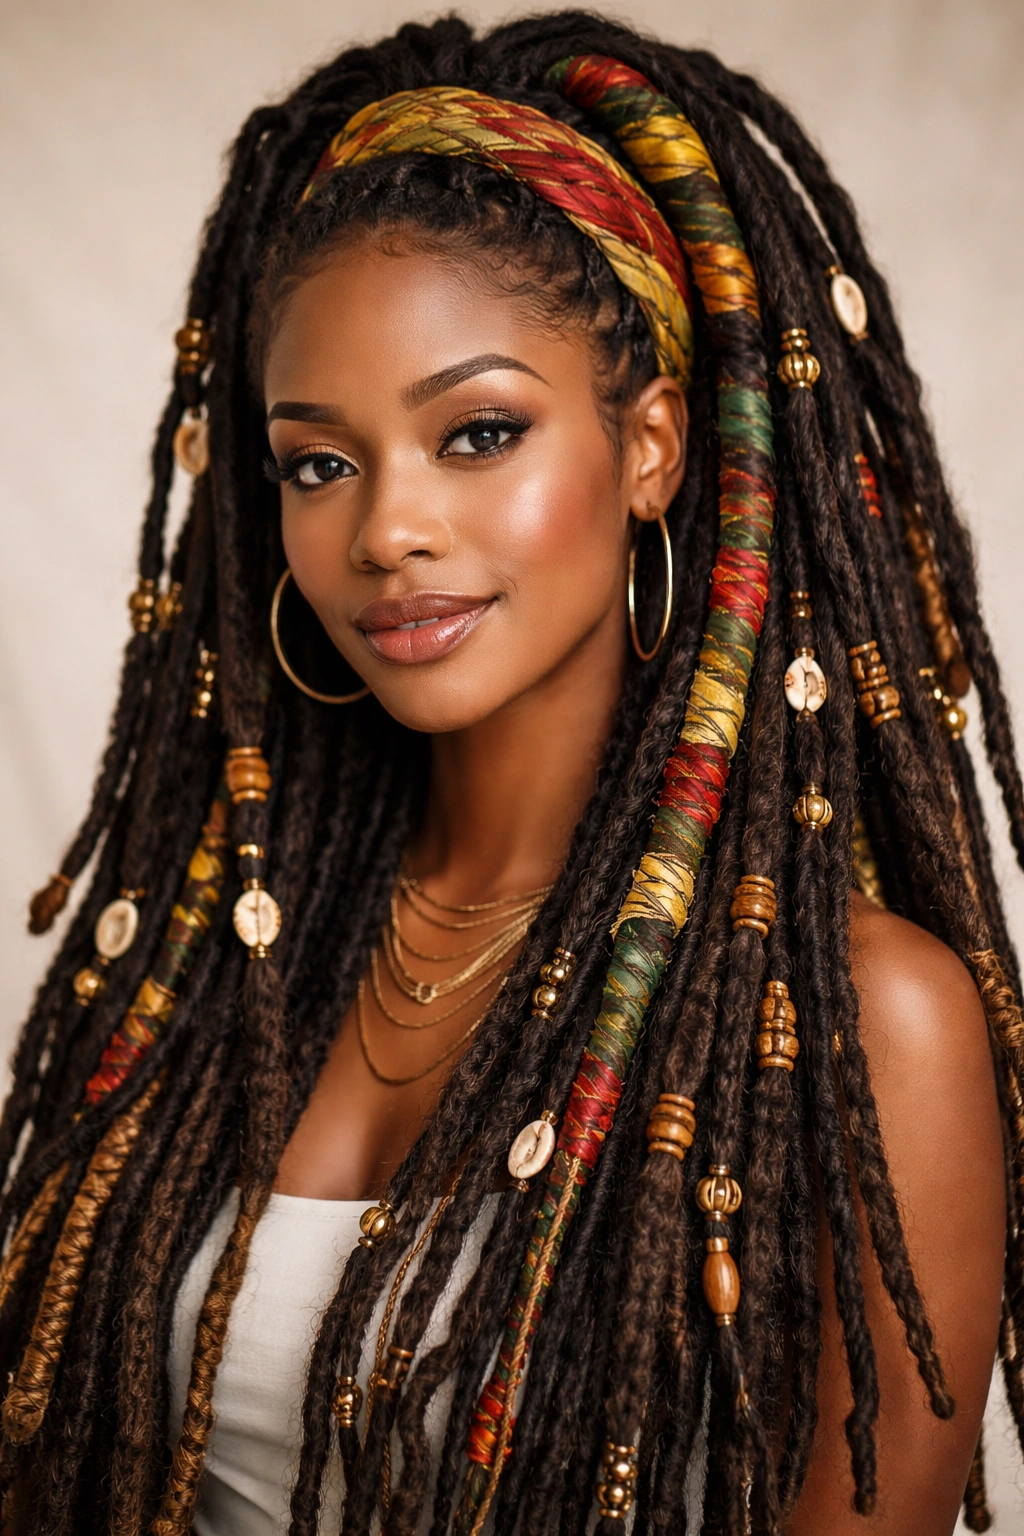
Natural locs were becoming increasingly popular in the ’90s, and people styled them with intention using fabric wraps, beads, cuffs, rings, and wires. A person might have honey-colored locs wrapped with burgundy fabric, gold cuffs at intervals, cowrie shells braided in, and colorful thread spiraling throughout. The locs became a framework for serious self-expression.
The Spiritual and Cultural Dimension
Locs carried spiritual significance and cultural weight in the ’90s. For many wearers, locs represented a commitment to natural hair and an intentional rejection of Eurocentric beauty standards. The wraps and ornaments weren’t just decorative — they were affirmations of identity and choice.
Styling and Ornamenting Your Locs
- Locs take months to fully develop and mature; this isn’t a quick style but a long-term commitment
- Wraps can be fabric, thread, or yarn wrapped around individual locs or sections of locs
- Beads, rings, and cuffs are threaded onto individual locs and can be moved around for different looks
- Cowrie shells, once deeply rooted in African spiritual practice, became popular embellishments in the ’90s
- Hair ornaments can be as simple as colored thread spiral-wrapped around a loc, or as elaborate as beaded patterns
- Maintenance means regular retwisting at the roots (every 2-3 months), moisturizing, and washing carefully
Pro tip: The most authentic ’90s versions mixed different types of ornaments — some locs wrapped, some adorned with beads, some with shells, creating visual complexity and movement.
7. Goddess Braids
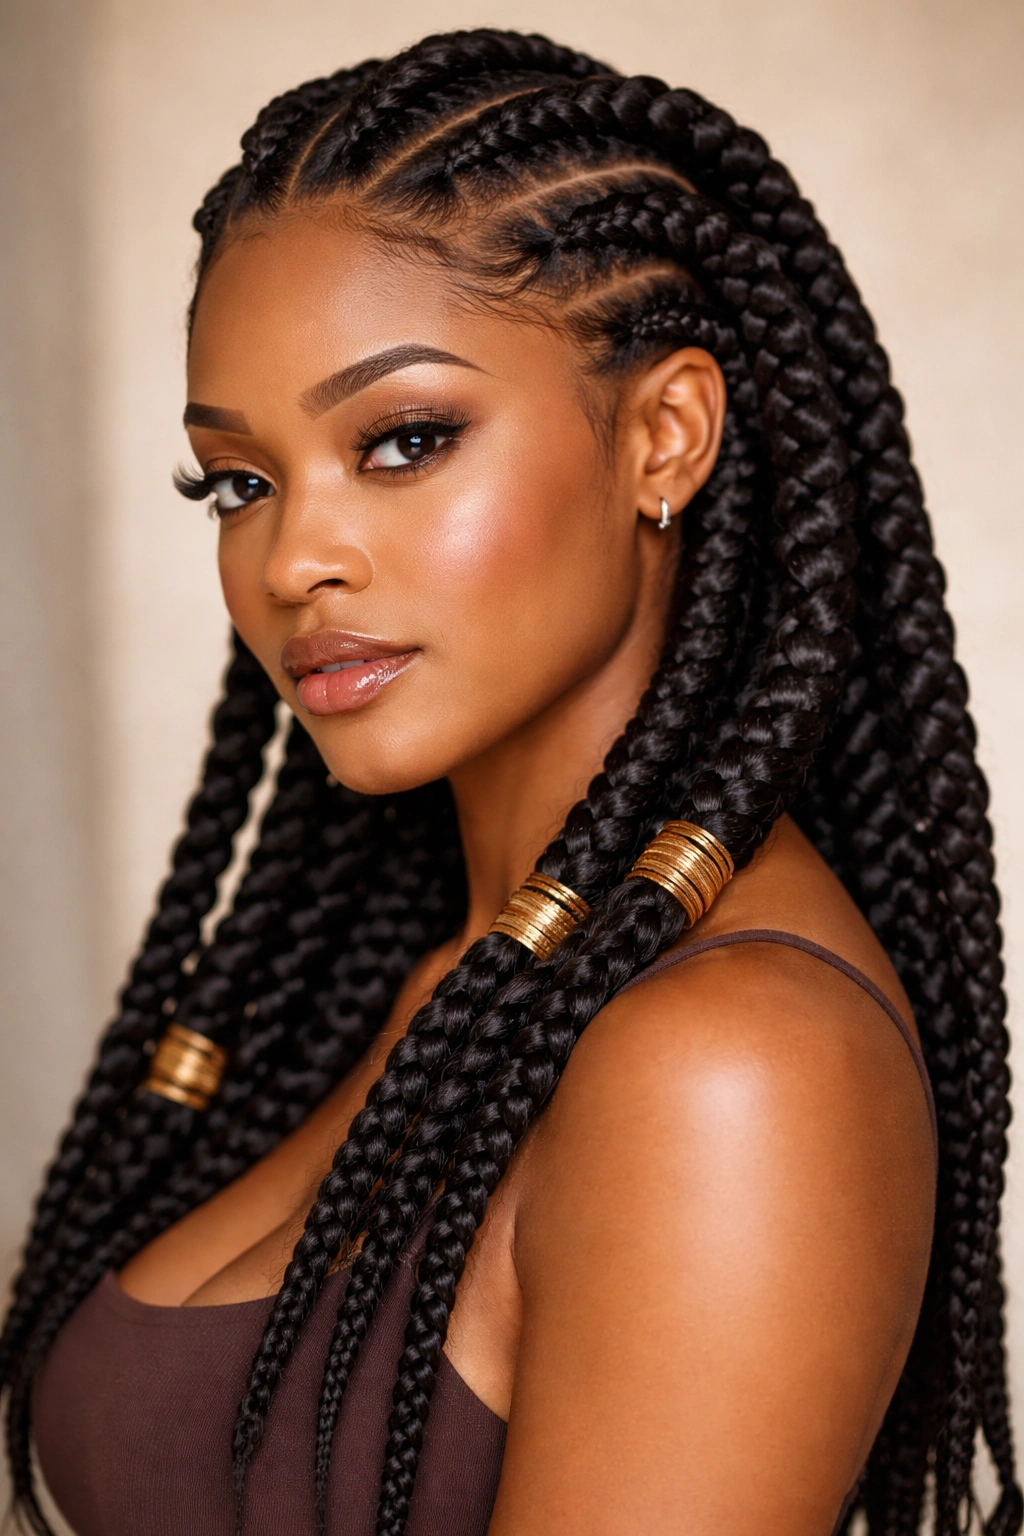
Goddess braids were thicker, often shoulder-length or longer, usually installed with a curve that hugged the head. Unlike traditional box braids, goddess braids were frequently thicker and installed with more tension around the scalp, creating a sleeker, more intentional silhouette. They often incorporated threading or wrapping at the roots for visual interest.
How Goddess Braids Differed from Standard Box Braids
Goddess braids felt more intentional, more sculpted, more chosen. The thickness of each braid was usually larger, the installation tighter, and the overall effect more refined. They worked beautifully as a protective style while also being unmistakably a styled choice rather than just “braids.”
Installing Goddess Braids
- Start with clean, moisturized hair; use a holding cream or gel for better grip and definition
- Create your braid sections using a tool or by hand; goddess braids are typically thicker than box braids
- Begin the braids at the hairline and work back, keeping tension consistent throughout
- Many versions include a slight curve or arch, which requires intentional directional braiding
- Add wraps or thread at the base of each braid for color and definition
- Vary the length to suit your preference — shoulder-length feels more ’90s authentic
- These braids typically last 5-7 weeks with proper nighttime care
Worth knowing: Goddess braids require significant scalp tension, so make sure your braider isn’t braiding too tightly, which can cause hair loss over time.
8. Twisted Crown With Loose Ends
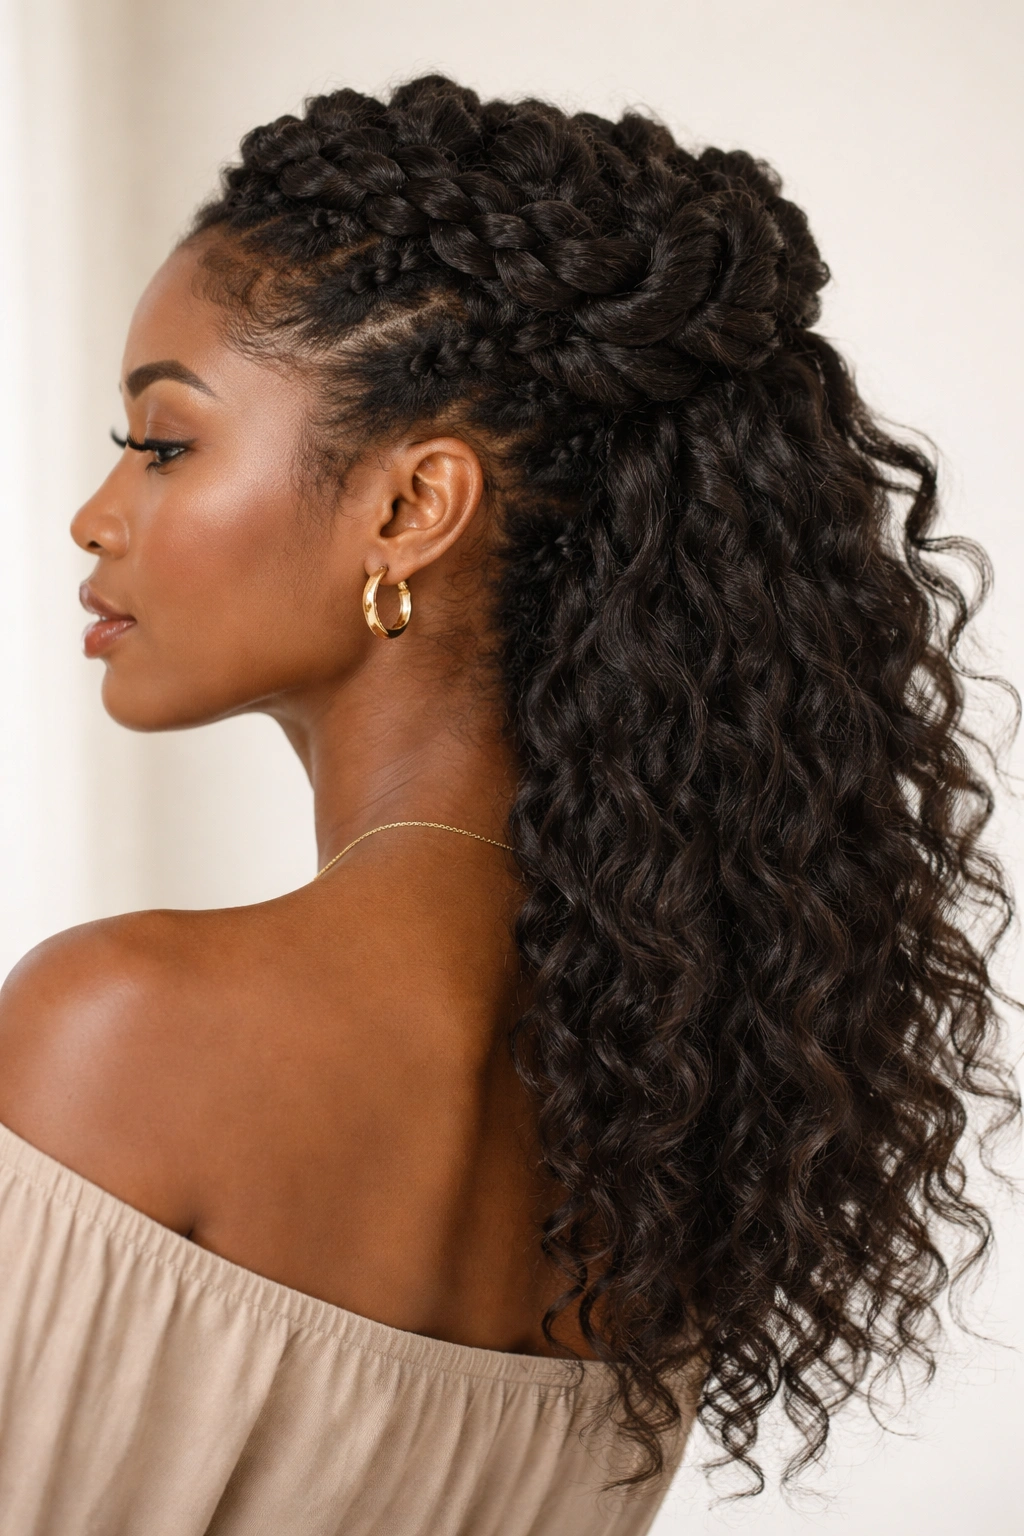
This romantic style twisted sections of hair upward and back, creating a crown-like effect with loose, textured ends flowing freely. It balanced structure with softness — the twisted crown felt intentional and styled, while the loose ends below maintained that carefree, natural aesthetic. It worked beautifully for medium-length and longer hair.
The Balance of Structure and Freedom
This style captured a specific ’90s energy: polished enough for intention, natural enough for authenticity. The twisted crown said “I’ve styled myself,” while the loose ends said “but I’m not trying too hard.” It was the perfect expression of the decade’s aesthetic.
Creating the Twisted Crown Look
- Divide the front and side sections into 2-4 larger sections depending on how full you want the crown to be
- Moisturize your hair and use a light styling cream for grip without flaking
- Twist each section and fold or pin it backward to create the crown effect
- You can bobby-pin the twisted sections, use claw clips, or secure them with a back comb
- Leave the back and lower sections untwisted and textured; pick them out or separate them into undefined pieces
- This style works best on damp or freshly moisturized hair
- It lasts 1-2 days before needing restyling; it’s not a protective style but rather a daily styling option
Pro tip: Accessorize with decorative bobby pins, cuffs, or beads woven into the twisted crown for extra visual impact.
9. Triangular Box Braids With Color
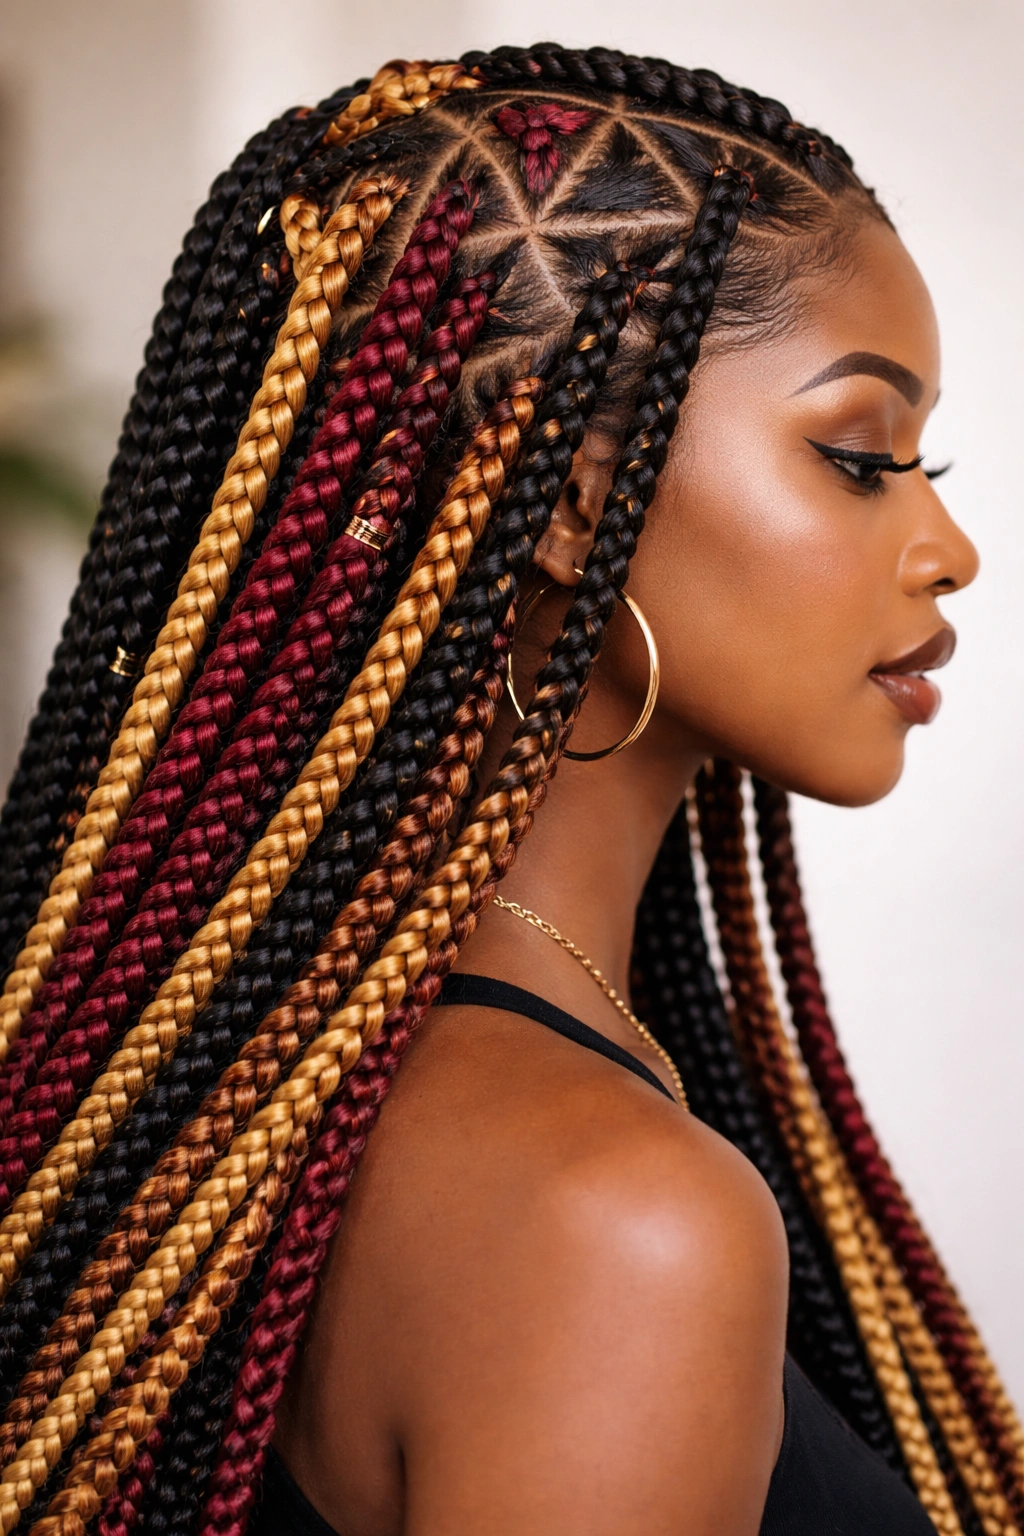
Box braids installed in triangular sections (instead of square ones) created a more organic, flowing look. These were often color-blocked — different shades in different sections — which maximized visual impact and created movement. The triangle installation meant the braids moved more freely and adapted to the natural head shape.
Why Triangular Sections Changed Everything
Square sections created a geometric, highly-structured look. Triangular sections felt more natural and allowed the braids to shift and move with your head’s contours. Add color variation, and the braids caught light differently as they moved. It was a subtle technical choice with a major visual impact.
Installing Triangle-Section Box Braids
- Map out your triangle sections before you start; they should point in various directions to follow your natural hair growth
- Create triangular partings using a comb and your fingers to maintain consistency
- Install box braids in a single color or color-block them by section for maximum impact
- Triangular sections typically allow you to install slightly thicker braids than square sections
- Color blocking means each triangular section gets a different shade — copper, burgundy, blonde, brown, creating visual drama
- These braids typically last 5-7 weeks depending on tension and maintenance
- Lighter colors may fade faster and show roots differently, which affects the overall look over time
Real talk: Color-blocking is higher maintenance than single-color braids. You’re committing to refreshing the look as the color fades or your roots grow out.
10. Spiral Twists (Also Called Corkscrew Curls)
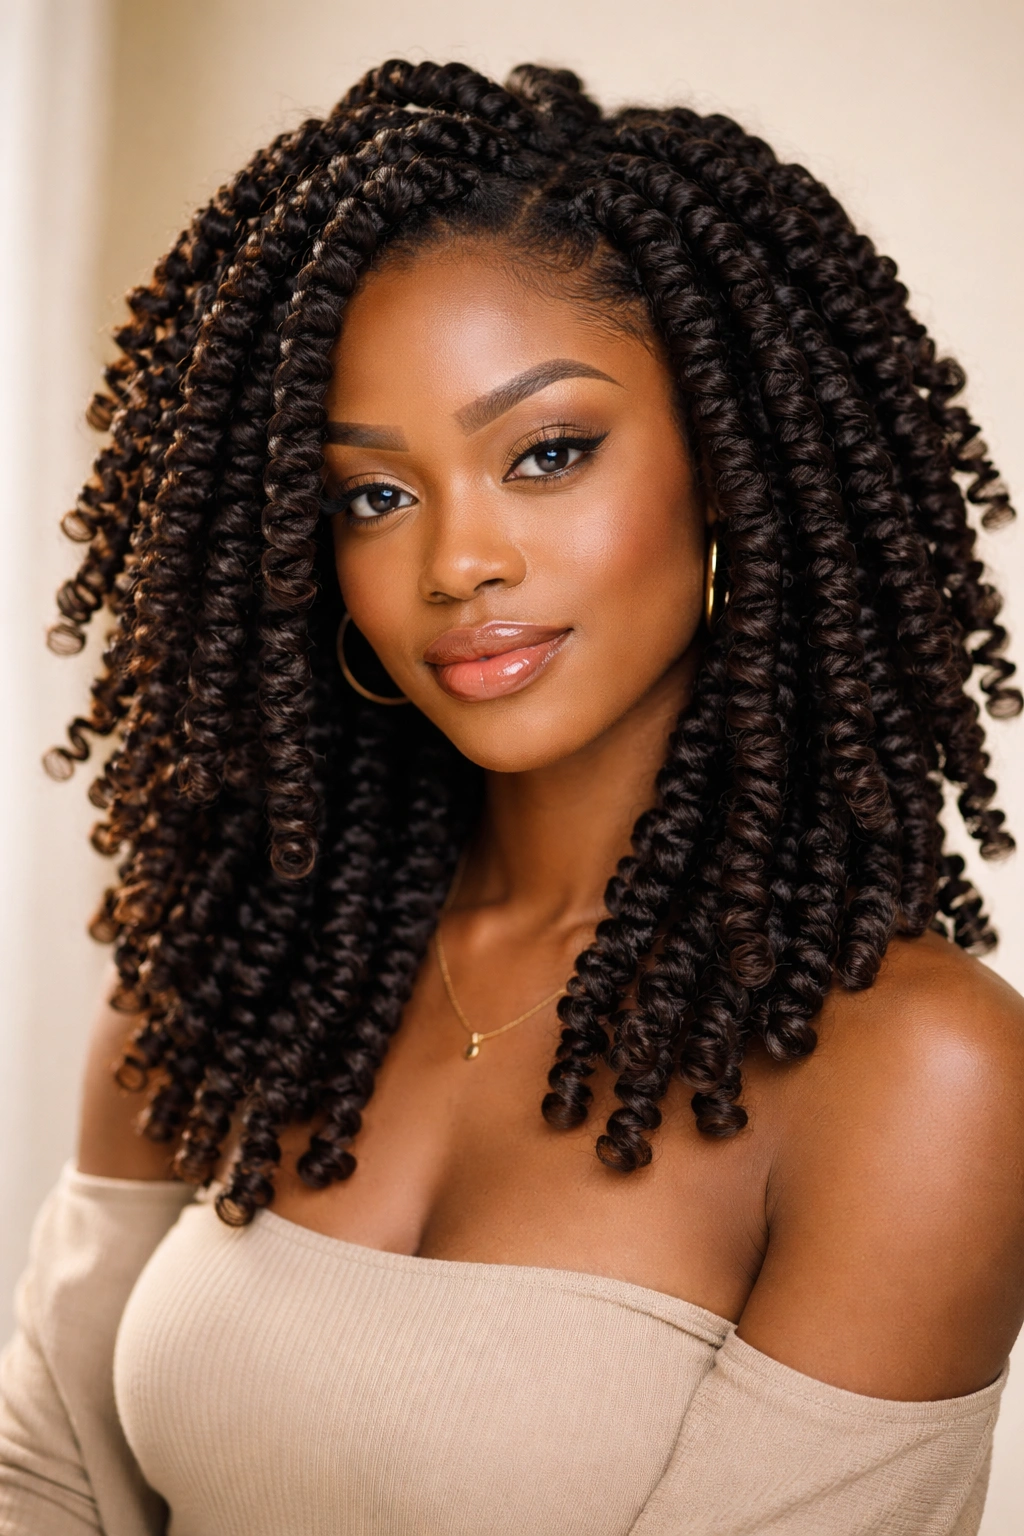
Spiral twists created a bouncy, defined curl pattern throughout the hair. Instead of regular two-strand twists, the twisting technique created a corkscrew effect, and when you unraveled them after a few days, you got defined coils. The style celebrated curl pattern and volume, especially when the twists were thick and chunky.
The Science That Made Spiral Twists Pop
The spiral pattern created compression that literally shaped the hair into tighter curls. When you released the twists, the hair held that pattern temporarily, creating a full, defined, bouncy look. It was a way to amplify natural curl pattern and create maximum volume and movement.
Achieving Perfect Spiral Twists
- Start with clean, damp hair and a moisturizing product with good slip (creams and butters work better than gels for this)
- Divide hair into sections — the thickness of your sections determines the thickness of your spirals
- Twist each section tightly while directing it slightly upward or in a spiral direction
- Use a styling tool or bobby pins to hold the twist in shape while it dries (or just braid them when they’re dry)
- You can keep the twists in for 3-7 days depending on how long you want the curl pattern to last
- When you unravel them, you’ll have defined coils that feel bouncy and full
- Refreshing with water and product throughout the week keeps the curls defined
Pro tip: For maximum impact, install spiral twists and sleep with your head elevated on a silk pillowcase. In the morning, shake them out gently and hit them with a light water mist for fresh definition.
Final Thoughts
The genius of ’90s afro styles wasn’t just how they looked — it was what they represented. These were styles that required patience, investment, and genuine commitment. They celebrated texture instead of fighting it, embraced boldness instead of shrinking it, and created space for individual expression within cultural tradition.
What made these styles matter then and what makes them worth recreating now is authenticity. You’re not just copying a look; you’re tapping into an aesthetic that was rooted in something real — a moment when natural hair celebration felt revolutionary for many people. Whether you choose a protective style like goddess braids, a styling choice like the twisted crown, or a commitment like natural locs, you’re participating in a lineage of people who’ve chosen to wear their hair as an expression of identity.
The technical side matters — finding a skilled stylist, using quality products, understanding how to care for whatever style you choose. But the deeper thing that makes these styles sing is wearing them with intention. Know why you’re choosing that style. Understand what it means to you. Take the time to maintain it properly. That’s what transforms a hairstyle into a genuine statement.
