



Afro puffs are the ultimate expression of Black beauty and hair confidence. They’re soft, rounded, and completely versatile — equally at home in the office, the gym, or a night out with friends. Whether you’re working with natural hair, locs, braids, or twists, a well-styled puff takes minutes to create and hours to keep looking fresh and intentional.
The real magic of puffs lies in their practicality. You get a polished, put-together look without the time commitment of elaborate styling. Your hair stays protected from daily friction and environmental stress, and you can switch up your style mood in seconds — from sleek and minimalist to textured and playful — just by changing how you gather your hair. For anyone with textured hair who’s tired of the choice between “spend two hours styling” and “throw it in a messy bun,” puffs hit the sweet spot.
But there’s more nuance to puff styling than just pulling your hair up. The placement, the texture you work with, the size you create, and the finishing touches all change how a puff reads and how long it lasts before needing a refresh. Some puffs are designed for quick morning grab-and-goes, while others reward a few extra minutes of intention and hold strong for a full day of activity.
Let’s break down nine distinct afro puff styles — each simple enough to execute on a regular Tuesday morning, each different enough to keep your rotation fresh.
1. High Puff
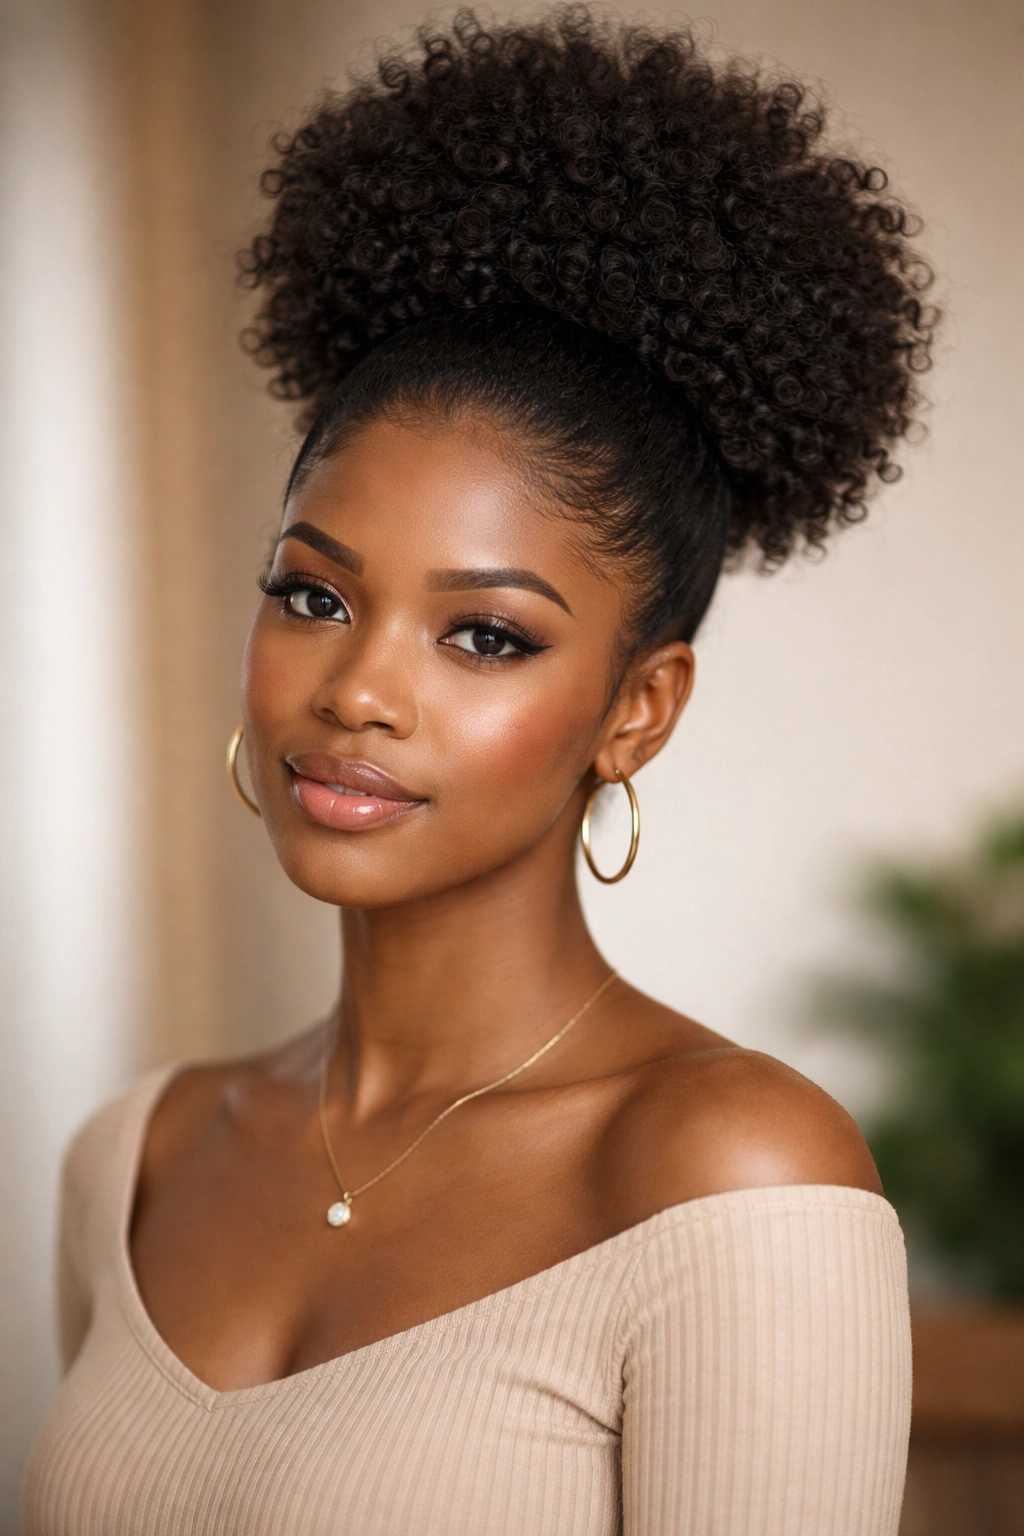
The high puff is the classic statement maker. This is the puff that sits at the crown of your head, bold and unapologetic, drawing the eye upward and framing your face with softness. It reads as intentional, youthful, and ready for anything — which is why it’s the go-to for everyone from students to working professionals who want their hair to announce their presence the moment they walk into a room.
Why It Works as an Everyday Style
A high puff feels elevated without requiring any complicated technique. The height creates an instant optical lift, making your silhouette taller and your face appear more open and approachable. When you place a puff at the crown rather than lower on the head, gravity works with you — the natural weight distribution keeps the puff sitting exactly where you want it, and it’s less likely to slide or flatten as your day progresses.
How to Create the Perfect High Puff
Start with hair that has some texture or grip — whether that’s day-two or day-three natural hair with a light reapplication of styling cream, braids, twists, or locs. Flip your head forward and gather all your hair toward the very crown of your scalp, using your fingers or a fine-tooth comb to smooth the hairline as you go. Secure with a hair tie that grips firmly without being painful — a silk or satin covered elastic is gentler than a standard rubber band, and it minimizes frizz around the perimeter.
Once the base is secured, gently fluff and shape your puff with your fingers, working in sections to create even volume all the way around. If you want the front sections to stay smooth, use a light mousse or edge control around the hairline, smoothing those front pieces down with a brush or your fingers.
Pro Tips for Maximum Impact
A high puff photographs beautifully and catches light in a way that flatters almost any face shape. If you’re using edge control around the front, less is more — a tiny amount goes a long way, and over-applying makes edges look stiff and unnatural. For extra longevity on a high puff, secure your hair tie at the exact spot where you want the puff to sit, then smooth any flyaways with a light spritz of flexible-hold hairspray. This keeps everything in place without making your hair feel crunchy.
2. Double Puffs
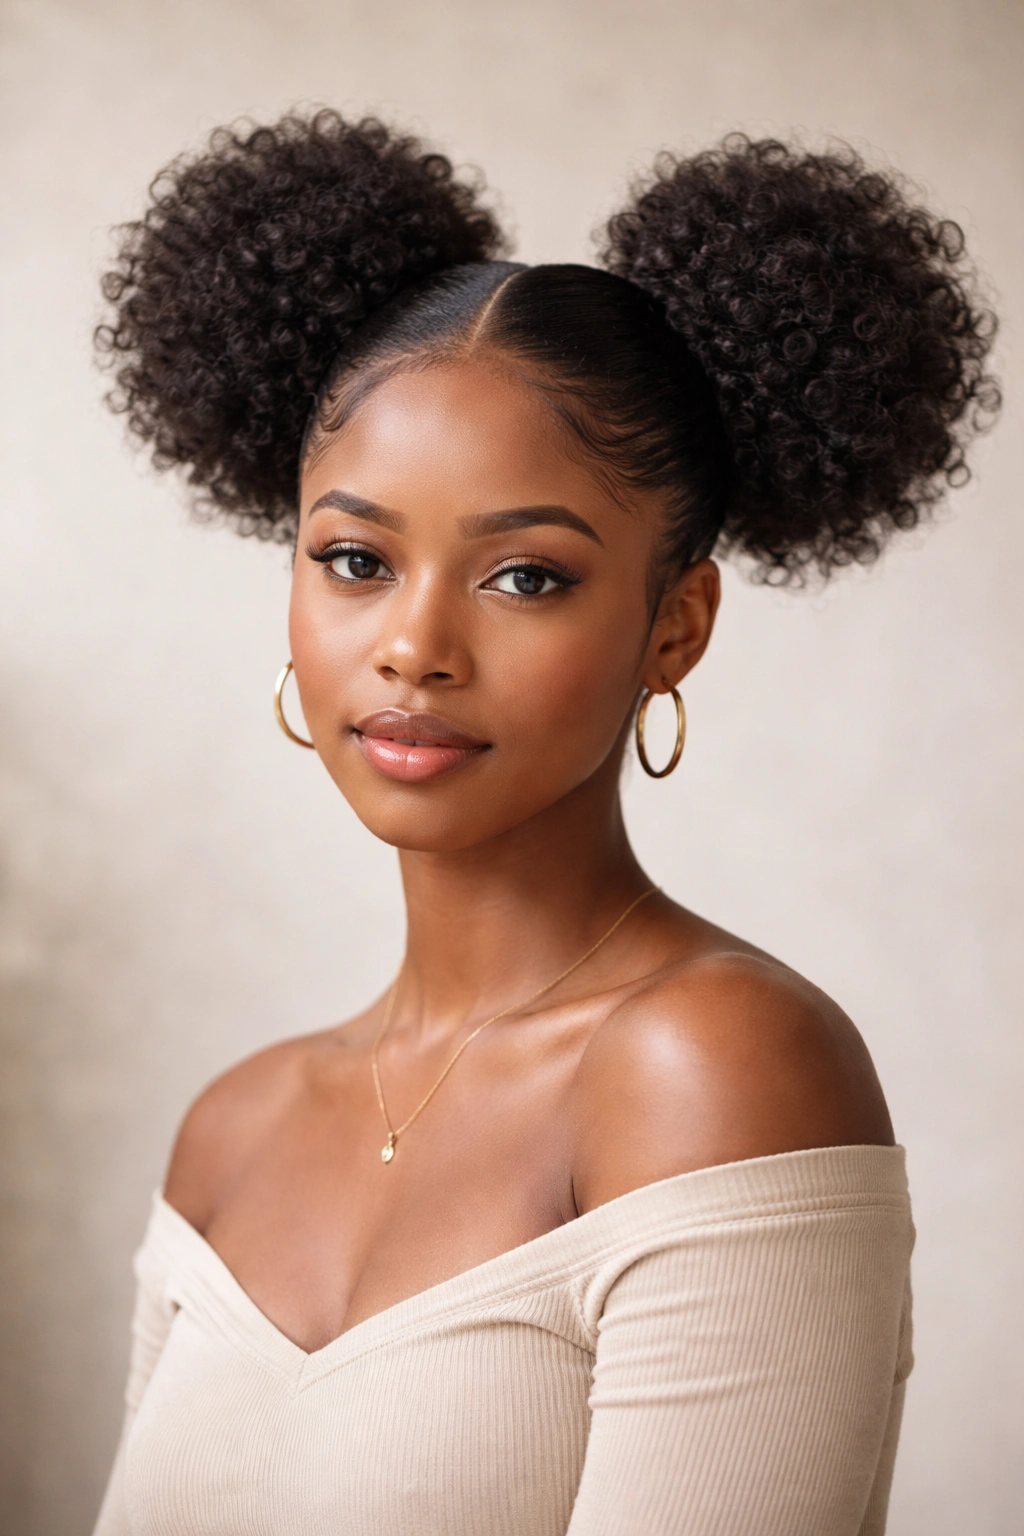
Double puffs are where playfulness lives. These twin puffs sit on either side of your head, usually at mid-height or slightly higher, creating instant visual interest and youthful energy. There’s something irresistibly fun about this style — it’s androgynous, it’s bold, it’s distinctly you, and it takes roughly the same amount of time as a single puff but feels like you put in serious effort.
Why Double Puffs Are Secretly Practical
Two smaller puffs actually distribute the weight of your hair more evenly across your scalp than one large puff, which can reduce tension and pulling at the crown. This matters if you’re doing this style regularly — you’re protecting your edges and hairline better because no single area is bearing all the weight. Beyond the hair health angle, double puffs offer another practical win: they’re more forgiving. If one puff starts to flatten or slip by midday, the other one is still going strong, keeping your whole look intact.
Creating Symmetrical Double Puffs
Divide your hair into two clean sections down the middle of your head, from your forehead to the nape of your neck. Smooth each section with a comb as you separate — this gives you a clean part line and prevents any wisps from escaping during styling. Secure each section with its own hair tie, placing them at the same height on either side of your head. The key to symmetry is measuring this placement visually as you gather — hold your hands level and check that both sections are at exactly the same distance from the crown.
Once both are secured, shape each puff by gently fluffing and rotating it so the volume is even on all sides. Smooth your part line and any baby hairs with edge control for a polished, intentional finish.
Getting the Volume Right
The beauty of double puffs is that you don’t need to go massive with the volume. Medium-sized puffs that sit comfortably on either side of your head feel modern and wearable. If you go too large, the style can tip from playful into costume-like territory — which is fun if that’s your intention, but for everyday wear, aim for puffs that are roughly the size of a grapefruit or a little smaller. This size reads as styled without being theatrical.
3. Low Puff
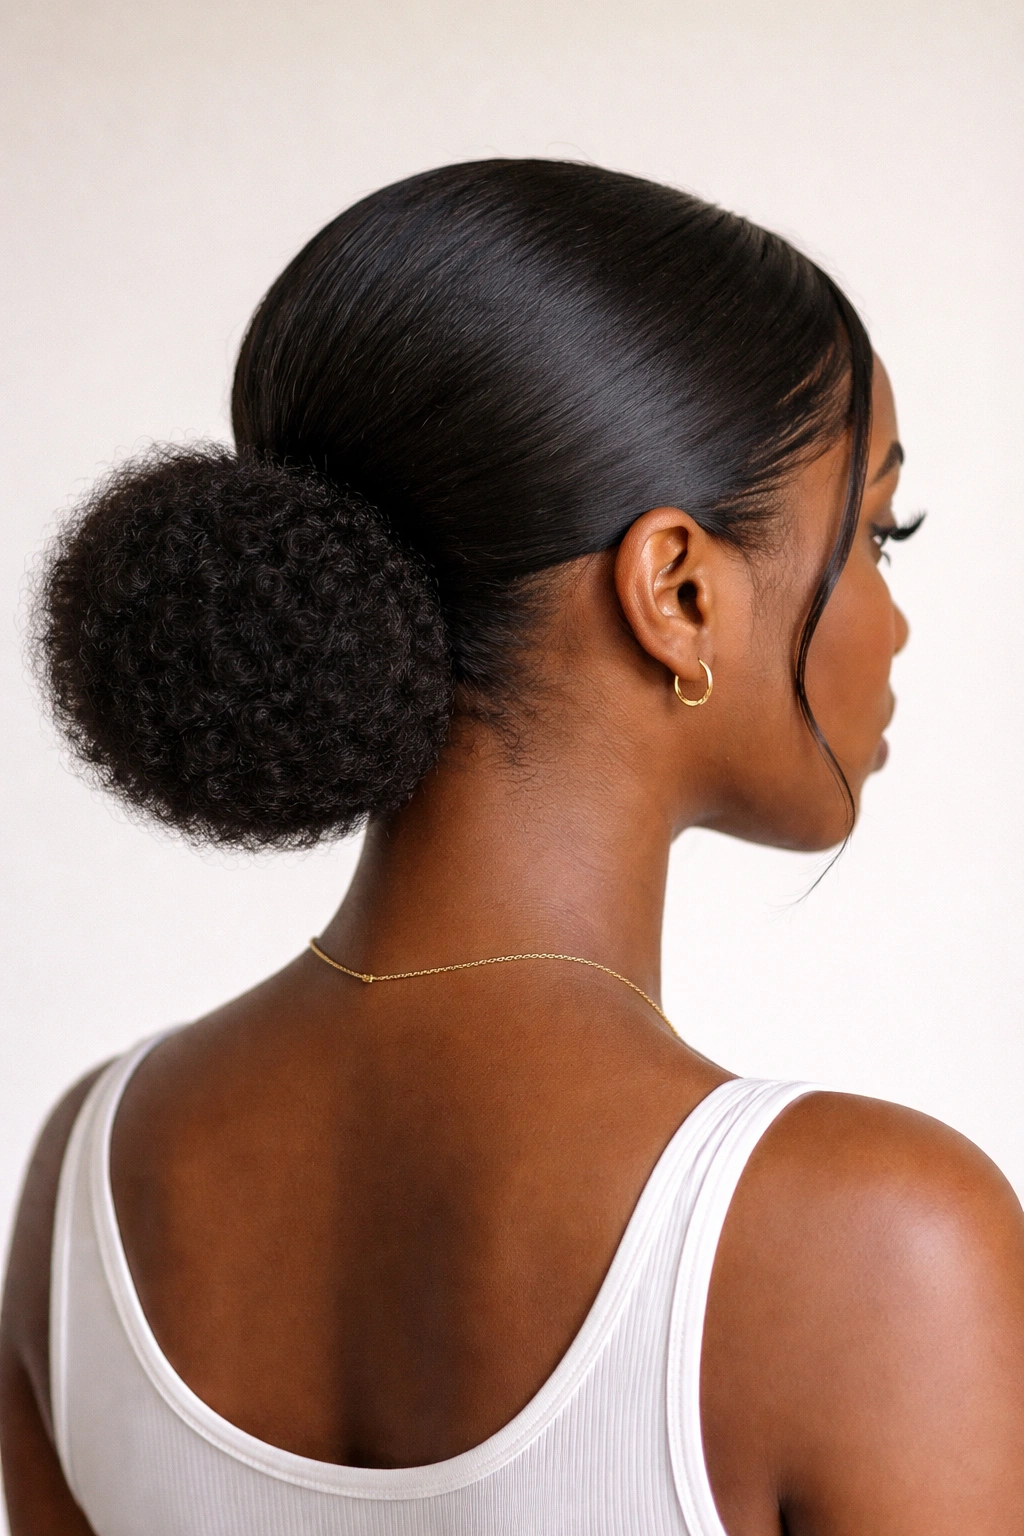
The low puff is the workhorse of the puff family — it’s sleek enough for professional settings, laid-back enough for the weekend, and it genuinely lasts all day. This puff sits lower on the head, usually at the nape of the neck or mid-way between crown and nape, and it creates a neat, contained silhouette that feels mature and intentional.
Why Low Puffs Excel for Busy Days
When your puff sits lower, your hair isn’t fighting gravity in the same way — there’s less weight pulling down on your hairline, which means your edges stay smoother and your front hairline stays defined longer. The lower placement also means fewer flyaways around your face and neck, so a low puff is your best bet if you’re going from office to gym to evening plans and don’t have time to touch up your style between transitions.
Styling a Low Puff for All-Day Hold
Start with smooth, well-moisturized hair — either natural hair that’s been conditioned and lightly lotioned, or braids and twists. Use a fine-tooth comb to smooth your hair upward and backward from your face, gathering everything toward the lower back of your head. Once you’ve got all your hair collected, secure it firmly with a quality elastic.
The shape of a low puff benefits from a little extra definition. Use your fingers to gently coax the gathered hair into a round, even shape, smoothing any bumps or uneven sections. For a refined look, you can take a small section from the base of the puff and wrap it around the elastic to hide it, securing the wrapped section with a bobby pin. This detail transforms a simple low puff into something that looks intentional and finished.
Styling Variations Within the Low Puff
You can wear a low puff sleek by smoothing every section with a brush and edge control, creating a polished, corporate-ready look. Or you can go textured by leaving the surface of the puff less controlled, letting natural texture show for a more relaxed vibe. Some people love to curl the loose ends of a puff slightly by gently wrapping sections around a finger before release — this adds softness and dimension without requiring any heat or extra products.
4. Twisted Puff
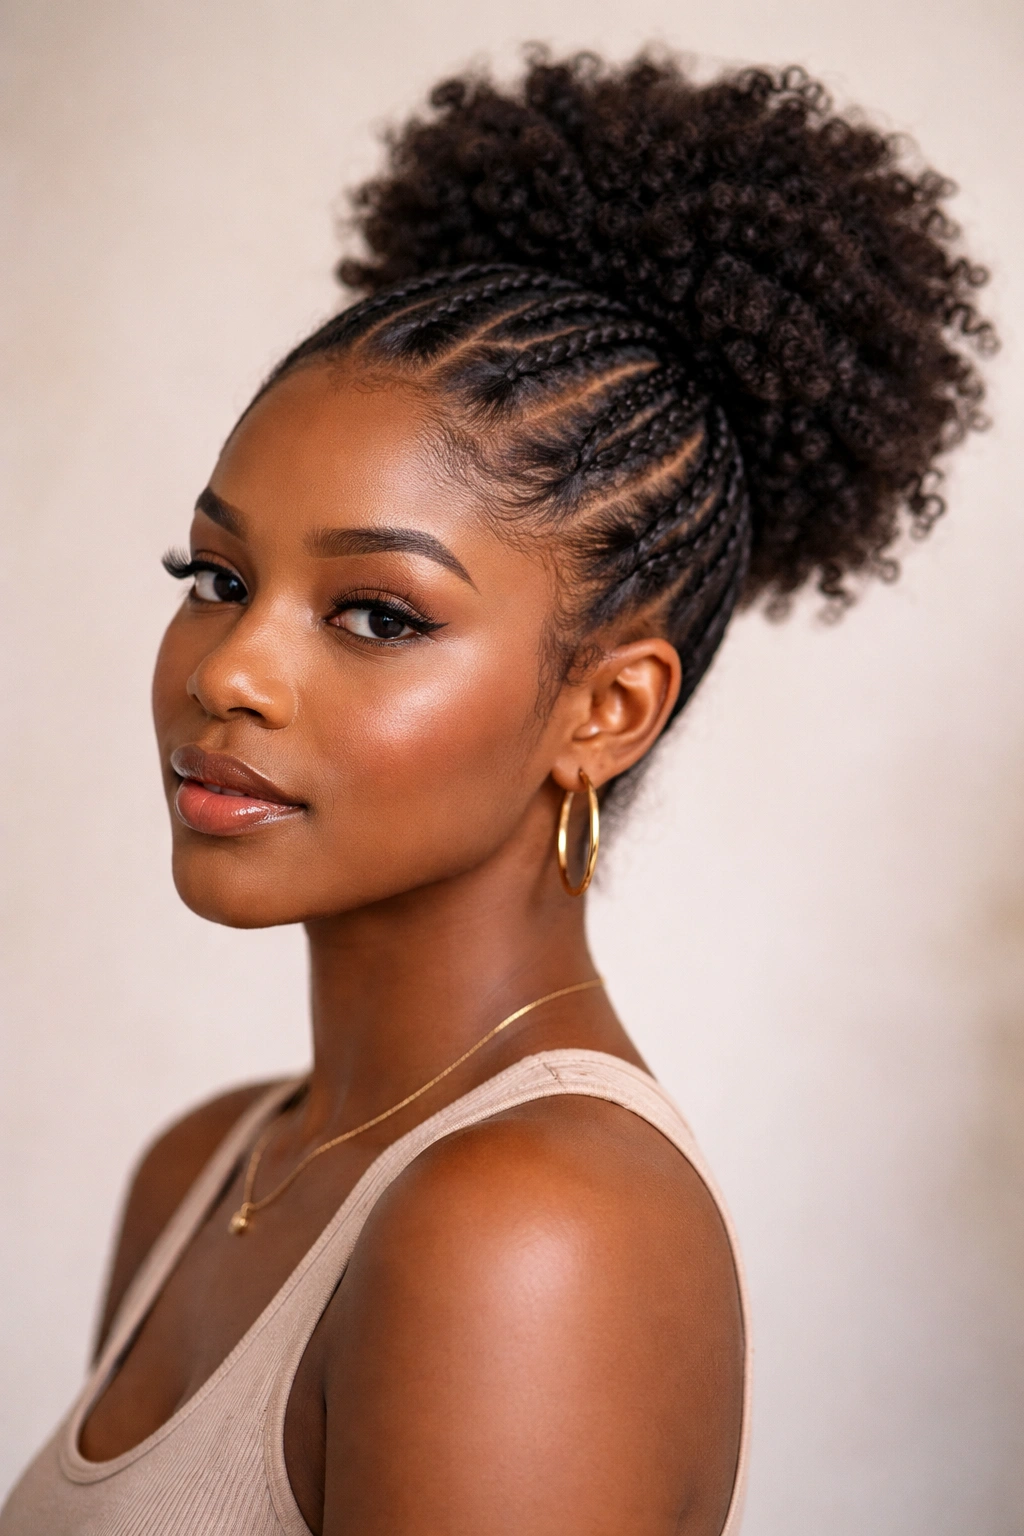
A twisted puff adds dimension and textural interest to a simple gathered style. Instead of gathering all your hair and securing it into one smooth section, you create two or more twisted strands that spiral together before being secured into a puff. The result is a style that looks more intricate than it actually is — it takes maybe five extra minutes compared to a basic puff, but it reads as significantly more styled.
How Twists Transform a Basic Puff
Twists create visual interest without requiring cornrows, braids, or any technique beyond sectioning and twisting. When two twisted strands wrap around each other toward the crown, they create a defined pattern that catches light and adds depth to your overall look. A twisted puff feels elevated and intentional, which is exactly what you want for days when you need to look more polished but don’t have time for elaborate styling.
Creating a Twisted Puff Step by Step
Part your hair into two equal sections — you can do a middle part for symmetry, or an off-center part if that suits your face better. Starting at the nape of your neck, twist one section tightly or loosely depending on the aesthetic you want (tighter twists look neater; loose, open twists feel more relaxed). As you twist upward toward the crown, guide the twisted section to follow a curved path around the back of your head.
Once you reach the crown, do the same with the second section, twisting it upward and guiding it to spiral around the opposite side. Bring both twisted sections together at the crown and secure them with a hair tie. The twists naturally spiral around each other as they meet, creating a beautiful braided-like effect without the effort of an actual braid.
Customizing Your Twisted Puff
You can create double twisted puffs by doing this technique twice, creating two smaller twisted puffs on either side of your head. You can also do a single twisted section that spirals around into a low puff — this creates a circular, almost rose-like pattern on the back of your head. For extra hold and definition, twist your hair while it’s still slightly damp or while holding a light styling cream between your fingers as you twist. This gives the twist more grip and helps it hold its shape longer.
5. Braided Puff
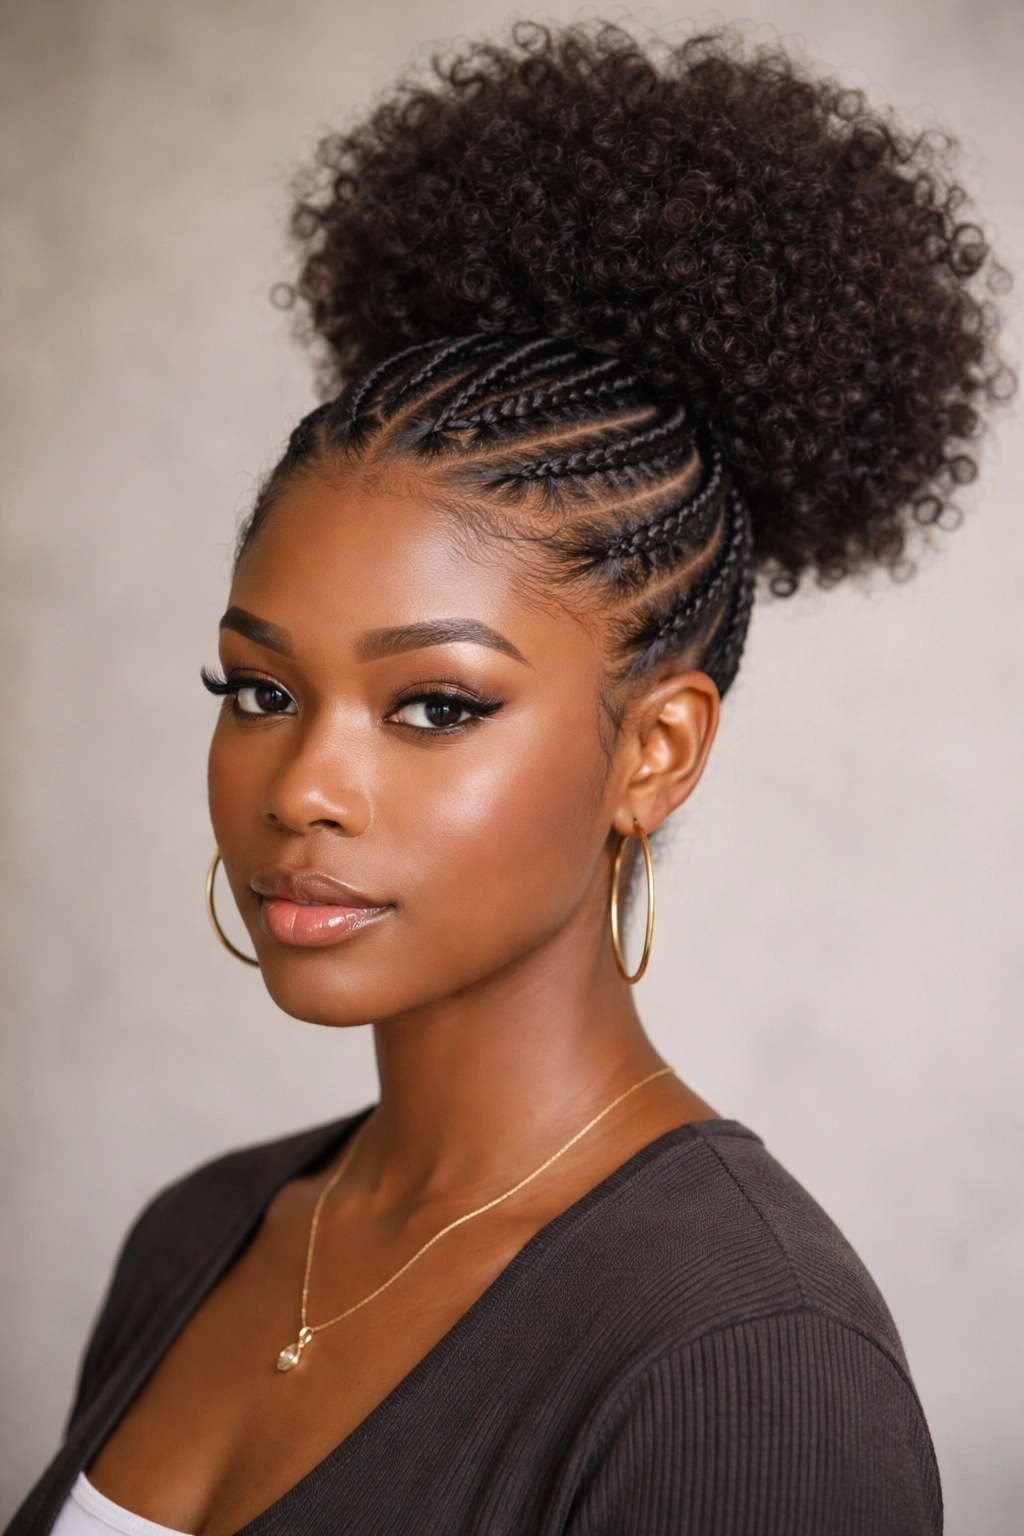
A braided puff incorporates actual braids into the puff structure, creating definition and texture that lasts for days. You can do a single braid that feeds into a puff, multiple smaller braids that all meet at the crown, or feed two side braids together into a unified puff at the back. This style sits at the intersection of protective styling and easy everyday wear.
Why Braids Make Puffs Last Longer
A puff by itself can start to look fuzzy or less defined by evening if you’re active or if you’re working with very fine, flyaway-prone hair. When you braid the understructure, you’ve got a solid, defined base that holds its shape longer and resists frizzing. The braids also distribute tension more evenly across your scalp, making this a genuinely protective option that you can wear multiple days in a row if you want to.
Creating a Two-Braid-to-Puff Style
Section your hair down the middle from your forehead to your nape, creating a clean, vertical part. Starting on one side, braid from the nape upward toward the crown — a simple three-strand braid works beautifully. As you braid upward, the braid naturally follows the curve of your head. Do the same on the other side.
Once both braids reach the crown, gather all the loose hair from both braids plus any hair you haven’t braided yet into a single puff at the crown. Secure everything with a hair tie. You end up with a style that’s got clean, defined braids running up the back of your head and a puff sitting proudly at the crown, anchored by the braids below.
Single Braid Puff Variation
Start with a braid from the nape of your neck and braid upward toward the crown — not down the middle, but slightly off to one side. As you reach the crown, guide the braid into a spiral, coiling it into a flat, circular shape and securing it with bobby pins. This creates a single braided puff that looks complex but only requires basic braiding skill.
Longevity and Touch-Ups
A braided puff can comfortably last three to five days before needing a full restyle, especially if you sleep on a silk pillowcase or wrap your hair in a silk scarf or bonnet at night. After the first day, gently re-fluff the puff part by lightly separating the sections with your fingers — this refreshes the look without undoing the braids underneath.
6. Side Puff
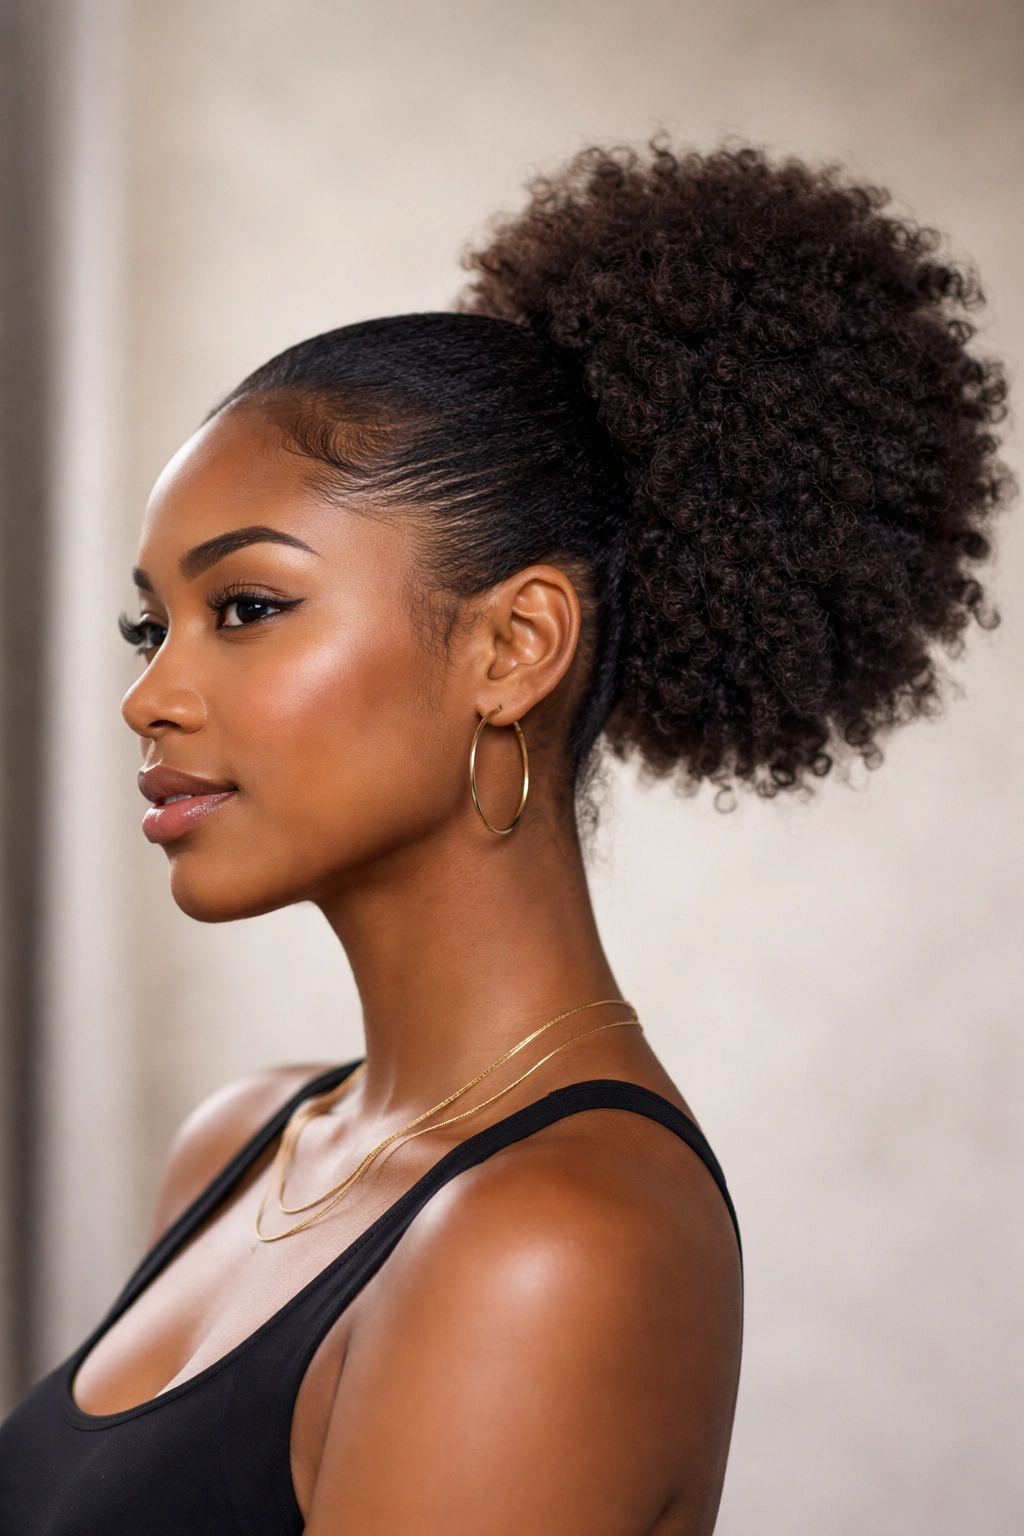
A side puff sits off to one side of your head, creating an asymmetrical look that’s modern, fashion-forward, and surprisingly easy to maintain. Instead of gathering everything at the crown or arranging it symmetrically, you’re placing your puff to one side — usually at the side-back of your head, though anywhere along the side works. This style reads as intentional and styled without requiring any more effort than a basic puff.
The Asymmetry Appeal
Side puffs are one of the easiest ways to give yourself an instantly more interesting silhouette. When you place your puff to the side, you’re creating visual movement and drawing the eye toward wherever you place it. For this reason, a side puff is flattering if you want to emphasize one side of your face or create a more balanced look if you have any facial asymmetry you’re working with.
How to Position a Side Puff
Sweep all your hair toward one side of your head — let’s say the right side. Using a fine-tooth comb, smooth everything as you gather it, creating a clean line where your part will be (usually from the crown toward your opposite ear). Secure all your hair on the right side with a hair tie, positioning the tie so that your puff sits at approximately where your ear is or slightly behind it.
Gently shape and fluff the puff once it’s secured. The beauty of a side puff is that the hair naturally wants to sit on the side you’ve gathered it to, so it requires less maintenance and reshaping than a crown-placed puff that’s fighting gravity all day.
Styling the Uncovered Side
Once your puff is secured to one side, you’ve got a whole side of your head that’s open and visible. You can wear it completely smooth with edge control applied all the way from your hairline to where your puff is. Or you can add texture — some people love to add a few small braids or twists to the exposed side, or even a few strategically placed bobby pins with beads on them for extra detail. You can also wear this side completely bare if your hairline is healthy and defined, letting your natural hairline and edge pattern be part of the style.
7. Puff with Headwrap
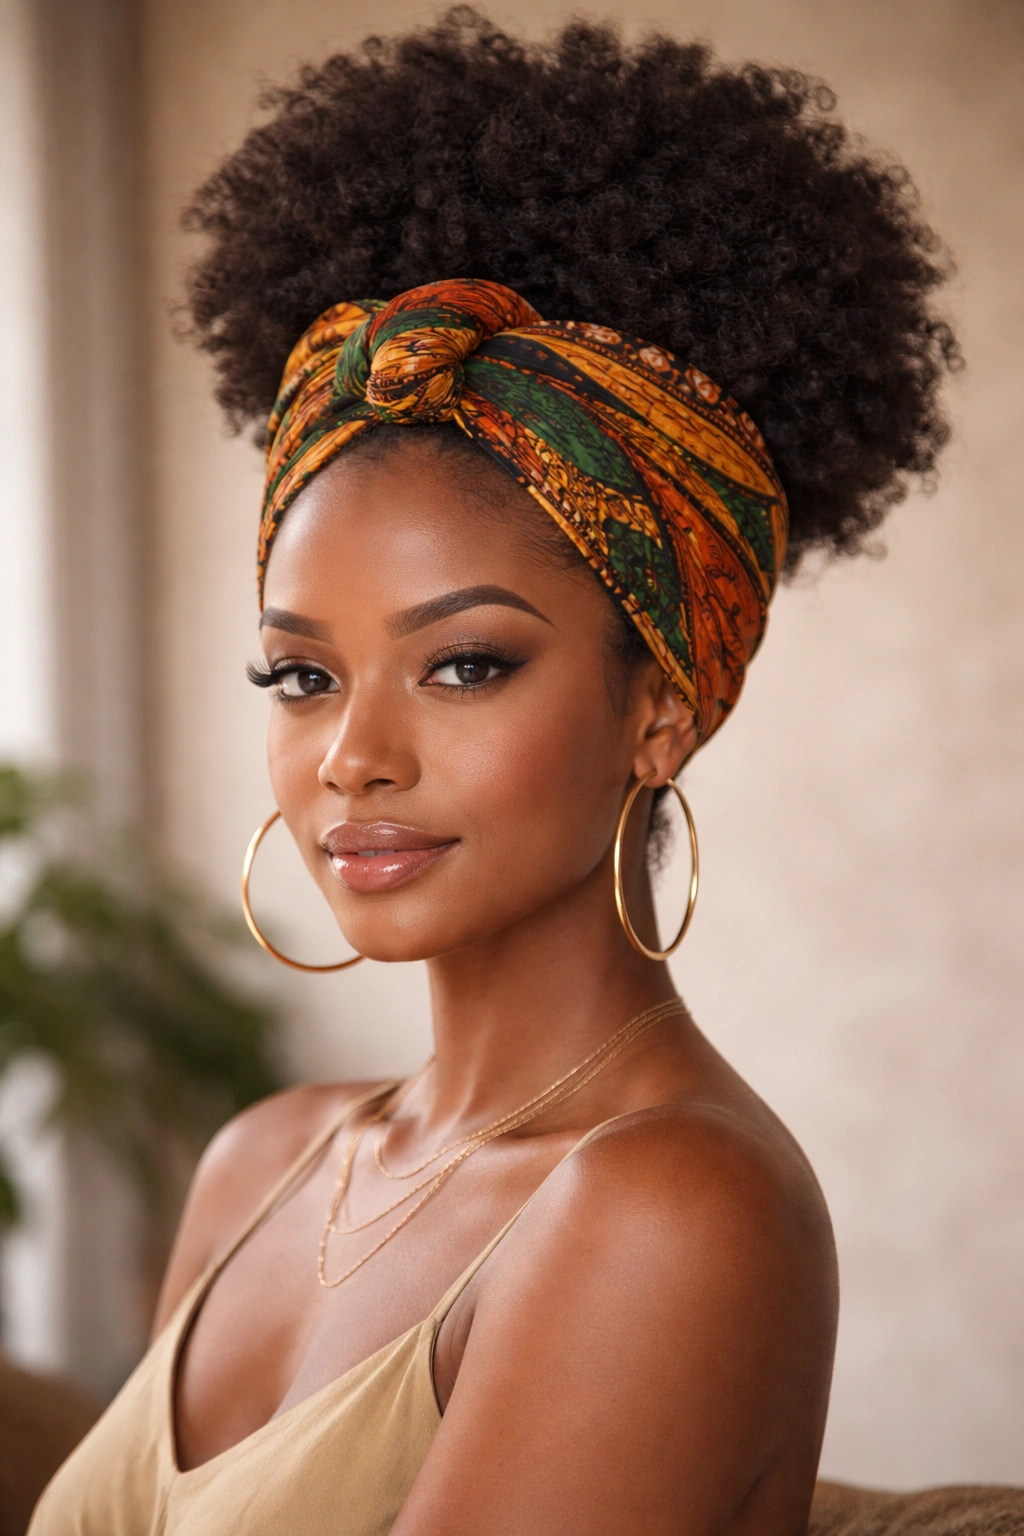
A puff with a coordinating headwrap is a style statement that works for any occasion, from casual to formal. The wrap frames the puff, adds color and pattern, and instantly elevates the simplest puff into something that looks intentionally styled. This combination is incredibly versatile — you can go minimal and modern, or go bold with color and pattern.
Choosing Your Wrap
A headwrap or head tie can be a long rectangular fabric, a pre-tied head wrap with elastic at the back, a scarf, or even a long strip of fabric. The best fabric for wrapping has some body and holds a shape — cotton, linen blends, or African print fabrics are all excellent choices. Silk is beautiful for reducing friction on your hair and is especially good if you’re wrapping damp hair.
Creating the Perfect Wrap and Puff Combination
Start by creating your puff — high, low, or wherever you prefer to wear it. Once your puff is secured and shaped, take your headwrap and fold it into a triangle or a long rectangle depending on the style you want. Position the wrap so that the front edge sits along your hairline and temples, covering the elastic of your hair tie if that’s where your puff is, and create a neat fold or knot at the crown or back of your head.
The wrap should feel secure but not uncomfortably tight. You’re not trying to secure your hair with the wrap — your hair tie is doing that job. The wrap is purely a styling element that frames and coordinates with your puff.
Wrap and Puff Styling Variations
For a minimal look, use a solid-colored wrap that’s neutral or complements your skin tone — this draws all the attention to the shape and texture of your puff. For a bolder statement, choose a wrap with a bright color or a pattern that speaks to your mood. Some people love to use a contrasting wrap color to make both the wrap and the puff more visually striking.
You can also layer wraps — start with a neutral wrap close to your head, then add a patterned wrap over top, letting both show. Or wrap one wrap all the way around your head, then add a second wrap to secure it and add more pattern coverage. The possibilities here are genuinely endless and open up every time you gain a new wrap in a different color or print.
8. Sleek Puff
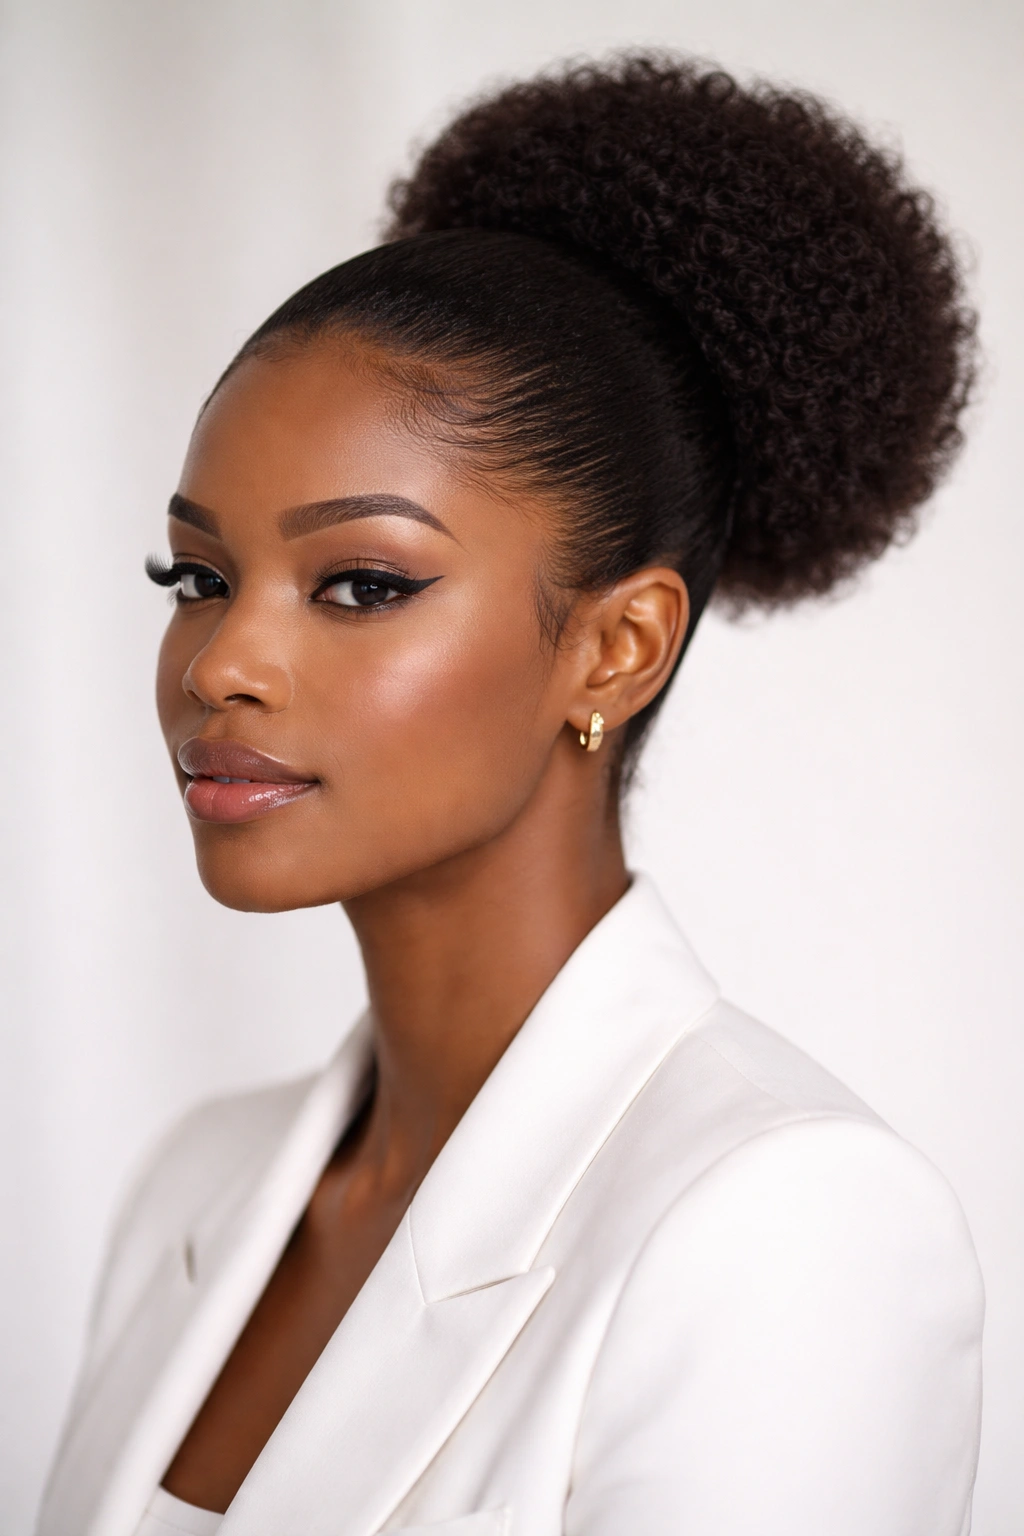
A sleek puff is the most polished, minimalist version of a puff — every edge is smooth, every strand is in place, and the overall effect is intentional and refined. This is the puff you wear to important meetings, formal events, or any day when you want to feel absolutely put-together. It requires a few more products and a bit more precision than a casual puff, but the payoff is a look that’s unquestionably professional and personal at the same time.
Creating Sleekness
Sleekness starts with preparation. Make sure your hair is moisturized and smooth — detangle gently with a leave-in conditioner and a wide-tooth comb before you start styling. Once your hair is tangle-free and smooth, use a fine-tooth comb to gather your hair, smoothing as you go. Apply a lightweight gel or mousse to your hairline and the back of your neck as you’re gathering, keeping everything sleek and controlled.
As you gather your hair toward your puff point, brush and smooth constantly. Take a small brush and smooth down any bumps or unevenness in the gathered hair. Once you’ve secured your puff with a hair tie, apply edge control or a light gel to your hairline, smoothing it down with a brush for a finished look.
Maintaining a Sleek Puff
A sleek puff requires more touch-ups during the day than a textured puff, simply because any humidity or friction will make fine hairs escape and lose that smooth appearance. Keep a small brush and your edge control product with you during the day so you can smooth down any flyaways that emerge. A light spritz of flexible-hold hairspray at the end helps everything stay in place and keeps your style looking fresh for longer.
The Role of Product in Sleekness
For a sleek puff, your product choices really matter. A heavy gel will look shiny and stiff; a light mousse gives you control without visible product buildup. Some people swear by using a tiny amount of oil-based edge control — just enough to smooth the hairline and make everything look intentional. The key is finding the right amount of product for your hair and hairline so that you look controlled and polished, not weighed down or greasy.
9. Textured Puff
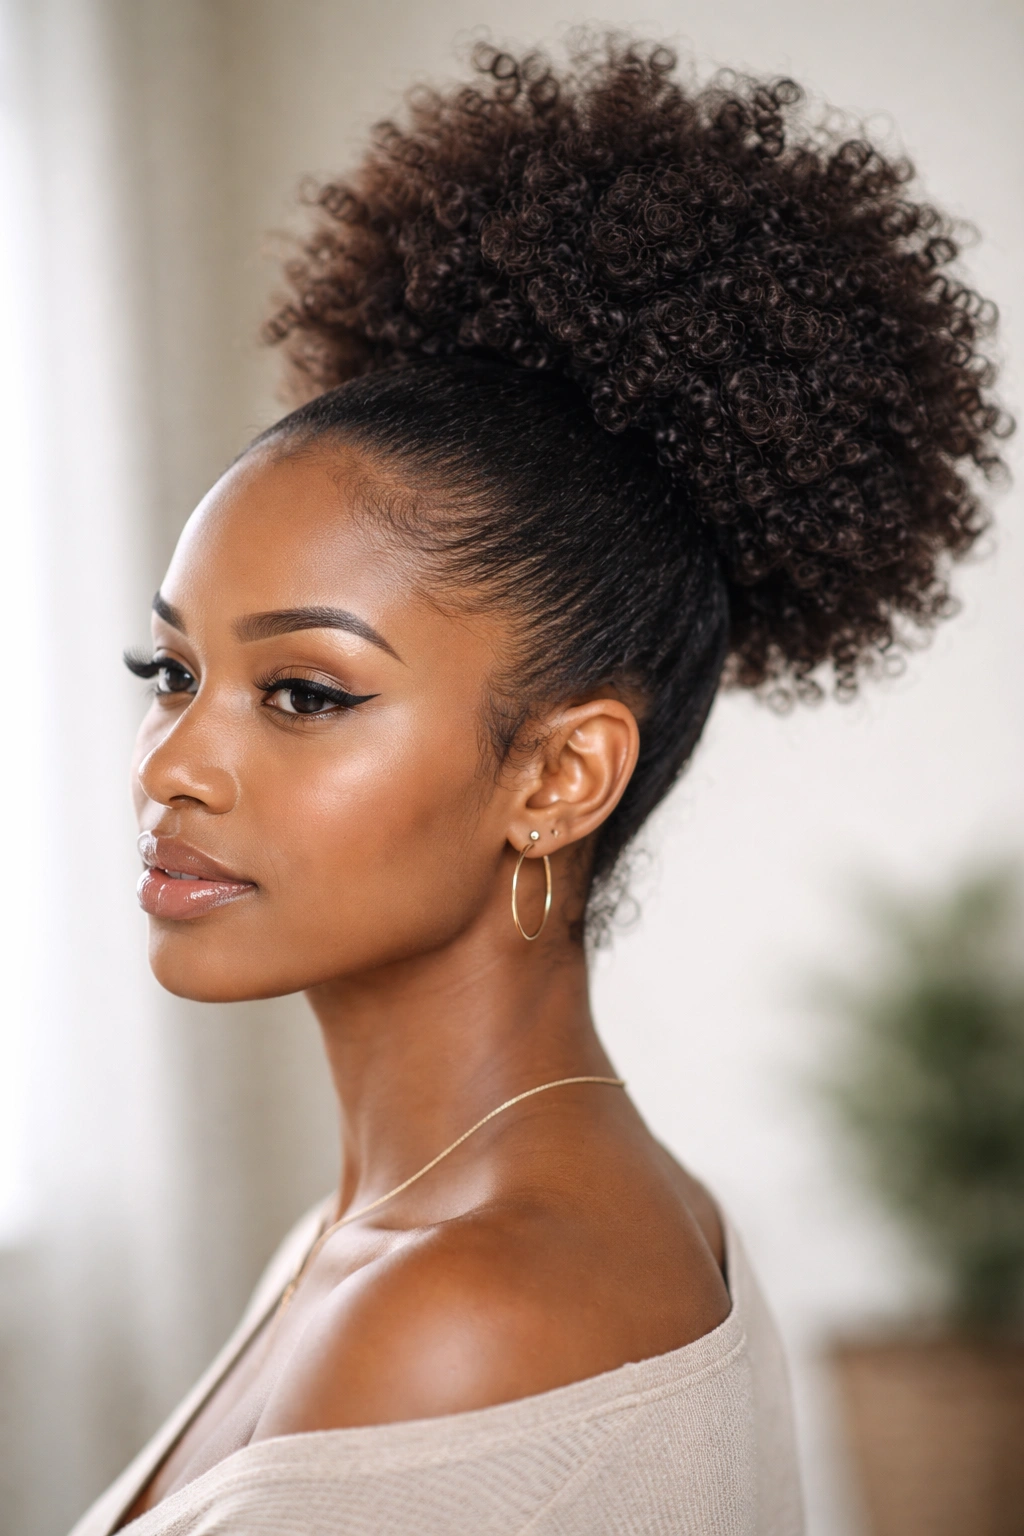
A textured puff celebrates the natural dimension and curl pattern of your hair, letting those natural contours be part of the style. Instead of smoothing everything flat, you’re encouraging the curl, coil, or wave pattern to show, creating a puff that looks effortlessly beautiful and full of dimension. This style requires the least amount of product and effort, and it often looks best on day two or three of your hair cycle.
Why Textured Puffs Are the Easiest to Maintain
When you’re not trying to smooth everything into a uniform sleek surface, your puff is more forgiving. Flyaways disappear into the texture, humidity creates volume instead of frizz, and you don’t need to touch it up throughout the day. A textured puff can look great from morning through evening without a single product refresh.
Creating Volume and Definition in a Textured Puff
Gather your hair as you normally would, but instead of using a brush to smooth everything, use your fingers to encourage separation and volume. As you bring hair toward your puff point, gently scrunch and compress the hair upward, encouraging curl pattern to show and volume to build. Once your hair is secured, use your fingers to gently separate the outer sections of your puff, pulling strands outward and upward to create a spherical, dimensional shape.
The goal isn’t a perfectly round puff — it’s a puff that celebrates the natural shape your hair wants to take. Some people love to use a tiny bit of curl-defining gel on their fingers before scrunching to enhance curl pattern, but this is entirely optional.
Styling Angles for Textured Puffs
A textured puff looks beautiful without any additional styling, but you can add interest by placing a few small clips or hair sticks strategically throughout, adding dimension and visual interest. Some people love to add a few bobby pins with bead ends, letting the beads catch light. Others prefer to wrap a strand of hair around the base of the puff to hide the hair tie, adding an organic finishing touch.
You can also set a textured puff by allowing it to air dry completely after styling — this locks in the curl pattern and makes the puff hold its shape longer. If you’re working with day-old hair, a light spritz of refresher spray (water mixed with a tiny bit of leave-in conditioner) before scrunching and arranging your puff revives the curl and adds back dimension.
Final Thoughts
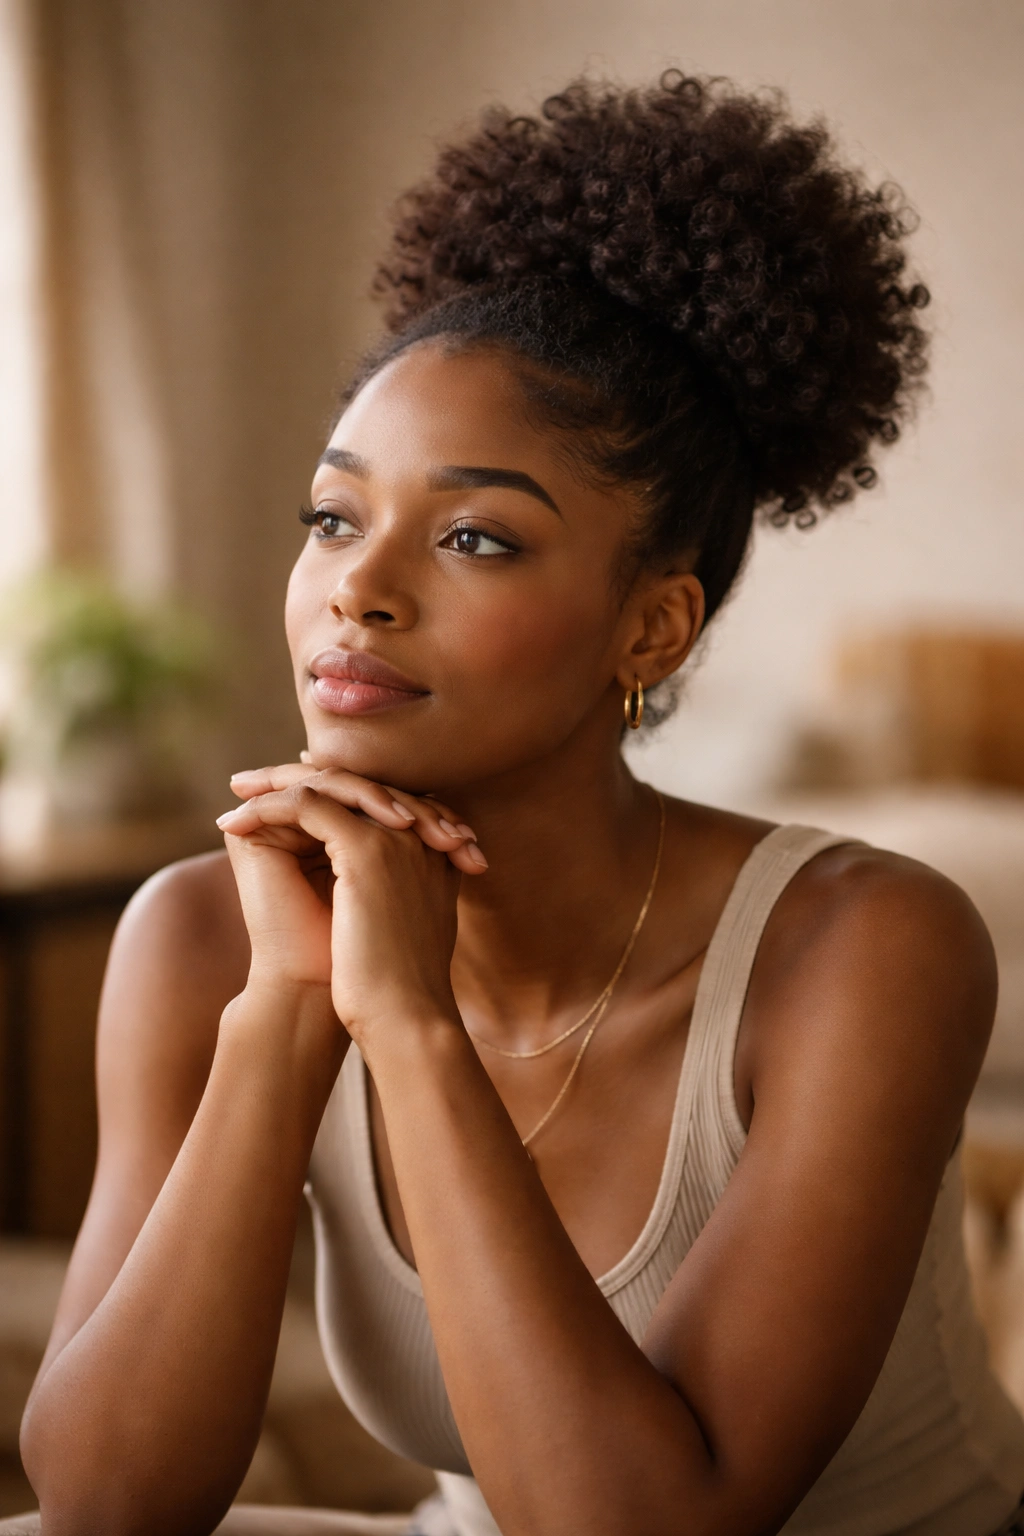
Every single one of these nine puff styles is genuinely quick enough for a regular Tuesday morning — none of them require more than five to ten minutes of active styling time. What changes between them is the feeling you create: playful or polished, symmetrical or boldly asymmetrical, textured or controlled, adorned or simple.
The real skill with puff styling isn’t mastering one perfect technique — it’s learning to read your hair on a given day and choose the style that makes sense for that day’s energy and demands. Your hair has probably been a different texture or density and required slightly different handling every single time you’ve woken up; the puffs that work on a day when your hair is a little dry and textured are slightly different from the ones that work when your hair is softer and more pliable.
Start with whichever style resonates with you emotionally — if you love symmetry and balance, begin with double puffs or a centered high puff. If you’re drawn to asymmetry and movement, dive into side puffs. If you want to feel polished and professional, perfect your sleek puff. Once you’ve got one style in your rotation that feels natural and effortless, the others become exponentially easier to learn. You’re building muscle memory and understanding how your specific hair behaves, which is the only real prerequisite to mastering any puff style.
Your puff is yours — own it completely, adjust it to match your mood and your day, and let it be exactly what you need it to be, whether that’s a five-minute grab-and-go or a statement moment that says everything about who you are.
