



There’s something truly magical about watching a little girl’s face light up when you’ve styled her hair beautifully. For kids with textured or afro hair, hairstyling isn’t just about looking cute — it’s about celebration, cultural pride, protection, and learning to love their natural crown from the very beginning. The challenge, though, is finding styles that are actually protective, age-appropriate, reasonably low-maintenance for busy parents, and fun enough that your daughter actually wants to wear them.
The good news? The world of afro hairstyling for children is overflowing with gorgeous, creative options that check all these boxes. Whether you’re looking for something quick for school days, a special-occasion style, or a protective hairstyle that’ll last through the week, there’s a perfect option waiting. These aren’t complicated salon-only looks — many of them you can master at home with patience, the right tools, and a little guidance.
Let’s walk through ten afro hairstyles that are beloved by parents and kids alike, with the specific details about how to create them, why they work so well for young girls, and exactly what to expect in terms of maintenance and longevity.
1. High Puffs and Double Puffs
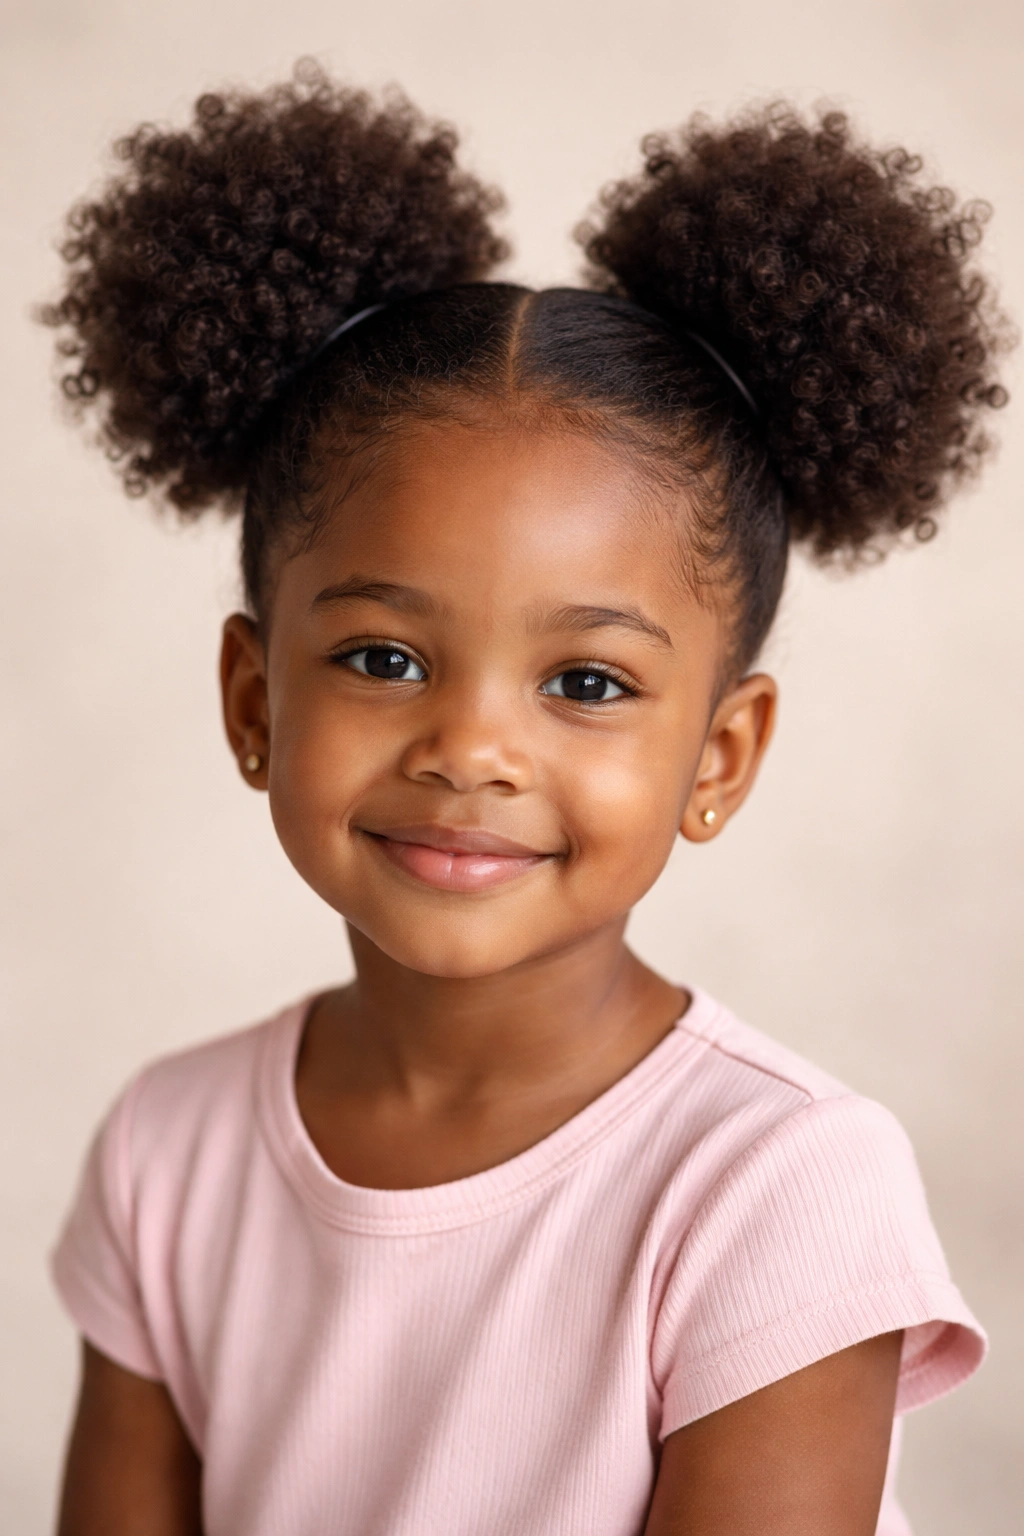
High puffs are the quintessential effortless-yet-adorable hairstyle that works for girls ages three and up. You’re basically gathering the hair from either the middle-top of the head (for a single puff) or splitting it down the middle for two matching puffs, securing each section tightly at the crown with a hair tie, and letting the gathered hair fan out at the top in a fluffy ball shape. The result is playful, protective (since the ends are tucked into the gathered section), and genuinely fun to style.
Why Puffs Are Perfect for Active Kids
Puffs work because they’re secured tightly enough to stay put through recess, playground adventures, and sports, yet they don’t require you to section the hair obsessively or use heat tools. The gathered part protects the fragile ends of the hair by folding them inward, which is the whole point of protective styling — you’re literally wrapping the most delicate parts of the hair away from friction and environmental damage. Plus, because the puff sits high on the head, it looks intentional and polished even if a few flyaways escape during the day.
How to Create Perfect Puffs
- Part and gather: Use a rat-tail comb to part your daughter’s hair cleanly, either straight down the middle (for two puffs) or in a circular section at the crown (for one puff). If you’re making two puffs, part from the forehead straight back to the nape of the neck. For a single puff, you can free-form the top section or follow a circular guide — just make sure it’s gathered from the roots.
- Smooth and secure: Use a gentle hold gel or mousse on the hair before pulling it into the tie. This prevents breakage and flyaways. Secure with a covered hair tie (elastic covered in fabric so it doesn’t catch hair) or a scrunchie. Don’t pull so tight it causes tension headaches, but tight enough that it won’t slip loose.
- Fluff and shape: Once secured, gently fluff the gathered hair outward with your fingers to create volume. Some parents use a pick or wide-tooth comb to lift and separate the curls for more height.
Pro tip: Puffs look even cuter with little clips, bows, or beads added to the base of each puff. Your daughter can help choose her favorite colors and pick them out herself, making the whole process feel collaborative and fun.
Maintenance and Longevity
High puffs can last anywhere from one to three days, depending on how active your daughter is and how you secure them. They’re perfect for school days or weekend activities. To keep them looking fresh, you might lightly spritz the puff with water and a leave-in conditioner mid-week, and make sure you’re sleeping on a satin pillowcase or bonnet to prevent frizz and friction at night.
2. Box Braids
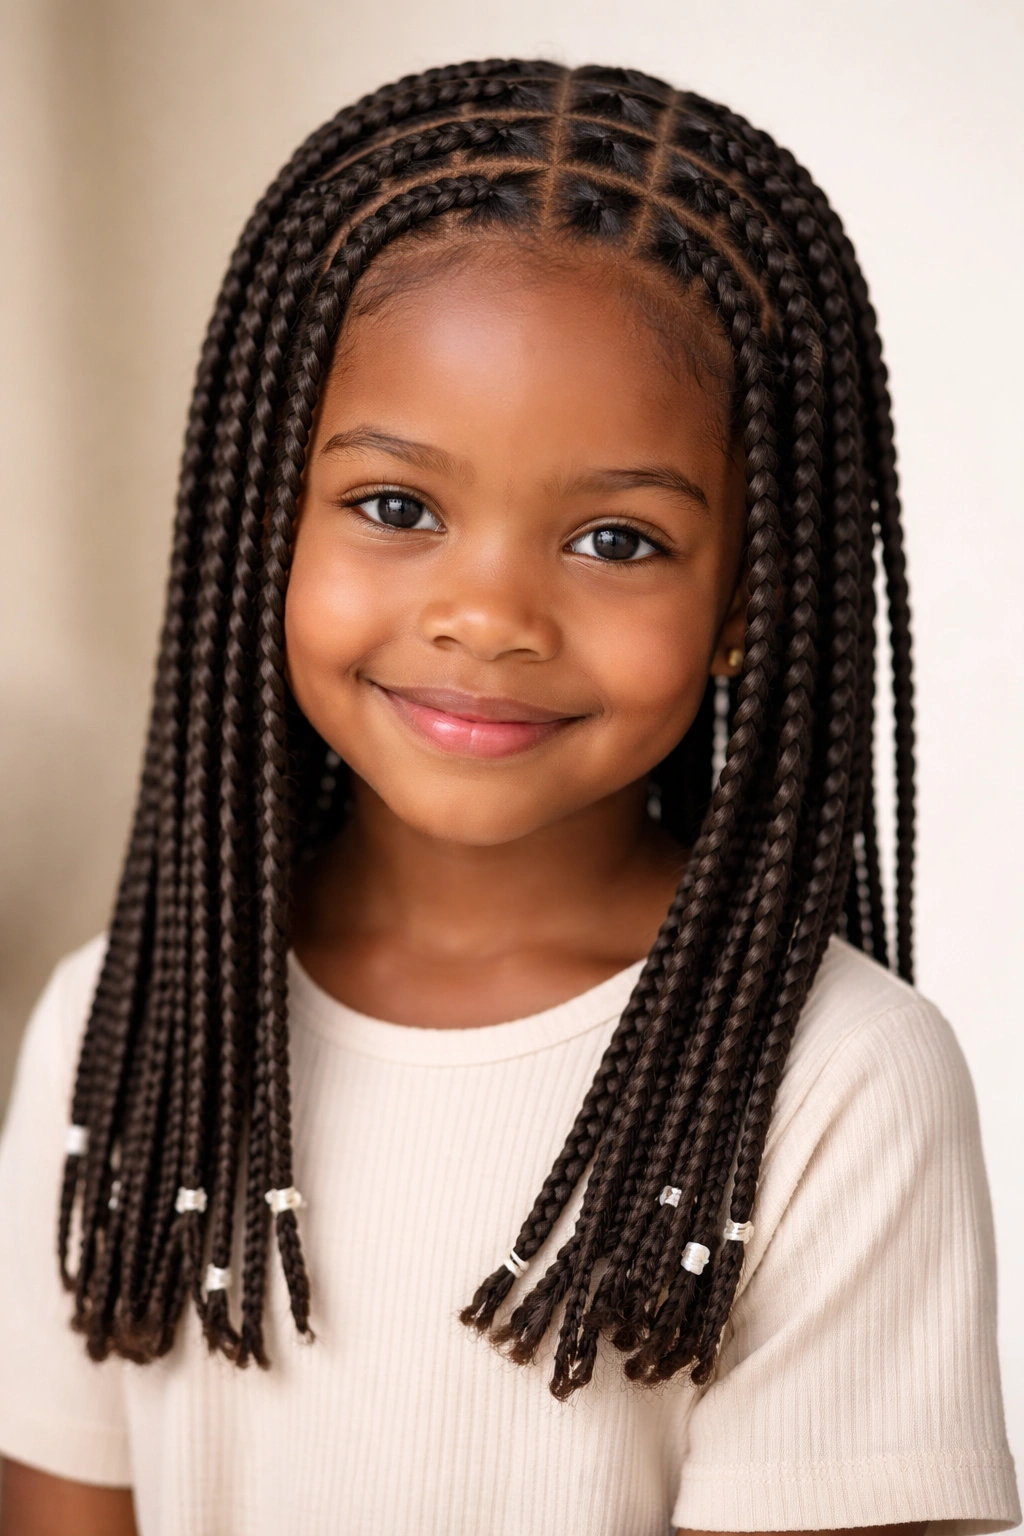
Box braids are the sophisticated, polished option that says “I take hair care seriously.” They’re braids created in distinct box-shaped sections, where you divide the hair into a grid pattern (hence the “boxes”) and braid three-strand braids — or twist braids for a softer look — from the roots all the way to the ends. For little girls, you can do them with or without added synthetic hair for length and fullness, and they can be worn in multiple adorable styles once they’re finished.
Why Box Braids Are Worth the Time Investment
Box braids are genuinely protective — when done correctly with appropriate tension, they tuck the ends of the natural hair completely away from handling, styling, and environmental stress. They’re also incredibly versatile. Your daughter can wear them down, pull them into a high ponytail, style them into a bun, or even curl the ends with water and let them dry for a wavy, romantic finish. Plus, once they’re in, you’re not styling hair daily — you’re maintaining braids, which is exponentially easier.
Creating Box Braids Step-by-Step
- Section cleanly: Start with clean, moisturized hair. You want to create even-sized squares across the entire head using a rat-tail comb. The size of your sections determines how many braids you’ll end up with — for little girls, aim for medium-sized sections (about the size of a postage stamp to a thumbnail) so the style isn’t overwhelming.
- Braid from root to tip: Take one section and divide it into three strands. Begin braiding tightly at the root, maintaining even tension throughout. If you’re adding synthetic hair for length, incorporate it at the root and braid it in alongside the natural hair. Braid all the way to the ends, then secure with a small elastic or thread.
- Seal the ends: To prevent unraveling and to create a polished finish, dip the very bottom of each braid in hot water for a few seconds (this melts synthetic hair slightly and creates a sealed end). Let them cool completely before touching them.
Worth knowing: Box braids take time — plan for 2-4 hours depending on how many you’re doing and your braiding speed. Many parents do them as a weekend project, or take their daughters to a braiding salon. If you’re doing them at home, it helps to braid in stages (do a few at a time over several days) rather than attempting the whole head in one marathon session.
How Long They Last
Box braids typically last 4-6 weeks, sometimes longer depending on how well they’re maintained. Wash your daughter’s hair while it’s braided using the “braid spray” method — mix water and leave-in conditioner in a spray bottle and spritz the braids rather than submerging them in water. This keeps the braids intact while keeping the scalp clean.
3. Twist-Outs
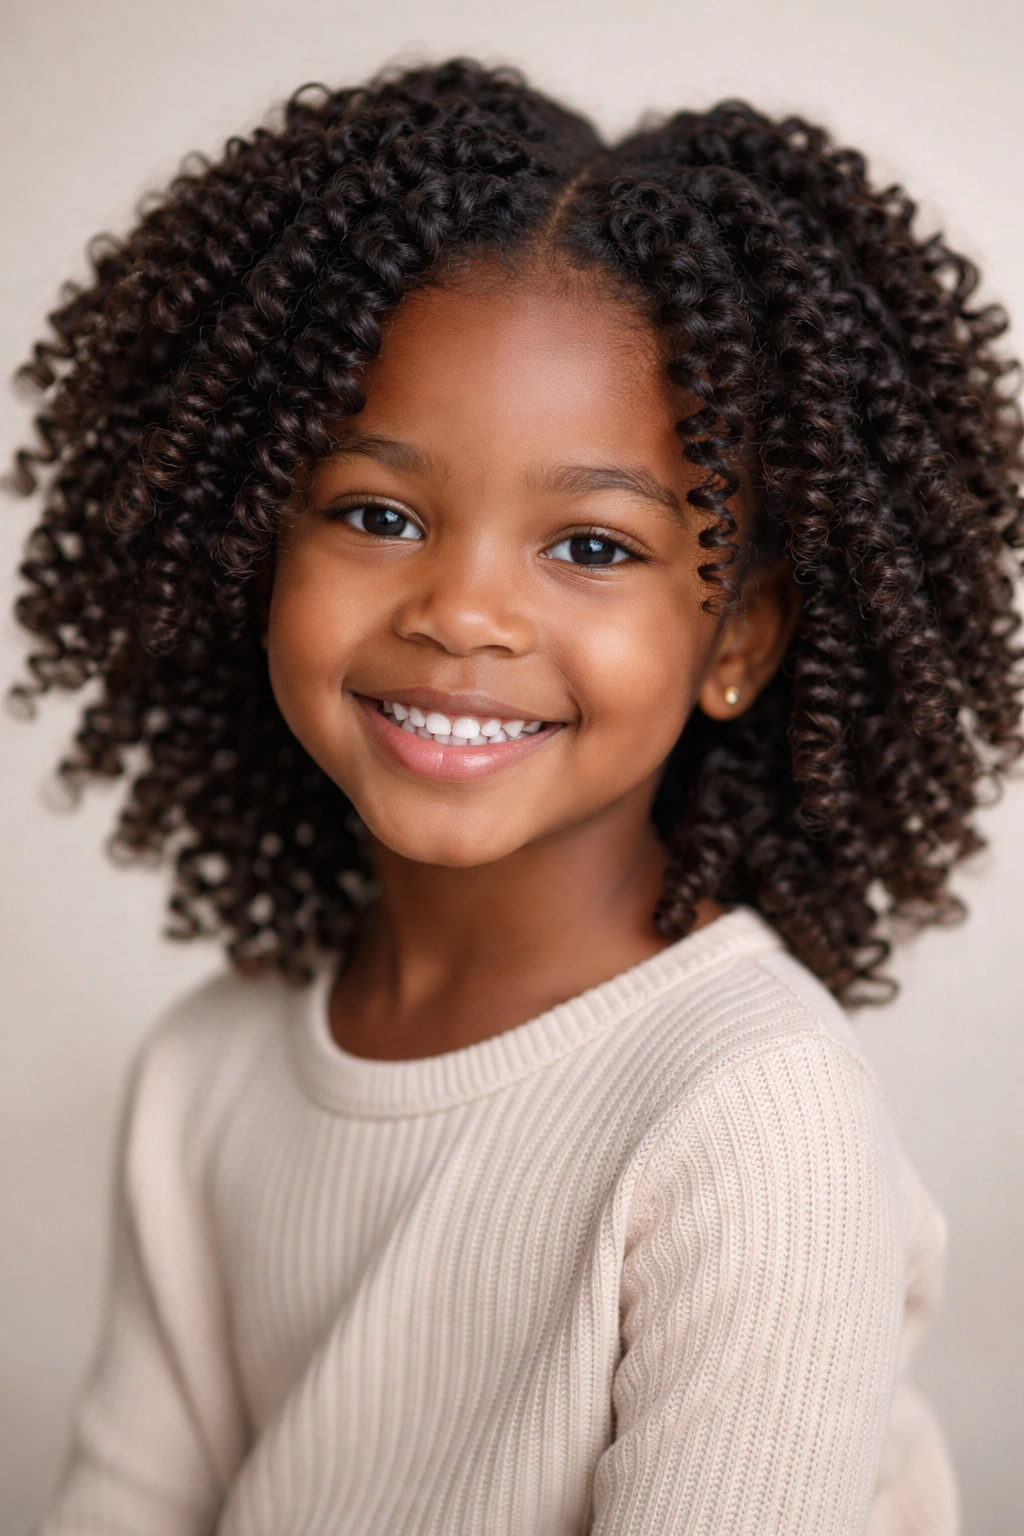
A twist-out is when you create two-strand twists (where two sections of hair are twisted around each other, rather than three-strand braided) and then unravel them after they’ve dried to create a softer, more textured curl pattern. For little girls, twist-outs are a fantastic low-commitment style because you can do them in an evening, and by the next morning your daughter wakes up with defined, bouncy curls that last several days with minimal fussing.
The Appeal of the Twist-Out
Twist-outs are loved because they showcase natural curl patterns in the most flattering way possible. Unlike some other styles that require regular maintenance, once the twists are undone and the curls are separated, the style practically maintains itself. They’re also soft and protective — the twisting process doesn’t require tension, so there’s minimal stress on the hairline or edges.
Creating a Twist-Out
- Section and moisturize: Start with damp hair (not soaking wet, but definitely moist). Section the hair into 4-8 large sections, depending on your daughter’s hair volume and texture. The number of sections determines how full and defined the final curls will be — more sections mean more individual curls.
- Twist each section: Take one section and divide it into two strands. Twist these two strands around each other, moving from the roots all the way to the ends. Keep the tension moderate — tight enough that it holds the twist shape, but loose enough that it’s not uncomfortable. Some parents prefer to use a styling cream or gel during twisting for extra hold and definition.
- Allow to dry completely: This is the key step that many people skip. The twists need to dry fully (preferably overnight) so that when you unravel them, the curl pattern sets in. You can air dry, use a hair dryer on low heat, or do a combination.
- Unravel gently: The next morning (or once the twists are completely dry), gently unravel each twist, starting from the bottom and working your way up. Separate the curls slightly with your fingers to create fullness, but be gentle — you don’t want to disturb the curl pattern you just created.
Pro tip: Twist-outs look amazing on camera and photograph beautifully for those special occasions. You can also add thin braids or decorative clips within the twist sections before twisting to create even more visual interest.
Longevity and Maintenance
A twist-out typically lasts 5-7 days with good maintenance. Sleep on a satin pillowcase or bonnet to protect the curl pattern at night. If curls start to relax or frizz mid-week, you can refresh them by spritzing lightly with water and scrunching, or redoing just a few of the original twists to reinforce the pattern.
4. Bantu Knots
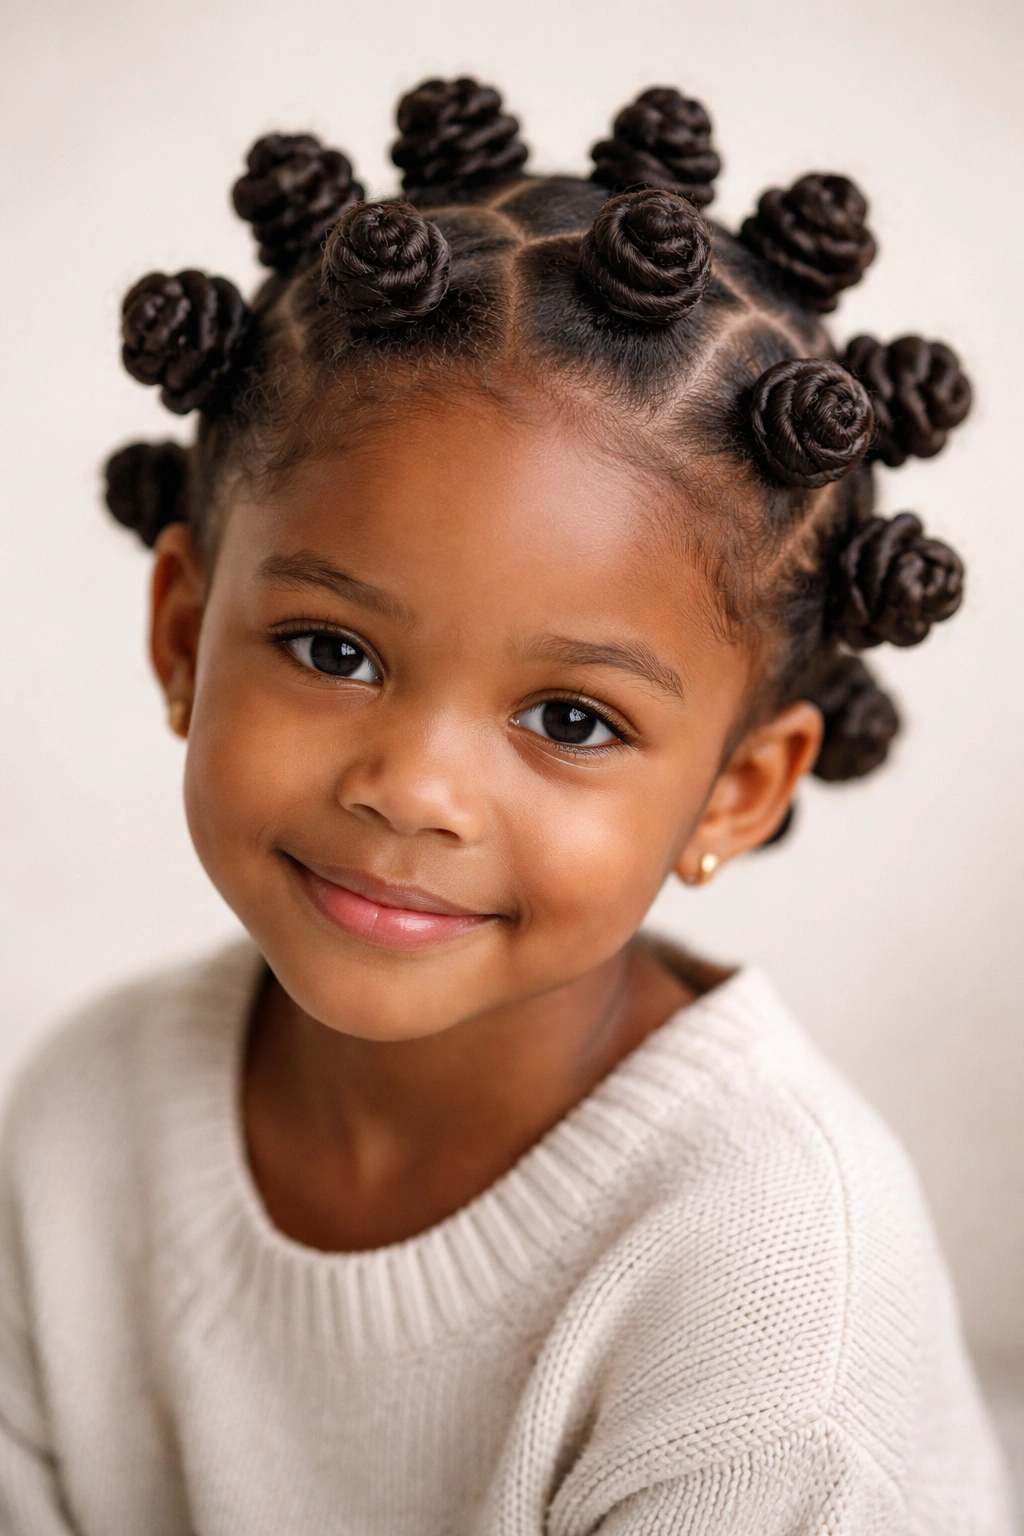
Bantu knots are a stunning style where you create small, spiral knots all over the head by taking a section of hair, twisting it upward, and then wrapping it around itself to form a knot that sits raised off the scalp. The result looks like a series of little coils dotting the head — it’s sculptural, beautiful, and genuinely eye-catching. Even better? They can be worn as-is for special occasions, or unraveled into a gorgeous coil-out for everyday wear.
Why Bantu Knots Are Special
Bantu knots are a protective style that also happens to be an art form. Unlike braids, which require sectioning and patience, Bantu knots are purely two-hand work — you twist and wrap, twist and wrap. They’re protective because the ends are fully wrapped into the knot, and they can be styled multiple ways depending on your daughter’s mood. For special occasions, the knots themselves are the style. For everyday, you unravel them in the morning and enjoy the beautiful coil texture created from the knot mold.
Mastering the Bantu Knot Technique
- Section the hair: Divide the head into equal sections using a rat-tail comb — anywhere from 8-15 knots depending on hair volume and your preference. Smaller sections create more knots and a fuller look; larger sections mean fewer, bolder knots.
- Twist and wrap: Take one section and apply styling cream or gel to it. Start twisting the hair upward from the scalp, building momentum and tightness. Once you’ve twisted the section fully to the ends, wrap the twisted hair around itself (around the base of the twist) to form a flat spiral knot. Secure it with a bobby pin or small elastic so it stays in place while drying.
- Dry thoroughly: Let the knots dry completely — ideally overnight. You can air dry, use a bonnet dryer, or a regular hair dryer on low heat.
- Unravel when dry: Once dry, carefully unpin and gently unravel each knot, starting from the end and working back toward the scalp. The longer you kept the hair twisted, the more defined and lasting the coil pattern will be.
Worth knowing: Bantu knots take 45 minutes to 2 hours to create, depending on how many you’re doing and how comfortable you are with the technique. They’re best done on hair that’s already been twisted or braided and is being refreshed, rather than on completely loose hair, because loose hair can slip while you’re twisting.
Styling Possibilities
Wear the knots as-is for 1-2 weeks as a bold statement style, or unravel them after 2-3 nights for a gorgeous coil-out that lasts another 3-5 days. This makes Bantu knots incredibly efficient — you’re essentially getting two separate hairstyles from one styling session.
5. Ghana Braids (Cornrows)
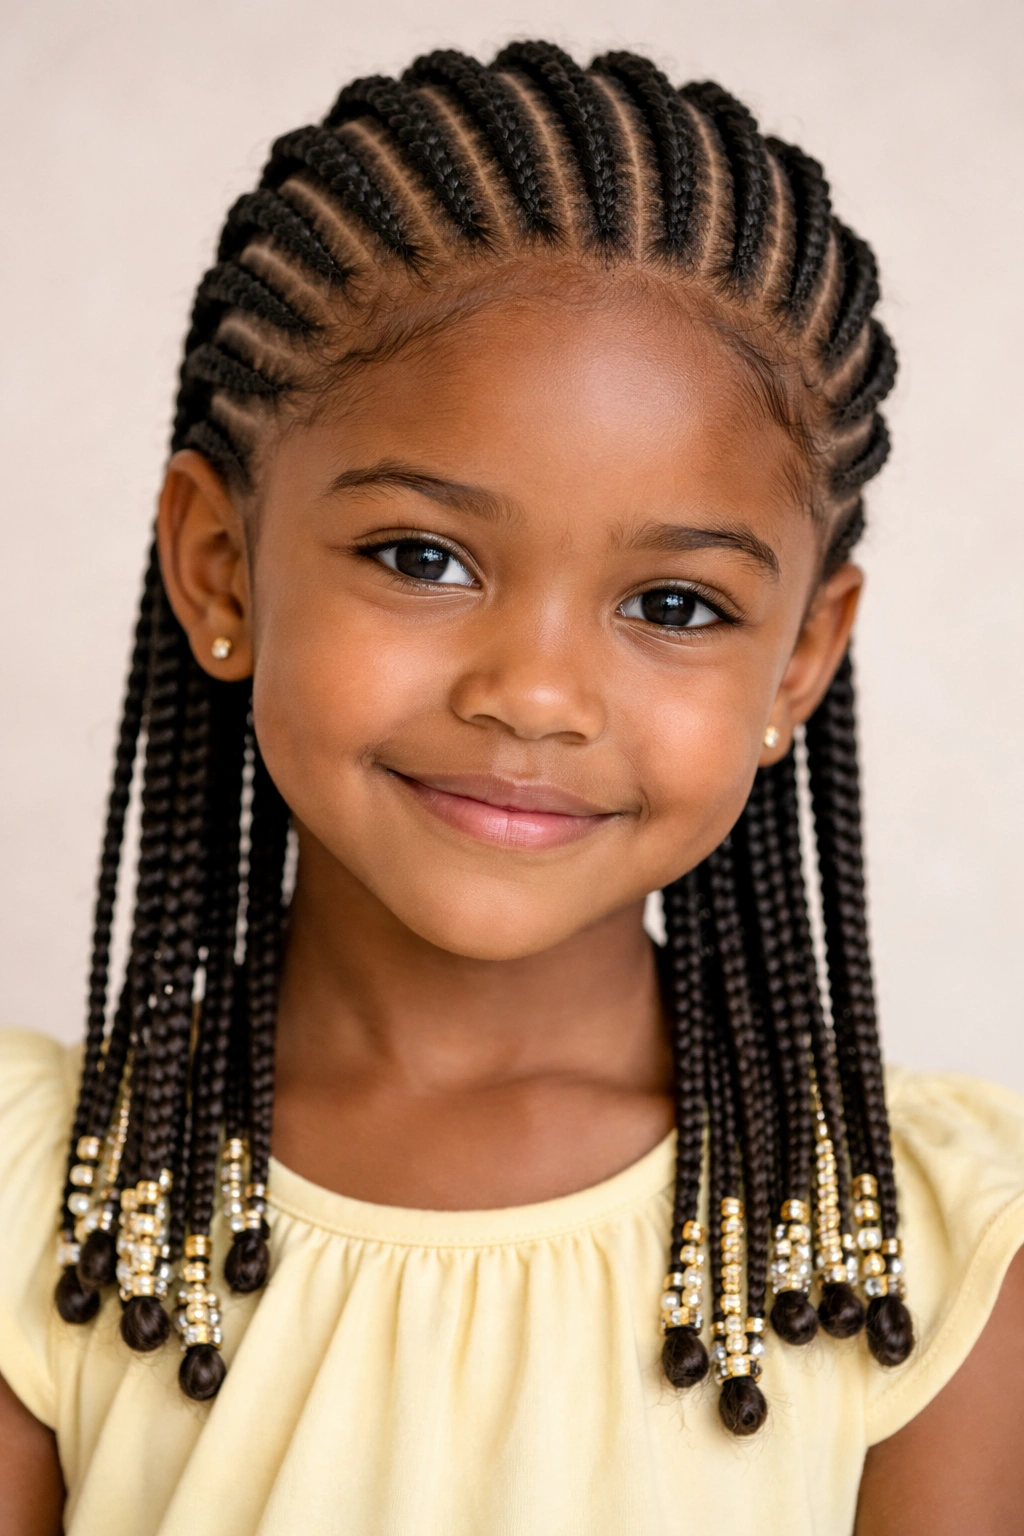
Ghana braids, also called cornrows or cane rows, are flat braids that run close to the scalp in clean rows or patterns across the head. The braid starts at the scalp and moves along a specific line (following a grid, a curved path, or a circular pattern) all the way to the nape of the neck or the ends of the hair. They’re one of the most classic, timeless protective styles in African and African-American hair culture — they’ve been worn for centuries and remain one of the most practical and beautiful options for kids.
The Lasting Appeal of Cornrows
Cornrows are beloved because they’re genuinely practical. They keep the hair completely secured and off the face all day — perfect for girls who are always moving, playing sports, or who simply don’t want hair in their eyes. They’re also incredibly protective, keeping the delicate ends tucked away from breakage. And once you master the technique, you can create them in infinite patterns — straight lines, zigzags, spirals, circular patterns — making them as simple or as creative as you want.
How to Braid Cornrows
- Part and plan: Use a rat-tail comb to part your daughter’s hair into the rows or pattern you’re creating. For beginners, straight lines from the forehead to the nape are easiest. Once you’re more comfortable, you can try zigzags, curves, or more complex patterns.
- Start the braid: At the top of one row, take the hair and divide it into three equal strands. Begin braiding, and here’s the key technique: as you braid, you’re constantly adding new hair from along the parting line into the braid. So as you cross the left strand over the middle, you pick up a small piece of hair from the scalp to add to that left strand. Then cross the right strand over the middle and pick up hair from the scalp. Continue this add-as-you-go motion all the way down the row.
- Maintain tension: Keep tension even and moderate — tight enough that the braid holds its shape and stays flat against the head, but not so tight that it’s uncomfortable or pulls the hairline. This is the most important skill to develop, and it comes with practice.
- Finish the ends: Once you reach the end of the row, continue braiding the remaining hair without adding any more sections from the scalp. Secure the end with a small elastic.
Pro tip: Cornrows look amazing when you add beads, cuffs, or colorful thread to the braids. Your daughter can help choose colors and pick out which braids get beads — this makes the whole process collaborative and fun, and she feels more ownership of her finished style.
How Long They Last
Cornrows typically last 2-4 weeks, depending on how tightly they were braided and how active your daughter is. Wash gently in sections while the braids are in place, using a braid spray rather than submerging the entire head in water. You can also spritz the scalp with a dry shampoo or refreshing spray if it needs cleaning between washes.
6. Two-Strand Twists (Loc-Inspired)
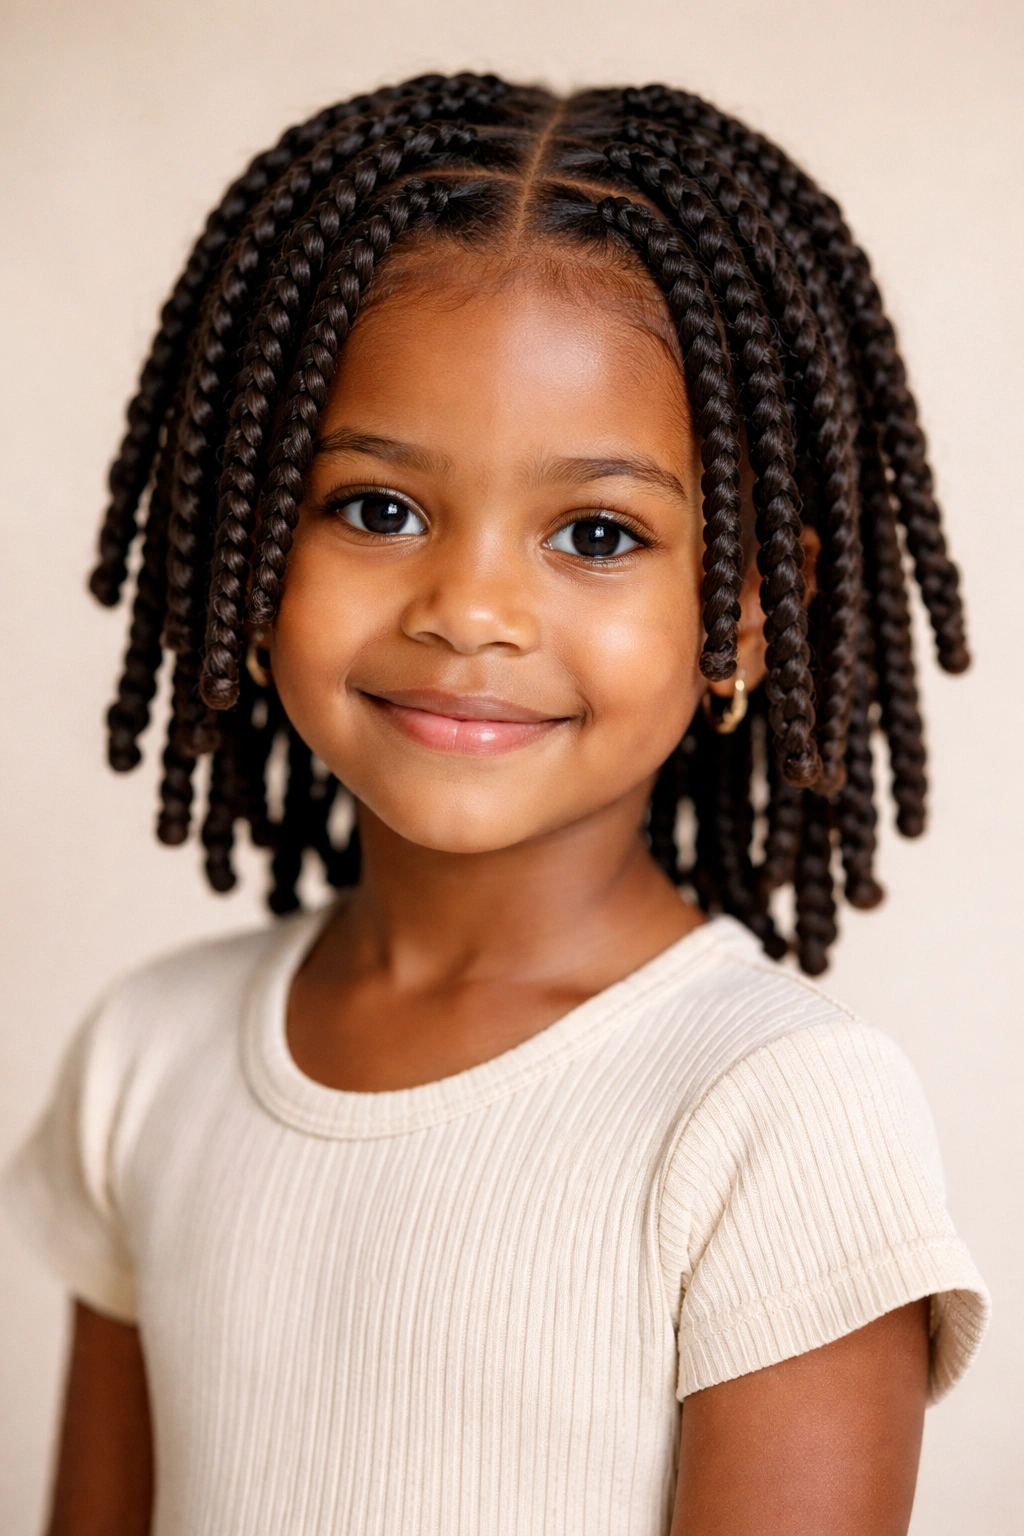
Two-strand twists are simple to create — you’re literally just taking two sections of hair and twisting them around each other — but the result is so striking that they look way more complex than they actually are. When done on relatively damp hair and left in for several days, two-strand twists create defined texture, develop a loc-like appearance (without the commitment of actual locs), and are protective and gorgeous.
Why Twists Work for Little Girls
Twists are low-pressure to create, require no added hair, and look polished and intentional even when you’re doing them at home without formal training. They’re protective in all the right ways — the ends are safely tucked into the twisted sections, and there’s minimal tension on the hairline if you’re doing them correctly. They also work for hair of varying lengths and textures, and they look beautiful on kids of any age from toddlers to teenagers.
Creating Defined Two-Strand Twists
- Prepare the hair: Start with clean, damp hair (not soaking wet). Apply a styling cream, leave-in conditioner, or gel to help with hold and definition. The product you choose will affect how shiny and defined the final twists look — a gel tends to create more shine and definition, while a cream creates a softer, more natural look.
- Section the hair: Use a rat-tail comb to divide the hair into even sections. The size of your sections determines the final look — small sections create many thin twists that look delicate and refined, while larger sections create chunkier twists that are bolder and require less time to create.
- Twist and hold: Take one section, divide it loosely into two strands, and twist the strands around each other. Keep the tension consistent but moderate — you’re not trying to create tension on the scalp, just create a neat twisted line. Twist all the way to the ends.
- Allow to dry: Let the twists set by drying completely. This locks in the twisted shape. You can air dry, use a bonnet dryer, or a hair dryer.
Worth knowing: Two-strand twists take anywhere from 1-3 hours depending on how many you’re doing and your speed. They last longer and look better the longer your hair is, because there’s more to work with and more of a visual impact from the twisted texture.
Wearing and Maintaining Twists
Two-strand twists last 1-2 weeks as a standalone style. You can refresh them midway through by spritzing lightly with water and re-twisting just the new growth that’s emerged from the scalp since you last styled. Some parents like to do two-strand twists in the evening, let them set overnight, and then unravel them gently in the morning for a beautiful wavy, textured look that lasts several more days.
7. Flat Twists with Creative Patterns
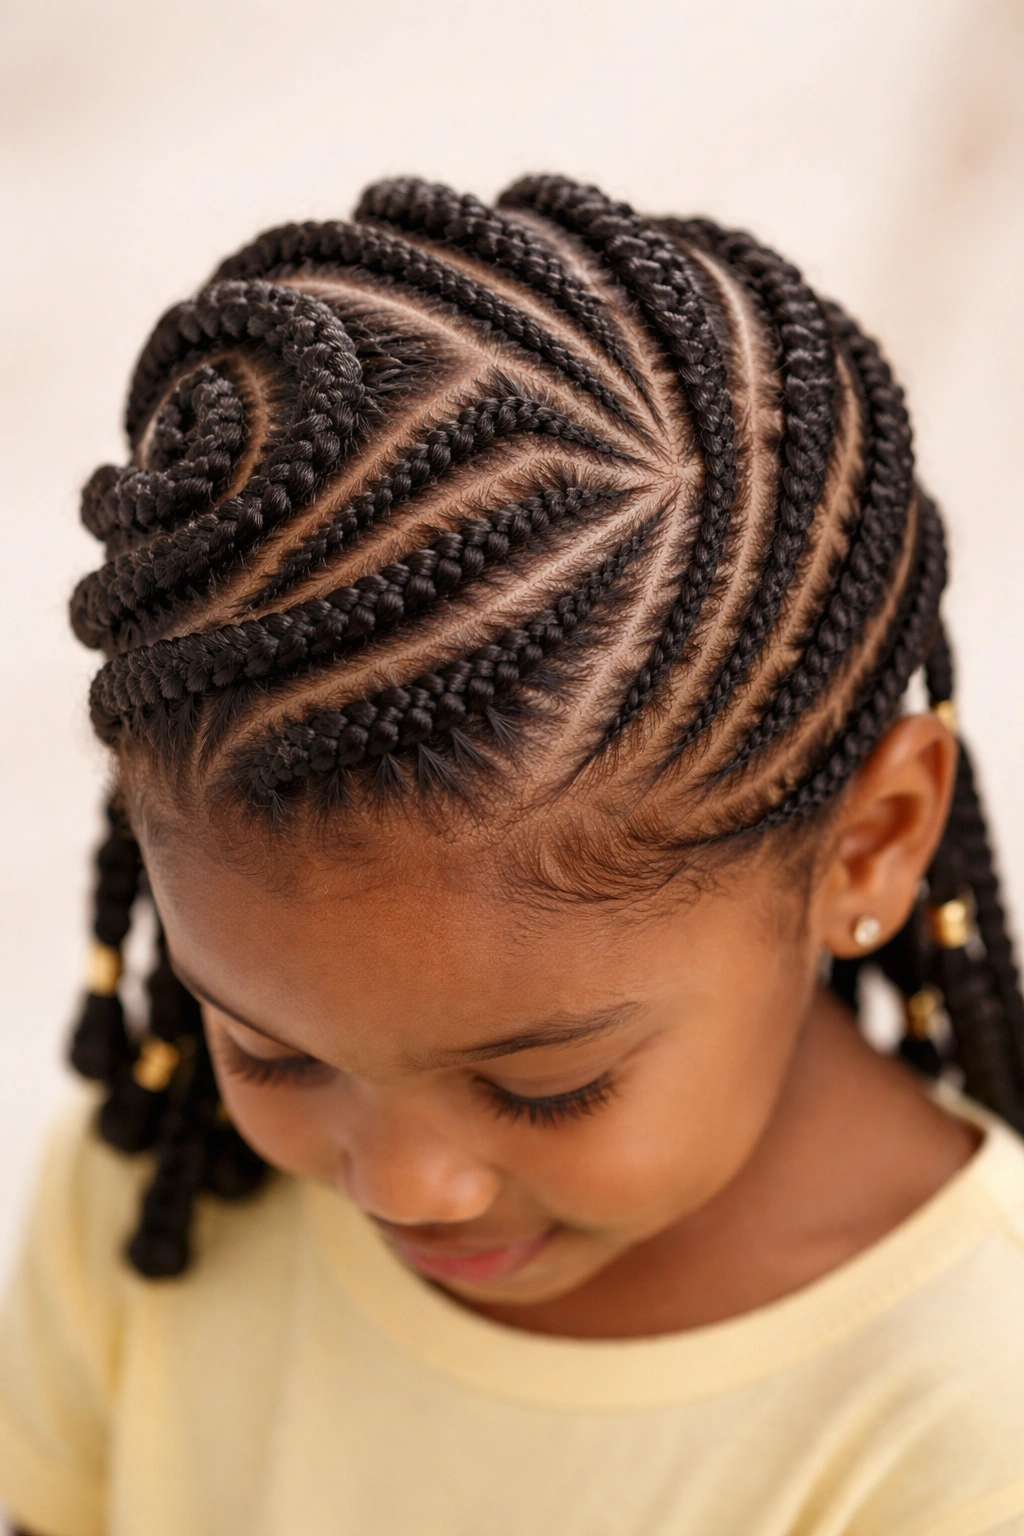
Flat twists are like the cornrow’s softer, gentler cousin. Instead of a three-strand braid that sits close to the scalp, you’re creating two-strand twists along a defined line on the head — the same add-as-you-go technique as cornrows, but with only two strands instead of three. The result is a softer, more organic-looking line that still protects the hair and keeps it secured and off the face.
What Makes Flat Twists Different
Flat twists are less formal-looking than cornrows, which makes them great for everyday wear when your daughter wants something protective and neat but not quite as structured. They’re also easier to learn than cornrows because you’re working with two strands instead of three, which means fewer moving parts. And they offer the same versatility as cornrows in terms of patterns — you can do straight lines, zigzags, spirals, or incorporate them into other styles.
Creating Flat Twists
- Plan your pattern: Use a rat-tail comb to map out where your flat twists will go. Straight lines are easiest; curves and spirals come with practice.
- Twist and add hair: Starting at the top of your first line, take a small section of hair from the scalp and divide it into two strands. Begin twisting these two strands around each other, and as you twist, pick up additional hair from along the parting line and incorporate it into the twist. This is the same add-as-you-go principle as cornrows.
- Maintain the flat shape: The key to flat twists looking polished is keeping them flat against the scalp. This requires even tension and consistently adding the same amount of hair from the scalp with each addition. It takes practice, but once you get the rhythm, it becomes automatic.
- Finish smoothly: Braid out to the ends and secure with a small elastic.
Pro tip: You can create a half-up style by doing flat twists on just the top portion of the head and leaving the rest loose. This is a great middle-ground style for kids who want something special but not full-coverage braiding.
Longevity and Styling
Flat twists last 2-3 weeks and require minimal maintenance. Wash gently, sleep on a satin pillowcase, and you’re set. Some girls love wearing them as-is; others like to unravel them after a few days for a textured, wavy look.
8. The Wash-and-Go
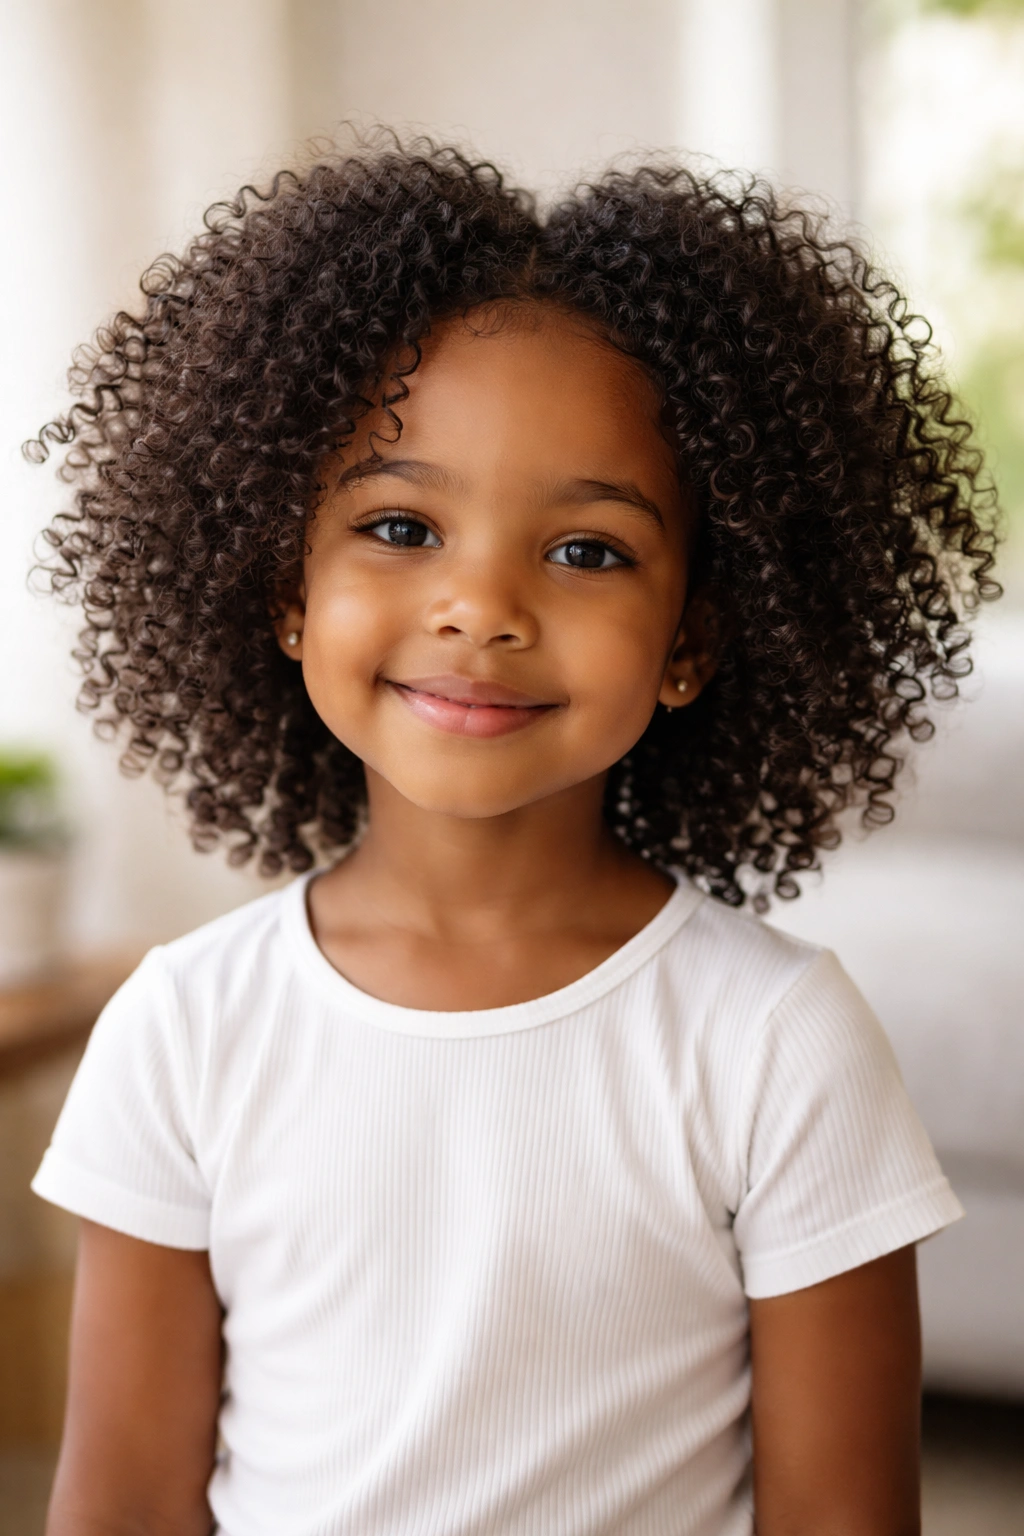
A wash-and-go is the ultimate low-maintenance style: you wash your daughter’s hair, apply the right moisturizing and styling products, and let the natural curl pattern do all the work. There’s no braiding, no twisting, no manipulation — just clean, moisturized, well-defined curls. It’s the go-to style for busy mornings, active weeks, and kids who simply love rocking their natural texture in its most straightforward form.
Why Wash-and-Go Works for Natural Hair
The wash-and-go is protective in a different way than braids — instead of tucking the ends away, you’re keeping the hair loose and free, which is generally protective for very young children or kids with fragile or extremely delicate hair texture. It also celebrates the natural curl pattern in its most authentic form. For kids who love their curls, a well-executed wash-and-go is genuinely the most beautiful option available.
Creating a Great Wash-and-Go
- Wash thoroughly: Use a sulfate-free cleanser (or a co-wash, which is a conditioner used as a cleanser for gentle cleansing without stripping moisture). Massage the scalp and roots gently, and let water run through the lengths. Rinse completely until the water runs clear.
- Apply leave-in conditioner: While the hair is still soaking wet, apply a generous amount of leave-in conditioner. This step is absolutely critical — it provides moisture that keeps curls defined and prevents frizz. Work the product through from roots to ends, making sure every strand is coated.
- Apply styling cream or gel: On top of the leave-in, apply your styling product of choice — a light styling cream for a softer look, or a gel for maximum definition and hold. Apply section by section, using praying hands (squeezing the product into the hair gently between your palms) or raking it through with your fingers.
- Set the curls: You can let them air dry (which takes several hours but is the gentlest), use a diffuser attachment on a hair dryer (which speeds up the process while maintaining curl definition), or use a bonnet dryer. The goal is to dry the hair fully so the curls set and the styling product hardens slightly, creating hold and definition.
Worth knowing: The right products make an enormous difference in wash-and-go success. You want a good leave-in conditioner and a styling product that provides moisture, not just hold. The specific products that work best depend on your daughter’s hair texture, so some experimentation might be needed.
Longevity and Refreshing
A wash-and-go typically looks great for 3-5 days, depending on how active your daughter is and your local humidity. Refresh mid-week by spritzing with water and a leave-in conditioner spray, and sleeping on a satin bonnet or pillowcase to protect the curl pattern at night. Some parents do a full wash-and-go once a week and refresh with water between washes.
9. Braid-Outs
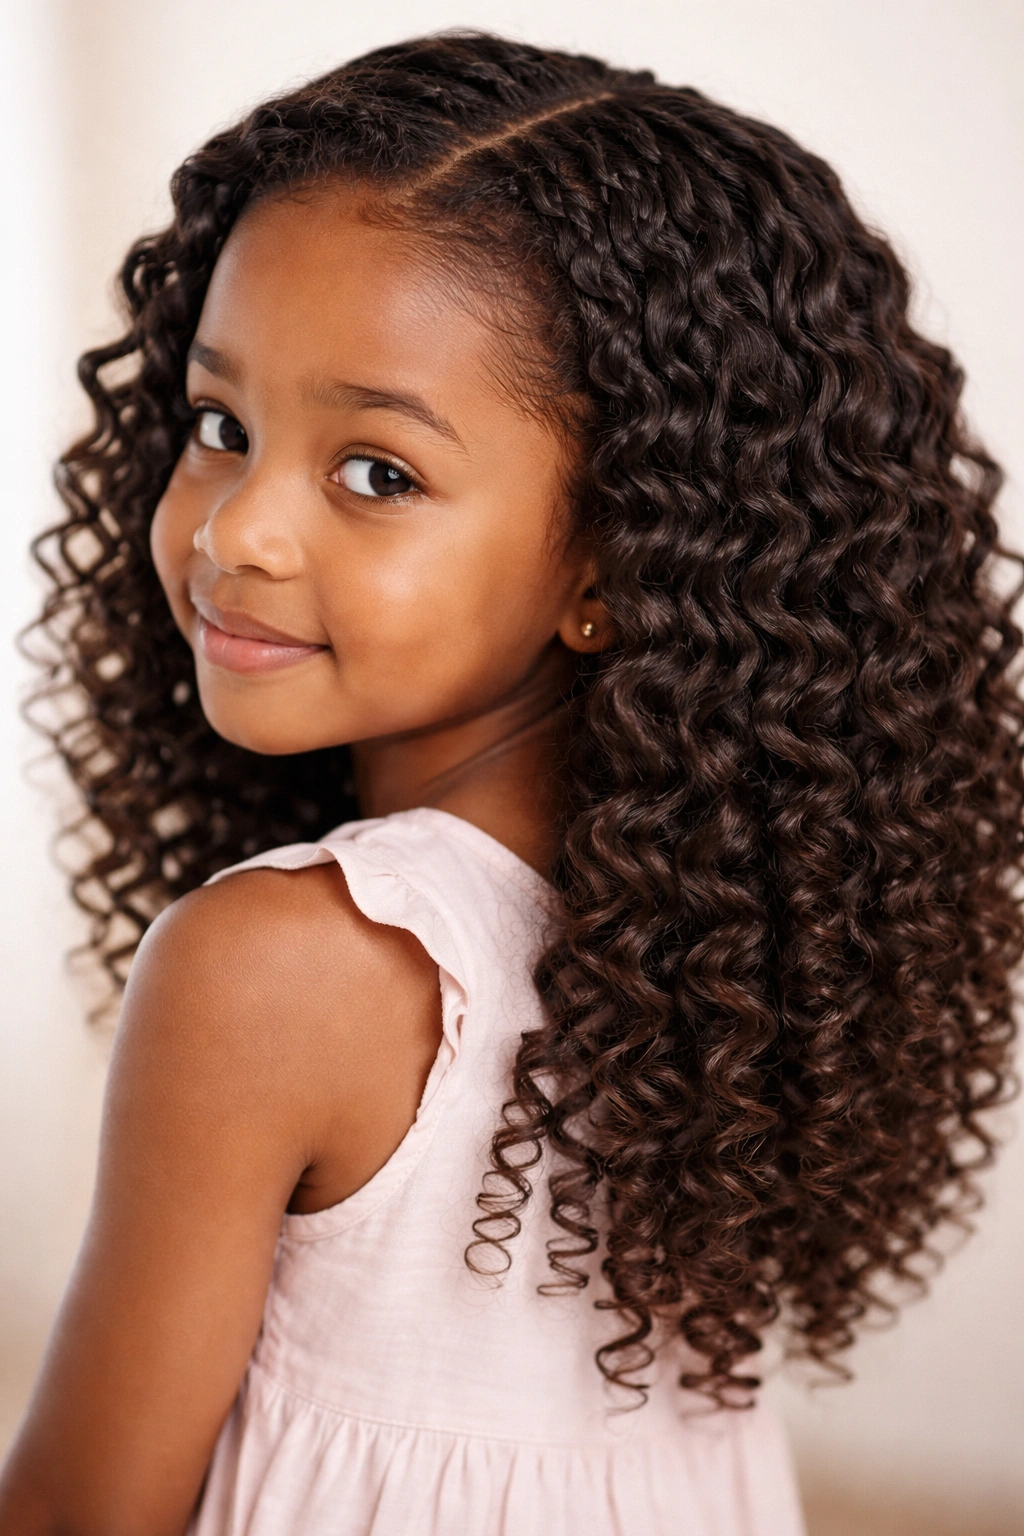
A braid-out is the cousin of the twist-out: you create braids (usually three-strand braids or box braids), leave them in for several days so they fully set, and then unbraid them to reveal a beautiful crimped or wavy texture throughout the hair. The result is incredibly voluminous, textured, and striking — your daughter literally gets a completely different look by undoing the braids, and the texture lasts for days afterward.
Why Braid-Outs Create Amazing Texture
When you braid hair, the braid mold shapes the hair over time. When you release that mold by unbraiding, you’re left with the texture that the braid imprinted. The longer the hair stays braided, the more defined and longer-lasting that texture will be. Braid-outs are protective, easy to create (they’re just regular braids with extra purpose), and they give you essentially two hairstyles for one styling session.
Creating a Braid-Out
- Start with clean, moisturized hair: Braid-outs work best when the hair is damp (not soaking wet). Apply a light styling cream or leave-in conditioner to help hold the texture.
- Create your braids: Do simple three-strand braids or box braids, depending on how much texture you want in the final result. Simple three-strand braids create broader waves; box braids create more defined, smaller crimped texture.
- Leave them in for several days: The minimum is overnight, but 2-3 days creates much more defined, longer-lasting texture. This is the critical step — the longer the braids stay in, the more set the texture becomes.
- Unbraid gently: Once you’re ready for the new look, carefully unbraid each braid starting from the bottom and working toward the scalp. Don’t rush — gently separate the sections as you unbraid so you don’t disturb the texture you’ve created.
- Fluff and separate: Once fully unbraided, gently fluff the hair with your fingers or a pick to add volume and separate the waves or crimps.
Pro tip: Braid-outs look especially amazing when you do them the night before a special occasion or photo day. That way the texture has maximum time to set, and you get a gorgeous, textured look that photographs beautifully.
Longevity
Braid-outs typically last 5-7 days with proper maintenance. Sleep on a satin bonnet or pillowcase, and refresh mid-week by spritzing with water and scrunching gently if the texture starts to relax.
10. Crinkle or Stretch Curls
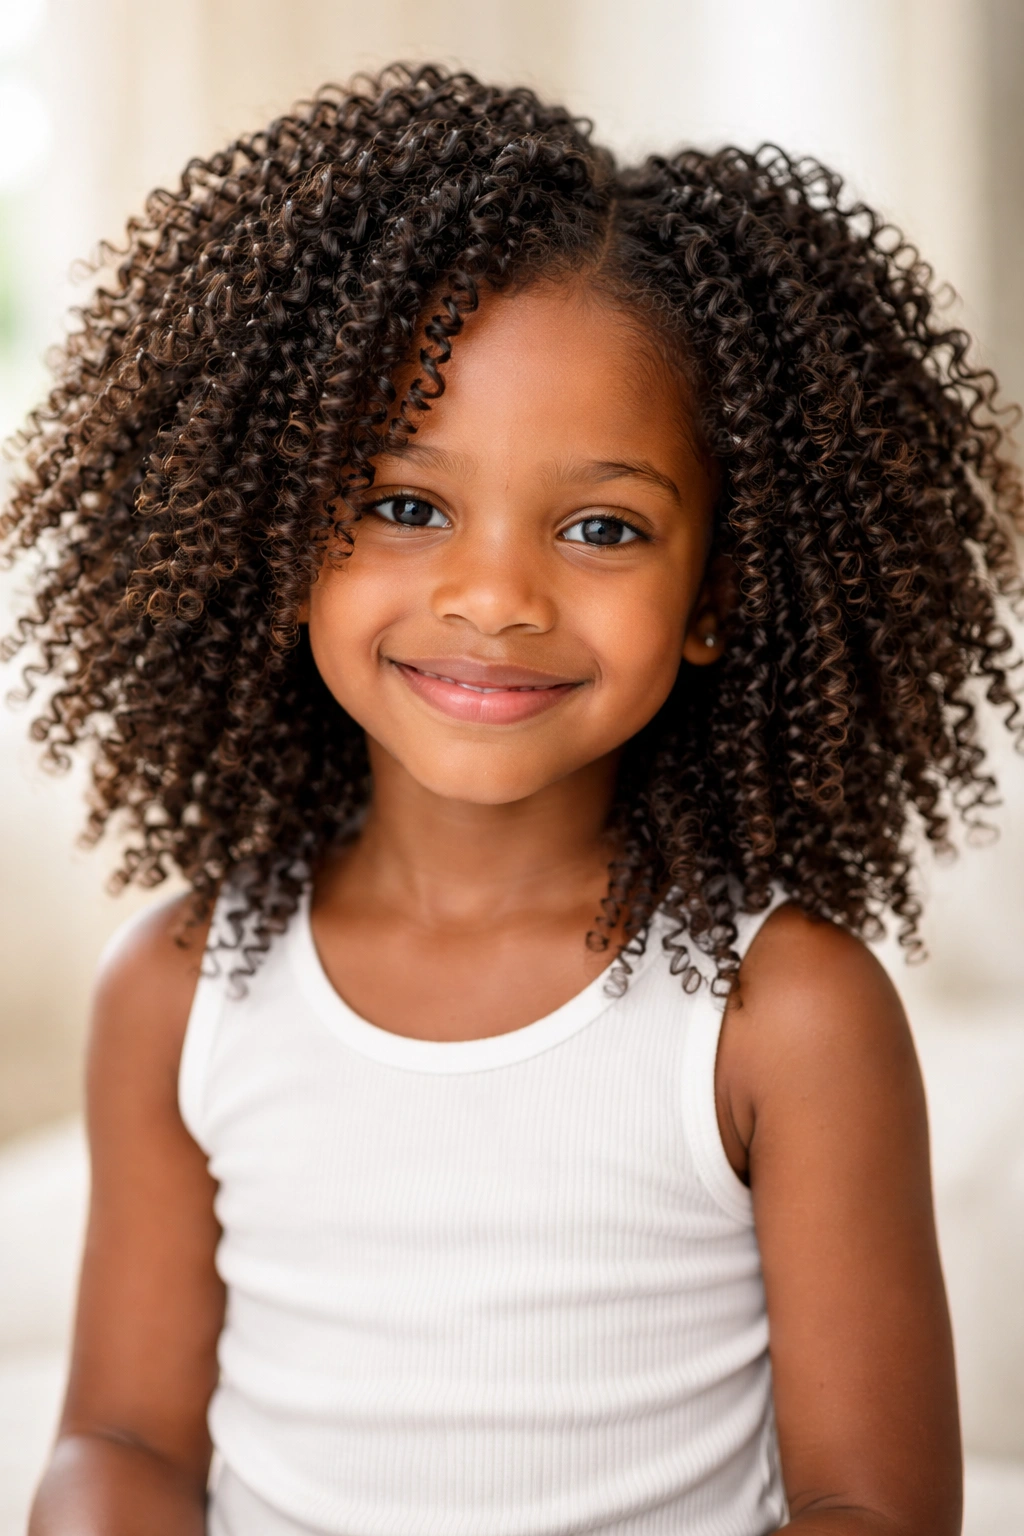
Crinkle curls are created by braiding the hair into many small braids, leaving them in for several days so they shrink and set, and then unbraiding them to reveal tight, voluminous crinkled texture throughout the hair. The result is maximum volume and a distinctive zigzag curl pattern that lasts for days. It’s the ultimate textured style — fun, bold, and absolutely protective.
What Makes Crinkle Curls So Special
Crinkle curls deliver the most dramatic texture transformation of any styling method. When you unbraid, your daughter’s hair essentially doubles or triples in volume, and the texture is so defined and structured that it lasts incredibly long. For kids who love maximum volume and a bold, distinctive look, crinkle curls are the answer. They’re also highly protective because the hair spends a week completely braided.
Creating Crinkle or Stretch Curls
- Plan many small sections: You’re going to create many small braids (anywhere from 20-50 depending on hair volume and desired intensity of texture). The more braids you create, the tighter and more defined the final crinkles will be.
- Braid tightly: Create small three-strand braids throughout the head, starting at the scalp and braiding all the way to the ends. Braid tightly enough that the braids hold their shape and maintain even tension — this is what creates the defined crinkled pattern when you unbraid.
- Leave in for 5-7 days minimum: The longer the braids stay in, the more set and longer-lasting the crinkled texture will be. A week is ideal; anything less and the texture might not be as defined.
- Unbraid and enjoy: Once you’re ready for the transformation, unbraid each braid carefully. The hair will be significantly fuller and more textured than when braided.
Worth knowing: Crinkle curls require commitment to the braided phase — your daughter will be wearing braids for a week. Make sure she’s okay with that before you start. Some kids love it because the braids are low-maintenance during that week; others prefer to see a finished style sooner.
Wearing and Maintaining
The crinkled texture lasts 7-10 days with good maintenance. Sleep on a satin bonnet, refresh with water and leave-in conditioner mid-week, and enjoy the incredible volume and texture. When you’re ready for a new style, wash out the crinkles gently, apply moisturizer, and start fresh with a new style.
Final Thoughts
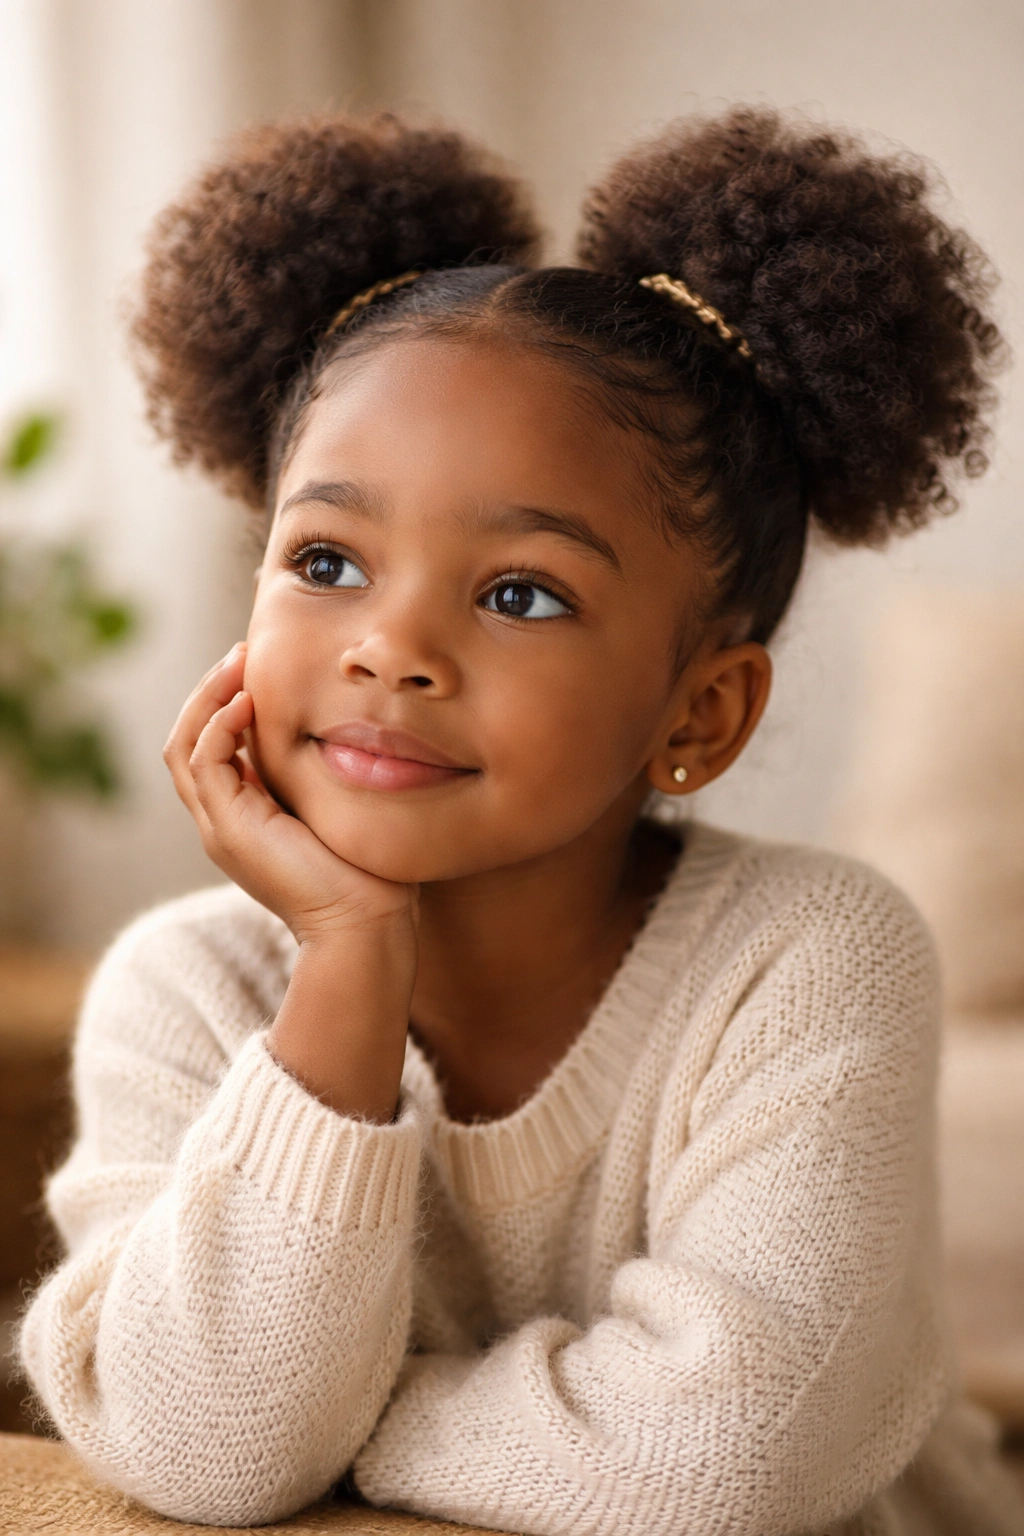
Every one of these ten styles celebrates your daughter’s natural hair texture while keeping it protected, healthy, and absolutely beautiful. The style you choose on any given week depends on a few practical factors: how much time you have to style, how long you want the style to last, whether your daughter’s in school or at home, and honestly, what she’s in the mood for.
Start by experimenting — try a simple wash-and-go one week, puffs the next, and box braids the week after. Pay attention to which styles your daughter feels most confident and comfortable in. Notice which ones last longest and require the least maintenance. Learn what products make the biggest difference in how defined and healthy her hair looks. Over time, you’ll develop an intuition for what works best for her specific hair type and your family’s lifestyle.
Remember that protective styling isn’t just about the physical protection it provides — it’s also about teaching your daughter that her natural hair is worthy of care, creativity, and celebration. Every time you style her hair, you’re telling her that her curls are beautiful, that her texture is special, and that taking time to nurture her crown is something worth doing. That message matters far more than any individual style.
