



If you have 4C hair, you already know that afro puffs are one of the most versatile, low-stress styling options in your natural hair playbook. But here’s what separates a truly stunning afro puff from an average one: the execution. A well-placed, thoughtfully textured puff can look polished enough for the office, playful enough for the weekend, and protective enough to keep your strands thriving. The beauty of 4C hair is that it holds volume naturally, grips elastics without slipping, and embraces texture in a way that shorter-haired textures sometimes struggle to achieve—when you know the tricks.
The real challenge with 4C puffs isn’t creating them; it’s creating variety. Once you master the basic technique, you’re ready to explore high puffs, low puffs, puffs with defined curl patterns, puffs with smooth silk-like finishes, puffs you can wear for a single day, and puffs that keep their shape for over a week. Some of the most versatile styling options for 4C hair involve stacking, layering, and strategic sectioning to build volume and texture. The best part? Most of these styles take under 30 minutes, require only basic tools, and actually improve your hair health because they’re low-manipulation and moisture-retaining.
This guide walks you through 10 distinct afro puff styles that work beautifully on 4C natural hair. Each one has a specific look, feel, maintenance window, and occasion it suits best. Whether you’re getting ready for work, a casual day, a special event, or you simply want to switch things up mid-week, you’ll find a puff style that feels like you.
1. The High Crown Puff
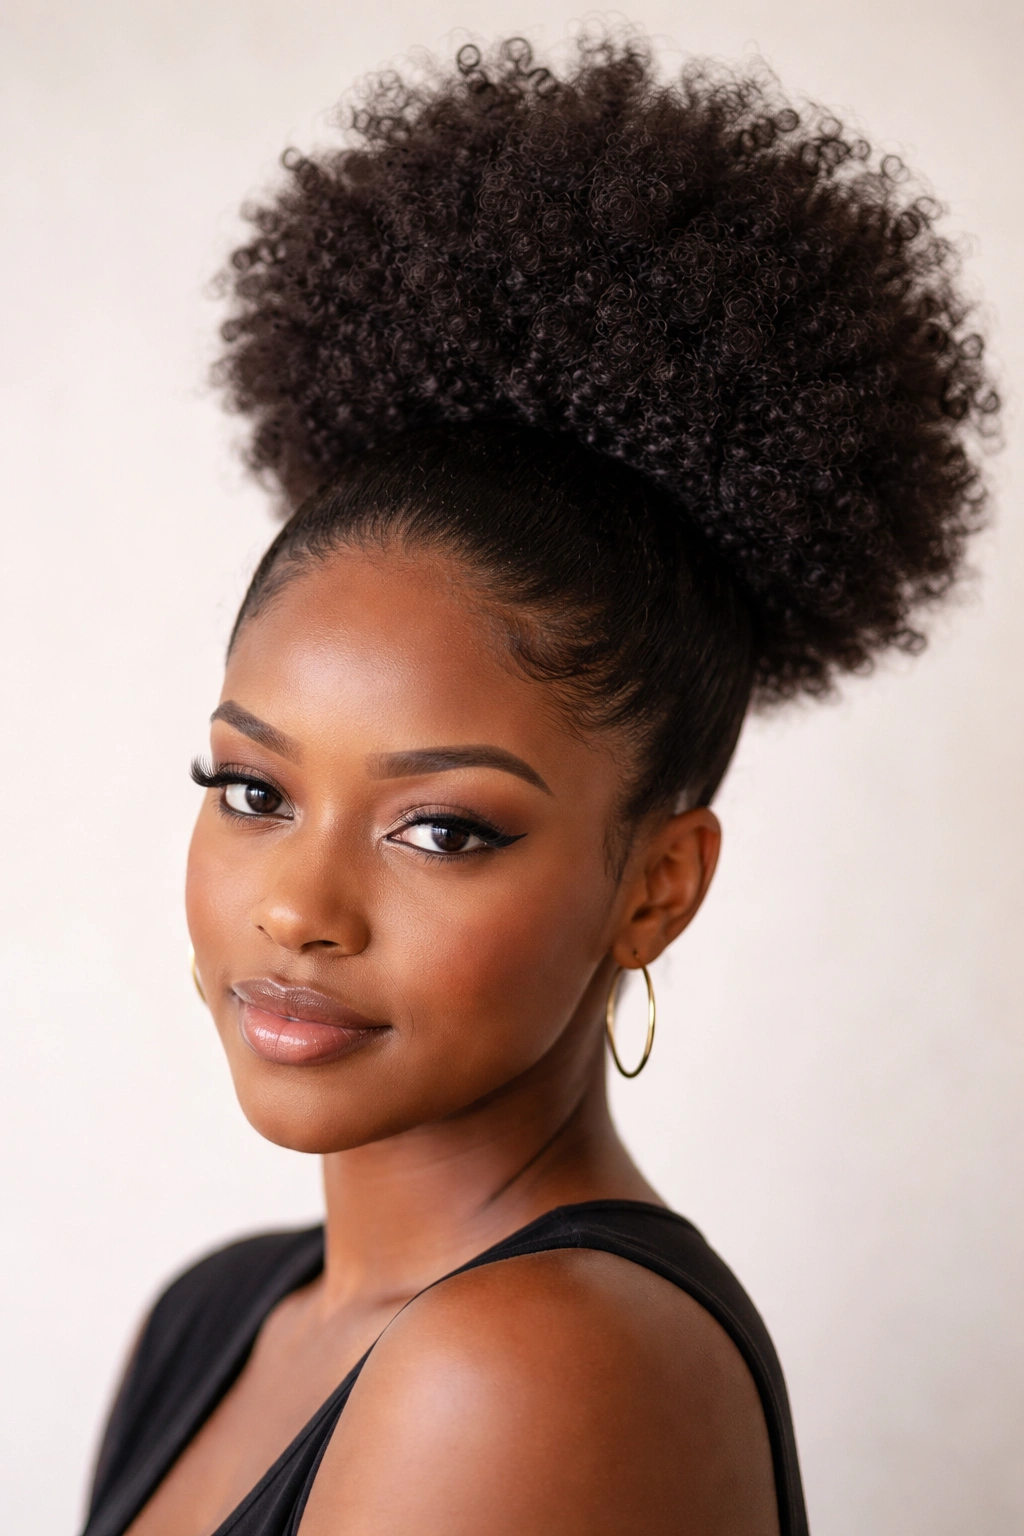
The high crown puff sits directly on top of your head, drawing all your hair up and back into one full, rounded shape. This is the signature afro puff that most people picture when they think of the style—bold, unapologetic, and surprisingly elegant when executed with intention. For 4C hair, the height and volume of a high crown puff is immediate and natural; your texture does most of the work for you.
Why This Silhouette Works for 4C Hair
A high crown puff leverages the natural lift and density of 4C curls, creating impressive volume without any heat styling or manipulation beyond gathering the hair. The coily texture of 4C hair catches and holds itself, which means your puff actually grows as it sits on your head throughout the day, becoming fuller and more defined. Unlike looser curl patterns that might flatten or lose shape, 4C puffs maintain their roundness and texture integrity for days. The weight of 4C coils also means elastics stay put without cutting off circulation or causing unnecessary tension on your edges.
How to Create a Smooth, Sculpted High Puff
- Start with damp, freshly moisturized hair and apply a lightweight cream or gel to smooth down your edges and add light hold to the sections you’re gathering
- Use a fine-tooth comb or your fingers to section hair from your forehead, straight back to the nape of your neck, creating a horseshoe-shaped section at the very crown
- Smooth that crown section upward toward the top of your head, gathering any stray strands as you go—the straighter and tighter you pull, the sleeker your final puff will look
- Secure with a silk or satin elastic, wrapping it around 2-3 times to lock the puff firmly in place without leaving creases
- Smooth the puff itself with a boar-bristle brush or soft paddle brush, working from the center outward to create a polished finish
- Tuck and secure any flyaway pieces with bobby pins, using just a tiny bit of edge control to keep them smooth
Pro tip: Spritz your finished puff lightly with a water-based setting spray to lock the style in place and keep it looking fresh for 5-7 days without re-doing it.
2. The Banded Puff with Stacked Coils
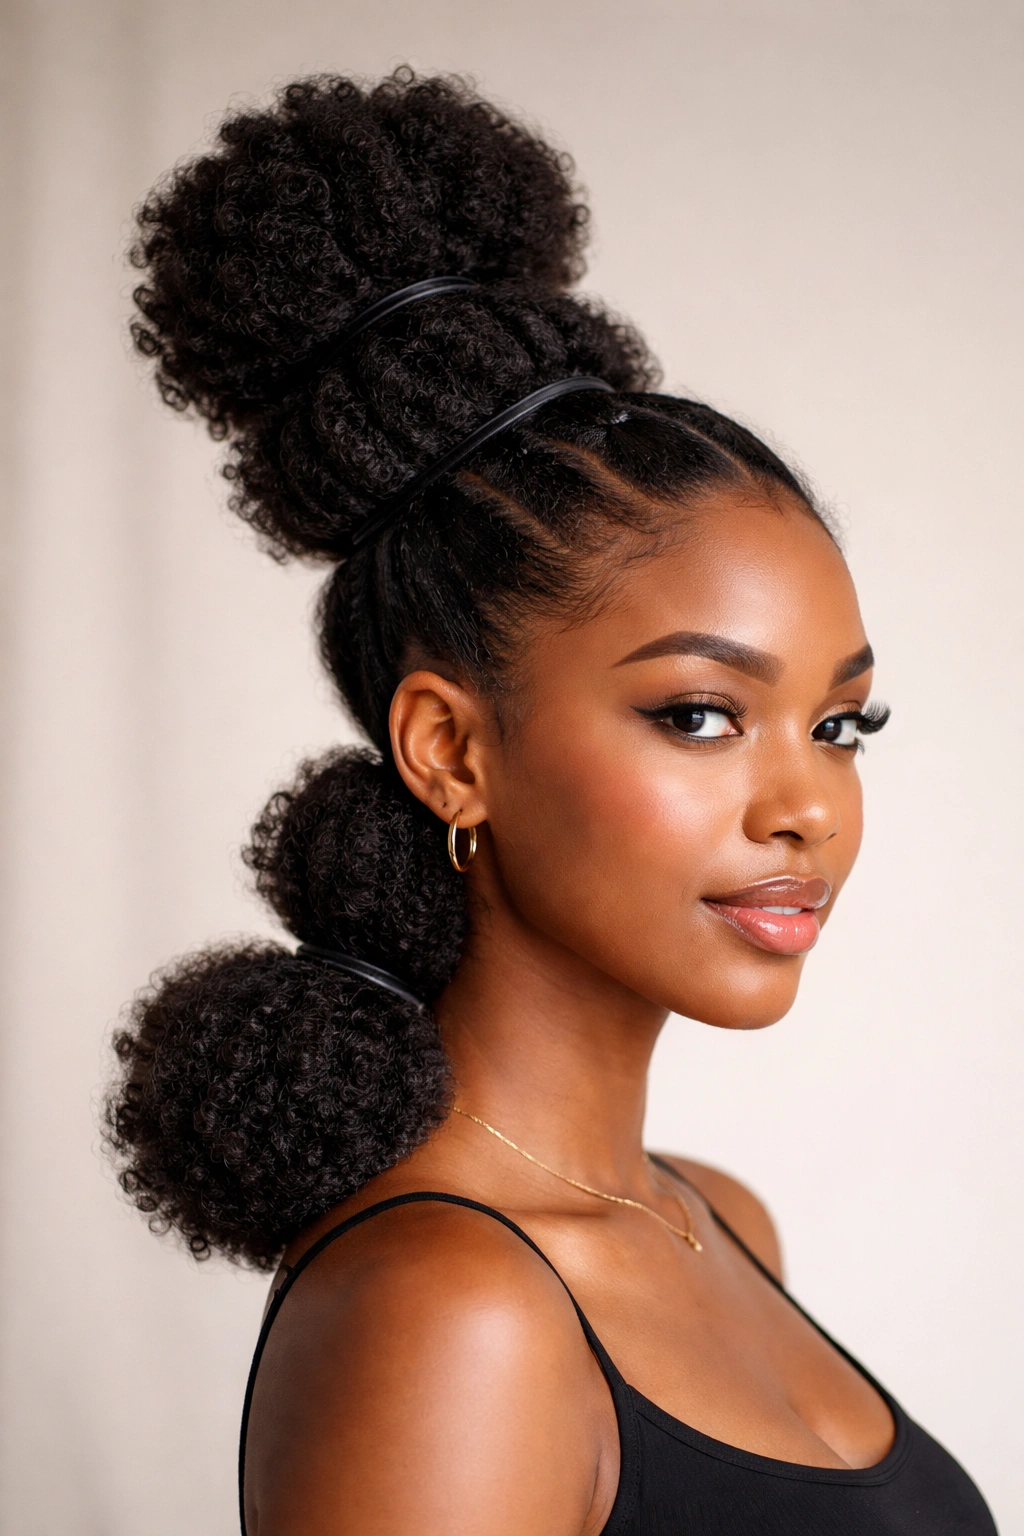
Banded puffs use small elastics positioned at intervals along your gathered hair to create distinct sections of defined, bouncy coils. Instead of one solid puff, you get multiple puffy “bubbles” stacked vertically, which not only looks incredibly dimensional and textured but also distributes tension more evenly across your scalp. This style is especially stunning on 4C hair because each band creates a natural breaking point where your coils pouf outward individually.
What Makes Banded Styling So Effective
Banding is a protective technique that keeps your coils separated and mobile instead of compressed into a single dense mass. Because 4C coils are tight and springy, they benefit from this kind of sectioning—it lets each coil express itself and maintain its integrity. The banding method also dramatically extends how long your puff stays looking intentional; a single-banded puff might start to look flat or compressed after day three, but a multi-banded version maintains distinct, voluminous sections for a full week. Another advantage: the stacking creates the illusion of even more hair and height, which is a huge win if you’re working with finer-density 4C hair or trying to add visual drama to a shorter length.
Step-by-Step Banding Instructions
- Gather your entire head of hair into a high puff using the method described above, secured with one main elastic
- Starting at the base of that gathered puff (closest to the elastic), wrap a second small elastic around the puff about 1.5 inches up from the first—you’re essentially creating a band that cinches the hair and lets it poof out on both sides of the elastic
- Move up about 2 inches and add another elastic, then another, spacing them consistently as you work toward the tip of the puff
- Tease the sections between each elastic gently with a soft brush to encourage them to poof outward and create distinct, rounded shapes
- Leave the very top of your puff unmanicured and fluffy, or smooth it with a brush if you prefer a more refined look
Insider note: For maximum staying power, use small satin elastics that blend with your hair color—they’re less visible and distribute pressure more evenly than standard rubber bands.
3. The Sleek Low Puff
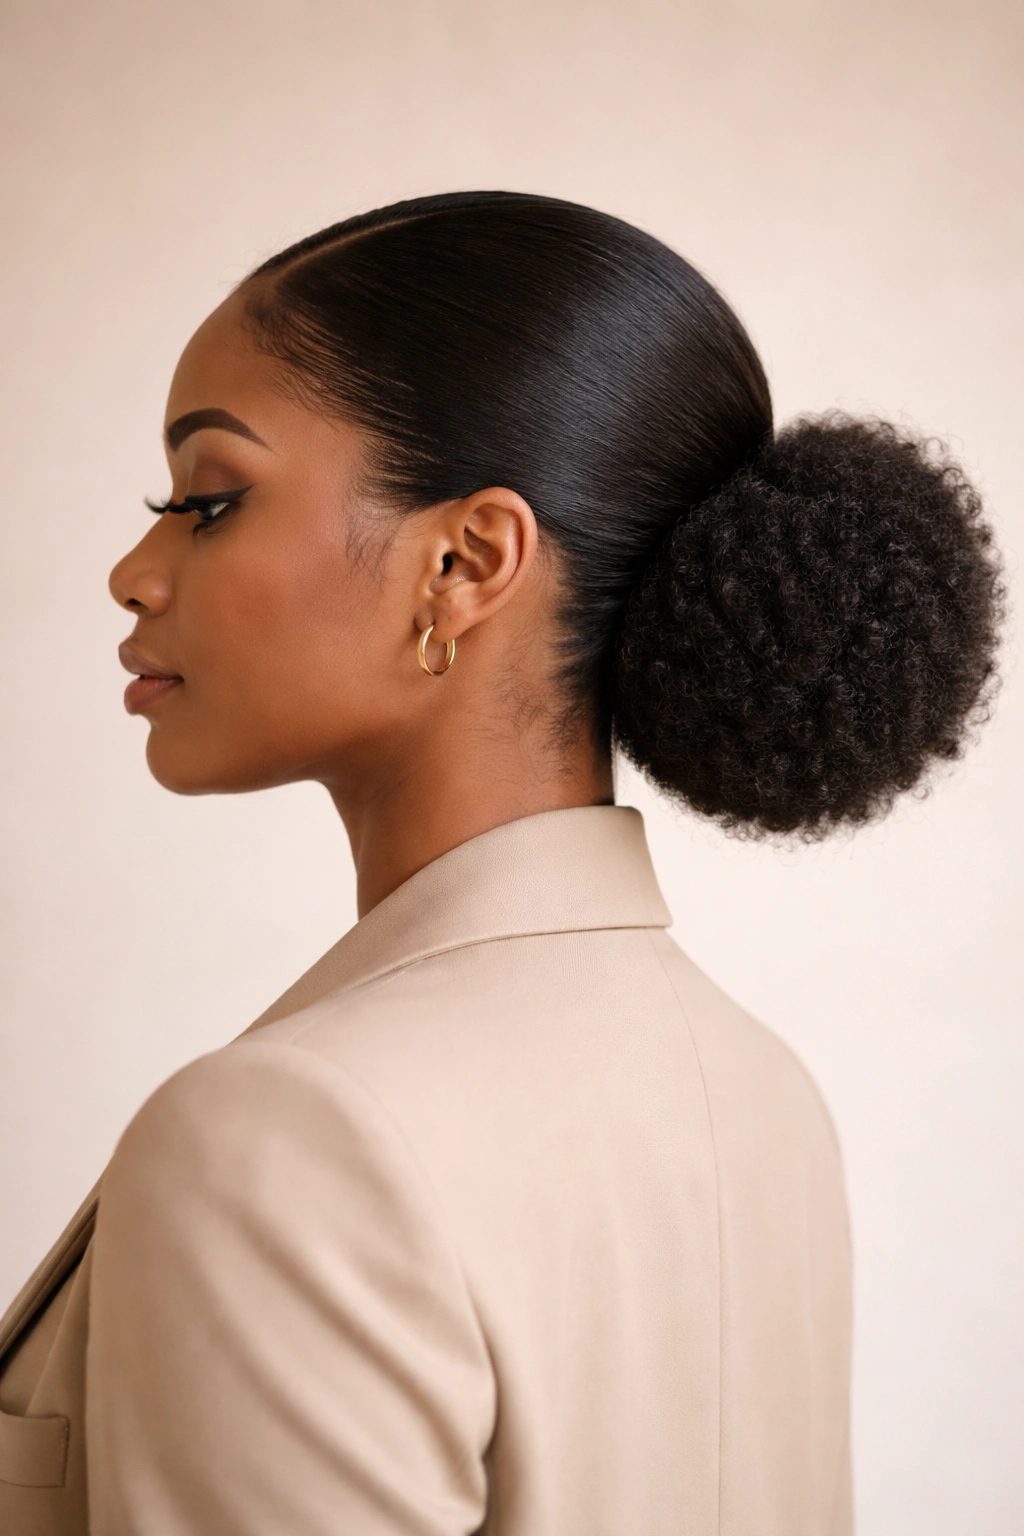
A low puff gathered at the nape of your neck creates an entirely different vibe from the high crown—more sophisticated, less youthful, and perfect for professional settings or any occasion where you want an elegant, polished look. The low placement also means less tension on your edges and hairline, making it an excellent choice if you’re in a growth phase or simply want to baby your front pieces. 4C hair’s natural texture creates a sophisticated, almost architectural look when gathered low, especially if you smooth the crown and sides.
Why Low Puffs Hit Differently on 4C Hair
When you gather 4C hair low, the coils at the base of your puff remain close to your scalp, while the length falls naturally from that low gathering point, creating an almost ornamental silhouette. The textured, rounded shape of your puff becomes a focal point at the back rather than the top of your head, which shifts the entire visual balance. Low puffs also feel inherently more mature and intentional—they read as a styling choice rather than a quickie protective style, which is a genuine advantage when you’re dressing for professional or formal contexts. Because you’re not pulling hair up and back from your face as intensely, your edges experience far less stress, and you can wear this style regularly without worrying about tension-related hair loss.
Creating the Perfect Low Puff Structure
- Flip your head forward so your hair falls toward the ground, then gather everything at the base of your neck—this gives you a clear visual of how the puff will hang and drape
- Use a rattail comb to create clean sections around your crown and sides if you want a more sculpted look, or just smooth those sections with a brush if you prefer softer, blended edges
- Pull the gathered section up and back into a low ponytail using a silk or satin elastic, positioning it right at the base of your neck or slightly lower depending on your hair length and the look you want
- Flip your head back up and smooth the puff gently to ensure it sits evenly
- Add a statement hair clip, wooden cuff, or decorative elastic to elevate the style—a low puff’s refined nature pairs beautifully with intentional accessory choices
Worth knowing: A low puff works better if you’ve worn your hair in a specific style the previous day and already have some set curl pattern; freshly washed hair can feel less controlled in a low gather.
4. The Twisted Puff
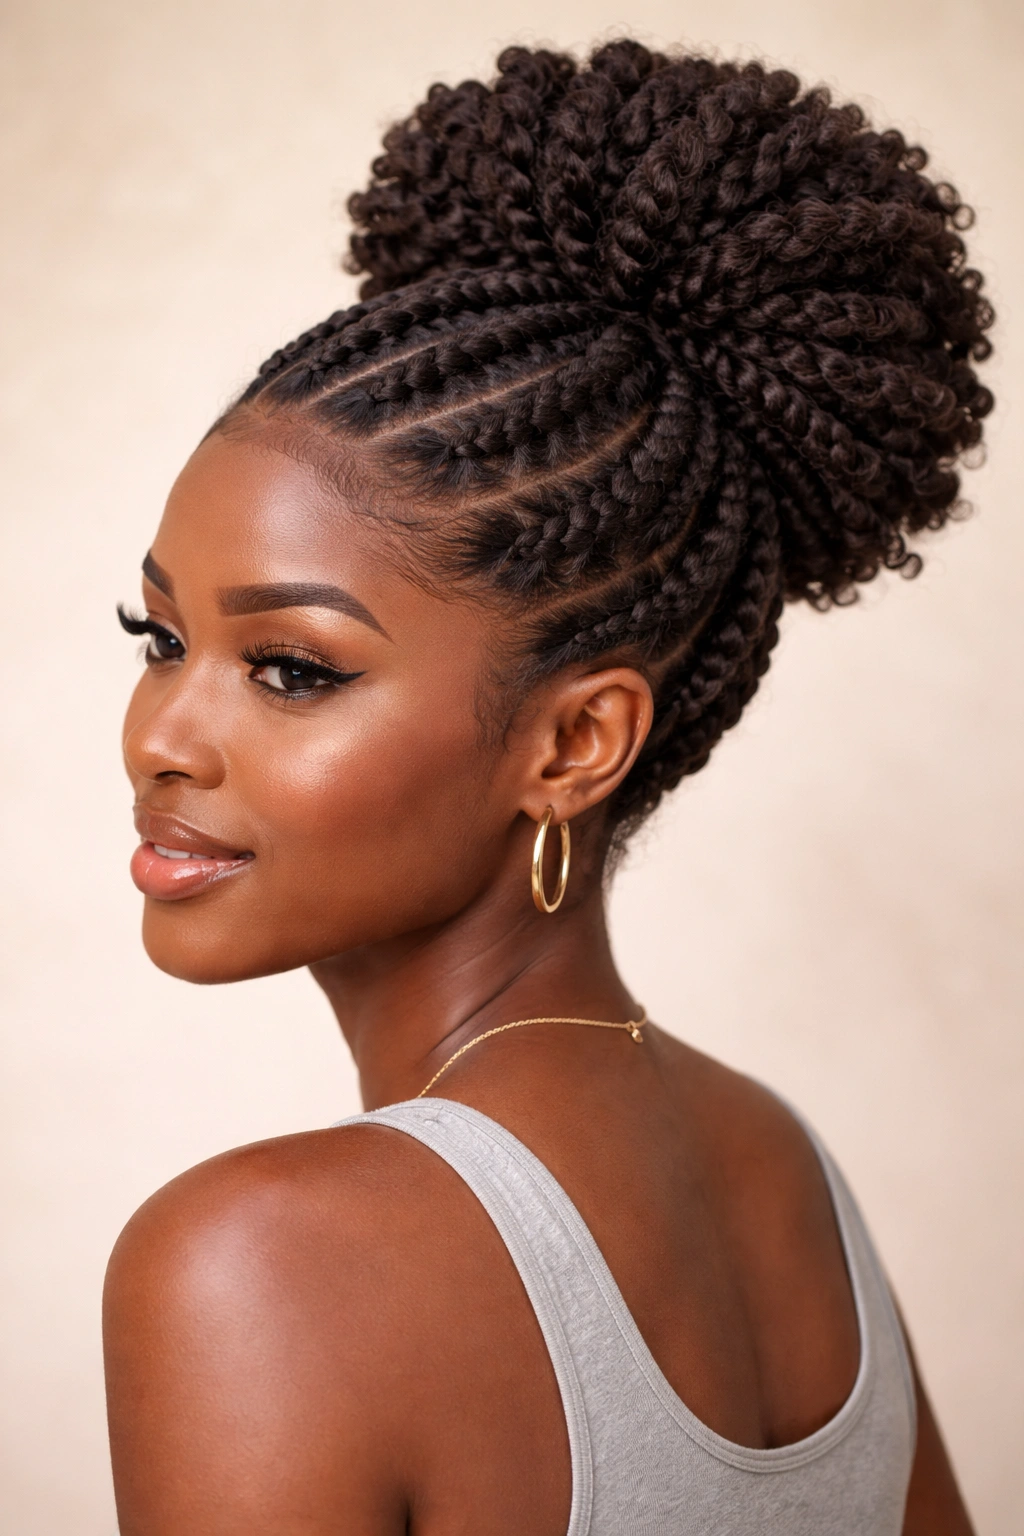
Instead of simply gathering and banding your hair, the twisted puff involves twisting sections of your hair before gathering them into a puff. The twists create visual texture and dimension that reads as more intentional and styled than a smooth puff, and the twisted strands actually hold better within the elastic, staying defined longer. For 4C hair, twists create beautiful, elongated coil patterns that look polished and controlled.
How Twists Change the Whole Look
When you incorporate twists into your puff, you’re adding an extra layer of styling sophistication that transforms the look from casual to deliberate. Twists on 4C hair create a smooth, rope-like texture that contrasts beautifully with the puffy, voluminous shape of your gathered hair, giving you both definition and fullness. The twisted sections also lock your curl pattern into place more effectively than smooth sections, so your puff maintains cleaner lines and more precise texture definition throughout the week. Twists are also less prone to frizz and fuzzing than smooth gathered hair, because the twisting motion compresses your coils and seals the cuticle layer.
Building Your Twisted Puff Layer by Layer
- Start with damp hair that’s lightly moisturized and prepped with your favorite styling cream or gel
- Section off your edges and crown (the front and top sections you want to keep smooth and framing your face)
- Take the remaining hair and divide it into 2, 3, or 4 even sections depending on how textured you want the final puff to look
- Two-strand twist each section, working from root to tip—the twists should be snug and consistent in thickness
- Once all sections are twisted, gather those twisted sections together at your desired puff height (high or low) and secure with a sturdy elastic
- Fluff and manipulate the twisted sections gently so they maintain their texture and don’t look flat against your head
- You can smooth your edges and crown with a brush if you want contrast, or leave them twisted for a fully textured look
Pro tip: Twisted puffs last longer than smooth ones because the twist structure holds your hair in place—you can often stretch this style to 10-14 days without it looking tired.
5. The Half-Up Puff
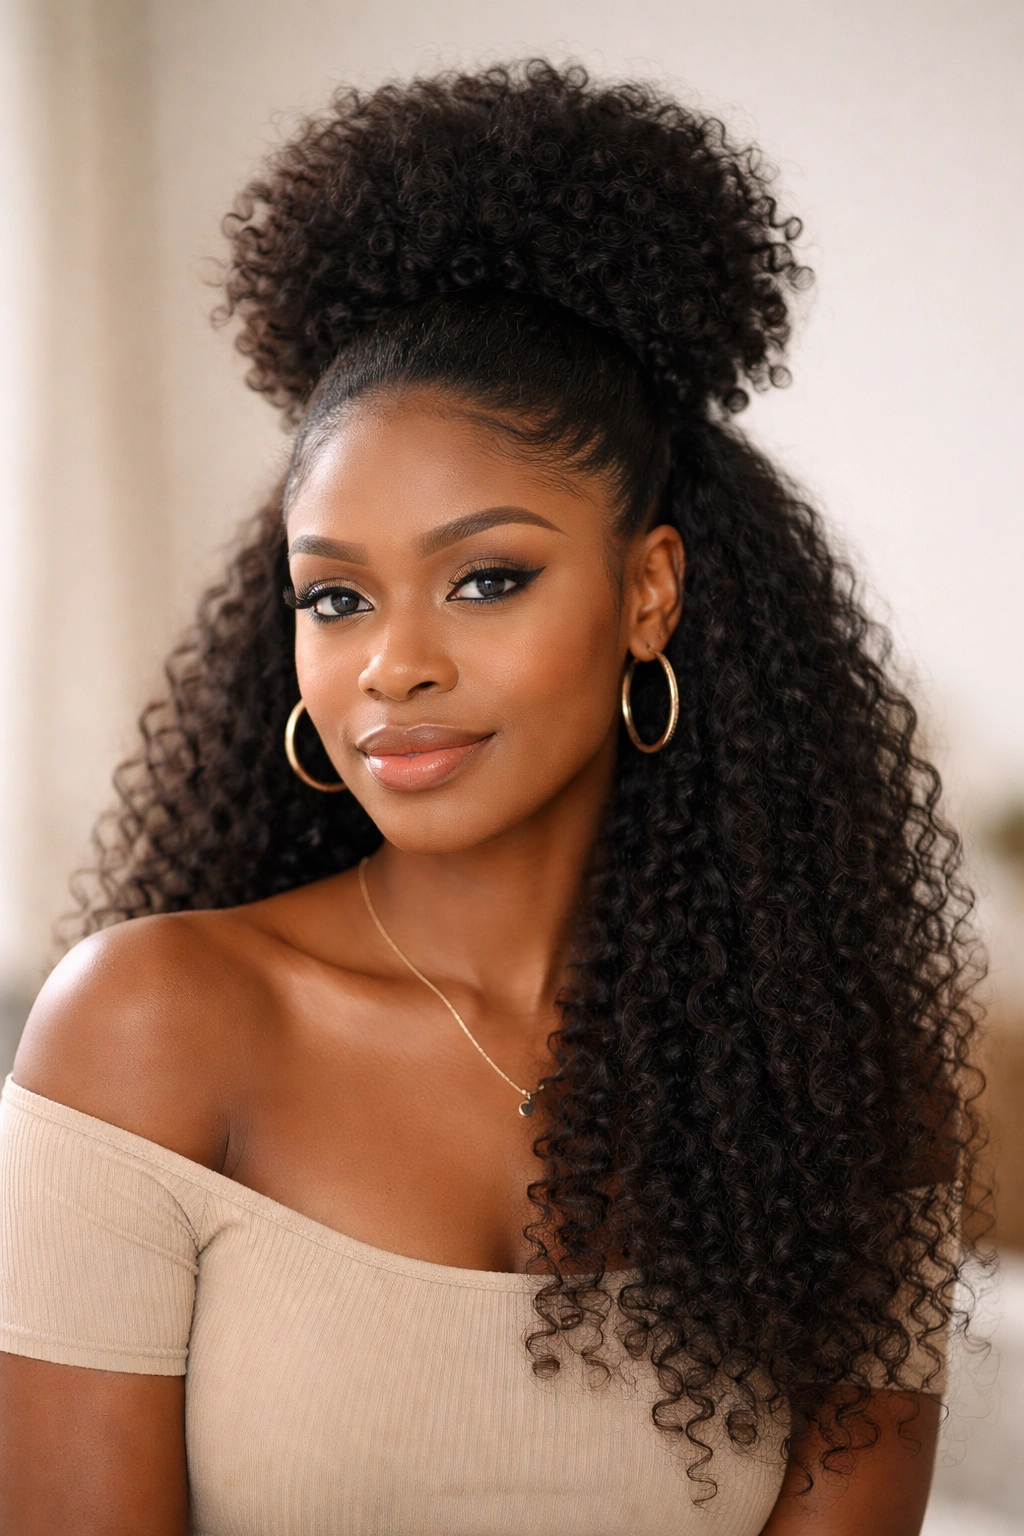
A half-up puff gathers only the top half of your hair, leaving the bottom half down and flowing. This style offers the best of both worlds: the sleekness and practicality of a gathered style on top, with the length and visual impact of down hair on the bottom. For 4C hair, which can sometimes feel heavy or hard to manage when completely down, a half-up allows you to style strategically while showing off your length.
Why Half-Ups Offer Maximum Styling Flexibility
Half-up puffs work beautifully for 4C hair because they let you style different textures in different ways within the same overall look. You might have a smooth, gelled puff on top and coily, textured hair down the back, or you might twist the gathered section and leave the bottom natural and voluminous. This style is also practical for warmer weather or when you want to keep hair off your face and neck without fully committing to an all-the-way-up style. Half-ups transition easily between casual and formal contexts just by changing your accessories—the same half-up puff can be a weekend vibe or an event look depending on what hair clip or scarf you add.
How to Execute a Balanced Half-Up Puff
- Define where your “half” line is by creating a horizontal section from ear to ear across the crown of your head
- Gather just the hair above that line into a puff at whatever height feels proportional (usually somewhere in the crown or slightly toward the back)
- Secure that gathered section with a sturdy elastic, making sure the puff is full and rounded
- Leave the bottom half of your hair down—you can brush it, style it into a curl pattern with a curling cream, or leave it natural and fluffy
- Smooth your edges and any flyaways with edge control if you want a polished look, or embrace the texture for a more relaxed vibe
- Consider adding a statement accessory at the base of your puff where the gathered and down sections meet—this creates a visual anchor that makes the style feel intentional rather than accidental
Insider note: Half-ups work especially well when you’ve worn your hair in a specific style for a few days and already have curl definition in the bottom section; it looks more cohesive than mixing freshly washed top with worn-in bottom.
6. The Double Puff
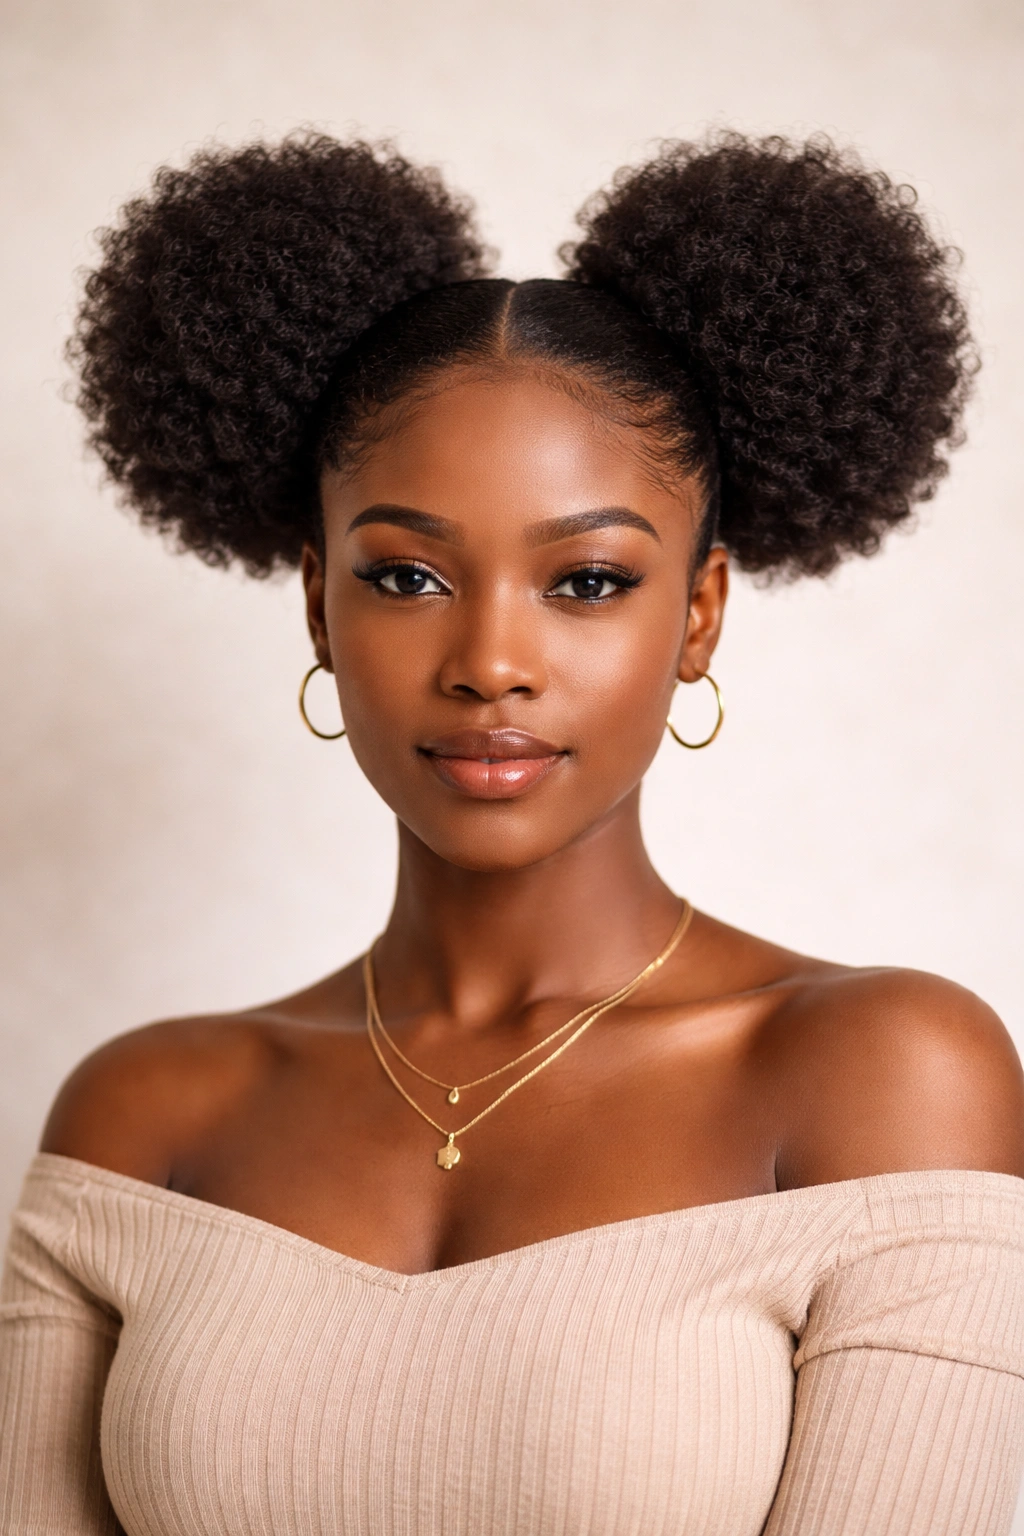
Double puffs place one puff on each side of your head rather than one centered puff, creating a playful, youthful, super-dimensional look. On 4C hair, double puffs are extraordinarily full and textured because each side gets its own volume and roundness. This style reads as more fashion-forward and intentional than a single puff, and it’s surprisingly comfortable because you’re distributing the weight of your hair across two gathering points instead of one.
The Magic of Two Over One
Double puffs distribute tension across your scalp more evenly, which means this is actually a gentler style than a single high puff if you’re focused on scalp and edge health. Because 4C hair is dense and textured, two distinct puffs create an even more dramatic visual impact than they might on looser curl patterns—you get serious volume and presence without any heat styling or artificial enhancement. Double puffs also photograph incredibly well, which is a bonus if you love documenting your styles. This style reads distinctly youthful and creative, which is perfect if that’s the energy you’re going for, but it also works beautifully as a statement style for special occasions or when you want to feel playful.
Creating Symmetrical, Full Double Puffs
- Start by creating a center part from your forehead straight back to your nape—use a rattail comb to make this line precise
- Divide your hair into two equal sections along that center line, clipping one side out of the way while you work on the first puff
- On the first side, smooth the hair slightly and gather it high on that side of your head, secured with an elastic
- Repeat on the second side, making sure both puffs are positioned at the same height and are approximately the same size and fullness
- Fluff and shape both puffs so they’re evenly round and full—manipulate the hair within each elastic gently to build maximum volume
- Smooth your center part and edges if you want definition, or leave everything textured for a more relaxed look
Pro tip: For maximum symmetry, use a hand mirror to check that both puffs look equally full and positioned at the same height before you consider the style complete.
7. The Defined Curl Puff
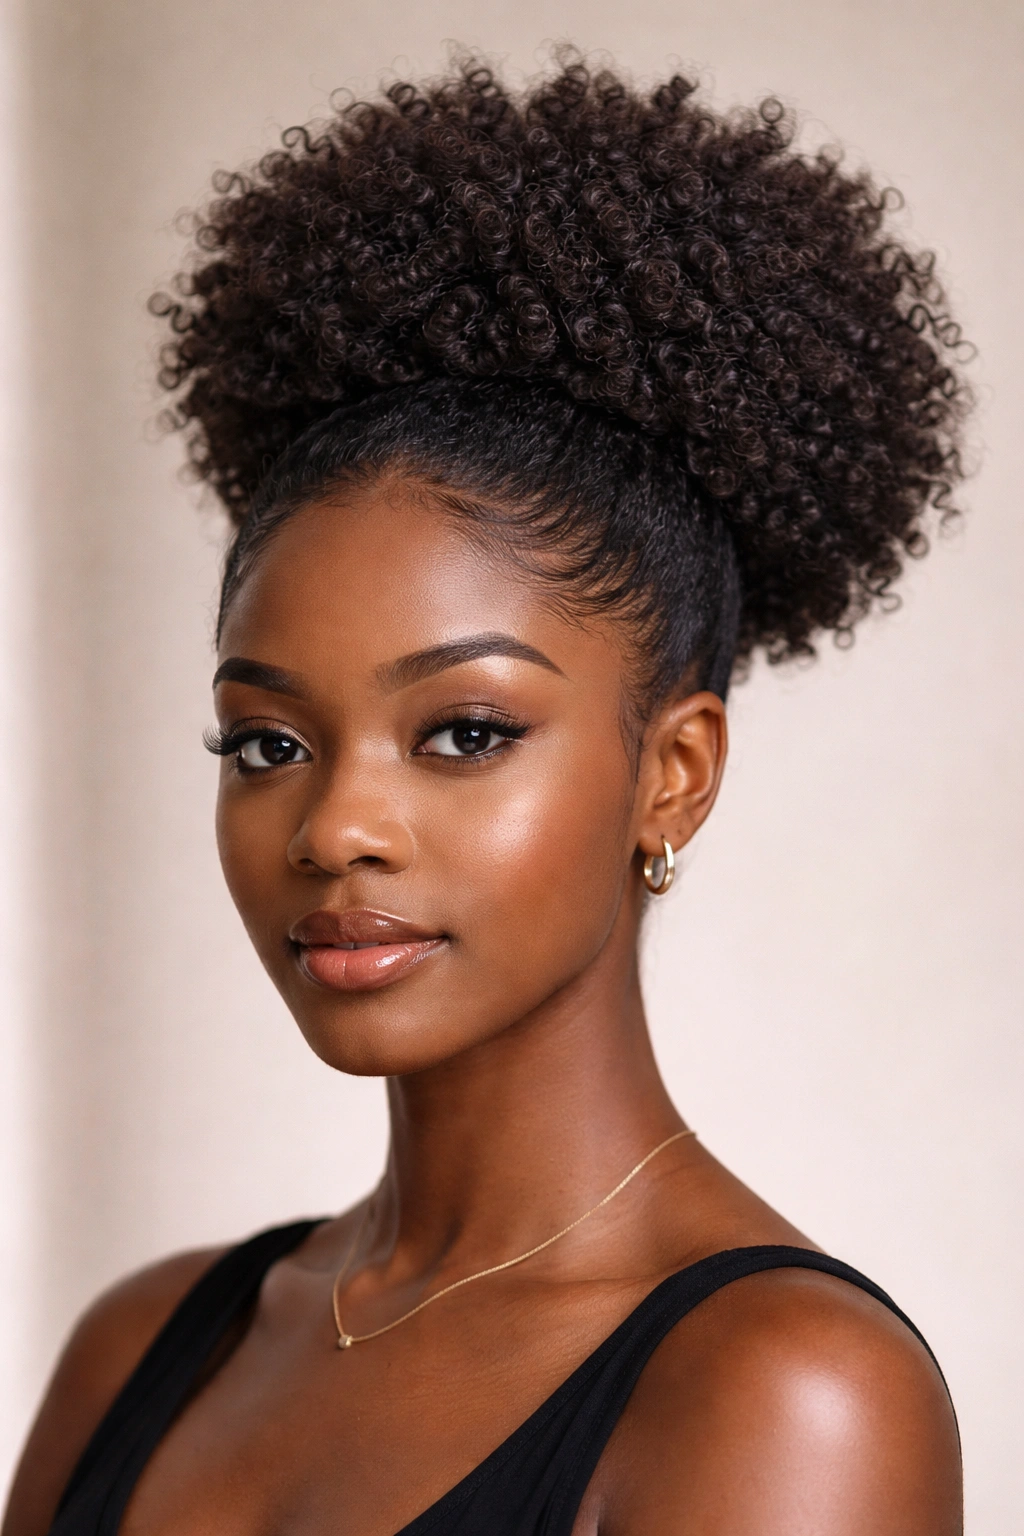
Instead of just gathering your hair into a rounded shape, a defined curl puff intentionally emphasizes the individual coil pattern of your hair. This might involve using a product like a curl-defining gel or cream before gathering, using a specific technique that brings out more coil definition, or it might mean styling your puff immediately after taking your hair out of bantu knots or another setting style. The result is a puff where each coil is visible and bouncy rather than compressed into a smooth or blended mass.
How Coil Definition Changes the Vibe
A defined curl puff celebrates the actual texture of your 4C hair in a way that a smooth puff doesn’t. Instead of sleek and polished, you get textured and bouncy. Instead of architectural and controlled, you get organic and natural-looking. This style works beautifully if you love the way your coils look up close and want them to be part of the visual statement of your puff. Defined curl puffs also hide frizz and fuzzing better than smooth puffs because the intentional texture means frizz reads as part of the design rather than something that went wrong. This style extends the lifespan of your puff because you can restyle the curls and reactivate definition even if the puff has been sitting for several days.
Techniques for Maximum Coil Pop
- Use a curl-defining product applied to damp hair before you gather into a puff; look for lightweight gels, creams, or liquid leave-ins that define rather than just hold
- Consider using the “praying hands” method when applying product: rub the product between your palms, then smooth it through your gathered puff with both hands rather than finger-coiling individual strands
- Alternatively, style your entire head into small bantu knots 24 hours before you plan to wear the puff, then unravel those knots and gather the textured hair into a puff—the coils will be bouncy and clearly defined
- Use a light-handed fluffing technique to separate and lift the coils in your puff without creating frizz—use your fingers or a pick rather than a brush
- Spritz with a water-based product or curl refresher to reactivate definition throughout the week without having to re-wet and restyle your entire puff
Worth knowing: Defined curl puffs photograph absolutely beautifully because the texture reads clearly, so this is an excellent choice if you’re planning to share your style or document your hair journey.
8. The Sleek Gel Puff with Smooth Sides
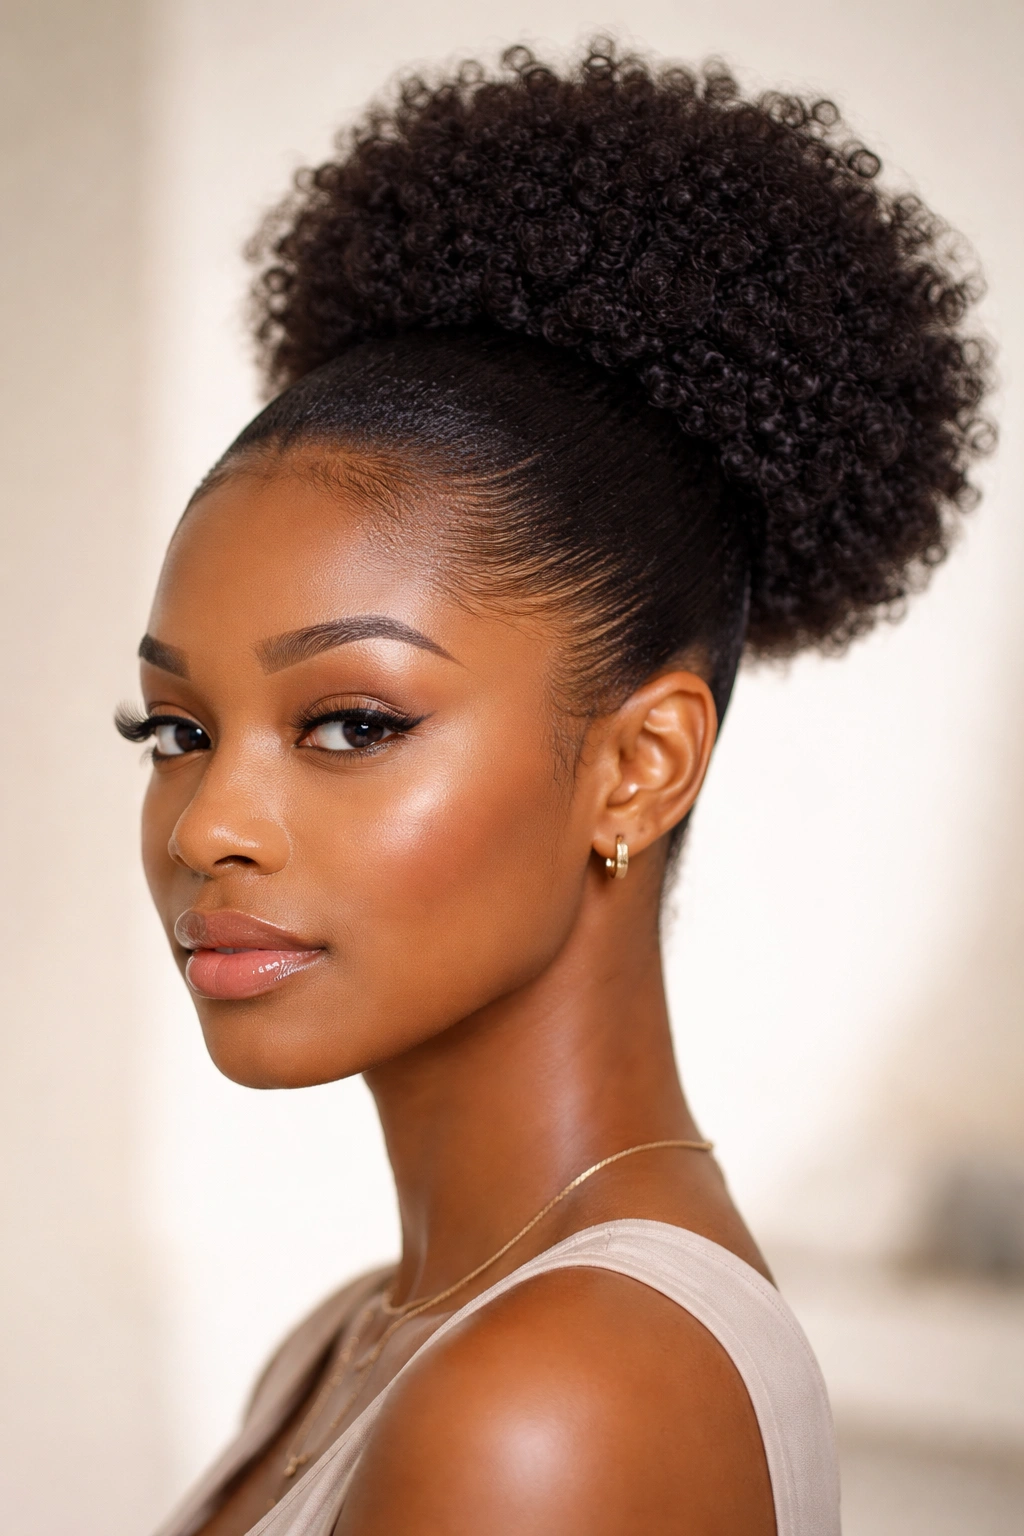
This style uses edge control, gel, or a smooth styling cream to create a highly polished, sculpted puff where both the gathered section and the surrounding hair are smooth and sleek. It’s the most formal-looking puff style, and it reads as intentional and styled in professional or event contexts. For 4C hair, achieving this smooth look requires product and technique, but the result is a gorgeous contrast between the textured volume of the puff itself and the smooth, shiny surface you’ve created.
Building a Truly Polished Finish
A smooth gel puff on 4C hair requires the right product—you need something with enough hold to keep hair smooth and shiny without flaking, crunching, or looking cakey. The technique matters too: you’re essentially “laying down” your hair in the sections surrounding your puff while letting the gathered section above be textured and voluminous. This creates a very intentional, almost architectural look that reads as more sophisticated than a more casual puff style. The sleekness of your edges and sides creates a frame that makes your puff itself look even fuller and rounder by contrast.
Step-by-Step Sleek Puff Construction
- Start with damp hair and apply your favorite lightweight moisturizer or leave-in conditioner to everything
- Apply a styling gel or edge control to your edges, crown, and the sections around where you’ll be gathering, working it through with a fine-tooth comb
- Brush and smooth those sections in the direction you want them to lay—usually straight back and away from your face
- Gather your hair high into a puff, positioning the elastic above your smooth sections so the puff sits on top of the smooth foundation
- Use a boar-bristle brush to smooth the very top of your puff, creating a polished rounded shape
- Apply a tiny bit of edge control to smooth any flyaway pieces and create clean lines around your hairline
- Finish with a light hairspray or setting spray to lock everything in place and add shine
Insider note: This style works best if you prep your hair the night before—let your gel dry fully and your edges set, which gives you a smoother, shinier base the next day.
9. The Textured Side Puff
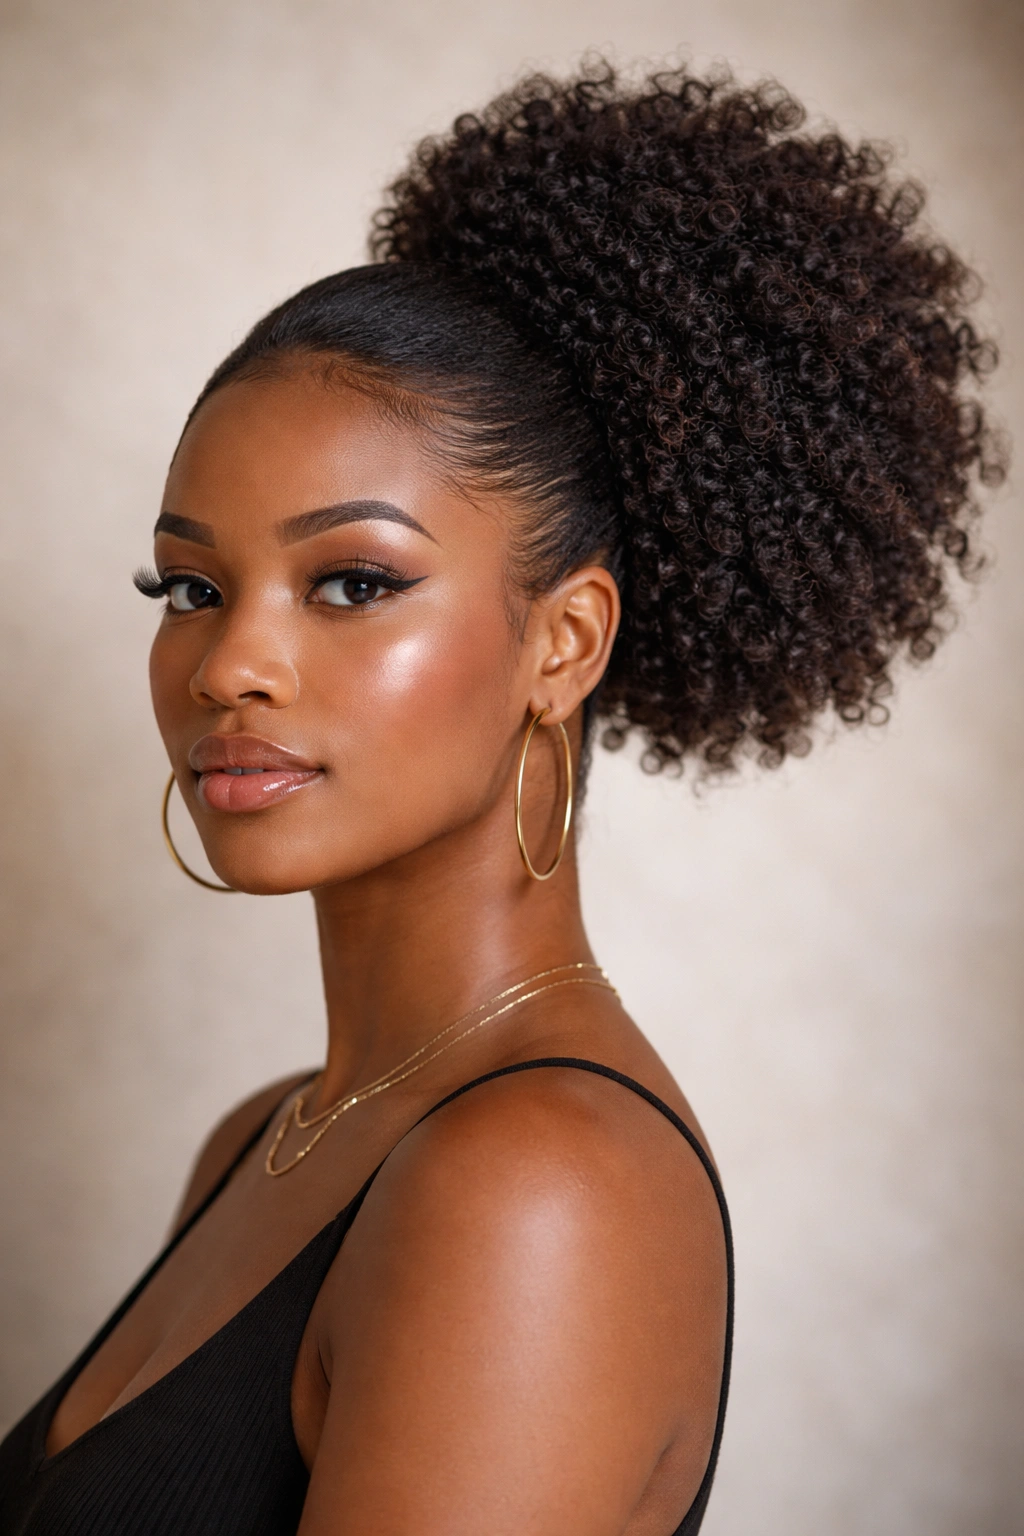
Instead of positioning your puff in the center crown or directly at the back, a side puff sits off to one side of your head, creating an asymmetrical, modern silhouette. On 4C hair, which has natural volume and dimension, a side puff reads as fashion-forward and intentional. This style works beautifully for people who want their hair off to one side while maintaining the ease and low-manipulation benefits of a puff style.
Why Side Positioning Changes Everything
A side puff automatically reads as more styled and intentional than a centered puff, even if it’s created using the exact same technique. The asymmetry is modern and deliberately imperfect in a way that feels current and personal. For 4C hair, a side puff lets one side of your face and neck remain fully visible and framed, which changes how the style photographs and how it feels to wear. Side puffs also work beautifully if you have one side of your hair that’s longer or fuller than the other, or if you’re growing out one particular section—the positioning can actually disguise or work with natural variations in your hair.
Executing a Side Puff That Stays Put
- Create a deep side part, starting from one temple and working back toward the nape
- On the larger side (the side with more hair), gather that section into a puff positioned toward the back of that side, roughly where your ear is or slightly behind
- On the smaller side, you can either leave hair completely down and loose, or brush and smooth it across the back of your head toward where the main puff sits
- Secure the puff firmly with a sturdy elastic—side puffs need extra-secure holding because of the way weight distributes when hair is gathered to one side
- Smooth any pieces around your part and edges, and consider adding a decorative hair clip or statement piece near where the puff sits to draw attention to the style
Pro tip: A side puff works beautifully with a deep side part that’s already been set for a day or two—trying to create a crisp new side part and a side puff on the same day can be fighting against your hair’s natural grain.
10. The Messy Textured Puff
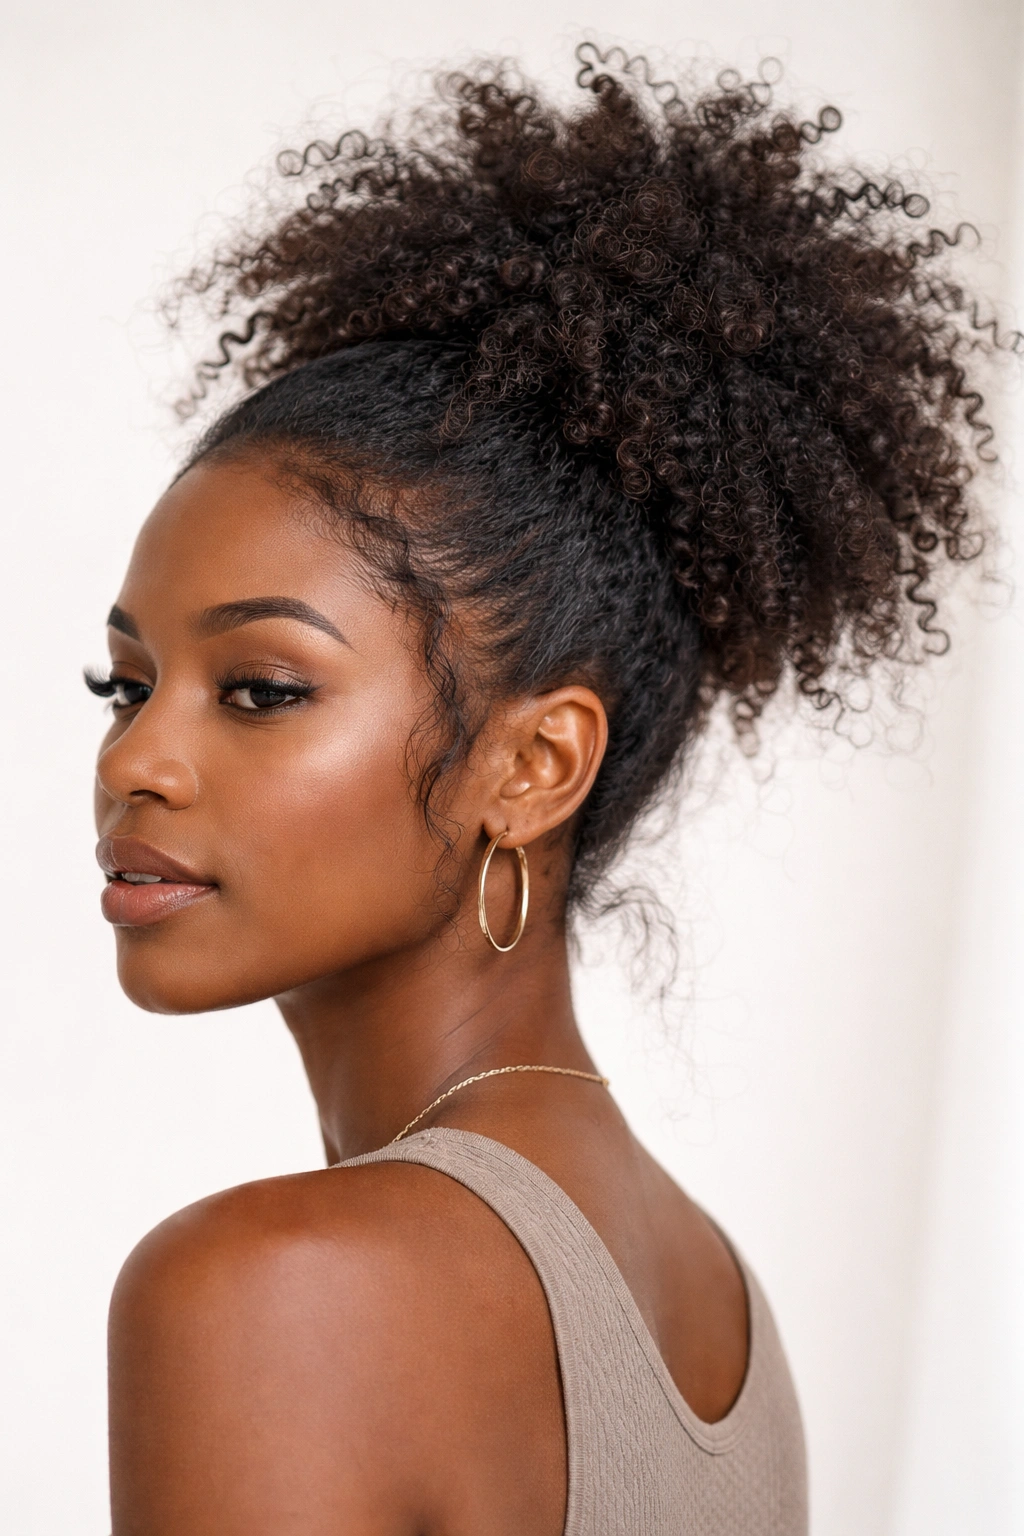
A messy puff deliberately embraces an undone, intentionally imperfect aesthetic where coils are separated, flyaways are visible, and the overall effect is textured and organic rather than polished and controlled. This is actually not easier to create than a neat puff—paradoxically, it requires more intention and technique to look intentionally messy. On 4C hair, this style celebrates natural texture and defies the pressure to smooth, polish, and tame your hair, creating a look that’s both casual and deeply stylish.
The Intentionality Behind “Messy”
A true messy puff isn’t what happens when you just throw your hair up—it’s a carefully orchestrated textured style where you’ve deliberately separated coils, added product for definition, and positioned things in a way that reads as relaxed but not sloppy. This style works beautifully on 4C hair because your texture is naturally voluminous and interesting; all you’re doing is leaning into what’s already there rather than fighting against it. A messy puff reads as confident and unapologetically textured, which is a powerful statement. It also has practical benefits: it’s forgiving when your hair is in that weird middle ground between freshly washed and old, and it looks good for longer because imperfection is built into the design.
Creating a Beautifully Imperfect Puff
- Start with hair that’s 2-5 days old and already has some texture and curl definition set in
- Apply a light curl cream or leave-in conditioner, working it through with your fingers rather than a comb—you’re aiming for loose, separated coils rather than sleek smoothness
- Gather your hair high or low into a puff, but don’t obsess over making it perfectly round or symmetrical
- Use your fingers (not a brush) to separate and fluff the coils in your puff, deliberately pulling some sections out so they’re more distinct and less blended
- Leave some pieces loose and framing your face; don’t create a perfectly clean edge, instead let some wispy, textured pieces be visible
- Spritz with a water-based product to encourage coil separation without adding heavy hold
- The final effect should be textured, separated, and full without being tight or overly controlled
Worth knowing: This style actually improves over a few days as your coils relax slightly and the texture becomes even more separated—by day 4 or 5 it often looks better than day 1.
Final Thoughts
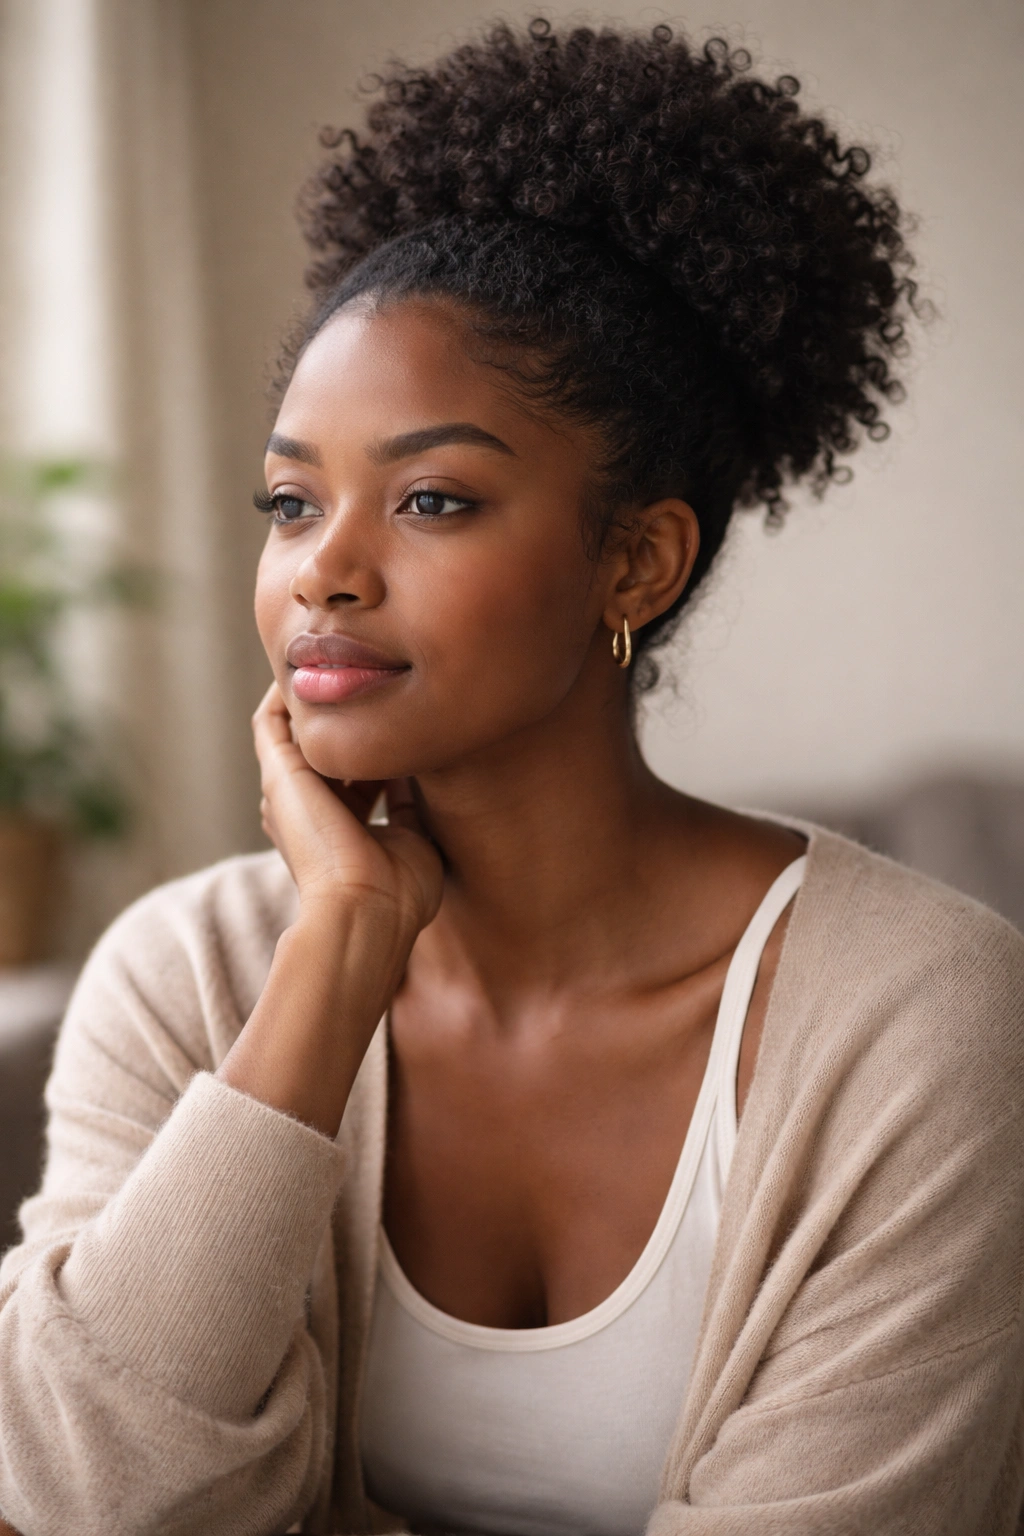
The versatility of afro puffs lies in their adaptability. You can wear the same basic puff style in a hundred different ways depending on your hair texture on that particular day, the products you use, the accessories you add, and the time you have available. What makes 4C hair especially magical for puff styling is that your natural texture does most of the heavy lifting for you—your coils grip elastics, your volume is automatic, and your definition comes from your hair itself rather than requiring heat styling or extreme manipulation.
The real skill isn’t learning to create one perfect puff; it’s understanding how to shift between styles depending on what your hair, your schedule, and your personal goals require that week. Some weeks you might rotate between three different puff styles. Other weeks, you might wear the same puff for 10 days straight, reactivating it with a light spritz and some finger-fluffing. The low-manipulation nature of all these styles—from sleek gel puffs to textured messy versions—means you’re actively protecting and preserving your hair health while exploring different aesthetics.
Pay attention to which puff styles make you feel most confident and comfortable. Notice which ones photograph well, which ones last longest without needing refreshing, and which ones feel easiest to create on mornings when you’re rushed. Your favorite puff style might shift seasonally, or as your hair grows longer, or simply as you evolve what you’re drawn to aesthetically. That flexibility is the entire point. Start with whichever style calls to you, master that one, then build outward from there.
