



Afro puffs are one of the most versatile, effortless, and confidence-boosting protective styles available to textured hair—but here’s the secret most tutorials won’t tell you: the placement, height, and texture of your puff can either beautifully frame your face or work against your natural features. The same puff style that looks stunning on someone with an oval face might overwhelm a round face, while a style that flatters a square jawline might not give a heart-shaped face the balance it needs.
The beauty of understanding how different puff placements interact with face shape is that you’re not limited to one go-to style. With just a few thoughtful adjustments—changing the height, adding volume in specific areas, incorporating braids, or shifting the placement slightly off-center—you can create versions of the same basic puff that enhance your specific features. Whether your face is round, oval, heart-shaped, square, oblong, or diamond, there’s an afro puff approach designed to highlight your best angles and create the proportions that make you feel most confident.
The styles in this guide span the full spectrum: from sleek and polished to textured and playful, from minimalist to statement-making. Each one is explained with the specific face shapes it suits best and the exact placement tweaks that make the difference between “nice” and “wow, that’s you.” You’ll also find practical tips for achieving each look, whether you’re working with natural texture, adding extensions, or creating the puff from styled hair.
Let’s find your signature puff.
1. High Crown Afro Puff
A high crown puff sits at the very top of your head, creating maximum vertical lift and elongating the face. This style works by drawing the eye upward, making it particularly flattering on round and square faces because it interrupts the widest part of the face and adds height proportionally. The dramatic uplift instantly makes your face appear slimmer and more sculpted.
Why It Works for Your Face Shape
Round faces benefit most from this style because the vertical lift counterbalances the horizontal width. Square faces love it because the crown placement softens the angular jawline and adds a feminine, elongated element. Even heart-shaped faces find this works well because the height at the crown balances a wider forehead. If you have a long, oblong face, go slightly lower (just past the crown) to avoid over-lengthening proportions.
How to Create the Perfect High Crown Puff
- Brush your hair upward and away from your face with a soft paddle brush or comb
- Secure tightly with an elastic at the very crown, gathering all hair straight up from your scalp
- Smooth the perimeter with edge control if you like a polished look, or keep flyaways loose for texture
- Fluff the puff outward once secured to add volume and dimension
- Use bobby pins to anchor stray sections if needed
Pro tip: Apply your edge control before securing the puff, not after. This prevents frizz around the hairline and gives you a cleaner, more intentional finish without the stiff, over-gelled appearance.
2. Sleek Low Puff
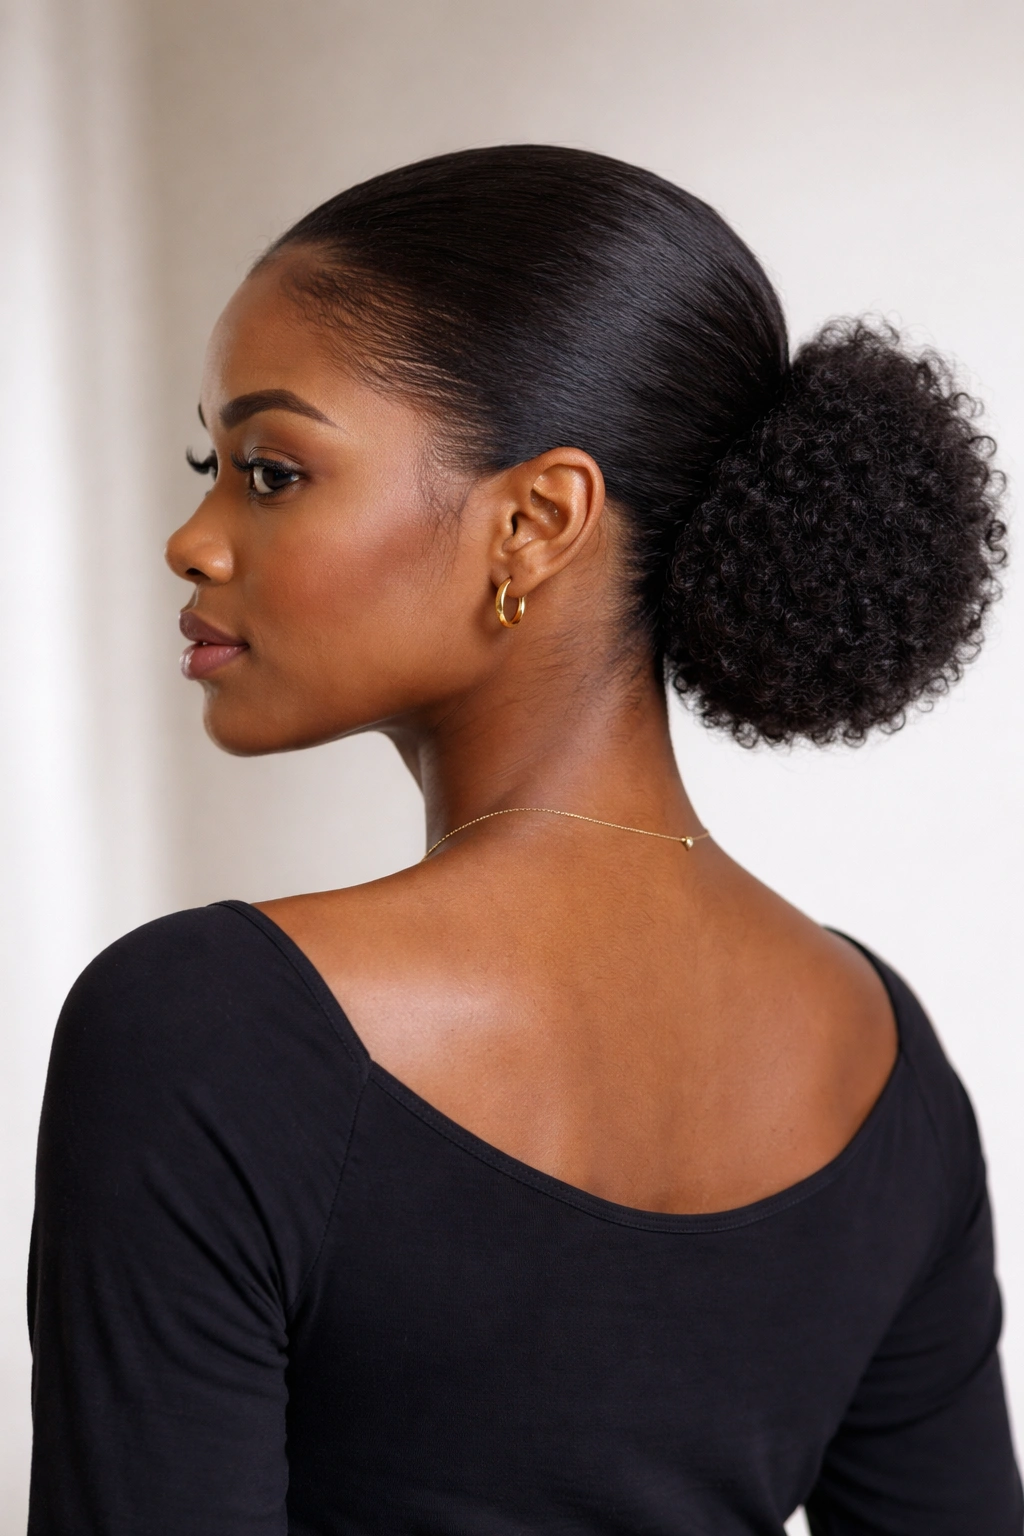
A sleek low puff positions the gathering at the nape of the neck, creating an elongated, elegant silhouette. This style works beautifully because it keeps the face fully exposed and unframed, making it ideal for highlighting cheekbones, a defined jawline, or distinctive facial features. The low placement is inherently balancing because it doesn’t add height—it adds sophistication.
Why It Works for Your Face Shape
Oval and rectangular faces absolutely thrive with a low puff because these shapes are already proportionate, and a low placement emphasizes their natural balance. Heart-shaped faces love this because it takes weight away from the forehead and draws focus to the narrower lower face. Diamond-shaped faces find this particularly flattering because it doesn’t compete with cheekbones—it lets them shine. Even round faces can wear this successfully if they add texture and volume to the puff itself rather than keeping it sleek and close to the head.
How to Create a Sleek Low Puff
- Apply smoothing cream or lightweight serum to damp or dry hair
- Use a fine-tooth comb to smooth hair back away from your face in one direction
- Gather hair at the nape and secure with a tight elastic
- Smooth the perimeter with edge control using a firm brush or applicator
- Keep the body of the puff compact and close to the head for that clean, sophisticated look
- Pin down any bumps or flyaways with bobby pins that match your hair color
Worth knowing: A sleek low puff photographs incredibly well and reads as polished in professional settings. If you’re aiming for that “effortlessly elegant” vibe, this is your style.
3. Double Buns
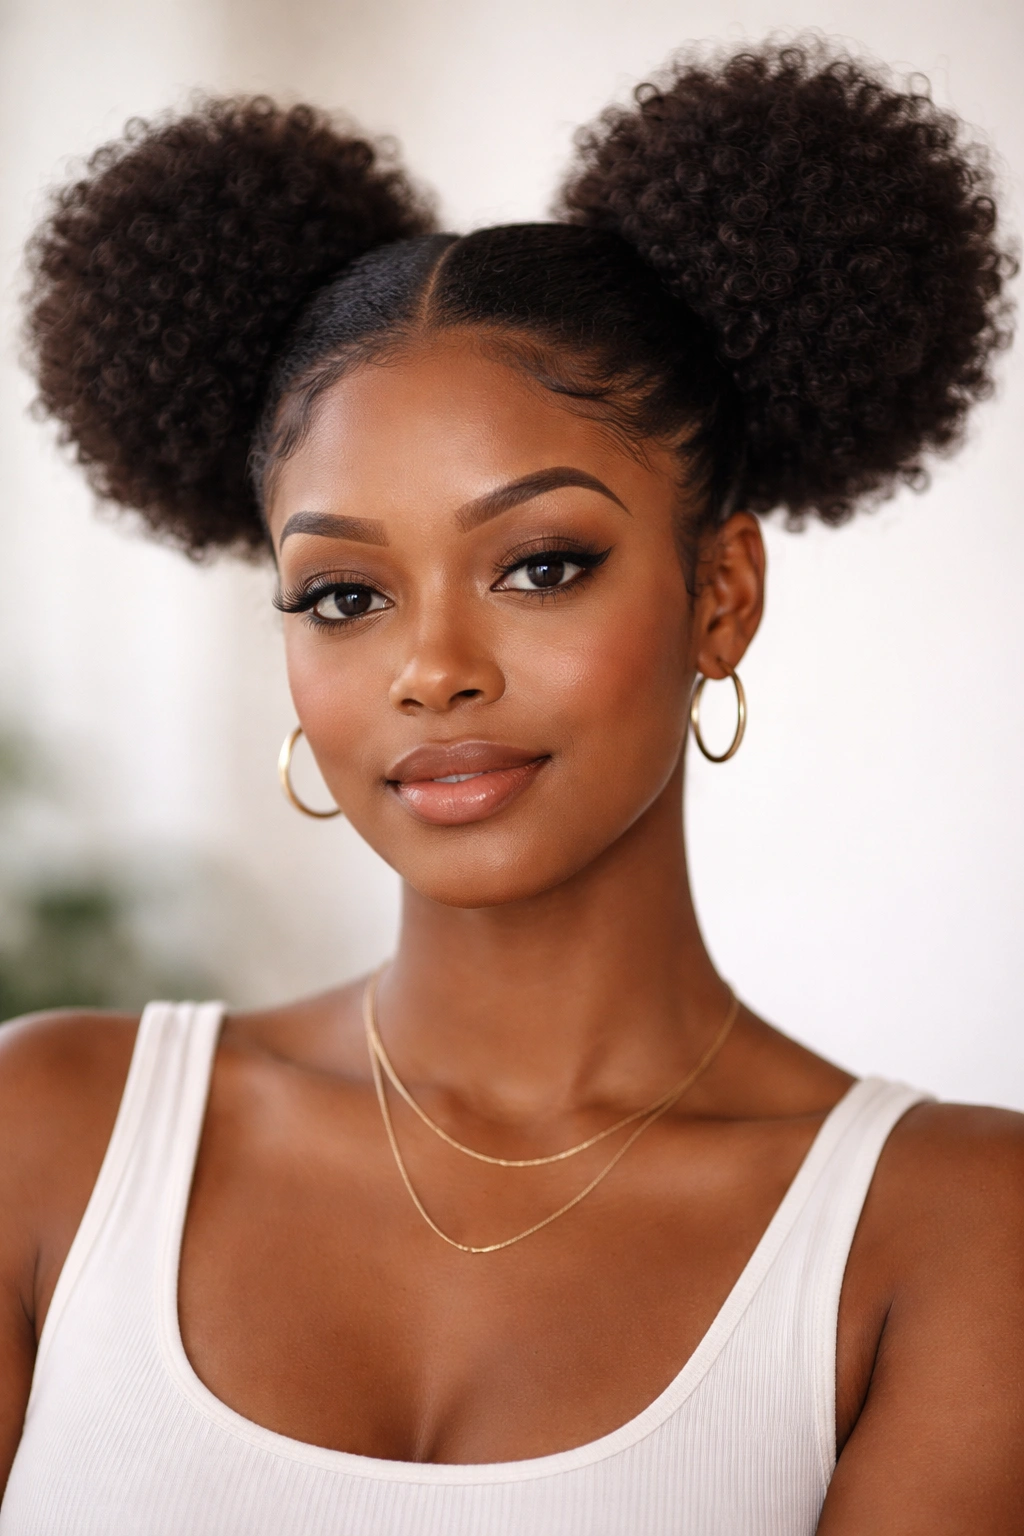
Two puffs, one on each side of the head, create balance and playfulness while strategically framing the face. This style works because the two focal points draw the eye outward and downward, creating visual width in just the right places. Double buns instantly make the face appear younger and can soften angular or severe facial features through their roundness and symmetry.
Why It Works for Your Face Shape
Oblong and rectangular faces love double buns because the horizontal placement and rounded shapes shorten the perceived length of the face. Square faces get a win here too—the side placement softens the angularity of a strong jawline. Heart-shaped and diamond faces work well with this style because the buns are positioned away from the widest part of the face. Round faces can make this work by positioning the buns slightly higher (not at ear level) and keeping them slightly tapered rather than fully rounded to avoid adding extra width.
How to Create Perfect Double Buns
- Divide your hair down the middle from your forehead to your nape
- Gather one section on each side of your head, positioning them where you want the buns (higher for length, lower for width)
- Twist or coil each section tightly and wrap it around itself to form a bun, securing with bobby pins and an elastic
- Adjust the position: move buns forward slightly to emphasize the lower face, or back slightly to highlight cheekbones
- Add texture by gently pulling at the bun to loosen it and create dimension
- Leave a few face-framing pieces if you like softness around the cheeks
Pro tip: If your two sections don’t match in size or fullness, wrap the smaller one slightly higher or add a clip-in extension to the thinner bun for balanced visual weight.
4. Side-Swept Puff
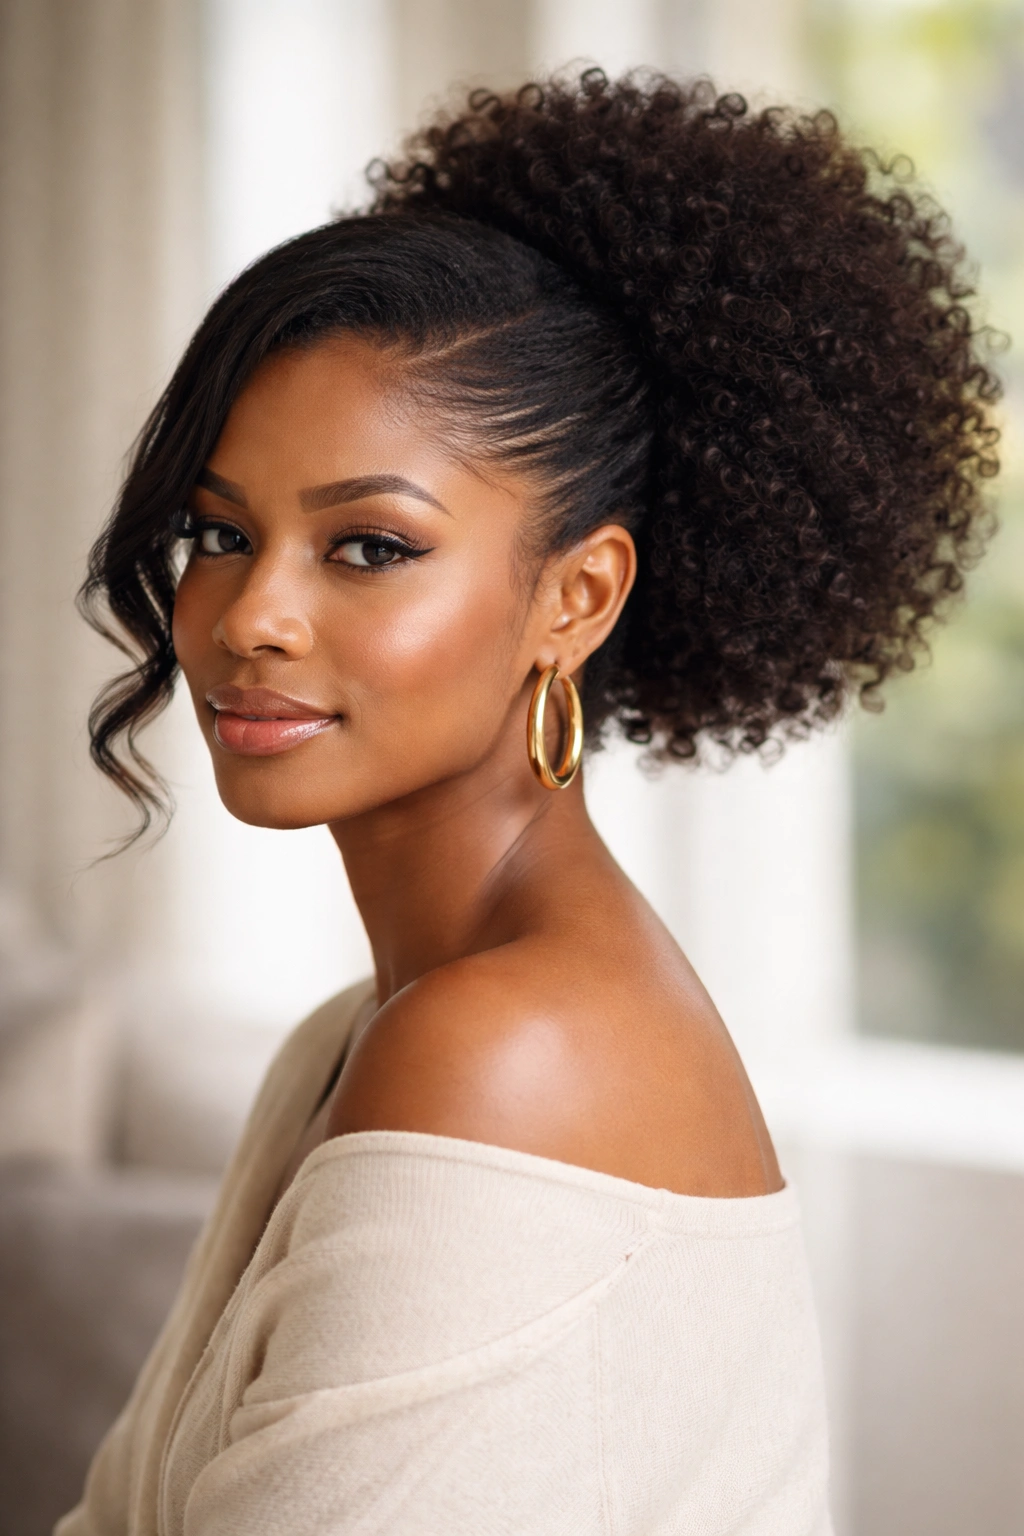
A side-swept puff shifts the gathering point to one side of the back of your head, creating asymmetry that frames one side of the face while leaving the other fully exposed. This style is remarkably flattering because asymmetry naturally draws attention to your best features—you can position the puff to highlight the side you love most while creating a subtle diagonal line that slims the face.
Why It Works for Your Face Shape
Round faces are major beneficiaries of asymmetry because the off-center placement and diagonal line created by the puff placement instantly make the face appear slimmer and more sculpted. Heart-shaped faces love positioning the puff toward the wider forehead area to create balance. Square faces benefit from the softness and asymmetry—position the puff toward the jawline to draw focus away from angular corners. Oblong faces work well with a slightly higher side placement to add perceived width.
How to Create a Side-Swept Puff
- Apply a smoothing product to damp or dry hair
- Use a comb to brush all hair toward one side of your head
- Gather the hair slightly off-center, toward the side you’re sweeping toward
- Secure with a strong elastic positioned where you want the puff base to sit
- Fluff and shape the puff so it sits prettily on that side
- Smooth the opposite side of your hair toward your face for a sleek, asymmetrical look
- Use edge control on the smoothed side for definition
Insider note: This style photographs beautifully from certain angles—if you have a favorite side of your face, position the puff toward the opposite side to maximize that angle.
5. Braided Base Puff
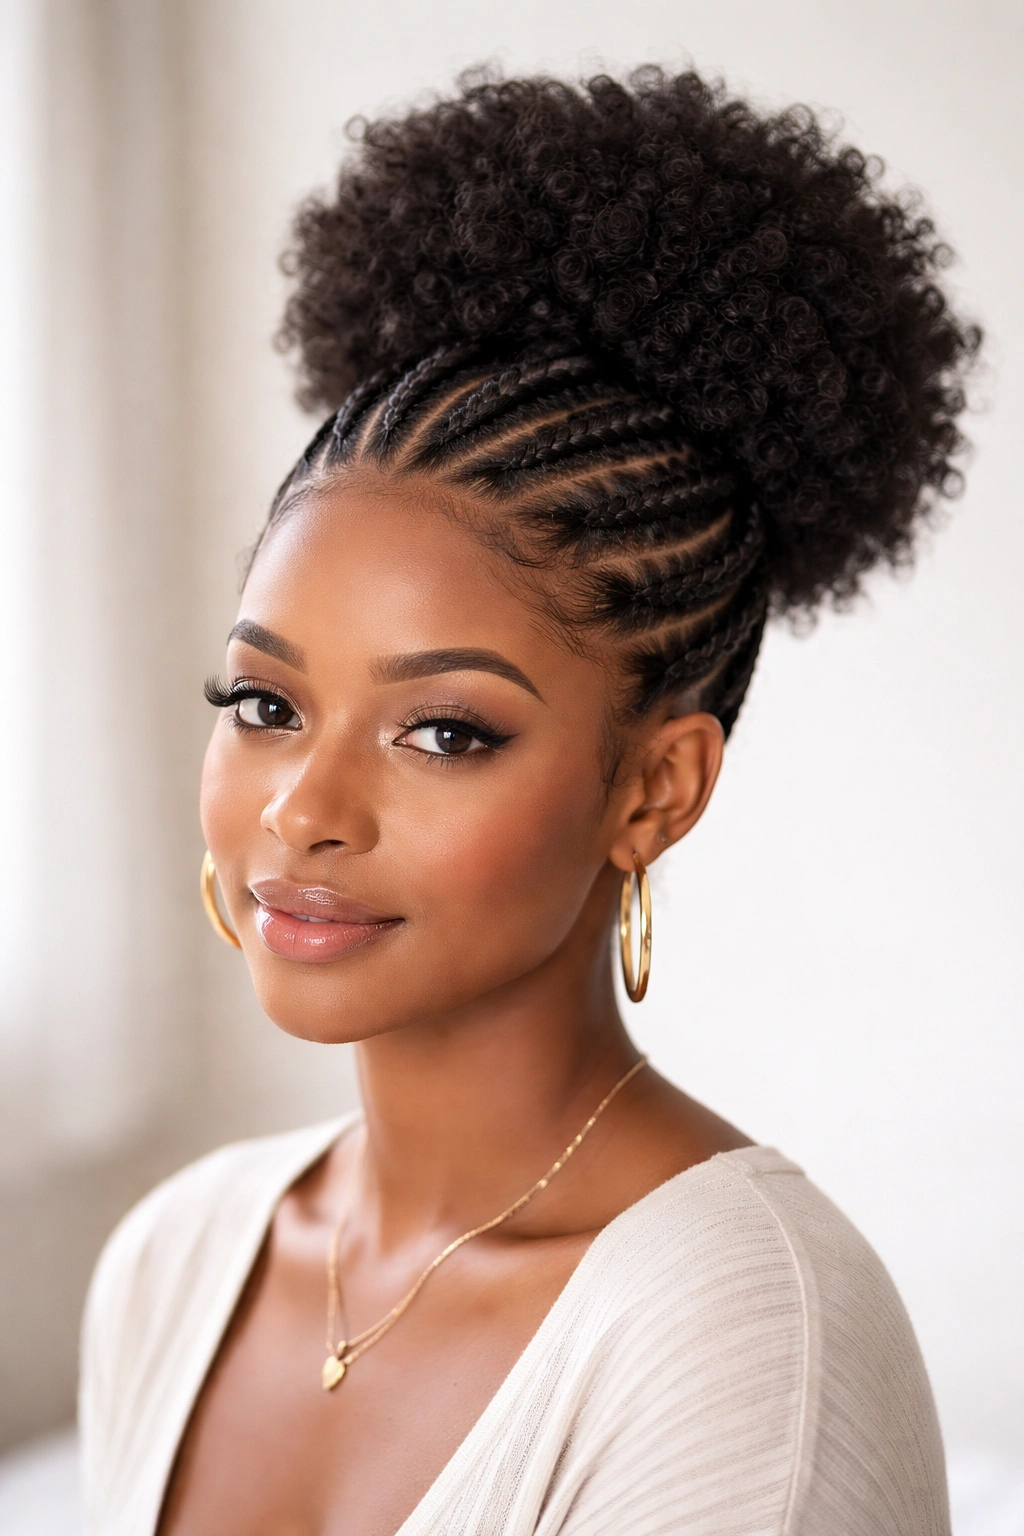
A braided base puff combines a braid or multiple braids with a gathered puff at the crown or back, creating visual interest and style complexity from a single protective style. The braids add texture and definition while the puff provides volume and dimension. This hybrid approach works beautifully because the braids create lines that draw the eye in flattering directions.
Why It Works for Your Face Shape
Heart-shaped faces absolutely shine with braids that angle downward from the crown, drawing attention away from the forehead. Round faces benefit from braids that add height and angularity—they create the illusion of a more sculpted face. Oval faces can wear any braid configuration because they’re naturally proportionate. Square faces love face-framing braids that soften the jawline, particularly cornrows or box braids that run slightly diagonally rather than straight back.
How to Create a Braided Base Puff
- Divide your hair into 2-4 sections depending on your puff size and desired braid pattern
- Create braids or cornrows from the hairline back toward where your puff will sit (you can braid all the way back, or just the first 2-3 inches)
- Gather the remaining loose hair at the back or crown
- Secure the braids and loose section together into one puff with an elastic
- Fluff the puff outward, gently pulling at braids to add dimension and texture
- Make sure the braids lay in the direction you want them to frame your face
Pro tip: Create your braids when your hair is damp or freshly moisturized. They’ll be easier to execute cleanly, and they’ll hold their shape much longer.
6. Twisted Puff
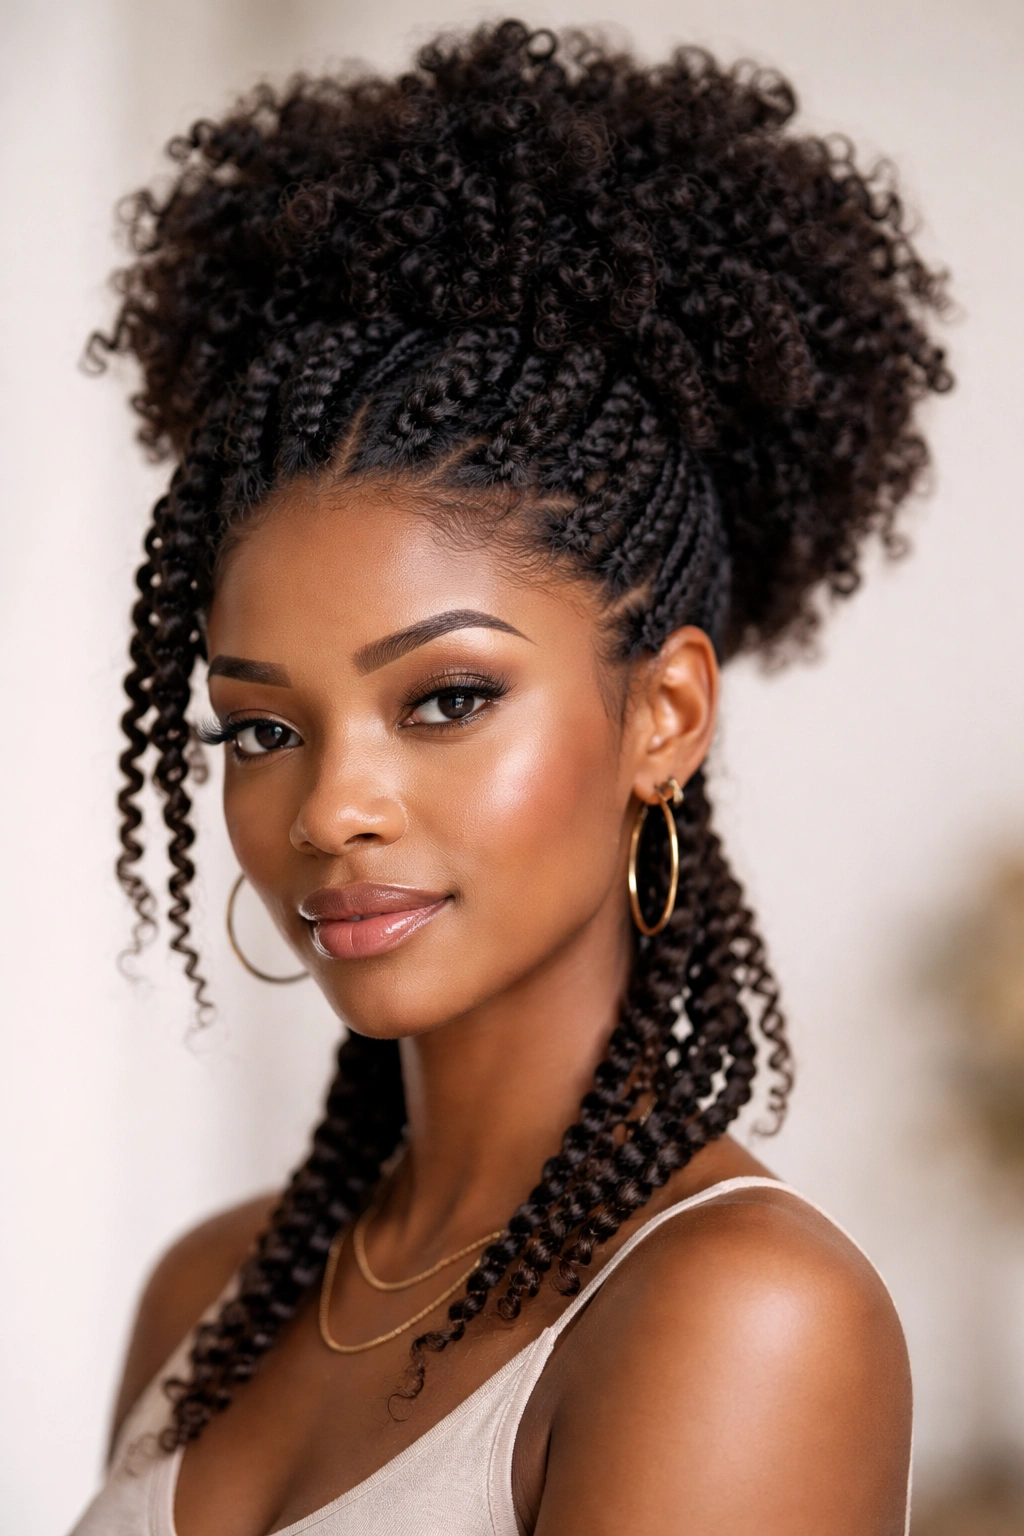
A twisted puff incorporates rope twists or strand twists throughout the puff, creating a textured, dimensional look that reads more intentional and styled than a simple gathered puff. Twists add visual interest and can be positioned strategically to frame the face beautifully. This style works because the texture breaks up the solidity of the puff and creates movement.
Why It Works for Your Face Shape
Oval and rectangular faces look fresh and modern with a twisted puff because the texture adds visual interest without overwhelming the face shape. Heart-shaped faces work well with twists positioned to frame the cheekbones, creating a flattering focal point. Diamond faces shine because twists can be arranged to emphasize the cheekbones while adding visual weight to the narrower chin and forehead. Round faces benefit from twists that create vertical lines and angles—they add definition that counteracts the roundness.
How to Create a Twisted Puff
- Divide your hair into 4-8 sections, depending on how much twist detail you want
- Create a two-strand twist with each section by dividing hair into two parts and wrapping them around each other
- Once all sections are twisted, gather them together at your crown or back of head
- Secure with an elastic, making sure twists are evenly distributed around the puff
- Gently pull at the twists to loosen and add dimension
- Twists can spiral outward from the center, or you can arrange them to create a specific frame around your face
Worth knowing: Twisted puffs hold their shape beautifully overnight and actually look better the next day as the twists relax slightly and become more textured.
7. Half-Up Puff
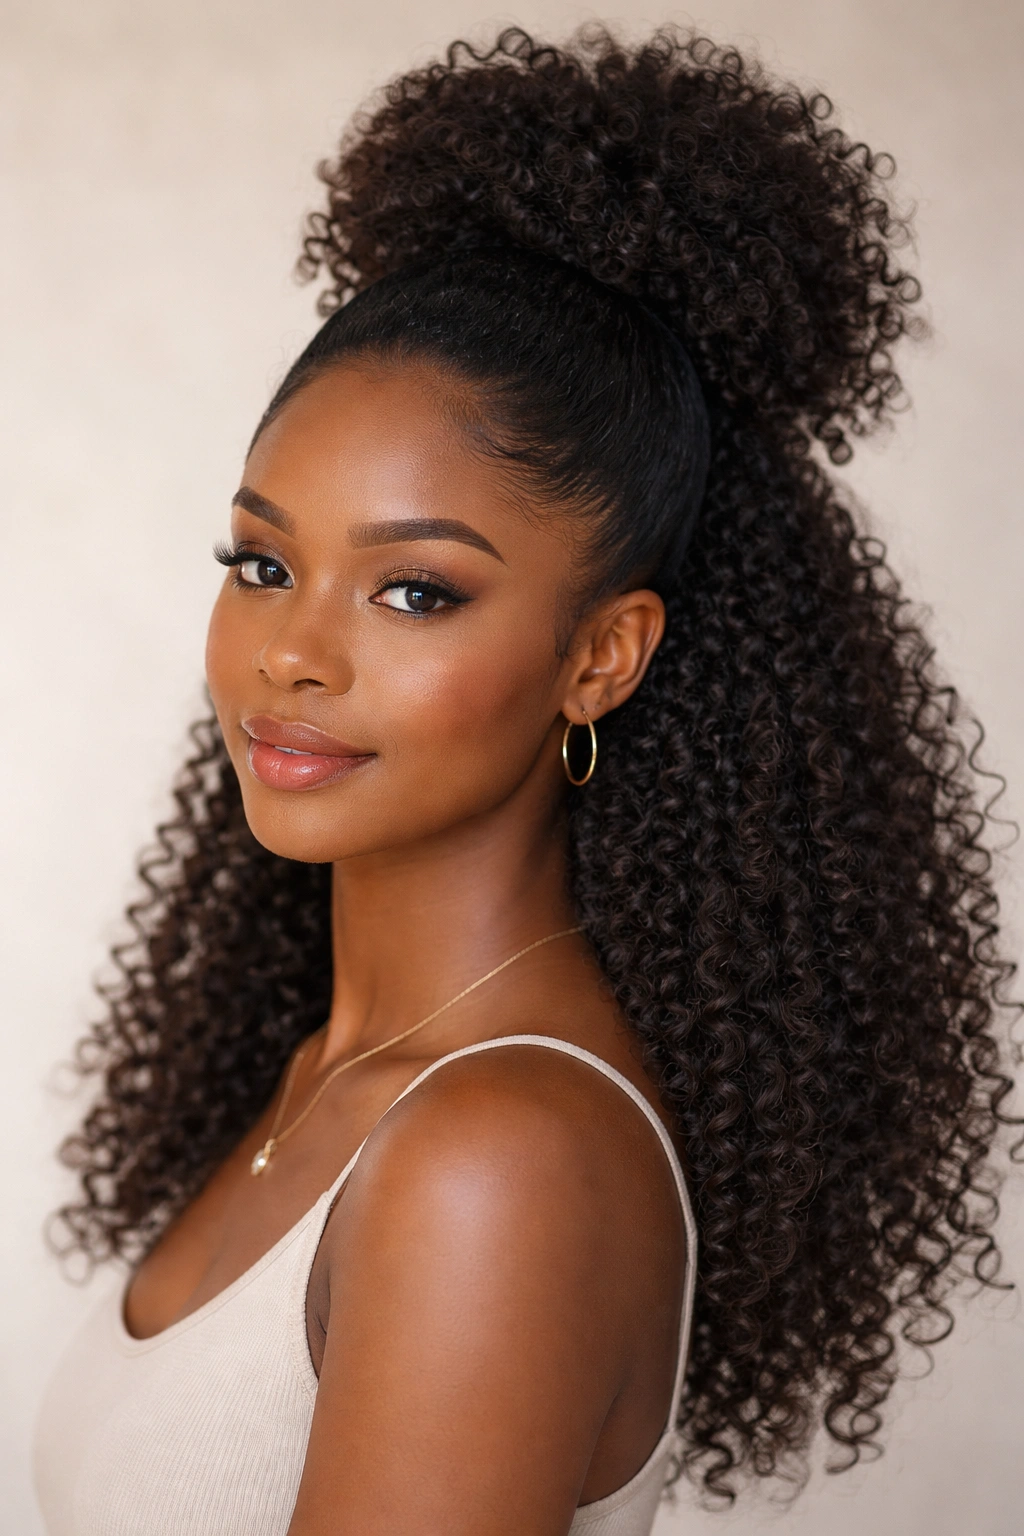
A half-up puff gathers only the top half of your hair into a puff while leaving the bottom half loose, creating a hybrid style that shows off hair length while providing the neatness of a gathered style. This works beautifully because it offers balance—structure without severity, volume without overwhelm. The loose hair below the puff provides movement and softness.
Why It Works for Your Face Shape
Heart-shaped faces adore half-up puffs because the gathered top provides structure while the loose bottom hair can frame the chin softly. Round faces benefit from the way a half-up puff creates the illusion of more angles and definition—the gathered section adds height, and the loose hair can be styled with some texture to create shadow and dimension. Oblong faces work well with this because the gathered section interrupts the length. Square faces soften with loose hair that can curve slightly inward toward the jawline, creating a less angular appearance.
How to Create a Half-Up Puff
- Take the top half of your hair (from your temples up and across the crown)
- Brush this section backward and slightly upward
- Secure with an elastic into a puff at the crown area, leaving the back half down
- Fluff the puff upward and outward
- Style the bottom half as desired—straight, waved, curled, or twisted
- You can leave face-framing pieces down for softness, or smooth everything back for a cleaner look
Pro tip: If you want the loose hair to blend seamlessly with the puff, make sure you gather the top section horizontally across your head rather than just from the center, so the gathered and loose sections meet naturally.
8. Voluminous Bubble Puff
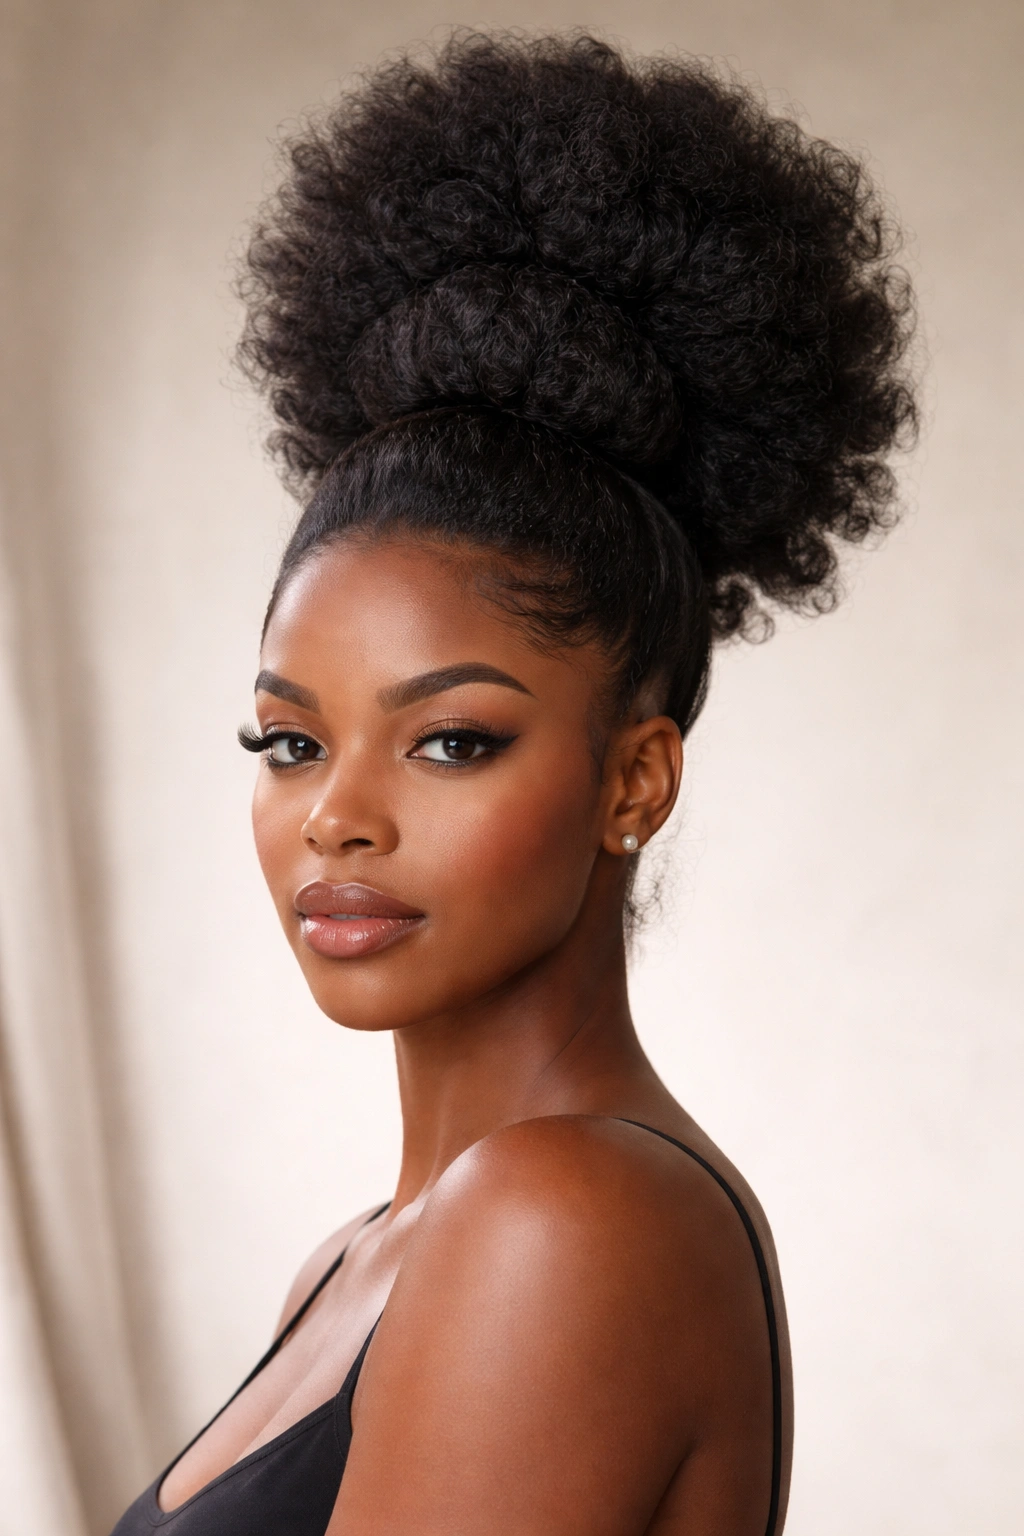
A voluminous bubble puff is all about drama and presence—maximum fluff, maximum height, maximum confidence. This style uses strategic elastics or a puff booster to create sections of volume, almost like bubbles stacked on top of each other. It works because pure volume is inherently flattering: it draws attention upward, elongates the face, and creates a stunning silhouette.
Why It Works for Your Face Shape
Round and square faces are the primary beneficiaries of a voluminous bubble puff because the height instantly elongates the face and counterbalances width. Oblong faces can wear this if they position the volume slightly lower (not at the crown) to avoid over-lengthening. Heart-shaped faces love the drama and forward presence. Diamond faces work well with moderate volume because too much height might overwhelm the narrower forehead, but some volume at the crown is flattering.
How to Create a Voluminous Bubble Puff
- Start with hair that has some texture or curl definition (freshly washed and dried, or textured hair that holds volume)
- Gather your hair into a high puff and secure with an elastic
- Use a second elastic positioned 2-3 inches below the first to create a “bubble” of volume above it
- You can add a third elastic further down for multiple bubbles if you like the effect
- Gently pull and fluff each section to maximize volume and create separation between bubbles
- Some people use a puff booster or hair donut under the puff to create extra height
Insider note: Voluminous bubble puffs photograph amazingly and create an instant statement. This is the style for days when you want your hair to command attention.
9. Textured Puff with Accessories
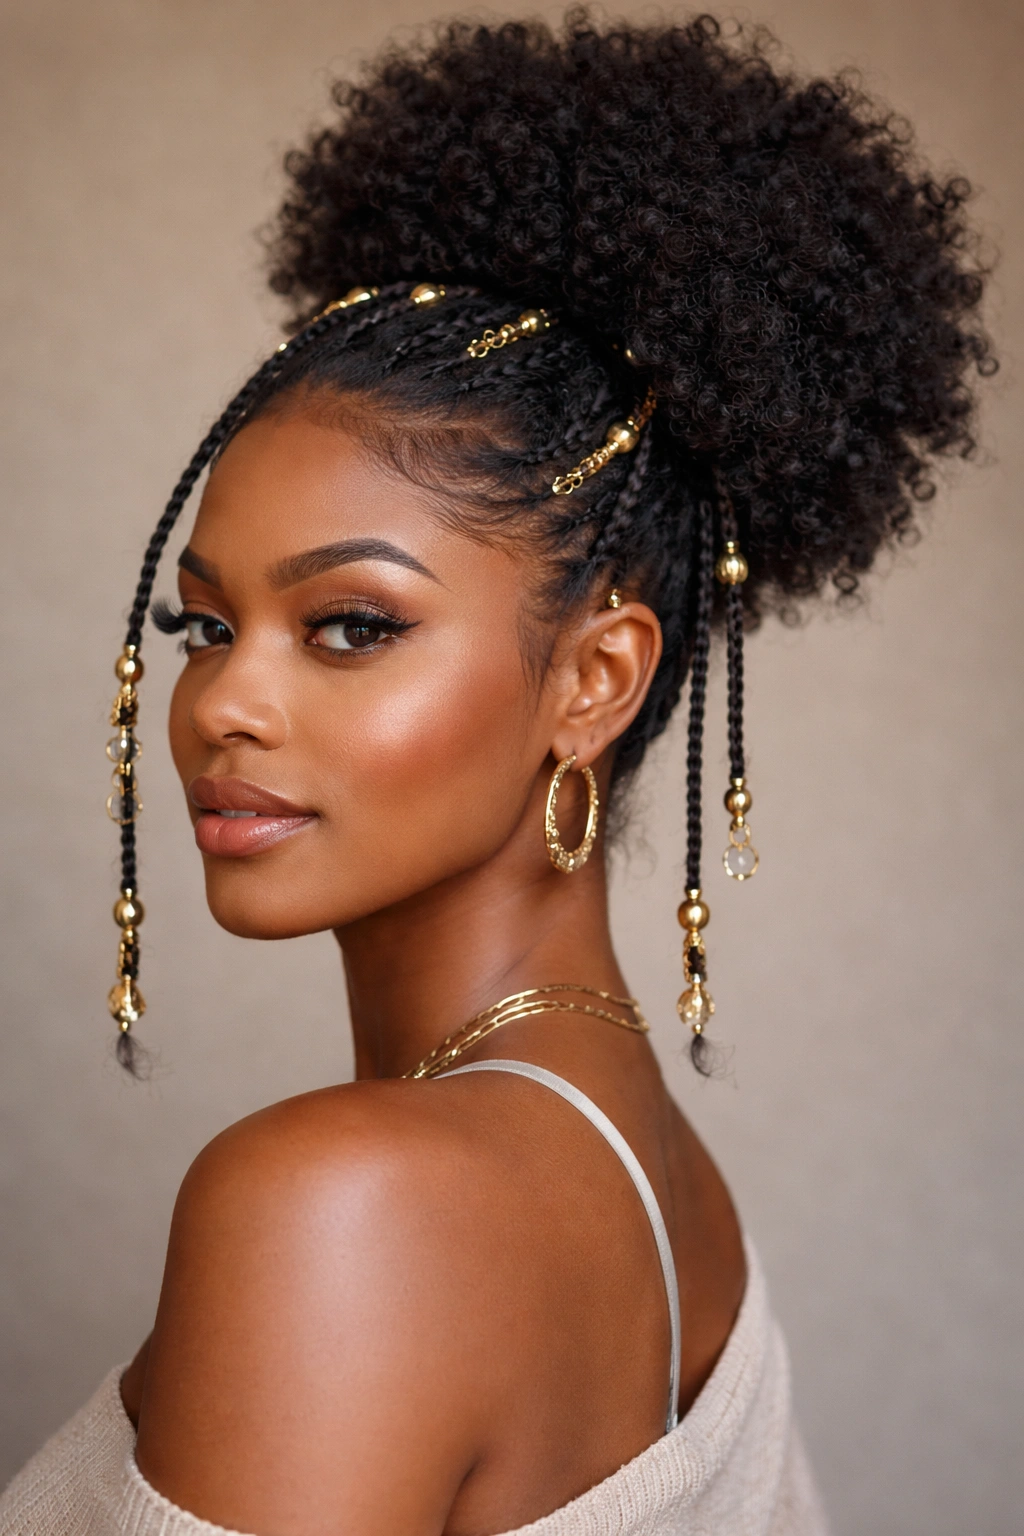
A textured puff with accessories combines natural texture with intentional adornment—cuffs, beads, rings, or decorative clips—to elevate the style from everyday protective to intentional fashion statement. Accessories work because they draw the eye to specific areas and add personality. Depending on where you place them, they can frame the face or create focal points that enhance your best features.
Why It Works for Your Face Shape
Accessories are equalizers—they work for every face shape because their placement is entirely within your control. Position beads or cuffs strategically: if you have a round face, place them toward the top of the puff to create vertical lines. Heart-shaped faces can position them to frame the cheekbones. Square faces benefit from accessories placed asymmetrically or toward one side. The key is being intentional about placement rather than random.
How to Create a Textured Puff with Accessories
- Gather your hair into a puff at your desired height and secure with an elastic
- Separate the puff into smaller sections or strands
- Slide decorative cuffs, rings, or beads onto individual strands
- Arrange cuffs or beads so they’re visible and create a pleasing visual pattern
- Consider spacing them out rather than clustering them all at the base
- You can also secure decorative clips into the puff itself, positioning them to frame your face
- Play with mixing metals (gold and silver) or coordinating with your outfit for a polished look
Pro tip: If you’re using beads, apply a tiny amount of wax or edge control to the strand end before threading the bead on—this prevents hair from unraveling and keeps the bead secure.
10. Undercut Puff
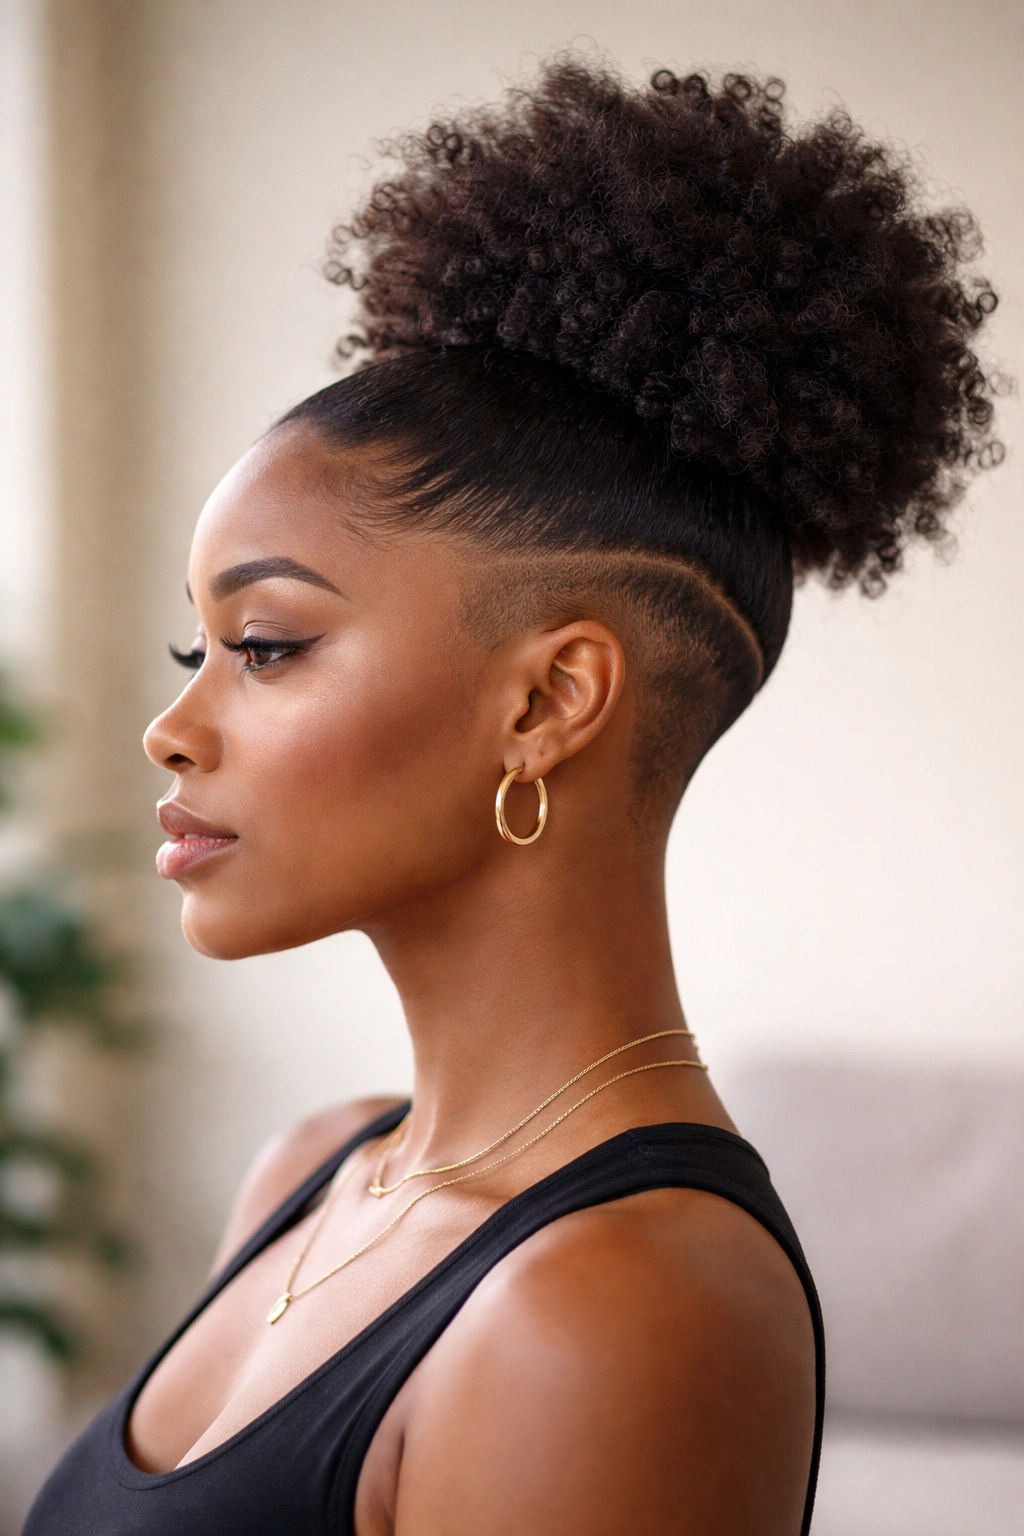
An undercut puff reveals shaved or very closely cut hair on the sides and/or back of the head, creating maximum contrast and drama. The puff sits atop clean undercut lines, making it appear fuller and more defined. This style works because the negative space created by the undercut makes the puff the undeniable focal point, and the clean lines are inherently flattering.
Why It Works for Your Face Shape
Undercut puffs are bold, and boldness flatters every face shape because it signals confidence. For round faces, the clean lines at the sides create definition and the puff becomes a gorgeous focal point. Heart-shaped faces benefit from the way undercut lines draw focus away from the forehead. Square and rectangular faces love the architectural quality of undercut lines paired with a soft, rounded puff. Diamond faces are striking because the contrast emphasizes cheekbones while adding structure.
How to Create an Undercut Puff
- Work with a barber or hair specialist to create clean undercut lines (on sides, back, or both)
- Keep the undercut faded and well-maintained—grow-out phase looks messy rather than intentional
- Gather your top hair into a puff, ensuring it contrasts dramatically with the undercut
- Smooth the perimeter and edges for a clean, polished appearance
- Consider your edge pattern—some people add designs or patterns to their undercuts, which adds even more visual interest
- Make sure your puff is full and fluffy to maximize the contrast with the close-shaved areas
Worth knowing: An undercut requires commitment—you’ll need to maintain it every 3-4 weeks for it to look intentional and sharp.
11. Puff with Crown Braid
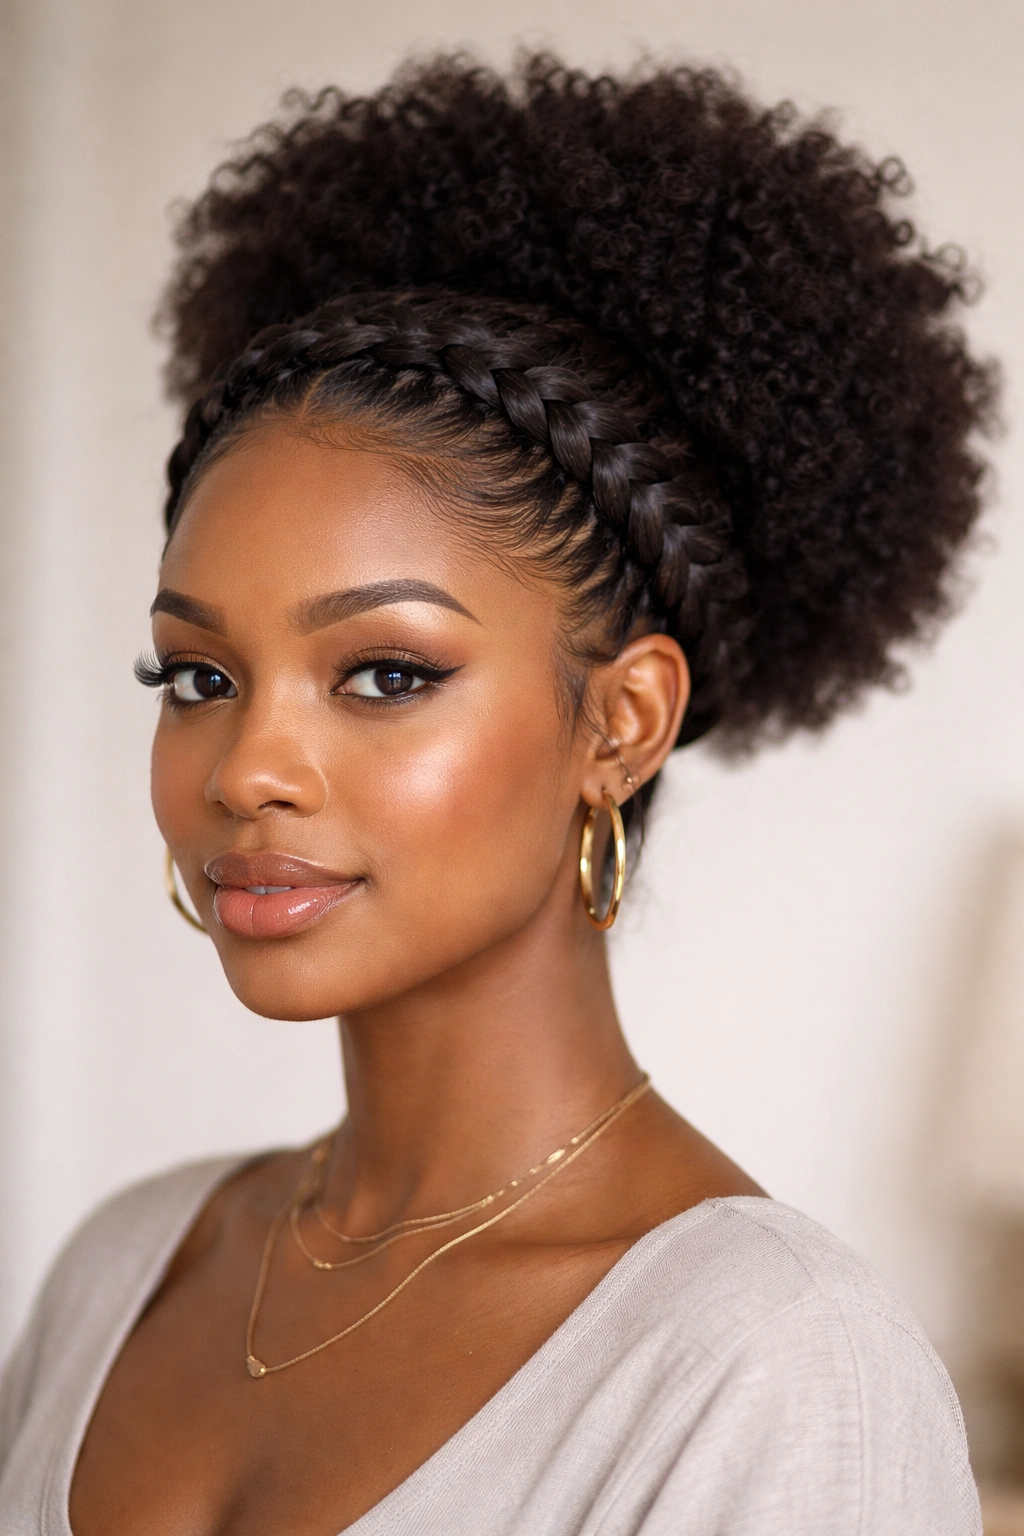
A puff with a crown braid combines a braid that wraps around the head like a crown with a gathered puff in the center or at the back, creating a regal, princess-like style. The braid frames the face beautifully while the puff adds volume and dimension. This style works because it’s inherently flattering: it draws attention upward and inward toward the face.
Why It Works for Your Face Shape
Heart-shaped faces are absolute showstoppers in a crown braid puff because the braid lifts the forehead while the puff balances and softens. Round faces benefit because the braid creates lines that slim the face while the puff adds height. Oblong faces love the way a crown braid interrupts the length. Diamond faces shine because the braid can be positioned to highlight cheekbones while the puff adds structure to the forehead area.
How to Create a Puff with Crown Braid
- Create a braid along your hairline from one side of your head to the other, as if you’re creating a crown (cornrows work beautifully for this)
- Leave the rest of your hair down and unbraided
- Gather the loose hair at the back or crown area and secure into a puff
- The braid serves as a frame, and the puff sits either tucked under the braid or sitting proudly above it
- Fluff the puff generously and ensure the braid creates a flattering frame around your face
- Pull gently at the braid to add texture and dimension
- Make sure face-framing pieces are smoothed or intentionally piece-y, depending on your preference
Pro tip: If you want the crown braid to look fuller and more dramatic, use a crochet or feed-in method to add hair extensions to your braids. This creates a thicker braid and a more statement-making style.
Final Thoughts
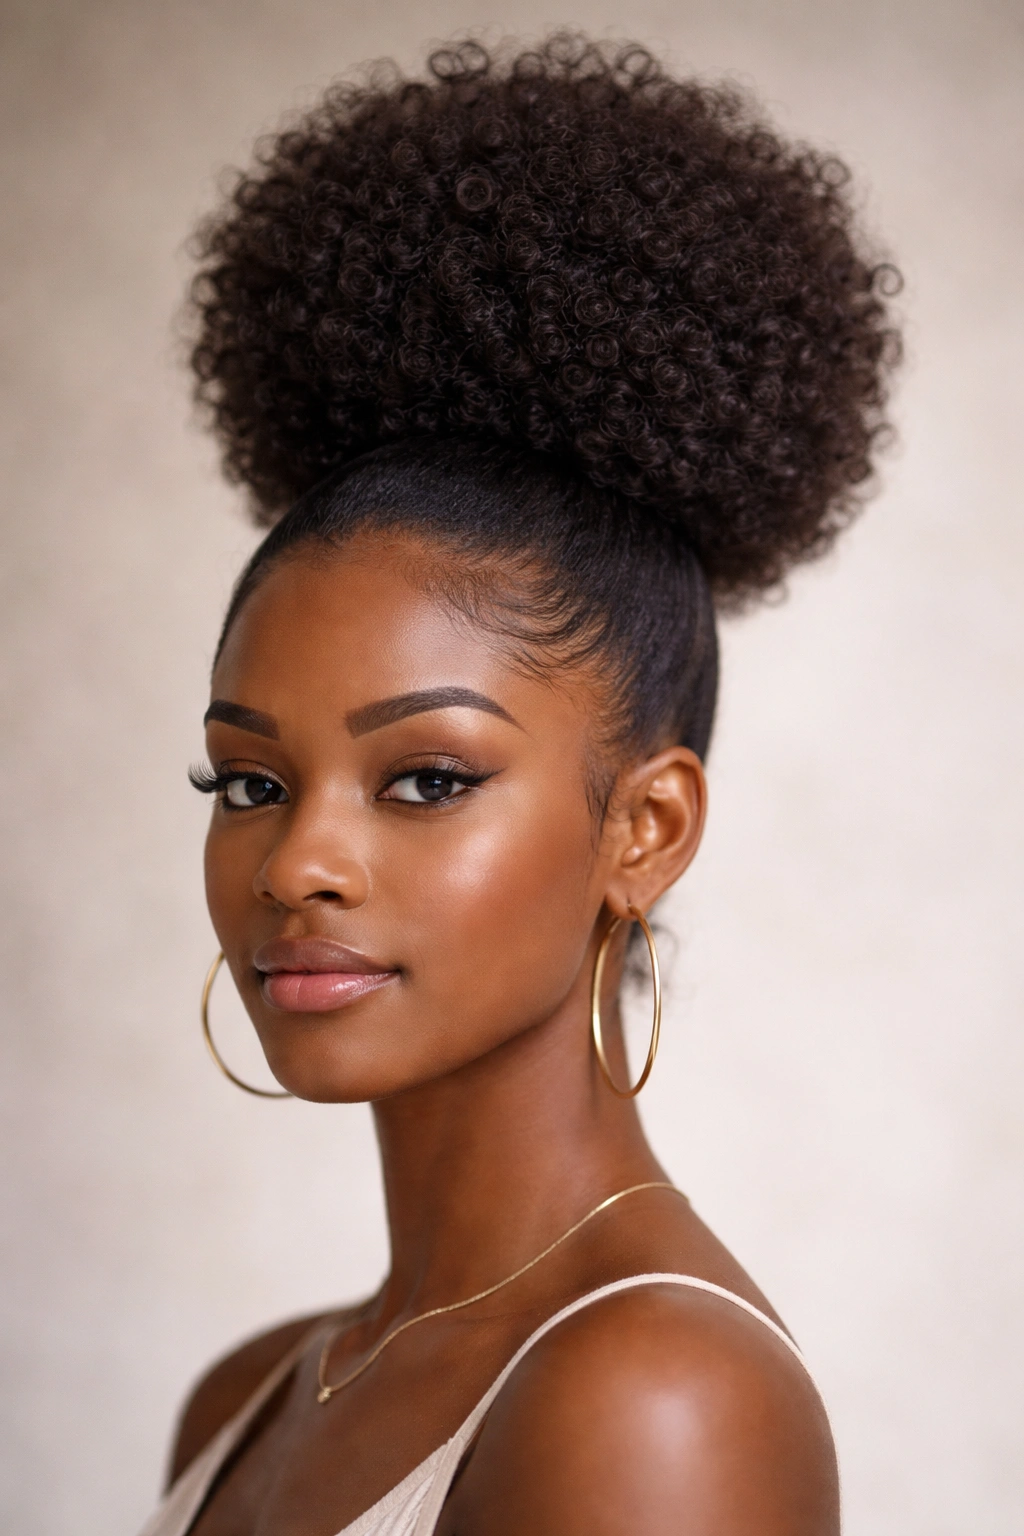
The right afro puff style isn’t just about what looks good in a photo—it’s about what makes you feel confident and comfortable wearing your hair. Face shape is one tool for finding your signature style, but the most important factors are how the style makes you feel and how well you can maintain it. An undercut puff is stunning only if you’re committed to keeping it sharp. A voluminous bubble puff is gorgeous only if you love how it feels on your head.
Start by trying one or two styles that match your face shape, and pay attention not just to how they look in a mirror, but to how they feel to wear. Does the height make you feel elongated and elegant, or does it feel top-heavy? Does the placement frame your face the way you hoped, or do you wish it moved an inch higher or lower? These observations matter more than any rule. Once you find a foundation style that works, you’ve got a template to experiment with—adjust the placement, add texture, incorporate accessories, or switch heights to keep things fresh.
Afro puffs are protective, they’re practical, they’re versatile, and when they’re styled with intention, they’re absolutely stunning. You have permission to take up space with your hair.
