Your wedding day is the perfect occasion to wear your hair in a way that feels both effortlessly beautiful and utterly sophisticated. Wavy hairstyles strike that ideal balance—they’re romantic without being overly formal, textured without looking undone, and they work for nearly every wedding setting from intimate garden ceremonies to grand ballroom receptions. The beauty of waves is their versatility; they can be sleek and polished for black-tie events or loose and tousled for casual celebrations, and they photograph beautifully from every angle.
The challenge, though, is figuring out which wavy style actually suits your face shape, hair type, wedding dress, and overall vision. There’s a massive difference between Hollywood Old Hollywood waves and beachy waves, between side-swept styles and center-parted volumes, between updos with soft waves and down styles with dramatic texture. This guide walks you through eighteen distinct wavy hairstyles that work for weddings—each one offers a different mood, different level of hold, and different way of framing the face and shoulders.
Whether you’re planning to wear your hair down, partially up, completely swept up, or something in between, you’ll find a style here that matches your aesthetic. Each of these styles can be customized with your hair length, thickness, and natural texture, and most of them can be adapted for different seasons and venues. Let’s explore the full range of possibilities.
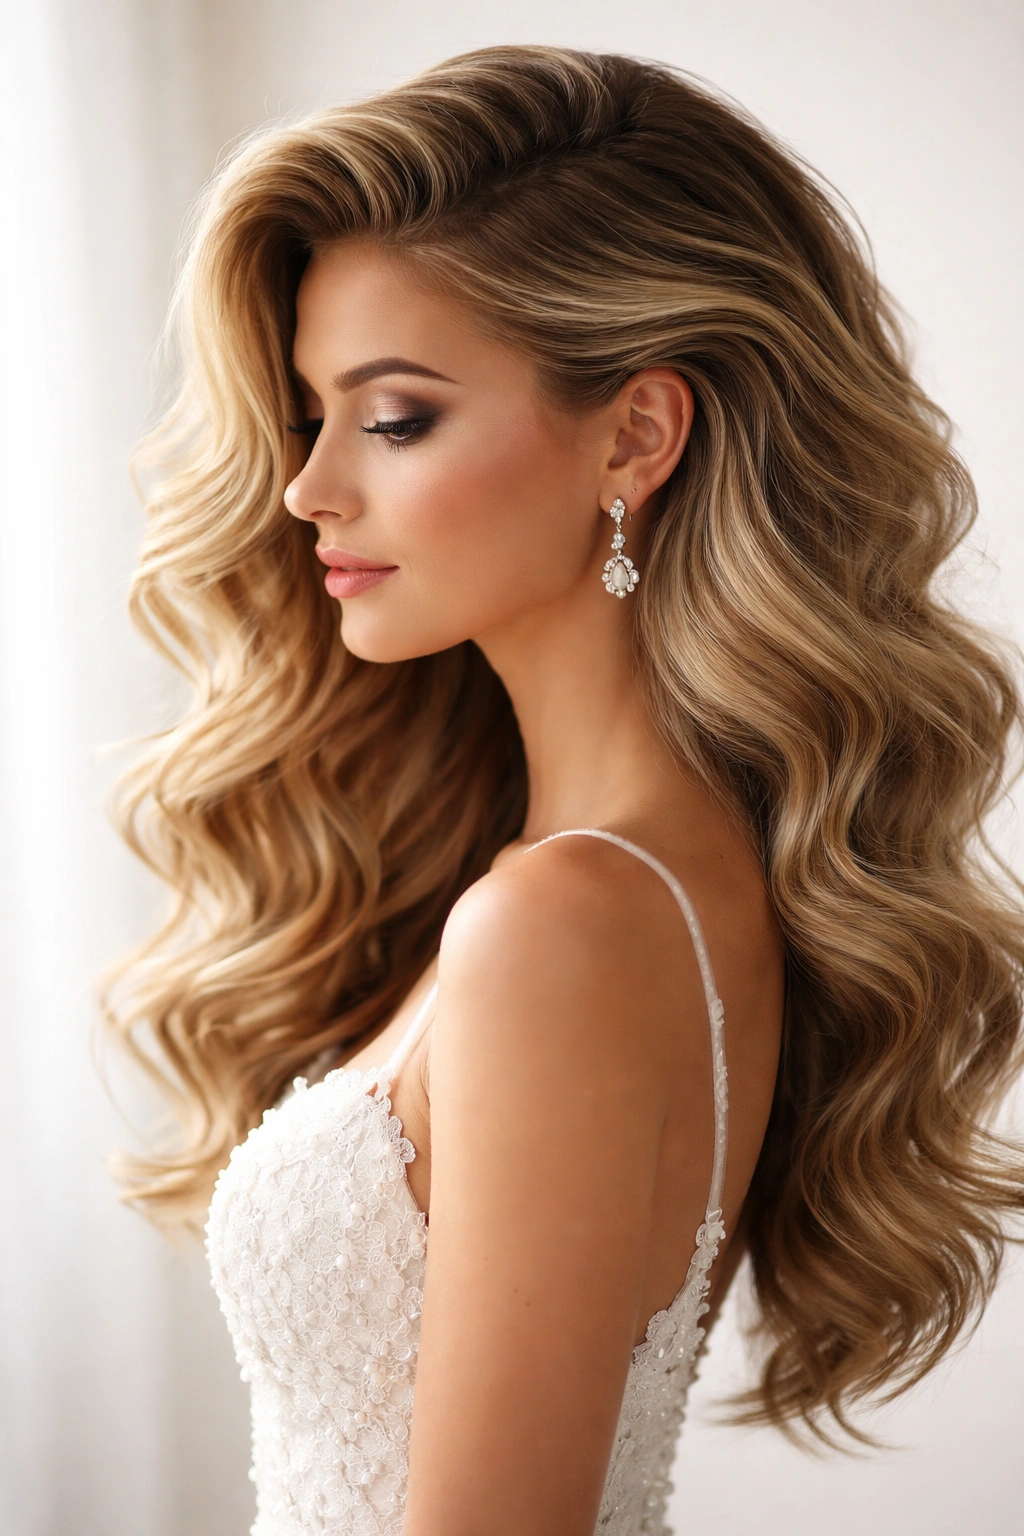
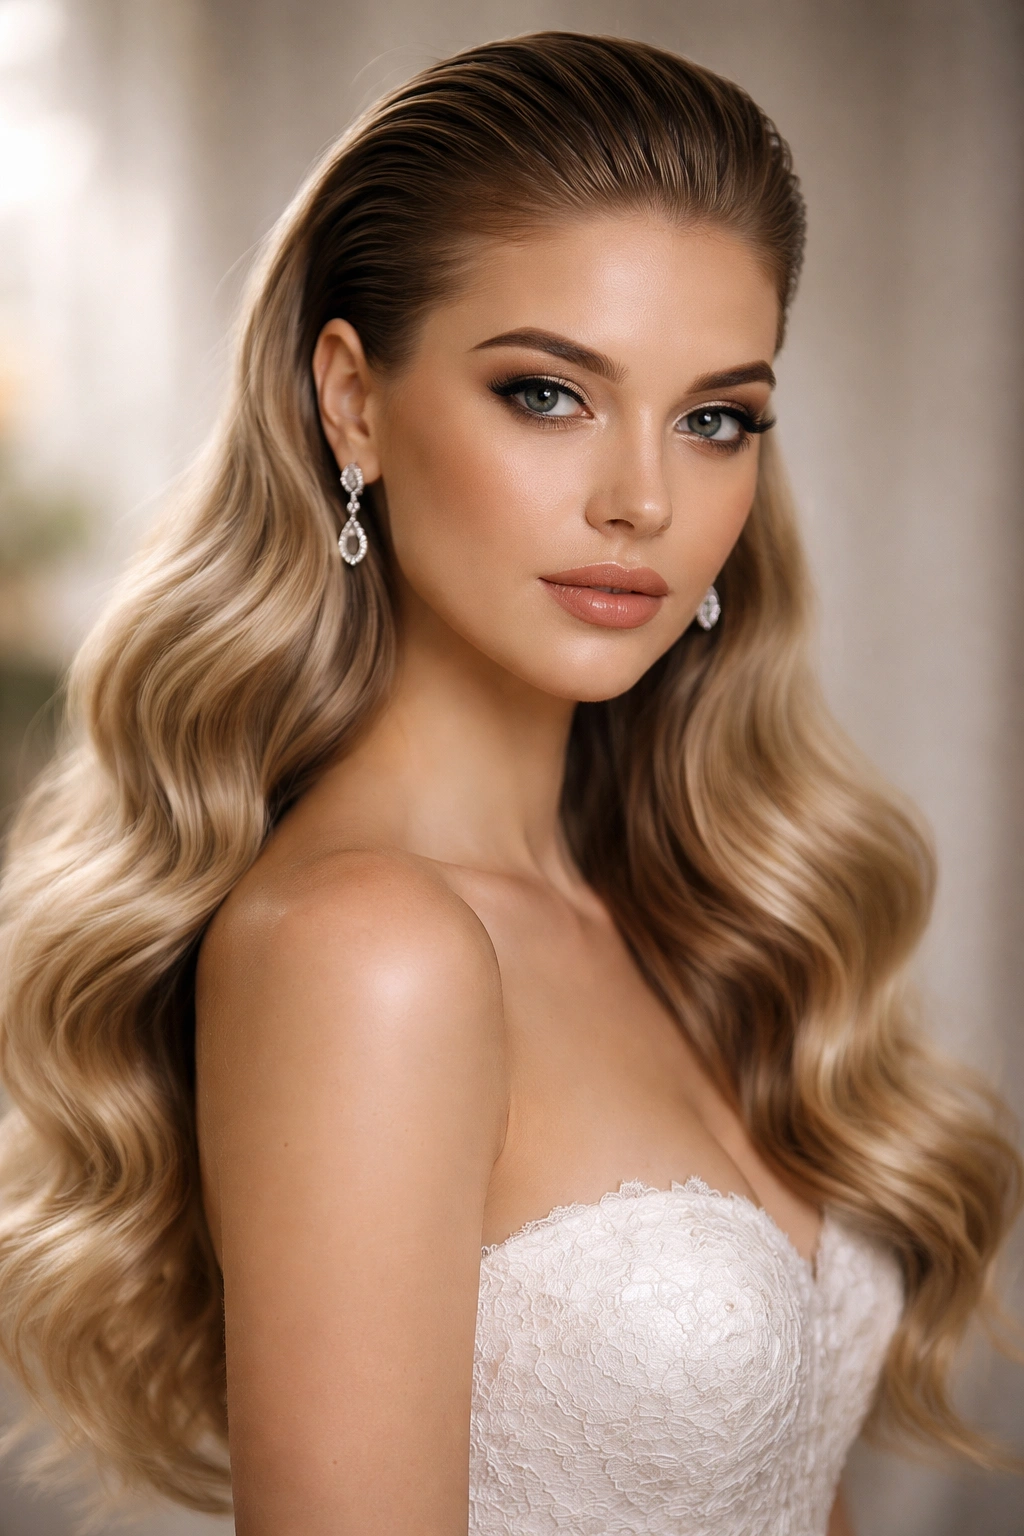
1. Classic Hollywood Waves

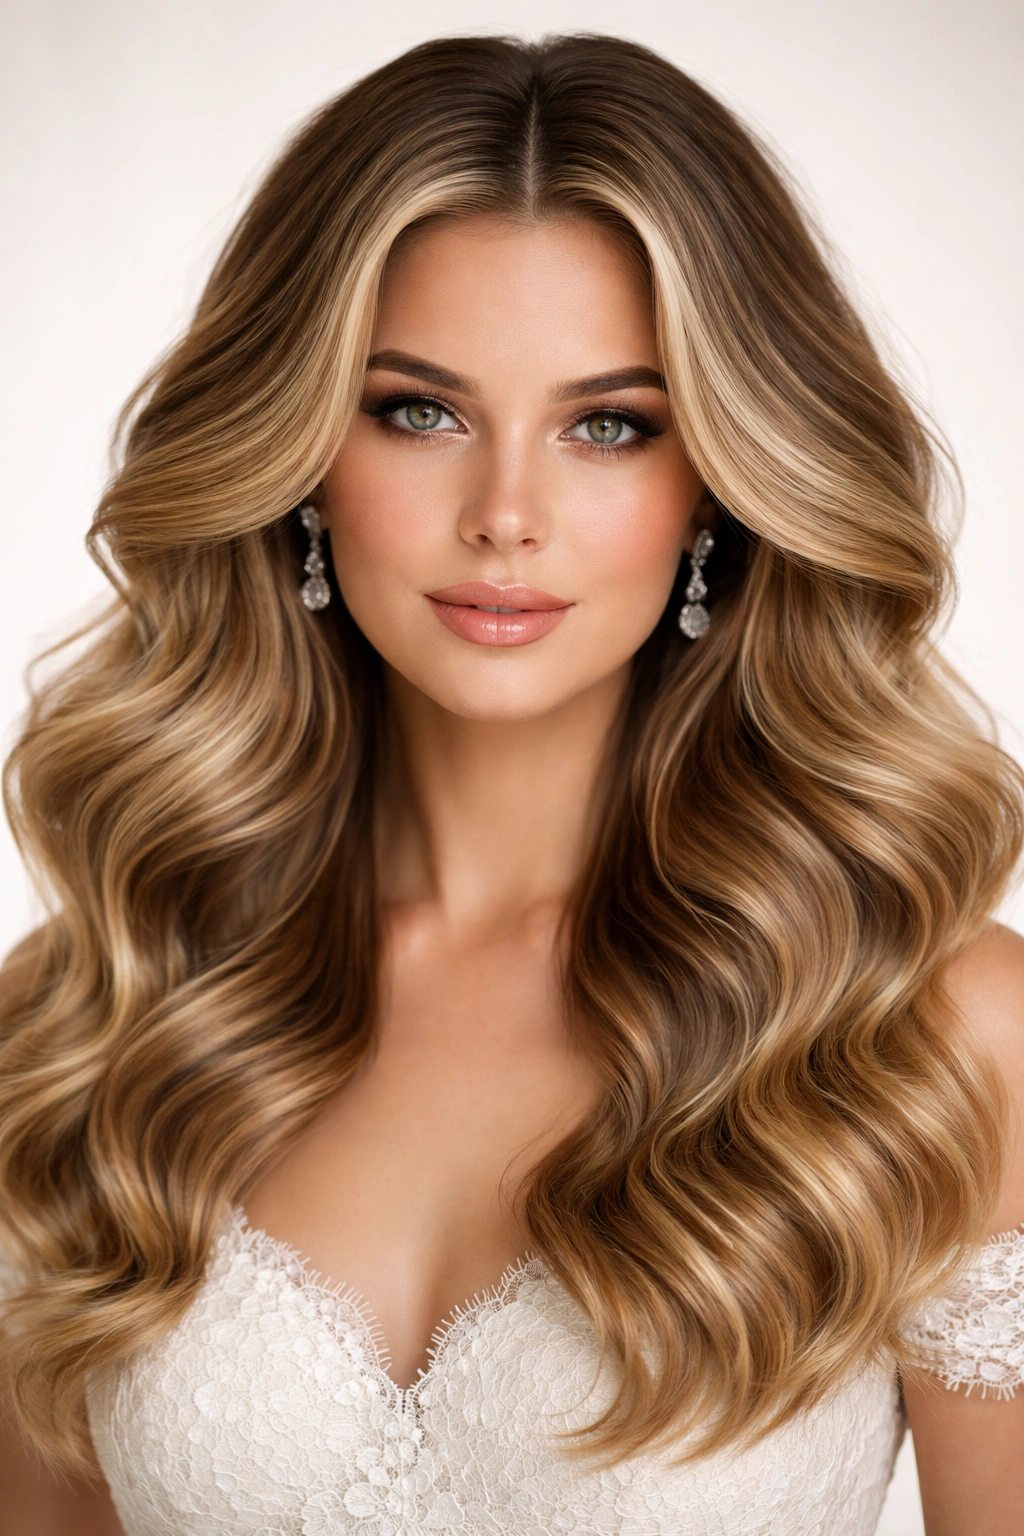
Classic Hollywood waves are the quintessential wedding hairstyle—they’re timeless, glamorous, and photographs like a dream. These aren’t subtle waves; they’re structured, bouncy waves that create visible dimension and movement throughout the entire head. The waves are typically created using a large-barrel curling iron or waves set with hot rollers, then brushed out to create that signature smooth, columnar wave pattern that the golden age of Hollywood made iconic.
Why This Works for Weddings
Hollywood waves convey sophistication and elegance no matter your dress style or wedding theme. They’re formal enough for a traditional ceremony yet elegant enough that they don’t look stuffy or overly done. The structured waves catch light beautifully in photographs, especially when backlit or sidelit, creating depth and dimension that makes your hair look impossibly full and polished. Because the waves are brushed out rather than left as tight curls, they feel refined and bridal without being costume-like.
How to Achieve and Maintain Them
- Use a 1.5-inch barrel curling iron, curling each section away from the face and pinning the curl in place while it cools
- Work section by section, starting from the bottom layers and working up
- Once all curls are completely cool, gently brush them out with a paddle brush using downward strokes
- Mist with a strong-hold hairspray that won’t leave your hair feeling stiff or sticky to the touch
- These waves typically hold for 8-10 hours, making them ideal for full-day celebrations
2. Soft Romantic Waves
Soft romantic waves are looser and more touchable than Hollywood waves, with a gentler, more relaxed appearance. Instead of structured column waves, soft romantic waves have a flowing quality—they look almost like they happened naturally but with just enough dimension to show intentionality. These waves are created using a combination of curling techniques and then softened through careful brushing and finger-combing rather than being fully blown out.
Why This Works for Weddings
This style bridges the gap between polished and effortless, making it perfect for brides who want elegance without looking stiff. The softness of these waves complements most face shapes beautifully, and they work especially well for outdoor or garden weddings where a slightly more relaxed vibe feels appropriate. Soft waves also look stunning against detailed dress backs—they don’t compete visually with intricate lace or beading the way very voluminous styles might.
How to Achieve and Maintain Them
- Use a 1.25-inch curling iron and wrap hair around the barrel, holding each curl for 8-10 seconds
- Rather than pinning curls in place, let them cool naturally as you move to the next section
- After all curls are cool, use your fingers to gently separate the waves rather than using a brush
- Work texturizing spray or sea salt spray through the ends to enhance the natural-looking texture
- These waves last 6-8 hours and actually improve slightly as the day goes on as they soften
3. Beachy Waves with Texture
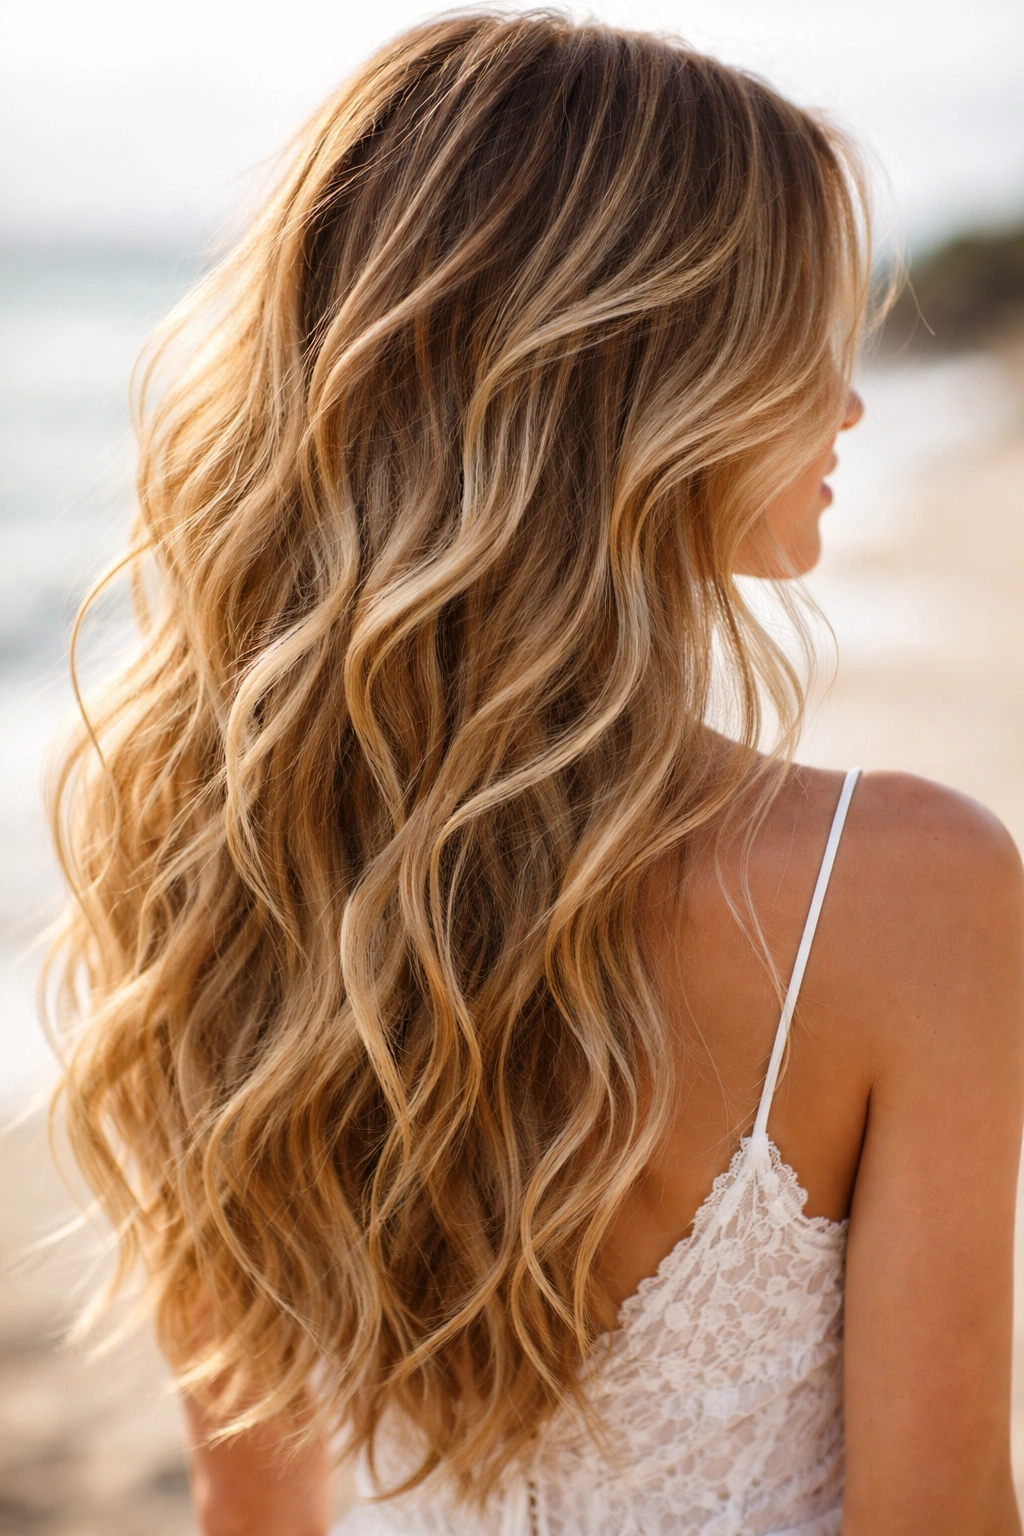
Beachy waves bring a laid-back, sun-kissed quality to your wedding hair—they look effortlessly undone while still being intentional and glamorous. This style is characterized by irregular wave patterns, piecey texture, and a slightly tousled appearance that suggests you just came from a coastal breeze. Beachy waves are created using either a curling iron with a more relaxed technique, braiding while damp and then releasing, or using a sea salt spray and finger-styling method.
Why This Works for Weddings
Beachy waves feel current and relaxed, making them perfect for destination weddings, casual ceremonies, or any bride who wants her hair to feel approachable rather than untouchable. The textured, slightly imperfect quality of beachy waves is incredibly flattering for most hair types—it actually looks better on thinner hair than Hollywood waves do because it doesn’t require the same level of density to look full. These waves photograph beautifully both in posed shots and candid moments.
How to Achieve and Maintain Them
- Create texture by curling random sections of hair at varying angles, not in a systematic pattern
- Leave some sections uncurled to maintain that natural, undone quality
- Use a sea salt texturizing spray to enhance grip and separation between waves
- Finger-comb through the hair rather than brushing to maintain the piecy, textured look
- Beachy waves actually hold better throughout the day if you embrace a slightly messier appearance rather than trying to keep them perfectly groomed
4. Side-Swept Waves with Volume
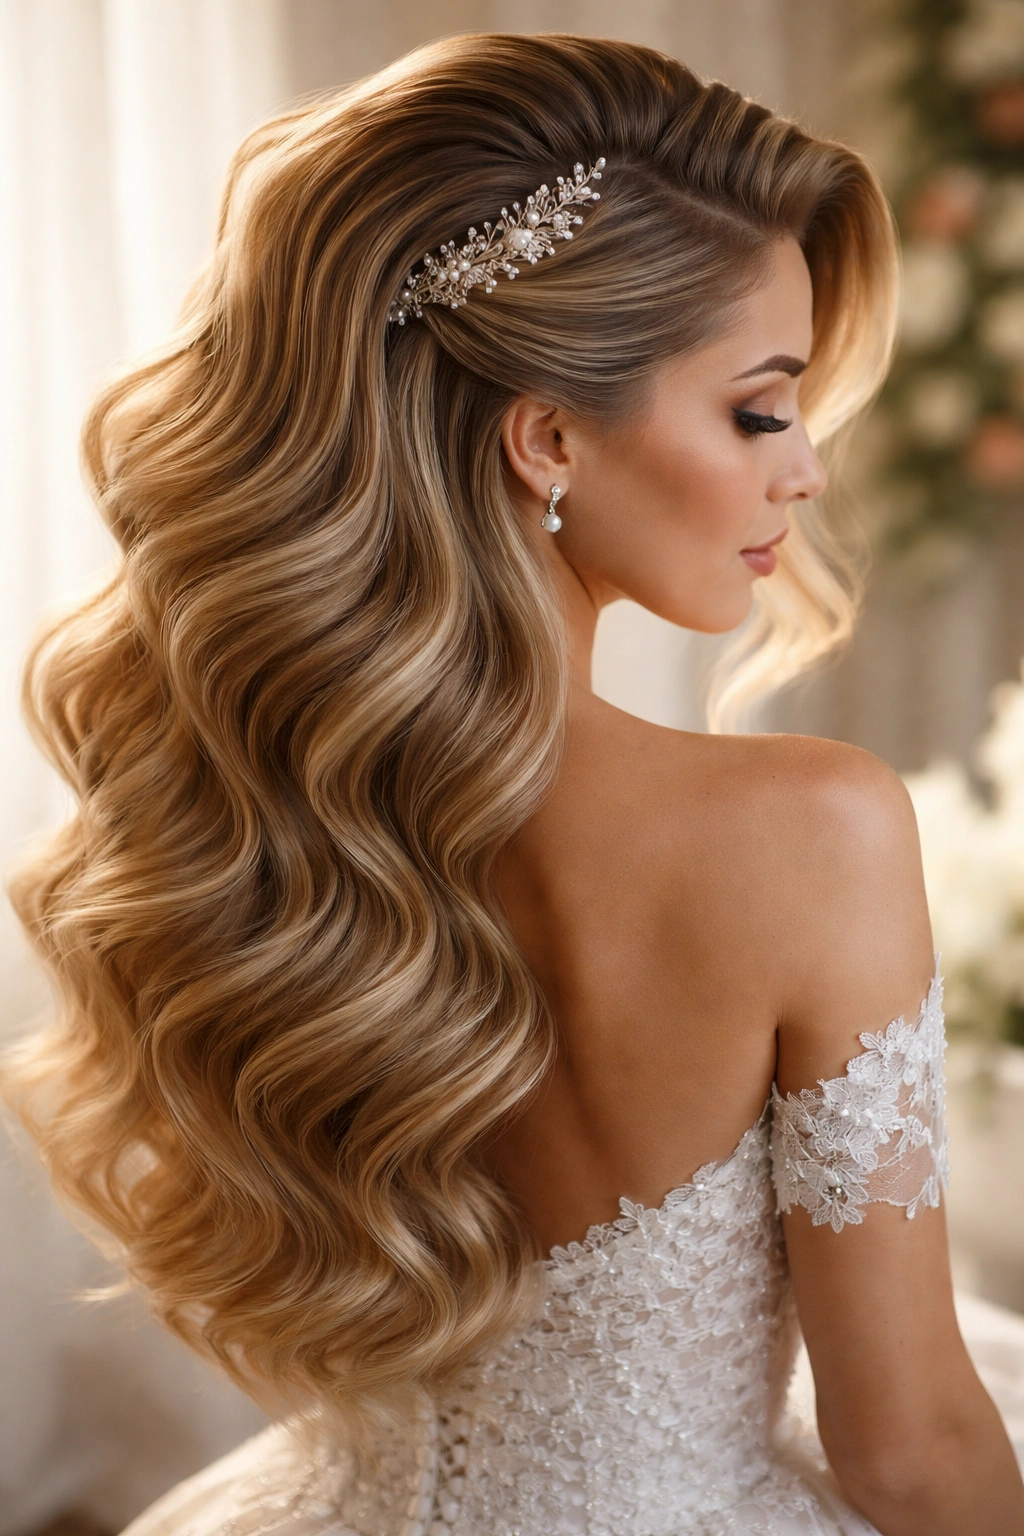
Side-swept waves create drama and elegance by sweeping the bulk of your hair to one side and creating waves that cascade asymmetrically across the head and shoulders. This style works beautifully with updos (where the waves frame the face while the bulk of hair is pinned) or as a down style where the swept section covers one shoulder. The key is creating maximum volume at the crown while the waves have movement and flow.
Why This Works for Weddings
This style is inherently flattering because it draws attention to one side of the face, which many people find more aesthetically pleasing than a symmetrical center part. The asymmetrical nature makes it feel sophisticated and intentional, and the side-sweep allows you to showcase your dress neckline and shoulders. Side-swept waves photograph beautifully from the side angle that photographers often use for detail shots and ceremony footage.
How to Achieve and Maintain Them
- Create height at the crown by blow-drying with your head upside down, then smoothing the top layer back
- Create waves primarily on the side that will be swept across, using a 1.25-inch barrel curling iron
- Use a fine-tooth comb to gently sweep the hair to the desired side, securing underneath with bobby pins
- Pin the swept section so it appears fluid and natural, not artificially stuck to one side
- A light hairspray keeps this style looking intentional without making it feel stiff or helmet-like
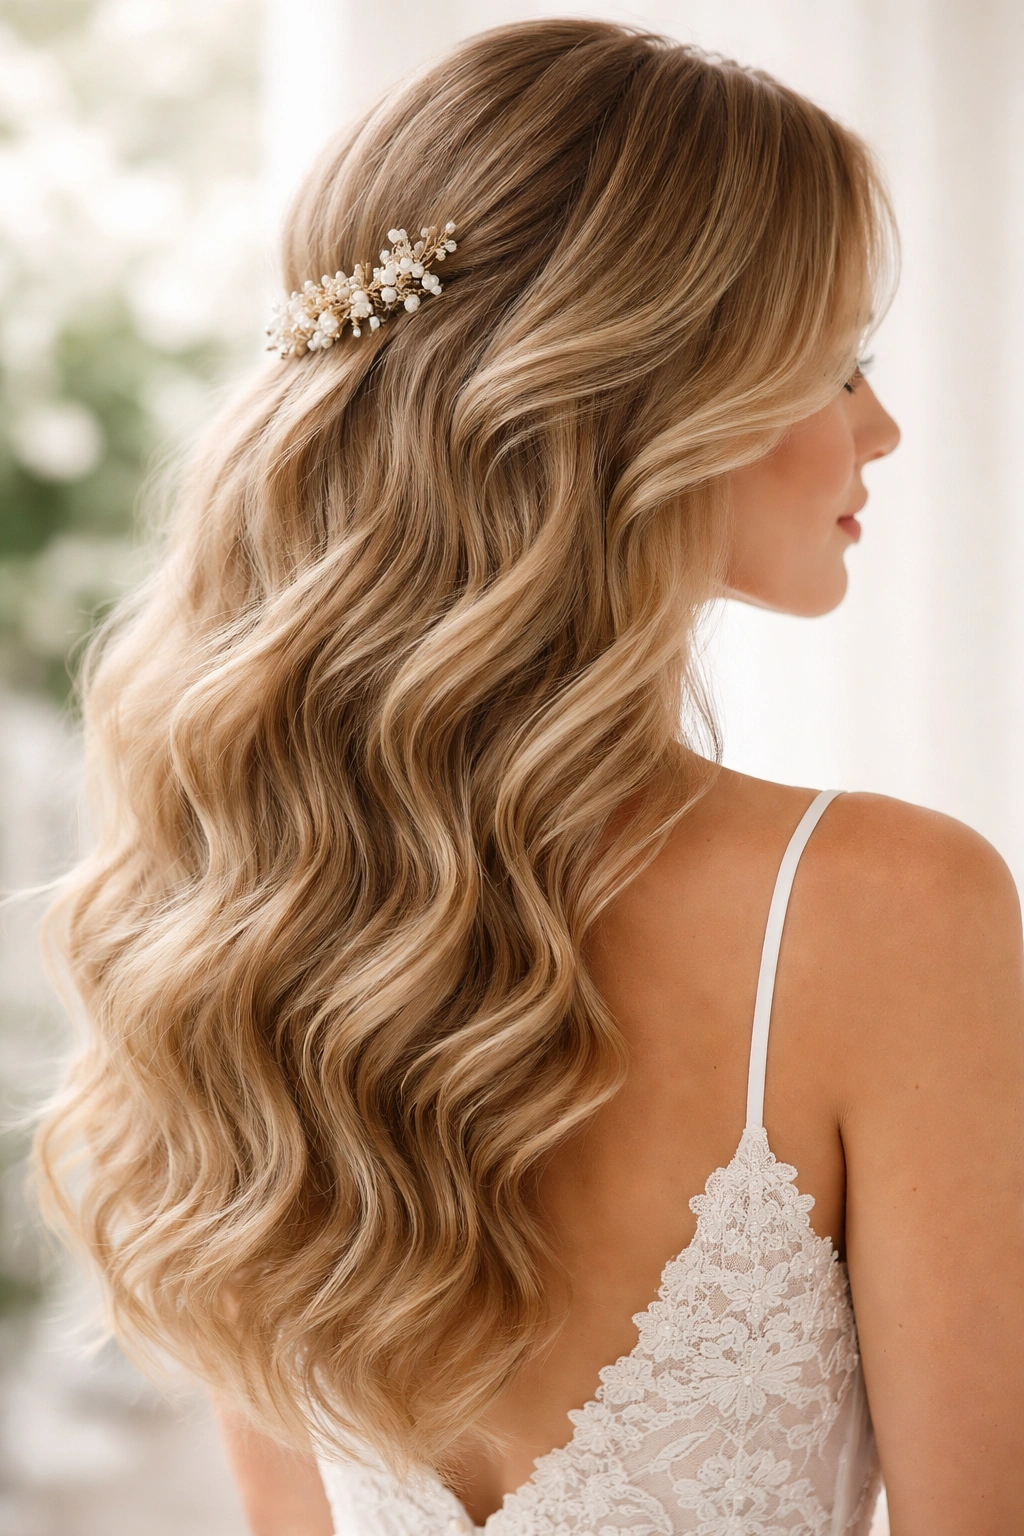
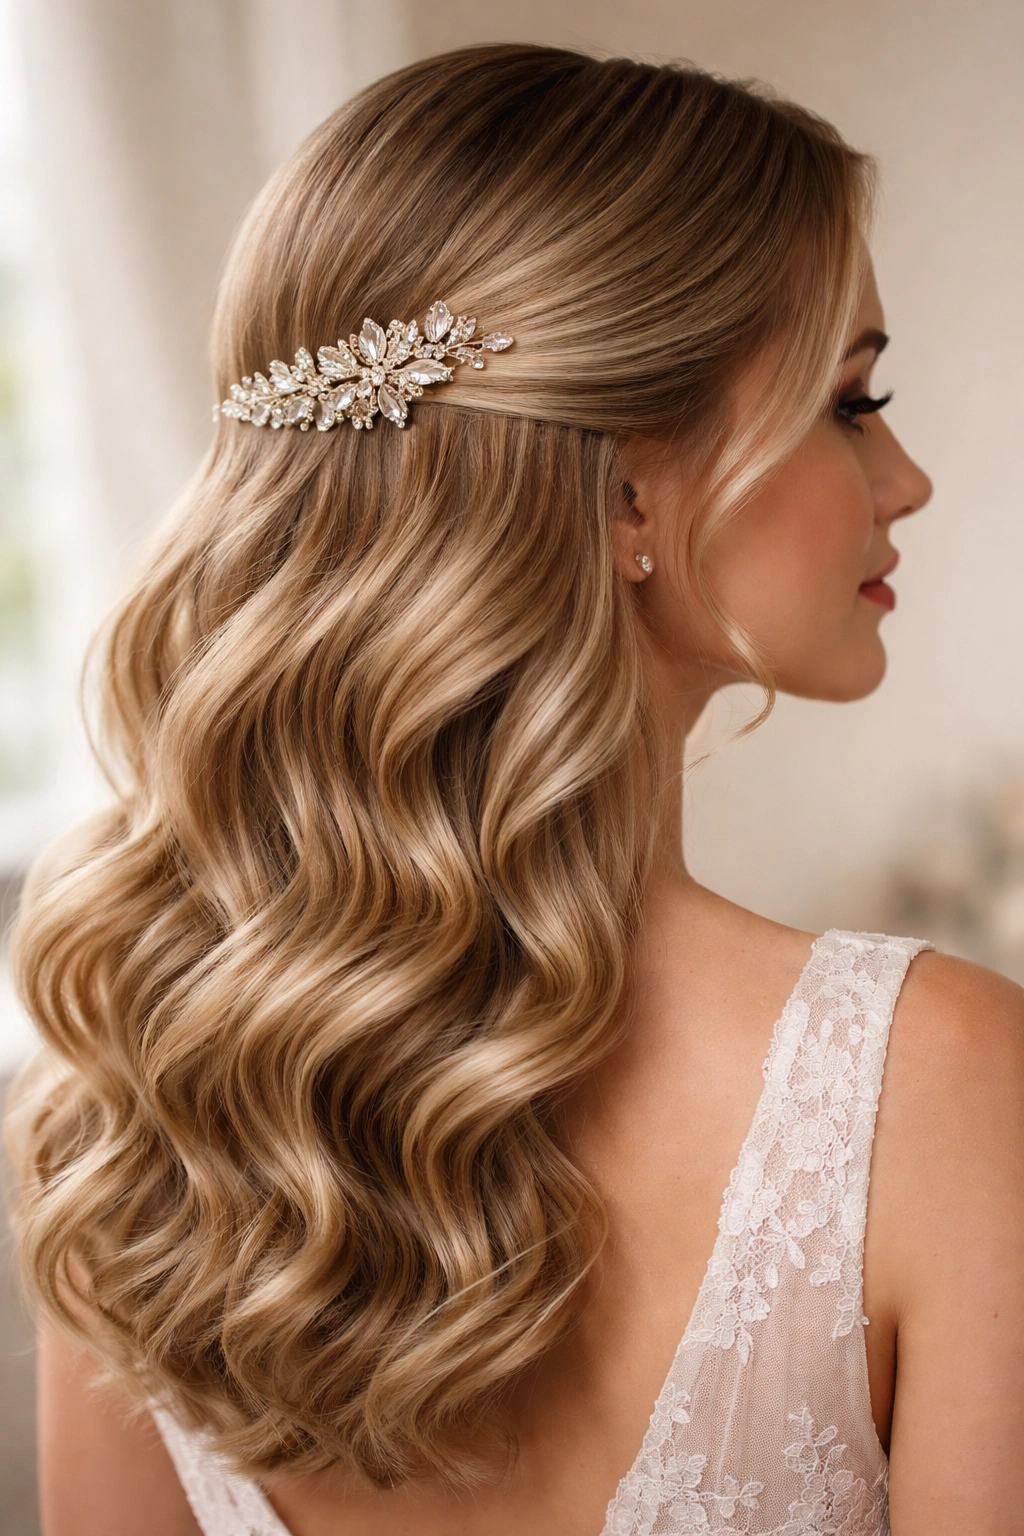
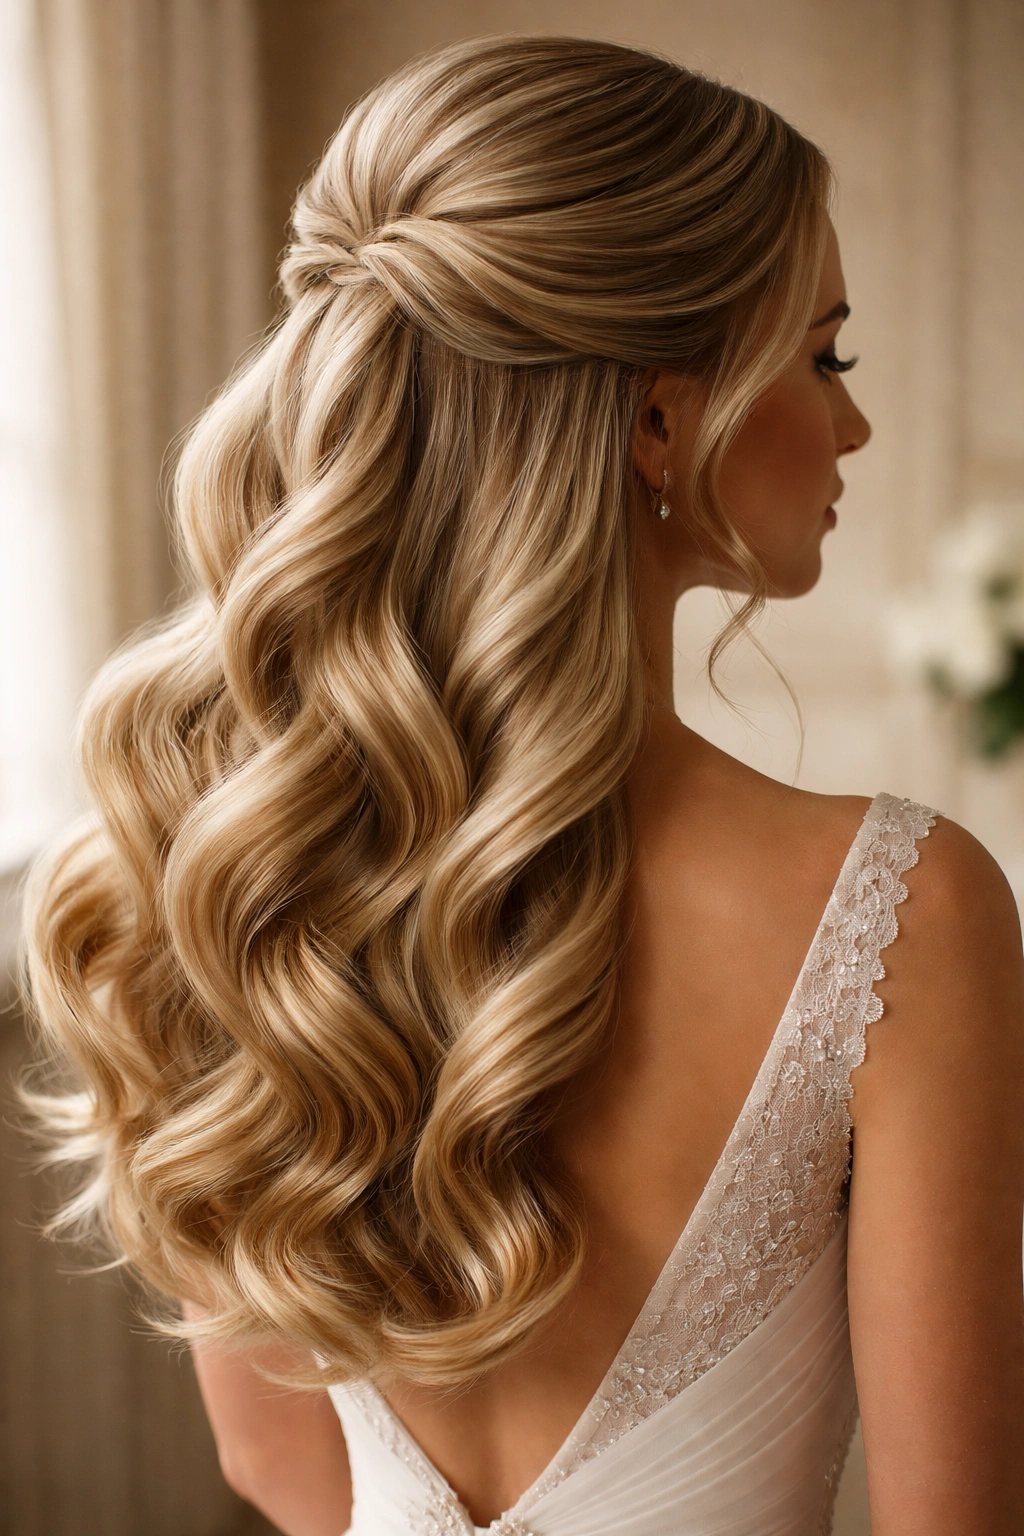
5. Half-Up Half-Down Waves
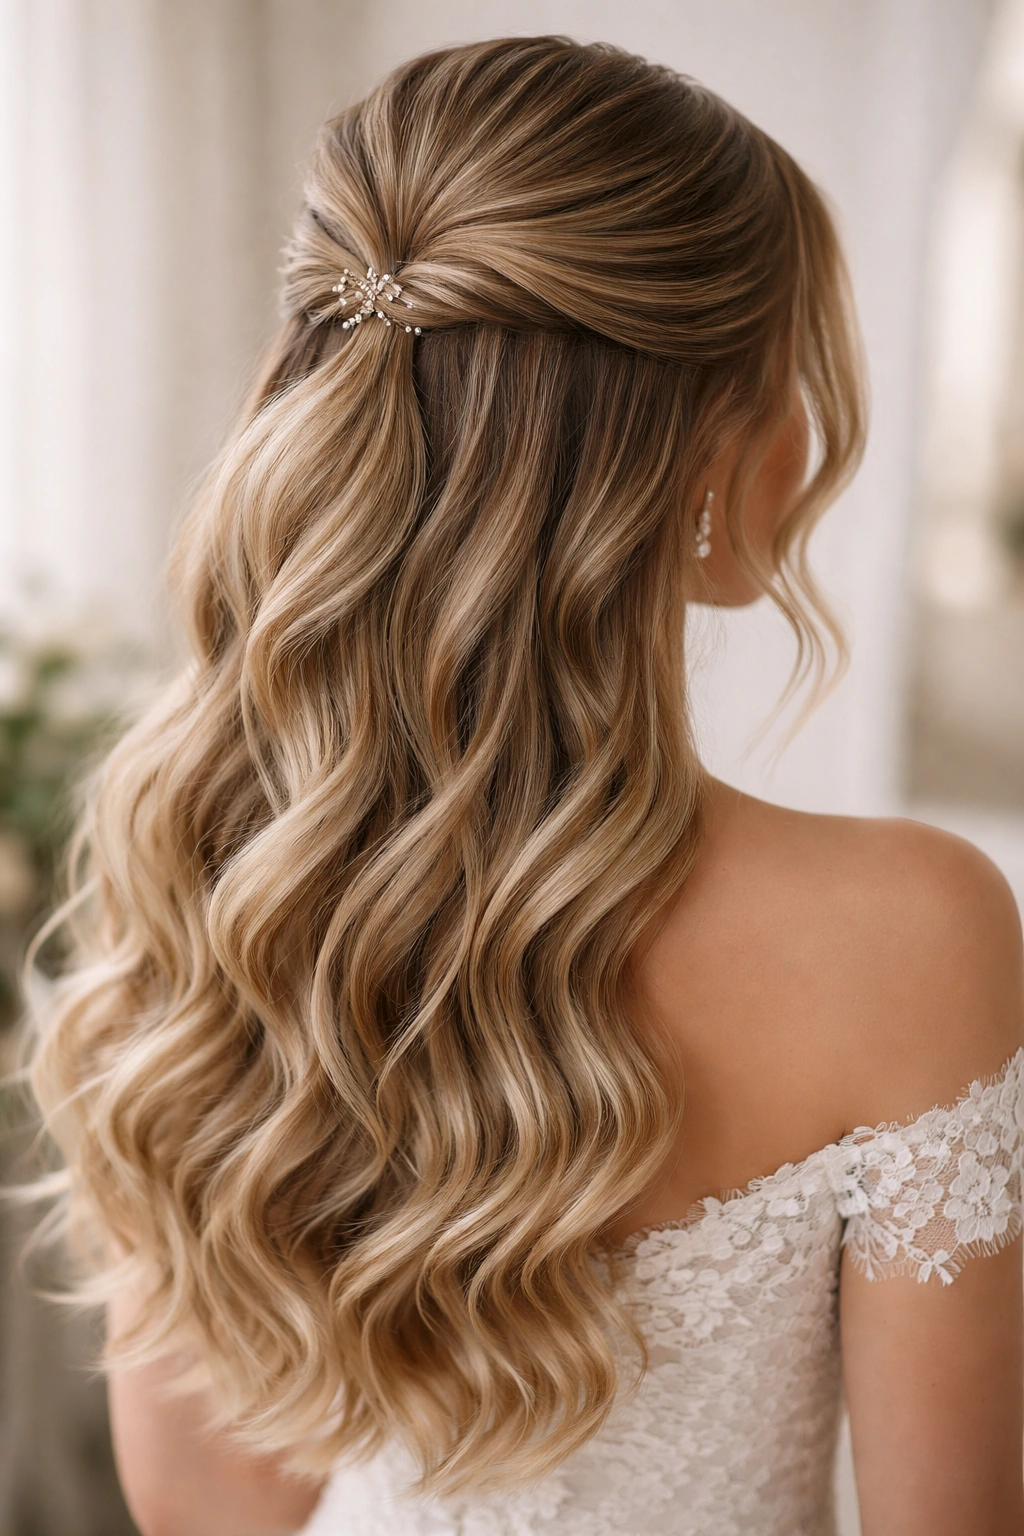
The half-up half-down style combines the romance of down hair with the elegance of an updo, making it one of the most versatile options for weddings. The top section of hair is gathered and secured (using bobby pins, a small elastic, or a decorative clip), while the rest flows down in waves. This style works for nearly every hair length from shoulder-length to floor-length, and it prevents hair from falling in your face during the ceremony while still showing off your length and texture.
Why This Works for Weddings
Half-up half-down styles feel balanced—they’re formal enough for a traditional wedding but romantic enough for any setting. This style is particularly practical because it keeps hair off your face during the ceremony and vows while still allowing you to wear your hair down for the reception. The proportion of the style is inherently flattering, as it frames the face while also showing off length and movement.
How to Achieve and Maintain Them
- Create waves throughout all the hair before securing the top section
- Gather the top section from ear to ear, right at the crown, and secure with bobby pins or a small elastic
- Gently pull a few face-framing pieces out of the gathered section for softness
- You can add a decorative bobby pin, a thin braid, or a delicate hair comb to the gathered section
- This style holds beautifully for 10+ hours because the secured section helps anchor the waves
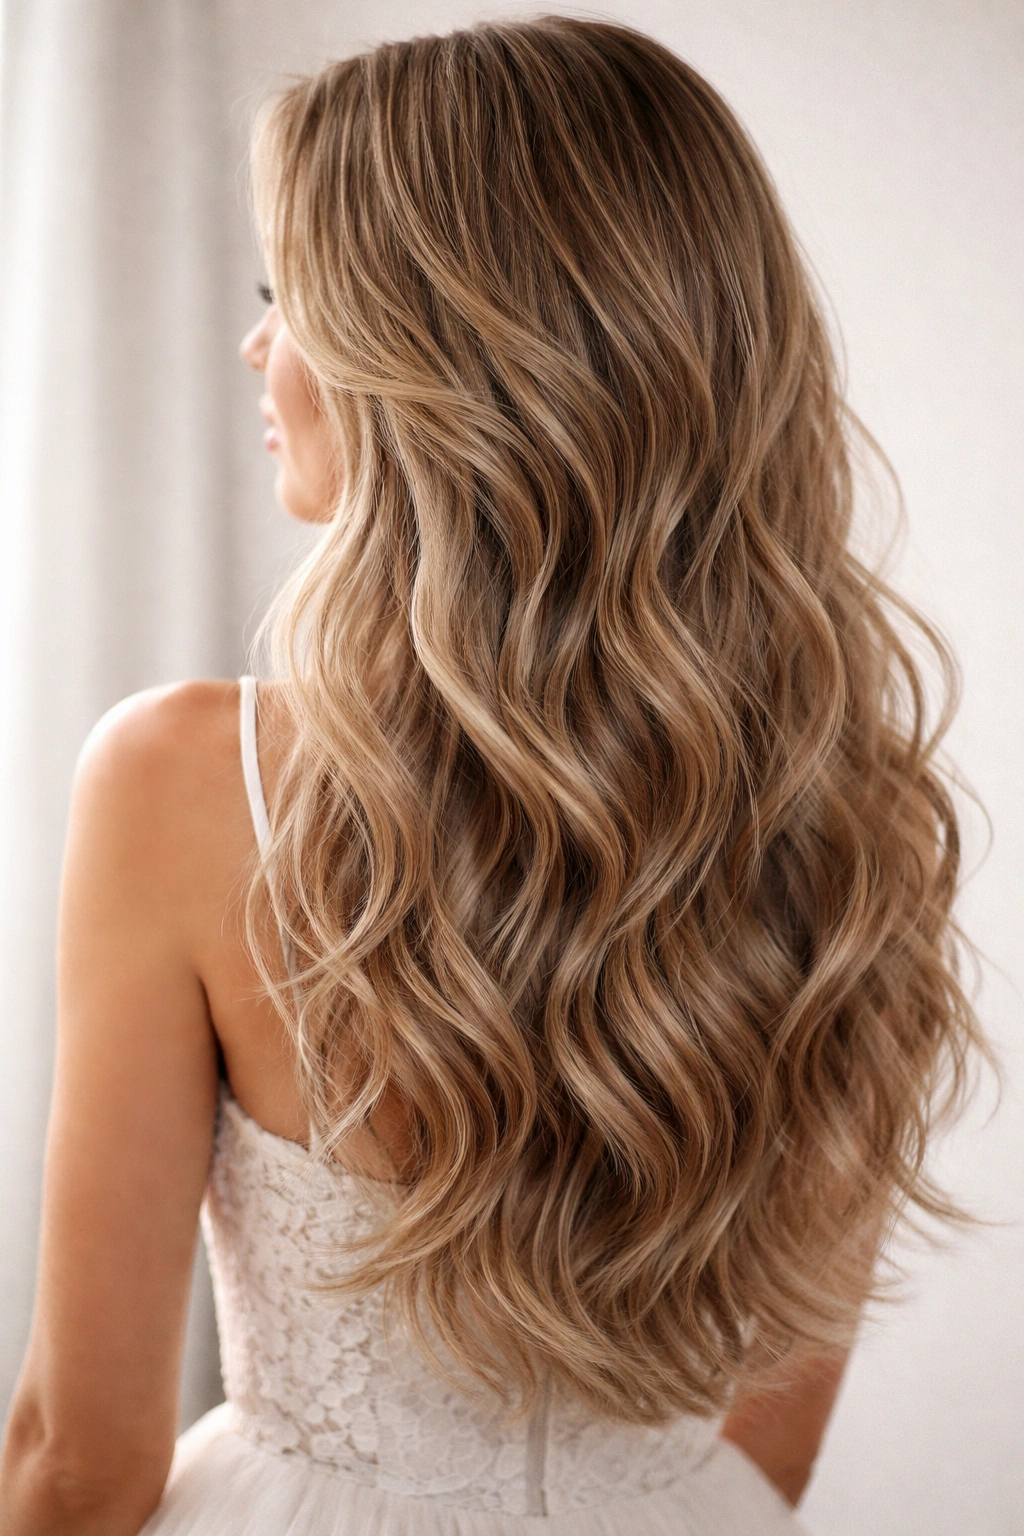
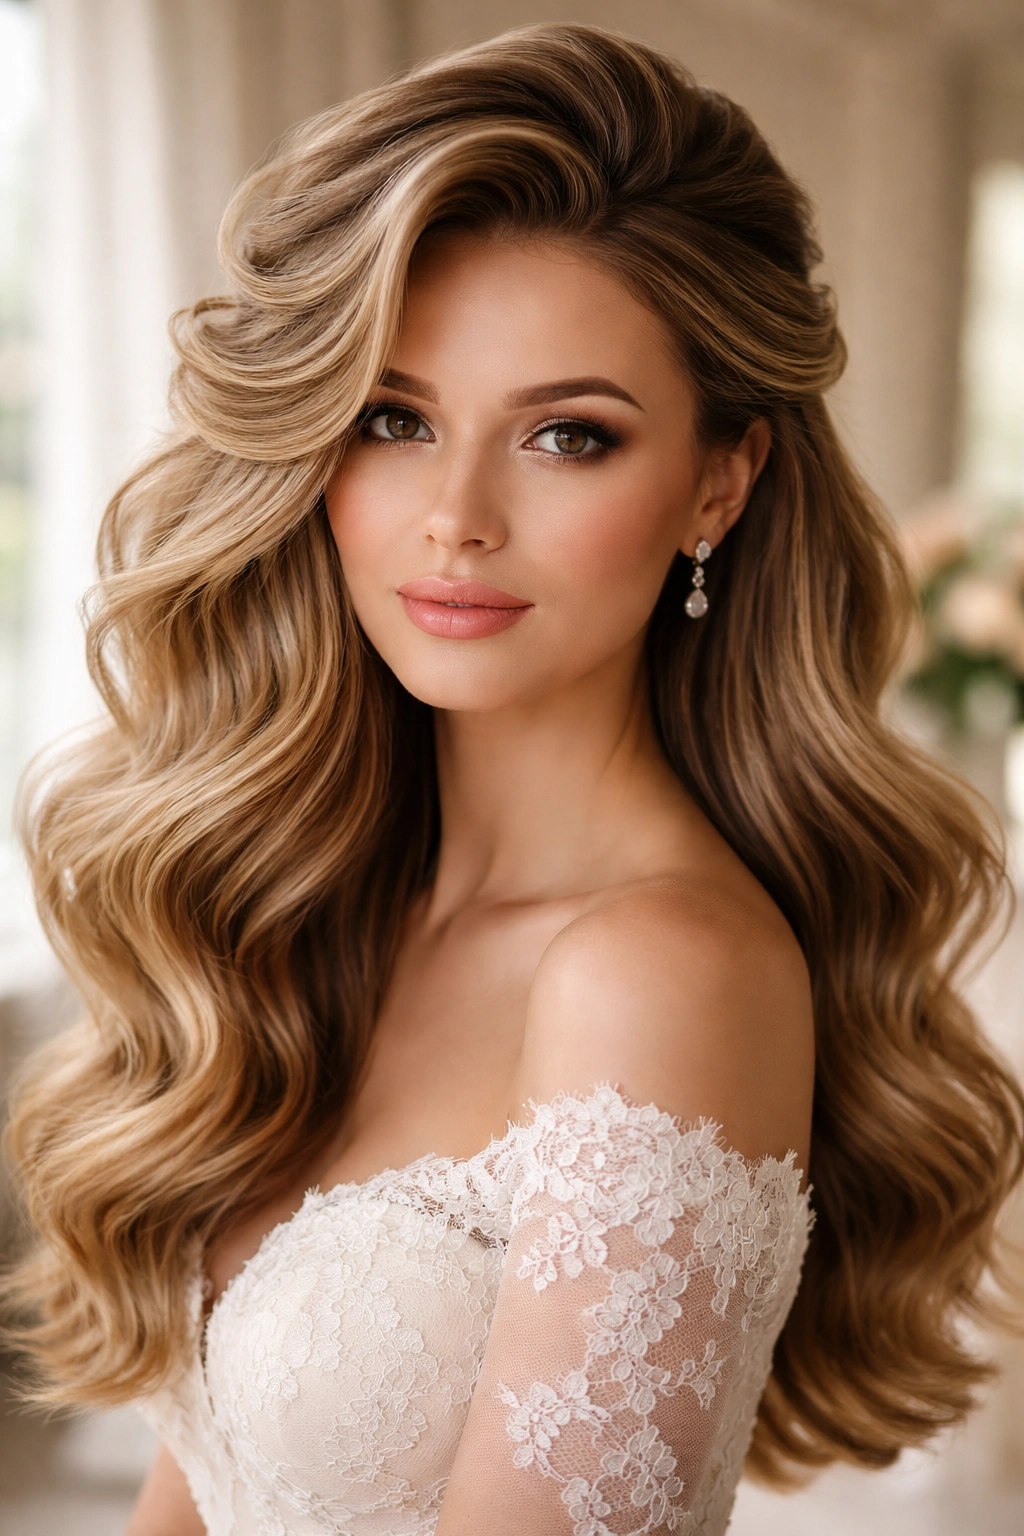
6. Center-Parted Waves with Maximum Volume
Center-parted waves create a balanced, symmetrical look that’s both elegant and modern. The center part divides the hair evenly, and waves are created throughout with special attention to building volume at the crown. This style works beautifully for brides who prefer symmetry and want their hair to frame their face evenly on both sides.
Why This Works for Weddings
A center part is flattering on most face shapes when paired with waves, because the waves soften the line of the part and create fullness on either side. This style feels effortlessly elegant—it’s not as obviously styled as a side-sweep, but it’s more intentional than simply wearing waves down naturally. The symmetry of a center part also balances most wedding dress designs, regardless of whether your dress has a centered detail or asymmetrical elements.
How to Achieve and Maintain Them
- Create the center part before blow-drying to ensure it’s straight and clean
- Blow-dry with your head upside down to build foundation volume throughout
- Create waves by curling away from the part on both sides, working section by section
- Use larger barrel curling iron for more relaxed waves, smaller barrel for tighter texture
- Set with a flexible hairspray that holds without creating stiffness—you want the waves to move, not stay frozen in place
7. Twisted Crown with Cascading Waves
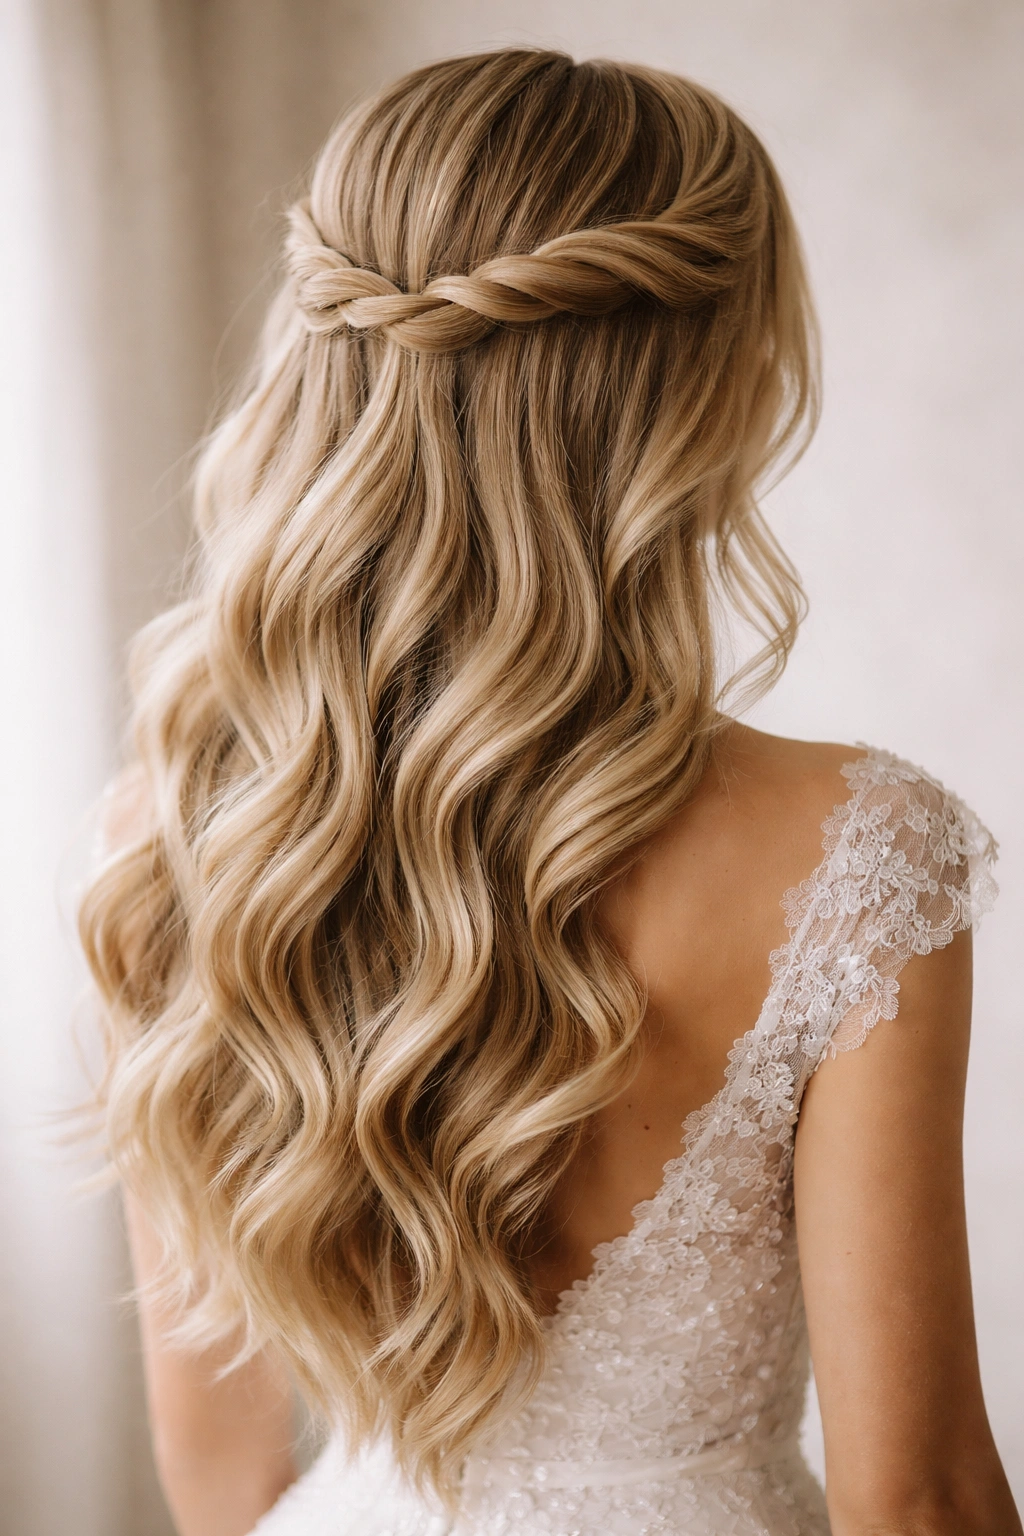
This romantic style features a twisted section that runs across the crown from one side to the other, while the rest of the hair flows down in soft waves. The twist acts like a subtle crown or halo, drawing attention upward while the cascading waves below add movement and romance. This is a gorgeous option for brides who want a bit of complexity and detail without committing to a full updo.
Why This Works for Weddings
The twisted crown adds visual interest and sophistication while maintaining the romance of down hair. It’s practical because it keeps some hair off the face and head while still showing off length and texture. This style photographs beautifully from the back and side angles, and it works equally well for formal or casual weddings.
How to Achieve and Maintain Them
- Create waves throughout the entire head before adding the twist
- Take a section of hair from one side (approximately from temple to above the ear)
- Twist this section firmly as you move toward the opposite side of the head
- Secure the twisted section on the opposite side using bobby pins that blend with your hair color
- Pull a few small pieces out of the twist for a softer, less formal appearance
8. Braided Section with Soft Waves
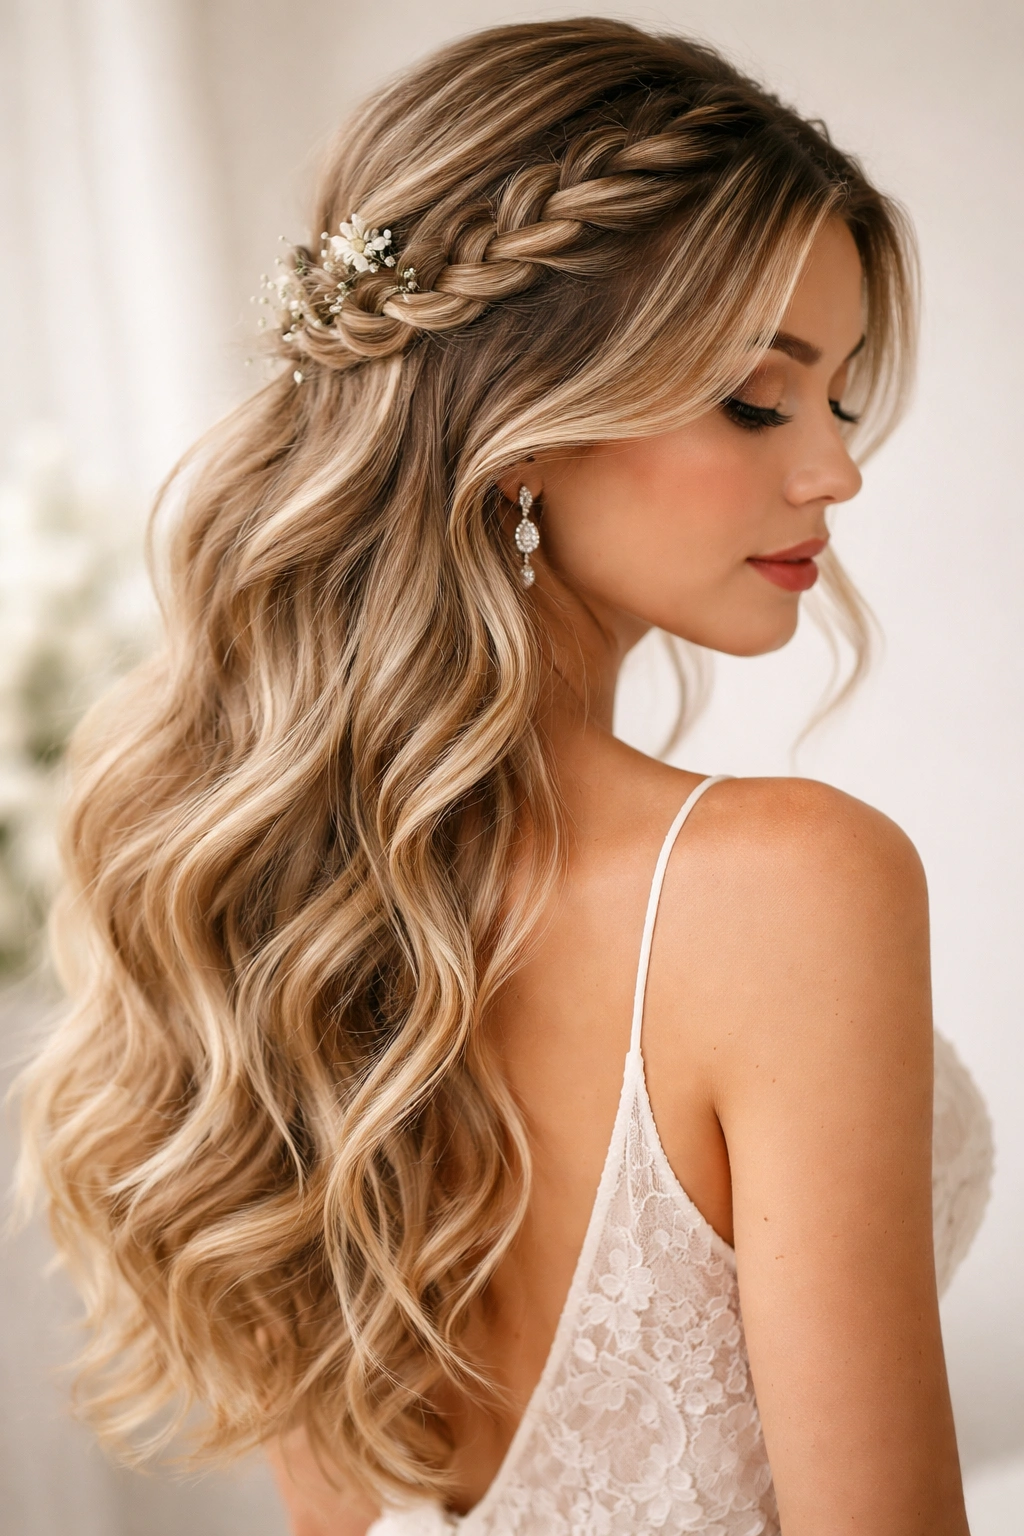
Incorporating a braid into wavy hair adds texture and visual interest while maintaining romantic movement. A single braid can start at the side, weave through the back, or frame the face—the options are endless. The braid provides a focal point and structural element while the waves throughout the rest of the hair add softness and movement.
Why This Works for Weddings
Braided elements feel special and intentional without being overly complicated or costume-like. A braid adds dimension and visual interest that makes even simple waves feel more elaborate. This style is perfect for brides who want something a bit more involved than plain waves but don’t want to commit to a full updo.
How to Achieve and Maintain Them
- Create soft waves throughout all the hair first
- Take a section of hair (thickness depends on how prominent you want the braid to be) and braid it carefully
- Position the braid where it will have the most visual impact—along the side for a face-framing effect, or along the back for a more subtle appearance
- You can tuck the end of the braid into the rest of the styled hair and secure with bobby pins
- The braid can be woven tightly for a structured look or braided more loosely for a softer, romantic appearance
9. Sleek Waves with Metallic Accents
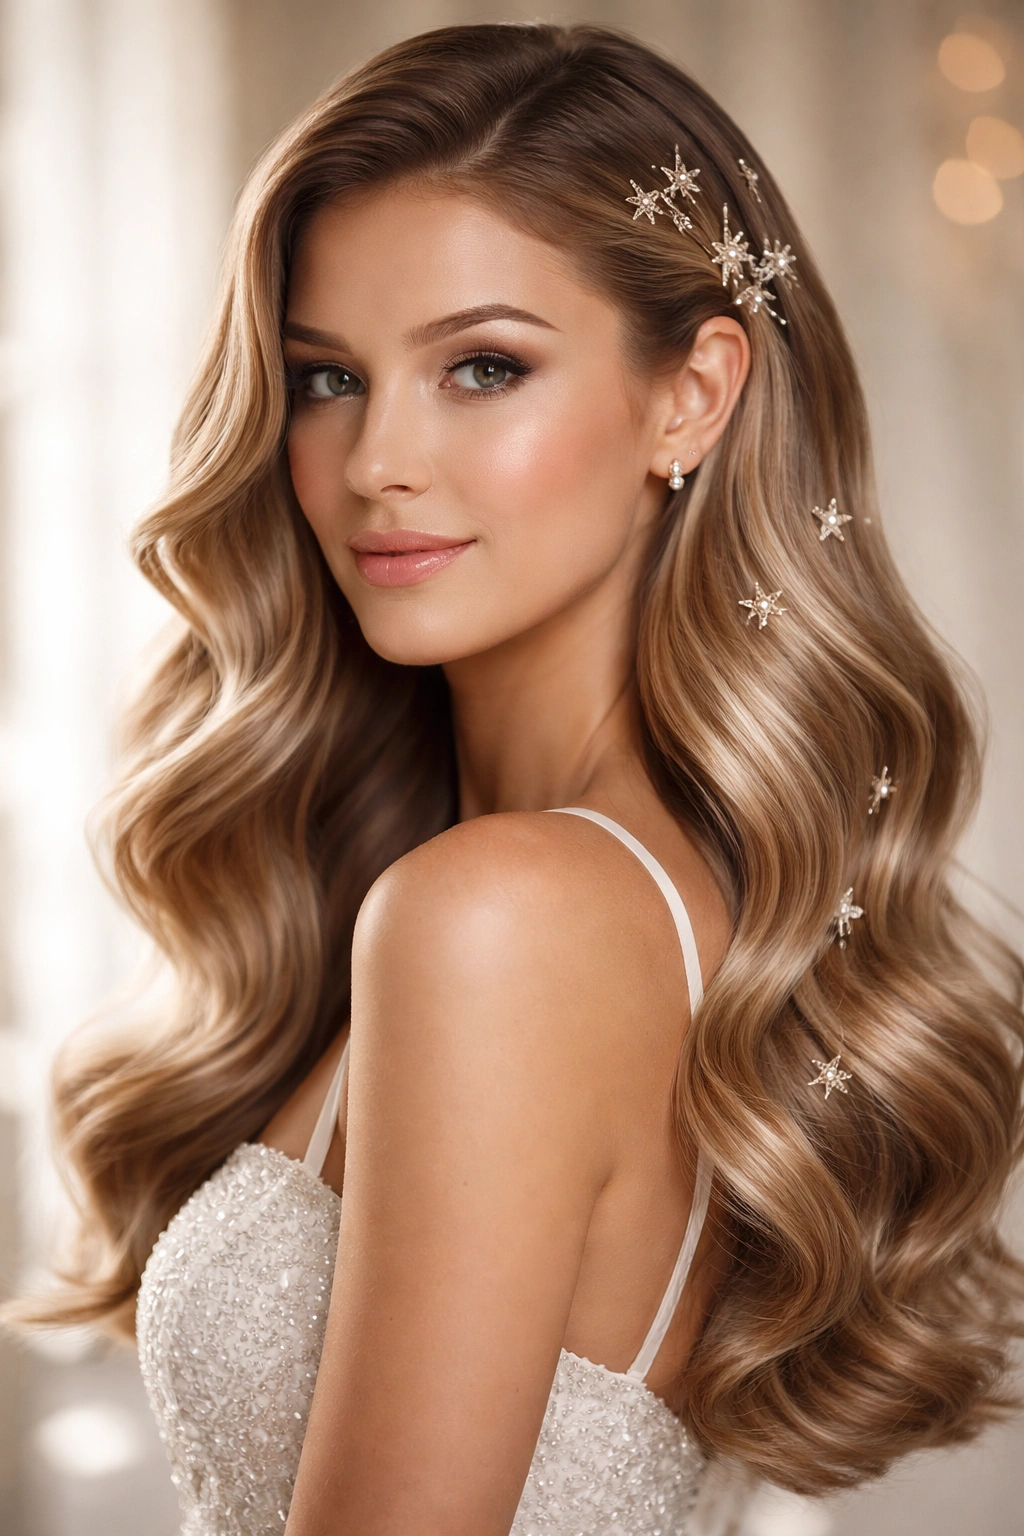
This modern take on wavy hair combines smooth, polished waves with metallic hair accessories—think delicate gold pins, silver hair clips, or jeweled bobby pins scattered throughout. The waves are brushed until they’re sleek and refined, and the metallic accents catch light and add glamour without feeling costume-like.
Why This Works for Weddings
This style feels contemporary and elegant, perfect for modern brides or destination weddings with a more fashion-forward aesthetic. The metallic accents add sparkle and visual interest that photographs beautifully, especially in indoor lighting. This style bridges the gap between classic and trendy, making it feel relevant without being trendy to the point of dating quickly.
How to Achieve and Maintain Them
- Create structured waves using a curling iron, then brush them out until they’re smooth and sleek
- Use a paddle brush with a smoothing serum to achieve a polished finish
- Place metallic hair pins or clips strategically throughout the waves—at the side, near the crown, or scattered throughout
- Ensure the metallic accents complement your dress and overall color palette
- Strong-hold hairspray keeps both the waves and the accessories in place
10. Low Waves with Decorative Barrette
This refined style features soft waves concentrated primarily on the lower half of the head, with the top section smoothed and secured with a decorative barrette or clip. The barrette acts as both a functional element (securing the hair) and a design element that adds elegance and detail.
Why This Works for Weddings
This style feels polished and intentional, with the barrette adding a jewelry-like element that dresses up the overall look. The concentration of waves on the lower half means less weight at the crown, making this a great option for fine hair or brides who want height without volume. This style works beautifully with updos and down styles alike.
How to Achieve and Maintain Them
- Blow-dry the top section straight and smooth, using a paddle brush for polish
- Create soft waves on the lower half using a curling iron or braiding technique
- Gather or smooth the top section backward and secure with bobby pins
- Clip a decorative barrette over the secured section, positioning it where it’s both visible and functional
- Choose a barrette that complements your dress and overall wedding aesthetic
11. Textured Waves with Feathered Ends
Feathered waves are characterized by layers that create movement at the ends, with waves running throughout the mid-lengths and ends. This style requires some layering in the cut itself, as the feathering technique creates piece-like texture naturally. The waves emphasize the layers, creating a style that looks effortlessly textured and moved.
Why This Works for Weddings
Feathered waves feel soft and romantic while also looking intentionally styled. The movement at the ends draws the eye and creates visual interest, and the layered nature makes even fine hair look fuller and more textured. This style is particularly flattering for brides with longer hair, as it shows off the length while adding movement throughout.
How to Achieve and Maintain Them
- This style works best with layered hair, as the layers are essential to achieving the feathered effect
- Create waves throughout all the hair using a curling iron or braiding method
- Use a texturizing spray or sea salt spray to enhance separation and emphasize the feathering
- Finger-comb through the hair to loosen and separate the waves, creating that piecey, feathered appearance
- A light-hold hairspray keeps the texture looking intentional without making hair feel heavy or stiff
12. Slicked Back Crown Waves
This dramatic style pulls hair tightly back from the face and crown, slicking it down with gel or mousse, while allowing waves to flow freely from the mid-length downward. The contrast between the sleek, polished crown and the soft waves below creates a sophisticated, fashion-forward look.
Why This Works for Weddings
This style is incredibly elegant and shows off facial features beautifully by removing all hair from the face and forehead. It’s particularly striking for brides with strong bone structure, and it photographs beautifully from the front and side angles. This style feels modern and intentional, making it perfect for contemporary wedding aesthetics.
How to Achieve and Maintain Them
- Apply a smoothing gel or mousse to damp hair at the crown and brush it straight back smoothly
- Blow-dry the slicked-back section to set it in place
- Create waves starting roughly at ear level downward using a curling iron
- Ensure the slicked-back section is completely smooth—any flyaways or bumps will be visible
- Use a flexible hairspray that holds the slicked section without making it shiny or sticky-looking
13. Wavy Low Bun with Face-Framing Pieces
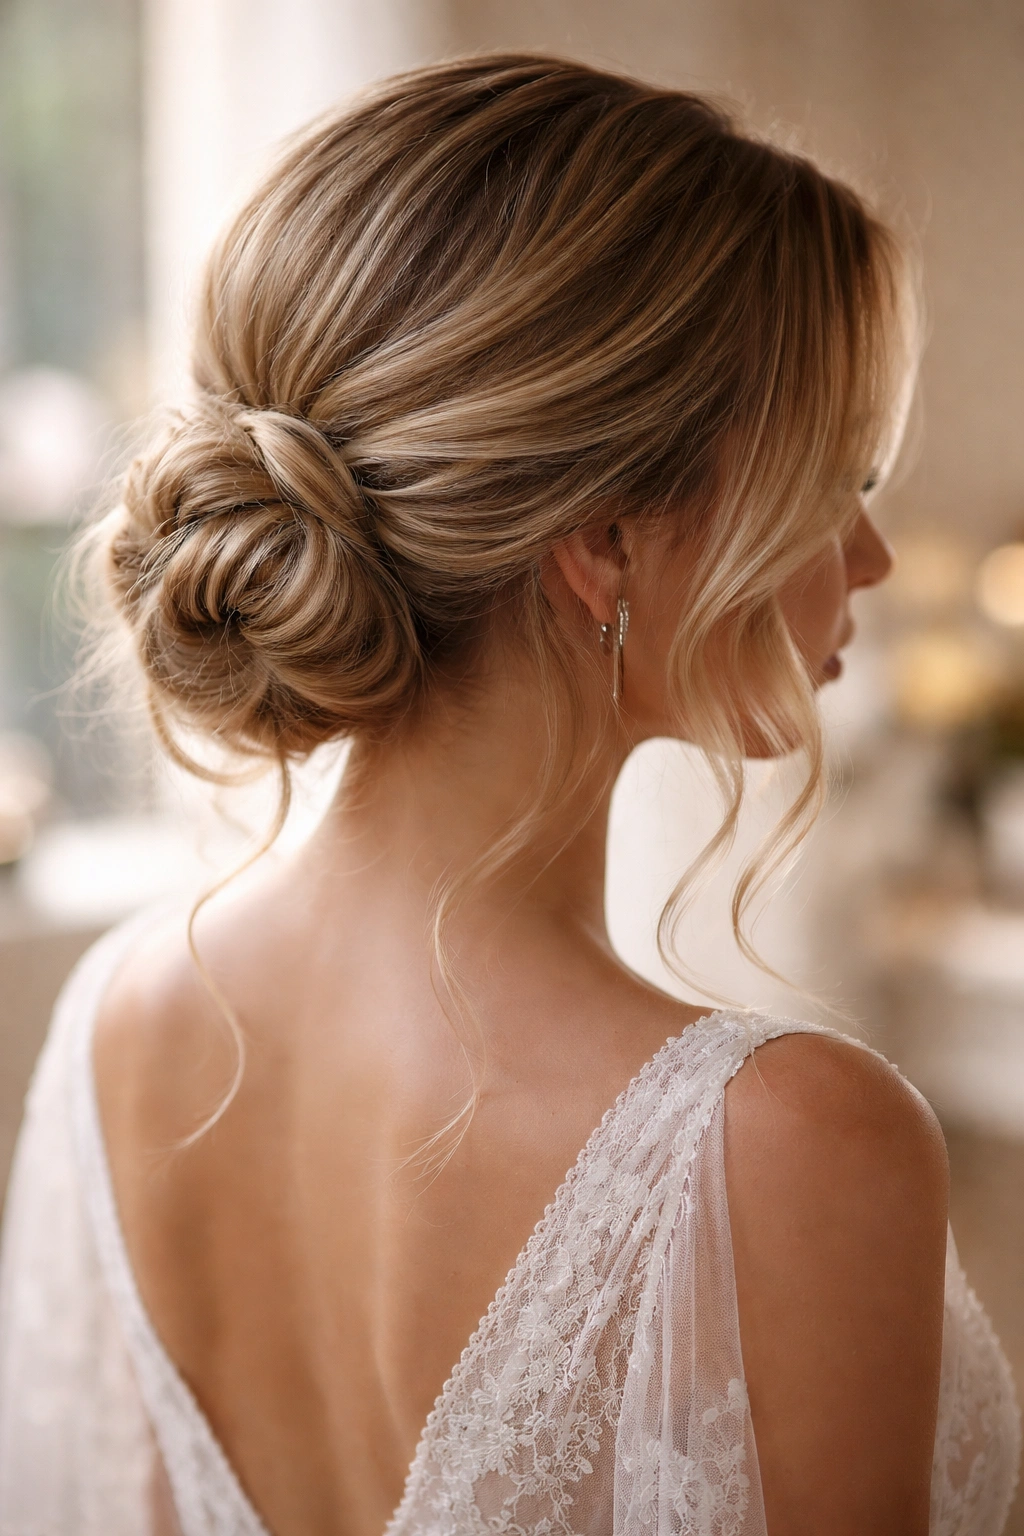
This style combines an updo with soft waves by creating a low bun (positioned at the nape of the neck) and leaving long, wavy face-framing pieces to fall forward. The waves in the face-framing section and throughout the bun create texture and romance while the bun itself is elegant and practical.
Why This Works for Weddings
This is one of the most versatile options because it works for nearly every dress neckline and wedding style. The low position of the bun is flattering on most people, and the face-framing waves add softness and femininity. You get the elegance of an updo with the softness and movement of wavy hair.
How to Achieve and Maintain Them
- Create soft waves throughout all the hair before securing the bun
- Leave longer face-framing pieces on either side and smooth them forward
- Gather the remaining hair into a low ponytail at the nape of the neck
- Twist or braid the ponytail section, then wrap it around the base to create a bun
- Secure the bun with bobby pins and smooth the top with a small amount of smoothing serum
- The face-framing waves should feel loose and soft, not rigidly styled
14. Deep Side Waves with Lifted Crown
This style creates maximum dimension by building significant volume at the crown while allowing deep, dramatic waves to sweep across and down from the lifted crown area. The waves are created using larger barrel curling irons and pinned while cool to set a strong wave pattern.
Why This Works for Weddings
This style creates the illusion of incredibly thick, full hair and photographs beautifully from most angles. The height at the crown is flattering for many face shapes, and the dramatic sweep of waves adds glamour and movement. This is an excellent choice for brides who want a high-impact, photograph-worthy style.
How to Achieve and Maintain Them
- Create height at the crown by blow-drying the top layers upside down and back
- Use a large-barrel curling iron (2 inches or larger) to create deep waves on the sections you want to sweep
- Pin the curls in place and allow them to completely cool before unpinning
- Gently brush through the waves to create that deep, columnar wave pattern
- Use a strong-hold hairspray and consider requesting that your stylist use setting spray under the waves for extra longevity
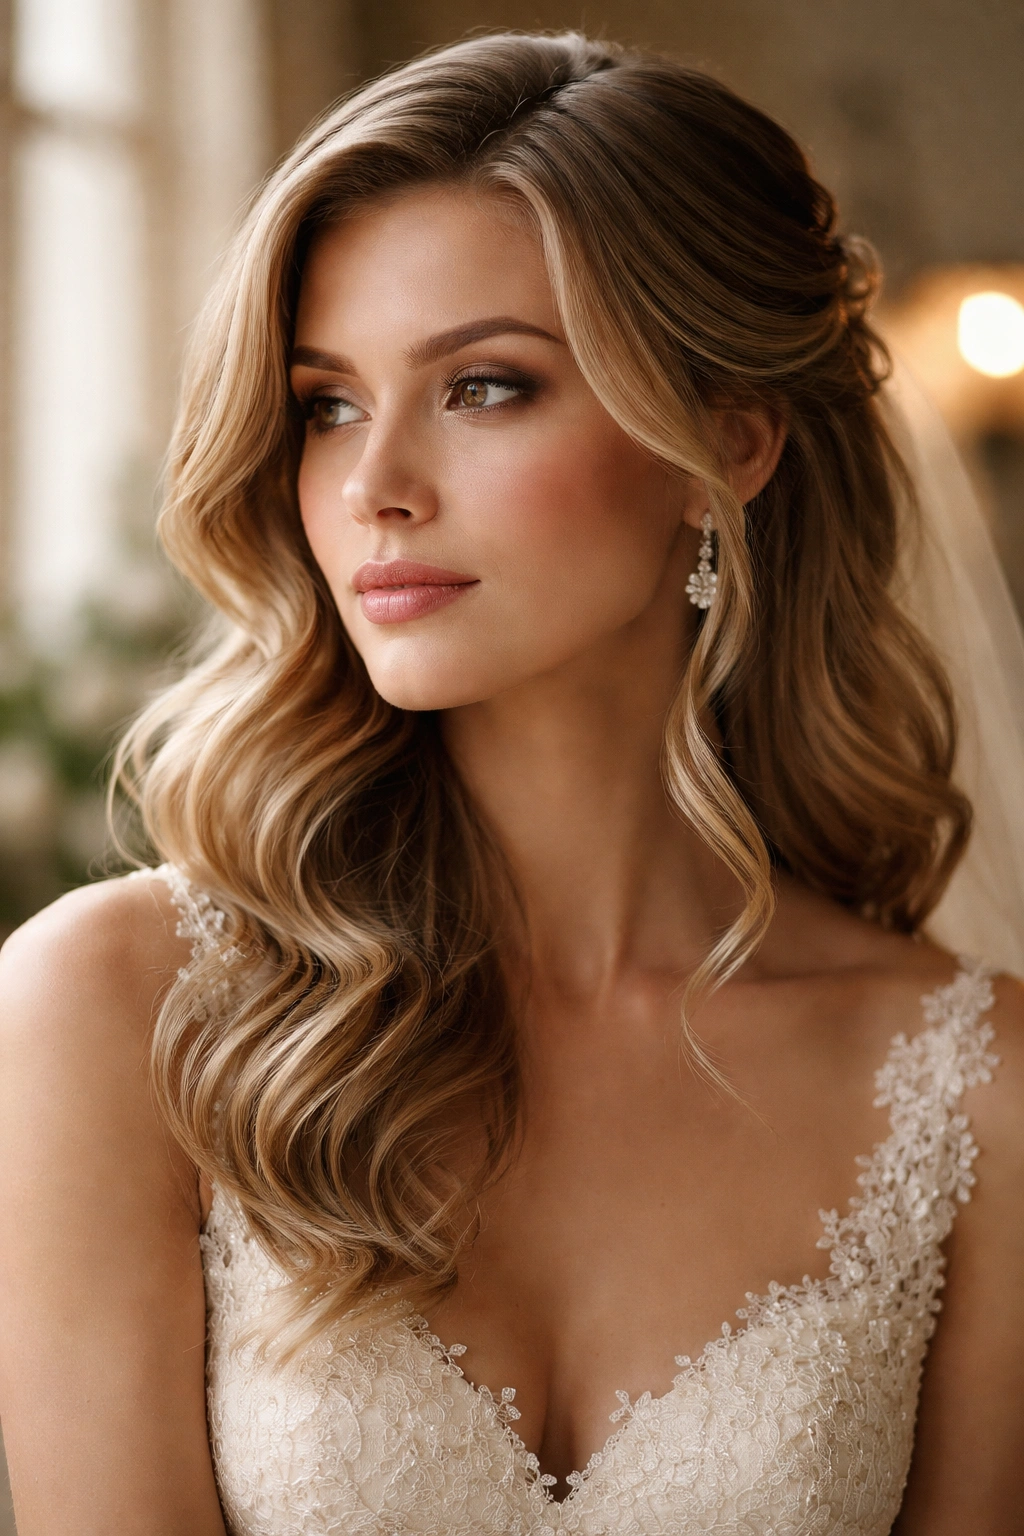
15. Cascading Waves from Side-Parted Section
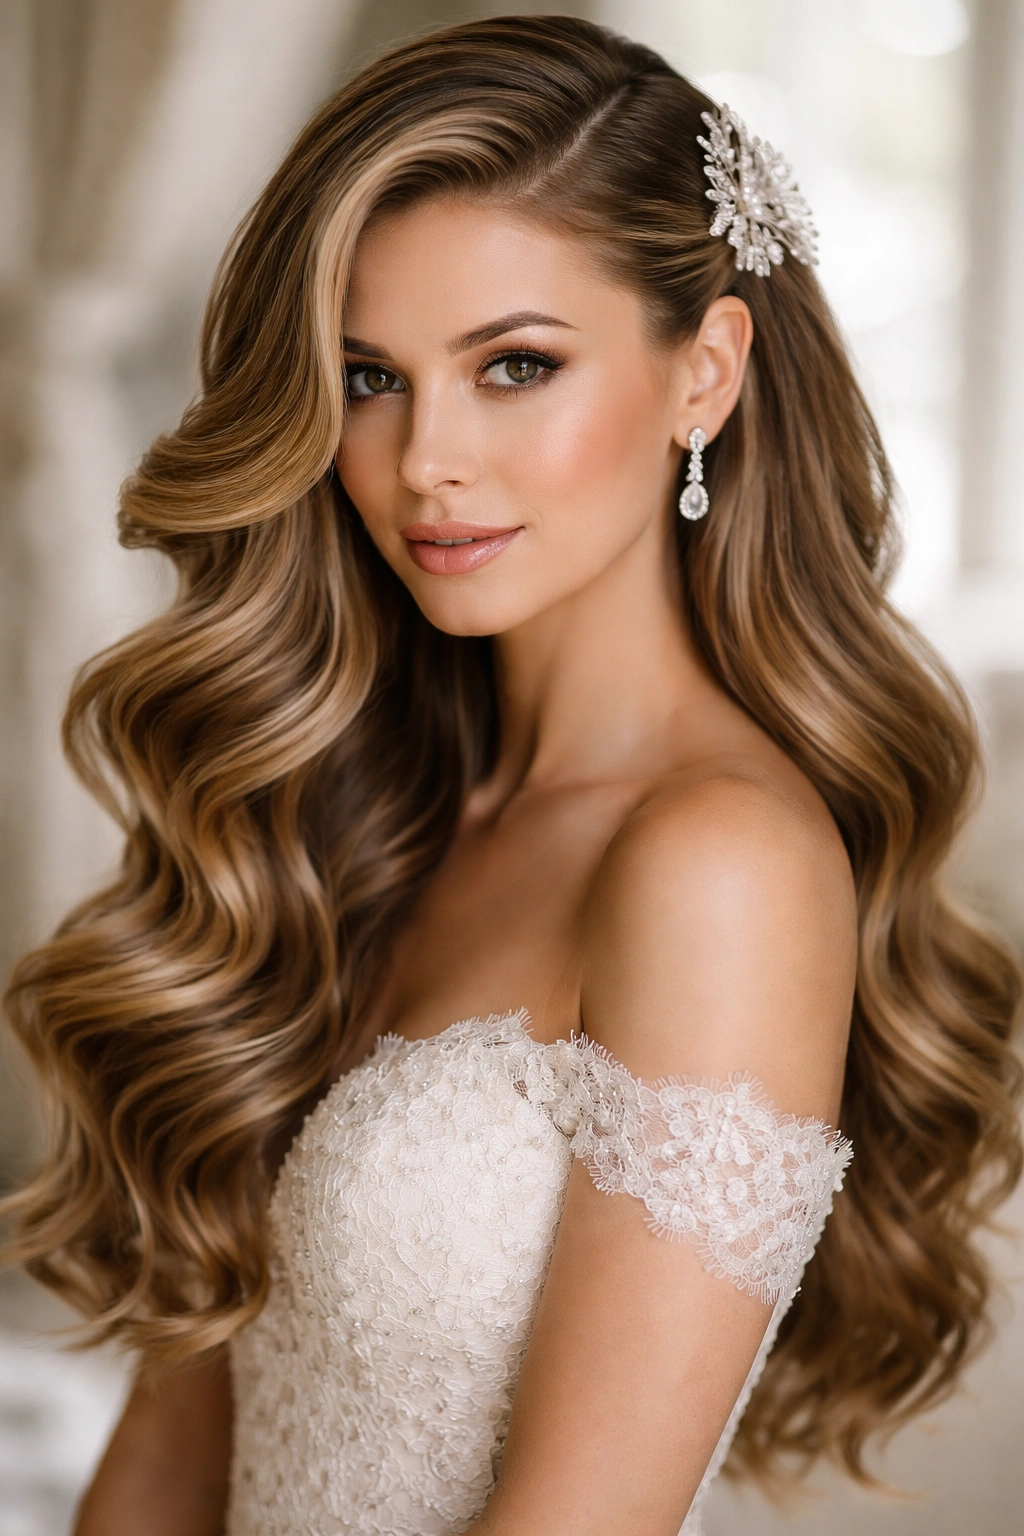
This romantic option features a deep side part with the majority of hair swept to one side, creating cascading waves that flow across the shoulder and down the back. The side section is heavily waved while the smaller side has a sleeker, more polished appearance.
Why This Works for Weddings
The asymmetry is naturally flattering and creates visual drama without being overly complicated. The cascading nature of the waves creates a romantic, movement-filled appearance that photographs beautifully in both posed and candid shots. This style works equally well for formal black-tie weddings and more casual celebrations.
How to Achieve and Maintain Them
- Create a deep side part, dividing the hair so the majority falls to one side
- Create waves primarily in the larger section, using a curling iron to create vertical movement
- Leave the smaller side more polished and smooth, perhaps with just subtle waves
- Secure the smaller side gently behind the ear with a bobby pin
- Use a flexible hairspray so the cascading waves can move and flow naturally
16. Voluminous Crown Waves with Smooth Underlayer
This style creates maximum impact by building dramatic volume at the crown while keeping the underlayer smooth and polished. The contrast between the textured top and smooth bottom creates dimension and visual interest, and it’s a great way to add volume without making the entire head feel heavy.
Why This Works for Weddings
This style is flattering for most face shapes and creates the illusion of incredible thickness and health in the hair. The smooth underlayer keeps the style looking polished while the voluminous crown adds drama and presence. This is an excellent choice for brides who want maximum impact and glamour.
How to Achieve and Maintain Them
- Blow-dry the crown area with your head upside down to create maximum foundation volume
- Create waves primarily at the crown and upper half of the head using a medium-barrel curling iron
- Brush out these waves until they’re smooth and columnar
- Smooth the underlayer with a paddle brush and smoothing serum
- Pin the smooth underlayer in a way that keeps it from mixing with the waved crown section
- A strong-hold hairspray throughout keeps this high-impact style in place
17. Romantic Waves with Fresh Flowers or Greenery
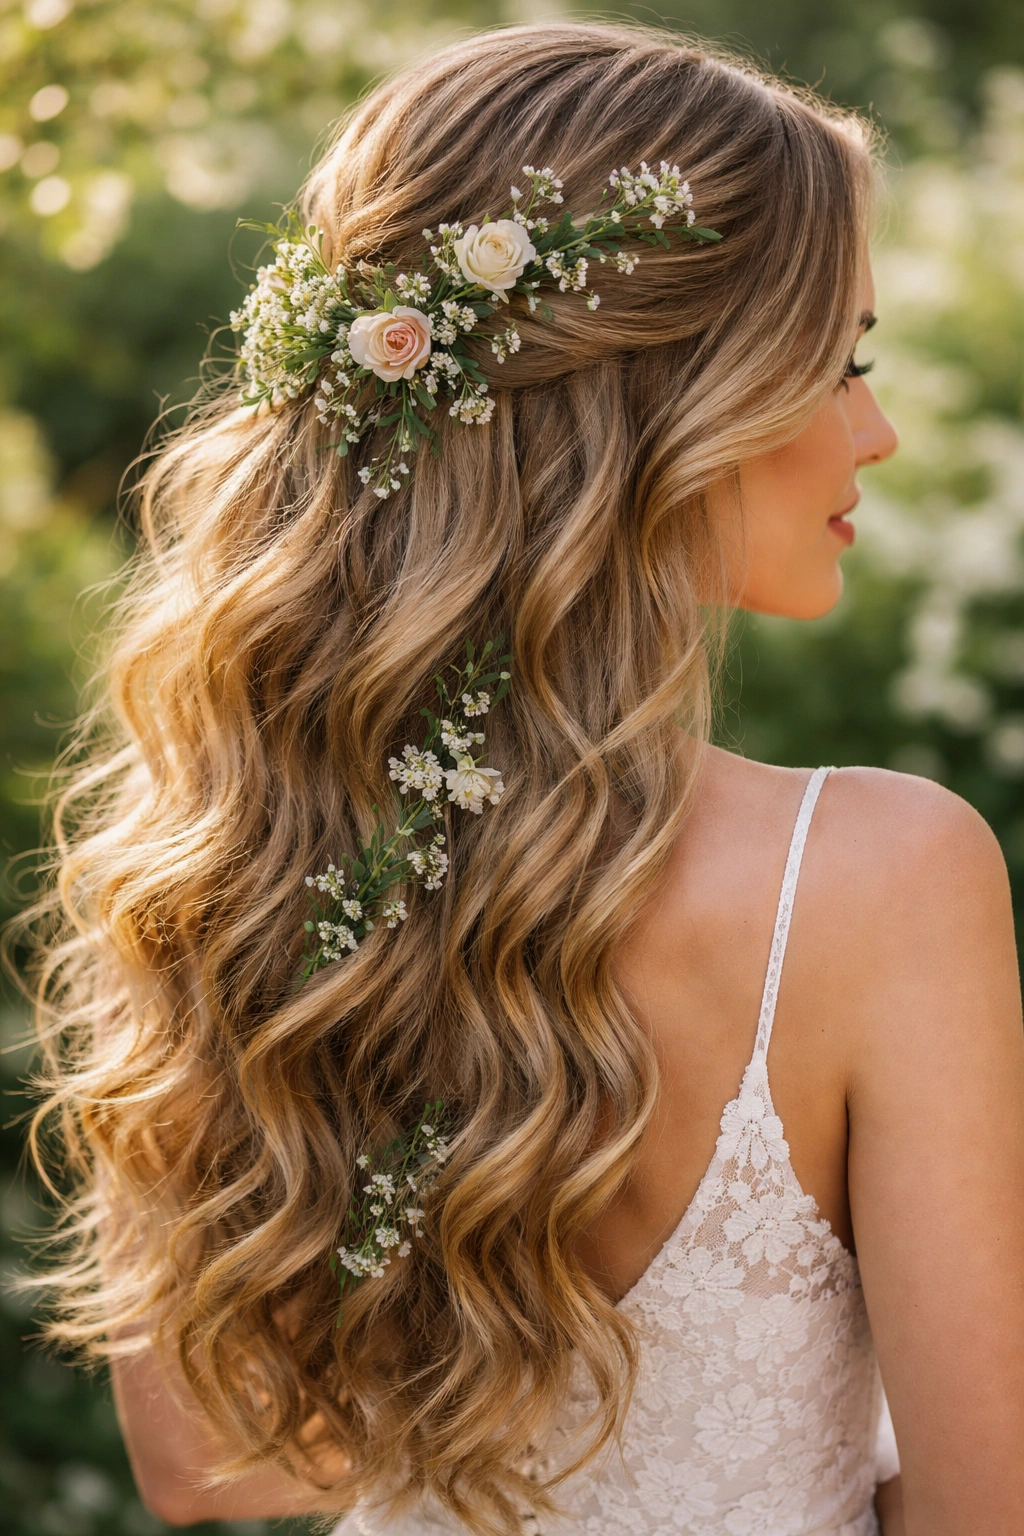
This whimsical yet elegant style pairs soft, romantic waves with the addition of fresh flowers or delicate greenery woven throughout or tucked into the hair. The flowers add a natural, garden-like element that elevates the waves and creates a truly bridal appearance.
Why This Works for Weddings
Fresh flowers add a natural, romantic element that photographs beautifully and smells wonderful. This is an excellent option for garden weddings, outdoor ceremonies, or any bride who loves a romantic, feminine aesthetic. The flowers act as both a functional element (helping to hold waves in place) and a beautiful design detail.
How to Achieve and Maintain Them
- Create soft romantic waves throughout all the hair first
- Choose flowers or greenery that complement your wedding flowers and color palette
- Tuck flowers and greenery into the waves, securing them with bobby pins that match your hair
- Work with your florist to ensure the flowers will stay fresh throughout the day
- Place flowers strategically—along the side, at the crown, or scattered throughout for a romantic scattered effect
- Mist the flowers very lightly with hairspray (avoiding the petals themselves) to help secure them
18. Hollywood Waves Half-Up Style
This refined hybrid style combines the glamour of classic Hollywood waves with the practicality of a half-up securing. The waves are created throughout the entire head using structured curling techniques, but the top section is gathered and secured, creating an elegant pulled-back element while maintaining the full glamour of the waves.
Why This Works for Weddings
This style maximizes the elegance of Hollywood waves while adding the practical benefit of keeping hair off the face. The combination feels incredibly bridal and glamorous, and it photographs beautifully from every angle. The gathered section adds a dimensional element that makes the style feel more intricate and special than plain Hollywood waves alone.
How to Achieve and Maintain Them
- Create structured Hollywood waves throughout all the hair using a large-barrel curling iron
- Pin curls while cool to set the wave pattern firmly
- Gently brush out the waves for that classic columnar appearance
- Once waves are set, gather the top section from ear to ear and secure with bobby pins
- Soften the gathered section slightly by pulling a few pieces out
- A strong-hold hairspray throughout ensures these waves last the entire celebration
Final Thoughts
Choosing a wavy hairstyle for your wedding is about finding the balance between what feels authentically like you and what makes you feel like the best, most confident version of yourself. The eighteen styles in this guide represent the full range of possibilities—from the classic and timeless to the modern and fashion-forward, from the romantic and soft to the dramatic and bold. Consider your face shape, hair texture and length, dress style, wedding venue, and personal aesthetic as you narrow down your choices. Once you’ve selected a style that speaks to you, schedule a trial with your stylist at least a few weeks before the wedding. Bring photos of your chosen style, discuss the specific techniques that will work best with your hair, and talk through how the style will photograph and hold up throughout your celebration. Remember that slight tweaks and customizations to any of these styles will make them feel uniquely yours. The perfect wedding hairstyle isn’t about copying a photo exactly—it’s about working with your stylist to create something that makes you feel absolutely beautiful, comfortable, and confident on one of the most important days of your life.