Long wavy hair is one of those rare hairstyle choices that manages to feel both effortlessly romantic and intentionally polished—exactly the vibe most brides and wedding guests are going for. The thing is, wavy styles offer an incredible range of options depending on how much drama, softness, or structure you want to bring to your look. Whether you’re going for delicate and ethereal or bold and voluminous, wavy hair gives you the flexibility to dial it up or down based on your wedding’s aesthetic and your personal style.
The beauty of choosing a long wavy hairstyle for a wedding is that waves work with almost any dress, any venue, and any season. They photograph beautifully—the texture catches light in a way that makes images look more dimensional than sleek styles. They also photograph well from every angle, which matters when photographers are capturing candid moments throughout the day. Plus, waves tend to hold up reasonably well through a long event, especially with the right products and techniques supporting them.
What makes waves particularly wedding-friendly is their natural ability to feel formal without looking stiff. You can add delicate accessories, incorporate flowers, layer in braids, or keep them completely bare—waves accommodate every single direction. That adaptability, combined with the undeniable romance waves bring, makes them the foundation for some of the most stunning wedding hairstyles.
1. Soft Beach Waves with Delicate Hair Pins
Soft, touchable waves that look like you spent the day at the ocean—except you didn’t, and these waves will actually stay put. This style works because it skips the overly structured perfection of some formal waves and leans instead into a relaxed-but-intentional aesthetic that reads as sophisticated, not careless. The hair cascades down your back or over your shoulder with gentle, flowing movement that photographs beautifully and feels comfortable to wear for eight hours.
Why This Style Works for Weddings
Soft beach waves read as romantic without being matchy-matchy with bridesmaid clichés. The waves are deep and defined enough to look intentional, but they don’t require the rigid curls that can feel dated or overly formal. Beach waves also suit almost every face shape because they’re soft, rounded, and forgiving—they won’t emphasize any features you’re self-conscious about. The casual nature of the style paradoxically makes it feel more modern and editorial than tightly sculpted waves, which can feel heavy or serious.
How to Achieve the Look
- Use a 1.25-inch curling iron or wand, wrapping sections away from your face for a softer finish
- Work in sections, curling alternate directions so waves flow naturally instead of spiraling the same way
- Let curls cool completely before running your fingers through them for that signature softness
- Finish with a texture spray or lightweight hairspray to encourage waves to hold without becoming stiff
- Secure strategically with 1-2 delicate gold or silver hair pins tucked into the waves at your ear or lower crown—just enough to keep everything in place without looking staged
Pro tip: Curl your hair the night before and sleep on a silk pillowcase. That overnight rest transforms hot, perfect curls into softer, more natural-looking waves that read as effortlessly elegant.
2. Romantic Half-Up, Half-Down Waves
Half-up styles occupy this magical middle ground where your hair feels special and intentional, but you’re still showing off the length and movement of your waves. This variation pulls back the front sections and secures them at the crown, leaving the bottom half flowing free. It’s a style that works equally well for a bride, a wedding attendant, or anyone wanting to feel polished without surrendering all their hair to an updo.
What Makes This Style Stand Out
The half-up approach solves a problem many people don’t consciously realize until they’re at a wedding: keeping hair out of your face and off your shoulders while still showcasing length and texture. It creates visual height and structure at the crown while maintaining softness and movement everywhere else. The style also reads as more formal than completely down, which matters if you’re aiming for a certain level of polish without going full updo. Photographically, it’s stunning because you get the drama of an upstyle combined with the softness of waves flowing down your back.
Styling Steps for This Look
- Blow-dry your hair straight or with minimal texture as a base for more controlled waves
- Create deep waves using a curling iron, curling larger sections than you would for beachy waves to keep the bottom half feeling looser
- Take a 2-inch section from each temple, twist gently, and pin both sections to the back of your crown using bobby pins secured with hairspray
- Add an optional accent: a delicate barrette, a pearl clip, or a ribbon woven through the twist for subtle elegance
- Gently tug at the pinned section to create texture and movement—this prevents the half-up from looking too tight or severe
Worth knowing: The key to a half-up that doesn’t scream “trying too hard” is keeping the twisted sections loose and undone-looking, not tight and polished.
3. Classic Mermaid Waves with Sleek Sides
Mermaid waves are the definition of glam-wavy—tight, defined waves that look like they belong in a fairy tale, except this version is grounded in reality and actually wearable for a full wedding day. This style features super structured, almost snake-like waves that cascade down, paired with sleek, smoothed sides that create a sophisticated frame for your face. It’s high-impact and undeniably glamorous, walking the line between editorial and wearable.
Why Brides Choose Mermaid Waves
Mermaid waves make a statement—they read as intentional, polished, and fashion-forward rather than romantic or soft. If you want guests to notice your hair, mermaid waves deliver. The structured waves photograph exceptionally well because they catch light at distinct points, creating dimension and movement even in still photos. The sleek sides also balance the texture, preventing the overall look from feeling chaotic or overwhelming. This style works particularly well for outdoor or evening weddings where dramatic waves feel appropriate to the occasion.
How to Create This Wave Pattern
- Start with straight hair blow-dried smooth or use a flat iron as a base
- Use a 1-inch curling iron, taking 2-3 inch sections and curling each one tightly, holding for a full 5 seconds before releasing
- Leave 2-3 inches at the crown and 1-2 inches at the very ends uncurled for a tapered effect
- Use a fine-tooth comb or brush to gently brush out the curls, transforming tight curls into structured, defined waves
- Smooth the sides flat with a flat iron or by hand, using hairspray to keep them sleek
- Finish the entire style with strong-hold hairspray to lock the wave structure in place
Pro tip: Brush out your mermaid waves sooner rather than later after curling. The longer you wait, the frizz-prone they become. Timing is everything with this style.
4. Cascading Side-Swept Waves
A dramatic side part that sends waves cascading over one shoulder creates an asymmetrical, glamorous look that instantly photographs like you hired a professional stylist. This style works because it creates visual drama through movement and asymmetry—one side is full and textured, while the other is smoother, creating balance and sophistication. The cascading effect draws attention to one side of your face, making it flattering for most face shapes when placed strategically.
The Sophistication Factor
Side-swept waves feel inherently more formal than center-parted or face-framing waves. There’s something about the asymmetry that reads as intentional and editorial—you’re making a choice about how you present yourself. The cascade creates a natural focal point, which means the style works beautifully with an off-shoulder wedding dress or when you’re wearing a statement earring on the unswepped side. The movement in cascading waves also makes you look more dynamic in photos, especially candids where slight movement creates beautiful light and shadow.
Building the Cascade
- Create a very deep side part—one that sits far to one side of your head, not a traditional center or slight off-center part
- Blow-dry your hair with volume at the roots, focusing most of your blow-dry effort on the side that will have more volume
- Curl the entire head in waves using a 1.25-inch iron, working in the direction the hair naturally falls
- Brush through the larger side gently to soften the curls while maintaining wave structure
- Use a round brush to direct waves on the lighter side to sweep smoothly backward
- Secure the style lightly with hairspray, holding enough structure that waves stay put but light enough that they still move
Insider note: The key to convincing cascade waves is positioning—the side with more volume should sweep completely over one shoulder, ideally covering part of that shoulder entirely.
5. Tousled Waves with Braided Crown
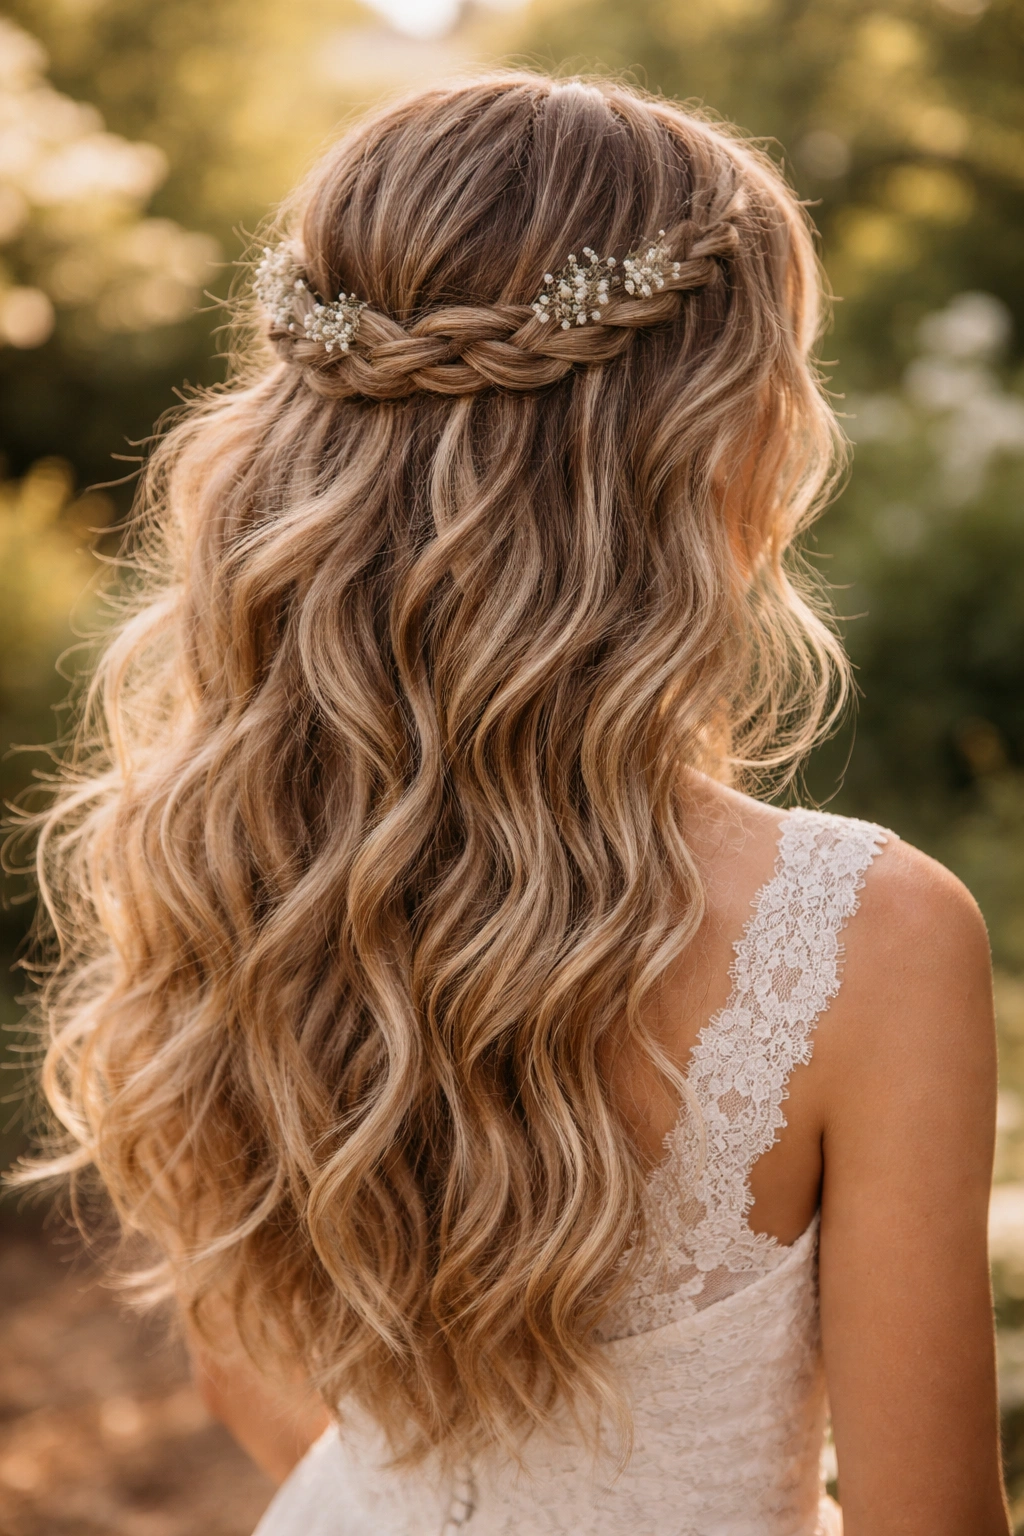
Braided crowns offer a way to add intricate detail and visual interest without looking overly formal or structured. This version pairs a loose, casual braid (or two) woven around the crown with soft, tousled waves flowing beneath. It balances delicate detail at the top with relaxed movement below, creating a style that feels bohemian but still polished enough for a formal event. The braid serves a practical purpose too—it anchors everything and helps the style hold throughout a long day.
What This Style Communicates
Braided details signal intentionality and fashion awareness without screaming “formal updo.” This style works beautifully for outdoor weddings, garden venues, or any setting with a naturally romantic vibe. The braid also provides a visual anchor that keeps the style from feeling too loose or undone, which is particularly useful if you’re worried about waves deflating or falling flat throughout the day. Photographically, the braid adds texture and visual interest that draws the eye, making the overall look more compelling than waves alone.
Step-by-Step Braided Crown Creation
- Create soft waves first using a 1.25-inch curling iron, letting them cool and relax completely
- Take a small section from one temple and braid it loosely (a three-strand braid is classic, but a looser, messier braid reads more romantic)
- Pin the braid to the back of your crown, allowing it to curve naturally around your head
- Optional: create a second braid from the opposite temple, mirroring the first one for a crown effect
- Leave the bottom half of your hair completely down and wavy—the braid acts as a frame and anchor
- Secure everything with bobby pins hidden within the braid and waves, then set with hairspray
Worth knowing: The most stunning braided crowns are the ones that look slightly undone—loosely woven, with small pieces of hair pulled out to frame the face.
6. Vintage-Inspired Finger Waves
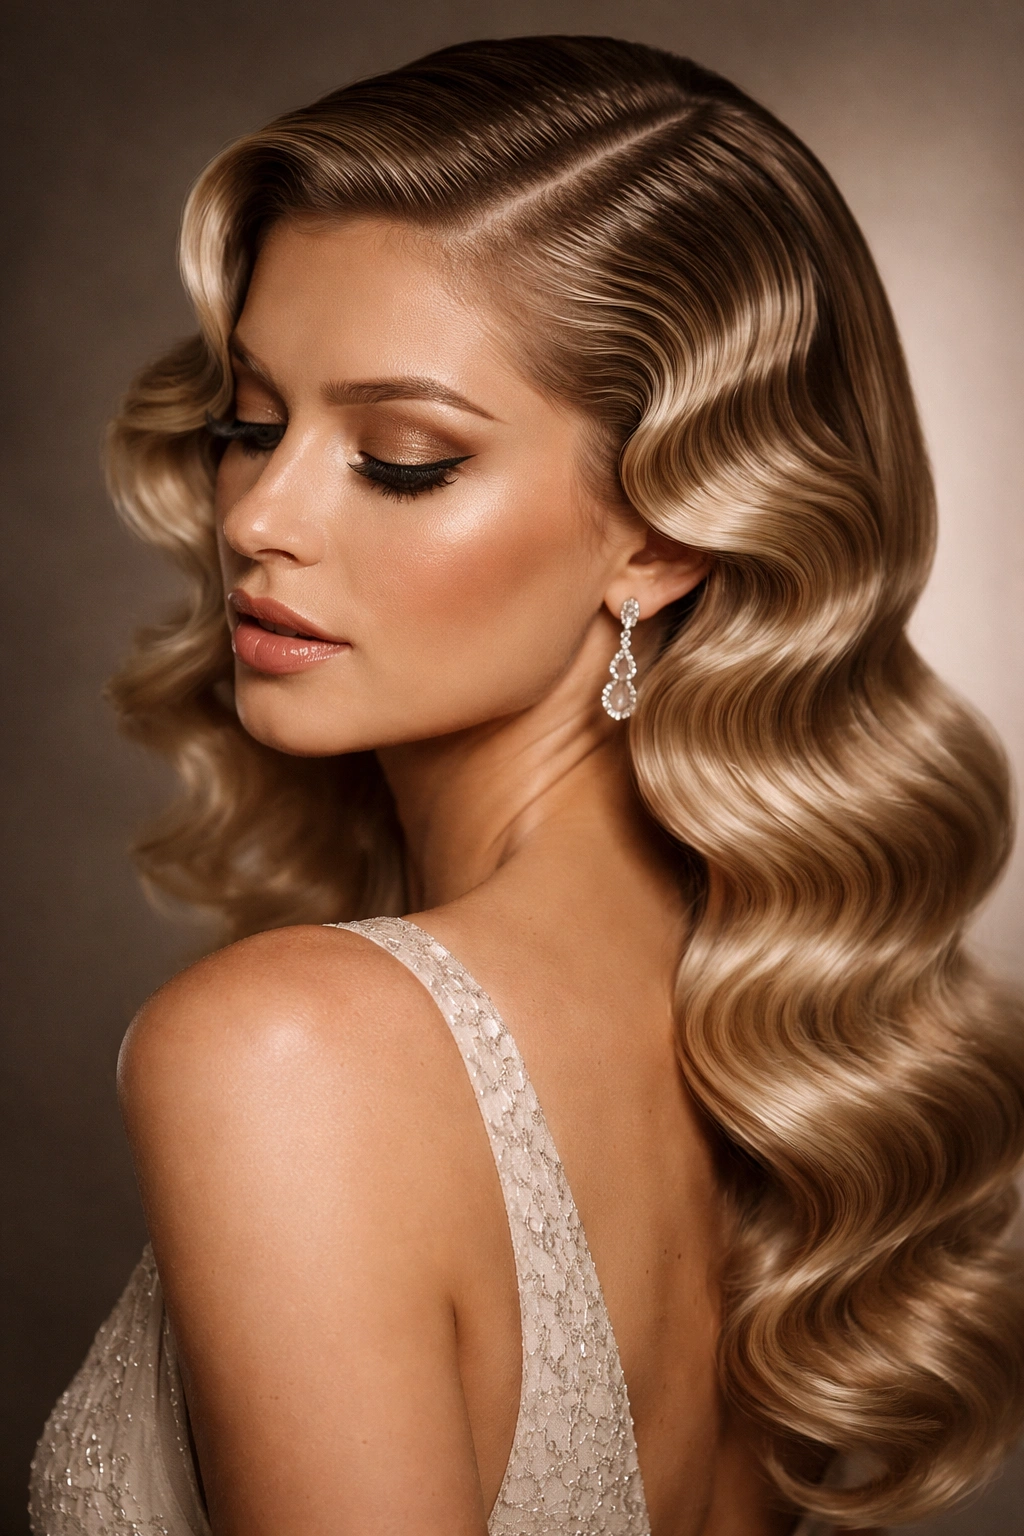
Finger waves bring 1920s-inspired glam to a modern wedding—they’re dramatic, architectural, and unmistakably elegant. These waves are created by manipulating hair with a comb and your fingers (hence the name) into S-shaped waves that are tight, defined, and deliberately structured. Unlike other wavy styles that aim for softness or movement, finger waves are about precision and glamour, the kind of style that says “I’m making a moment.”
Why Finger Waves Feel Timeless
Finger waves never look dated because they’re so definitively nostalgic that they exist outside of typical trend cycles. They read as undeniably glamorous and intentional—zero ambiguity about whether the wearer put effort into their look. The style works beautifully with vintage-inspired wedding dresses, art deco jewelry, or any wedding aesthetic that embraces retro elements. They photograph like absolute dreams because the structure creates consistent shadow and light play, making hair look thick, luxurious, and impossibly elegant.
How to Create Finger Waves
- Start with damp hair and blow-dry it straight or with minimal texture
- Spray a small section (roughly 2 inches wide) with firm-hold hairspray or a wave-setting lotion
- Using a fine-tooth comb, comb the hair into an S-shape, working methodically from roots to ends
- Secure each wave with a clip or bobby pin while the product dries, or use your fingers to hold the shape while blow-drying with a cool shot
- Repeat this process across the entire head, creating parallel waves that flow in the same direction
- Once all waves are set, gently remove pins and smooth with hairspray for a finished, polished look
Pro tip: Finger waves look most impressive when they’re tight and defined, which means you need either a good wave-setting product or willingness to let clips sit in your hair for a while—there’s no shortcut to perfection here.
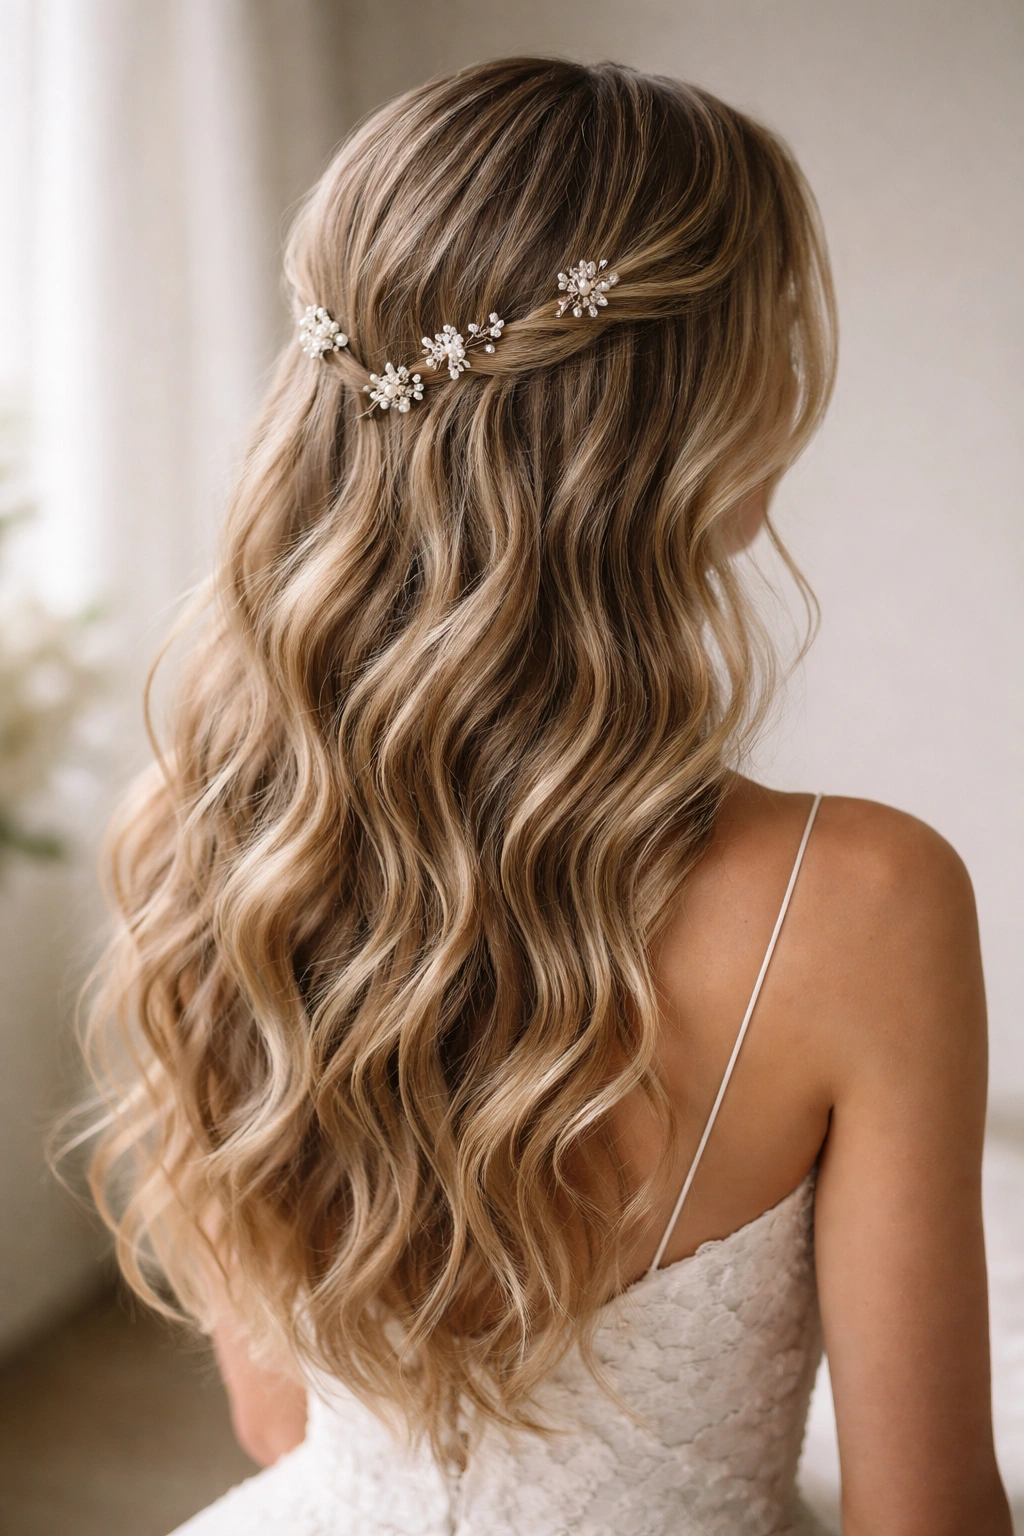
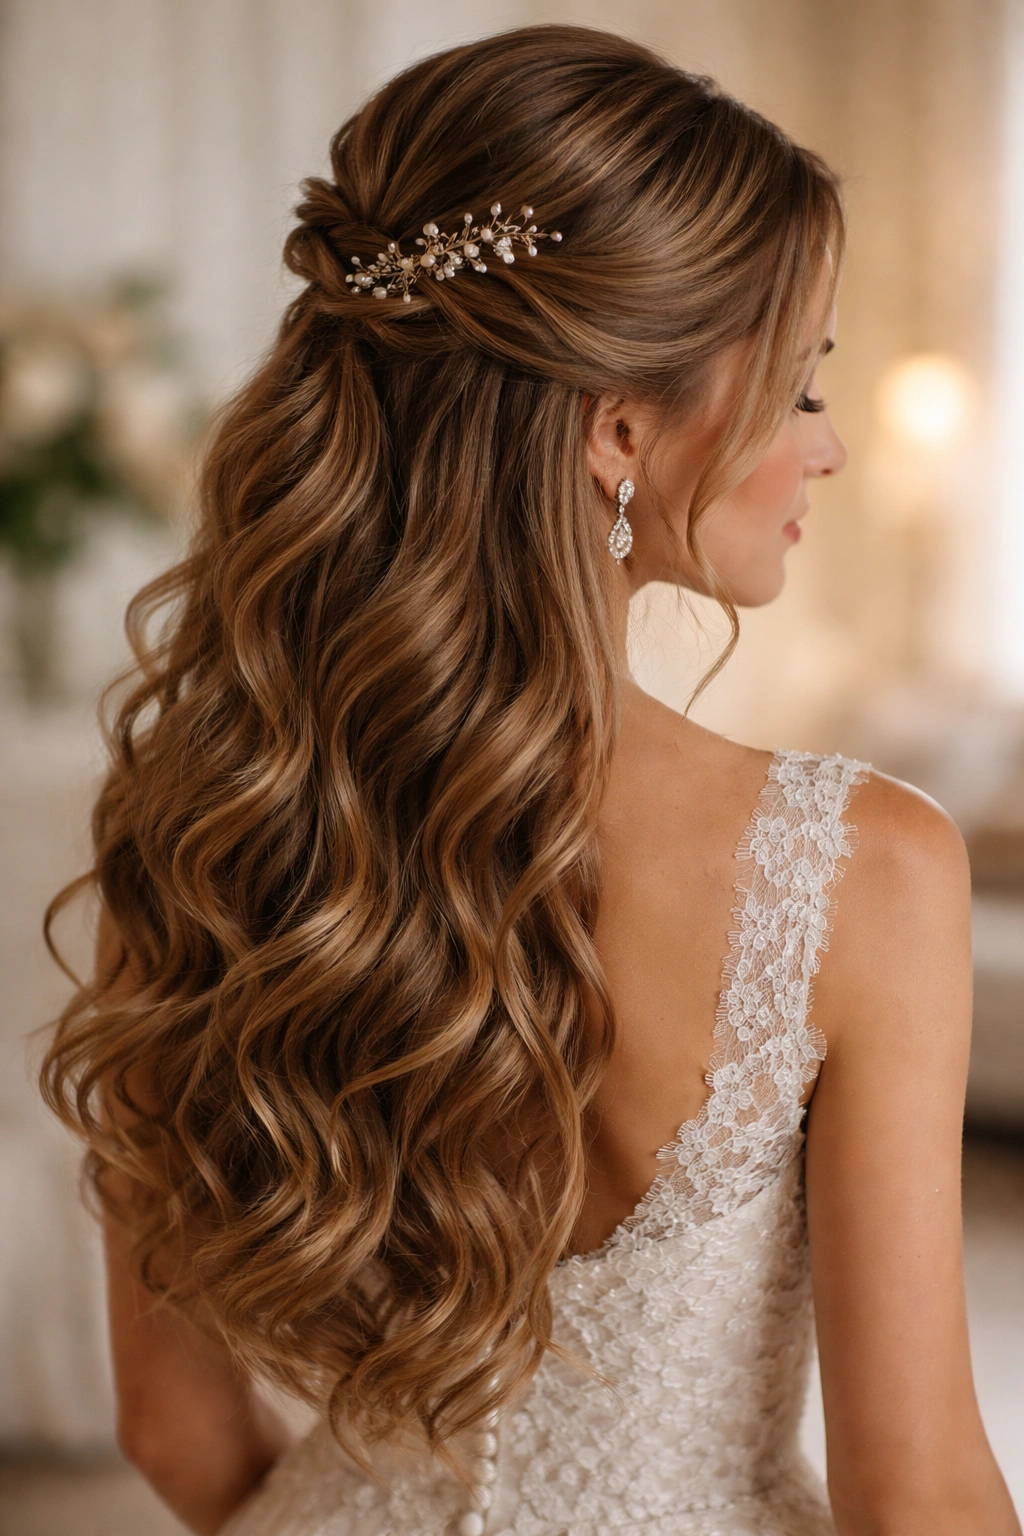
7. Waves with Pearl-Adorned Hairpiece
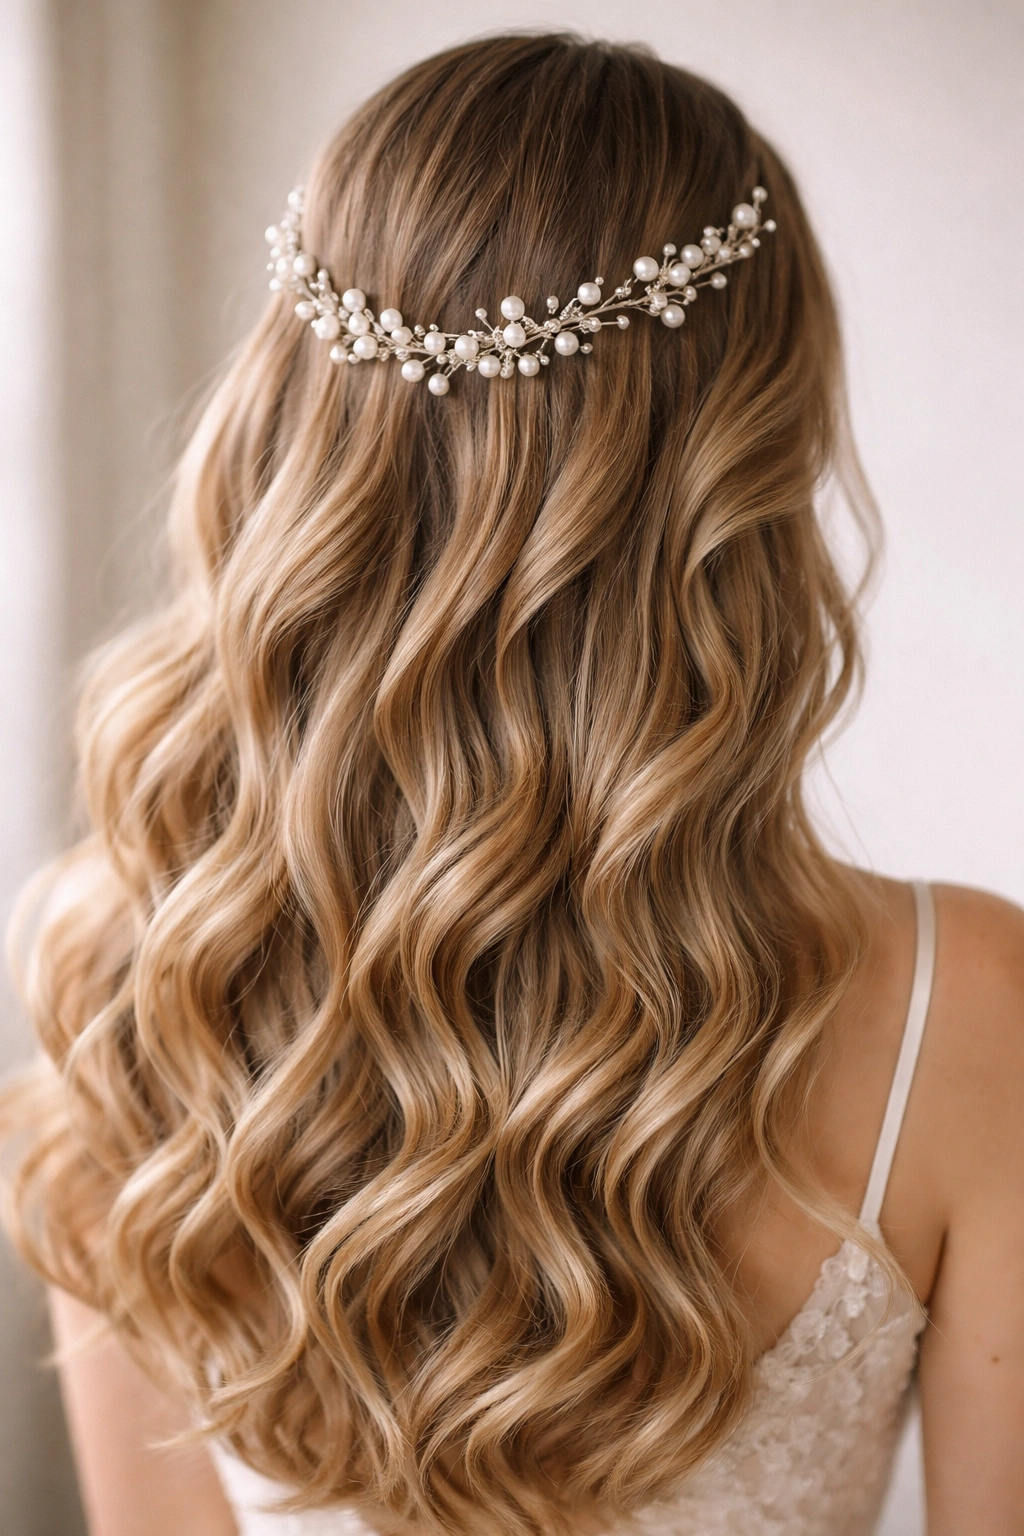
Adding a delicate pearl hairpiece to long waves transforms them from pretty to wedding-day glamorous with minimal extra effort. The pearls (whether a statement comb, a hair vine, or scattered pins) catch light beautifully and add sophistication and intentional styling detail. This approach works because it layers visual interest—the texture of waves plus the shine and detail of pearls creates a look that’s more memorable and polished than waves alone.
The Accessory Advantage
A hairpiece elevates waves without requiring structural changes or the commitment of an updo. It adds formality and intentionality in a way that feels effortless. Pearls specifically read as classic and bridal—they’ve been wedding-hair accessories for generations because they work with nearly every aesthetic. The piece also serves as a focal point that draws attention to your hair and keeps eyes on the overall look rather than focusing on any specific feature. Photographically, the light reflection off pearls adds another dimension to images.
Choosing and Styling Your Pearl Piece
- Select a pearl hairpiece that matches your hair color if it has a comb or base (silver or gold tone depending on your skin tone)
- Decide where it will sit: a classic placement is off to one side, low in the crown area, or as a scattered detail across the back
- Create your waves first using whatever method gives you the texture you love—full waves, soft waves, or defined waves all work
- Gently insert the hairpiece once waves are set, securing it with bobby pins if it doesn’t have its own clip mechanism
- Ensure the piece is secure enough that it won’t shift during dancing or movement, but positioned naturally so it doesn’t look glued on
Worth knowing: The most elegant pearl hairpieces are understated, not heavily encrusted—think delicate clusters or a single small comb rather than a dramatic statement piece that competes with your face and dress.
8. Textured Waves with Volume on Top
This style builds intentional height and texture at the crown while allowing waves to flow freely below, creating a look that’s flattering on most face shapes and inherently polished. The volume is created through blow-drying technique and strategic curling rather than teasing, which keeps the style looking modern and intentional rather than dated. This approach works because it draws the eye upward, creates visual interest at the crown, and balances the weight of long hair flowing down.
Building the Volume
Volume at the crown requires both technique during blow-drying and strategic curling. Start by blow-drying your hair in the opposite direction of how it naturally falls—this trains the roots to stand up rather than lie flat. Use a round brush at the crown to direct hair upward and backward as you blow-dry, building lift. Then, add texture by curling the crown section in slightly tighter waves than the rest of your hair, creating more defined curls that hold volume. Once you’ve curled everything, use your fingers to gently separate and texturize the crown waves, allowing them to appear fuller and more dimensional than the softer waves below.
Creating Height That Lasts
- Blow-dry roots at the crown completely dry before moving to the rest of your hair
- Use a volumizing spray or texturizing spray on dry roots before curling for extra grip
- Curl the crown section in 1.5-inch sections using a medium or smaller barrel iron to create tighter waves
- Leave the bottom half of your hair in looser 1.25-inch waves for contrast and softness
- Once everything is curled and cooled, gently backcomb the crown section at the roots for additional height
- Smooth the backcombed section gently with a comb so it looks textured rather than teased
- Set everything with a flexible hold hairspray that allows movement
Pro tip: The secret to volume that lasts all day is using dry shampoo or a texturizing spray on completely dry hair at the roots before you even start styling—this gives your curling iron something grippy to work with.
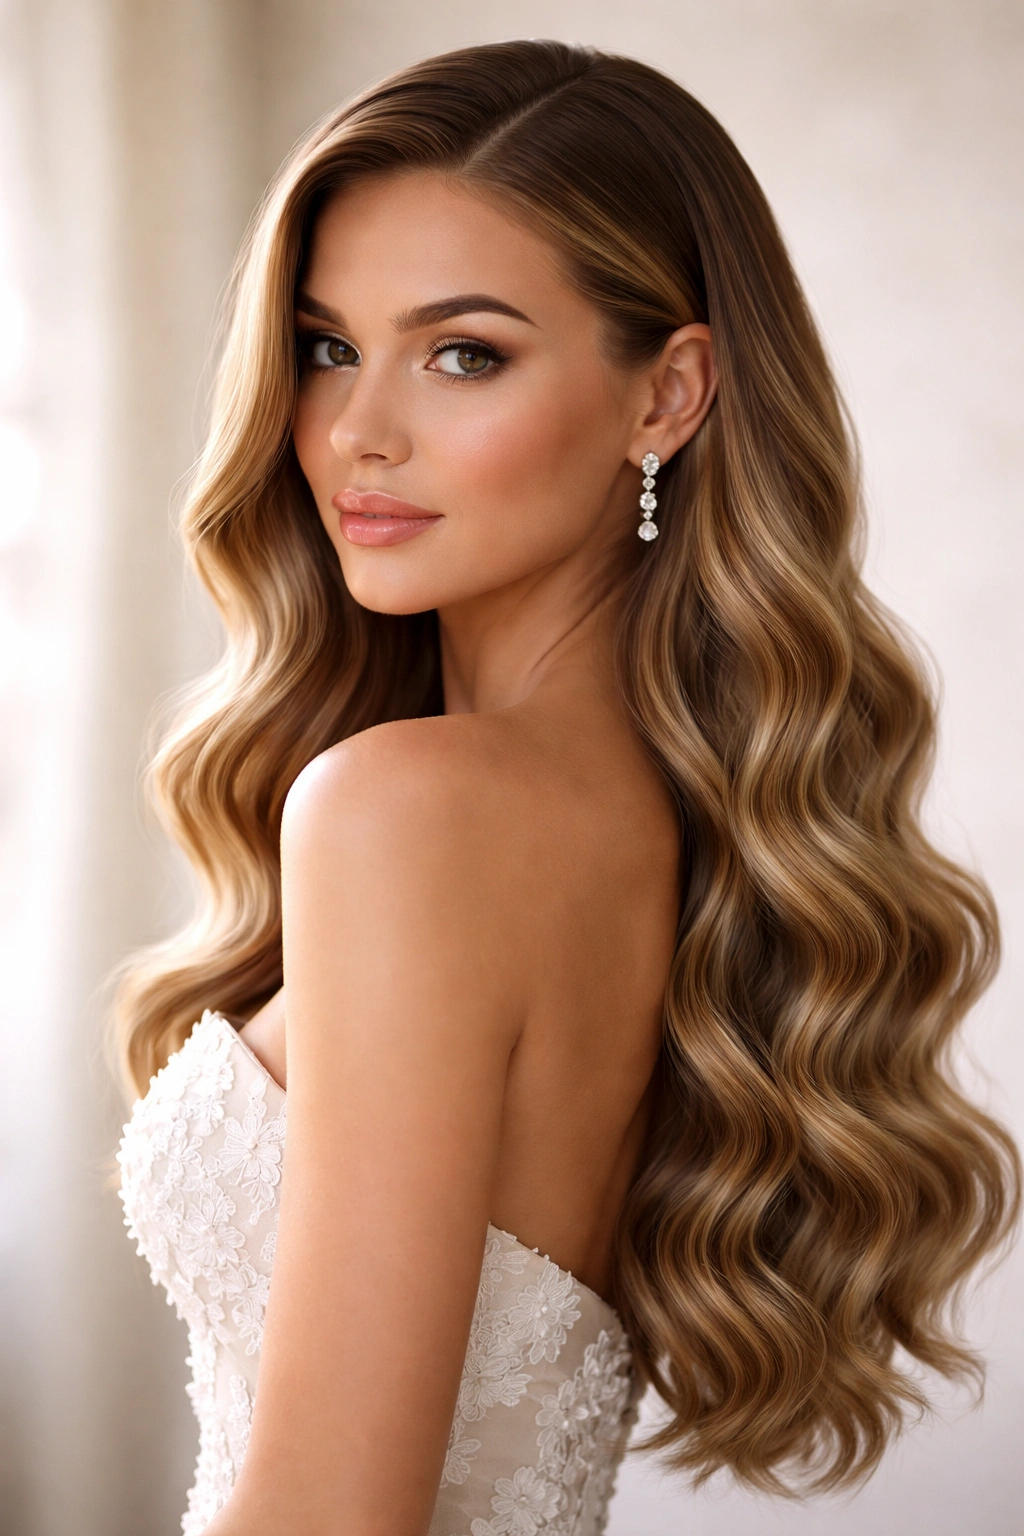
9. Romantic Center-Parted Waves with Flowers
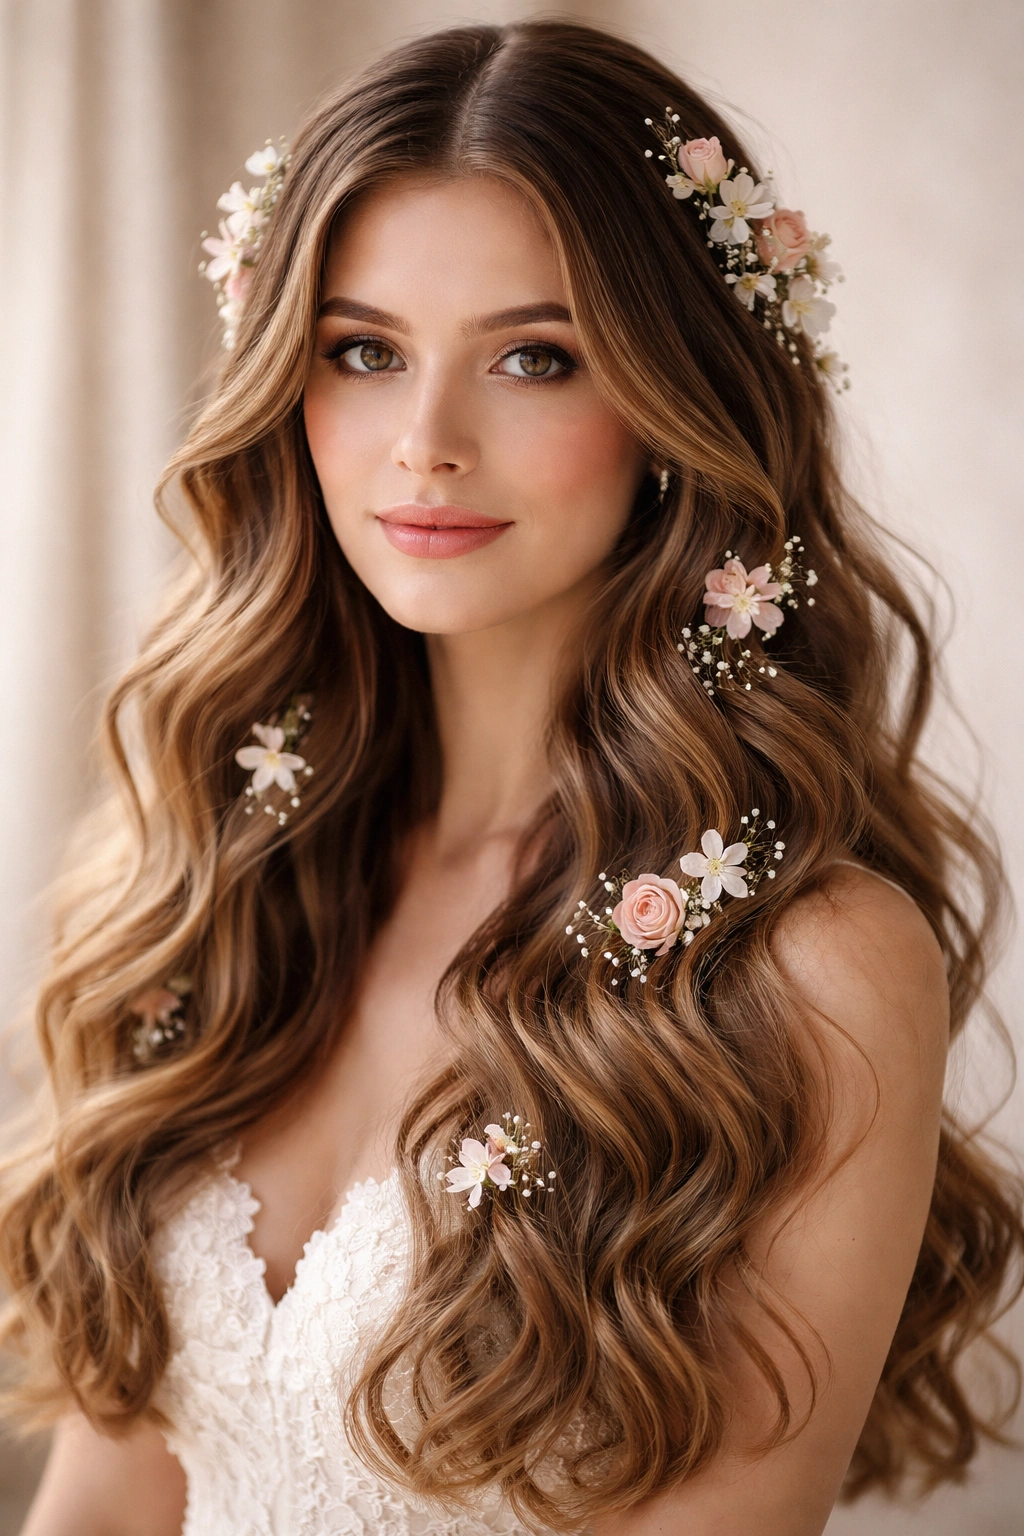
Center-parted waves are inherently romantic and face-framing, especially when decorated with subtle floral accents woven through or tucked into the waves. This style works because the center part creates visual balance and symmetry, while flowers add whimsy, color, and a wedding-specific detail that feels special without being overdone. The combination of structure (the part) and softness (the waves and flowers) creates harmony that photographs beautifully from every angle.
Why Flowers Transform Waves
Flowers add a personal, romantic dimension that generic waves sometimes lack. Fresh flowers catch light differently than hair alone, creating more visual interest in photos. They also anchor the style, preventing waves from looking too loose or undone. Flowers signal that this hair is intentionally styled for a special occasion rather than just casual waves. Whether you use delicate baby’s breath, small garden roses, or larger statement blooms depends entirely on your wedding aesthetic, but the general principle remains: flowers make waves feel ceremonial and special.
Incorporating Flowers Into Waves
- Create a deep center part using a rattail comb or the pointed end of a styling brush
- Blow-dry your hair straight initially, then create soft, flowing waves using a 1.25-inch curling iron
- Decide where flowers will sit: scattered throughout, clustered on one side, or woven through the waves
- If using a flower crown or hair vine, secure it with bobby pins hidden in the waves
- If using individual flowers, tuck stems carefully into the waves or secure with small bobby pins
- For the most romantic look, keep flowers understated—a few delicate blooms reading as natural rather than heavily decorated
Insider note: Fresh flowers will hold up better if they’re hydrated—ask your florist to keep them in water until the last possible moment, or use a small water pick secured in your hair to keep the stems hydrated.
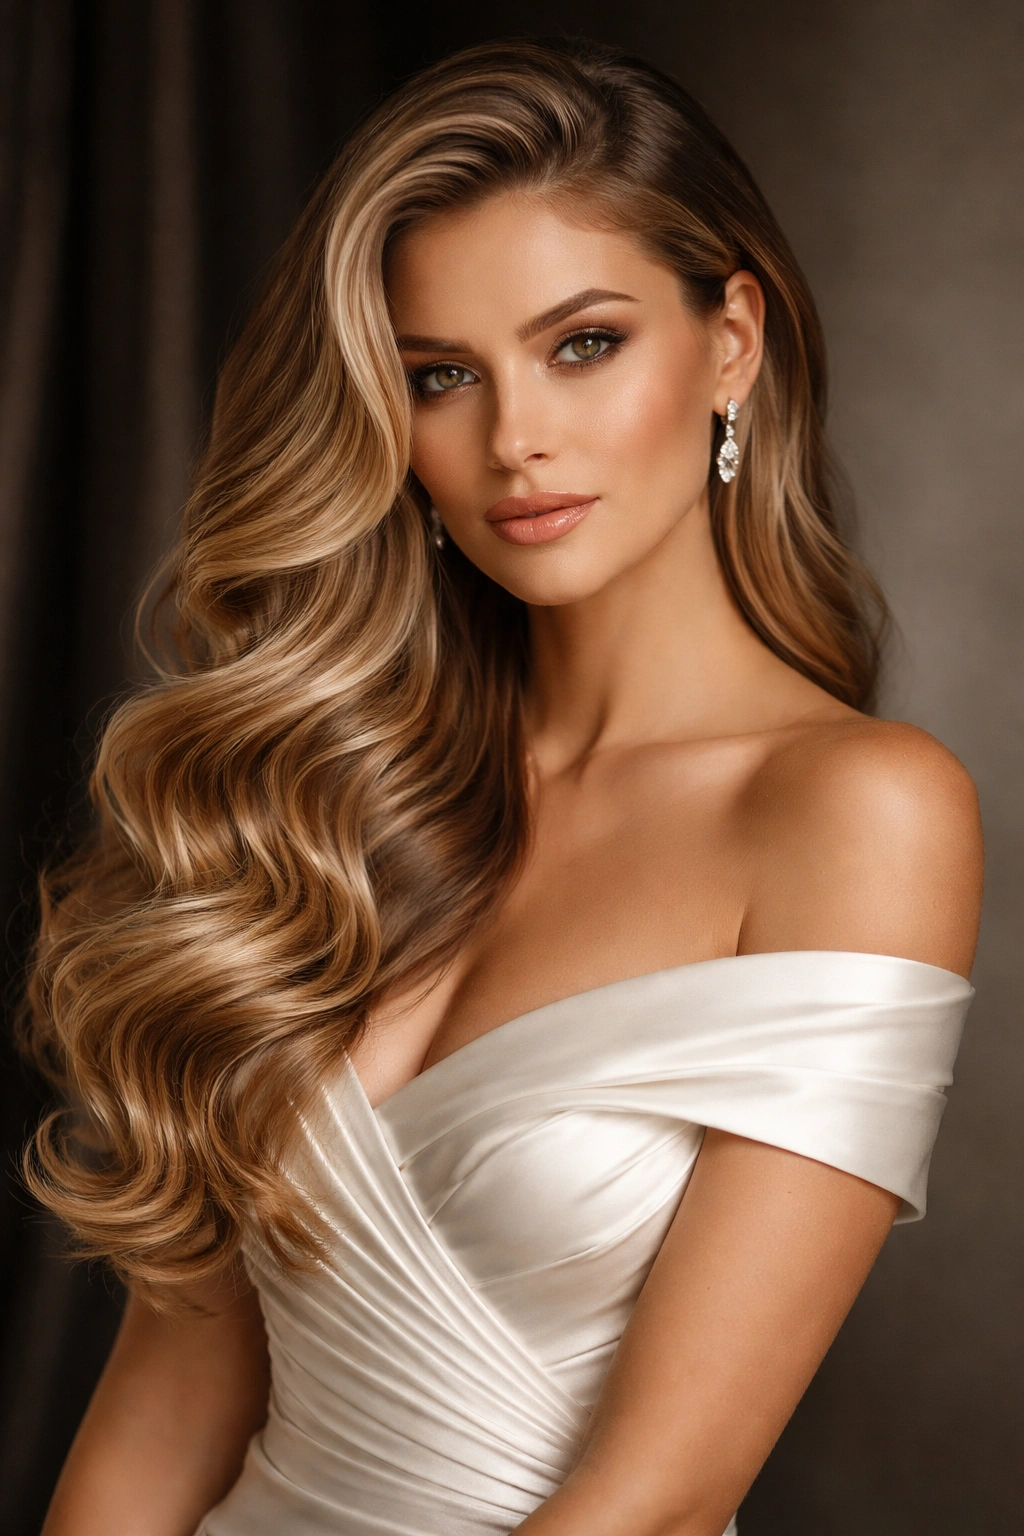
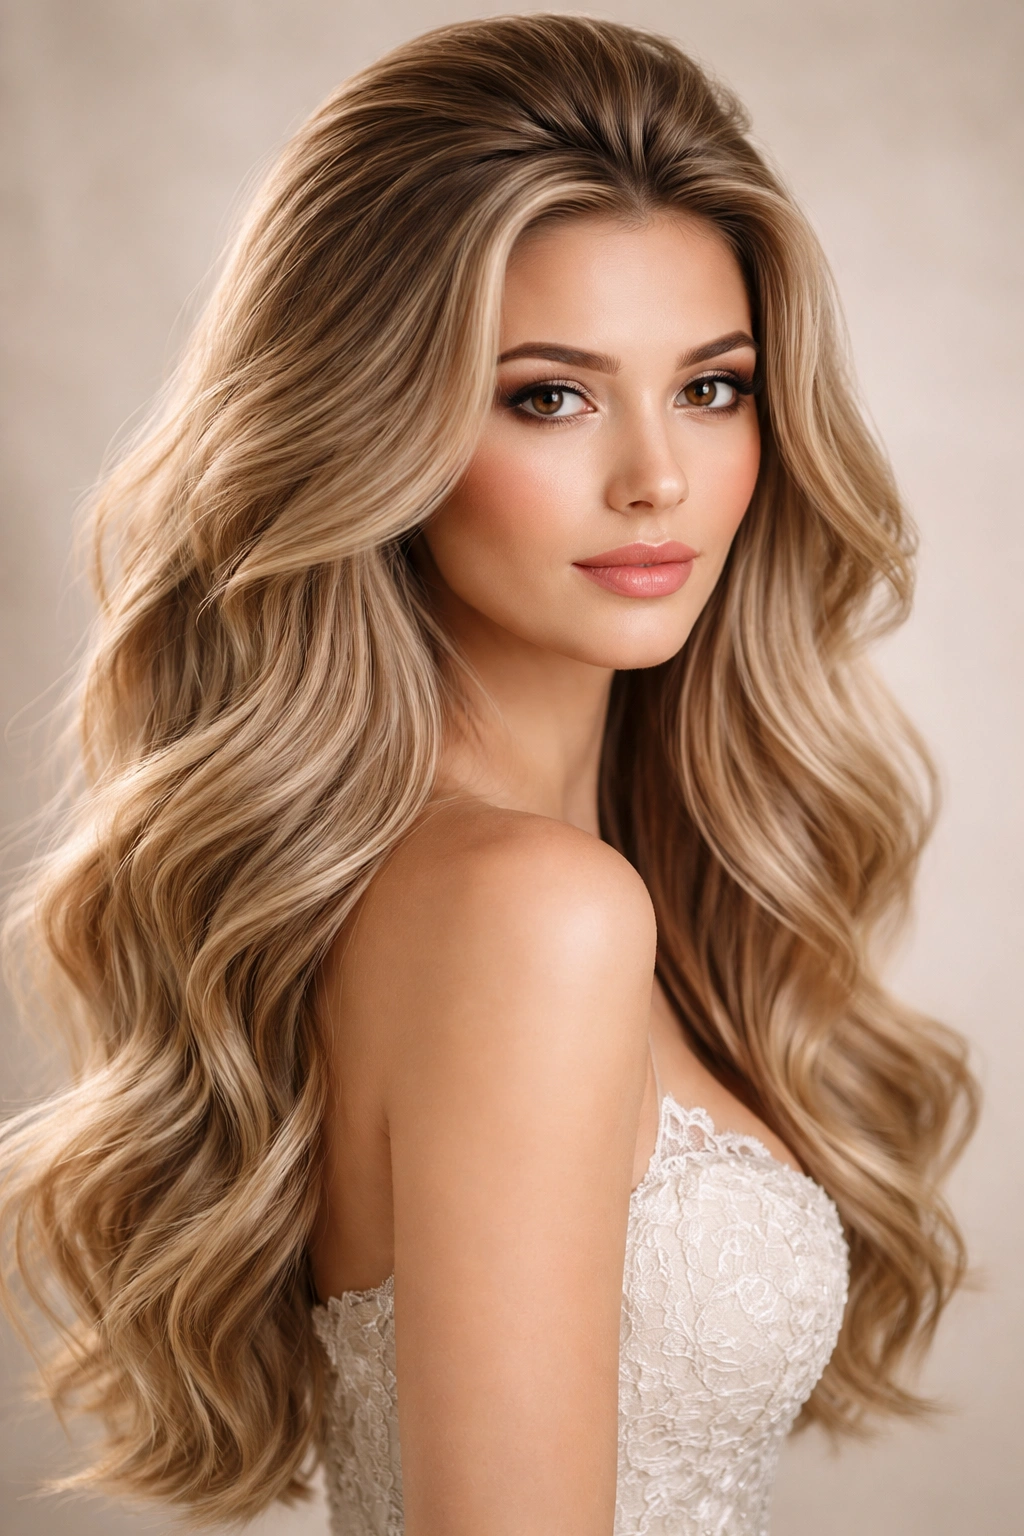
10. Glamorous Waves with Deep Side Part
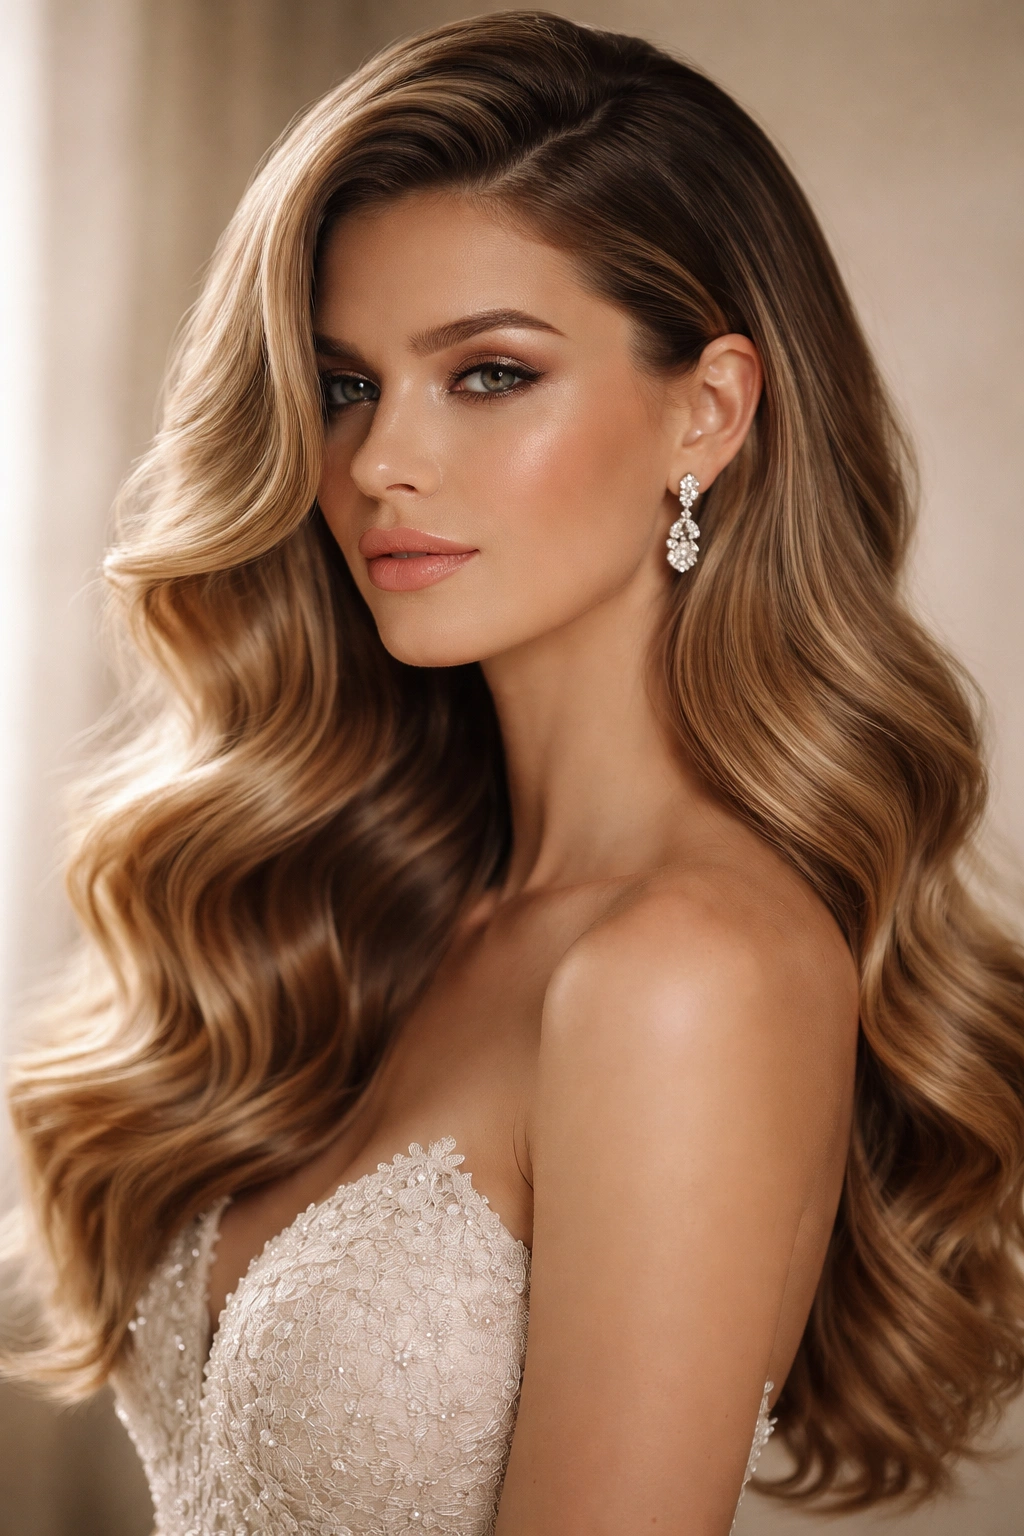
A dramatic deep side part paired with voluminous, glamorous waves creates instant red-carpet energy—the kind of style that makes you feel incredible wearing it and looks stunning in every photo. The asymmetry created by a deep part adds sophistication and intentionality, while glamorous waves (larger than beachy, more defined than soft) bring drama and presence. This combination works because it’s bold without being costume-like, polished without being rigid.
The Power of Asymmetry
Deep side parts inherently feel more formal and fashion-forward than center parts or subtle off-center parts. The asymmetry draws attention to one side of your face and creates a sense of intentional styling that reads as high-fashion. Pairing this with voluminous waves makes the style even more statement-making—the waves on the fuller side are emphasized by the part, creating visual weight and drama. This style broadcasts confidence and sophistication in a way that subtler styles sometimes don’t.
Achieving Glamorous Waves with Impact
- Create a very deep side part using a rattail comb, positioning it almost at your temple
- Blow-dry your hair with volume at the roots, focusing extra effort on the side that will appear fuller
- Curl the entire head in waves using a 1.25-inch curling iron, curling away from the face on both sides
- On the fuller side, curl in slightly tighter, more defined waves; on the lighter side, create softer, looser waves
- Brush through the fuller side gently to create soft waves rather than defined curls, but maintain more structure than the lighter side
- Smooth the lighter side with a round brush to create a more refined, less textured appearance
- Use strong-hold hairspray to lock everything in place without making hair feel stiff
Pro tip: The glamour in this style comes from the contrast between sides—the fuller side should have obvious texture and volume, while the lighter side should be noticeably smoother and less textured.
Final Thoughts
Long wavy hairstyles offer an incredible range of options, each suited to different wedding aesthetics, venues, and personal styles. Whether you’re drawn to soft, touchable waves or dramatic, structured styles, the key is choosing a look that makes you feel confident and beautiful—because that confidence will translate into every photo and every moment of your day. The best wedding hairstyle is ultimately the one that feels true to who you are while making you feel genuinely special.
Texture, movement, and intentionality are what separate wedding-day waves from everyday waves. A professional stylist can absolutely help bring these styles to life, but understanding the different approaches—the techniques, the products, the placement details—gives you the language to communicate exactly what you want. Bring photos of styles you love, discuss your hair type and what it naturally does, and talk through how much time and product you’re willing to commit to maintenance throughout your event. The perfect wavy wedding hairstyle isn’t about following a template; it’s about finding the approach that celebrates your hair while making you feel like the best version of yourself.