



There’s a reason messy buns have become the go-to hairstyle for busy mornings, gym sessions, and lazy weekends—they’re effortless, polished enough for most occasions, and they work with almost any hair texture. But here’s the catch that frustrates most people: bobby pins constantly slip out, leave dents, and require a seemingly endless search through your hair to remove them all at the end of the day. If you’ve ever felt that tiny sharp point jabbing into your scalp while you’re trying to focus, you know exactly what I mean.
The good news? You don’t actually need bobby pins to create a stunning messy bun. In fact, some of the most secure, longest-lasting messy bun styles rely entirely on tension, twisting, wrapping, and everyday tools you probably already have lying around your bathroom or kitchen. These methods hold just as well—sometimes better—without the frustration of lost pins or the pressure-point headaches that come with them.
Whether you have thick, heavy hair or fine, delicate strands, there’s a pin-free messy bun technique waiting for you. The methods below aren’t just alternatives; they’re genuinely better in many ways. You’ll get a hold that lasts through a full workout, you can take your bun down without a five-minute pin hunt, and your hair stays healthier without the creasing and tension that bobby pins create. Let’s explore the most effective and surprisingly simple styles that prove bobby pins were never the real MVP of messy bun styling.
1. The Twisted Knot Bun
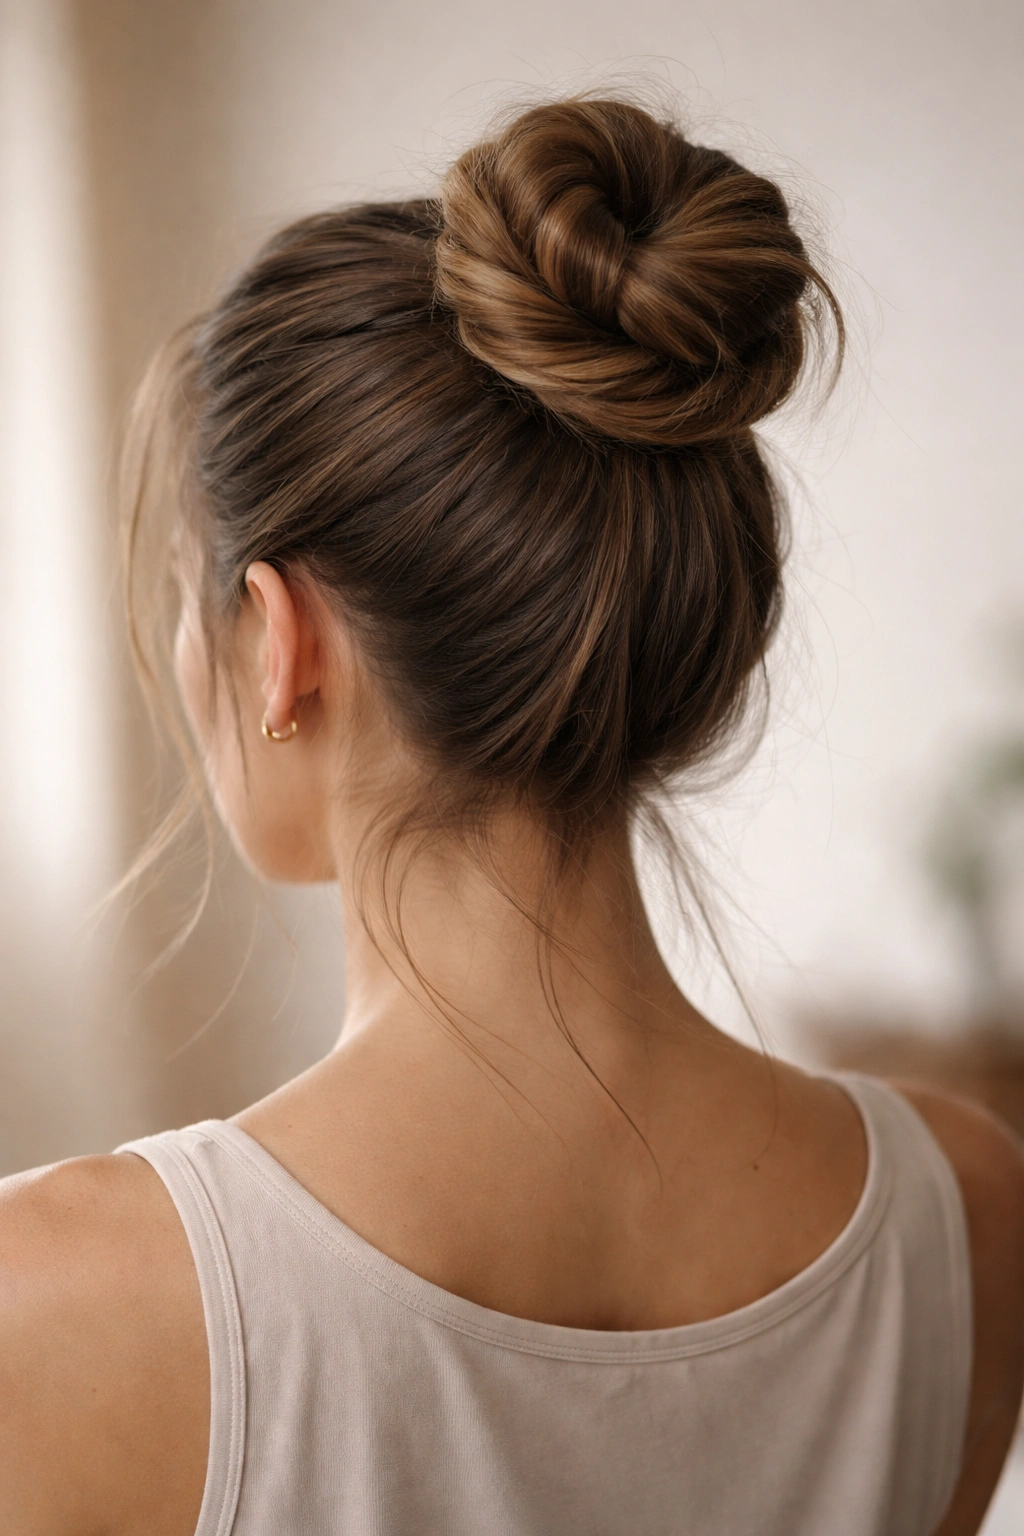
This style works like magic because it relies on the natural grip that comes from twisting your own hair into a sturdy base. Instead of securing strands individually with pins, you’re creating one continuous twisted rope that wraps around itself and locks in place through sheer tension. The result is a bun that looks intentionally artsy and undone while staying put from morning through evening.
How to Twist Your Way to Security
Start with hair that’s been in a high or mid-level ponytail, secured with a single elastic band. The key is to divide your ponytail into two equal sections. Twist one section tightly toward your face, then twist the second section the same direction. Now comes the clever part: wrap these two twisted strands around each other in a spiral motion, creating one thicker, more stable rope. Coil this final twisted rope into a bun shape and tuck the ends underneath and into the coil itself. The tension from the twisted strands keeps everything locked down without needing a single pin.
Why This Method Holds So Well
The twisted knot bun creates multiple layers of grip. Each twist tightens the hair, creating friction between the strands. When you wrap those twisted sections around each other, you’re multiplying that friction. The coiling action that follows adds even more hold points. Your hair is basically holding itself together through the engineering of the twist itself, not through external fasteners poking through. This method works especially well for medium to thick hair because the volume of strands provides more surface area for friction to take hold.
Pro Tip:
Twist tighter if you have finer hair—the increased tension compensates for lower strand volume and keeps everything secure throughout the day.
2. The Braided Wrap Bun
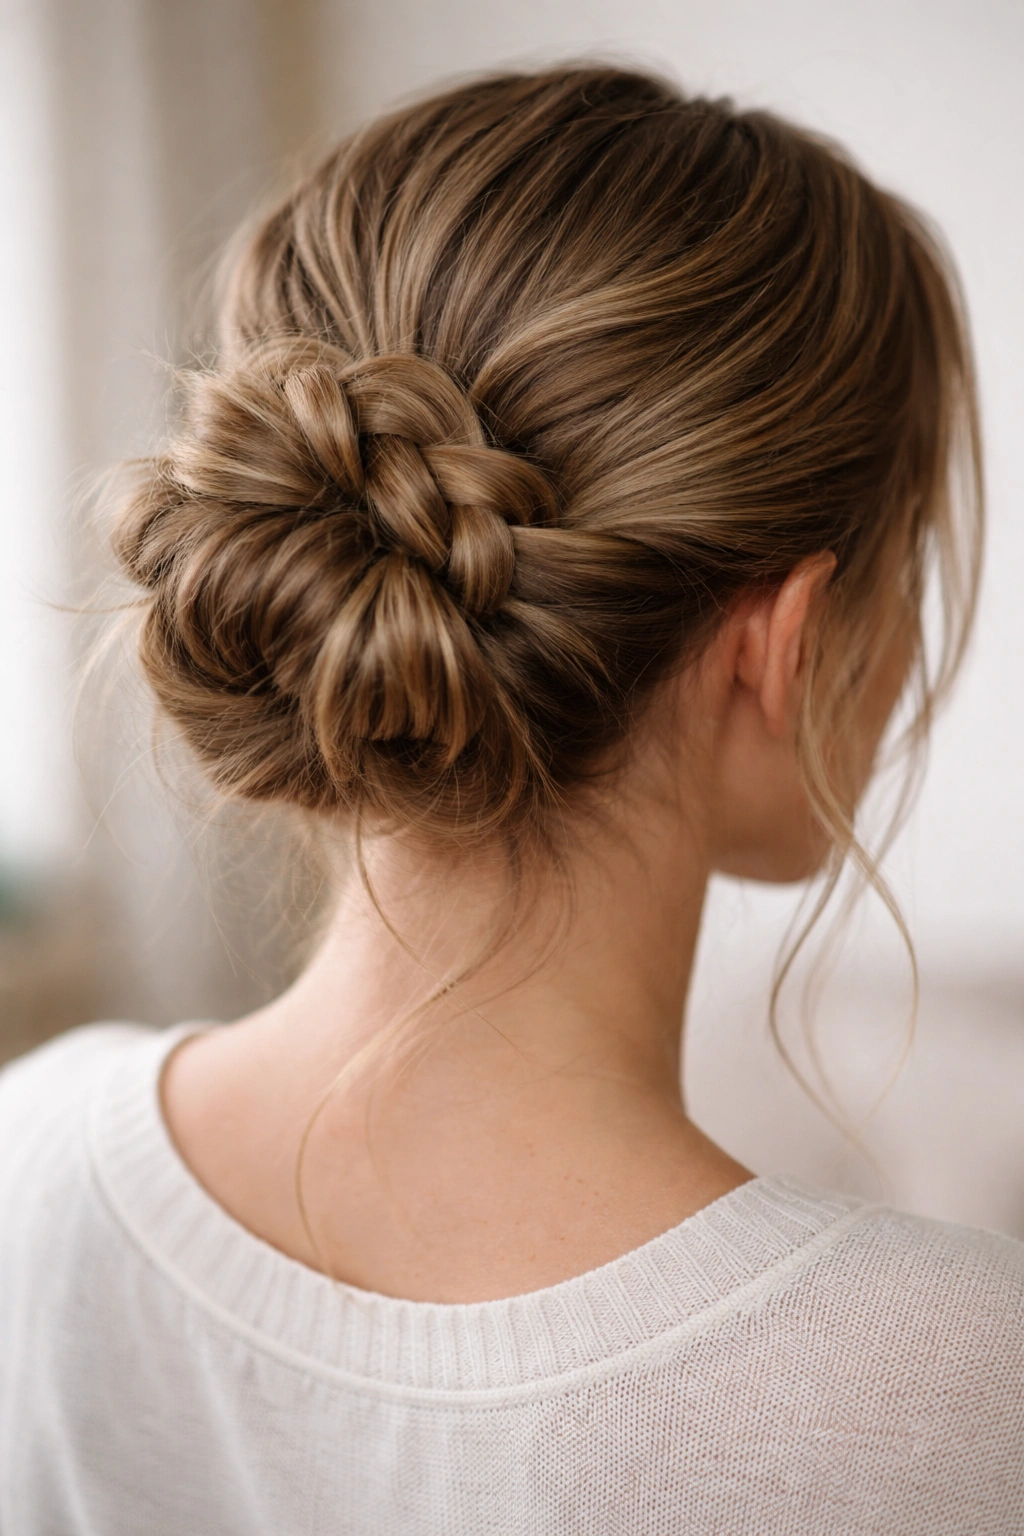
Braids are nature’s built-in grip system. They compress hair strands together and create a form that’s inherently stable. By turning your ponytail into a braid before wrapping it into a bun, you’re essentially creating a solid rope that can be shaped into virtually any bun form while maintaining its structure without a single pin.
Building a Braid That Holds Everything
Secure your hair into a ponytail first, then create a simple three-strand braid from the base of the ponytail all the way to the ends. Don’t worry about making it perfect—the whole point is to keep it loose and piece-y for that messy aesthetic. Once your braid is done, coil it loosely around the base of your ponytail to form a bun shape. Now here’s the critical part: tuck the braided tail underneath itself and weave it back through the bun structure, creating a web of braided hair that physically can’t slip out because it’s interlocked with itself.
Why Braids Create Unbreakable Hold
The braid compresses your strands so tightly that each section of hair is locked between two neighbors. When you coil and tuck a braid, you’re creating multiple anchor points where the braid catches on itself. A braid is also thicker than loose hair, so when you wrap it around your crown, there’s more surface area creating contact and friction. The result is a bun that can handle sweat, movement, and humidity without loosening or slipping.
What to Watch For:
Avoid making the braid too tight if you have a sensitive scalp—the goal is security, not a tension headache. A slightly loose braid is more forgiving and still holds beautifully.
3. The Sock Bun Masterpiece
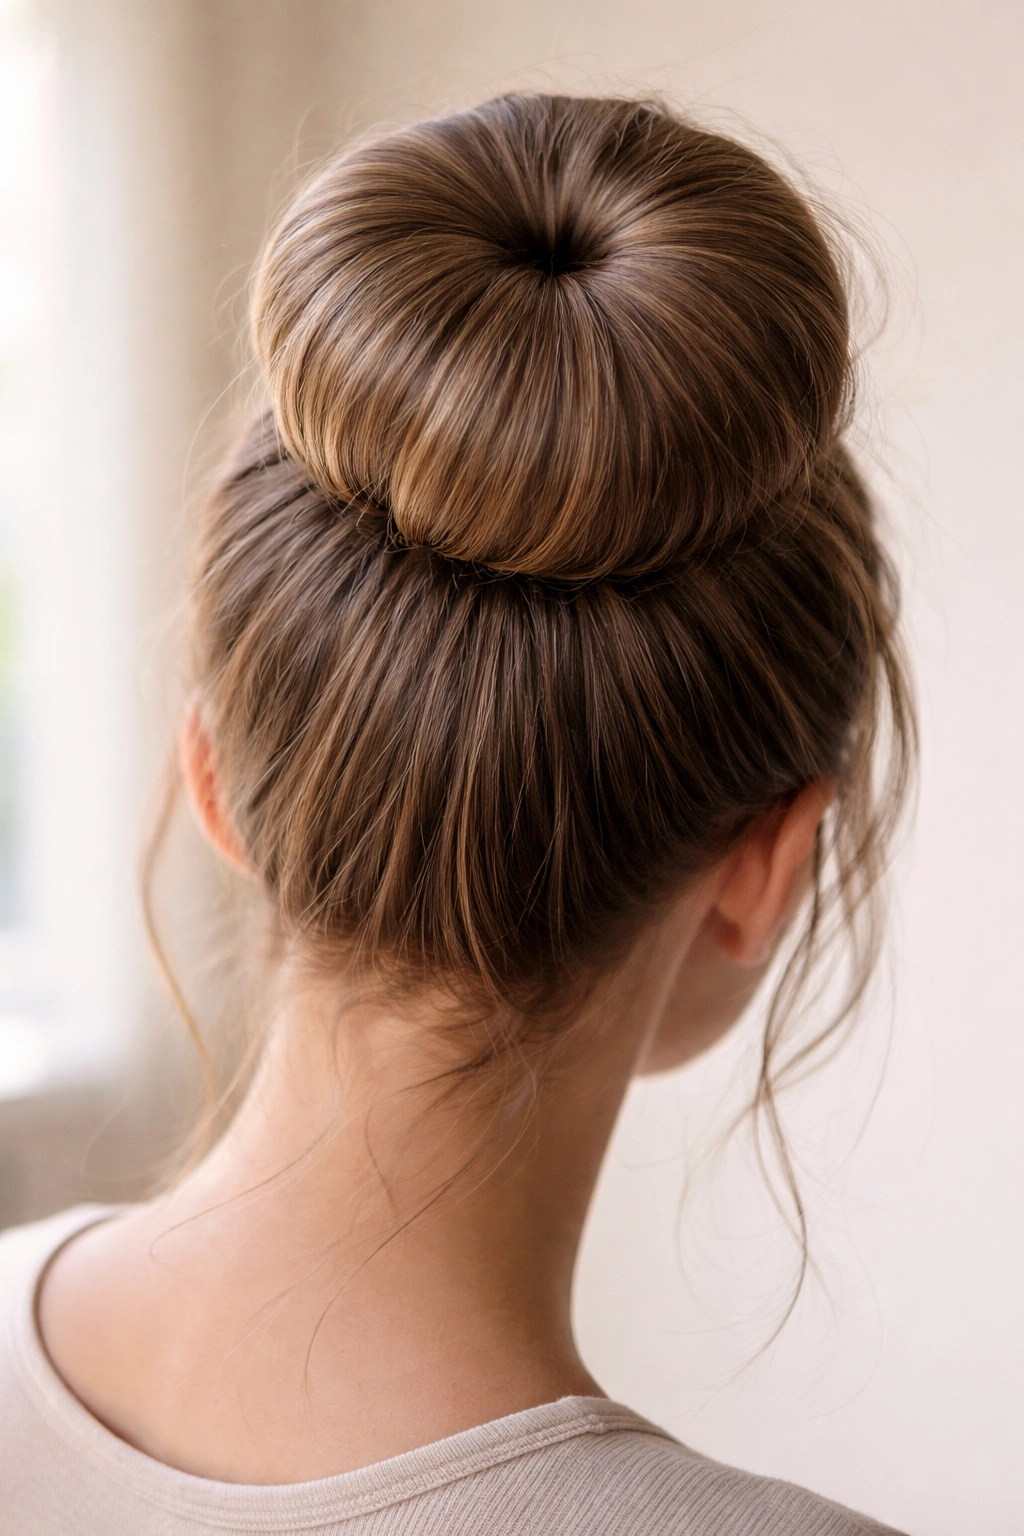
The sock bun technique has been around for years, but many people assume it requires bobby pins to hold the fabric in place. It doesn’t. What makes this method so effective is that the donut-shaped sock distributes the weight of your bun evenly and provides a three-dimensional form around which you can shape your hair. The hair naturally wraps around the sock structure and holds itself in place through contact and compression.
Creating the Perfect Sock Bun Foundation
Cut the elastic off an old knee-high sock (a light color works best for styling) and roll it into a tight donut shape. Secure your ponytail with a regular elastic band, then thread the ponytail through the sock donut. The sock sits at the base of your ponytail like a cushioning ring. Now comes the important part: distribute your hair evenly around the sock donut so it covers the entire surface. Take small sections of your ponytail and fold them back over and under the sock, gradually covering all of it. Once the sock is hidden, secure the whole thing with one final elastic band wrapped tightly around the base of the bun. No pins needed—the elastic and the compression of hair around the sock structure hold everything in place.
Why This Creates Such Voluminous Hold
The sock donut acts as an internal scaffolding for your bun. Instead of relying on pins to anchor individual strands, you’re using the sock’s shape to support the overall structure. The hair wrapped around the sock has nowhere to go—it’s literally wrapped around a three-dimensional object. The final elastic band at the base cinches everything, creating compression that keeps all the layers locked. This method creates exceptionally full, voluminous messy buns because you’re not compressing all your hair into a tight knot; you’re spreading it across the sock structure.
Pro Tip:
Tease your hair before wrapping it around the sock—this adds texture and grip, making the hair less likely to slip.
4. The Clip-Secured Messy Bun
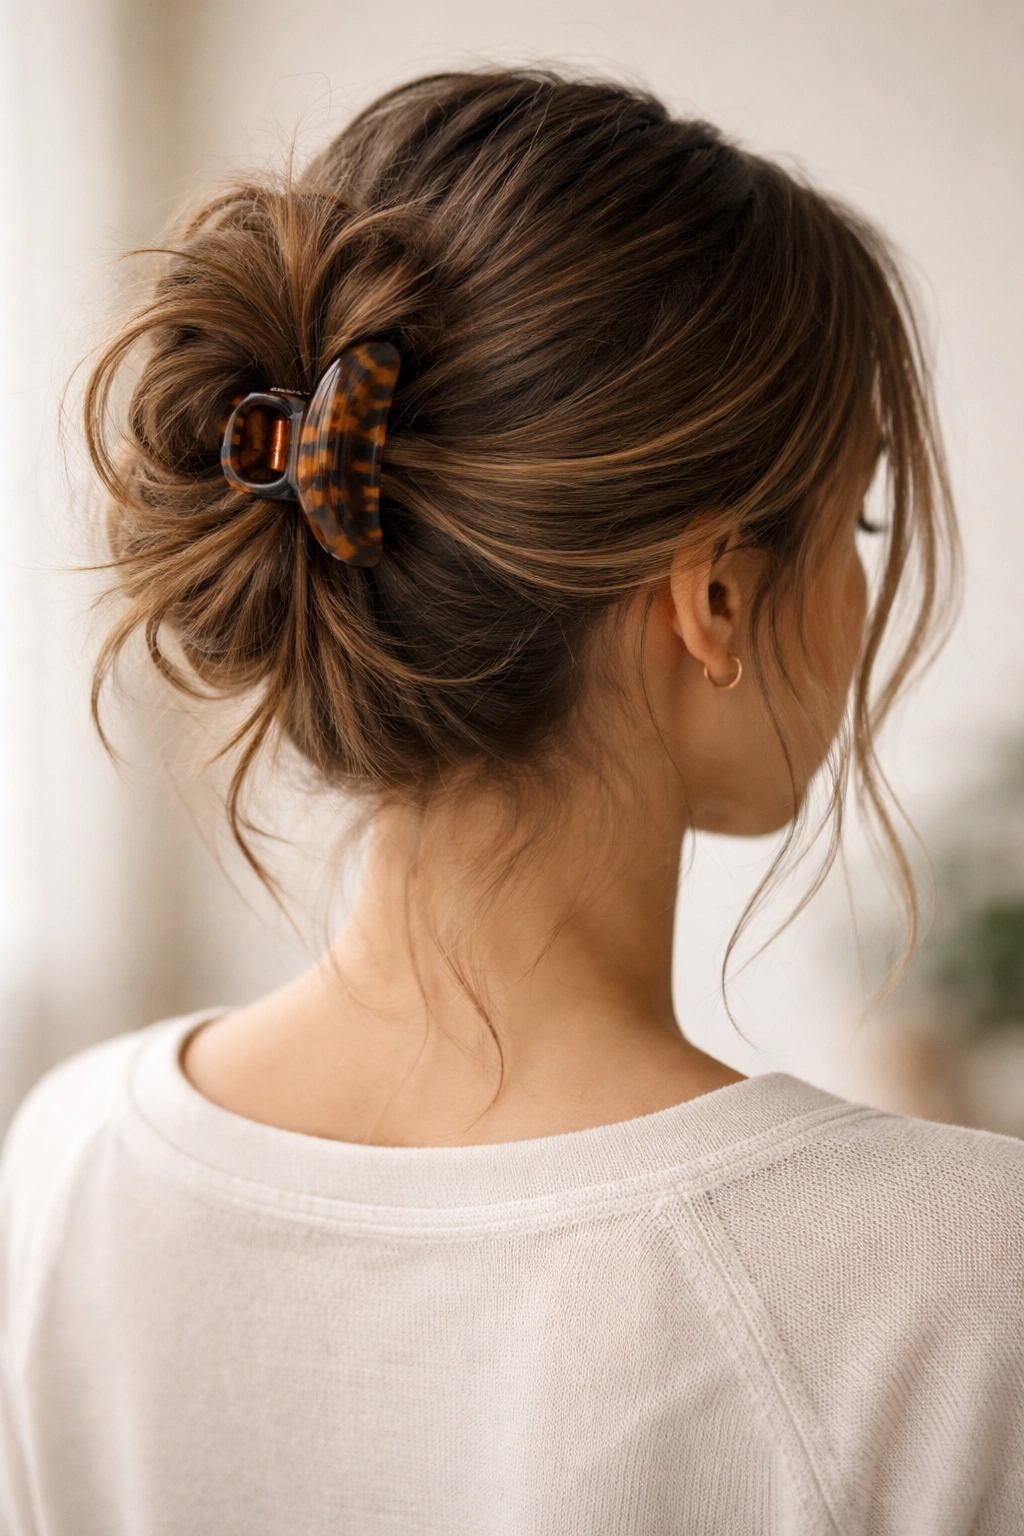
A quality clip designed to hold buns can be far more secure than a handful of bobby pins, and it eliminates the whole searching-for-lost-pins problem entirely. A jaw clip, claw clip, or bun clip grips your hair using pressure and surface area rather than piercing through strands. For a truly pin-free approach, this is one of the easiest solutions that delivers restaurant-ready hold.
Choosing and Using the Right Clip
Start with a sturdy clip that’s large enough to hold the volume of your hair—generally, clips labeled for thick or very thick hair work best regardless of your actual hair thickness, because they have longer jaws and more gripping surface. Gather your hair into a high ponytail and smooth the crown if you prefer a sleeker look, or leave it a bit tousled for that intentional messy vibe. Twist your ponytail gently into a loose spiral, then coil it into a bun shape and clamp the clip onto the base of the bun. The clip’s pressure keeps the coiled structure locked in place. Tease or pull a few face-framing pieces loose for the effortless messy effect.
Why Clips Outperform Pins for Many People
A clip grips across a much larger surface area than any bobby pin. Instead of relying on the barbed texture of a single pin to catch individual strands, a clip uses the pressure of its jaws to hold your entire bun base. This means more stability with less risk of the clip slipping over time. Clips are also significantly easier to remove—you’re not fishing around your scalp searching for a tiny pin that somehow migrated four inches from where you put it. Just unclip and you’re done.
Worth Knowing:
Metal clips are more durable and grip better than plastic ones, especially if you plan to wear your bun for 8+ hours.
5. The Velcro Roller Bun
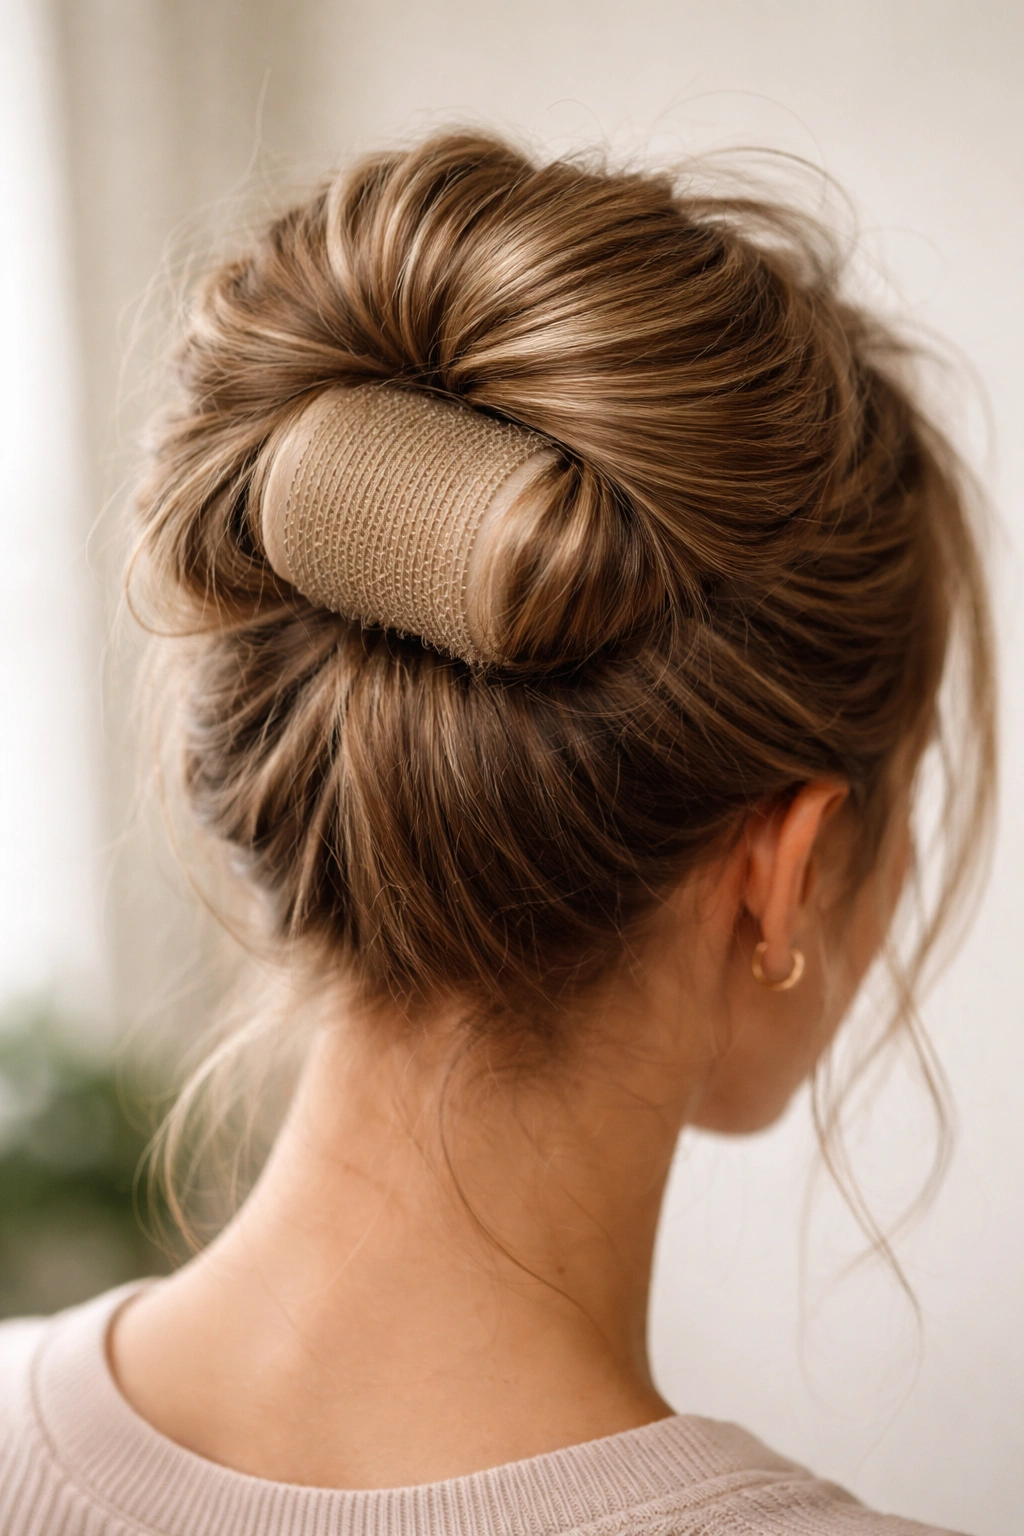
Velcro hair rollers weren’t originally designed as a bun solution, but they work brilliantly for this purpose because the sticky velcro surface grips hair without piercing or damaging it. The roller creates a cylindrical form around which your ponytail wraps, and the hair clings to the velcro through friction and contact—no pins required.
Rolling Your Way to Textured Hold
Use a velcro roller that’s about 1.5 to 2 inches in diameter—large enough to create volume but manageable for bun styling. Secure your hair into a high ponytail and gently brush it smooth. Roll the velcro roller away from your face and toward the crown, rolling your ponytail around it until the roller sits at the base of the bun. The hair naturally clings to the velcro as you roll. Once the roller is positioned, wrap the remaining ponytail length around the roller and tuck the ends underneath, creating a bun shape. The velcro grip keeps the hair firmly attached to the roller, and the bun structure is supported by the roller’s form.
The Velcro Advantage Over Traditional Methods
Velcro creates a non-damaging grip. Unlike bobby pins that can create crease marks or pull out strands, velcro simply holds your hair against its surface through adhesion and friction. The grip is so reliable that you can move around, exercise, or work throughout the day without your bun loosening. Velcro also won’t create the dents and creases that clips sometimes do, because it distributes pressure evenly across the hair that’s in contact with it.
Pro Tip:
Let your velcro roller dry completely if your hair is damp from washing or styling—the velcro grips wet hair less effectively than completely dry strands.
6. The Hair Stick Bun
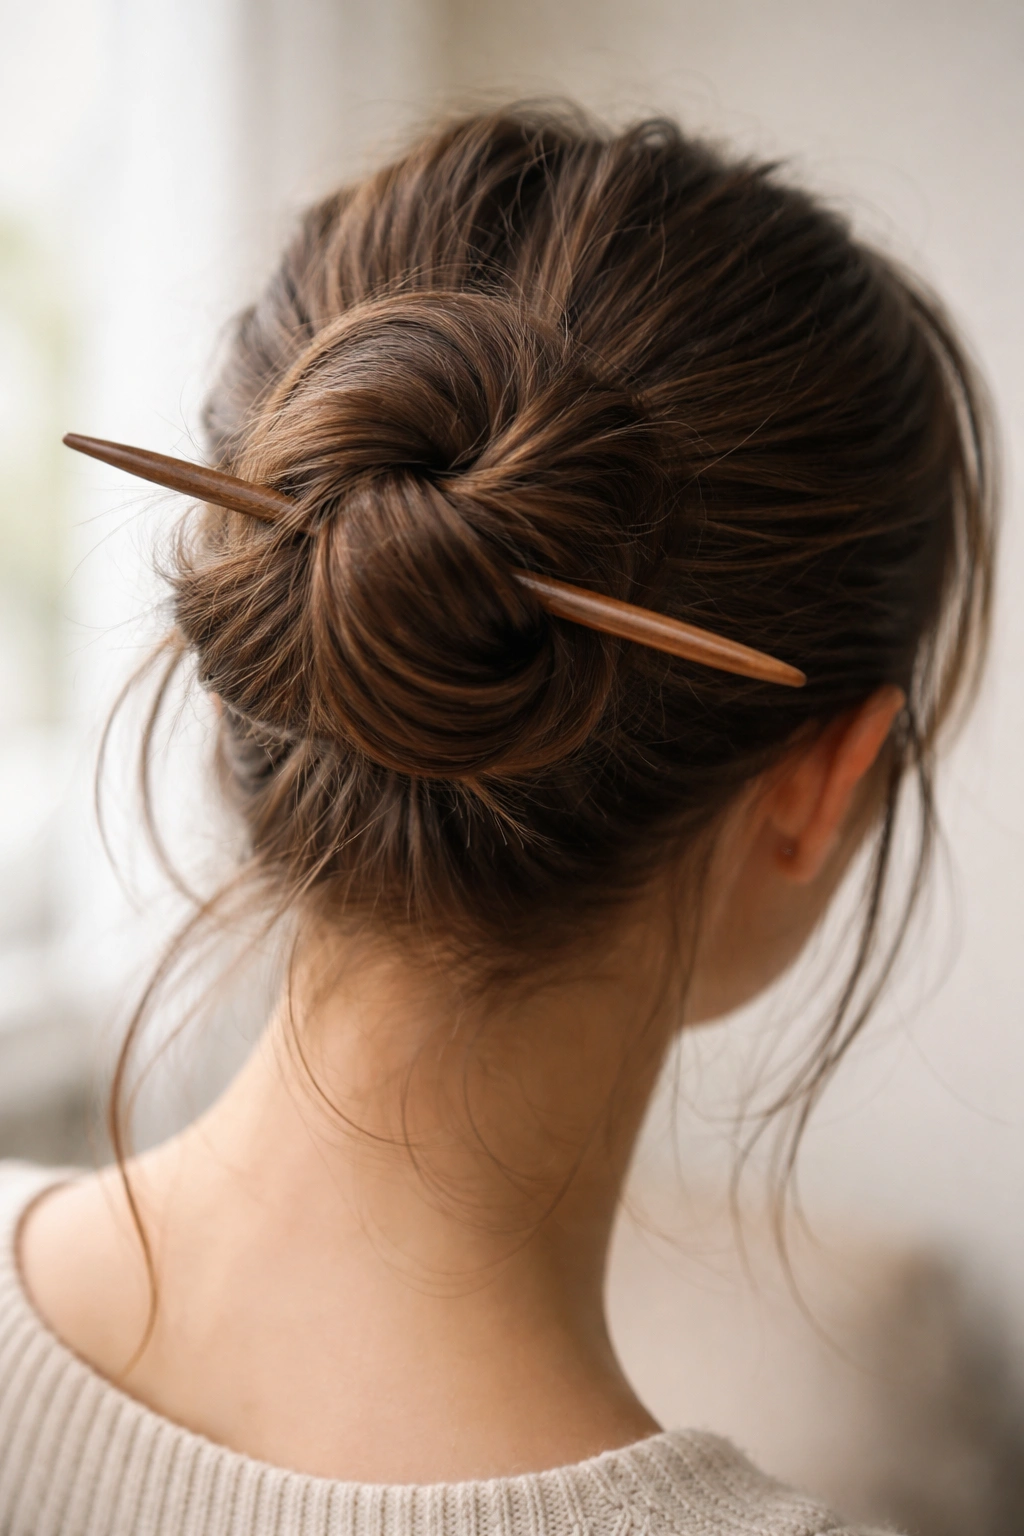
A hair stick (also called a hair fork or bun stick) is a tool specifically designed to hold buns without pins or clips. It works on a completely different principle than anything else on this list—instead of wrapping your hair tightly or using external pressure, you’re weaving the stick through your hair so the strands physically can’t escape.
Threading Through for Total Security
Create a ponytail at the crown or mid-back of your head, then coil the ponytail loosely into a bun shape against your scalp. The key is keeping it relaxed, not super tight. Now take your hair stick (which is typically a smooth, tapered stick about 4-6 inches long) and insert it horizontally through the center of your bun, making sure it passes through multiple layers of hair. Push the stick all the way through so it emerges on the opposite side. The hair is now threaded onto the stick and physically trapped—it literally cannot come loose without removing the stick.
Why Hair Sticks Are Genuinely Genius
Hair sticks work because they use the hair itself as the fastening mechanism. You’re not relying on friction, pins, clips, or elastic bands—you’re using simple physics. Hair wrapped around a stick and threaded through by that same stick creates a stable structure that won’t slip, loosen, or come undone. Your hair stays healthy because there’s no tension pulling or pins creating pressure points. The stick distributes any tension evenly across multiple strands rather than concentrating it at single points.
What to Know:
Hair sticks work best with longer hair (shoulder-length or longer) because you need enough length to create a bun and wrap it around the stick. They’re also an investment, but they last indefinitely with care.
7. The Rubber Band Spiral Bun
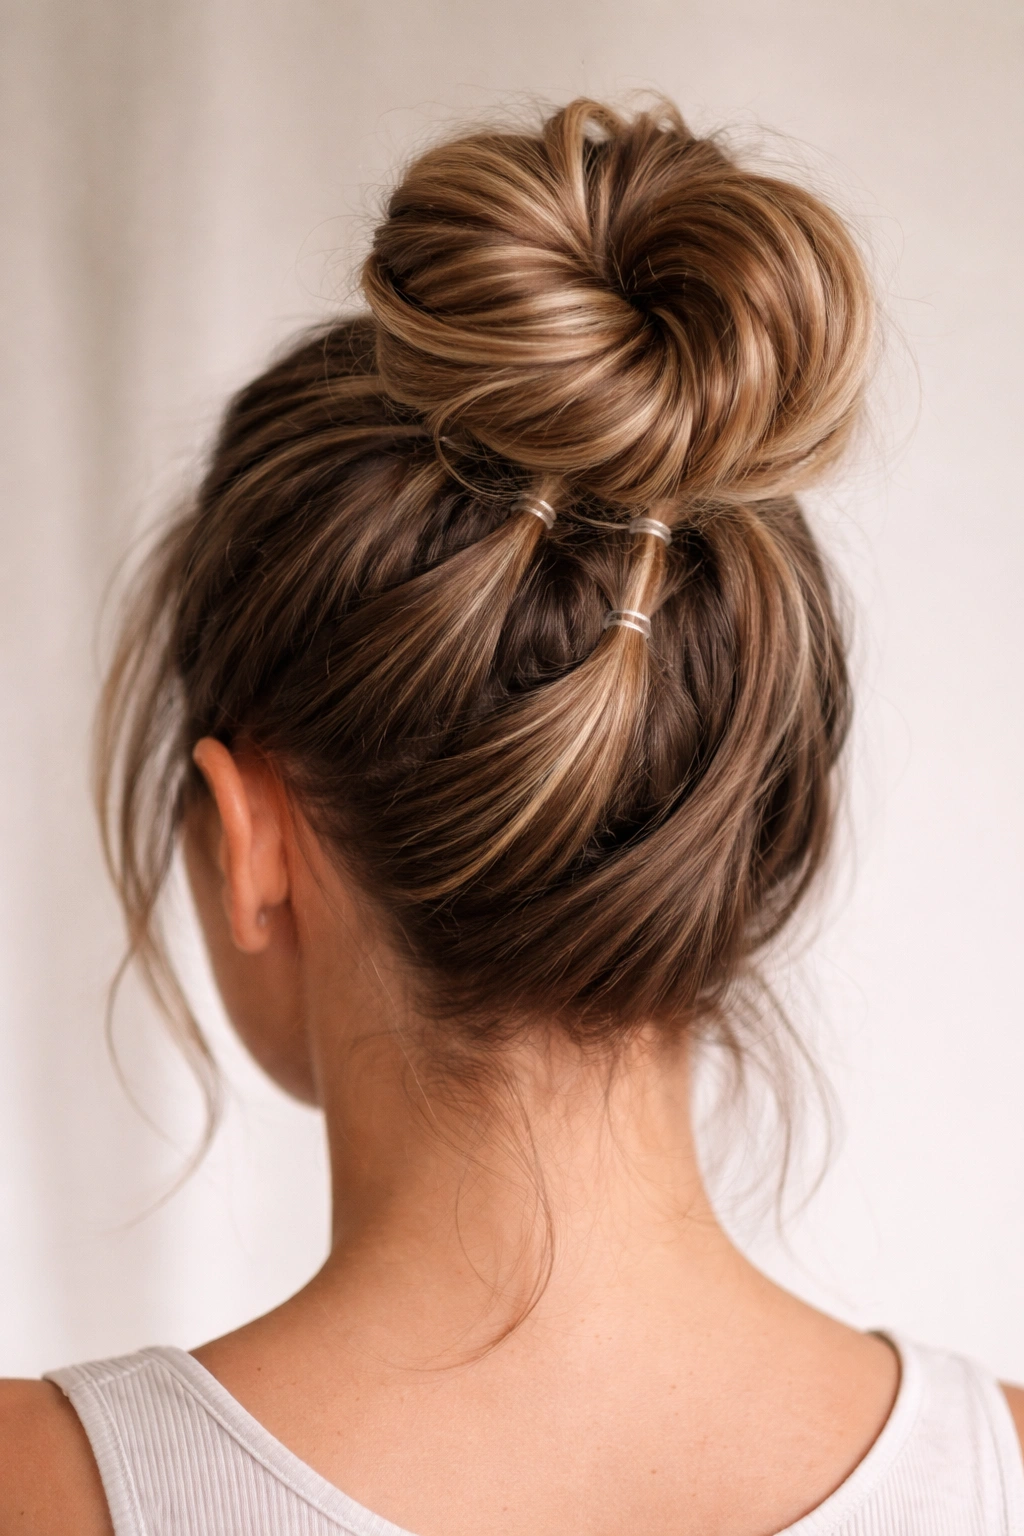
This method sounds simple because it is—you’re using only rubber bands, strategically placed to create a spiral pattern that locks your bun in place through multiple compression points rather than relying on a single base elastic.
Building the Spiral Lock Structure
Start with a high ponytail secured with one elastic band. Divide your ponytail into three or four equal vertical sections. Take the first section and wrap it spirally around the base of the ponytail, then secure it with a small elastic band at the end where it meets your scalp. Do the same with the second section, wrapping it in a spiral around the base and securing with another elastic. Continue this process with all sections, creating a spiral pattern where each section is independently wrapped and banded. The result is a bun that looks like a cinnamon roll, with each spiral held in place by its own small elastic band. This distributes hold across multiple points instead of concentrating it all at the base.
Why the Spiral Distributes Hold So Effectively
Instead of one elastic band trying to hold all your hair in one place, you’re using multiple bands positioned strategically throughout the bun. This means if one section starts to loosen slightly, the other sections keep everything else stable. The spiral structure also looks intentional and textured, fitting the “messy bun” aesthetic perfectly. This method works exceptionally well for fine or medium hair because you’re not trying to create a single point of compression around all your hair at once.
Quick Facts:
- Works best with elastic bands that match your hair color for less visibility
- The more sections you spiral, the more secure the hold (four sections is usually the sweet spot)
- This style actually holds better after a few hours as the spirals settle into place
8. The Pencil Twist Bun
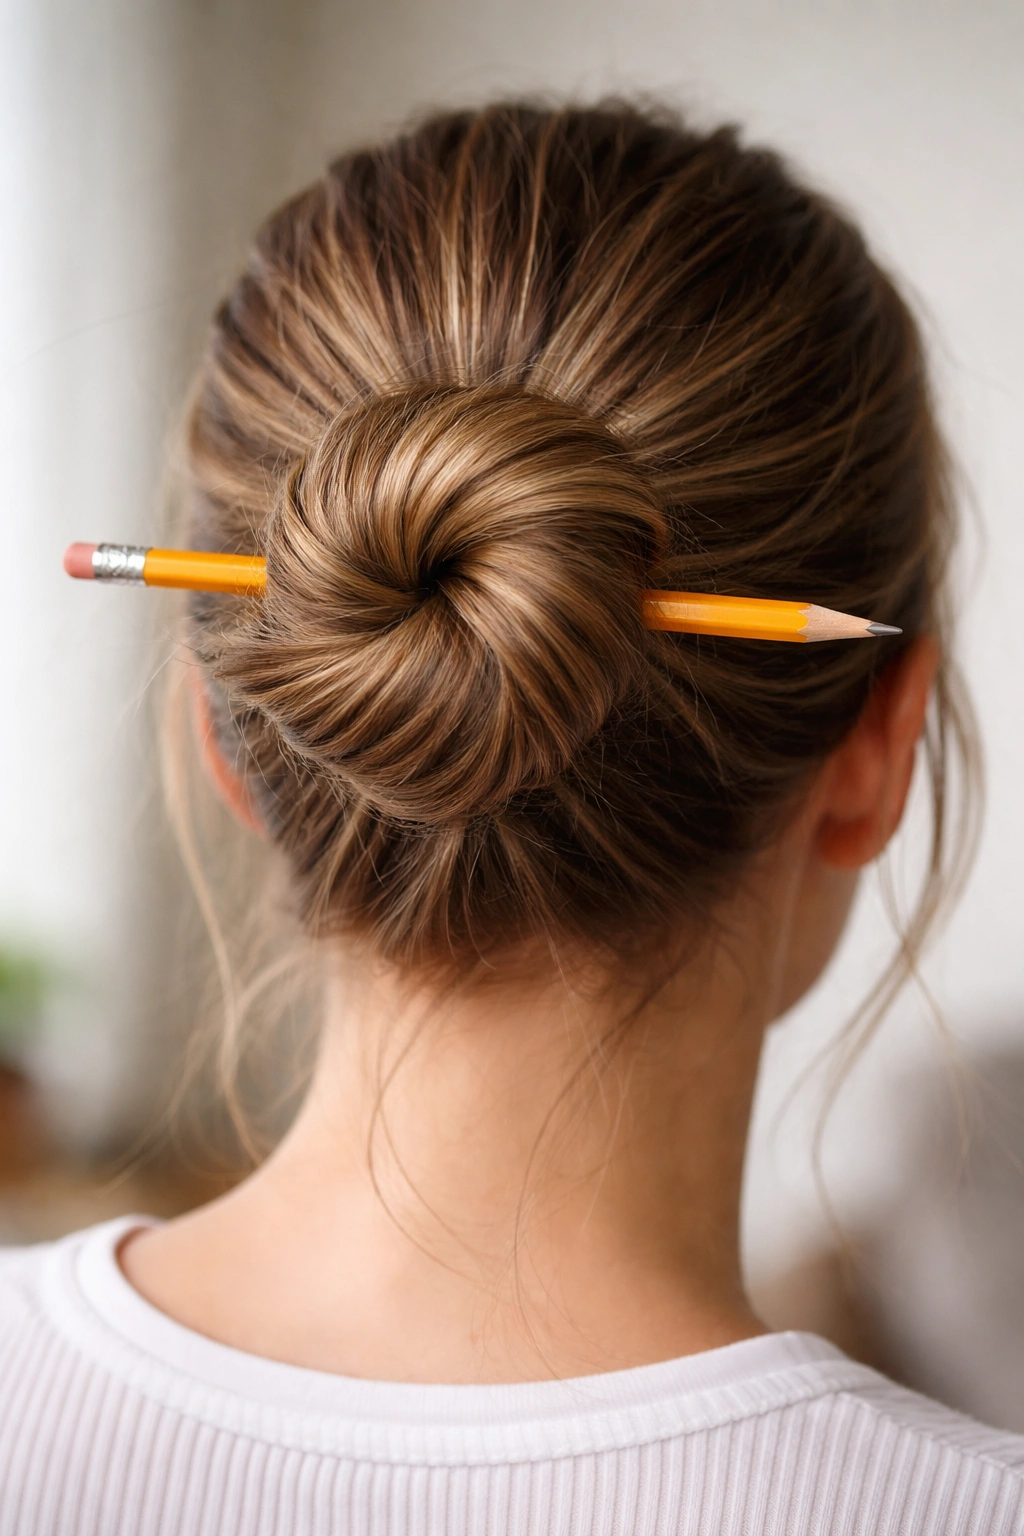
A pencil, wooden dowel, or smooth hair stick inserted through your twisted ponytail creates a hold method that’s functionally identical to a hair stick but uses a tool you definitely already have at home. The pencil’s smoothness allows your hair to grip without snagging, and the insertion point creates a stable anchor.
Twisting and Pinning With a Pencil
Gather your hair into a ponytail, then twist your entire ponytail tightly into a rope. Coil this twisted rope around the base of your ponytail to form a bun shape. Now insert a pencil (eraser end first) horizontally through the center of the bun, passing through as many layers of the twisted rope as possible. Push it all the way through so the pencil extends on both sides of your head. The twisted hair wrapped around and threaded by the pencil is mechanically locked—the twist prevents the hair from slipping off the pencil’s shaft.
Why Pencil Twist Buns Are Surprisingly Reliable
The combination of a tight twist plus the pencil’s stabilizing presence creates impressive hold. The twist already compresses your hair tightly, and the pencil running through the middle of that twist adds a secondary locking mechanism. You could leave this bun in for a full day of work or errands without any slippage. The pencil also won’t damage hair the way bobby pins sometimes do, because there’s no barbed texture—it’s smooth and gentle.
Pro Tip:
Use a pencil with a full eraser end (not sharpened) to avoid any sharp edges against your scalp.
9. The Elastic Wrap Bun
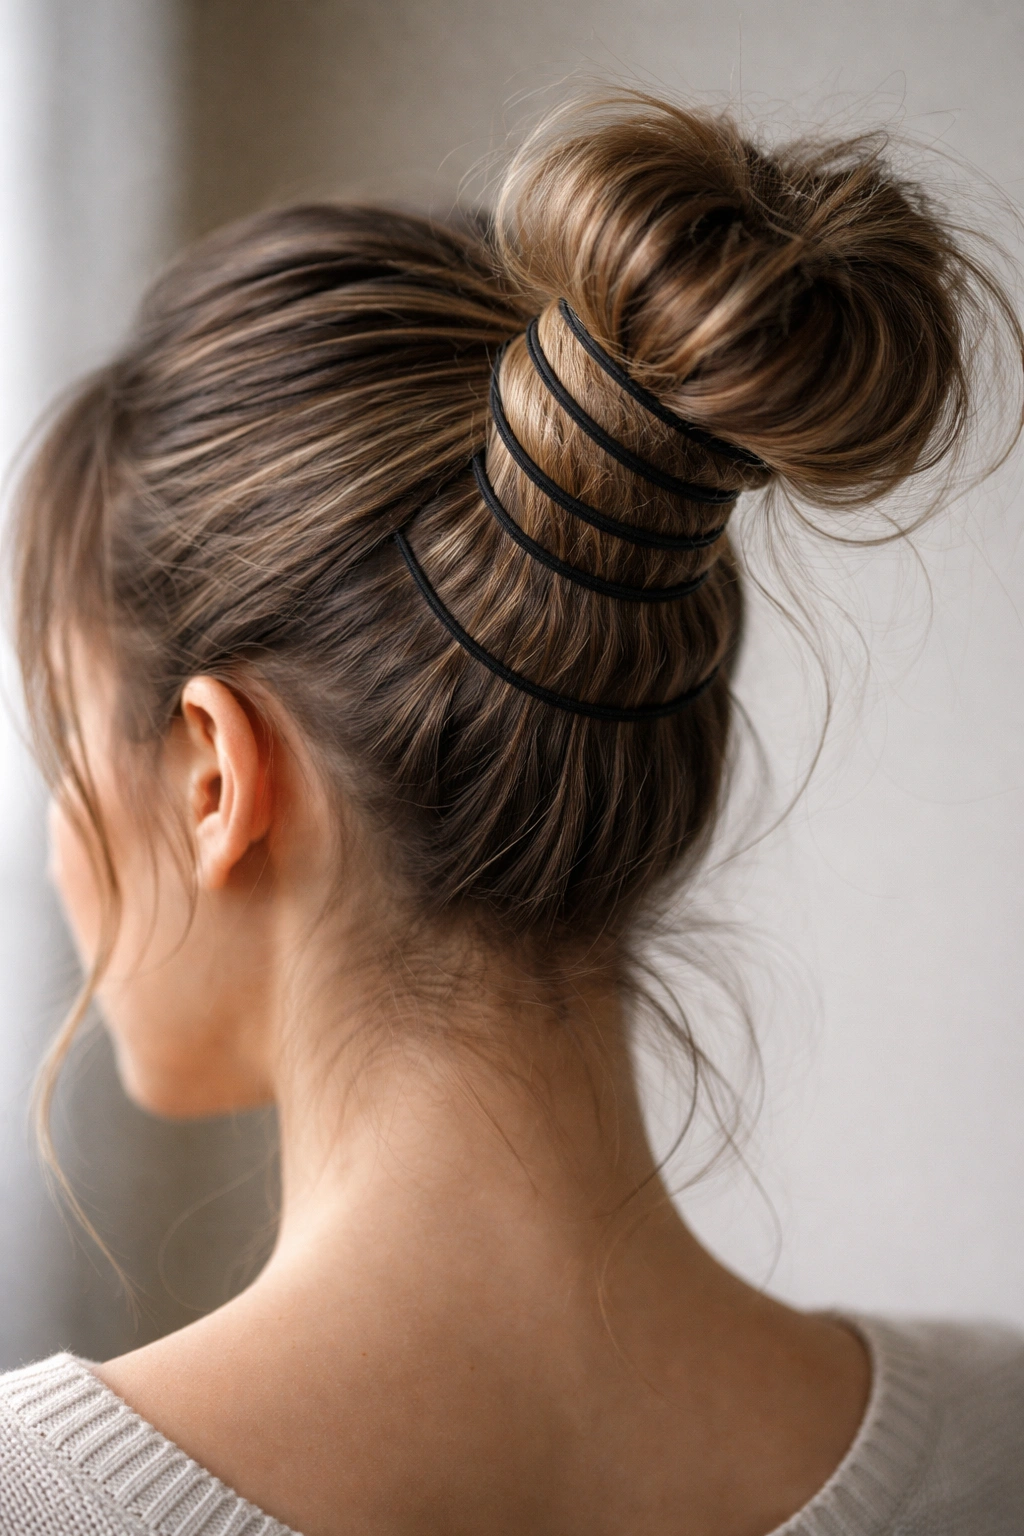
This method uses only elastic bands but in a completely different way than the spiral method—instead of creating multiple spirals, you’re wrapping your ponytail with elastic bands in horizontal bands that create a cage-like structure holding the bun in place.
Creating Horizontal Hold Points
Secure your hair into a high or mid-level ponytail. Starting at about two inches below the elastic that holds your ponytail base, wrap a small elastic band tightly around your ponytail, creating a section of compressed hair. Move down about an inch and wrap another elastic band. Continue wrapping elastic bands down the length of your ponytail, spacing them roughly an inch apart. Once you have four to six wrapped sections, coil the end of your ponytail back up and around the base, tucking it under the wrapped sections to create a bun shape. The pre-existing wrapped bands hold the coil in place and prevent any slipping.
Why This Creates Such Reliable Hold
You’ve essentially created anchoring points all along your ponytail’s length. Even if the bun tries to shift or loosen, these horizontal bands act like brackets preventing movement. This is an especially effective method for thick hair or anyone with texture issues where loose hair might slip. The multiple small bands distribute pressure across many points instead of concentrating it in one spot.
Worth Knowing:
This style works best when you use thin elastic bands—they’re less visible and create neater compression points than thicker bands.
10. The Scarf or Headwrap Bun
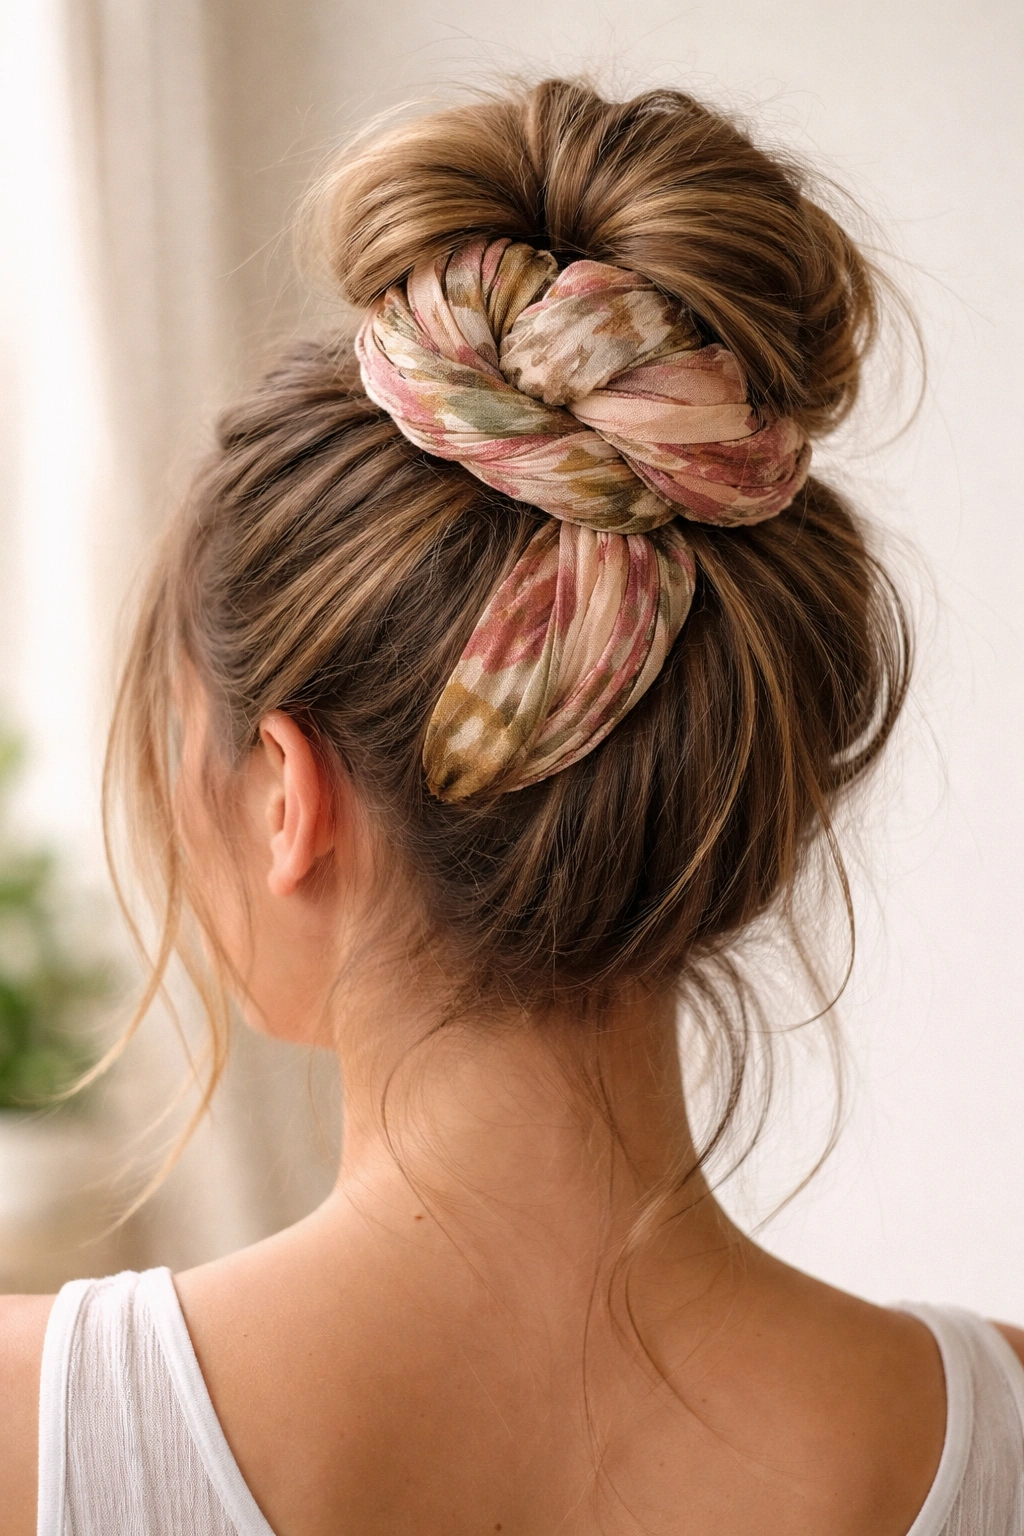
A lightweight scarf, bandana, or fabric headwrap woven through your ponytail and used to tie your bun in place creates a style that’s both secure and fashionable. The fabric adds grip while simultaneously creating a decorative element that elevates the entire look.
Weaving Fabric Into Security and Style
Gather your hair into a high ponytail and smooth it if you want a neater look, or leave it tousled for maximum messiness. Take a lightweight scarf or fabric wrap and fold it into a long strip. Starting at the base of your ponytail, weave the scarf through sections of your ponytail, alternating over and under strands as you move down the length. Once you’ve woven the scarf throughout, use the remaining fabric ends to wrap around your ponytail multiple times, then tie the ends together securely. Coil your ponytail into a bun shape as you wrap, and the fabric wrapping keeps it locked. The result is a beautiful, bohemian-style bun with decorative fabric that prevents any movement.
Why Fabric Adds a Different Kind of Hold
Textured fabric grips hair differently than smooth surfaces do. Instead of relying on friction between hair and a smooth object, you’re using the weave and texture of the fabric itself to catch and hold strands. The weaving motion also distributes the fabric throughout the bun rather than just at the base, creating multiple anchor points. Plus, the scarf adds visual interest and allows for endless style variations depending on the fabric pattern and color you choose.
Pro Tip:
Cotton or linen scarves work better than silky fabrics, which slide through hair too easily. A scarf with some grip and structure will hold your bun much more securely throughout the day.
Final Thoughts

The myth that you need bobby pins for a secure messy bun couldn’t be further from the truth. In fact, most of these methods—twisting, braiding, wrapping, and using clips or hair sticks—hold better, last longer, and are gentler on your hair and scalp than traditional pin-based buns ever were. Your choice really comes down to what you have available, how much time you want to spend styling, and which method feels most natural for your hair type and texture.
If you have thick hair and want something quick, a clip or twisted knot bun gets you out the door in seconds. If you have fine hair and want maximum security, try the braided wrap or rubber band spiral method. Want to add fashion-forward flair? The scarf bun is your answer. The beauty of these no-pin techniques is that you can experiment until you find your go-to, and once you do, you’ll wonder why you ever bothered with bobby pins at all.
The other huge advantage is the practicality of removing your bun at the end of the day. No more scalp hunts for lost pins. No more tiny puncture marks on your head. Just undo whatever method you used, and you’re completely pin-free. Your hair will thank you for the break from pinning pressure, and your evenings will be infinitely less frustrating once you’re no longer searching for wayward bobby pins that somehow ended up tucked in random sections of your hair.
