



Curly afro hair is incredibly versatile — it can be styled into dozens of gorgeous shapes, textures, and silhouettes depending on length, curl pattern, and styling technique. Whether you’re working with a short, close-cropped cut or long, flowing coils, the possibilities for self-expression through your natural texture are genuinely limitless. The key is understanding which styles work best for your specific hair length and what products, tools, and techniques bring out the best version of your curls.
What often holds people back from trying new afro curl styles isn’t a lack of inspiration — it’s confusion about what’s actually achievable with their hair length, or intimidation about the styling process itself. The thing is, you don’t need access to a salon visit or advanced styling skills to create a stunning afro curl style. Most of the techniques used by professional stylists are completely learnable, and many of the best styles actually look better and feel more authentic when you create them yourself, with your own hands and your own energy.
The styles in this guide span every hair length from short, textured cuts to waist-length coils. Each style includes the real technical details — the products that actually work, the hand techniques that make the difference, how long it genuinely takes, and which curl patterns it works best for. More importantly, each style is designed to work with your natural curl pattern rather than fighting against it. You’re not trying to make your hair into something it’s not; you’re amplifying what it already does beautifully.
1. The Tapered Cut with Full Crown
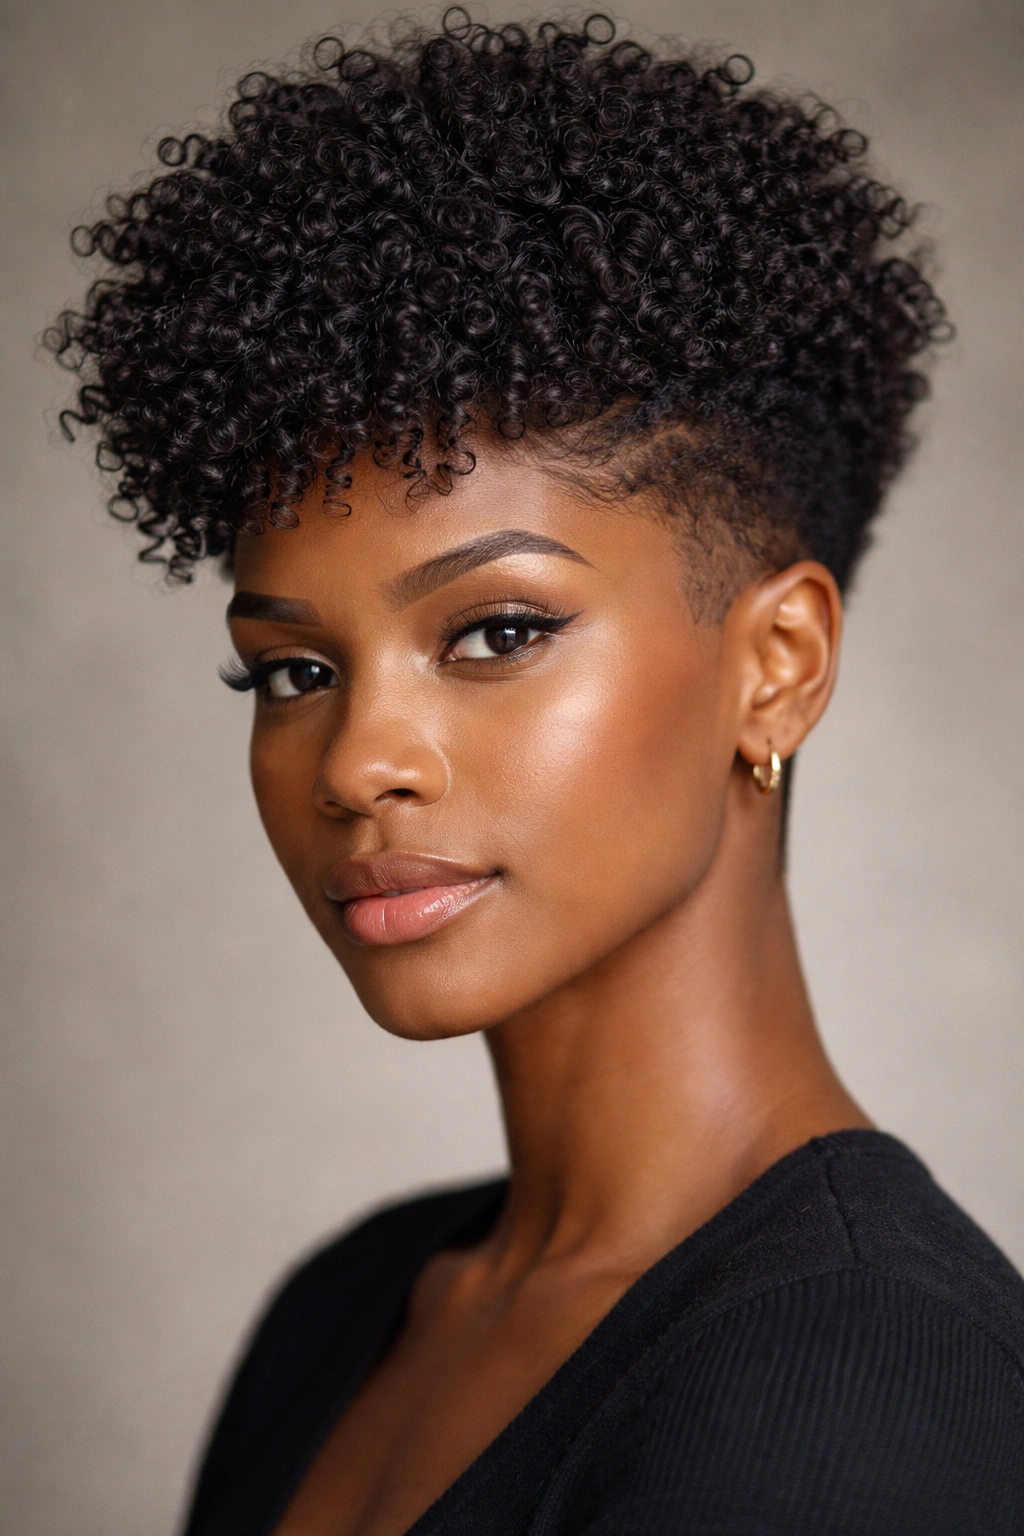
A tapered cut is one of the most striking and low-maintenance afro curl styles, especially for shorter hair lengths ranging from a half-inch to about three inches. The sides and back are cut close to the scalp — typically faded or undercut for visual contrast — while the crown is left fuller and taller, creating a sculptural silhouette that frames the face beautifully. The appeal of this style goes far beyond aesthetics; it’s genuinely practical because you get the definition and shape of a short cut without the daily styling commitment of longer styles.
Why This Cut Works Across Different Hair Types
The tapered cut works exceptionally well for tightly coiled hair (4C and 4B textures) because the close-cut sides actually enhance the definition of your coils rather than flatten them. As your hair grows out slightly from the fade, each curl becomes more visible and textured looking. For looser curl patterns (2C, 3A, 3B), the contrast between the faded sides and the fuller crown creates amazing dimension — the crown area curls pop visually against the sleeker cut of the sides. The key technical advantage is that with less total hair to manage, your natural curl pattern has more space to express itself without the weight and tension that longer lengths create.
Styling and Maintenance Essentials
- Product routine: Use a lightweight curl cream or styling gel on the crown section while it’s still damp, applying with a praying hands method (smoothing between your palms) or raking it through with your fingers
- Drying technique: Air-dry or use a diffuser on low heat to encourage curl definition without frizz
- Fade maintenance: Plan for a recut every 3-4 weeks to keep the fade sharp and the contrast clean
- Daily refresh: Lightly mist with water and reapply a small amount of curl cream to refresh definition between wash days
Real talk: This style is genuinely low-maintenance compared to longer styles, but it does require regular trims to maintain the intentional shape. If you’re not ready to commit to monthly or bi-monthly haircuts, this might not be the right choice right now.
2. The Two-Strand Twist-Out on Shoulder-Length Hair
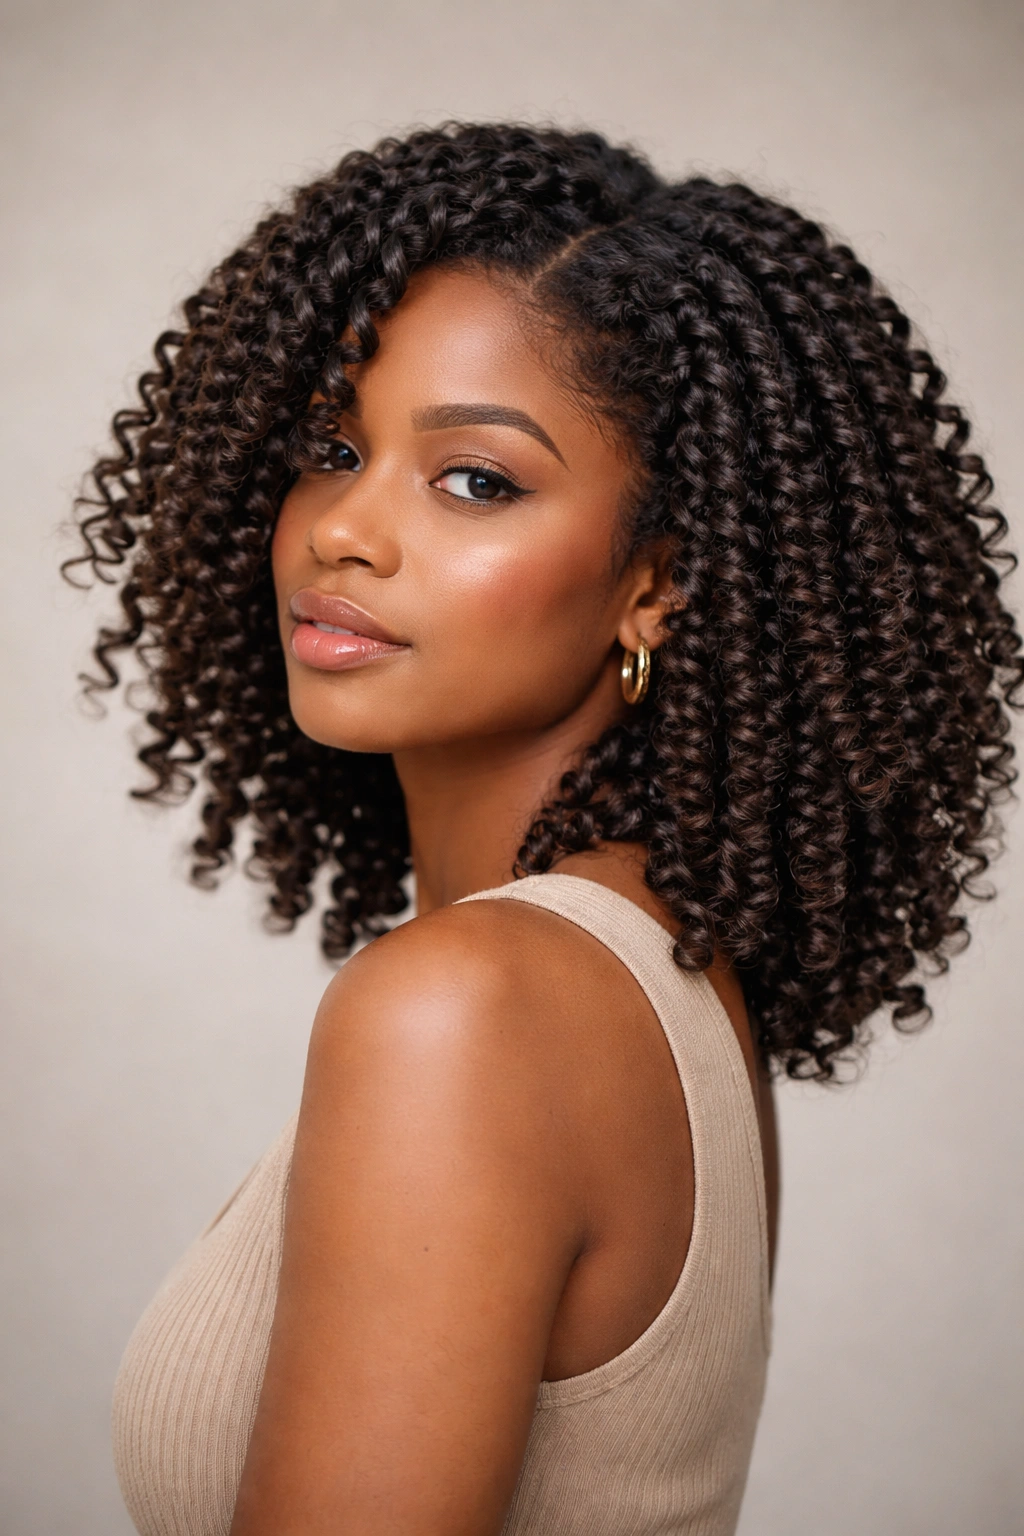
Two-strand twists are one of the most transformative protective styling techniques for medium to shoulder-length afro hair, but what many people don’t realize is that they’re also an incredible foundation for creating beautiful, defined curl patterns through a twist-out. When you unravel twisted sections after they’ve dried (or after you’ve slept on them for 1-2 days), the hair springs into a gorgeous, elongated twisted curl pattern that looks completely different from your natural curl texture.
The magic of this style happens in the technique itself. You’re not creating something artificial; you’re manipulating your natural curl pattern to express itself in a new way, then allowing it to set into that shape. For shoulder-length hair, two-strand twists typically take 45 minutes to 2 hours depending on how many twists you create and your comfort level with the technique. The bigger the twists, the faster you finish — but finer, more numerous twists create more delicate, defined results.
The Technical Process for Success
The quality of your twist-out depends almost entirely on how well you created the original twists. Start with clean, damp hair and apply a leave-in conditioner and lightweight styling cream or gel to each section before twisting. The products are what’s going to hold your curl pattern in place once you unravel — without them, you’re just back to your natural curl pattern. Divide your hair into sections (anywhere from 8 to 20 sections depending on desired thickness), then twist each section tightly from root to tip, wrapping one section of hair around the other in a consistent direction.
Here’s the part that changes everything: let those twists dry completely before touching them. Rushing this step means they won’t hold their shape. You can air-dry overnight, use a hooded dryer for 2-3 hours, or even sit under a blow dryer on low heat for about 30 minutes if you’re patient. Once completely dry, gently unravel each twist starting from the bottom, using a light hand to avoid disrupting the pattern. The result is a beautifully defined, elongated curl pattern that lasts about 3-5 days depending on your hair texture and moisture level.
Maintenance Between Styling Sessions
- Nighttime protection: Use a silk or satin bonnet or pillowcase to prevent frizz and preserve definition
- Refreshing curls: A light misting of water mixed with a tiny bit of leave-in conditioner will revive curls on day 2-3
- Combating frizz: If frizz appears, don’t try to brush it out; instead, smooth it down with a bit of gel applied with your hands
- Retwisting sections: You can selectively retwist a few sections mid-week if they’ve loosened, without redoing the entire style
Pro tip: The texture of your two-strand twist-out actually improves on day 2 or 3 after you unravel. The curls have time to fully settle and relax into their pattern, so resist the urge to style them immediately after unraveling.
3. The High Puff with Face-Framing Pieces
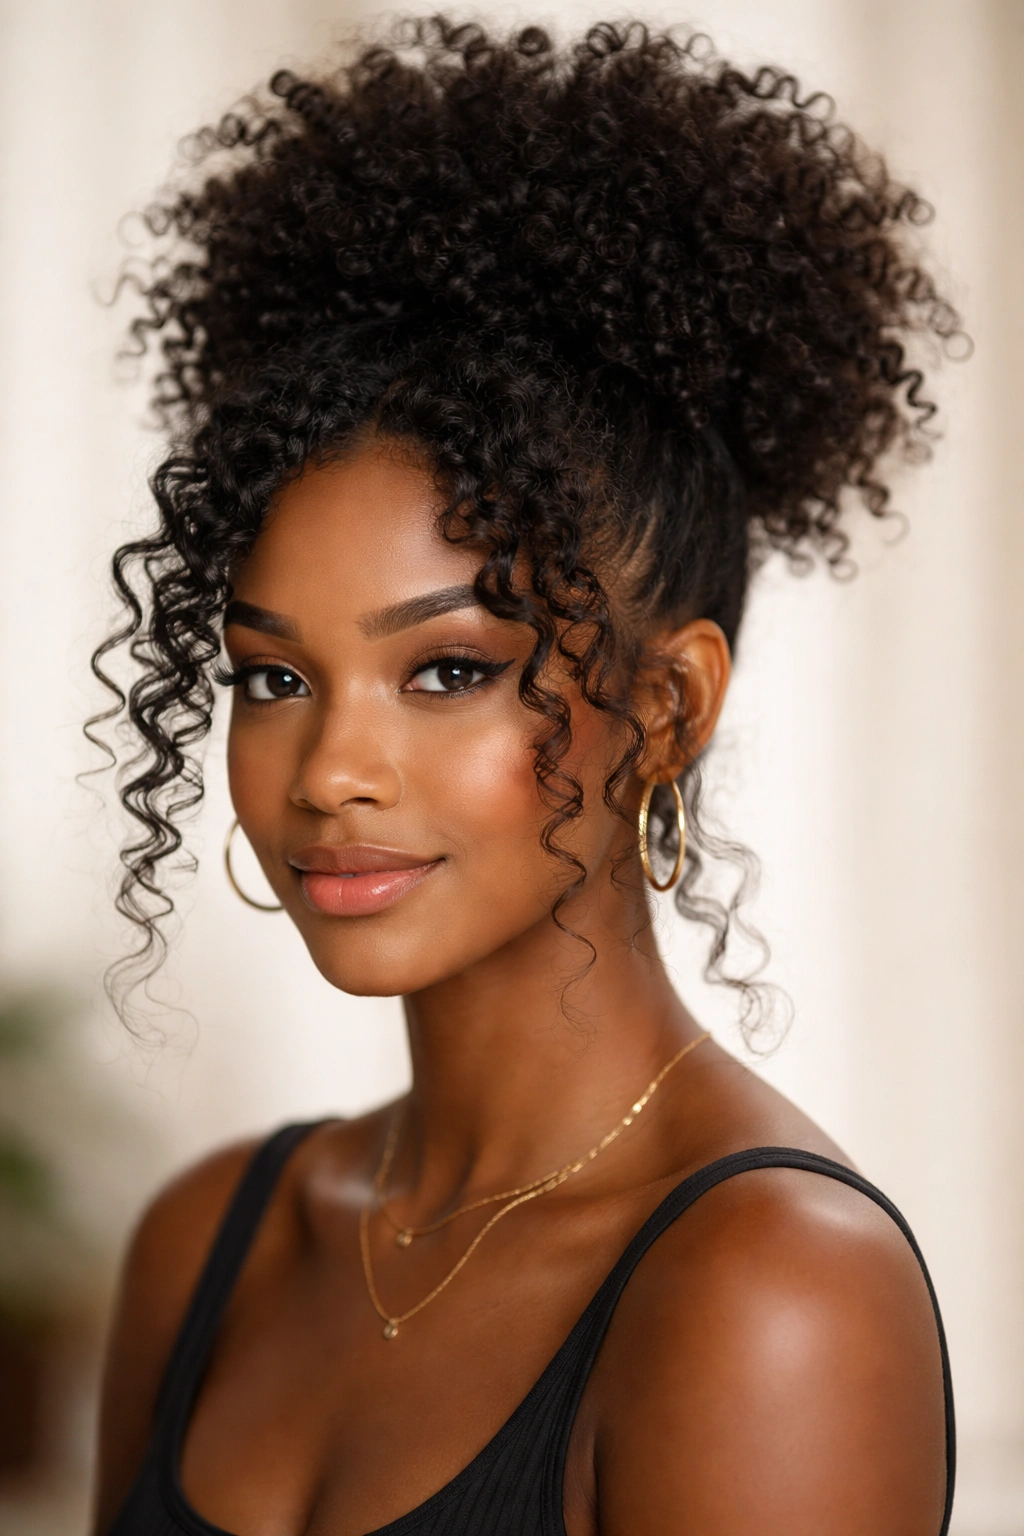
A high puff is exactly what it sounds like — all of your hair gathered into a high ponytail at the crown and shaped into a voluminous, rounded puff — but the magic happens when you leave a few intentional pieces of hair loose around your face and edges. These face-framing pieces soften the overall look, add movement and dimension, and create a more nuanced style that feels both polished and effortlessly cool. This style works beautifully on medium to long hair (roughly shoulder-length to hip-length) and is genuinely one of the most versatile styles because you can dress it up or down depending on your needs.
Creating the Perfect Puff Structure
Start with hair that’s been freshly washed and is either still slightly damp or has been fully dried and lightly misted with water to activate curl definition. Use a soft hair tie or silk scrunchie — this matters because elastic hair ties create tension that can break hair — and gather hair at the crown into a high ponytail, leaving a small section of hair around each temple and a few pieces around your face completely loose. The gathered hair should be smooth and secure but not painfully tight; you want tension, not tension that makes your scalp ache.
Once the ponytail is secure, gently fluff the hair outward in all directions, using your fingers to separate and shape the puff into a rounded, voluminous shape. The key technique here is not to brush it with a brush or comb — instead, use your fingers to gently lift and shape, which maintains curl definition while creating volume. For extra height and a more dramatic shape, you can use a hair pick on the underside of the puff to create more lift, or lightly backcomb the base of the ponytail for added volume.
The loose face-framing pieces should blend softly with the puff, so style them to match your natural curl pattern. If you want more definition, apply a light curl cream and allow them to air-dry. If you prefer them smoother, you can use a small amount of gel on these pieces while leaving the rest of your hair textured and natural.
Styling Variations That Keep It Fresh
- Wrapped base: Wrap a small section of hair from the ponytail around the hair tie to hide it completely — this creates a polished, finished look
- Double puff: Create two smaller puffs at either side of your head instead of one high puff for a playful, youthful vibe
- Braided into the puff: Create one or two French braids leading up to the ponytail, then gather into the puff for added visual interest
- Accessorized puff: Add a decorative hair stick, claw clip, or wrap through the puff to elevate the style
- Side puff: Move the ponytail to the side of your head instead of center-crown for a completely different silhouette
Worth knowing: The puff actually holds better and looks more voluminous if you’ve worn your hair in braids or twists the night before. The slight texture from that styling creates grip that holds the puff in place better than smooth, freshly washed curls.
4. The Defined Coil-Out on Short to Medium Hair
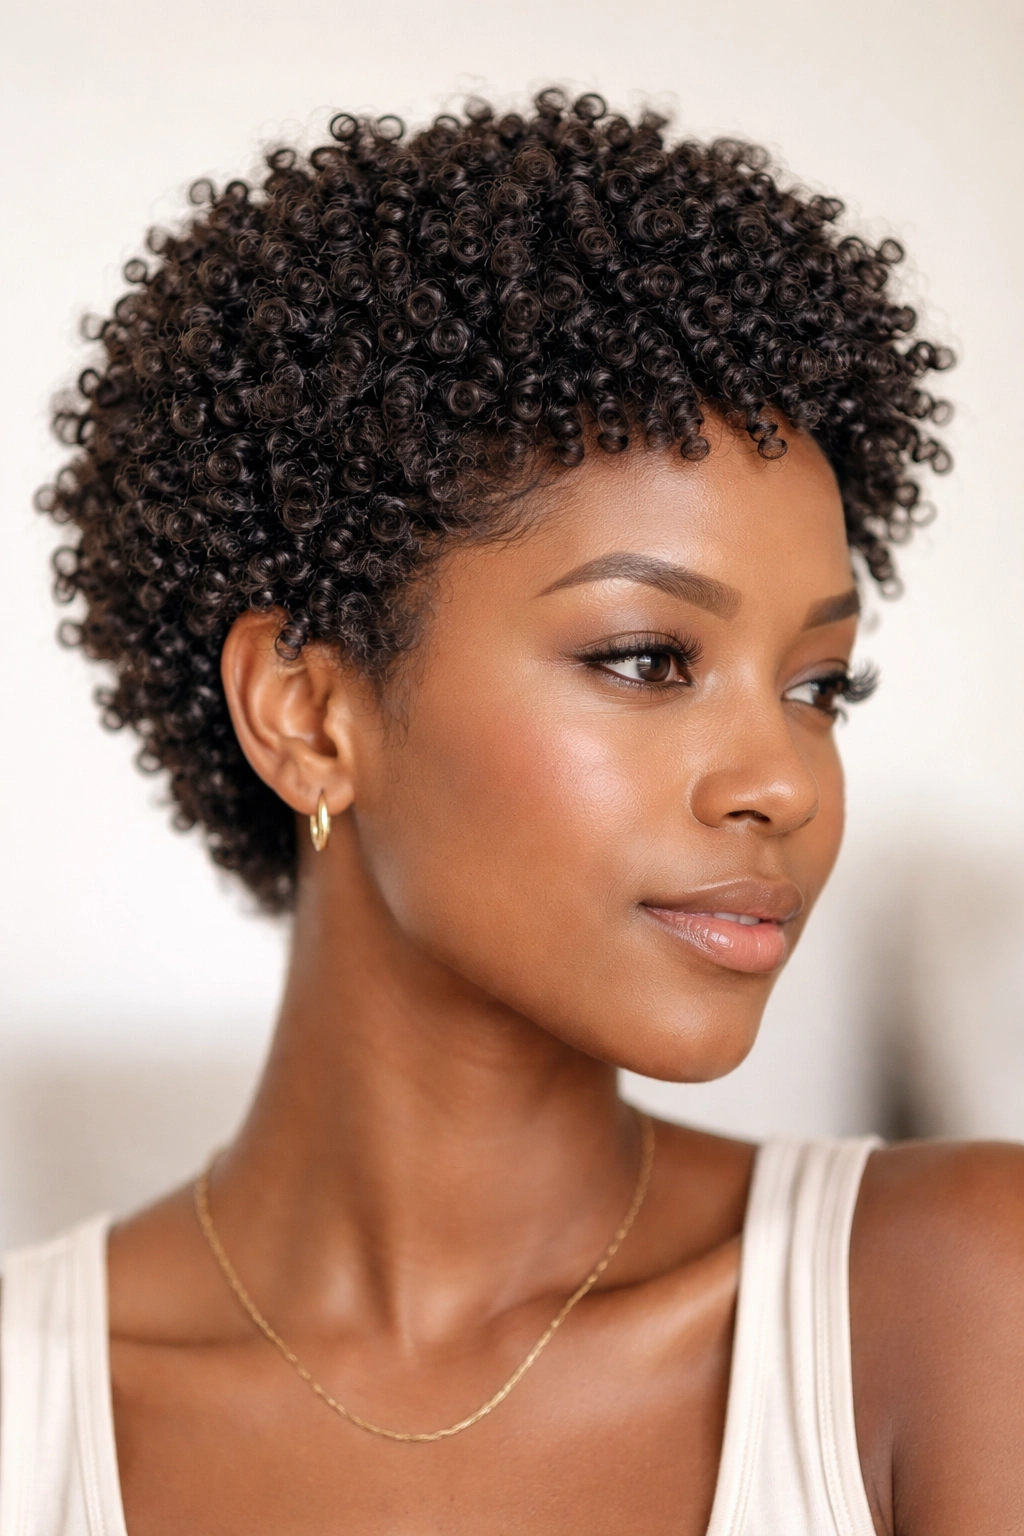
A coil-out is the natural curl styling technique that makes your curl pattern shine — literally shine, with all the definition and separation of individual curls that your hair naturally wants to have. The technique involves applying styling products to damp hair and then allowing it to air-dry without manipulation, so the hair dries in whatever shape it naturally falls into. For short to medium hair (roughly 2-4 inches), this creates a beautifully defined, textured look that shows off the real architecture of your curl pattern.
The appeal of a coil-out is its simplicity and the fact that it works with your hair’s natural behavior rather than against it. You’re not using heat tools, you’re not manipulating the hair into a different pattern, and you’re not fighting against your curl texture. Instead, you’re creating the perfect environment for your curls to express their natural definition. The result looks effortless — because it mostly is — but the technique actually requires more intentionality than it might seem.
The Step-by-Step Coil-Out Method
Start right after washing your hair, when it’s thoroughly cleansed and still quite wet. Applying products to very wet hair is crucial because the water provides slip that helps you distribute products evenly without disrupting your curl pattern. Choose a leave-in conditioner and a styling product — typically a lightweight gel or curl cream depending on your hair porosity and curl tightness. Apply the leave-in conditioner first, combing it through gently with a wide-tooth comb or your fingers to ensure even distribution.
Next comes the styling product, which is what creates definition and hold. Apply it using one of two methods: the praying hands method (smoothing product between your palms and running them through your hair) or the raking method (combing product through with your fingers). The praying hands method creates smoother, more defined individual curls. The raking method creates more texture and separates curls more distinctly. Choose whichever matches your desired texture outcome. The critical step is next: absolutely do not touch, manipulate, or rake through your hair while it dries. Any movement disrupts the curl pattern formation. Let it air-dry completely, untouched, for 6-12 hours depending on your hair thickness and humidity.
Once completely dry, you can gently scrunch from the bottom to add a bit of extra volume and softness, or simply leave it as is. The dried product will have cast — a slight stiffness — which creates definition. Scrunching breaks this cast and softens the look, making curls bouncier and less crunchy.
Product and Technique Variations
- Maximum definition: Use a medium-hold gel and the raking method to separate curls completely
- Softer texture: Use a lightweight curl cream and the praying hands method for more blended, less separated curls
- Enhanced volume: Flip your head upside down while air-drying the first 30% of the drying time to encourage root lift
- Speed-drying option: Use a hooded dryer or diffuser instead of air-drying to reduce drying time to 2-3 hours
Insider note: The humidity level in your environment absolutely affects how your coil-out looks. High humidity can create more frizz and looser definition, while dry environments encourage tighter coils and more defined separation. Adjust your product choices accordingly — more hold product in humid environments, lighter products in drier settings.
5. The Braided Crown on Long Hair
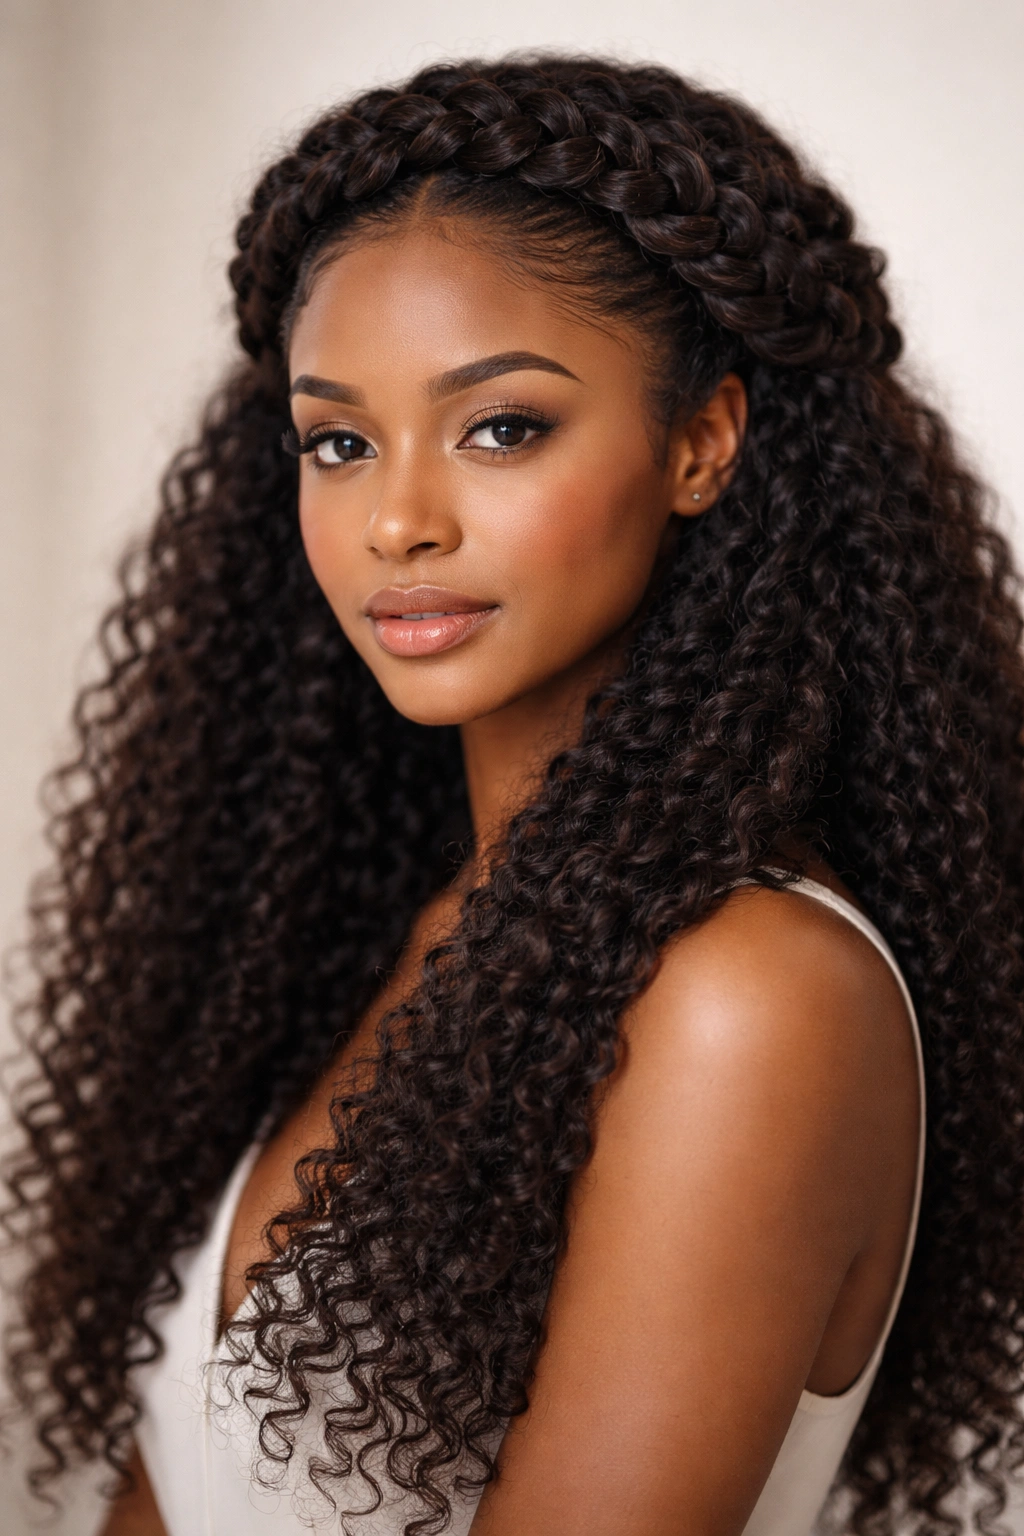
A braided crown is a protective style that’s also incredibly beautiful and works on long afro hair (roughly waist-length or longer) to create an elegant, styled look that genuinely protects your ends and reduces daily manipulation. The technique involves creating one or more braids (usually three or four) that wrap around the crown of your head like a halo or crown, and then gathering the remaining loose hair into a puff, bun, or allowing it to flow freely down your back, depending on your preference and the occasion.
This style is protective because the ends of your hair are tucked safely away inside the braids and gathered sections, meaning they’re not exposed to friction, breakage, or environmental stressors. It’s also versatile enough to work for casual everyday wear or dressed up for an event. The technical skill required is moderate — you need to be comfortable creating braids, but you don’t need to be an expert. Many people create this style on themselves with a hand mirror or even manage it without a mirror once they’ve done it a few times.
Creating a Flawless Braided Crown
Start with hair that’s been washed and is either still damp or fully dry (both work, though damp hair is easier to manage). Part your hair into sections — typically you’ll create 3-4 braids that wrap around the crown. The number depends on how much hair you have and how thick you want each braid to be. Start by creating a braid on one side of your head, beginning near your temple and braiding toward the back of your head, incorporating more hair as you go if you want a thicker crown braid.
The technique here is important: consistency in braid thickness creates a polished, intentional look, while varying braid thickness creates a more organic, artful appearance. Choose whichever aesthetic appeals to you. As you braid toward the back, you can either finish the braid at the nape of your neck and pin it, or continue braiding all the way down the back of your head and incorporate that longer braid into your back gathering.
Once all crown braids are complete, gather the remaining loose hair at the back or crown into a puff, a low bun, or allow it to hang freely in twisted or coiled sections. You can add beads to the ends of the braids for extra visual interest, or keep it clean and minimal depending on the occasion. The beauty of this style is that it works for both a sleek, polished look and a textured, bohemian vibe depending on how you finish it.
Styling Extensions and Variations
- Thicker braids with extensions: Incorporate braiding hair into your braids to create thicker, more dramatic braids and add length
- Beaded ends: Add gold, silver, or wooden beads to the ends of braids for an elevated, intentional look
- Partial braided crown: Create braids only on one side or the front, leaving the back loose for a less structured appearance
- Twisted crown instead: Replace braids with two-strand twists for a softer, more delicate crown effect
- Woven pattern: Create braids that weave across your head in a more intricate pattern instead of a simple side-to-back direction
Real talk: This style actually looks better on day 2-3 after you create it. On the first day, the braids are very neat and tight. By day 2, they’ve relaxed slightly, gained dimension, and look more naturally blended with the rest of your hair. This is actually ideal for a protective style because that relaxation means less tension on your scalp.
6. The Wash-and-Go with Product Layering
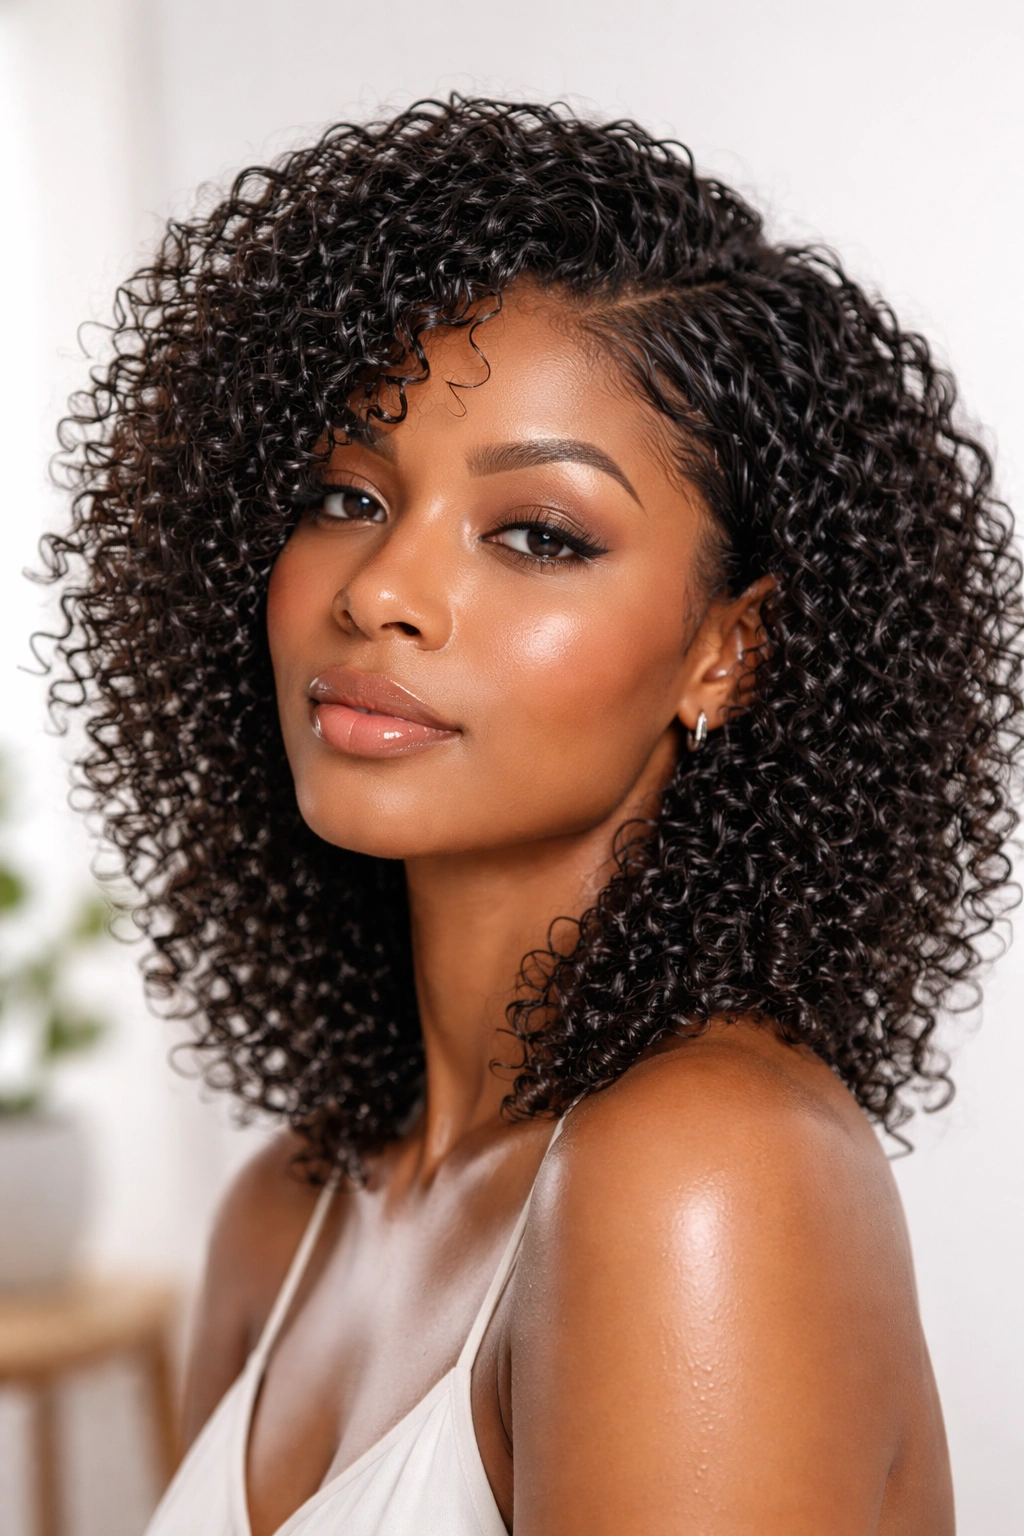
A wash-and-go is the ultimate afro curl style because it requires no manipulation, no special technique beyond product application, and no styling tools — just washing your hair, applying the right products, and allowing your natural curl pattern to do what it does. This style works on any hair length from short cuts to long, flowing coils, and it’s the style most people wear most days because it’s simply the path of least resistance.
The catch — and this is important — is that a wash-and-go that actually looks intentional and polished rather than accidental requires more thoughtfulness about products and technique than most people realize. A mediocre wash-and-go happens when you just throw whatever styling products on wet hair and hope for the best. A genuinely beautiful wash-and-go happens when you’ve figured out your specific product layering sequence, the exact amount of product for your hair density, and the optimal drying method for your curl pattern.
Building Your Personal Wash-and-Go Formula
Every curl pattern responds differently to products, so you need to experiment to find your formula — but here’s the general framework. After washing, apply a leave-in conditioner to very wet hair and distribute it thoroughly. This is your hydration and slip layer. Next, apply a styling product: this might be a gel for maximum definition and hold, a cream for softer texture, or a lightweight mousse for volume. The styling product is what creates the shape and definition of your curls as they dry.
Here’s where most people get it wrong: the amount of product matters tremendously, and more product doesn’t mean better results. Too much product weighs curls down and makes them look dull and clumpy. Too little product and you don’t get any definition or hold. The right amount depends on your hair density, porosity, and curl tightness. A good starting point is about a nickel-sized amount of gel or cream for short hair, a quarter-sized amount for medium hair, and a half-dollar-sized amount for longer, thicker hair — but you need to adjust based on results.
Apply product using the praying hands method (smoothing through your hands first, then through your hair) for definition and smoothness, or the raking method (combing through with your fingers) for separation and texture. Then allow your hair to air-dry completely without touching it. This is the non-negotiable step. Any manipulation while drying disrupts curl formation. Once completely dry, you can gently scrunch to break up product cast and soften the look, but that’s optional.
Customizing Your Wash-and-Go by Hair Type
- Tight coils (4C/4B): Use a thicker cream-based styling product with good slip; apply products to soaking wet hair to ensure even distribution
- Medium curls (3A/3B): A lighter gel or cream works well; you can use less product and still get good definition
- Loose waves (2C/3A): Use lightweight gels or serums that won’t weigh curls down; apply to very wet hair for best distribution
- High porosity hair: Use products with silicones or oils to create a seal and prevent excess frizz
- Low porosity hair: Use lightweight, water-based products that won’t sit on top of your curls
Pro tip: Your wash-and-go will look noticeably better on day 2 after you create it. The curls have fully set, the product has distributed evenly through each curl, and the overall texture has developed more dimension. This is completely normal and actually means your technique is working.
7. The Passion Twists or Locs-Inspired Style on Medium to Long Hair
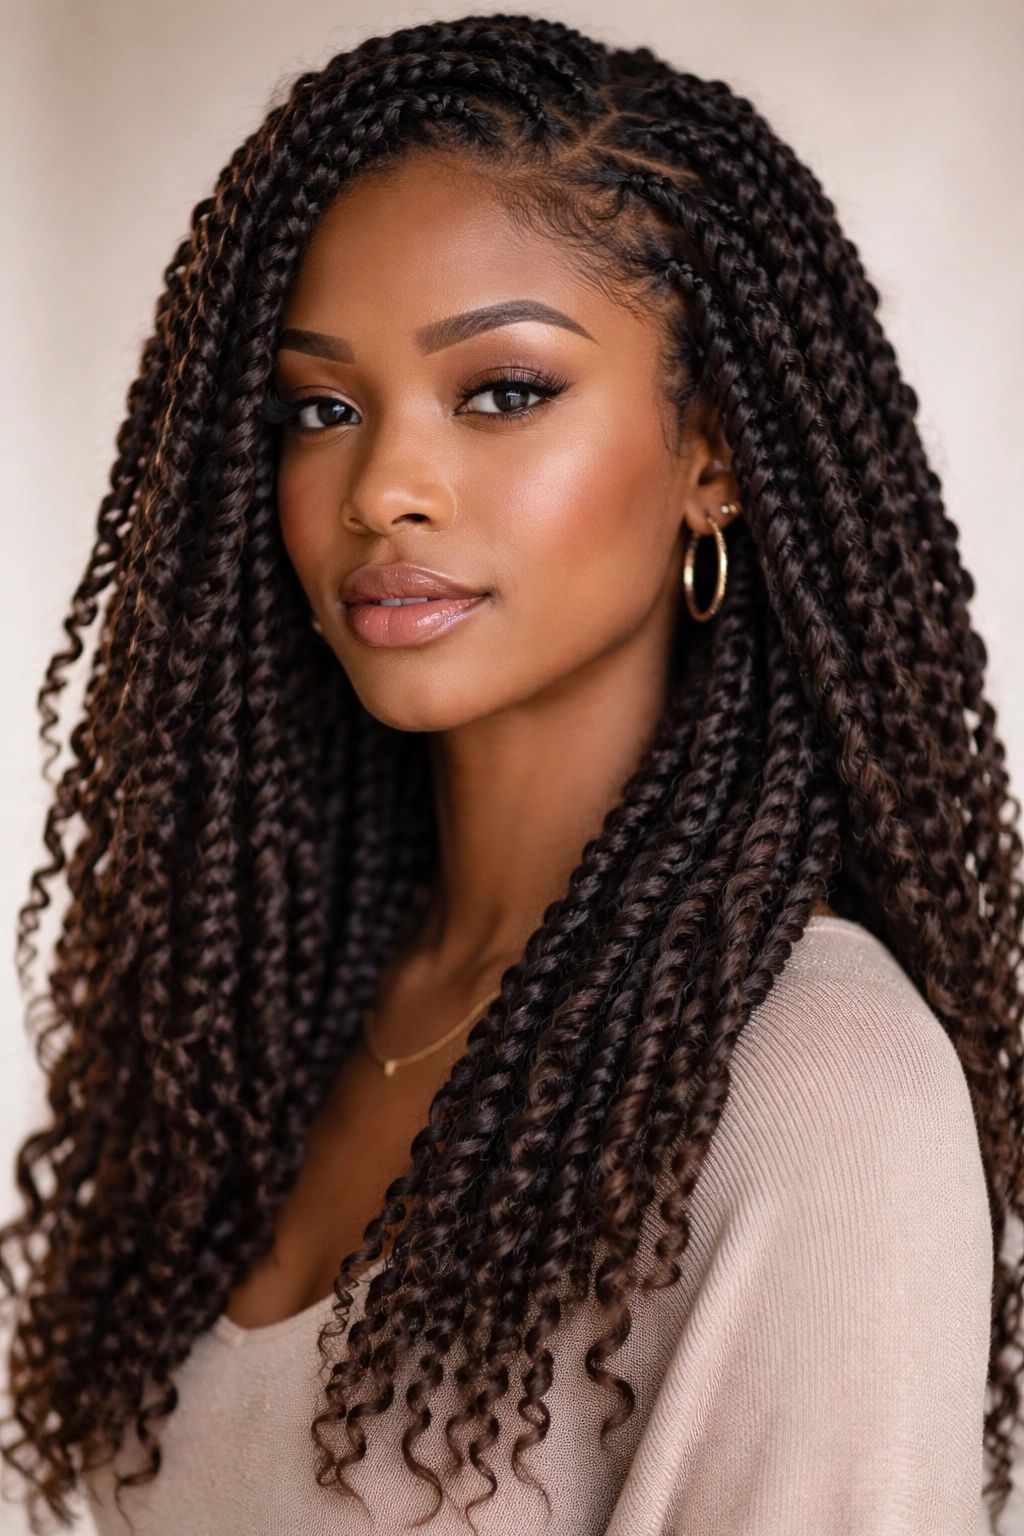
Passion twists are a textured, bohemian protective style that falls somewhere between two-strand twists and faux locs — they’re slightly thicker and have a more organic, textured appearance than traditional twists, and they’re created by wrapping braiding hair or yarn around your natural hair as you twist. This style works beautifully on medium to long hair and creates a stunning, intricate look that can last 4-8 weeks with proper maintenance.
The appeal of passion twists goes beyond aesthetics. They’re genuinely protective because your natural hair is completely covered and you’re not manipulating it daily, which allows it to rest and retain length. They also allow for versatility in styling — you can wear them up or down, create different updos, and even style individual twists differently.
The Step-by-Step Passion Twist Technique
Start with clean, moisturized hair that’s completely dry. Divide your hair into sections — the size depends on how thick you want each twist to be, but roughly ¼ to ½ inch thick is typical. This might result in 20-60 twists depending on your hair length and density. Within each section, create a two-strand twist with your natural hair, twisting tightly from root to tip. Once you’ve created the base twist with your natural hair, grab a piece of braiding hair (usually yarn or synthetic hair in your chosen color) and wrap it around the twist, continuing to twist as you wrap.
The wrapped portion is what creates the textured, bohemian appearance. Continue wrapping and twisting all the way to the ends, making sure the wrapping is even and consistent. The thicker your wrap material and the more you wrap around each twist, the chunkier and more textured the final style appears. Thinner wrapping creates a more delicate look. Once all twists are complete, you can seal the ends by dipping them in hot water (carefully — don’t burn your scalp or fingers) to set the wrap, or you can leave them as is.
Maintaining Passion Twists Throughout Their Lifespan
- Moisturizing routine: Spray twists with a lightweight leave-in conditioner every 2-3 days to keep your natural hair underneath hydrated
- Nighttime protection: Use a silk bonnet or pineapple method (gathering twists into a high ponytail) to prevent frizz and unraveling
- Washing: You can wash passion twists by spraying your scalp and twists with diluted shampoo, focusing on cleansing the scalp area, then rinsing thoroughly
- Refreshing edges: After 4-5 weeks, you may need to re-twist the roots (the section closest to your scalp) if new growth has appeared
- Removal process: Carefully unravel the braiding hair first, then gently untwist your natural hair, being patient to avoid breakage
Worth knowing: Passion twists actually look their best and have the most texture around week 2-3. Right after installation, they look neat and tight. As they sit for a few weeks, they naturally frizz slightly and develop more dimension and a lived-in texture that’s incredibly beautiful.
8. The Braids or Cornrows with Curly Ends on Any Length
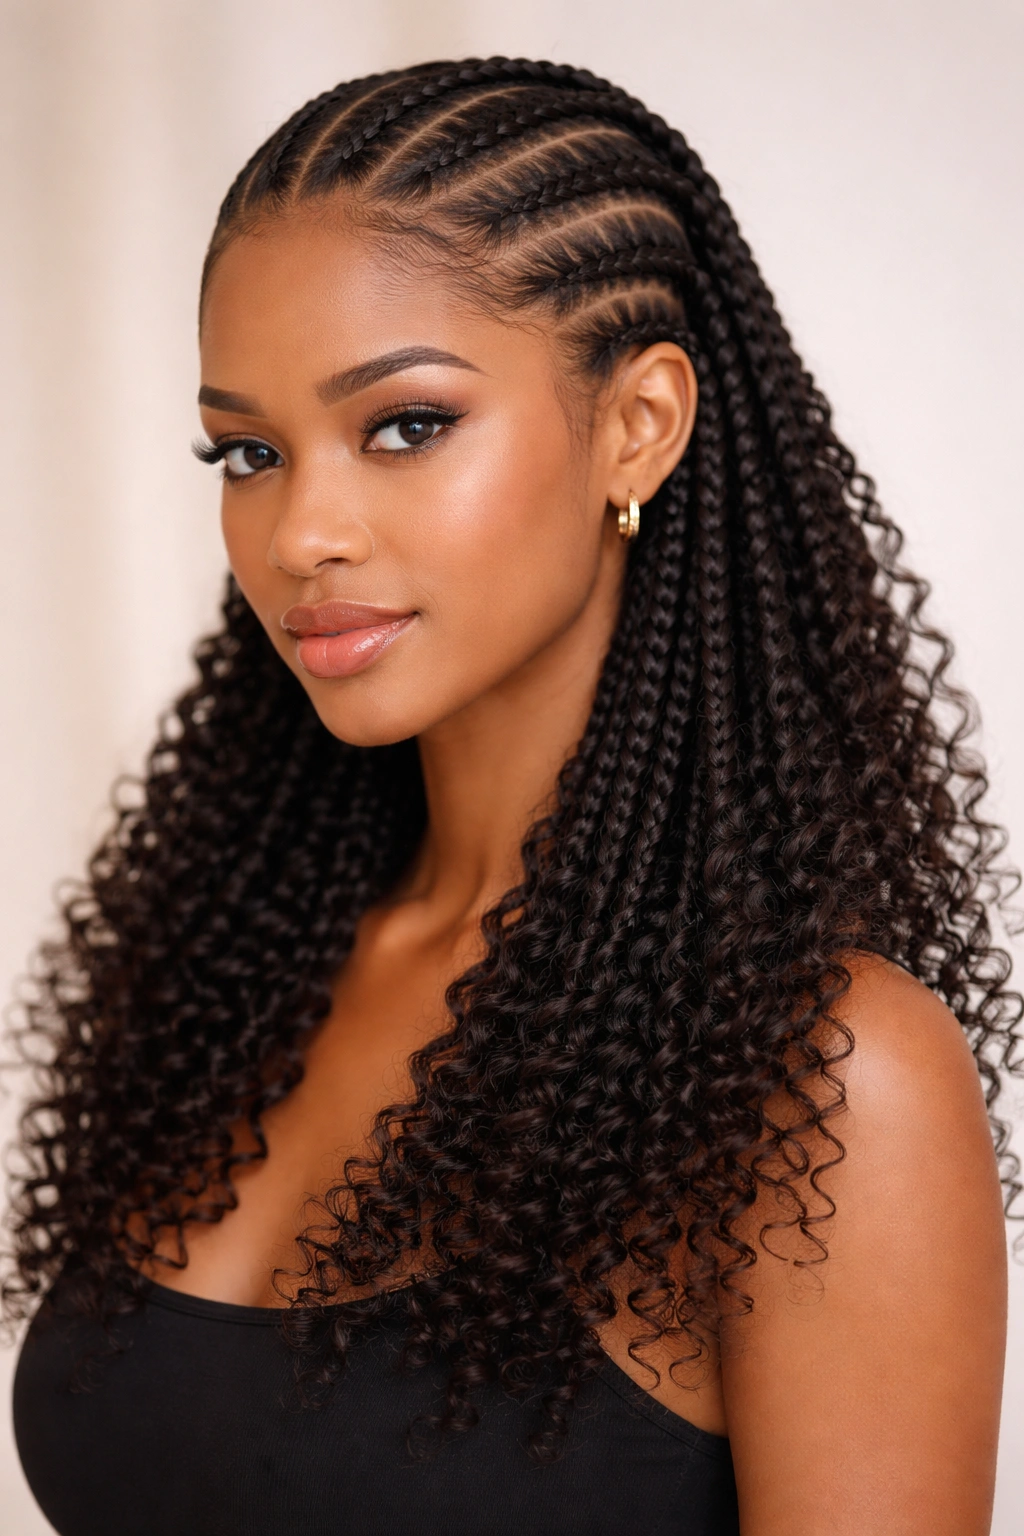
Braids and cornrows are protective styles that work on virtually any hair length, and when you leave loose, curly ends or transition into loose curls at the bottom, you get a style that’s both protective and incredibly versatile. This might mean creating cornrows that go straight back and then transitioning into loose coils at the ends, or creating more loose braids throughout with curly sections, depending on the overall look you’re going for.
The technical advantage of this style is that your hair is protected along the braided sections, so you’re not exposing those areas to daily manipulation and environmental damage. The loose, curly ends add movement, allow you to show your natural curl pattern, and create a beautiful visual contrast between the structured braided sections and the organic texture of loose curls.
Planning Your Braid-Out Design
Sketch out (or simply imagine) the braid pattern you want before you start. Common patterns include: straight-back cornrows transitioning to loose coils, side-part cornrows flowing to one side with curly ends, free-form braids scattered throughout the head with curly sections, or two thick braids framing the face with the rest loose. The design you choose depends on your personal style and the amount of time you have to spend styling.
For the braided sections, create cornrows or regular braids by dividing your hair into sections and braiding tightly and neatly, incorporating hair as you go (for cornrows) or simply braiding the section over itself (for regular braids). The key to beautiful braids is consistency in braid thickness and tension — not too tight that you feel your scalp pulling, but tight enough that the braids hold shape.
For the loose, curly sections, you have options. You can apply curl cream or gel to the unbraided hair and allow it to air-dry into your natural curl pattern, or you can create two-strand twists with the loose hair and then unravel them for a twisted curl texture. You can also leave the loose hair completely natural, with no product, for a relaxed, effortless look. The choice depends on the occasion and your desired texture.
Customizing Your Braid-Out Design
- Ombré braids: Use lighter-colored braiding hair in the lower sections for a color-fading effect
- Braids with beads: Add beads throughout the braids for an elevated, intentional look
- Mixed braid textures: Combine cornrows in some sections with regular braids in others for visual interest
- Spiral braids: Create flat twists or spiral braids instead of straight braids for a more intricate pattern
- Half-braided style: Braid only the top section of your head, leaving the bottom half completely loose and curly
Insider note: This style actually looks more textured and beautiful if you wait a day or two after creating it before wearing it down completely. Initially, the braids are tight and the contrast is sharp. After a day, the braids have relaxed slightly, the curly ends have defined more, and the overall look is more cohesive and blended.
9. The Flat Twisted Updo on Medium to Long Hair
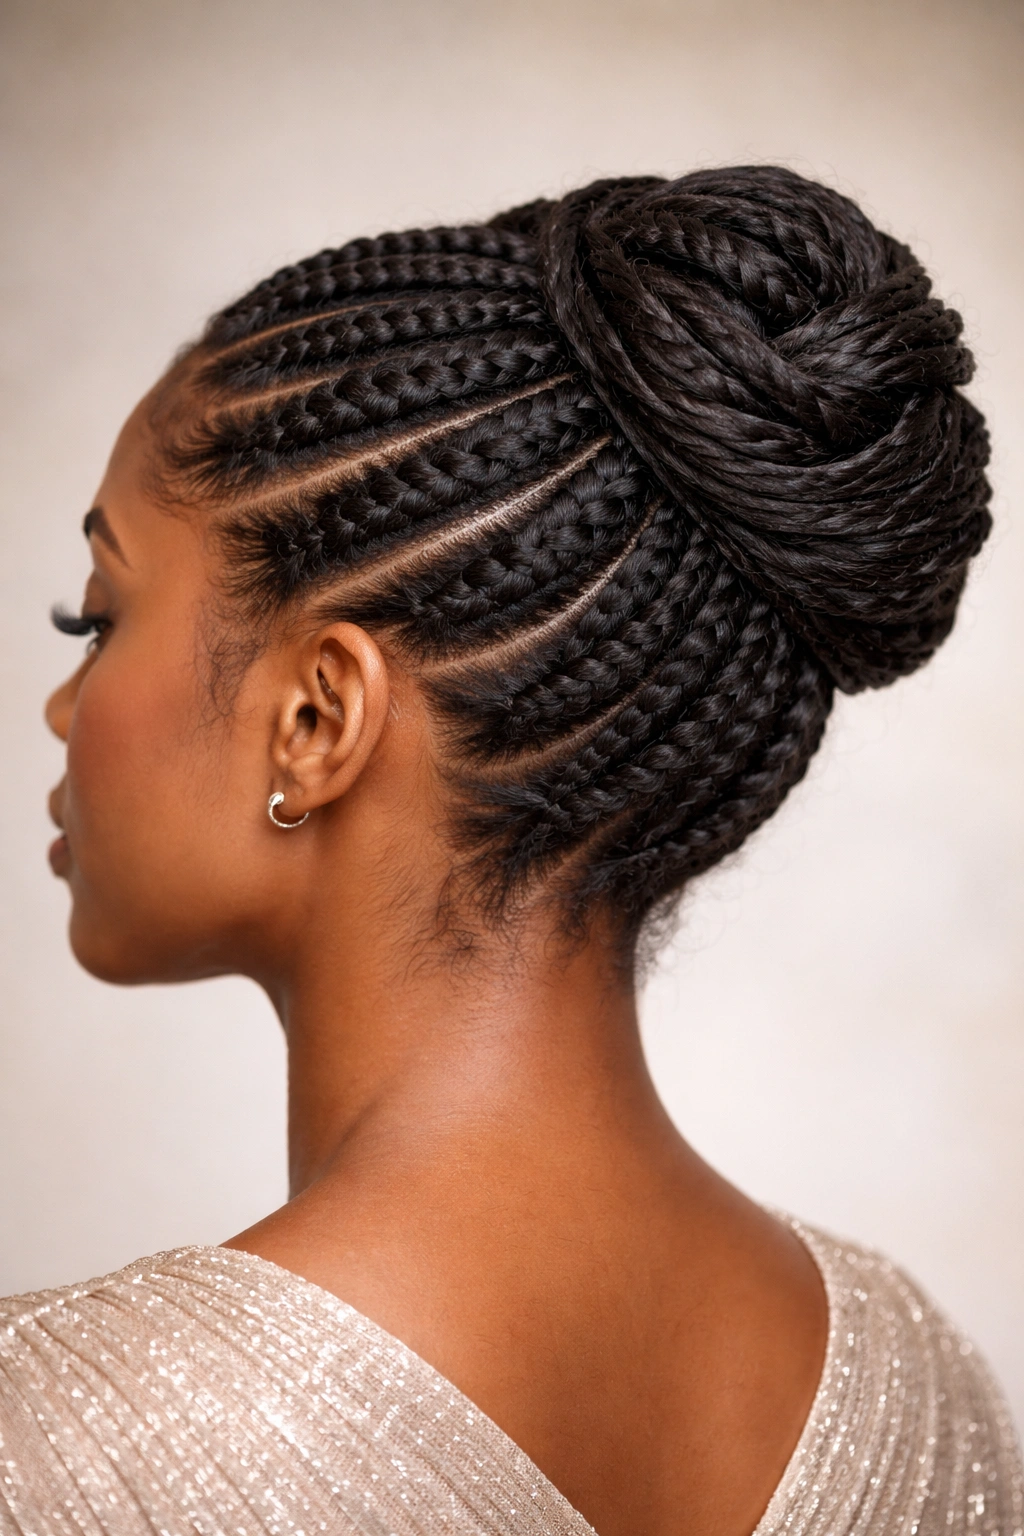
Flat twists are similar to cornrows but created differently — instead of incorporating hair as you braid, you’re creating small two-strand twists flat against your scalp. When you create multiple flat twists going in the same direction or pattern and then gather the ends into an updo, you get a beautiful, intricate protective style that looks incredibly polished and intentional.
The appeal of flat twists is that they’re slightly easier to create than cornrows (no need to incorporate hair as you go), and they create a really beautiful, textured look. This style works particularly well on medium to long hair because you have enough length to gather the twisted ends into a substantial updo — typically a bun, puff, or gathered twist at the back or crown.
The Flat Twist Technique for Scalp-Hugging Texture
Start with clean, damp hair. You’ll create flat twists by taking a small section of hair at your hairline and creating two-strand twists that sit flat against your scalp as you move toward the back of your head. The key technique is to keep the twists very close to your scalp — they should lie flat, not stick out. This requires some practice, but the technique is simply maintaining tension on both sections of hair as you twist, making sure the twist stays in contact with your scalp throughout.
Create multiple flat twists — typically 4-8 depending on your hair thickness and desired effect — all going in the same direction (usually toward the back of your head). Once you reach the nape of your neck, the remaining loose hair from each twist can be combined with the loose hair from other twists and gathered into an updo. Common updo options include a high or low puff, a twisted bun, a braided bun, or simply loose, gathered coils.
The beautiful part is that the flat twists create an intricate pattern that frames your face and adds visual interest, while the updo keeps all hair secured and off your neck. This works for both casual wear and more formal occasions depending on how you finish the updo.
Variations and Styling Options
- Single flat twist: Create just one flat twist from your crown toward the back, then gather remaining hair into a bun or puff
- Wrapped updo: Take the ends of your flat twists and wrap them around the base of your bun or puff for a polished finish
- Beaded flat twists: Add beads to the flat twists for extra visual interest and an elevated look
- Curved flat twists: Instead of going straight back, curve your flat twists to the side for a different aesthetic
- Multiple small twists into a gathered style: Create many small flat twists and gather them all into a high puff or bun for maximum texture and detail
Real talk: Flat twists take practice to get right. Your first attempt might result in twists that aren’t quite flat or that have inconsistent tension. This is completely normal. With each time you create them, you’ll develop the muscle memory and spatial awareness to create them more quickly and neatly. Most people notice a significant improvement by their third or fourth time creating flat twists.
10. The Loose, Elongated Coils on Long Hair with Moisture-Rich Products
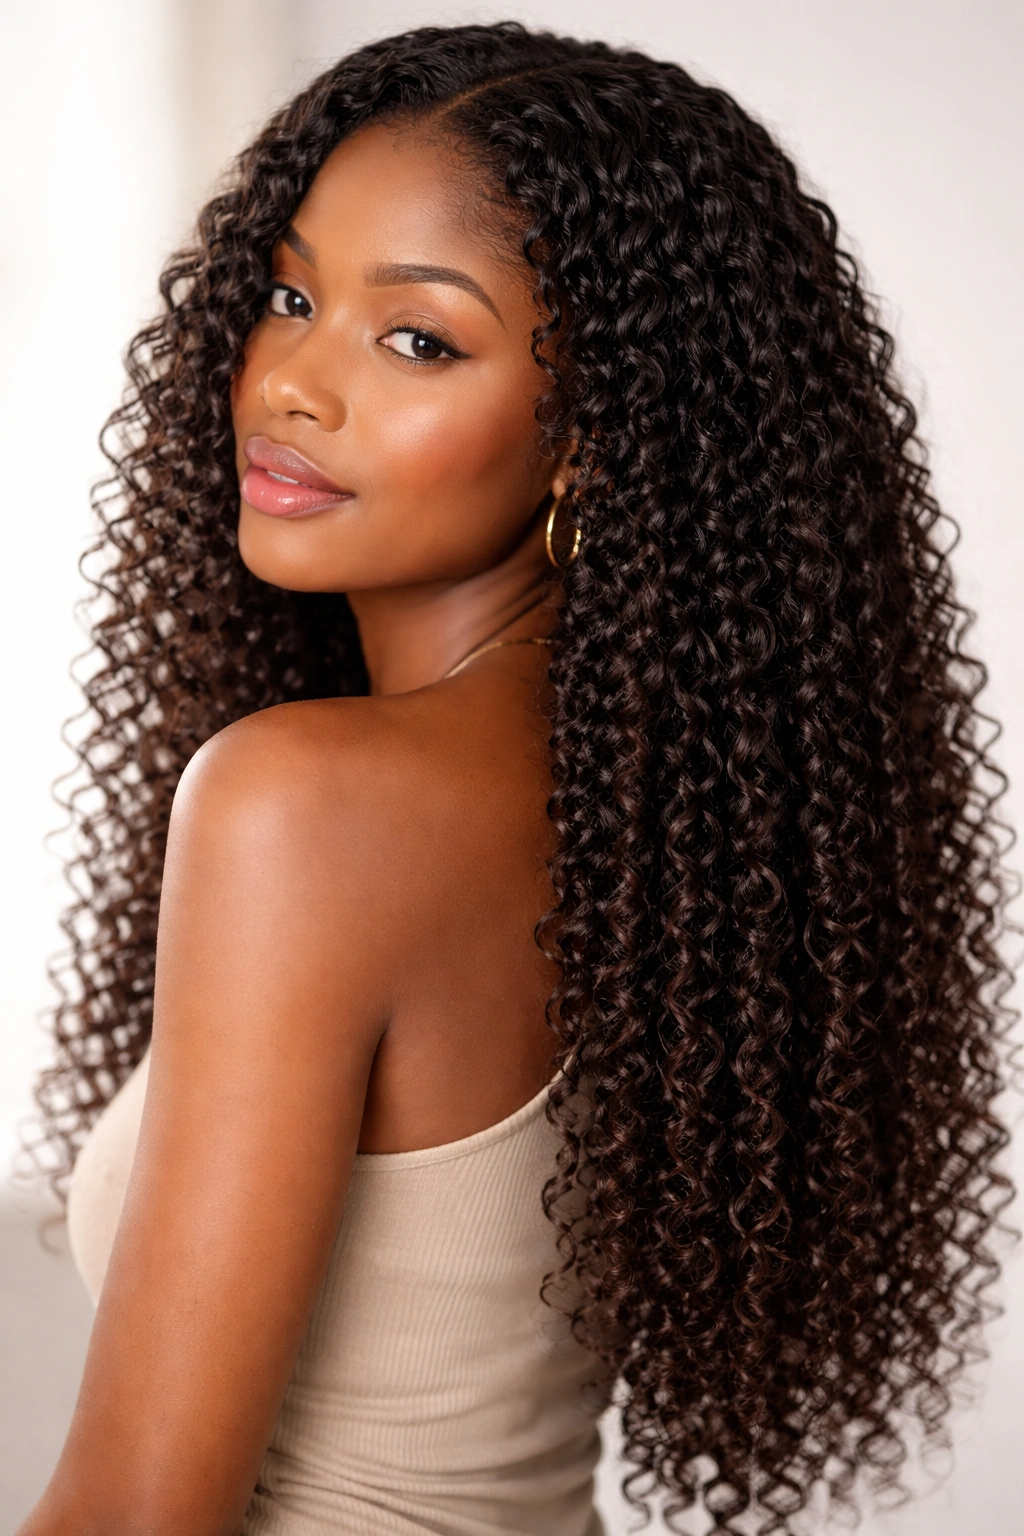
Loose, elongated coils are an incredibly striking style for long afro hair — think beautiful, defined spirals that fall past your shoulders with dimension, separation, and a gorgeous bounce. This style creates a completely different silhouette from tight natural coils because the coils are stretched and elongated, often reaching 12-18 inches even if your hair is only 20-24 inches long. The style works because the coils are defined and visibly textured, showing your natural curl pattern while creating more length and flow than your coils might naturally fall into.
This style is created through a combination of technique and product choice. You’re essentially working with your curl pattern, hydrating it extremely well, and allowing it to dry in an elongated formation. Unlike a two-strand twist-out where you’re manipulating your hair into a new pattern, with elongated coils you’re encouraging your natural curl pattern to express itself in its most open, stretched form.
Creating Elongated Coils with Strategic Product Layering
Start with hair that’s been thoroughly cleansed and is still very wet. Apply a rich leave-in conditioner first — this step is crucial because elongated coils require serious hydration to hold their shape and prevent frizz. Use more leave-in conditioner than you might for other styles; this isn’t a minimalist approach. Follow with a lightweight styling cream or gel that provides definition without being heavy.
Here’s the technique that creates elongation: as you apply product, gently stretch each curl as you work product through. This slight stretching, combined with the weight of water and product in your very wet hair, encourages curls to dry in a slightly more elongated form than they might naturally. You’re not forcing them into an unnatural pattern; you’re working with your natural curl structure to encourage the most open, longest expression of it.
Allow your hair to air-dry completely without manipulation. This usually takes 8-12 hours depending on your hair density and humidity. During drying, the weight of the water and product keeps your curls slightly stretched, so by the time they’re dry, they’ve set into more elongated coils. You can also diffuse-dry on low heat if you need to speed the process, though air-drying generally creates better results.
Maintenance and Refreshing Your Coils
- Moisturizing routine: Spray coils with a leave-in conditioner every 2-3 days to maintain hydration and definition
- Nighttime protection: Use a silk bonnet or pineapple method to prevent frizz and maintain your coil pattern
- Refreshing second-day coils: A light misting of water mixed with leave-in conditioner and a tiny amount of gel will revive your coils beautifully
- Weekly deep conditioning: Use a rich, moisturizing deep conditioner weekly to maintain the hydration elongated coils need
- Avoiding manipulation: Resist the urge to touch and rearrange your coils while they’re wet or damp
Pro tip: Elongated coils actually look their best on day 2-3 after you create them. The initial drying sometimes creates some frizz, which calms down as the coils fully set. By day 2, you’ve got maximum definition, separation, and bounce — that’s the sweet spot for this style.
Final Thoughts
Choosing the right afro curl style for your hair comes down to three things: your current hair length, how much time you want to spend styling, and whether you prefer protective styles (which keep your ends tucked away and minimize daily manipulation) or styles that show your natural curl pattern with minimal coverage. Every style in this guide is genuinely beautiful and achievable — the difference between an okay version and a stunning version comes down to understanding the specific technique, using the right products for your curl type, and giving yourself permission to practice and improve.
The styles you gravitate toward will likely shift depending on what’s happening in your life. During seasons when you have more time, you might enjoy the ritual of creating a detailed braided crown or the meditative process of installing passion twists. During busier seasons, a simple wash-and-go or a high puff might be exactly what you need. The point is that you have options — genuinely beautiful, protective, intentional options that celebrate your natural hair rather than fighting against it.
Start with one or two styles that appeal to you and practice them until you feel genuinely confident. Watch video tutorials if a particular technique feels unclear. Don’t hesitate to adjust products or methods based on how your specific curl pattern responds. Your natural hair is unique to you, and the most beautiful version of any style is the one you’ve customized to work with your texture, your lifestyle, and what makes you feel confident and like yourself.
