



Type 4 natural hair is gorgeous, and messy buns are one of the easiest ways to show it off while keeping it protected. But let’s be real—not every messy bun tutorial out there works for the texture, density, and shrinkage that comes with tightly coiled or kinky hair. You need styles that actually hold, that look intentionally undone rather than undone-for-the-wrong-reasons, and that don’t pull your hairline or require you to use so much product you could seal a car with it.
The good news? Messy buns are perfect for type 4 hair when you know how to work with your texture instead of against it. The key is understanding that “messy” for coiled hair means something different than messy for straighter textures. It means celebrating the volume, the natural springiness, and the way your coils naturally create texture and dimension without you having to tease it to death. A well-executed messy bun on type 4 hair looks intentional, stylish, and honestly, a little bit effortless (even if it takes a few tries to figure out what works for your specific curl pattern).
This isn’t just about throwing your hair up and calling it a day. We’re talking about styles that showcase your natural curl definition, that work whether your hair is freshly washed or a few days into a refresh, and that can transition from a casual weekend look to something polished enough for work or a night out. The styles below are tested approaches that actually work with type 4 hair’s unique characteristics, complete with the specific techniques and troubleshooting tips that most generic bun tutorials never mention.
1. The Chunky Textured Bun
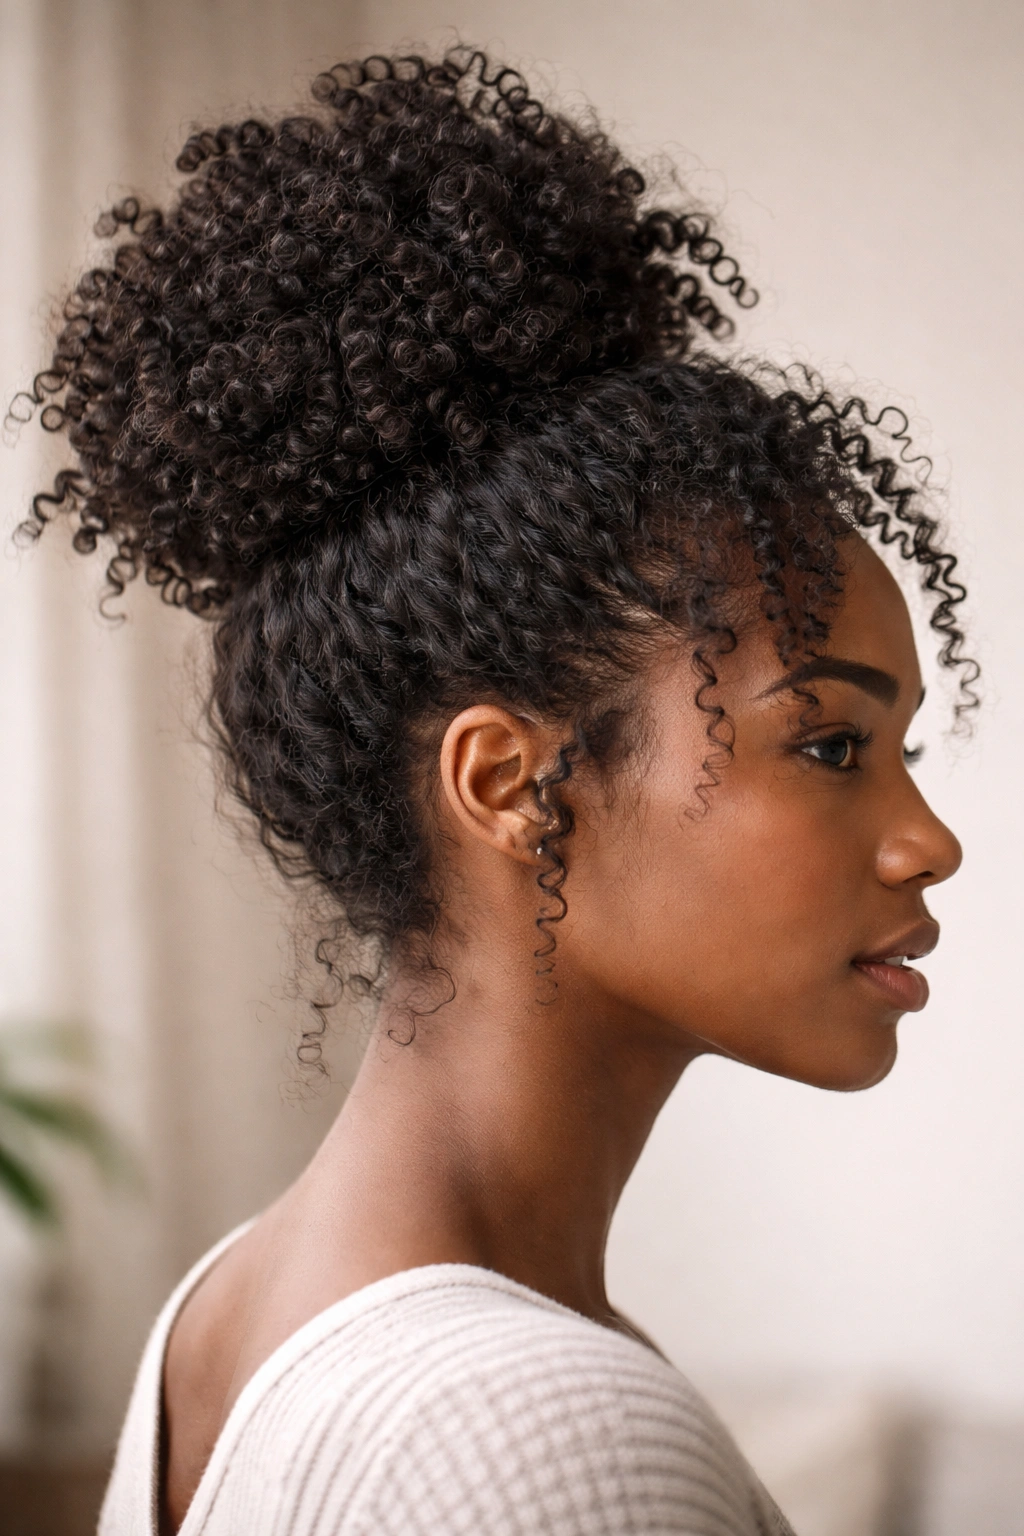
This is the most forgiving messy bun for type 4 hair, and it’s the one you’ll want to master first if you’re new to styling natural texture. The whole goal is to gather your hair loosely and let your coils do the work of creating that “messy” look naturally. You’re not aiming for smooth, sleek, or polished—you’re celebrating the texture itself.
Why It Works for Type 4 Hair
Type 4 hair naturally has volume and dimension built in. When you create this bun style, you’re not fighting against your curl pattern; you’re using it. The individual coils hold their shape and catch the light beautifully, creating a textured crown that looks intentional even when it’s loose. Because you’re gathering the hair gently rather than smoothing it, you’re also minimizing breakage and strain on your edges, which is crucial for long-term hair health.
How to Create This Look
Start with damp or slightly moisturized hair—completely dry hair may be harder to work with and more prone to breakage. If your hair shrinks significantly when dry, dampening it will give you more length to work with. Flip your head upside down and gently gather your hair into a high ponytail at the crown, securing it with a silk-lined hair tie. The key here is “gently”—you’re not trying to smooth every strand into submission.
Once you’ve secured the ponytail, gently coax a few sections of coils out around your face and at the nape of your neck. These should look a bit undone and shouldn’t require much manipulation. Now, with the ponytail still flipped upside down, take the ponytail section and loosely wrap it around the base of the elastic, creating a loose spiral. Secure it with bobby pins as needed, but don’t aim for a neat, compact bun—you want some coils sticking out at all angles.
Tips for Success
The texture holds this style together, so resist the urge to use heavy products or lots of gel to try to smooth it. A lightweight leave-in conditioner and maybe a touch of edge control around your hairline is truly all you need. If your bun feels like it’s unraveling, bobby pins hidden throughout the wrapped section will secure it without flattening your coils. This style typically lasts three to five days depending on how you sleep, so pineapple it at night (gather the ponytail at the crown and secure it loosely with a silk scrunchie) to maintain the texture.
Best for: Casual days, working out, running errands, or any time you want your hair protected without thinking about it too hard.
2. The High Crown Bun
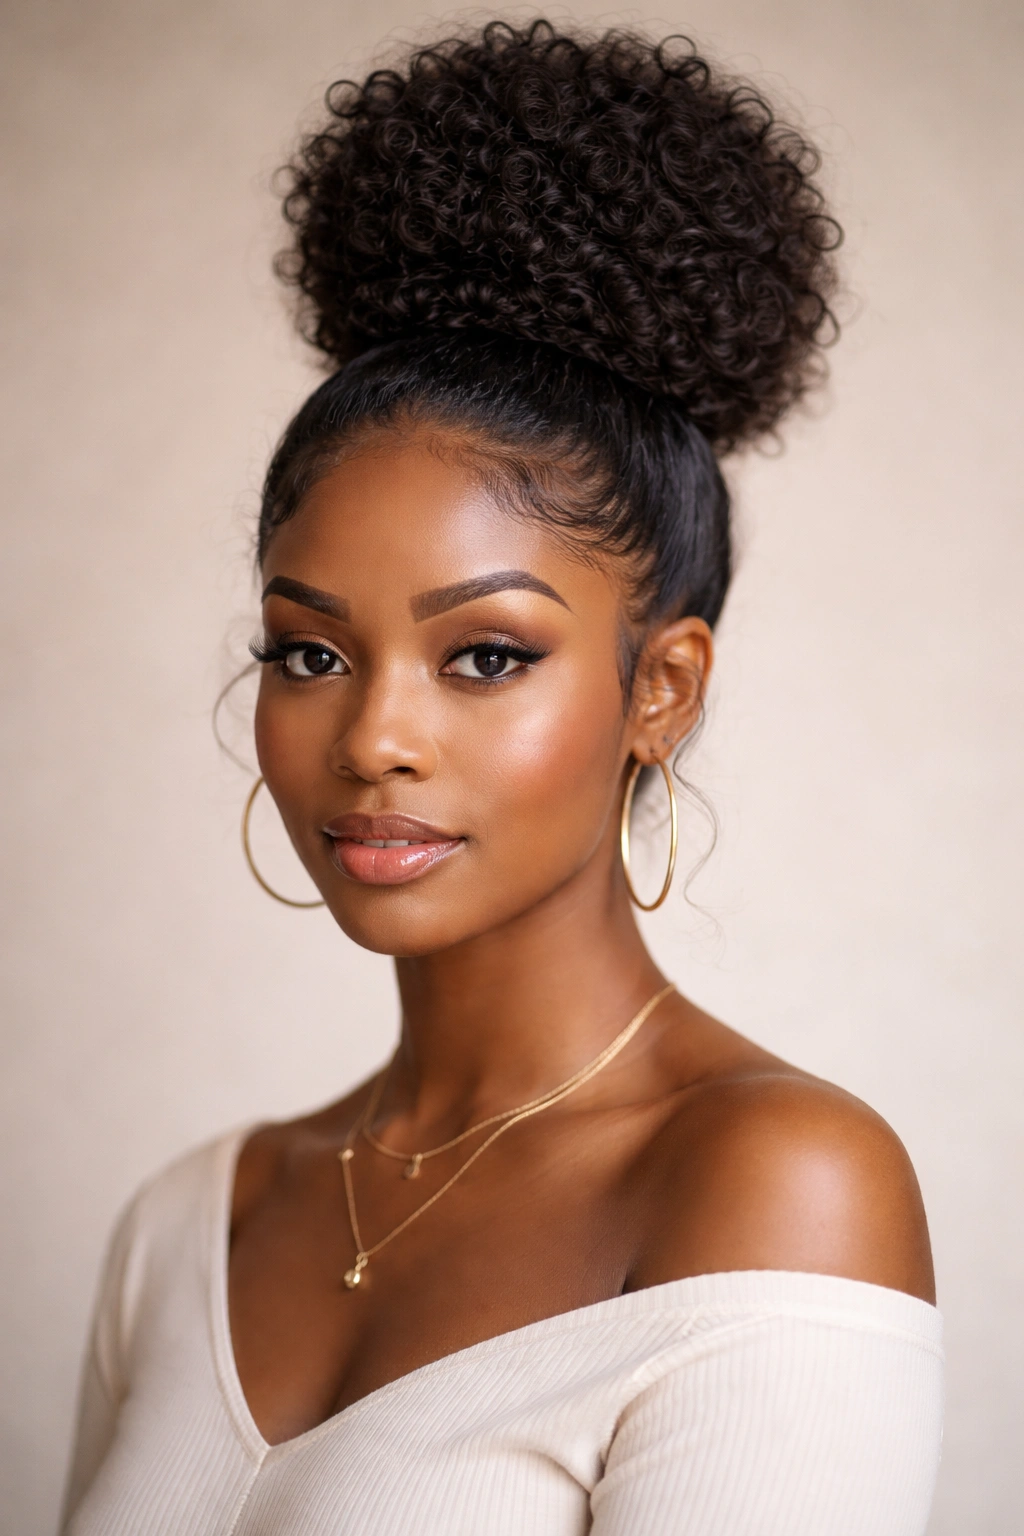
This style sits at the very top of your head and creates a lifted, almost regal silhouette that works beautifully with the natural volume of type 4 hair. It’s one of the more polished-looking messy bun options, which makes it perfect for those days when you want to look put-together while still keeping things effortless.
Why It Works for Type 4 Hair
The height at the crown plays into the natural growth pattern of coiled hair and draws attention upward, which actually makes the style feel more intentional and styled. The high placement also keeps the hair away from your neck and shoulders, reducing friction and keeping your styles fresher longer. This positioning also means less tension on your edges since you’re not pulling hair back so tightly—everything is gathered up and away naturally.
How to Create This Look
Start with hair that’s at least partially set or styled (fresh twist-outs, braid-outs, or refreshed curls work beautifully). Using a fine-tooth comb or your fingers, gently flip your head to one side and create a deep side part. Gather the hair straight up from the crown into a high ponytail—think the very top of your head, not your typical ponytail placement. Secure with a silk-lined elastic.
Now take that ponytail and use a bobby pin or two to anchor it to the base, but don’t wrap it smoothly. Instead, let the coils bunch and fold naturally around the base of the elastic, and tuck stray sections in as you go. Grab a few smaller sections from the ponytail and let them fall gently against your head to create that “messy” element. The more you let the natural texture speak, the better this style looks.
Tips for Success
This style works especially well if you’ve been refreshing your curl pattern between washes—two or three-day-old curls often have more dimension and hold better than freshly set ones. A light mist of water or refresher spray on the day you’re styling will help reactivate your curl pattern and make everything sit more smoothly. If you have shorter or more delicate hair at your edges, take extra care when pulling back to the high crown—you can section out a few face-framing pieces beforehand to avoid tension there.
Best for: Work, dinner out, date nights, or any time you want to look polished while maintaining that effortless natural texture vibe.
3. The Twisted Crown Bun
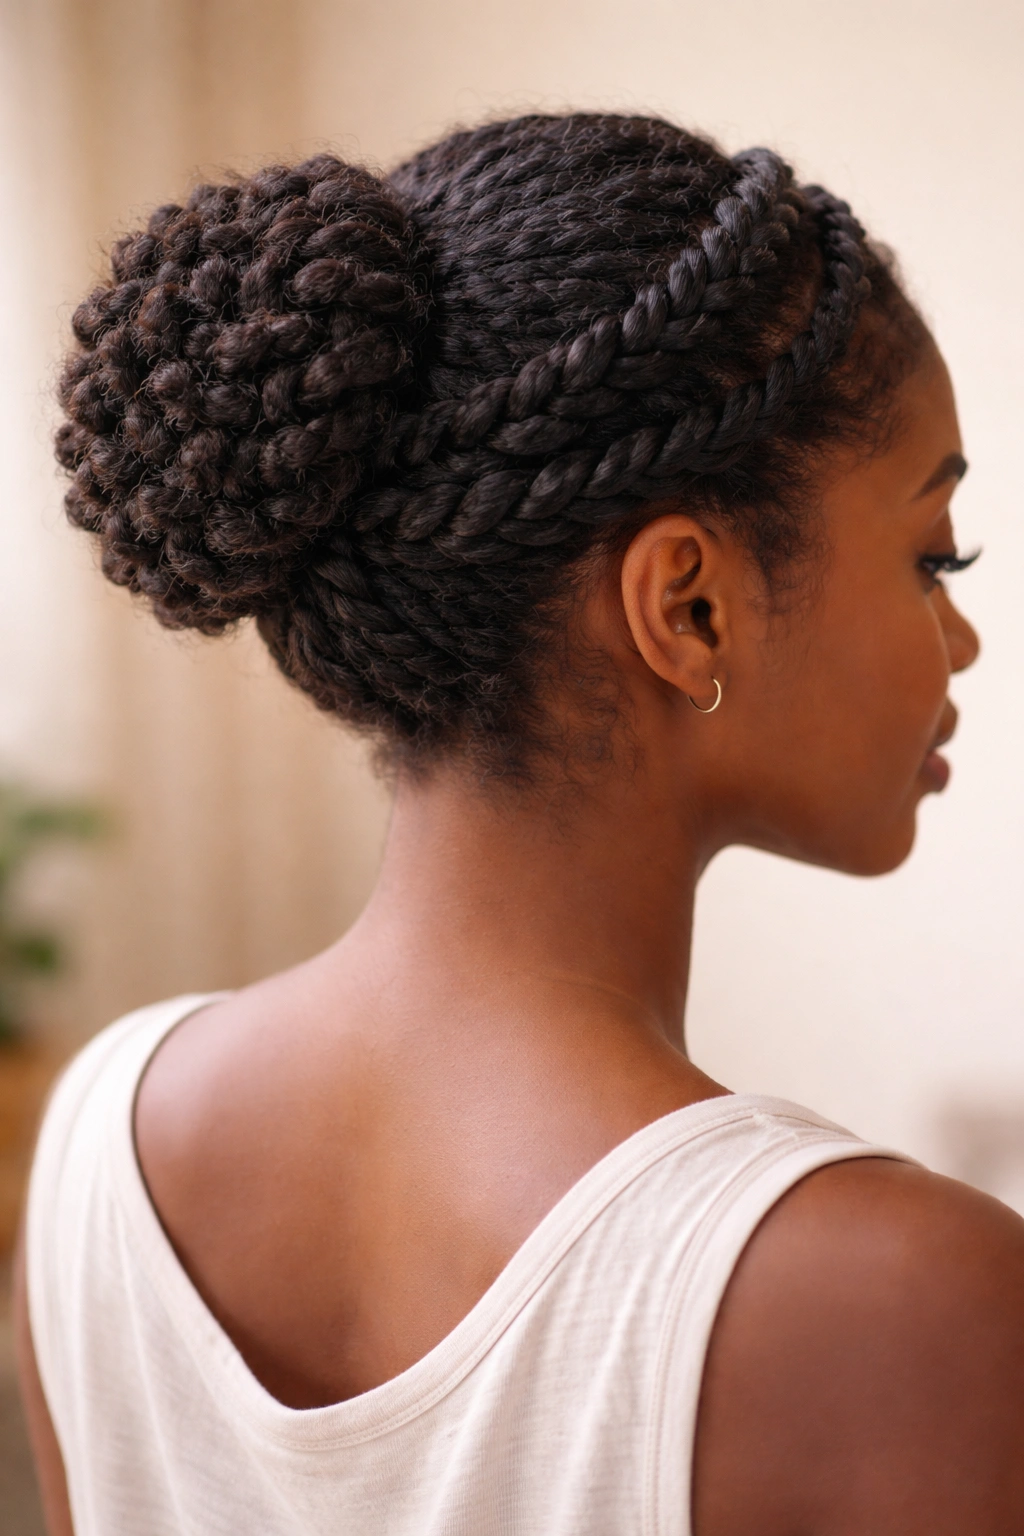
This style involves two-strand twists wrapping around your head like a crown before looping into a bun, creating visual interest and a more intricate look than a simple gathered bun. It’s more involved than some of the other styles, but it’s absolutely worth the extra few minutes.
Why It Works for Type 4 Hair
Twists on type 4 hair are stunning because they show off your coil definition and create a smooth, defined line that contrasts beautifully with the natural texture of the bun itself. The twists give the style structure and intentionality, so even if the bun section is loose and textured, the whole look feels sophisticated and well-planned. This style also keeps your hair in a protective state without needing heavy products—the twists naturally hold thanks to your curl pattern.
How to Create This Look
Start with moisturized, detangled hair. If your hair is freshly washed, let it dry to at least 50% before starting, or work with damp hair using a leave-in conditioner to help with manipulation. Create two even sections by parting your hair down the middle from your forehead to the back of your head.
Take one section and create a two-strand twist, beginning at your temple and twisting as you move toward the back of your head. The twist should follow the natural curve of your head. Secure the end temporarily with a clip. Repeat on the other side. Now you have two twists that curve from your temples toward the back. Unclip the twists and gather all your hair (twists and loose hair) into a ponytail at the back, securing it with an elastic.
Take the ponytail and loosely wrap it around the base of the elastic, tucking and pinning as you go. The twists will naturally integrate into the bun, creating a textured crown effect. Pull out a few coils around the bun to emphasize the messy aesthetic, and secure anything loose with bobby pins.
Tips for Success
This style requires slightly more product than others—a lightweight styling cream or gel helps the twists stay defined without feeling crunchy. Work in sections to avoid frustration, especially when you’re first learning the style. If your twists are falling apart, you can apply a tiny bit more product to each one as you go. This bun can be styled at night for next-day wear, which is great for extending your style cycle. Sleep on a silk pillowcase to keep the twists intact.
Best for: Special occasions, work presentations, date nights, or days when you want your natural hair to feel dressed up.
4. The Coil-Wrapped Bun
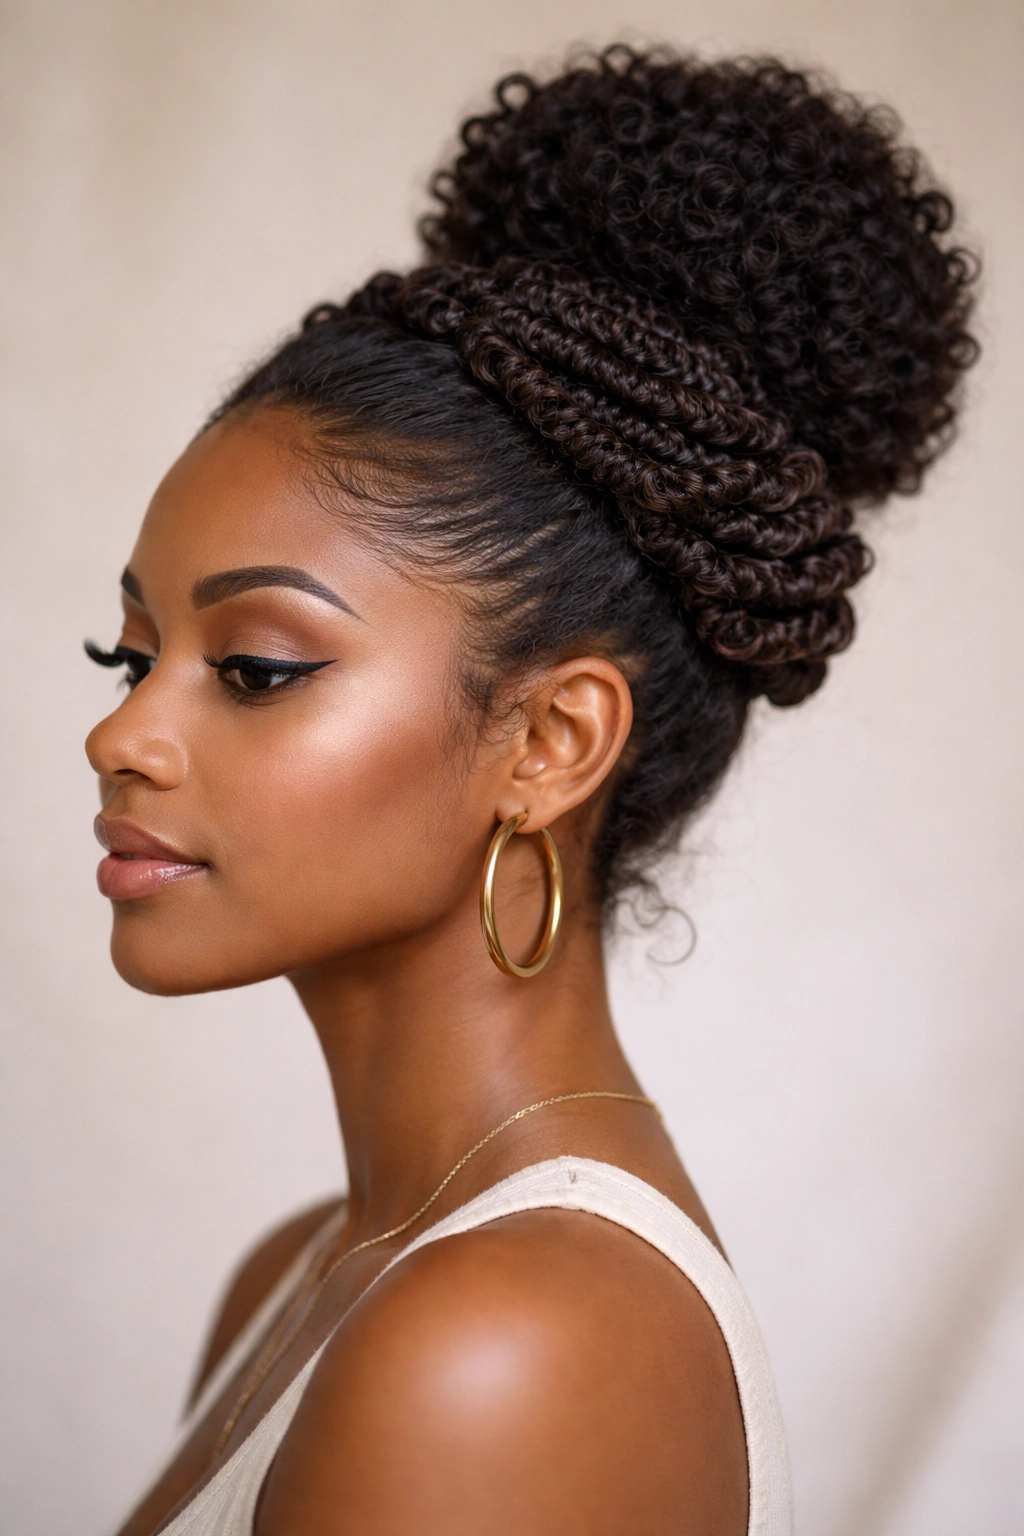
This style emphasizes your natural coils by intentionally wrapping defined coils around the bun base, creating a visually striking and textured effect that looks incredibly intricate even though it’s surprisingly manageable once you get the hang of it.
Why It Works for Type 4 Hair
This is the style that really celebrates type 4 hair in its most authentic form. You’re not smoothing, straightening, or trying to minimize your curl pattern—you’re literally using your coils as a decorative element. The wrapped coils add visual depth and dimension, and because you’re working with your natural texture rather than fighting it, the style lasts longer and causes less stress to your hair.
How to Create This Look
Begin with hair that has clearly defined curl or coil patterns—a fresh wash-and-go, a braid-out, or a twist-out are all perfect starting points. Gently gather your hair into a high or mid-height ponytail using your fingers or a wide-tooth comb, securing it with a silk-lined elastic. Don’t smooth it too much; you want to maintain the definition of your coils.
Now, identify several individual coil sections from the ponytail that are well-defined and have good texture. Starting with one section, gently separate it from the ponytail and wrap it around the base of the elastic, like you’re coiling it in a spiral. Use bobby pins as needed to keep it in place, then move to the next coil section and repeat. You’ll create a spiral effect of wrapped coils around the base of your bun, with the remaining hair in the ponytail loosely bunched behind these wrapped sections.
Tips for Success
The key to this style is patience and using coils that already have strong definition. If your coils are loosely defined or your hair tends toward a more wavy or fluffy texture, this style may not work as dramatically—but don’t count it out; you can still wrap textured sections for a subtler effect. Use minimal product; you want the coils themselves to hold the shape, not gel. A light leave-in conditioner or curl cream is plenty. This style looks especially good on the second or third day when coils have set further and have even more definition.
Best for: Any occasion where you want to make a bold, beautiful statement with your natural texture. This is the ultimate “yes, this is my real hair” style.
5. The Braided Base Bun
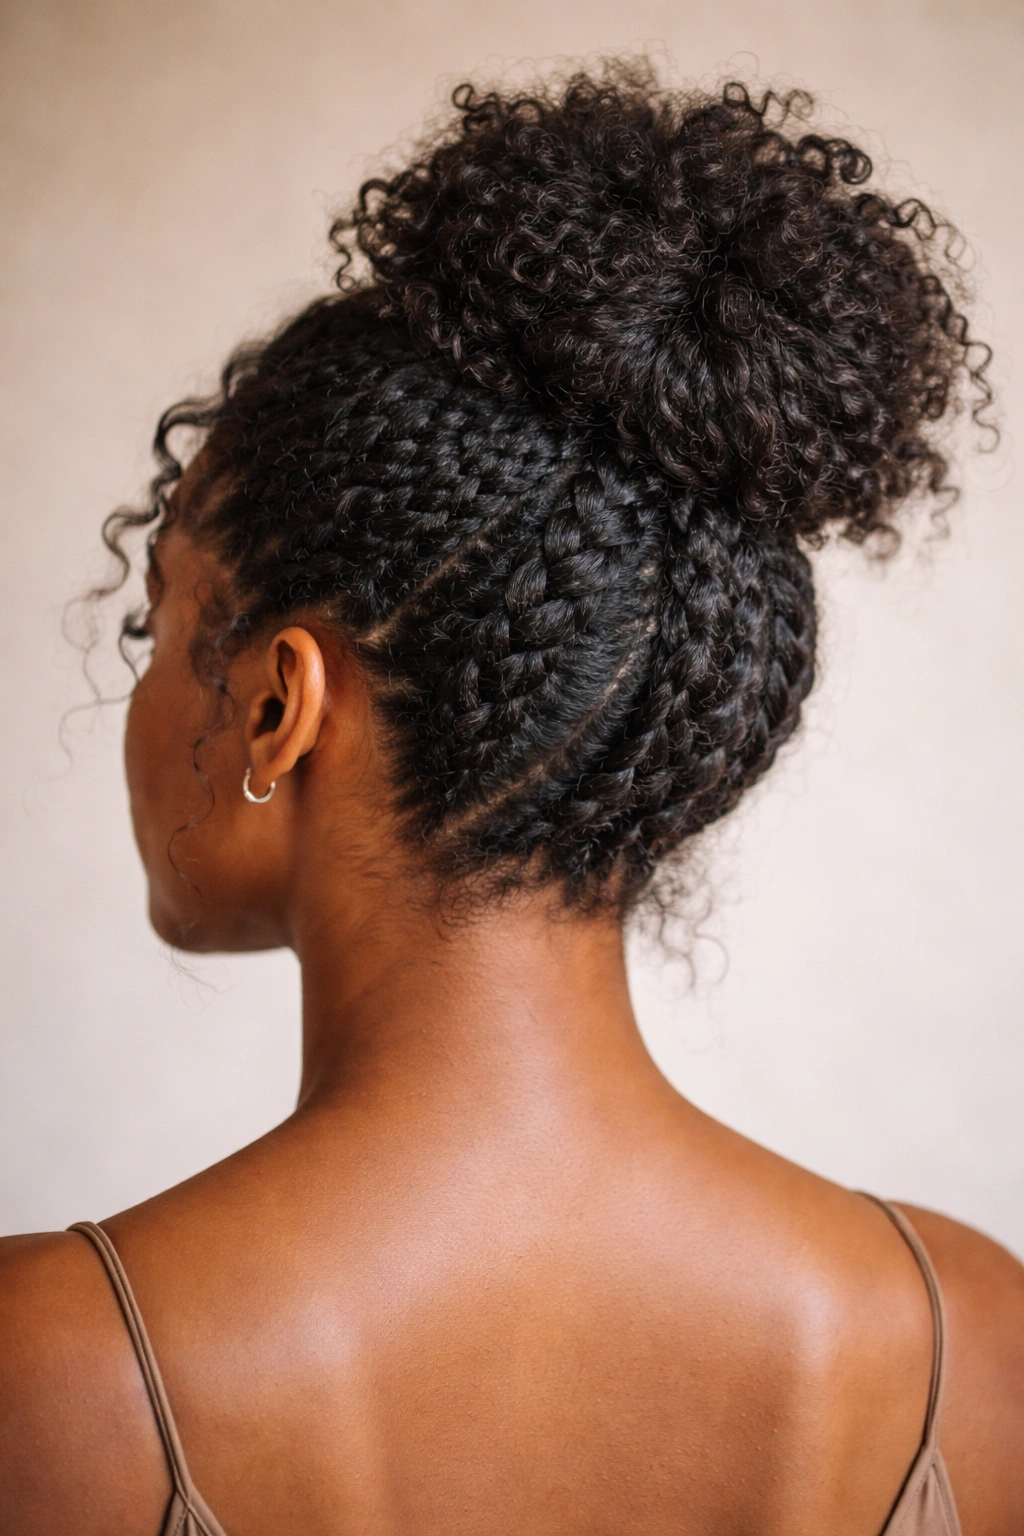
This style creates a structured base of one or more braids and then bunches the remaining hair loosely on top, combining the organization of braids with the effortless feel of a messy bun. It’s a fantastic middle ground between simple and intricate.
Why It Works for Type 4 Hair
Braids on type 4 hair are protective, beautiful, and they hold exceptionally well because of your natural curl pattern. By using one or more braids as the foundation of your bun, you’re creating a solid anchor that keeps everything in place without requiring you to overload your hair with products or bobby pins. The braids provide visual interest and structure, while the bunched top creates the relaxed, messy element.
How to Create This Look
Divide your hair into two sections with a middle part or a deep side part. Create a Dutch braid (braiding from top to bottom, with the sections going under rather than over each other) on each side, starting at your temple and braiding toward the back. These braids should meet at the back of your head.
Once both braids reach the back, secure them temporarily with clips. Now, gather all remaining hair (including the ends of the braids and any hair between them) into a low ponytail at the nape of your neck. Secure it with an elastic. Take that ponytail and loosely wrap it around the base, bunching it up and pinning as you go. The two braids become the structural base, spiraling into the bun, while the looser hair creates the textured, messy top layer.
Tips for Success
Fresh braids (done the day of or the night before) hold better than braids done several days prior. If your edges are delicate, you can skip the face-framing braids and just do one central braid down the back of your head for a similar effect with less tension. This style works beautifully at night if you braid your hair before bed—by morning, the braids are set, and you just need to gather everything into the bun for a surprisingly polished look that feels completely effortless. Use a silk or satin bonnet to protect the style overnight.
Best for: Days when you want your style to feel intentional and structured, but you don’t want to spend a lot of time on it. Great for work, casual outings, or any time you want the best of both worlds.
6. The Low, Loose Bun
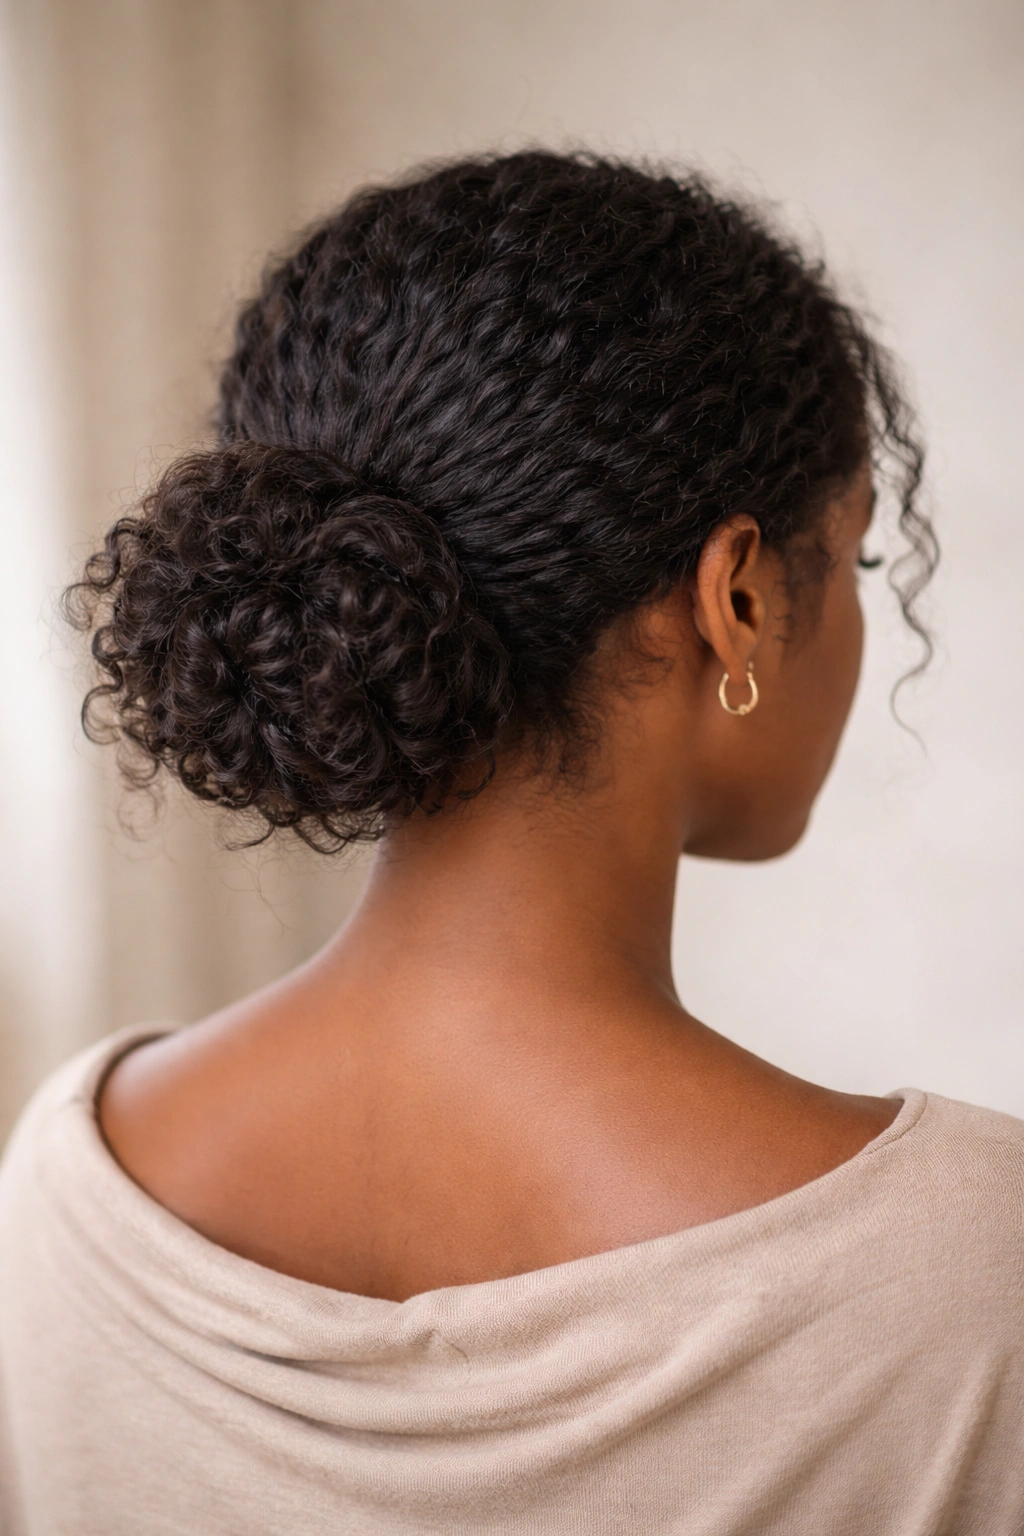
This style sits at the nape of your neck and uses barely any tension, making it one of the gentlest options for your hairline and edges. It’s perfect when you want maximum comfort and minimal styling stress.
Why It Works for Type 4 Hair
The low placement keeps your edges completely safe and free from tension, which is crucial if you’ve experienced breakage or thinning. Type 4 hair can be delicate at the edges, and a low, loose bun respects that vulnerability. The low gathering also creates a sophisticated look that works for professional settings, and the loose texture keeps your natural curl pattern visible and beautiful rather than flattened against your head.
How to Create This Look
Start with hair that’s either freshly styled or refreshed. Use your fingers to gently gather hair at the nape of your neck into a very low ponytail—we’re talking right at the base of your head, almost where your neck meets your hair. Secure it loosely with a silk-lined elastic; you should be able to slip your finger through the base without feeling tension.
Now, here’s where the “loose” part comes in. You’re not wrapping this ponytail around the elastic to create a compact bun. Instead, loosely coil it around the base, letting big sections of coils stick out at all angles. Use just one or two bobby pins, tucked underneath, to secure the coil in place. The rest of the bun is held together purely by the natural texture and structure of your hair—no heavy product, no lots of pins, just your coils doing what they naturally do.
Tips for Success
This style is forgiving and low-effort, but it does require your coils to have decent shape and definition. If your hair is very shrunk or your coils are loose, adding a very light curl cream or gel can help everything hold together. This is the perfect style for sleeping—it’s so loose that you can sleep on it without creating indentations or ruining the texture. Wake up, fluff it out a bit, and you’re ready to go. It lasts beautifully for at least a week if you pineapple it at night.
Best for: Professional settings, relaxed days at home, sleeping, or any time you want maximum comfort and minimal intervention.
7. The Double Bun
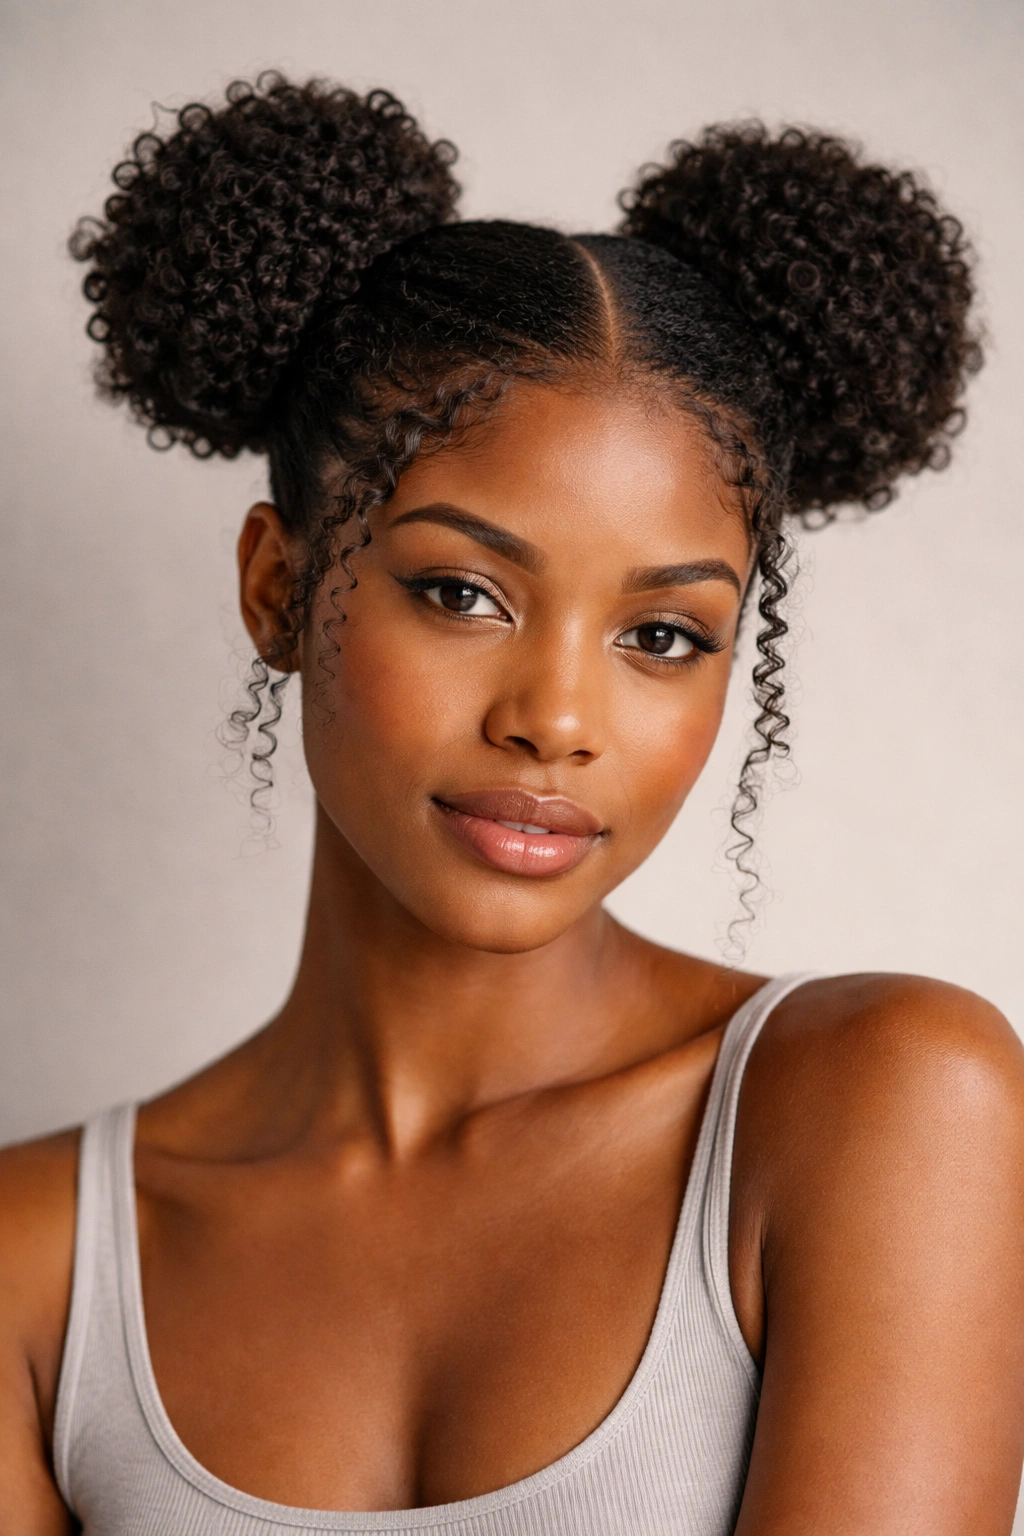
This playful style creates two smaller buns, one on each side of your head, giving you that youthful, creative energy while still keeping your hair protected and out of your face. It’s more daring than a single bun, but it works surprisingly well with natural texture.
Why It Works for Type 4 Hair
Double buns actually balance the volume that comes with type 4 hair beautifully. Rather than pulling all that volume to one spot at the top or back of your head, you’re dividing it, which creates a more proportionate silhouette. The two buns also mean more texture on display—you get twice the opportunity to show off your coils and natural definition. Plus, if one bun loosens throughout the day, you still have another one holding everything together.
How to Create This Look
Start with a center part, dividing your hair into two even sections from your forehead straight down the middle of your head. Take one section and create a high ponytail on that side of your head, securing it with an elastic. Repeat on the other side so you have two symmetrical ponytails.
Now, take the first ponytail and loosely coil it around its base, using bobby pins as needed to secure. Repeat with the second ponytail on the other side. You should end up with two distinct buns, positioned symmetrically. Let plenty of coils stick out from each bun for that messy texture—this style actually looks better when it’s a bit undone rather than perfectly neat.
Tips for Success
This style works best with shoulder-length hair or longer, but you can make it work with shorter natural hair too; the buns will just be smaller and sit closer to your scalp. Make sure both ponytails are gathered at the same height and tension so the style looks intentional rather than lopsided. Use bobby pins in a color that matches your hair so they blend in. This style is surprisingly durable because the two buns act as anchors for each other; even if one loosens, the whole style usually stays put.
Best for: Creative days, playing around with your style, younger looks, casual hangouts, or whenever you want to have fun with your natural hair.
8. The Pineapple Bun
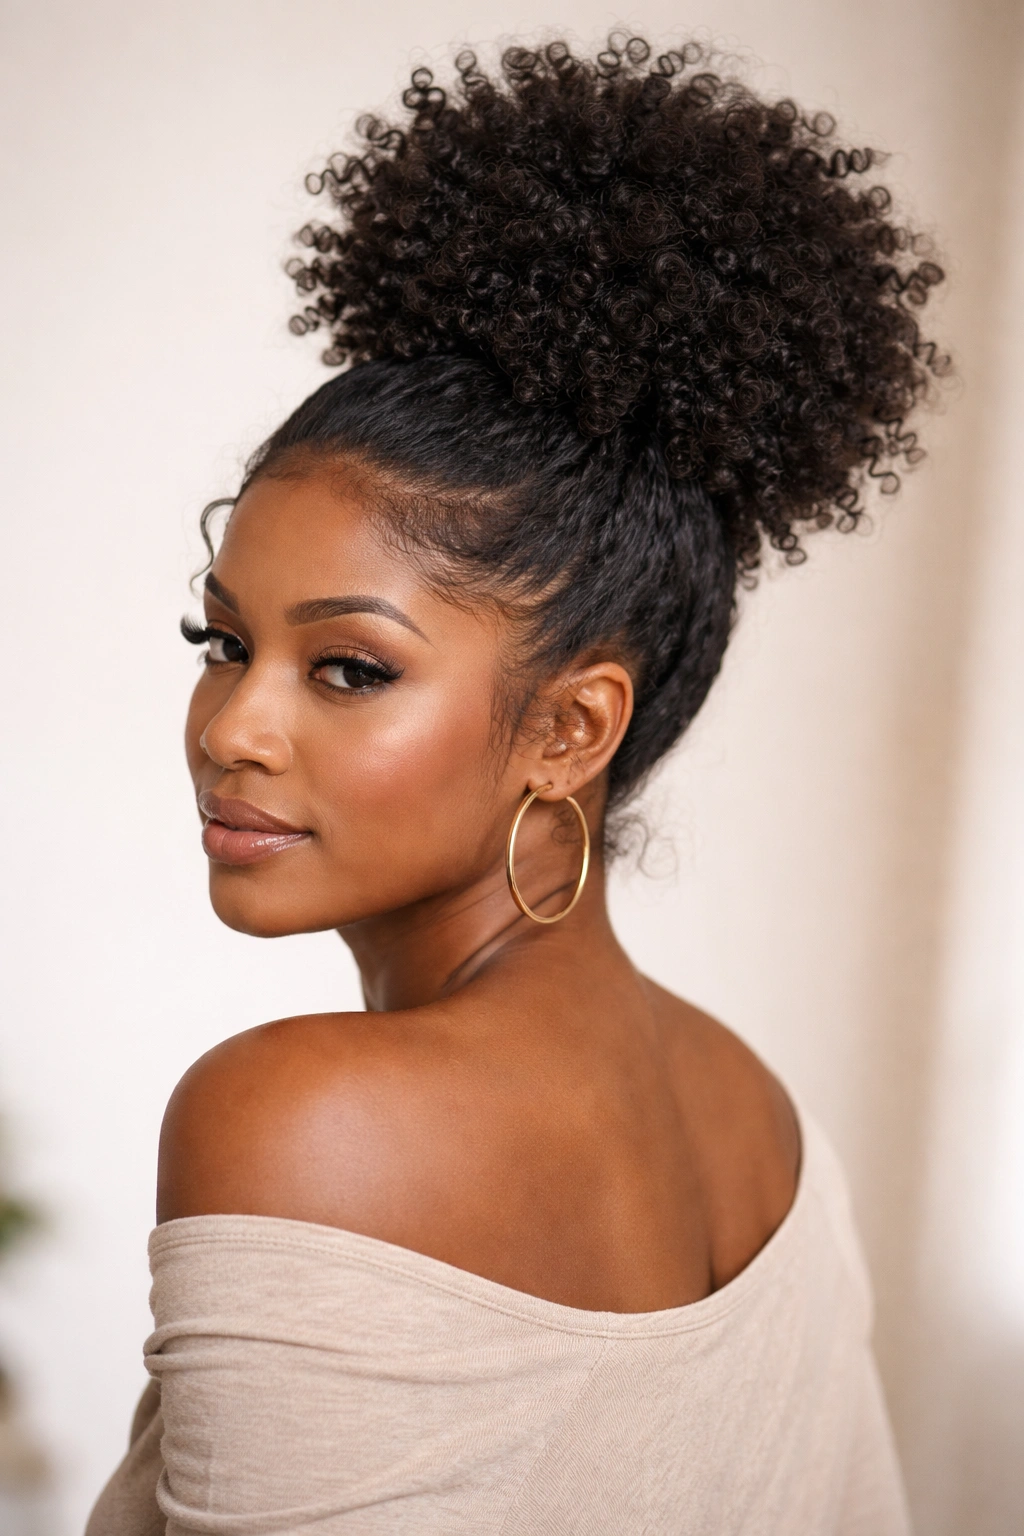
This style, also called a high-top pineapple, gathers all your hair at the very crown of your head into a loose, towering bun that showcases your maximum volume. It’s dramatic, it’s beautiful, and it’s become iconic in natural hair communities for a reason.
Why It Works for Type 4 Hair
If there’s one style that truly lets your type 4 hair shine in all its volumous glory, it’s the pineapple bun. The height at the crown uses your hair’s natural fullness as an asset rather than a “problem” to manage. The style is incredibly protective—all your hair is safely gathered and off your neck and shoulders—while also being impossibly glamorous. This is the style that makes people stop and ask where you got your bun done, even though you did it yourself in five minutes.
How to Create This Look
Flip your head upside down completely, so your hair hangs below you toward the floor. Take all your hair and gather it straight up from where you’re bent over, creating a very high ponytail at the crown. The position might feel awkward at first, but this is the key to getting the height right. Secure it with a silk-lined elastic while you’re still flipped. Now, slowly flip your head back up to standing position. You should have a very high ponytail positioned at your crown.
Take that high ponytail and loosely gather it into a bun shape, coiling it gently and securing with bobby pins. The trick here is to let the coils fan out and create that pineapple shape—don’t smooth them down or try to create a compact, neat bun. Instead, use your fingers to gently fluff and separate sections of the coils so they radiate outward. This creates that characteristic crown effect.
Tips for Success
This style shows off your coils best when they have good definition, so it’s perfect for fresh wash-and-gos or the first few days of a set style. If your coils are drooping or losing shape, a very light spritz of a refresher spray or water mixed with a tiny bit of leave-in conditioner will reactivate them. The bun naturally creates some height and drama, but you can enhance it by using your hands to gently spread the coils outward as you go. This style is best for special occasions or days when you’re feeling confident and want your hair to announce your arrival.
Best for: Special events, date nights, anytime you want to feel confident and beautiful, professional settings where you want to make an impression, or just days when you’re celebrating your natural hair.
Final Thoughts
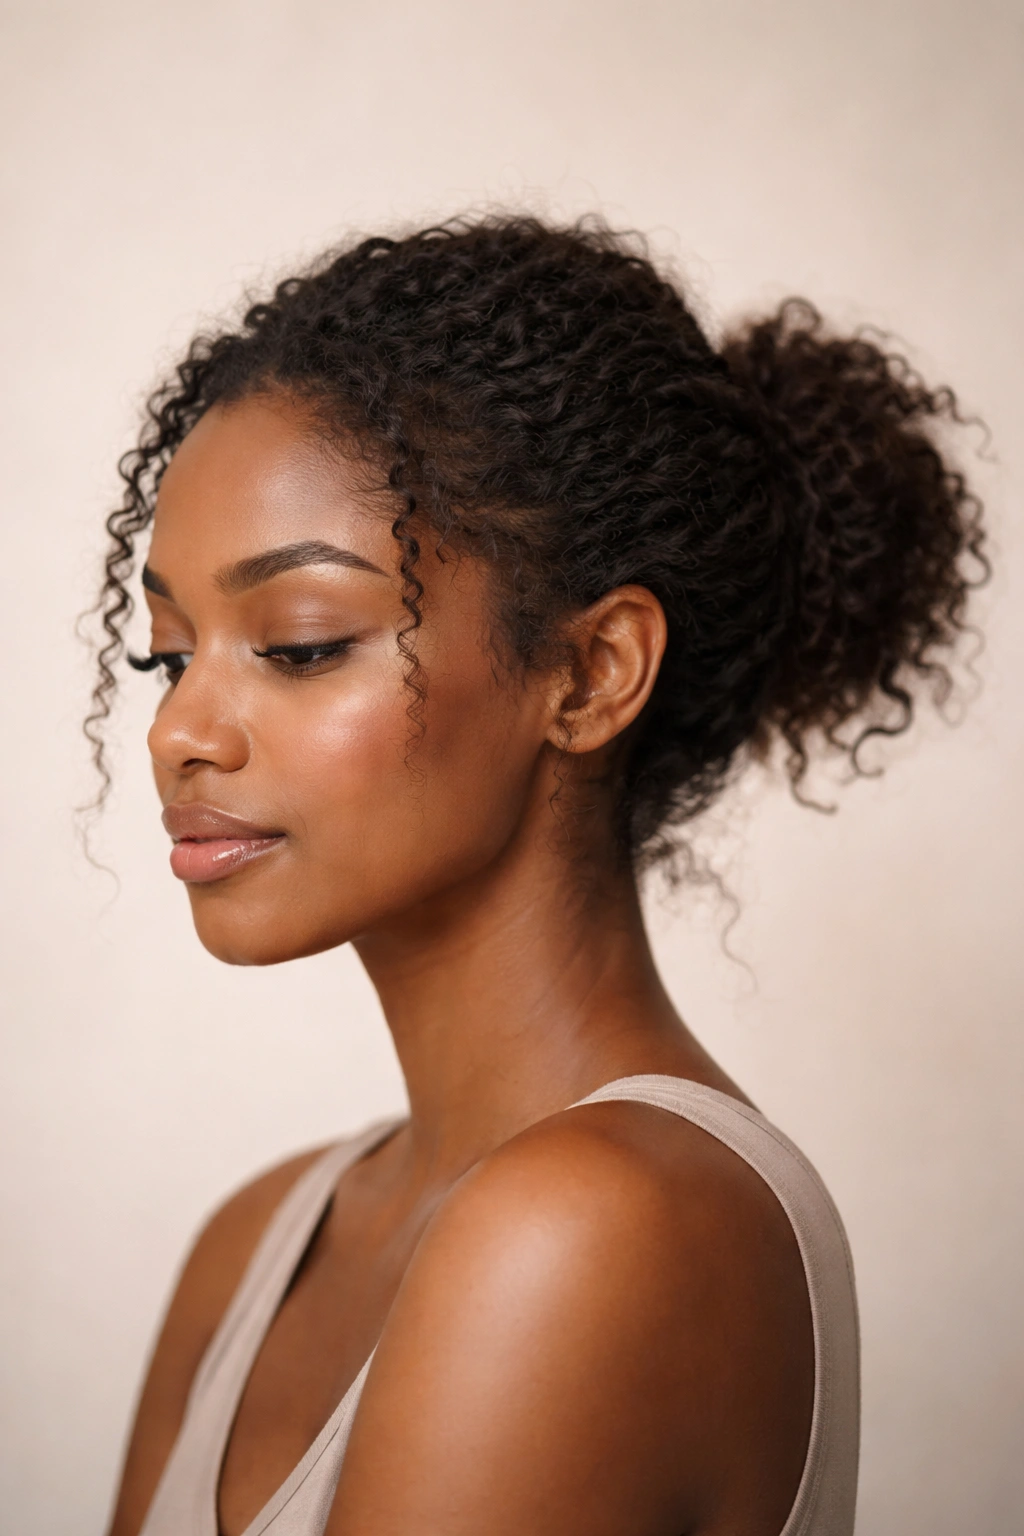
The beautiful thing about messy buns for type 4 hair is that there’s truly a style for every mood, occasion, and level of styling effort. Whether you’re looking for something you can throw together in five minutes or a more intentional style that makes a statement, your natural texture is your greatest asset. These styles work because of your coils, twists, and natural volume—not in spite of them.
Start with whichever style appeals to you most, and don’t worry if it takes a few tries to get it exactly right. Your hair will teach you as you go, showing you what works with your specific curl pattern, porosity, and density. Once you master even two or three of these styles, you’ll have go-to options for any situation, and you’ll have protected your hair while looking absolutely stunning.
The most important thing to remember is that messy doesn’t mean careless. These styles look effortless because they work with your natural texture rather than fighting against it. Keep your products minimal, your hands gentle, and your mindset focused on celebrating what your hair naturally does. That’s when messy buns on type 4 hair become absolutely magical.
