



A messy bun paired with a bow is one of those deceptively simple hairstyles that works whether you’ve got five minutes before work or you’re prepping for a special occasion. The beauty of this combination is that it bridges the gap between polished and laid-back—the bun gives you that effortless, textured vibe while the bow instantly elevates the whole look. Whether you’re going for romantic, playful, sophisticated, or just trying to get your hair off your neck on a hectic day, a bow transforms a basic bun into something genuinely stylish.
The best part? These styles work on nearly every hair type and length. If you’ve got shoulder-length hair or longer, you’ve got everything you need to master at least a few of these looks. And bows themselves are incredibly versatile—velvet, satin, silk, metallic, subtle, bold, small, oversized—they adjust the entire energy of your hairstyle depending on which one you choose. A delicate ribbon bow reads completely different from a chunky grosgrain bow or a sleek leather style.
Real talk: once you get comfortable with one or two of these styles, you’ll find yourself reaching for them constantly. They’re the kind of hairstyles that feel a little fancy but take about the same amount of time as just throwing your hair into a regular bun. The bow does the heavy lifting in terms of making it look intentional and put-together. Let’s break down the six styles that give you the most mileage and work in the widest variety of situations.
1. The Classic High Messy Bun With Bow
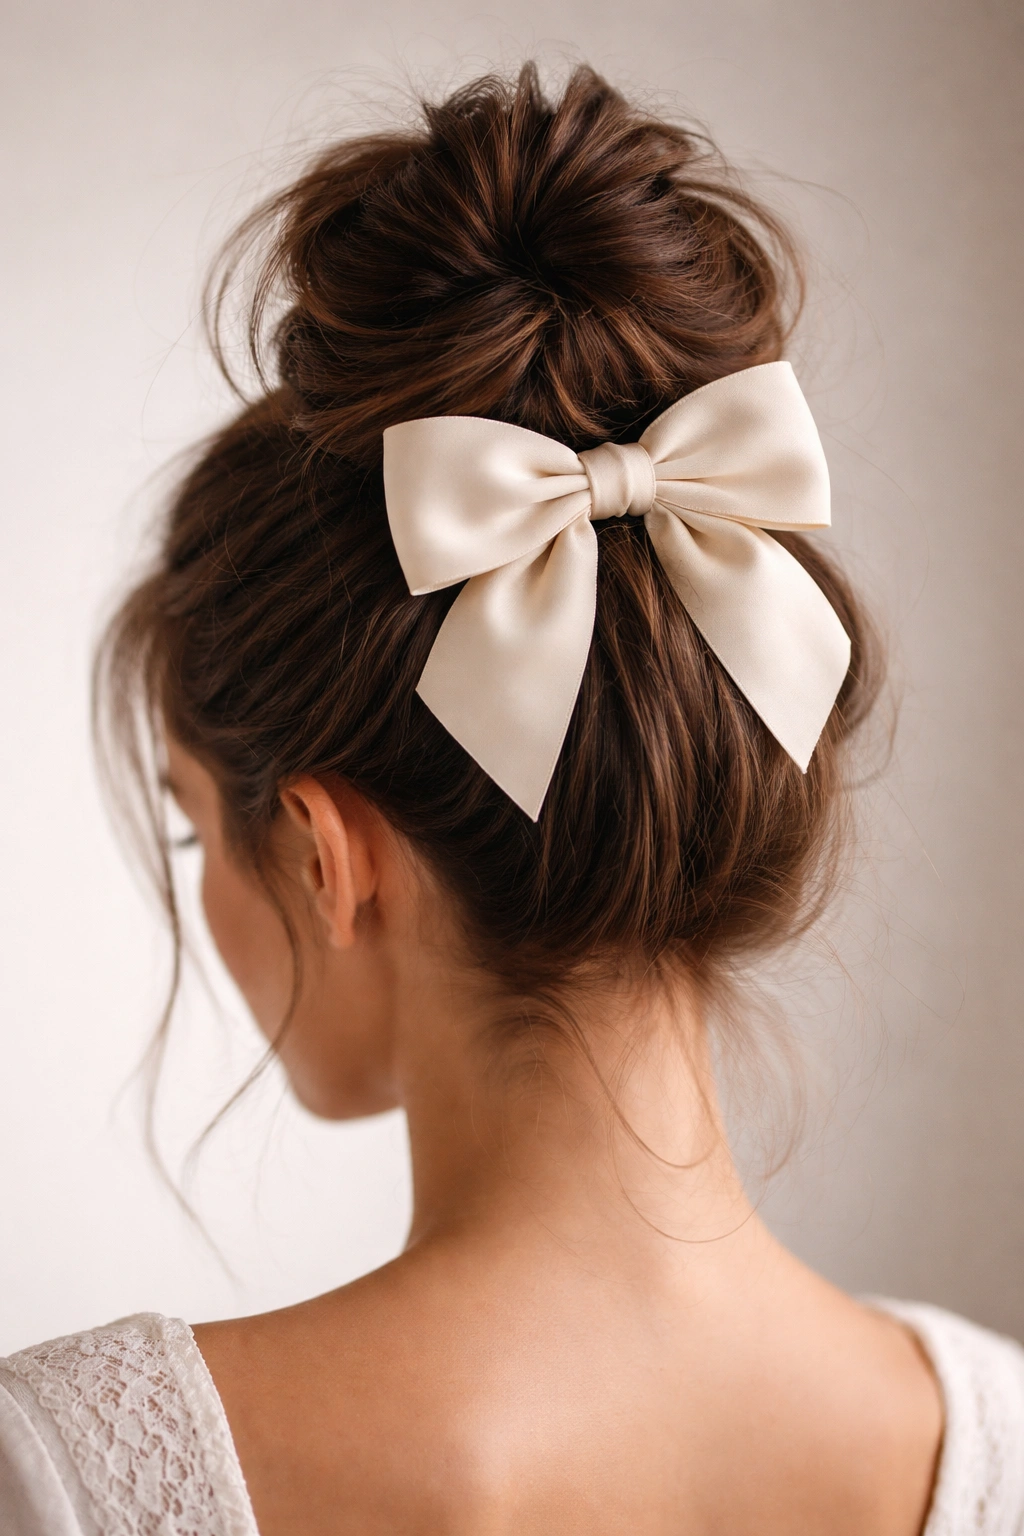
This is the version you’ve probably seen countless times—and for good reason. The bun sits at the crown of your head, and the bow clips in right at the base or weaves through the actual bun itself. It’s fresh, youthful, and works equally well for a casual weekend look or a dressed-up evening. The height of the bun draws attention to your face and elongates your neck, which is why this placement is so universally flattering.
The Best Times to Wear It
This style shines at casual social events, brunch with friends, date nights, or any time you want to look put-together without looking like you tried too hard. It’s also excellent for keeping hair completely out of your face while you’re working, studying, or dealing with an active day. The high placement makes it feel more intentional than a low bun, so it reads as “I styled my hair” rather than “I was busy and needed it up.”
How to Build This Messy Bun
- Start with texture: Use a texturizing spray or dry shampoo on dry hair to give yourself grip. Skip this if you naturally have textured or curly hair.
- Create the base: Flip your head upside down and gather hair at the crown using a hair tie. This reverse ponytail creates more volume than tying it while upright.
- Twist and wrap: Twist the ponytail loosely and wrap it around the base to form the bun. Leave some pieces loose and pull out a few face-framing strands.
- Secure and mess it up: Use bobby pins to secure the bun in place, then gently tug at the edges to create that intentionally undone texture.
- Attach the bow: Clip your bow at the base of the bun or thread the ponytail through a ribbon bow before wrapping it into the bun shape. A velvet bow, satin ribbon, or silk bow all work beautifully here.
Pro Tips for the Perfect Texture
The messier texture actually looks better when your hair isn’t freshly washed—second or third-day hair grabs and holds much more easily. If you’ve got slippery, straight hair, that texturizing spray isn’t optional; it’s what makes the difference between a polished bun and a slipping, collapsing one. Play with the bow placement until it feels balanced—too high and it looks like an afterthought; too low and the bow overwhelms the style.
2. The Romantic Side Messy Bun With Bow
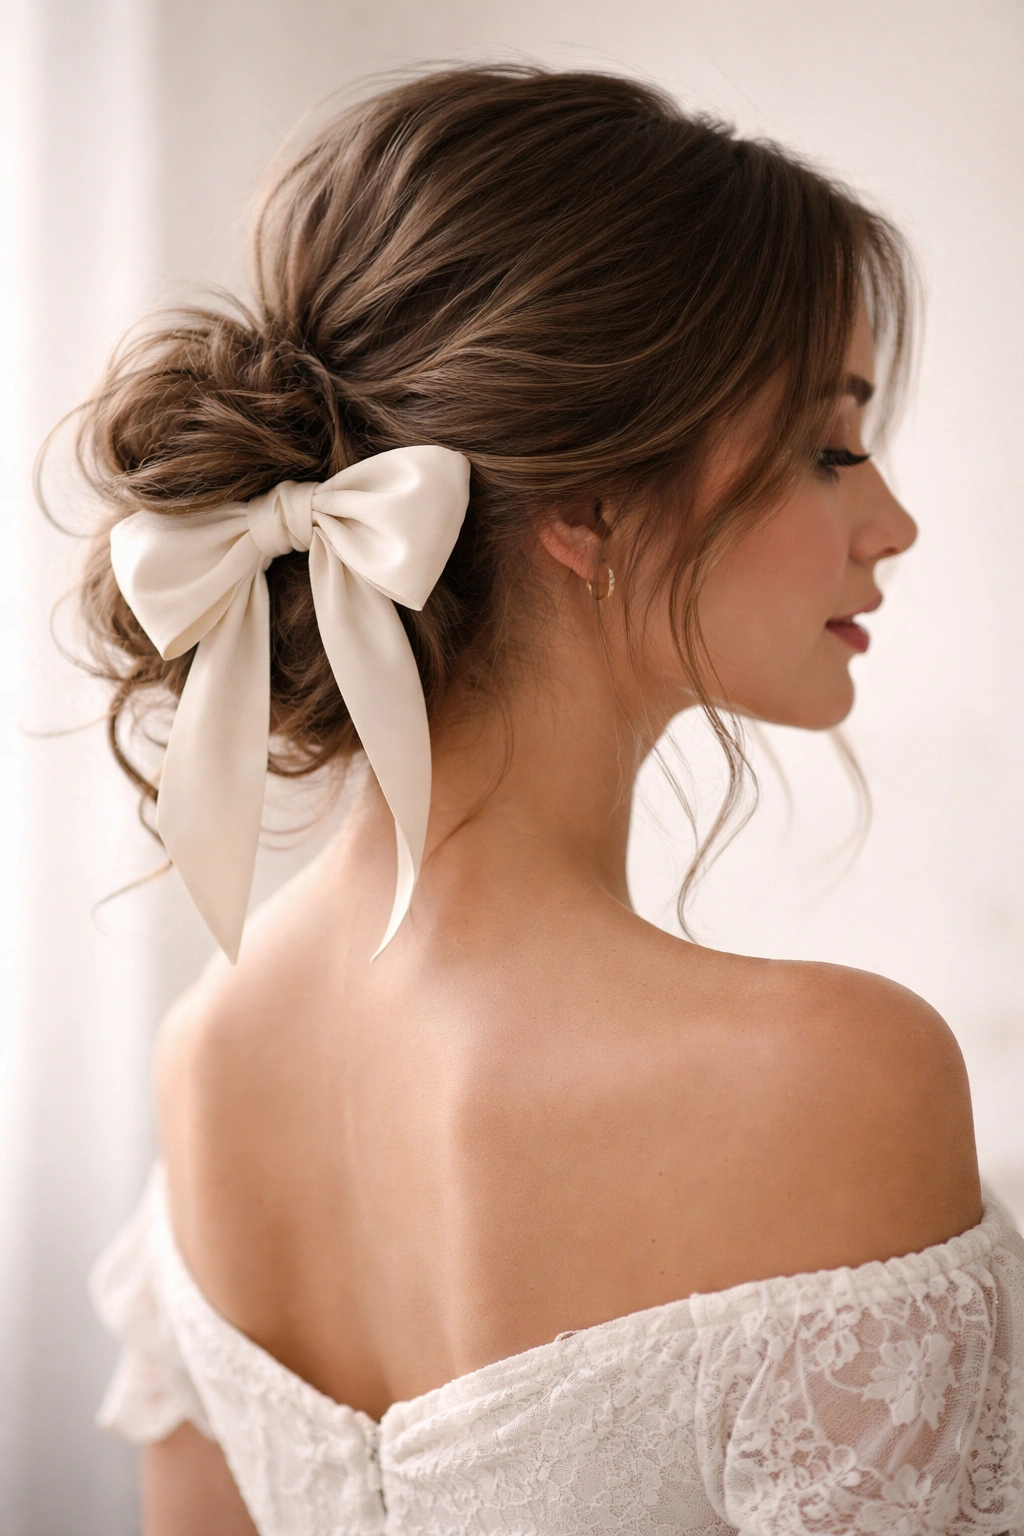
Move that bun slightly off-center, and you’ve completely changed the mood. A side messy bun has an inherently softer, more romantic feel than a centered one. The bow on a side bun works like punctuation at the end of a sentence—it draws the eye exactly where you want it and adds a touch of feminine polish. This style is exceptional for events where you want to look elegant without being formal.
When Romance Meets Practicality
This works gorgeously for weddings (as a guest or in the wedding party), fancy dinners, date nights, or any situation where you want to feel special but not overdressed. The side placement also has a practical advantage—it’s comfortable if you’re leaning against something or resting your head. It’s easier to sleep in than a centered bun and doesn’t create an obvious flat spot if you need to take it down.
How to Create the Romantic Side Bun
- Brush and position: Brush your hair smoothly to one side—doesn’t need to be perfectly sleek, some soft pieces are actually preferable.
- Gather and tie: Create a low side ponytail, aiming for one side of your neck rather than directly at the nape. The lower and more to the side, the more romantic it feels.
- Tease gently: Use a fine-tooth comb to backcomb the ponytail slightly, creating texture and volume. This prevents the bun from looking slick or too controlled.
- Wrap and pin: Twist the ponytail loosely and wrap it around the base, pinning as you go. Leave ends loose and pull out soft pieces around your face.
- Bow placement: A smaller, more delicate bow often suits this style better than a chunky one. Position it at the base of the bun or secure it with a clip that threads through a few strands of the wrapped bun.
The Texture That Makes It Work
What separates a romantic side bun from just any side bun is the intentional softness. You’re not going for sleek here—you’re going for touchable, slightly undone, and effortlessly elegant. Pull out a few shorter pieces near your face and let them frame gently. Use a light hairspray that holds without looking crunchy. A satin or silk bow adds to the romantic vibe far better than structured fabrics.
3. The Low Textured Messy Bun With Bow
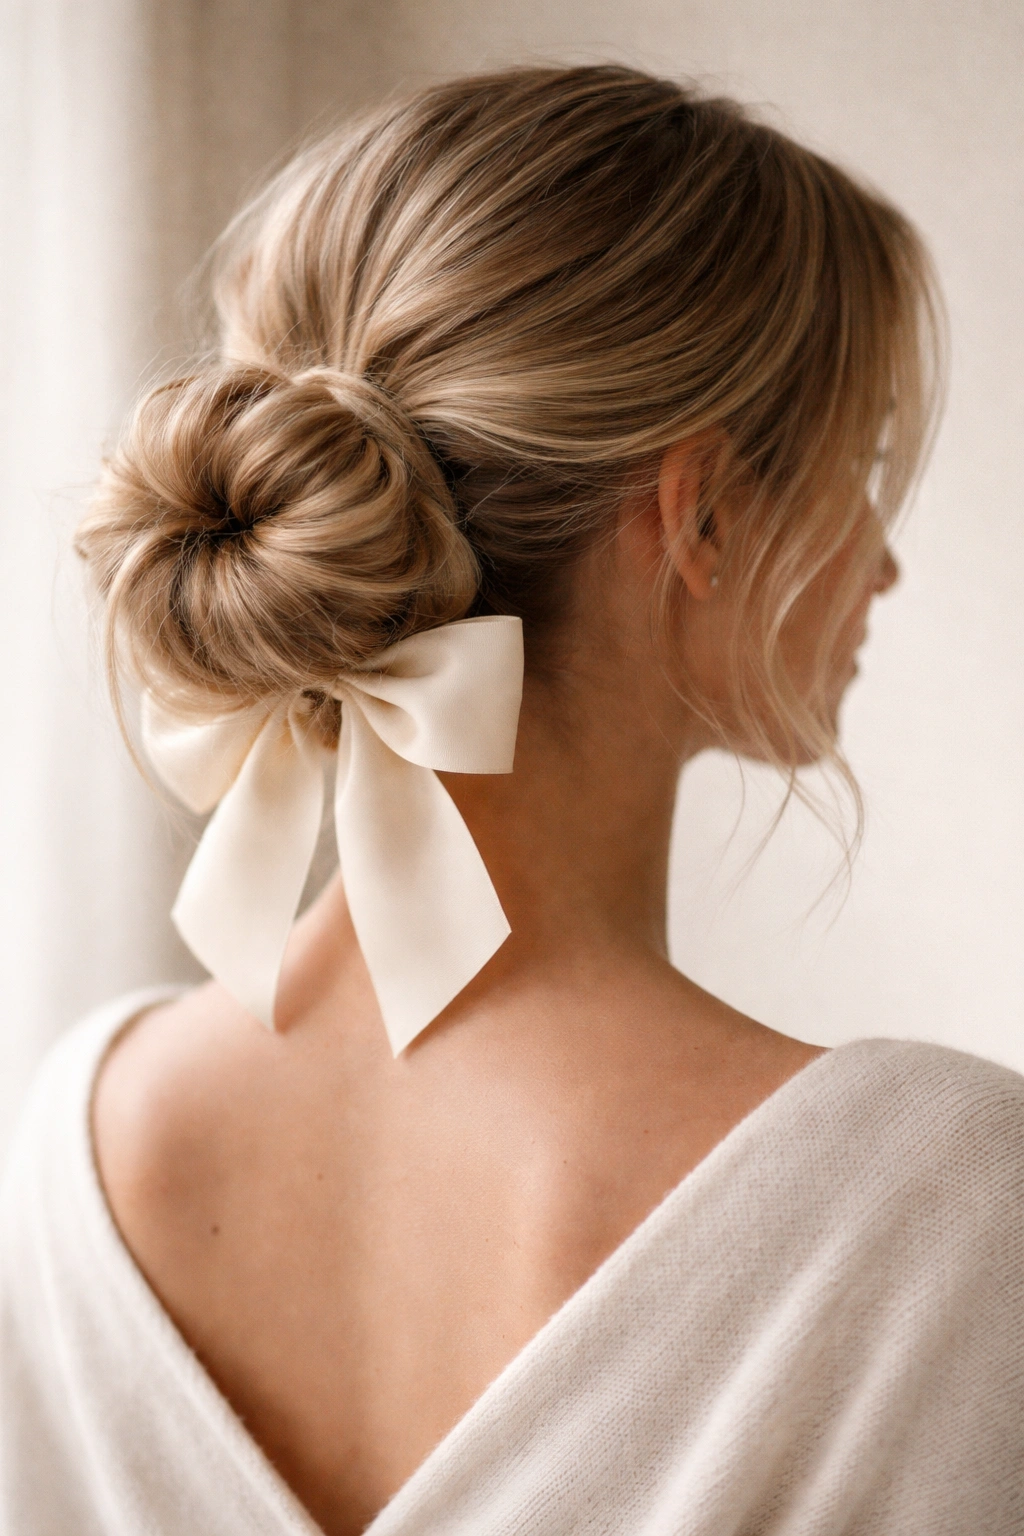
Sit that bun at the nape of your neck, right at the base of your skull, and you’ve got a style that skews sophisticated and grounded. A low bun automatically reads as more mature and polished than a high one—it’s the choice of people who are past the “trying hard to look young and fun” phase. It’s also the most practical for work environments where you want to look professional but still maintain some personality through the bow.
Why Low Buns Command Respect
There’s something about a low bun that makes you look like you have your act together. Maybe it’s because it requires slightly more effort to position correctly, or maybe it’s just that lower placements feel more formal by default. Pair it with a bow and you’ve got a style that says “I’m competent and creative,” which is exactly the vibe you want in professional settings.
How to Style the Low Textured Version
- Apply texture first: Dry shampoo or texturizing spray is your friend here. Apply to the roots and mid-lengths, then scrunch with your hands to activate it.
- Create a low ponytail: Gather hair at the nape of your neck, lower than you probably think. The lower it is, the more sophisticated it feels.
- Backcomb for volume: Use a fine-tooth comb to gently backcomb the entire ponytail section. You want enough texture that the bun has dimension, not so much that it looks matted.
- Loosely twist and wrap: Twist the ponytail gently around itself, then wrap the twisted section around the base. Secure with bobby pins as you go.
- Create intentional flyaways: Pull out a few shorter pieces and some looser strands. The texture should feel lived-in, not fussy.
- Secure the bow: A slightly larger, statement bow often works better at the low placement. Satin ribbons, grosgrain, or even a structured bow feel right here.
The Details That Elevate It
Low buns benefit from being slightly more polished at the crown and messier at the base. This creates depth and visual interest while maintaining that sophisticated feel. Make sure at least some of your bun is actually visible—too many flyaways and too much mess and it reads as neglected rather than intentional. The bow becomes the focal point, so choose one that reflects the occasion or your personal style.
4. The Twisted Wrap Messy Bun With Bow
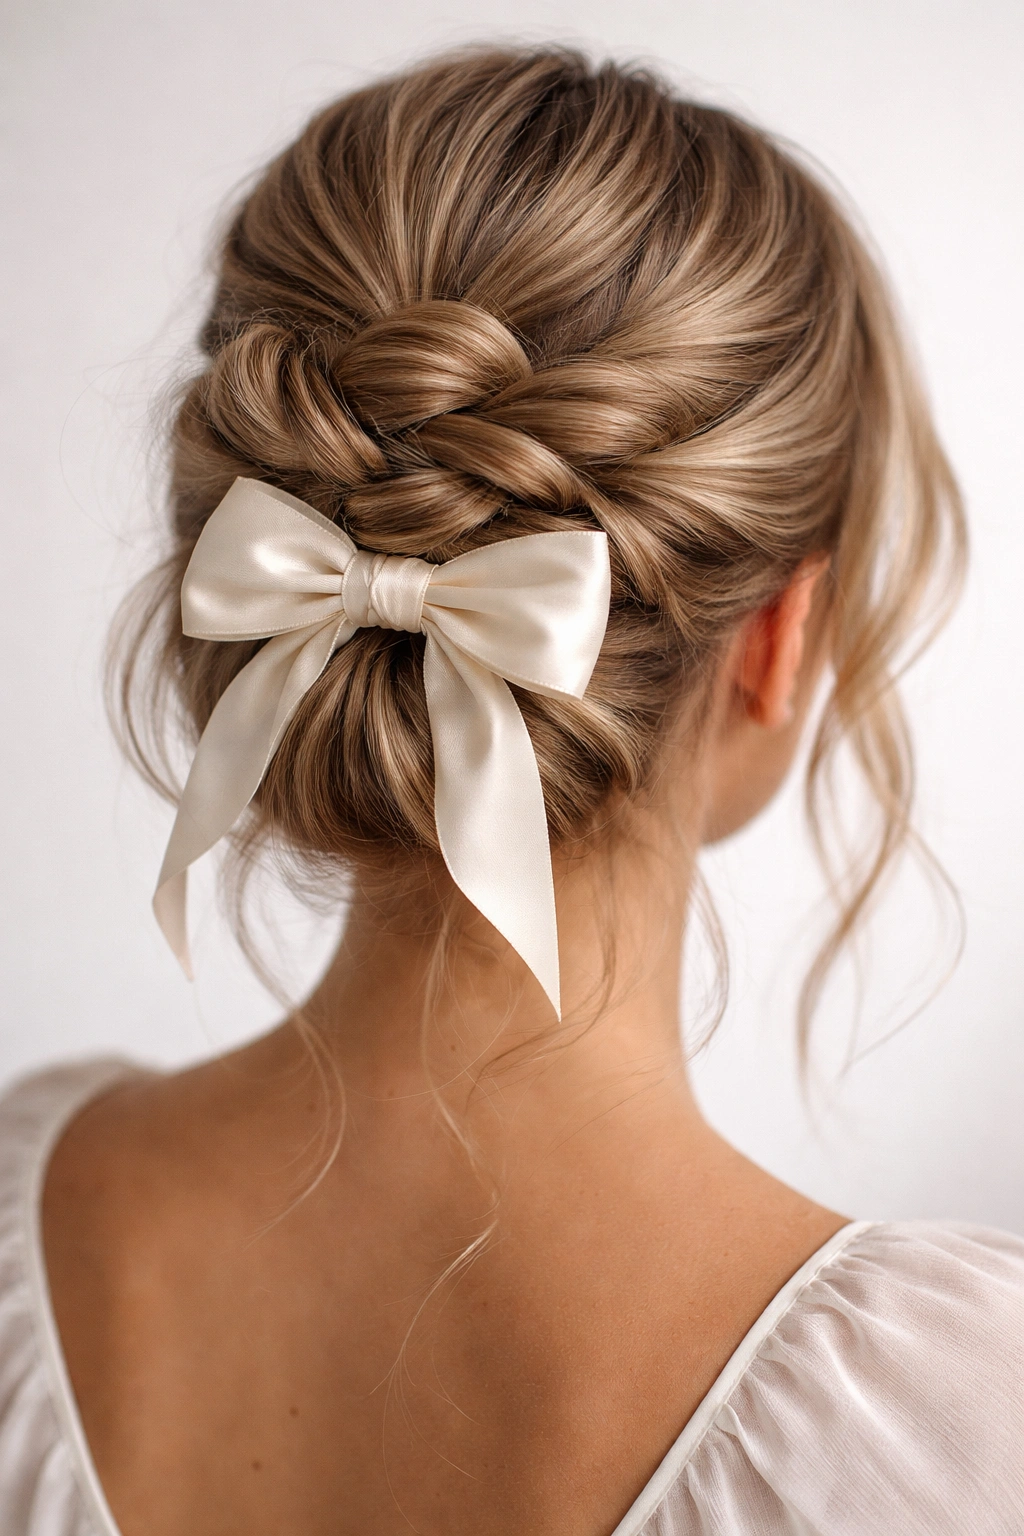
This style uses twisted sections of hair wrapped around and through the bun structure, creating a more dimensional, intricate look than a simple wrapped bun. It takes maybe three extra minutes, but the result looks significantly more complicated and thoughtful than it actually is. It’s the style to choose when you want to show that you put in genuine effort without it actually being difficult.
For Days When You Want to Look Impressive
This works beautifully for events where you want to stand out a bit—not necessarily formal occasions, but situations where you want to look like you styled your hair intentionally rather than just threw it up. Workplace events, date nights, meeting your partner’s family, or just wanting to feel extra put-together. The twisted elements catch the light differently than a regular wrapped bun, giving everything more visual interest.
The Twist-and-Wrap Technique
- Create a base ponytail: Gather hair at your crown or to the side—high, low, or side placement all work with this technique.
- Divide the ponytail: Separate the ponytail into 2-3 sections. Don’t overthink this; natural sections work fine.
- Twist each section: Twist each section loosely. Loose twists are key here—tight twists look controlled, not messy. The texture should show.
- Wrap around the base: Take one twisted section and wrap it around where your ponytail ties in, securing with a bobby pin. Add the next twisted section next to it, overlapping slightly, and pin that down too. Continue until your bun is formed.
- Leave ends loose: Don’t tuck everything in tightly. Let some twisted ends hang and create a piece-y texture. Pull out additional strands to soften the overall effect.
- Bow placement: The bow works best clipped at the center where all the twists meet, creating a focal point for all those details. A ribbon bow or elegant clip work equally well.
Where the Dimension Comes In
What makes this style special is that all those visible twists create texture and depth that a solid wrapped bun simply can’t match. The light catches each twisted strand differently. It’s more interesting to look at and photographs beautifully. This is honestly the style I reach for when I want to feel like I’ve done something ambitious with my hair but I don’t have an hour to spend styling.
5. The Undone Faux Hawk Messy Bun With Bow
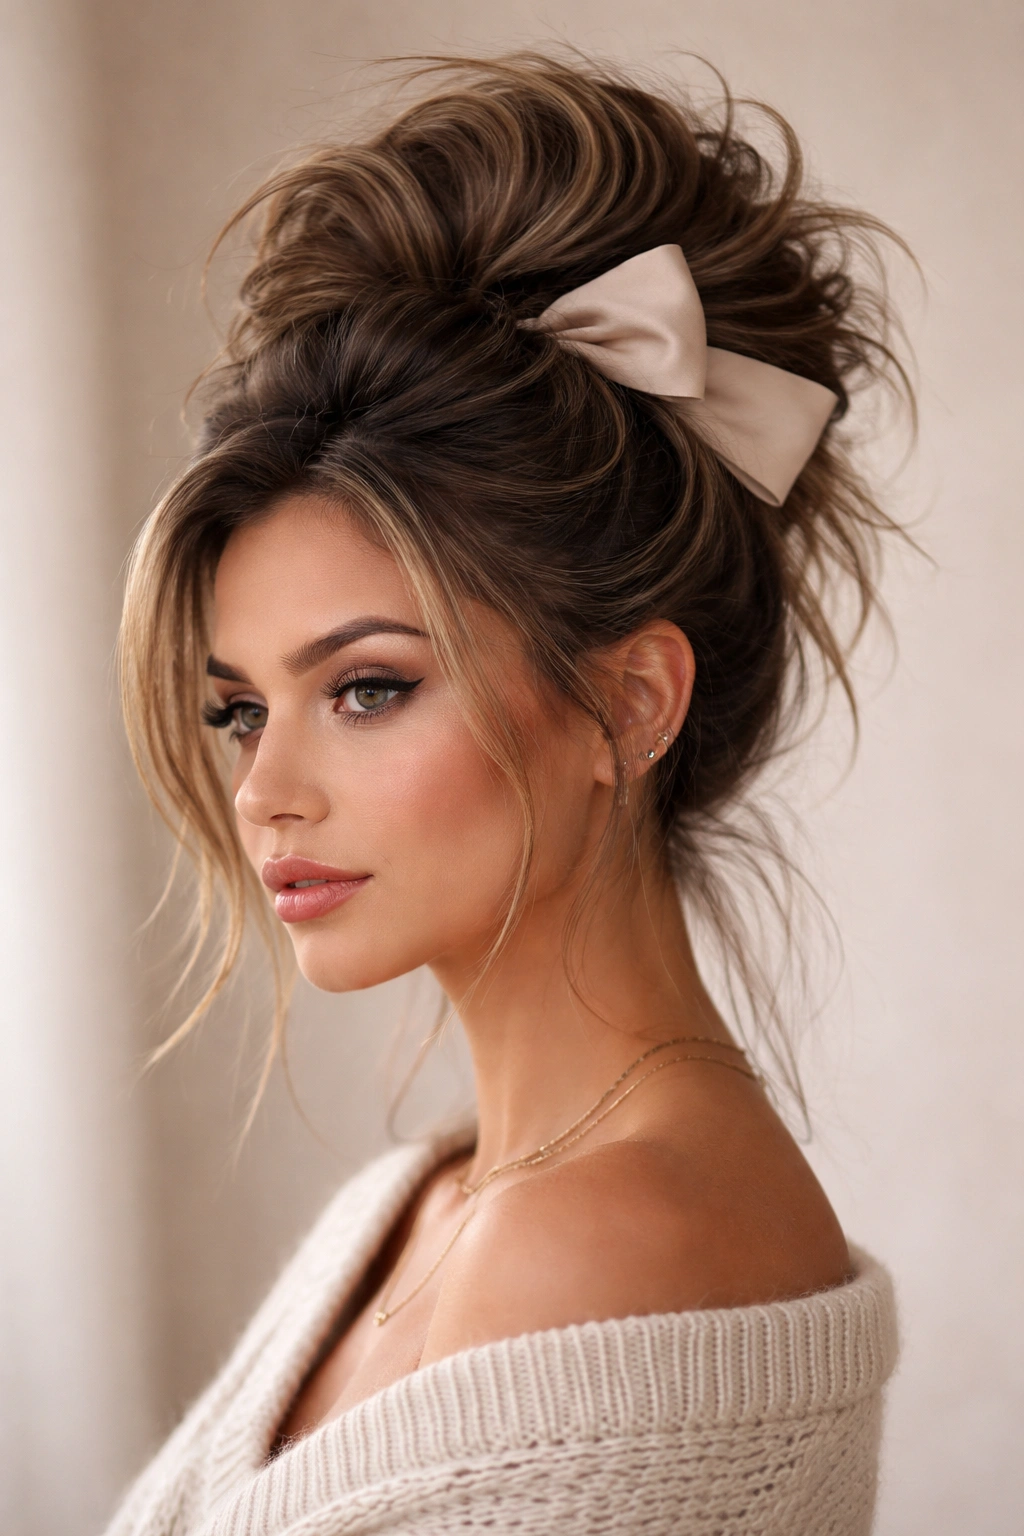
Take elements of a faux hawk—the lifted center, the volume at the crown—and combine them with a bun placed just behind the peak of height, and you’ve got a seriously cool, modern take on the messy bun with bow. This style has an edge to it, a confidence that reads differently depending on your bow choice. Pair it with a structured bow and it’s bold; choose something delicate and it becomes surprisingly wearable for everyday.
The Statement Style
This is the choice when you want your hair to make a statement. It works for younger crowds, creative industries, casual-but-stylish social situations, or whenever you want your hairstyle to be part of your overall vibe rather than just practical. It’s also fantastic if you have some length or layers that would fall flat in a traditional bun—this style actually benefits from texture and varying lengths.
How to Build the Faux Hawk Bun
- Create height at the crown: Using a blow dryer and round brush (or just your fingers if your hair is naturally wavy), create volume at the crown and through the top of your head. Backcomb here if needed; the height is what defines this style.
- Gather just the peak: Don’t grab all your hair. Instead, gather just the hair from the lifted crown area into a small, loose ponytail positioned slightly behind where your maximum height is. This creates that faux hawk moment.
- Gather the sides: Take sections from each side near your temples and loosely twist them backward. These side sections should frame your face and wrap around toward the back.
- Wrap the ponytail: Take your small crown ponytail and twist it loosely, then wrap it into a small bun. Secure with bobby pins.
- Weave in the side sections: Wrap your twisted side sections around the small bun, weaving them through as you go. Pin everything securely.
- Build the volume: The sides of your head should have lifted volume (from the side twists and the overall bun placement), creating that faux hawk silhouette. Leave hair loose on the underside of your head—this creates that undone contrast.
- Attach the bow: Either a small clip bow at the peak or a larger statement bow integrated into the bun works here. A leather bow, metallic bow, or bold color bow all suit this edgy style.
The Modern Edge
This is not a delicate style. It’s bold, it’s intentional, and it’s unapologetically stylish. The contrast between the lifted, texturized top and the looser bottom is exactly what makes it work. Embrace the mess, don’t try to make it sleek. Let pieces escape. The undone quality is the entire point.
6. The Double Bun With Matching Bows
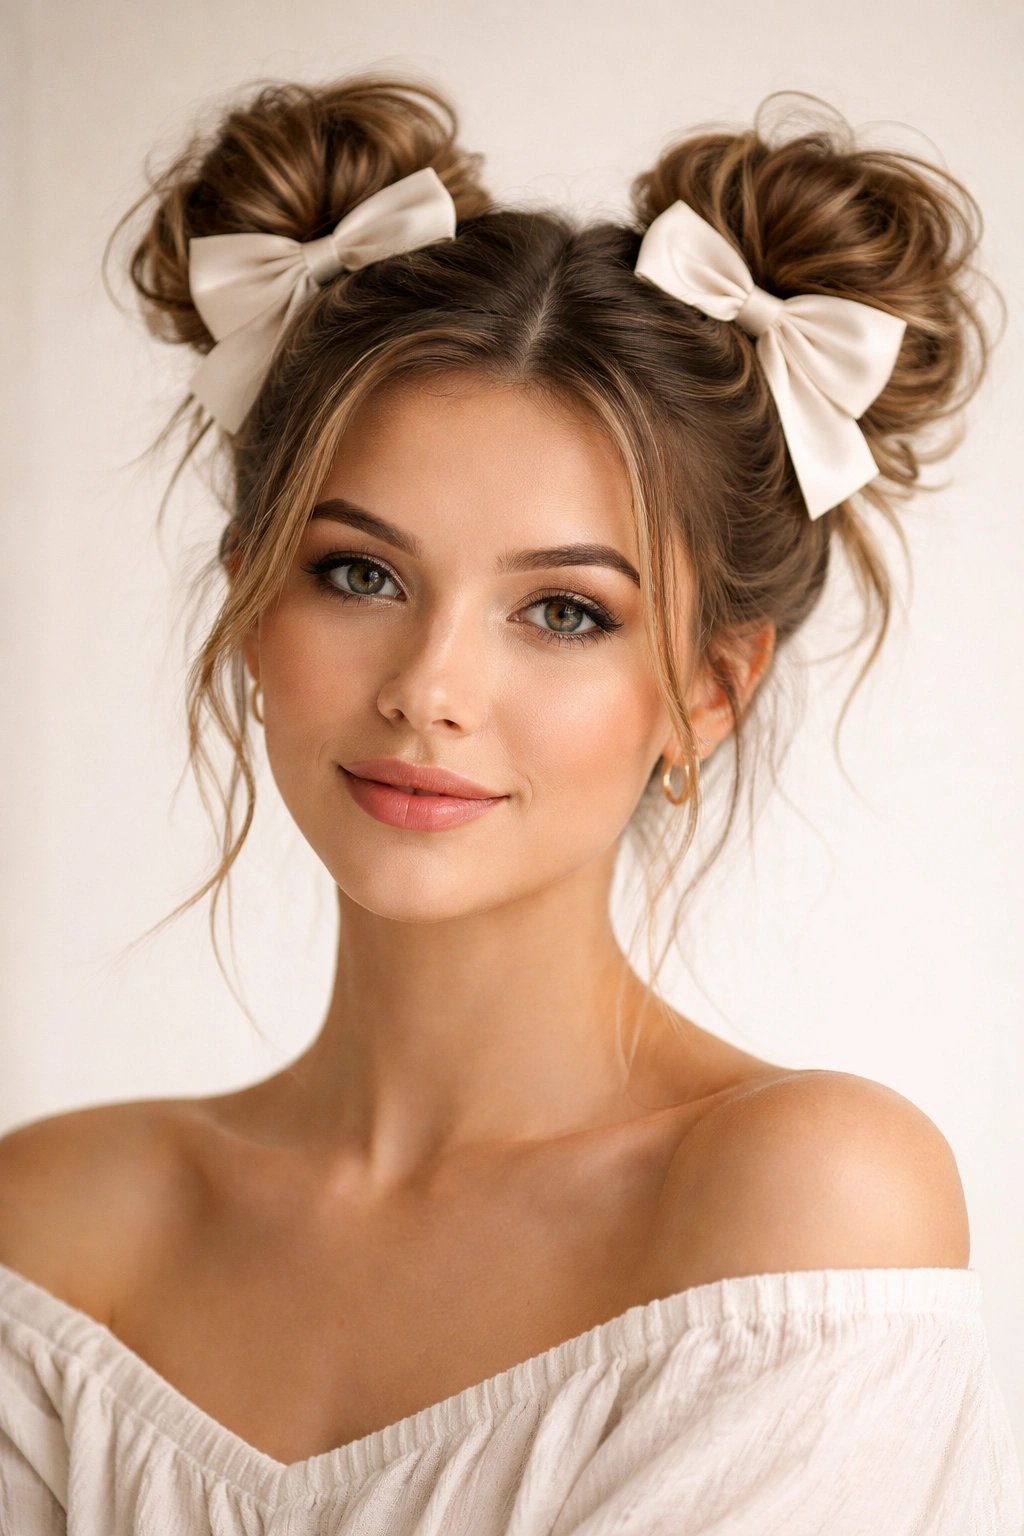
Go back to your roots (figuratively speaking) with double buns, but style them in a messy, grown-up way that looks nothing like the childhood version. Twin messy buns with coordinating or matching bows is playful without being childish, especially when you use the right colors and bow styles. This is the route to take when you want to have fun with your hair and not take yourself too seriously.
When Playfulness Meets Style
This works for casual hangouts, music festivals, fun dates, brunch with friends, or anytime you want to look approachable and creative rather than serious and formal. The double bun with bows reads as confident and whimsical—you’re clearly comfortable enough to pull off something that’s not the expected default. It’s also incredibly practical if you need your hair out of the way but want something more interesting than a single bun.
Creating Perfectly Imperfect Double Buns
- Apply texture throughout: Use dry shampoo or texturizing spray from root to tip. Messy double buns need good grip or they’ll slip and slide.
- Create two ponytails: Part your hair down the center, from your forehead to the nape of your neck. Tie one side into a ponytail, positioned a bit higher and to the side (you want them visibly separate, not at identical spots).
- Tie the second side: Create the second ponytail on the opposite side, at roughly the same height as the first one. They don’t need to match exactly—some asymmetry actually looks more intentional.
- Backcomb both sections: Gently backcomb each ponytail to create texture and grip. This prevents the buns from looking flat or sliding around.
- Twist and wrap each ponytail: Twist one ponytail loosely and wrap it around its base, securing with bobby pins. Repeat with the second ponytail.
- Pull out pieces intentionally: Grab a few shorter strands and some longer pieces from each bun. Messy is the whole point here—leave visible texture.
- Coordinate or match the bows: You can go matchy-matchy with identical bows on each bun, or choose complementary bows in the same color family. Placement is up to you—at the base of each bun, woven through the twisted sections, or clipped at the very top.
Making Double Buns Look Intentional
The difference between “playing dress-up” and “rocking double buns as a style choice” is in the execution. You want these buns to look deliberately textured and undone, not just thrown together. The bow choices matter—avoid anything too cutesy; aim for styles that would work as a standalone accessory. Satin bows, leather, metallic, even simple silk ribbons all work better here than overly decorative options.
Choosing the Right Bow for Your Messy Bun
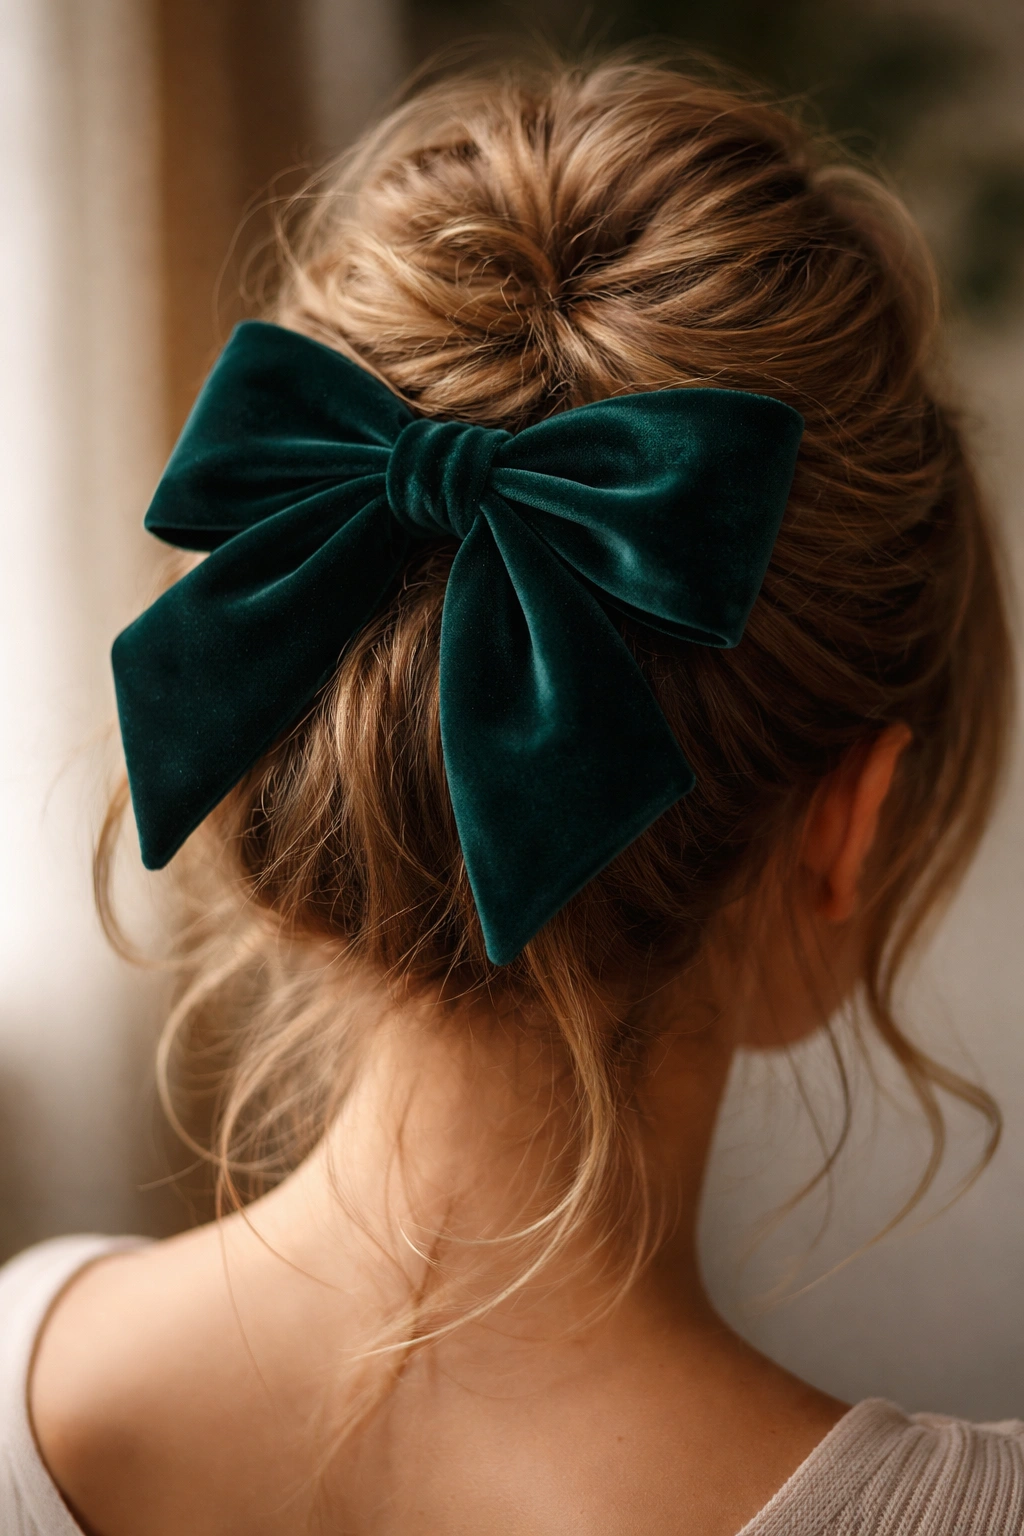
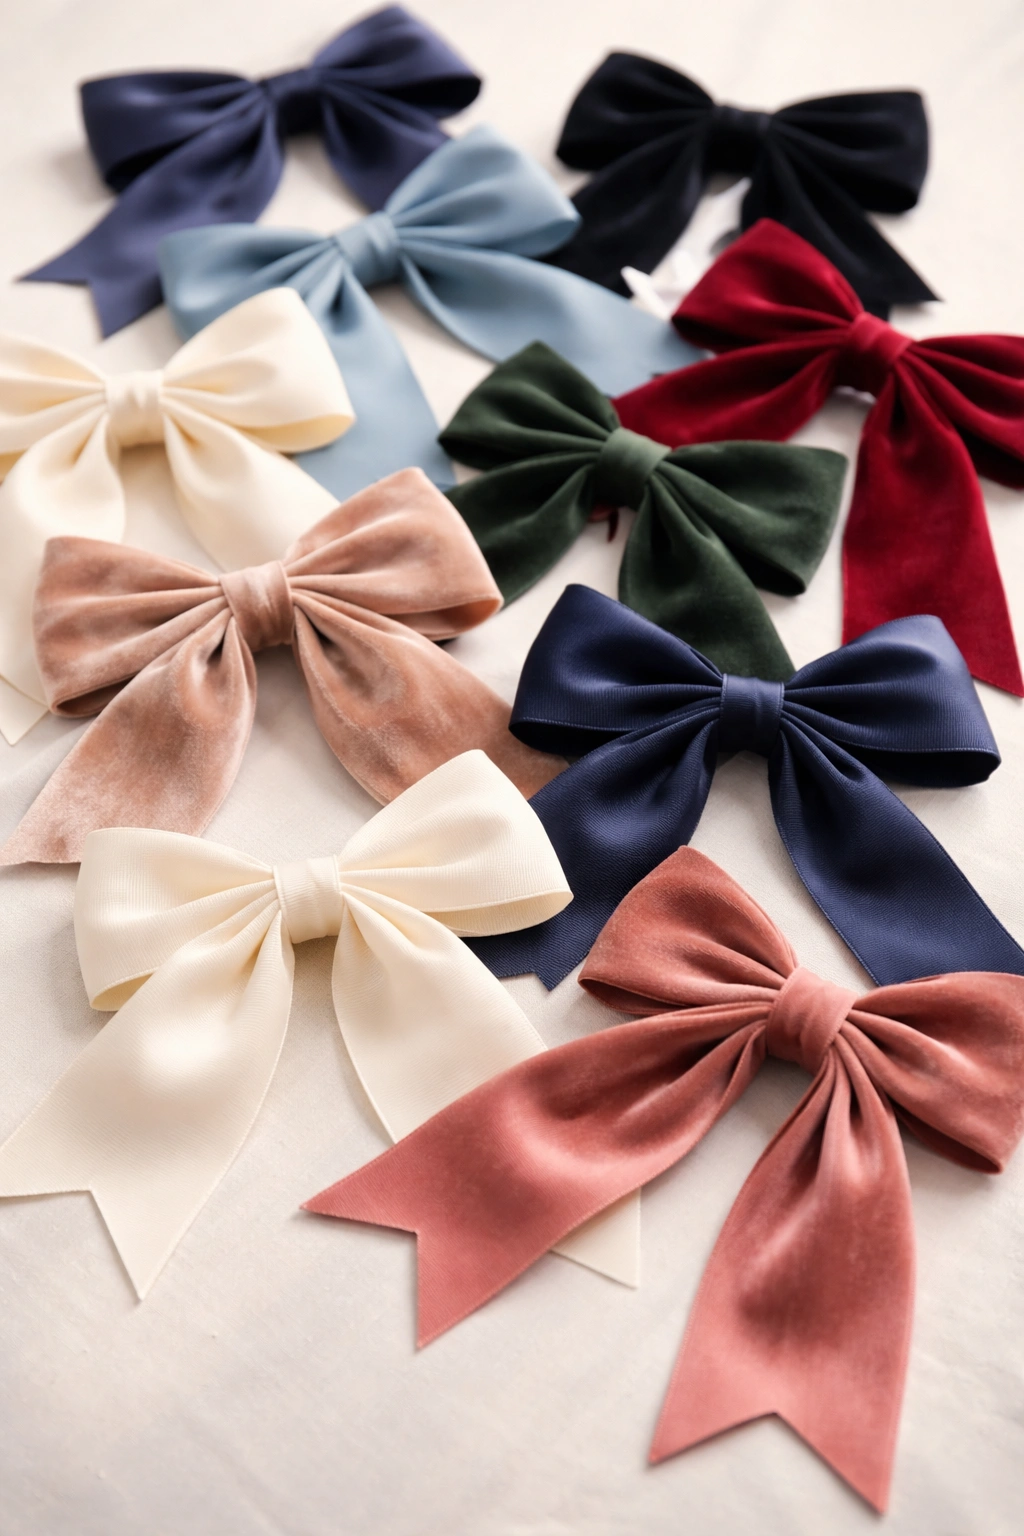
The bow is honestly the most important accessory once you’ve got your bun structure down. Size, material, and color all shift the entire vibe of the style. A chunky velvet bow in jewel tones reads completely differently from a delicate ribbon bow in blush pink, even if the bun underneath is identical.
Think about proportions—if you have finer, thinner hair, an oversized bow can overwhelm your entire look. Thicker, fuller hair can handle bigger, chunkier bows without being swallowed by them. Thin ribbons and delicate bows work beautifully when your messy bun has generous volume; they’d disappear into a tiny, sleek bun.
Material matters more than you’d think. Satin bows have a luxe feel that works for dressier occasions. Velvet bows add texture and sophistication. Silk or silk-like materials feel delicate and refined. Leather bows are modern and edgy. Grosgrain has a classic, preppy vibe. Consider the overall message you want your hairstyle to send, then pick a bow that reinforces that message.
Making Your Messy Bun Last All Day
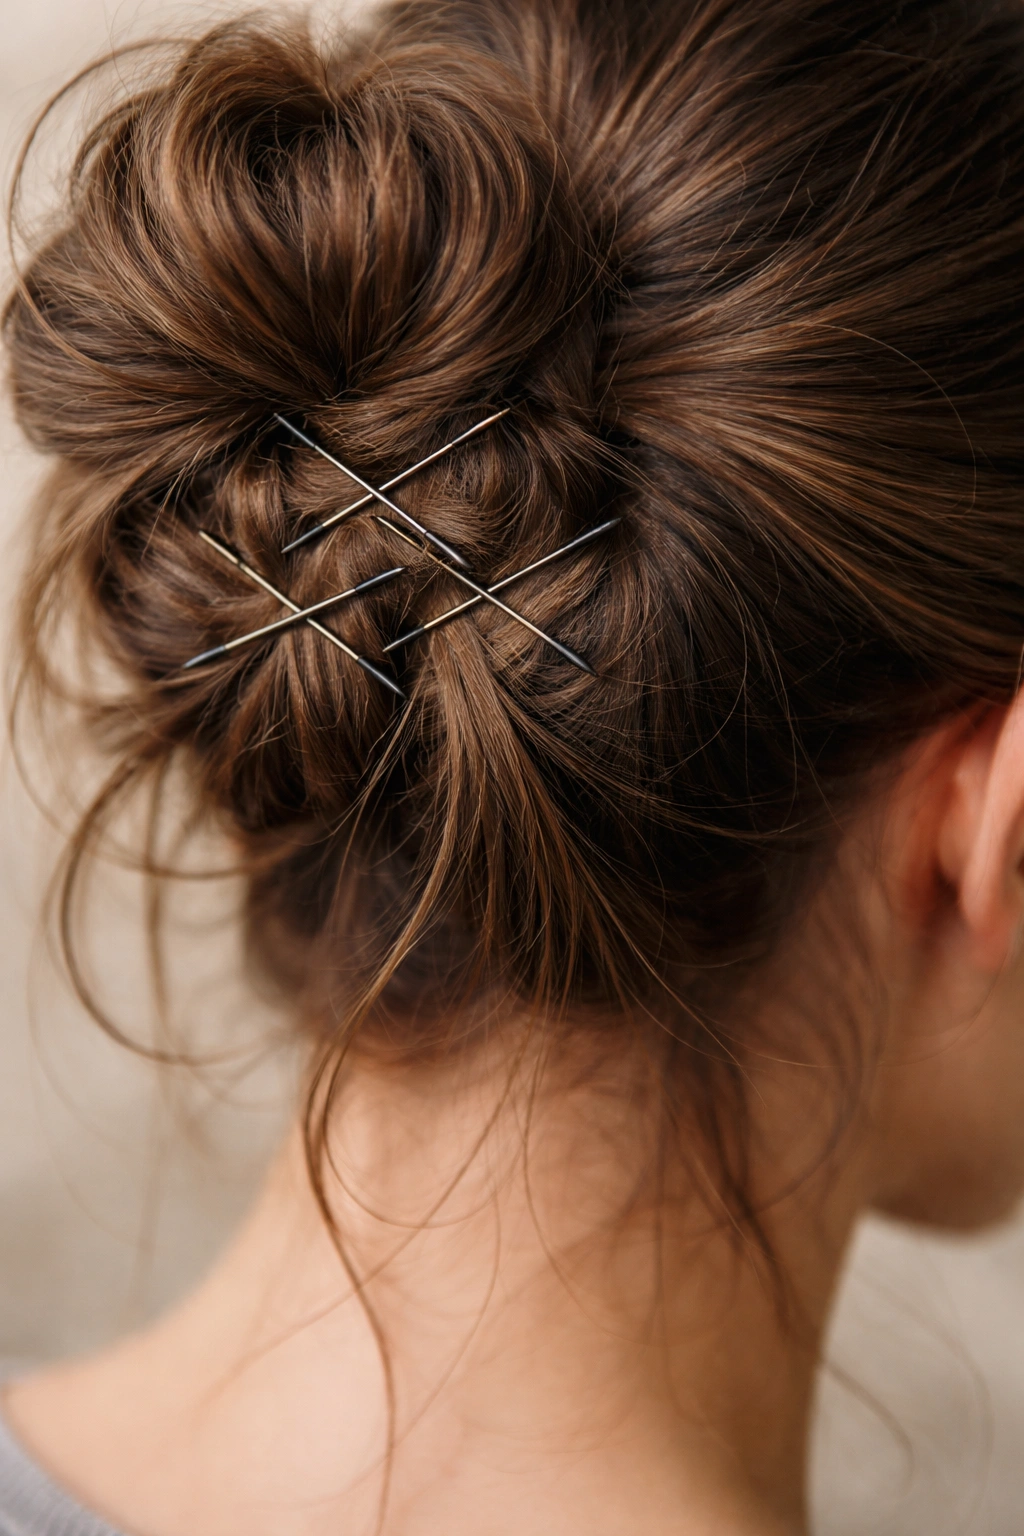
A bun that holds up to real life—moving around, leaning against things, maybe even sweating a little—requires some strategy beyond just twisting and pinning. The foundation matters more than people realize.
Texture is non-negotiable. Smooth, freshly-washed hair has nothing for bobby pins to grip. Dry shampoo, texturizing spray, or even just tousling your hair with your hands before you start creates the grip you need. Second or third-day hair is genuinely easier to work with than freshly shampooed hair.
Enough bobby pins sounds obvious, but most people severely underestimate how many they need. For a messy bun, you’re typically looking at 6-10 bobby pins depending on your hair thickness and how secure you need it to be. Place them in an X pattern for stability, making sure they actually go through sections of hair and wrap around the structure, not just floating in empty space.
Hairspray application should happen in layers. One light spritz before you do anything, another once the structure is mostly built, and a final protective layer once everything is pinned. Light, flexible hold hairspray is better than heavy; you want the style to stay together without looking crunchy or feeling stiff.
The right bobby pins actually matter. Longer pins give you more holding power than standard short ones. Pins with texture or coating grip better than smooth, slippery ones. Matching your pin color to your hair color makes them less visible if a few escape.
Final Thoughts
A messy bun with a bow is one of those rare hairstyles that genuinely works in almost every situation. It’s casual enough for running errands but put-together enough for actual plans. It takes five to ten minutes once you know the technique. It works on straight hair, wavy hair, curly hair, thick hair, fine hair—basically every hair type can pull off at least a couple of these styles.
The beauty is that you don’t have to commit to just one version. Learning all six of these gives you options depending on your mood, your plans, and what kind of energy you want to project that day. A high bun for feeling youthful and playful. A low bun for looking polished and professional. Double buns for fun, social situations. The faux hawk for confidence and edge.
Bows are also such an underrated styling tool. They’re affordable, they come in infinite variations, and they genuinely elevate any bun from “I needed my hair out of the way” to “I styled my hair intentionally.” Collect a few different styles—a delicate ribbon, a satin bow, maybe something with a bit of edge—and you’ve got the flexibility to shift the entire mood of any of these styles depending on what you’re doing.
