



Low messy buns strike the perfect balance for prom — they look intentionally undone and effortlessly elegant without requiring the formality of a slicked-back high style. There’s something about the casual-meets-glamorous vibe of a low bun that photographs beautifully, stays secure through an entire evening of dancing and celebrating, and actually works with the strapless or off-shoulder dresses that dominate prom season. The best part? A low messy bun doesn’t demand hours at the salon or professional styling skills you don’t have.
The thing is, not all low buns feel right for prom. Some come across too gym-ready, others look better suited for a casual afternoon than a formal event. The key is choosing a style that feels polished enough for photos and slow dances while maintaining that relaxed, intentional messiness that makes a statement. You want your friends asking “how did you get your hair to look like that?” not “did you just throw your hair up?”
This guide walks through eight distinct low messy bun styles that genuinely elevate a prom look, with specific styling steps, techniques to prevent the dreaded flop-over, and real tips from what actually holds up through hours of movement and humidity. Each style works beautifully with different dress necklines, face shapes, and hair textures — which means you’ll find something that feels authentically you rather than a generic recreation of someone else’s photo.
1. The Twisted Low Bun with Loose Tendrils
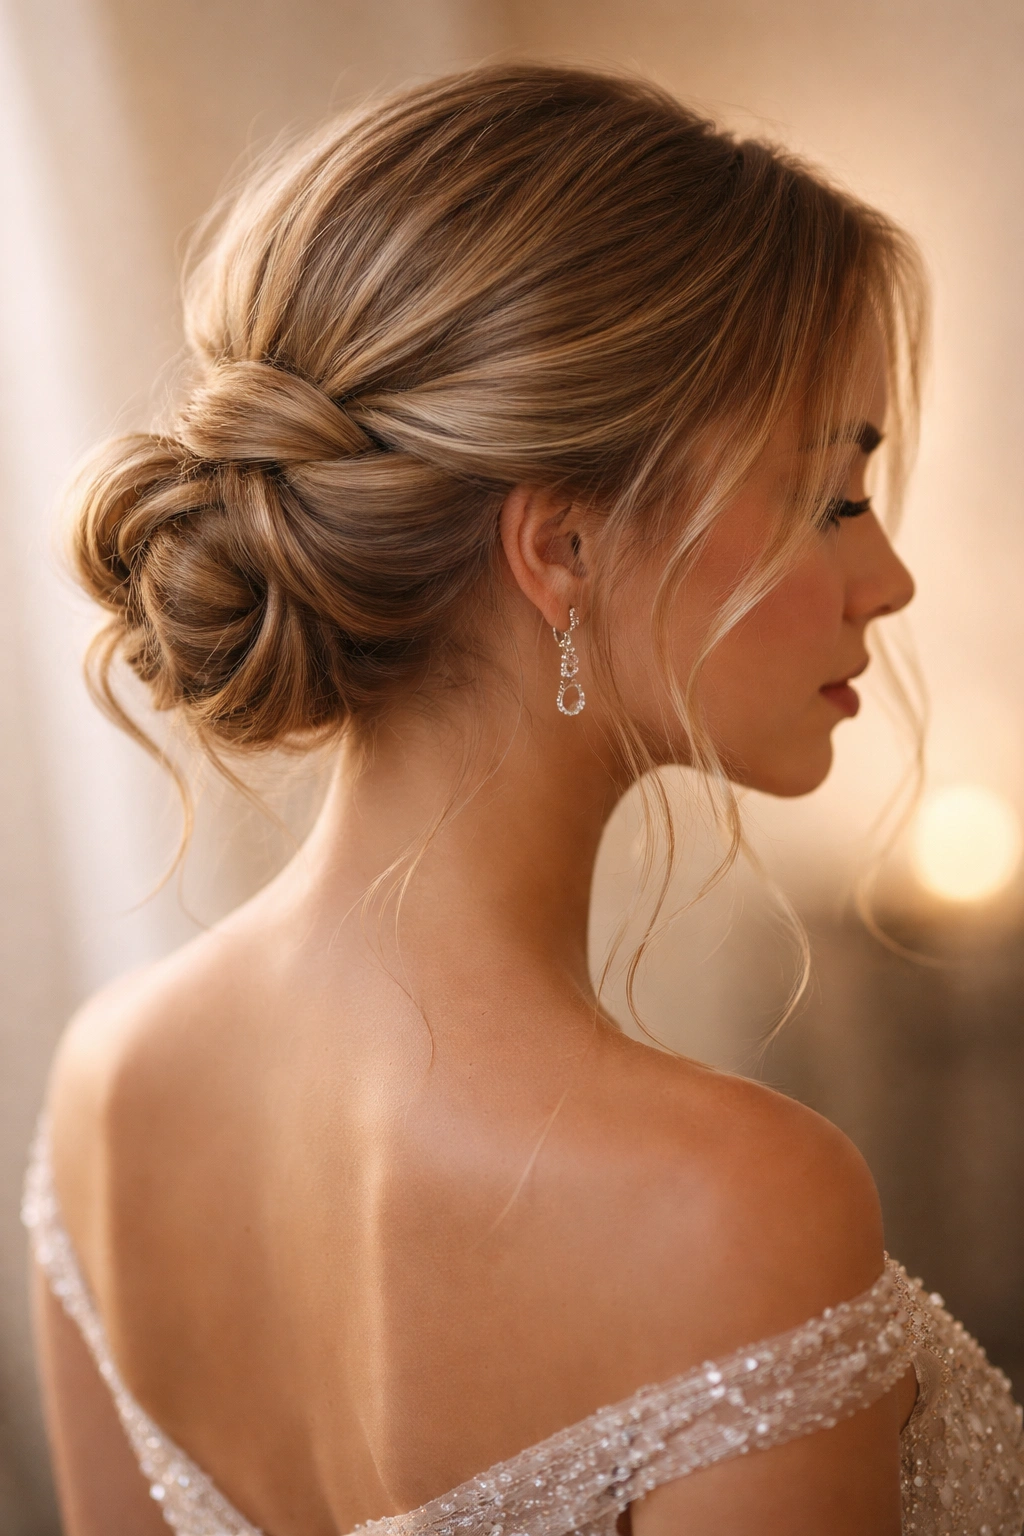
This style threads the line between structured and undone, giving your updo a purposeful architectural quality while keeping face-framing pieces flowing. The twisted texture adds visual interest without looking fussy, and the loose strands around your face soften the entire look in a way that photographs exceptionally well.
Why This Works as Your Prom Hairstyle
A twisted low bun reads as intentionally styled rather than hastily put together, which matters when you’re spending prom night being photographed from every angle. The twists create natural texture that helps disguise any bumps or imperfections in your base, and the face-framing pieces are flattering on nearly every face shape because they soften your features without obscuring them. The security of the twist — all those wrapped sections interlocking — means the bun holds firm through dancing and movement.
How to Create the Twisted Low Bun
- Begin with hair that’s been blow-dried smooth or lightly waved; texture actually helps the style hold
- Brush your hair back into a low ponytail positioned just at the nape of your neck
- Divide the ponytail into two equal sections and twist each section in the same direction (clockwise or counterclockwise)
- Wrap one twisted section around the base of the ponytail, securing with bobby pins
- Wrap the second twisted section around the bun to completely conceal the elastic, pinning as you go
- Gently pull a few wisps from around your face and loosen them with your fingers
- Finish with a light spray of hair spray — this is crucial because the twist texture needs to hold without feeling crunchy
Pro tip: The night before prom, practice this style at least twice. The wrapping motion feels awkward the first time, but once your hands memorize the movement, you can execute it in under five minutes.
2. The Braided Low Bun with Wrapped Texture
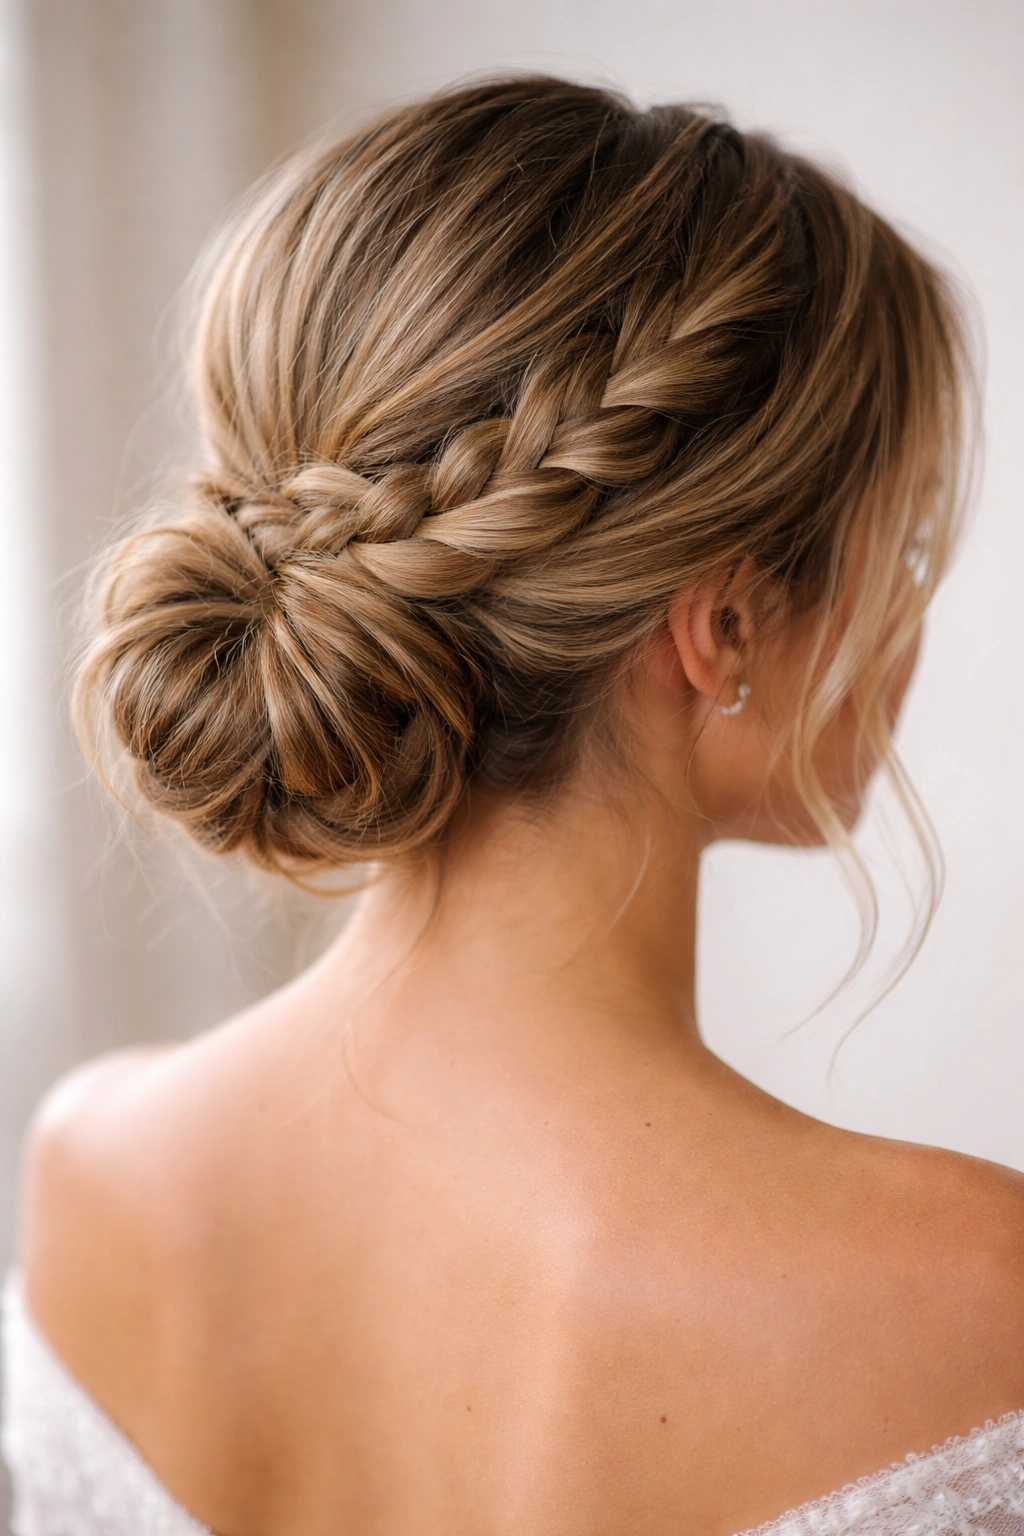
Braids add an extra dimension of visual interest to a low bun while giving it stronger hold. This style works especially well if you want your hair to feel completely secure — the braid structure means fewer sections slipping free as the night progresses.
The Appeal of Braided Construction
A braided base transformed into a bun says you put thought into your prom hair without screaming “I spent two hours at a salon.” The braid adds texture that makes the bun look fuller and more intentionally messy, even when execution is precise. This style photographs beautifully because the braid’s definition shows up in photos while the gathered bun maintains that effortless vibe.
Steps for a Braided Low Bun
- Apply a texturizing spray to damp hair and let it dry for easier grip and braid hold
- Create a deep side part and sweep your hair into a low side ponytail (slightly offset from dead center)
- French braid the ponytail downward, starting from the elastic and braiding until you reach the ends
- Roll the braided ponytail into a circular bun shape, tucking the braid ends underneath
- Secure the bun with bobby pins placed horizontally and vertically for maximum hold
- Gently tease the bun slightly with a fine-tooth comb to add volume and that “just right” messiness
- Pull a few pieces from your braid to frame your face, especially if you’re wearing your hair off your neck
Worth knowing: If your hair is finer or shorter, a French braid positioned from the crown down and then transformed into the bun creates the illusion of fuller hair and stronger structure.
3. The Romantic Low Bun with Peekaboo Waves
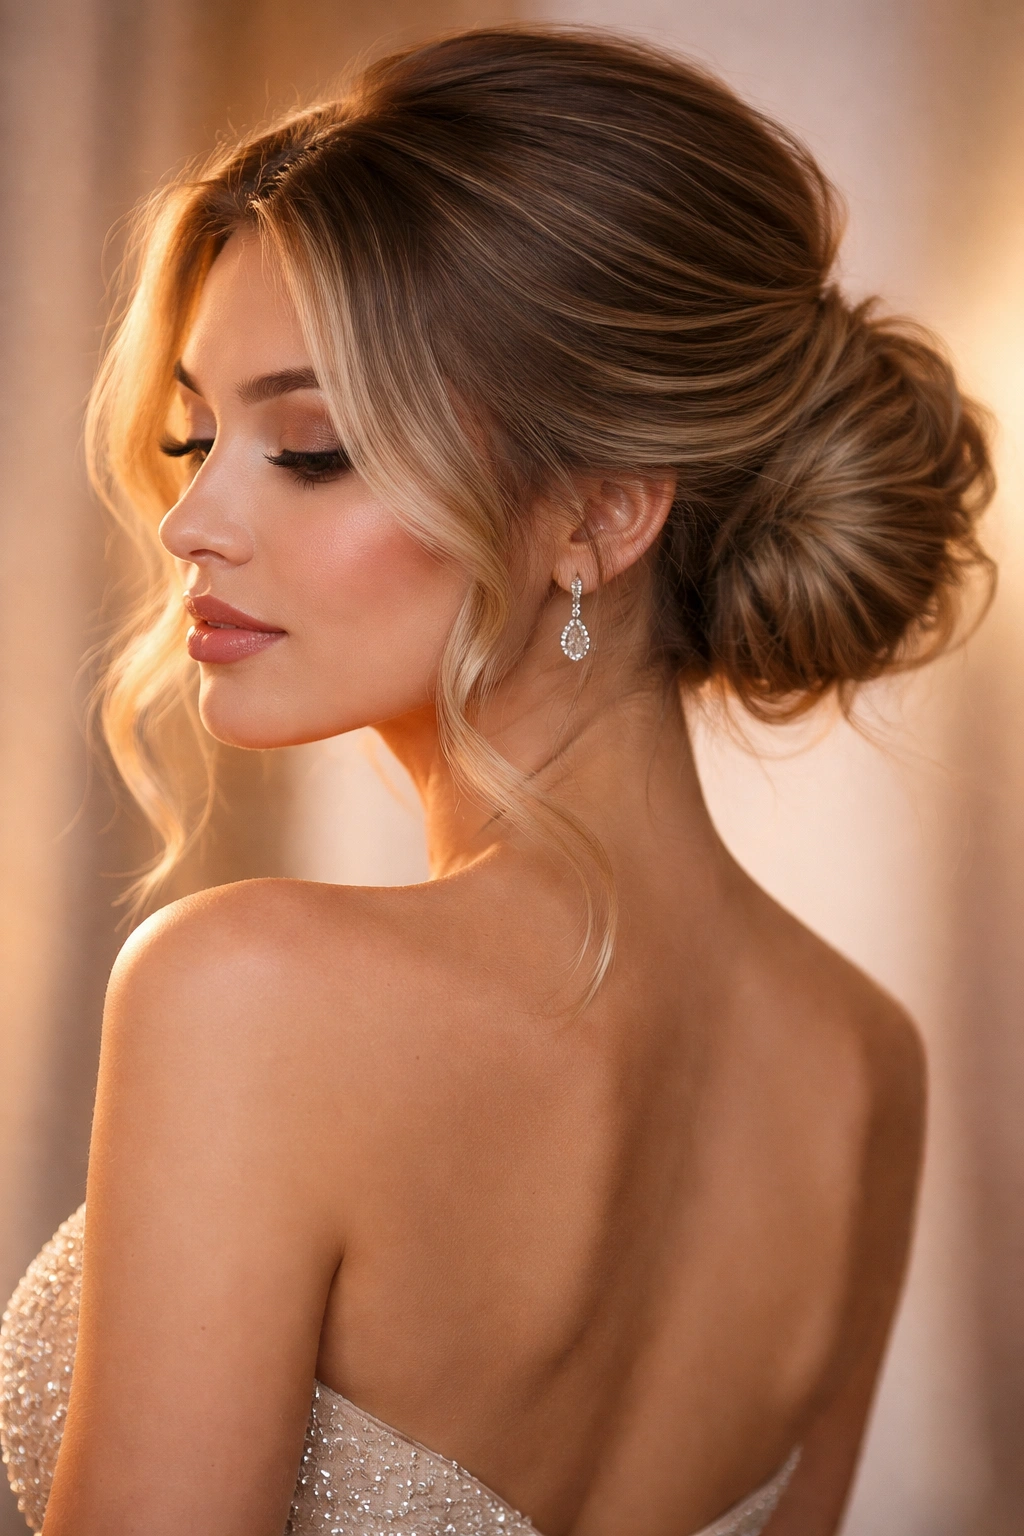
This style keeps longer pieces down around your face and neck in soft waves while gathering the bulk of your hair into a low bun. It’s the choice if you want the elegance of an updo without sacrificing the softness and flow of down hair.
Why Peekaboo Waves Feel Prom-Perfect
Peekaboo waves give you the best of both worlds — the face-flattering, hair-flowing appeal of wearing your hair down combined with the polished, movement-friendly convenience of an updo. The waves frame your face beautifully for photos, work with any dress neckline imaginable, and create depth and dimension that reads as intentional styling. The low bun itself stays completely secure and out of your way, while the waves steal the visual show.
Creating the Peekaboo Wave Style
- Section out two to three one-inch sections of hair on each side of your face (basically from your temple back to behind your ear)
- Curl these sections loosely with a one-and-a-quarter-inch curling iron, leaving the ends out for a wave effect
- Brush your remaining hair into a low ponytail at the nape of your neck, keeping the face-frame sections separate
- Twist or braid your ponytail, then wrap it into a low bun and secure with bobby pins
- Arrange your waved face-frame pieces so they sit naturally around your shoulders
- Set everything with hairspray, using a light hand so the waves move fluidly rather than feeling locked in place
Pro tip: Curl your face-frame waves earlier in the day if possible — the longer they sit before being incorporated into the bun, the more natural and relaxed the wave will appear.
4. The Sleek-to-Messy Hybrid Bun
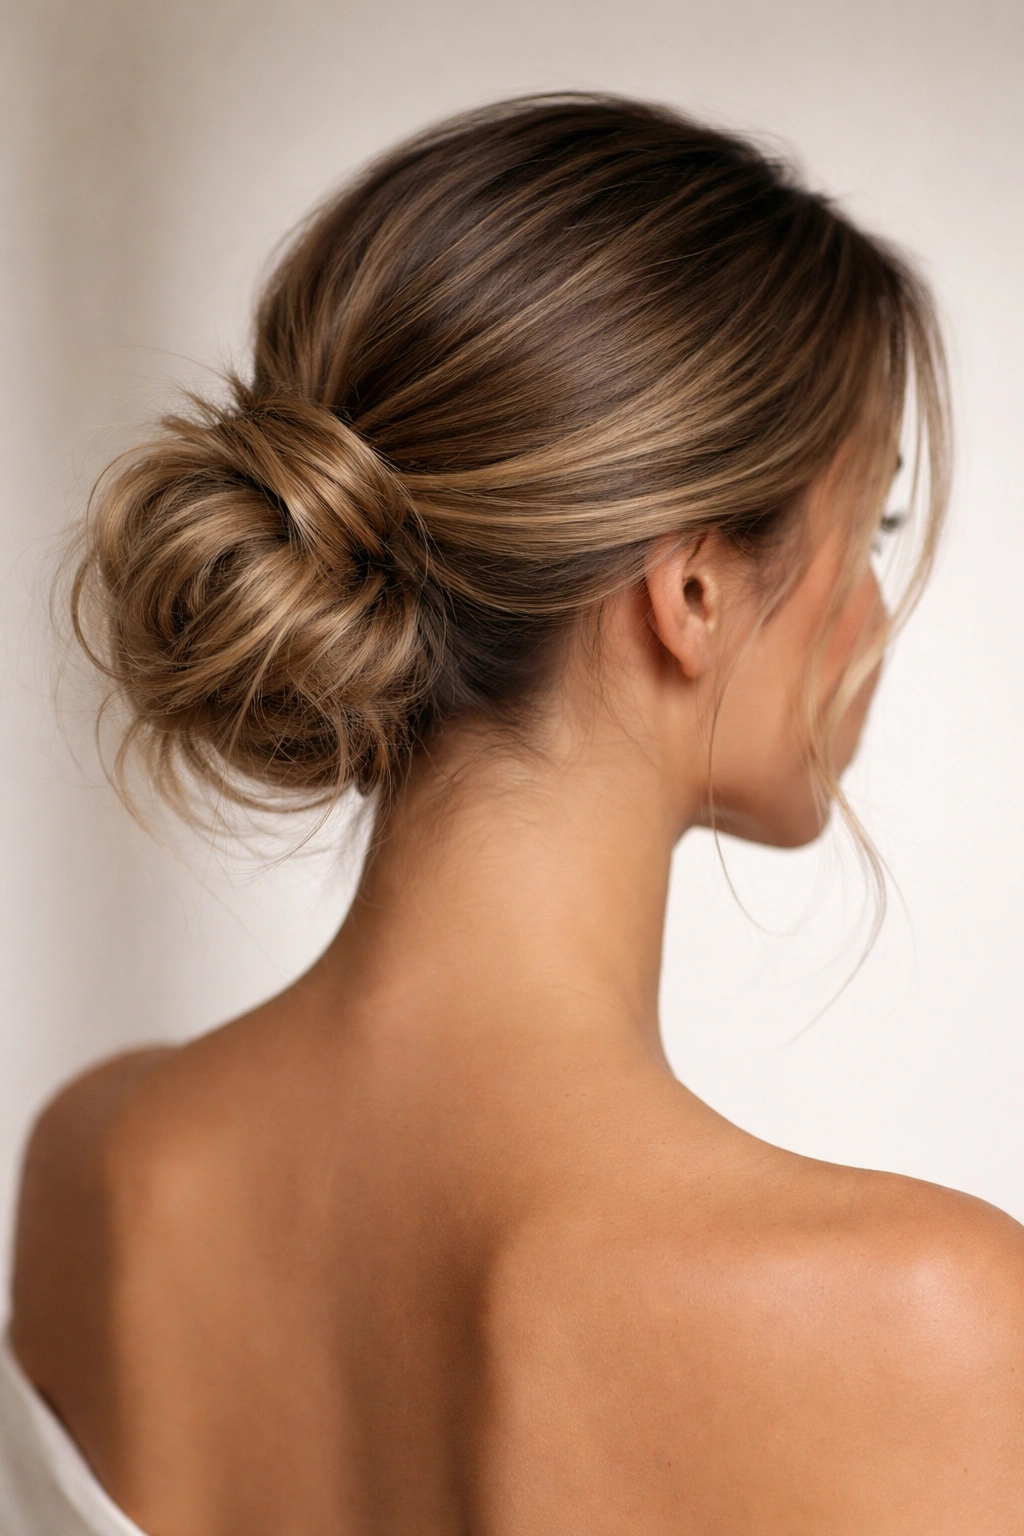
This style features a smooth, almost slicked back pull transitioning into a deliberately messy, textured bun. It’s modern, unexpected, and incredibly flattering because the sleekness balances the messiness, creating visual interest without looking unkempt.
The Modern Edge of Sleek-to-Messy
The contrast between the smooth back and the textured bun creates an almost architectural quality that photographs beautifully and reads as intentionally styled rather than randomly assembled. This style works brilliantly if you have a strong facial structure because the slicked-back portion emphasizes your bone structure, while the messy bun below softens the overall effect. It’s the rare prom hairstyle that feels both current and timeless simultaneously.
Building the Sleek-to-Messy Look
- Apply a smoothing serum or light pomade to damp hair, focusing on your roots and mid-lengths
- Blow-dry your hair straight, using a paddle brush to eliminate any texture or wave
- Brush your hair back into a low, smooth, tight ponytail at the nape of your neck (think ballet-dancer sleek)
- Secure with a clear elastic, making sure zero flyaways escape
- Tease the ponytail section gently with a fine-tooth comb to add texture and volume
- Twist the teased ponytail loosely and wrap it into a bun, creating intentional lumps and bumps rather than a smooth, round shape
- Pin strategically so the messiness stays in place but looks naturally undone
- Smooth your hairline with a fine-tooth comb and a tiny dab of pomade to maintain that sleek contrast
Insider note: The key to making this work is having genuinely sleek hair in the back section and genuinely textured, slightly loose bun in front. The contrast is what makes the style sing.
5. The Wrapped-Piece Low Bun with Dimension
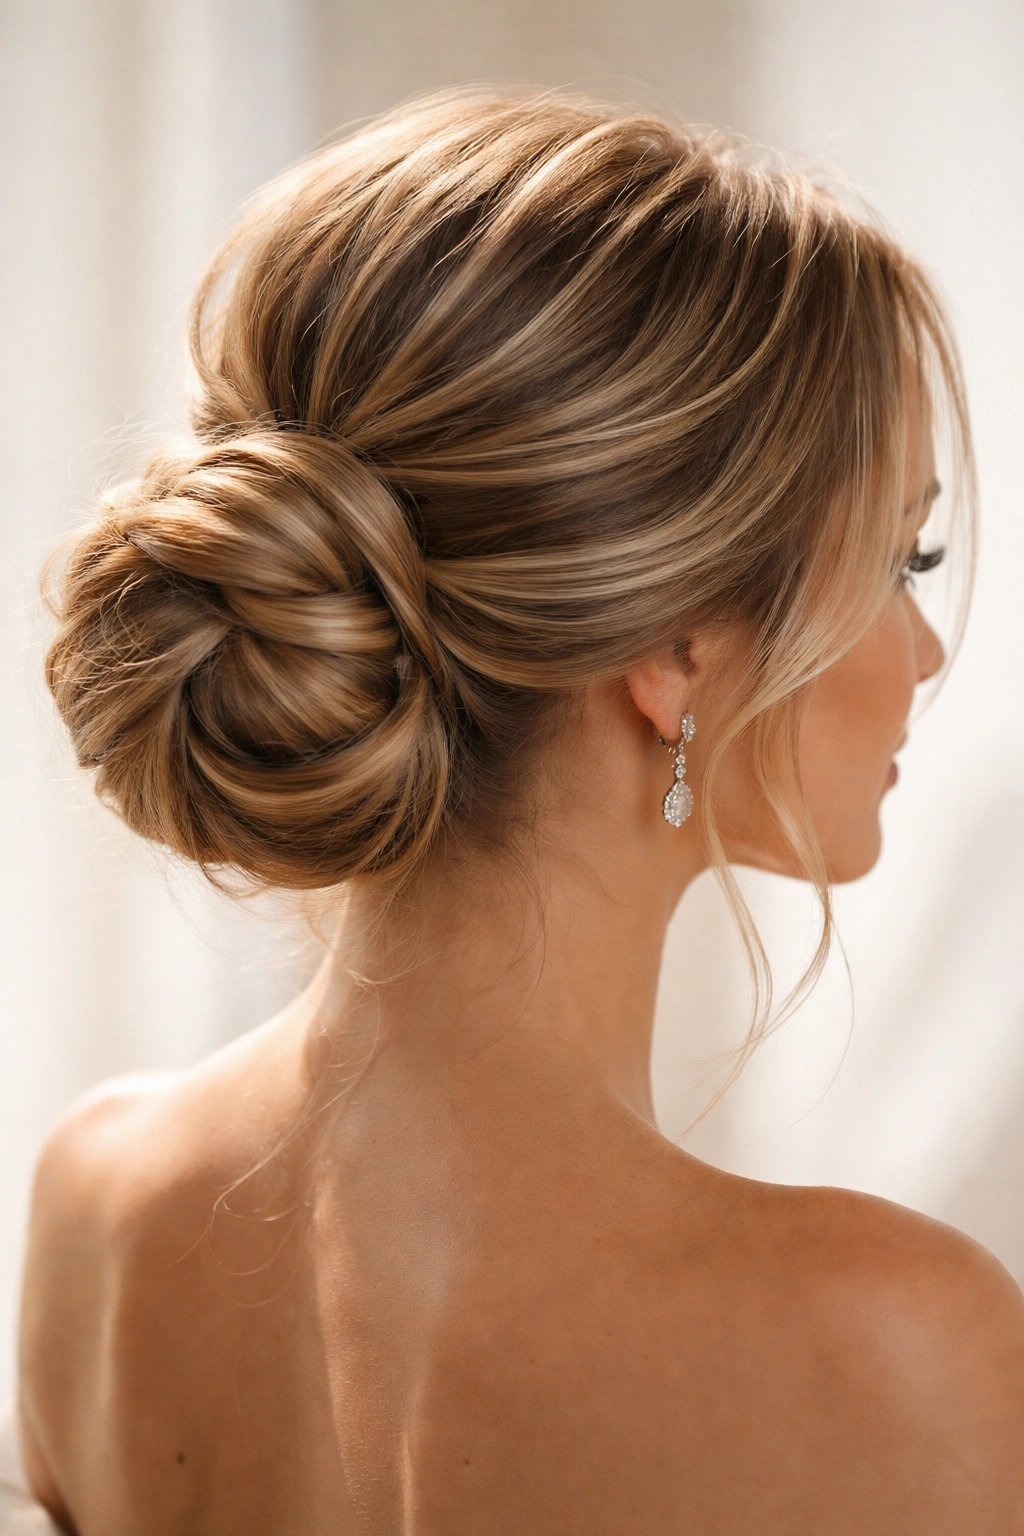
This style involves wrapping individual sections of hair around your low bun rather than twisting or braiding them first. Each wrapped piece adds another layer of visual texture and dimension, creating a bun that’s far more interesting to look at than a standard gathered style.
Why Wrapped Pieces Add Undeniable Elegance
Wrapped sections create a bun that looks fuller and more intentionally styled than a basic gathered bun, yet the wrapped method is actually easier to execute than braiding. Each wrapped piece catches light differently, creating shadow and dimension that photographs like a dream. The technique also naturally creates that messy, slightly undone quality without requiring you to deliberately tease or roughen the texture.
Executing the Wrapped-Piece Technique
- Brush your hair into a low ponytail at the nape and secure loosely with an elastic
- Divide the ponytail into four to six sections (thicker sections = bolder wrapped effect)
- Take the first section, twist it gently, and wrap it around the base of the ponytail, pinning as you go
- Repeat with each section, wrapping in the same direction so the wrapped pieces layer smoothly
- As you wrap, let each section sit slightly loose and textured rather than pulling it tight — this creates the intentional messiness
- Once all pieces are wrapped and pinned, gently pull the bun slightly to loosen it and add volume
- Spritz with light hairspray and you’re done
Worth knowing: This style works best when you start with a loose, low ponytail rather than pulling hair tightly back. The looser base allows for easier wrapping and automatically creates that relaxed, undone quality.
6. The Half-Up, Half-Down Low Bun Fusion
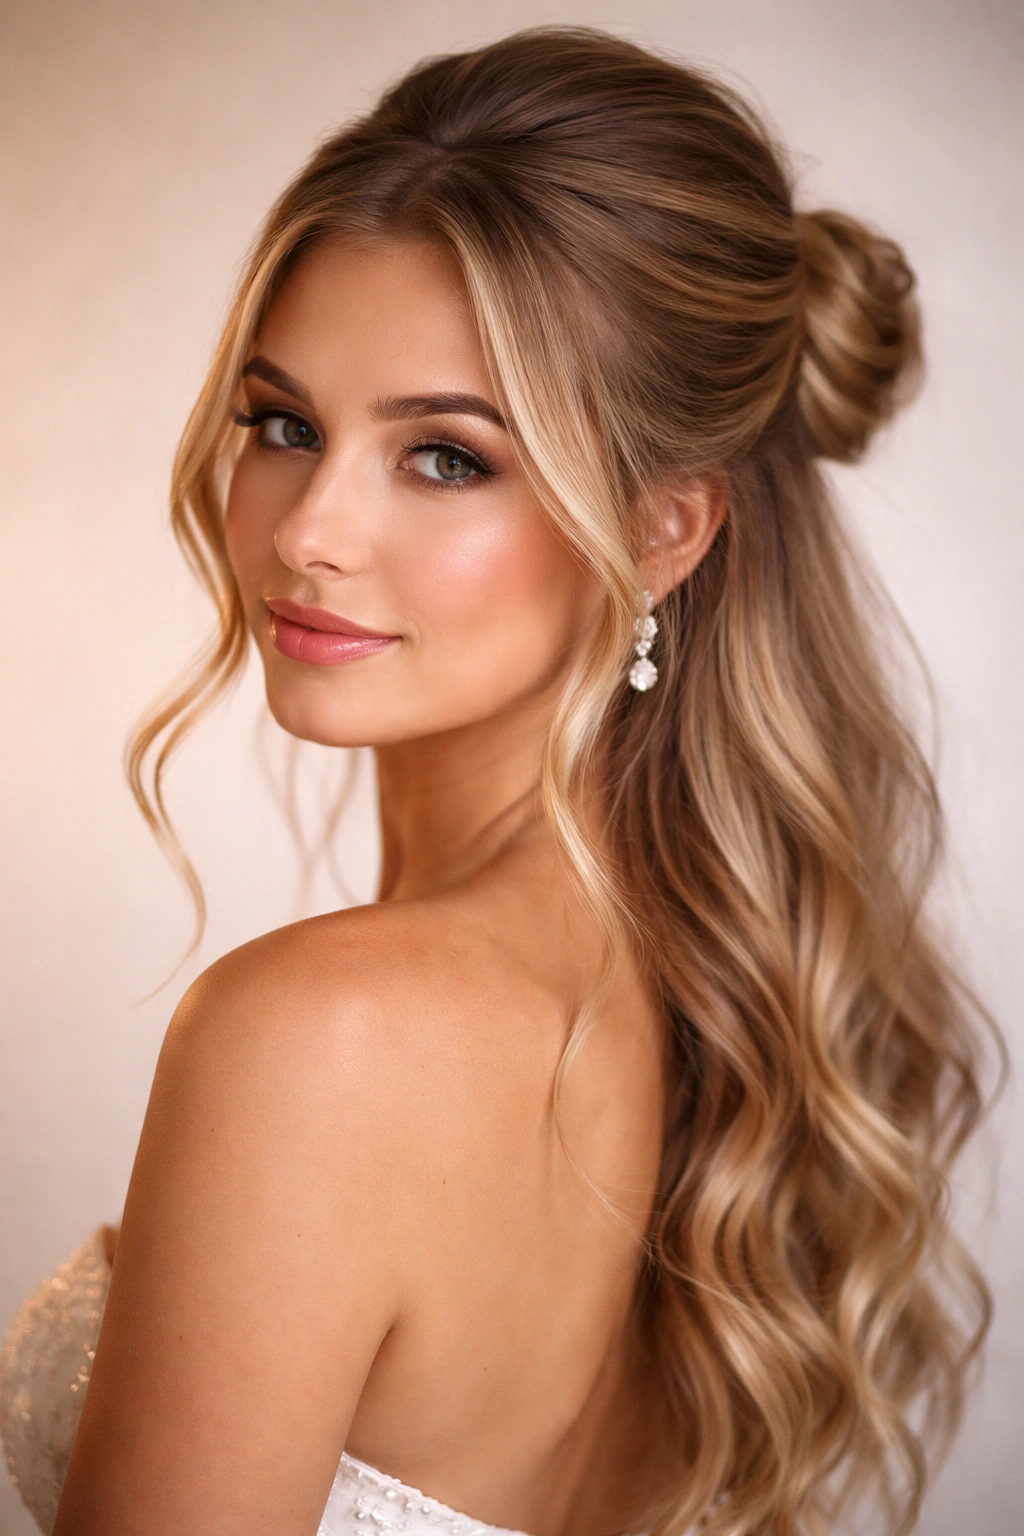
This hybrid style keeps a significant portion of your hair down and flowing while gathering the top section into a low bun. It offers the sophistication of a partial updo while maintaining the soft, romantic appeal of down hair — genuinely the best compromise for anyone who feels torn between updo and down-hair options.
The Dual Appeal of Half-Up, Half-Down
This style solves the prom dilemma of wanting the elegance of an updo without sacrificing the romantic flow and movement of down hair. Half your hair gets the polished, movement-friendly security of being pinned up, while the other half gets to cascade and move and photograph beautifully. The result is a style that works with any dress neckline, flatters any face shape, and literally no one else will have identical hair because the style is so customizable.
Creating the Half-Up, Half-Down Fusion
- Start with your hair down and gently waved or curled throughout
- Section off the top half of your hair (imagine a line ear-to-ear across the crown of your head)
- Brush the top section back into a low ponytail, securing it just at the occipital bone (the bump at the back of your head)
- Take the ponytail and twist it gently, then wrap the twist into a bun, pinning securely
- Leave your bottom half of hair completely down, allowing your lower section of hair to frame and flow around the low bun
- Arrange your down hair so it sits naturally — slightly curled or waved adds movement and dimension
- Pin any flyaways and set with light hairspray
Pro tip: This style is forgiving if your layers are uneven or if you have shorter pieces, because the half-down portion disguises length inconsistencies beautifully.
7. The Textured Pompadour Bun
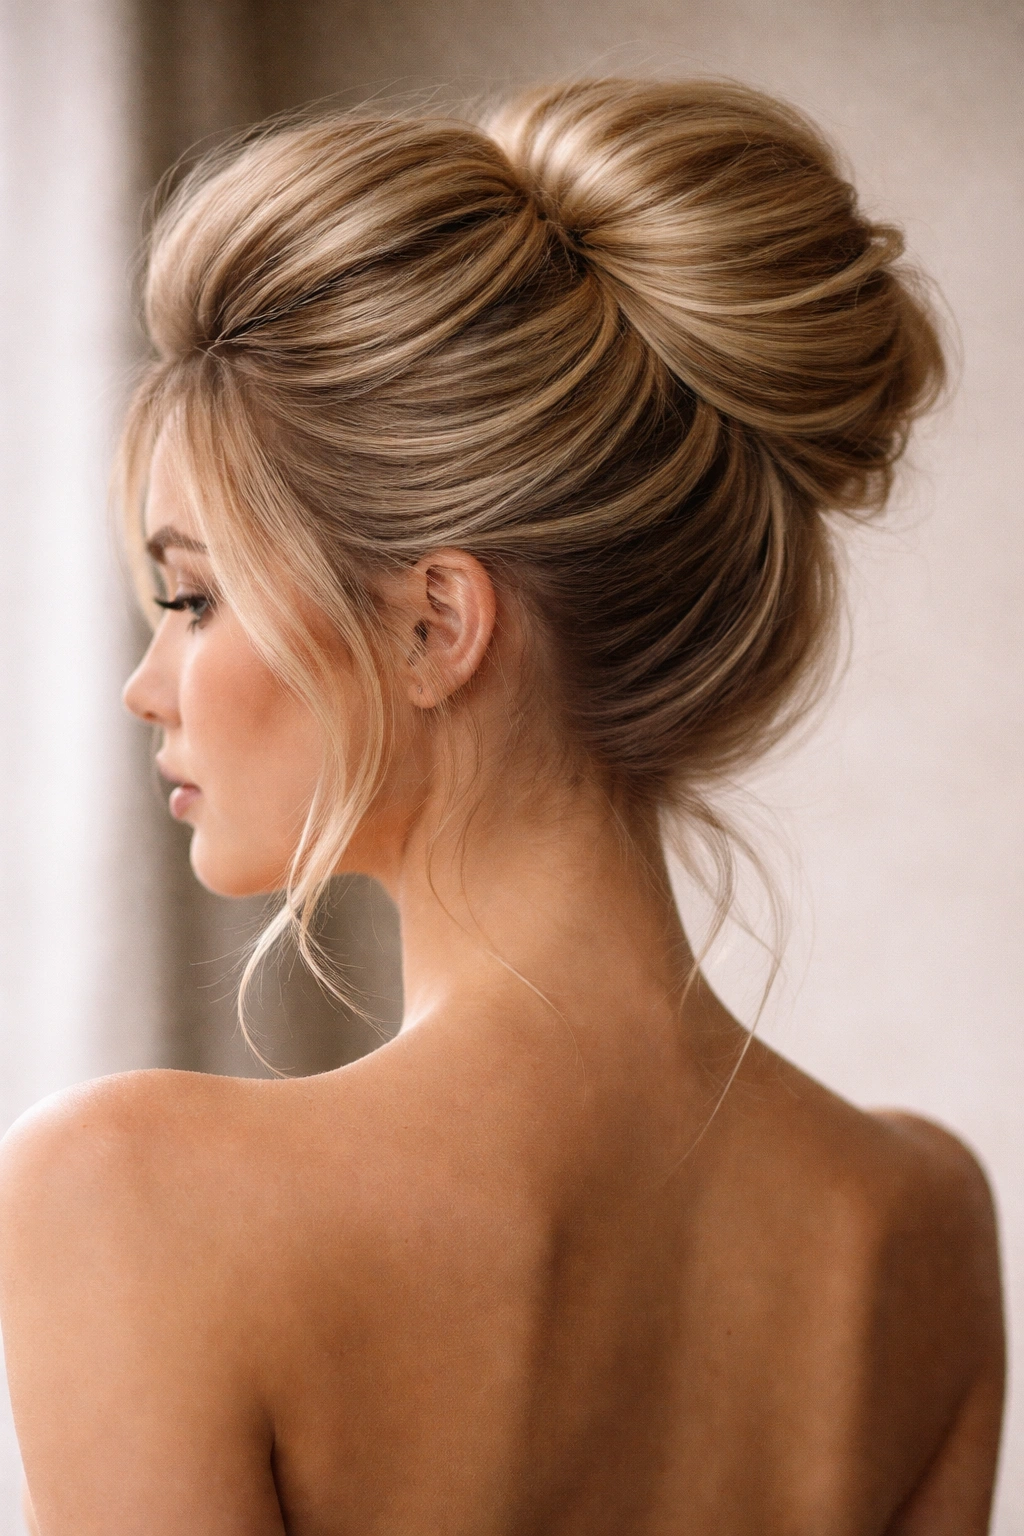
This style elevates your crown with height and volume while keeping the bulk of the bun low and compact. It’s dramatic, modern, and absolutely stunning in photographs because the height difference creates visual interest and depth.
The Wow Factor of Pompadour Volume
A textured pompadour bun makes a bold statement without requiring you to go full-glam. The elevated volume at your crown photographs beautifully and works with nearly every face shape because the height actually elongates your proportions. This is the style if you want people to genuinely notice and compliment your prom hair — it’s not subtle, but it’s not costumey either.
Building the Pompadour Bun Structure
- Blow-dry your hair with a round brush, focusing on lifting your roots and creating volume at the crown
- Section off a three-to-four-inch square at your crown (front to back, ear to ear)
- Gently tease this crown section at the roots using a fine-tooth comb
- Smooth the outer layer slightly with your comb, creating a polished surface over textured roots
- Gather the crown section and secure it to itself with bobby pins — don’t combine it with your lower hair yet
- This creates your pompadour base
- Now gather all your hair, including the pinned crown section, into a low ponytail at the nape
- Twist or braid the ponytail and wrap it into a low bun
- Gently pull the pompadour section upward and outward to enhance the height and shape
- Pin everything securely and set with flexible hairspray (not stiff hold, which would kill the texture)
Worth knowing: This style requires hair that’s at least shoulder-length to have enough length and substance to create genuine pompadour volume and still manage a low bun.
8. The Twisted Spiral Low Bun with Pulled Sections
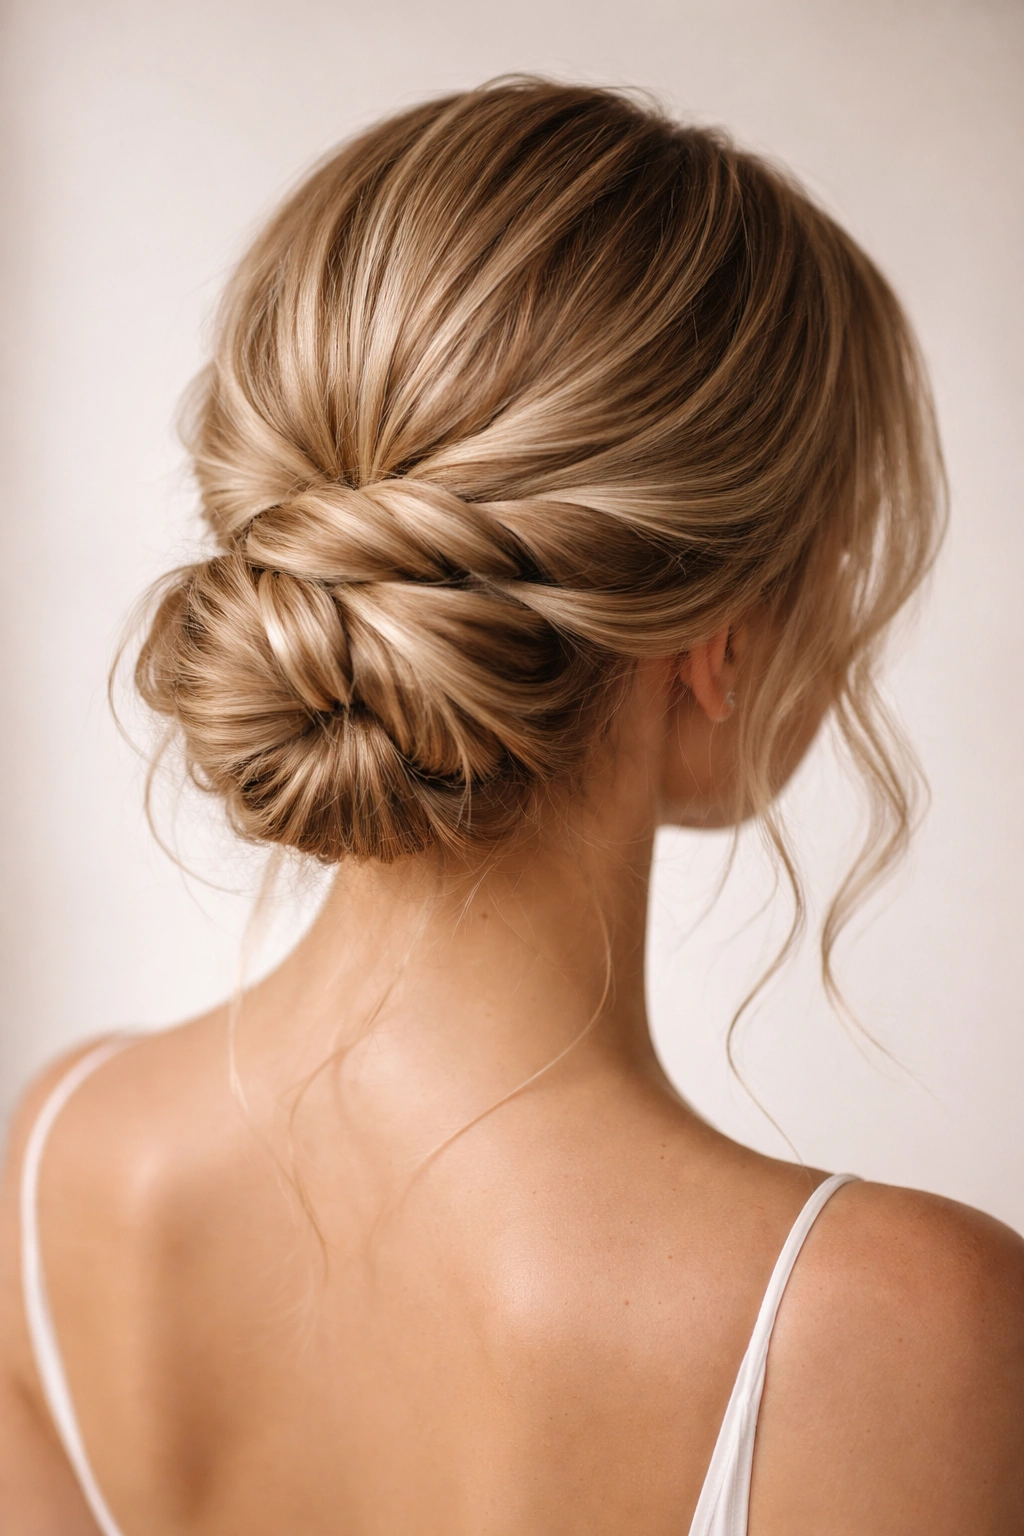
This final style spirals twisted sections of hair around your low bun, creating a bun that looks far more complex and intentionally styled than it actually is to execute. Each spiral adds another layer of visual dimension, and the pulled sections give that romantic, undone quality.
Why Spiraled Twists Look Effortlessly Elegant
Spiraling twisted sections around a bun creates a style that looks like it took hours to achieve, when in reality it’s remarkably straightforward. The spiral pattern creates visual movement and interest, the pulled sections add romance and softness, and the overall effect reads as intentionally styled while maintaining that “I’m not trying too hard” vibe. This style photographs beautifully and holds up through an entire evening of movement.
Steps for the Twisted Spiral Bun
- Brush your hair into a low ponytail at the nape of your neck and secure with an elastic
- Divide the ponytail into three to four sections
- Take the first section and twist it — not tightly, but with intention — until you reach the ends
- Spiral this twisted section around the base of the ponytail, starting at the elastic and working outward, pinning as you go
- Repeat with each remaining section, spiraling in the same direction (clockwise or counterclockwise)
- Once all sections are spiraled and pinned, gently pull the bun to loosen it and add volume
- Pull a few individual strands from your spiraled sections to create softer, face-framing pieces
- Finish with hairspray using a light hand — you want hold, not crunch
Pro tip: The night before, braid your hair loosely and sleep on it to create texture. This natural texture makes both the twisting and the final messy effect more forgiving and authentic.
Final Thoughts
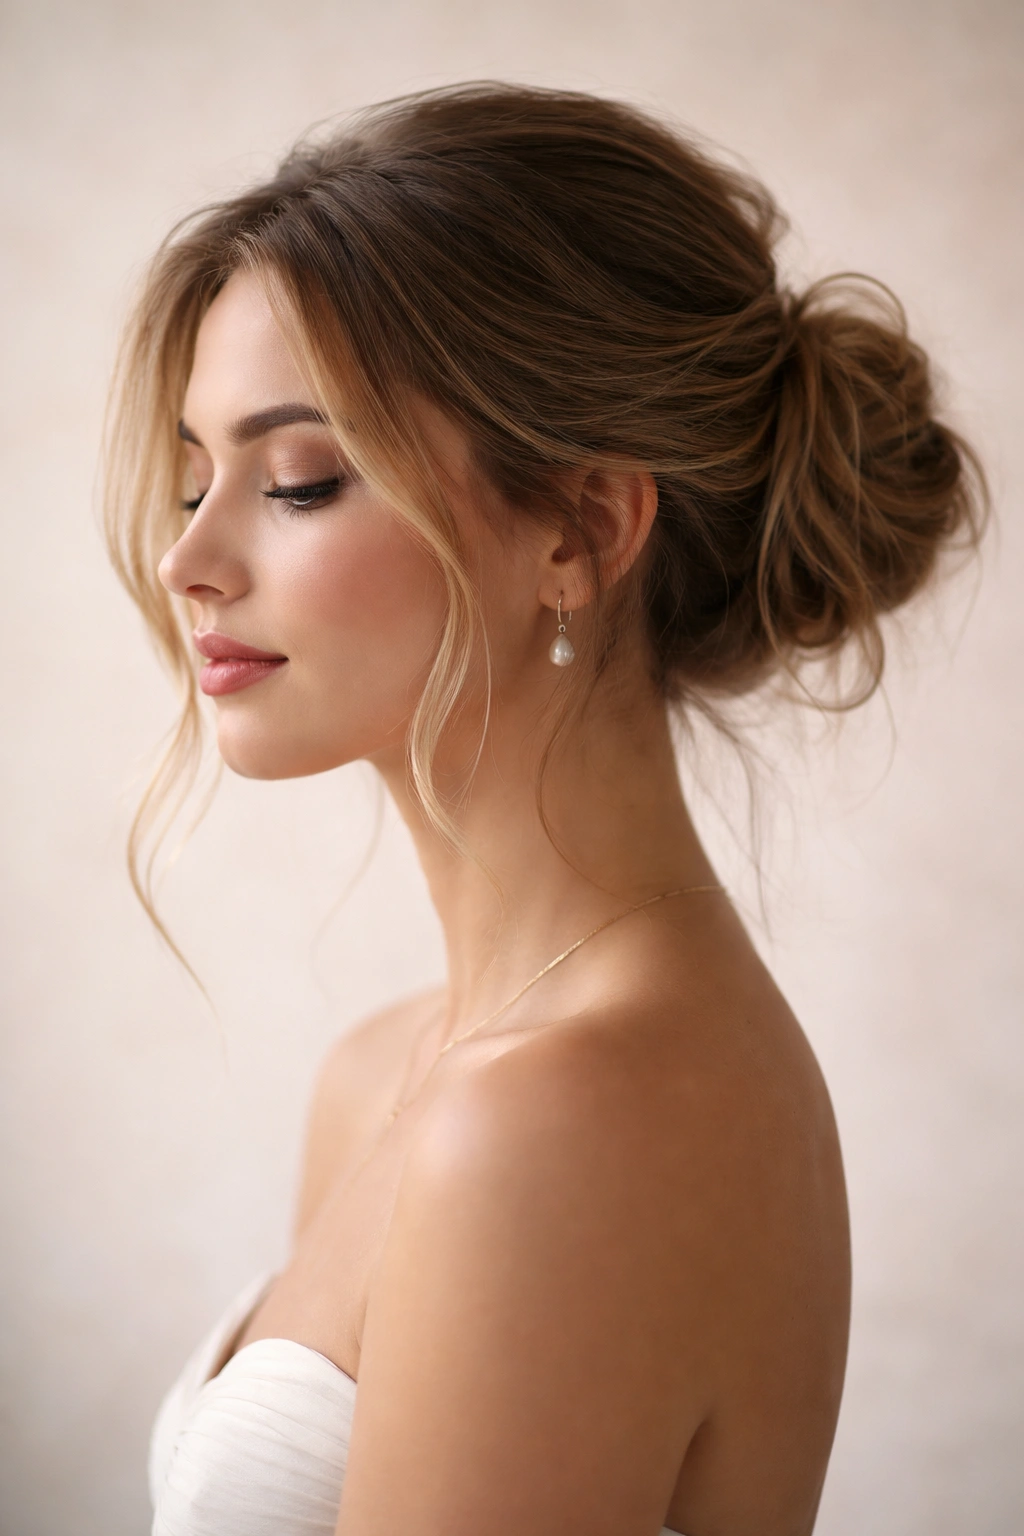
Your prom hairstyle sets the tone for your entire look — it’s the detail that ties together your dress, makeup, and overall vibe. A low messy bun offers the perfect combination of sophistication and approachability, elegance and ease. The eight styles in this guide give you genuine options rather than variations on the same theme, which means you can choose the approach that genuinely reflects your personal style rather than defaulting to whatever you see everyone else doing.
The truth that makes a real difference: the best prom hairstyle is one you’re confident wearing. Confidence looks better in photos than perfection ever will. Whether you go with romantic waves framing your face, bold spiraled twists, or sleek-to-messy contrast, your hair will look stunning because you chose something that feels authentically you. Spend an evening before prom actually practicing your chosen style — not just watching videos, but actually standing in front of your mirror with your hands in your hair, executing each step until your fingers remember the movements. This practice isn’t about achieving perfection; it’s about eliminating first-time jitters so that on prom night, you can focus on the celebration instead of wondering if your bun will hold.
