



Flat twists have become one of the most versatile and protective styling options for natural hair, combining the aesthetic appeal of intricate patterns with the practical benefits of a low-manipulation protective style. Whether you’re looking for something sleek and polished for the office or bold and creative for a night out, flat twists deliver on both fronts. The beauty of this technique lies in its flexibility—you can wear them for days, transform them into countless variations, and take them down to reveal beautifully defined waves without relying on heat styling.
The reason flat twists work so well for Afro-textured hair specifically is that they protect your natural curl pattern while allowing you to experiment with direction, length, and positioning. Unlike styles that require heat or tension that compromises hair integrity, flat twists sit at that sweet spot between protective and expressive. They work on all porosity levels, all curl patterns within the Afro hair spectrum, and they look genuinely polished from day one—no waiting for waves to set or hoping a style comes together over time.
What makes this style category so practical is that you don’t need expensive products, fancy tools, or professional-level skills to execute most flat twist looks. Once you understand the core technique, you can create an almost unlimited number of variations. The 10 styles we’re covering here represent different aesthetic directions, difficulty levels, and occasions—so whether you’re a flat twist beginner or you’ve been rocking them for years, you’ll find something fresh to try.
Understanding Flat Twists and Why They Work for Natural Hair
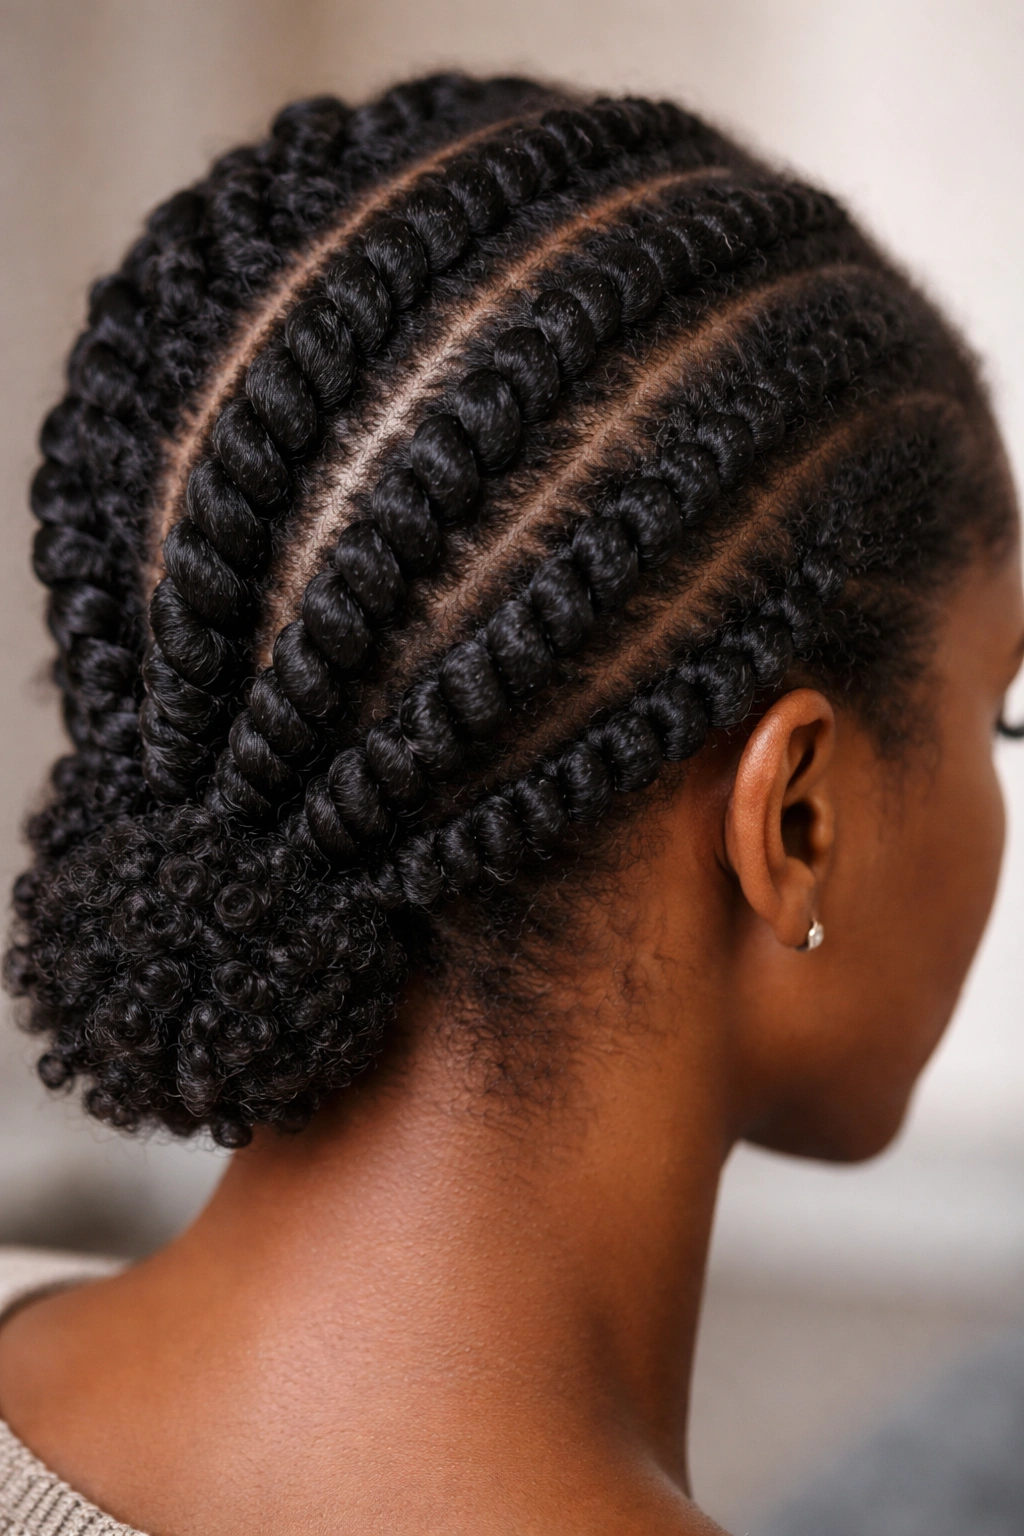
Before diving into specific styles, it’s worth understanding what makes flat twists such an effective protective style. A flat twist is created by taking two sections of hair and twisting them around each other while simultaneously feeding in small sections from the surrounding hair—similar to a Dutch braid, but using a twist motion rather than a crossing motion. This creates a raised, three-dimensional rope of twisted hair that lies flat against your scalp.
The protective benefit comes from the fact that your hair strands are bundled together and lying close to your scalp, which minimizes manipulation and reduces breakage. Your ends are tucked away and protected from friction against pillows, clothing, and environmental stressors. The style also allows your natural curl pattern to thrive without being disrupted, which means when you take it down, you get beautiful texture and definition.
Flat twists work particularly well on Afro-textured hair because they don’t require the hair to be stretched out or straightened to look intentional and polished. In fact, they look better when your hair has some texture and grip. The coiliness and natural shrinkage of Afro hair actually makes it easier to create clean, defined twists compared to straighter hair types.
1. Feed-In Flat Twists Down the Center
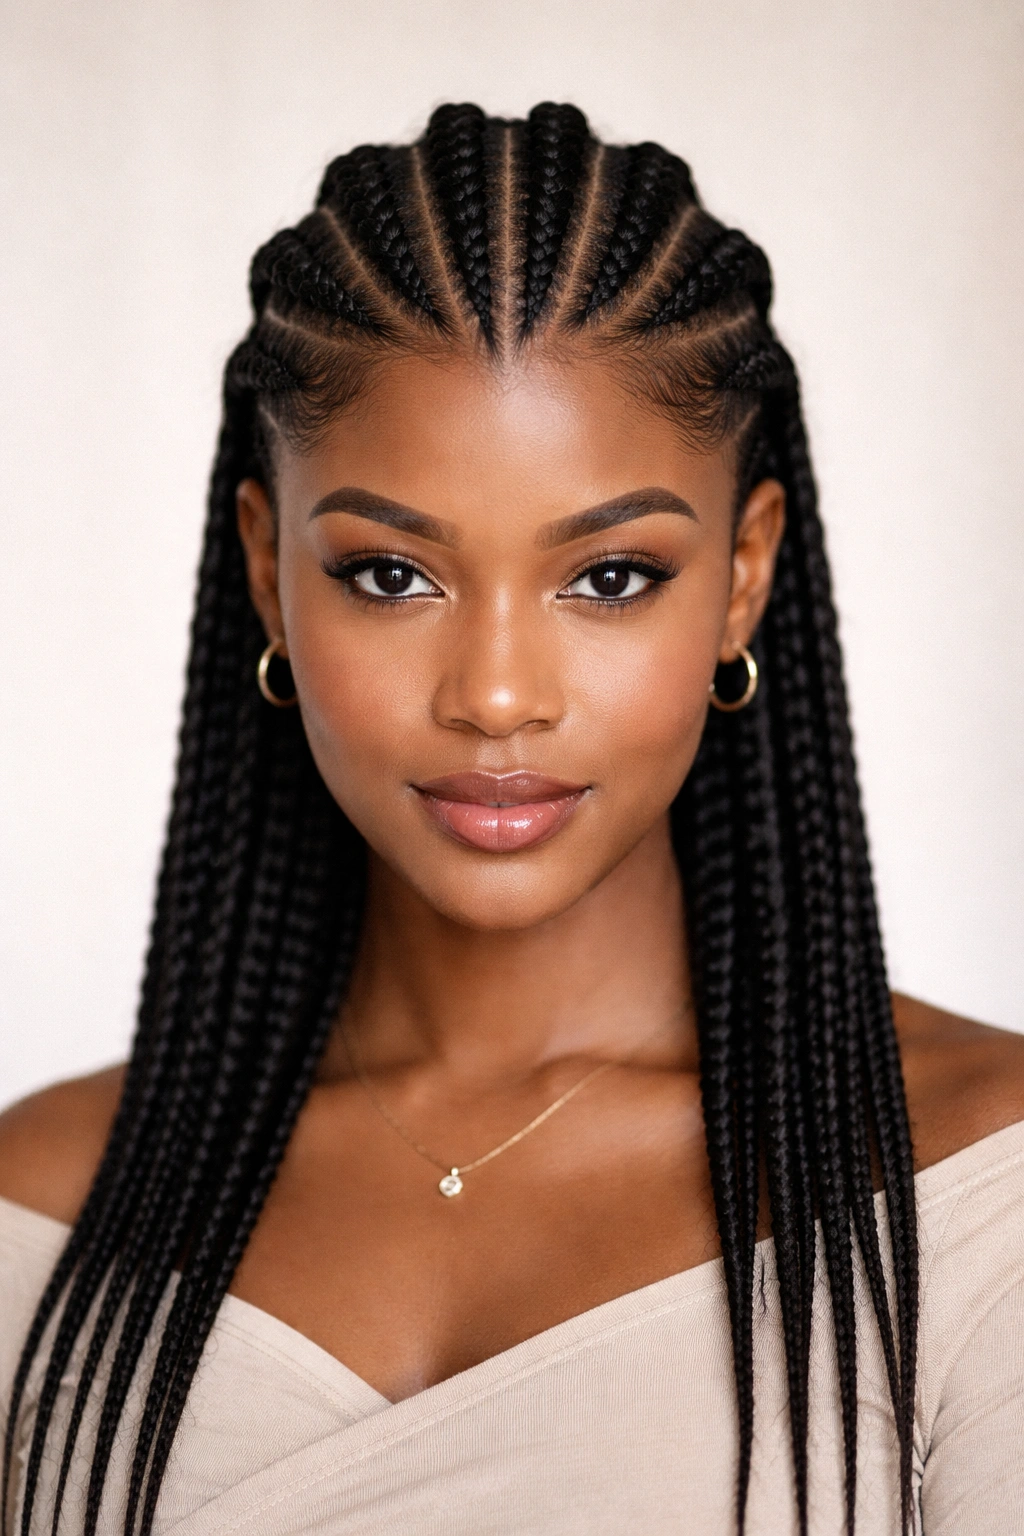
Feed-in flat twists running down the center of your head create a striking line that feels both modern and classic. This style works beautifully when you want something simple enough for everyday wear but intentional enough to feel like you’ve made an effort. The centering creates a naturally balanced, face-framing effect that’s flattering on most face shapes.
Why This Style Stands Out
The center placement draws attention to the middle of your face and creates a symmetrical, grounded appearance. Because you’re working with a clear visual line, the twists automatically look more precise and polished. This is an excellent gateway style if you’re new to flat twists—the straight path down the center means fewer directional decisions and cleaner results.
How to Create It
Start by parting your hair down the center of your scalp from your hairline to the nape of your neck. On one side, take a small section of hair at your hairline and begin your flat twist, feeding in hair as you move down the center line. The key is keeping your tension consistent so the twist stays uniform. Once you reach the end, you can pin it into place, wrap it, or leave it loose depending on your preferred finish. Repeat on the other side.
Styling Tips and Variations
For a softer look, create looser twists that showcase your natural curl pattern. For a more structured aesthetic, twist tightly and leave the twists up for an extra day or two before wearing them down. You can also add subtle color with temporary hair chalk on the twists themselves, or create thicker or thinner twists depending on your hair volume.
Pro tip: The center part is a great place to experiment with sheen sprays or lightweight oils—the twists will hold a subtle glow without looking greasy.
2. Crown Twists with Loose Ends
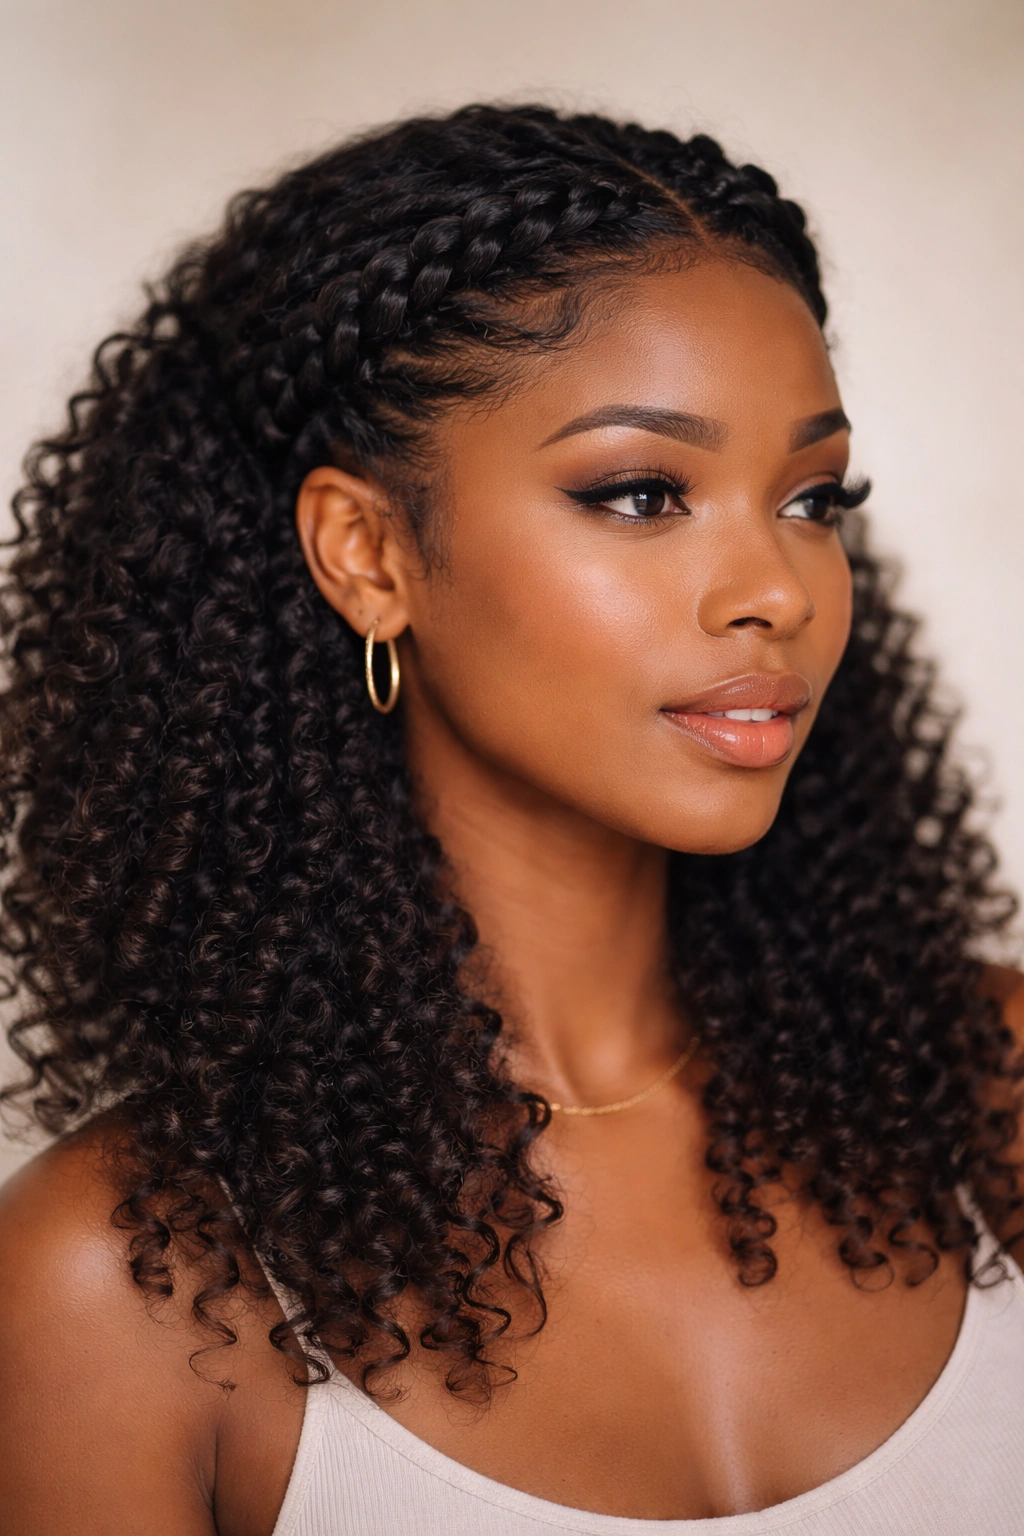
Crown twists create a romantic, ethereal look by running your flat twists around the perimeter of your head while leaving the interior hair completely loose and textured. This hybrid style gives you the protective benefits of twists while keeping the bulk of your hair free to move and display your natural curls. It’s the perfect middle ground between a fully protective style and completely loose hair.
What Makes Crown Twists Special
This style works for both work and social settings because it reads as intentional and styled while still feeling relaxed and natural. The twists act as a frame that highlights your face, and the loose curls in the center show off texture and dimension. You get the protective benefits where you need them most (your hairline and the areas that experience the most friction) while keeping the styling commitment minimal.
How to Build This Style
Create your first flat twist starting at one temple, feeding in hair as you move toward the back of your head. Angle your twists slightly upward to create a crown-like placement. You can do two twists (one on each side) or create a full crown by continuing the twists all the way around. Leave everything inside this twisted frame completely loose—don’t manipulate or separate the curls, just let them sit naturally.
Best Practices for This Look
The crown twists stay best when you twist them on dry or nearly dry hair. If your twists are slipping or not holding definition, use a lightweight styling cream or gel just on the twisted sections to give them grip. This style typically lasts 4-7 days depending on your hair texture and how loosely you twisted.
3. Mohawk-Style Flat Twists
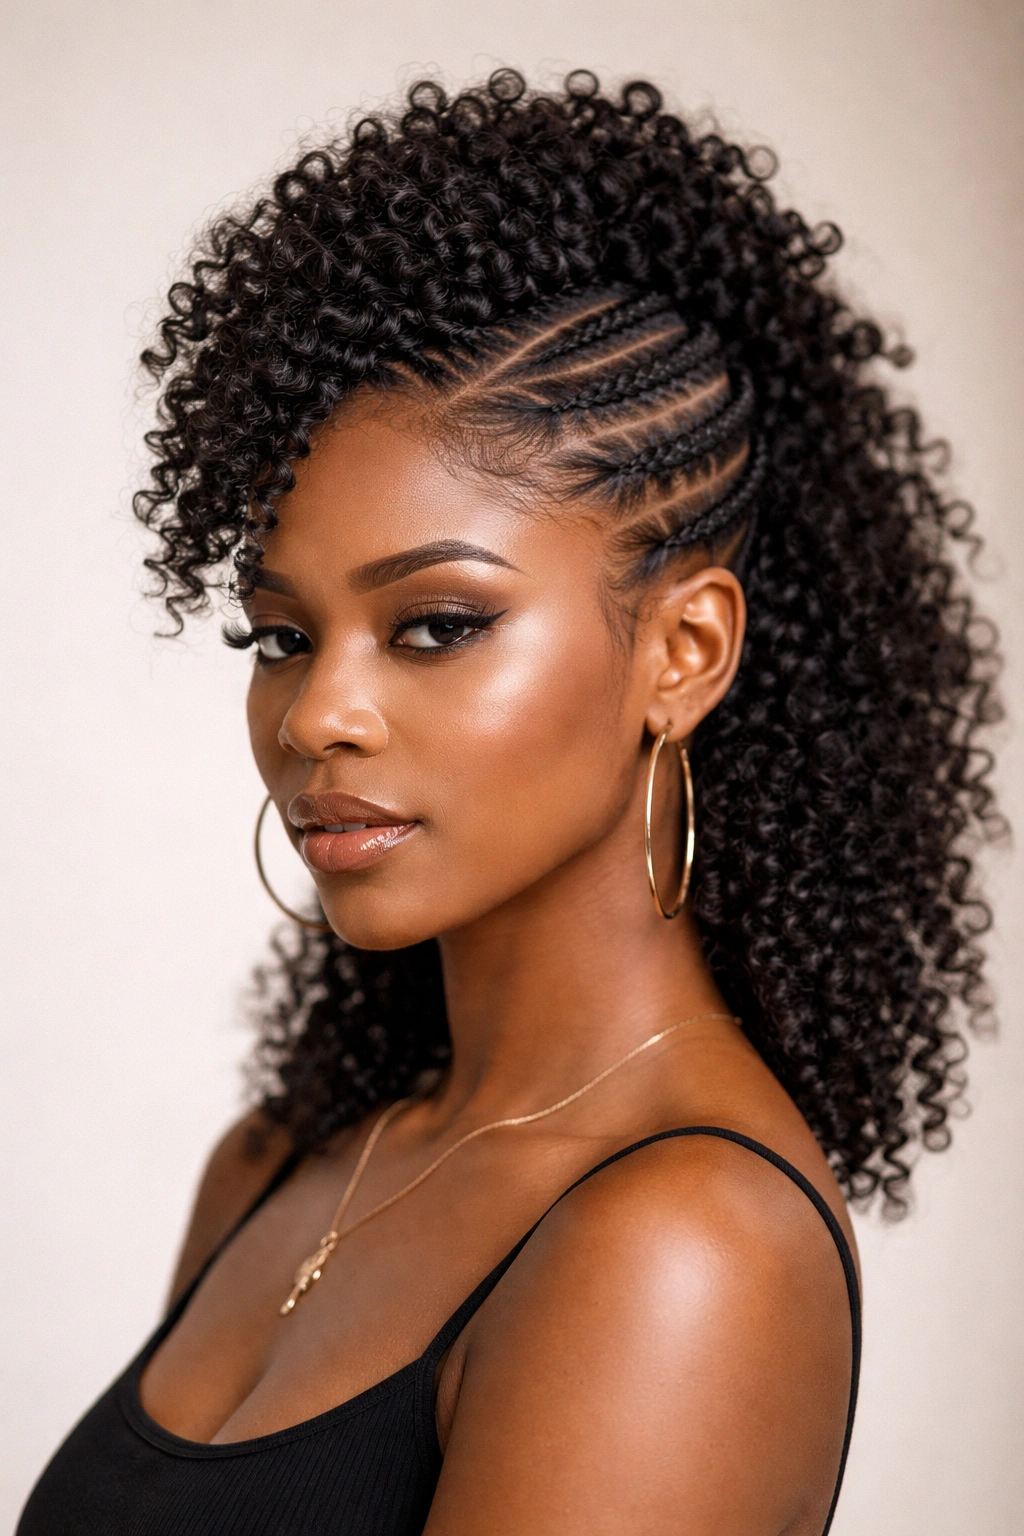
Flat twists arranged in a mohawk pattern create a bold, statement-making style that definitely turns heads. This look involves creating multiple twists that run from your hairline straight back, with the sides of your head left completely open or with sections of loose curls falling alongside. It’s edgy, modern, and surprisingly wearable.
Why This Style Feels So Striking
The mohawk arrangement instantly draws the eye upward and creates height and dimension. Even if you’re using the same number of twists you would in another style, the vertical direction creates a completely different visual impact. This style also feels intentional and artistic—it’s clearly a deliberate choice rather than a default protective style.
Execution and Styling Approach
Part your hair to create a section down the center of your head from hairline to nape, then divide that section into 3-5 smaller sections (depending on hair thickness and how bold you want the effect). Create a flat twist with each section, working from hairline to the back of your neck. The sides of your head can be left completely open with natural curls, or you can create additional twists that fall alongside the center twists for a more complex arrangement.
Creative Variations
This is a style where accessories really shine. Add cuffs, jewelry, or wraps to the ends of your twists for extra visual interest. You can also create two smaller mohawks instead of one down the center, or angle your twists at different angles rather than straight back for a more avant-garde take.
4. Spiral Flat Twists for Maximum Curl Definition
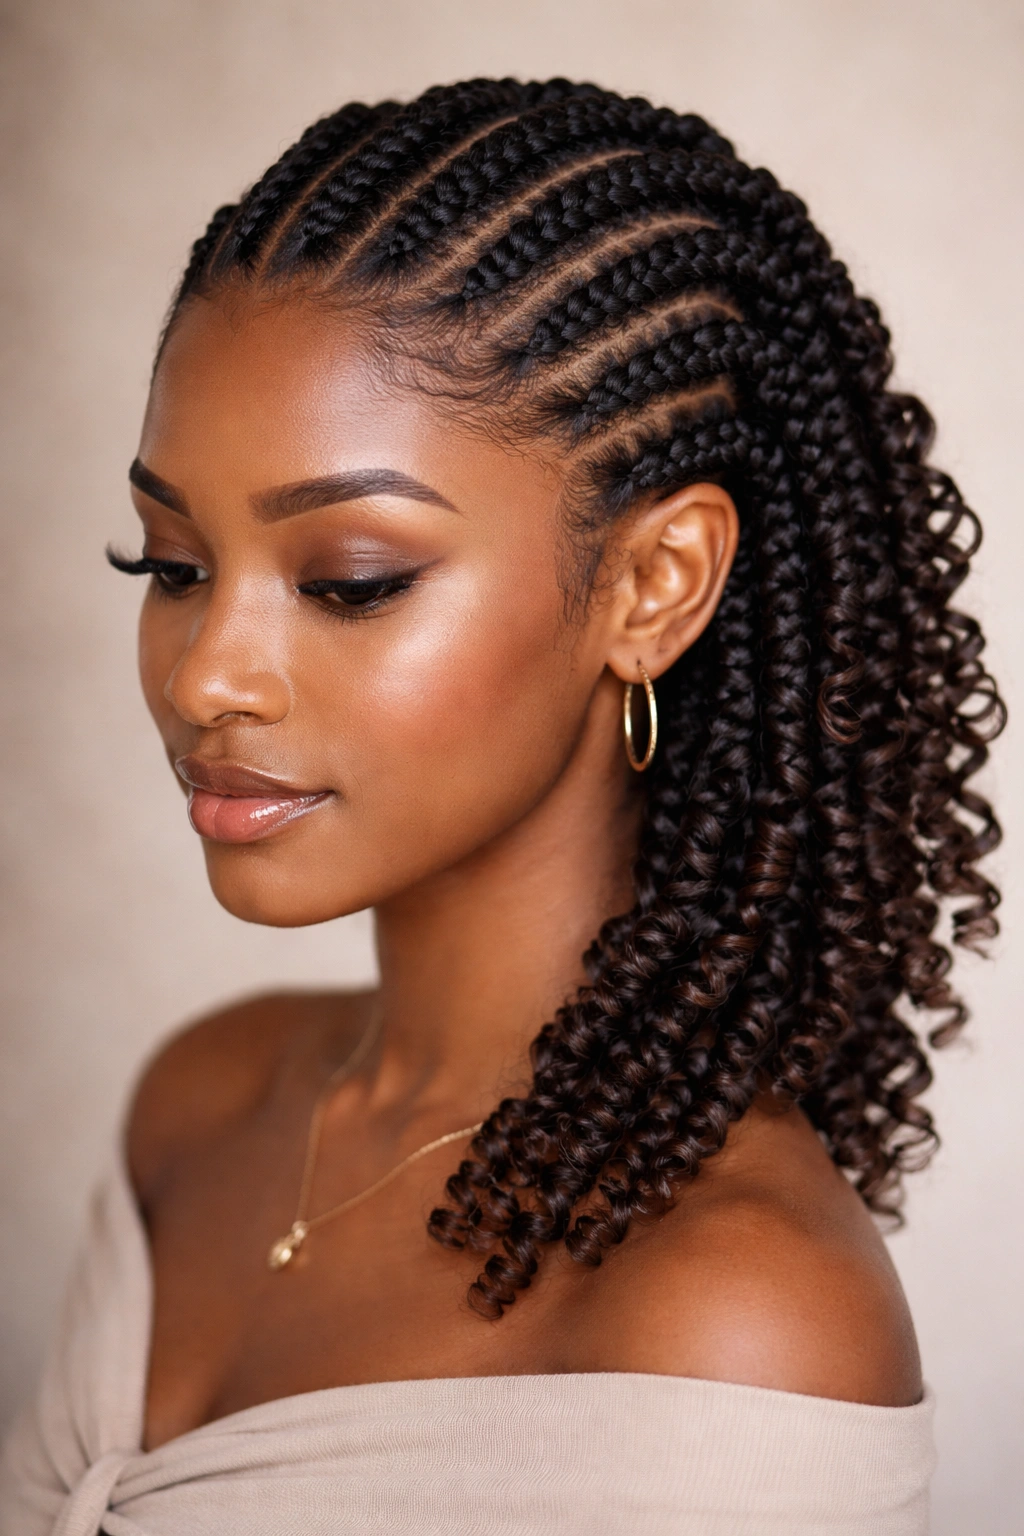
Spiral flat twists take the basic technique and wrap them into coils as they reach the ends, creating a style that emphasizes your natural curl pattern and adds visual interest and movement. The spiraling technique at the ends means your twists literally curl as they fall, creating a textured, dynamic appearance that reads as high-effort even when it’s quite straightforward to create.
The Curl-Definition Advantage
When you spiral your twists, you’re creating multiple curves and bends that enhance whatever natural curl pattern you have. This means your twists don’t just sit flat—they actively show dimension, texture, and movement. The spiraling also helps keep your twist together without as much need for gel or setting products, because the coil creates inherent hold.
How to Create the Spiral Effect
Complete your flat twist as usual until you reach the ends of your hair. Once you’ve fed in all the hair you want to include, take the remaining twisted section and wrap it into a coil, similar to wrapping string around your finger. Secure the coil by tucking it underneath itself or using a small clip. The coil will naturally want to sit on your head because it’s spiraled, rather than hanging straight down.
Styling and Longevity
Spiral twists typically last 5-8 days depending on how tightly you coiled them. They look especially striking with a high-shine product applied over the twists—the way light reflects off the spirals creates depth. This style also works beautifully in photos because the spirals create visual texture from every angle.
5. Stacked Flat Twists with Banding
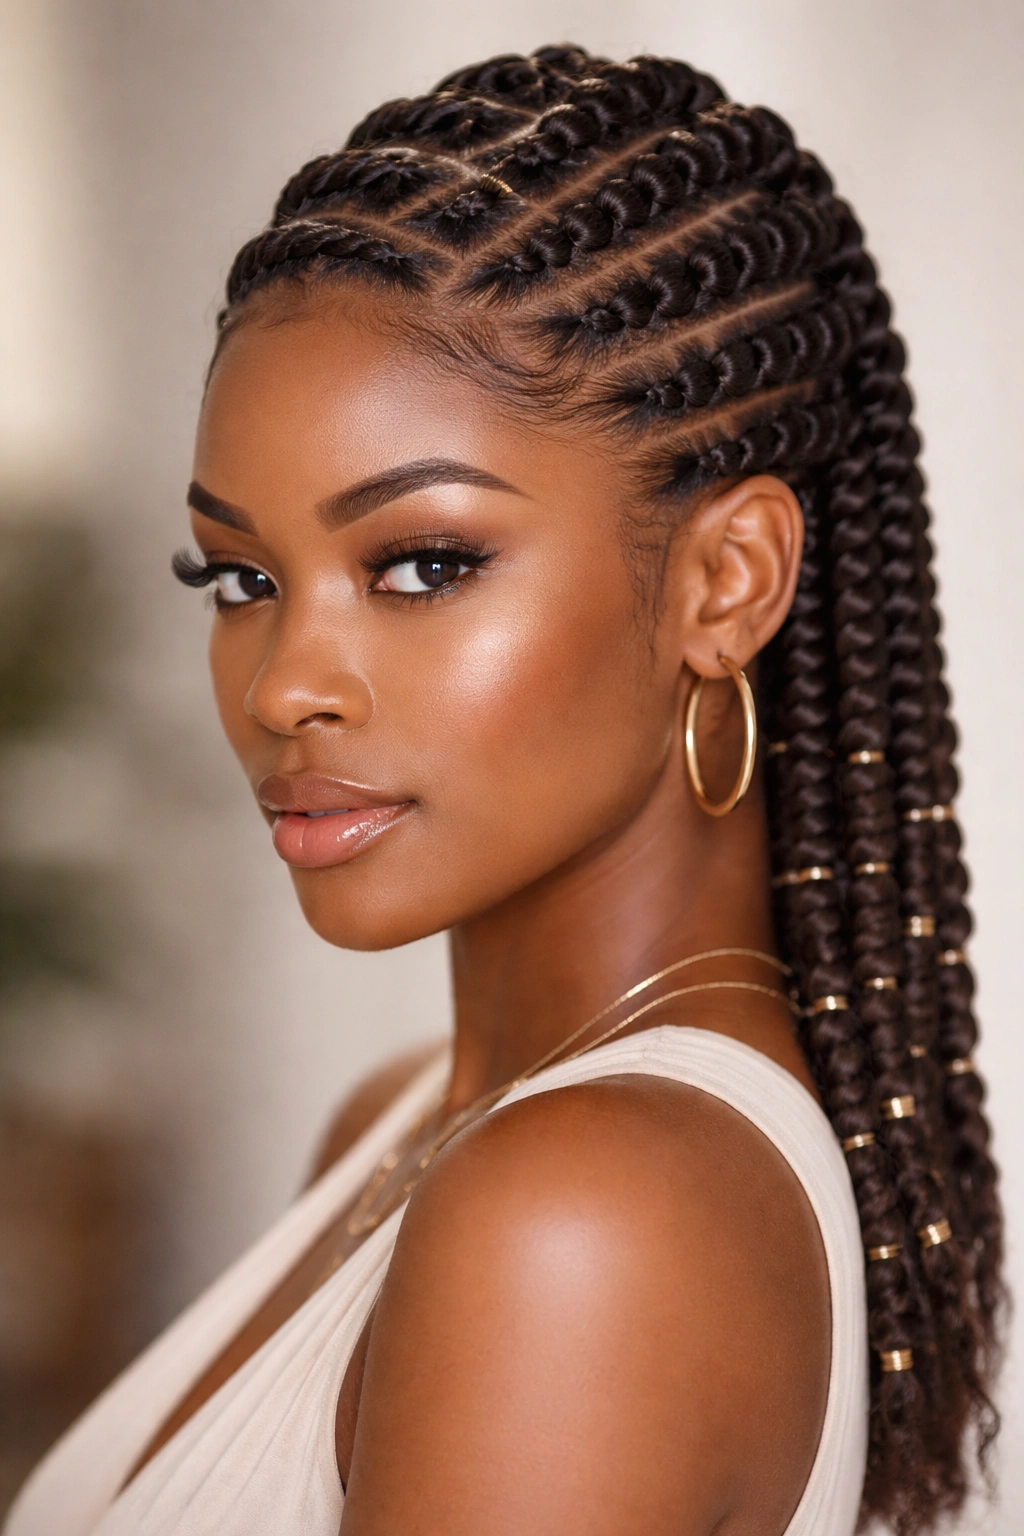
Stacked flat twists involve creating multiple twists close together in rows, then adding bands or wraps at intervals to create distinct sections. This style transforms simple flat twists into something visually complex and artistic. The banding serves both aesthetic and practical purposes—it helps keep the twists from unraveling and creates obvious breaks in the visual pattern.
Why Stacking and Banding Creates Impact
When you create multiple twists and band them at regular intervals, you create a geometric, almost architectural quality. From a distance, the style reads as intricate and intentional. Up close, the banding becomes a design element itself—you can use thread, yarn, metal cuffs, or decorative wire to make the bands part of your statement.
Building Your Stacked Twist Pattern
Divide your head into a grid pattern—usually 4-8 sections, depending on hair thickness and desired thickness of each twist. Create a flat twist in each section, working all the way from your roots to the ends. Once all twists are complete, add bands at regular intervals (usually every 1-2 inches). The banding actually helps keep twists structured, so they hold their definition longer.
Customizing with Color and Materials
This style is particularly fun to customize. You can use bands in your hair color for a subtle, polished look, or use contrasting yarn or thread to make the banding a bright design element. Some people use alternating band colors to create patterns. The banding also makes it easier to maintain twists over time—you can re-band problem areas without redoing the entire twist.
6. Two-Strand Twist Hybrid with Flat Twist Accents
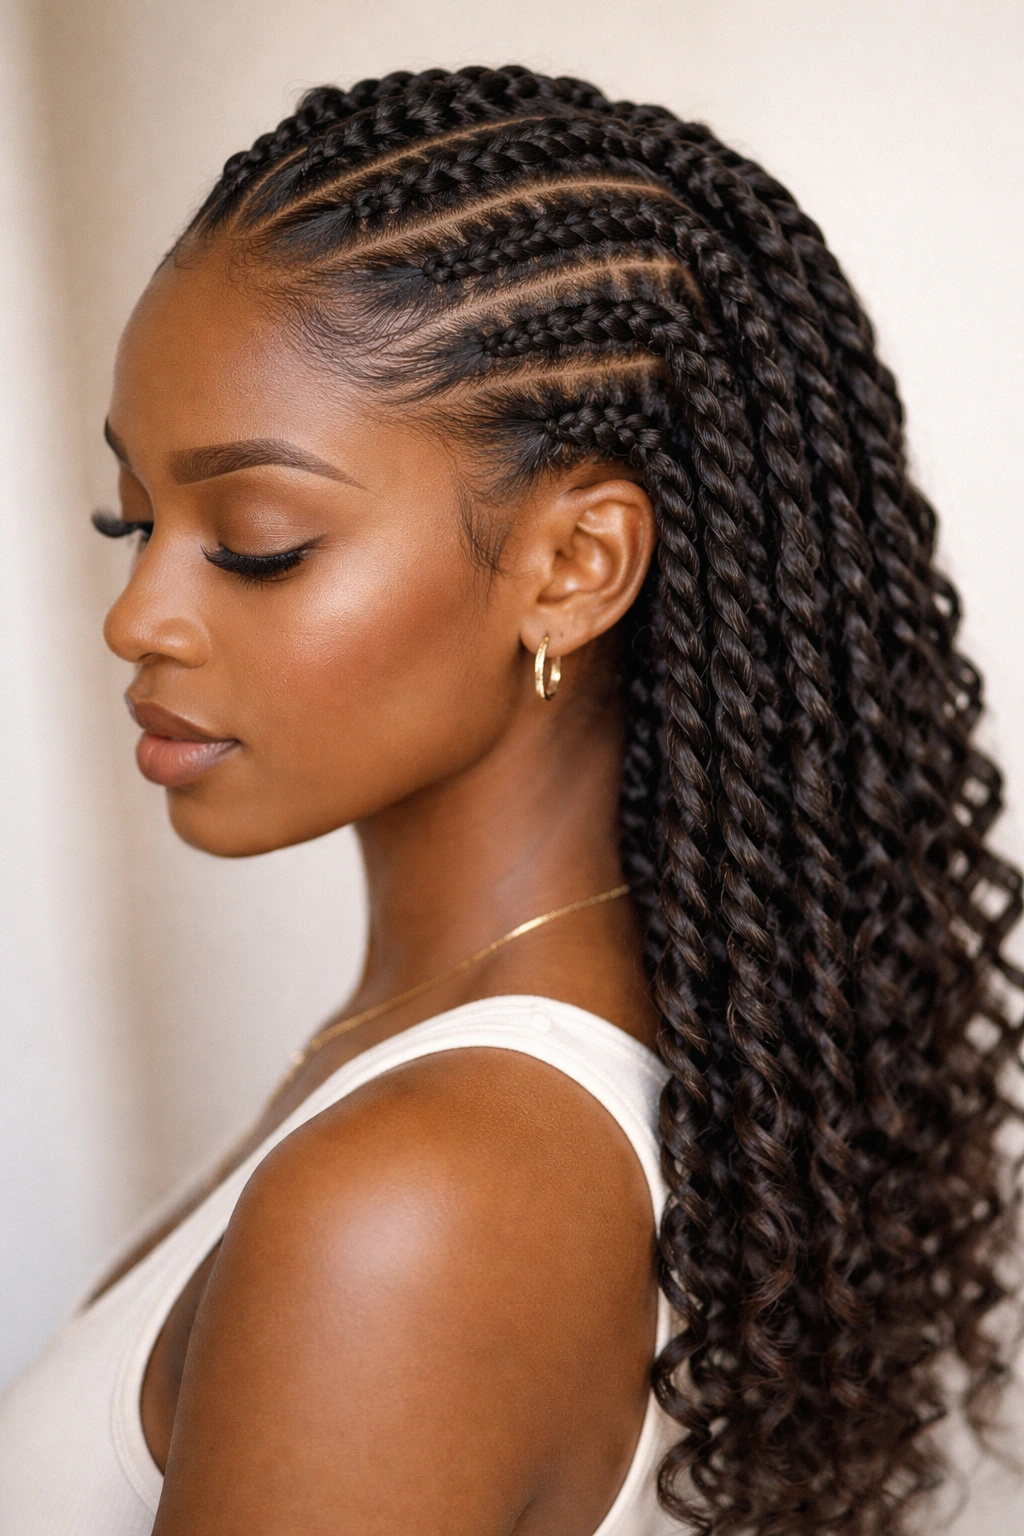
This hybrid style combines traditional two-strand twists with flat twist details for a sophisticated look that balances structure with movement. For example, you might create flat twists as a crown or frame, then transition to two-strand twists that hang freely. This approach gives you the best of both worlds—the polished structure of flat twists with the textural movement of two-strand twists.
The Strategic Combination Advantage
By using flat twists strategically (usually at the top or as a frame) and letting two-strand twists dominate the bottom or sides, you create a style that looks planned and artistic rather than like you couldn’t decide between two styles. The structured top grounds the whole look while the looser twists below create movement and personality.
Planning Your Hybrid Arrangement
Decide where your transition point will be. Many people create flat twists from the hairline straight back about halfway down the head, then feed that flat twist into a two-strand twist from the midpoint backward. Alternatively, create a flat twist crown and let two-strand twists fall freely around it. The key is making your transition intentional and clean.
Maintenance and Longevity
This hybrid approach actually tends to last longer than pure two-strand twists because the flat twist anchor at the top keeps the whole style more stable. The combination also means your style looks fresh and dimensional throughout the duration you wear it—the flat sections maintain structure while the two-strand sections gradually reveal your curl pattern.
7. Thin Flat Twists for Delicate, Intricate Looks
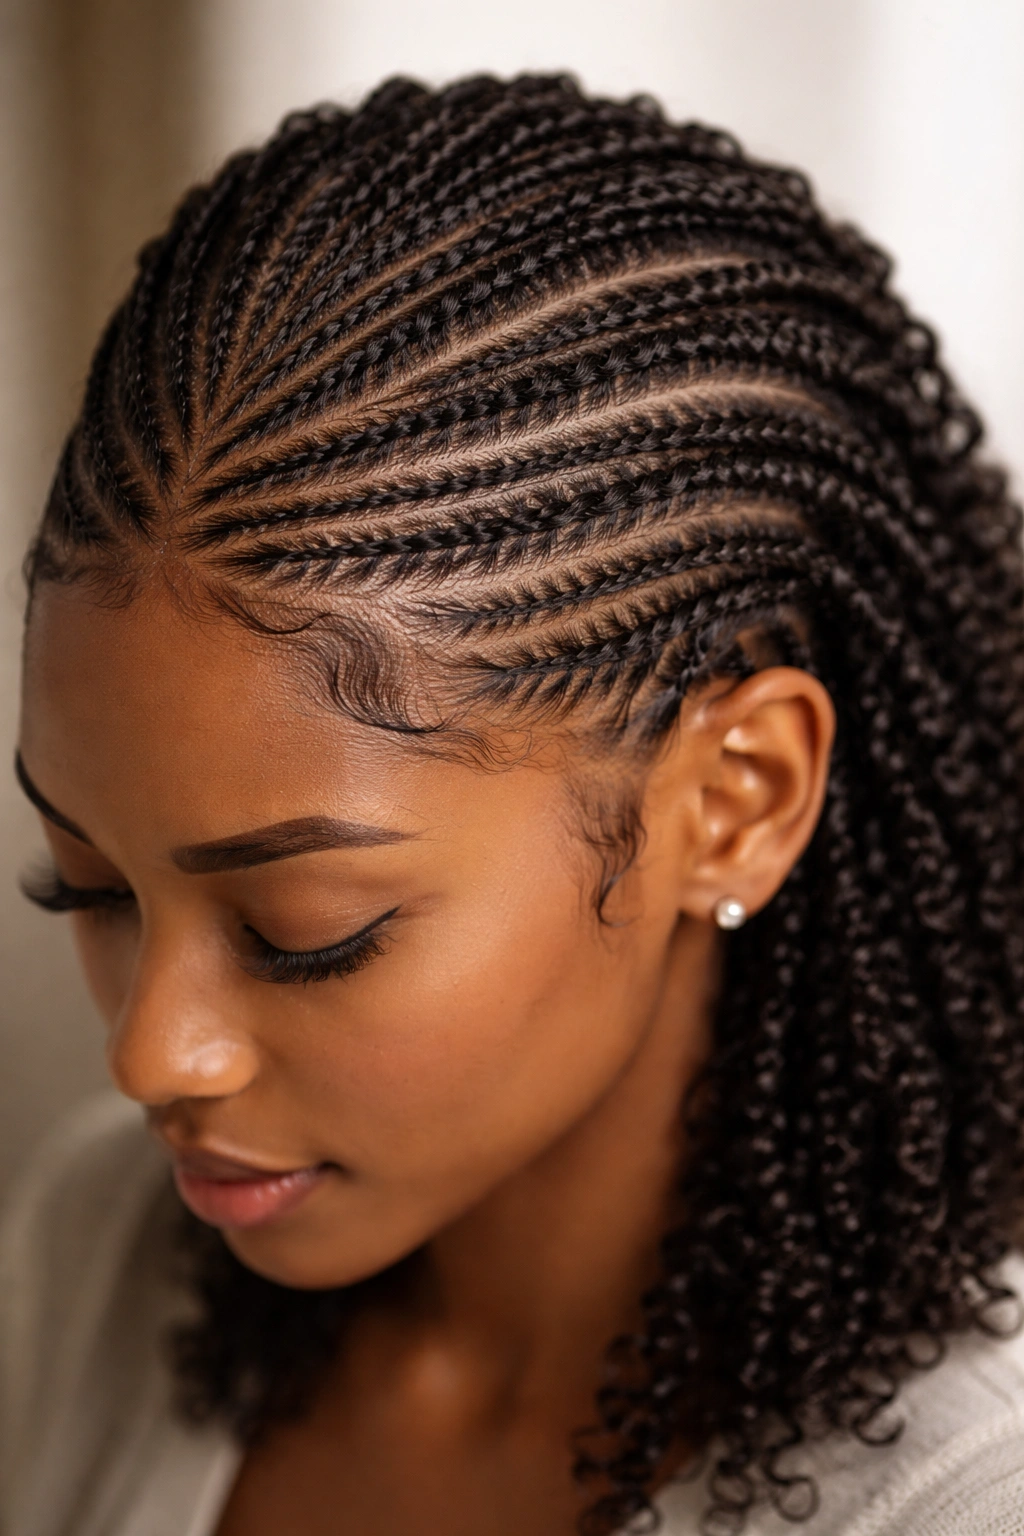
Creating very thin flat twists—sometimes using pencil-thin sections of hair—results in an intricate, lace-like appearance that feels delicate and detailed. This approach works beautifully if you want maximum visual complexity and are willing to invest the time in the creation process. Thin twists also tend to show your natural curl pattern more beautifully when you take them down.
The Aesthetic of Intricate Detail
Thin flat twists create a visual pattern that feels almost lace-like or decorated, especially when you work them across your entire head. The style has a certain lightness and intricacy that thicker twists simply can’t achieve. From a distance, thin flat twists can almost read as beaded braids or very detailed texture work.
Creating Thin Twists Successfully
Thin twists require good product grip to hold together. Use a smoothing cream or lightweight gel on each section before you twist. Work slowly and deliberately—rushing thin twists leads to unraveling. Thin twists also benefit from being set for a day or two before you start wearing them, which allows the twist pattern to fully set.
Patience and Payoff
Creating thin flat twists takes longer than creating thicker twists (sometimes significantly longer), but the visual payoff is substantial. These twists photograph beautifully and create an impression of serious styling effort. They last 6-10 days, which is longer than thicker twists, because the tighter structure holds better.
8. Thick Flat Twists for Bold Statements
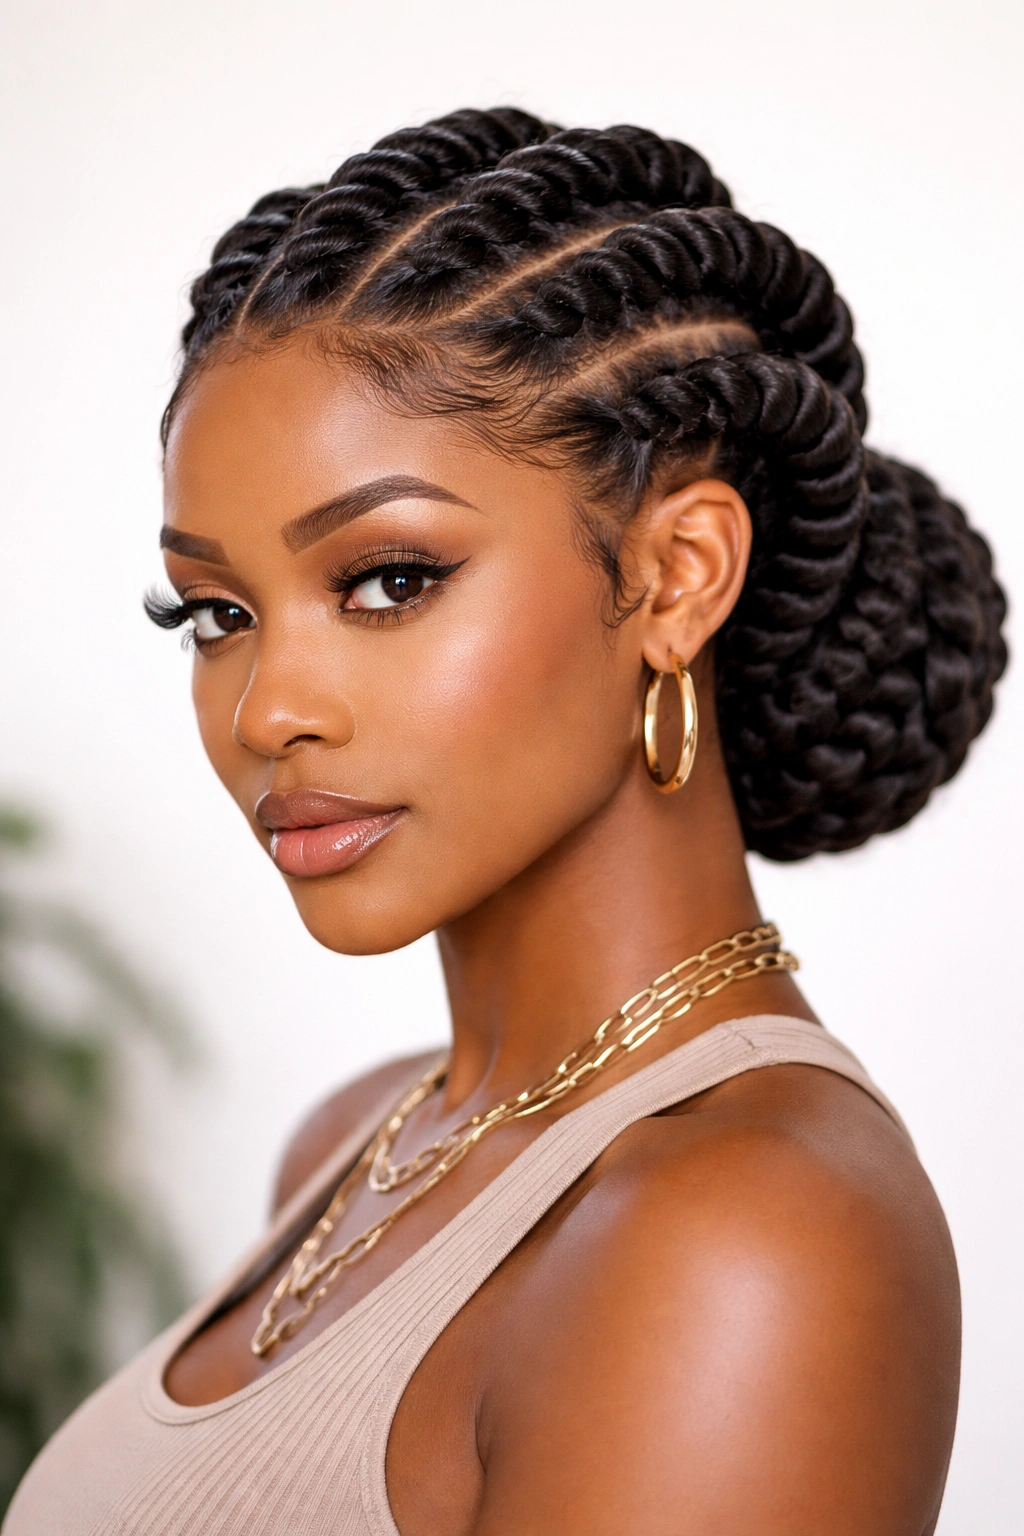
On the opposite end of the spectrum, thick flat twists create a bold, chunky aesthetic that emphasizes definition and stands out from a distance. This approach minimizes styling time, creates maximum texture and movement, and works especially well if you love a statement look. Thick twists also reveal your natural curl pattern beautifully when you take them down.
Why Bold and Chunky Works
Thick flat twists are instantly recognizable and require no fine detail work to look intentional. They create deep, defined lines across your scalp and allow your natural curl pattern to show through the twisted sections. This style is particularly striking on people with high curl definition and lots of volume.
Technique for Thick Twists
Take larger sections of hair (sometimes 1-2 inches across) and create your flat twists with these thicker sections. The advantage is that thick twists are faster to create and more forgiving—small imperfections aren’t as noticeable. They’re also easier to manage and maintain because they have more inherent structure.
Styling Freedom with Thick Twists
Thick twists work well with a wider range of accessories because the twists themselves are substantial enough to hold things in place. You can add wraps, cuffs, or jewelry without them feeling overwhelming. This style is also perfect if you’re looking for maximum styling impact with minimum time investment.
9. Flat Twists into Space Buns
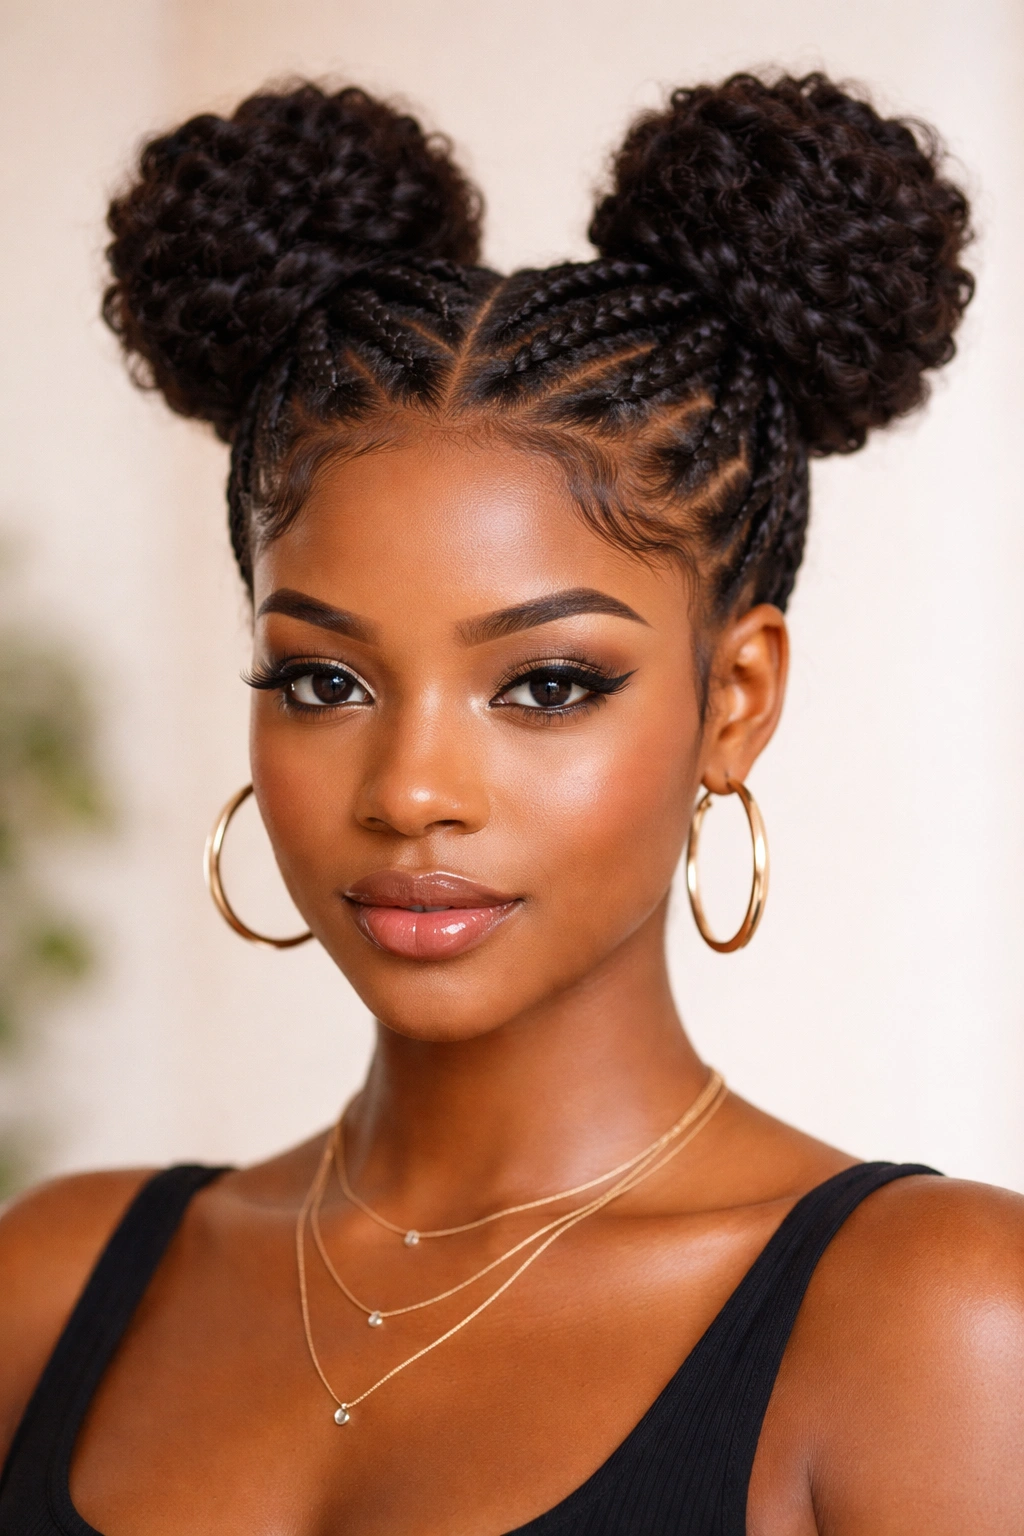
This playful style takes flat twists and feeds them into large coils at the crown, creating space-bun-like shapes that sit on top of your head. It’s youthful, fun, and surprisingly wearable for casual settings. The space buns add height and visual interest while still offering protection for your hair.
The Playful Factor
Space bun flat twists feel more creative and less “corporate” than center-down twists or crown twists, but they’re still structured enough to read as intentional. This style works well if you want something that feels fun without being overly edgy or extreme.
Building Your Space Buns
Create two flat twists starting at opposite sides of your head, angling them toward the crown as you move backward. Once you reach the crown area, coil each twist into a bun shape and pin it securely. You’ll end up with two defined buns sitting on top of your head, with flat twists as the “anchor” sections leading up to them.
Customizing the Look
You can make these buns larger and puffier for a more playful effect, or keep them tight and structured for something more polished. Adding a pop of color through temporary hair chalk on the twists, or using bright hair cuffs on the buns, instantly amps up the fun factor.
10. Wrap-Around Flat Twists Framing the Face
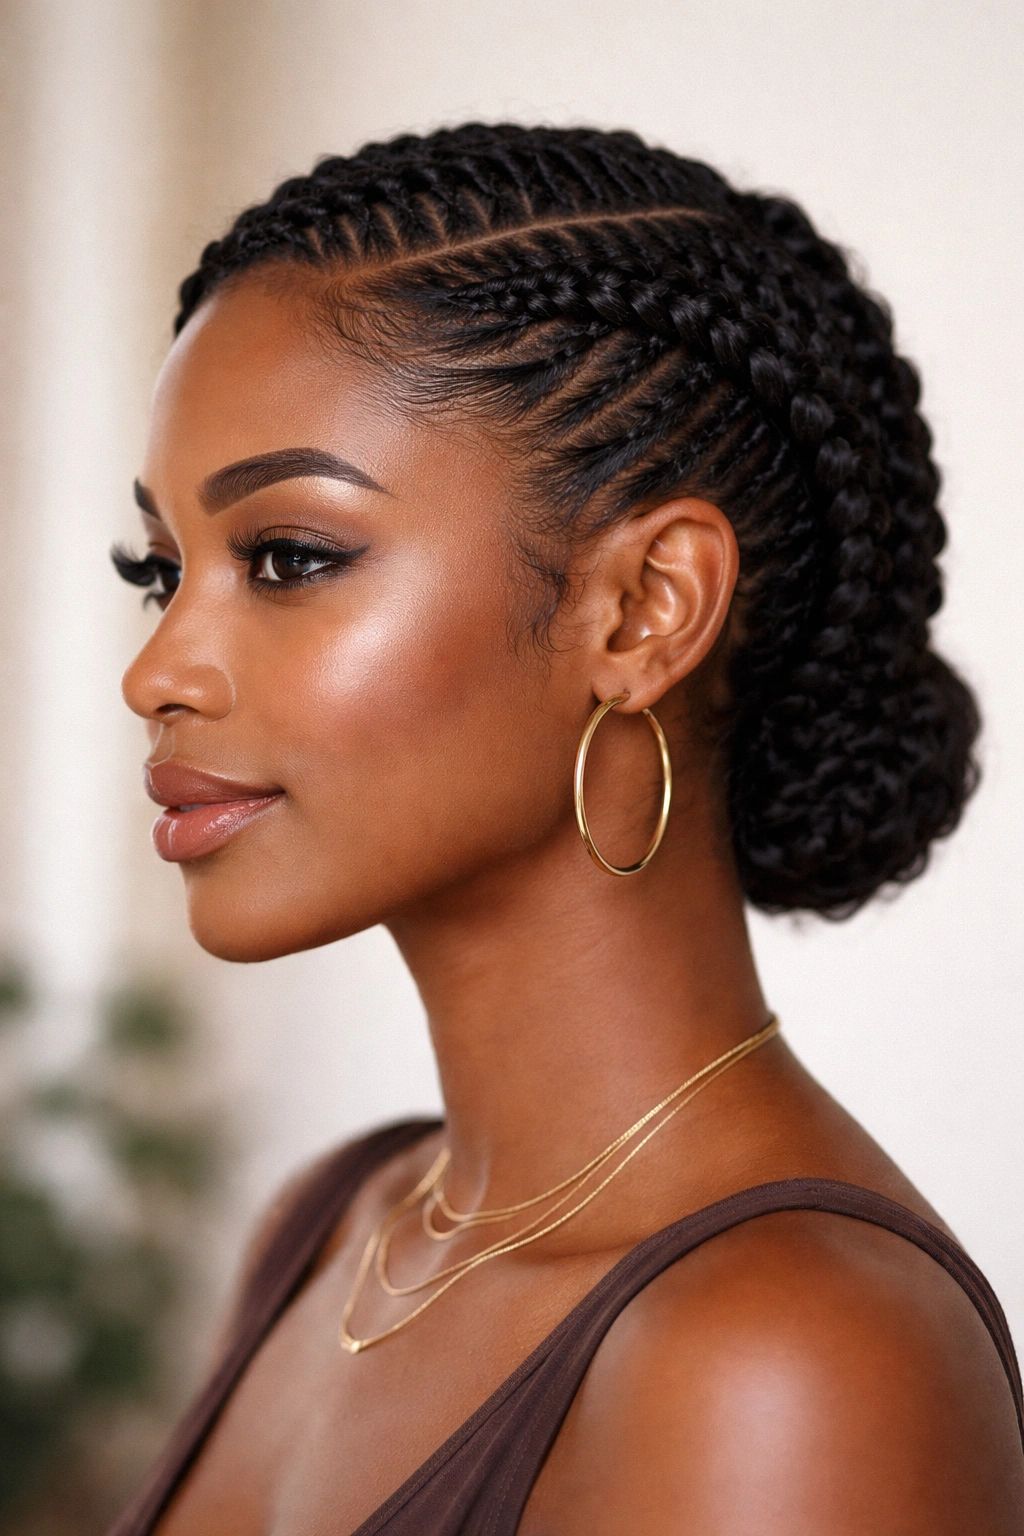
This refined style creates flat twists that frame your entire face, running from one temple around the back of your head and finishing at the opposite temple. It’s sophisticated, flattering, and works beautifully across multiple occasions. The face-framing placement naturally highlights your features and creates a polished, intentional appearance.
The Face-Flattering Quality
By framing your face with twists, you immediately create a focal point that highlights your features. The twist lines become like a subtle sculptural element that enhances your overall look. This style is particularly flattering if you want to emphasize your bone structure or simply create a frame that feels balanced and intentional.
Creating the Wrap-Around
Start at one temple with a flat twist, angling it slightly upward and backward as you feed in hair. Continue your twist across the back of your head, aiming for the opposite temple. The path should follow roughly where a headband would sit, creating a natural frame around your face. Finish the twist at your opposite temple and pin it securely.
Wearing and Styling Options
This style works beautifully worn for days as a protective style, or worn in the first day or two before taking it down to reveal your curl pattern. The twists actually help define your waves and coils, so you get extra texture and dimension when you unravel them. You can wear this style sleek and close to your head, or gently separate the twist sections for a softer, more textured appearance.
How to Master the Flat Twist Technique
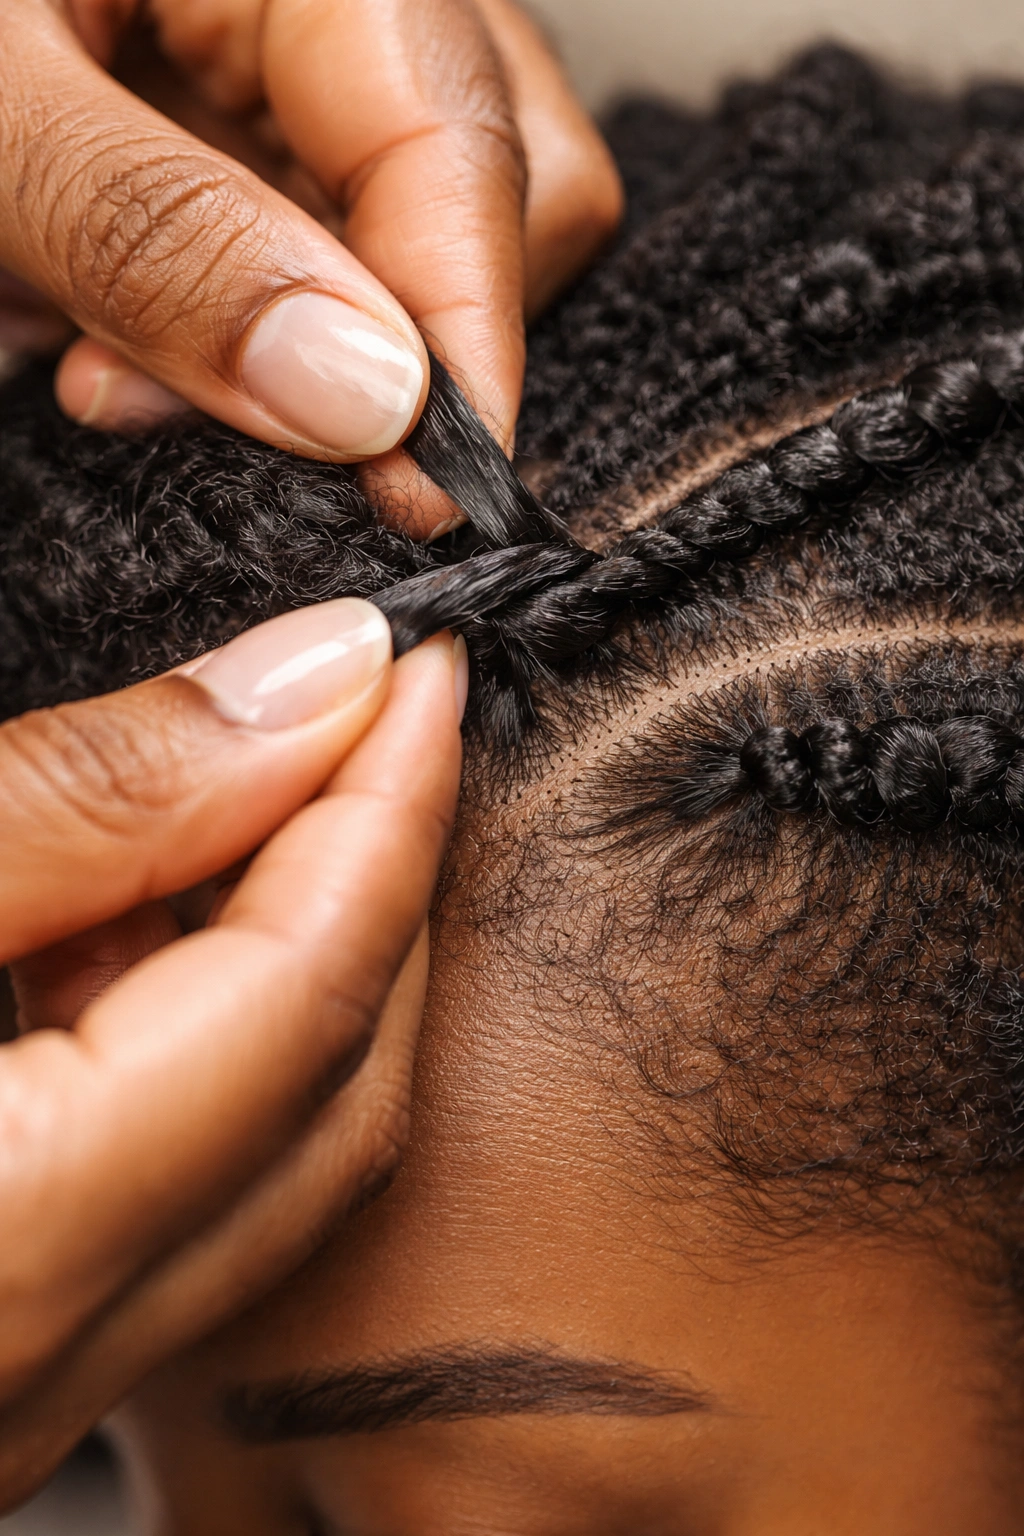
Understanding the fundamental technique will make every variation easier and more successful. A flat twist begins with two small sections of hair, twisted around each other while you simultaneously feed in new hair from the surrounding sections. The feeding-in component is what creates the raised, dimensional look that sits flat against your scalp.
Start with a small section of hair at your starting point—usually about the size of a pencil or finger in diameter, depending on how thick you want your final twist. Divide this section in half to create two subsections. Cross one subsection over the other (this is the beginning of your twist), then pull a small section of hair from the surrounding area and incorporate it into whichever subsection is now closer to the outside of your twist. Cross your twisted sections again, feed in more hair, and continue this pattern as you move along your desired path.
The tension is critical—too loose and your twists won’t hold, too tight and you risk creating tension alopecia and damaging your hairline. Aim for snug but not painful. If you find your scalp is uncomfortable, your tension is too tight. You should be able to feel your twists holding their shape without experiencing any pulling sensation at your roots.
Preparing Your Hair for Flat Twists
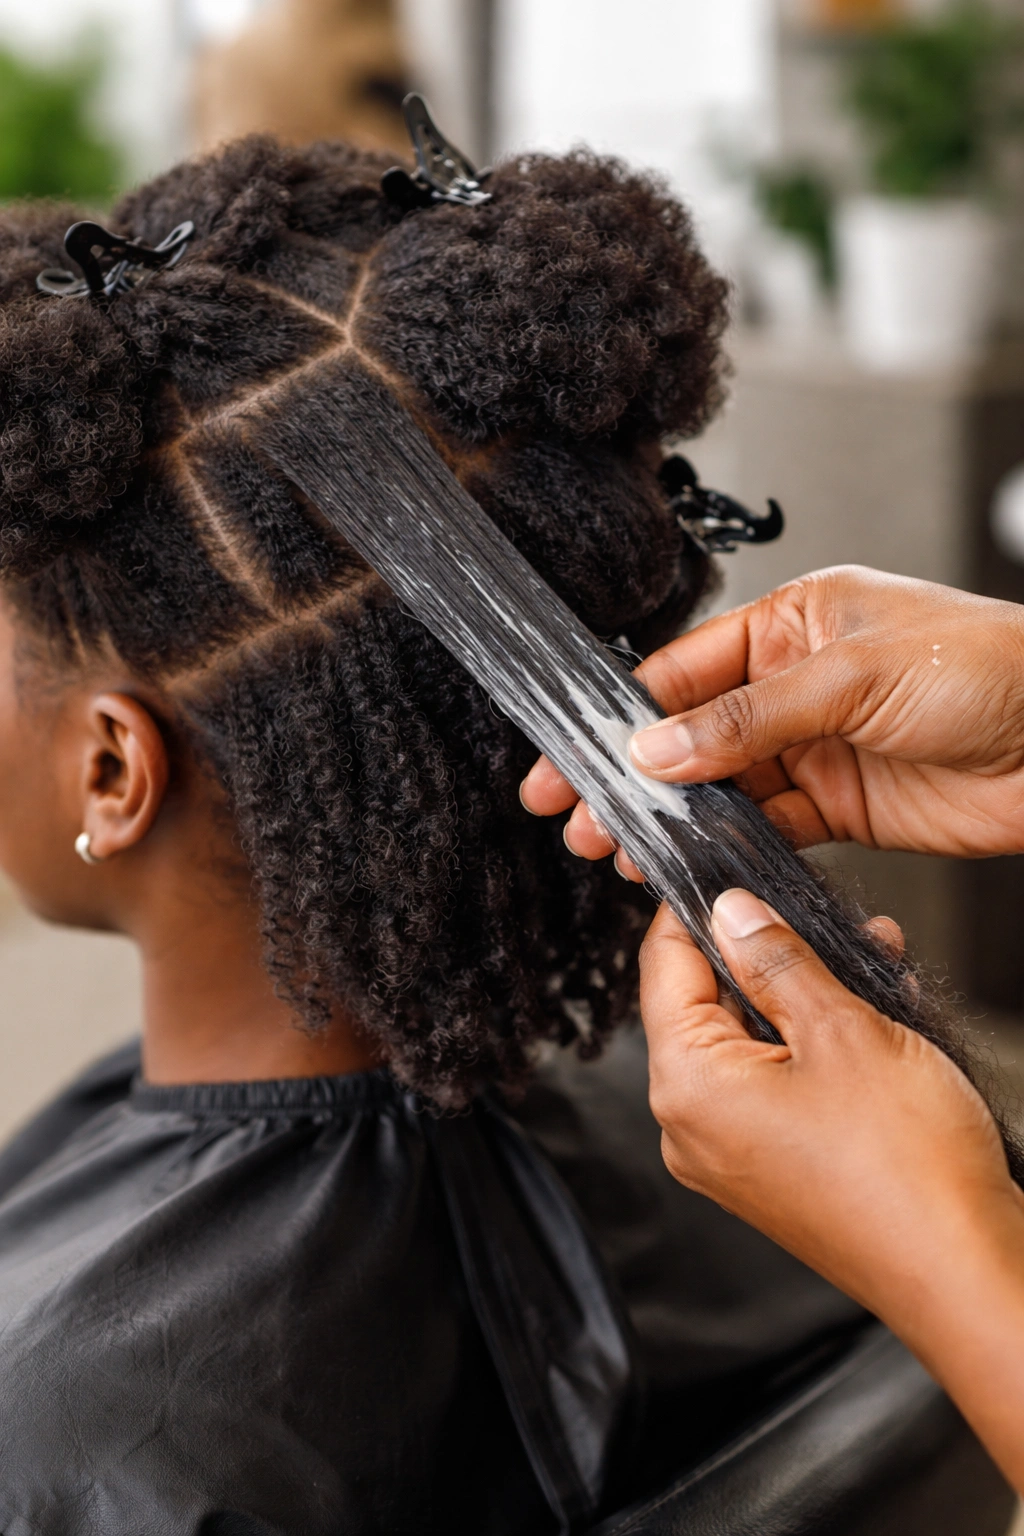
The condition of your hair before you start twisting significantly impacts how well your twists hold and how your hair looks once you take them down. Starting with clean, conditioned, moisturized hair means your twists will look better and last longer. If your hair is dry or brittle, you’ll struggle to create defined twists, and your hair will be more prone to breakage.
Wash and deep condition your hair 2-3 days before you plan to twist. This gives your hair time to air dry fully, which makes twisting easier. If you wash the day you twist, your hair will be too slippery and difficult to grip. Completely dry hair twists much better than damp hair. You can lightly mist your twists with water as you work if they’re becoming too dry, but your base hair should be dry before you start.
Apply a smoothing cream or lightweight leave-in conditioner to each section of hair just before you twist it. This adds slip, makes the twisting process smoother, and helps your twists hold their shape. Don’t use heavy products that will weigh your hair down or make it greasy—lightweight, water-based products work best for flat twists.
Maintaining Your Flat Twists for Maximum Longevity

Flat twists typically last 5-10 days depending on your hair texture, how tightly you twisted, and how you care for them while they’re in. Proper maintenance can actually extend the life of your twists and keep them looking fresh throughout the duration you wear them.
Sleep on a silk or satin pillowcase or wrap your twists in a silk scarf at night. Cotton absorbs moisture and creates friction, which can disrupt your twist definition and frizz your twists. A silk or satin surface lets your twists glide smoothly, maintaining their shape and keeping your hair moisturized.
Refresh your twists on day three or four by spritzing them lightly with water mixed with a leave-in conditioner, then gently re-twisting any sections that have loosened. You’re not redoing the entire twist—just gently rolling loosened sections between your fingers to tighten them. This refresh can give your style several extra days of wearability.
Avoid excessive manipulation. The whole point of flat twists as a protective style is to minimize how much you’re touching and manipulating your hair. The less you pull on them, separate them, or fidget with them, the longer they’ll hold and the better your hair will be when you take them down.
Taking Down Your Flat Twists Carefully
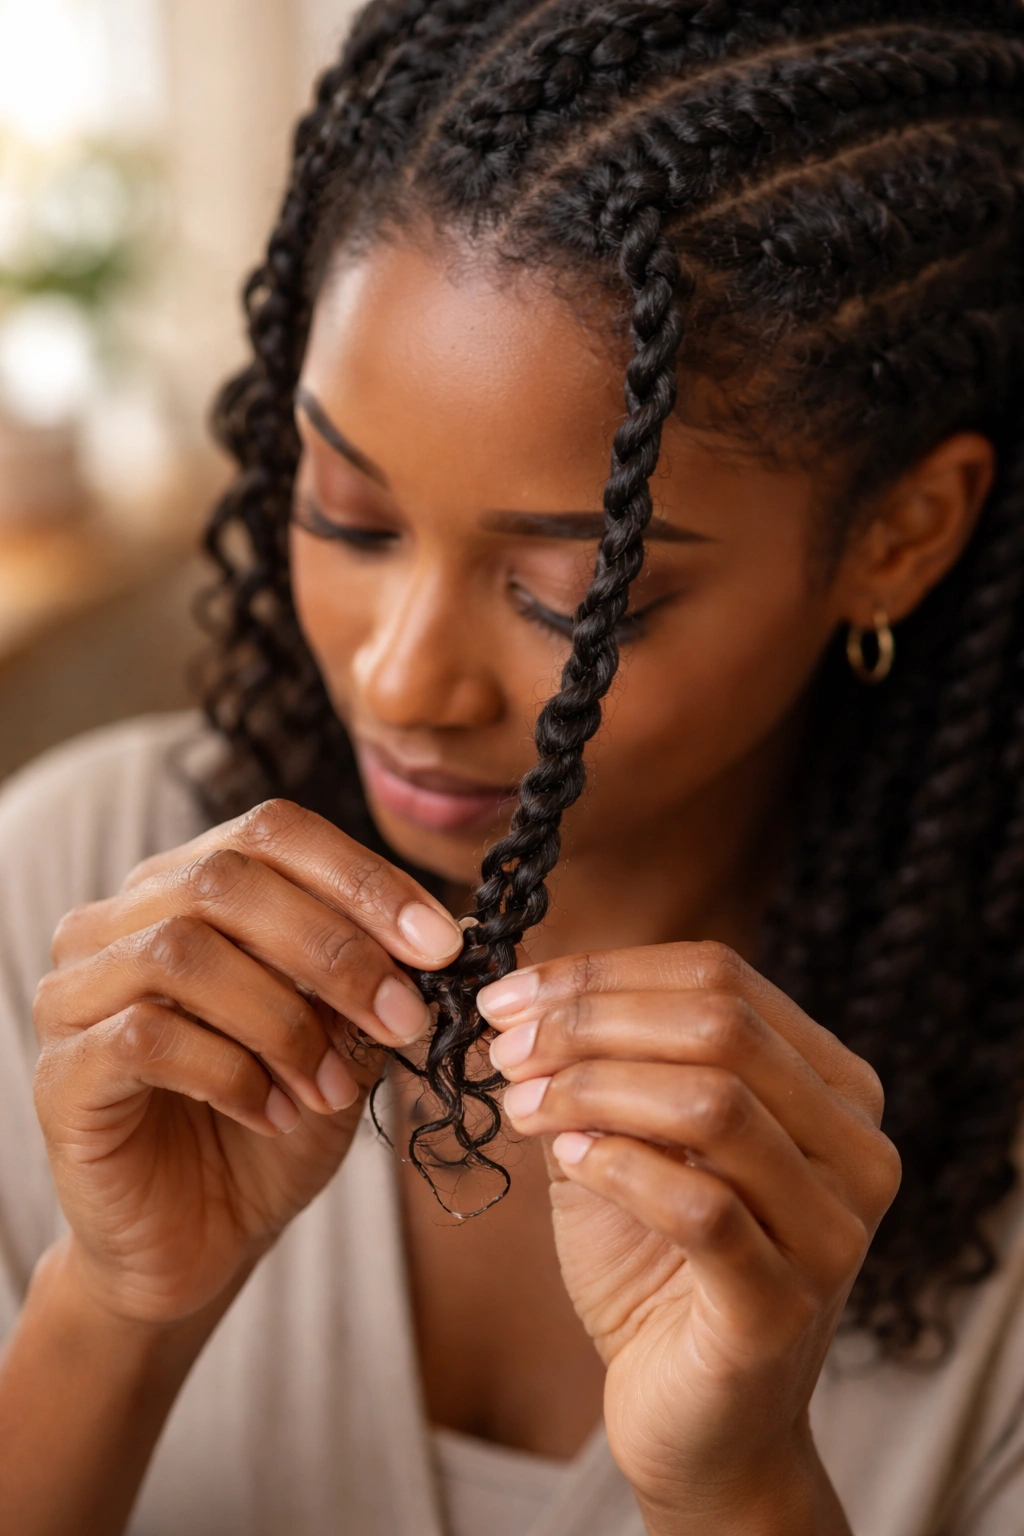
How you remove your flat twists impacts whether you get to enjoy the beautiful curl definition they create and whether you avoid unnecessary breakage. Rushing the removal process can undo the protective benefits the style provided.
Starting at the end of a twist, gently unwind it rather than pulling it straight out. Use your fingers to carefully separate the twisted sections, working from the ends toward your roots. If your twists are stubborn, apply a bit of leave-in conditioner or oil to help the sections slide apart more easily. This gentle approach prevents breakage and takes advantage of the definition the twists created.
Once your twists are fully unraveled, don’t immediately manipulate your curls. Let them sit for a few hours (or overnight) to fully relax and form their natural curl pattern. The curls will look more defined and bouncy than if you start separating them immediately.
Choosing Between Flat Twists and Other Protective Styles
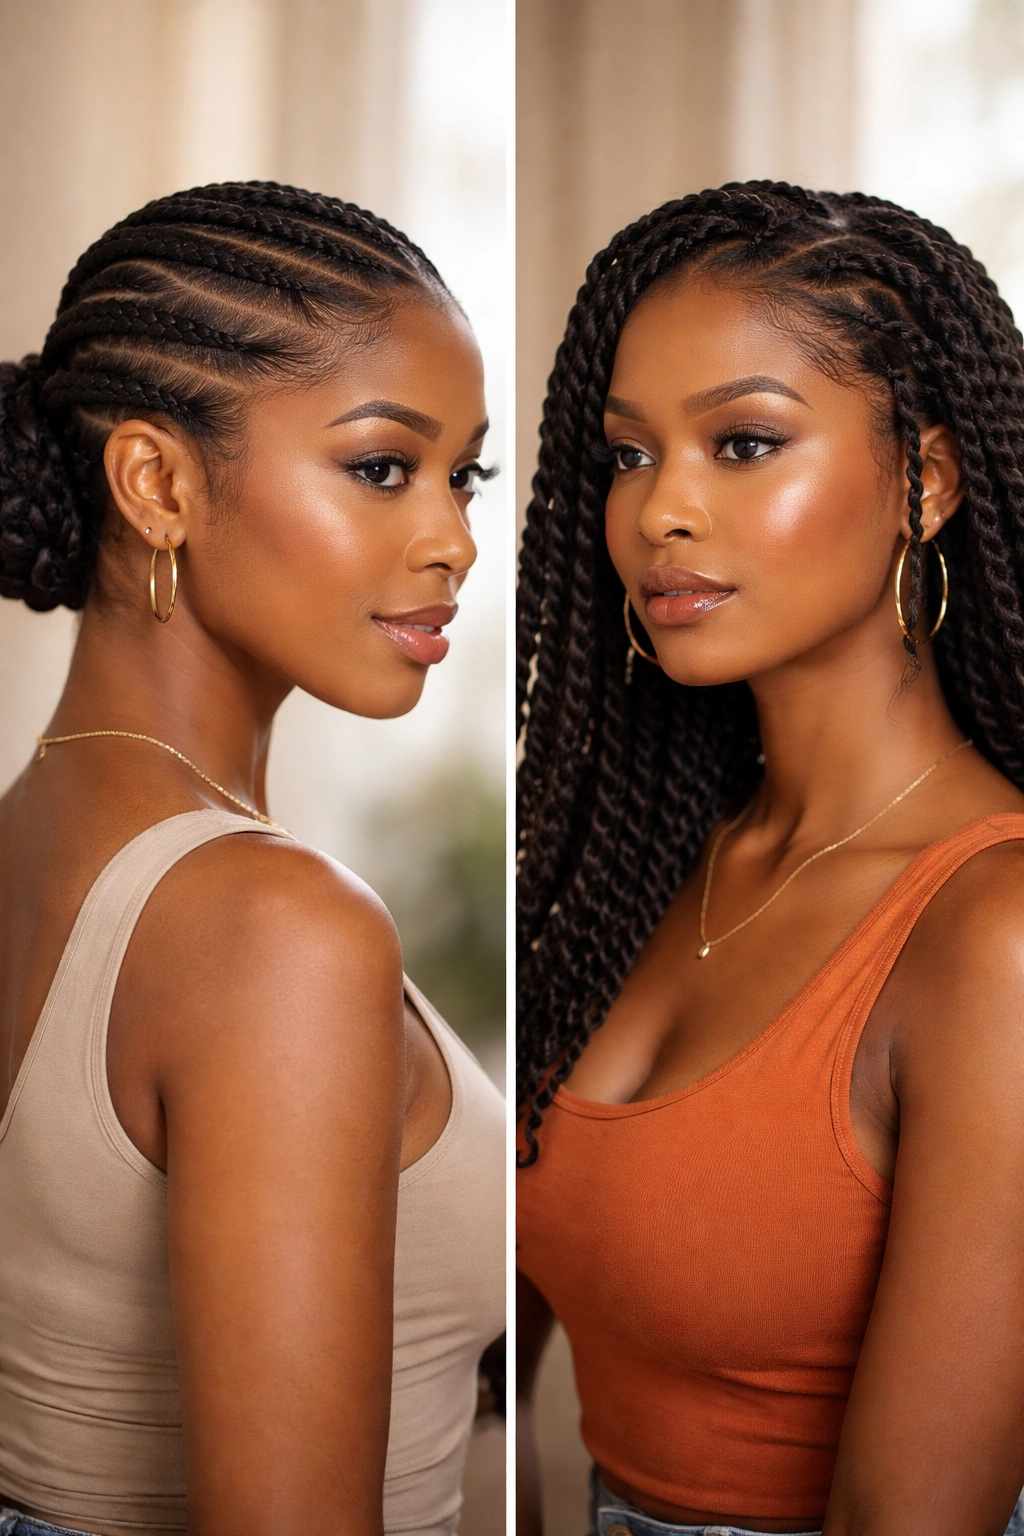
Flat twists offer some advantages over other protective styles, but they’re not the only option available. Understanding when flat twists are the best choice for your hair and situation helps you make decisions that serve your hair’s health and your personal preferences.
Flat twists are excellent for anyone wanting a protective style that looks intentional and polished. They require less setting time than some other styles and don’t require your hair to be wet when you style. They work on all hair types within the natural hair spectrum and can be adapted for any occasion. If you want a protective style that also looks like you’ve made a styling effort, flat twists are ideal.
Compared to other braiding styles, flat twists are less stressful on your edges (if you’re careful with tension), don’t require any added hair, and allow you to see and care for your actual hair more easily. Compared to two-strand twists, flat twists hold longer and have a more polished appearance, though two-strand twists feel looser and show more movement. Your choice depends on whether you prioritize longevity and structure (flat twists) or movement and casual feel (two-strand twists).
Final Thoughts
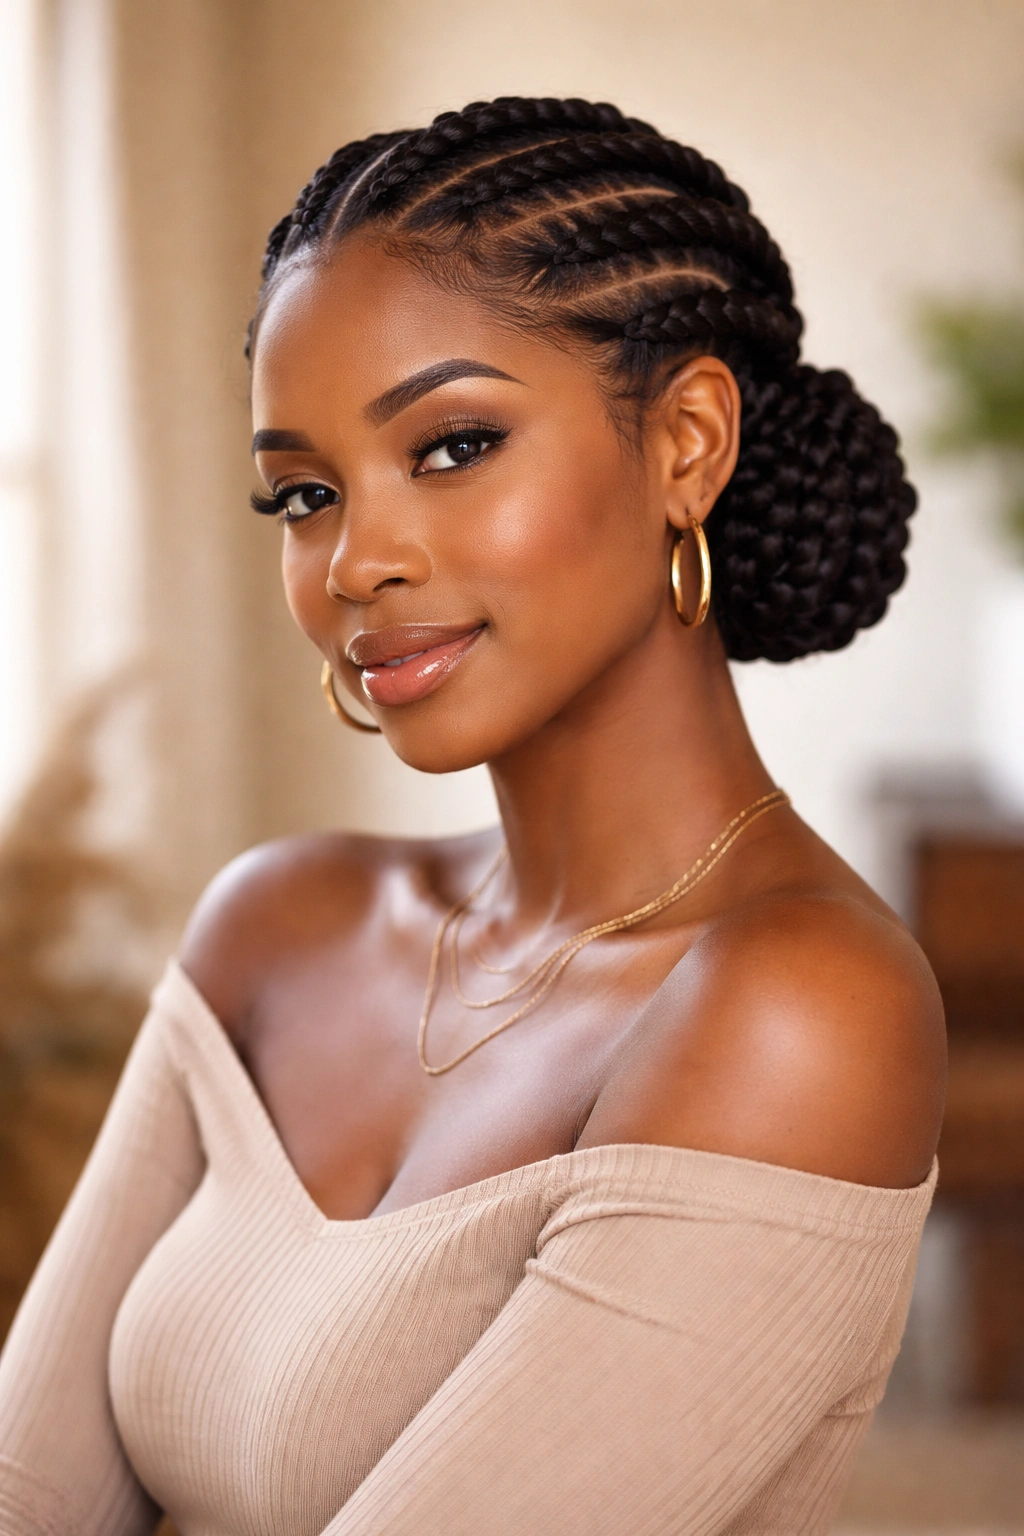
Flat twists offer remarkable versatility—you can create anywhere from a simple, understated protective style to an intricate, artistic statement look depending on which of these 10 approaches you choose. The real power of learning flat twists is that once you understand the technique, you can create endless variations based on your mood, occasion, and creative impulse on any given day.
The key to success with any of these styles is practicing the technique until it feels natural, starting with thicker, easier twists and working your way toward thinner and more complex arrangements. Your first attempts might take longer or look less perfect than you’d like—that’s completely normal and doesn’t mean you’re doing anything wrong. Every twist you create builds your skill and speed.
Each of these 10 styles offers something different, whether you’re looking for maximum protection, creative expression, time efficiency, or the perfect balance of effort and impact. The best flat twist style is the one you’ll actually wear consistently because it makes you feel confident and beautiful.
