



Short hair on your wedding day doesn’t mean sacrificing an updo. In fact, some of the most romantic and effortlessly elegant wedding hairstyles happen to work beautifully with shorter lengths. A messy bun specifically offers that perfect balance between polished bridal sophistication and the relaxed romance that modern weddings celebrate. The key is understanding which messy bun styles flatter short hair, how to build volume and texture, and what techniques actually hold without pins falling out in your first dance.
The truth is that short hair requires a different approach than long hair when creating a messy bun. You’re working with less length to grip, which means the texture and preparation become everything. The best messy buns for short hair rely on strategic teasing, clever styling techniques, and the right products to create that deliberately undone look that photographs beautifully and stays secure all day. Whether your short hair is a chin-length bob, a pixie-bob hybrid, or a choppy shoulder-length cut, there’s a messy bun style that’ll work.
What follows are six distinct messy bun styles designed specifically for short hair, each with its own personality, difficulty level, and visual impact. Some suit garden ceremonies and bohemian vibes. Others lean into modern minimalism or vintage-inspired romance. You’ll find detailed instructions on how to build each style, what products and tools you’ll need, and honest assessment of whether you can DIY it or when a skilled stylist makes all the difference.
1. The Textured Crown Bun
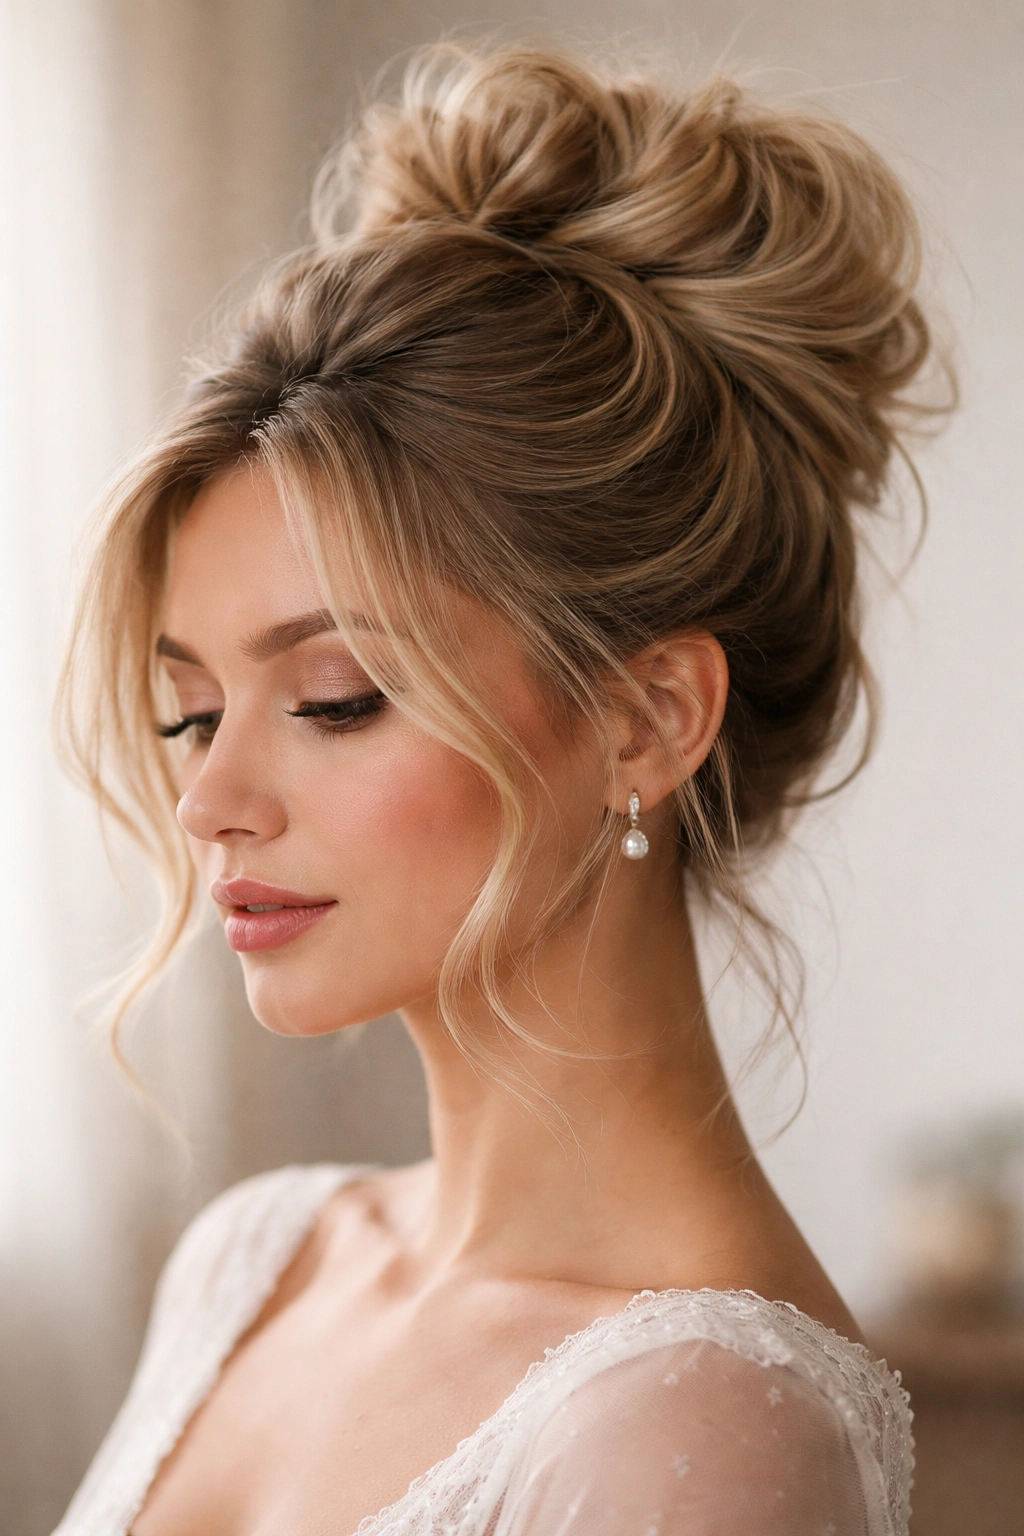
This style sits high on the head and creates volume that works especially well with short layers or choppy bobs. The crown bun uses your hair’s natural movement and texture rather than fighting against short length. It’s romantic without being overly feminine, and it photographs beautifully from every angle because the height creates flattering dimension on the face.
Why This Works for Short Hair
The crown bun relies on strategic teasing at the roots rather than length, which makes it genuinely ideal for short styles. When you backcomb the crown area of your head, you’re creating height that makes short hair appear fuller and longer than it actually is. The bun itself sits at the top-back of your head, allowing shorter face-framing pieces to fall naturally around your face and neck. This style works with bobs that hit anywhere from chin-length to shoulder-length, and it’s particularly stunning if your hair has natural wave or texture already built in.
The undone quality comes from leaving wispy, slightly messy pieces around the bun itself and not trying to make it perfectly smooth. This actually plays to short hair’s advantage because shorter pieces naturally break away from the bun, creating that coveted effortless look without extra effort.
How to Build This Style
Start with hair that has been styled with loose waves or texture. If your hair is naturally straight, use a curling iron to create soft waves throughout before you begin. Flip your head upside down and backcomb the crown area generously—this is the step that creates the foundation for volume. Flip back upright, gently smooth the teased section with a brush, and gather the hair at the crown into a low ponytail using a clear elastic. Twist the ponytail loosely and wrap it around the base to form a bun, securing with bobby pins pushed deep into the teased section. Pull gently at the bun to create texture and an undone appearance, leaving a few shorter pieces loose around the edges.
Products and Styling Tools You’ll Need
- Light texturizing spray or sea salt spray (apply to roots before teasing)
- Teasing brush or backcomb
- Clear elastic bands (2-3)
- Bobby pins in your hair color (you need at least 8-10)
- Light hold hairspray for final set
- Curling iron for waves
Difficulty Level
Intermediate — The teasing requires some practice to get right, and you need enough hand strength to twist and wrap your own hair. A stylist can make this perfect in 20 minutes, but it’s absolutely doable at home with patience.
2. The Romantic Half-Up Messy Bun
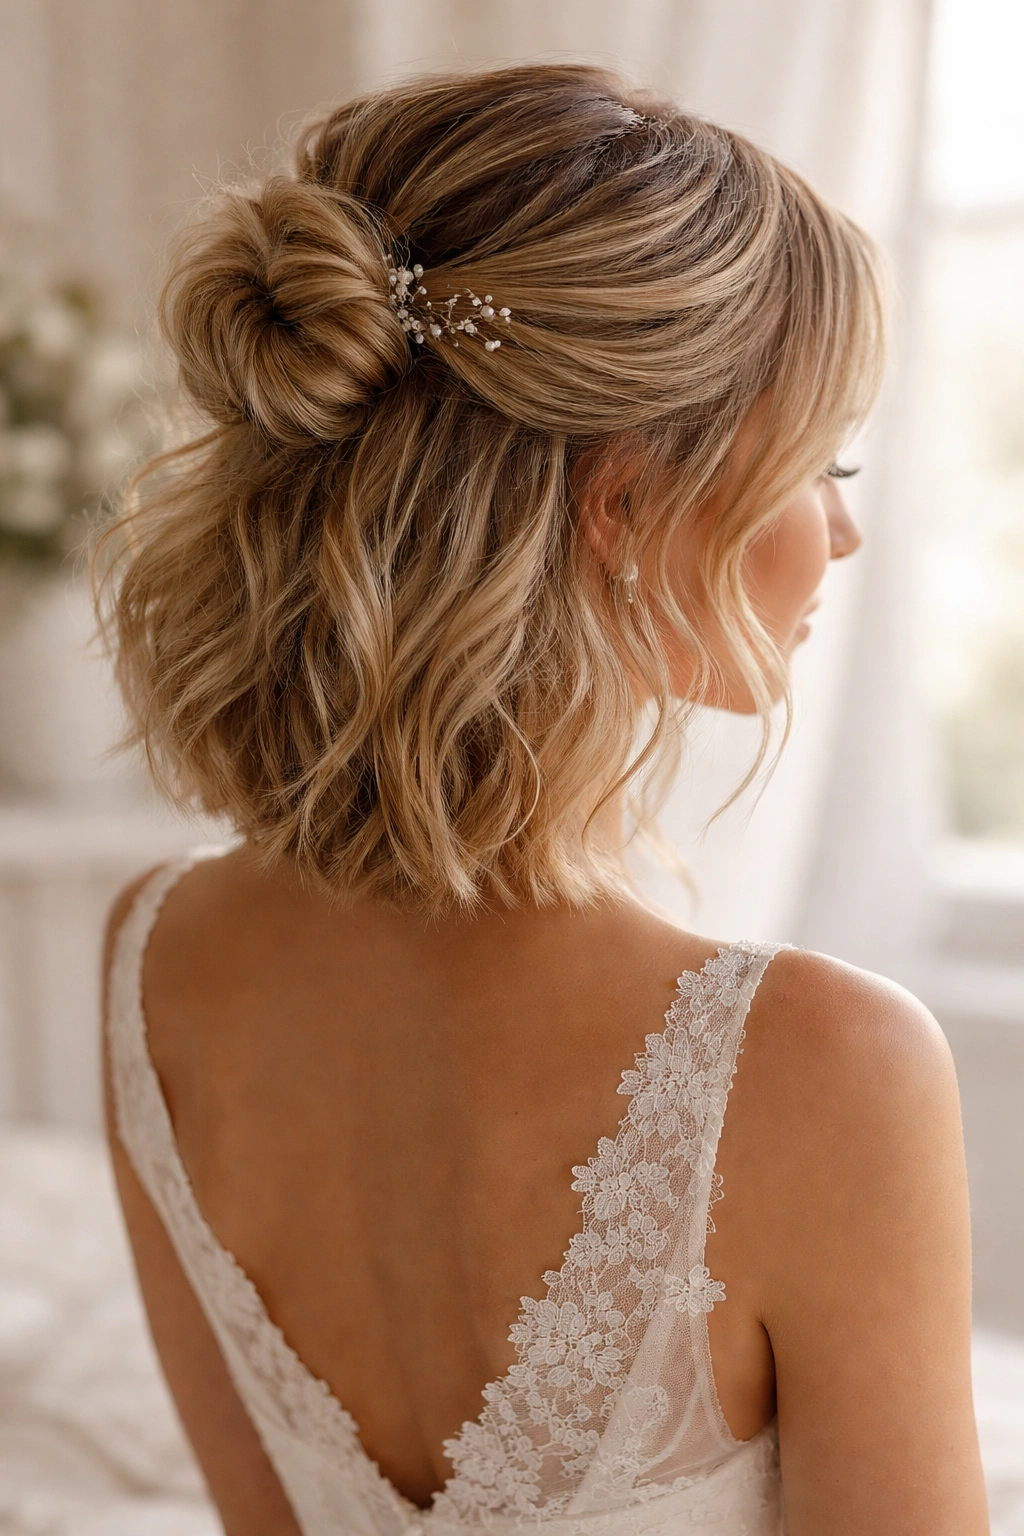
This style leaves half your hair down while the upper half twists into a loose bun, creating a hybrid updo-downdo that feels both casual and dressy. It’s perfect for short hair because it doesn’t require gathering all your length, and the flowing bottom half distracts from any thickness concerns. This is one of the most versatile wedding bun styles because it suits everything from outdoor ceremonies to ballroom receptions.
Why This Works for Short Hair
The half-up bun specifically solves one of the biggest challenges with updo attempts on short hair: not having enough length to work with. By only using the upper half of your hair for the bun, you’re working with more manageable sections while still creating an updo aesthetic. The hair left down adds movement and length to your overall silhouette, making even a chin-length bob feel more substantial. This style also frames the face beautifully because you have pieces around the cheekbones and neck from the released bottom section.
Short hair also means your bun will naturally look less heavy and more airy, which makes this romantic style feel even lighter and more ethereal. It’s genuinely the most flattering updo option if you’re self-conscious about the volume or thickness of a full bun.
How to Build This Style
Part your hair horizontally from the top of one ear to the top of the other ear, creating an upper and lower section. Clip the lower section out of the way. With the upper section, apply texturizing spray and tease gently at the roots for volume. Gather the upper section into a ponytail at the crown. Twist the ponytail loosely and wrap it around itself to create a bun, securing with bobby pins. Release the lower section and brush it gently to blend with the upper bun. Pull and tease the bun slightly to create dimension and that deliberately undone texture.
Styling Variations for Different Looks
- With a center part: Creates a modern, clean aesthetic that suits minimalist weddings
- With a deep side part: Adds glamour and drama, perfect for garden or outdoor ceremonies
- With the lower section in soft waves: Makes the released half feel intentional and styled
- With small braids woven from the half-up section into the bun: Adds bridal detail and texture
Difficulty Level
Beginner to Intermediate — This is genuinely easier than a full bun because you’re working with less hair. The half-up bun concept is forgiving, and imperfections read as intentional messiness. Most people can master this in 2-3 practice sessions.
3. The Sleek Low Messy Bun
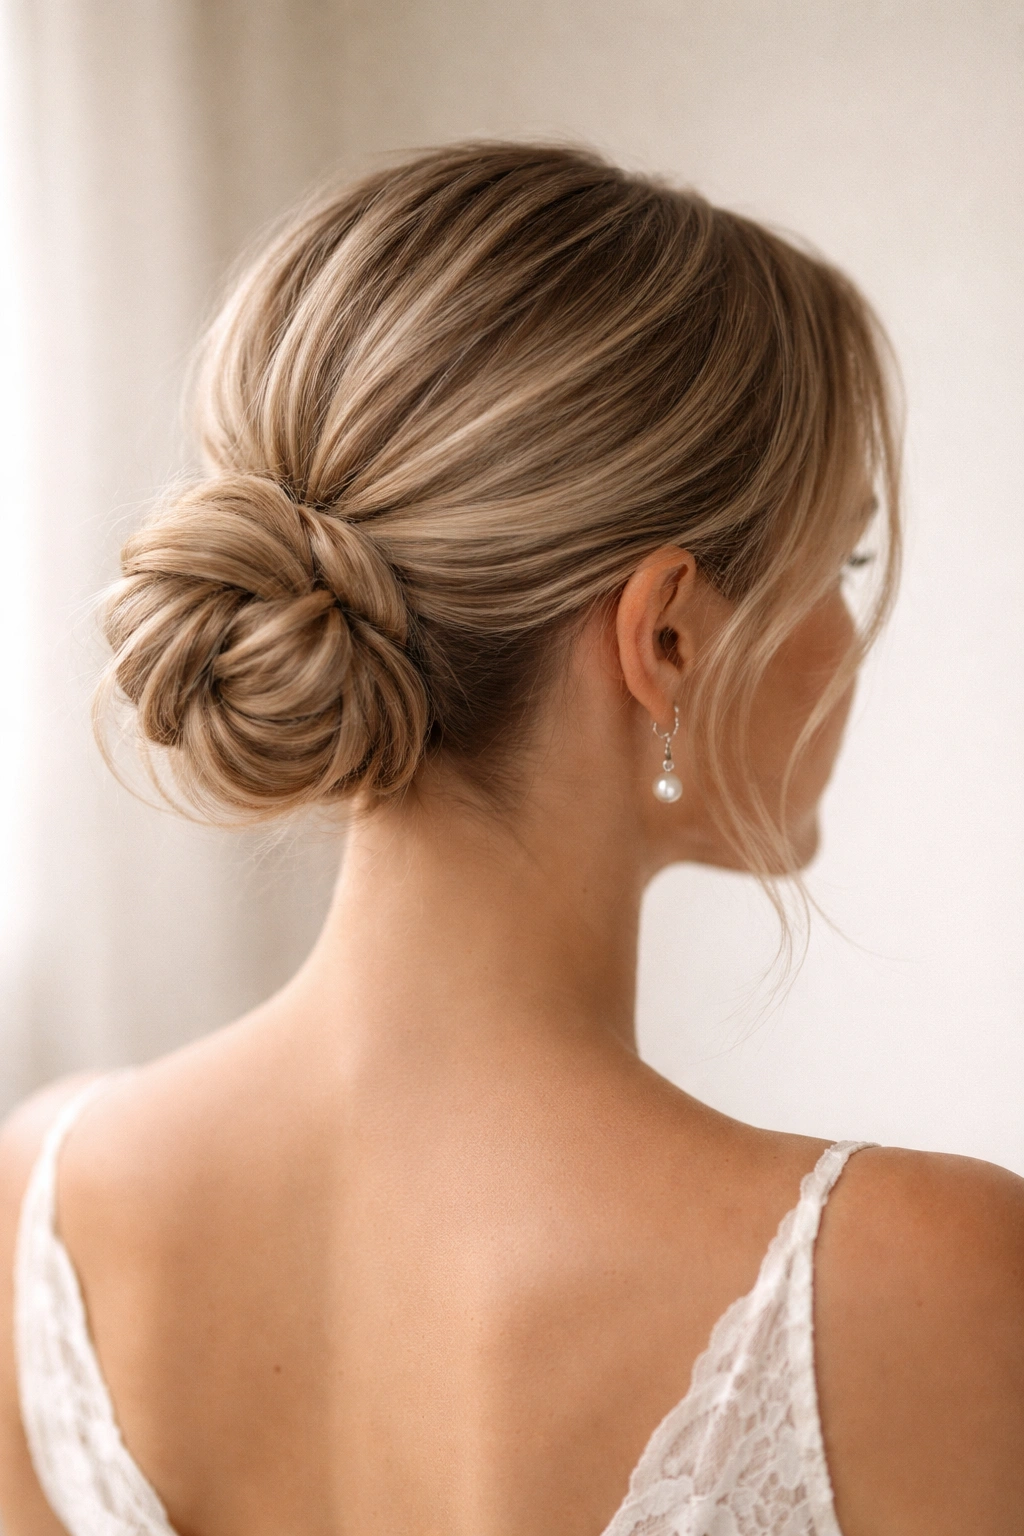
This style trades the height and volume of other messy buns for a low-on-the-nape positioning that feels incredibly sophisticated. The word “sleek” might surprise you in a “messy bun” article, but this style is sleek in its structure yet deliberately messy in its finish—a controlled chaos that photographs as pure elegance. It’s perfect for short hair worn in a modern pixie, a geometric bob, or a shorter shag, and it suits minimalist and modern wedding aesthetics beautifully.
Why This Works for Short Hair
A low bun positioned just at the nape of your neck doesn’t require length, making it one of the few true updo options for very short hair (we’re talking 2-3 inches). The low placement is naturally flattering because it doesn’t draw attention to the crown where shorter hair might feel thin. It’s also incredibly secure because gravity and the natural angle work in your favor. The “sleek” element comes from smooth styling while the “messy” comes from deliberately pulling and texturing the bun after it’s formed, creating visual interest without chaos.
This style is also perfect if you’re wearing a statement necklace or have bare shoulders, because the low positioning doesn’t compete with those design elements. It reads as intentionally minimalist rather than like you ran out of hair to style.
How to Build This Style
Smooth your hair back into a low ponytail using a fine-tooth comb and light gel or smoothing cream. Position the ponytail at the nape of your neck, just where your hair naturally ends. Secure tightly with a clear elastic. Divide the ponytail into 2-3 sections and twist each section separately. Wrap the twisted sections around the ponytail base in alternating directions to create a bun, securing with bobby pins tucked inside for invisibility. Here’s the crucial step: gently pull the bun slightly to create a relaxed, undone texture, but keep the base smooth and structured. This is the balance between sleek and messy.
Styling Tips for Maximum Impact
- Use a light gel or smoothing cream on the base and crown area for a polished, deliberately neat look
- Apply the messiness strategically—pull only the outer layer of the bun, leaving the base neat
- This style actually pairs beautifully with a decorative hair comb or small jeweled pin if you want bridal detail
- Shorter haircuts with undercuts or tapered sides make this look even more modern
Difficulty Level
Beginner — This is hands-down the easiest messy bun style because you’re working with minimal hair and a straightforward technique. A stylist can execute this in 15 minutes, and most people can DIY it in under 10 minutes once they’ve tried it once.
4. The Twisted Side Bun
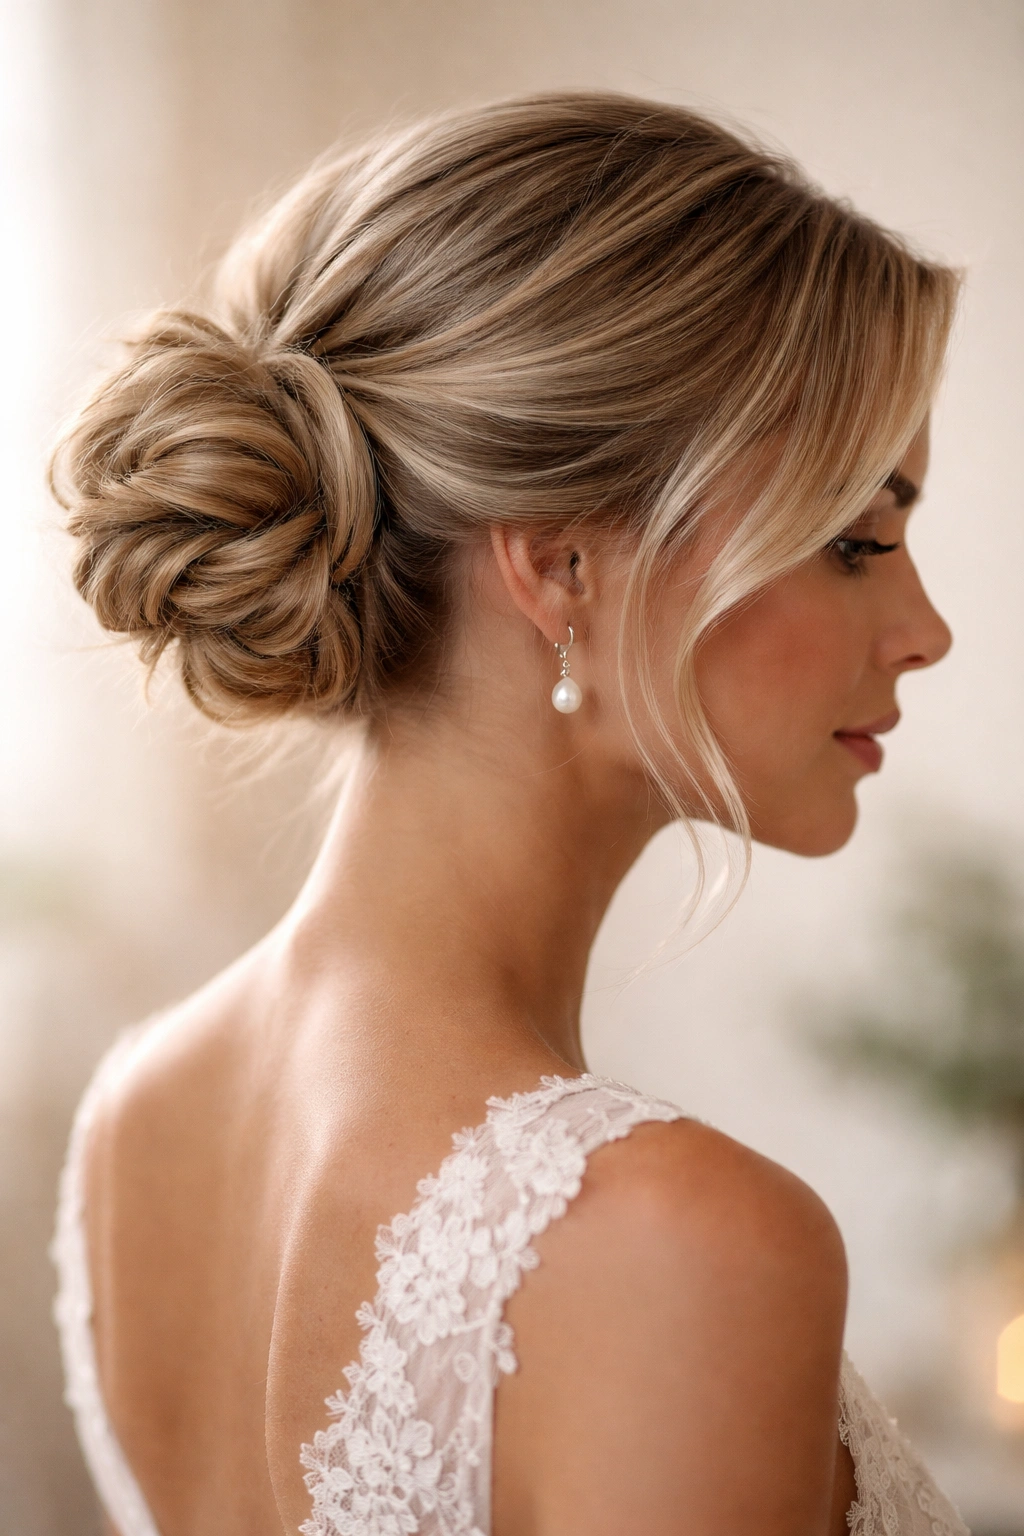
This style gathers hair to one side of the head rather than center or back, creating an asymmetrical romance that feels playful and fashion-forward. The side positioning makes it especially flattering for short hair because it creates a visual line from the face down through the neck and shoulder. It photographs beautifully from one angle (your “good side”), and it’s a style choice that says you’re confident enough to break traditional rules.
Why This Works for Short Hair
Side buns are inherently forgiving with short hair because the asymmetrical positioning creates visual length and interest that disguises the actual hair length. A side bun also allows you to show off your haircut’s shape and undercut (if you have one), which adds modern bridal sophistication. The off-to-the-side placement means you’re gathering hair from the back and sides, which is easier with shorter lengths than trying to bring hair all the way to center.
This style also suits the “modern bride” aesthetic, particularly if you’re getting married in a non-traditional setting, wearing a more edgy or contemporary dress, or making bold personal style statements. Short hair in a side bun reads as intentional and editorial rather than conventional.
How to Build This Style
Apply texturizing spray to add grip, then tease the crown area lightly for volume. Create a side part on whichever side feels flattering—generally, your hair’s natural growth pattern will tell you which side works. Brush the bulk of your hair to the side. You can leave a few longer pieces loose on the opposite side to fall across your face, or tuck everything into the side bun depending on the look you want. Gather the hair on the chosen side into a low ponytail positioned toward the nape of your neck but shifted to that side. Twist the ponytail loosely and wrap it around itself to form a bun, securing with bobby pins.
Deliberately pull the bun to create dimension and softness. The messiness here comes from texture and loose wrapping rather than pieces falling out—you want it to stay put while looking intentionally undone.
Variations for Different Wedding Vibes
- With a sleek side part and smooth base: Looks editorial and modern, suits contemporary weddings
- With loose face-framing pieces: Adds romance and softness, works for garden ceremonies
- With a small braid woven into the bun base: Adds bridal texture without looking overly done
- With the opposite side swept behind your ear: Creates a clean, architectural look perfect for minimalist aesthetics
Difficulty Level
Intermediate — You need to figure out which side is flattering and have decent grip on how to position the bun off-center. The actual technique is straightforward, but the styling choices require some thought.
5. The Undone Top Knot
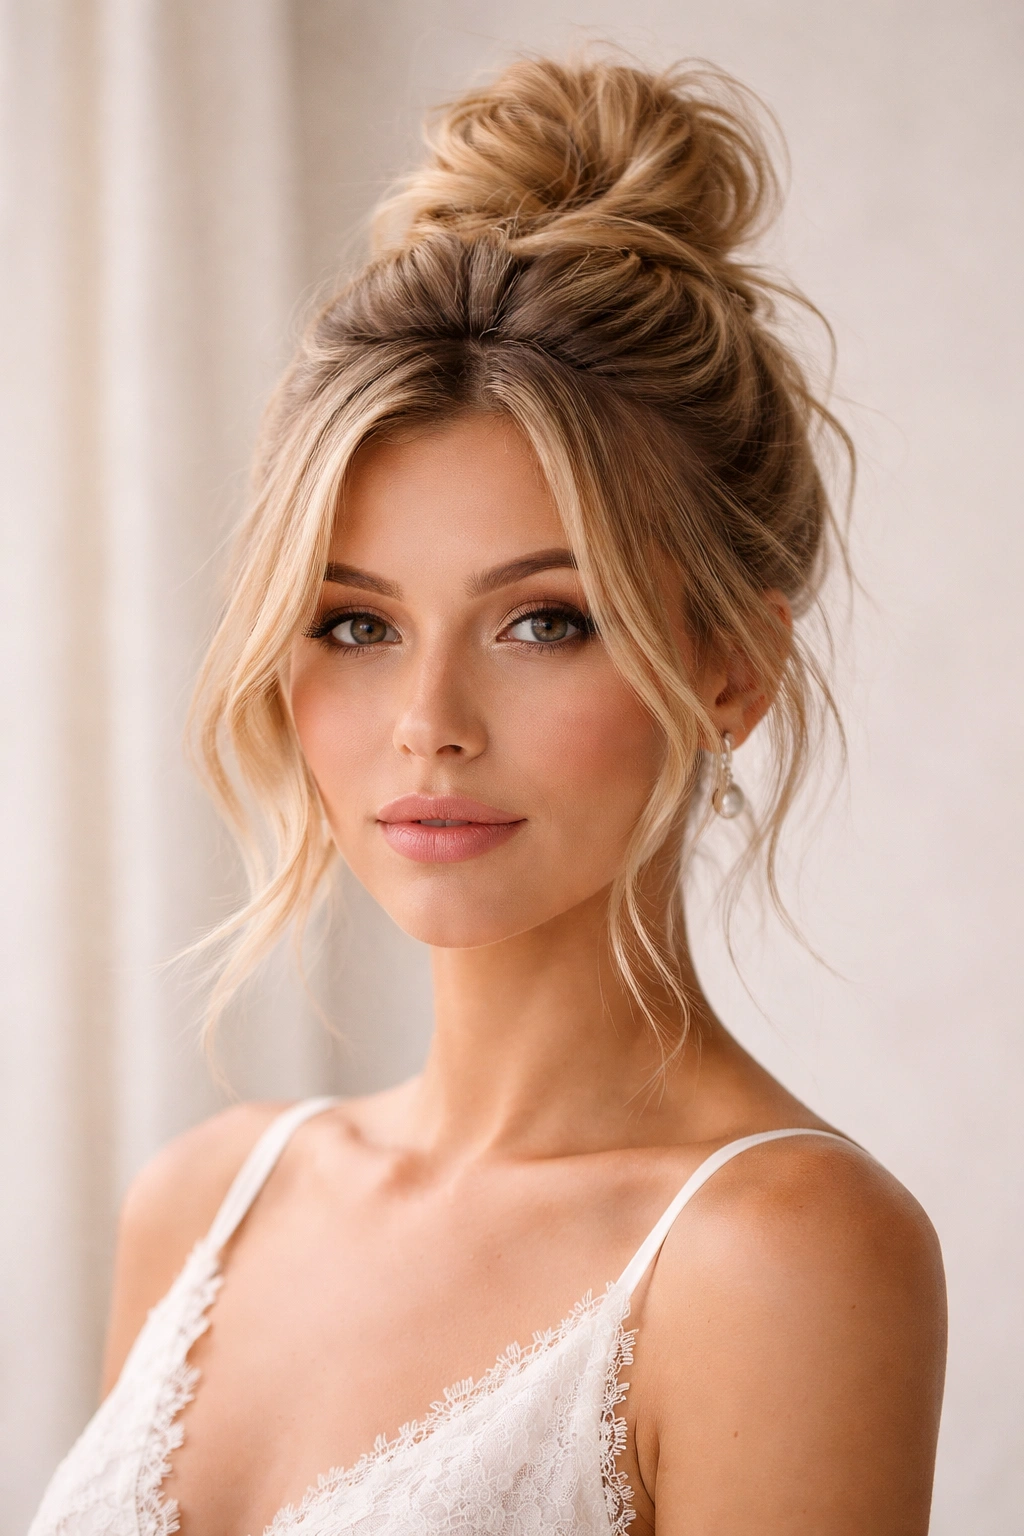
This is the most intentionally messy option on this list—a true top knot style positioned at the crown that celebrates imperfection and effortlessness. Despite its casual appearance, the undone top knot is absolutely appropriate for weddings, particularly those with bohemian, garden, or relaxed vibes. It’s also the best option if you have very short hair because it requires minimal length and maximum texture.
Why This Works for Short Hair
The undone top knot specifically works because it’s not trying to be a perfect bun—it’s celebrating the fact that your hair is short and textured. This style actually looks better when executed with shorter lengths because the natural breakaway of short pieces creates authentic messiness rather than pieces you’ve had to deliberately loosen. If your short hair has layers, waves, or texture, a top knot is where that cut truly shines.
This style also requires the least amount of products and tools, making it perfect for DIY brides and for the reality of looking perfect at the ceremony while keeping hair feeling comfortable and light throughout a long day. It’s genuinely the path of least resistance for short hair on a wedding day.
How to Build This Style
Apply a texturizing spray generously, especially if your hair is naturally straight—you need texture to create the messy hold. Gather all your hair at the very crown of your head into a high ponytail. Here’s where the “undone” comes in: don’t pull it too tight. A slightly loose ponytail actually looks more intentional and romantic than a tight one. Twist the ponytail loosely (don’t twist tightly—that makes it look neater than you want) and wrap it around the base once or twice, securing with bobby pins. Pull the knot in multiple directions to create volume and that deliberately disheveled appearance.
The goal is for loose pieces to escape naturally around the crown and face. If pieces want to fall out, you can pin them back in softly or leave them for extra texture. This is the one style where imperfection genuinely reads as beautiful rather than like you tried and failed.
Creating the Right Level of Undone-ness
- Too tight: Looks like you’re trying too hard, loses the romantic quality
- Too loose: Will actually fall apart, so aim for the middle ground where it’s deliberately relaxed but structurally sound
- The texture matters more than the structure: A messy top knot with waves looks intentional; a messy top knot with straight hair can look like you didn’t try
Difficulty Level
Beginner — This is genuinely the easiest style on this list. The entire point is that it’s undone, so there’s very little room to make mistakes. You can create this in under 5 minutes and truly make it work even on your first attempt.
6. The Braided Wrap Bun
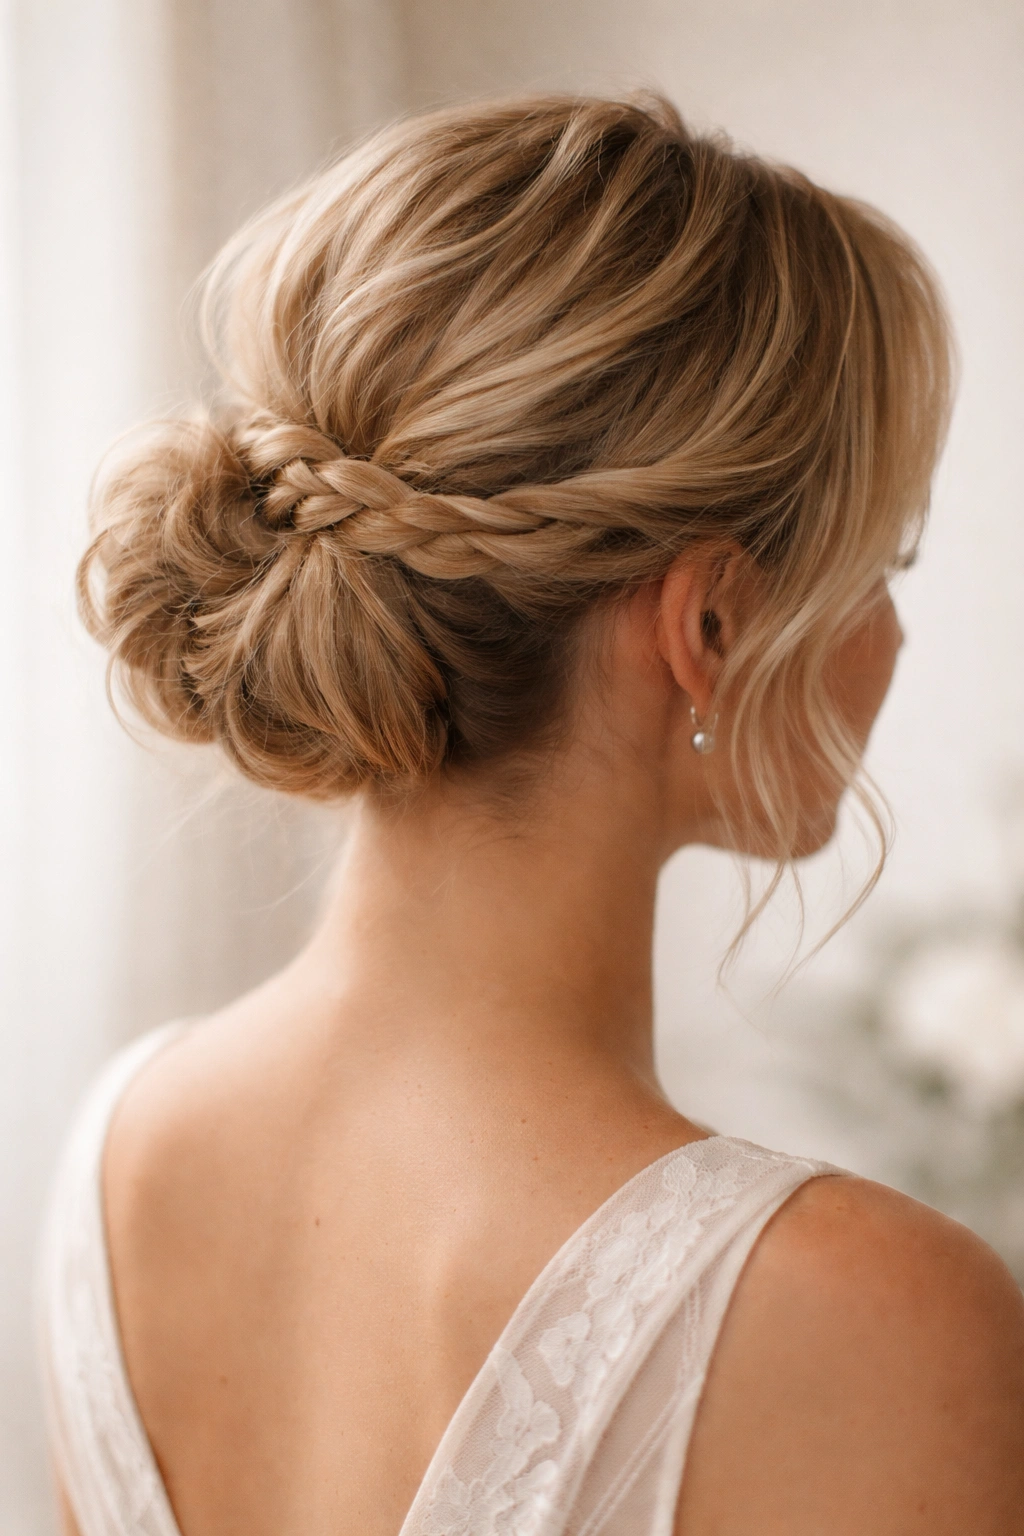
This final style integrates a small braid or twist that wraps around the bun base, adding bridal detail and texture without requiring long hair or advanced braiding skills. The braid creates visual interest and intentionality that elevates the messy bun into truly wedding-appropriate territory. It’s perfect for short hair because the braid doesn’t need to be long—just a small detail that adds sophistication.
Why This Works for Short Hair
The braided wrap bun combines the messiness that short hair naturally creates with a specific, intentional styling detail that reads as bridal. A small braid wrapping around the bun base looks intentional and beautiful rather than like you couldn’t manage to keep your bun contained. This style bridges the gap between “undone romantic” and “I put thought into how I look for this major event.”
The braid also adds texture and visual interest, which helps disguise the fact that you’re working with less hair. A small Dutch braid or twist wrapped around the base creates a focal point that draws the eye and suggests more volume than actually exists. It’s a brilliant styling hack specifically for short hair at formal events.
How to Build This Style
Create a textured base by applying sea salt spray or texturizing spray throughout your hair, and tease gently at the crown for volume. Gather your hair into a high or mid-height ponytail depending on your preference. Separate a small section of hair from the ponytail—about 1 inch thick—and create a small Dutch braid with just that section. If braiding feels intimidating, a simple twist works just as well and reads as equally intentional.
Wrap the braid around the ponytail base, securing the end with a bobby pin tucked inside the bun. Twist the remaining ponytail section loosely around itself to form the bun body, securing with additional bobby pins. Gently pull and tease the bun to create dimension, leaving the braid as the neat, intentional detail that anchors the whole style.
Braid Options for Different Aesthetics
- Small Dutch braid: Modern and architectural, suits contemporary weddings
- Simple two-strand twist: Soft and romantic, perfect for bohemian ceremonies
- Fishtail braid: Delicate and detailed, excellent for garden or outdoor weddings
- Braid with baby’s breath or small flowers woven through: Instantly bridal and romantic
Troubleshooting Messy Bun Challenges
Short hair presents specific challenges that longer styles don’t face. If your bun keeps loosening, you’re likely using too-light products or bobby pins that aren’t gripping securely enough. Invest in textured or grip bobby pins designed for fine hair, and use at least 10-12 pins per bun rather than trying to make 4 do the heavy lifting. If pieces are falling out constantly, apply more texturizing product to the ponytail section after you’ve created it—not just the root area, but the actual hair you’re using for the bun.
If your bun looks too small or thin, commit to aggressive teasing at the crown and roots. The goal is volume at the foundation, which makes even a modest amount of actual hair create the illusion of fullness. Use your teasing brush to backcomb every section of hair destined for the bun, then gently smooth the surface layer while keeping the texture underneath.
Difficulty Level
Intermediate — This requires braiding skills and the ability to wrap the braid neatly while securing everything, but most people with basic braid experience can manage it. A stylist will create this flawlessly in 25-30 minutes.
Final Thoughts
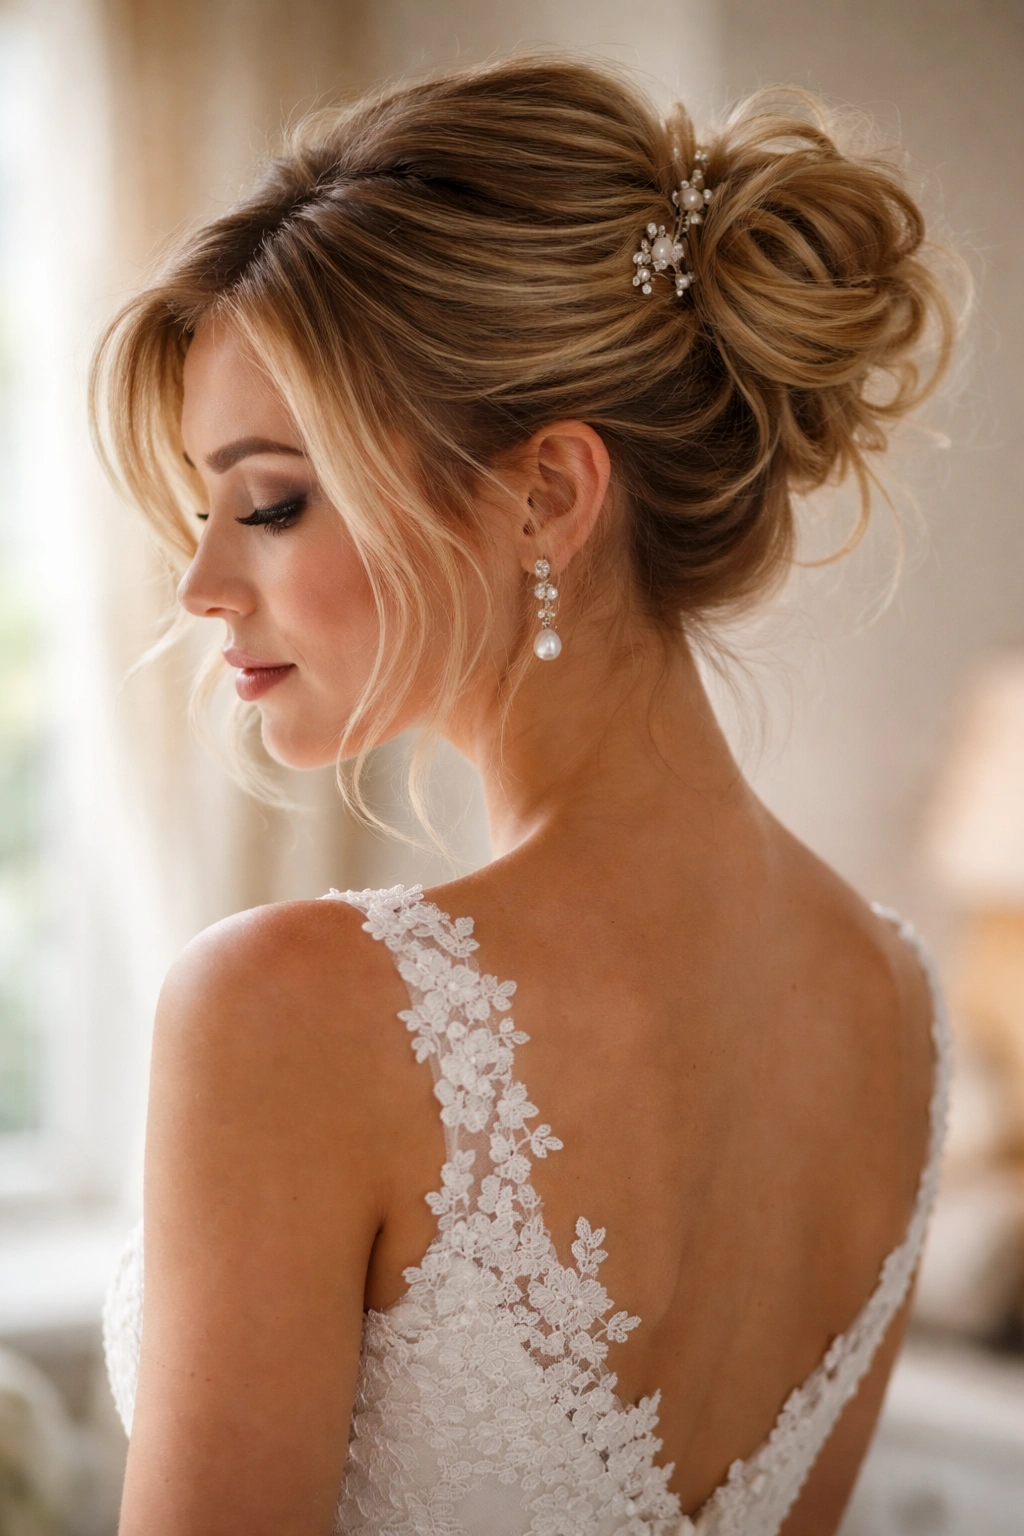
The right messy bun can be the most flattering, comfortable, and ultimately romantic option for your wedding day—especially with short hair. Each of these six styles offers a different feel, from the structured elegance of the sleek low bun to the effortless charm of the undone top knot. The beauty of short hair is that you’re never fighting against length or weight; you’re working with natural movement and texture that longer hair requires products and styling to achieve.
The key is choosing a style that genuinely fits both your hair type and your wedding aesthetic. If your hair is naturally straight, styles with more deliberate teasing and texture (the crown bun, the braided wrap) will serve you better than the undone top knot. If your hair has natural wave or texture, you can lean into any of these styles and let your hair do much of the work for you. Most importantly, practice your chosen style multiple times before your wedding day—what feels awkward at first will become second nature by the time you’re walking down the aisle.
Consider booking a trial with a stylist even if you plan to DIY on the actual day. Twenty to thirty minutes with a professional can show you exactly how much teasing is enough, where the bobby pins should go for maximum security, and how to create the right balance between intentional structure and deliberate messiness. The small investment pays off in confidence on your wedding day, knowing exactly how your hair will look and last from ceremony through dancing.
