



Long, thick hair is a blessing — and sometimes a logistical challenge when you’re trying to style it into something effortlessly chic. The low messy bun sits right at that sweet spot between polished and relaxed, working beautifully for everything from casual workdays to weekend brunches. The trick with thick hair isn’t fighting your volume; it’s channeling it to create texture and movement that actually looks intentional and undone rather than sloppy.
Low buns work particularly well for thicker hair because they’re forgiving about the weight distribution and actually benefit from the extra texture you naturally have. Unlike high buns that can feel heavy or strained on the crown, low styles sit lower on the nape of your neck, distributing the weight more evenly and creating a more flattering silhouette. The beauty of a messy bun is that “messy” doesn’t mean careless — it’s a deliberate aesthetic that transforms what could look undone into something deliberately chic.
What makes a low messy bun work for thick hair specifically is understanding how to use your volume as an asset. Thicker strands hold texture longer, maintain waves or braids better, and create that coveted “I didn’t spend an hour on this” look far more convincingly than finer hair can. The styles that follow are each designed to handle your hair’s weight, show off its texture, and keep everything secure without looking stiff or overly styled. Whether you’re going for effortlessly undone or polished-meets-casual, these six variations give you real options.
1. The Twisted Low Bun
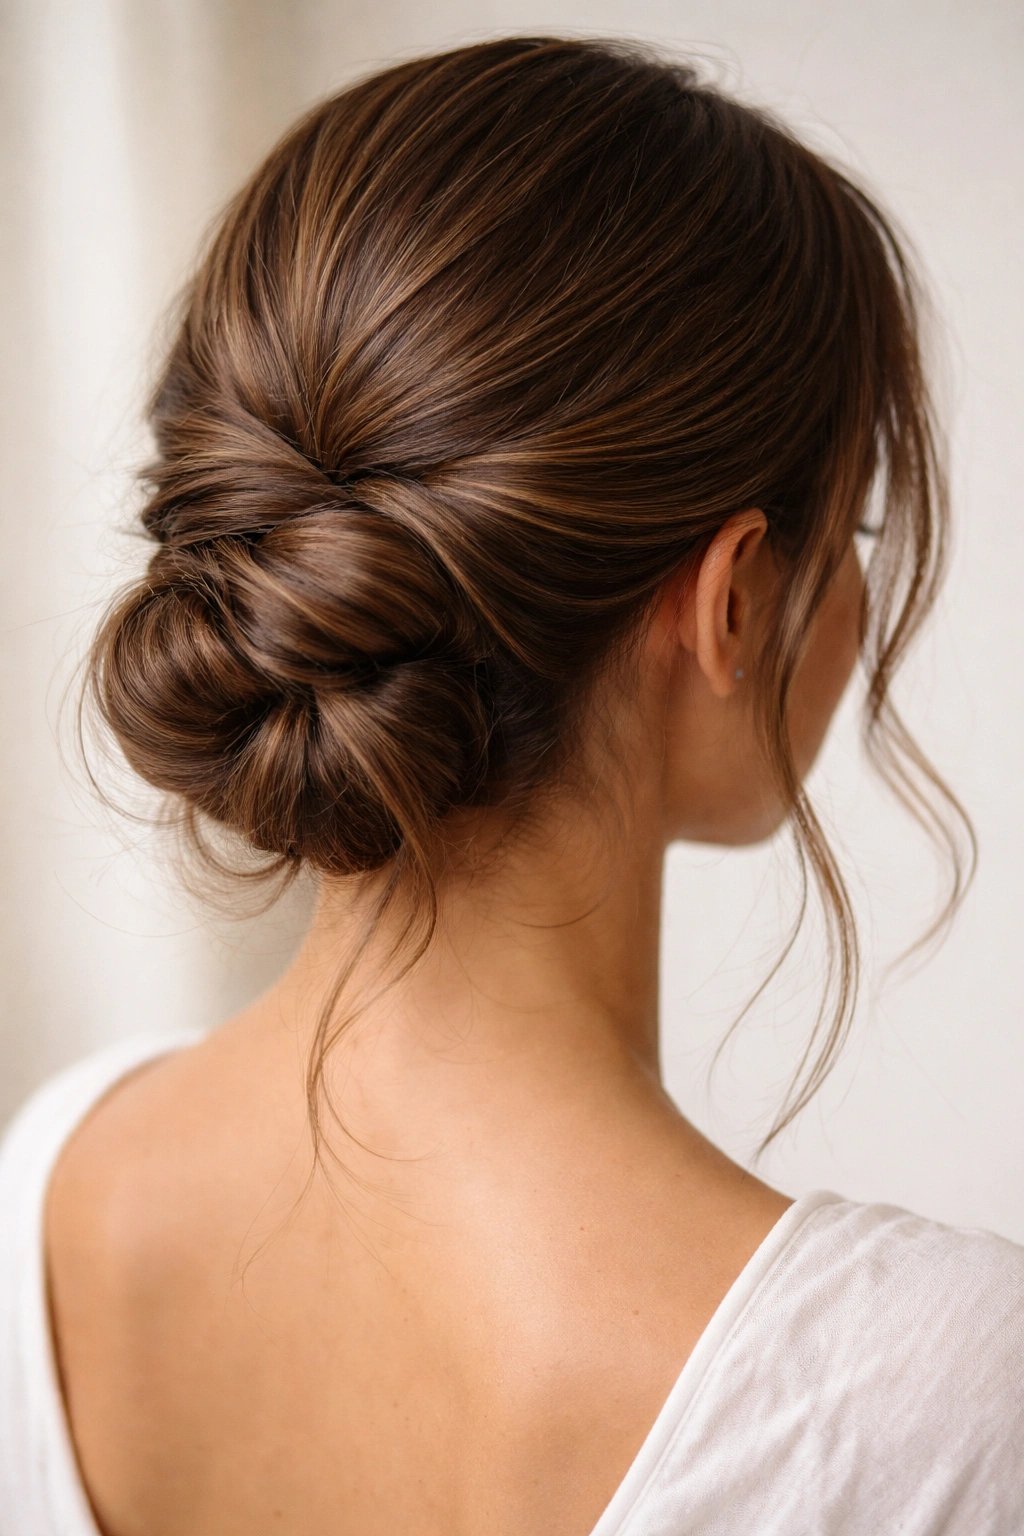
The twisted low bun is the ultimate no-fuss style for thick hair — it looks intentional and sophisticated even when you style it in five minutes. The two-strand twist creates natural texture that thick hair absolutely excels at, and the casual placement of pieces around your face gives you that sought-after “I’m put-together but not trying too hard” energy.
Why It Works So Well for Thick Hair
The twisted low bun is forgiving because your hair’s natural thickness creates visible definition in the twists themselves. Thicker strands hold the twist structure without slipping, so you don’t need to worry about your style falling apart by midday. The volume you naturally have also means the finished bun has dimension and movement built in — no need to curl or tease to add texture that thinner hair would require. The twist technique actually uses your thickness to your advantage, creating a bun that looks effortlessly messy rather than sparse or thin.
How to Create the Twisted Low Bun
- Start with second-day or textured hair (dry shampoo helps if your hair is freshly washed and slippery)
- Brush your hair back into a low ponytail at the nape of your neck, leaving a few face-framing pieces loose
- Divide the ponytail into two equal sections
- Twist each section away from your face, working the twists down the length of the ponytail — don’t pull tight, let them remain loose and textured
- Wrap the twisted sections around the base of your ponytail to form a bun, crossing and overlapping them to create a fuller shape
- Secure with 2-3 bobby pins, tucking them in at different angles for maximum hold
- Gently pull and tease the bun to release more texture and create that undone appearance
Styling Tips for Maximum Hold and Movement
The key to a lasting twisted bun with thick hair is securing it properly without over-tightening. Use bobby pins that match your hair color and insert them horizontally rather than straight in, anchoring into both the twist and the base of the bun. If you have flyaways or shorter pieces, a light texturizing spray or light hairspray will hold them without making your bun look stiff. Don’t smooth everything down — the slight messiness is the entire point, so embrace the texture and let pieces frame your face naturally.
Pro tip: If your twists feel slippery even with textured hair, mist them very lightly with dry shampoo before twisting to add grip. This also enhances the texture you already have.
2. The Braided Low Bun
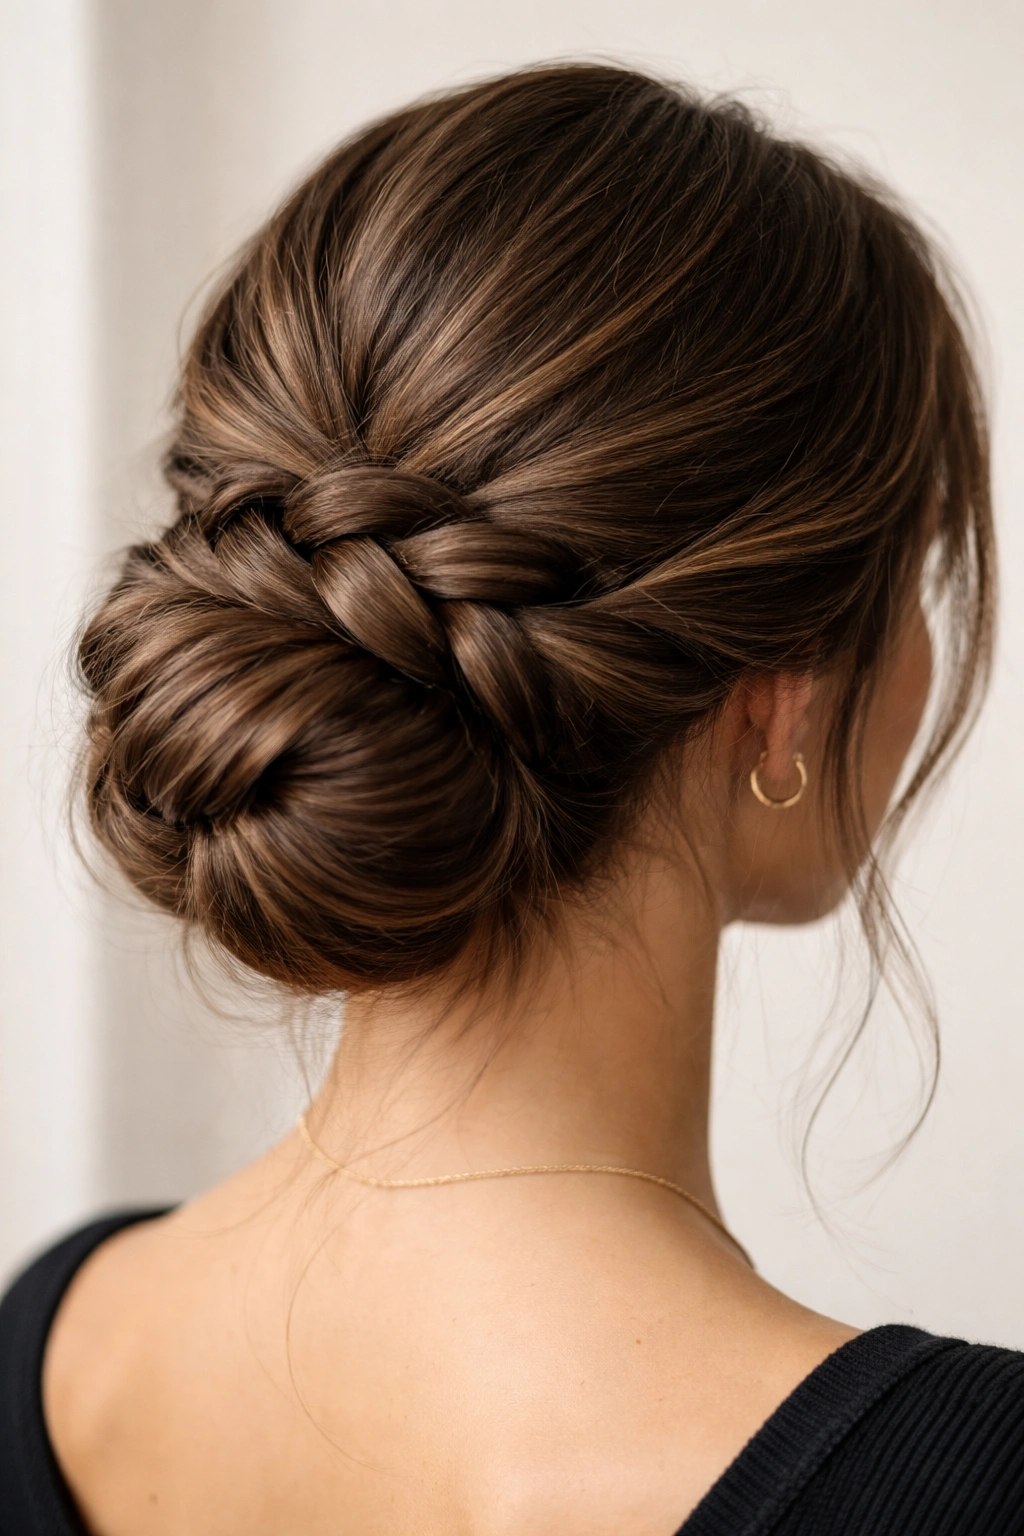
A braided low bun transforms thick hair into a textured crown that’s formal enough for important events but casual enough for everyday wear. The braid adds visual interest and structure, and with thick hair, your braid will have depth and definition that makes the entire style look intentional and polished.
Why Braids Are Your Thick Hair Superpower
Braids were practically made for thick hair — your strands show every detail of the weave, and the fullness of your hair means the braid itself is a statement rather than a delicate accent. Thick hair also holds a braid’s shape all day without loosening or needing to be re-braided, so a braided bun is genuinely low-maintenance despite looking intricate. The braid structure gives you built-in security too; braids are naturally more stable than loose ponytails, so your bun will stay put even with active movement or humidity.
How to Create the Braided Low Bun
- Brush hair back into a low ponytail, leaving a 2-inch section loose at the very crown for face-framing
- Divide your ponytail into three sections and begin a standard three-strand braid
- Braid down the full length of the ponytail, keeping tension even but not overly tight
- Once you reach the end, secure the braid with a small elastic
- Coil the braid around the base of the ponytail like a spiral, wrapping it around itself to form the bun shape
- Secure the coiled braid with 3-4 bobby pins positioned at different points around the bun
- Gently pull sections of the braid outward to add volume and create a fuller appearance
Making Your Braid Look Effortlessly Textured
After you’ve pinned your bun, spend a moment deliberately loosening the braid. Thick hair can sometimes look almost too neat in a braid, so pulling the braid strands outward in sections creates that textured, undone aesthetic. Start at the top and work your way down, gently tugging each section of the braid to release the weave slightly. This step alone transforms a neat braid into something that looks intentionally messy and sophisticated. The thicker your hair, the more dramatic this loosening effect will be, so don’t be afraid to be generous with it.
Pro tip: A Dutch braid (braiding under instead of over) shows more texture than a regular braid and photographs beautifully if you need this style for an event.
3. The Textured Wrap Low Bun
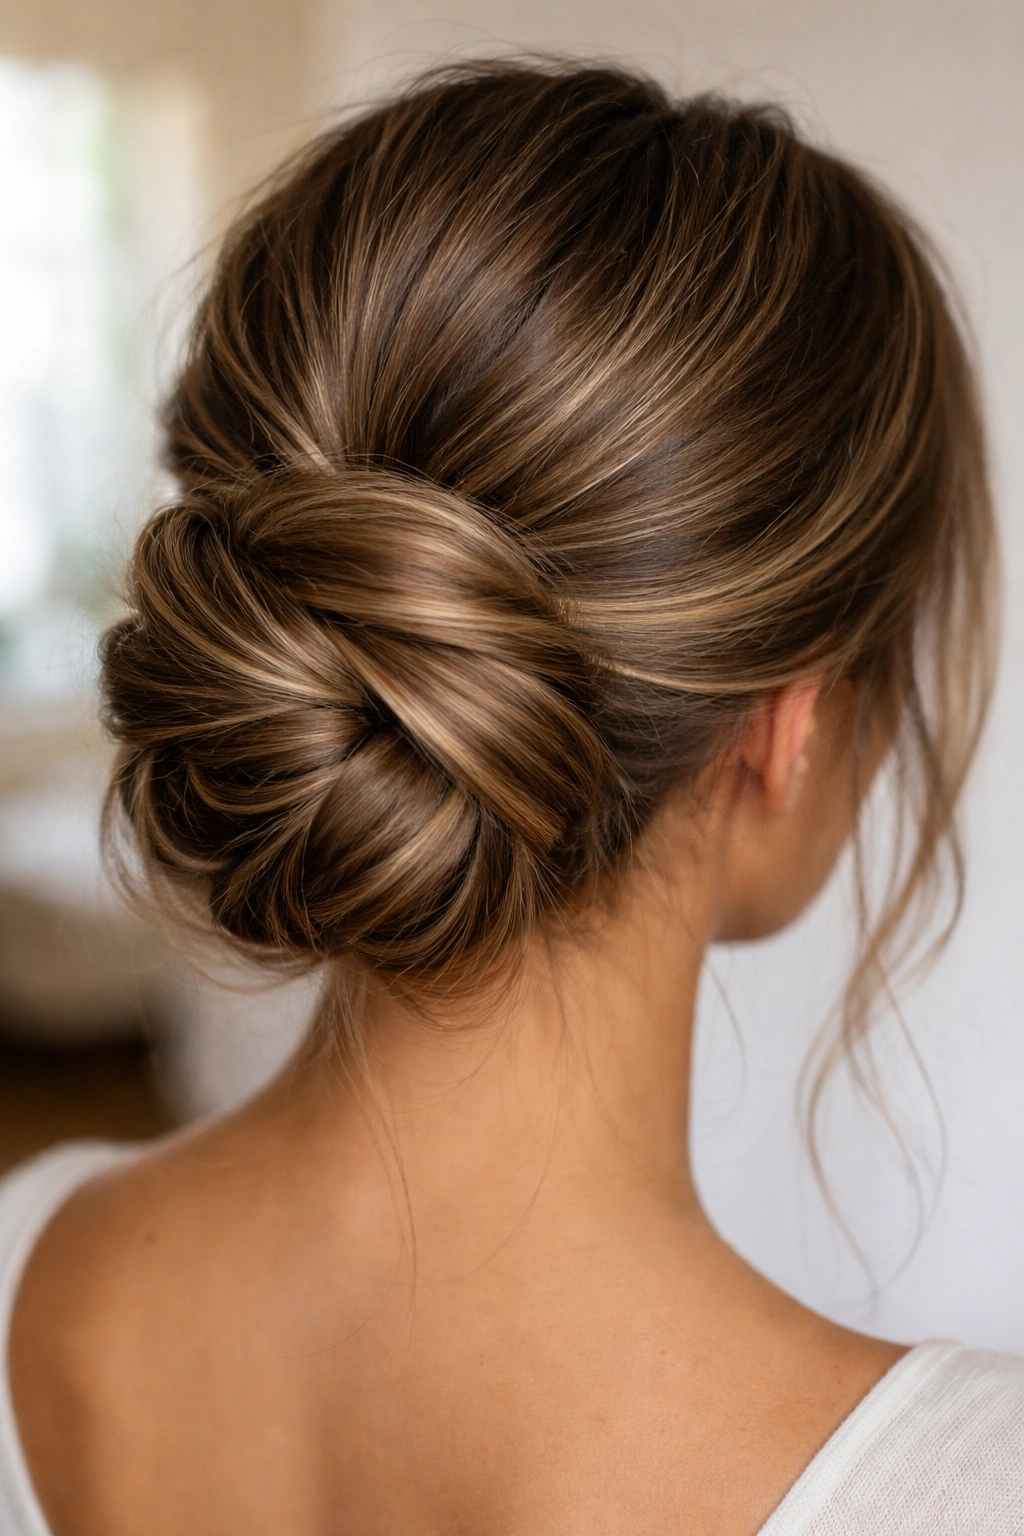
The textured wrap bun is pure sophistication — it looks like you spent 20 minutes styling when you actually spent five. This style works beautifully with thick hair because you’re actually wrapping sections of hair around your ponytail rather than twisting a single unit, creating multiple points of visual interest and texture.
Why Wrapping Creates Dimension with Thick Hair
Wrapping individual or paired sections of hair around a ponytail gives you far more visual detail than a simple twist, and thick hair makes each wrapped section visible and dimensional. The wrap technique also distributes your hair’s weight evenly, so the bun sits securely without any single area bearing too much tension. The finished look has a layered, textured appearance that’s nearly impossible to achieve with thinner hair, but thick strands create this effect naturally.
How to Create the Textured Wrap Low Bun
- Gather hair into a low ponytail, securing it with an elastic
- Divide the ponytail into 4-6 sections (the more sections, the more textured the final bun)
- Take the first section and wrap it around the base of the ponytail, securing the end with a bobby pin
- Continue with each section, wrapping them in alternating directions (clockwise, counterclockwise) to create a varied, layered appearance
- Leave the last section of hair hanging loose to wrap around the exterior of the bun for a finished edge
- Adjust the sections so they overlap slightly and create a full, textured bun shape
- Secure any loose ends with additional bobby pins tucked into the bun interior
Creating That Intentionally Undone Look
The wrap technique naturally creates pockets and texture in your bun, but you can enhance this by slightly loosening wrapped sections after pinning. Pull gently on the outer edges of wrapped sections to create a ruffled appearance that reads as effortlessly styled. With thick hair, these pulled sections will hold their shape all day, so this is a one-time adjustment that lasts through your entire day. The thicker your hair, the more forgiving this style is — imperfections actually add to the aesthetic rather than detract from it.
Pro tip: Spritz wrapped sections with light hold hairspray as you go to help them maintain their position without needing excessive pins.
4. The Two-Section Low Bun
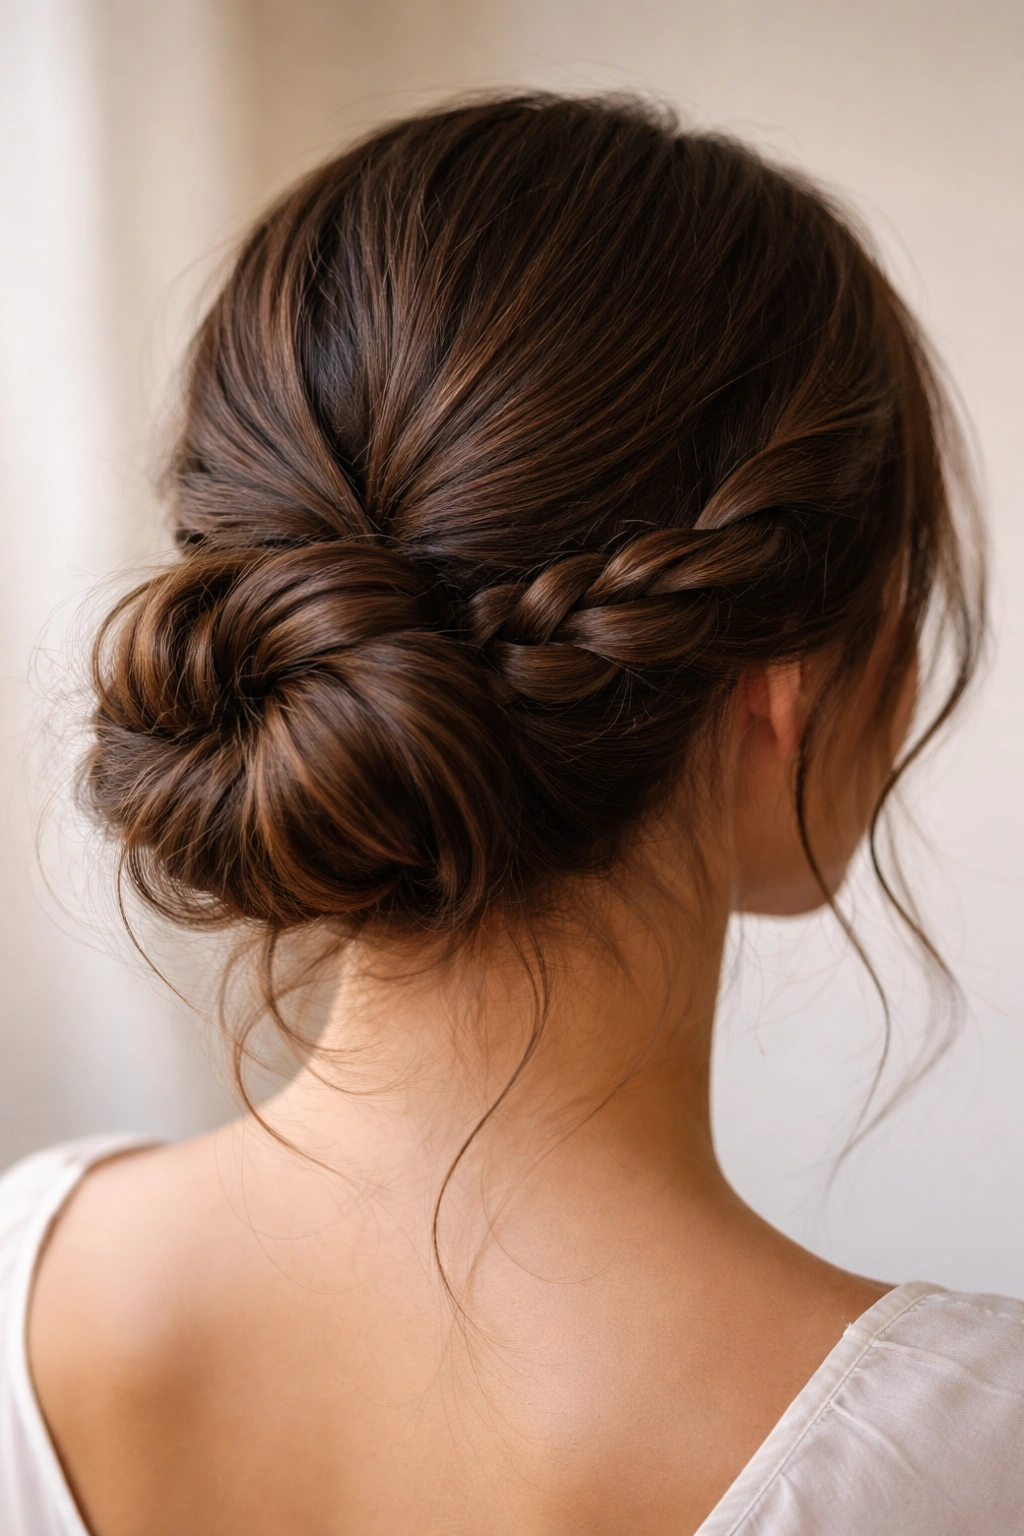
The two-section bun creates visual interest by using contrasting techniques — one side might be twisted while the other is braided, or both sides use different textures. For thick hair, this style is striking because each section has distinct definition and the finished bun looks more complex and polished than it actually is to create.
Why Split Sections Work for Thick Hair
Dividing your hair into two sections before forming the bun actually makes styling easier with thick hair because you’re working with manageable amounts of volume rather than wrestling with the entire ponytail at once. Each section shows its own texture and detail, whether twisted, braided, or wrapped, and thick hair displays these textures beautifully. The two-section approach also creates a bun with more apparent height and shape, which works in your favor because thick hair’s natural weight won’t collapse the style into a flat disc.
How to Create the Two-Section Low Bun
- Gather hair into a low ponytail
- Divide the ponytail vertically down the middle into two equal sections
- Style the first section using your choice of technique: twist it loosely, braid it, or wrap it
- Style the second section using the same or a contrasting technique
- Coil each styled section around the base of the ponytail, wrapping them in opposite directions to create a balanced bun shape
- Interweave the two sections where they meet for a cohesive look
- Secure both sections with bobby pins positioned throughout the bun
Choosing Your Section Techniques
You can mix and match techniques to create your desired effect. A twisted section paired with a braided section creates clear visual contrast. Two twisted sections that spiral in opposite directions look balanced and intentional. Two wrapped sections using different wrap widths add texture variation. With thick hair, you have the volume to pull off any combination convincingly — the key is choosing techniques that feel natural to you and that you can execute quickly.
Pro tip: If one section feels heavier or looser than the other, pull the looser section gently outward after pinning to increase its apparent volume and balance the overall bun.
5. The Messy Fishtail Low Bun
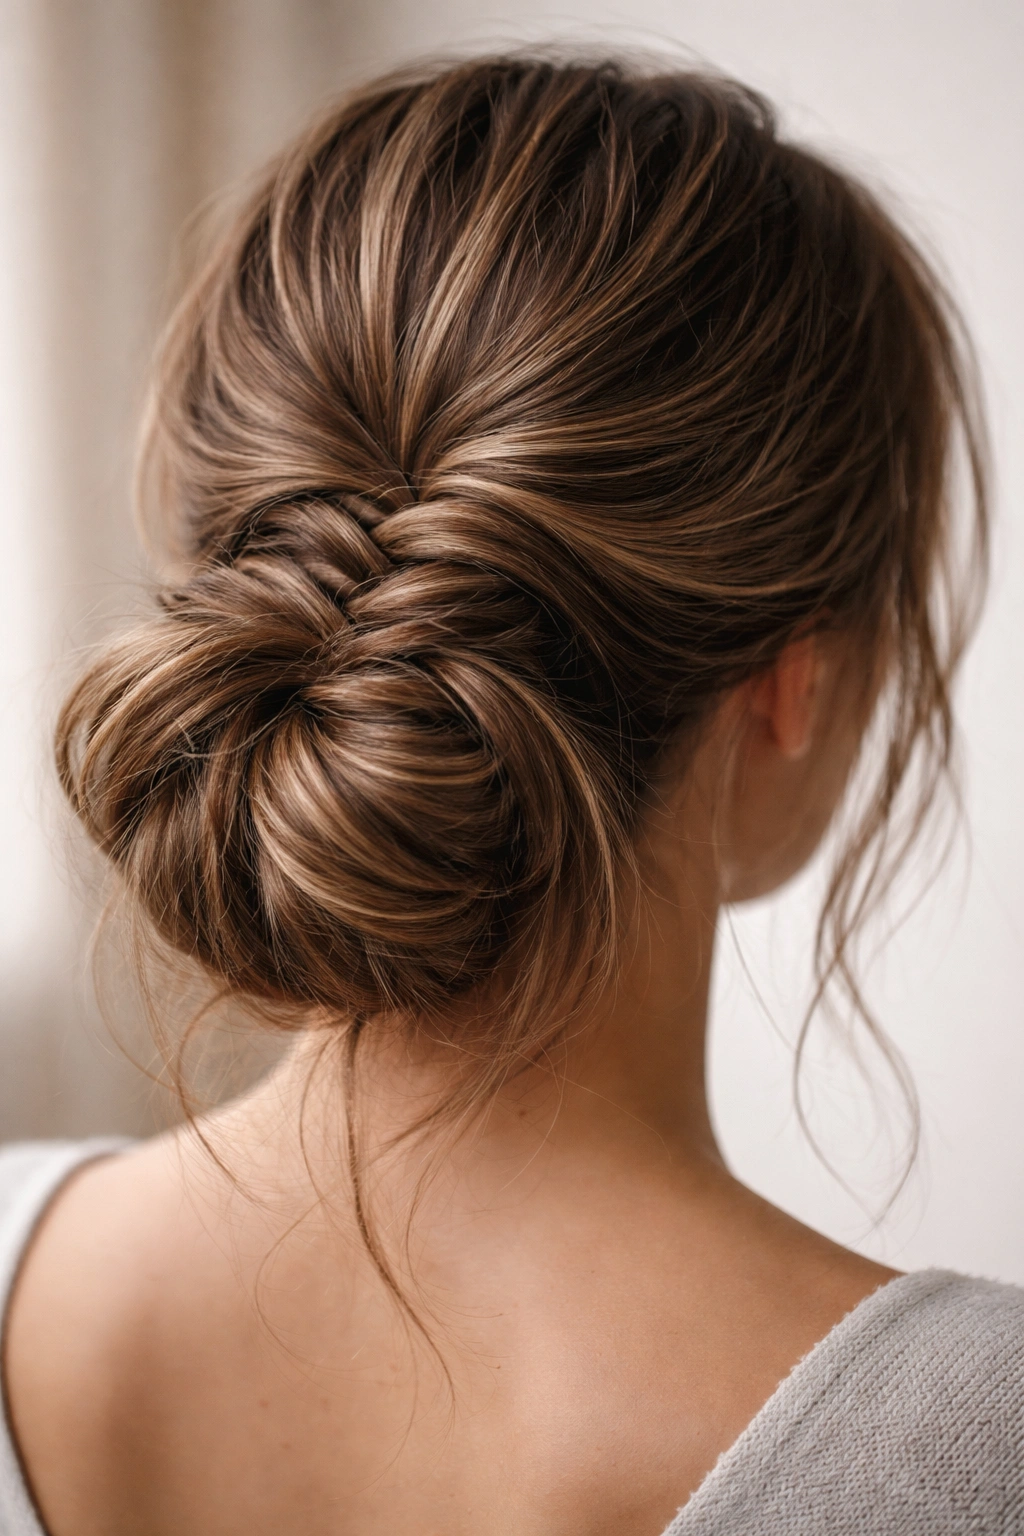
The fishtail braid is where thick hair truly shines — it’s a show-stopping technique that looks intricate and deliberately styled. Converted into a low bun, a fishtail creates a bun that’s visually interesting from every angle, with the characteristic woven appearance of a fishtail showing through the bun shape.
Why Fishtails Are Made for Thick Hair
A fishtail braid requires volume to look good, and thick hair is ideal for this technique. The fishtail’s side-to-side weave pattern shows clearly in thick strands, and the finished braid has a fuller, more textured appearance than finer hair can achieve. The multiple intersecting strands in a fishtail also make it incredibly secure — your bun will stay put even during active days or in humid conditions. Thick hair makes a fishtail look intentionally complex rather than delicate, so it reads as sophistication rather than fragility.
How to Create the Messy Fishtail Low Bun
- Brush hair into a low ponytail, leaving a small face-framing section
- Divide the ponytail into two large sections (thicker than you would for a standard braid)
- Take a thin strand from the outer edge of the right section and cross it over to the left section
- Take a thin strand from the outer edge of the left section and cross it over to the right section
- Continue this pattern, always taking from the outer edge and crossing to the opposite side, working down the full length of the ponytail
- Secure the finished fishtail with a small elastic
- Loosely coil the fishtail around itself to form a bun, positioning it to show off the woven pattern
- Secure with 3-4 bobby pins, tucking them in where they won’t be visible
- Gently pull sections of the fishtail outward to release the weave and create fullness
Making Your Fishtail Look Intentionally Textured
The magic of a fishtail bun with thick hair is in the loosening step. After you’ve coiled and pinned your bun, spend 2-3 minutes deliberately pulling the fishtail sections outward. Start at the top and work down, creating a graduated effect where the top is looser and more textured than the bottom. This pulling doesn’t unravel the braid — it just releases it slightly, creating pockets of texture and visible weave. The result looks effortlessly styled rather than too-neat, which is the entire goal of a messy bun.
Pro tip: A fishtail bun photographs beautifully because the weave pattern is visible and interesting — perfect if you need this style for photos or special events.
6. The Pinned Section Low Bun
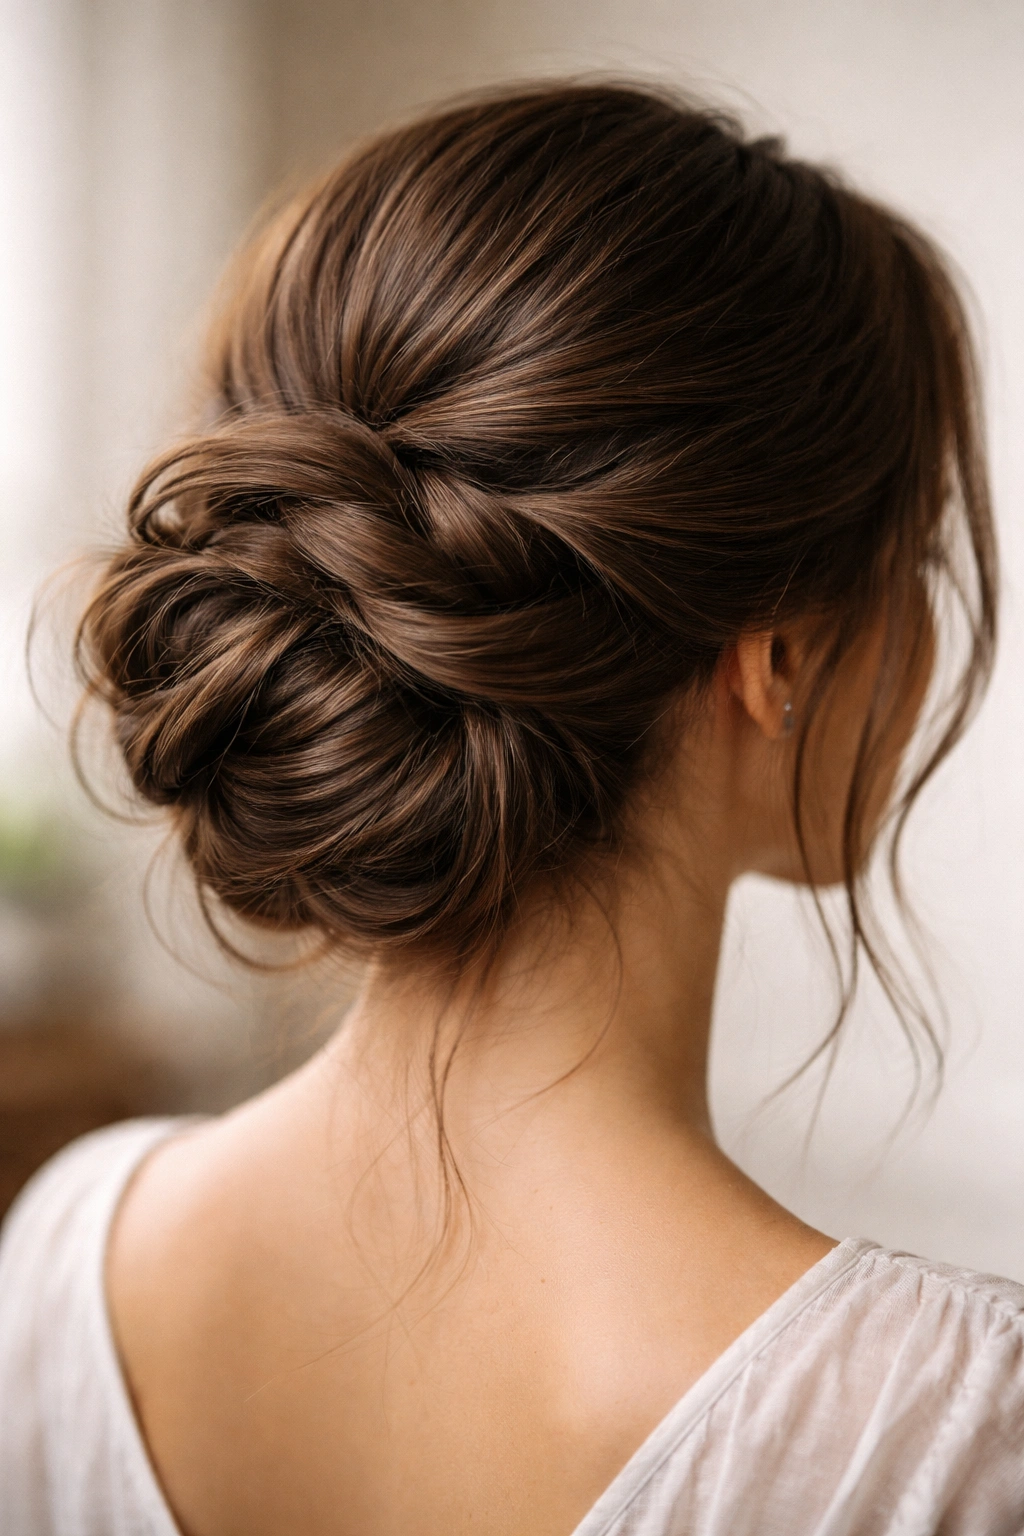
The pinned section bun is pure artistry — instead of twisting or braiding your entire ponytail, you’re creating a bun by pinning individual curved sections of hair, which creates a ruffled, romantic effect that looks unexpectedly intricate. This technique works spectacularly with thick hair because each pinned section is substantial and visible.
Why Individual Sections Work Best with Thick Hair
Thick hair has the weight and substance to hold curved sections in place without them falling flat or slipping out. Each section you pin creates a distinct visual layer in your bun, and because your hair is thick, these layers show clearly and create a bun with real dimension and depth. The pinned section technique also distributes weight evenly across the back of your head, so there’s no strain or heaviness in a single area — your thick hair’s weight is the asset that makes this style possible.
How to Create the Pinned Section Low Bun
- Gather hair into a low ponytail and secure loosely (you’ll be removing this elastic once sections are pinned)
- Take a 2-3 inch section from the ponytail and curve it gently, creating a loose loop
- Pin this loop in place by inserting a bobby pin through the loop and into the base of the ponytail
- Repeat with the next section, positioning it slightly overlapping the first section to create a layered effect
- Continue pinning sections around the base of the ponytail, working your way around until the entire ponytail is incorporated into pinned loops
- Once all sections are pinned, carefully remove the ponytail elastic (gently work it free between the pinned sections)
- Adjust sections so they overlap and create a full, ruffled bun shape
- Add a final 1-2 bobby pins for security if needed
Achieving Balanced Fullness and Shape
The pinned section technique requires patience because you’re essentially building your bun piece by piece. With thick hair, each section will have natural texture and curve, so you don’t need to overthink the shape — let the sections stack naturally and adjust as you go. The key is varying the size of each section slightly; slightly larger sections create a fuller bun, while smaller sections add definition and detail. After you’ve pinned everything, step back and assess the overall shape — you should see a bun that’s fuller on the sides and back, with a slightly tapered front that frames your face.
Pro tip: Rough up each pinned section slightly after pinning to make your bun look more intentionally textured and less manicured.
Final Thoughts
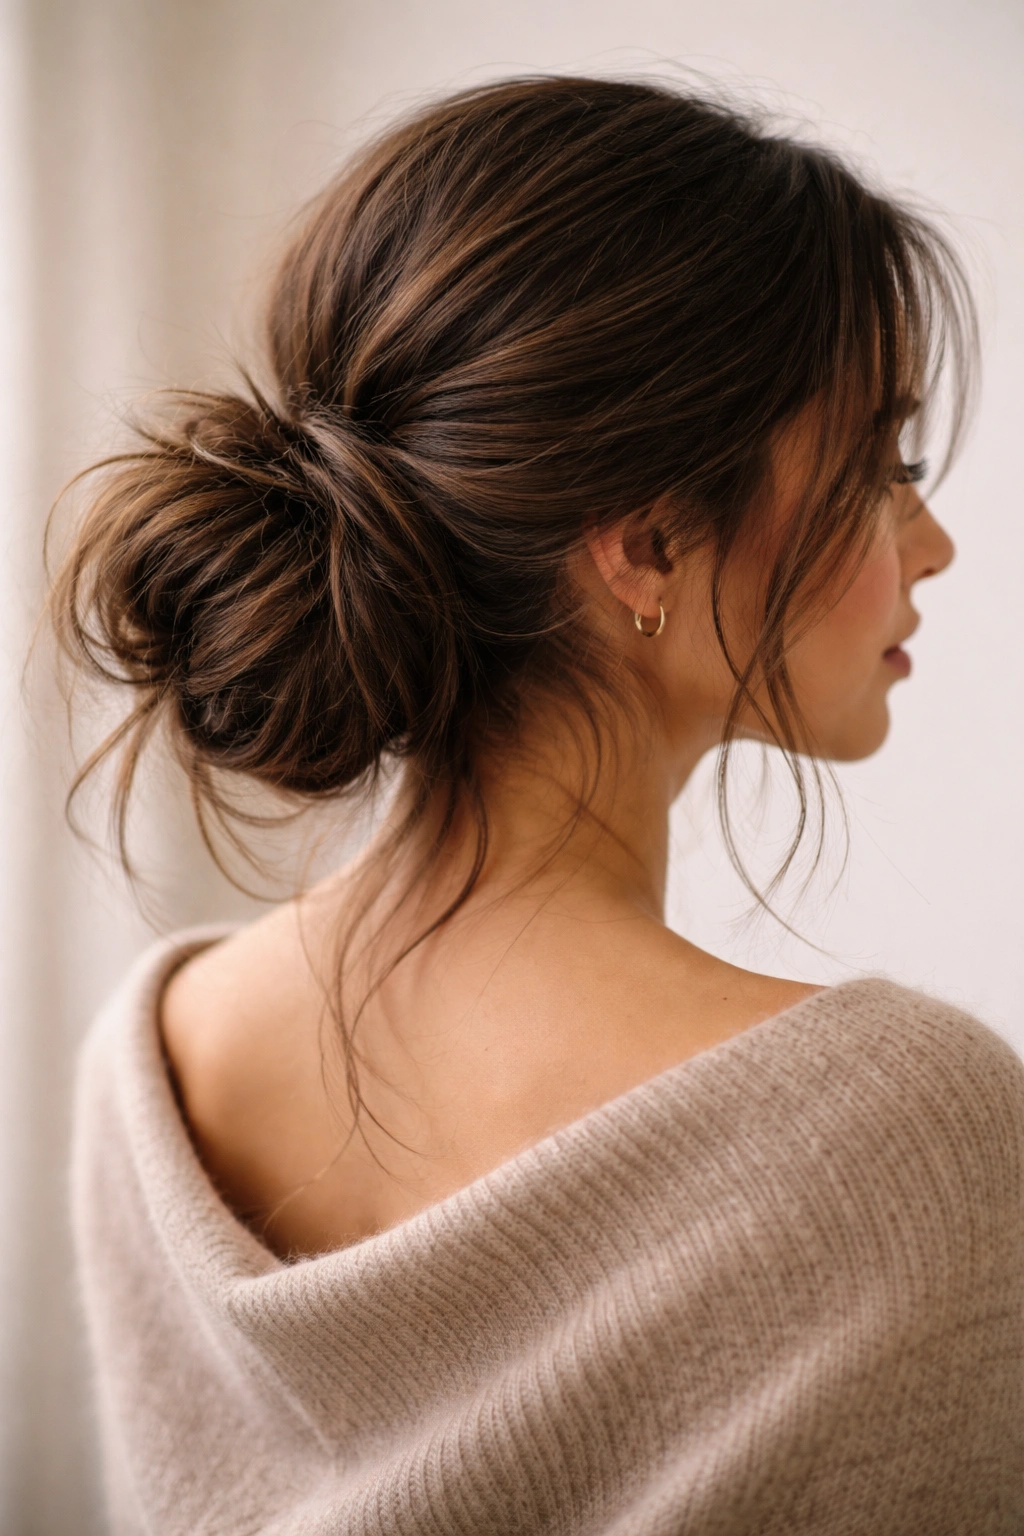
The beauty of a low messy bun is that it actually gets better with the texture and weight that thick hair naturally has. These six styles each approach the messy-bun aesthetic differently, giving you options depending on your mood, the occasion, and how much time you want to spend styling. The twisted version works for rushed mornings, the braided style suits days when you want something more polished, and the pinned section technique is perfect when you want to look like you’ve invested real effort into your appearance.
The common thread through all these styles is that they embrace your hair’s thickness rather than fighting it. Thick hair holds texture longer, maintains intricate styles without slipping, and naturally creates that effortlessly styled appearance that thinner hair has to work much harder to achieve. Once you master the basic techniques — twisting, braiding, wrapping, and pinning — you can mix and match them to create new variations and keep your styling routine interesting.
Start with the style that appeals most to you visually and practice it a few times until your hands know the motions. Your low messy bun doesn’t need to be perfect; in fact, the slight imperfections are what make it look intentionally undone. After your first few attempts, you’ll develop your own small adjustments and shortcuts that make the style work best with your hair’s unique texture and thickness. That’s when styling stops feeling like a chore and starts feeling effortless.
