Claw clips are having a genuine renaissance, and if you’ve got curly hair, you already know why. These little hinged wonders grip texture like nothing else—they don’t slip through waves and coils the way bobby pins do, they don’t create creases the way elastic hair ties do, and they add genuine style instead of just corralling your hair out of the way. The trick is knowing which claw clip style works best for your specific curl pattern and what you’re actually trying to achieve. Whether you want an effortless half-up moment, a full updo that lasts all day, or a playful accent that shows off your coils, there’s a claw clip style designed for exactly that.
The beauty of claw clips for curly hair lies in their versatility combined with their forgiving grip. Unlike sleek straight hair that needs tension and definition, curly hair benefits from the loose, textured hold that claw clips provide naturally. You can create undone, lived-in styles that actually look intentional instead of accident-prone. You can grab your hair quickly without damaging it or creating frizz zones. And honestly, they just look cooler than most other hair accessories when you’re wearing them in your curls.
What follows aren’t just claw clip styles—they’re real, tested approaches that work across different curl types and densities. You’ll find what works for your specific hair and learn how to customize these looks to match your daily vibe, whether that’s polished-professional or weekend-casual.
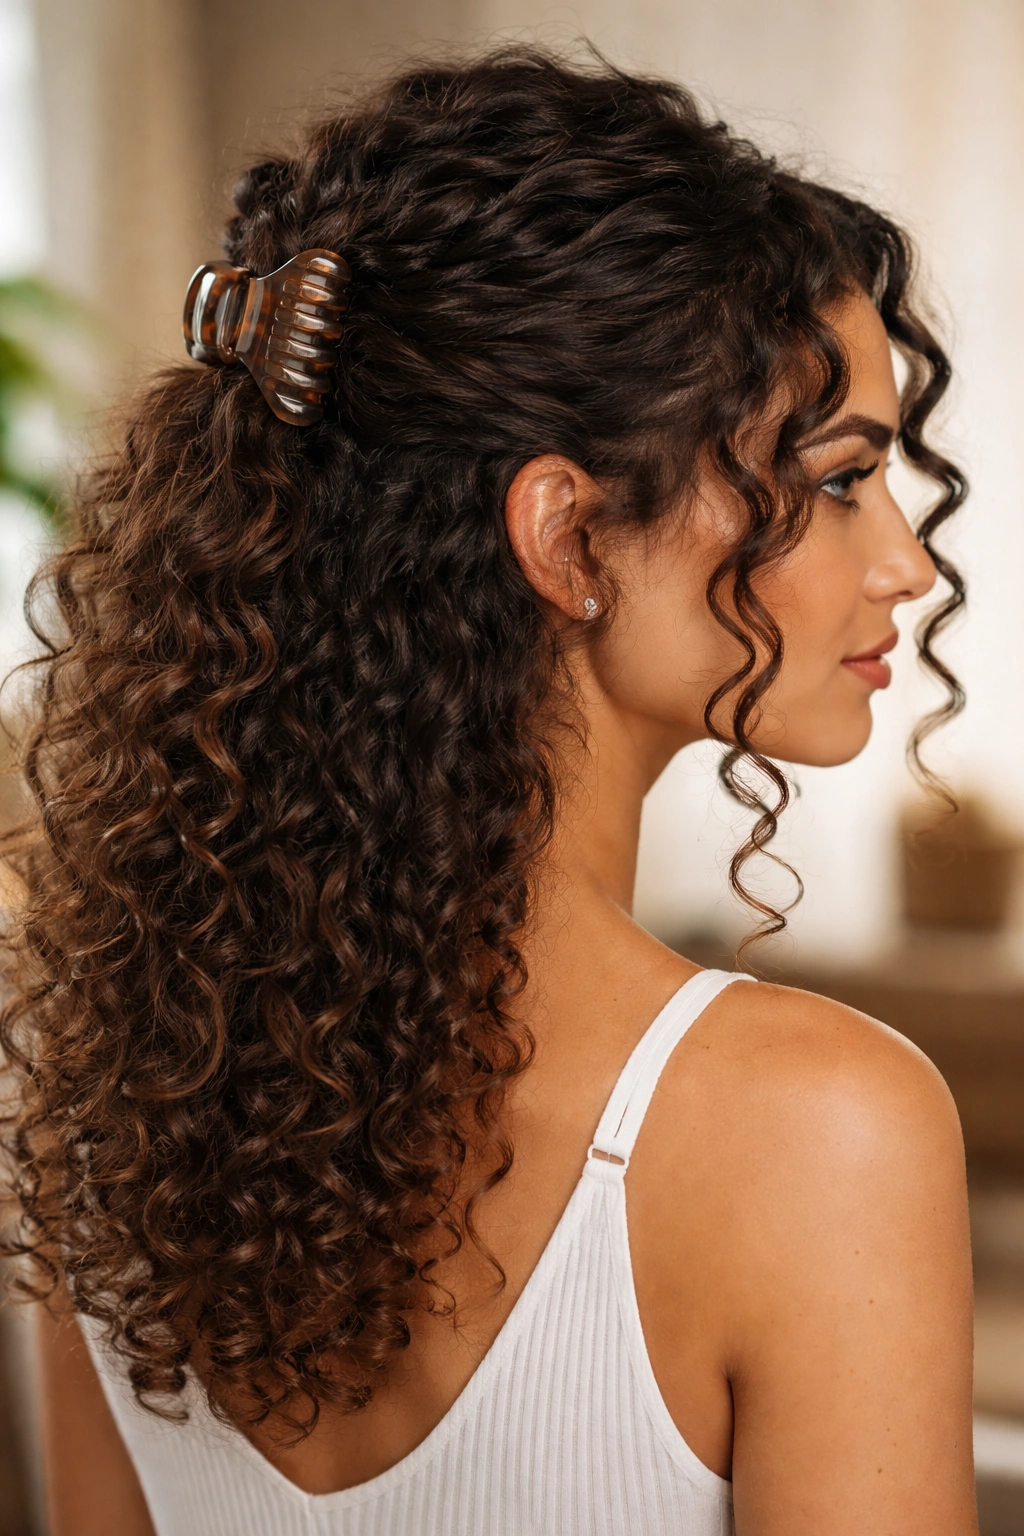
1. The Effortless Half-Up Claw Clip

This is the everyday workhorse style, and it’s deceptively simple to master. Flip your head forward, gather the top section of your curls (from about temple to temple across the crown), flip back upright, and secure everything with a medium-sized claw clip right at the nape of your neck or slightly lower. The point isn’t perfection—loose strands and flyaways actually add to the appeal here. This style works because it takes the weight off the back of your neck without going full updo, so your curls can still showcase their full texture while being partially off your face.
Why It’s Perfect for Daily Wear
The half-up claw clip style keeps hair away from your face without requiring any product, heat, or complicated technique. It takes literally 30 seconds and honestly looks better the messier you keep it. Your curls still have complete freedom to move and spring at the back, which means your curl pattern gets maximum visibility. This is the style you’ll reach for when you want to look intentional without actually trying.
How to Make It Work for Your Curl Type
- Fine curls: Use a smaller claw clip (the tiny tortoiseshell ones work beautifully) and grab less hair so it doesn’t feel heavy or weigh your curls down at the crown.
- Thick/dense curls: Go for a larger clip and don’t hesitate to grab a generous section—your hair can handle it and actually looks more balanced when fully secured.
- Mixed curl pattern: Gather just the loose pieces and smaller curls that frame your face, leaving denser sections down—this creates asymmetric texture that looks intentional.
Pro tip: Grip the clip from underneath rather than on top, then slide it up your gathered hair about an inch before fully closing. This keeps curls from getting pinched at the roots and prevents that awkward dent.
2. The Full Updo Claw Clip Twist
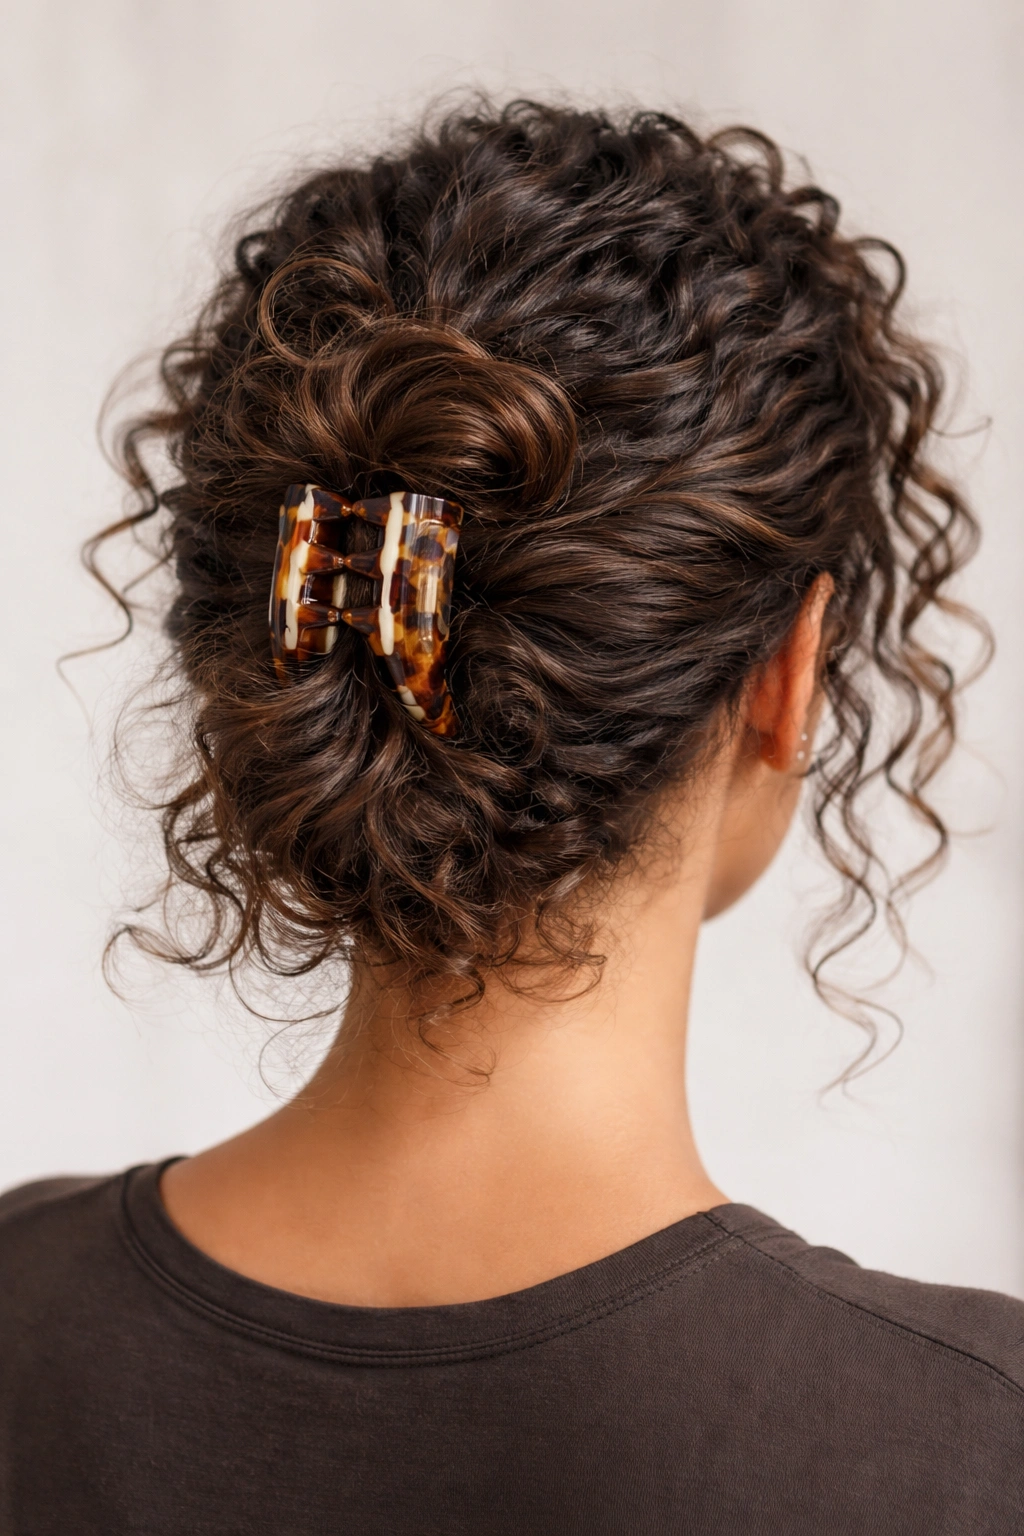
Ready for the statement version? Gather all your hair at the crown or mid-head, twist or loosely braid it on itself, and secure the entire bundle with a jumbo claw clip. This works especially well for second-day or third-day curls that have set and clumped together—it’s actually the moment when many curly-haired people achieve their best texture. The twist creates visual interest and keeps everything locked in place for hours, whether you’re going to the gym, running errands, or settling in for a full workday. The key is not over-twisting—loose, relaxed twists look infinitely better than tight, strained ones.
Why This Style Lasts All Day
The full updo grip means your hair stays exactly where you put it without slowly sliding throughout the day. Claw clips naturally distribute pressure across a broader surface area than bobby pins, which means less tension on individual hair strands and less damage overall. You’re also working with your curl pattern’s natural clumping rather than fighting it, which is why this style stays put so effectively.
Making This Work Across Different Hair Densities
- Fine-textured curls: Use a medium clip and don’t overthink the twist—even a gentle, barely-there coil will hold fine curls securely.
- Thick, dense curls: Go full-size jumbo claw and create a more defined twist so there’s visual weight to match your hair’s actual volume.
- Coily/kinky texture: A loose, looped twist works better than a tight spiral—your coils will grip themselves and the clip without needing excessive tension.
Insider note: The third or fourth day of your curl pattern is actually ideal for this style. By then, your curls have naturally banded together and will hold a twist far more securely than freshly washed curls.
3. The Textured Top Knot with Claw Clip
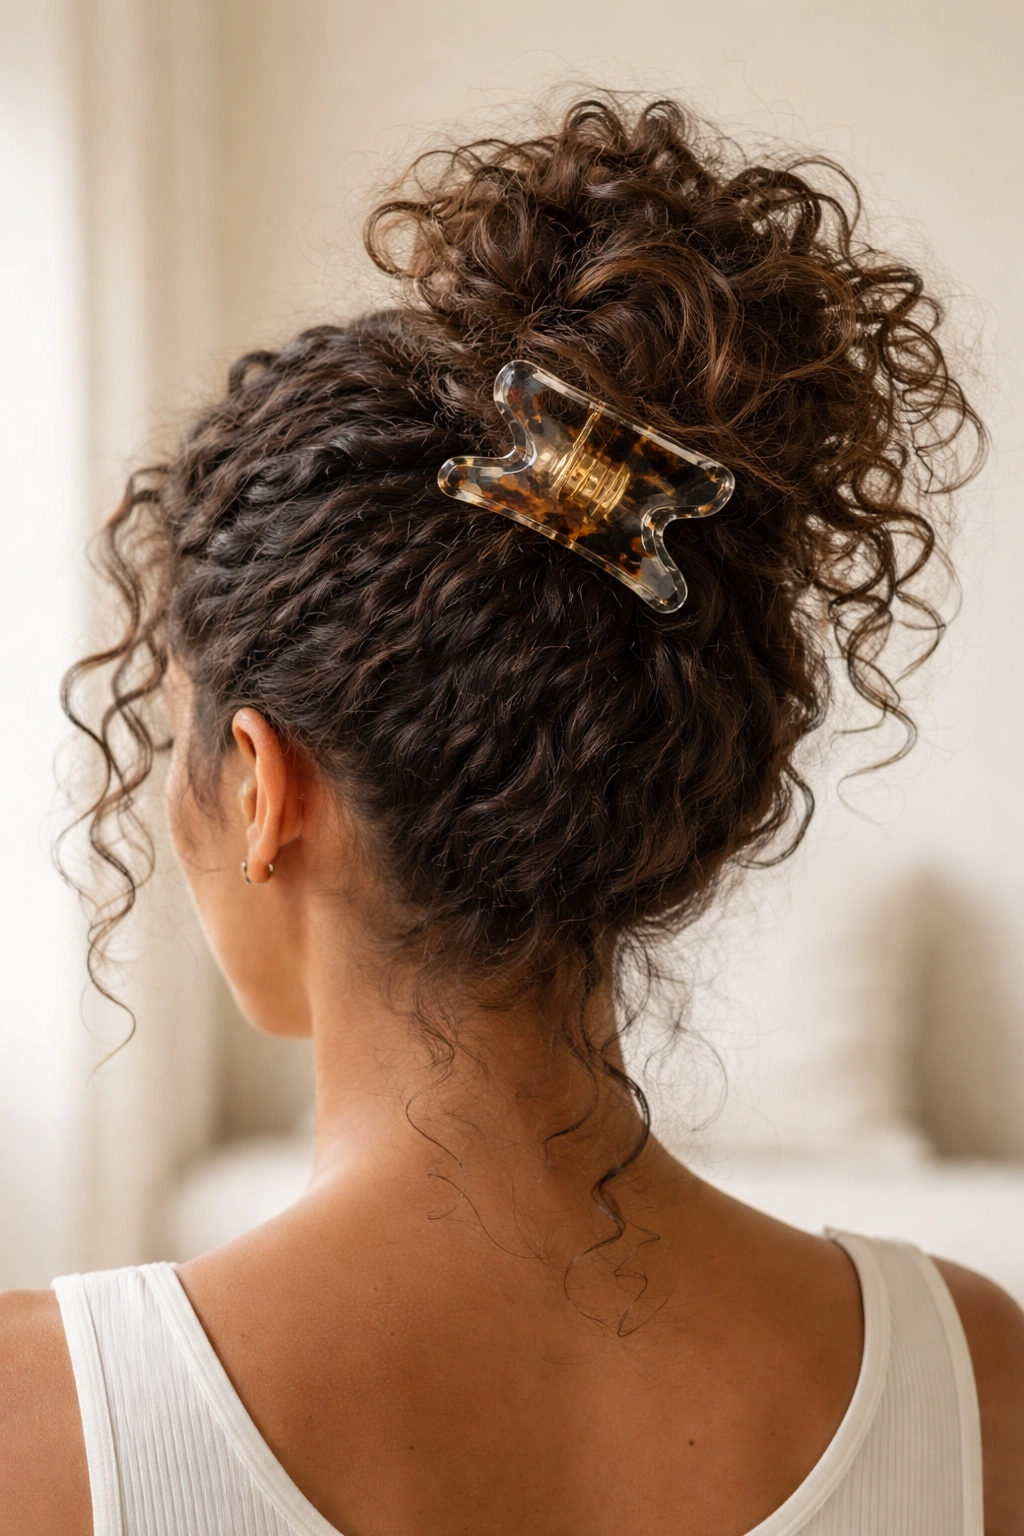
Instead of wrapping your hair into a tight bun, gather everything into a high ponytail, loop it into a very loose coil or knot shape, and secure the tail and the coil together with an oversized claw clip. This version celebrates the actual texture of your curls instead of smoothing everything down. The knot doesn’t need to be neat or symmetrical—in fact, looser and slightly messier versions look far more intentional. This style works beautifully when you want your hair completely off your neck but still showing off texture.
Why Texture Matters in Top Knots
A traditional tight bun can actually flatten curls permanently if worn regularly, creating dents that take days to bounce out. This loosely clipped version keeps your coils and waves visible and alive while still securing everything. You get the practical benefit of a true updo without the aesthetic cost of flattened, controlled curls.
Customizing Your Top Knot by Curl Pattern
- Loose waves: A single large coil works beautifully; the waves naturally create a pretty spiraled shape that doesn’t need fussing.
- Defined ringlets: Let multiple separate curls loop around each other naturally; the individual curl definition adds visual interest and dimension.
- Tight coils: Two or three smaller coils pinned together with one clip creates height and volume without overstressing individual coils.
Worth knowing: You can create extra height and drama by gently pulling at the outer edges of your knot once it’s clipped—this creates a softer, more textured silhouette than if you leave it compact.
4. The Twisted Crown Claw Clip
Take two sections of hair from either side of your head, twist each section loosely as you move toward the back of your head, then cross the two twists at the nape and secure them with a claw clip. This is the style that looks far more complicated than it actually is, which is exactly why people always compliment it. The twists frame your face beautifully while keeping shorter pieces and face-framing curls secured without tension. It’s classic enough for professional settings but styled enough to look intentional and deliberate.
Why This Style Photographs Well
The crown placement and twist detail are inherently flattering to your face shape and curls—the twists create visual movement and don’t flatten your hair the way a centered ponytail can. The style draws attention upward and frames your face naturally. You can wear this to work, on a date, or to a casual event and it works in every context.
Adapting the Crown Twist for Your Hair
- Finer curl patterns: Use thinner twists by taking smaller sections, so the weight stays manageable at the crown.
- Thicker curls: Fatter twists made from larger sections actually look more balanced with denser hair.
- Very short or tapered sides: Skip traditional twists and instead braid the sections loosely before crossing and clipping—this creates defined lines that look intentional even with shorter lengths.
Quick fact: The tighter you twist, the more structured the look becomes. For a softer, more romantic vibe, barely twist at all—just gently coil your hair around itself with minimal tension, then clip. It takes zero extra time but transforms the entire aesthetic.
5. The Twisted Side Sweep Claw Clip
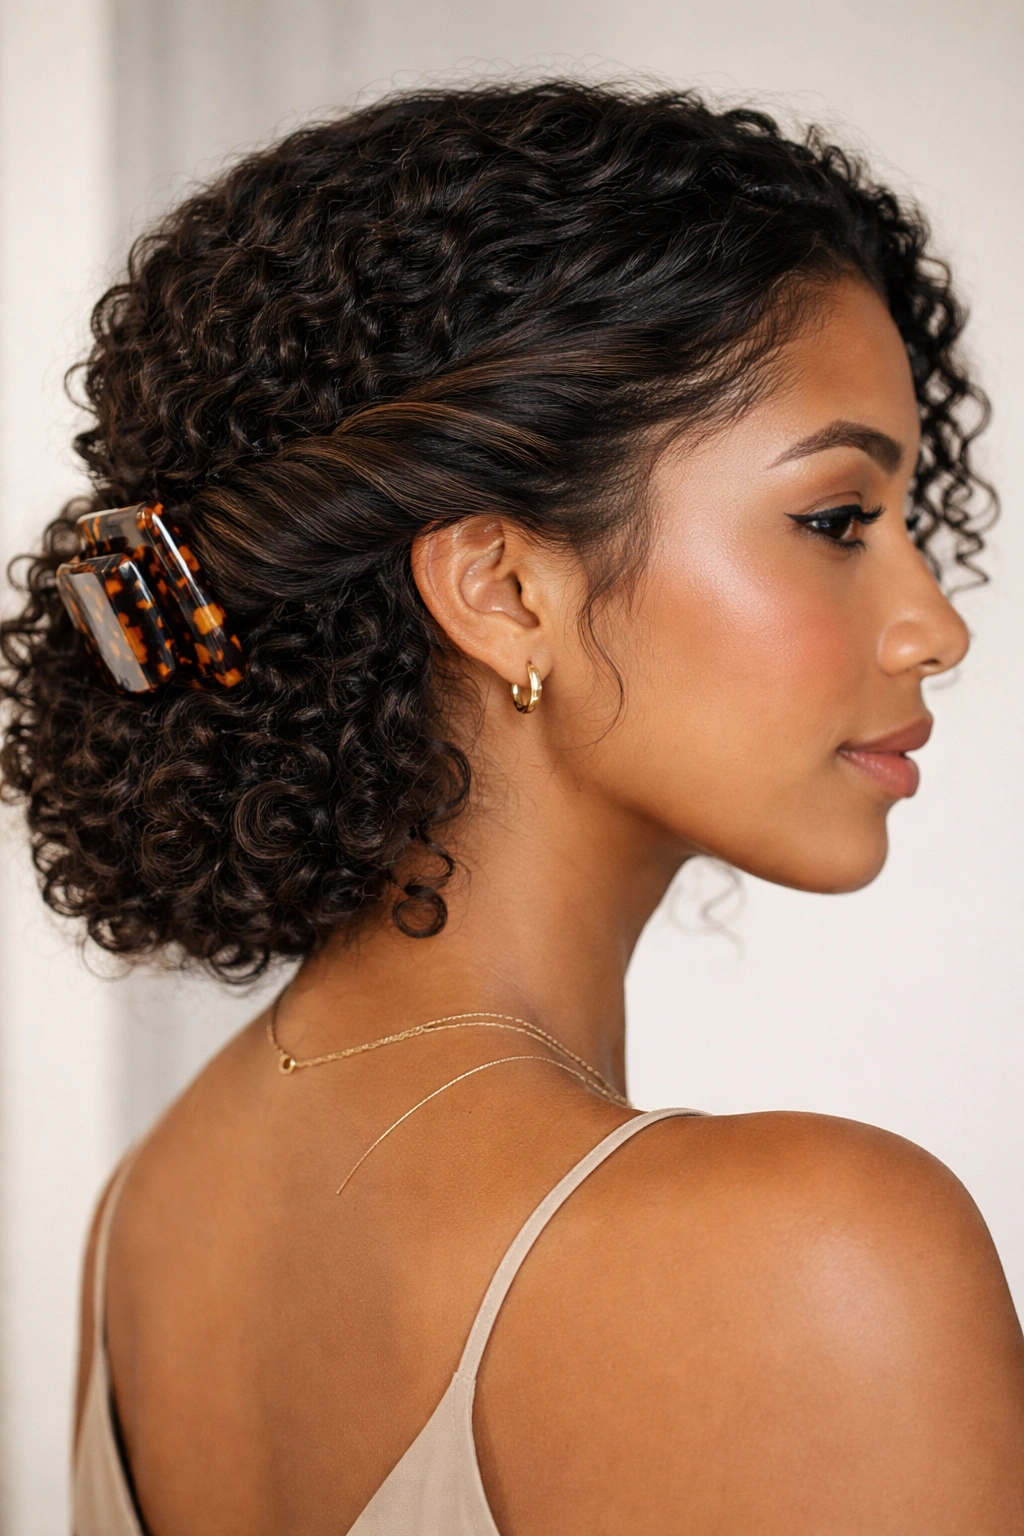
Create a deep side part, then twist the larger section of hair as you sweep it across the back of your head, securing everything with a claw clip tucked low and to one side. This style is phenomenal for asymmetrical face shapes or when you want to emphasize one side of your face. It’s also genuinely one of the easiest styles to execute—you’re literally just twisting in one direction and clipping—but it looks far more put-together than the actual effort suggests.
What Makes Side Sweep Styles Flattering
By shifting all your hair to one side, you create vertical lines that can elongate your face shape. You’re also making a statement without being as bold as a full side ponytail. This sits right in the sweet spot of “clearly intentional but not overdone.”
How to Execute This on Different Curl Densities
- Fine, wavy curls: A loose, barely-visible twist is more flattering than trying to create defined spirals that don’t hold naturally.
- Thick, dense curls: A more pronounced twist with actual dimension reads better against the volume of your hair.
- Combination curl types: Work with the naturally curlier sections by letting them sit closer to your face on the sweeping side, creating depth and visual interest.
Pro tip: Mist your twist lightly with a hold spray before clipping if you want it to last all day without slipping. This is especially helpful if your hair is freshly washed or very soft.
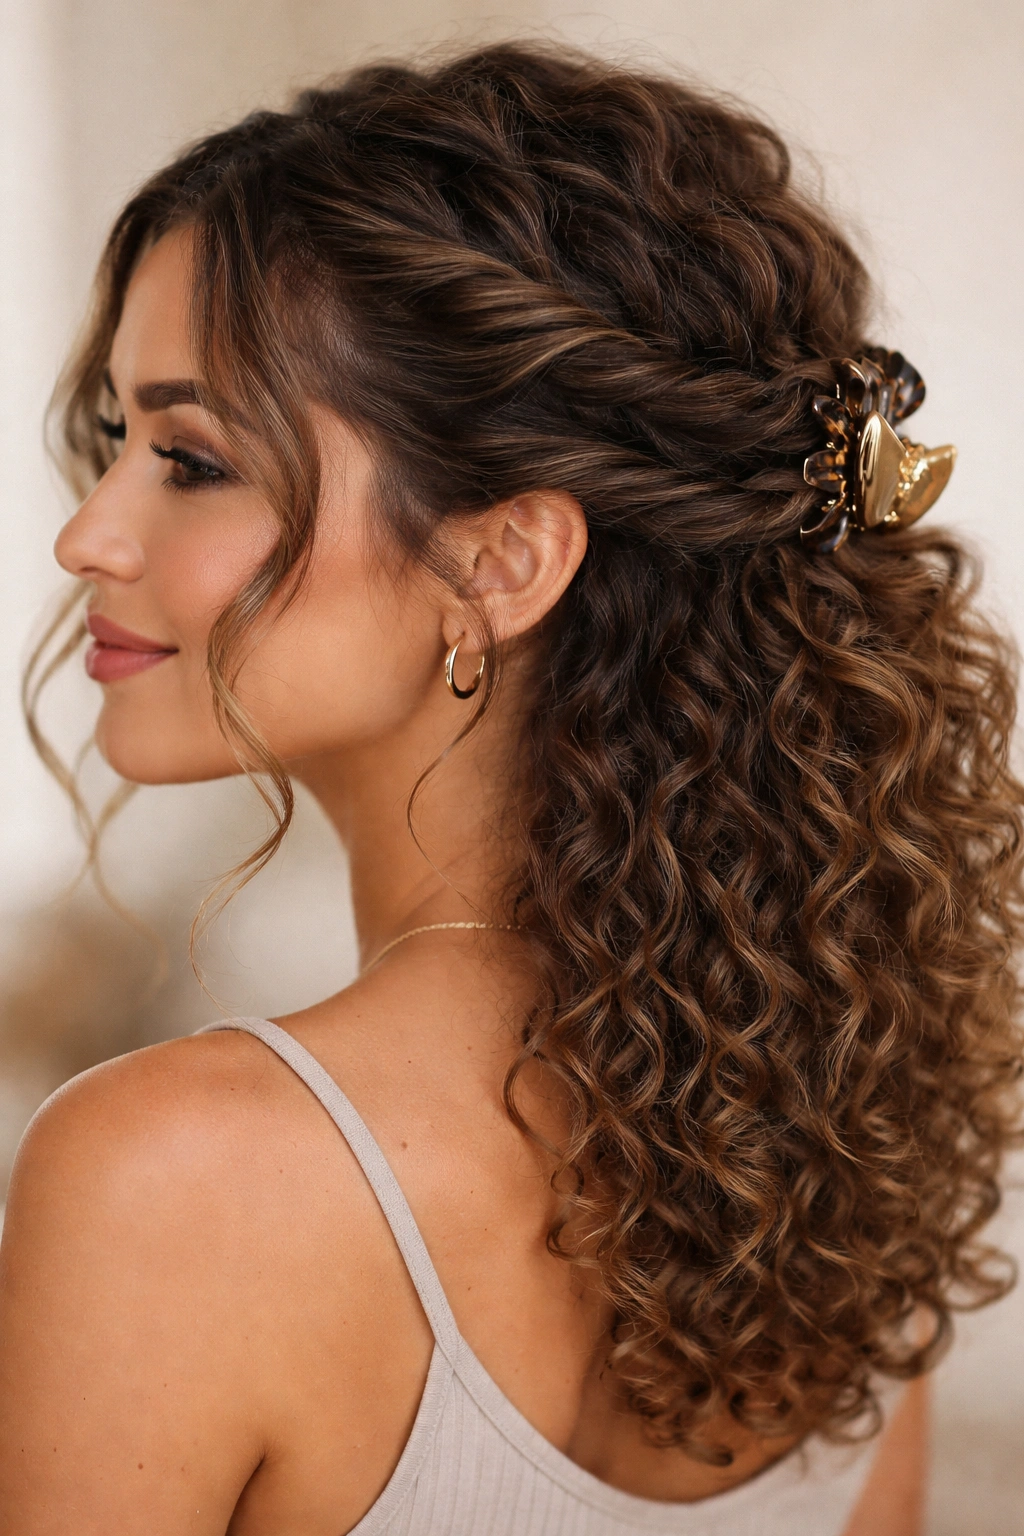
6. The Claw Clip Half-Up with Face-Framing Spirals
Gather your half-up section, but deliberately pull out one or two larger curls or coils from the clipped section and let them frame your face. The clip holds everything in place while the face-framing spirals add softness and dimension. This style works on pretty much every curl type and is particularly stunning when your natural curl pattern creates defined, bouncy coils. You’re essentially using the claw clip to support a style while letting your actual curl definition shine.
Why This Balances Face and Texture
The face-framing elements soften the crown, preventing the style from looking too severe or pulled-back. You get the practical benefits of a secured half-up style while maintaining the romantic, textured vibe that shows off your actual curl pattern. This is what happens when you work with your hair’s natural shape instead of fighting it.
Making This Work on Every Curl Pattern
- Wavy, looser curls: Pull out subtle pieces that blend with the rest of your style, creating soft movement rather than obvious separated sections.
- Defined ringlets: Pull out one or two really beautiful, bouncy coils—their individual definition will create striking face-framing contrast against the clipped-up hair.
- Coily, textured curls: Let small, springy coils frame your face naturally; the way they catch the light and move adds dimension without looking sparse.
Insider note: This style looks exponentially better if you do it on day two or three of your curl pattern when curls have set and clumped together—the face-framing pieces will be more substantial and defined.
7. The Wrapped Ponytail Claw Clip
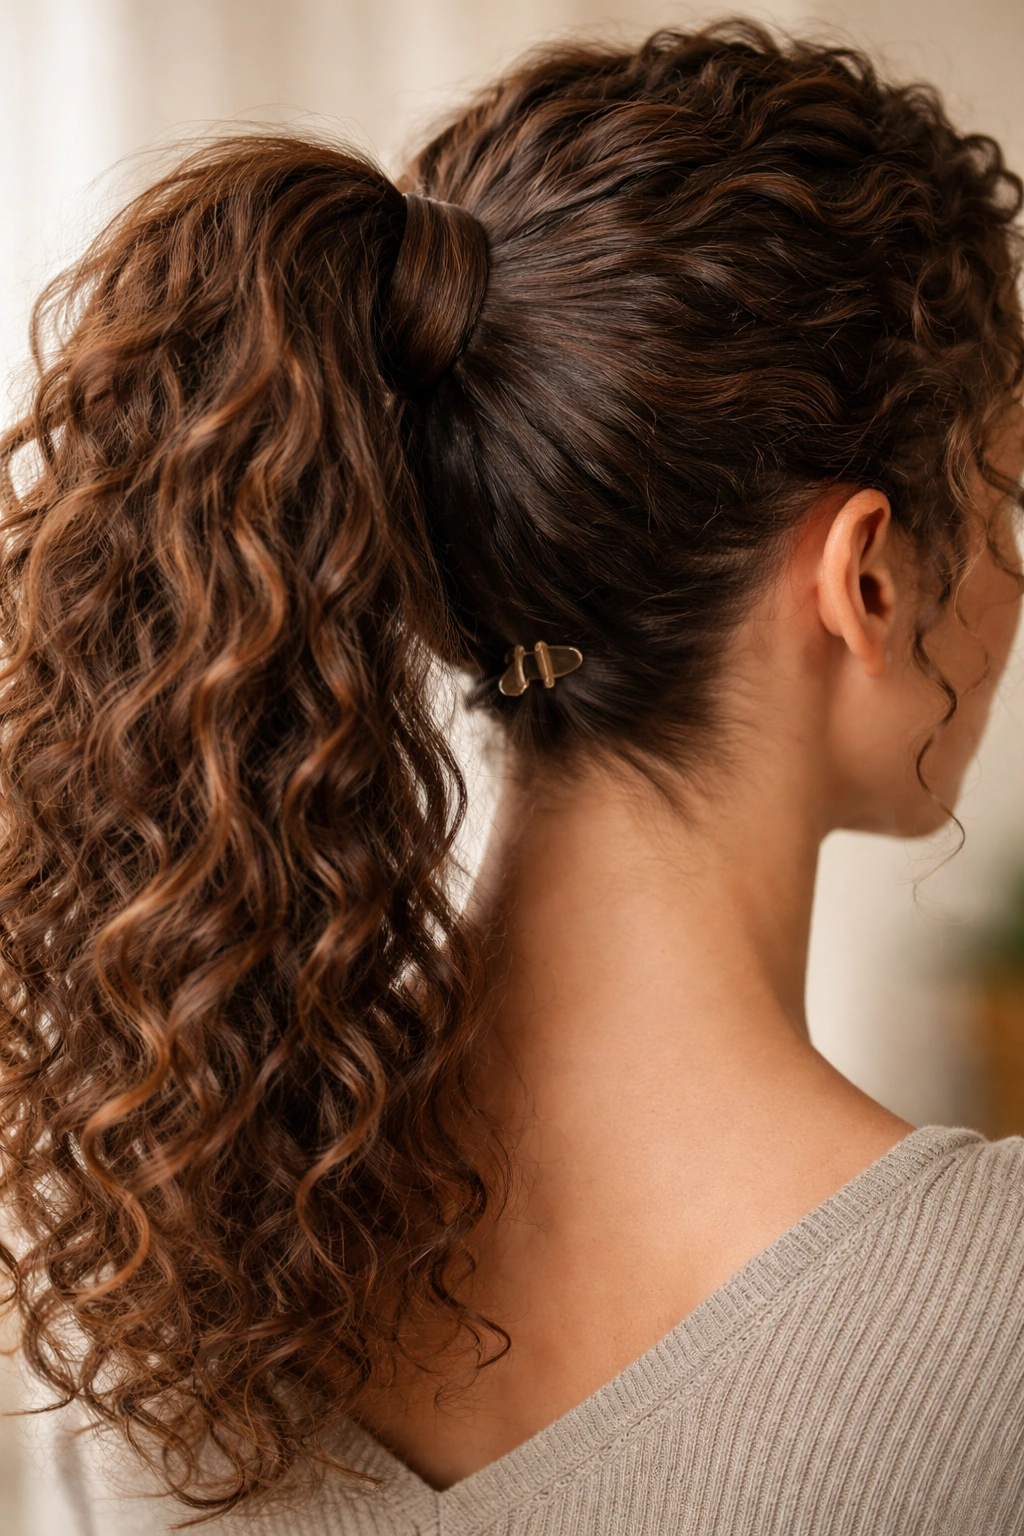
Create a high ponytail, then take a small section from the ponytail itself, wrap it around the base to hide the elastic, and secure the wrap with a small claw clip tucked underneath. This is the style that transforms a basic ponytail into something that looks polished and intentional. It works on every curl type and actually protects the hair at your base from the tension of a traditional elastic. The wrapped section and hidden clip create visual interest and refinement without any actual complexity.
Why Wrapping Changes Everything
A exposed elastic immediately reads as casual or rushed. A wrapped base—especially with a tiny clip tucked discretely underneath—reads as deliberately styled. You’re creating polish with something that takes maybe 15 extra seconds. This is the move that separates “I threw my hair up” from “I styled my hair.”
Adjusting the Wrap Style for Your Hair
- Fine curls: Use an ultra-thin section for wrapping so you don’t lose too much hair from the main ponytail and create a sparse look.
- Thick, dense curls: A more substantial wrap actually looks better proportionally and doesn’t pull from your ponytail noticeably.
- Very curly, coiled hair: Let the wrapping section curl naturally around the base rather than smoothing it down—the texture adds visual interest.
Quick fact: You can make the wrapped section look fuller and more textured by lightly teasing or roughing it up before wrapping, creating dimension in an area that could otherwise look flat.
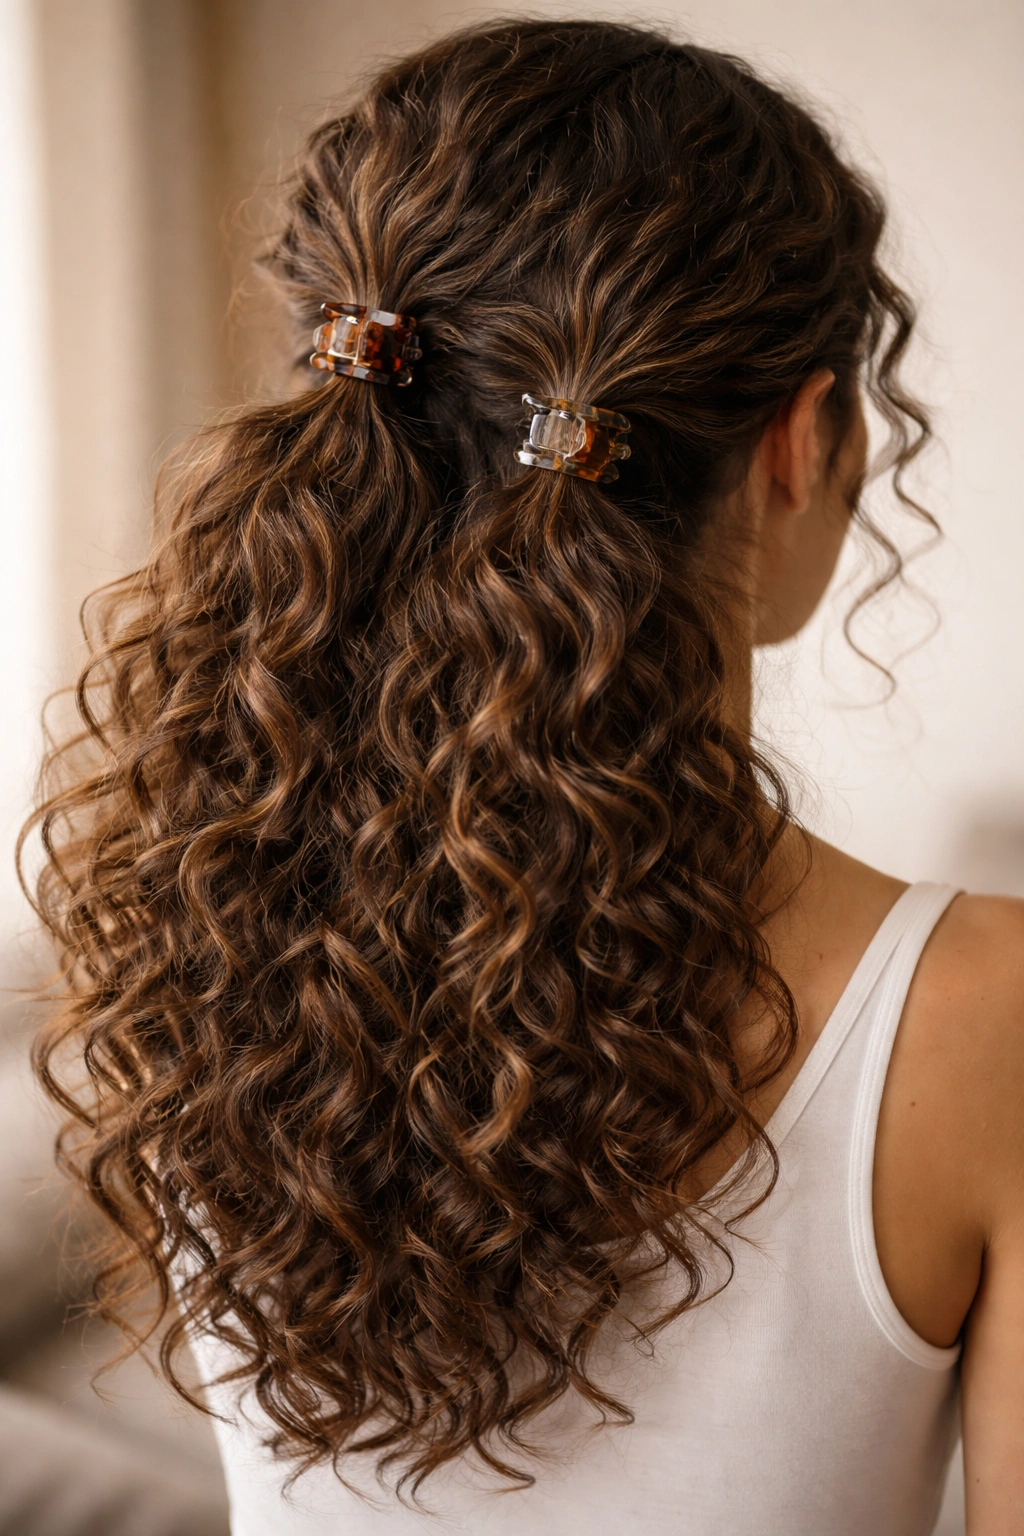
8. The Double Claw Clip Crown

Use two smaller claw clips positioned symmetrically on either side of your crown, each holding a twisted or swept section of hair from that side. This style is peak Y2K-inspired beauty and works surprisingly well for curly hair when executed loosely. Each clip holds just enough hair to show intention without flattening your texture. The symmetry is inherently pleasing to the eye, and you get to show off more of your actual curl pattern than styles that gather everything into one clip.
Why Two Clips Work Better Than One Here
Splitting the visual weight between two clips prevents the “all hair pulled straight up” tension that one centered clip can create. Your hair gets to maintain its natural shape and curl at the crown and back, which is essential for showing off texture. The double placement creates a more interesting visual line than a single centered clip.
Making the Double Clip Balanced on Different Hair Types
- Fine, wavy hair: Smaller clips and lighter sections prevent crown flatness and maintain volume at the top.
- Thick curls: Proportionally larger clips and more substantial sections balance better against your hair’s actual density.
- Asymmetrical curl patterns: Position your clips slightly off-center to account for naturally denser sections on one side.
Pro tip: Twist each section in the opposite direction from the other—one clockwise, one counterclockwise—so they look intentionally coordinated rather than accidentally matched.
9. The Low Claw Clip Bun with Wispy Pieces
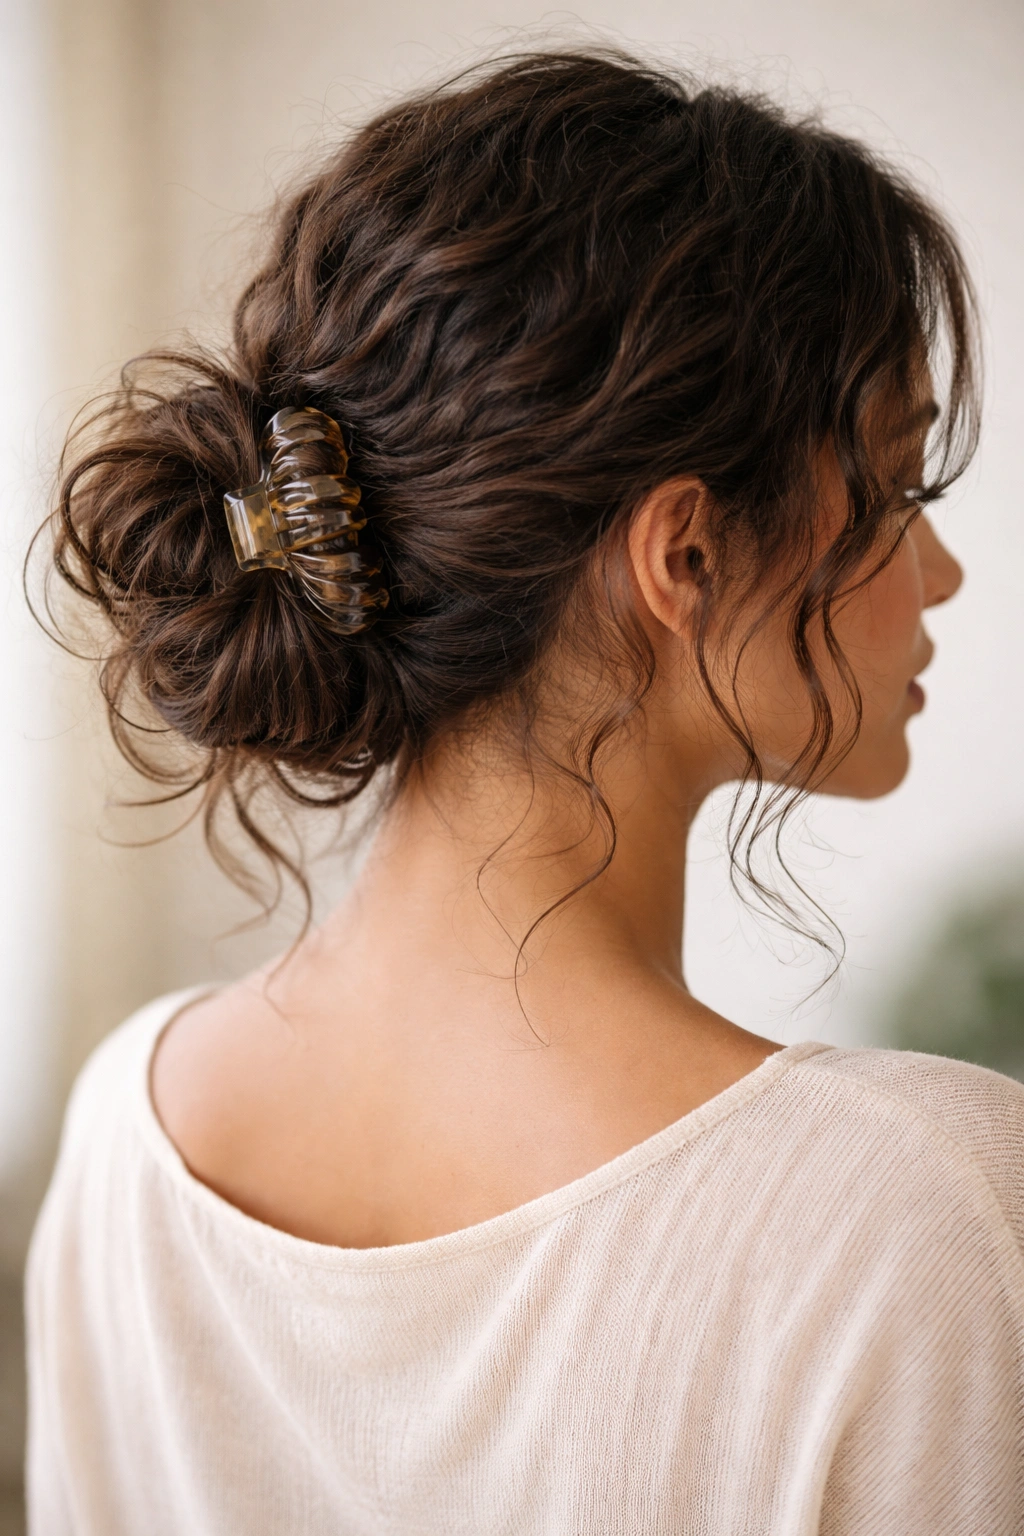
Gather your hair into a low ponytail at the nape of your neck, twist or loosely coil the ponytail, secure it into a soft bun shape with a claw clip, then deliberately let shorter pieces and face-framing curls escape. This is the style for when you actually need your hair completely off your neck (because you’re working out, cooking, or just genuinely tired of hair on your face) but still want to look intentional and even romantic. The wispy pieces prevent the style from reading as utilitarian.
Why Low Placement Changes the Energy
A high bun can look stern or ballet-focused. A low bun instantly feels more relaxed and mature. When you add the texture of actual curls instead of a sleek, polished bun, you get romantic and gentle rather than formal. This is professional-setting appropriate while still celebrating your natural texture.
Customizing Low Bun Placement by Hair Type
- Fine curls: Position your clip slightly lower to avoid concentration of weight at one point, which can create tension.
- Thick, dense curls: Your clip can sit higher without causing problems because the weight distributes across more hair volume.
- Very curly, coiled hair: A looser bun with more wispy pieces prevents the style from reading as overly controlled or flat.
Worth knowing: This style actually looks better if your bun isn’t perfectly neat. Gently pulling at the outer edges after clipping creates a softer, more organic silhouette that complements curls far better than tight, controlled bunning.
10. The Three-Section Cascading Claw Clip
Divide your hair into three sections—left, center, right—create a loose braid or twist pattern by bringing each section forward and securing with small claw clips as you go. This is more complex than the other styles but actually easier than a traditional braid because you’re using clips to hold sections rather than maintaining hand tension throughout. The cascading effect creates dimension and visual movement, and the strategic clip placement becomes part of the style’s appeal.
Why Cascading Techniques Show Off Texture
Instead of a tight braid that flattens everything, you’re creating separated sections that showcase individual curl coils and waves. Each clip acts as a visual punctuation mark, and the spacing between clips creates rhythm and movement in your style. This is the approach for when you want maximum texture visibility with maximum style complexity.
Adapting Cascading Clips Across Curl Patterns
- Loose waves and wavy curls: Three clips create natural sections that emphasize wave patterns and add gentle structure.
- Defined ringlets: Each clip placement separates individual coils, creating visual drama and dimension that wouldn’t be visible in a single gathered style.
- Very coily, textured hair: The spacing between clips prevents that compressed, flat feeling and lets your natural bounce show through.
Quick fact: You don’t need to create an actual braid pattern—you can simply create three separate twisted or swept sections and clip each one, leaving them slightly separated. The clips are doing the real work of holding everything while your curls do all the visual heavy lifting.
Final Thoughts
The right claw clip style for your curls depends on what you’re trying to accomplish—quick morning styling, all-day security, professional polish, or just celebrating your actual curl pattern without fussing. The beautiful truth about claw clips and curly hair is that they work with your natural texture instead of against it. You’re not trying to smooth or control your hair; you’re just redirecting it and letting it do what it already does beautifully.
Start with whichever style feels most achievable for your typical day, then experiment with the others as you get comfortable. Most of these styles take under two minutes once you’ve done them once or twice. The learning curve is genuinely minimal, and the payoff in terms of quick styling and actually protecting your hair health is massive. Your curls will thank you, and honestly, you’ll get more compliments on these styles than on most of the hairstyles you’ve attempted with heat tools and products.