Wavy hair has a natural texture that can work beautifully in bun styles—when you know which ones enhance your waves rather than fight them. The right bun isn’t just about pulling your hair up; it’s about working with your wave pattern to create a polished look that actually lasts all day. Trying to force wavy hair into bun styles designed for straight hair often leads to frizz, loose pieces escaping almost immediately, and that deflated feeling by noon.
The secret is choosing buns that either celebrate the volume and movement your waves naturally create, or use techniques that anchor your waves securely without flattening them. Some styles play up the texture for an intentionally undone, romantic look. Others keep your waves controlled while maintaining dimension and interest. Whether you’re heading to the office, a casual gathering, or somewhere more formal, there’s a bun style that works for wavy hair.
Here’s what makes buns for wavy hair different from standard bun tutorials: the techniques need to account for how your hair grips itself, how weight distributes differently through textured hair, and which methods actually hold without requiring a pound of product. The styles below have all been tested specifically on wavy hair and come with the exact modifications that make them work.
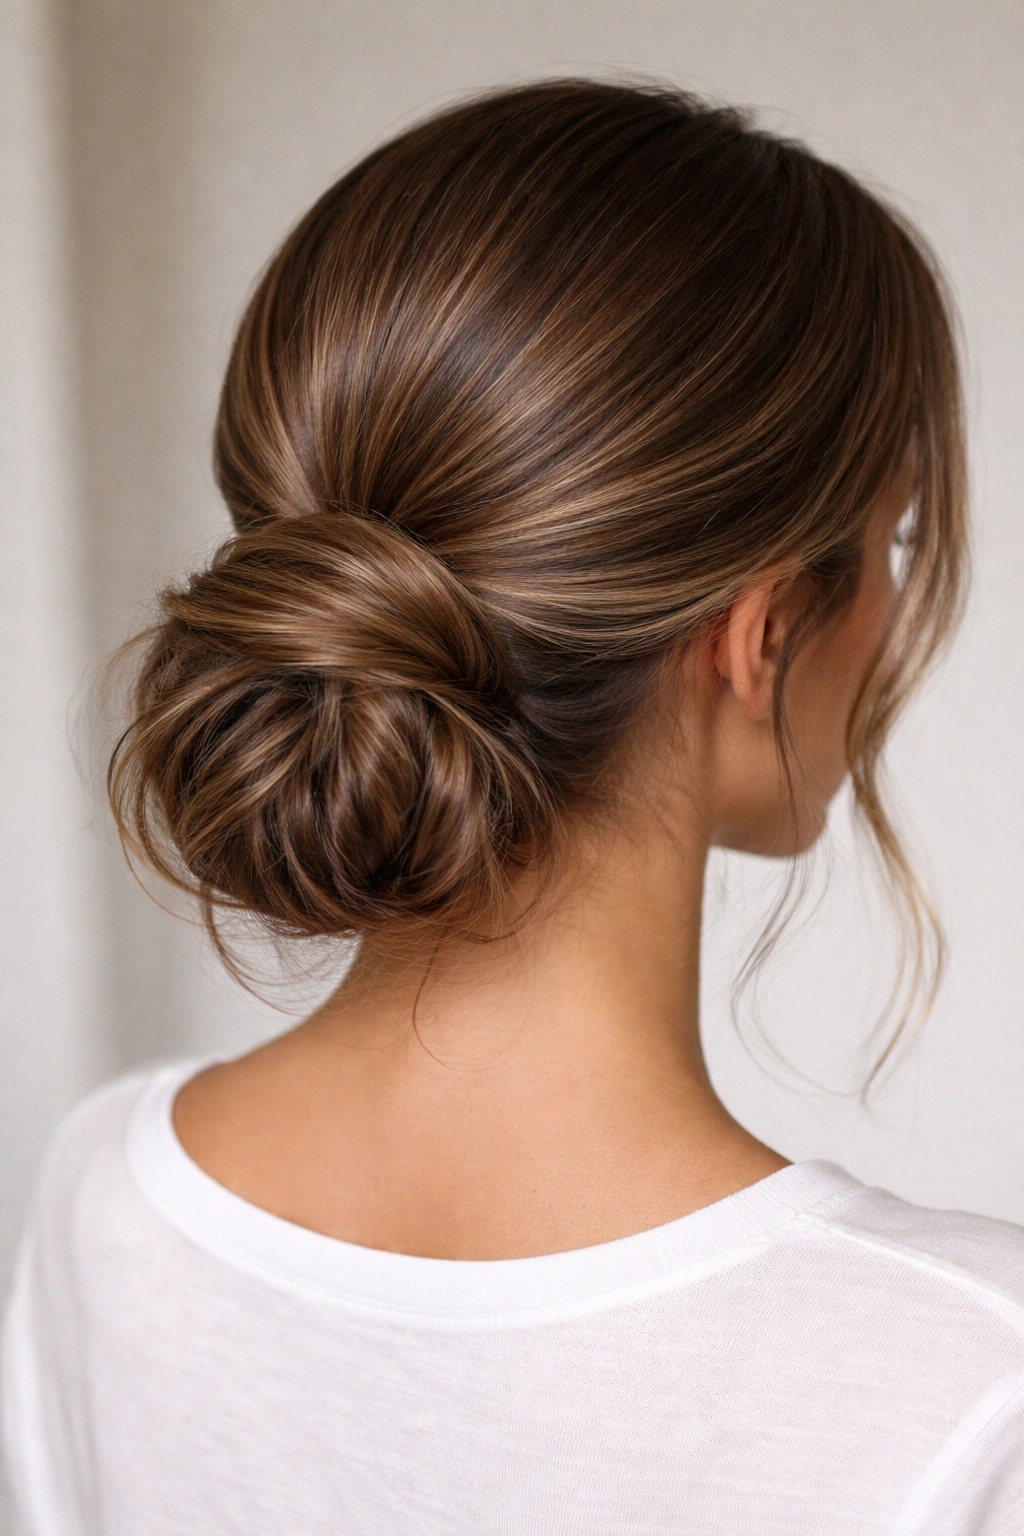
1. The Tousled Low Bun
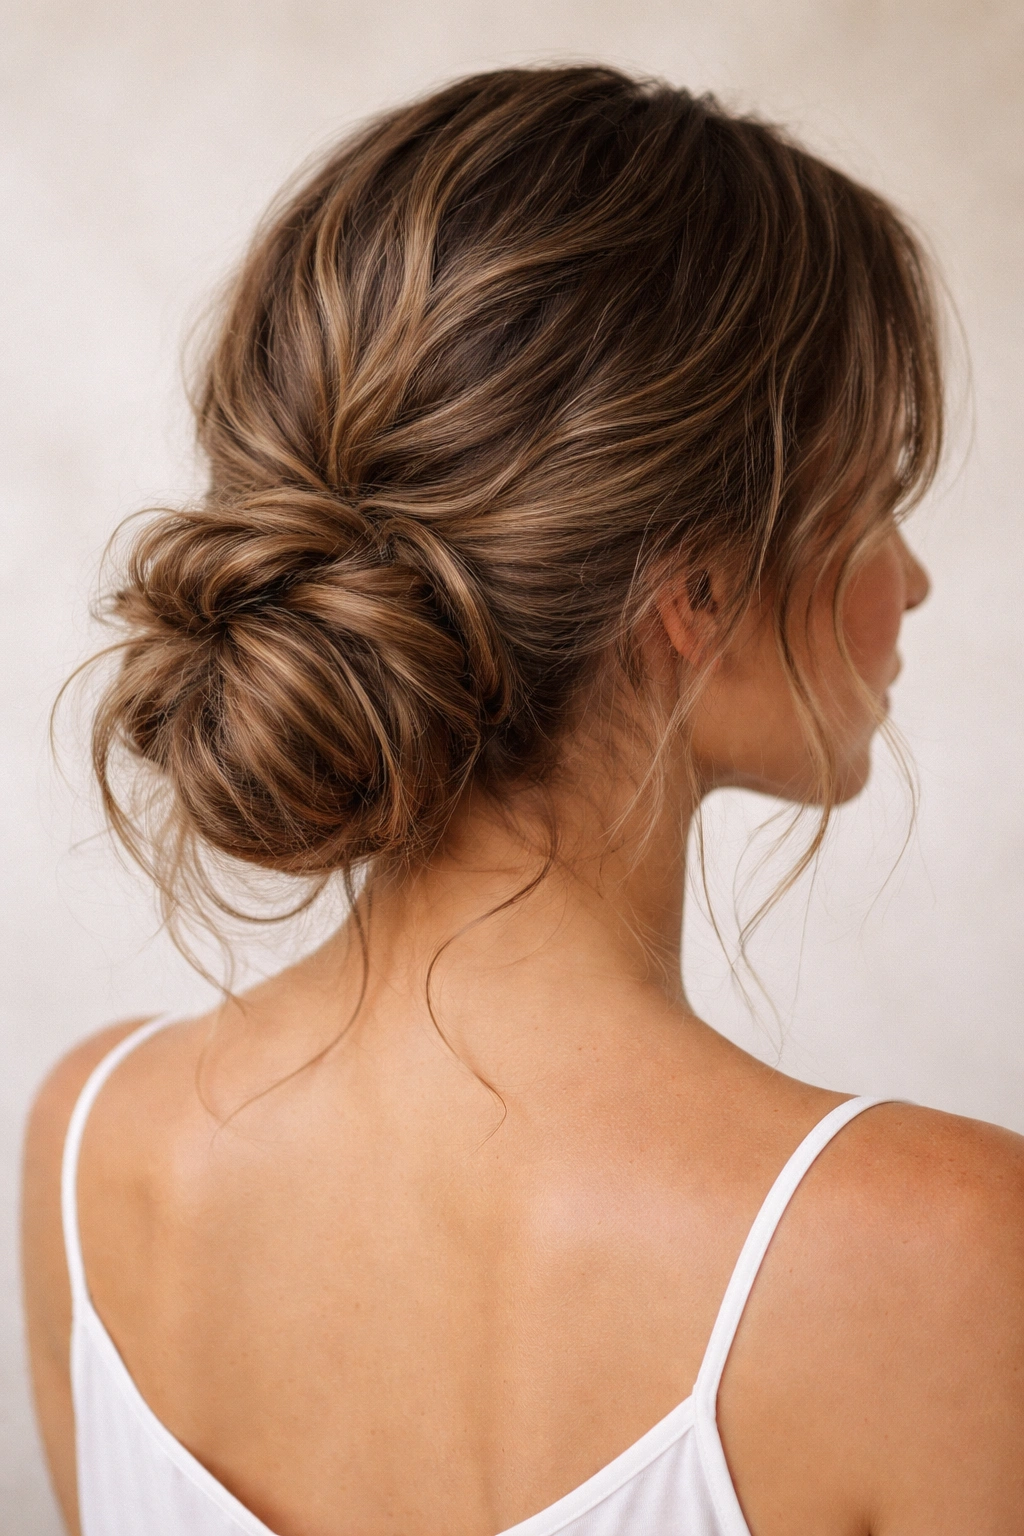
This is probably the most forgiving bun for wavy hair because the whole point is for it to look intentionally undone and textured. You’re not fighting your waves; you’re leaning into them completely. The style works best when you start with second or third-day hair (when your waves have set in and have natural grip), and it’s perfect for days when your hair texture is cooperating but isn’t perfectly smooth.
Why Wavy Hair Pulls This Off Perfectly
The tousled low bun doesn’t require sleekness or a polished finish—in fact, texture makes it look better and more intentional. Wavy hair naturally creates the slightly messy vibe that makes this style look effortlessly chic rather than sloppy. Unlike straight hair, where “messy” can read as careless, wavy hair in a tousled bun reads as deliberately relaxed and textured. The waves actually add visual interest and dimension that a sleek version wouldn’t have.
Steps to Create the Look
- Flip your head upside down and gather hair loosely at the nape of your neck, flipping your head back up as you secure it
- Don’t pull the elastic tight—you want the texture to have room to breathe and sit naturally
- Twist the ponytail loosely and wrap it around the base to form a bun shape
- Instead of tucking all the ends in, leave a few wispy pieces and strands loose around your face
- Use bobby pins to anchor the bun at 2-3 points, but leave plenty of texture peeking out
Pro tip: This bun actually looks better on day two or three of your wave pattern, when your natural texture has fully developed and has more grip. Trying it on freshly washed hair means more flyaways and pieces slipping out.
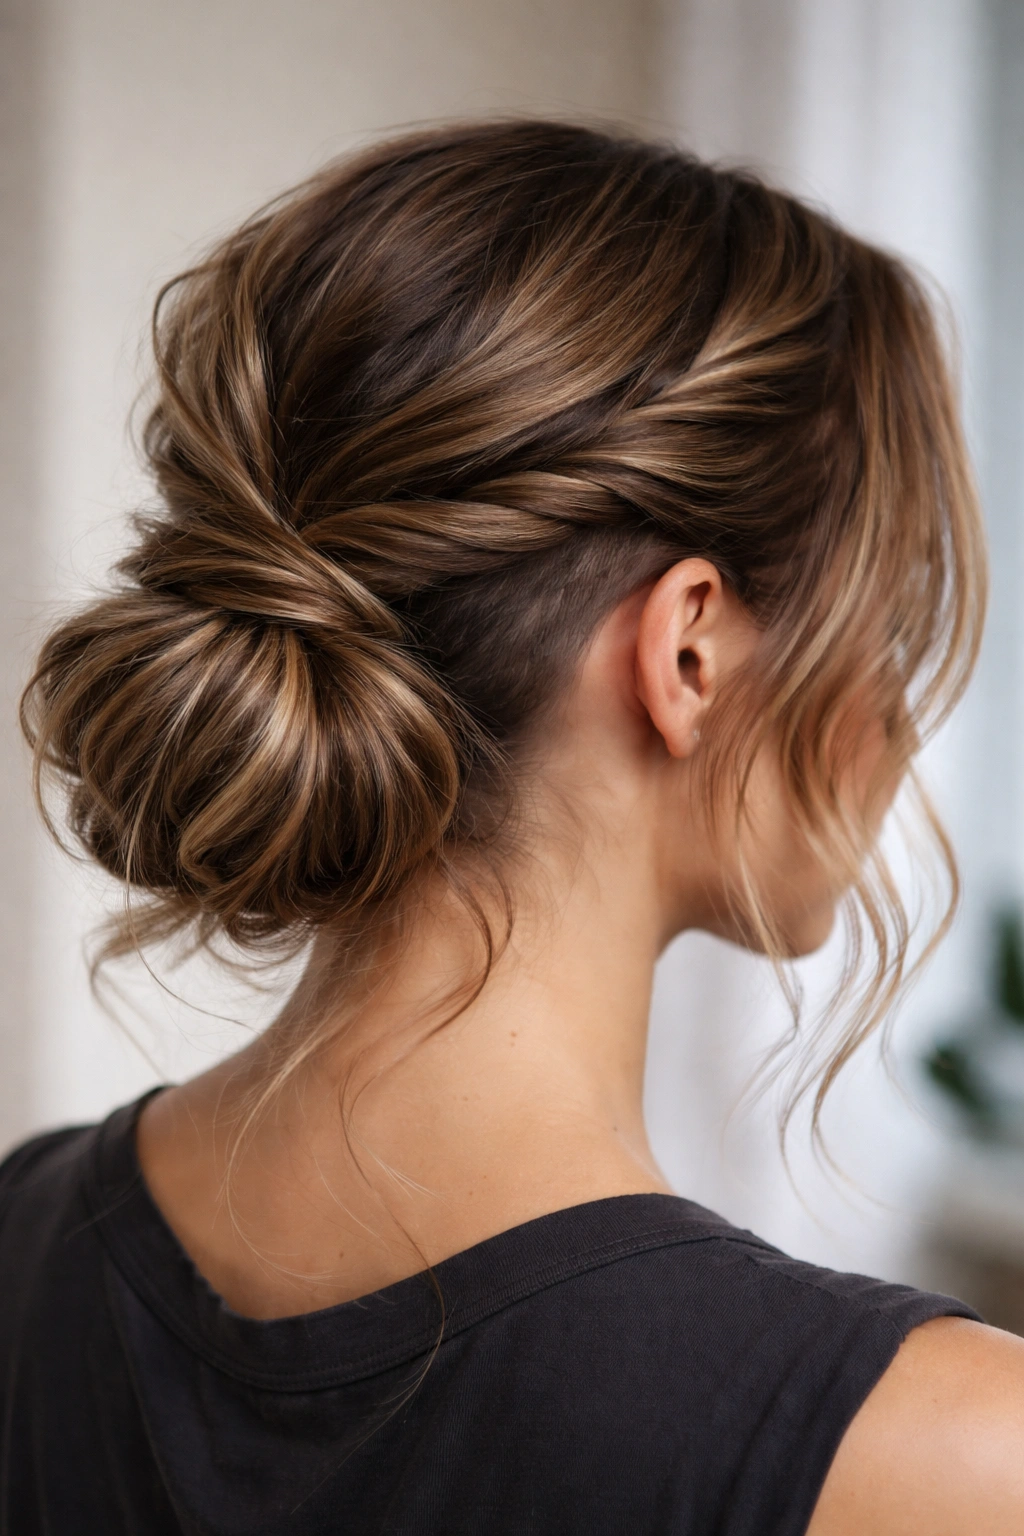
2. The Braided Crown Bun
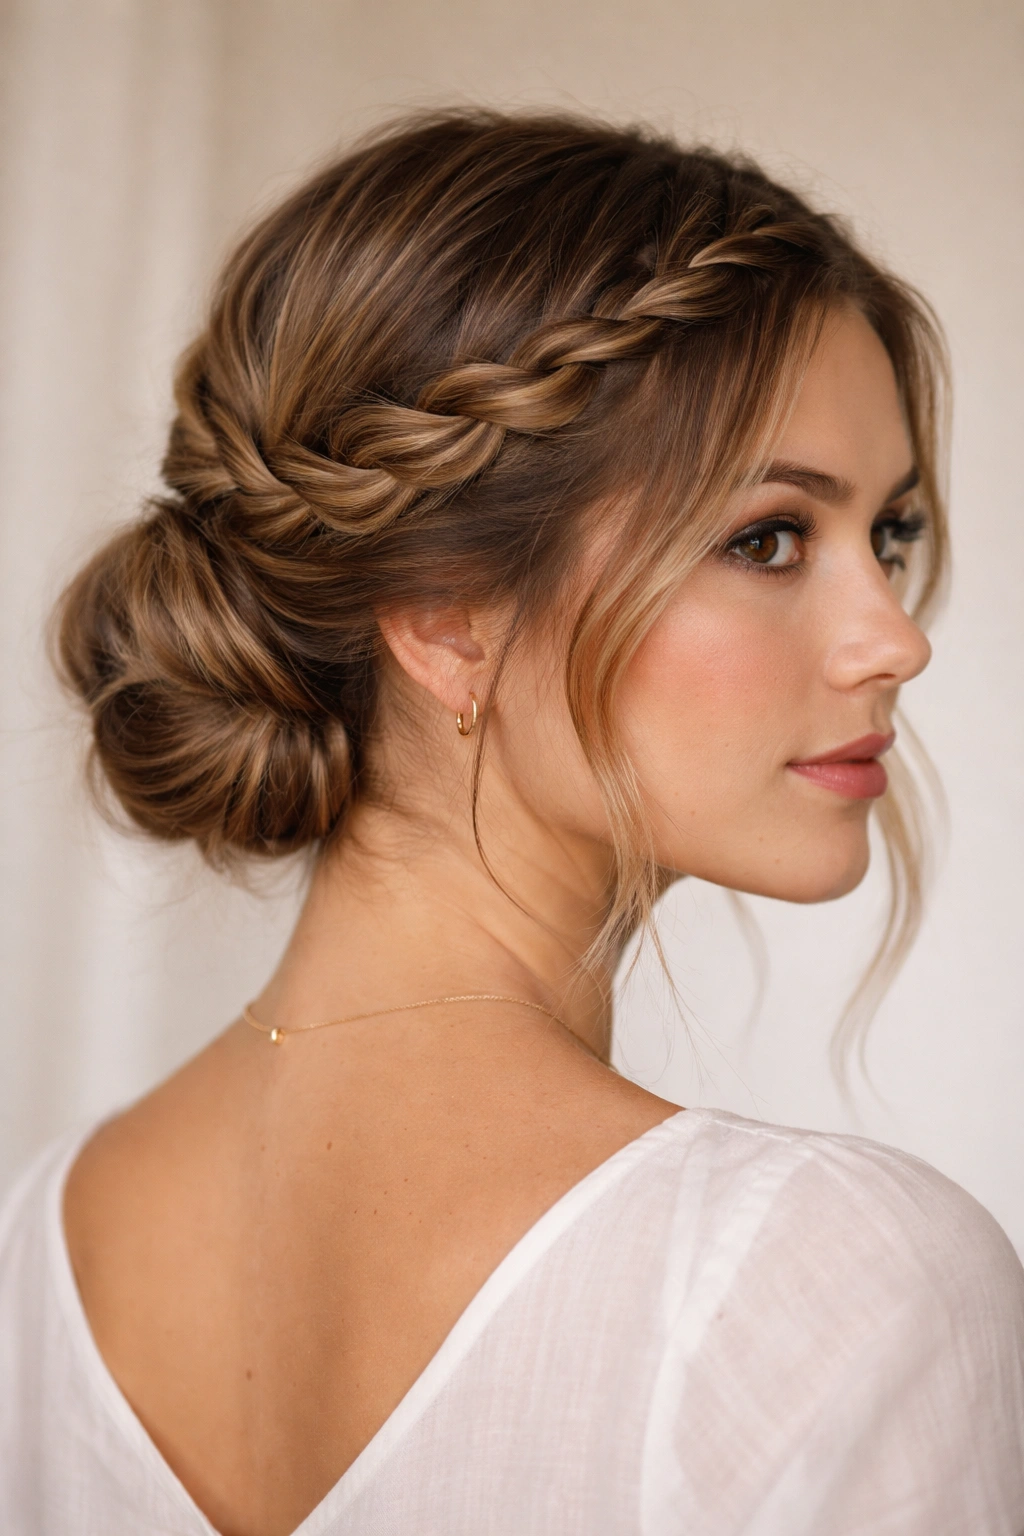
Braiding sections of your wavy hair before wrapping them into a bun creates anchor points that hold the style in place while adding visual interest. This is a more styled, intentional look compared to the tousled version, and it works beautifully for wavy hair because the braids actually grip better on textured hair than on completely straight strands.
How Braids Strengthen Wavy Hair Buns
When you braid wavy hair, each section of the braid catches and holds against the wave pattern, creating natural friction that keeps the braid tight without needing to pull aggressively. This means you can create a secure braided crown around your head that genuinely holds throughout the day. On straight hair, braids can sometimes loosen quickly as the strands slip past each other, but wavy hair’s natural texture creates built-in grip that keeps the braid intact.
How to Build the Style
- Start with damp or slightly damp wavy hair (dry hair can slip too much)
- Take a section from one side of your face and braid it loosely toward the back of your head
- Repeat on the other side, creating a braided crown frame
- Gather your hair into a low ponytail at the nape, incorporating the ends of both braids
- Twist the ponytail loosely and wrap it into a bun, pinning the braids across and through the bun as you go
- Gently pull the braids slightly to loosen them just a touch, creating more texture and dimension
Worth knowing: If your waves are very loose or fine, slightly damp hair works much better than bone-dry hair. The slight moisture gives you enough grip to work with without making your waves flat or clumpy.
3. The Textured Top Knot
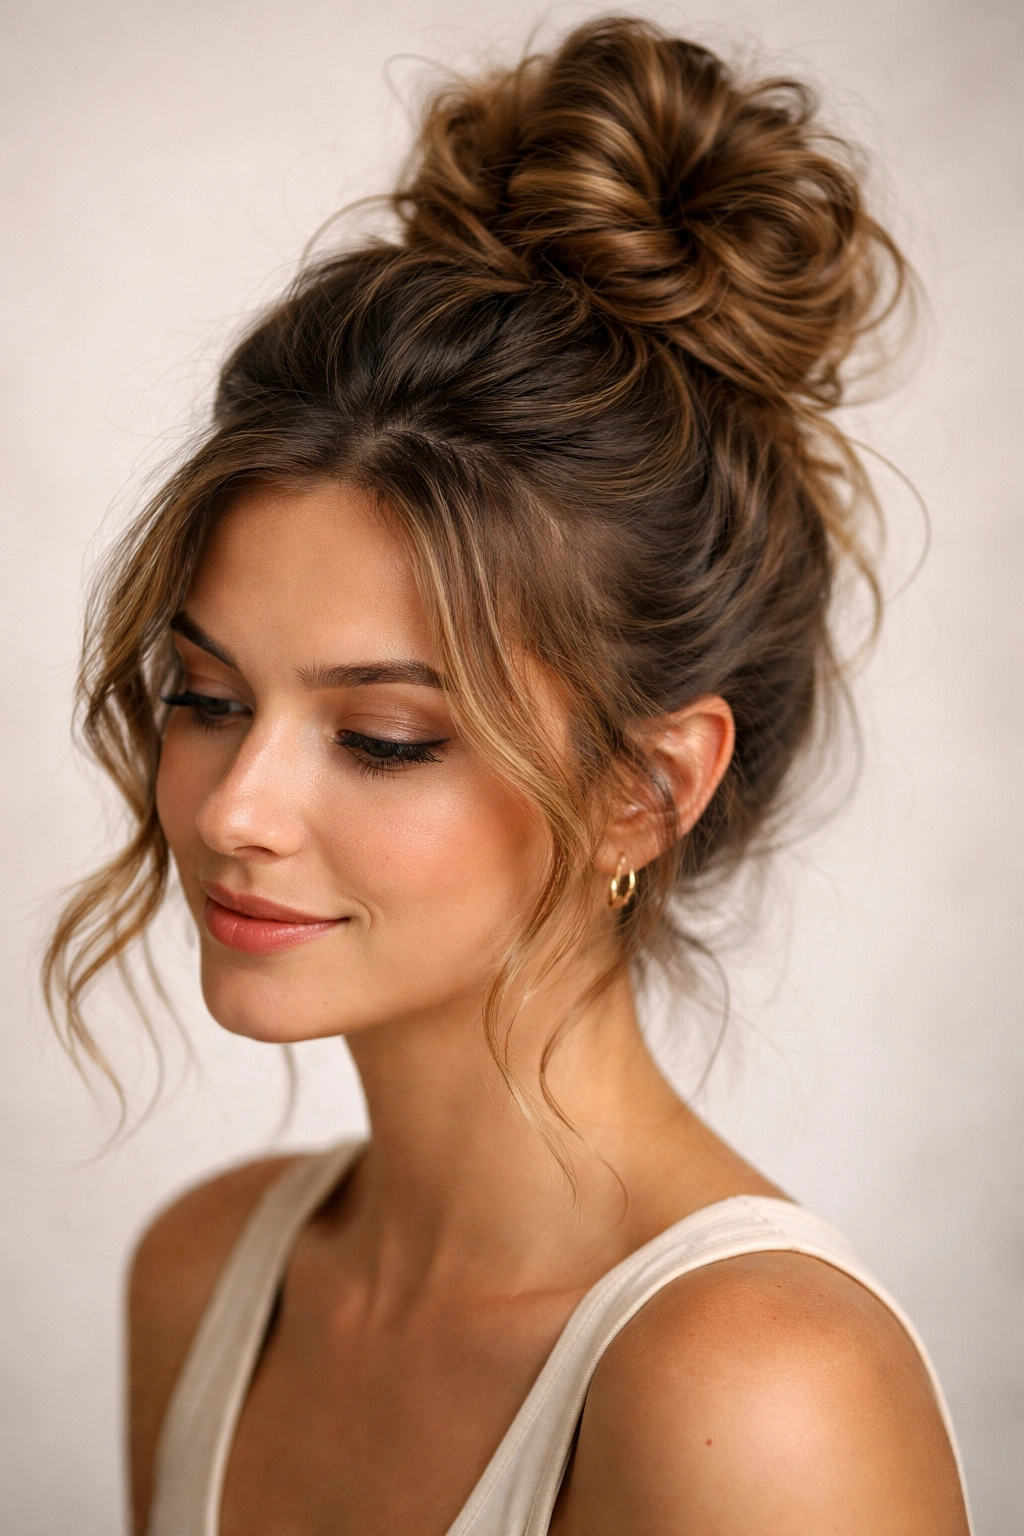
A top knot sits high on your crown and works surprisingly well for wavy hair when you embrace the texture rather than trying to slick everything back. This style is best for days when your waves are voluminous and you want to keep hair off your face while showing off the movement and texture of your crown.
Why Volume Is Your Friend in a Top Knot
Wavy hair naturally creates lift and volume at the crown, which is exactly what makes a top knot look substantial and intentional rather than thin and struggling. Instead of fighting your waves to create a smooth, tight knot, you’re using the existing volume your waves create. This means less styling effort and a result that actually looks more polished because it has movement and dimension rather than appearing as a tight, strained knot.
Creating a Top Knot That Actually Holds
- Gather your hair at the very crown of your head into a high ponytail, but don’t pull it super tight
- Leave a couple of small face-framing pieces loose on each side
- Twist the ponytail loosely and wrap it around the base to form your knot shape
- Secure with bobby pins placed strategically to anchor the twists without flattening the texture
- Once secured, gently pull at sections of the knot to create a fuller, messier, more textured appearance
- Spray lightly with texturizing spray to enhance the waves throughout the knot and help everything stay in place
Insider note: If your top knot tends to slip, the trick isn’t to pull tighter—it’s to use a matte-finish hairspray before you even start styling. This gives all your hair better grip without needing to create tension that flattens your waves.
4. The Side Sweep Bun
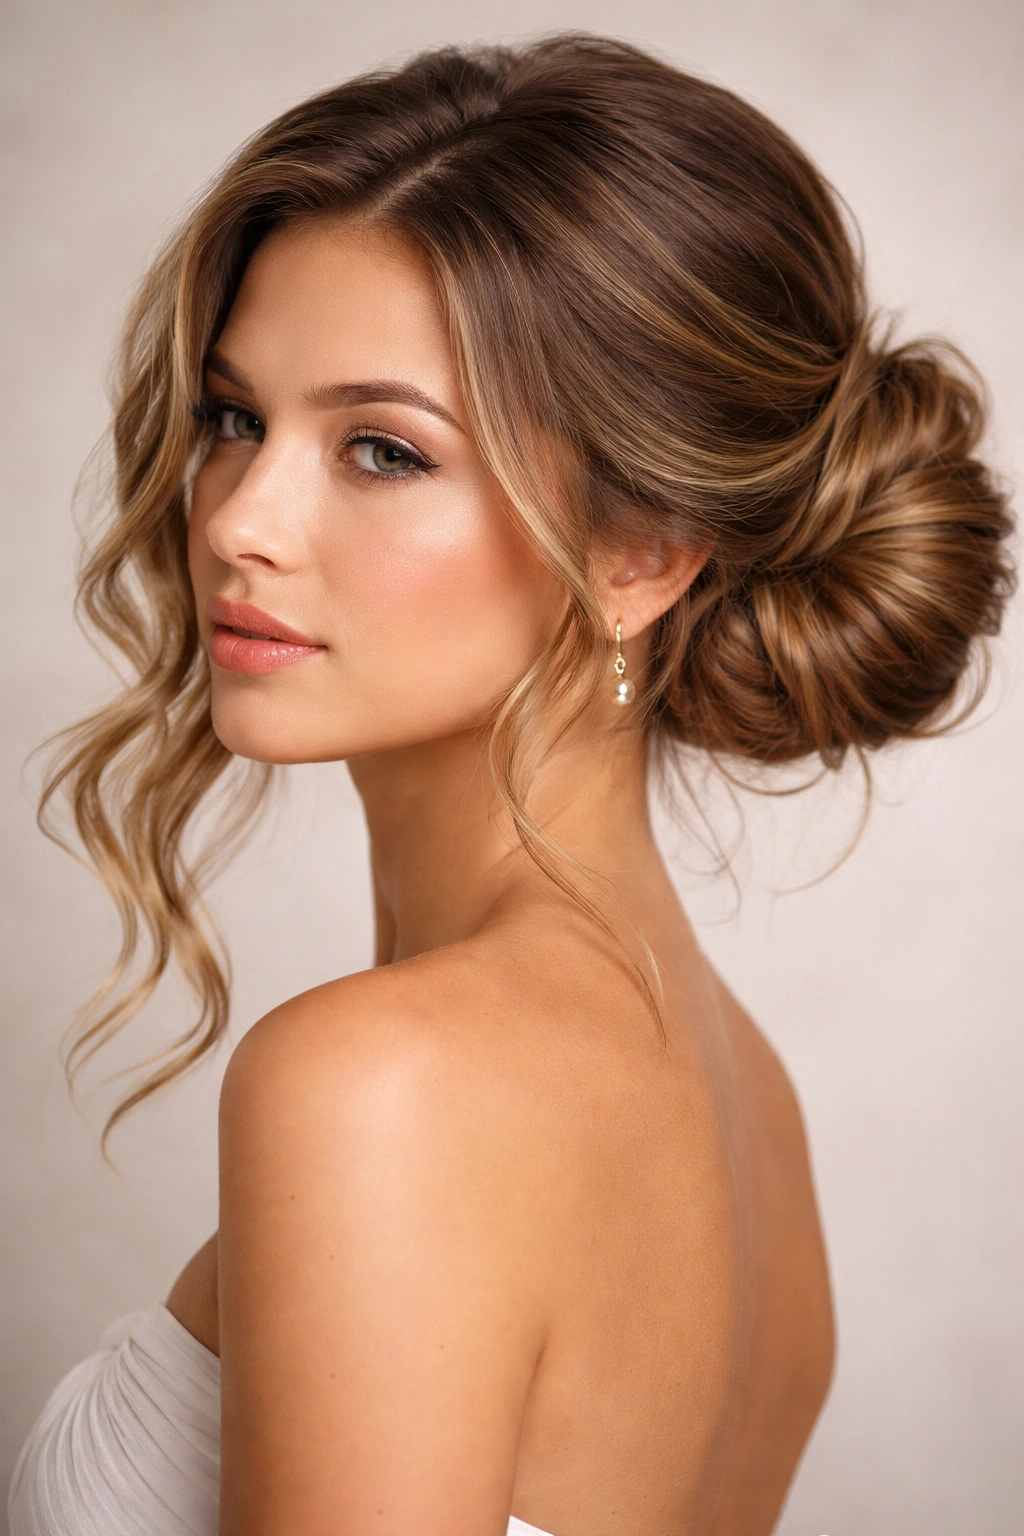
This bun sits off to one side of your head, creating an asymmetrical, romantic look that works particularly well with wavy hair because one side naturally frames your face while the other shows off your wave pattern. It’s softer and more feminine than a centered bun, and the side placement means your waves create beautiful movement and definition.
The Romantic Advantage of Asymmetry
Side sweep buns suit wavy hair especially well because they don’t require perfect symmetry or sleekness—in fact, slight unevenness actually makes the look more interesting. The waves on the non-bunned side create gorgeous texture and movement, and because the bun is positioned to the side, your hair has room to fall naturally rather than being pulled taut. This positioning is also forgiving if your wave pattern isn’t perfectly even across your head.
Building the Side Sweep
- Create a deep side part, moving more hair to one side than the other
- Flip your head to the opposite side and gather all your hair toward where you want the bun (typically at the base of your ear or just below)
- Use a soft elastic to create a ponytail at that side position—don’t pull too tight
- Twist the ponytail and wrap it into a bun, securing with bobby pins along the side and back of your head
- Leave the other side of your hair down, letting your waves fall naturally across your shoulder and chest
- Use your fingers to gently separate and define the waves on the loose side
Quick tip: This style works best when you have some texture and definition in your waves already. If you’re working with fresh-wash waves that are still settling, a light texturizing spray helps define the loose side.
5. The Bubble Bun with Wave Definition
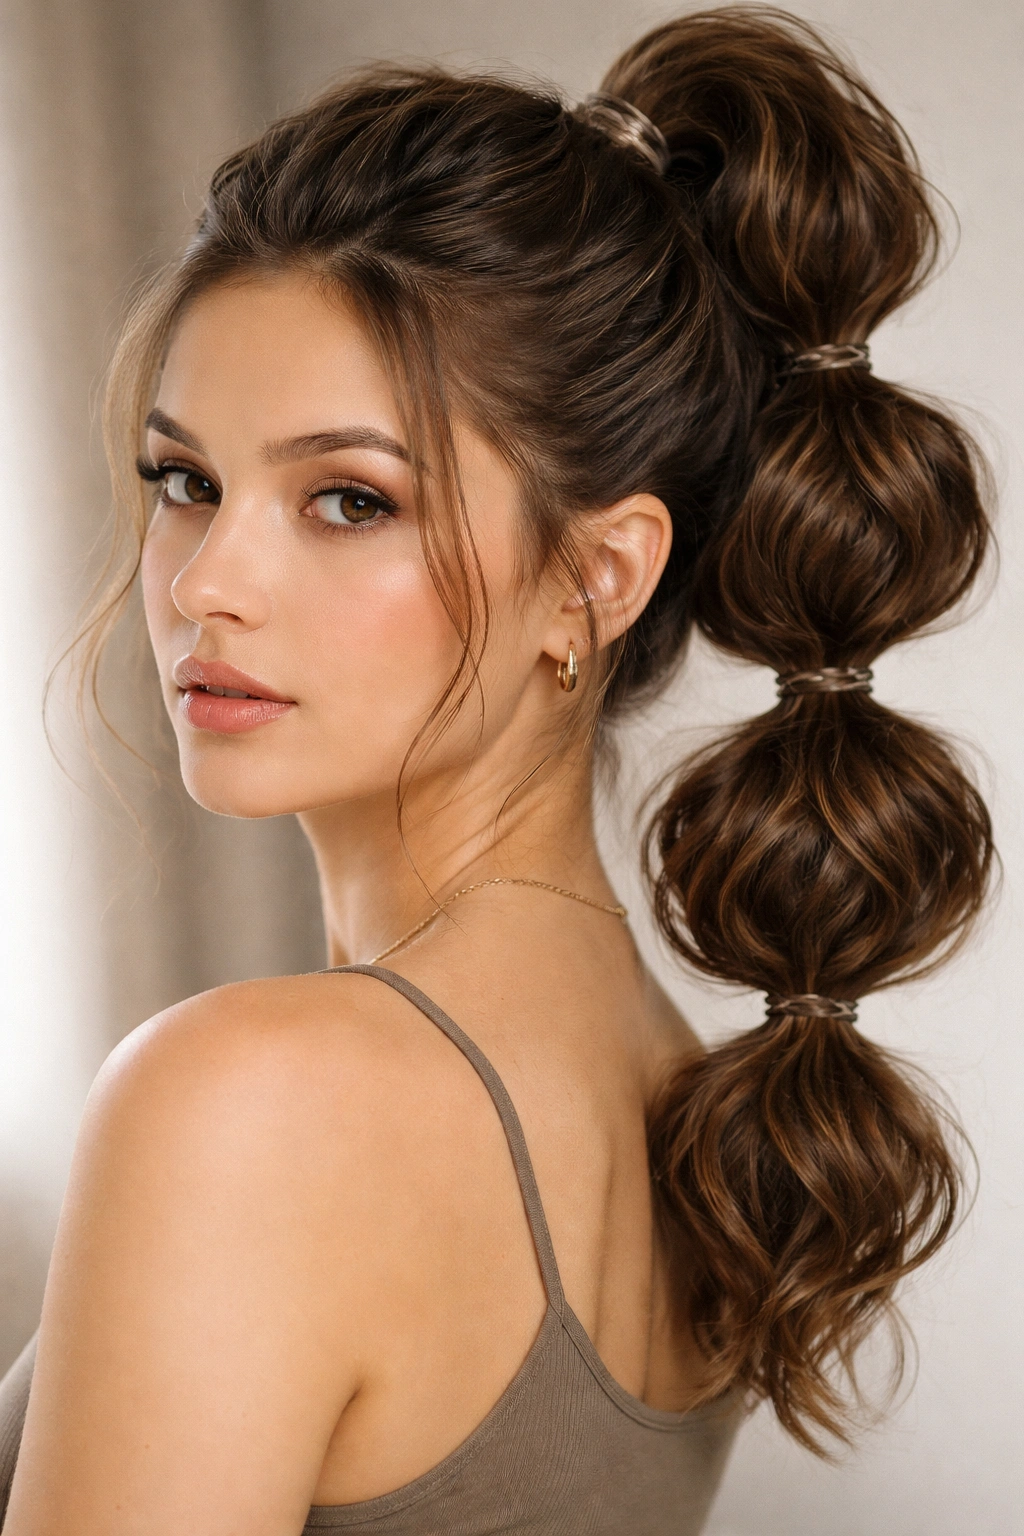
Instead of one bun, this style creates 3-4 smaller sections stacked on top of each other, creating a bubble or tiered effect. For wavy hair, this is a fun, playful approach that works because you can define the texture within each bubble section, creating a style that’s visually interesting and still holds securely.
Why Bubbles Work on Wavy Hair
Each bubble is smaller and more manageable than one large bun, which means the elastic doesn’t need to pull as tightly across all your hair. This is a significant advantage for wavy hair, where tight pulling flattens your waves and can cause damage. Plus, you can deliberately create texture and separation within each bubble by pulling and fluffing the sections, which makes your wave pattern actually show through the style rather than getting lost in a single heavy mass.
Creating the Bubble Effect
- Gather your hair into a high ponytail and secure with a clear elastic
- Just below the elastic, create another elastic around the same ponytail, leaving about 2-3 inches of space between the first and second elastic—this creates your first bubble
- Gently pull the hair between the two elastics outward and upward to create a poofy bubble shape
- Continue this pattern, creating 2-3 more bubbles as you work down the length of your ponytail
- Once all bubbles are formed, gather the end section into a bun at the base and secure with bobby pins
- Use your fingers to gently separate and fluff each bubble, pulling slightly to create texture and dimension
Pro tip: This style looks more intentional if you spend a moment defining the waves within each bubble section. Gently separate some of the texture as you shape each bubble, which lets your wave pattern show rather than appearing as a solid, smooth section.
6. The Rope Twist Bun
Instead of a single twist wrapping around the base, this style uses two sections of hair twisted together to create a rope-like structure that wraps around the bun. The rope provides both visual interest and additional securing power, which is especially helpful for wavy hair that might slip out of a simple twist.
Double Grip From Twisted Rope Structure
Creating a rope twist instead of a single twist works better on wavy hair because the rope structure inherently grips more surfaces and has more anchor points. When you twist two sections together, you’re creating friction between multiple pieces of hair simultaneously, which means the rope holds more securely without needing aggressive tension. This is the beauty of working with textured hair—the wave pattern creates natural grip that straight hair simply doesn’t have.
Forming and Securing the Rope
- Gather your hair into a low ponytail and secure loosely with an elastic
- Divide the ponytail into two equal sections
- Twist both sections individually, but in the same direction (both clockwise or both counterclockwise)
- Now twist those two twisted sections around each other, creating a rope-like structure
- Wrap this rope around the base of your ponytail to create the bun
- Pin the rope securely as you wrap, creating 3-4 anchor points
- Gently pull sections of the rope slightly to create texture and reduce the sleekness
Worth knowing: The tighter you twist each section before creating the rope, the more secure your final bun will be. If your waves tend to slip throughout the day, slightly tighter twists will help you maintain the style.
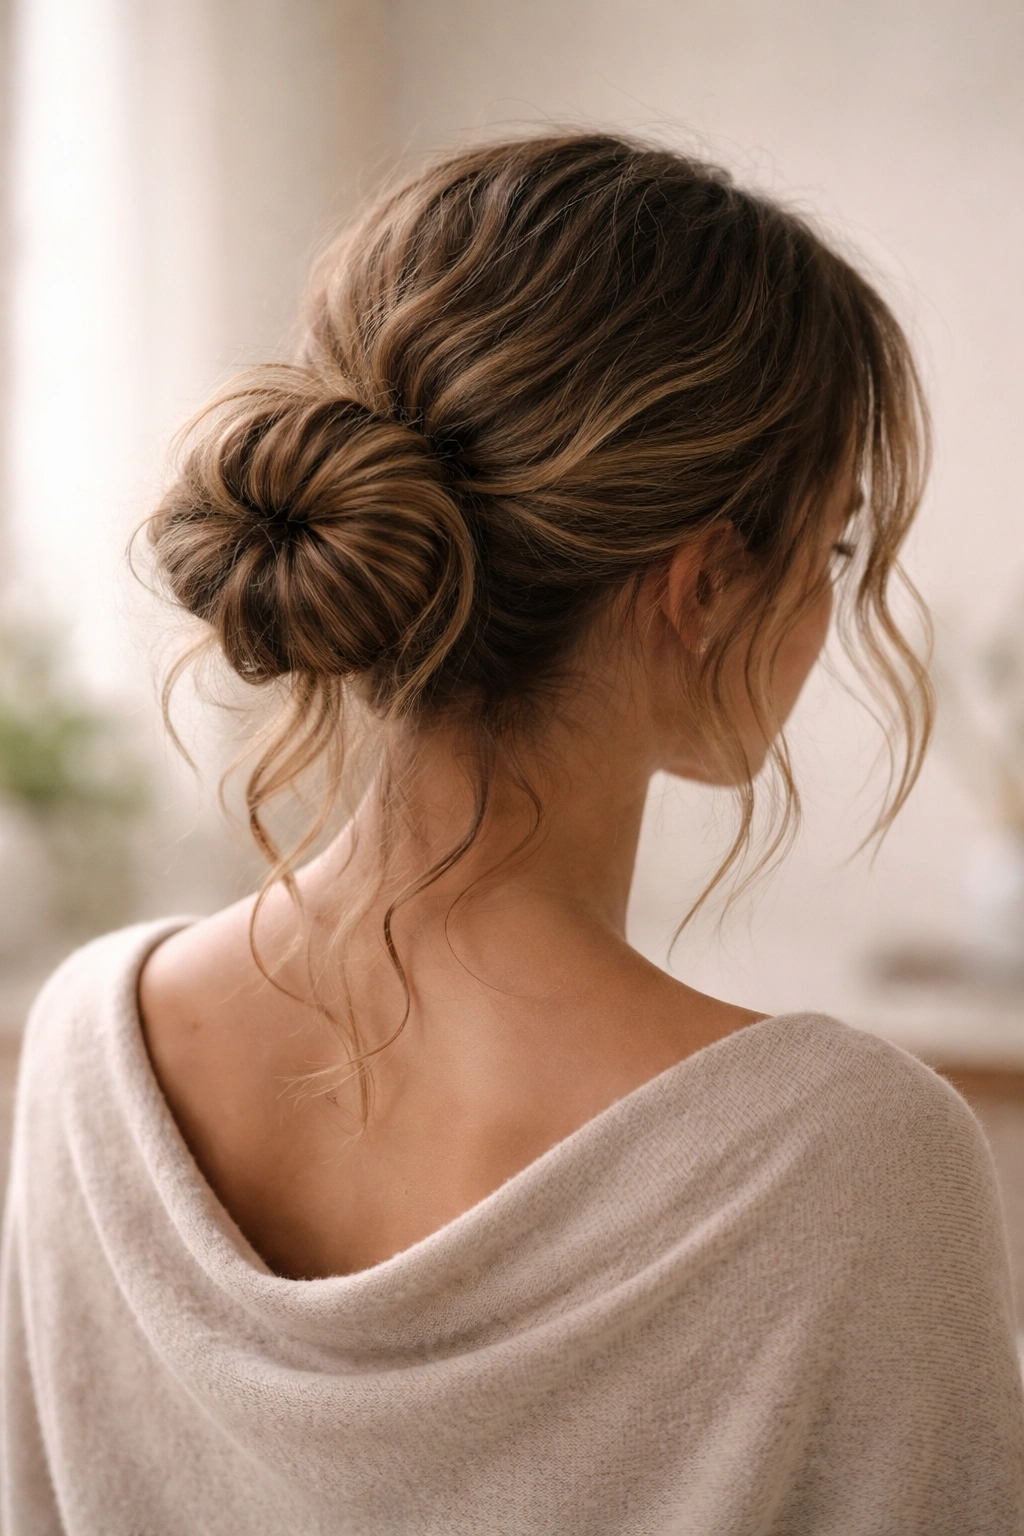
7. The Messy Low Bun with Face-Framing Waves
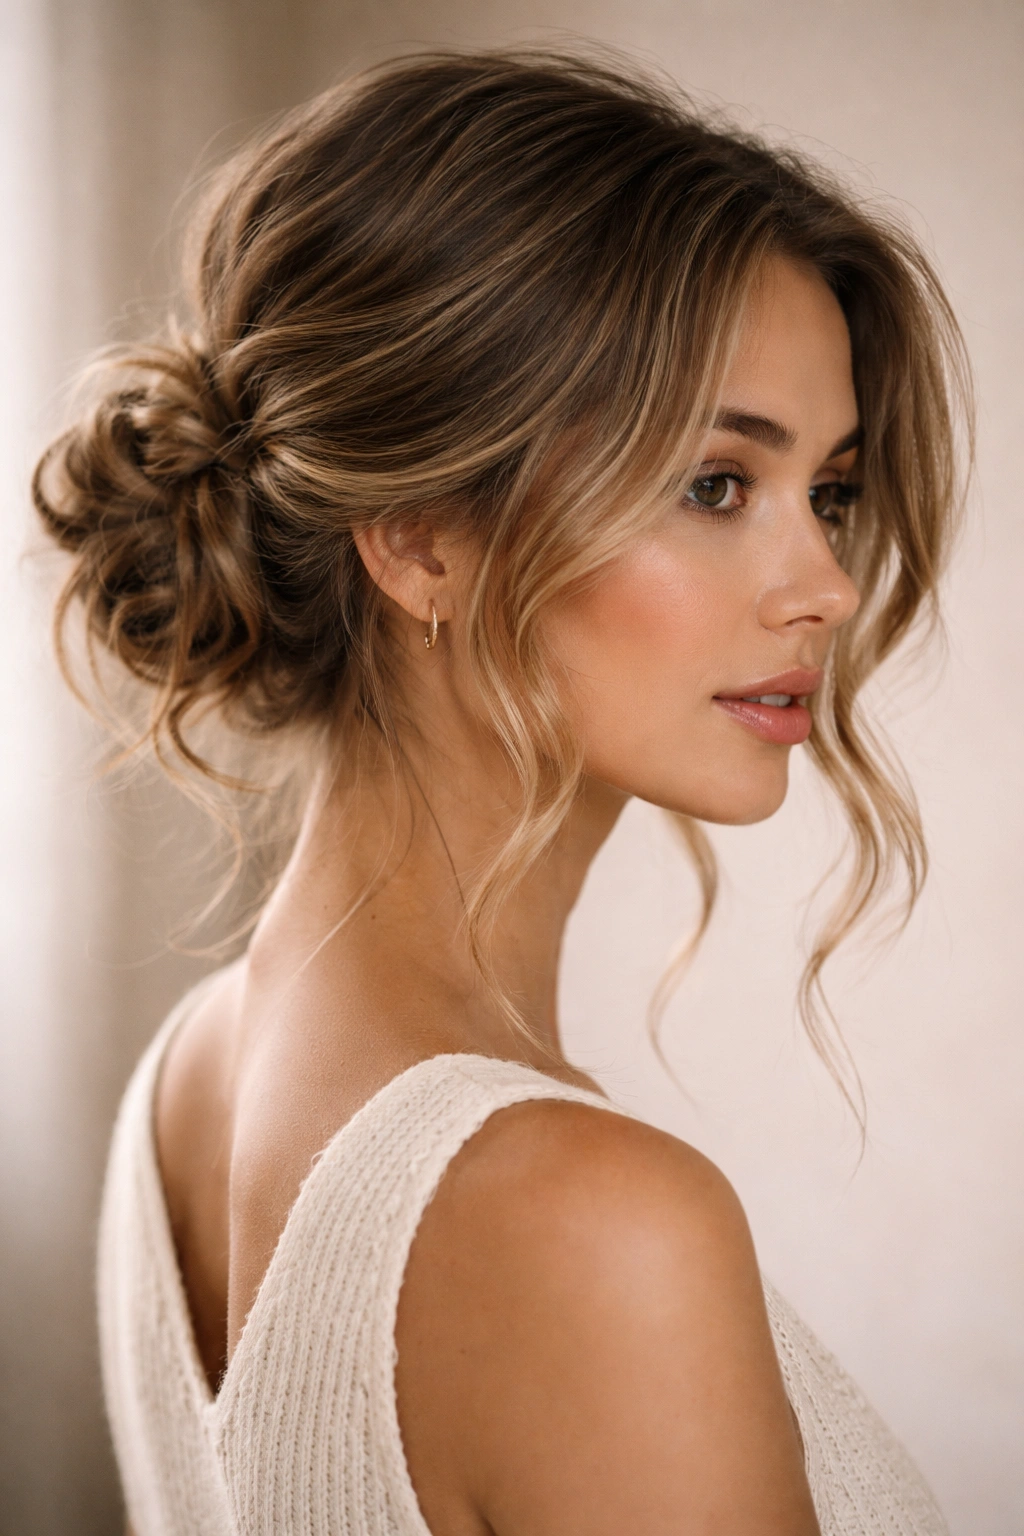
This is the ultimate “I woke up like this” style for wavy hair—a low, intentionally undone bun with several wisps and waves left loose around your face and neck. It’s soft, romantic, and flattering because it keeps hair off your shoulders while showing off the texture and movement of your waves.
Why Wavy Hair Makes This Look Effortlessly Chic
Straight hair in a messy bun can sometimes read as actually messy or unintentional. Wavy hair in the same style reads as deliberately textured and romantic because the waves create intentional visual interest and movement. Your natural texture does half the work for you—it creates dimension and character that a smooth version simply wouldn’t have. This is one of the few hairstyles where wavy hair’s tendency to have texture and movement is genuinely an advantage rather than something to work around.
Steps for the Effortless Look
- Gather your hair into a very loose, low ponytail at the nape of your neck—don’t pull tight
- Before securing the ponytail, pull out 2-3 small face-framing pieces on each side
- Secure the ponytail with a soft elastic, keeping it loose enough that you could fit a couple fingers between the elastic and your hair
- Twist the ponytail loosely and wrap into a bun, but leave the ends somewhat loose rather than tucking everything in neatly
- Secure with bobby pins placed to hold the general structure without flattening everything
- Use your fingers to gently pull and separate the bun, creating a fuller, more textured appearance
Insider secret: The key to this looking intentional rather than like your bun fell apart is making sure your face-framing pieces have actual definition and your bun has some deliberate texture to it. Spend a moment pulling at the bun and loosening individual sections so it’s clearly intentional.
8. The Half-Up Bun
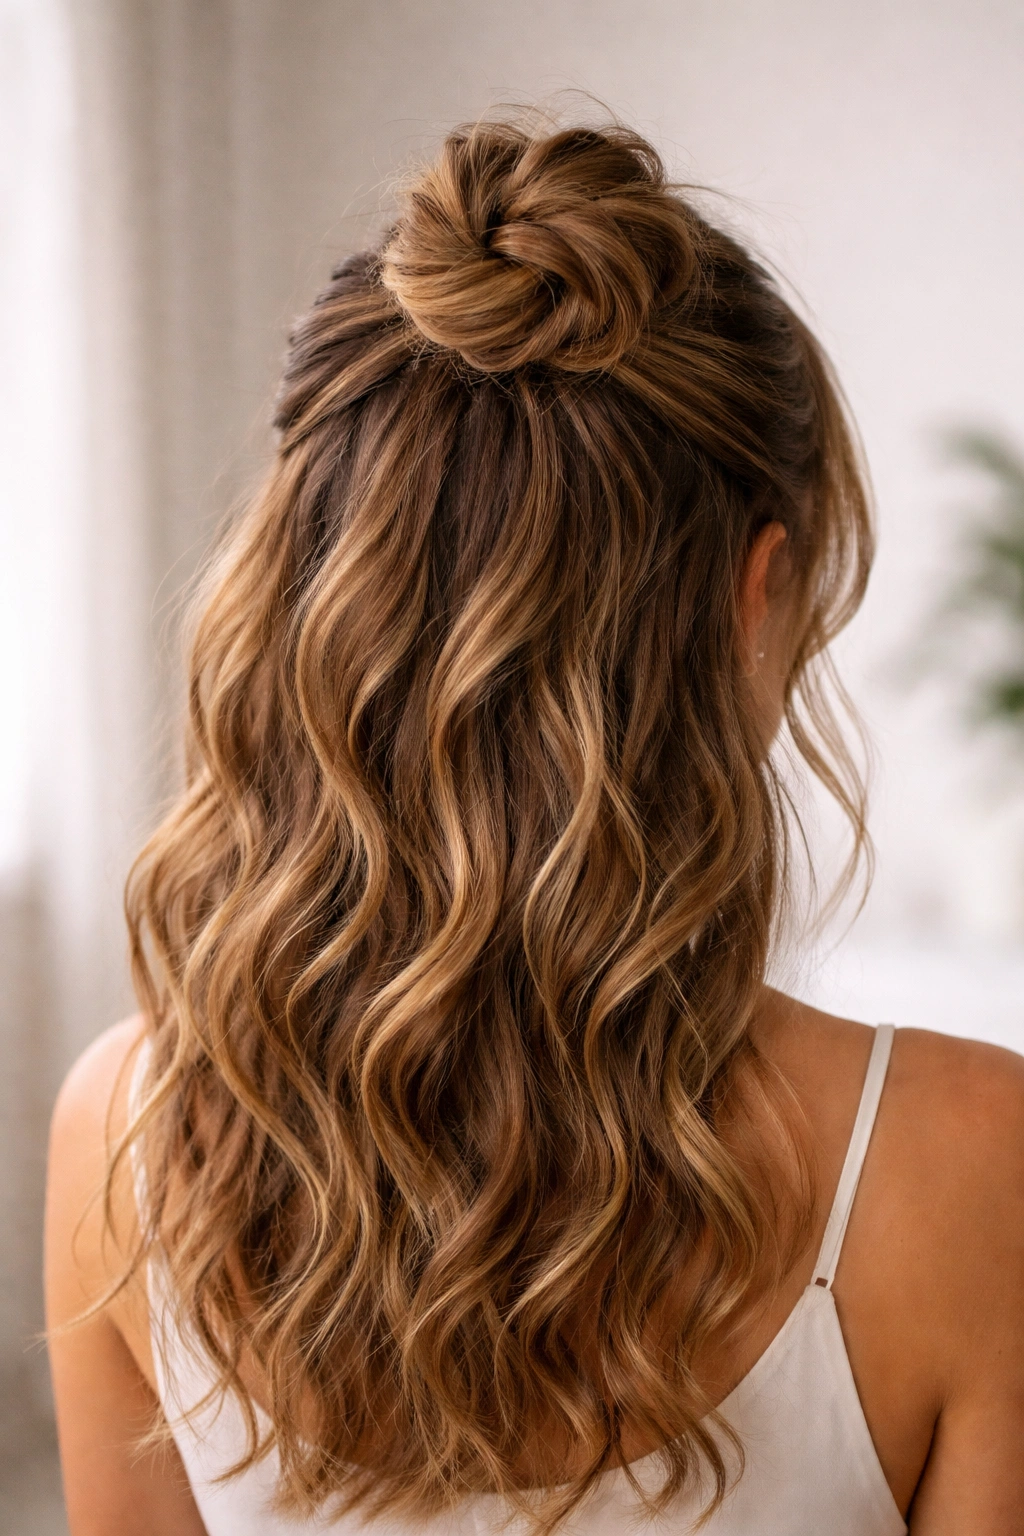
This hybrid style keeps the top half of your hair up in a bun while leaving the bottom half down and wavy. It’s perfect for when you want some hair off your face without committing to a full updo, and it’s especially flattering for wavy hair because the waves below create beautiful movement while the bun keeps everything balanced.
How Volume Works in Half-Up Styles
With wavy hair, a half-up bun creates a more balanced proportion than it might on other hair types because the waves below add texture and visual weight that prevents the top from looking too heavy or out of proportion. The waves also create natural separation between the bunned section and the loose section, which makes both parts of the style more visually distinct and interesting. You’re essentially getting two hairstyles in one.
Creating the Half-Up Bun
- Start with your hair down and wavy, with some definition in your wave pattern
- Take a section from the crown of your head down to about ear level on both sides—you’re claiming the top half
- Pull these sections back and secure loosely at the back of your head with a soft elastic
- Twist this section loosely and wrap into a bun, securing with bobby pins
- Leave the bottom half of your hair down completely
- Use your fingers to gently separate and define the waves in the loose section
- You can leave some face-framing pieces loose in front, or brush them back with the bunned section depending on your preference
Pro tip: This style holds better if you use a lightweight hairspray in the loose waves rather than product that weighs them down. You want those waves to have movement and definition, not to be flattened by heavy product.
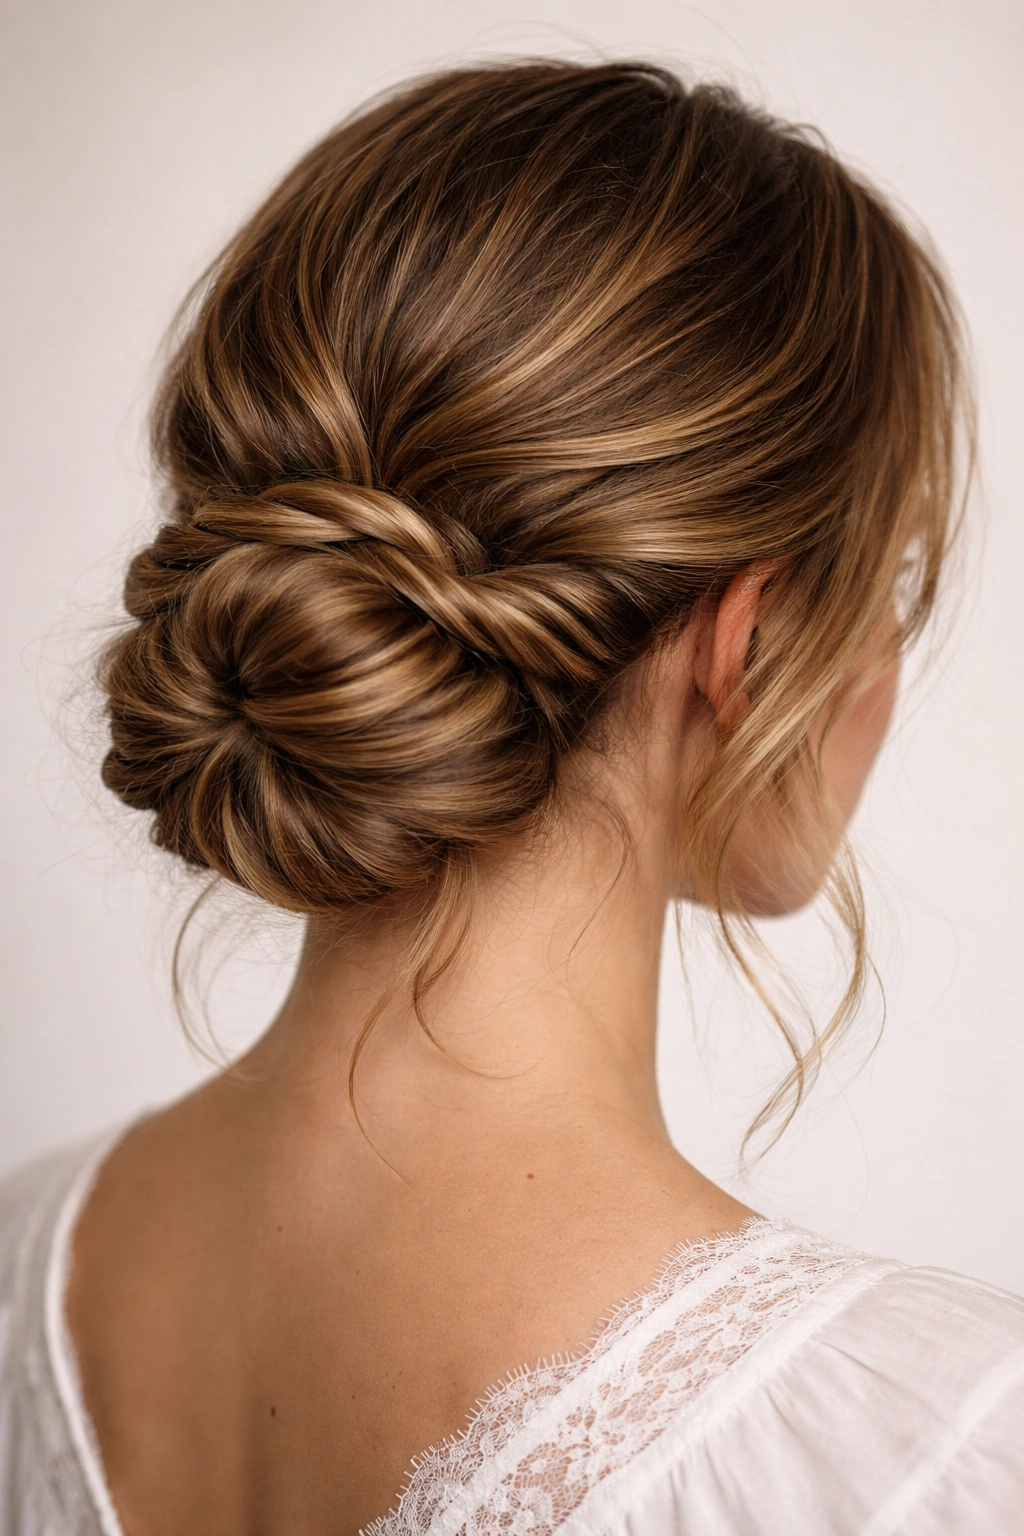
9. The Sleek-ish Low Bun with Texture Overlay
This style looks polished enough for professional settings or more formal occasions, but it maintains enough texture and movement that it doesn’t appear overly strict or severe. You’re using some smoothing technique to create a base that holds well, but then deliberately adding texture back in rather than leaving it completely sleek.
Balancing Polish With Your Natural Texture
Wavy hair doesn’t need to become straight to look professional or polished. Instead, you can smooth the top layers just enough to create a neat base while leaving your natural wave texture visible throughout. This approach is actually more interesting visually than a completely sleek version, and it’s also more sustainable for your hair—you’re not fighting your texture or requiring excessive heat or tension to maintain the style.
Building the Polished But Textured Version
- Apply a lightweight smoothing cream or serum to damp hair and blow-dry with a brush to smooth the surface while keeping texture underneath
- Gather your hair into a low ponytail at the nape of your neck, smoothing the top layer as you gather
- Create a clean, neat ponytail base using a thin elastic or small hair clip (not too tight)
- Twist the ponytail and wrap into a bun, securing with bobby pins
- Don’t tuck all the ends—leave some texture peeking out around the bun base
- Use your fingers to gently fluff and define the textured sections peeking through
- A light hairspray holds the smooth base without adding weight to the textured portions
Quick fact: This balance of smooth and textured actually works better on wavy hair than completely sleek styles do, because your hair’s natural texture reads as intentional rather than as frizz or damage.
10. The Twisted Low Bun with Undercut Detail
This more intricate style works beautifully on wavy hair because you’re creating visual interest through structure (the twists) rather than relying on sleekness. If you have longer, thicker wavy hair, this style is particularly striking because the twists create defined lines while your wave texture shows throughout.
Why Twist Details Work on Wavy Hair
Wavy hair already has movement and texture, so adding structural elements like twisted sections creates contrast and visual interest. The twists give you defined lines and intentional shape, while the waves beneath provide natural texture and dimension. This combination makes the style look more intentional and sophisticated than simply leaving hair loose, without requiring the hair to become sleek or smooth.
Creating the Twisted Detail
- Gather your hair into a low ponytail, but create a section of two thin twisted pieces along one side before gathering everything
- To create the side twist section: take a thin piece from the side of your face, twist it loosely, and secure it temporarily with a small clip
- Gather the rest of your hair into a low ponytail with the elastic placed slightly lower than your twist
- Secure your side twist into the ponytail elastic, incorporating it into the base
- Twist your ponytail and wrap into a bun, arranging it so the side twist creates a visible curved line
- Pin the side twist securely as you wrap the main bun
- Fluff the bun texture slightly while leaving the twisted detail visible and defined
Worth knowing: The side twist detail looks more intentional if it’s thin and delicate rather than thick and chunky. Use a smaller section than you might think you need, which creates elegant definition without overwhelming the overall style.
Final Thoughts
Finding the right bun style for wavy hair is really about understanding that your texture is an asset, not something to fight against. The best bun styles for waves are ones that either celebrate the texture completely (like the tousled and bubble versions) or use techniques that work with your wave pattern rather than against it. When you stop trying to force your waves into bun styles designed for straight hair, everything becomes easier—the bun holds better, it requires less product and styling effort, and it actually looks more polished and intentional.
The key across all these styles is that you’re not pulling aggressively tight, and you’re leaving enough texture visible that your waves actually show through rather than getting flattened into submission. Your waves create natural grip and friction that helps styles hold securely without needing excessive tension. That’s your advantage right there—use it.
Start with whichever style appeals to you most, and don’t hesitate to modify it based on your specific wave pattern, hair thickness, and how much time you have to style. The variations and flexibility are part of what makes buns so great for wavy hair. What works beautifully one day might need a slight adjustment the next, depending on how your waves are cooperating. That adaptability isn’t a limitation—it’s actually freedom to work with your hair’s natural patterns rather than against them.