



An updo is more than just a hairstyle—it’s a statement of confidence, elegance, and celebration. When you’re wearing your natural hair, every style choice matters even more because you’re showcasing the versatility and beauty of your texture. Whether you’re walking down the aisle, stepping into an intimate dinner, or dancing the night away at a celebration, the right afro updo can transform how you feel and how the world sees you.
Afro updos hold a special place in Black beauty culture. They require real skill, intention, and an understanding of how your hair moves, shrinks, and holds. Unlike updos designed for straight or wavy hair, afro updos must work with your natural texture—not against it. The best ones embrace your curl pattern, honor the volume your hair naturally creates, and look just as stunning at hour one as they do at hour eight.
The following styles range from sleek and minimalist to textured and romantic. Some take an hour to create; others require just 15 minutes. Some celebrate your coils in their fullest glory; others create an elegant, structured silhouette. All of them prove that when you’re styling natural hair for a special moment, you have endless possibilities.
1. The High Crown Bun with Face-Framing Swoop
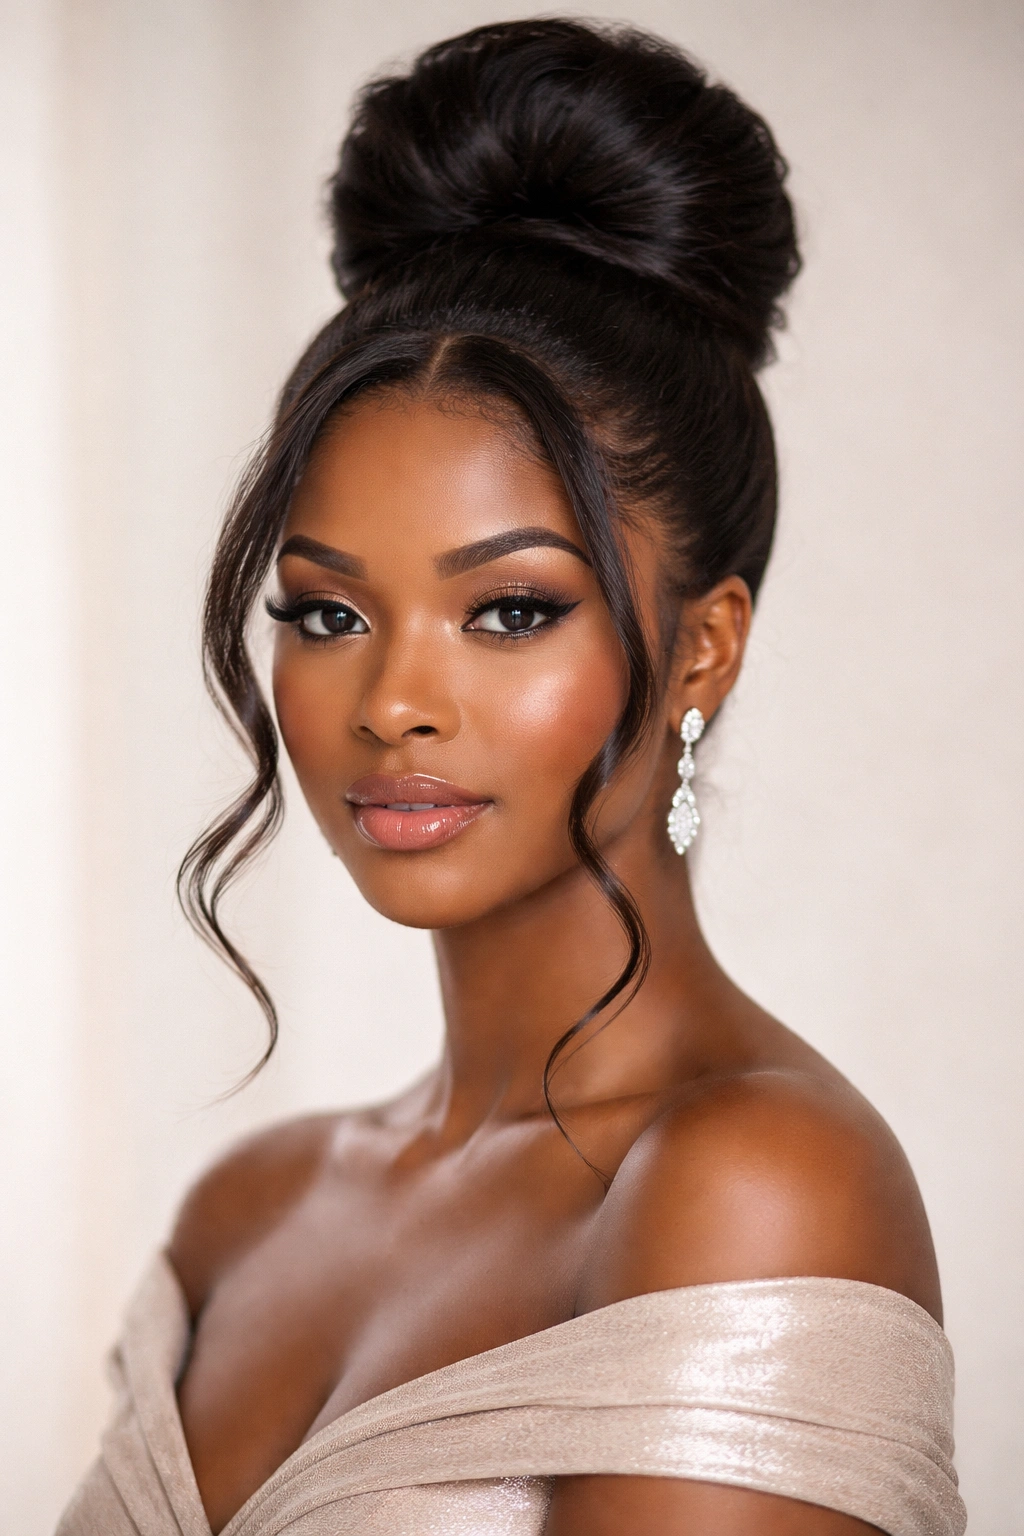
This is the updo that says “I’m the main character tonight.” A high crown bun sits at the crown of your head, pulling your hair up and back while allowing a few face-framing tendrils to softly swoop forward. It’s elegant without being severe, polished without feeling stiff—and it photographs beautifully from every angle.
Why This Works for Special Occasions
The high crown bun flatters most face shapes because the height elongates your features and creates a lifted, regal silhouette. By leaving those soft pieces in front, you avoid the overly pulled look that can sometimes feel harsh on deeper skin tones. Instead, you get dimension, movement, and softness. The swooping tendrils catch light and draw attention to your face—exactly what you want when you’re celebrating.
How to Create It
- Start with hair that’s been moisturized and has some grip to it. If your hair is freshly washed and dripping wet, blow-dry it on low heat with a diffuser to get some texture and body.
- Section your hair into two parts: the crown section (roughly from ear to ear across the top) and the underneath section.
- Smooth the crown section upward using a brush or comb with a light gel or edge control. Gather it into a high ponytail at the very top of your head.
- Twist or braid that ponytail loosely, then wrap it around the base to form a bun. Secure with bobby pins tucked underneath so they’re invisible.
- Leave 2-3 pieces in front—one on each side near your temples, and possibly one in the center—and gently reshape them so they curve softly around your face.
- Smooth everything with edge control cream and set with a light hairspray that won’t flake.
Styling Tips and Duration
This style lasts all night and into the next morning if you sleep on a silk pillowcase. The key is using enough moisturizer and the right amount of hold product—too much and your hair looks stiff; too little and the bun loosens. You can achieve this look in 20–30 minutes once you get the hang of it. For a wedding or formal event, have your stylist create this the morning of so the bun has all day to settle and look natural.
2. Twisted Low Ponytail into Spiral Bun
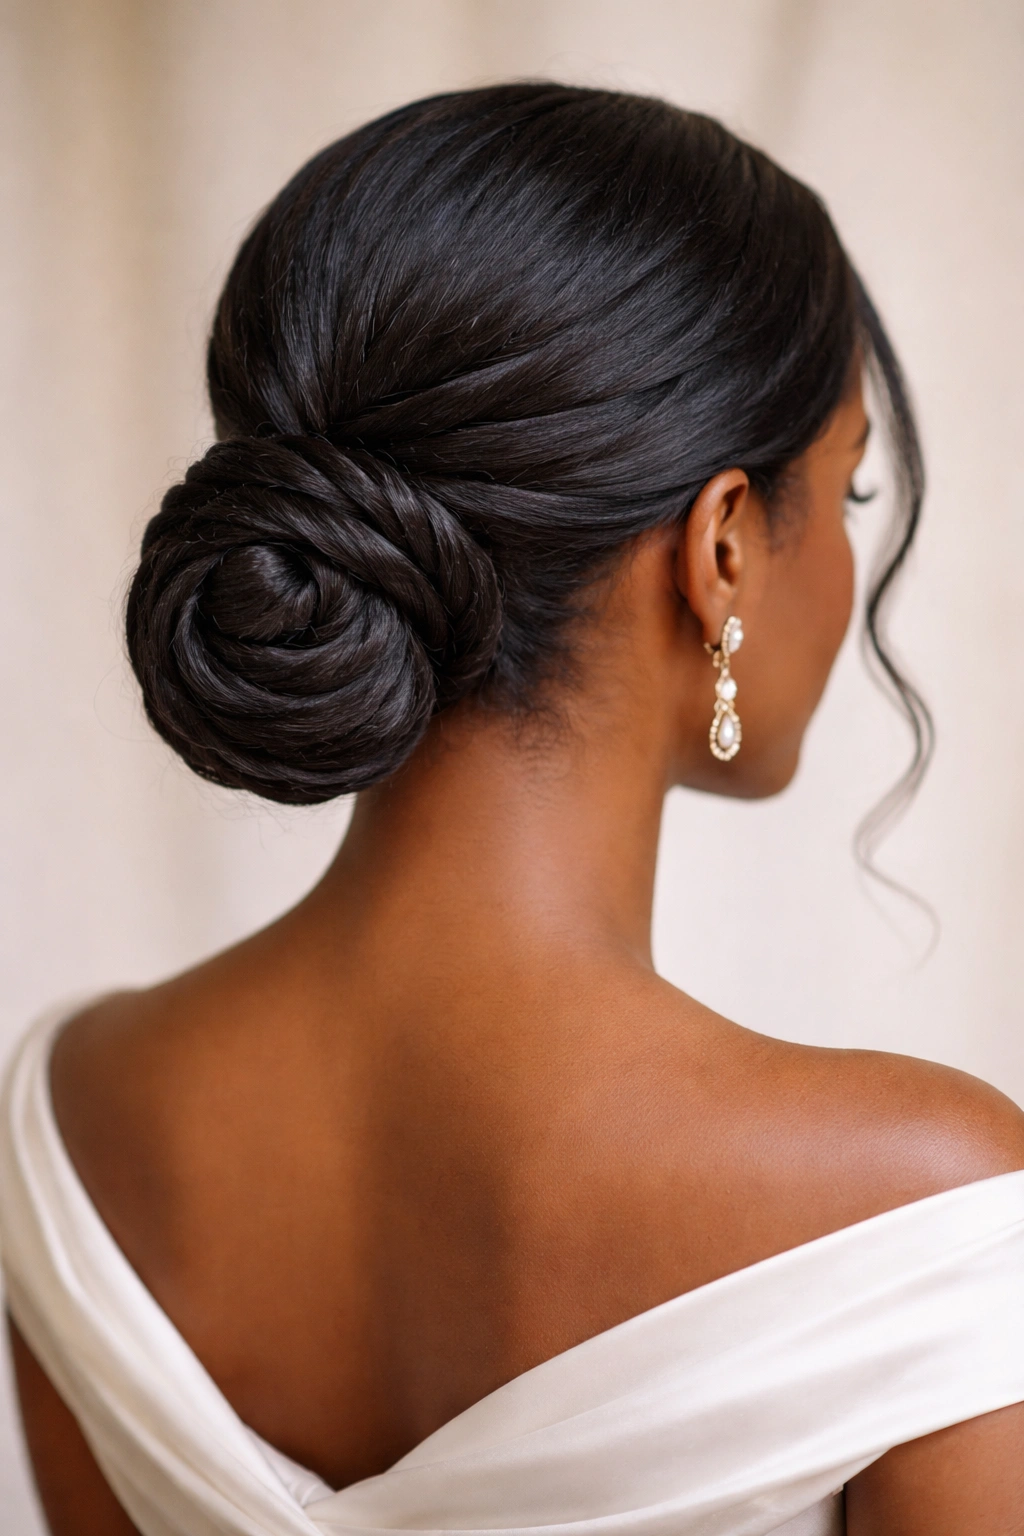
This style is pure texture—it celebrates your coils by twisting them and then spiraling them into a compact, sculptural bun. It’s sophisticated, modern, and gives major editorial energy. The twists catch light beautifully and show off the dimension in your hair color, whether that’s your natural color or a shade you’ve chosen.
Why This Works for Special Occasions
A twisted spiral bun feels intentional and artistic. It’s not trying to hide your texture; it’s showcasing it. This makes it perfect for celebrations where you want to feel like yourself—just elevated. The bun sits low on your neck, which elongates your silhouette and works beautifully in formal wear, off-shoulder dresses, and gowns. It also photographs incredibly well because the spirals create visual texture and movement.
How to Create It
- Brush your hair gently to detangle, then gather it into a low ponytail at the nape of your neck. Use a hair tie that matches your hair color.
- Divide the ponytail into 2–4 sections, depending on how thick your hair is. The more sections, the more intricate the final spiral will look.
- Twist each section tightly from the base of the ponytail all the way to the end. As you twist, your natural curl pattern will interlock and create texture.
- Take the first twisted section and wrap it around the base of the ponytail to form a coil. Secure with bobby pins. Repeat with each twisted section, layering them around the base to form a compact spiral bun.
- Tuck in any loose ends and add bobby pins as needed. Use a flexible hold hairspray to keep everything in place without making it look stiff.
Styling Tips and Duration
This style is incredibly durable—it can last 10+ hours without loosening. The twisting actually strengthens the hold because each twist interlocks with your curls. You’ll need 30–45 minutes to create this style, depending on your hair thickness and how many twists you want. It works especially well on hair that’s been styled for a few days (not freshly washed), because that hair has more grip and holds the twists better.
3. Bantu Knots Styled into an Updo
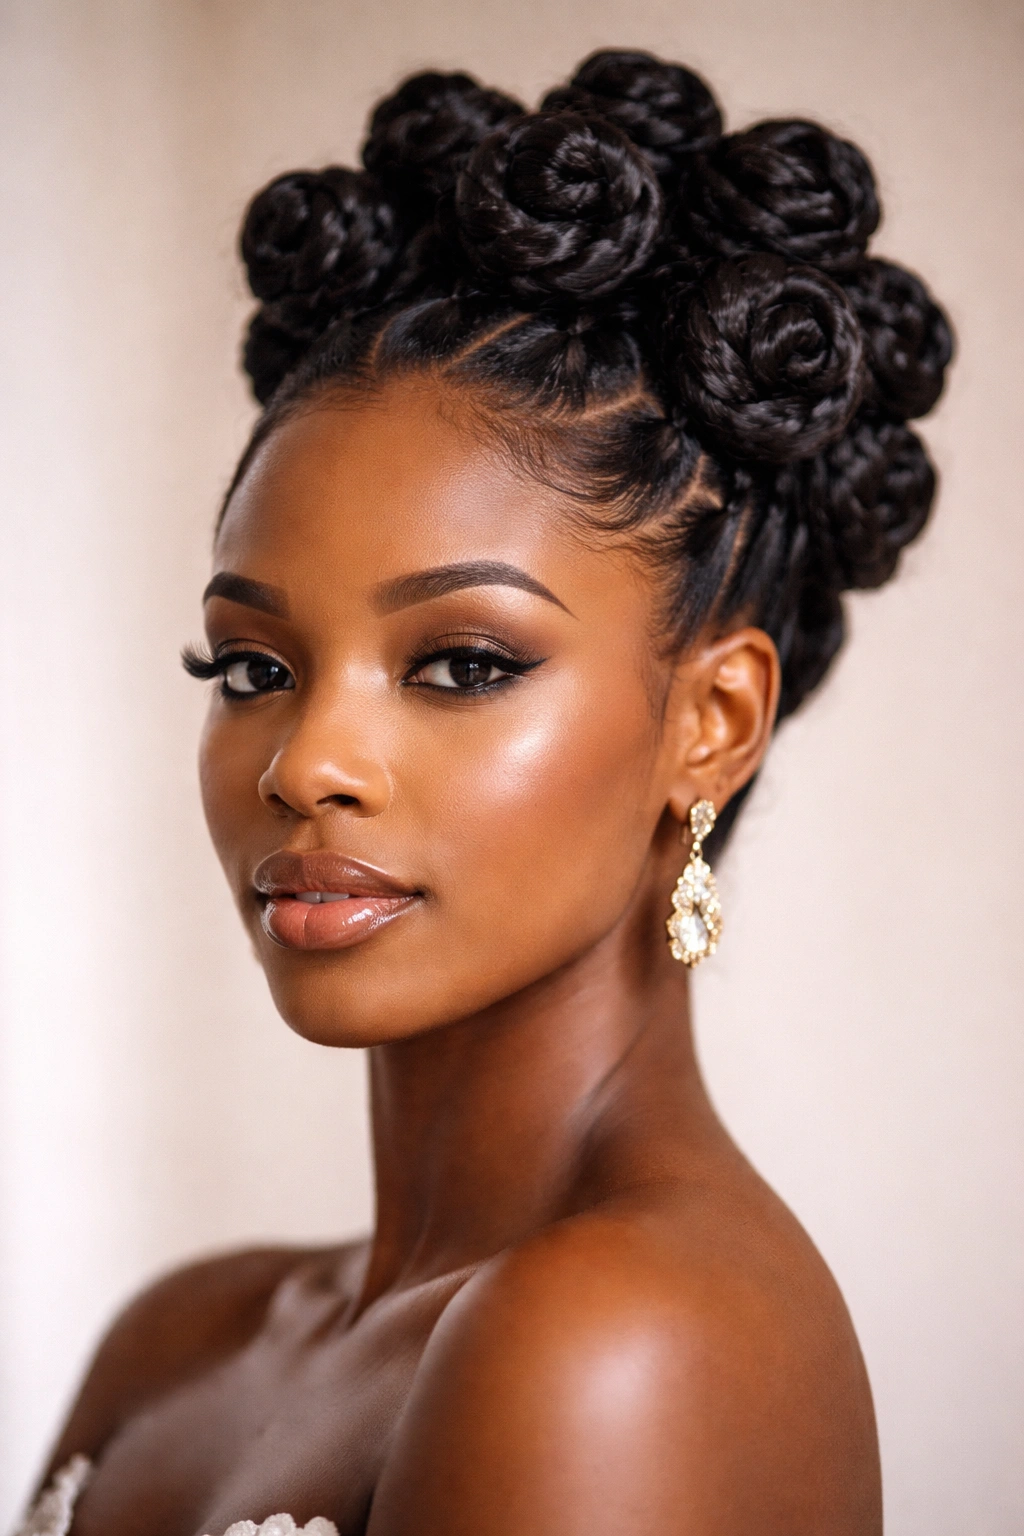
Bantu knots are a celebration of your heritage and your hair’s natural ability to hold sculptural shapes. By creating multiple knots and then gently pulling them into an updo, you get a style that’s visually striking, textured, and deeply connected to African hair traditions. This is a style that makes a cultural statement while looking absolutely stunning.
Why This Works for Special Occasions
Bantu knots are a powerful style choice. They honor the beauty of Black hair and Black culture while creating a look that’s genuinely unique. No two people’s Bantu knot updos look exactly the same because it depends on your hair texture, the number of knots, and how you style them. For weddings and celebrations within the Black community, this style carries real significance. For other occasions, it’s a bold, artistic choice that shows confidence and cultural pride.
How to Create It
- Start with hair that has some moisture and definition. If your curls have fallen a bit, refresh them with a curl cream and a light misting of water.
- Section your hair into 6–12 sections, depending on how full you want the knots and how long your hair is. Smaller sections create tighter, more defined knots; larger sections create looser, fluffier knots.
- Take one section and apply a light curl cream or edge control to it.
- Starting at the root, twist the section around itself, coiling tightly as you move down the hair. Once you reach the end, wrap the twisted section around the coil at the root to create a knot. Secure with bobby pins.
- Repeat for all sections. You can leave the knots as is for a stunning statement style, or you can gently pull them upward and pin them to the back of your head to create an updo.
- If creating an updo, gather the knots loosely at the crown or base of your neck, leaving a few unpinned for movement and dimension.
Styling Tips and Duration
Bantu knots can be created on freshly washed hair or on hair that’s been styled for several days. They typically last 3–5 days if you sleep on a silk pillowcase and don’t disturb them. Creating all the knots takes 45–90 minutes depending on your hair density and section size. If you’re wearing them as an updo for a single event, ask your stylist to create them the day before so they have time to set and look their best. You can also create Bantu knots for a few days before your event, then style them into the updo on the day itself.
4. Sleek High Bun with Curved Edge Details
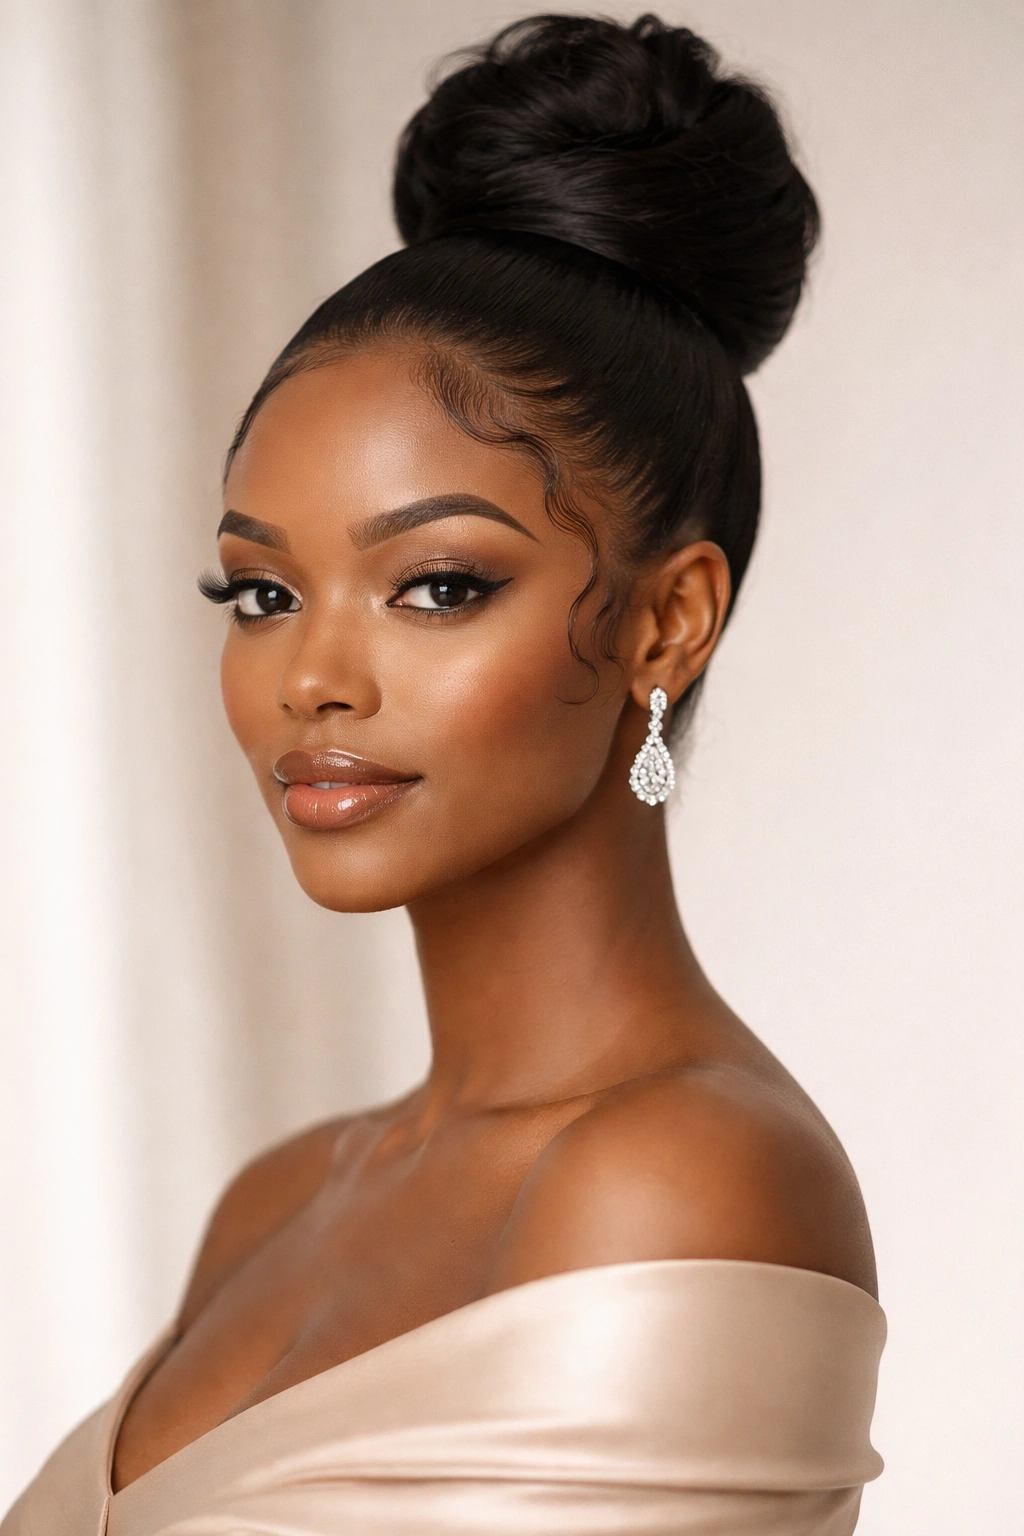
If you want to feel polished and put-together, this is your style. A sleek high bun means everything is smoothly brushed upward with precision—zero flyaways, zero texture showing, pure clean lines. Then you add curved edge details around your face and neck using edge control, creating an almost architectural frame for your face. It’s the updo that says “I planned this down to the millimeter.”
Why This Works for Special Occasions
There’s real power in a sleek bun. It elongates your face, emphasizes your bone structure, and creates an almost regal silhouette. The curved edge details add artistic flair and show that you put thought into the style. This look works beautifully with minimal jewelry because the style itself is a statement. It also photographs incredibly well because there’s nothing to distract from your face and features.
How to Create It
- Brush your hair firmly upward from your hairline to the crown, using a fine-toothed brush and a smoothing cream or gel. Really commit to smoothing—you want zero bumps or texture visible.
- Gather all your hair at the very top of your head into a tight, high ponytail. Secure with a elastic that matches your hair color.
- Twist the ponytail tightly, then coil it around the elastic at the base. Secure with bobby pins, making sure the bun feels secure and doesn’t wiggle.
- Using a toothbrush or edge brush and strong-hold edge control, create curved designs along your hairline. You can do simple swoops on each side, or get more intricate with multiple curves and designs.
- Finish with a strong-hold hairspray to lock everything in place.
Styling Tips and Duration
The key to a sleek bun is using the right products—you need a smoothing cream that tames frizz without flaking, and then a gel or edge control that’s strong enough to hold the sleekness all day. This style takes about 20 minutes once you’re practiced. It works best on hair that’s been relaxed, pressed, or blown out to a smooth state. If you have highly textured coils, you may want to blow-dry with a brush first to smooth the hair, then apply the gel. This style lasts beautifully for 8–10 hours, though you may need to touch up the edges halfway through the night if you’re dancing or sweating.
5. Twisted Crown with Loose Curls Down the Back
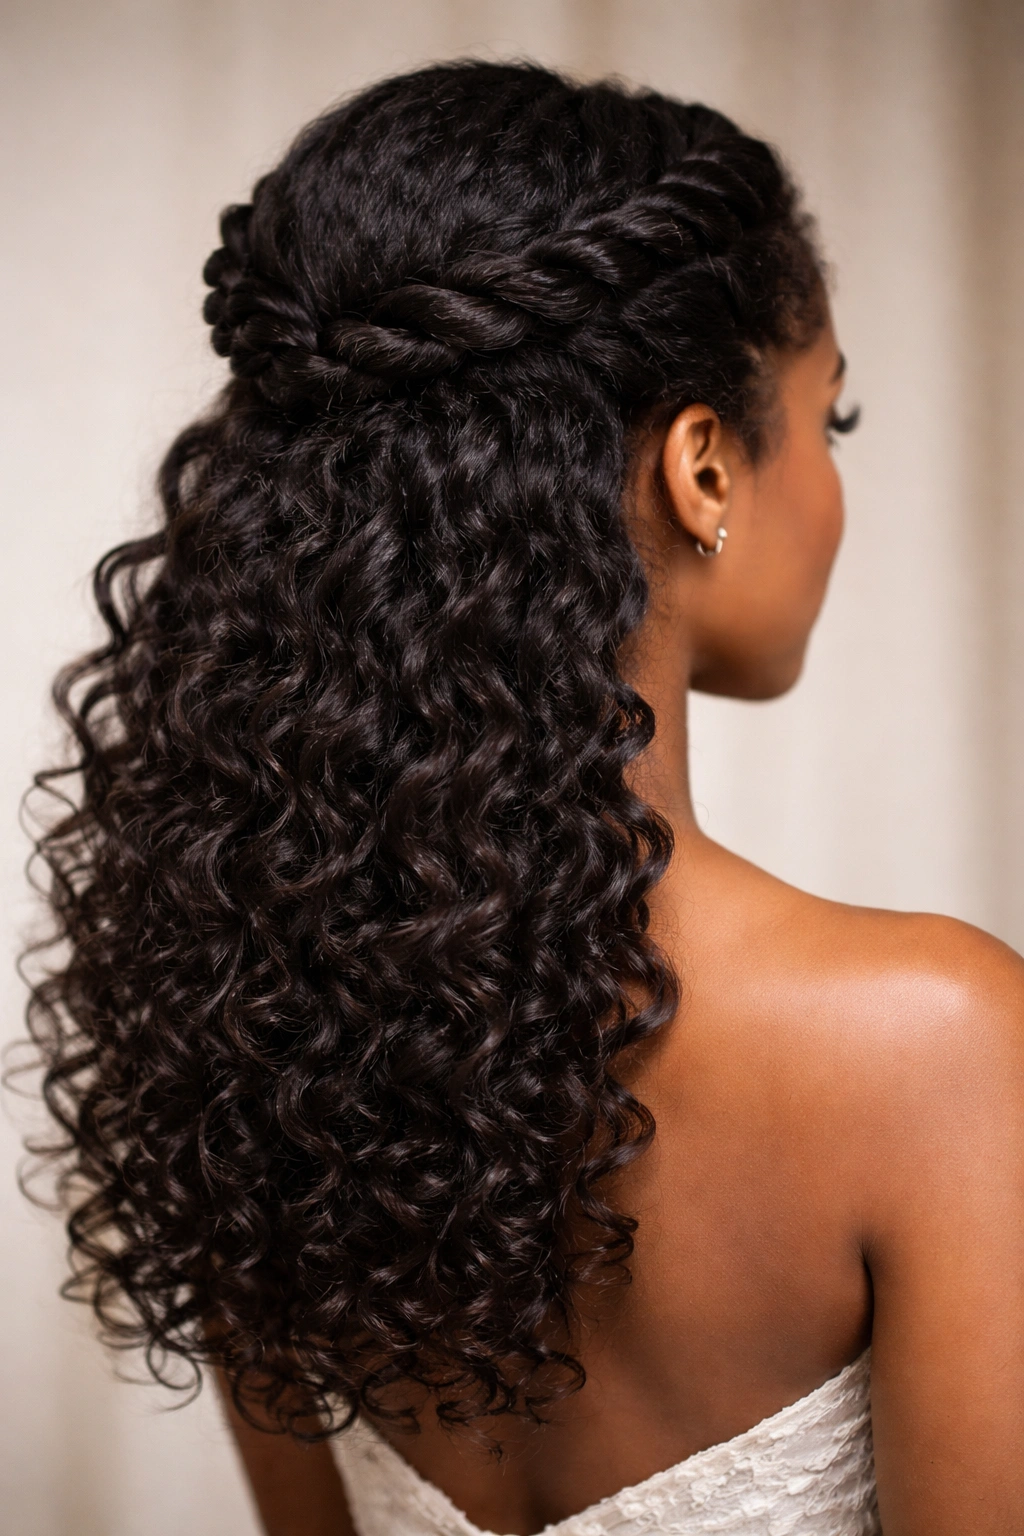
This style is romantic and soft while still being polished enough for a formal occasion. Two twists frame your face and wrap around the back of your head like a crown, while the rest of your hair falls loose in defined curls down your back and shoulders. It’s the perfect middle ground between “up” and “down”—you get the elegance of an updo with the softness and movement of loose hair.
Why This Works for Special Occasions
The twisted crown works beautifully for date nights because it’s soft and romantic without being fully down. For weddings, it’s elegant and works with most necklines and dress styles. The beauty of this style is that it showcases your curl pattern and the length of your hair while keeping hair off your face and neck. It also feels intentional and styled without being overly formal or severe.
How to Create It
- Create a deep side part, leaving more hair on one side than the other.
- On the side with less hair, take a small section at your temple and begin twisting it away from your face. Don’t make it too tight—you want it to look soft and romantic.
- Twist around the back of your head, following your natural hairline. Stop at the opposite side of your head (roughly behind your opposite ear).
- Secure the end of the first twist with bobby pins hidden underneath.
- On the side with more hair, take a slightly larger section and create a second twist. Twist it in the same direction as the first twist, and pin it to meet the first twist, creating a crown effect.
- Leave the rest of your hair down. If your curls need refreshment, use a curl cream and a light water mist. Scrunch gently to reactivate your curls and create definition.
- Flip your head upside down and scrunch more to add volume at the roots.
Styling Tips and Duration
This style works best on hair that has curl definition and bounce. If your hair has been flat or your curls have relaxed, refresh them the night before or the morning of your event. The twists will last all night, and the loose curls will hold their shape for 6–8 hours depending on humidity and your hair’s natural curl pattern. You can create this style in about 25–35 minutes. For a special event, apply a curl cream and light-hold hairspray to keep the curls defined but still touchable and soft.
6. Intricate Braided Bun Crown
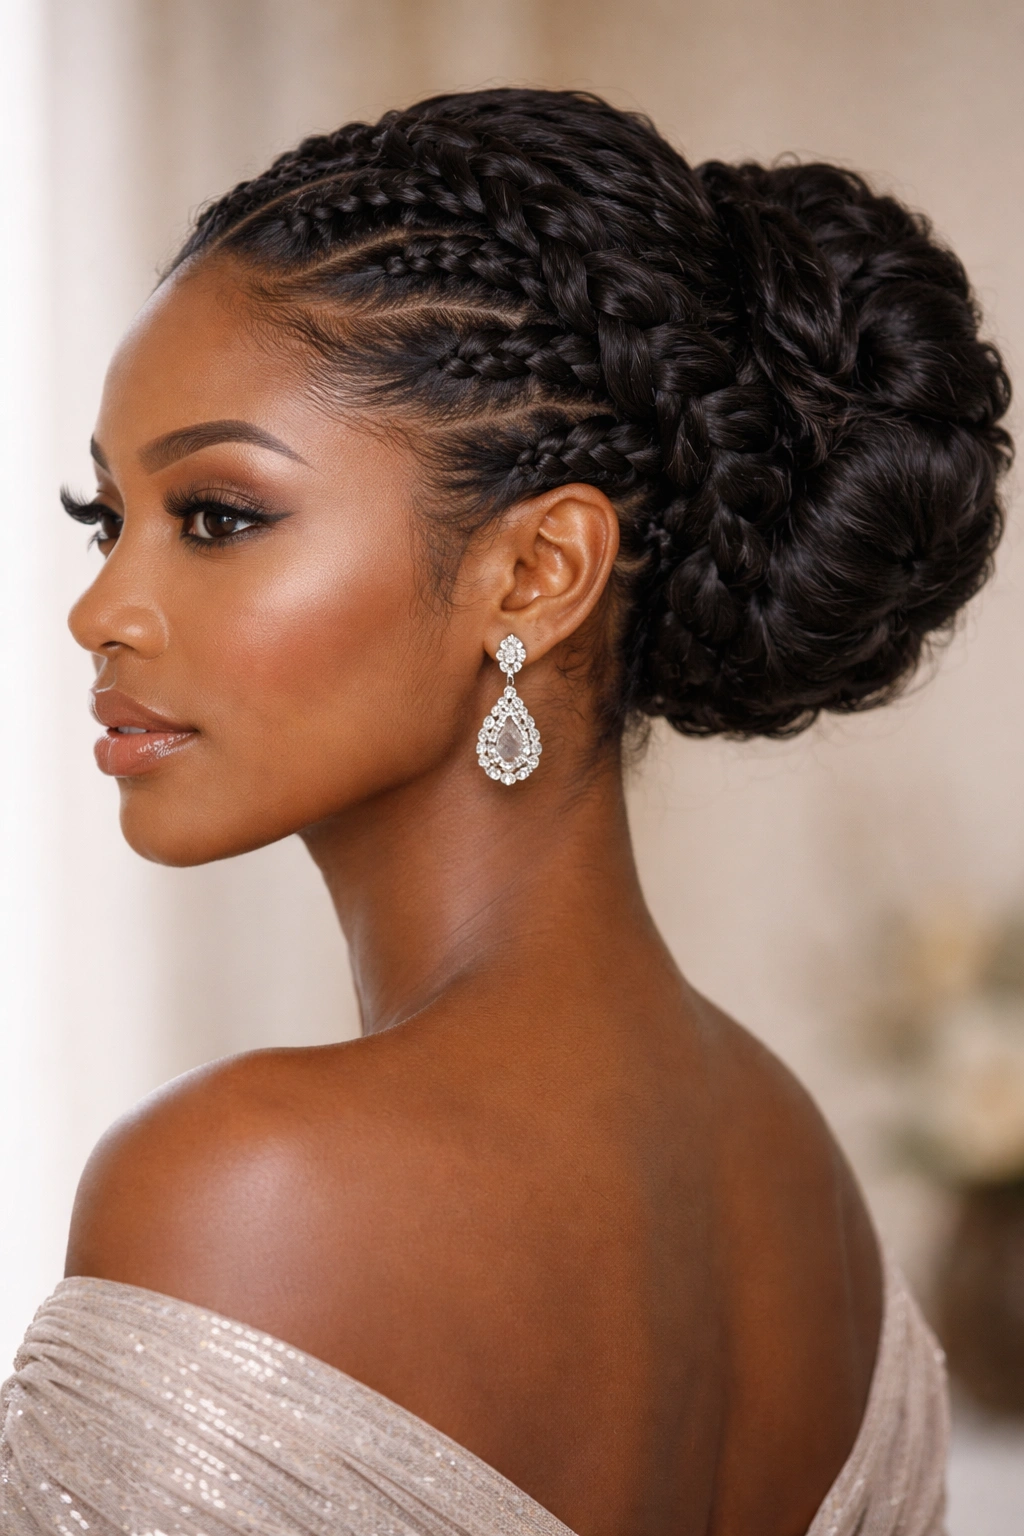
Braids are the foundation of countless protective and celebratory styles, and when you braid around your entire head to form a crown, then gather your hair into a bun at the back, you create something truly special. This style is intricate, artistic, and shows off serious hair skill. It’s the kind of style people will ask you about all night.
Why This Works for Special Occasions
A braided bun crown is a statement style. It’s not subtle or minimalist—it’s bold and intentional. The braids create visual texture and movement, and the bun at the back sits at a flattering height. This style works beautifully for weddings, especially if you’re wearing a dress with an open or low back. It also works wonderfully for date nights where you want to feel special and confident. The braids mean this style was created with intention and care, which shows respect for the occasion.
How to Create It
- Section your hair into 2–3 cornrow sections that will run from your front hairline around to the back of your head.
- Apply a braiding cream to the first section and create a clean cornrow from your hairline toward the back. As you braid, pick up hair from both sides so the braid grows fuller and follows your head shape.
- Repeat with the second and third sections, creating parallel rows of braids that follow the curve of your head.
- Once all braids reach the back, gather all your loose hair (the ends of the braids plus any remaining hair at the back) into a high or mid-height bun.
- Secure the bun with bobby pins, then wrap a small section of hair around the base to hide the elastic.
- Use edge control to smooth any flyaways and set with hairspray.
Styling Tips and Duration
This style requires practice or a skilled stylist—expect it to take 60–90 minutes if you’re new to cornrowing. Once you’re experienced, you can complete it in 45–60 minutes. The advantage of this style is that it’s incredibly durable. The braids won’t loosen, and the bun will hold beautifully all day and night. You can create this style the day before your event and sleep on a silk pillowcase, then simply refresh the bun on the day of. This style works on any hair type but is especially beautiful on hair with strong texture and curl.
7. Twisted Half-Updo with Statement Clips
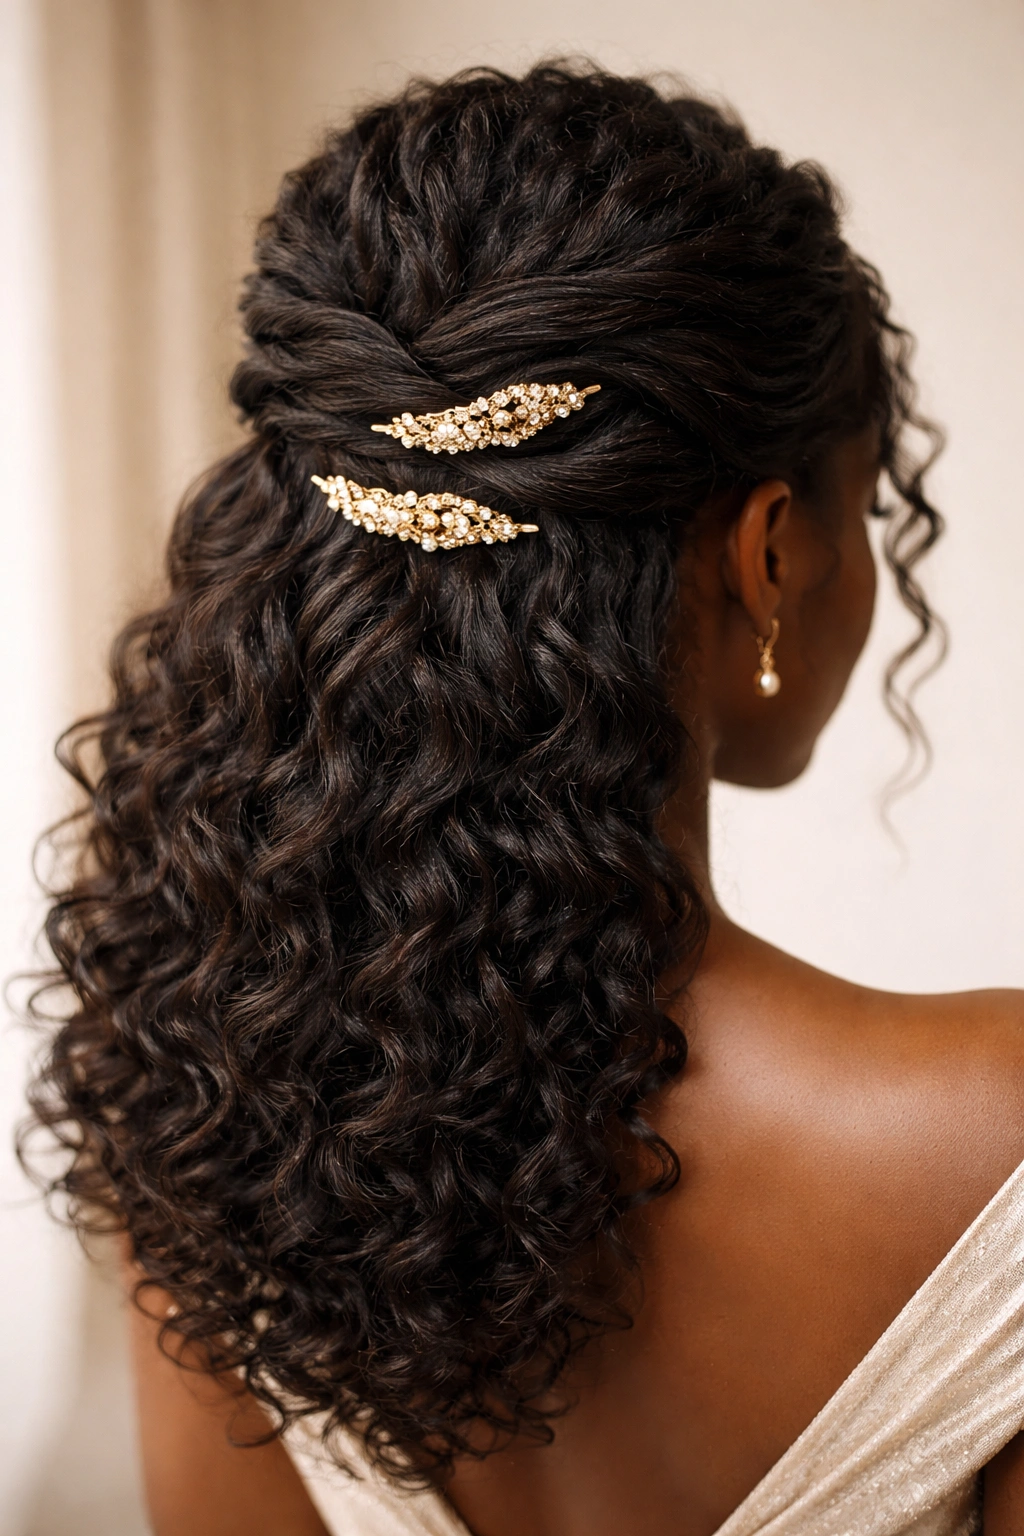
Sometimes you don’t want to commit to a full updo—you want the elegance of styled hair without the full drama. A twisted half-updo takes hair from both sides, twists it, and gathers it at the back, leaving the bottom half of your hair loose. Add statement clips in gold, silver, pearls, or crystals, and you have something that’s formal enough for a wedding but still romantic and effortless-feeling.
Why This Works for Special Occasions
A half-updo gives you the best of both worlds. Your hair is partially styled and secured, which keeps it off your face and neck, but you still get the softness and movement of loose curls. Adding statement clips makes this style feel intentional and special without requiring hours at the salon. The clips draw attention to the back of your head and neck, which is flattering for most body types and dress styles. This style also works beautifully for weddings where you want an updo feel but not a full updo.
How to Create It
- Start with refreshed curls. If your curls have fallen flat, apply a curl cream and water, then scrunch to reactivate them.
- Take a section of hair from your right temple, roughly 2 inches wide and going back to behind your ear.
- Twist this section firmly, moving upward and backward toward the crown.
- Repeat on the left side, twisting a section of the same size in the same direction.
- Bring both twisted sections to the back of your head and secure them together with bobby pins. You should have a half-moon shape of twisted hair at the back, with loose curls falling below.
- Slide one or more statement clips into the twisted hair at the back, positioning them where they’ll be visible.
- Leave the back curls loose and full. If you want them bouncier, flip your head and scrunch again.
Styling Tips and Duration
This style takes just 15–20 minutes to create, making it perfect if you’re short on time. The clips stay in place all night and add real visual interest to the back of your head. You can use anything from simple bobby pins to elaborate jeweled clips depending on the formality of your event. This style works on all curl types and textures. The looser your curls, the more romantic and soft the style feels.
8. Piled High Topknot with Textured Wrap
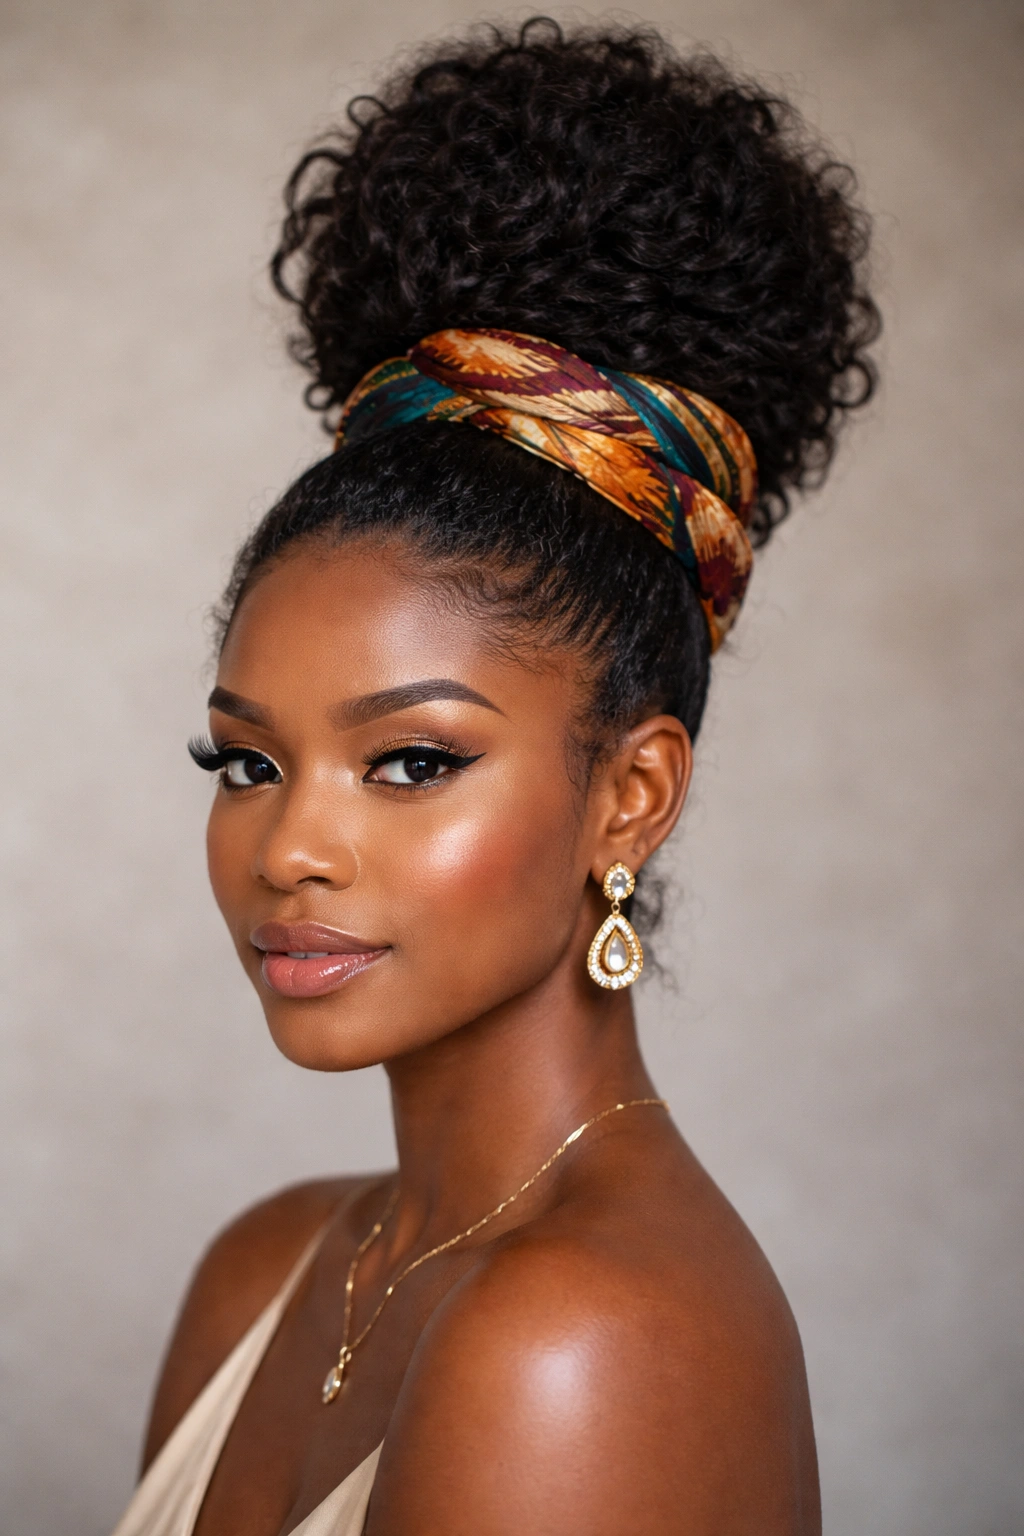
A topknot is playful, modern, and incredibly flattering—and when you create one on textured hair, it becomes something even more special. Instead of a sleek, tight bun, pile your coils loosely and let them sit high and full on the top of your head. Then wrap a decorative scarf, thread, or even a section of your own hair around the base to anchor it and add visual interest. It’s chic, it’s fun, and it says “I’m confident enough to take risks.”
Why This Works for Special Occasions
A textured topknot is bold. It’s not trying to be demure or traditionally formal—it’s celebrating your hair’s natural texture and volume. This works beautifully for weddings where you want to feel like yourself, date nights where you want to feel confident and modern, and any celebration where expressing your personal style matters. The topknot elongates your neck and face, and the height creates a lifted silhouette. Adding a wrap—whether it’s a colorful scarf that matches your outfit or a gold thread—makes the style feel intentional and coordinated.
How to Create It
- Gather your hair loosely into a high ponytail at the very top of your head. Don’t make it too tight—you want it to feel full and voluminous.
- Gently twist or braid the ponytail, then coil it around the elastic at the base. As you coil, don’t smooth it down—instead, let your curls puff up and create volume.
- Secure with bobby pins, tucking them underneath so they’re not visible.
- Take a silk scarf, decorative thread, or gold yarn and wrap it around the base of the topknot. You can wrap it once, twice, or multiple times depending on how bold you want the look.
- Tuck the end of the wrap underneath the knot and secure with a bobby pin.
- Gently reshape the topknot so it sits high and full, with curls loose and textured.
Styling Tips and Duration
This style is quick to create—about 15–20 minutes—and it lasts all day. The key is not making the initial ponytail too tight, because that restricts the volume and defeats the purpose of celebrating your texture. This style works best on hair with defined coils or curls. If your curls have lost definition, refresh them the morning of your event with a curl cream and water. The wrap is key to making this style feel intentional rather than casual—choose something that coordinates with your outfit, whether that’s metallics, jewel tones, or a color that complements your skin tone.
9. Smooth Pulled-Back Low Bun with Delicate Tendrils
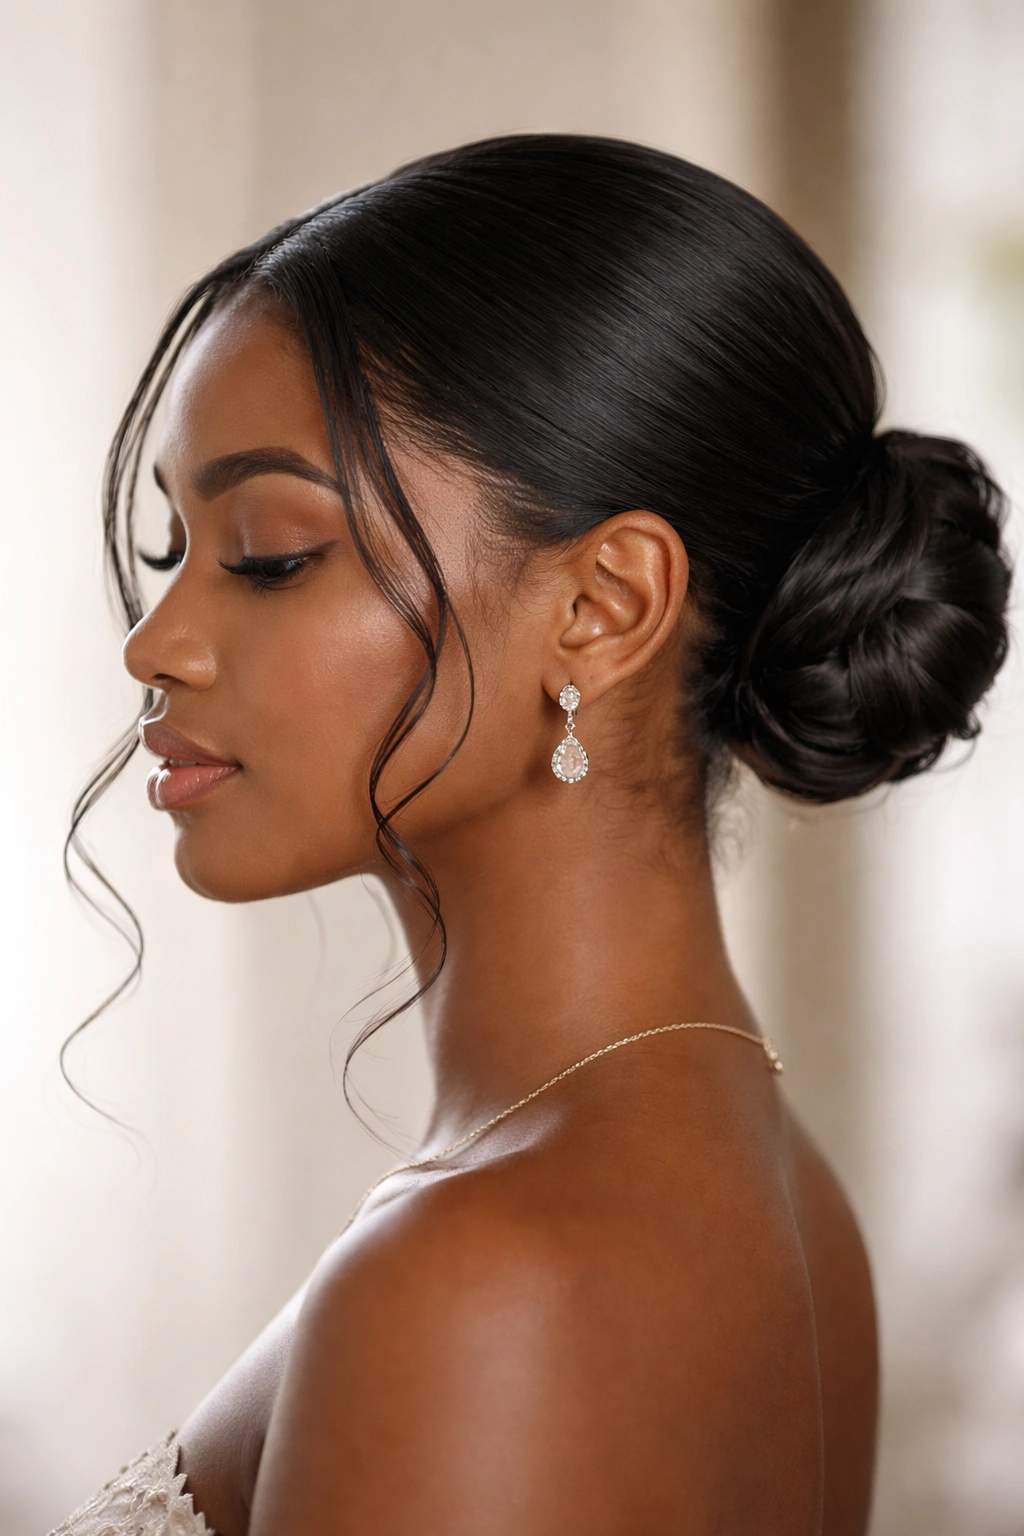
This is the style for when you want to feel elegant and timeless. Everything is pulled back smoothly and secured into a low bun at the nape of your neck, then you leave delicate, curly tendrils loose around your face and temples. It’s feminine, soft, and works beautifully with most face shapes and hair types. It’s also the kind of updo that feels effortless even though it requires real precision to create.
Why This Works for Special Occasions
A low bun with tendrils is the definition of elegant. It works for traditional weddings, intimate date nights, and formal events. The low placement is sophisticated and works beautifully with most dress necklines. The loose tendrils soften the face and add movement and dimension without compromising the polished look. This is also the style that photographs well across multiple shots because the tendrils catch light and create visual interest as you move.
How to Create It
- Brush your hair back smoothly, using a brush and smoothing cream or light gel. Create a center or side part depending on what feels right for your face shape.
- Use a comb to smooth all hair toward the back of your head, gathering it at the nape of your neck into a low ponytail.
- Secure with an elastic that matches your hair color.
- Before creating the bun, gently pull out 2–3 small sections from near your face—one on each side near your temples, and possibly one near your center part.
- Reshape these loose sections so they frame your face in soft, loose curls or waves.
- Take the main ponytail and twist it, then wrap it around the elastic to form a bun. Secure with bobby pins.
- Use edge control or a small amount of smoothing cream to define the hairline and any flyaways, then set with a light hairspray.
Styling Tips and Duration
This style takes about 25–30 minutes to perfect. The key is using the right amount of product—you need enough to smooth the hair and keep it in place, but not so much that it looks stiff or weighs down the tendrils. Avoid thick gels; instead, use a light smoothing cream and a flexible-hold hairspray. This style works beautifully on all hair types, from coily to wavy to straight. If you have very thick, coily hair, consider blow-drying with a brush first to create smoothness, then applying product. This style lasts 8–10 hours comfortably.
10. Spiral Locks Styled into a Formal Updo Crown
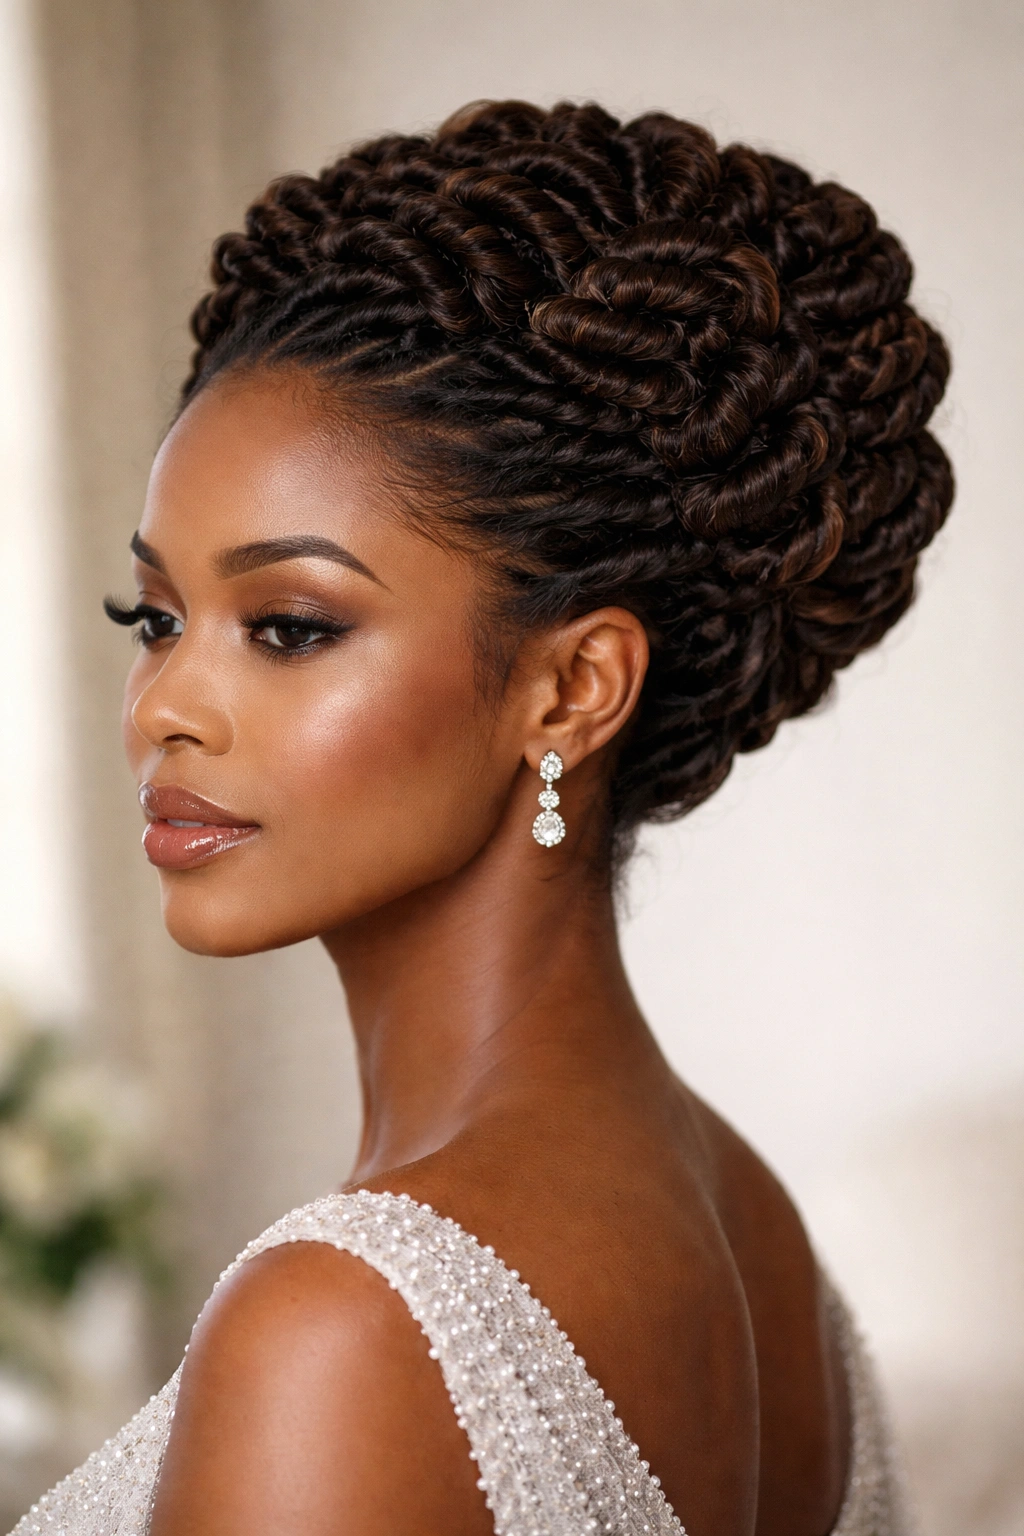
If you wear your hair in locks—whether they’re faux locs, sister locks, or permanent locs—you have a foundation for some truly stunning updos. Creating a formal crown or halo with your locks is a style that celebrates your chosen protective style while creating something elegant and structured. The locks form natural spirals and texture, and when you gather them into an updo, you create something that’s both artistic and deeply personal.
Why This Works for Special Occasions
Locks are a powerful, intentional choice, and styling them into a formal updo honors that intention while creating something that works for any formal occasion. The natural spirals and texture of locks create visual interest without any additional styling—they’re essentially doing the work for you. Gathering them into an updo shows that you’re proud of your hair choice and confident enough to style them in a polished way. This style works beautifully for weddings, especially if you’re getting married or in the wedding party. It also works for any celebration where you want to feel powerful and polished.
How to Create It
- If your locks are loose (not permanently locked), dampen them lightly with water and apply a light locking gel to prepare them for styling.
- Decide on your updo shape—will you create a high crown, a low bun, a circular halo, or multiple buns? Sketch out mentally where you want the locks to sit.
- Gently section your locks into groups based on your chosen design. Use small rubber bands or threading to temporarily hold sections in place.
- Take the first section and begin gathering the locks upward and backward, positioning them where you want them to sit.
- Secure the section with bobby pins, threading them through the locks themselves for a secure hold.
- Repeat with each section, building your updo crown or bun shape.
- Once all locks are positioned, gently reshape any that have shifted. Add any decorative elements—gold cuffs, beads, or jewelry that threads through your locks.
- Use a flexible-hold hairspray to keep everything in place without making the locks look stiff.
Styling Tips and Duration
If you have permanent locks, this style takes 30–45 minutes to create and lasts indefinitely until you choose to take it down. If you have faux locs or sister locks, the style lasts as long as you wear the locs. The beauty of this style is that your locks do much of the visual work—you’re really just positioning them and securing them. You can create this updo the day before your event and sleep on it, adjusting slightly the next morning if needed. Adding small decorative elements like gold cuffs or beads makes the style feel even more intentional and special.
Final Thoughts
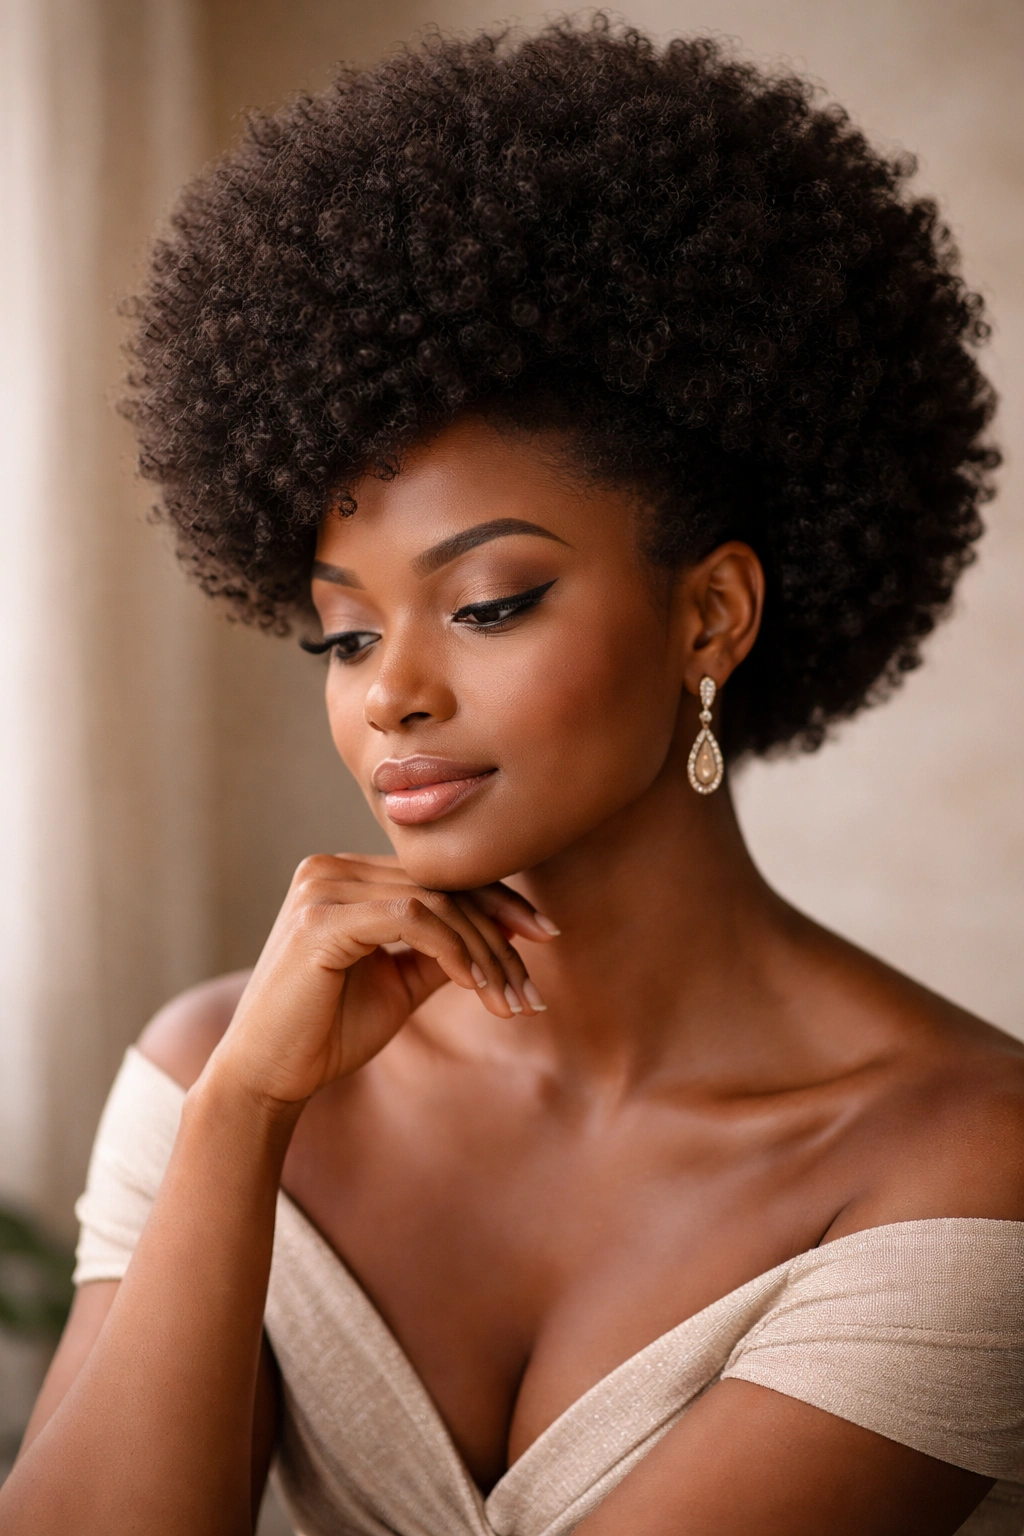
Every updo on this list celebrates something different about your hair and your confidence. Some are sleek and structured, showing off precision and polish. Others are textured and voluminous, celebrating your curl pattern and natural texture. Some are quick to create; others require time and intention.
The best updo for you depends on three things: your hair type and texture, how much time you want to spend styling, and how you want to feel. If you feel most confident and beautiful with your texture on display, choose a style like Bantu knots or a textured topknot. If you want polish and precision, go for a sleek high bun or pulled-back low bun. If you want balance, a half-updo or twisted crown gives you elegance without sacrificing the romance of loose curls.
Whatever style you choose, remember that you’re not just creating a hairstyle—you’re creating a whole feeling for yourself on a night that matters. Take time with it. Use products that make your hair feel soft and moisturized, not stiff and dry. Pin carefully so you can wear your style for hours without discomfort. And most importantly, choose something that makes you feel like the best version of yourself.
