



When you’re ready to switch up your look but want something sleek, polished, and undeniably chic, straight afro hairstyles offer exactly that transformation. These styles work beautifully whether you’re transitioning from natural curls, maintaining relaxed hair, or experimenting with protective styling techniques. The versatility is remarkable—you can go from an effortless everyday look to a statement-making style that turns heads the moment you walk into a room.
What makes straight afro styles so compelling is how they celebrate the natural texture of your hair while offering a completely different aesthetic than coily or curly presentations. They’re not about conforming to one standard of beauty; they’re about you choosing what makes you feel most confident and comfortable right now. Some styles take minutes to achieve, while others offer longer-lasting results that carry you through several days without restyling. Whether you’re drawn to the polished sophistication of a silk press, the bold statement of sleek braids, or something with more movement and texture, there’s a straight afro style waiting for you.
1. Sleek Straight Locs
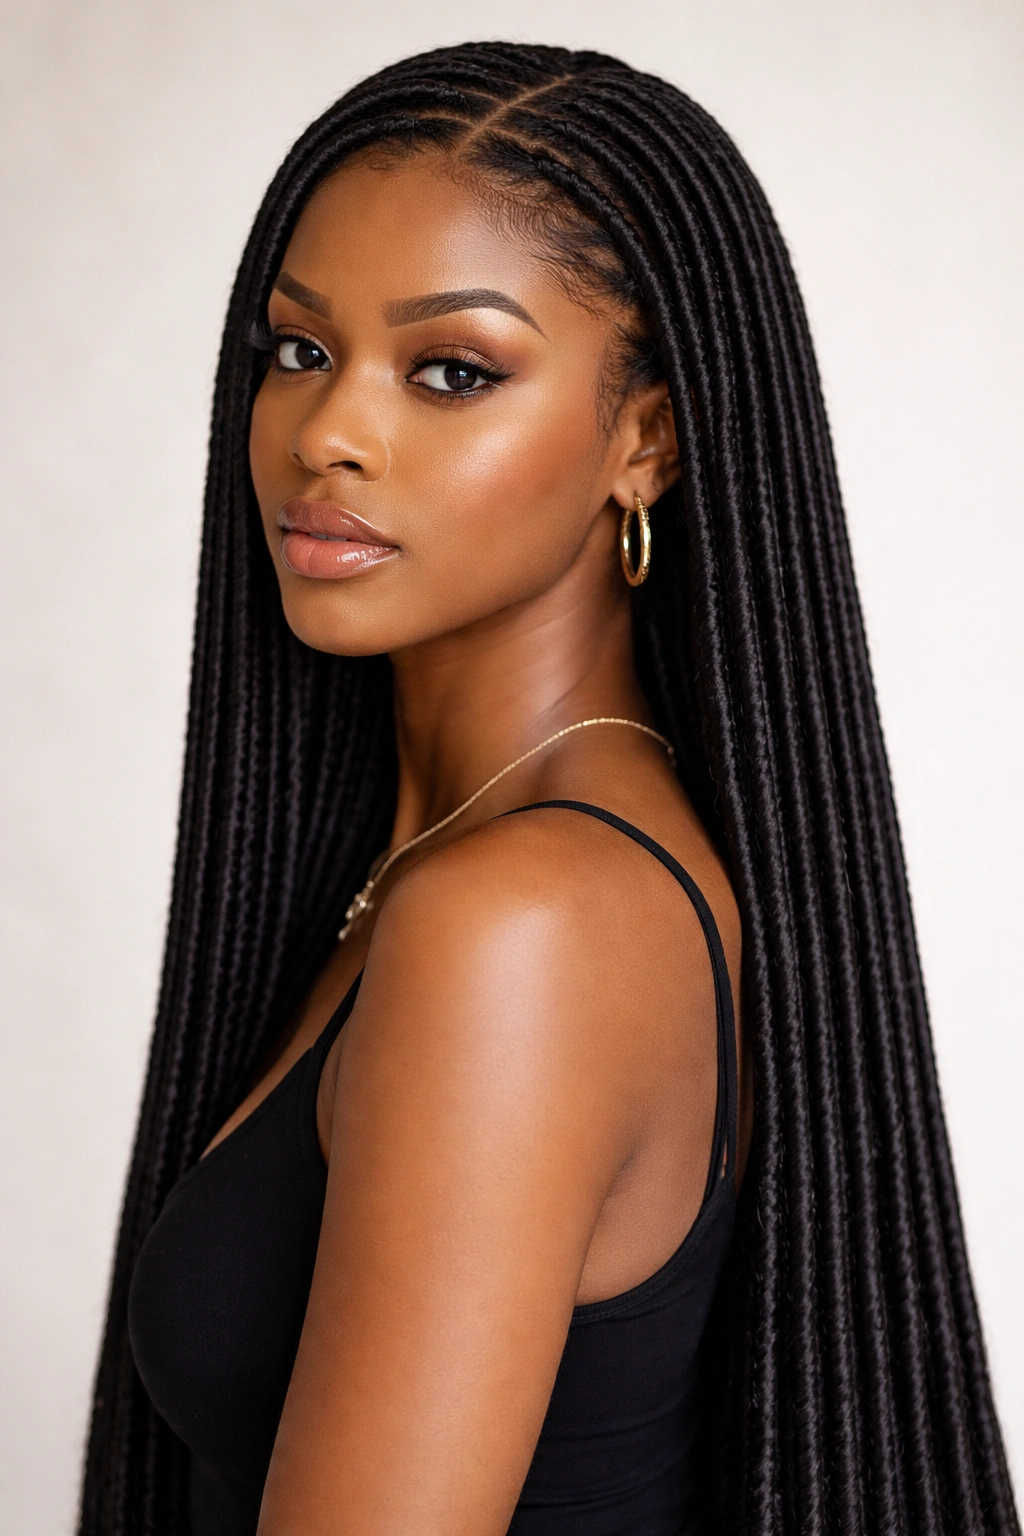
Straight locs represent a stunning evolution of the traditional locs style, creating a refined, elongated look that flows with intention and presence. Unlike traditional curly locs, straight locs maintain a uniform, cylindrical shape from root to tip, giving your overall appearance a more streamlined and controlled aesthetic. They sit close to the head initially and drape beautifully down your back or over your shoulders, creating movement that feels both graceful and powerful.
Why This Style Commands Attention
Straight locs transform how your face shape reads and how your silhouette appears, often making features feel more defined and creating a longer visual line from head to toe. The uniformity of the locs creates a graphic quality that photographs incredibly well and catches light in unexpected ways as you move. Many people find that straight locs feel lighter and less heavy than thicker, curlier locs, which can reduce tension on the scalp and make the overall style feel more wearable long-term.
Getting and Maintaining Them
- Installation typically takes 4-6 hours depending on your hair length and how many locs you’re getting
- You’ll need to maintain them every 4-6 weeks with retwists to keep the straight pattern crisp and defined
- Straight locs work beautifully with protective styling—you can create high buns, side sweeps, or wrap them in silk for sleeping
- They hold their shape exceptionally well if you keep them moisturized with lightweight oils or loc-specific products
- Expect them to last 6 months to 2+ years depending on your hair growth and maintenance commitment
Pro tip: Sleep on a silk or satin pillowcase or wrap your locs loosely in a silk scarf to maintain the straight pattern and reduce frizz between retwists.
2. Straight Twist-Out
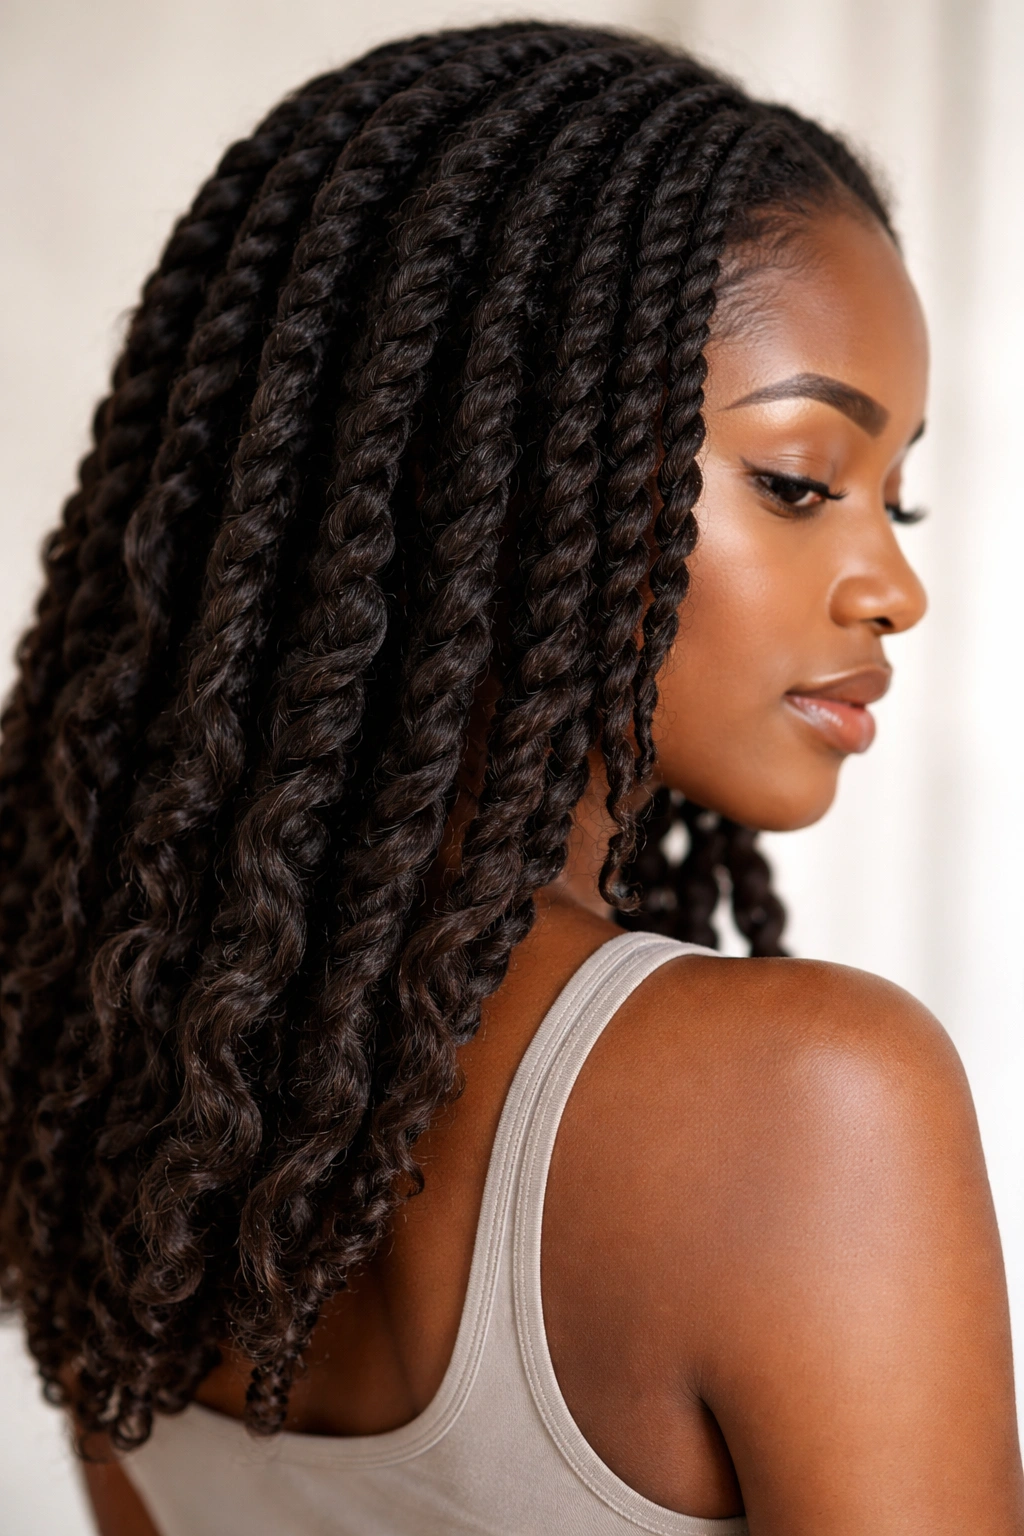
A twist-out transforms your natural texture by creating a stretched, rope-like pattern that unfolds into beautiful waves and straight sections with subtle definition. The technique involves twisting damp hair around itself, allowing it to dry or set overnight, then gently unraveling those twists to reveal the pattern underneath. The result sits somewhere between fully straight and naturally textured—you get straightness with character, movement, and dimension that feels fresh and intentional.
What Makes This Technique Special
Twist-outs work with your hair’s natural tendencies rather than against them, making them gentler than heat-based straightening methods. The stretched pattern created by twisting actually elongates your curl pattern, making hair appear straighter while maintaining the health and integrity of each strand. This style transitions beautifully throughout the week—it starts with the clearest twist pattern, gradually loosens into waves, and eventually settles into a softer, straighter look by day three or four.
How to Create a Twist-Out
- Start with freshly washed, damp hair; apply a leave-in conditioner and styling cream to damp strands
- Divide hair into sections (typically 4-8 large sections depending on density), then divide each section into two strands
- Twist each pair of strands around each other, working from root to tip with slight tension and consistency
- Allow hair to air-dry completely or sleep on the twists overnight for the best hold and definition
- Carefully unravel each twist gently from the tip upward, using your fingers to separate and fluff
- Spritz lightly with water and a curl cream if you want to refresh and define the pattern on day one
Worth knowing: The tighter your twists, the straighter your result. Loose, relaxed twists create more wave and curl; tight, consistent twists create straighter, more defined patterns.
3. Blowout Waves
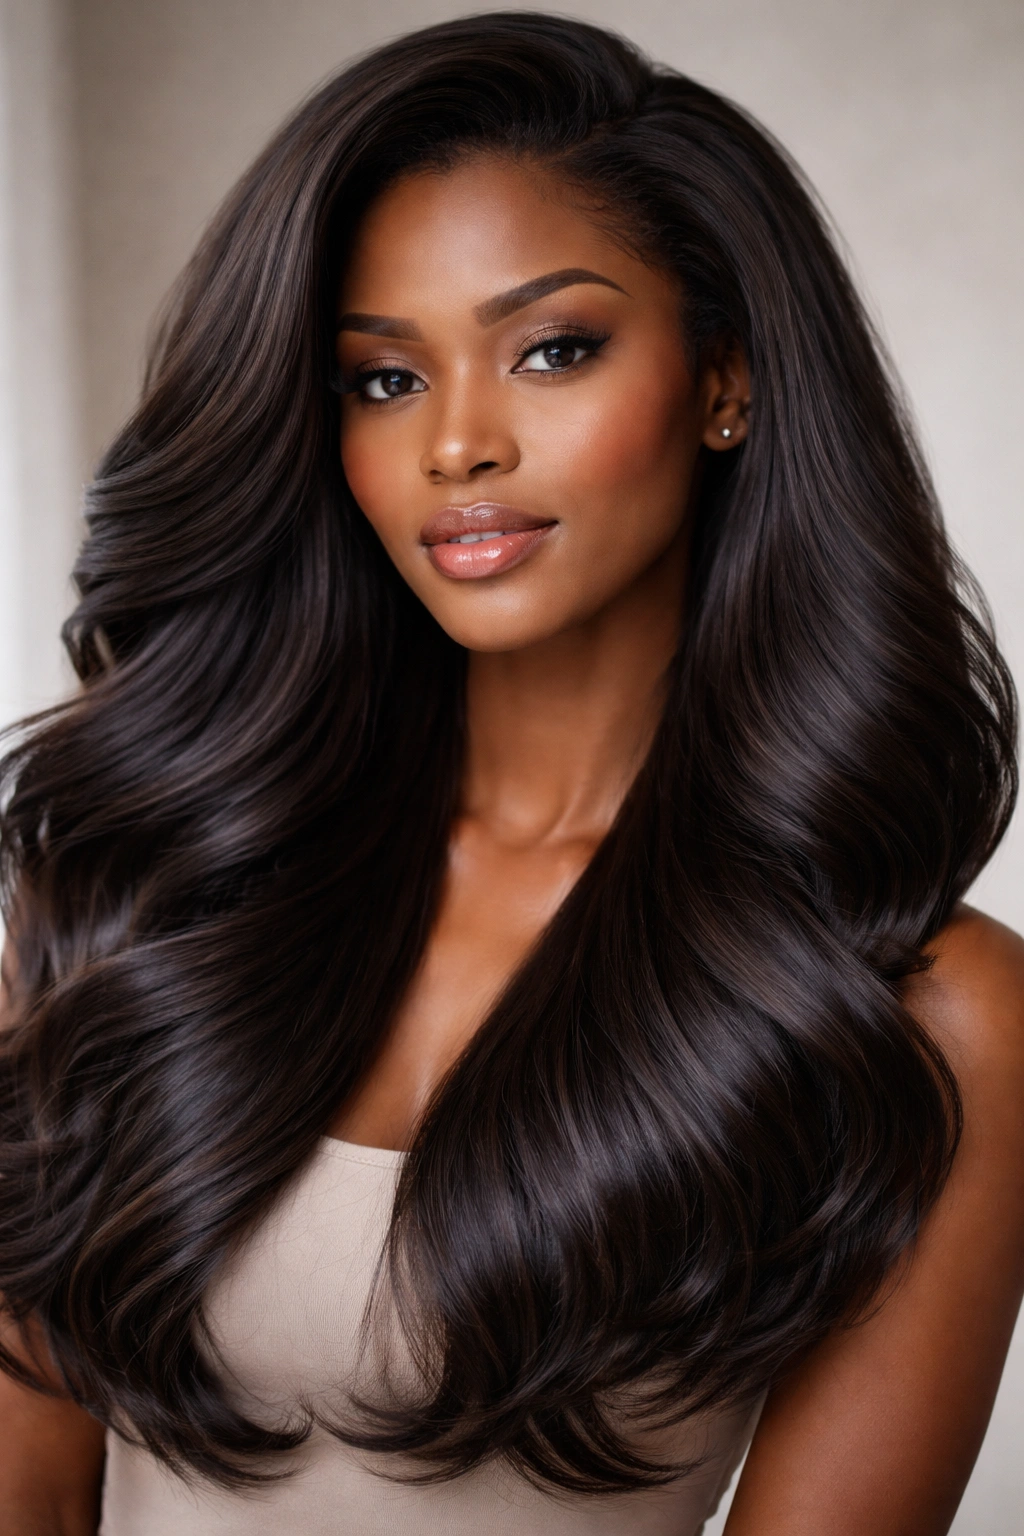
A blowout takes your natural hair and stretches it with heat and airflow to create smooth, flowing waves that feel luxurious and polished. This technique uses a blow-dryer, sometimes with a concentrator nozzle attachment, to smooth the hair cuticle and elongate your curl pattern into waves and straighter sections. The result is a sophisticated, flowing look that has serious movement and shine—perfect when you want your hair to feel styled but still effortlessly beautiful.
Why Blowouts Feel Like Luxury
There’s something instantly gratifying about the way a blowout transforms your hair’s texture and appearance. Your hair becomes smoother, shinier, and more manageable because the cuticles lie flat, reflecting light beautifully. The stretched pattern creates waves and definition that look professional and intentional, but the look also has airiness and movement that feels contemporary and wearable.
Achieving the Perfect Blowout
- Shampoo and condition with products that add slip and smoothness (leave-in conditioner is essential)
- Apply a heat protectant spray generously throughout damp hair, especially on your ends
- Use a blow-dryer on medium heat with a concentrator nozzle; start at the roots and work downward, directing airflow downward to smooth the cuticle
- You can use a round brush or paddle brush to help stretch and smooth sections as you dry, or simply use your fingers to direct the airflow
- For more defined waves, gently twist or coil damp sections around your fingers or a curling iron while the hair is still warm
- Finish with a light oil or serum on the ends to enhance shine and reduce frizz
Insider note: The key to a long-lasting blowout is fully drying your hair—any dampness will cause your natural texture to return as hair cools. Take your time with the drying process.
4. Sleek Box Braids with Straight Edges
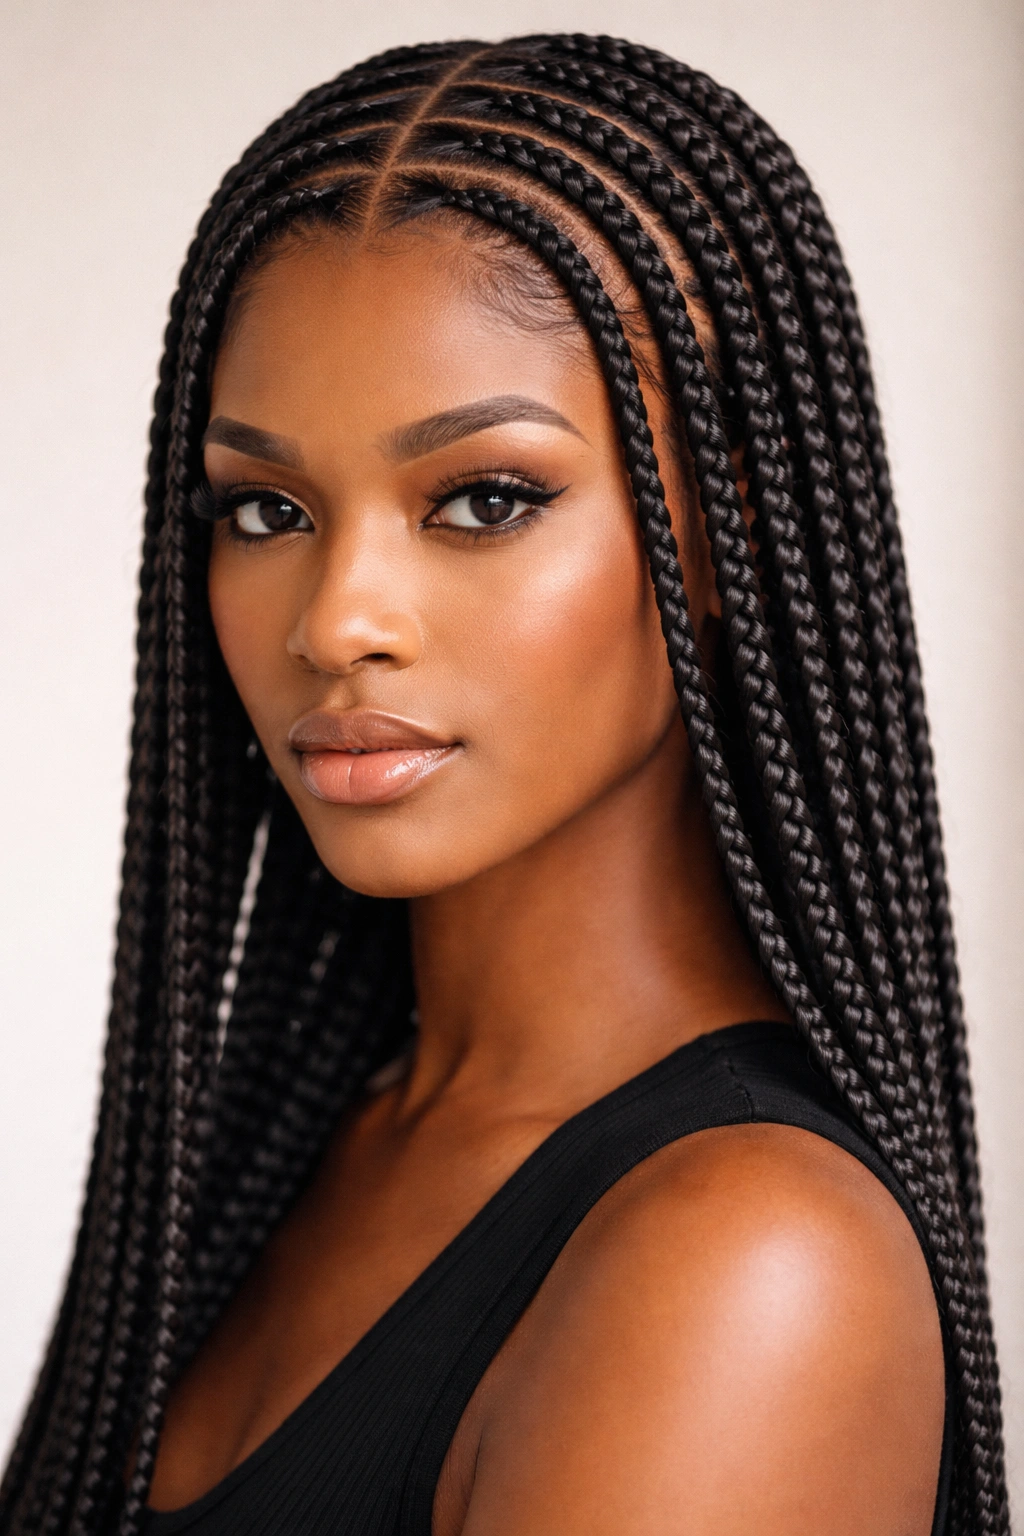
Box braids reimagined as a straight afro style offer incredible protection while giving you a polished, sculptural look that feels both powerful and artistic. Traditional box braids work with your curl pattern to create a three-dimensional, textured style; straight box braids instead use straight hair or incorporate straightening into the braiding process, creating clean, uniform braids that sit smoothly against the head and drape in orderly lines down your back.
The Visual Impact of Straight Braids
Straight braids create a more architectural, structured appearance than curly braids because the individual plaits don’t interlock and blend as they sit against your scalp. You can see each individual braid clearly, which creates a bold, graphic quality that photographs beautifully and reads as intentionally styled rather than naturally occurring. This style makes a statement—it says you’re deliberate about your presentation and confident in your aesthetic choices.
Creating and Styling Straight Braids
- Braids typically take 4-8 hours depending on your hair length, density, and how many braids you want
- Straight braids work best when created with hair that’s already straight or straightened before the installation begins
- You can add colored hair, beads, or cuffs to personalize the style and add visual interest
- Maintenance involves keeping the edges smooth and potentially re-braiding the roots every 4-6 weeks as your natural hair grows
- Straight braids can be styled up into high buns, low ponytails, wrapped around your head, or left to flow freely down your back
- This style typically lasts 6-8 weeks before needing to be redone, making it an excellent long-term protective style
Real talk: Straight braids can feel heavy since there’s less volume distribution than curly braids, so if you have fine hair or sensitive edges, start with fewer, thicker braids rather than many thin ones.
5. Silk Press with Waves
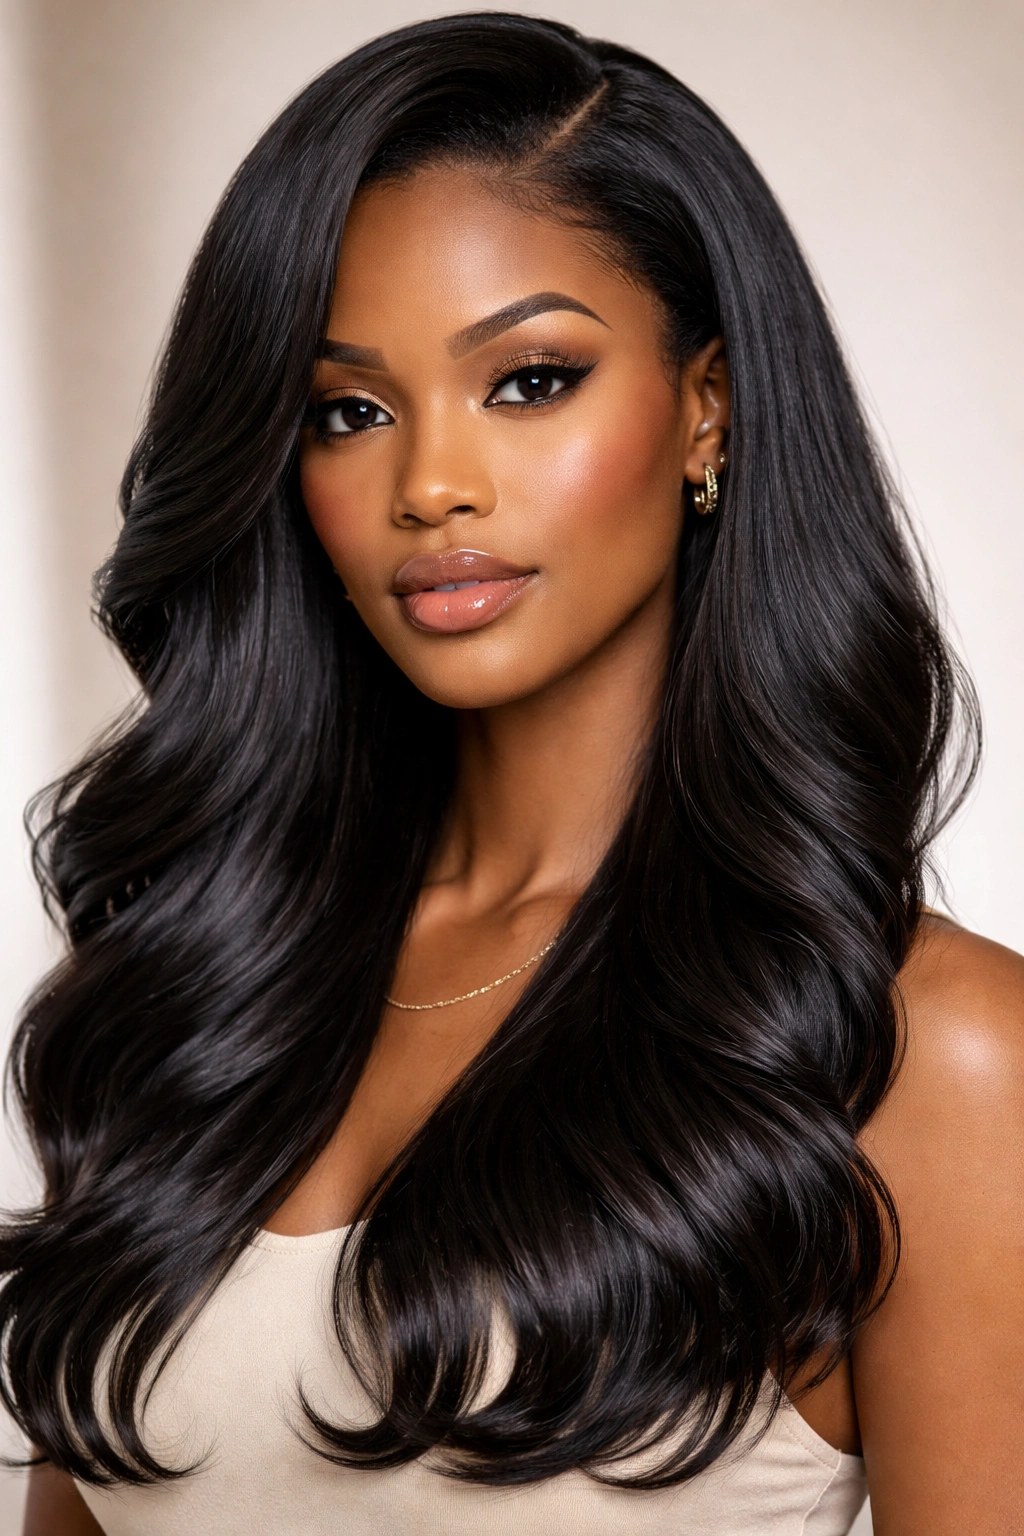
A silk press represents the ultimate in polished, sleek styling—your hair is shampooed, deep conditioned, blow-dried, and then pressed with a flat iron on very low heat to create smooth, straight hair with optional waves or movement built in. This technique originated in African salons and has become synonymous with beautifully maintained, straightened afro-textured hair. The result is shiny, smooth, and incredibly elegant—the kind of style that makes you feel put-together the moment you leave the salon.
What Makes a Silk Press Different
The key difference between a silk press and a regular blowout is the gentle application of a hot tool (usually a flat iron) on very low heat to smooth the hair cuticle even further. The “silk” refers to how silky smooth the hair becomes, with a liquid, flowing quality that reflects light and drapes beautifully. A skilled stylist can create a silk press that looks like your hair naturally grows straight, without the crispy, damaged appearance that comes from excessive heat.
The Silk Press Process
- Your stylist starts with a gentle shampoo and deep conditioning treatment, sometimes using a protein treatment for added strength
- Hair is blow-dried section by section, stretched smooth and straight as it dries
- A flat iron on low heat (typically 250-320°F depending on your hair’s texture and heat tolerance) is run through each section with a smoothing cream or oil for glide
- Some stylists will create waves by wrapping warm sections around their fingers or using a curling iron just on the ends
- The entire process typically takes 2-3 hours depending on your hair length and density
- Results last 1-2 weeks depending on humidity, how you sleep on your hair, and your daily styling
Pro tip: A silk press requires consistent moisture maintenance—use lightweight oils and moisturizing sprays throughout the week, and sleep on a silk or satin pillowcase to extend the style’s life and maintain shine.
6. Straightened Hair with Dramatic Side Sweep
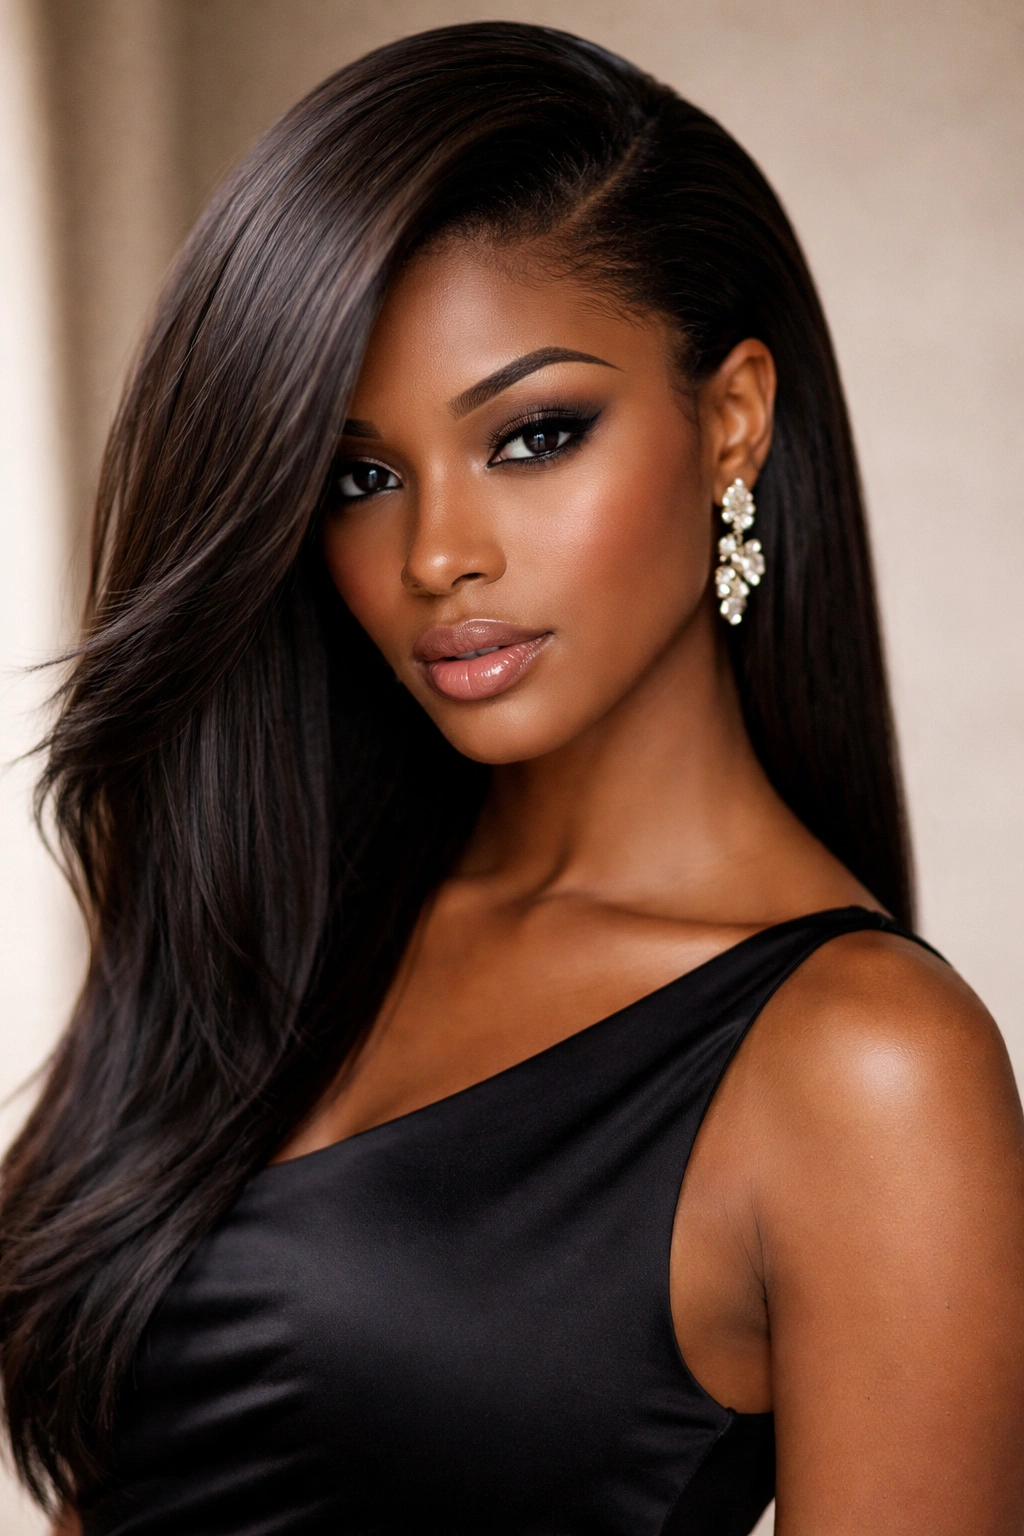
This style takes straight hair and styles it with intention, sweeping a substantial portion of your hair to one side to create asymmetry, drama, and visual interest. Rather than a simple center or side part, a dramatic side sweep involves positioning the majority of your hair on one side of your head, often tucking the smaller side behind your ear or against your head for contrast. It’s a style that flatters nearly every face shape because the diagonal line it creates is inherently flattering and helps define your features.
Why This Styling Choice Transforms Your Look
A dramatic side sweep immediately reads as intentional and styled rather than a casual everyday look. The asymmetry draws focus to one side of your face, which can be incredibly flattering if you understand how it frames your features. This style also has surprising versatility—it works equally well for professional settings, nights out, casual daily styling, or formal events. The angle of the sweep and which side you choose can actually change how your face proportions appear to others.
How to Create and Maintain It
- Start with freshly straightened hair (using any method: blowout, flat iron, silk press, or twist-out)
- Apply a smoothing serum or lightweight oil to hair for shine and frizz control
- Use a fine-tooth comb to brush all your hair to one side, starting at the crown and working downward
- Pin the smaller section back with bobby pins that match your hair color, tucking it smoothly against your head
- Smooth any flyaways with a small brush and edge control product
- Set the style with a light hairspray to keep everything in place without stiffness
- As your style ages throughout the week, you can refresh it by re-smoothing the swept section and reapplying product
Worth knowing: The dramatic side sweep looks most striking when there’s a clear contrast between the two sides. If your hair is too similar in volume on both sides, the effect won’t feel as dramatic.
7. Sleek High Ponytail with Straight Hair
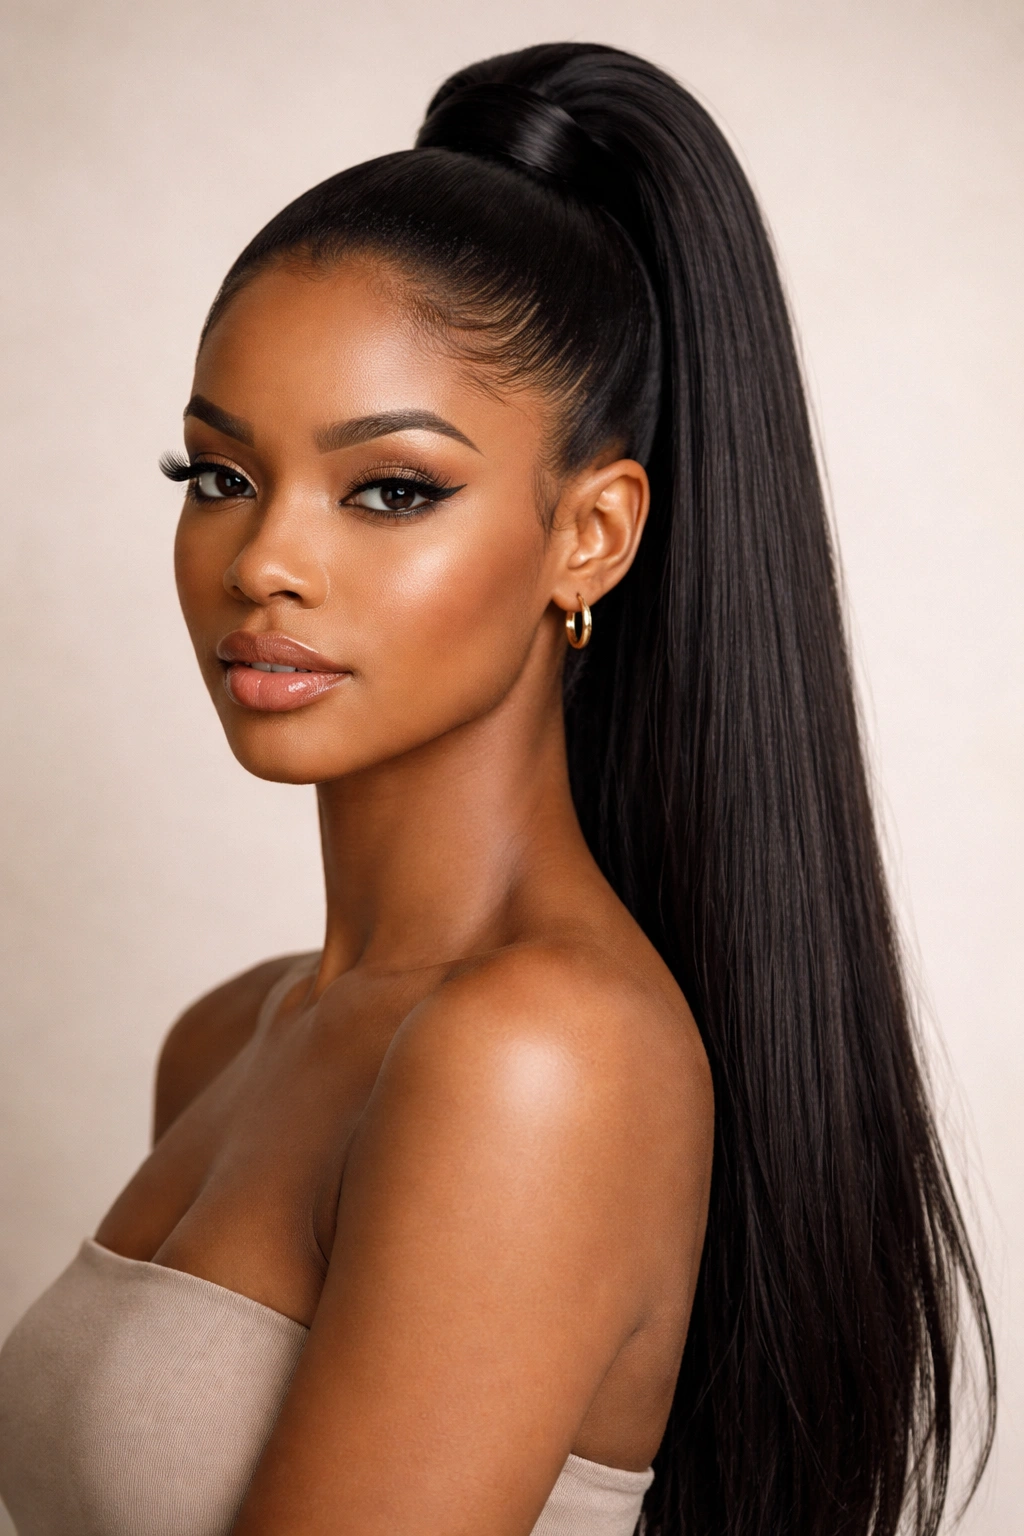
A sleek high ponytail takes straightened hair and gathers it into a polished, pulled-back style that feels both sporty and sophisticated depending on how you style it. The hair is smoothed back to the crown or top of the head with no bumps or loose pieces, then gathered tightly into a ponytail that sits high and elongates your neck and face. The result is clean, controlled, and instantly flattering—this is the style that makes you feel confident and put-together.
The Versatility of a Sleek Ponytail
What makes this style so valuable is how it works in virtually every context. Wear it to the gym or during workouts because it keeps hair completely off your face and neck. Take it straight from work to dinner by simply adjusting your edges and adding a hair accessory. Pair it with a silk scarf wrapped around the base for a more textured, trendy look, or leave it bare and minimal for maximum polish. The high placement naturally elongates your silhouette and draws focus upward to your face, making it flattering for nearly every face shape.
Perfecting Your Sleek Ponytail
- Start with straightened hair and apply a smoothing cream or gel to the hair you’ll be pulling back
- Use a fine-tooth comb to brush hair back to your desired placement (crown for high, slightly lower for mid-height)
- Gather hair into a tight elastic, making sure there are no bumps, loose pieces, or flyaways
- Smooth your edges with edge control and a small brush, creating clean lines around your hairline
- For added polish, take a small section of hair from inside the ponytail and wrap it around the elastic to hide the band
- Secure the wrapped section with a bobby pin
- Finish with hairspray to set everything in place and tame any flyaways
- You can leave the ponytail straight, curl the ends with a curling iron, or braid it for variation
Pro tip: The smoothness of your ponytail is everything—invest in a satin or silk hair tie rather than a standard elastic, which can create bumps and frizz that ruin the sleek effect.
8. Straightened Bob with Textured Ends
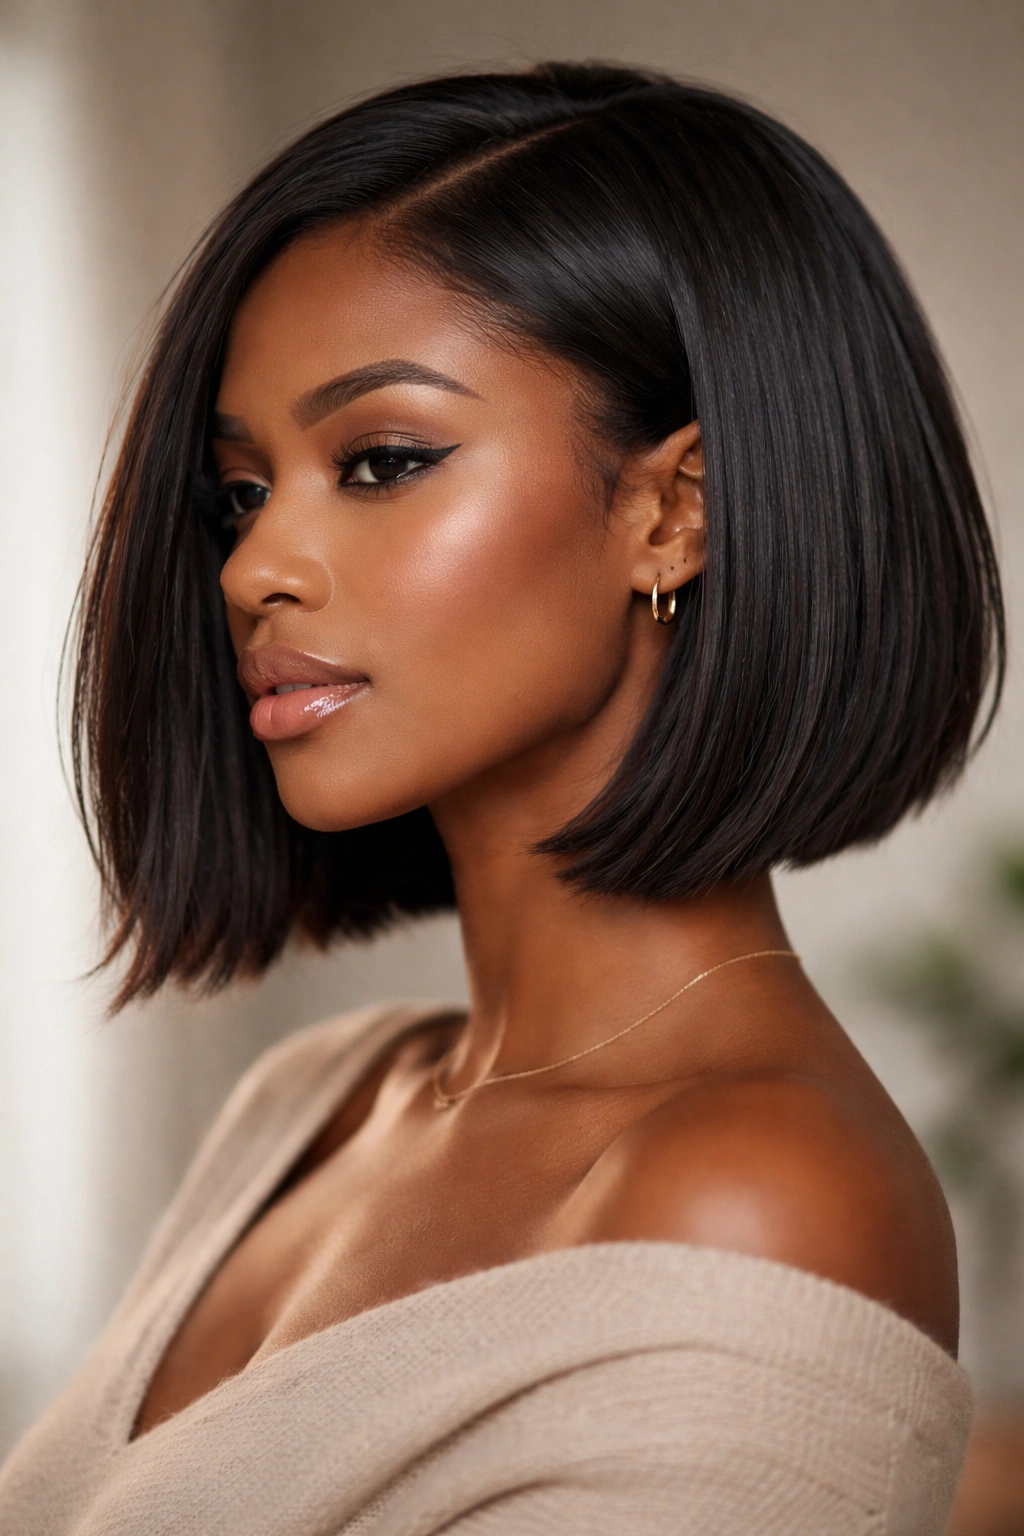
A straightened bob offers a clean, contemporary silhouette that feels modern and intentional, especially when the ends are textured or slightly tapered for movement and dimension. Rather than a blunt-cut bob that can feel heavy, a textured-end bob maintains the length and style of a bob cut while incorporating subtle waves, crimping, or layering into the ends. This creates a style that’s straight and sleek at the roots and crown, then gradually transitions into movement and texture as it approaches the ends.
Why a Textured-End Bob Feels Fresh
This style bridges the gap between fully straight and naturally textured—you get the polish and control of straightened hair with the movement and dimension of texture. It feels contemporary because it acknowledges that the most interesting styles rarely stay in one rigid form; they evolve and change as they move. The gradual transition from sleek to textured also creates visual interest and depth that a uniform straight bob might lack.
Creating and Maintaining the Bob
- Start with straightened hair cut into a bob shape that reaches your chin or slightly below (work with a skilled stylist who understands textured hair)
- Straighten the roots and crown area completely for maximum sleekness
- Create texture on the ends by gently waving them with a curling iron, adding subtle braids, or using a crimping tool
- Apply a curl-defining cream or texturizing spray to the textured sections to enhance the pattern and hold
- Style by smoothing back the straightened sections with a small brush and edge control, leaving the textured ends soft and movable
- This style refreshes beautifully throughout the week as the texture becomes more pronounced and the straight sections gradually relax
- Retouch every 4-6 weeks as your natural hair grows and new growth becomes visible
Insider note: A textured-end bob is particularly flattering because the texture at your chin level frames your face beautifully while the straightness at the crown keeps everything from feeling too heavy or overdone.
Final Thoughts
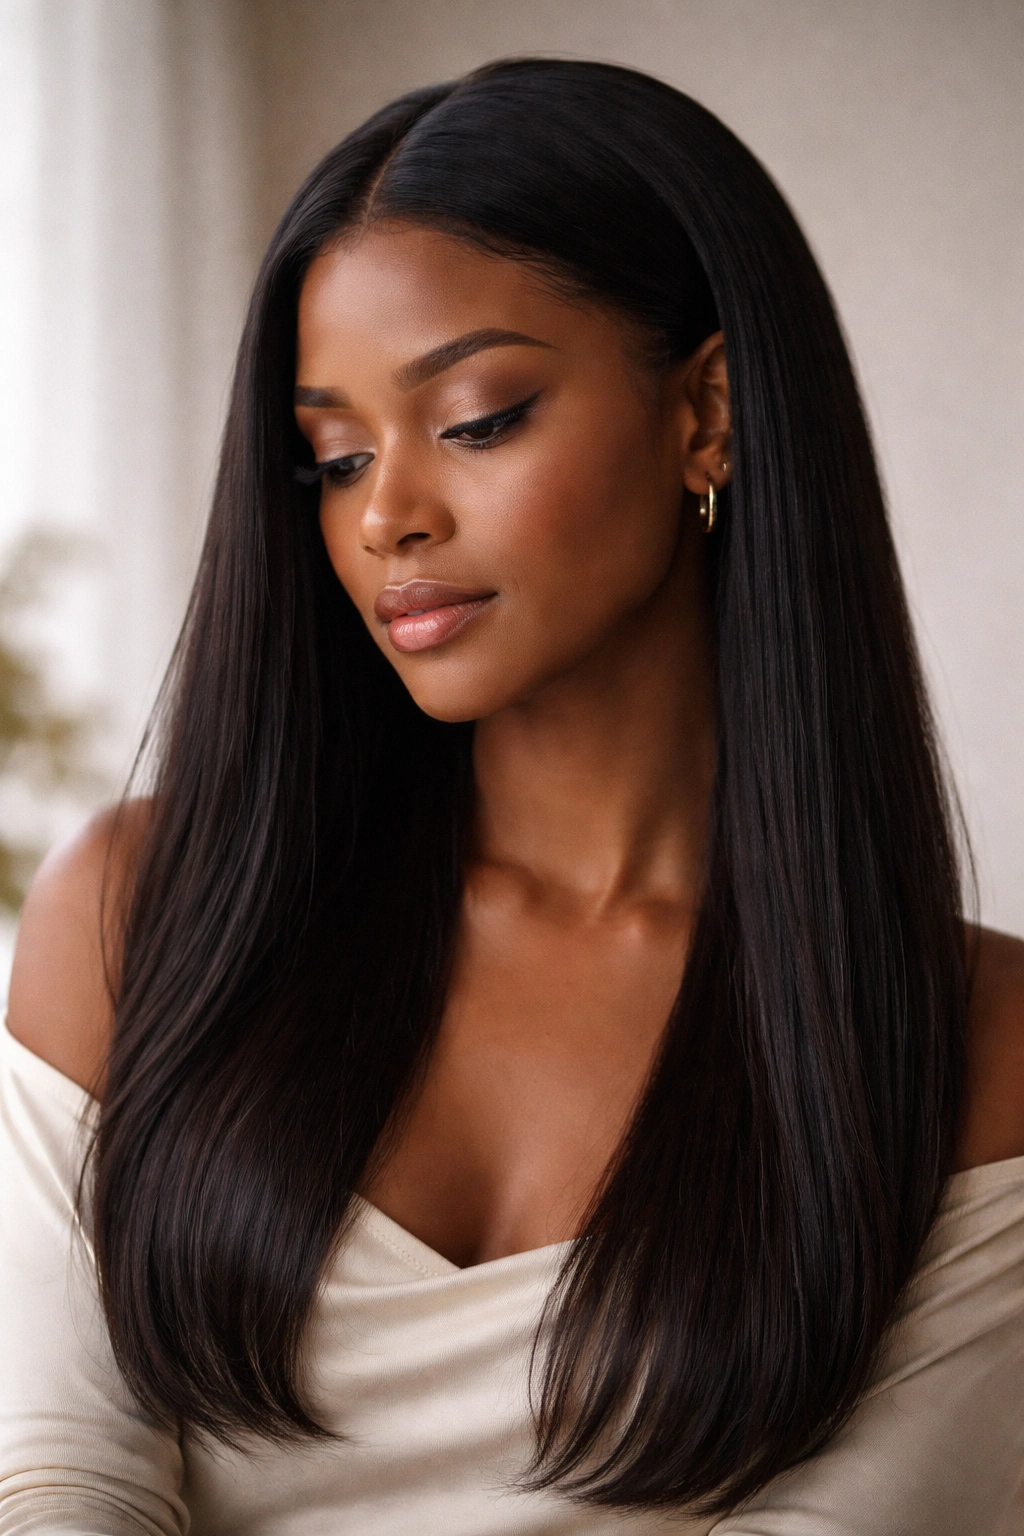
Straight afro hairstyles offer incredible range, from the instant polish of a blowout or silk press to the long-lasting protection of straight box braids or locs. What connects all of these styles isn’t sameness—it’s the power to feel confident, to express intention, and to celebrate your hair in a form that makes you feel most like yourself. Some of these styles are quick styling choices you can create whenever you want a change; others are protective investments that carry you through weeks of low-manipulation styling. Whether you’re drawn to the sculptural drama of sleek braids, the flowing elegance of a silk press, or something with more subtle movement like a twist-out or textured bob, there’s a straight afro style waiting to become part of your rotation.
The best style is always the one that makes you feel good when you look in the mirror. Experiment without pressure. Try the style that’s been calling to you, even if it feels like a departure from what you usually do. Your hair is forgiving enough to handle multiple attempts, bold enough to carry whatever style you choose, and uniquely yours to style however you see fit.
