



Prom night is the moment to celebrate who you are, and your natural hair is the perfect canvas for bold, beautiful styling. Unlike straight hair, textured and coily hair offers incredible versatility — you can create dimension, height, movement, and visual interest that honestly, many other hair textures simply can’t achieve. The key is choosing a hairstyle that honors your natural texture while feeling special enough for the occasion.
Finding the right prom hairstyle for natural hair doesn’t mean fighting your curls into something they’re not. The most stunning looks work with your texture, not against it. Whether you’re rocking tight coils, loose waves, thick coils, or a blend of curl patterns, there’s a prom hairstyle that’ll make you feel confident, gorgeous, and unmistakably you on that big night.
The styles that follow are designed specifically for natural hair textures — each one celebrates volume, definition, and the raw beauty of your curls. Some are more daring and sculptural, others are softer and romantic. All of them are absolutely prom-worthy.
1. High Puff with Side-Swept Bang
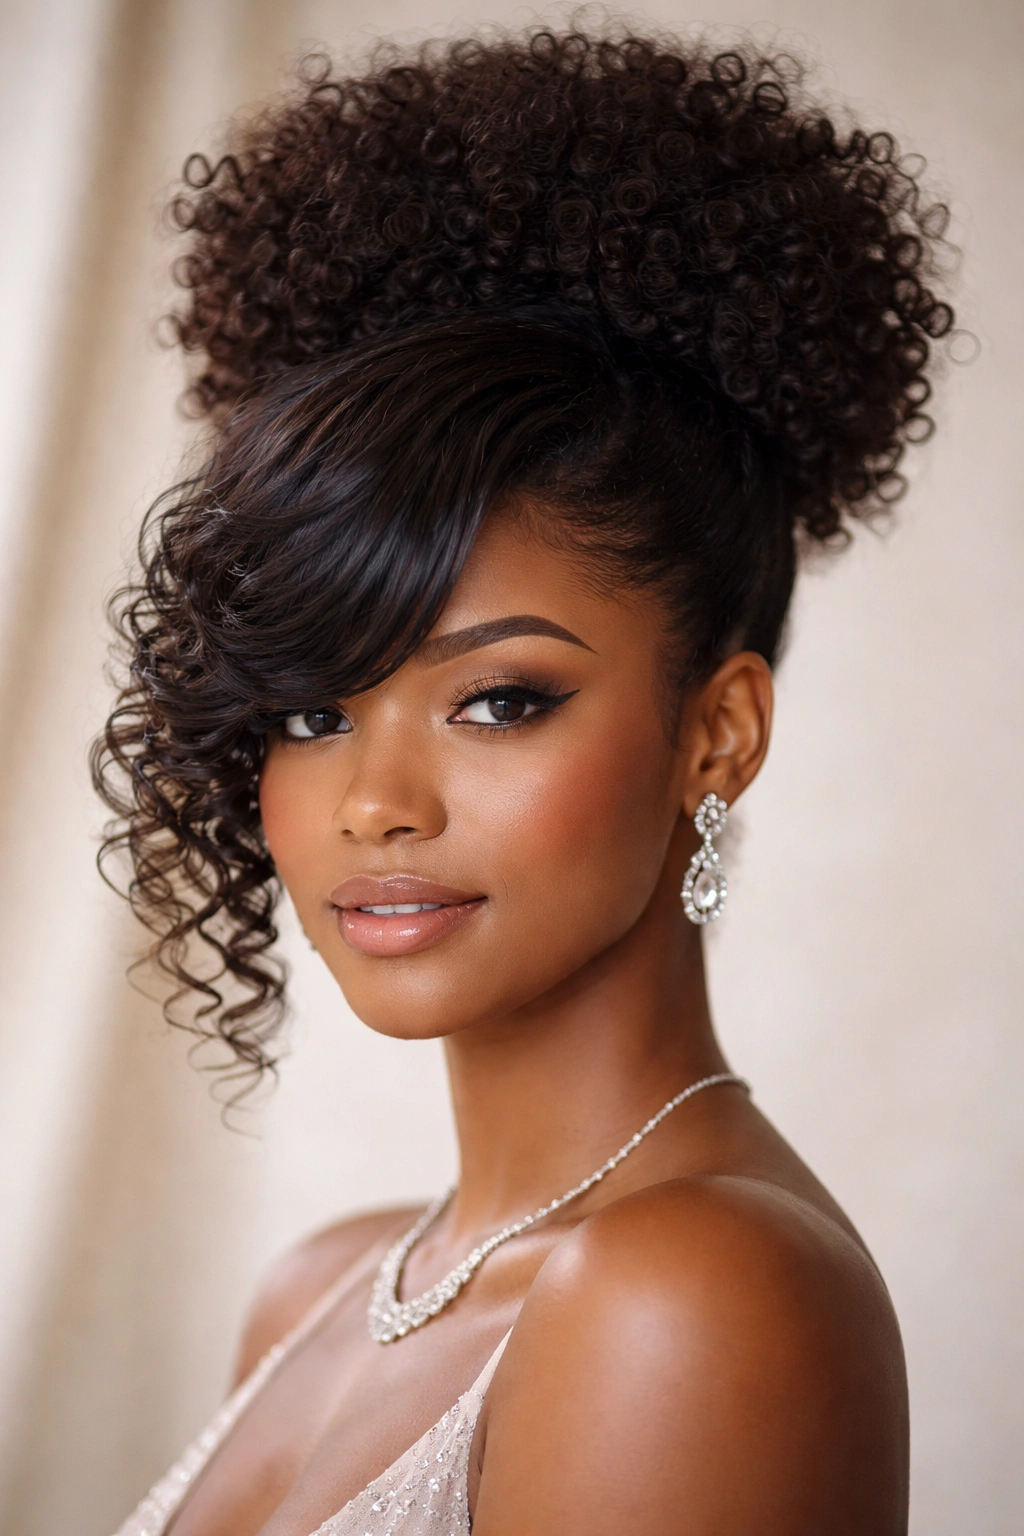
A high puff is pure confidence on the dance floor. Gather your hair into a high, voluminous ponytail, then smooth and blend the gathered section into a full, rounded puff at the crown. This style says “I’m comfortable in my skin” while looking effortlessly polished. The key is creating actual volume — not a flat, tight ball, but an airy, sculptural puff that catches light and commands space.
Why This Works for Prom
High puffs have serious elegance when executed with intention. The lifted placement elongates your neck and face, while the volume frames your features beautifully in photos. Unlike a standard sleek bun, a textured puff shows off the natural dimension and shine of your curls. You can accessorize heavily (decorative pins, wrapped metallic thread, pearl clips) because the puff serves as a statement piece all on its own. The style is also surprisingly low-maintenance once it’s set — it won’t deflate or shift much throughout the evening, which matters when you’re dancing for hours.
How to Create This Look
- Start with hair that’s been moisturized and defined — use a curl cream or gel to bring out natural texture and shine
- Blow-dry sections from underneath to create lift at the roots, then gather everything into a high ponytail using a secure elastic
- Separate the ponytail into 2-3 sections and gently tease each one at the base to add fullness and dimension
- Use your fingers or a wide-tooth comb to smooth the outer layer while keeping the interior textured and voluminous
- Secure any flyaways with edge control, then mist the whole puff with a light-hold spray so it lasts all night
- Add decorative elements like hair jewelry, wrapped thread, or a decorative claw clip at the base
Pro tip: Do a full hair styling trial at least one week before prom. This gives you a chance to see how long the style lasts, identify what products work best, and make adjustments without the pressure of prom-day timing.
2. Braided Crown with Flowing Curls
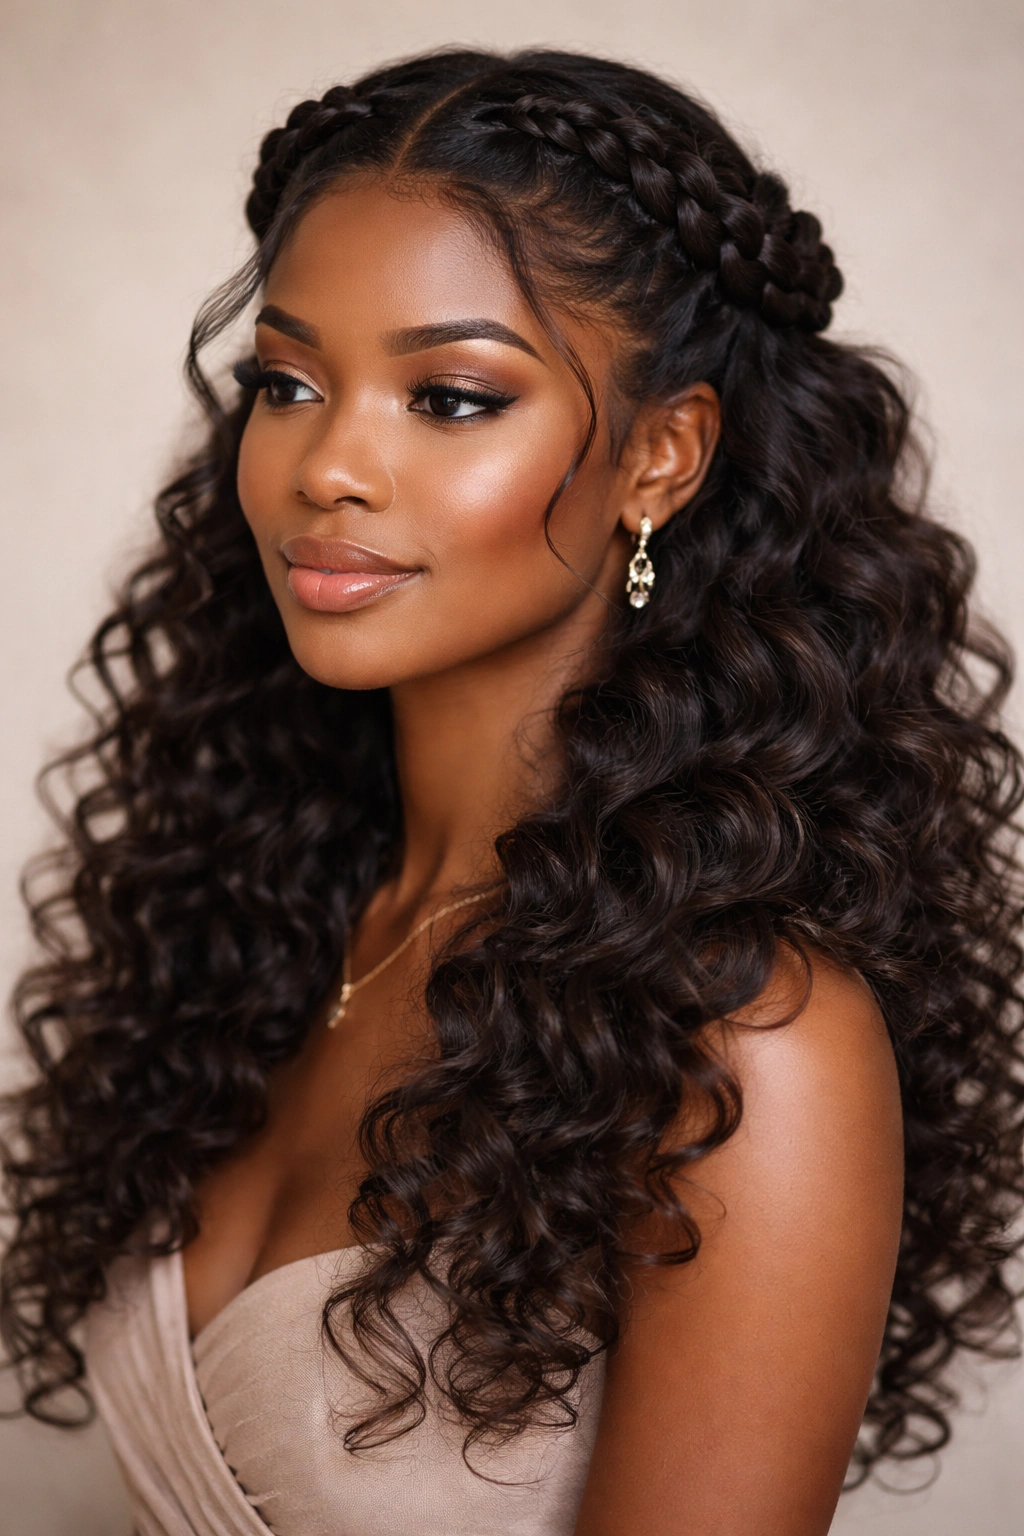
This style blends two of the most prom-appropriate looks — a delicate crown and flowing curls — into one romantic statement. Two thick braids frame your face and meet at the back, creating a tiara-like effect. The rest of your hair cascades freely, creating softness and movement. This look works especially well for girls with longer textured hair who want elegance without being too structured.
The Beauty of the Braided Crown
Braids automatically elevate any hairstyle into something special occasion-ready. A crown braid specifically draws focus upward and frames the face, which is perfect for prom photos. The braids themselves become a design element — you can use different braid styles (Dutch, French, or flat braids) or incorporate metallic thread or delicate jewelry directly into the braids. The contrast between the sculptural braids and the soft, flowing curls below creates visual interest and texture variety that photographs beautifully.
Styling Steps for This Look
- Start with freshly defined curls — the curls below the braids need to look shiny and bouncy
- Create a deep side part, then begin a Dutch or French braid from one temple
- Braid along the top of your head in a curved path, collecting hair as you go, until you reach the back
- Repeat on the other side with a second braid that mirrors the first
- Secure both braids together at the back with an elastic, or interweave them gently for a more unified look
- Leave the bulk of your hair free to curl and flow
- Use a curl cream or light oil on the loose curls to enhance shine and definition
Worth knowing: If you’re nervous about braiding your own hair, absolutely get this done professionally one week before prom. A stylist can braid it perfectly and also give you recommendations on products to help the style hold all night.
3. Twisted Updo with Metallic Accents
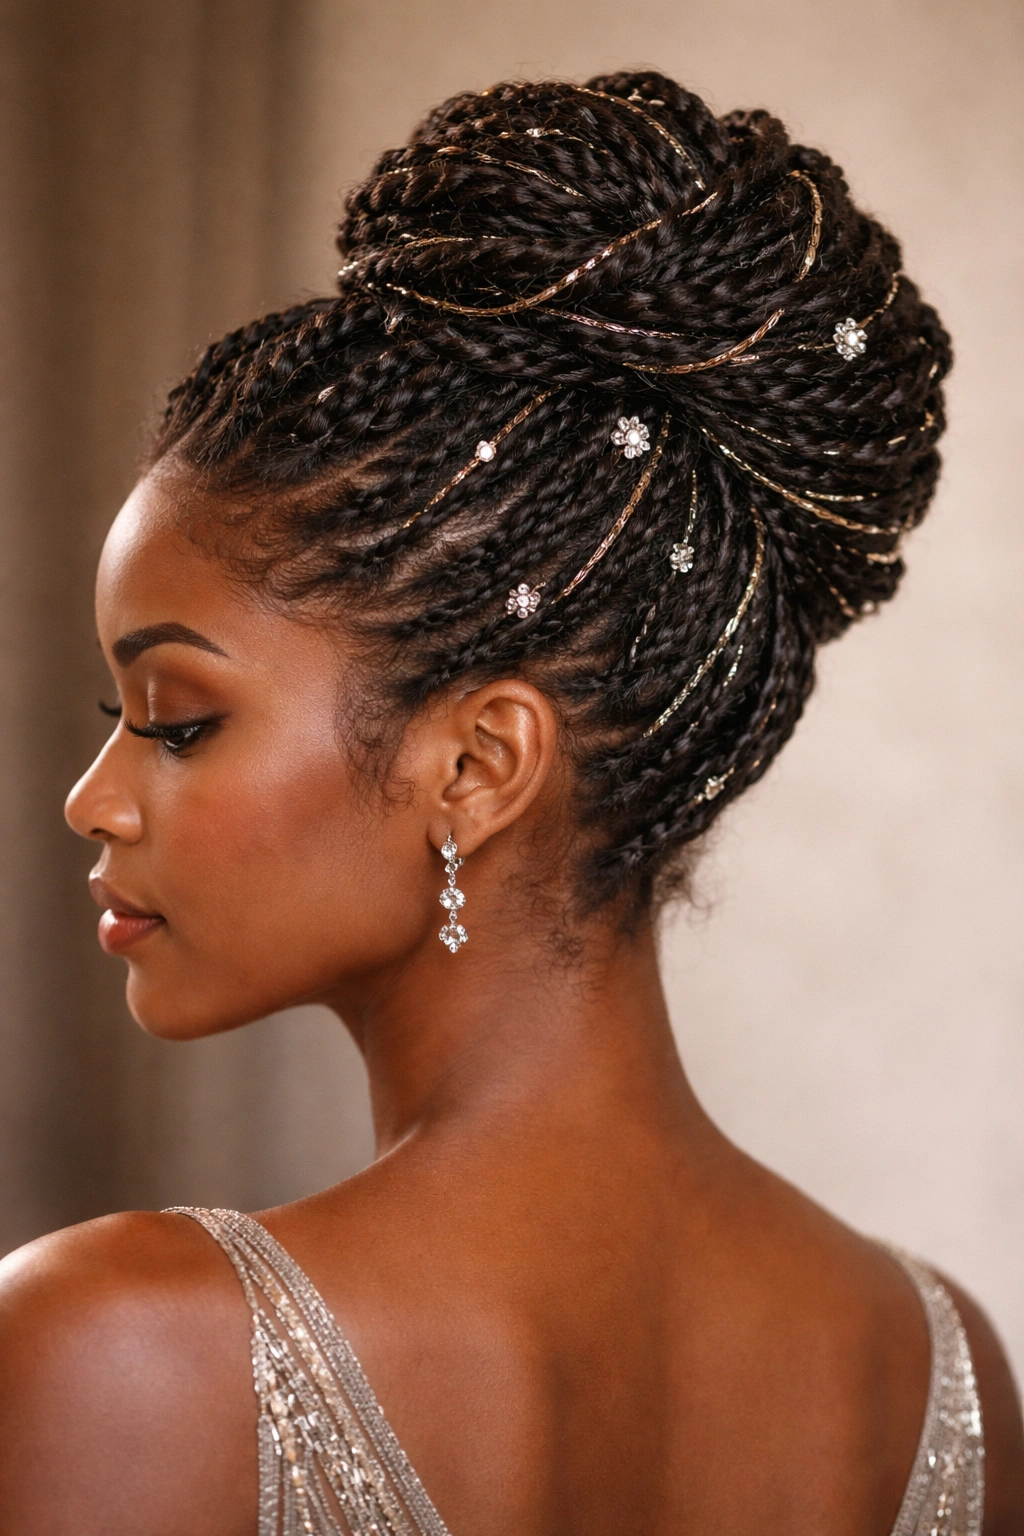
Twists are the sophisticated cousin of braids — they look intricate without being overly fussy, and they photograph like absolute magic. Create an updo entirely from two-strand twists, spiraling them around your head in a circular pattern, then secure everything into a gorgeous knot at the crown or low at the nape. Add metallic thread, gold bobby pins, or small crystal clips throughout for glamour.
Why Twists Elevate a Prom Look
Two-strand twists have an inherent elegance that works for any face shape and hair texture. Unlike braids, which can sometimes read as casual, twists feel more refined and intentional. They also allow you to play with different thicknesses — thick twists look bold and dramatic, while thinner twists look delicate and intricate. A full updo made entirely of twists shows off your versatility and the definition in your natural curls. The texture catches light beautifully in photos, and the style can hold for an entire night if properly secured.
Building a Twisted Updo
- Begin with moisturized, defined curls — apply a twist cream or gel to enhance pattern and hold
- Create a center part or side part depending on your face shape (center parts suit longer faces; side parts suit rounder faces)
- Take a section of hair at one temple and twist it loosely away from your face, moving backward and upward
- Gradually incorporate more hair into the twist as you move along the scalp, creating a thicker, fuller twist
- Coil the twist around itself at the back of your head and pin it securely
- Repeat on the other side with a second twist
- Use bobby pins and hair clips to secure everything, and tuck in any loose ends
- Add metallic accents — wrap thin gold or silver thread around some of the twists, or insert small clips
Pro tip: Use rust-proof bobby pins and clips, and secure them with a light-hold hairspray. This keeps everything in place without creating that stiff, overly done look.
4. Half-Up, Half-Down with Spiraled Coils
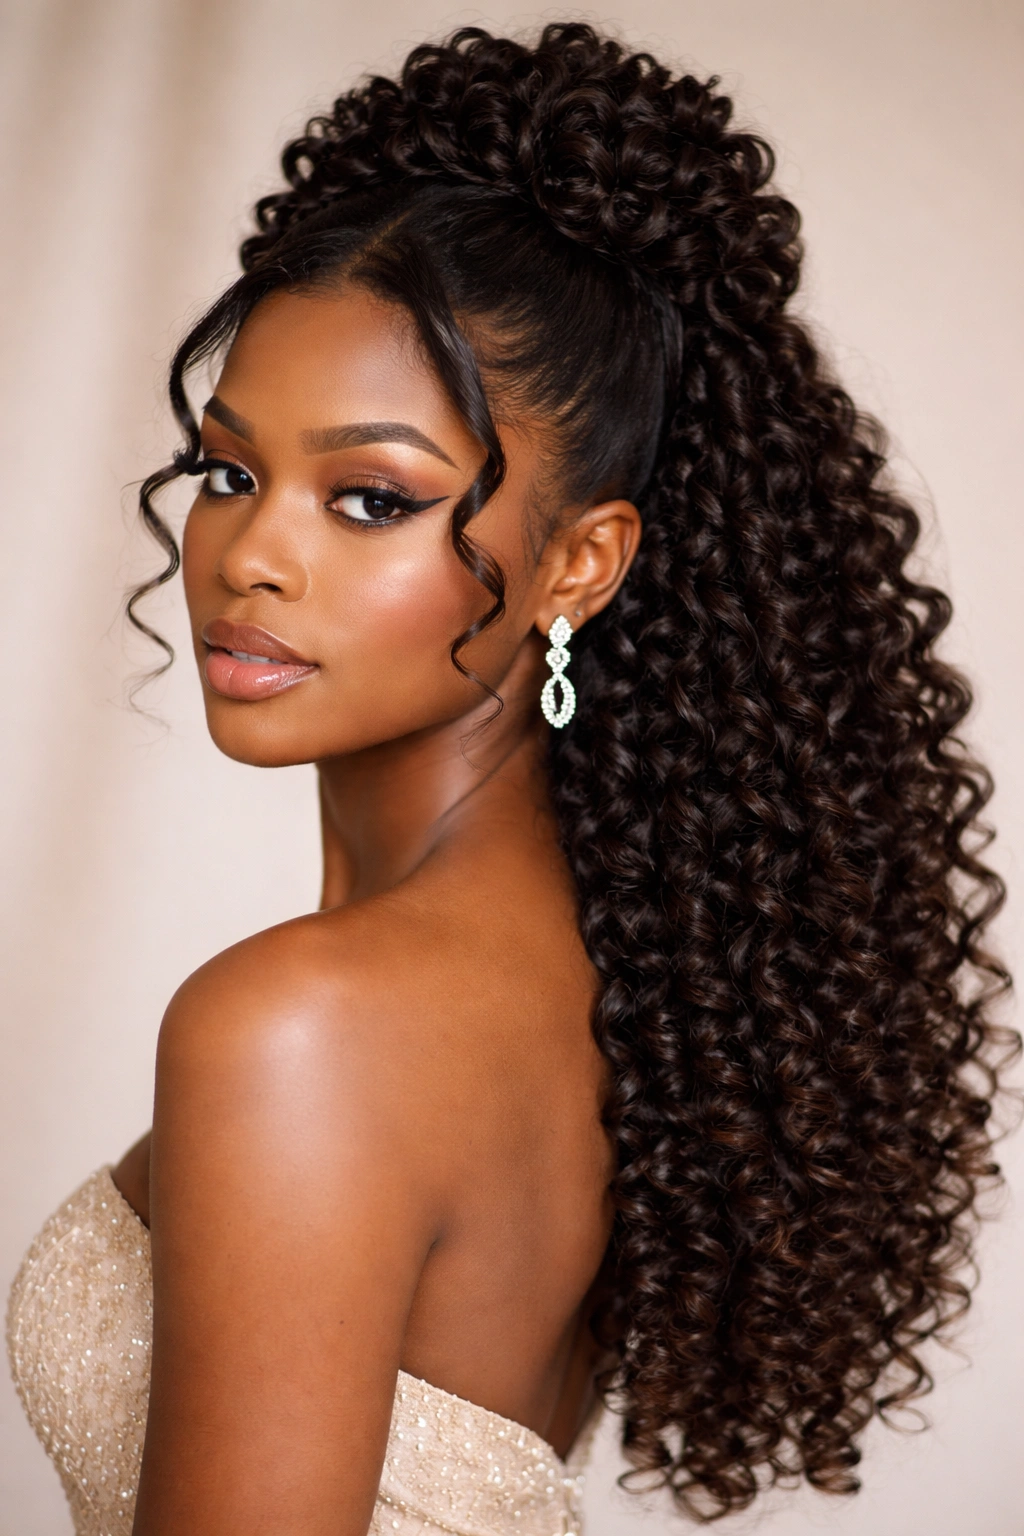
This is the hairstyle for someone who wants glamour without sacrificing the feeling of free-flowing hair. Take the upper half of your hair — roughly the section from ear to ear across the crown — and gather it into a half-up style. Add texture by creating spirals or curls within that gathered section, then let the bottom half flow loose with defined, shiny coils. You get the best of both worlds: structure and movement.
The Appeal of Half-Up Styles for Prom
Half-up hairstyles strike the perfect balance. They’re romantic and soft (because of the flowing hair), but also polished and intentional (because of the gathered section). This style is particularly flattering for prom because it frames your face while keeping hair off your shoulders and neck — practical for dancing and photos. The half-up section can be simple (just a ponytail or bun) or ornate (braids, twists, or twisted sections). You can secure everything with an elegant clip, a jeweled barrette, or even a decorative comb.
Creating a Half-Up, Half-Down Look
- Start with freshly moisturized, defined curls throughout your entire head
- Use a comb to gently gather the hair from one ear, across the crown, to the other ear (this is your half-up section)
- Smooth the gathered section slightly using edge control, then secure it with an elastic at the back of your head
- For added detail, separate the gathered section into 2-3 smaller subsections and gently tease each one to add volume and texture
- Use decorative clips, small braids, or wrapped thread to enhance the gathered section
- Let the bottom half fall freely, and enhance those curls with a curl cream or light shine spray
- Smooth your hairline and lay down any baby hairs with edge control for a polished finish
Insider note: If your hair is very long or very thick, this style can feel heavy in the gathered section. Ask your stylist about creating small twists or braids within the gathered area to distribute the weight and add visual interest.
5. Box Braid Bun with Shaved Detail
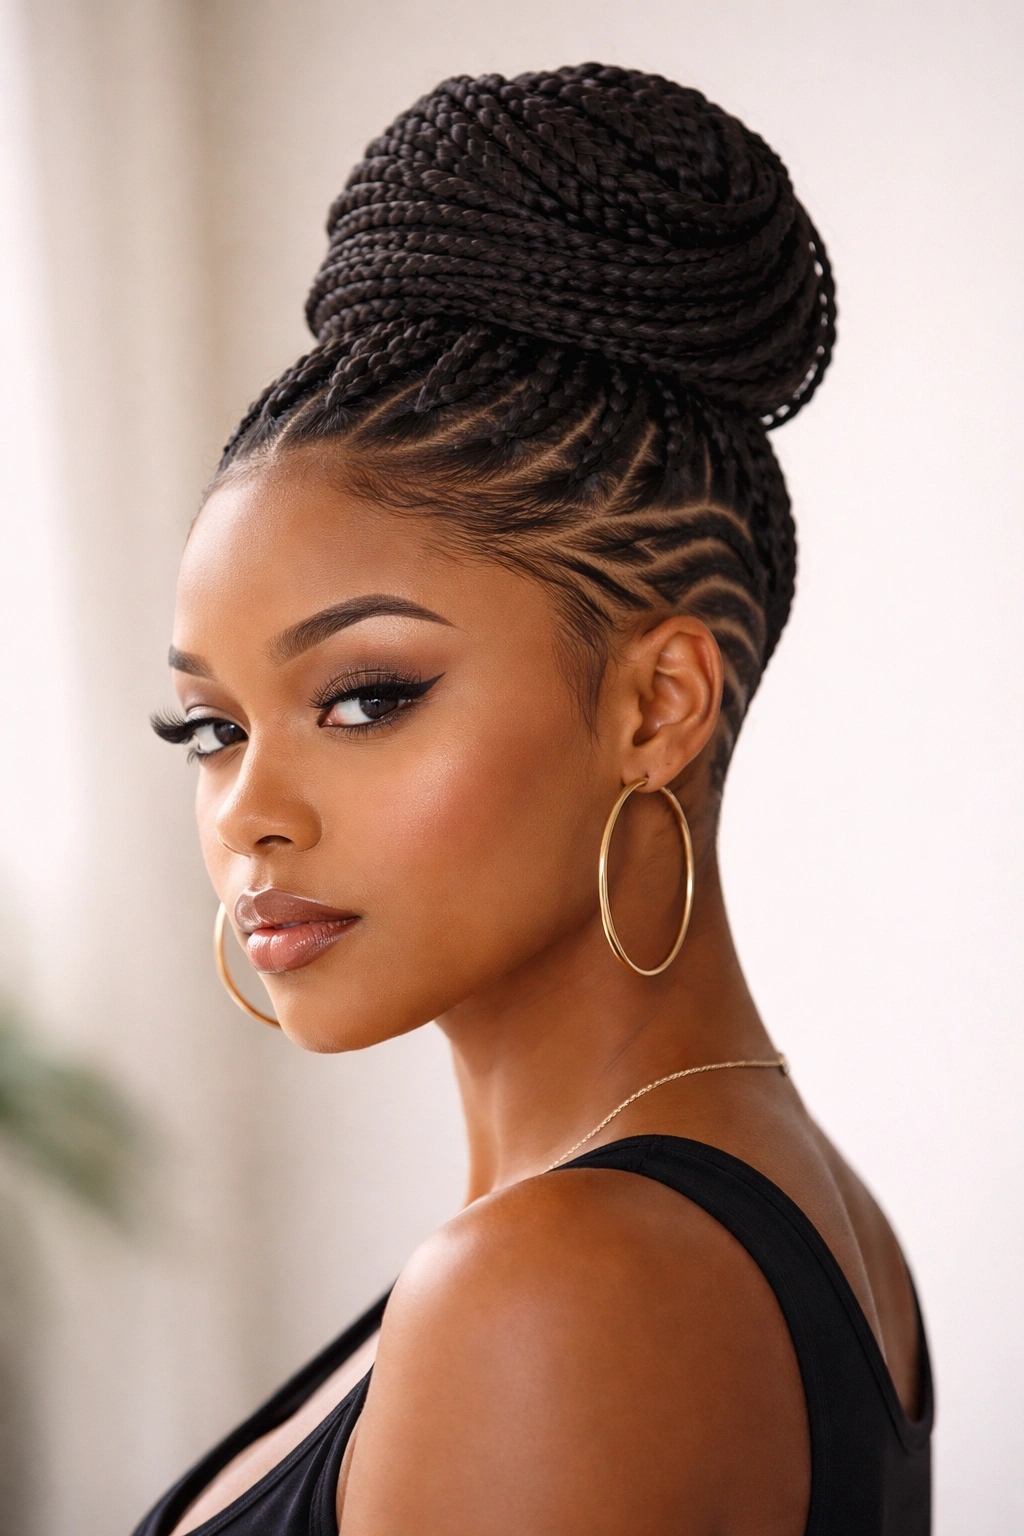
If you’ve been wearing box braids, prom is the perfect occasion to style them into something special. Create a full bun at the crown using your braids, then add a shaved or faded detail on one or both sides for edge and personality. This look is bold, confident, and undeniably cool — perfect for someone who wants to stand out and own their natural style.
Why This Works as a Statement Prom Style
Box braids are incredibly versatile styling tools, and gathering them into a bun instantly transforms them from everyday wear into formal styling. The bun placement at the crown is flattering and shows off facial features beautifully. A shaved or faded design on the sides (which you’ll want to have done by a professional barber or stylist) adds an unexpected edge that says you’re not just following conventional prom rules. You’re creating something that’s uniquely you. This style works best for girls with shorter, more tapered sides or those who are open to more experimental styling.
Styling Box Braids Into a Prom Bun
- If your braids don’t already have a shaved detail, schedule this with a professional barber at least two weeks before prom
- Gather all your braids into a high or mid-height ponytail using a secure elastic
- Wrap the braids around the elastic base to create a full, rounded bun
- Pin the bun securely with bobby pins throughout, tucking in any loose braid ends
- Smooth your hairline with edge control for a sharp, polished look
- Add decorative elements if desired — gold cuffs on some of the braids, or jewelry positioned near the base of the bun
Worth knowing: Box braids can last 6-8 weeks, so plan ahead if you want to have them done before prom. Fresh braids will look shinier and fuller than older braids, so timing matters.
6. Faux Hawk with Sculpted Waves
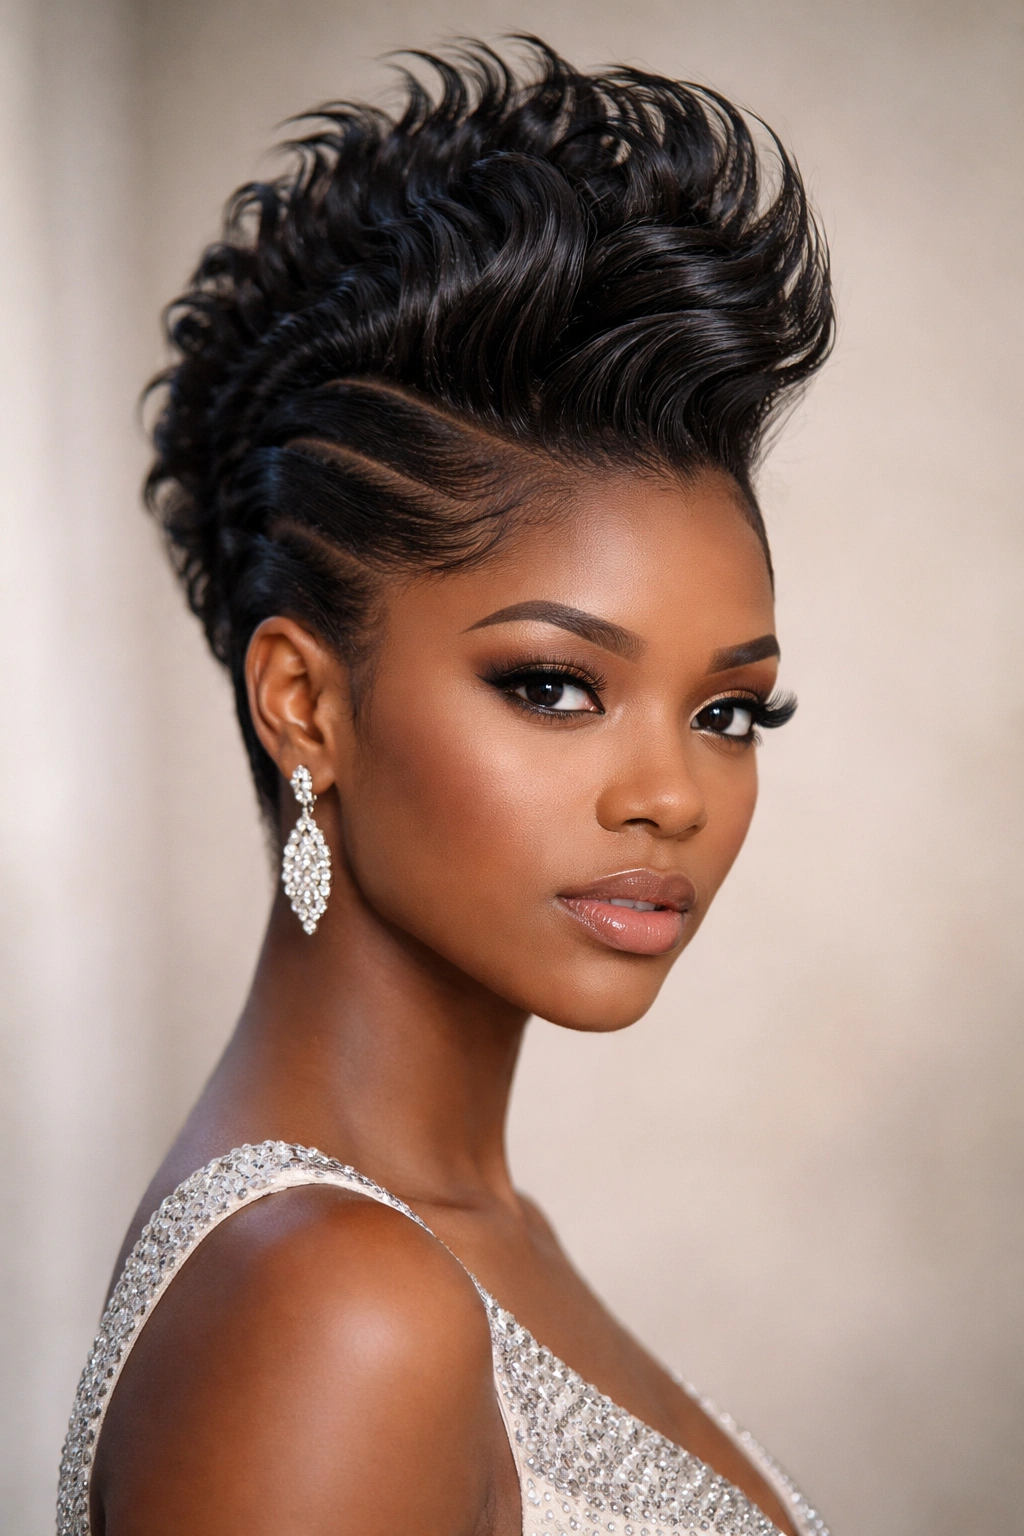
For the girl who wants to make a statement, a faux hawk is prom-night perfection. Instead of a traditional hawk (which requires shaving the sides), create a faux version by sectioning your hair into a center strip and smoothing the sides sleekly while the center section stands tall and voluminous. Enhance the standing section with defined waves or spirals for sculptural drama. This is high fashion, high confidence styling.
The Drama of a Sculpted Faux Hawk
A faux hawk reads as bold and intentional without being quite as edgy as a true hawk. It’s a style choice that says you know who you are and you’re not afraid to be different on prom night. The center section can be molded into waves, spikes, or defined curls — whatever showcases your natural texture most dramatically. The sides are typically sleek and smooth, creating maximum contrast. This look photographs exceptionally well because it has clear lines, dimension, and an undeniable visual statement.
Building a Faux Hawk
- Apply a strong-hold gel or mousse to damp hair
- Create a center section by parting your hair down the middle from forehead to nape
- Use edge control and a fine-tooth comb to smooth the hair on each side of the center section, laying it flat against your head
- Blow-dry the side sections smooth while the center section air-dries or blow-dries with some texture
- Once the side sections are smooth and dry, the center section should naturally stand taller
- Define the center section further by creating waves, finger coils, or spirals depending on your curl pattern
- Use a strong-hold hairspray to keep everything in place
- Add decorative elements like gold cuffs, clips, or metallic accents throughout the center section
Pro tip: This style requires strong-hold products and strategic hairspray application. Do a full trial run at least one week before prom to see how long it holds and what products work best for your specific hair type.
7. Low Twisted Ponytail with Wrap Detail
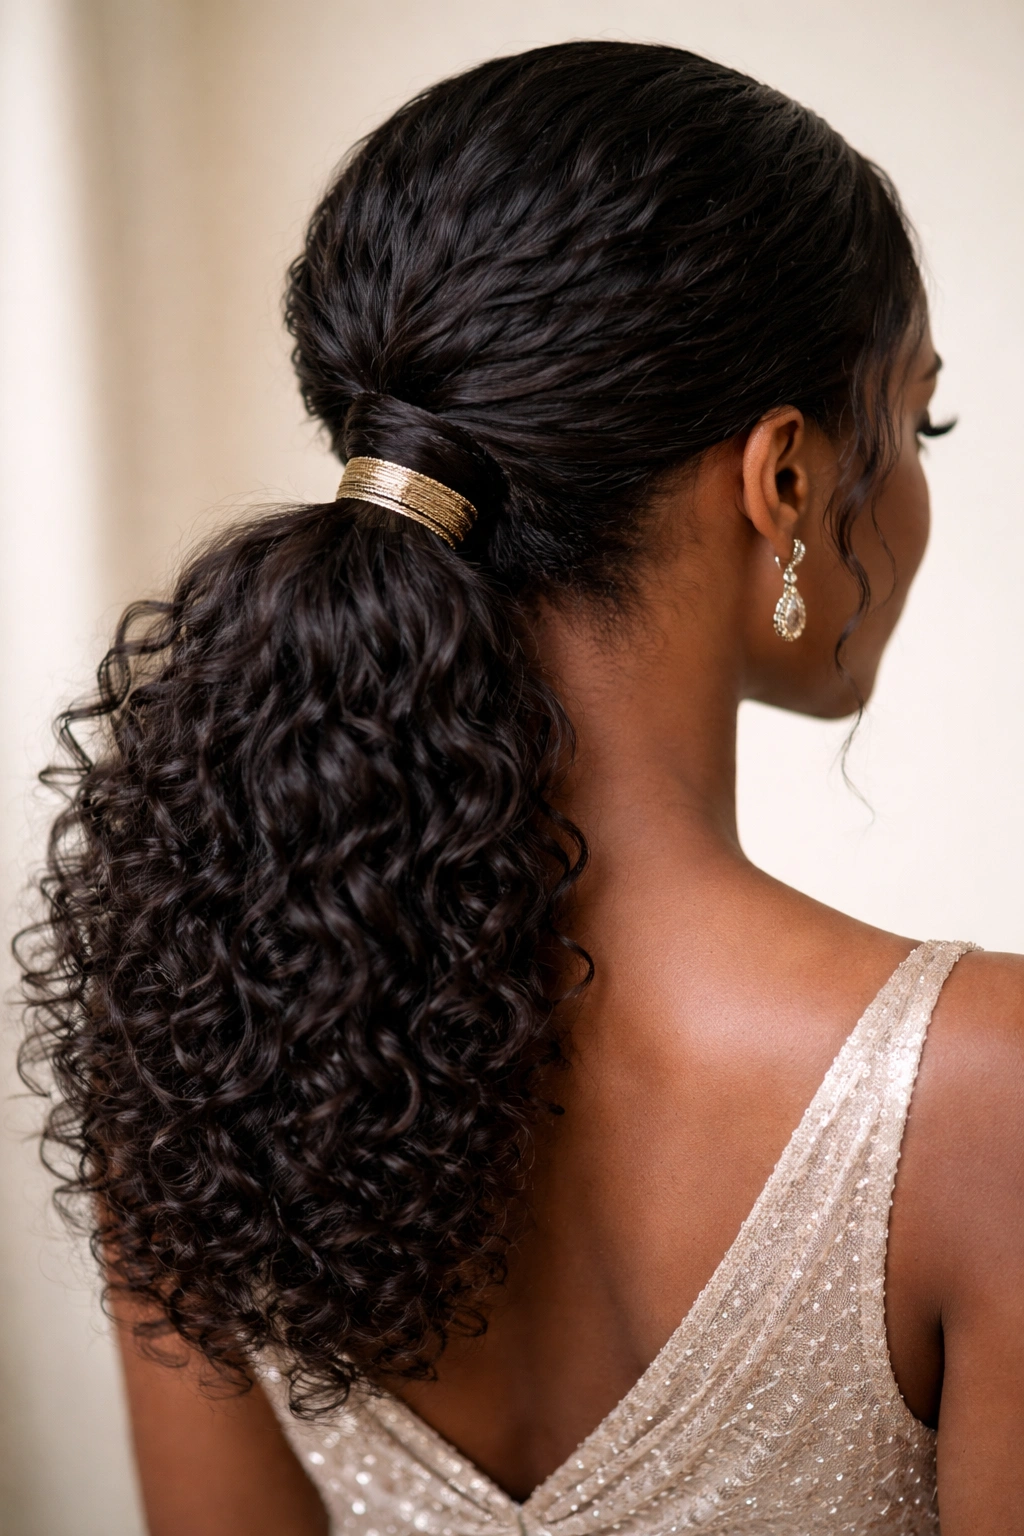
Sometimes elegance means simplicity with intention. Gather your hair into a low ponytail at the nape of your neck, then wrap the base with a contrasting thread (gold, silver, or a rich jewel tone), or with a small braid, or with a section of your own hair for a refined, polished finish. The ponytail itself should showcase your natural curls and coils with maximum shine and definition.
The Understated Power of a Low Ponytail
A low ponytail is inherently elegant — it’s simple, timeless, and flattering on almost everyone. For prom, the magic is in the details. The wrap at the base transforms a basic style into something intentional and special. You can make the wrap as simple or as ornate as you like — a thin wrap is delicate and understated, while a thicker wrap or braid becomes a focal point. This style works beautifully for girls with longer hair who want to feel pulled-together without the complexity of braids or twists.
Creating a Polished Low Ponytail
- Start with freshly defined curls with lots of shine and bounce
- Apply a light cream or oil to the ponytail section to enhance curl definition
- Gather your hair into a low ponytail at the nape of your neck using a secure elastic
- Create your wrap by taking a thin section of hair from the ponytail itself and wringing it tightly, then wrapping it around the elastic base
- Secure the wrapped section with a bobby pin tucked underneath so it’s not visible
- Alternatively, use a thin metallic thread, wrapped around the base several times and tied off at the back
- Smooth your hairline and lay down baby hairs with edge control
- Enhance the curl definition in the ponytail itself with a curl cream and light hairspray
Worth knowing: If your hair is very thick or very long, use a thicker elastic or even a hair stick (a decorative wooden or metal stick that holds the ponytail in place) to ensure the style stays secure throughout the night.
8. Multi-Textured Crown Braid
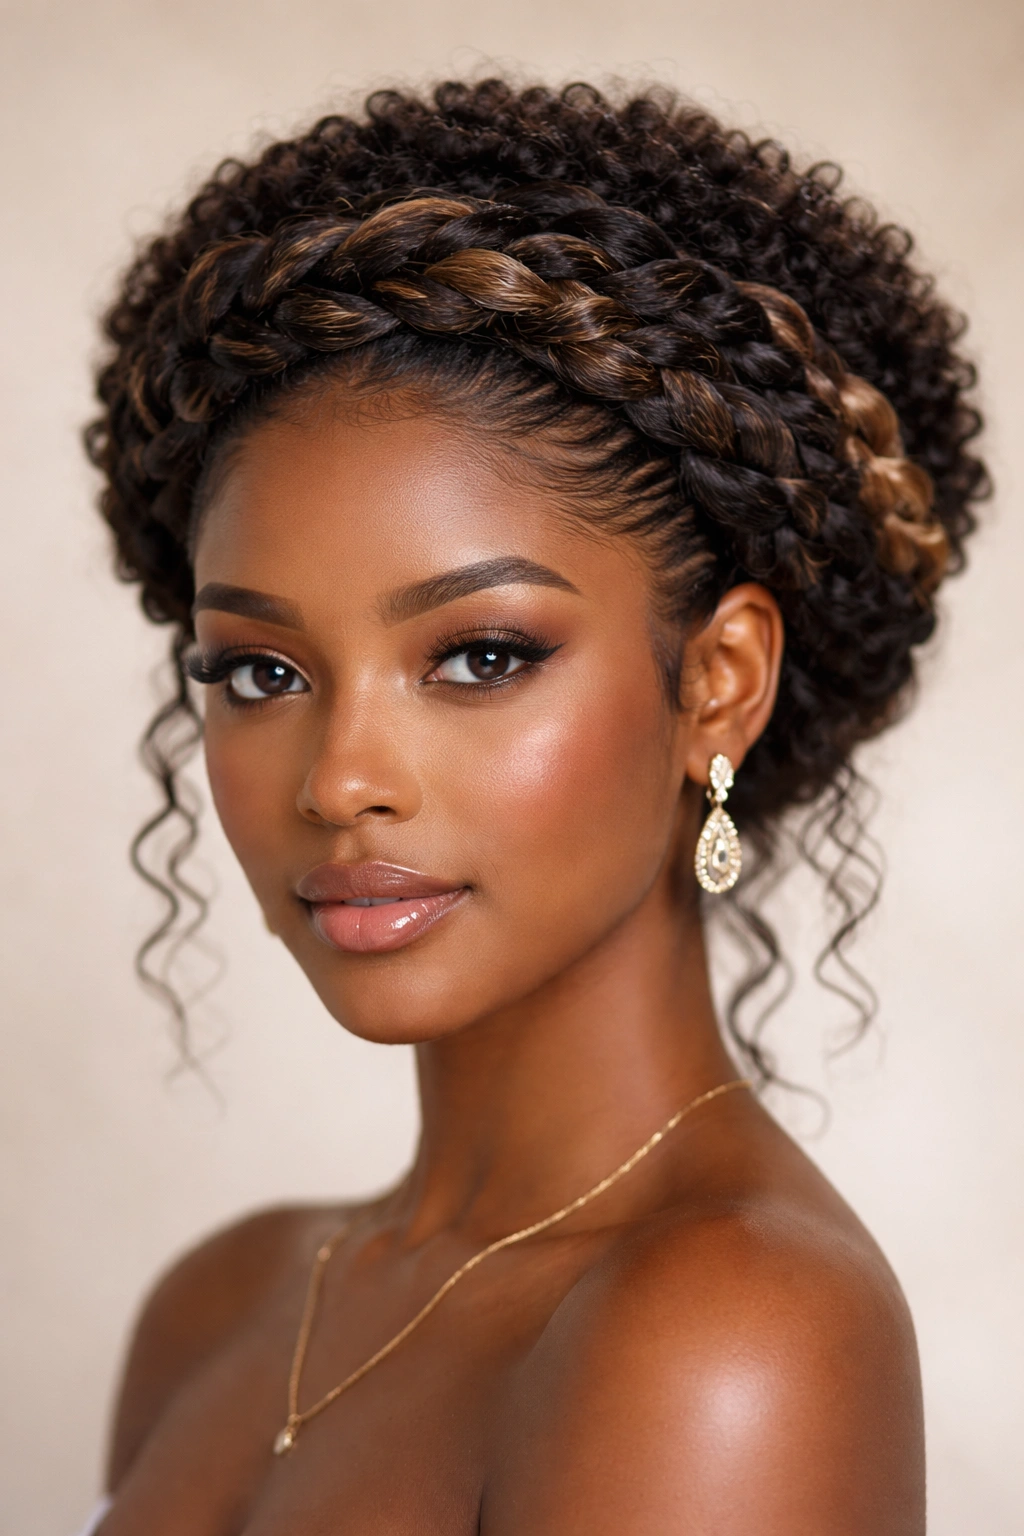
If you have naturally multi-textured hair — different curl patterns, different densities, perhaps some sections that are looser and some that are tighter — lean into that diversity with a crown braid that celebrates each texture. The braid itself becomes a work of art because each section shows different dimension and light reflection. This style is for someone who’s proud of the unique texture mix their hair has.
Celebrating Natural Hair Diversity
Multi-textured hair is absolutely beautiful and deserves a prom style that shows off that complexity. A crown braid is perfect because it travels around your entire head, allowing viewers to see every texture variation you have. The braid creates structure and elegance, while the varying curl patterns within the braid create natural visual interest and dimension. This style says you’re comfortable with what makes you unique, and you’re not trying to force your hair into conformity.
Braiding Multi-Textured Hair
- Apply a curl-defining cream or gel to each section, adjusting the amount based on how much hold each texture needs
- Create a deep side part
- Begin a loose Dutch or French braid from one temple, following the natural curl pattern of each section as you braid
- Don’t try to make the braid perfectly uniform — let the varied textures show through
- Continue the braid across the back of your head and secure it at the other side with an elegant clip or by tucking the end into a small bun
- Leave the back section of your hair loose and flowing, or incorporate it into the braid depending on the look you prefer
- Use a light hairspray that won’t disrupt the curl pattern
Pro tip: Test this braiding technique well before prom. Multi-textured hair requires slightly different tension and technique in each section, so practice will make a huge difference in how polished the final result looks.
9. Stacked Bun with Defined Curls
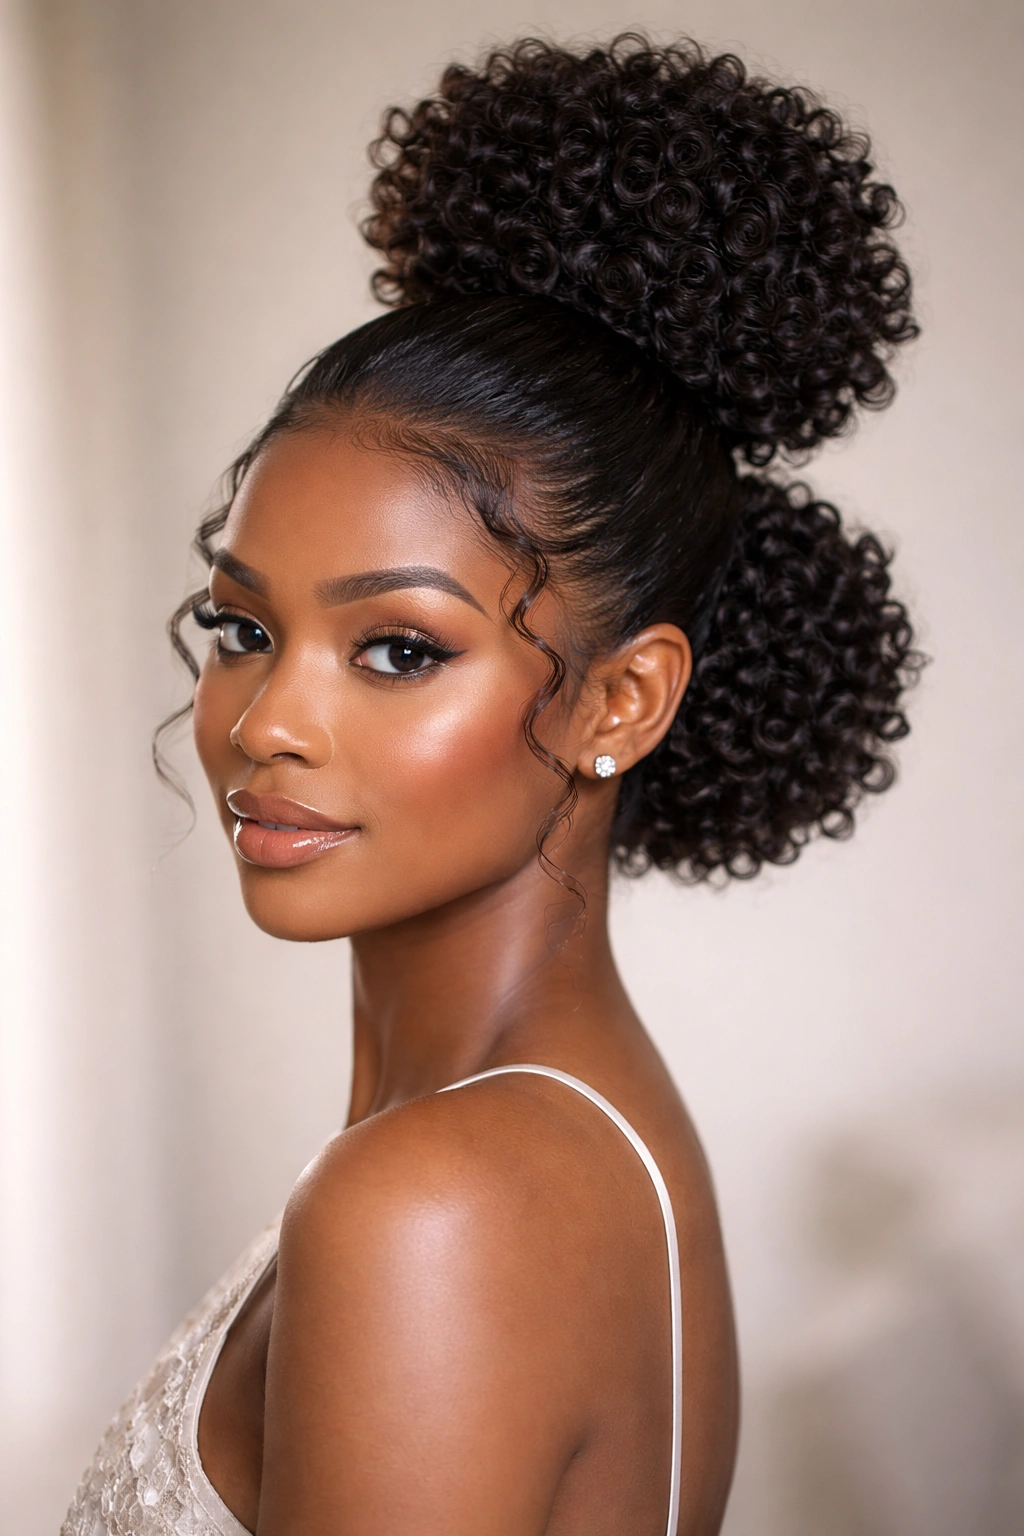
Create two buns instead of one — stack them vertically along the center or back of your head. Use your most defined, shiniest curls for this look, and make sure each bun is voluminous and clearly separate from the other. This is a fun, youthful take on an updo that feels modern and playful while still being completely prom-appropriate.
The Appeal of Stacked Styling
Stacked buns are eye-catching without feeling juvenile — they’re playful but polished. The double-bun approach gives you more surface area to showcase your curl definition and shine. Each bun can be styled slightly differently (one tighter, one looser; one higher, one lower) or they can mirror each other perfectly for a more symmetrical look. This style is excellent for girls with very voluminous or very thick hair, because it distributes the weight and creates a more flattering silhouette than a single large bun.
Building Stacked Buns
- Start with freshly defined, shiny curls throughout your hair
- Create a center part from forehead to nape
- Gather the upper half of your hair into a high ponytail at the crown and secure it with an elastic
- Transform this ponytail into a full, voluminous bun by wrapping the ponytail around the elastic base and pinning it securely
- Now gather the lower half of your hair into a second ponytail at the nape and create a second bun below the first
- Make sure both buns are equally full and voluminous
- Pin everything securely with multiple bobby pins
- Add decorative elements like clips, wrapped thread, or small pieces of jewelry on or around each bun
- Enhance the curl definition with a light hairspray
Worth knowing: If you have thick hair, you might actually prefer doing the bottom bun first (to avoid having too much hair in the top ponytail), then creating the top bun. Adjust the method based on what works best for your hair density.
10. Sleek Gel Pattern with High Volume Top
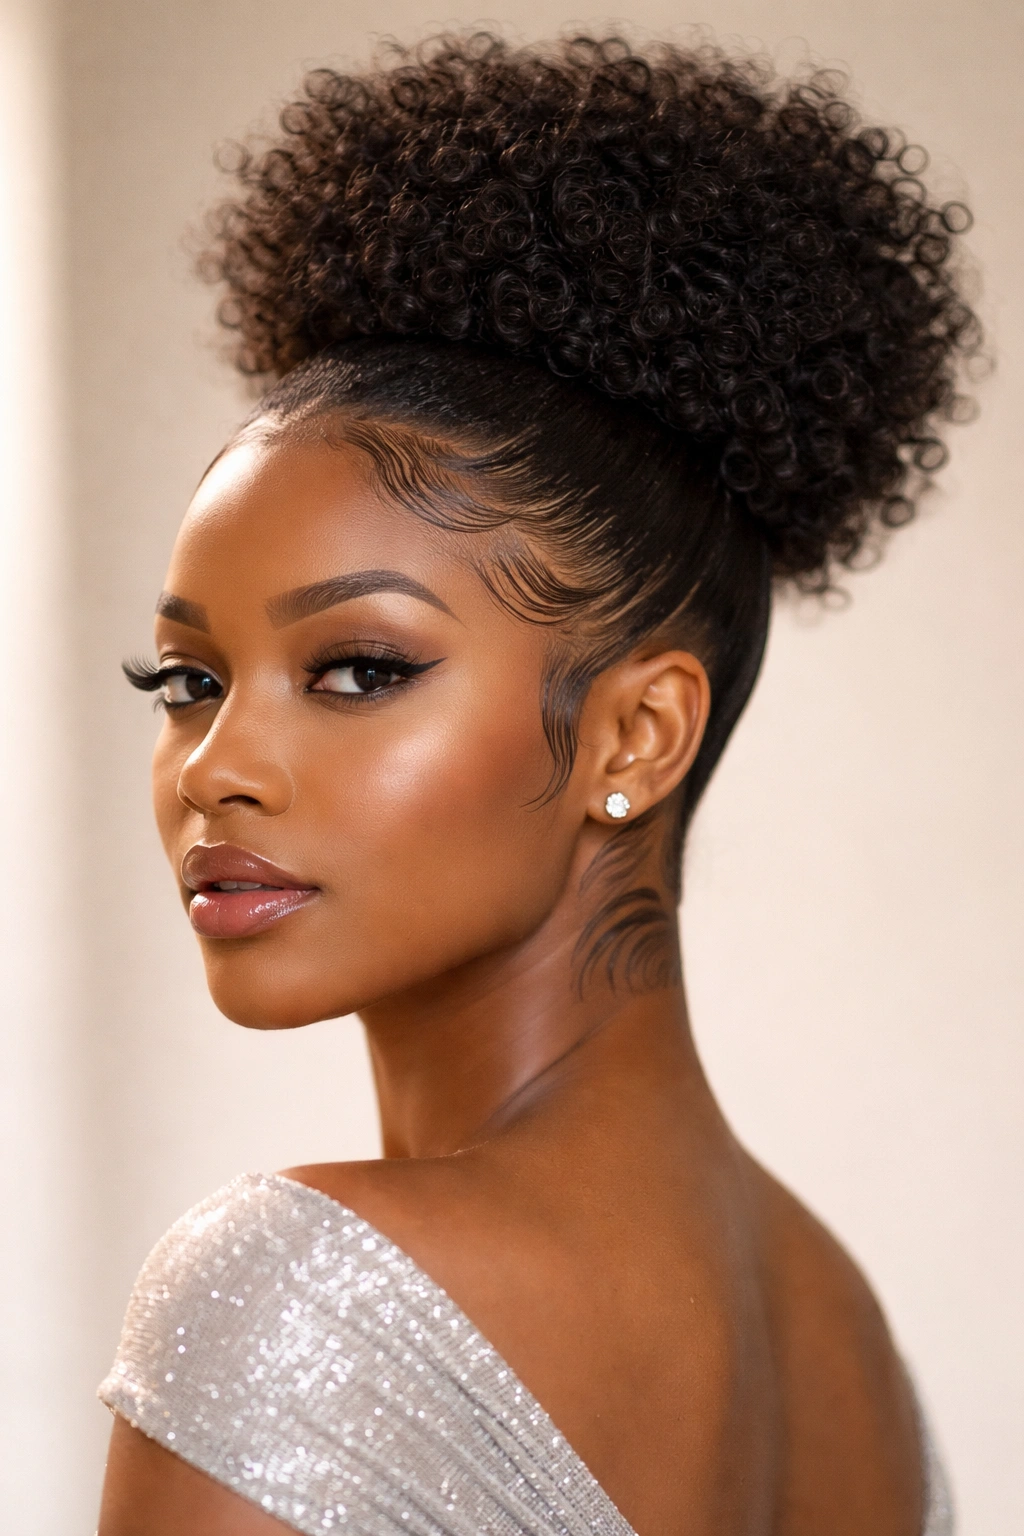
Create geometric patterns on your hairline and lower sides using edge control and a fine-tooth comb, while the top and crown remain full, textured, and voluminous. This style combines sculpture and softness — the sleek patterns show off your edges and facial features, while the high volume on top is undeniably glamorous. This look is particularly stunning on girls with tighter curl patterns and well-defined edges.
The Modern Edge of Sculpted Patterns
Gel patterns and sculpted edges are having a cultural moment, and they look absolutely stunning for prom. This style is bold without being over-the-top — the sculptural patterns frame your face beautifully in photos, while the high volume on top prevents the look from feeling too flat or severe. You’re creating intentional art on your own head, which is a beautiful form of self-expression. This style especially suits girls with medium to thick hair and tighter curl patterns, because those curl types show pattern definition most clearly.
Creating Sculpted Patterns with High Volume
- Apply a strong-hold edge control to your hairline, lower sides, and nape
- Using a fine-tooth comb, create geometric patterns (waves, lines, spirals) in the gel by combing through the control product in specific directions
- Let the gel dry completely — this sets the pattern
- Apply curl cream or mousse to the top section of your hair
- Blow-dry the top section using your fingers to encourage maximum volume and lift at the roots
- Once dry, the top section should stand full and textured while the lower sections are sleekly patterned
- Define the curls on top with a curl cream and light hairspray
- The contrast between the sculpted lower section and the voluminous top is the whole point — embrace it
Pro tip: If you’re nervous about creating gel patterns yourself, visit a professional stylist 2-3 days before prom. They can create perfect patterns, and you’ll have a few days for any small corrections if needed. Never attempt this for the first time on prom day itself.
Final Thoughts
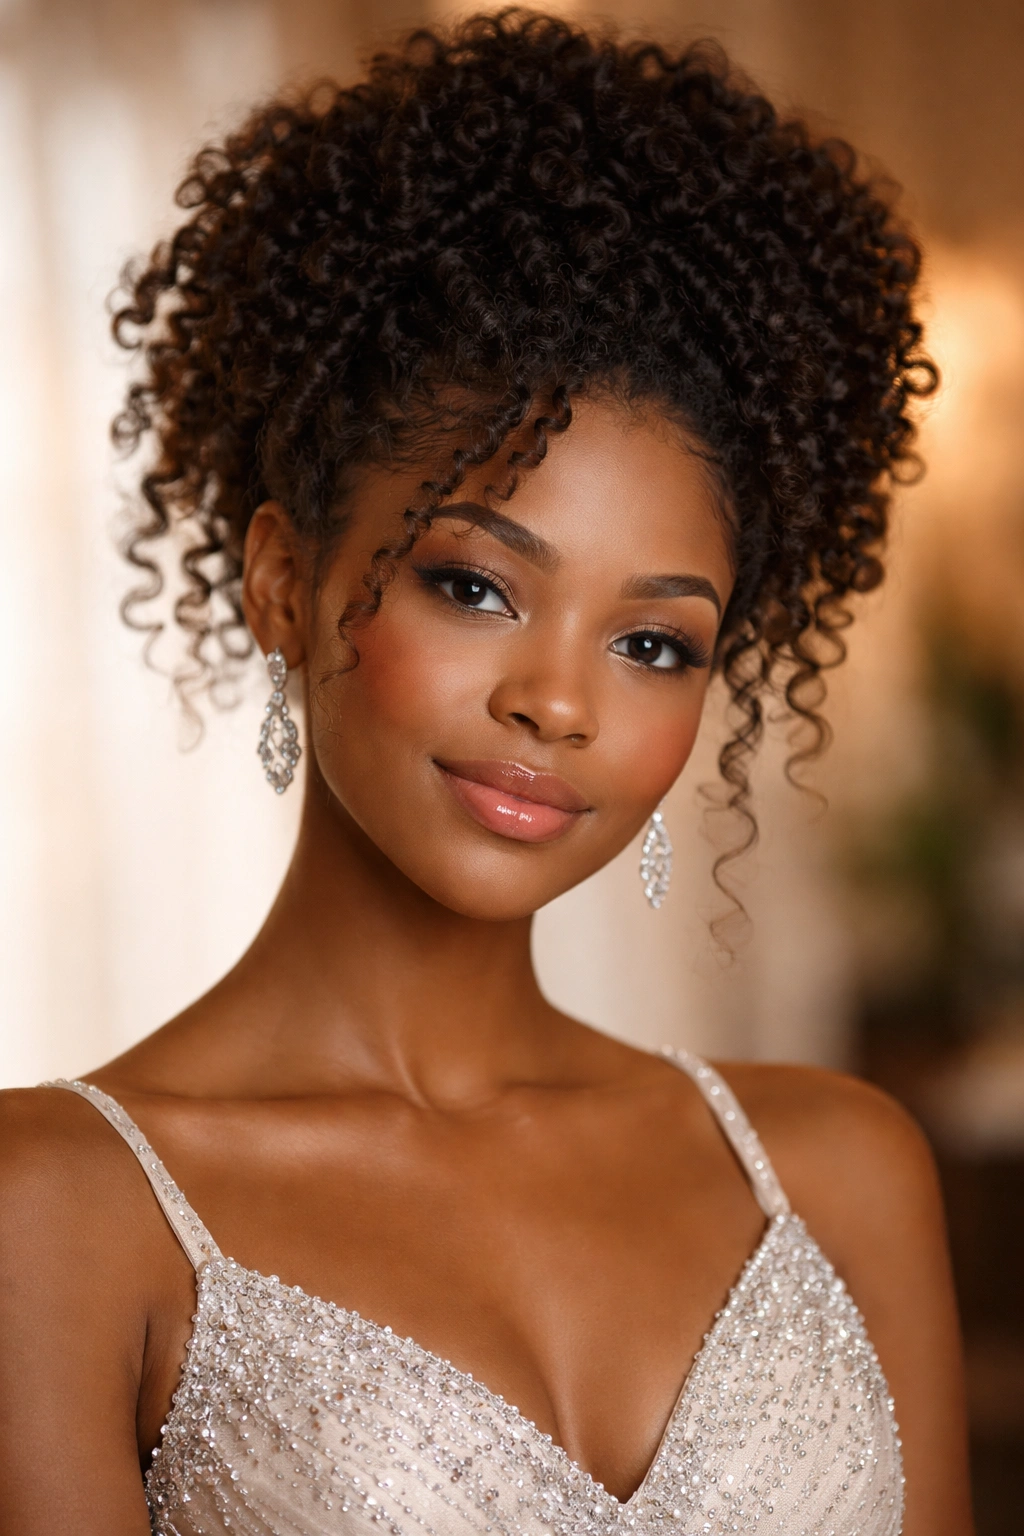
Your natural hair is genuinely one of your most powerful beauty assets — especially on a night as important as prom. Every style here celebrates your texture, your curl pattern, and your unique beauty in its own way. The best prom hairstyle for you is one that makes you feel confident, comfortable, and completely yourself.
Whether you choose something bold and sculptural, romantic and flowing, or playfully modern, the key is starting with healthy, well-moisturized curls and using products that enhance rather than fight your natural texture. Get a professional trial done if possible, have backup bobby pins and hairspray on hand, and take a moment before prom to just admire yourself. You’re going to look absolutely stunning.
