



Afro twist hairstyles have become a go-to choice for anyone looking to style textured hair with versatility, longevity, and genuine style. Whether you’re heading to work, running errands, or meeting friends, twists offer a practical way to protect your natural hair while looking polished and intentional. The beauty of twist styles lies in their flexibility—you can wear them slicked back and sleek, pile them into an updo, let them fall loosely, or combine them with other textures for a unique look that’s entirely your own.
The appeal of twists for everyday wear goes beyond aesthetics. When you create two-strand, three-strand, or flat twists, you’re distributing tension evenly across your hair, which means less breakage and healthier growth over time. Most twist styles last anywhere from one to two weeks with proper maintenance, making them far more practical than starting fresh daily styling. You can sleep on them, refresh them with a spritz of water or light product, and wake up ready to go.
What makes twist styles so versatile is that they work for every hair texture within the natural hair spectrum. Whether you have fine, densely coiled natural hair or thick, beautifully coarse strands, there’s a twist style that’ll work for your specific hair type and lifestyle. The styles in this guide range from simple everyday twists you can do yourself in 30 minutes to more elaborate designs perfect for special occasions or when you have a bit more time to invest.
Let’s explore 10 afro twist looks that work beautifully for everyday wear, each with its own vibe, difficulty level, and personality.
1. Two-Strand Twist Updo
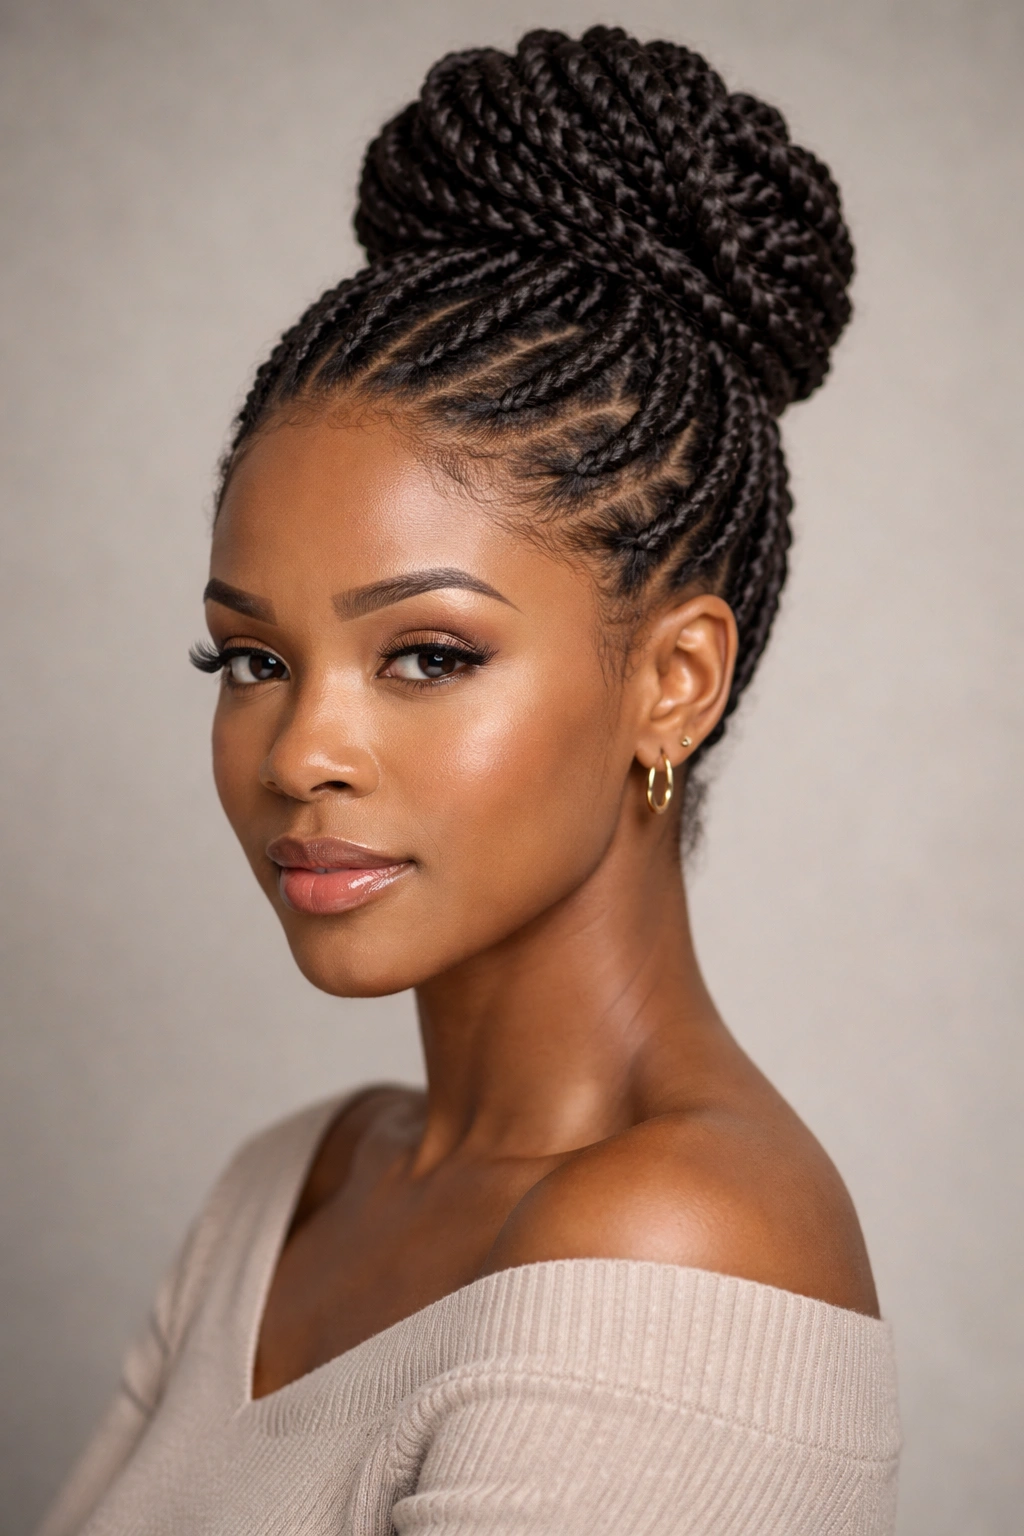
The two-strand twist updo is the reliable workhorse of natural hair styling—it looks intentional and put-together whether you’re at the office, the gym, or a casual gathering. This style involves twisting two sections of hair together from root to tip throughout your entire head, then gathering those twists into a high, medium, or low bun, usually secured with bobby pins and a few hair ties.
Why This Style Works for Daily Wear
Two-strand twists are incredibly forgiving because they work with your hair’s natural texture without fighting it. The twisting motion elongates your curls slightly while maintaining definition, so you don’t need heat or heavy products to achieve a sleek, finished look. The updo version keeps hair off your face and neck, making it perfect for humid weather, workouts, or any situation where you need your hair out of the way without sacrificing style.
The beauty of this updo is that it looks more intentional than a simple twist-out ponytail, but it’s nearly as quick to create. Once your twists are set (which you can do while relaxing in the evening), you can restyle the updo in just a few minutes each morning, and it holds beautifully throughout the day.
How to Create Your Two-Strand Twist Updo
- Prep your hair with a lightweight leave-in conditioner and a small amount of styling cream or gel to help define each twist without creating buildup
- Section your hair into 4-6 sections depending on density—thicker hair typically needs more sections for manageability
- Create each two-strand twist by taking two strands of hair, crossing one over the other repeatedly from scalp to end, keeping tension consistent so twists don’t unravel
- Gather twists loosely into your desired bun position and secure with bobby pins, working in a circular pattern around the base
- Smooth flyaways with a tiny bit of edge control cream applied with a firm toothbrush, and finish with a light hairspray for hold
- Refresh daily by lightly spritzing with water or a refresher spray and gently fluffing the bun to redistribute the twists
Pro tip: Create your twists on a Sunday evening, sleep on them, and you’ll have perfectly set twists that hold their shape for the entire week of updos without redoing them daily.
2. Chunky Twisted Braids
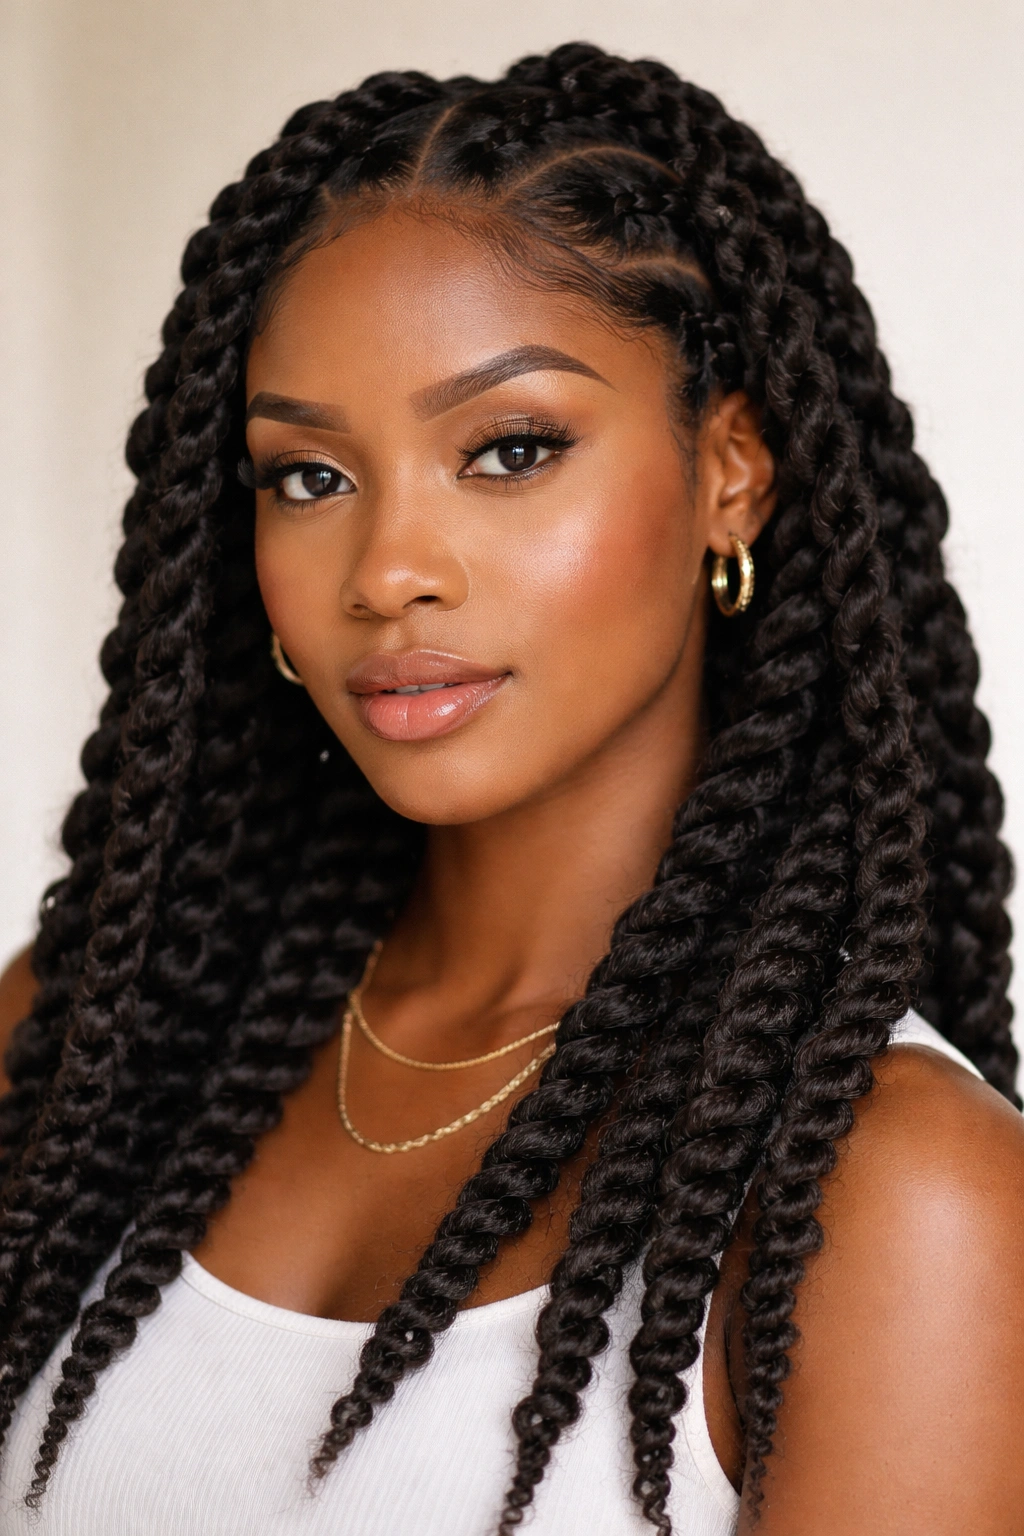
Chunky twisted braids offer a bolder visual statement than fine twists, with each individual plait visible and textured. This style uses thicker sections of hair—typically 4-8 large twists across the entire head—and the larger size means installation is faster while the style still looks intentional and detailed. Chunky twists have weight and movement that bounces with each step.
The Impact of Larger Twist Sections
When you work with thicker sections, you’re creating more defined negative space around each twist, which gives the hairstyle a sculptural quality that thinner twists can’t quite achieve. The larger surface area of each plait also catches light differently, creating dimension and depth in your overall look. Chunky twists also feel less structured than fine twists, giving off a more relaxed, effortless vibe while still looking completely intentional.
This style is particularly flattering if you have medium to thick hair density—the larger sections prevent the style from looking sparse or wispy. It’s also genuinely one of the fastest twist styles to install if you’re doing them yourself, which makes it ideal for busy people who want a polished look without spending four hours styling.
Creating and Styling Chunky Twists
- Use 4-8 sections total across your head, depending on your hair thickness and desired visual impact
- Apply styling product generously to each section before twisting, since larger sections need more help holding their shape
- Twist each section firmly from scalp to end, and consider sealing the ends with a small amount of edge control or lightweight moisturizer to prevent fraying
- Style the twists down your back, to the side, into an updo, or arranged in a crown around your head—chunky twists work with almost any arrangement
- Add subtle accessories like thread wraps around sections, thin hair cuffs, or metal bangles to elevate the look for specific occasions
Insider note: Chunky twists hold their shape longer if you sleep on them loosely braided or in a satin bonnet rather than down, which prevents unnecessary loosening at the scalp.
3. Senegalese Twists Reimagined as Rope Twists
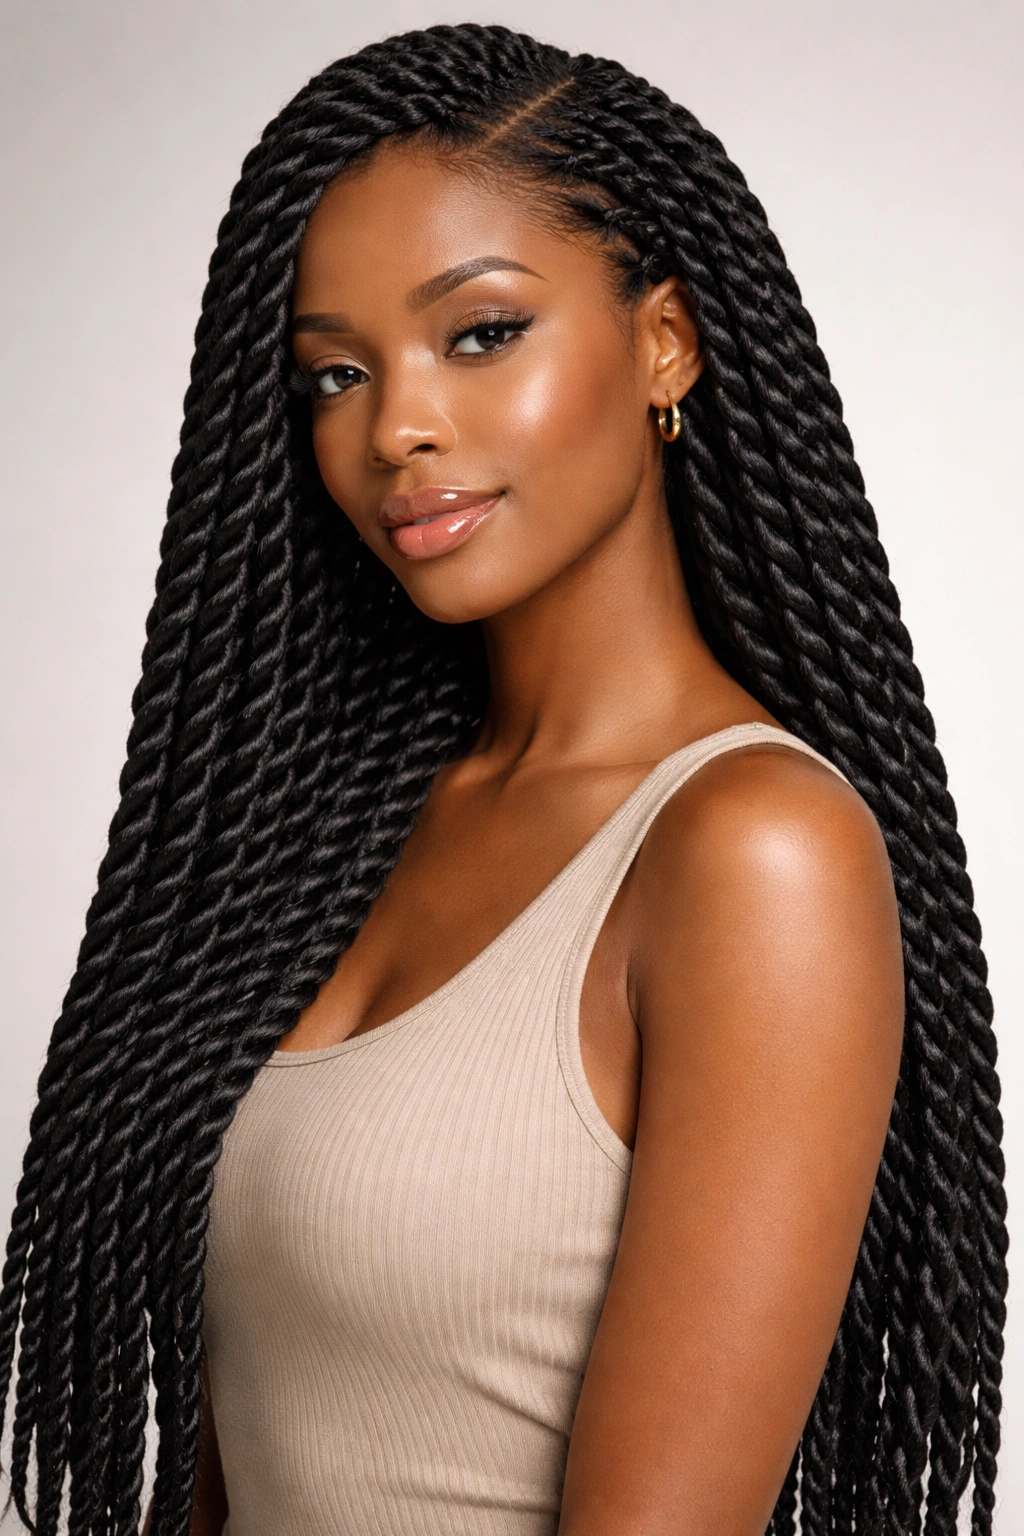
Senegalese twists traditionally use synthetic hair added to your natural strands for length and fullness, but you can create a similar aesthetic using only your natural hair by creating tightly twisted “rope” twists that mimic the look and feel of that classic style. These are three-strand twists that are wrapped incredibly tightly and often sealed with heat or product for a sleek, polished appearance.
The Rope Twist Aesthetic
Rope twists have a refined, almost sculptural quality because of their tightness and smoothness. They catch light beautifully and can look surprisingly glamorous for an everyday style, especially if you add subtle gold thread wraps or small cuffs. The tightly twisted construction means they hold their shape for weeks, making them one of the most low-maintenance twist styles once they’re installed.
This style works beautifully on fine to medium hair textures because the tight twisting actually creates the illusion of fuller hair while protecting your actual strands underneath. The tight construction also means less frizz over time compared to loosely twisted styles, so these are ideal if you live in humid climates or have hair prone to undefined edges.
Installing and Maintaining Rope Twists
- Apply a firm-hold styling cream to small sections of hair—rope twists require consistent product to maintain their tight structure
- Create three-strand twists (rather than two-strand) and twist as tightly and smoothly as possible while keeping the scalp comfortable
- Smooth each twist with your fingers while still damp to eliminate bumps and create that polished rope appearance
- Seal the ends with a small amount of moisturizer or lightweight oil to prevent unraveling
- Refresh by finger-coiling small sections if they begin to loosen at the roots after a week or two
Worth knowing: Rope twists sealed with a light coating of gel dry into an incredibly smooth, shiny finish that looks refined for professional settings while still being casual enough for everyday wear.
4. Flat Twist Crown
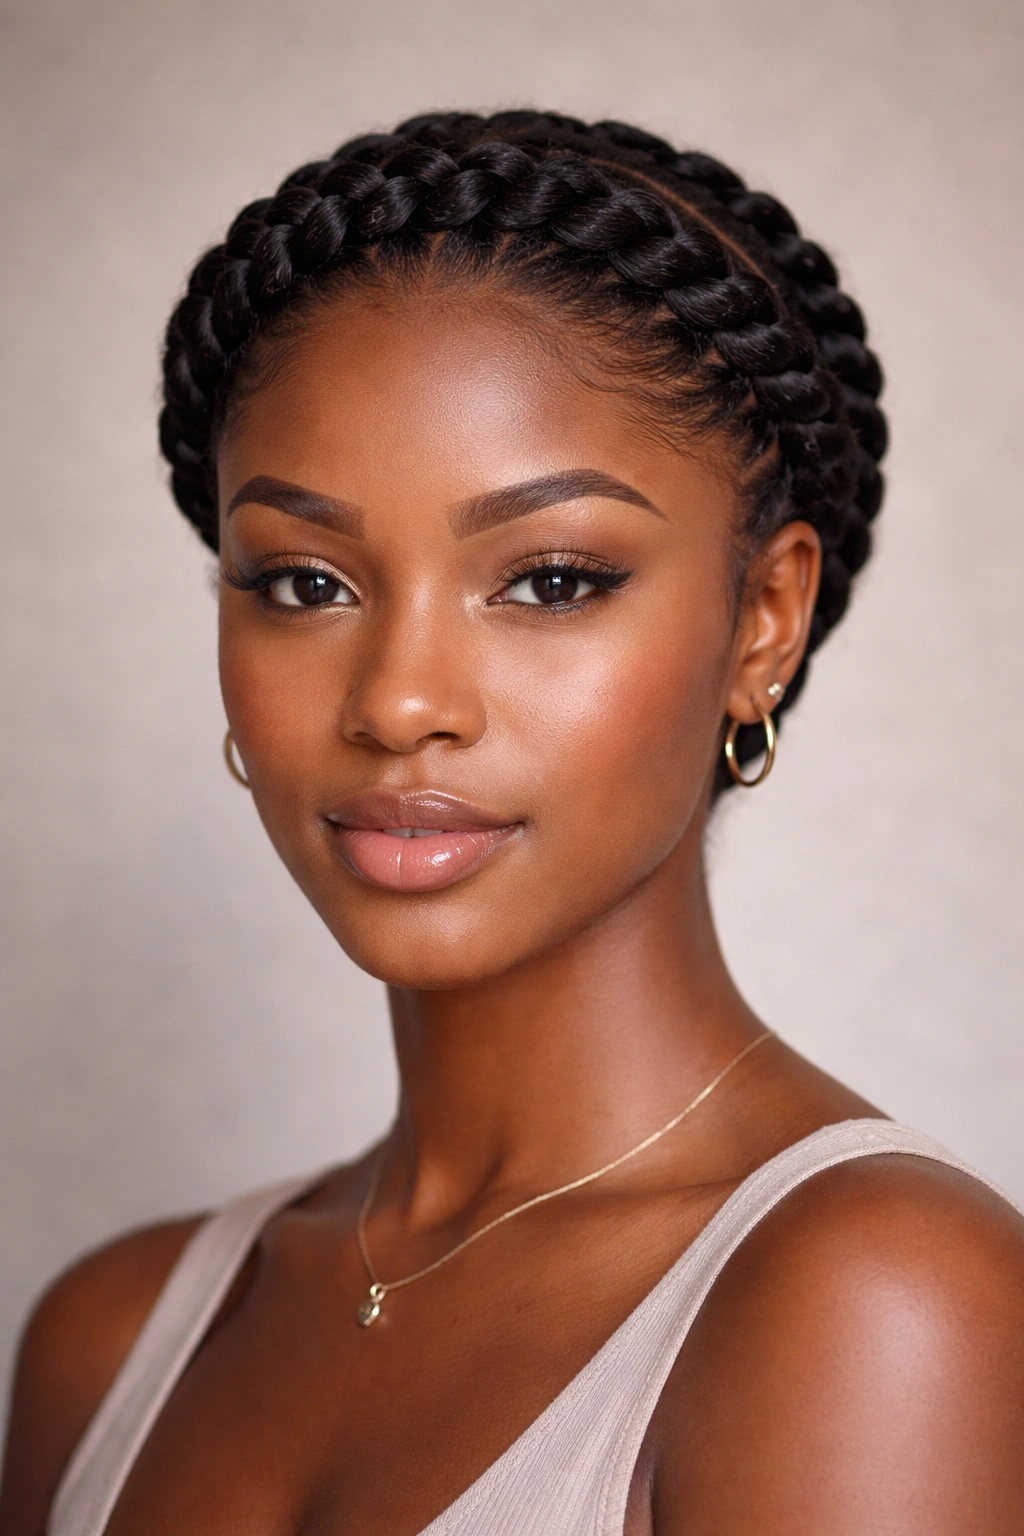
A flat twist crown creates a halo effect around your head using flat twists that follow a curved, crown-like path from one side to the other (or all the way around your head if you’re ambitious). This style combines the practical benefits of flat twists—they’re less bulky and stay extremely smooth—with an elevated, intentional look that works for both everyday and special occasions.
Why the Crown Layout Works
Flat twists are created by twisting two strands while also braiding them against your scalp, which creates a flat, linear appearance rather than a rounded twist. When you arrange them in a crown pattern, they become a design element rather than just a protective style. The crown creates a natural frame for your face and adds visual interest without requiring you to do anything complicated with the rest of your hair.
The genius of the crown layout is that you can wear your hair down and natural underneath while the crown twists do all the visual work. You get the protective benefits of twists while maintaining the freedom to wear your hair loose, creating a hybrid style that feels both polished and relaxed.
Creating a Flat Twist Crown
- Start at one temple and create a flat twist by taking small sections of hair, crossing one over the other while simultaneously braiding against your scalp toward your ear
- Continue the flat twist along the curve of your head toward the back, keeping tension even so the twist follows a smooth, curved line
- You can stop at the nape of your neck and secure with bobby pins, or continue all the way around your head for a full crown effect
- Define the twists by smoothing them down with a small brush and a light application of edge control while they’re still slightly damp
- Secure the ends at the back with bobby pins inserted under other hair so they’re invisible, and leave the rest of your hair down and natural
Quick fact: Flat twists last longer than two-strand twists because of how they grip your scalp, meaning a crown can easily last 10-14 days with minimal touch-ups.
5. Twisted Bun with Side Sweep
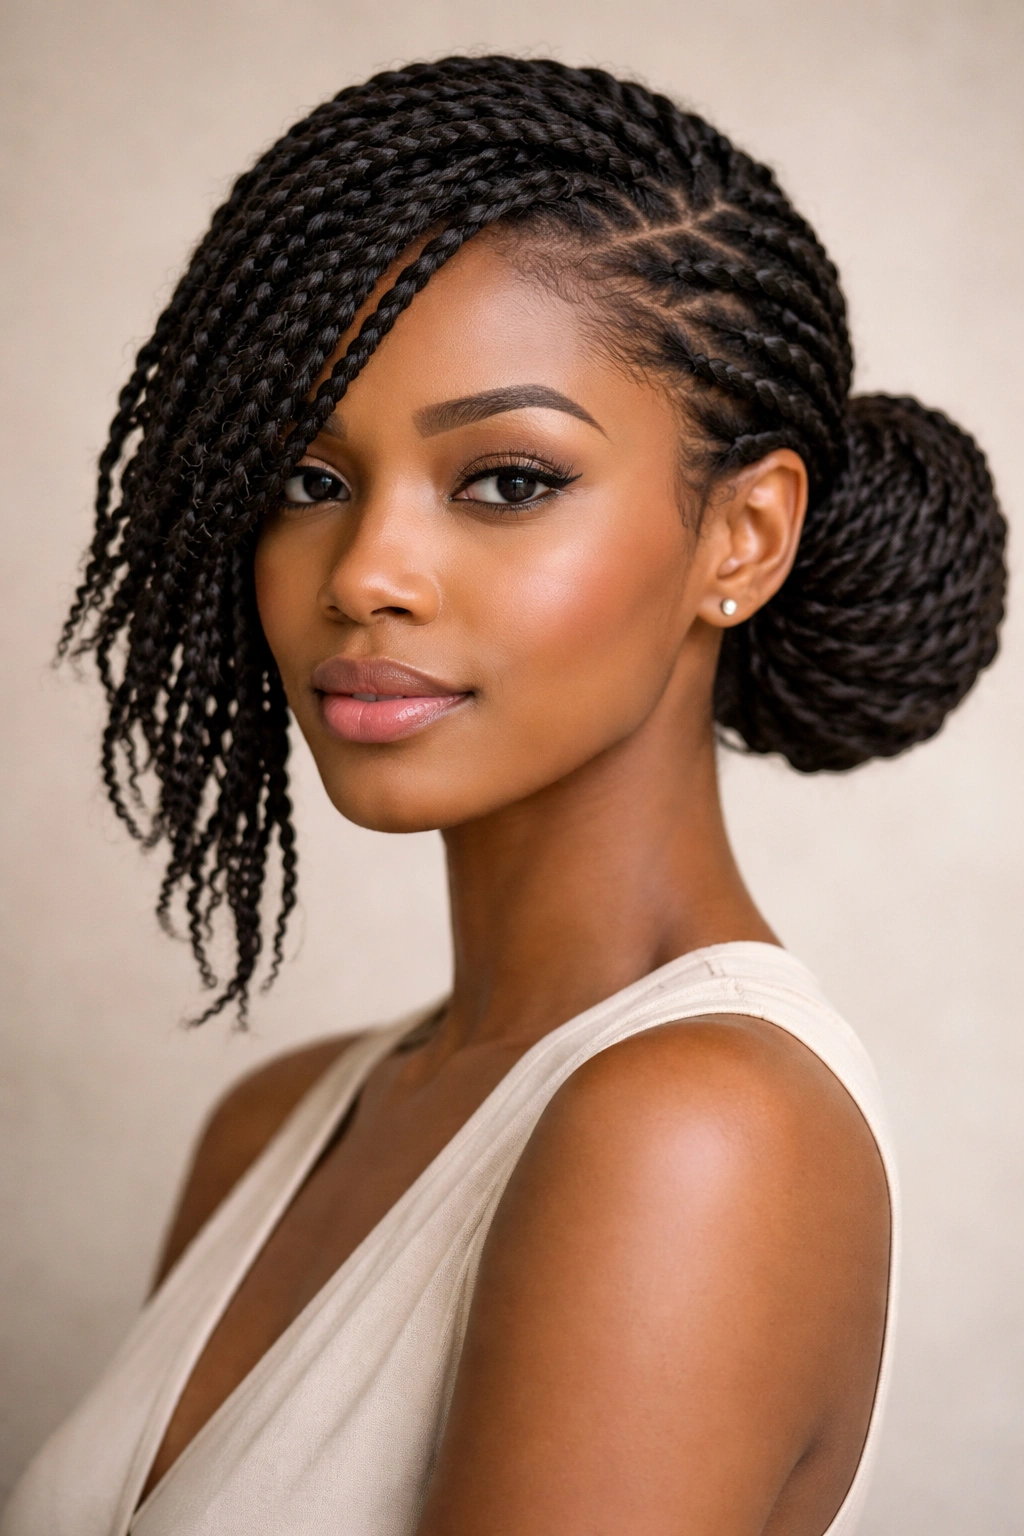
A twisted bun with a side sweep combines the practicality of a protective bun with a deliberate, asymmetrical style that feels more intentional than a centered bun. You create twists on one side of your head and sweep them into a bun positioned low on that same side, leaving the other side of your hair down and natural or twisted loosely.
The Elegance of Asymmetry
Side-swept styles automatically read as more sophisticated because they require an intentional styling choice rather than just pushing everything back and securing it. The asymmetry draws attention to your facial features on the open side and creates visual movement even when your hair is technically in a protective style. This works beautifully for work settings, dates, or anytime you want to look polished without appearing overly formal.
The key to making this style work is ensuring that your side-swept twists don’t look accidentally messy but rather deliberately artful. This means maintaining consistent twist tension, keeping the bun secure without looking too tight, and paying attention to any flyaways that might detract from the intentional vibe.
Creating the Side-Swept Twisted Bun
- Create twists on your preferred side (right or left), working from your temple toward the back of your head and twisting 3-4 larger sections
- Gather the twisted sections toward your ear or the nape of your neck, depending on where you want the bun positioned
- Roll the twists into a bun and secure tightly with bobby pins worked in every direction for support
- Smooth the open side of your hair with your hands or a light brush, and consider adding a side part or tucking the hair slightly behind your ear for clarity
- Finish with edge control on the secured twists and a light hairspray for hold throughout the day
Pro tip: Add a small, delicate hair cuff or wrap the secured bun with a thin piece of metallic thread for an elevated look that transforms this from casual to dressier.
6. Two-Strand Twist Out
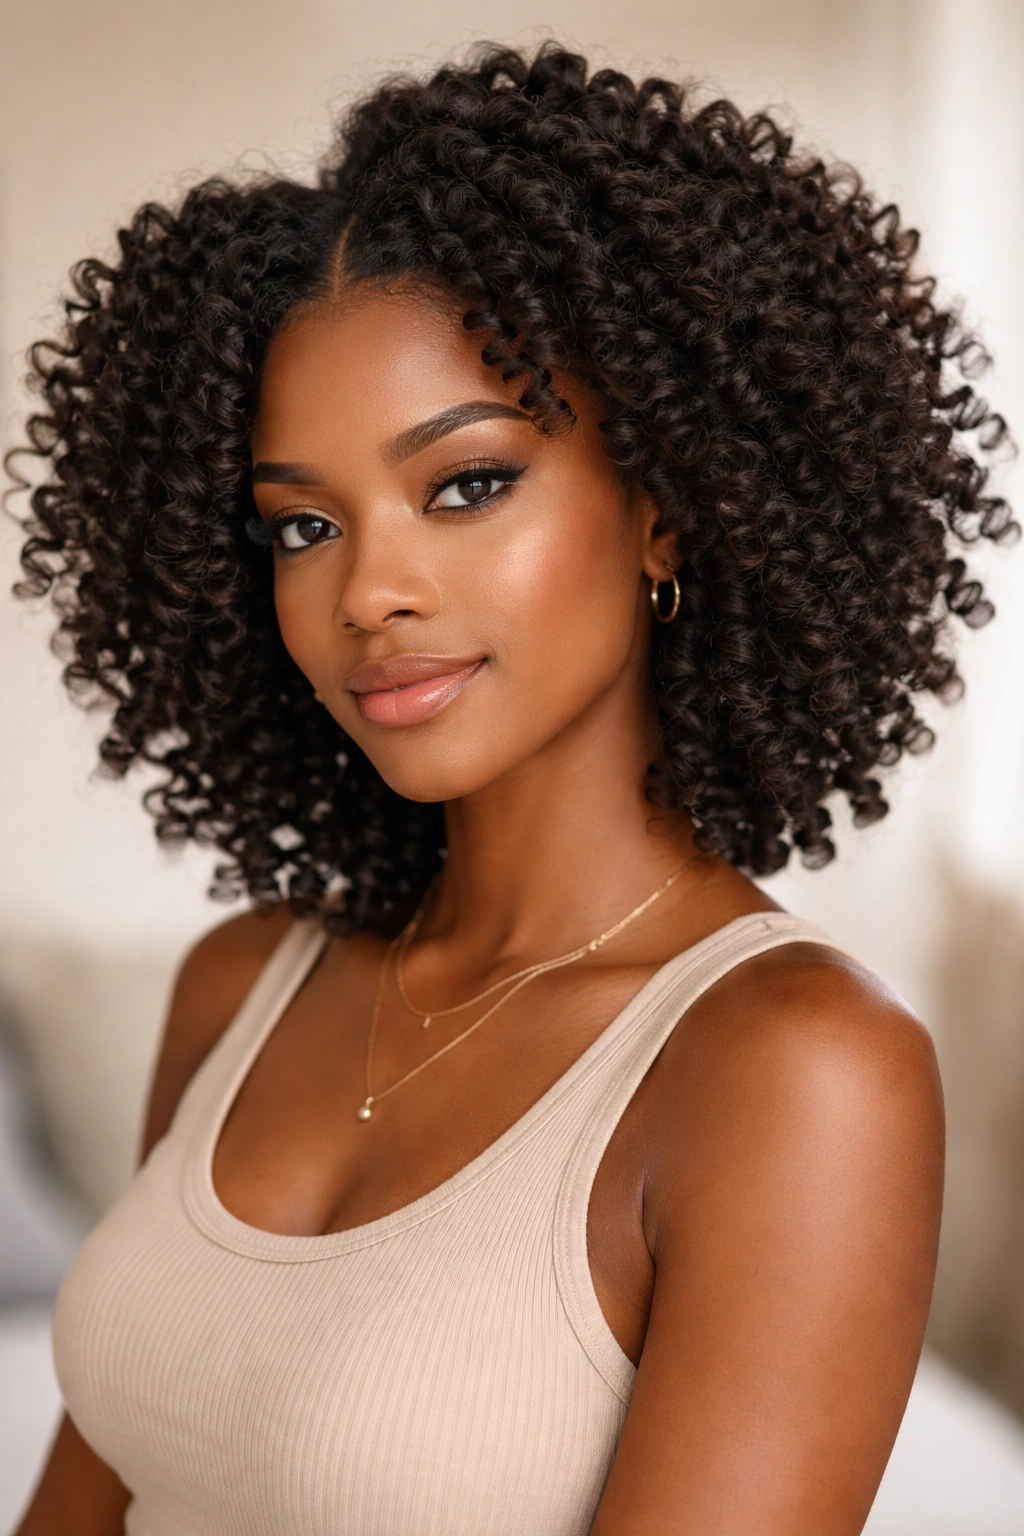
A twist out is created by installing two-strand twists and then unraveling them after they’ve set, creating voluminous, defined curls that are bouncy, airy, and feel completely natural. This style gives you the protective benefits of twists during the setting period while delivering the aesthetic of your most beautiful natural curls without heat styling.
Why Twist Outs Deliver Superior Definition
When you twist your hair, you’re setting your curls into a specific shape while your hair dries. When you then unravel those twists, your curls are already trained into that defined shape, so they look fuller and more intentional than curls you’d get from just leaving your natural hair alone. Twist outs also elongate your curls slightly, making your overall style appear larger and more voluminous than your natural curl pattern might be on its own.
The beauty of a twist out is that it works regardless of whether your hair is freshly twisted or your twists have been in for a week. You can unravel twists that are just a few days old for tighter, more defined curls, or wait until they’ve been in for seven days for looser, wavier curls with softer definition.
Installing and Releasing Your Twist Out
- Create two-strand twists throughout your hair using the same method as the twist updo, but keep them loose enough that you’ll be able to gently unravel them without breakage
- Allow twists to set for at least 5-7 days, sleeping on them in a satin bonnet to protect the twists and prevent unraveling
- Lightly mist your hair with water or a refresher spray right before unraveling to add moisture and softness to your curls
- Gently unravel each twist by slowly separating the two strands, working from the end up toward the scalp to avoid breakage
- Gently fluff and shape your curls with your fingers, and consider adding a small amount of lightweight oil or curl cream to enhance definition
Worth knowing: Twist outs look most voluminous when you unravel them while your hair is still slightly damp rather than completely dry, which allows your curls to separate and expand fully.
7. Twisted Ponytail with Curls
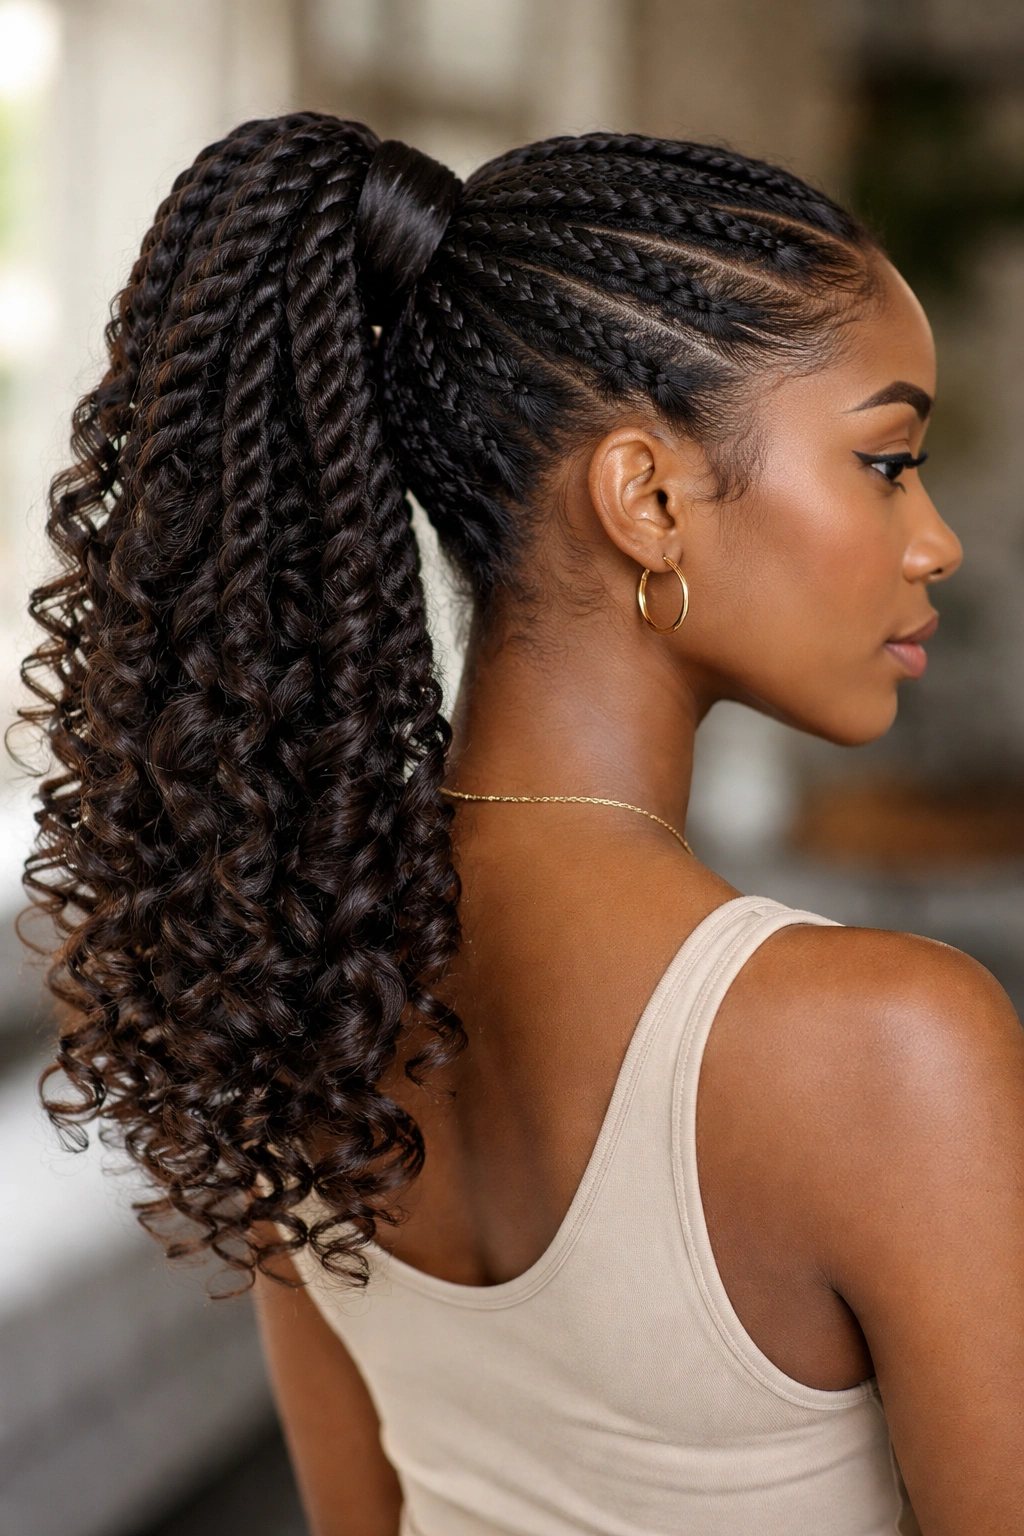
A twisted ponytail combines the polished look of a gathered ponytail with the texture and dimension of twisted sections, creating a style that’s practical, pretty, and requires less manipulation than a full head of twists. You gather your hair into a high or mid-level ponytail, and then divide the ponytail into sections and twist each one, allowing the twists to create a beautiful textured effect.
Why This Works for Busy Days
This style is ideal for days when you want protection and style without the time commitment of twisting your entire head. Since you’re only twisting the hair already gathered in your ponytail, installation is genuinely quick—usually 15-20 minutes depending on your hair thickness and ponytail size. The finished look appears intentional and styled while still being simple enough to accomplish on a rushed morning.
The twisted sections also hold your ponytail in place more securely than a smooth gathered ponytail would, so it’s less likely to slip down throughout the day. Additionally, the texture and dimension created by the twists make the ponytail appear fuller and more interesting than a standard smooth ponytail.
Creating a Twisted Ponytail
- Smooth your hair back into a high or mid-level ponytail using a brush and edge control, and secure with a elastic band
- Divide your ponytail into 4-6 sections depending on ponytail thickness and desired twist size
- Create a two-strand twist in each section, working from the base of the ponytail down to the ends
- Secure the twisted ponytail with another elastic band at the ends of your twists to hold everything together
- Gently pull and fluff each twisted section to create a slightly fuller appearance, and smooth any flyaways with edge control
Insider note: The most polished version of this style includes slightly loose, pulled-apart twists rather than tight, neat twists—the intentional softness reads as more sophisticated and intentional.
8. Coiled Twist Loops
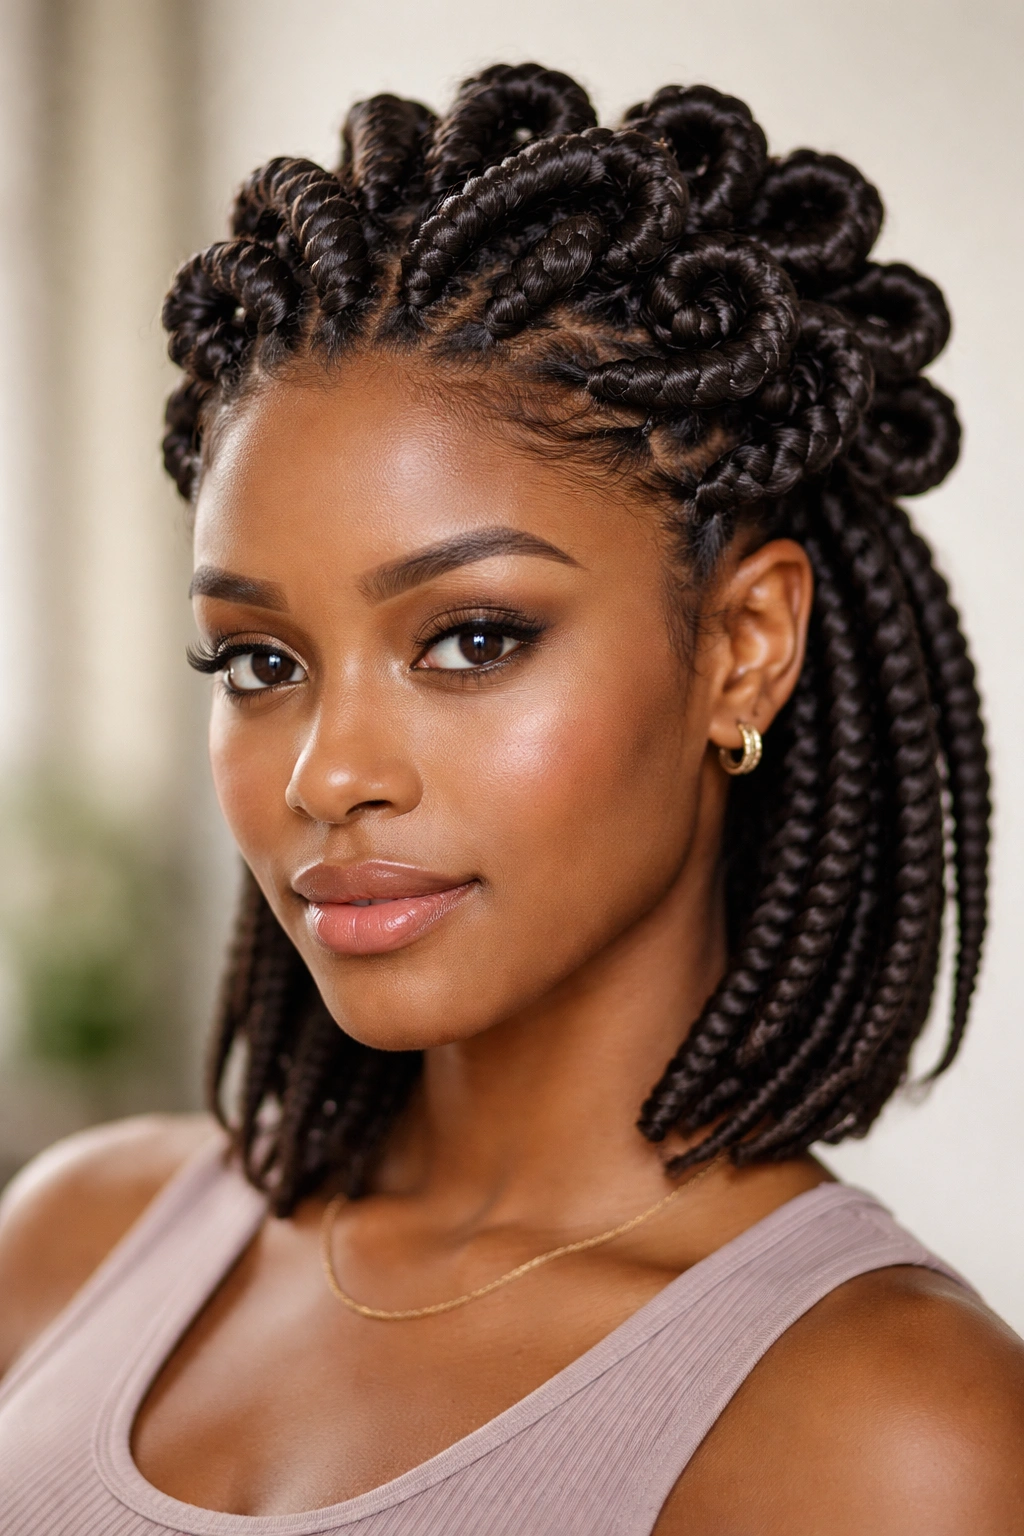
Coiled twist loops are a playful, dimensional variation where you create twist sections and then loop them back on themselves, securing them with bobby pins to create decorative coils across your scalp. This style has a sculptural quality and genuinely stands out visually while still protecting your hair and maintaining a polished appearance.
The Visual Impact of Loop Details
When you create a two-strand twist and then loop it back on itself, you’re creating a three-dimensional design element that catches light and draws attention. The loops create visual interest and movement even when your hair is technically in a protective style. This style works beautifully if you have medium to thick hair texture because the loops have enough substance to appear intentional rather than accidental.
Coiled loops also create a unique transitional style—your hair is protected, but the loops give it a deliberately styled, fashion-forward aesthetic that works well for creative workplaces, social events, or simply for days when you want your everyday style to feel a bit more elevated and intentional.
Creating Coiled Twist Loops
- Section your hair into 6-8 sections depending on desired loop size and hair thickness
- Create a two-strand twist in each section, working from root to tip while keeping tension consistent
- Loop each completed twist back on itself, creating a coil shape, and secure the loop with bobby pins inserted at the base of the scalp
- Adjust and tighten each loop so all coils are roughly the same size and sit at a consistent height on your scalp
- Tidy the appearance by smoothing down any flyaways and making sure pins are fully hidden under the twists
Quick fact: Coiled loops typically hold their shape for 7-10 days, and you can refresh the look each morning by simply adjusting the pins and giving the loops a light spritz with water to reactivate the twist definition.
9. Feed-In Twisted Sides
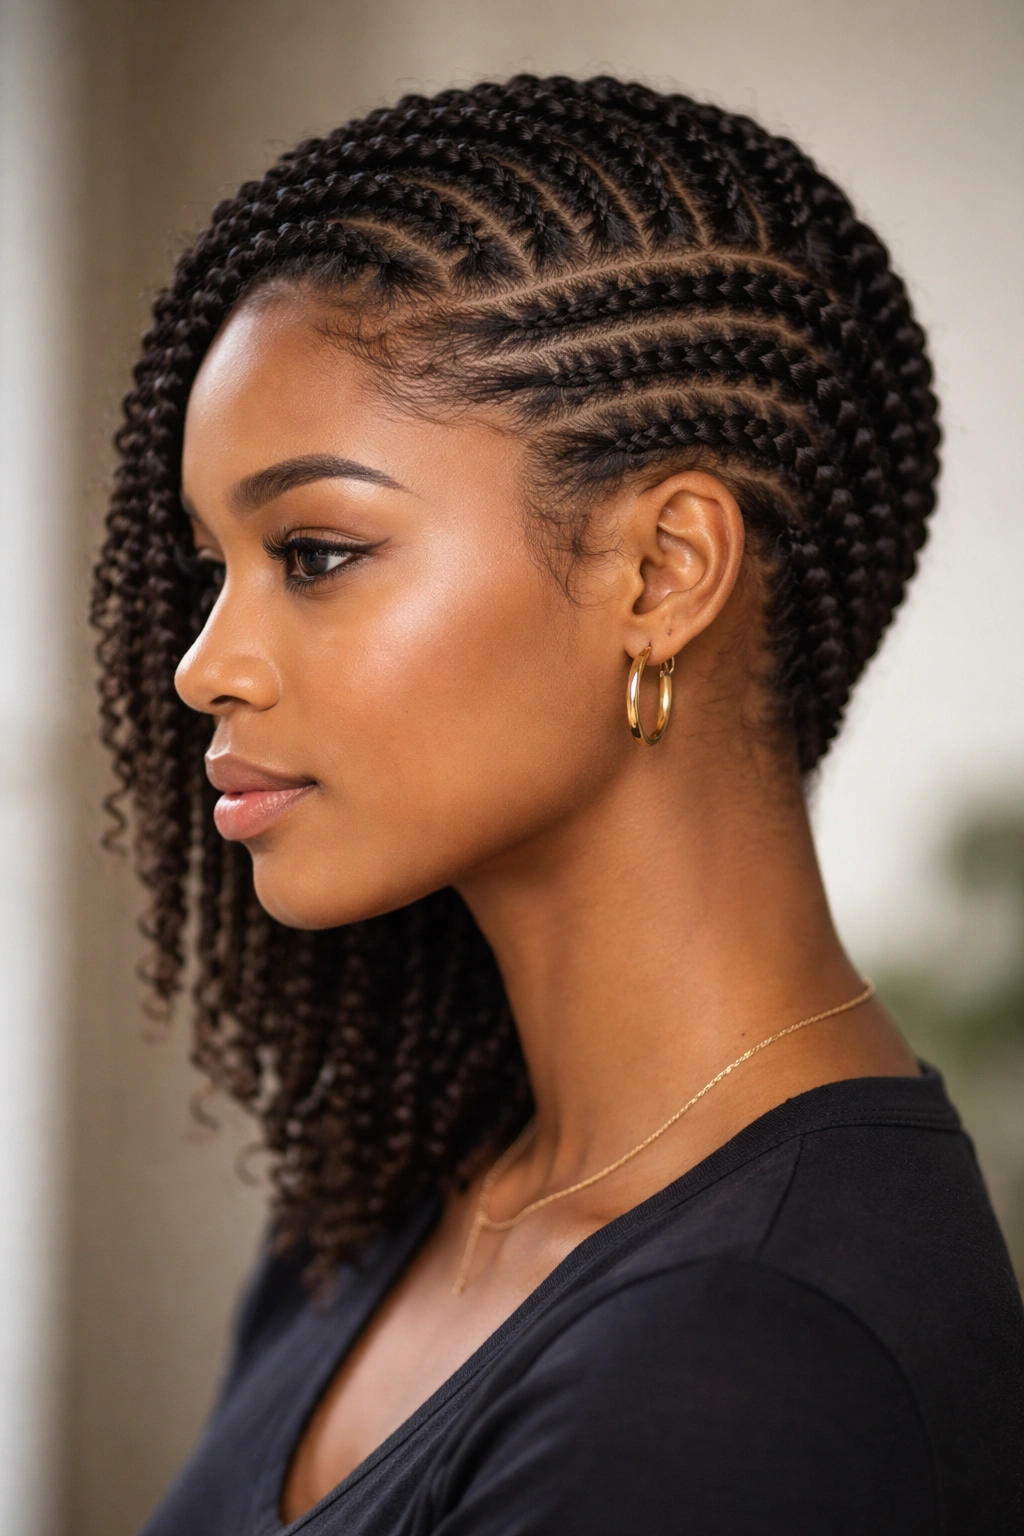
Feed-in twists on the sides of your head create a stunning, protective look where you start with a small amount of hair at your scalp and gradually add more hair as you twist downward, similar to the technique used in feed-in braids. This creates twists that are thinner at the crown and thicker at the bottom, with a beautifully tapered appearance.
Why Feed-In Technique Matters
Feed-in twisting distributes tension more evenly across your scalp because you’re not pulling any one section excessively tight at the roots. The gradual addition of hair means less breakage at your hairline and more sustainable styling for frequent wear. Additionally, the tapered appearance—thin at the top, thick at the bottom—is visually flattering and creates an elegant line from your scalp downward.
This style works beautifully styled down your back with the rest of your hair loose and natural, or you can gather the twisted sides into a half-up style, an updo, or even a side ponytail. The feed-in twists on the sides become a framing element that draws attention to your face while protecting the delicate hair at your edges.
Creating Feed-In Twisted Sides
- Start with a small section at your temple, and begin creating a two-strand twist using just that hair
- As you twist downward, gradually introduce more hair from nearby sections into your twists, feeding the hair in smoothly rather than adding it all at once
- Maintain consistent twist tension as you add hair, keeping the twist balanced so it doesn’t appear lumpy or uneven
- Continue twisting to the nape of your neck, where you can secure the twist end or leave it hanging
- Repeat on the opposite side so you have twists framing both sides of your face, and leave the back and crown of your hair loose and natural
Pro tip: Feed-in twists are most successful when you add hair gradually in small amounts rather than trying to add large sections at once—small incremental additions create the smoothest, most professional-looking result.
10. Twisted Half-Up Style
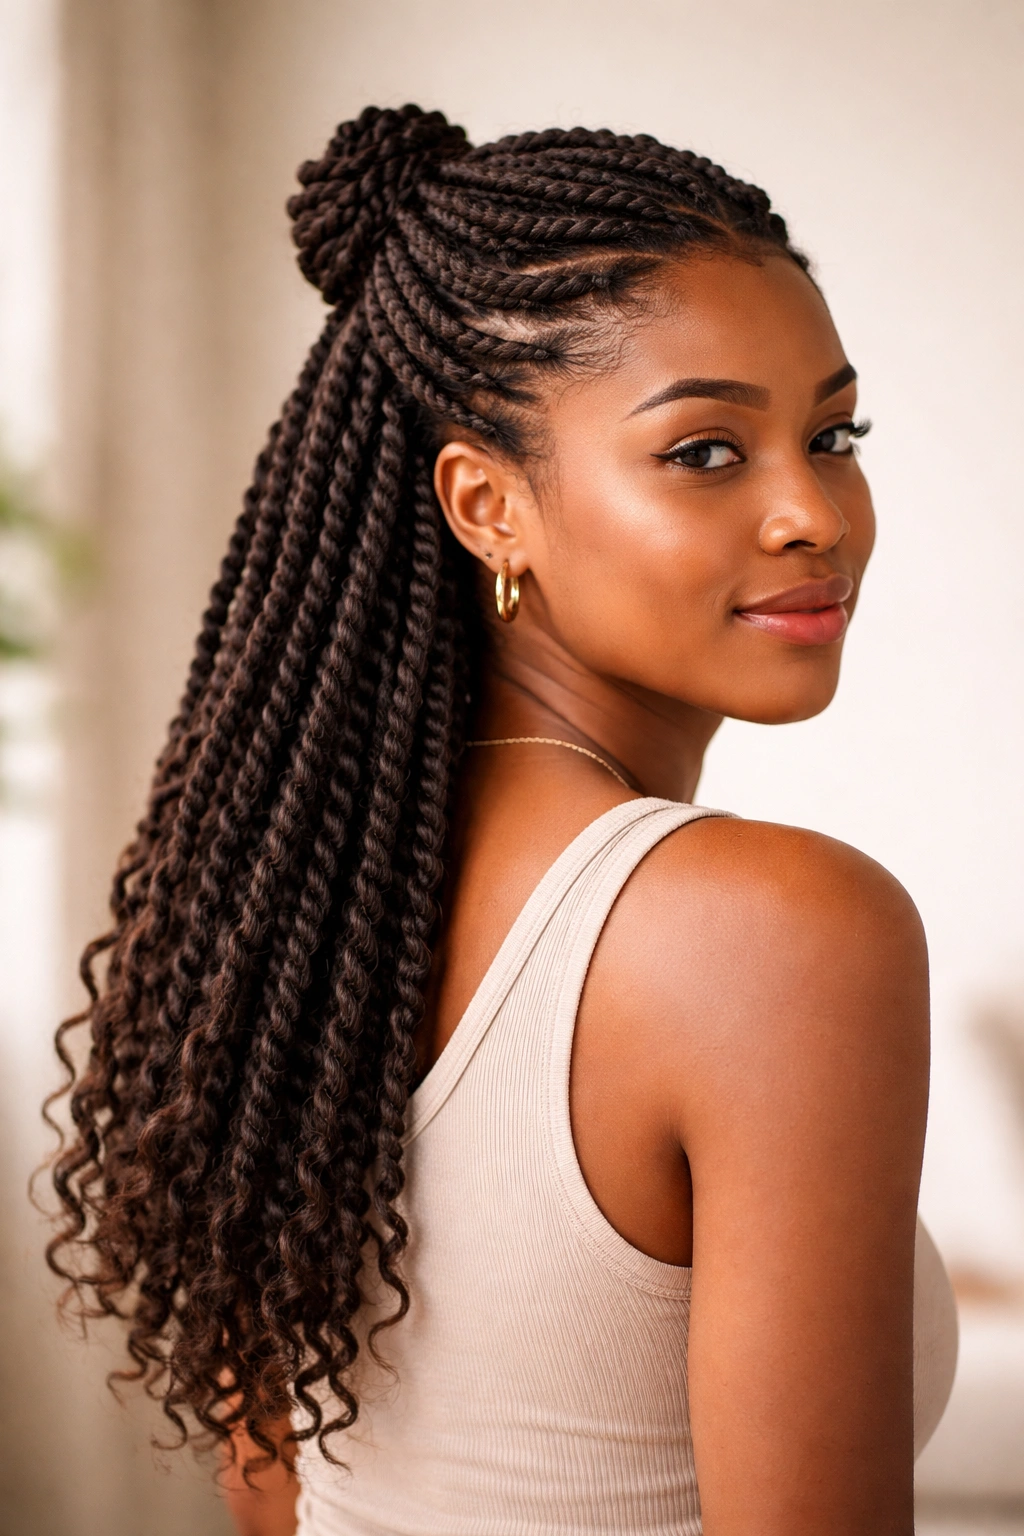
A twisted half-up style gathers the top portion of your hair into twists while leaving the bottom half down and natural, creating a look that’s practical, pretty, and strikes a perfect balance between styling and low-maintenance. You can create 2-4 twists in the gathered section, arrange them into a small bun, or sweep them to one side.
The Versatility of Half-Up Design
The half-up style is genuinely one of the most versatile configurations because you’re creating a styled look that doesn’t require you to protect or contain your entire head. The gathered portion keeps hair off your face and neck, which is practical for work or exercise, while the loose bottom section maintains softness and movement. You can go from casual to dressed-up simply by adjusting how you arrange the twists—a centered half-up bun reads polished and professional, while a side-swept half-up reads casual and artful.
This style is also practical for hair care because you’re still protecting a significant portion of your hair in twists while keeping the lower half accessible for moisture and styling. It’s a gentle protective style that doesn’t feel restrictive while still offering genuine protection benefits.
Creating a Twisted Half-Up Style
- Create a center part (or off-center, depending on preference) that runs from your forehead to the nape of your neck
- Section the top half of your hair as if you were creating a high ponytail, from temple to temple across the crown
- Create 2-3 two-strand twists in the gathered section, working from root to tip
- Secure the twists into a small bun by twirling them together and pinning them, or leave them hanging down the back for a looser, more casual appearance
- Leave the bottom half of your hair down and natural, and consider adding a curl cream or lightweight moisturizer to create definition in the loose section
Worth knowing: The most polished twisted half-up styles include slightly loosened, pull-apart twists rather than tight, compact twists—the texture and softness look more intentional and sophisticated than overly controlled twists.
Final Thoughts
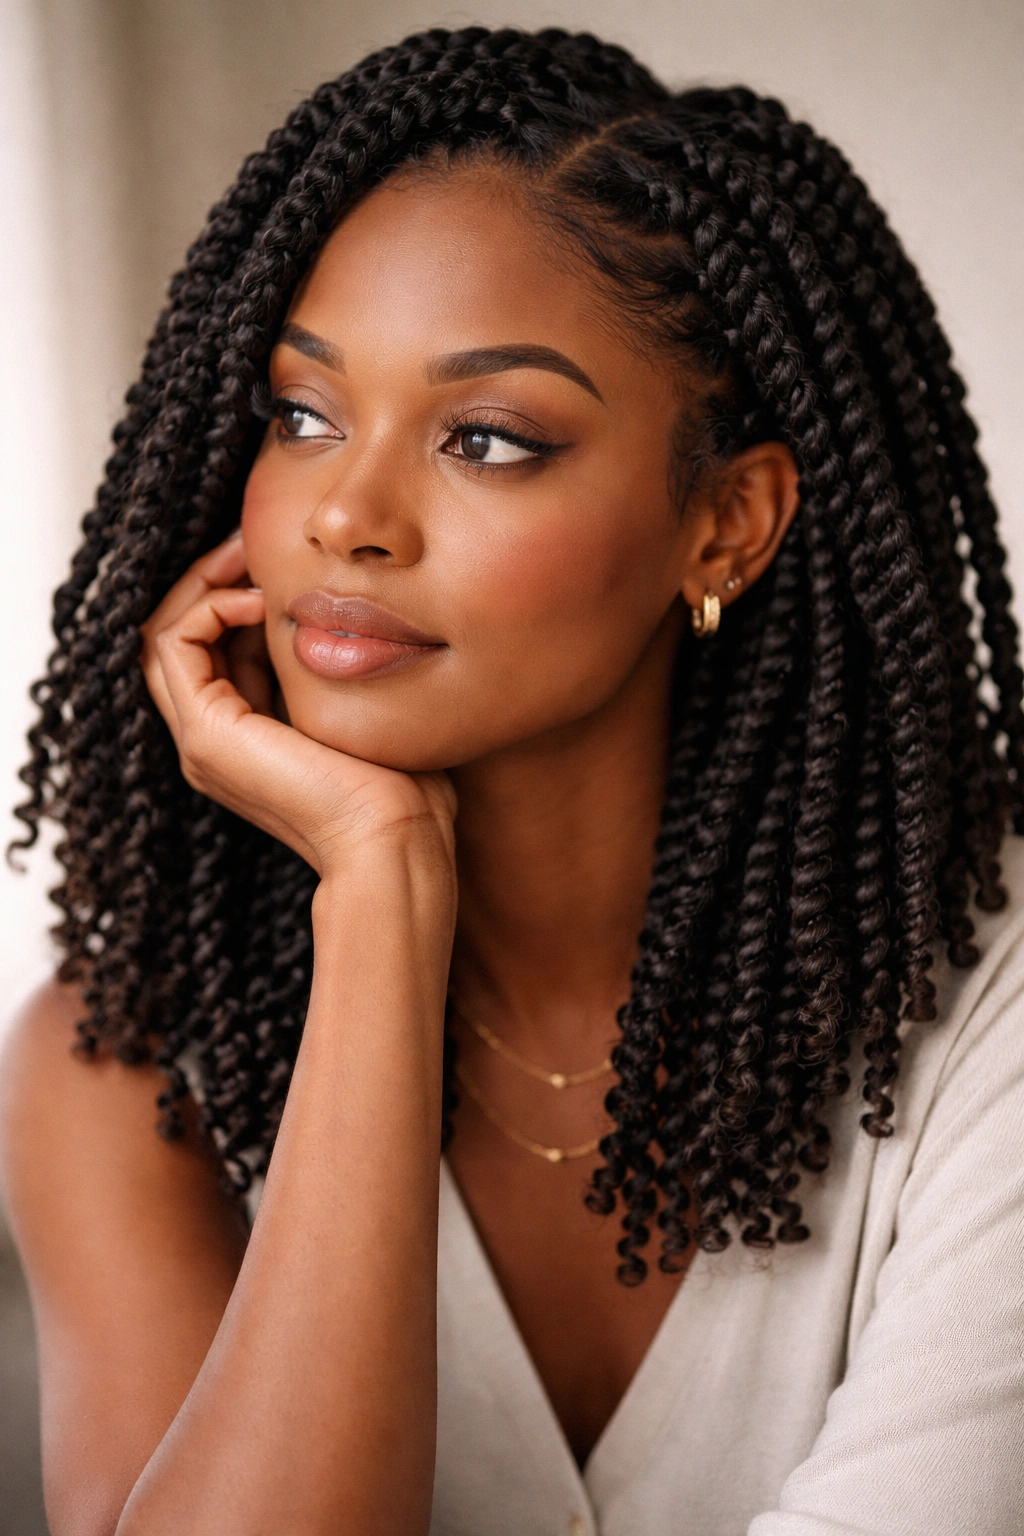
Afro twist hairstyles offer something special that goes beyond their aesthetic appeal. They protect your hair from daily manipulation and environmental stress, they give you flexibility in how you wear and restyle them, and they celebrate the natural beauty of your hair texture instead of fighting against it. Whether you’re drawn to the simplicity of a two-strand twist out, the elegance of flat twist crowns, or the playfulness of coiled loops, there’s a twist style that fits your personality, your lifestyle, and your hair type.
The key to loving your twist styles is finding the versions that work specifically for you—your hair texture, your styling comfort level, and your daily needs. Some people thrive with twists that stay in for two full weeks, while others prefer changing their style more frequently. Neither approach is wrong; it’s about discovering what keeps your hair healthy, what makes you feel confident, and what fits realistically into your routine.
Start with one or two styles from this guide, get comfortable with the installation and refreshing process, and then branch out to others as you build your skills and confidence. Your twist styling journey is yours alone, and these everyday looks are really just the beginning of what’s possible with this versatile, protective, and genuinely beautiful way to wear your natural hair.
