



Messy buns have become the go-to style for anyone who wants to look effortlessly put-together without spending an hour on hair, but there’s a catch — not all messy buns actually look intentional or polished. That’s where slick back messy buns change the game. By combining the relaxed, undone texture of a traditional messy bun with the clean, refined control of slicked-back styling, you get something special: a hairstyle that’s genuinely practical for everyday wear yet looks like you’ve put real thought into your appearance.
The beauty of a slick back messy bun is that it bridges two worlds. You get the comfort and ease of a messy bun — your hair is secured, off your face, and manageable — but you lose that “I just rolled out of bed” vibe. Instead, you get a polished, intentional look that works equally well in a professional setting, at the gym, or out for casual plans. The slicked-back element adds structure and definition while the messiness keeps things modern and wearable.
Whether you’re dealing with fine hair that needs texture, thick hair that needs control, or anything in between, there’s a slick back messy bun technique waiting for you. These styles come in various heights, parts, and finishes — from minimalist and architectural to textured and tousled. The best part? Once you understand the basic principle (apply hold + comb smoothly + gather and secure + tease strategically), you can adapt these styles to match your hair type, face shape, and personal taste.
1. Classic Sleek High Bun
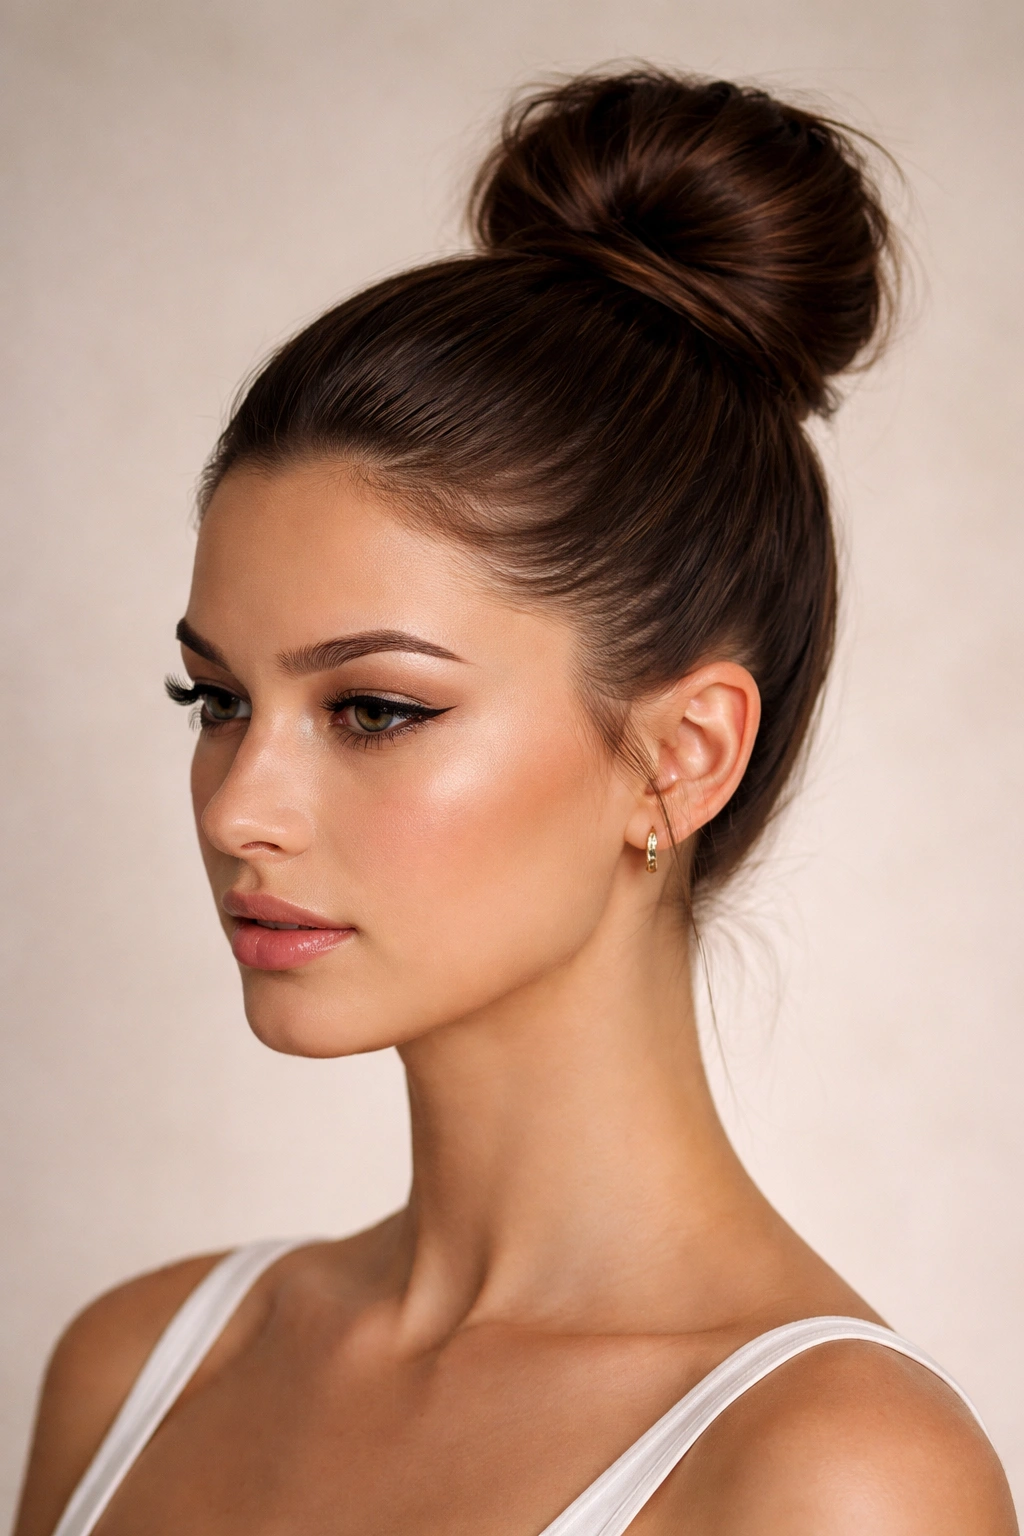
The classic sleek high bun is the foundation of the slicked-back messy bun family, and it’s the style to master first. This version sits high on your crown, pulling your hair straight back in a smooth, controlled manner from roots to scalp, before the ponytail blossoms into that beautiful, undone texture at the base. It’s a clean, no-nonsense style that reads professional in a boardroom but cool enough for weekend brunch.
Why This Style Works for Any Hair Type
The classic high slicked-back bun works because it relies on technique rather than hair texture. You’re not trying to hide anything — you’re creating intentional smoothness and then deliberately softening it. The slicked-back portion keeps loose pieces at bay, and the messy finish at the base prevents the style from looking overly constructed or severe. People with straight hair will notice the smoothness throughout; people with curly or wavy hair will see how the hold product and brushing create a sleek base that still honors their natural texture once it reaches the bun portion.
How to Create the Look
- Start with second-day hair or lightly dampened clean hair — fresh hair is too slippery for slicked-back styling. Dampening helps grip better than dry hair while still giving you control.
- Apply a smoothing product like a gel, edge control, or light pomade to your hands and run them through your hair from front to back, smoothing out any flyaways and creating a uniform surface. Work in sections if you have thicker hair.
- Use a fine-tooth comb or a brush designed for slicking (paddle brushes work well) to comb your hair straight back, pressing gently but firmly to create that sleek base.
- Gather your hair at the crown into a high ponytail. The position should be roughly at the midpoint between your hairline and the back of your head.
- Secure the ponytail with a clear elastic, leaving a few inches of hair below the elastic to work with for the bun.
- Twist or wrap the remaining ponytail hair around the base of the ponytail to create a bun shape, tucking the ends underneath and securing with bobby pins. This is where you want softness — don’t pull too tightly.
Pro tip: If you have fine or thin hair, backcomb or tease just the ponytail section gently before wrapping it into the bun. This adds volume without affecting the sleek base.
2. Low Slicked Back Bun
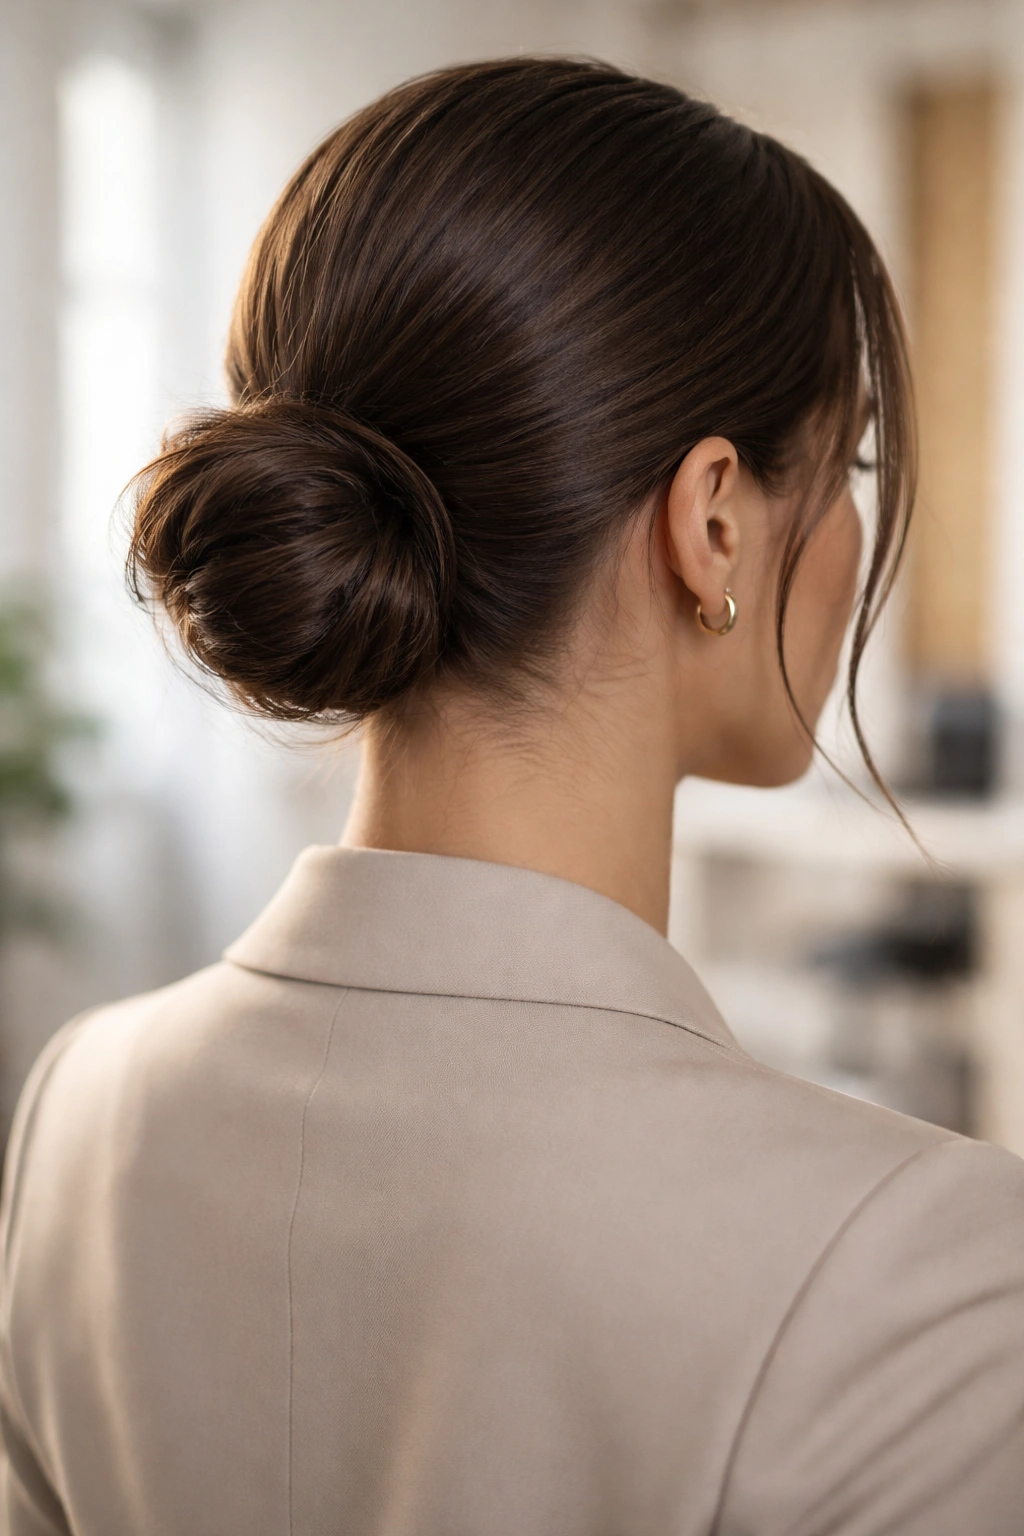
The low slicked back bun is the more understated sibling of the high version, sitting at the nape of your neck where it’s sophisticated and office-appropriate while still maintaining that relaxed-but-intentional vibe. This style is exceptionally flattering for long face shapes because the lower placement creates visual width, and it’s gentler on your edges if you’re concerned about hair breakage from tight styling.
What Makes This Style Work
A low slicked back bun feels inherently more elegant and mature than higher styles. It elongates the neck, creates a clean visual line from the back of your head down your spine, and has historically been associated with polished, refined dressing. The slicked-back component makes it impossible to dismiss as undone, while the messy bun finish keeps it from feeling too formal or stiff. You’re hitting the sweet spot between “I’m serious about this look” and “I didn’t overthink it.”
The Perfect Placement and Technique
- Determine your bun placement by finding the midpoint between the crown of your head and your nape — that’s roughly where your low bun should sit.
- Apply your smoothing product (gel, edge control, or pomade) to damp or second-day hair, working from your hairline straight back in smooth, even strokes.
- Create a center part, side part, or no part — the slick-back technique works with any parting, so choose based on your face shape and preference.
- Using a fine-tooth comb, smooth and brush back all the hair toward the nape, maintaining tension and evenness.
- Gather into a low ponytail at the base of your skull, positioning the elastic so the ponytail sits just where you want the bun to be.
- Twist the ponytail into a soft coil and wrap it around itself, securing with bobby pins placed to hide under the bun layers.
- Finish by pulling a few loose strands from the bun and pinning them back loosely for that intentionally undone texture.
Insider note: Smooth the very front hairline with a fine-tooth brush or old toothbrush and edge control once your bun is complete. This polishes the look without adding time to your routine.
3. Slicked Back Side Bun
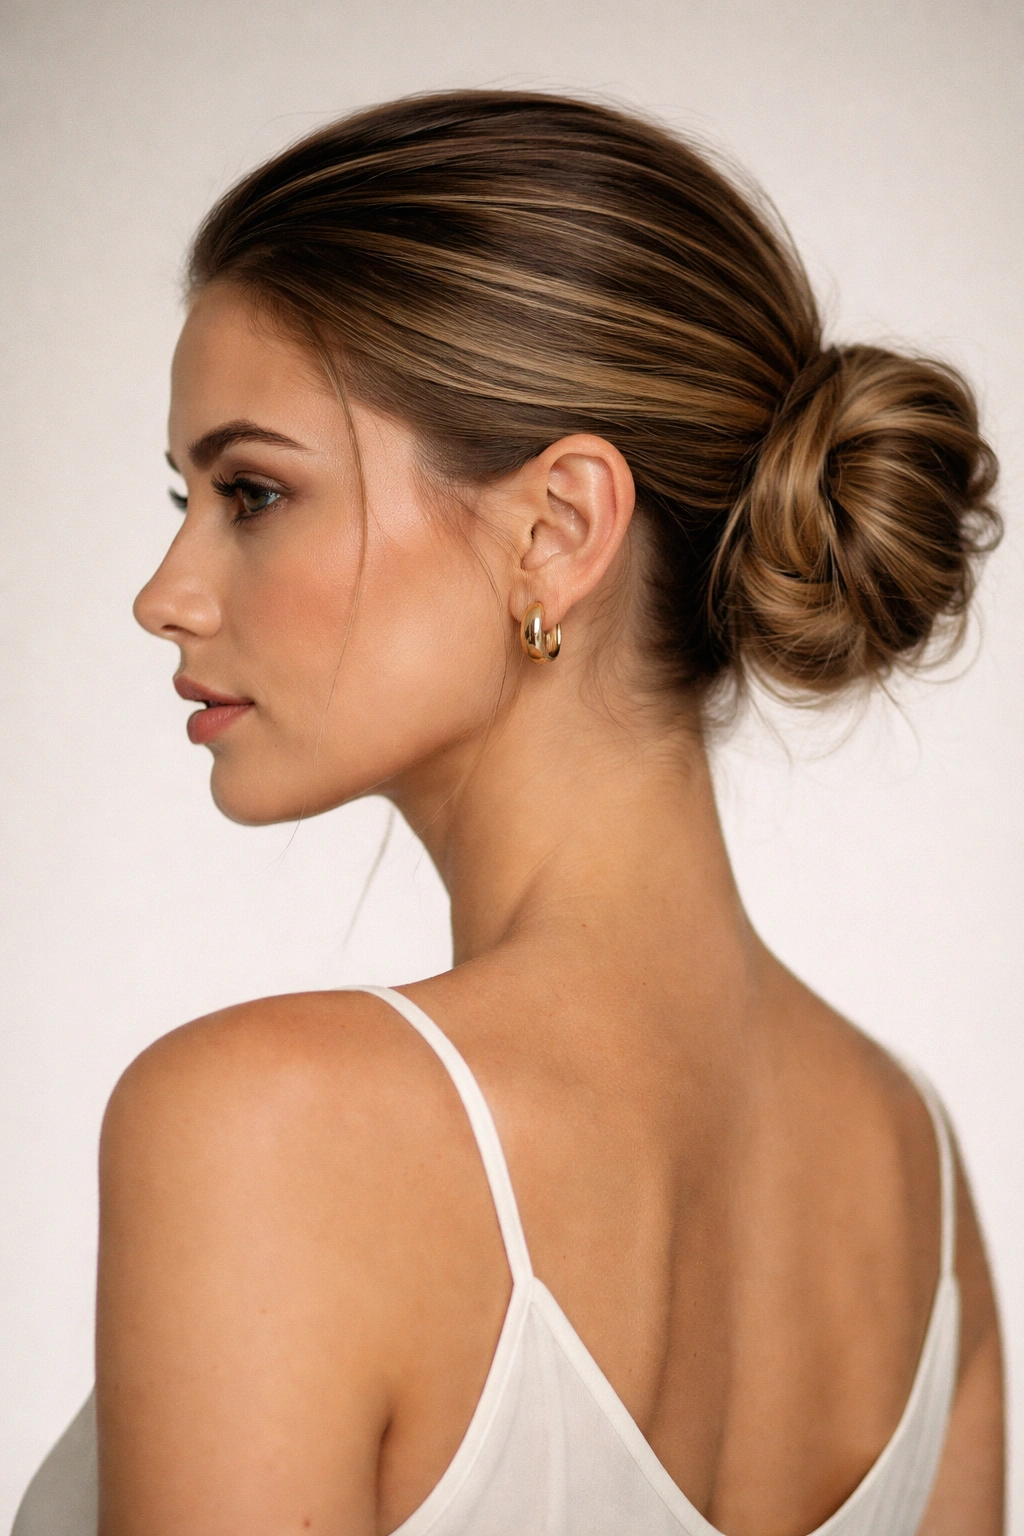
The side bun is a playful variation that adds asymmetrical interest to the slicked-back family. Instead of centering your hair directly back, you’re directing it to one side before gathering it into a bun. This style is particularly flattering if you prefer off-center styling, want to show off your profile, or have naturally wavy hair that you’re trying to control while keeping some movement visible.
Why This Style Stands Out
A slicked back side bun is distinctive because it creates natural face-framing — the slick-back elements smooth the front and side of your head, but the placement of the bun off to one side creates visual movement and balance. It’s the style that looks effortless but is actually carefully constructed, which is precisely what makes it interesting. You’re not just putting your hair in a bun; you’re making a directional choice that defines the geometry of the style.
Creating Your Side Bun
- Apply your smoothing product generously but evenly to damp or second-day hair.
- Rather than combing straight back, comb your hair at an angle toward the side where you want your bun. If you’re moving hair toward the right side, comb from the left-front hairline diagonally back toward the right.
- Maintain smooth, even pressure as you comb, and smooth down any flyaways with your hands before securing.
- Gather your smoothed hair into a ponytail positioned just to one side — placement depends on preference, but somewhere above the ear or just behind it usually works best.
- Secure with an elastic, then twist the ponytail into a bun shape, coiling it around the base of the ponytail and pinning carefully.
- Loosen a few small sections from the bun to create that textured, undone finish that balances the severe smoothness of the slicked-back portion.
Worth knowing: Side buns can feel unbalanced if the bun is too voluminous or too tight. Aim for a medium-sized bun that feels substantial enough to match the visual weight of the slicked portion.
4. Braided Slicked Back Bun
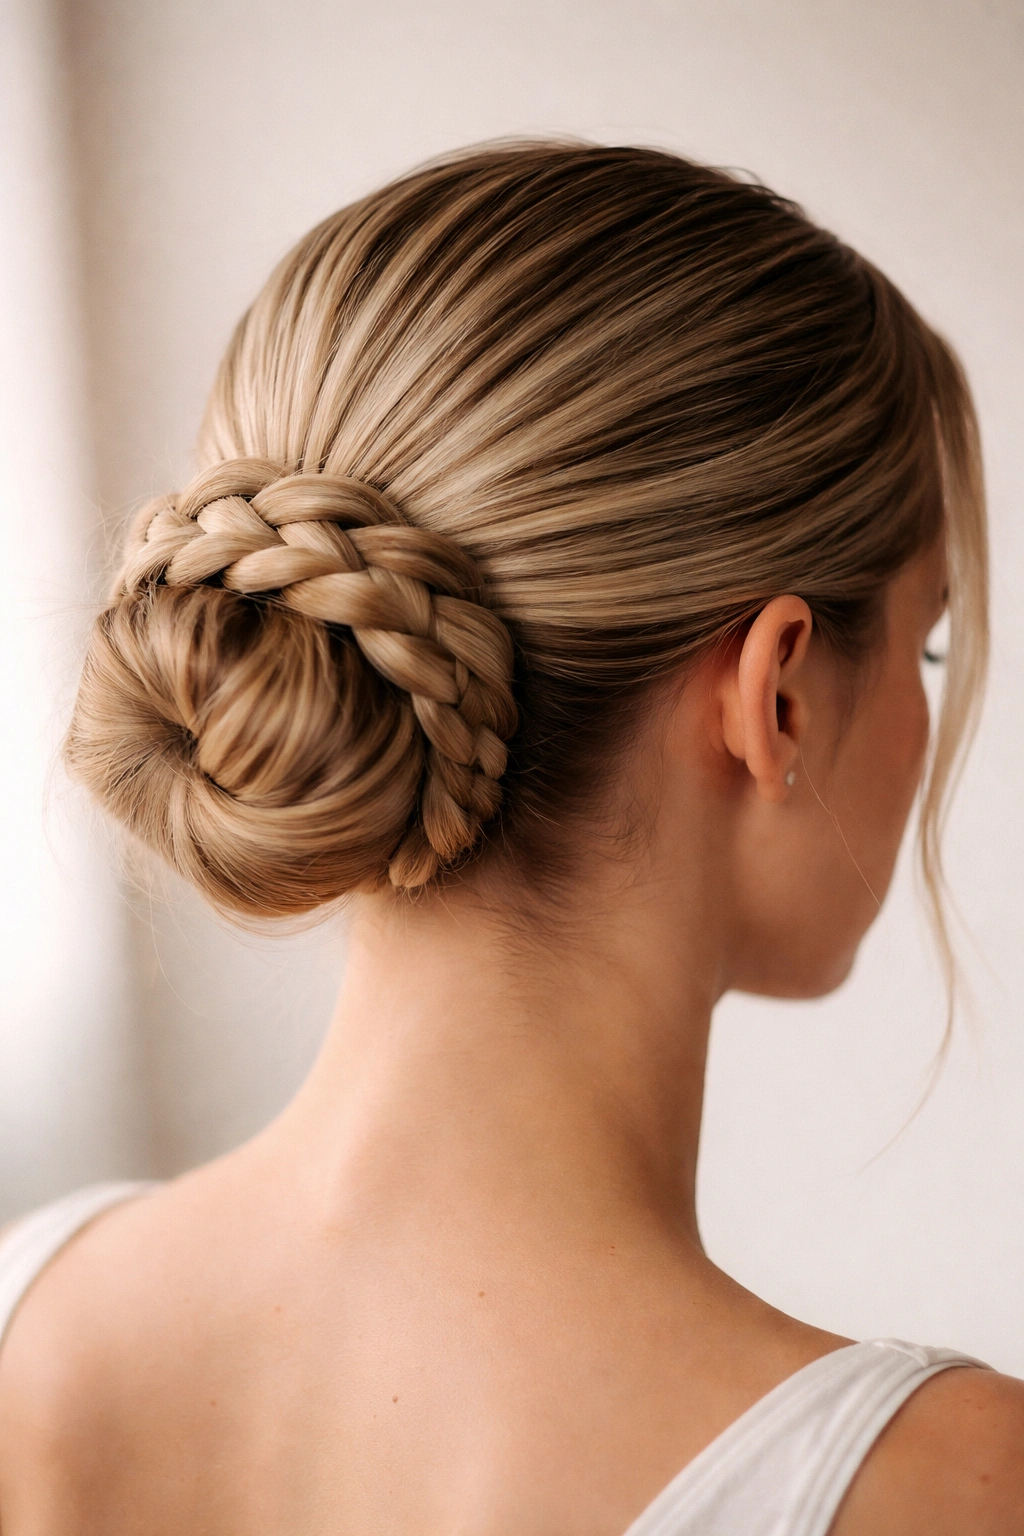
Introducing a braid into your slicked back bun adds texture, visual interest, and a dose of sophistication that moves beyond simple smoothing. The braid element gives your bun more structure and personality while maintaining the clean, intentional aesthetic that slicked-back styling provides. This is the style for days when you want to look like you’ve put genuine effort into your hair without it being complicated.
What Makes Braiding a Game-Changer
When you slick your hair back and then incorporate a braid, you’re creating layers of visual texture and complexity. The slicked-back base reads as controlled and refined, while the braid adds craft and intentionality. It’s a perfect middle ground for people who think “messy bun” might be too casual but worry that a fully structured updo might be too formal. The combination of smooth and braided reads as thoughtful and deliberately designed.
How to Build a Braided Slicked Bun
- Smooth and slick your hair back completely, just as you would for a classic slicked bun.
- Gather your smoothed hair into a ponytail positioned high, at your crown or slightly forward of center.
- Rather than twisting the ponytail into a bun immediately, divide the ponytail into three sections to create a three-strand braid.
- Braid the ponytail loosely for about two-thirds of its length, then stop the braid and let the remaining hair hang loose (this creates a beautiful flowing quality to the bun).
- Wrap the braided section around the base of the ponytail, and secure it with bobby pins, allowing the loose ends of the ponytail to fall naturally within and around the bun shape.
- Gently pull apart the braid sections slightly to add width and texture without losing the braid structure.
Pro tip: A Dutch braid (braiding under rather than over) creates more visual texture than a regular braid and photographs beautifully.
5. Sleek Bun with Face-Framing Pieces
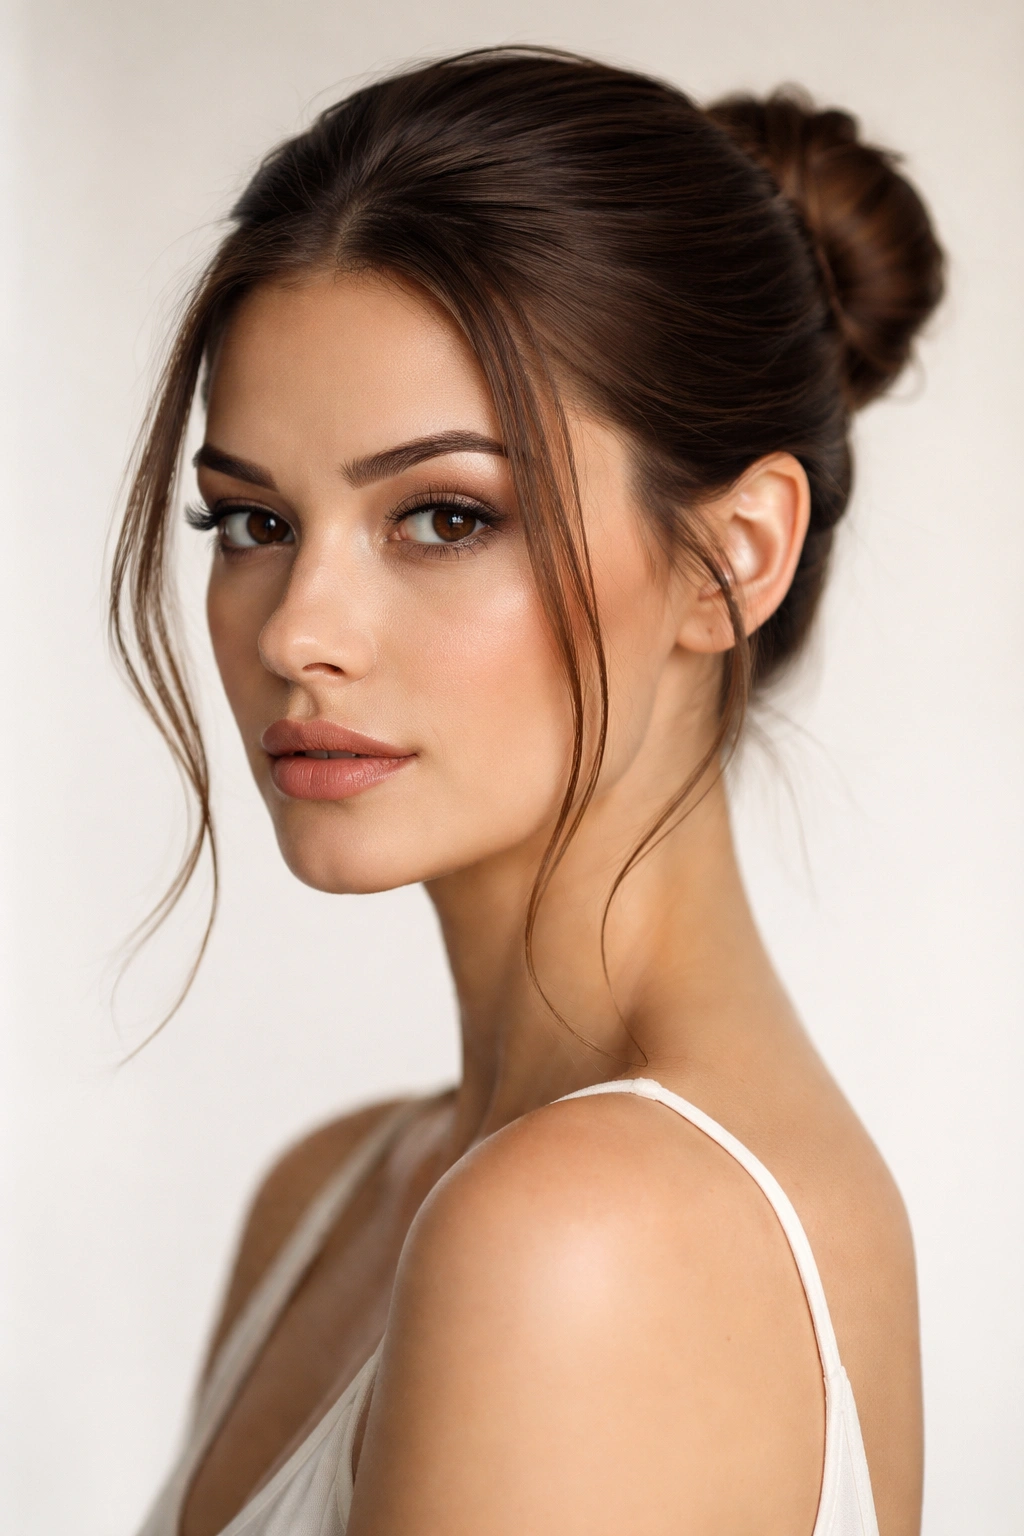
This variation intentionally releases a few carefully chosen pieces of hair from the slicked-back and bun structure, letting them frame the face. It’s a style that looks deliberate and fashion-forward rather than accidentally loose, and it’s especially flattering for people who find fully pulled-back styles too severe or aging. The face-framing pieces soften the face while the slicked-back bun maintains structure and control.
Why Face-Framing Works
Face-framing pieces break up the severity of a completely slicked-back style while keeping the overall structure neat and intentional. They soften sharp angles, add dimension around the face, and create the visual impression of a more relaxed, lived-in look — even though you’ve planned exactly which pieces to release. The slicked back portion anchors the style in control and refinement, while the loose pieces keep it from feeling too formal or dated.
Positioning Your Face-Framing Pieces
- Slick your hair back and create your bun following any of the previous techniques — high, low, or to the side, depending on preference.
- Once the bun is secured, strategically pull out one or two small sections from just in front of each ear.
- Alternatively, release two small sections from either side of your center part before you even secure the main ponytail, then slick the rest back and form your bun around them.
- Use a light touch with your smoothing product to keep these pieces defined without making them look limp or greasy.
- You can wrap these pieces around your fingers to add a soft wave before allowing them to fall naturally.
- Finish with a light-hold hairspray rather than heavy gel on the face-framing pieces so they move naturally without looking stiff.
Insider note: The size and texture of your face-framing pieces matter enormously. Very thin, delicate pieces look accidental and messy; thicker pieces (about the thickness of a crayon or marker) look intentional and designed.
6. Slicked Back Top Knot Bun
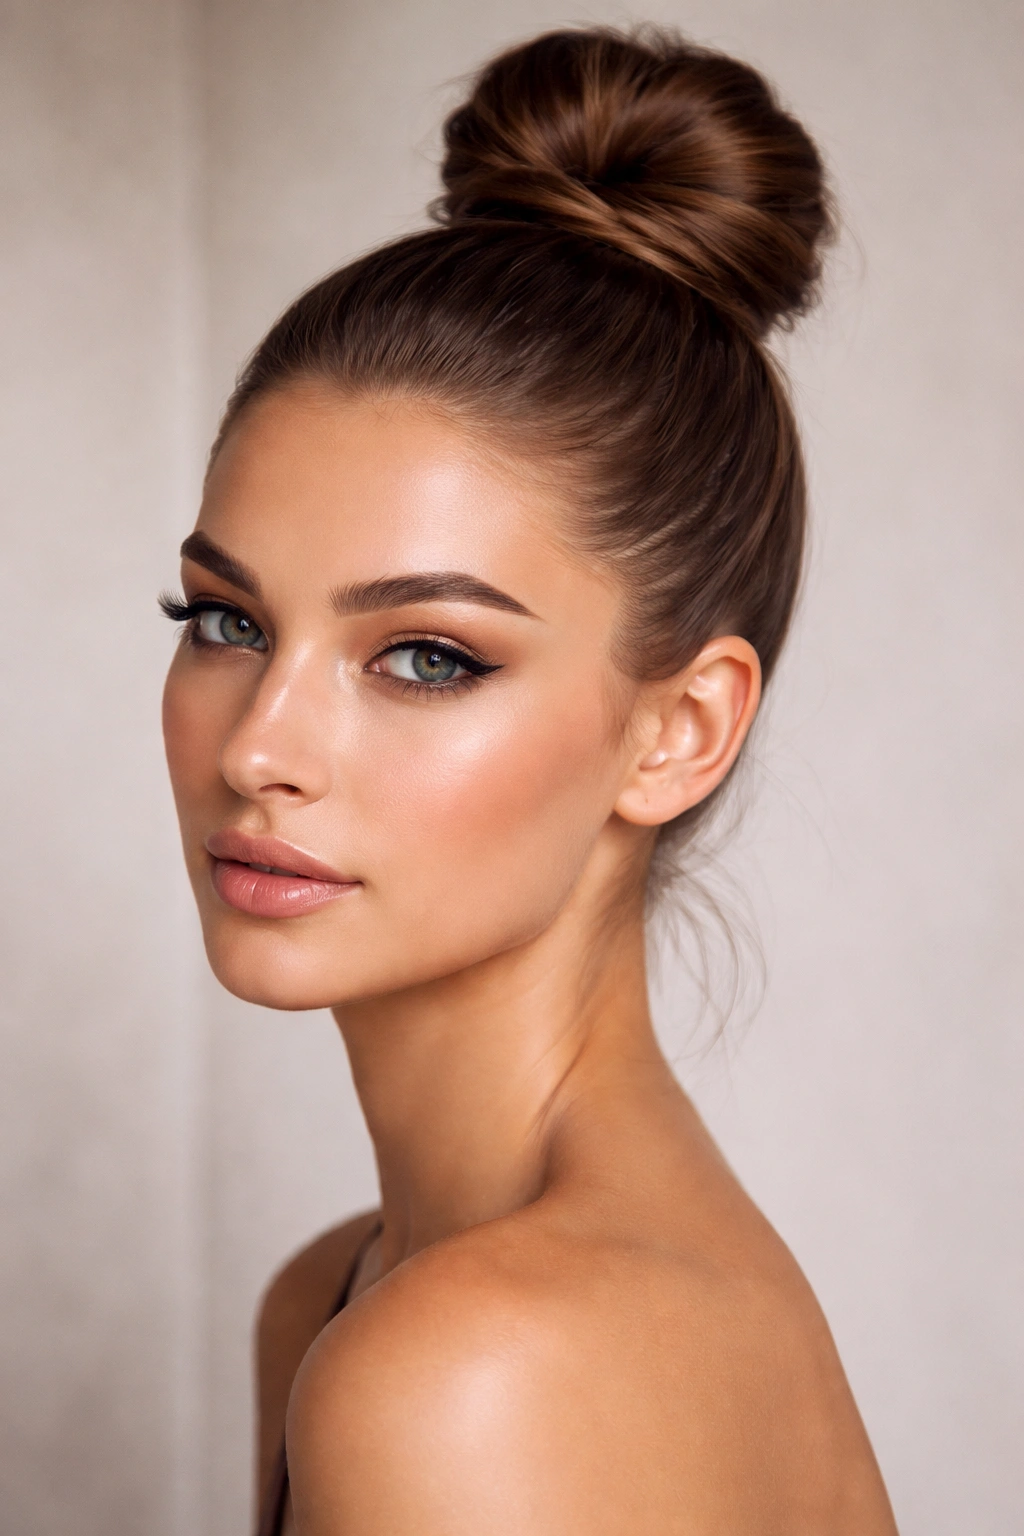
A top knot bun is the smallest, most concentrated version of the slicked-back bun — the hair gathers at the very crown of your head into a tight, high knot rather than a loose, voluminous bun. This style is sharply architectural, works beautifully with modern or minimalist fashion, and is ideal if you have long, thick hair that you want to corral completely without adding bulk. It reads athletic and fashion-forward simultaneously.
Why the Top Knot Works
A slicked back top knot is uncompromisingly clean and modern. There’s no softness, no gentle waves, no relaxed texture — just pure, intentional styling. This means it’s less forgiving of flyaways and less versatile for casual occasions, but when you want to make a bold, confident statement with your hair, it delivers. It works exceptionally well with strong makeup, structured clothing, and modern jewelry because it doesn’t compete visually — it supports.
Creating a Structured Top Knot
- Start with damp or second-day hair and apply a medium-hold gel or pomade to your hands.
- Smooth your hair back tightly from your forehead and sides, using a fine-tooth comb to create an absolutely smooth surface from hairline to crown.
- Continue smoothing toward the top of your head, gathering all your hair at the very apex of your crown.
- Secure tightly with a strong elastic, creating a high ponytail concentrated at the topmost point of your head.
- Twist the ponytail tightly into a rope, then coil it into a compact knot shape and pin securely with multiple bobby pins.
- Smooth down any flyaways or loose pieces with a toothbrush and edge control, creating a polished perimeter around the knot.
Worth knowing: Top knots work best when your hair is pulled very tightly — don’t worry about it feeling uncomfortable. This style isn’t designed for maximum comfort; it’s designed for maximum impact.
7. Textured Slicked Back Bun
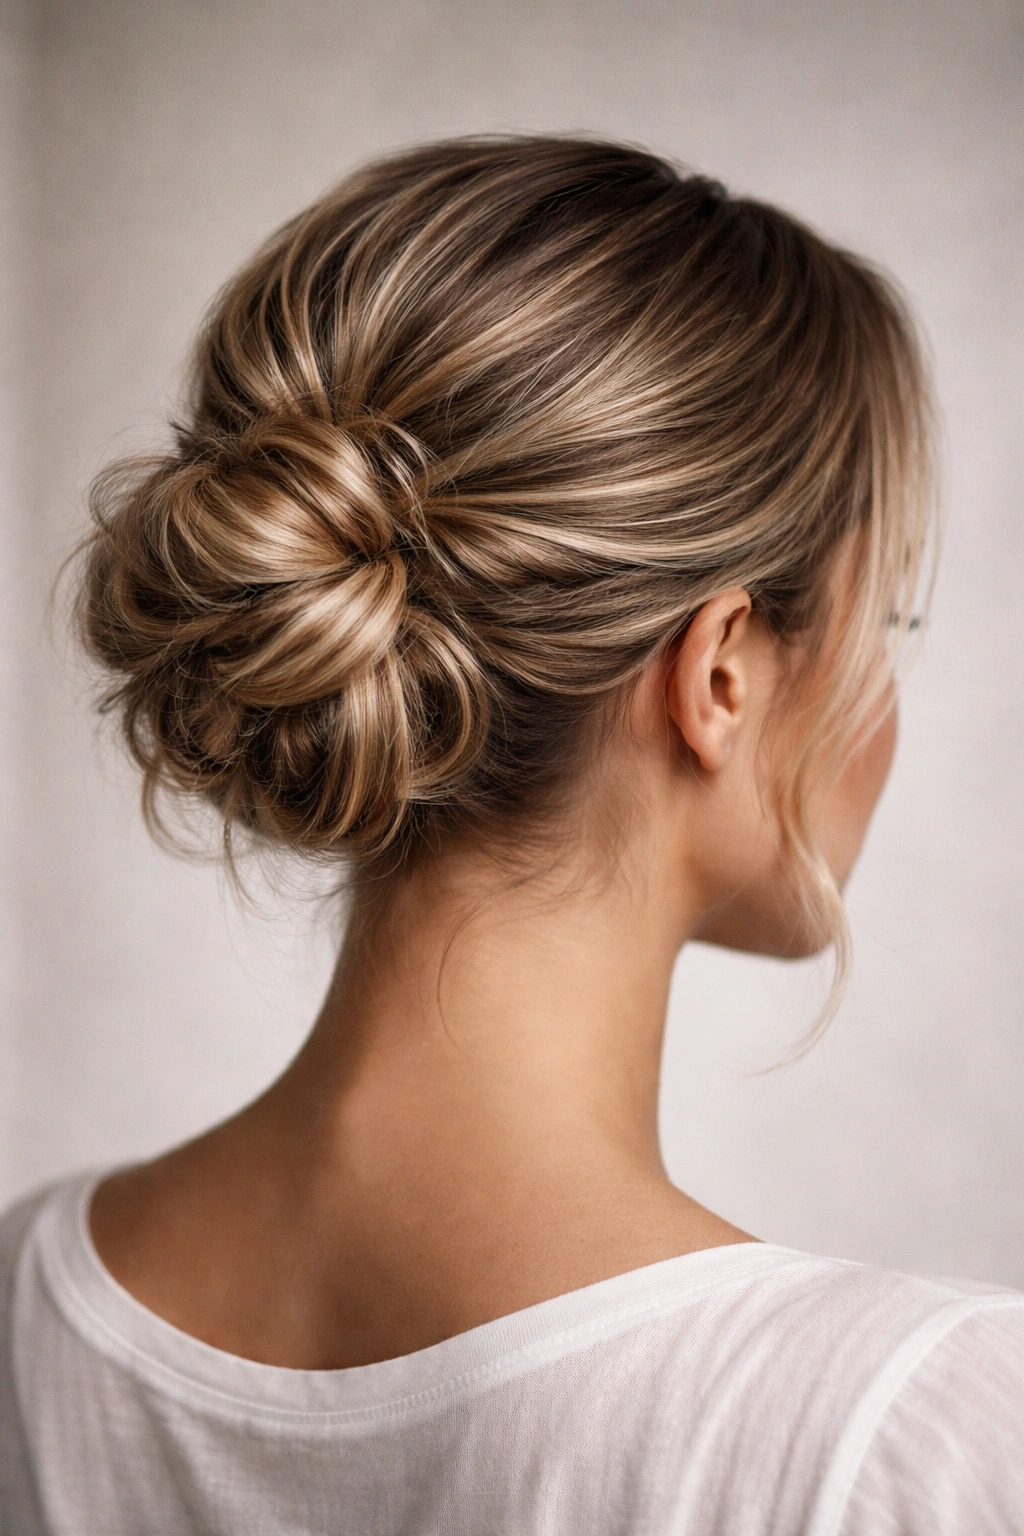
This variation maintains the slicked-back smoothness but adds deliberate texture and dimension to the bun portion itself. Instead of a simple twist or wrap, you’re creating a bun with visible layers, waves, or braided elements that catch light and create visual interest. It’s the perfect style for people who want sophistication without sterility, or who have textured hair and want to work with their natural texture rather than against it.
What Makes Texture Strategic Here
Adding texture to your bun while keeping your base sleek creates visual contrast and depth. The slicked-back portion reads as controlled and intentional, while the textured bun reads as effortlessly chic and modern. You’re not fighting your hair’s natural wave or curl — you’re incorporating it strategically into a style that shows intention. This approach works beautifully for people with naturally wavy, curly, or coily hair who’ve historically felt limited to either fully slicked styles or completely loose styles.
Building Texture Into Your Bun
- Slick your hair back smoothly following the standard technique, but use a lighter hold product so the hair maintains some movement.
- Gather into a ponytail at your desired height (high, low, or side).
- Rather than twisting smoothly, gently flip your ponytail over on itself and twist loosely, creating intentional kinks and waves in the ponytail hair.
- Loosely coil this twisted, textured ponytail around itself to form a bun.
- Deliberately pull apart sections of the bun to add volume and visible texture.
- Finish with a light-hold hairspray that defines texture without flattening it.
Pro tip: If you have naturally curly hair, apply your smoothing product to the front and sides while leaving the ponytail section with a bit more natural texture. The contrast between smooth and textured looks intentional rather than like an accident.
8. Slicked Back Low Bun with Center Part
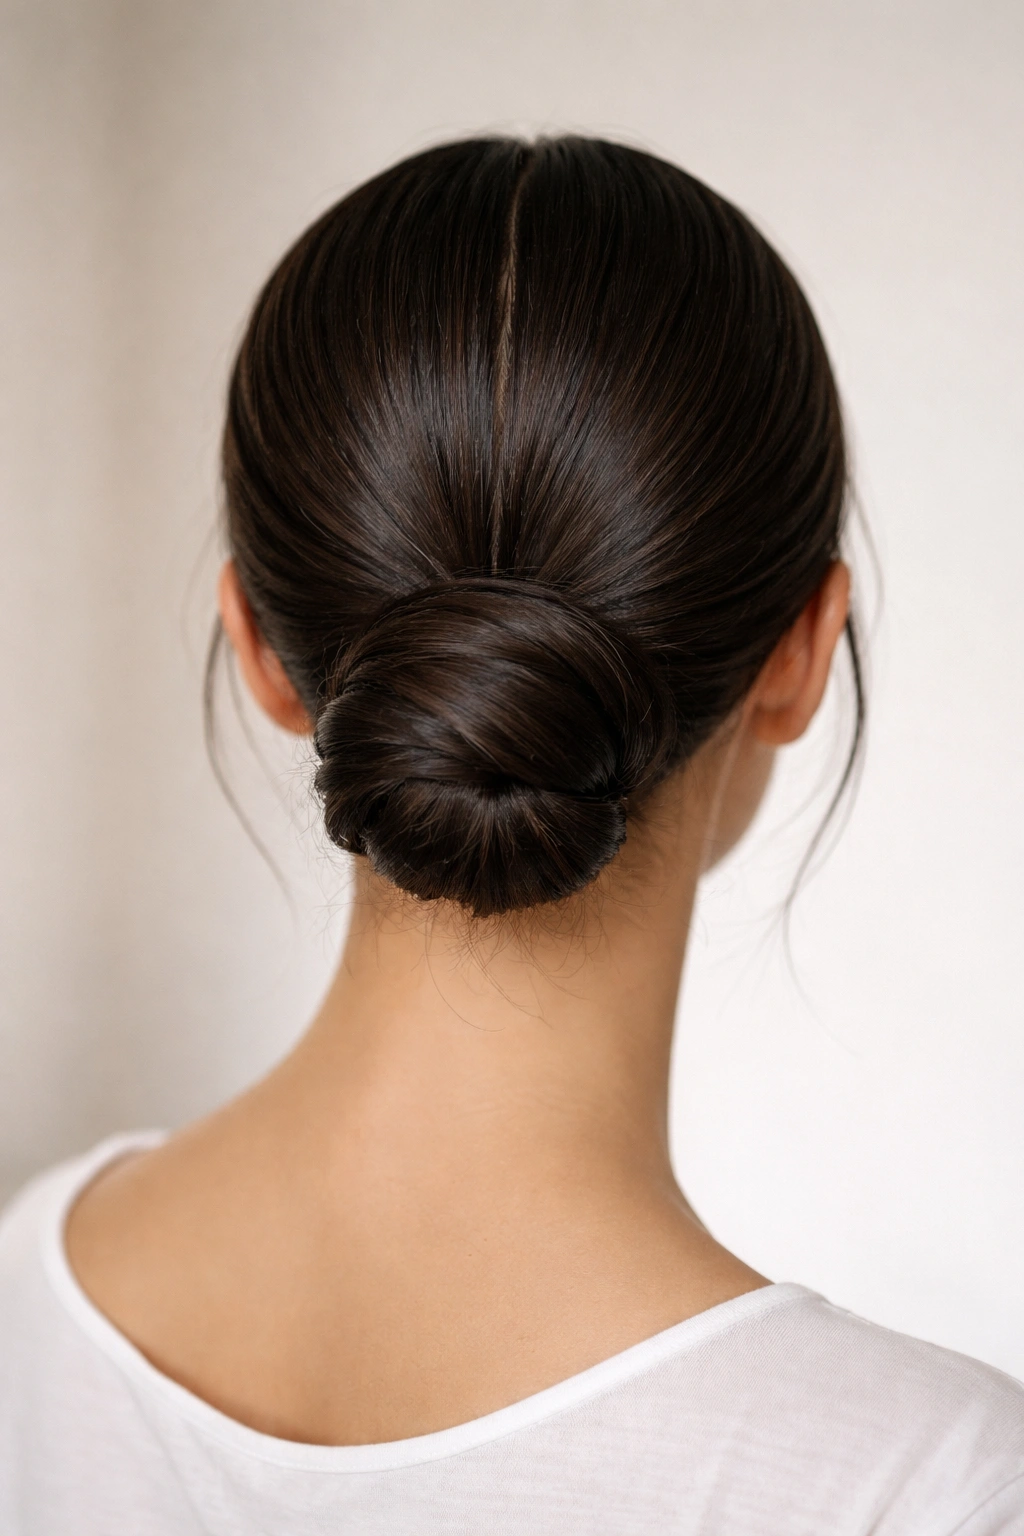
This final style adds a dramatic element: a clean, sharp center part that emphasizes symmetry and balance. Everything is slicked smoothly back from a defined center line, creating a look that’s equal parts modern and timeless. It’s the style that photographs well, works for both casual and formal occasions, and suits almost every face shape because the symmetry is inherently flattering.
The Power of the Center Part
A center part creates perfect balance and draw attention upward to your face and eyes. When combined with a slicked-back bun, the center part becomes the defining line of the style — the first thing someone notices. This makes the center part almost architectural, and it demands precision in your execution. But when you get it right, the result is a hairstyle that feels curated, deliberate, and undeniably polished.
Executing the Center Part Slicked Bun
- Dampen your hair slightly and use a fine-tooth comb or a rattail comb (the pointed end helps create precise lines) to create a perfectly straight center part from your hairline to the nape of your neck.
- Apply your smoothing product evenly to both sides, ensuring the product is distributed consistently for even slickness.
- Using your comb, smooth one side of your hair straight back toward the side, pressing gently for maximum smoothness.
- Repeat on the other side, creating two sleek, distinct sections separated by your center part.
- Gather both sections into a low ponytail at your nape, positioning it so the center part extends all the way down the back of your head.
- Secure the ponytail and twist it into a soft bun, allowing some texture in the bun portion to contrast with the severe smoothness of the slicked sides.
- The center part should remain visible and defined — don’t cover it with bun hair.
Insider note: The key to a stunning center-part slicked bun is precision in the parting. Take time to get the line exactly straight — use a mirror, take a step back, and ensure both sides of the part are equidistant from your midline.
Essential Styling Products and Techniques
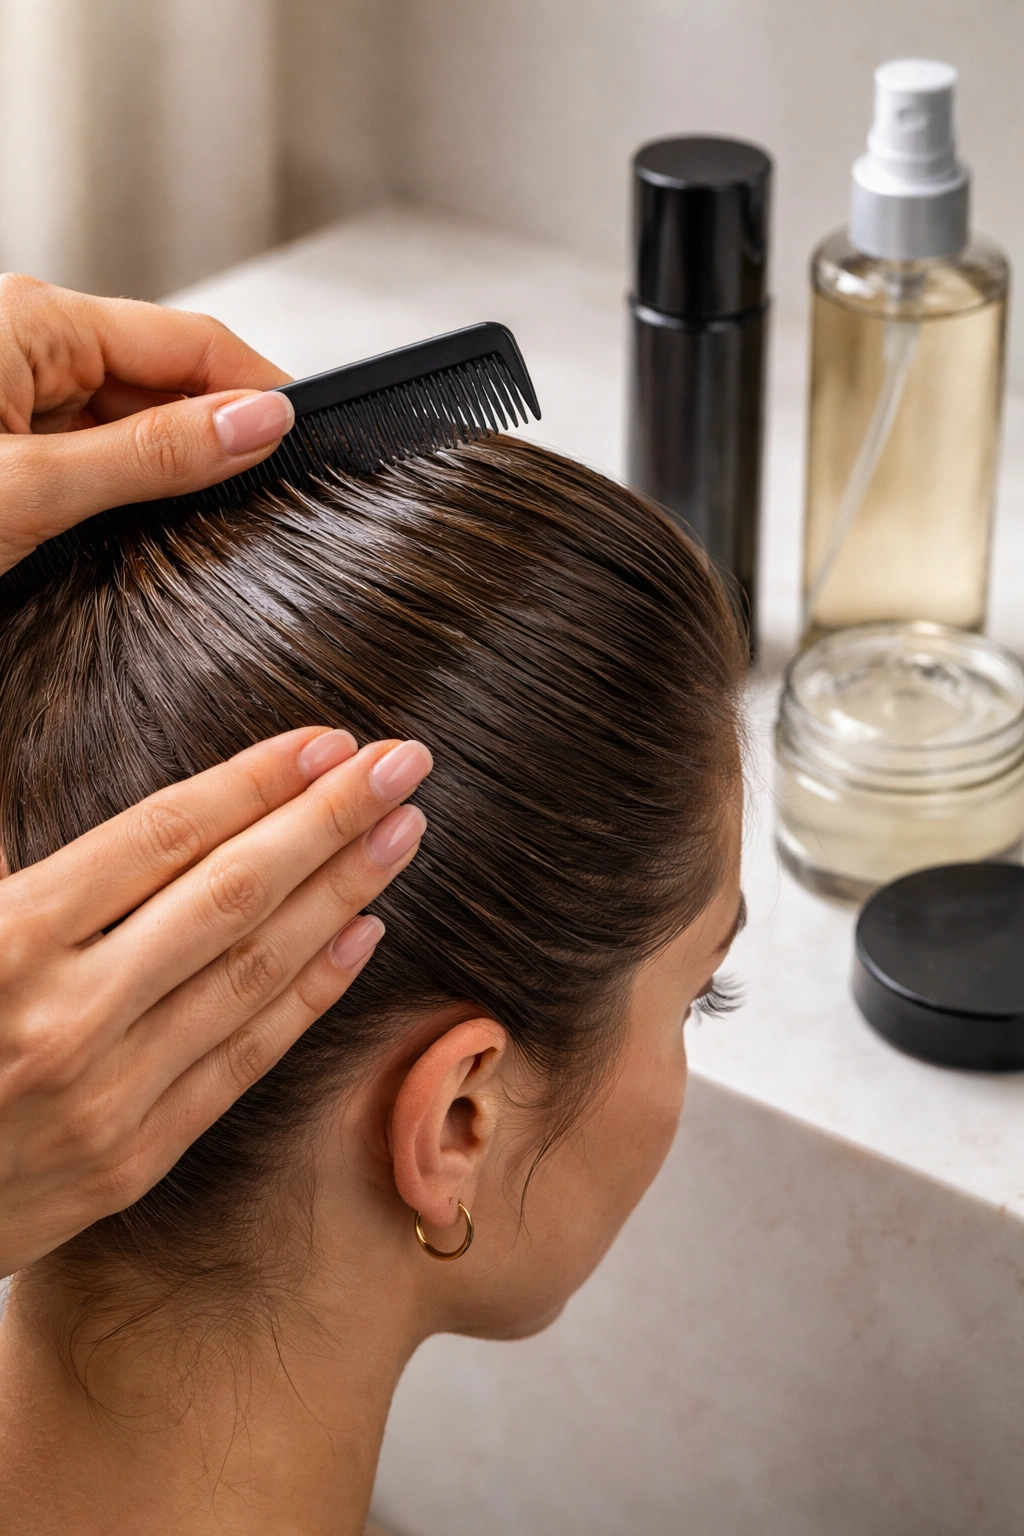
No slicked back messy bun is complete without the right products. A good edge control or gel is non-negotiable — it’s what creates that smooth, defined base that separates this style from a standard messy bun. Look for products that offer medium hold without being overly greasy or flaky. Gel-based formulas tend to dry clear and hold longer, while cream-based edge controls offer more smoothness and shine but require reapplication throughout the day.
A fine-tooth comb or slicking brush is equally essential. This isn’t optional if you want genuine smoothness — regular hairbrushes don’t create the tight, controlled sleekness that defines the style. Paddle brushes work well for larger sections, while fine-tooth combs are superior for precise smoothing and eliminating flyaways.
Hairspray should be your final step, but choose wisely. Light-hold hairspray keeps your style intact without creating a helmet-like feeling or visible product buildup. Heavier, stronger-hold hairsprays are necessary only if you’re styling for an entire day and need the bun to survive humidity or movement.
One technique that separates amateur slicked-back styling from professional results is the smoothing finish. After your bun is complete, dampen a soft toothbrush or a small paddle brush, apply a tiny amount of edge control or smoothing serum, and gently brush the hairline and any flyaways. This creates a polished finish that looks intentional rather than haphazard. This single step takes a good slicked back bun and makes it look expertly done.
Adapting These Styles to Your Hair Type
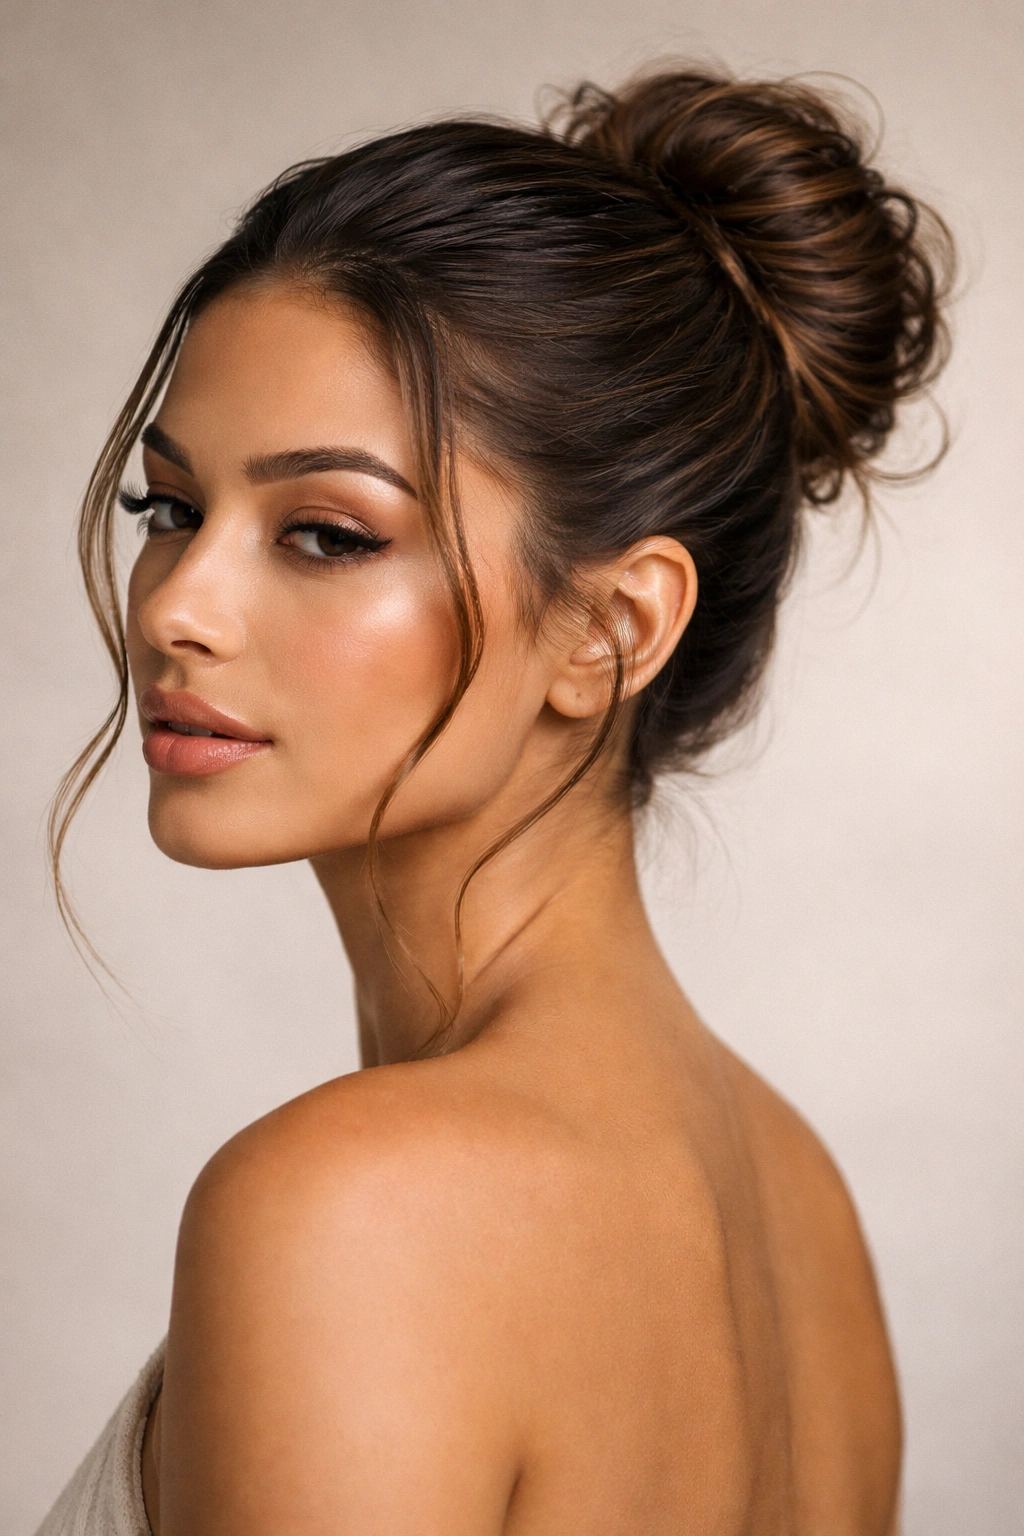
Fine or thin hair benefits from a lighter-hold product and slightly less aggressive smoothing — you want polish without flatness. Consider backcombing or texturizing the ponytail section to add volume where it matters. A low bun or side bun often photographs better on fine hair than a high bun because the concentrated volume at the crown can look thin.
Thick or dense hair should use a stronger-hold product and can handle more aggressive smoothing without losing all texture. These buns often look best when you embrace the substantial volume of your bun and pull a few pieces loose intentionally. Consider the textured version or the braided variation — your hair has enough body to support added complexity.
Straight hair is a blank canvas for slicked-back styling — these styles work beautifully without modification. The only challenge is potential flyaways and slippage, so use a medium-hold product and a fine-tooth comb for control.
Wavy, curly, or coily hair thrives when you work with your texture rather than against it. Use smoothing products on the front and sides while allowing the ponytail section to retain some natural texture. The textured bun variation (#7) was specifically designed with this hair type in mind. Consider using a light gel on the slicked portion and a more moisturizing product on the bun for definition without dryness.
Key Takeaways
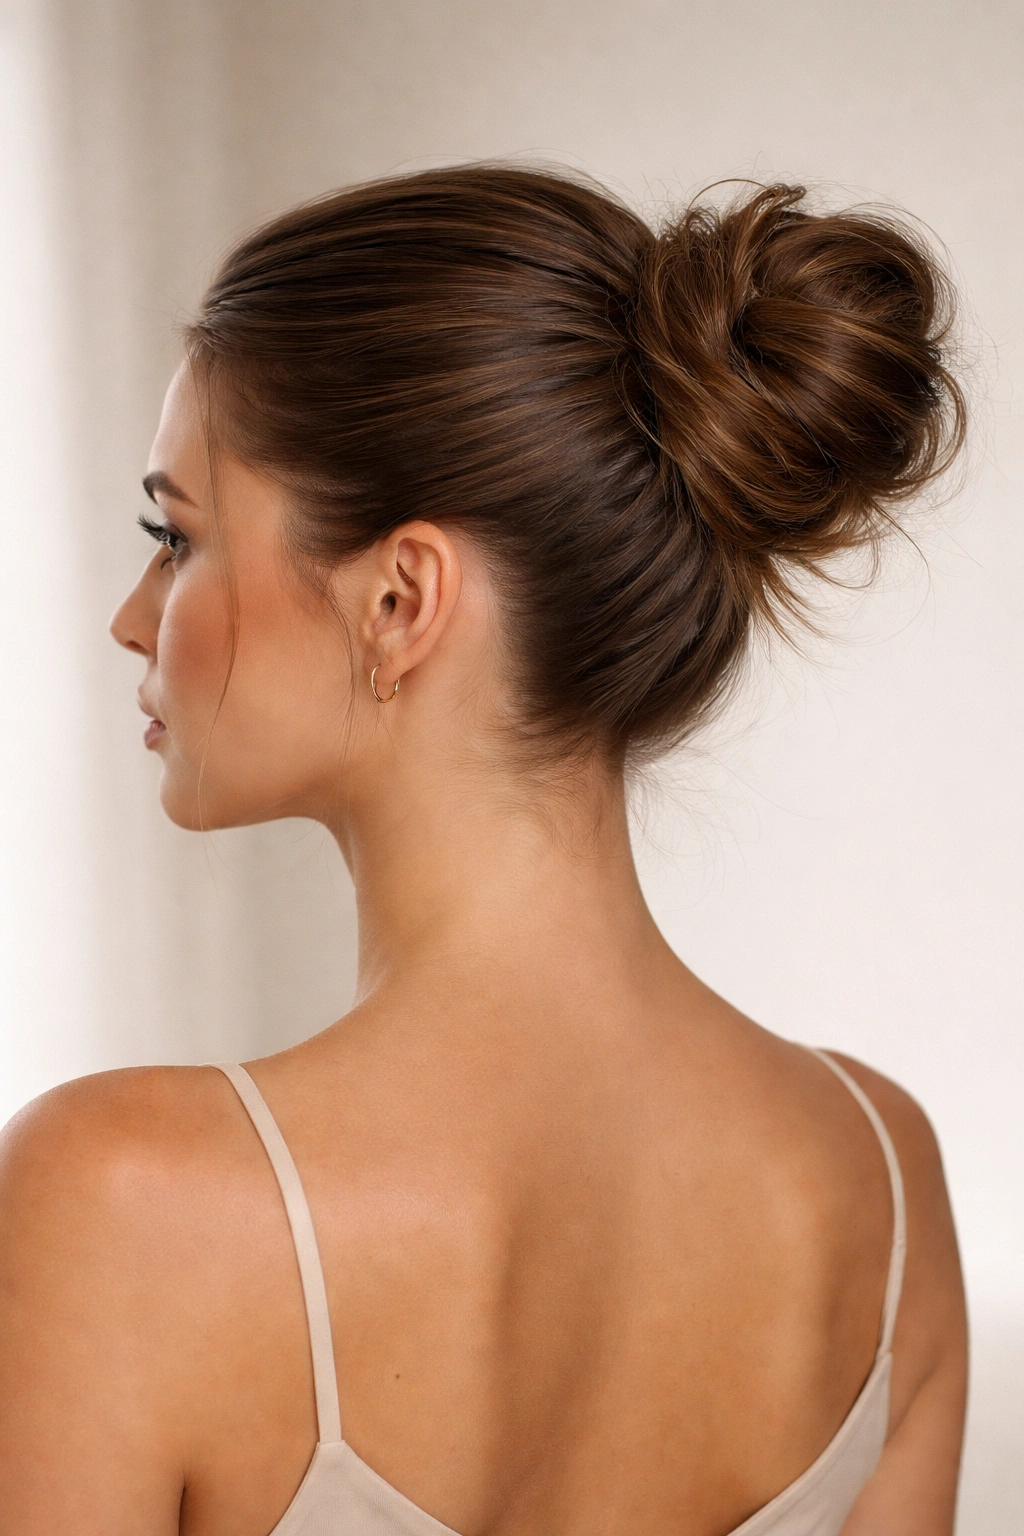
A slick back messy bun is the rare hairstyle that feels both polished and practical, formal and modern, controlled and effortless. The key to mastering these styles is understanding that the slicked-back portion is about technique and product — smooth, precise, intentional — while the messy bun portion is about balance and texture. You’re not trying to hide the fact that your hair is in a bun; you’re using the contrast between smooth and textured to create something visually interesting and undeniably intentional.
The specific variation you choose matters far less than consistent execution. Whether you prefer your bun high or low, centered or to the side, simple or braided, the fundamentals remain the same: start with the right product, use a fine-tooth comb for genuine smoothness, gather your hair with intention, secure confidently, and finish with strategic looseness that doesn’t undermine your carefully slicked base.
These eight styles give you options for every occasion, hair type, and personal preference. Master the classic high bun first, then experiment with the variations that appeal to you. Within a few tries, you’ll develop the muscle memory to create a polished slicked back messy bun in under five minutes — and that’s when you’ll really appreciate why this style has become the go-to for anyone who wants their hair to work with their life rather than against it.
