



Afro ponytails are far more versatile than most people realize. Whether you’re sitting in back-to-back meetings, heading out for weekend errands, or transitioning from office to happy hour, there’s an afro ponytail style that works perfectly for the moment. The beauty of this hairstyle lies in its range—you can make it polished and corporate on Monday morning, then transform it into something playful and textured by Friday evening.
What makes afro ponytails so valuable in a styling rotation is that they take pressure off your crown and edges while keeping your hair protected and looking intentional. They work with virtually any hair texture within the afro-textured spectrum, they hold up through a full workday without losing shape, and they’re genuinely protective styling when done thoughtfully. The challenge most people face isn’t whether afro ponytails work—it’s knowing which version suits which occasion and how to execute it with polish and personality.
The Range of Professional and Weekend Afro Ponytails
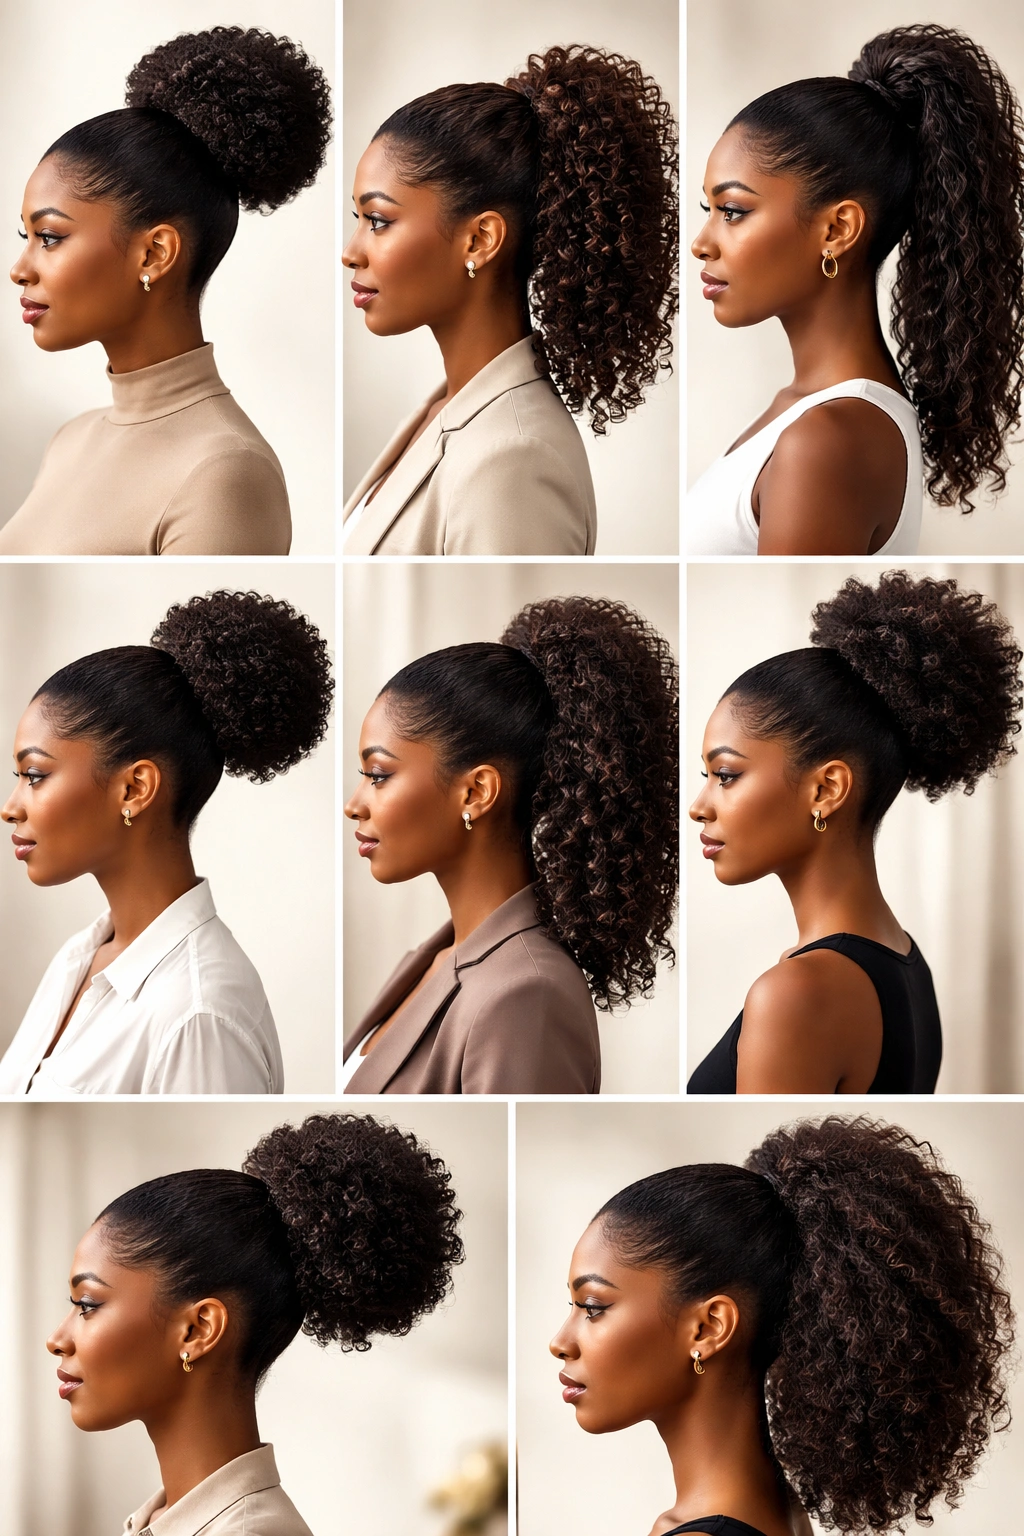
Afro ponytails come in enough distinct styles that you can literally never repeat the same look twice if you don’t want to. Some sit high and sleek on the crown, channeling executive energy. Others are gathered lower and fuller, creating a more relaxed vibe that works equally well for casual Friday or weekend adventures. Some feature texture and definition throughout, while others are smoothed or even partially straightened for contrast. Some are enhanced with extensions or braided sections, while others showcase your natural density without additions.
Understanding these variations gives you real flexibility. You’re not choosing between “one professional ponytail” and “one casual ponytail”—you’re building a toolkit where each style serves a specific purpose and aesthetic. The best part? Once you nail the techniques for a few of these styles, you can execute them in under fifteen minutes on any morning.
1. The High-Crown Sleek Ponytail
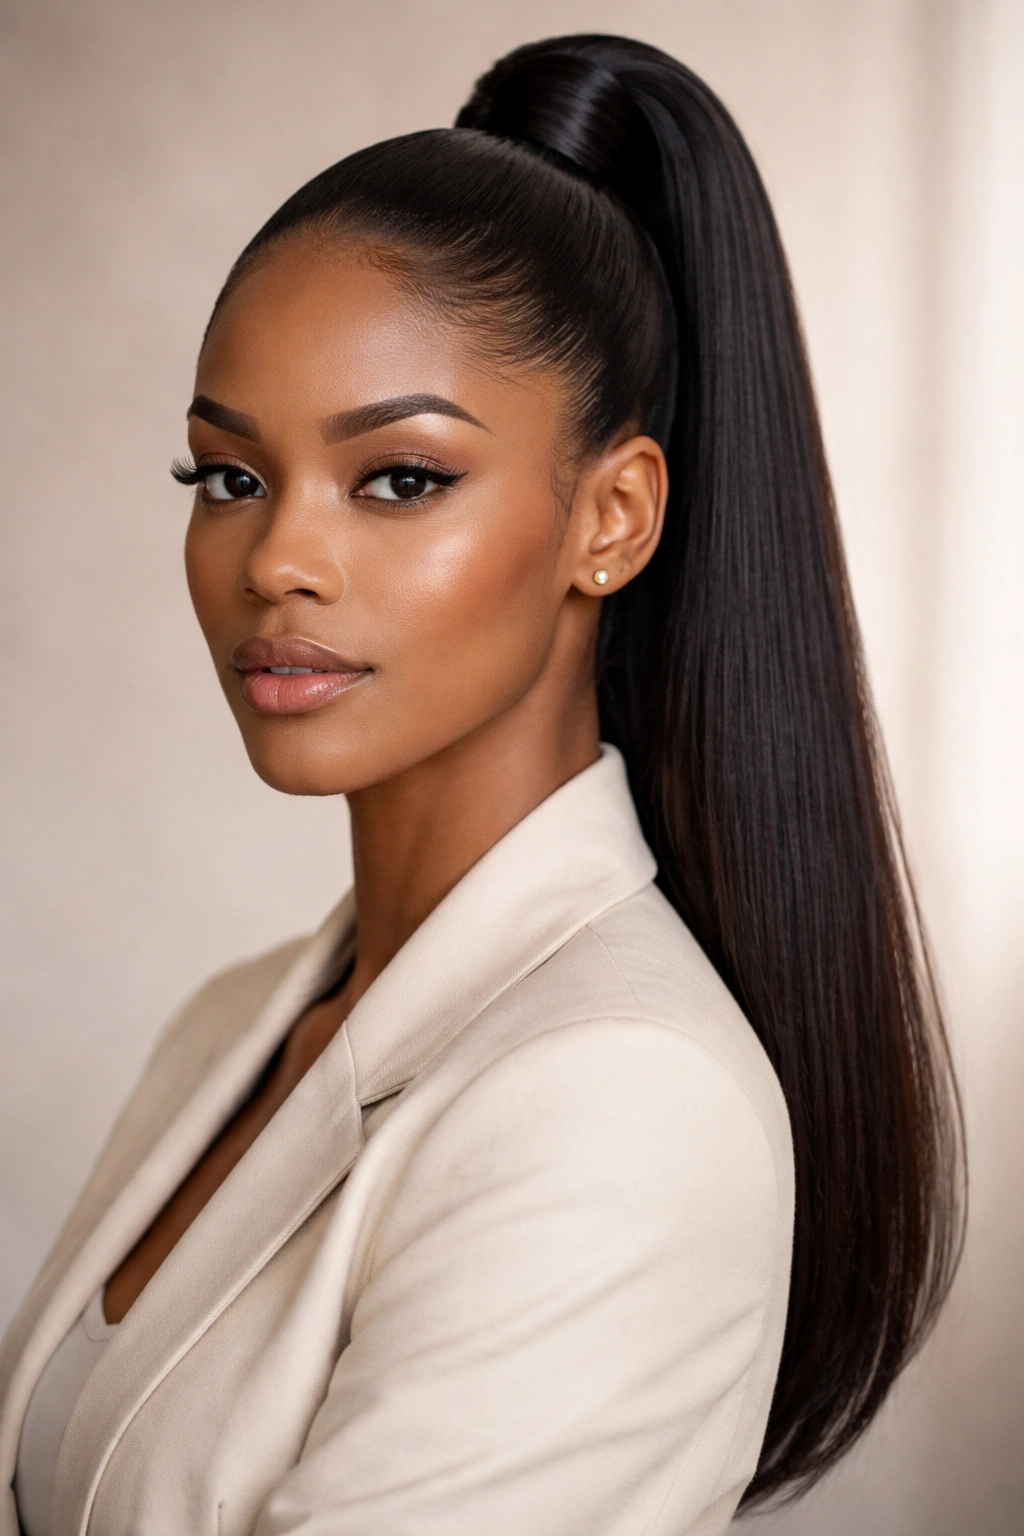
This is the version that walks into the boardroom and means business. The ponytail sits high on the crown, pulled smooth and tight, with no flyaways and no texture visible at the base. It reads as polished, intentional, and powerful—the kind of style that makes you feel ready to lead a meeting or present your ideas to senior leadership. The height of the placement automatically elongates your face and neck, which is why this version photographs so well on video calls and in professional settings.
Why It Works for Professional Settings
The high-crown placement is inherently formal because it requires precision and control to execute well. It keeps all your hair off your face and neck, which prevents distraction and reads as put-together even on days when you’re running on coffee and determination. The style stays stable through a full workday of movement, sitting, and talking without requiring mid-day touch-ups. Most importantly, this version commands presence—there’s nothing apologetic or uncertain about how it looks.
How to Create a Sleek High Ponytail
- Start with hair that’s either freshly washed or second-day hair with some texture for grip. Completely clean, slippery hair is actually harder to control, so don’t shampoo the morning of if possible.
- Apply a smoothing cream, edge control, or light gel to the front hairline and crown, working it through gently with your fingers or a soft brush.
- Use a fine-tooth comb or smoothing brush to gather hair at the very crown—this is higher than most people initially place it, roughly at the highest point of your head where you’d feel the crown bone.
- Secure with a strong elastic band wrapped twice for hold. A metal clasp or spiral band grips afro-textured hair better than standard elastics.
- Smooth any flyaways with a small amount of edge control on a toothbrush or fine comb, paying particular attention to the hairline and the nape of your neck.
- Optional: wrap a small section of your own hair around the base of the ponytail and secure with a bobby pin to hide the elastic entirely—this creates a more finished, polished look.
Pro tip: Apply edge control when your hair is slightly damp, not bone dry. Damp hair accepts product more evenly and smooths more effectively without looking heavy or stiff.
2. The Low Gathered Ponytail
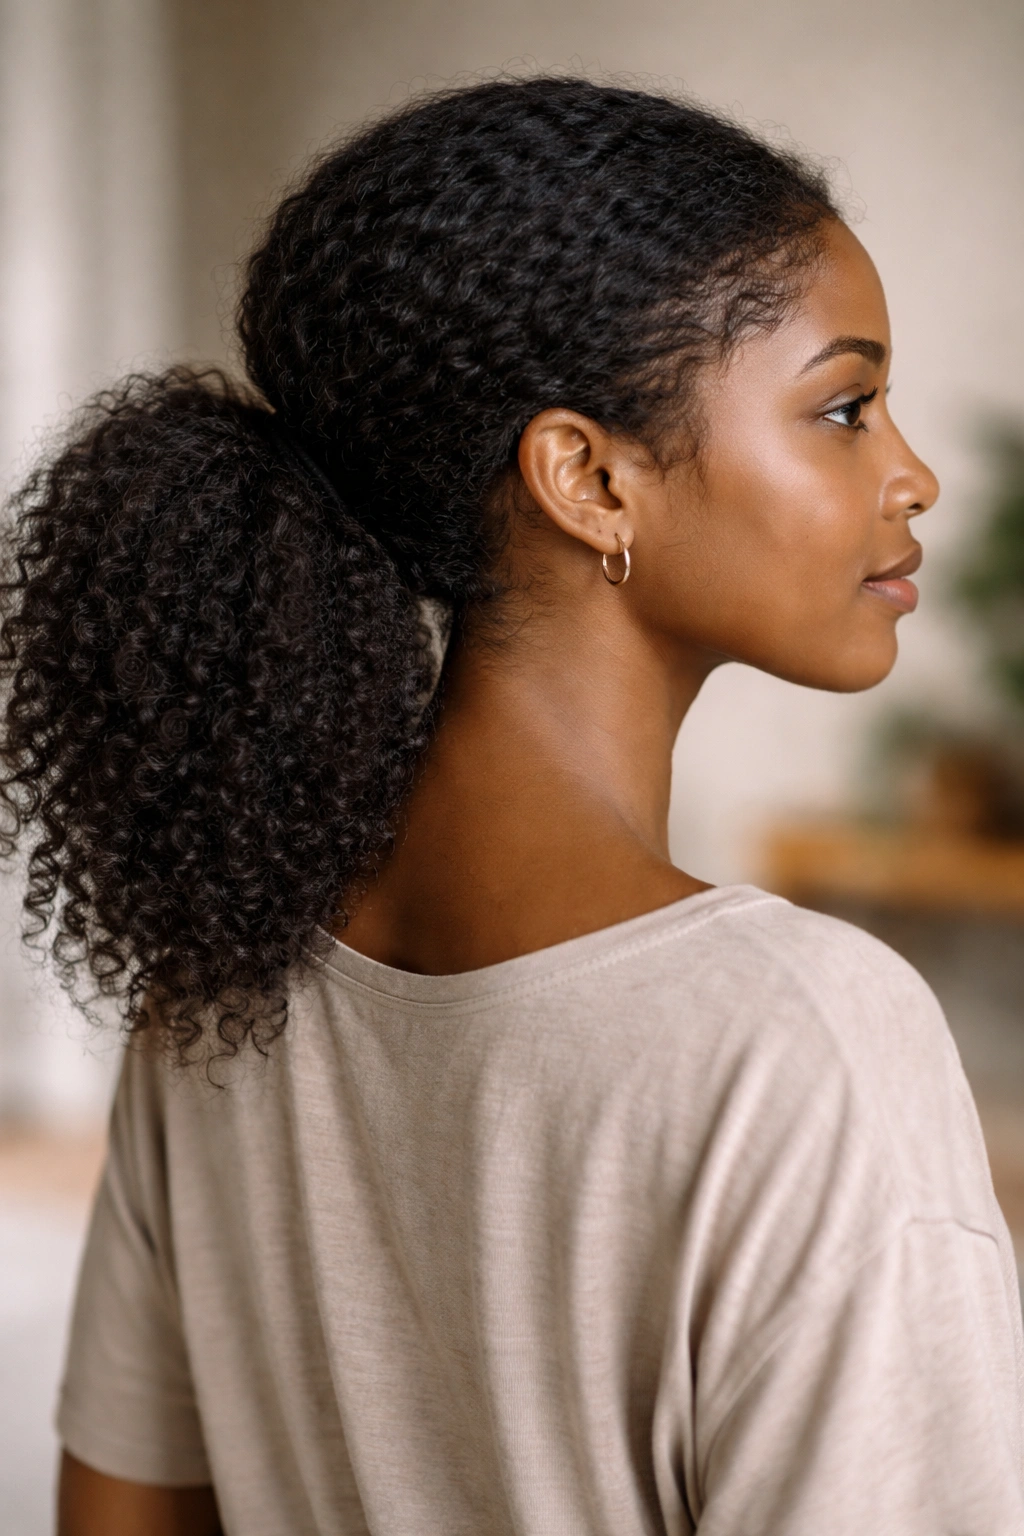
If the high-crown version is for Monday morning meetings, this one is for Wednesday evening drinks or Saturday brunch. The ponytail gathers lower, usually at the nape of the neck or just slightly above, creating a more relaxed and approachable energy while still looking completely intentional. This placement is also kinder to your hairline if you have sensitivity to tight styles, and it’s genuinely easier to execute without making your scalp feel stretched.
Why It’s Perfect for Weekend Wear
The low placement feels instantly more casual without looking sloppy. It suggests ease and confidence rather than corporate rigidity. This style is excellent for weekend activities where you want your hair out of your way but don’t need to project boardroom power. The lower gathering also works beautifully if you want to wear earrings, scarves, or statement necklaces—nothing competes with a high ponytail for attention the way these accessories do.
The Technique for a Relaxed Low Ponytail
- Work with hair that has some body and texture—this style actually looks better when your ponytail isn’t aggressively smoothed.
- Flip your head upside down and gather all your hair with your fingers, then flip back and assess the placement. You want the elastic sitting approximately where your ear connects to your head.
- Use your fingers to gently gather the hair rather than a brush, which keeps more texture and movement intact.
- Secure with an elastic, then gently release a few face-framing pieces if you want softness around your features. These pieces should be left loose intentionally, not escaped accidentally.
- This style actually benefits from a little texture, so skip extensive smoothing. A light spritz of finish spray is all it needs.
Insider note: Wear this style lower when you’re pairing it with statement earrings or a bold necklace. The openness of your neck becomes part of the overall styling, so use it intentionally.
3. The Textured Bubble Ponytail
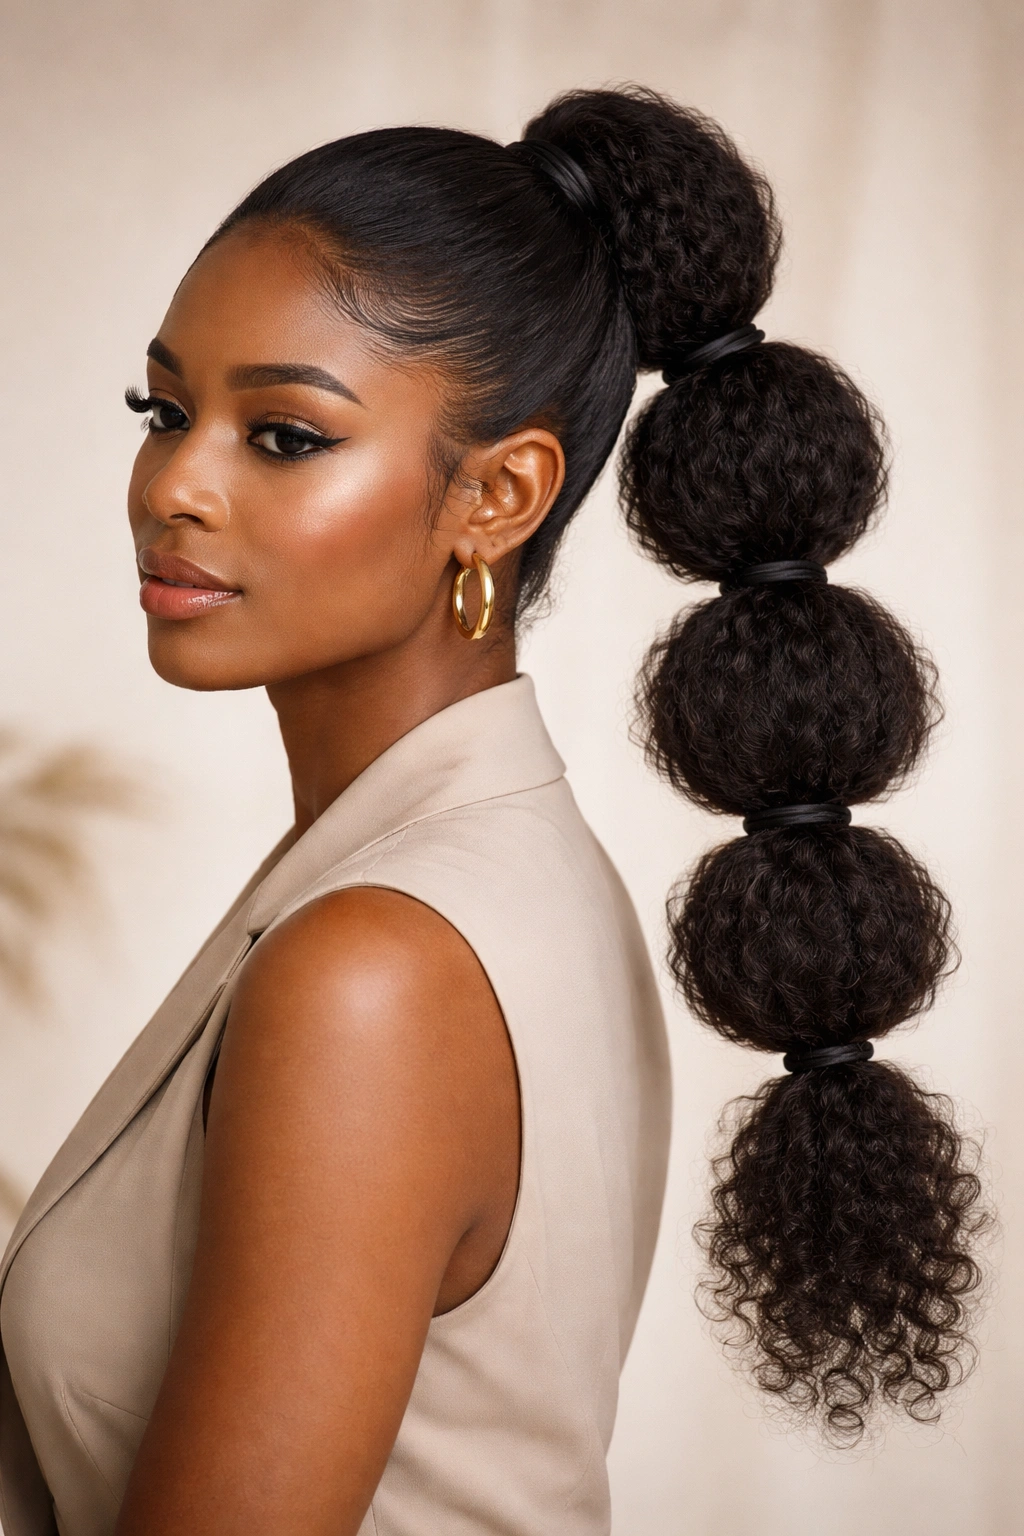
This version uses elastic bands placed at intervals down the length of the ponytail to create a stacked, bubble-like effect. Each section puffs out slightly above the elastic below it, creating dimension, movement, and visual interest that reads as intentional and playful. It takes a basic ponytail and transforms it into something that’s both fun and undeniably well-considered. The bubble effect is dimensional enough to look special without requiring any braiding or complicated technique.
Why This Works Across Both Worlds
The bubble ponytail is sophisticated enough for work—especially creative industries or less formal office environments—while being obviously fun enough for weekend plans. It reads as confident and personal, like you know exactly who you are and aren’t afraid to show it. The movement and texture make it inherently more interesting than a smooth ponytail, which means it photographs better and keeps your styling feeling fresh even in the middle of a long week.
Creating a Textured Bubble Ponytail Step by Step
- Gather your hair into a high or mid-height ponytail and secure with a strong elastic band.
- Place a second elastic band about 1.5 to 2 inches below the first, securing it tightly around the same ponytail section.
- Gently pull the hair between the first and second elastic upward and outward, creating a puff. The hair should bulge above the second elastic in a soft, defined bubble.
- Continue down the length of the ponytail, placing elastics every 1.5 to 2 inches and creating a puff above each one.
- If you’re using four or five elastics, the bubbles will extend down quite far. If you want a shorter effect, use just two or three elastics and let the rest of the ponytail hang loose below the final bubble.
- Adjust each bubble’s fullness to match—they don’t need to be perfectly identical, but they should feel intentional rather than accidental.
Worth knowing: This style actually works better with slightly fuller hair density. If you have finer afro-textured hair, the bubbles may not have quite as much presence, but you can enhance the effect by gently teasing each section slightly before releasing the puff.
4. The Two-Strand-Twisted Ponytail
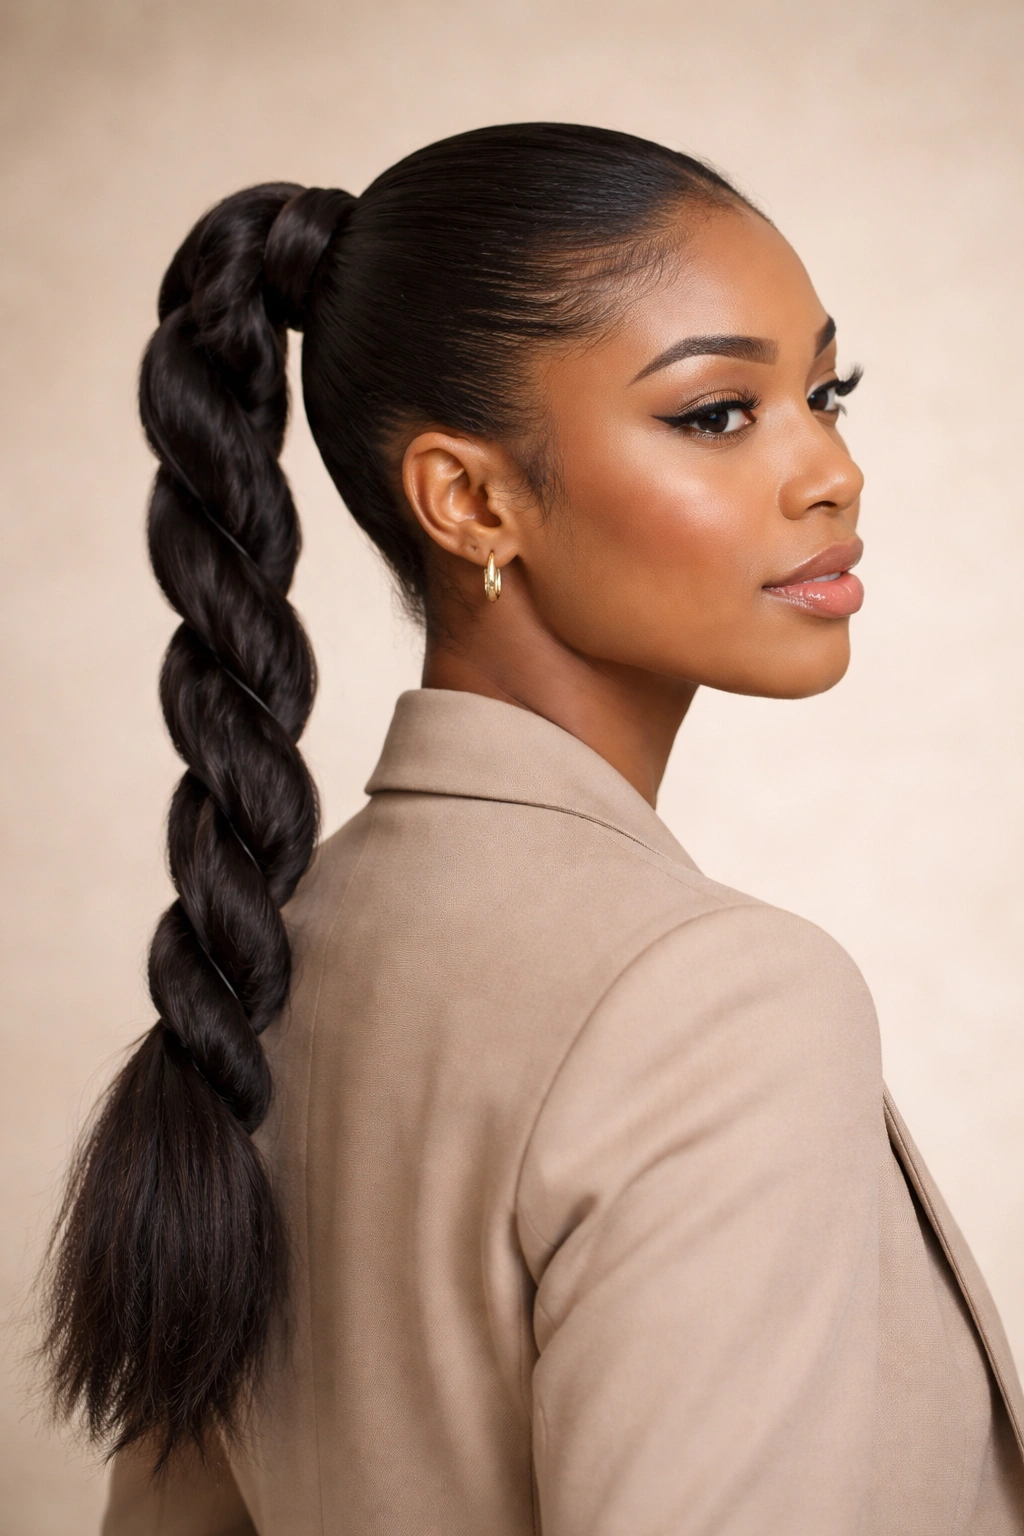
This style intertwines two sections of hair throughout the length of a gathered ponytail, creating a sophisticated linear detail that reads as deliberately styled without feeling overdone. The twist can be tight and controlled for a professional setting, or looser and more textured for weekend wear. It’s one of those styles that looks complicated enough to impress but simple enough that you can execute it in just a few minutes once you practice the technique.
When to Wear It and Why
The twisted ponytail is genuinely versatile. A tight, neat twist paired with a high ponytail placement reads as polished and creative—perfect for work environments where you want to look like you put thought into your appearance. The same style executed with a lower ponytail and looser twisting becomes weekend-friendly and relaxed. What makes this version special is that it adds visual interest and movement without adding bulk or requiring extensions.
How to Execute Two-Strand Twists in a Ponytail
- Gather your hair into a ponytail at whatever height you prefer and secure with an elastic band.
- Divide the ponytail into two equal sections.
- Cross one section over the other, then bring the section that’s now on the bottom back over the top. This is the foundational twisting motion.
- Continue this over-and-under pattern all the way down the length of the ponytail. The twist should feel relaxed and natural, not tight enough to strain your hair.
- Secure the end with a small elastic band, bobby pin, or decorative hair clip depending on your style preference.
- For a softer, more weekend-ready effect, gently pull at the edges of the twist to create a slightly expanded, less-defined texture. This makes the twist look full and intentional rather than thin and fragile.
Pro tip: If twisting the entire length feels tedious, twist only the top section (from the elastic down about 3 or 4 inches), then let the rest of the ponytail hang loose. This creates a styled detail without requiring you to commit your entire ponytail to the technique.
5. The Banded and Beaded Ponytail
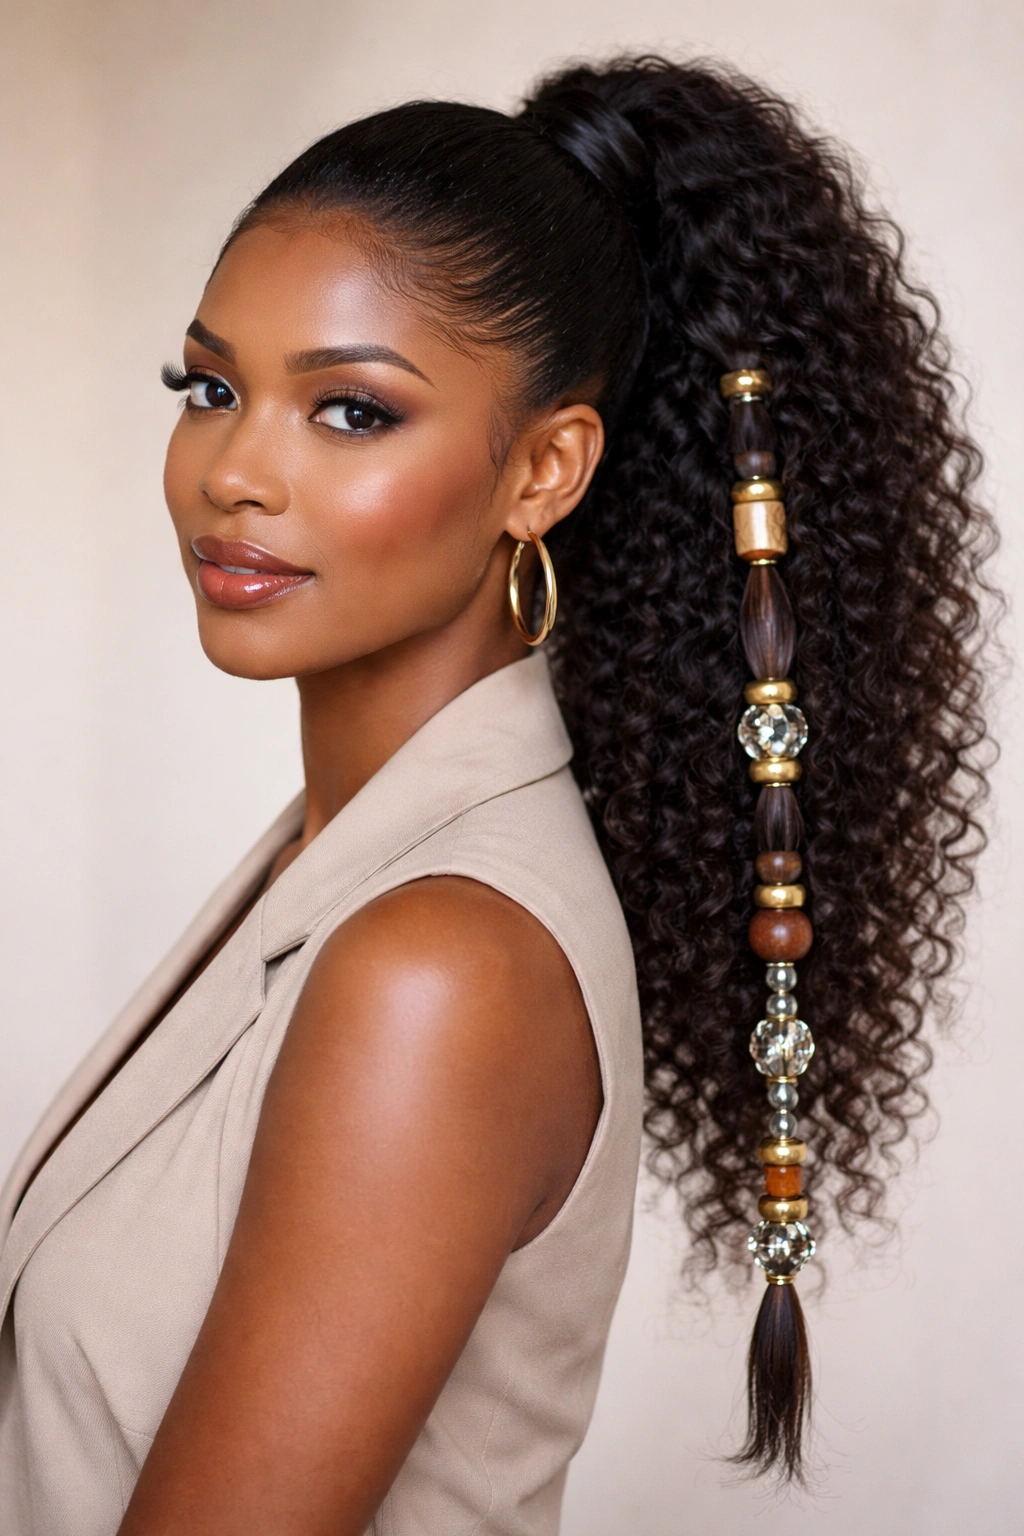
This version incorporates decorative bands, cuffs, rings, or beads placed at strategic points along the ponytail, adding a metallic or colorful accent that instantly elevates the whole look. Whether you choose sleek metal cuffs for a boardroom moment or playful beads for weekend vibes, the right accessory transforms a simple ponytail into something intentional and fashion-forward. This is one of the easiest ways to customize a basic ponytail and make it feel like exactly your style.
Why Accessories Transform Ponytails
The right hair accessory changes how the entire style reads without requiring you to change the actual ponytail structure. Metal cuffs create a sharp, modern, professional vibe. Wooden beads or colorful rings feel bohemian and relaxed. Multiple smaller bands feel playful and young. One well-placed cuff feels elegant and intentional. By switching accessories, you can wear the exact same ponytail structure to five completely different settings.
Placing Bands and Beads for Maximum Impact
- Decide whether you want a single accent piece or multiple bands. One strategically placed band is more sophisticated; multiple bands feel more playful and fun.
- For a professional look, place a single metal cuff or band about 2 inches below the ponytail elastic, positioning it so it sits on the visible gathered section.
- For a fun, weekend vibe, place multiple smaller bands or beads down the length of the ponytail, spacing them roughly evenly. Spacing them about 1.5 to 2 inches apart creates a balanced, intentional look.
- Make sure bands are secure and won’t slip down the ponytail. Try them on and gently tug to ensure they’re grippy enough to stay in place through a full day of movement.
- If you’re using beads with larger holes, thread them onto the ponytail directly. If you’re using decorative cuffs or rings, position them over your gathered hair and slide them into place.
Insider note: Mixing metals can actually look intentional and modern—don’t feel like you need to match all your accessories. Gold with silver with rose gold reads as curated, not confused, when the overall styling is confident.
6. The Half-Up Ponytail
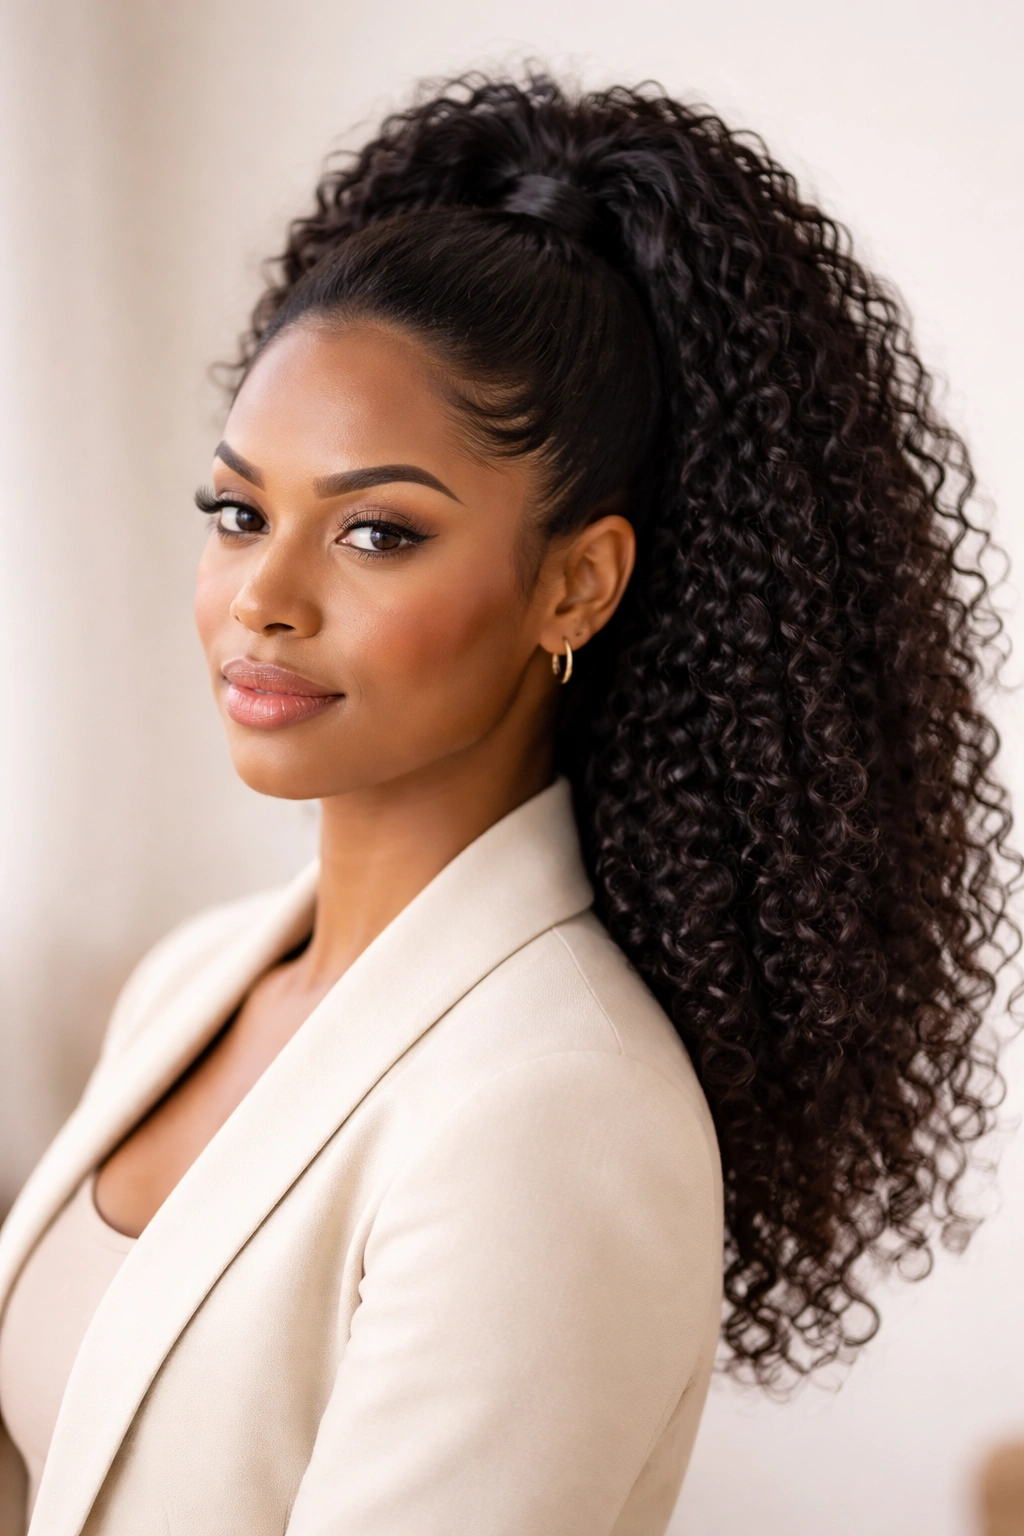
This style gathers the top half of your hair at the crown while leaving the bottom half down, creating a hybrid between a fully gathered ponytail and completely loose hair. It looks instantly youthful and approachable while still keeping some hair off your face and neck. For people who find fully gathered ponytails too severe or those who want their natural length and volume visible, the half-up version is genuinely game-changing.
Why This Works for Both Professional and Casual Settings
The half-up ponytail reads as intentional and styled without feeling formal or restrictive. In professional settings, it says “I care about my appearance and I’m put-together” without projecting intimidation. In weekend settings, it feels young, approachable, and casual. It’s also the perfect solution when you want some hair off your face and neck but don’t want your entire head pulled tight. If you have any scalp sensitivity, this style is significantly more comfortable than a full ponytail.
Creating a Balanced Half-Up Ponytail
- Part your hair down the center or in whatever direction you normally part it. The half-up works with any part style, but whatever you choose creates the framework for how the style will read overall.
- At the crown, gather only the top section of hair—imagine you’re taking hair from about ear to ear across the back of your head, from the crown down to approximately where the crown meets the side section.
- Twist this section loosely or smooth it depending on whether you want texture or polish, then secure at the crown with an elastic band.
- Leave the lower half completely down. This section can be textured, twisted, or completely loose depending on your preference and the impression you want to create.
- Gently release a few small face-framing pieces from the gathered section if you want softness around your features. These intentional escapes look styled, not sloppy.
Worth knowing: The half-up ponytail is one of the only styles where you can genuinely get away with a partial blowout or straightening on just the upper section. You could smooth the top half and leave the bottom textured, creating a deliberate style contrast.
7. The Braided Crown Ponytail
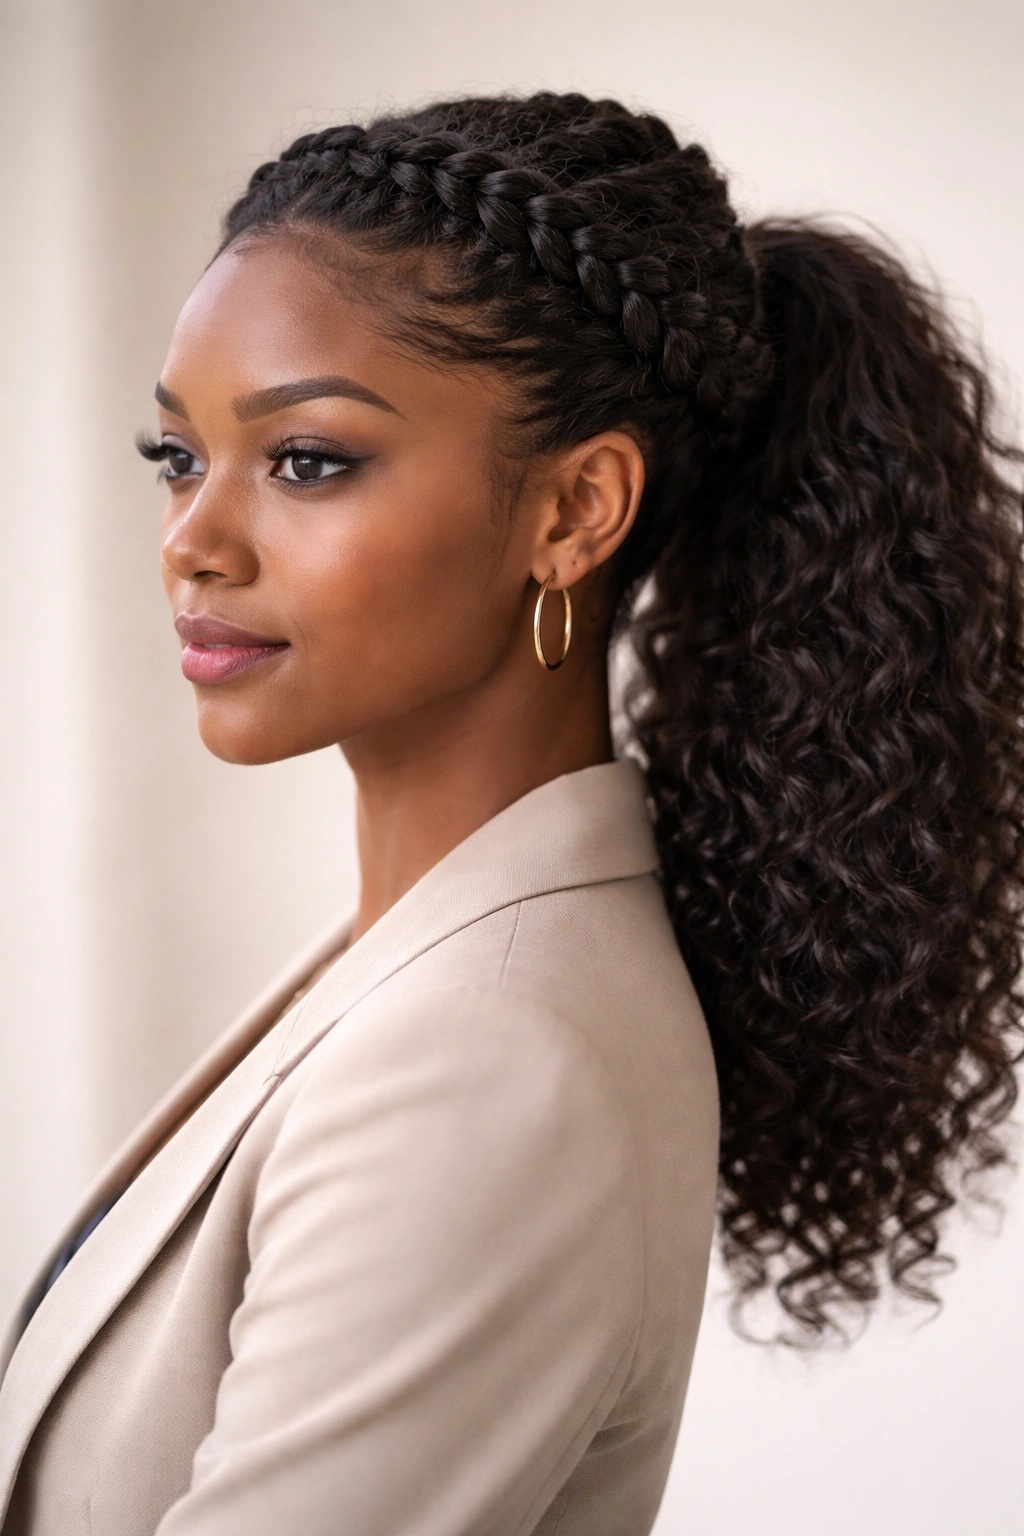
This version braids the top section of your hair around the crown, then gathers all your hair (including the braided section) into a ponytail at the back of your head. It’s more intricate and intentional-looking than a basic ponytail but doesn’t require the advanced braid skills of more complex styles. The braid acts as a decorative detail that frames your face while adding sophistication to the overall look.
When This Style Shines
The braided crown ponytail reads as put-together enough for work environments where you want to look thoughtful and creative. It’s polished without being corporate, interesting without being distracting. For weekends, it feels special and deliberate—like you took time to create something intentional rather than just pulling your hair up in a rush. This style works especially well if you have any face-framing pieces or babies hairs you want to incorporate gracefully into the styling rather than fight against.
The Braiding Technique for a Crown Ponytail
- Starting at one temple, take a small section of hair and divide it into three subsections for a basic three-strand braid.
- Begin braiding, adding small sections of new hair from near your hairline as you move toward the back of your head. This creates a braid that follows the curve of your scalp.
- Continue braiding around the crown toward the opposite ear, incorporating new sections as you go. The braid should hug your head rather than sitting loosely away from it.
- Once you reach the back of your head, secure the braid with a small elastic or bobby pin, then gather all your hair (including the braided section) into a ponytail at the back of your head.
- Secure the entire ponytail with a main elastic band placed low enough that it sits below where the braid ends.
- Gently pull at the edges of the braid to add fullness and texture. The braid should look defined but soft, not thin or under-tension.
Pro tip: You don’t need perfectly neat, tight braiding for this to look intentional. A slightly textured, fuller braid often looks more modern and appealing than a thin, tight one.
8. The Wrapped Ponytail with Accessories
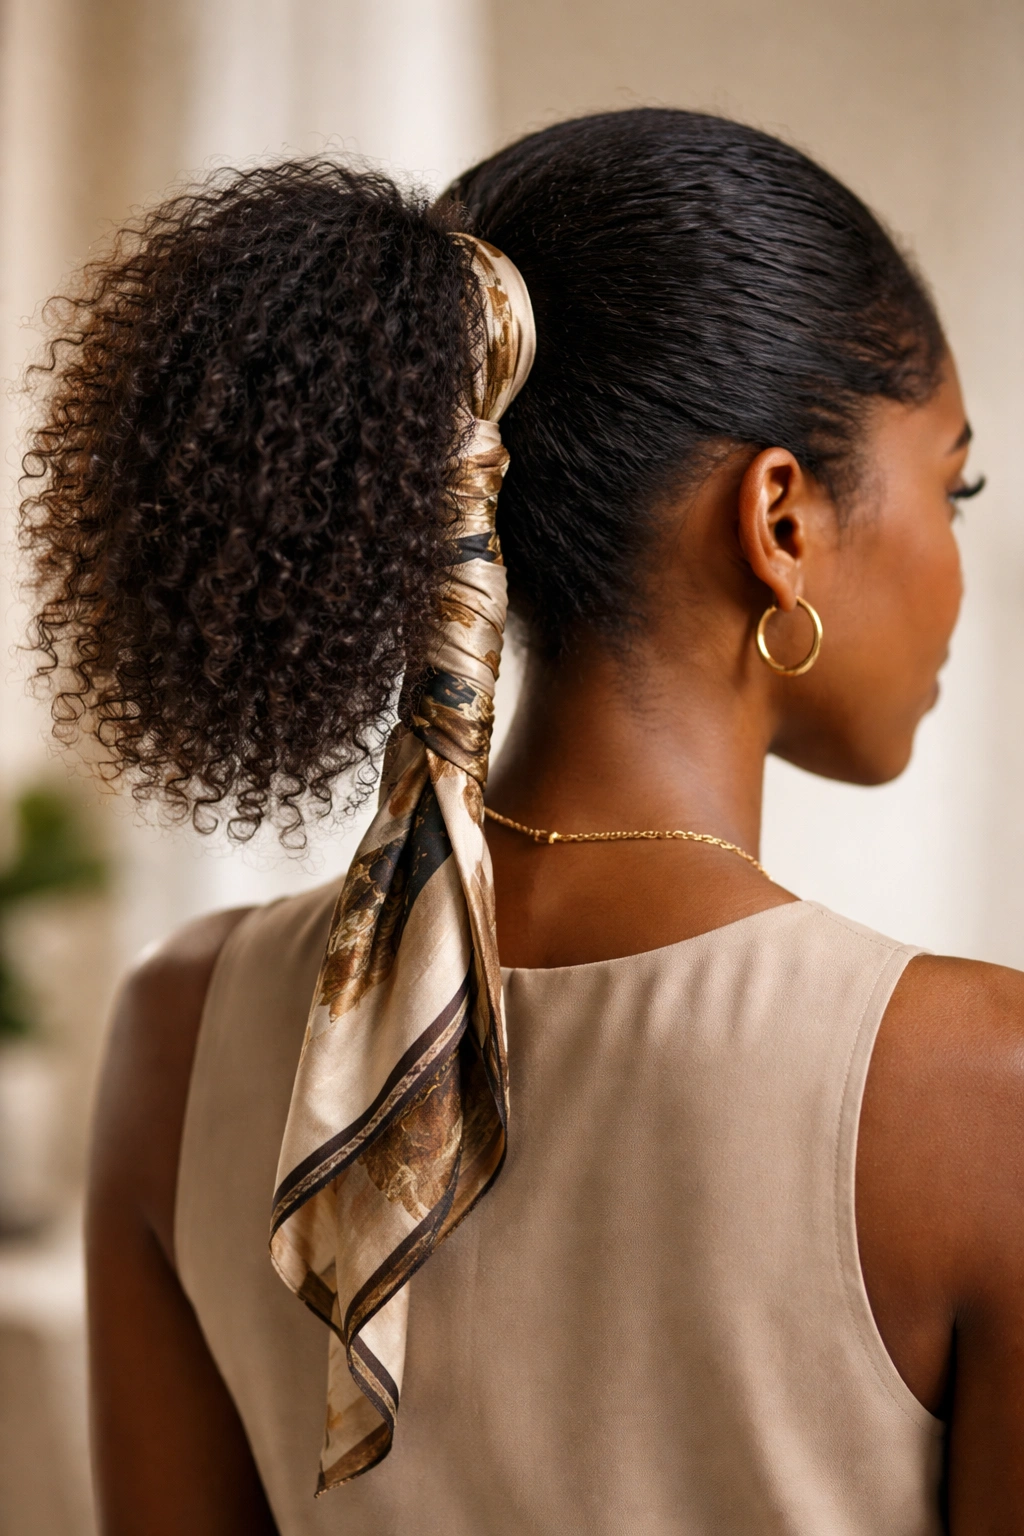
This version features a decorative wrap—either a fabric scrap, a silk ribbon, a beaded strand, or a woven cord—wound around the base of the ponytail, covering the elastic band entirely and creating a polished, finished look. The wrap serves both an aesthetic and protective function, since it shields the elastic from your hair, reducing breakage and friction. It’s one of the simplest ways to make any basic ponytail feel intentional and expensive-looking.
Why the Wrap Changes Everything
A wrapped base instantly elevates any ponytail from “I threw my hair up” to “I deliberately styled this.” The wrap can be subtle and sophisticated (a sleek silk ribbon in a matching shade) or bold and playful (a patterned fabric scrap or metallic cord). Because wraps are removable and interchangeable, you can change the vibe of your ponytail throughout the week without changing the actual ponytail structure. A professional wrap for Monday, a fun patterned one for Friday.
How to Wrap Your Ponytail Base
- Gather your hair into a ponytail at whatever height and tightness you prefer, securing it with an elastic band.
- Choose your wrap material—silk ribbons, fabric scraps, beaded strands, or decorative cords all work beautifully. Aim for something about half an inch to an inch wide so it covers the elastic completely.
- Starting at one side of the elastic band, wrap your chosen material around the base of the ponytail, moving in a circular direction. Each wrap should sit slightly below the previous one, so they stack down the base.
- Wrap around 3 to 5 times depending on how much of the elastic you want covered and how wide your wrap material is.
- At the end, tuck the tail of your wrap underneath one of the previous wraps and secure with a bobby pin placed behind the wrap so it’s completely hidden. Alternatively, use a small clear elastic to secure the wrap in place.
- Gently separate and fluff any hair that’s slightly compressed beneath the wrap, creating a smooth transition between the wrapped base and the loose ponytail below.
Insider note: Silk wraps are worth the investment because they’re gentle on your hair and feel luxurious. But literally any fabric can work—old silk scarves, ribbon, fabric scraps from sewing projects, even decorative shoelaces create an intentional look.
9. The Textured and Voluminous Ponytail
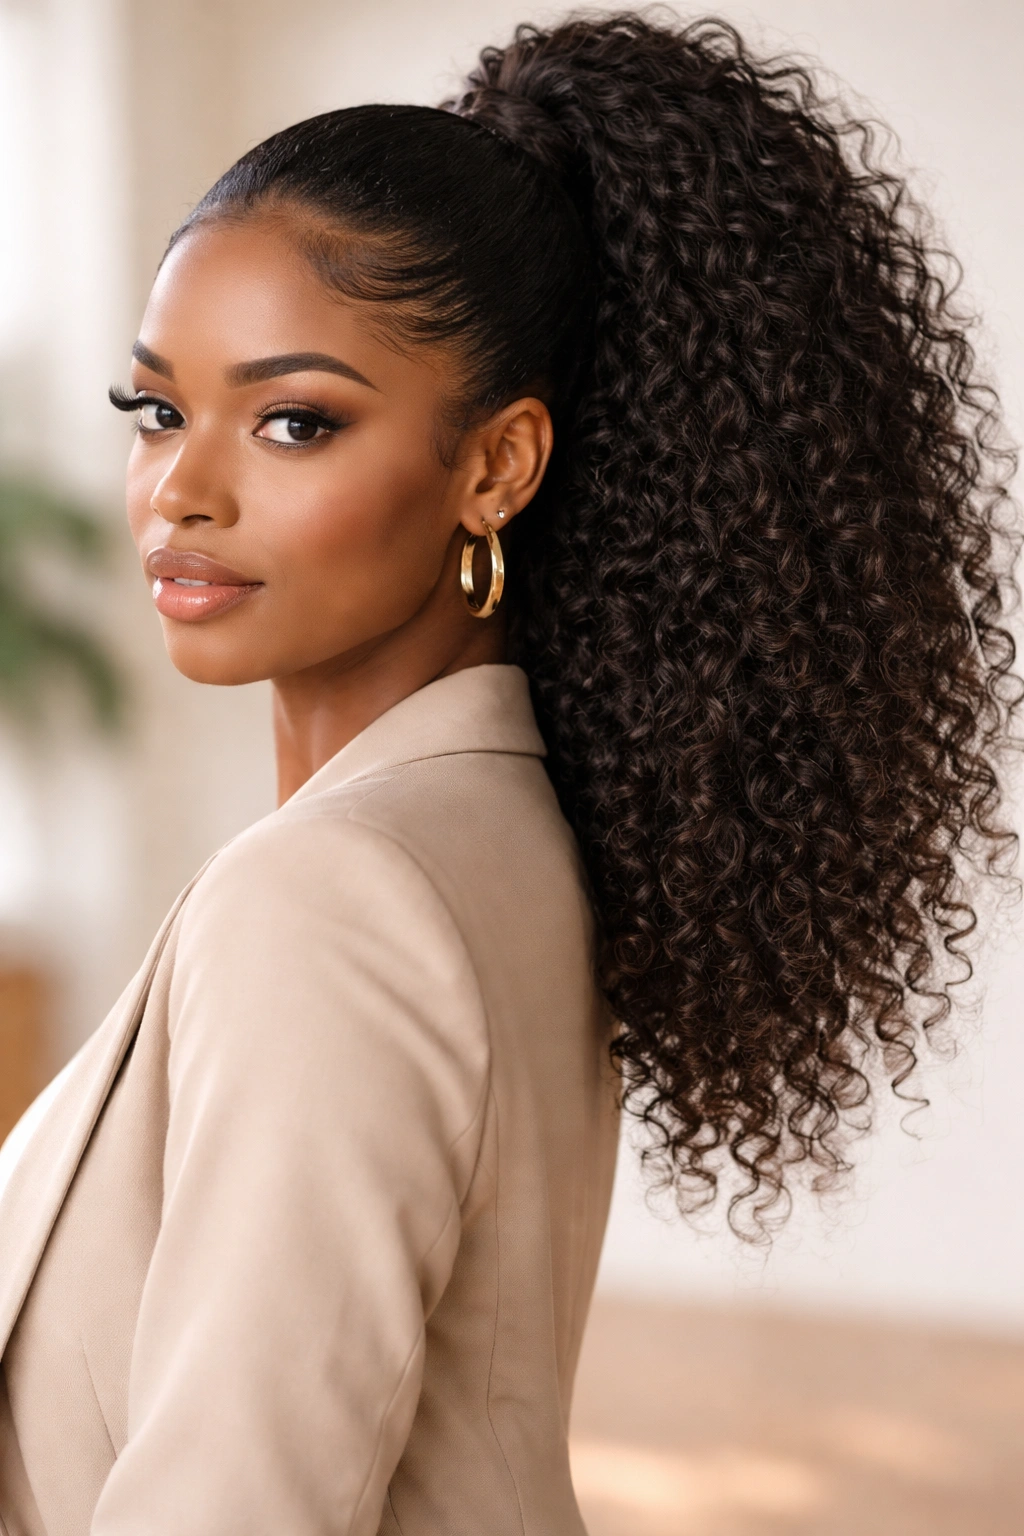
This final version prioritizes fullness and texture throughout the entire ponytail, creating a style that’s undeniably present and confident. Rather than smoothing your hair, this approach leans into your natural texture and density, sometimes adding extensions or doubling over sections to create maximum volume. It’s the ponytail version that says “yes, my hair is full, and I’m not apologizing for it.”
Why This Works for People Who Love Maximum Presence
The voluminous ponytail is genuinely statement-making. It photographs beautifully, it photographs from any angle, and it reads as confident and uncompromising. This style celebrates rather than minimizes your hair’s natural properties. For weekends especially, this is the energy—full presence, no apologies. In professional settings, it works best in creative industries or environments where individual expression is valued over strict conformity.
Creating Maximum Texture and Volume
- Start with hair that has its natural texture intact. Second-day or third-day hair works better here than freshly washed hair.
- Rather than smoothing your hair completely, use your fingers to gently gather it rather than a brush. This preserves texture and movement.
- As you gather the ponytail, gently pull at sections of hair to create a slightly expanded, textured appearance rather than a sleek, compressed one.
- Secure with a strong elastic band that won’t slip as your hair settles.
- After securing, gently pull at various sections of the gathered ponytail to add fullness and texture throughout the length. The ponytail should look like it has presence and dimension, not thin or delicate.
- Optional: for additional volume, section the ponytail into two or three subsections and gently backcomb each one slightly before releasing, creating a fuller overall effect. This is especially effective if your hair density is finer than you’d like.
- Use a lightweight finishing spray rather than a hold-all gel, which would weigh down your texture and compress your volume.
Worth knowing: This style actually benefits from a light texture spray or dry shampoo applied before gathering, which adds grip and body. The spray gives your hair’s natural texture something to grip onto, creating better hold without requiring heavy product.
Final Thoughts
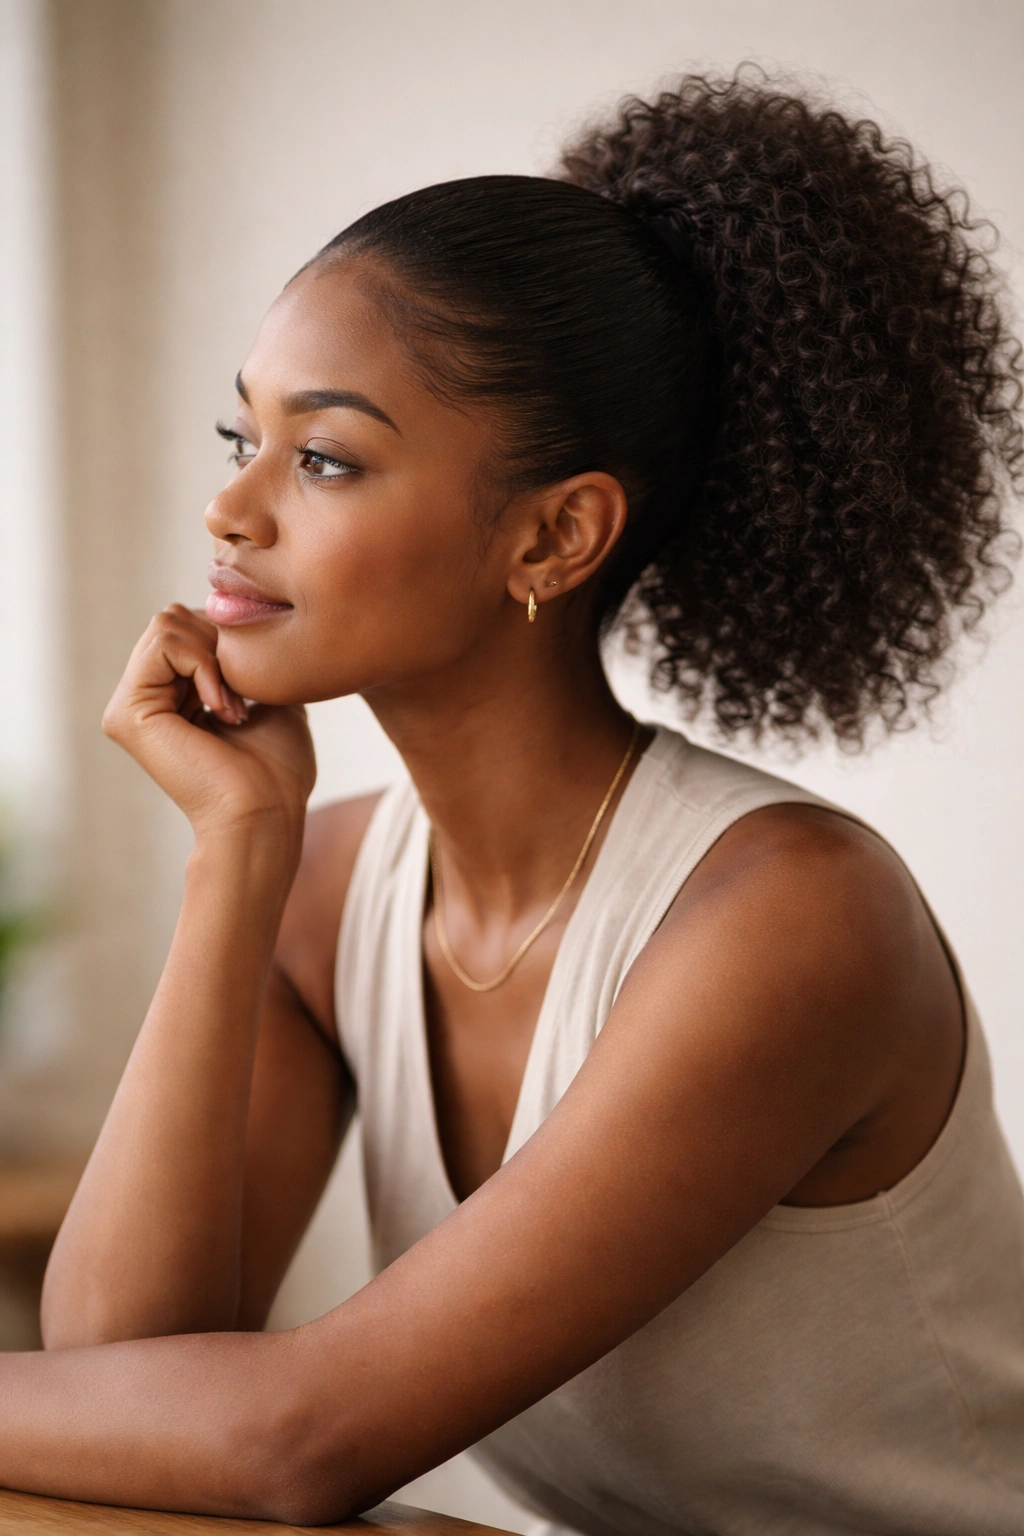
Afro ponytails are far more dynamic than a single style—they’re an entire styling system that adapts to who you are and where you’re going. Whether you’re showing up with polished precision on a Monday morning or weekend confidence on Saturday afternoon, there’s a version here that matches your energy and your setting. The techniques are simple, the results are professional, and the versatility means you’ll never run out of fresh ways to wear your hair.
The real secret is understanding that each of these styles serves a specific moment and communicates something distinct about how you want to present yourself. A sleek high ponytail says something completely different from a textured, voluminous one—both are powerful, but they speak different languages. Once you’ve practiced a few of these versions, you can execute them quickly and confidently, which means you can match your hairstyle to your energy without it ever feeling like a chore. That’s the real point of having options—not to complicate your life, but to give you the tools to express exactly who you are, every single day.
