



Afro ponytails have become a go-to protective style and an effortlessly chic everyday look for Black women—and for good reason. They’re versatile enough to work for everything from a quick trip to the grocery store to a polished evening out, require minimal daily styling once they’re set, and most importantly, they celebrate the natural texture and volume of curly and coily hair. Whether you’re looking for something sleek and professional, playful and textured, or decorated with creative accessories, there’s an afro ponytail style that fits your vibe.
The beauty of these styles lies in their adaptability. You can wear them on different days with your natural hair in various stages of curl definition, you can dress them up or down depending on where you’re headed, and you can absolutely make them your own by adjusting height, texture, and embellishments to suit your personal aesthetic. What follows are nine distinct afro ponytail variations that showcase the range of what’s possible when you work with your natural hair’s volume and texture.
1. High Afro Pony
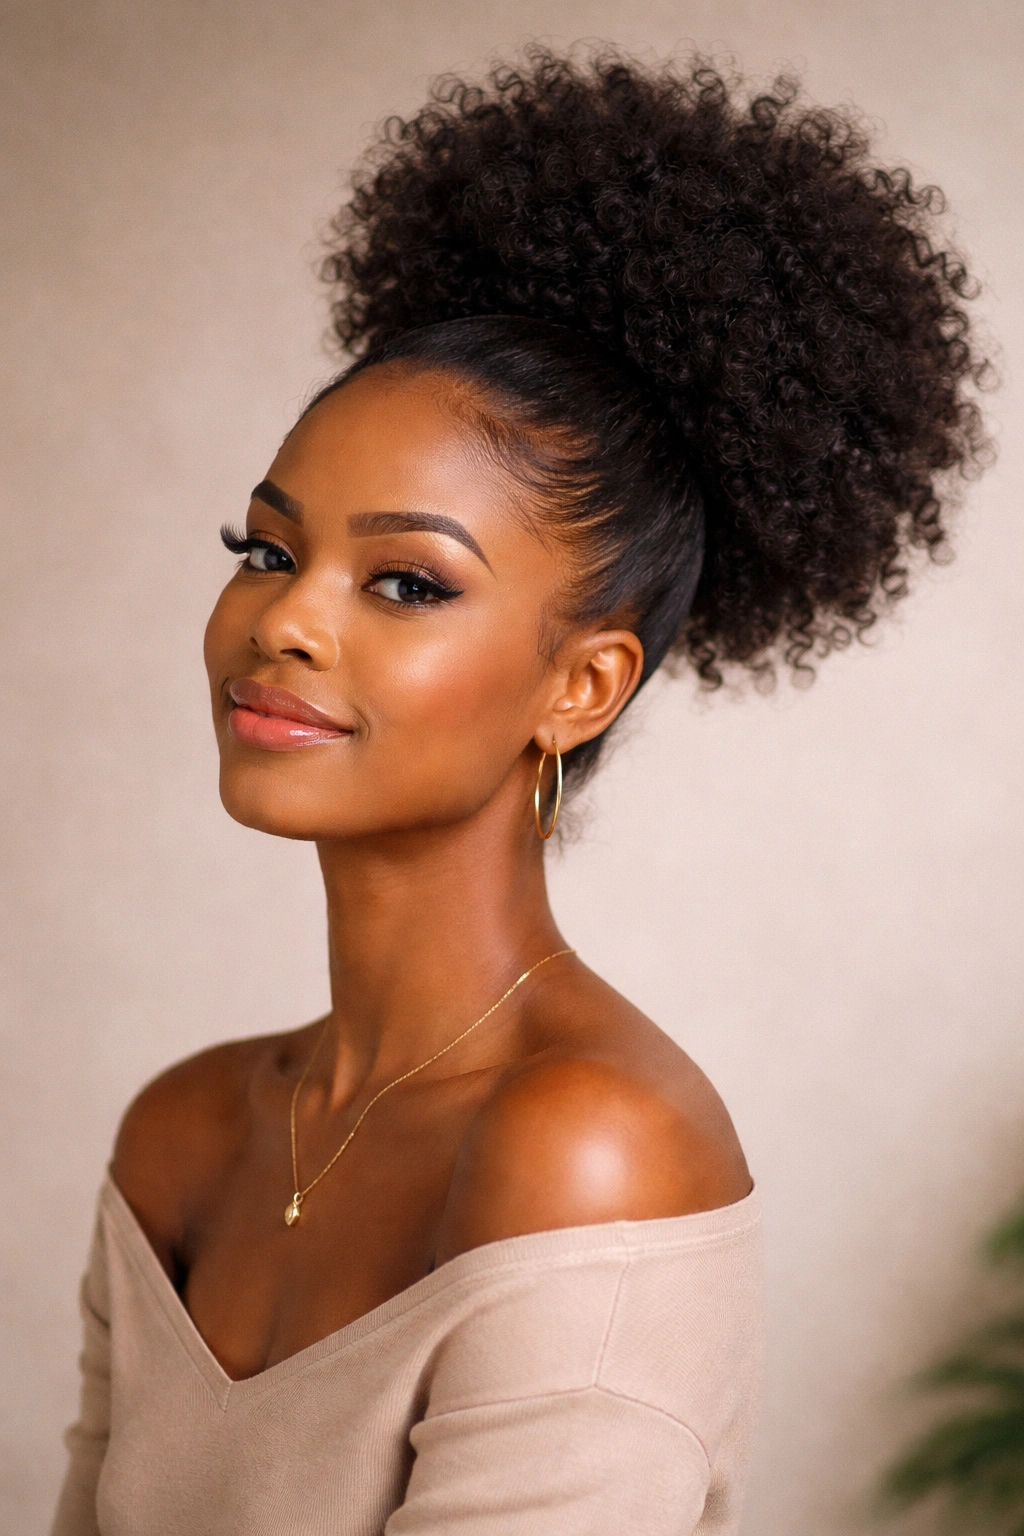
The high afro ponytail sits elevated at the crown, creating a lifted, open look that instantly brightens the face and elongates the neck. This style works beautifully for showing off your natural hair’s fullness and works equally well whether your curls are in their most defined state or slightly fluffed out for added drama. It’s the kind of style that feels both casual enough for a weekend outing and polished enough for work.
Why This Style Stands Out
The high placement catches light differently than lower ponytails, creating dimension and movement. Because gravity naturally pulls some curls downward, a high pony actually tends to feel lighter and less weighty on your scalp than you’d think—making it genuinely comfortable for all-day wear. The openness it creates around your face and shoulders also means you can showcase earrings, neck jewelry, or a fresh skin-care glow without obstruction.
How to Create and Perfect It
- Brush your hair gently with a paddle brush or wide-tooth comb to remove tangles while maintaining curl definition
- Flip your head forward and gather all your hair at the crown—imagine pulling toward the highest point at the top of your head, not toward your forehead
- Secure with a smooth, satin-coated elastic that won’t snag on delicate strands; avoid rubber bands entirely
- Smooth the outer edges with a lightweight gel or edge control if you prefer a polished look, or leave them naturally textured for a more relaxed vibe
- Fluff the pony base gently with your fingers to redistribute volume and create a balanced shape
A pro tip that makes a real difference: the higher you go, the more dramatic the style becomes, but also the more weight is concentrated on the hair at the crown. If you plan to wear a high pony multiple days in a row, alternate with lower styles to give those strands a break from tension.
2. Low Sleek Afro Pony
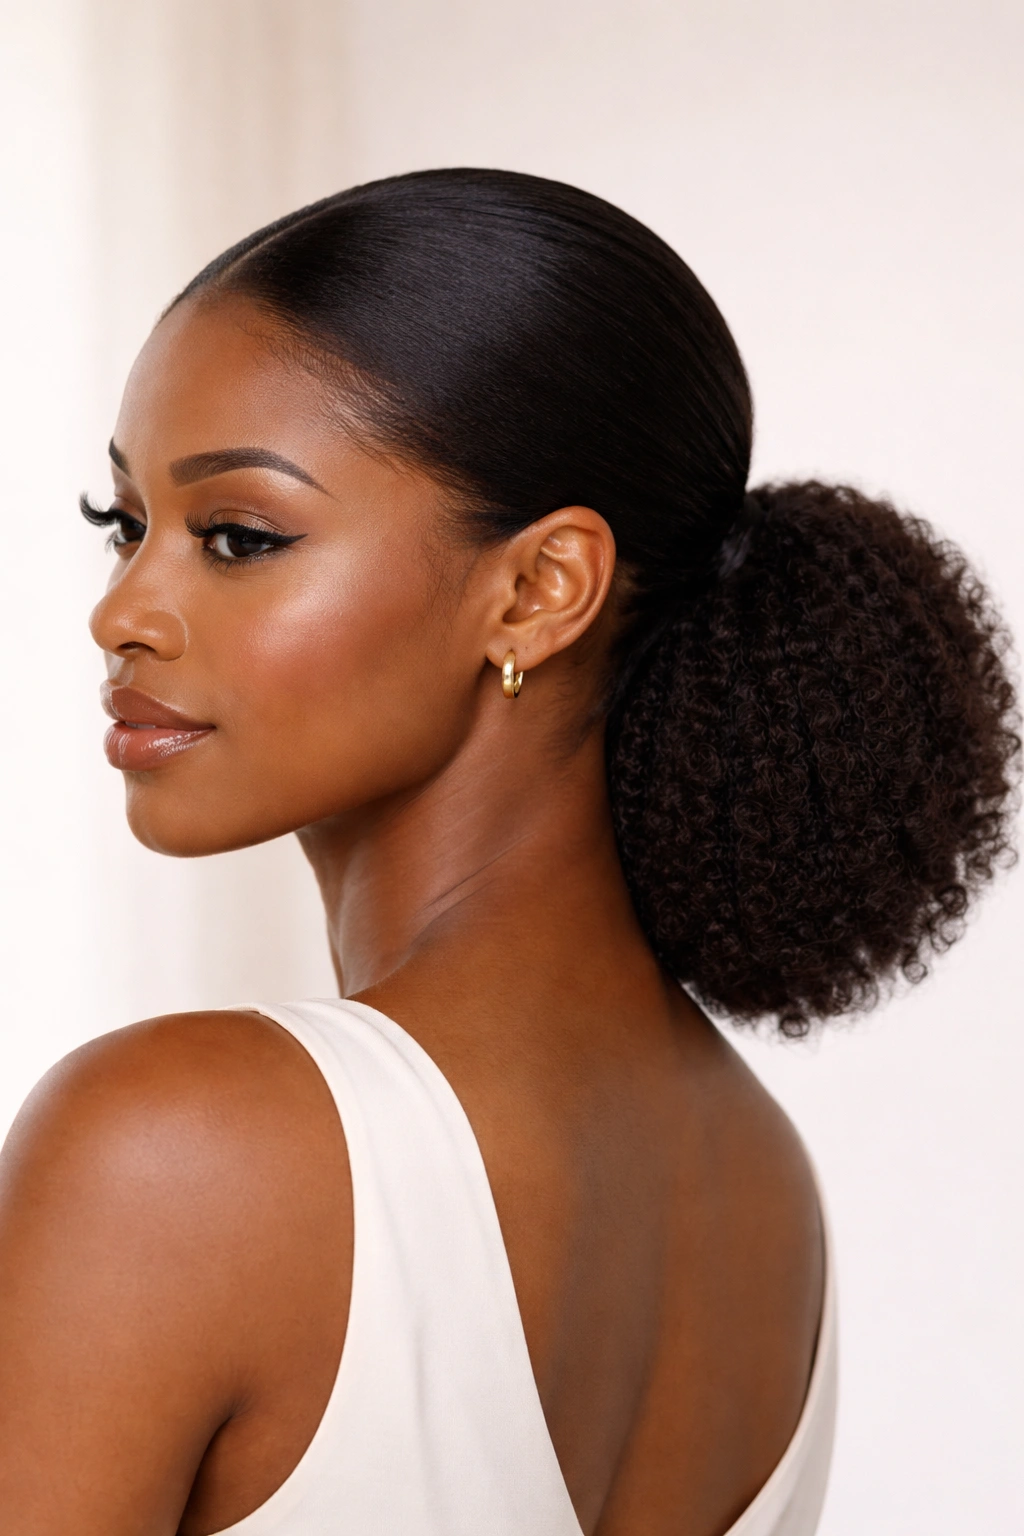
A low afro ponytail gathered at the nape of your neck creates a polished, sophisticated silhouette—especially when the sides are smoothed down with gel and the gathered section is ultra-sleek. This style reads as intentional and professional while still celebrating texture and volume in the pony itself, making it ideal for workplaces that value a refined appearance.
What Makes It Different
The low placement automatically feels more controlled and structured than higher ponytails, which means this works beautifully when you want your hair to feel secure and long-lasting. The contrast between the smooth, flat sides and back and the textured fullness of the pony creates visual interest without looking chaotic. It’s also significantly more comfortable for extended wear because it distributes weight along the entire back of your head rather than concentrating it at one point.
Steps to Get the Sleek Effect
- Thoroughly brush or comb your hair, working through each section to eliminate tangles completely
- Apply a smoothing cream or lightweight gel to your hands and run them along the sides and back of your head, laying the hair flat against your scalp
- Use a soft-bristle brush to smooth down any flyaways, working from your hairline toward the back
- Gather all hair at the nape into a low pony, keeping hands moisturized so the hair glides smoothly into place
- Secure with a satin elastic and smooth any remaining texture with a finishing gel
- Optional: wrap a small section of hair around the elastic base to hide it and elevate the polish factor
Worth knowing: Low ponytails look especially sharp when you’ve done a fresh wash and blow-dry with a concentrator nozzle, which helps you direct the hair backward smoothly. If you’re working with hair that’s a few days old, the extra texture can actually work against the sleek effect.
3. Bubble Afro Pony
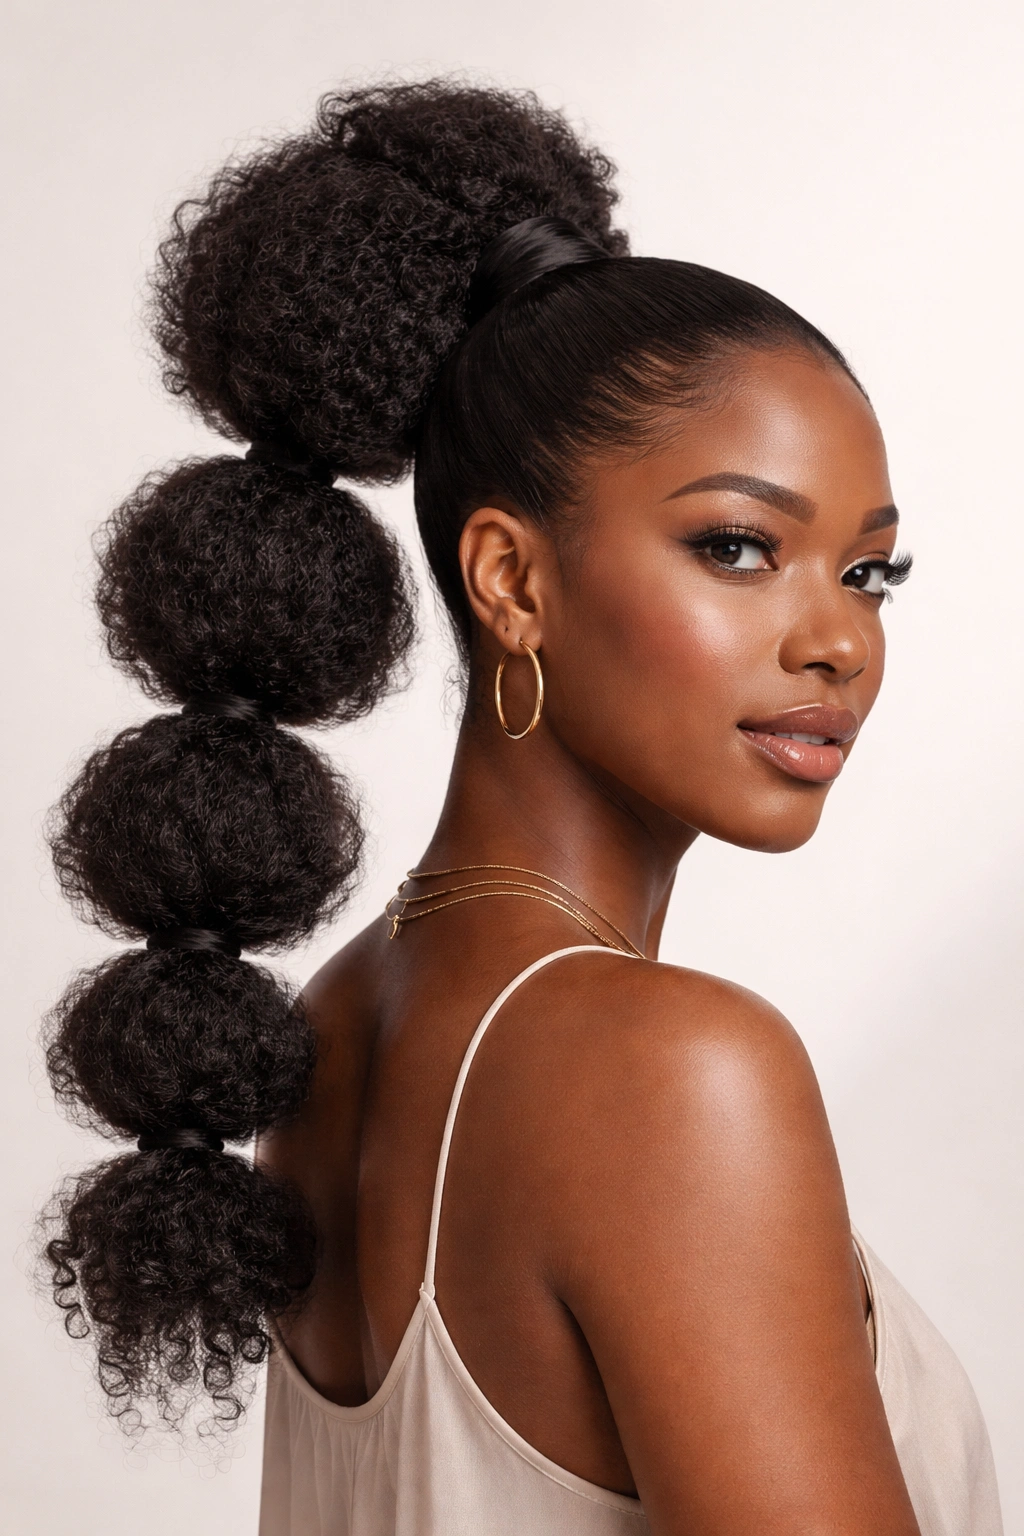
The bubble ponytail (sometimes called a bubble braid when it’s braided throughout) features multiple horizontal sections stacked vertically down the length of the pony, creating distinct puffy “bubbles” separated by the elastics holding them in place. It’s a playful, eye-catching style that instantly elevates a simple ponytail into something creative and intentional-looking, despite being surprisingly simple to execute.
Why It’s Worth the Five Extra Minutes
This style creates the illusion of length and fullness while actually being quite secure—the multiple elastics ensure no section slips loose, even with active movement or extended wear. The bubbles also add visual texture that works beautifully on hair with beautiful curl definition. It reads as trendy and deliberate without requiring any braiding skills or advanced technique, which means it’s genuinely accessible.
How to Build Your Bubble Pony
- Gather your hair into a high or mid-height ponytail and secure it with your first elastic
- Measure down about 1.5 to 2 inches from the elastic and place a second elastic around the pony—this creates your first bubble
- Gently fluff the section between the two elastics outward and slightly upward to emphasize the bubble shape
- Repeat: measure another 1.5 to 2 inches, add an elastic, fluff that section
- Continue down the length of the pony until you reach the ends
- Go back and adjust each bubble so they’re all roughly the same size and puffiness for a balanced look
Pro tip: Use elastics that match your hair color so they disappear visually, or intentionally use contrasting metallics (gold, silver, brass) to make them a design feature rather than something to hide.
4. Side-Swept Afro Pony
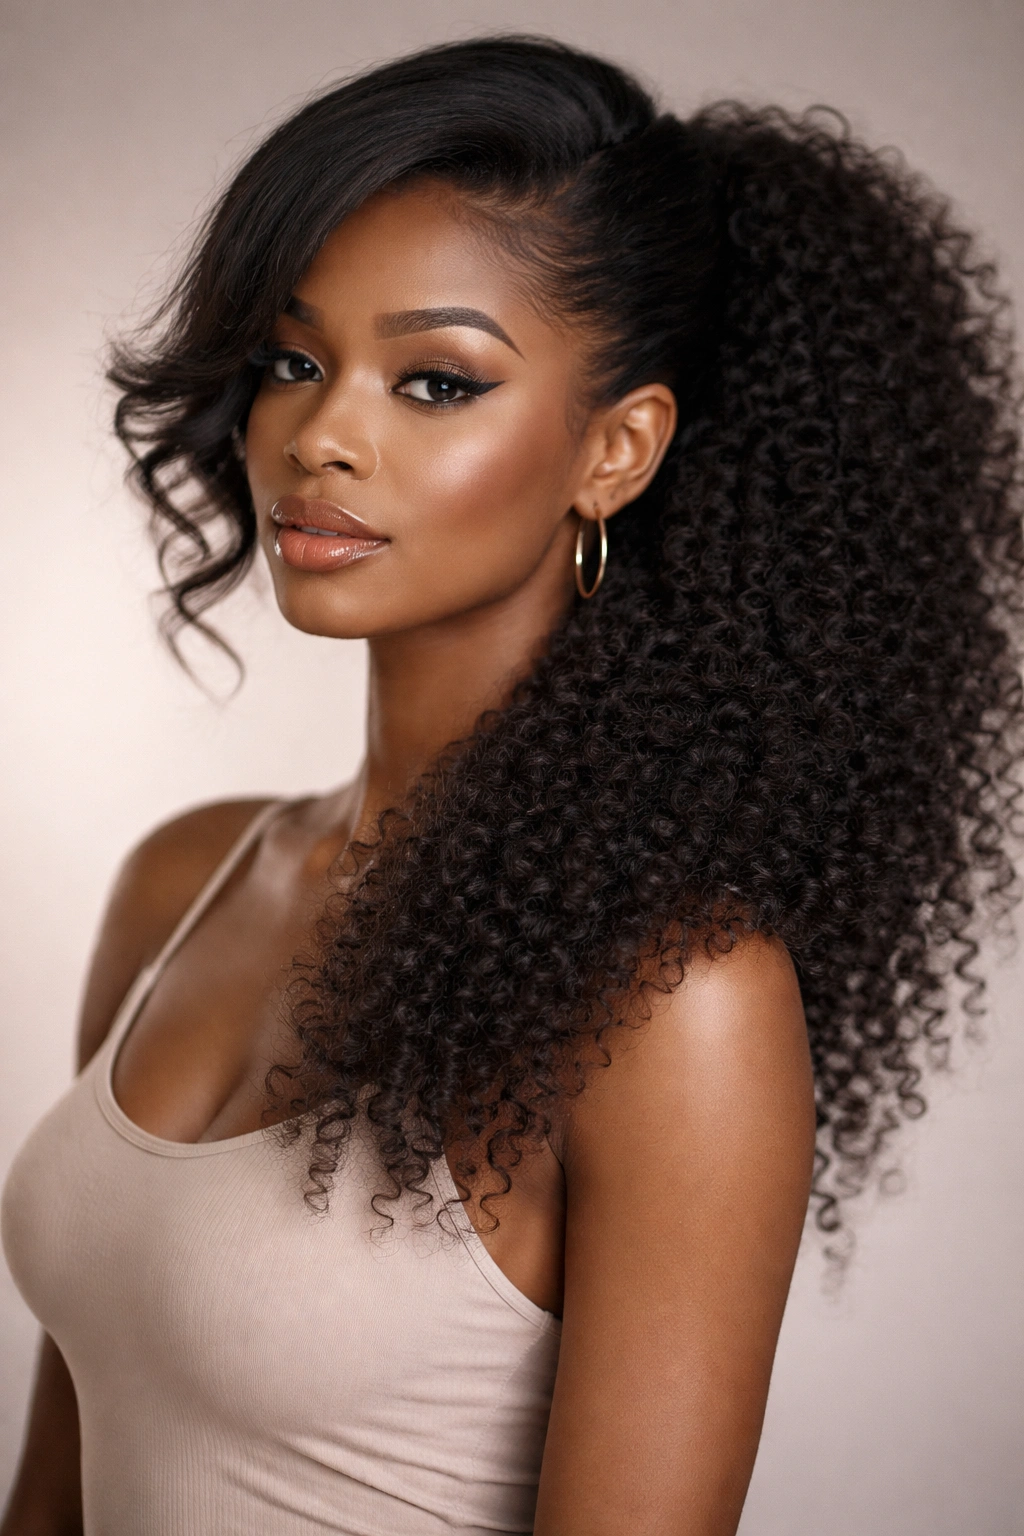
Rather than gathering hair at the center back, a side-swept ponytail sits off to one side—usually over the shoulder or gathered at an angle toward one ear. This asymmetrical placement creates a dramatic, directional look that flatters most face shapes by drawing attention to whichever side you choose to emphasize.
What Makes It Visually Striking
The offset placement instantly feels more intentional and fashion-forward than a centered pony. It also creates an interesting interplay between the side-swept section and the natural fall of your hair on the other side—if you leave some hair down, you get a half-up variation that feels feminine and movement-filled. The asymmetry alone can make an otherwise basic style look considered and stylish.
Creating the Off-Centered Look
- Part your hair to one side using a comb, creating a clear directional line from your forehead back
- Brush that section smoothly toward the side where you want your pony to sit—if going to the right, brush rightward and backward
- Gather all hair and secure it at the side position, roughly at ear level or slightly lower depending on the drama you want
- The natural fall of the hair from the opposite side will create an asymmetrical frame around your face
- Smooth the gathered section with gel if you want a sleek look, or leave it textured
- Optional: take a small section from the pony and wrap it around the elastic base for a polished finish
One thing to watch: if you have fine hair or less density overall, side-sweeping can sometimes look sparse. If that’s your situation, gathering at the back first and then repositioning the entire pony to the side (rather than gathering from the side in the first place) can make the gathered section look fuller.
5. Two-Strand Twist Ponytail
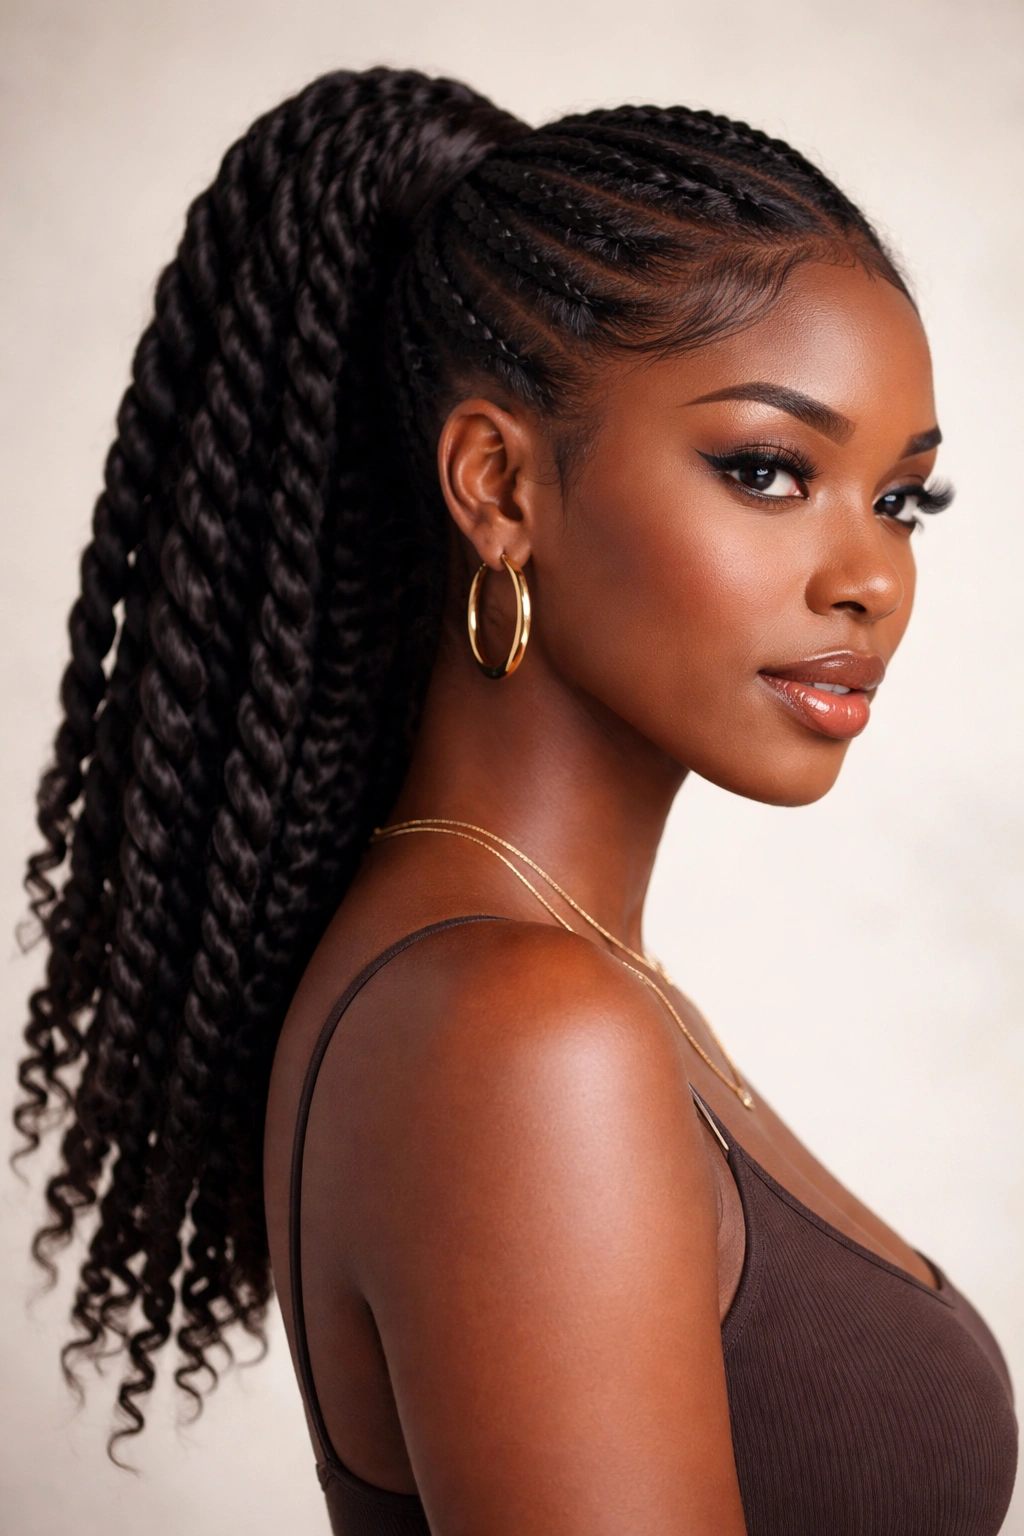
Instead of gathering a simple rounded pony, create a two-strand twist by dividing your ponytail section into two parts and twisting them around each other, then securing the twisted length. This adds texture and visual dimension to the pony itself while creating a style that’s completely different from day to day depending on how tight or loose you make the twist.
How It Transforms Your Pony
Two-strand twists are a gorgeous textural choice that celebrates the way your hair naturally intertwines when you work with it deliberately. The twisted effect is more defined than a simple pony but requires less time and skill than braids. It also creates a style that photographs beautifully because the dimensional, spiraling texture catches light and adds movement.
The Twist Technique
- Gather your hair into a ponytail at your preferred height and secure with an elastic
- Divide the ponytail into two equal sections
- Cross the right section over the left, then bring the left section over the right—continue this crossing motion all the way down the length
- Keep tension relatively even; loose twists look more relaxed and textured, while tighter twists look more formal and defined
- Secure the twisted end with a small elastic
- Gently tug on the twist to loosen it slightly and enhance the texture (optional, depending on your preferred look)
- Fluff the base at the elastic to add volume and softness to the gathered section
Worth knowing: The tighter you twist, the longer the style stays looking fresh—loose twists can start to unravel after a day or two if you’re active. If you want longevity, embrace a tighter twist; if you prefer a more natural, undone vibe, go loose.
6. Braid-Wrapped Afro Pony
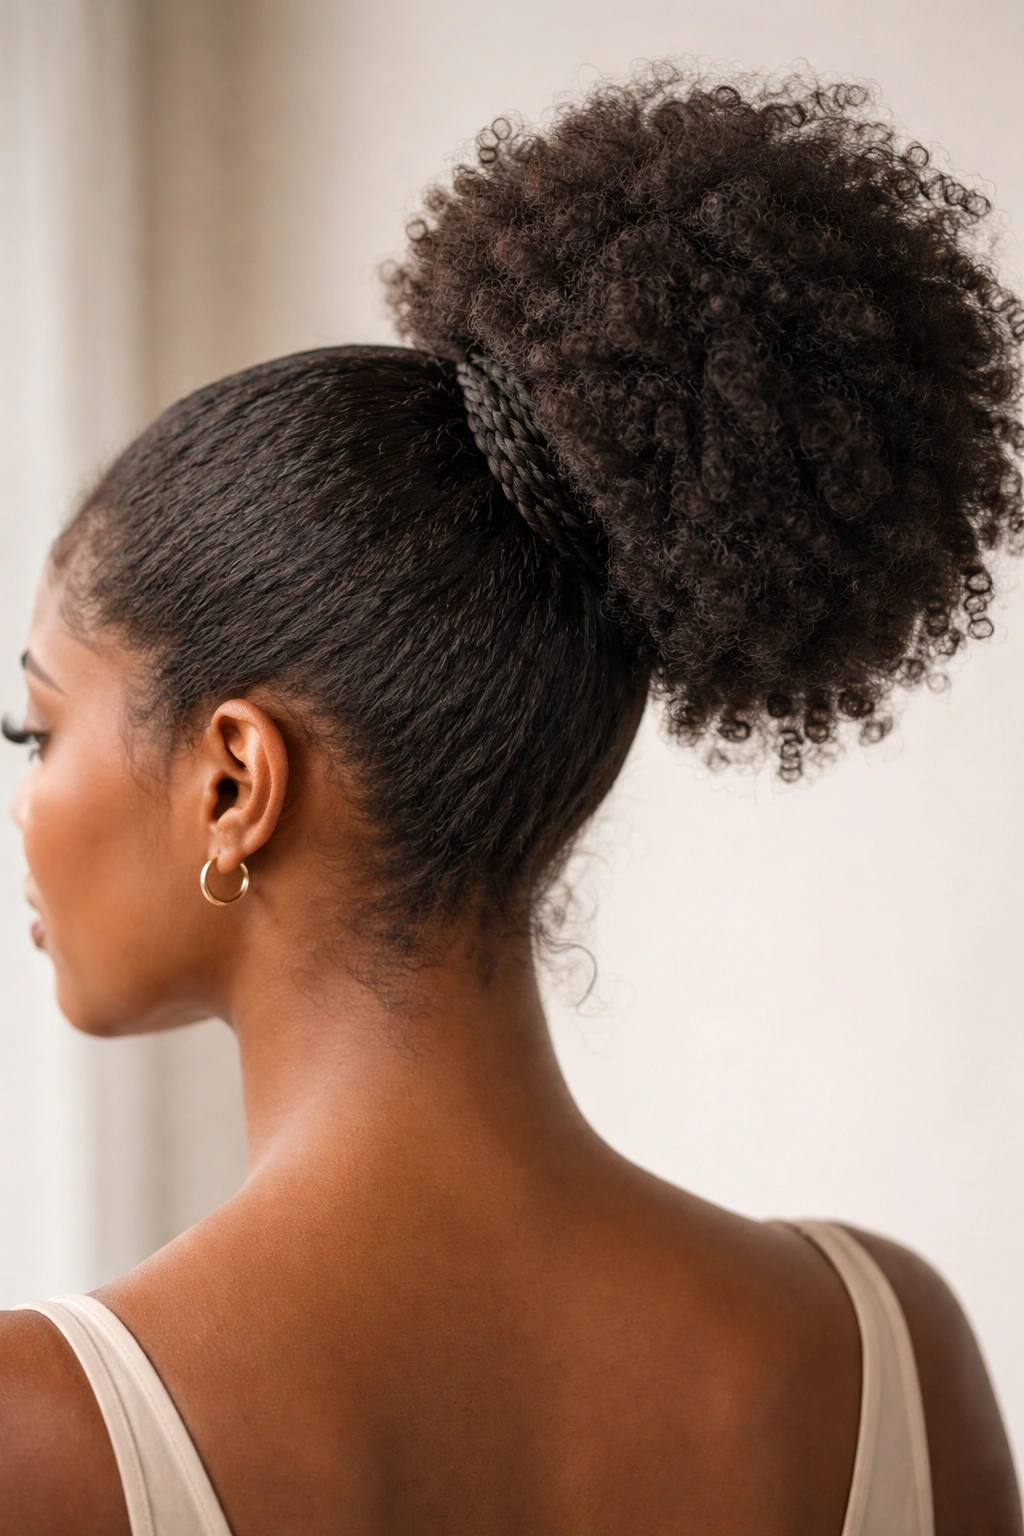
Take a simple ponytail and elevate it by wrapping a small braid around the base where the elastic sits. This tiny detail transforms an everyday pony into something that looks intentional and finished, and it simultaneously hides the elastic so your style looks polished and seamless.
Why This Detail Matters
That wrapped braid is what separates a rushed-looking pony from one that reads as genuinely styled. It’s a small addition—literally just a three-strand braid made from a small section of your own hair—but it signals care and attention. It also protects the elastic slightly, which can help your ponytail last longer without the elastic digging into or damaging the hair at the base.
How to Add the Wrap
- Create your base ponytail at whatever height you prefer and secure it with an elastic
- Take a small, thin section of hair from underneath the ponytail (or from the side of the base)
- Divide that section into three strands and create a three-strand braid
- Wrap the finished braid around the base of your ponytail, covering the elastic completely
- Secure the braid end by tucking it underneath itself or pinning it with a bobby pin that matches your hair color
- If any flyaways are visible, smooth them with a tiny bit of gel
The beauty of this approach is that even if your braid isn’t perfectly even, the wrapped position hides imperfections beautifully. You can make this as simple or as detailed as you want—a loose, casual braid has a different vibe than a tight, polished one.
7. Puff Ponytail (Stacked or Layered)
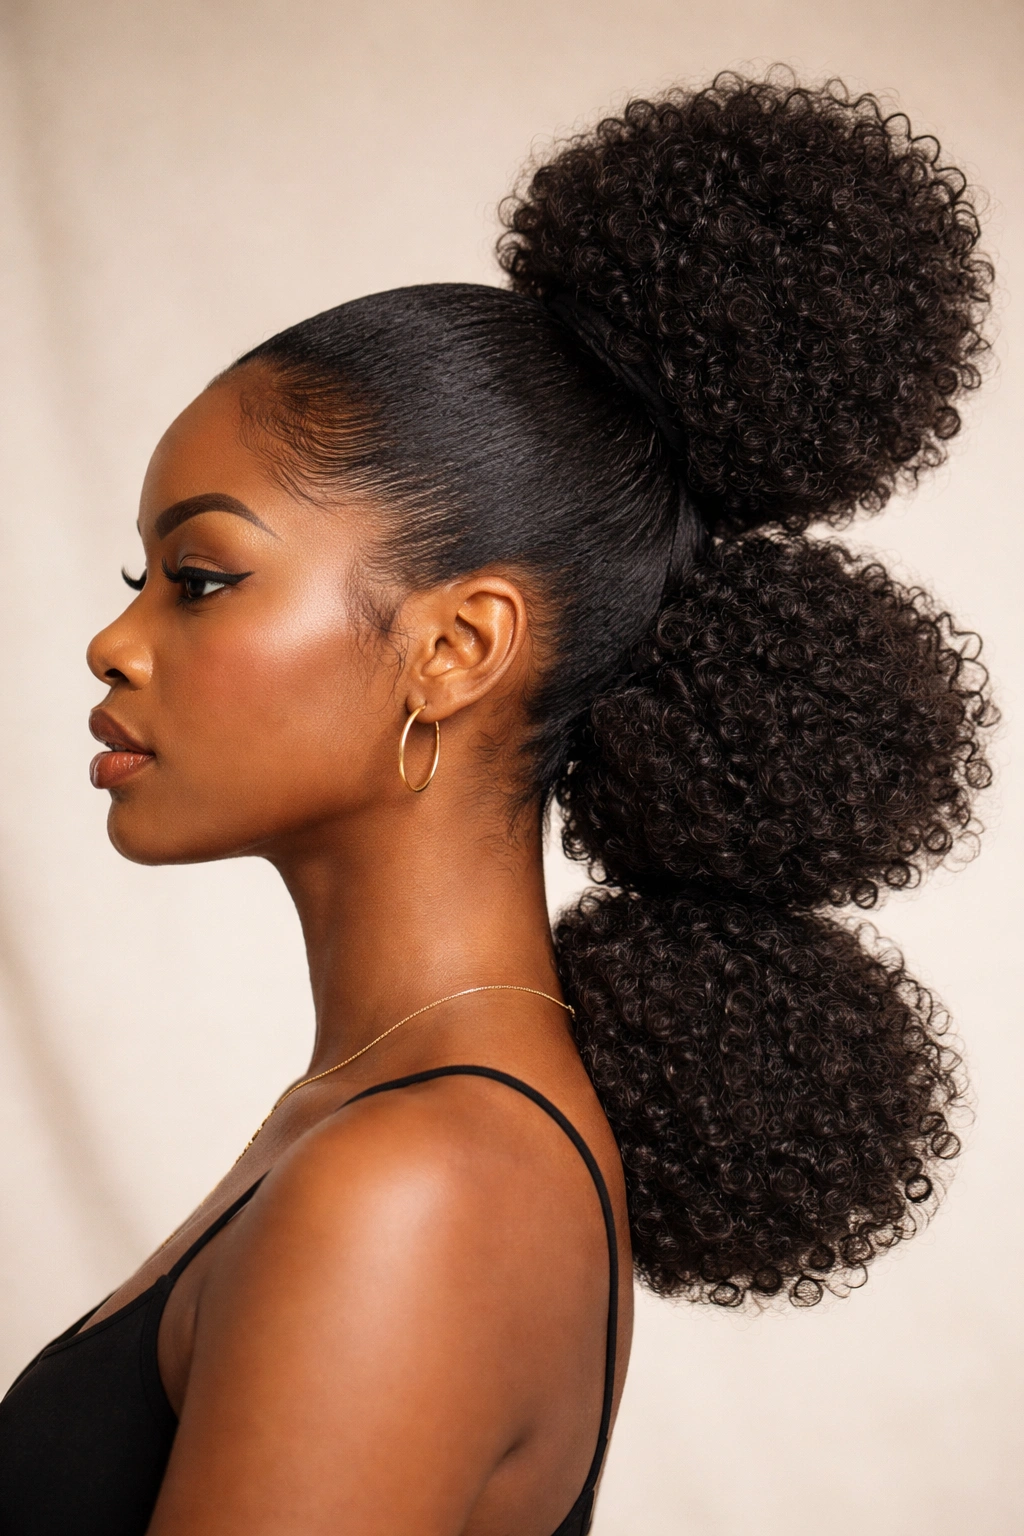
A puff ponytail involves gathering your hair into one or more rounded, cloud-like sections and securing them vertically. You can create a single large puff, or stack multiple puffs one above the other for a more dramatic, sculptural effect. This style is a celebration of volume and is particularly stunning on hair with beautiful curl definition.
What Makes Puffs So Striking
Puffs are inherently photogenic because of their rounded, dimensional shape—they catch light beautifully and showcase your hair’s natural texture and bounce. Stacking them creates an almost architectural look that’s both playful and undeniably stylish. This style also works well at any scale: a single small puff can be understated and everyday, while multiple stacked puffs read as bold and intentional.
Creating Stacked Puffs
- Divide your hair into horizontal sections using clips to separate them clearly
- Start with the lowest section (at your nape) and gather it into a pony, securing with an elastic
- Gently flip that pony upward and arrange it into a rounded puff shape, using your fingers to redistribute the hair into a cloud-like form
- Move to your next section up and repeat, gathering it into a pony directly above the first
- Continue upward through all your sections
- Go back and adjust each puff so they’re balanced in size and puffiness
- Add a final elastic at the very top to secure everything together if desired, or leave them as individual stacked units
Pro tip: Puffs look even more dramatic and intentional if you take a moment to add a lightweight curl-enhancing cream or mousse to your hands and scrunch each puff while shaping it—this adds definition and helps the curls pop visually.
8. Twisted Afro Pony
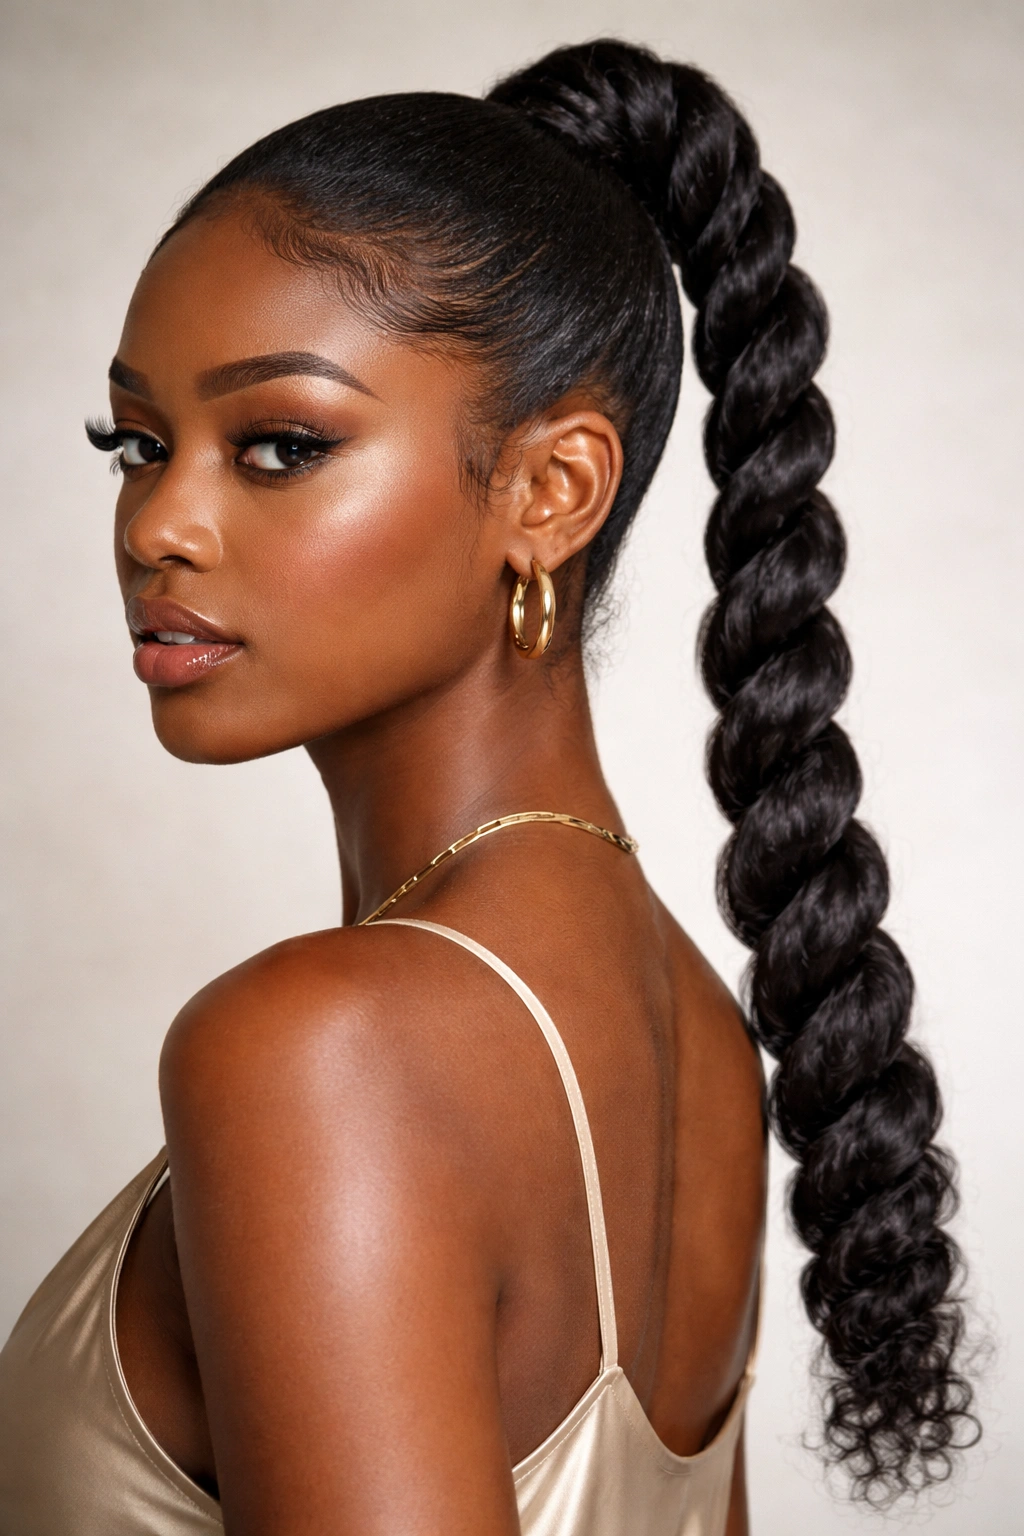
A twisted ponytail differs from a two-strand twist because here you’re twisting your entire hair section (rather than dividing it into two parts and crossing them). You simply gather your ponytail, hold it taut, and rotate it in one direction until it naturally coils into a rope-like twisted form, then secure.
How It Differs From Two-Strand Twists
A full twist creates a denser, more rope-like texture than two-strand twists, and it’s often faster to execute. The visual effect is slightly different too—a full twist can look more sleek and elegant when done tightly, while two-strand twists tend to read as more textural and organic. Both are beautiful; this is really about what look you’re going for on a given day.
The Full-Twist Method
- Gather your hair into a ponytail at your preferred height and secure loosely with an elastic
- Hold the length of the ponytail firmly in one hand
- With your other hand, rotate the ponytail in one consistent direction (clockwise or counterclockwise—it doesn’t matter which, just pick one)
- Keep rotating until the entire section naturally coils into a twisted rope shape
- Secure the twisted end with an elastic to lock in the twist
- You can leave it tight and sleek, or gently unwind it very slightly to add a bit of looseness and texture
Real talk: If your hair is very thick or very long, this might feel awkward at first because you’re working with a lot of hair length. The key is to maintain consistent rotational pressure throughout the entire twist rather than trying to force it all at once. Work in sections if needed—twist, then rotate your grip further down, then continue rotating.
9. Accessorized Afro Pony
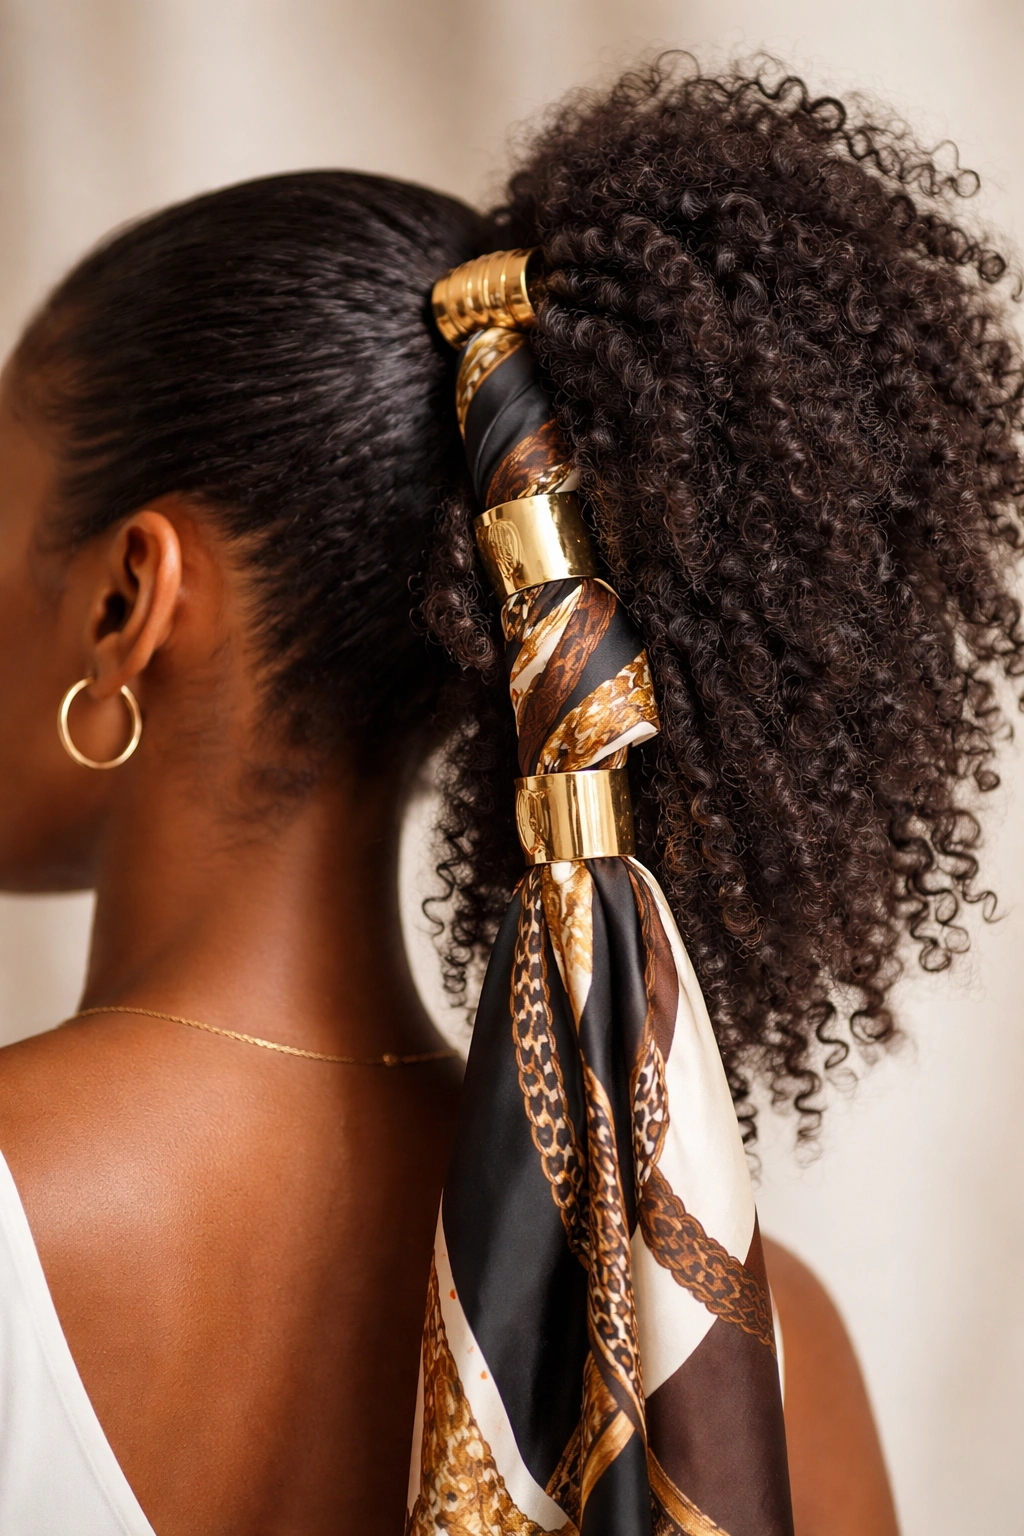
Take any of the above styles and elevate it instantly with thoughtful accessories: metallic cuffs around the elastic, decorative clips, beaded or shell hair jewelry, colorful ribbons woven through, gold wire wrapped artfully, or silk scarves tied into the base. Accessories transform a basic ponytail into a statement piece.
Why Accessories Amplify Everything
The right accessory doesn’t just sit on top of your style—it changes how the entire look reads. A metallic cuff makes even a simple high pony feel intentional and elevated. A silk scarf adds color and texture. Shell or wooden beads add cultural resonance and visual interest. Accessories are where you inject your personal style and make the look distinctly yours.
Accessory Placement Ideas
- Wrap a metallic cuff or multiple thin cuffs around your elastic at the ponytail base for a sleek, modern look
- Thread a silk scarf through the ponytail elastic, letting the ends drape down alongside the pony
- Insert decorative pins or clips into the body of the ponytail for a touch of sparkle or color
- Wrap colored string or ribbon around sections of a bubble pony or twist pony
- Attach beaded hair cuffs or rings to individual curl sections within the pony
- Tie a silk bonnet or scarf around the entire ponytail for a vintage or glamorous feel
- Layer multiple thin gold or silver chains through the base of the pony
The best part about accessorizing is that you can change your entire look without restyling your hair—swap out one cuff for another, change the scarf color, add or remove clips, and your style transforms.
Final Thoughts
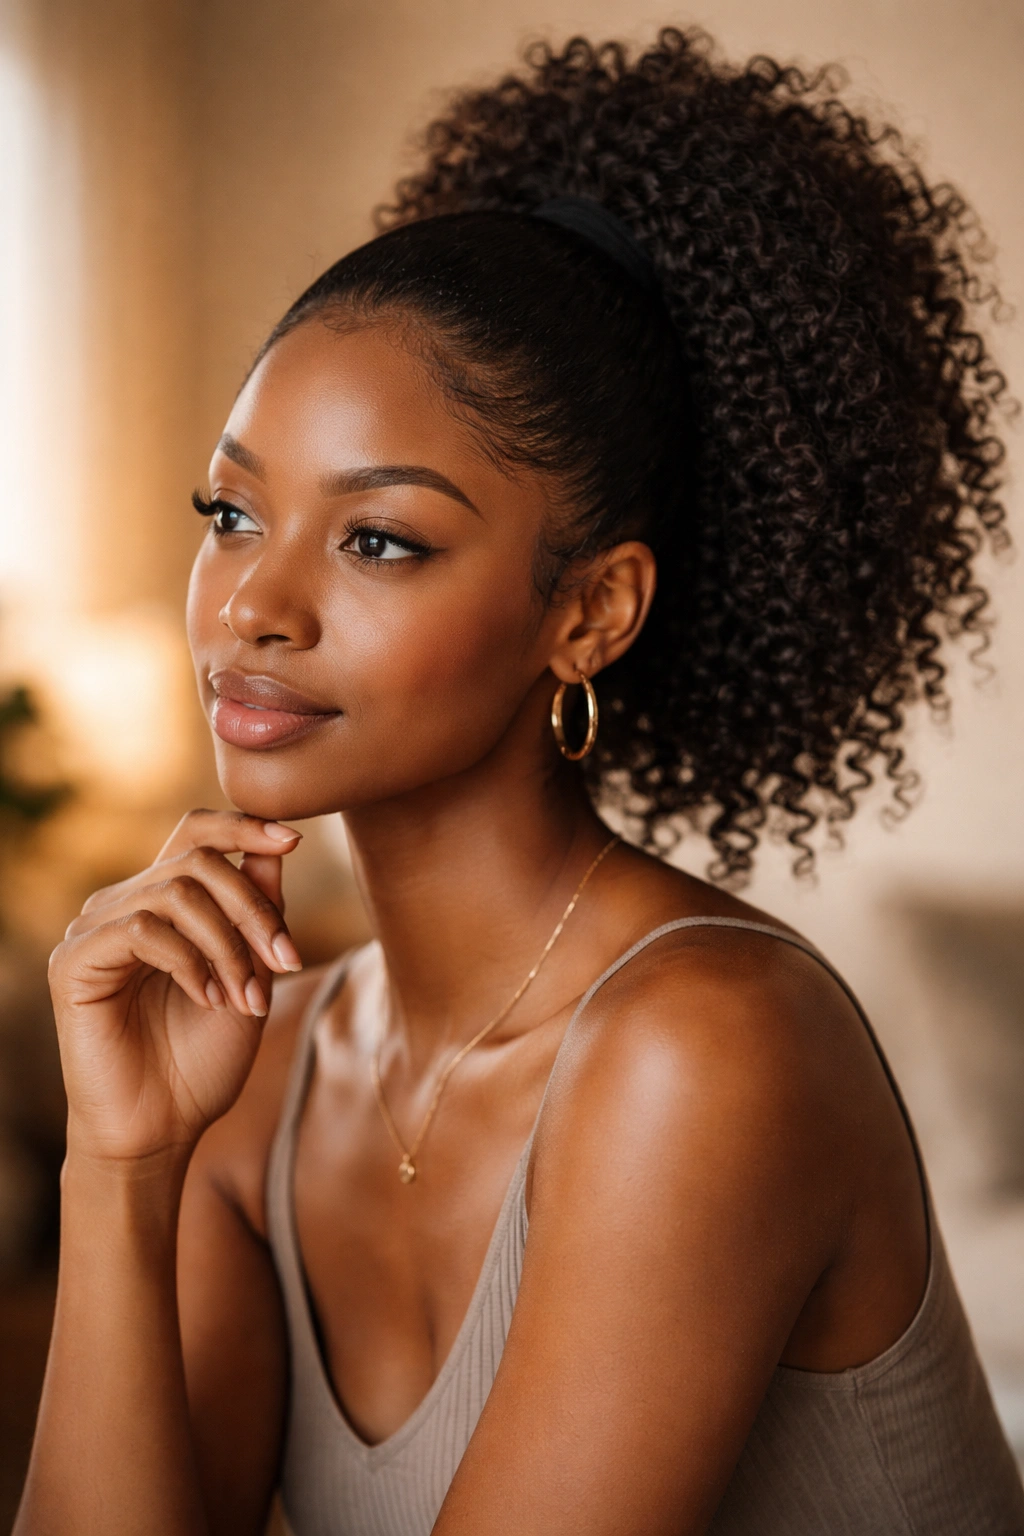
Afro ponytails work because they meet you wherever you are—whether you’re fresh off a wash day with defined curls or a few days into your style cycle when everything has relaxed and fluffed out. They take five minutes to execute or fifteen if you want to add braids and accessories, and they genuinely protect your edges and hair strands from daily friction and tension that can lead to breakage.
The nine styles here are really just a starting point. Once you understand the core principles—how height changes the vibe, how texture in the pony (twists, braids, bubbles) adds visual interest, how accessories elevate everything—you’ll find yourself mixing and matching to create variations that feel completely personal to you. Experiment with different heights, different textures, and different accessories until you discover which combination feels most like you on different days and for different occasions.
What matters most is that you’re celebrating your hair’s natural texture and volume rather than fighting against it. That’s where the real beauty of afro ponytails shines through.
