



Braiding natural afro hair is an art form—it’s a way to style, protect, and celebrate your curls all at once. Whether you’re looking to give your hair a break from daily manipulation, create a bold statement look, or protect your ends while your hair grows stronger, braids offer incredible versatility. The beauty of braiding afro-textured hair is that you can create anything from sleek, intricate patterns to textured, voluminous styles that celebrate the natural bounce and fullness of your curls.
The world of braid styles for natural hair is genuinely diverse. Some styles work best on freshly washed, moisturized hair, while others shine when your hair has a few days of texture and grip built in. Some braids protect your hair inside the style itself, while others work as a protective barrier that lets your ends rest. Some are statement pieces you wear proudly for weeks, and others are more casual, everyday looks. What matters most is finding styles that work with your hair’s texture, thickness, and length—and that actually feel good when you wear them.
Your natural hair is strong, beautiful, and capable of holding so much more than you might think. The key is understanding how different braid techniques interact with your curl pattern, how long each style lasts realistically, and what maintenance they actually need. This isn’t about forcing your hair into styles it doesn’t want—it’s about working with your natural texture to create looks that are both protective and genuinely gorgeous.
1. Box Braids With Defined Curl Pattern
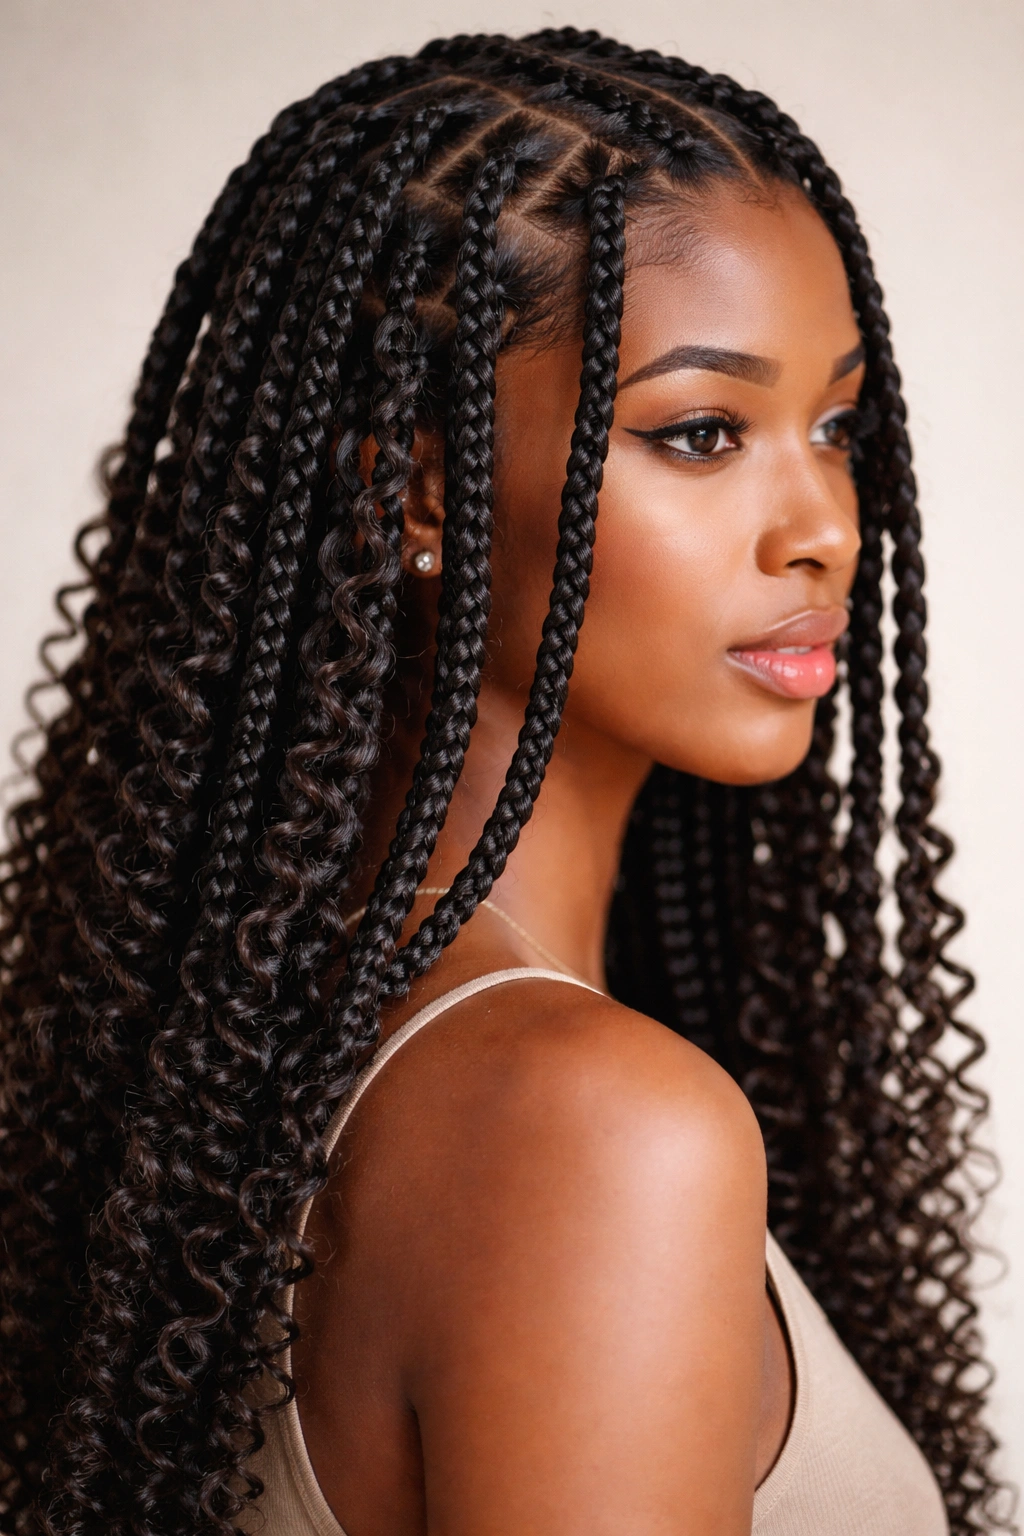
Box braids are the classic protective style that never goes out of style, but there’s a way to make them even more beautiful when you’re starting with natural afro hair: allowing the curl pattern to show within each braid itself. Instead of braiding all the way down with extension hair that flattens your natural texture, box braids with defined curls let your natural coils peek through, creating a softer, more integrated look that feels authentically you.
How to Achieve This Style
The secret is using lightweight braiding hair that matches your natural hair texture as closely as possible, then braiding loosely enough that your natural curls can express themselves through the extension hair. Start with fresh, deeply moisturized hair—this is crucial because dry, shrunken curls will be harder to see. Section your hair into clean boxes (typically ½-inch to 1-inch sections, depending on how voluminous you want the final look), then braid each section, leaving gentle tension. The result is a style that looks fuller and more natural than traditional box braids while still offering that protective, low-maintenance benefit.
Why This Works for Natural Hair
- Creates protective length while celebrating your natural curl pattern rather than hiding it
- Lasts 6-8 weeks with proper maintenance, giving you excellent protection-to-effort ratio
- Works beautifully on medium to thick hair textures and looks especially striking on longer hair
- Allows your natural curls room to breathe instead of being completely encased in straight braids
Pro tip: Braid while your hair is still slightly damp—the moisture helps your curls lock in naturally and makes the final curl definition much more visible once the style is fully dry.
2. Jumbo Box Braids for Maximum Volume
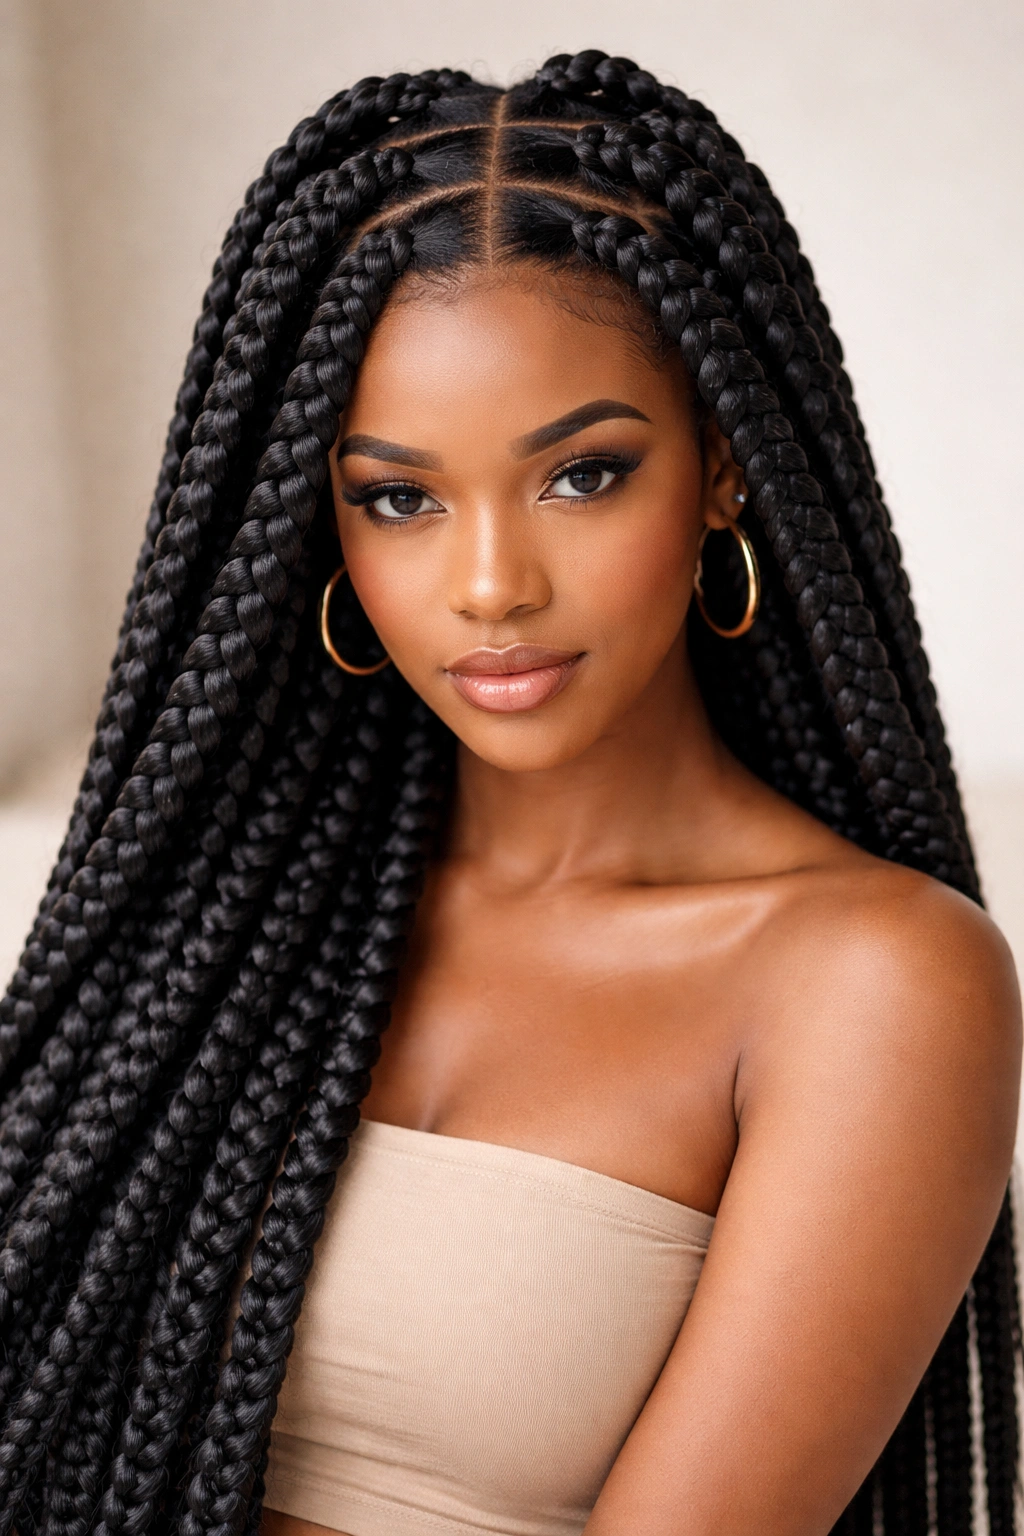
If you love the protective benefits of box braids but want a bolder, more statement-making look, jumbo box braids are your answer. These larger, thicker braids are faster to install, easier to maintain, and absolutely stunning on natural afro hair—they show off your hair’s thickness and allow each braid to become a dramatic focal point rather than one of dozens.
What Makes Them Different
Jumbo braids typically use ¾-inch to 1½-inch sections, creating maybe 20-30 total braids instead of the 100+ you’d have with traditional box braids. This means less time in the salon chair (installation can take 3-4 hours instead of 6-8), less tension on your scalp, and frankly, less maintenance. The trade-off is that the protective benefits aren’t quite as strong—your hair is more exposed between each braid—so these work better as a style you’ll wear for 4-6 weeks rather than a long-term protective style.
Installation and Styling Tips
- Use thicker, heavier braiding hair to match the scale of the braid—thin extensions will look spindly and wrong
- Create a clean grid pattern on your scalp before you start braiding; larger sections require more precision
- You can create movement by braiding some sections vertically down, some at angles, and some in curved patterns
- These braids hold curls beautifully, so you can braid-out texture into the style or wear them sleek
Worth knowing: Jumbo braids place concentrated weight on each braid, so make sure your natural hair is in genuinely good condition before installing. If your hair is fragile or dealing with breakage, traditional box braids might be safer.
3. Feed-In Braids for Seamless Edge Control
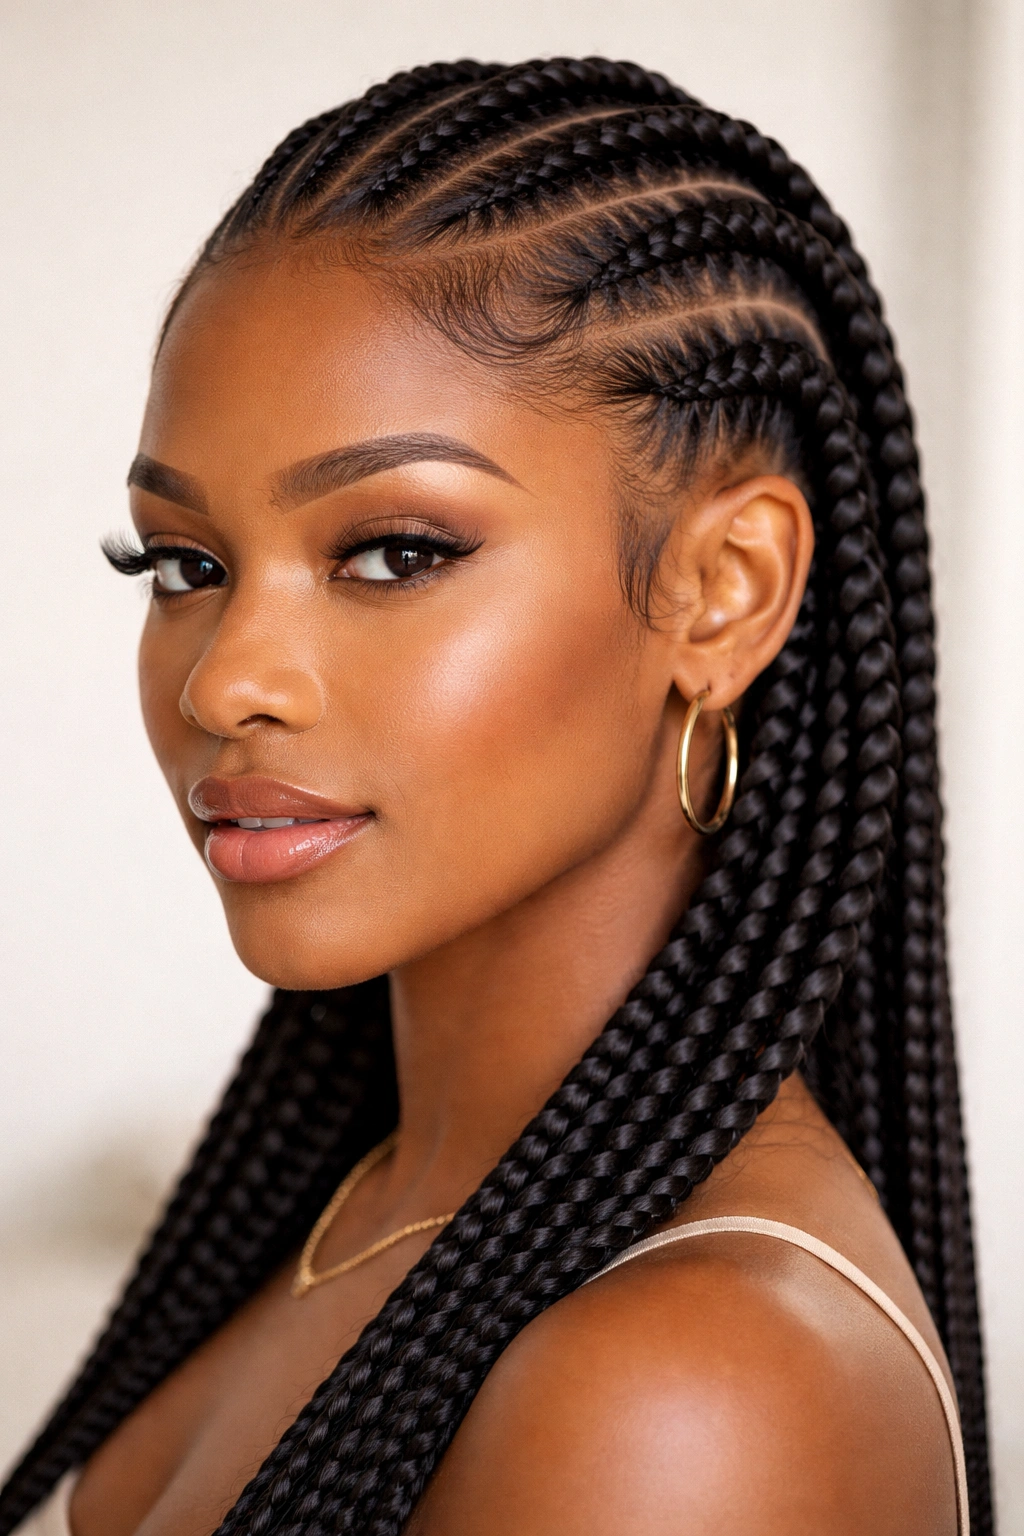
Feed-in braids are where technical skill meets artistry. Unlike box braids where you braid a section of your own hair from root to tip, feed-in braids gradually introduce the braiding hair as you go, creating a style that appears to grow directly from your scalp. For natural afro hair, this technique is absolutely transformative—it creates gorgeous, defined edges, reduces tension at the roots, and looks incredibly polished.
The Technique Explained
Feed-in braiding requires taking a tiny piece of your natural hair at the root and braiding it with a small amount of extension hair, then gradually adding more extension hair as you work down each section. This creates a tapered effect that looks incredibly intentional and neat. The result is braids that don’t show any harsh line where your natural hair meets the extensions—instead, there’s a beautiful, seamless blend.
Why Natural Hair Loves This Style
- Minimal tension at the scalp because the weight of the braid increases gradually, not all at once
- Creates the most polished, salon-quality appearance of any braiding technique
- Works beautifully for styles that frame your face—feed-in braids along the front are practically a signature look
- Lasts 6-8 weeks and actually tends to hold up better than box braids because the roots aren’t under constant tension
Maintenance Requirements
- Refresh the style with a mousse or gel around the edges to keep edges laid and neat
- These require skilled installation—they’re worth paying for professional work rather than attempting solo
- Keep your scalp moisturized because feed-in braids are tighter and can feel dry faster
4. Goddess Braids With Decorative Accents
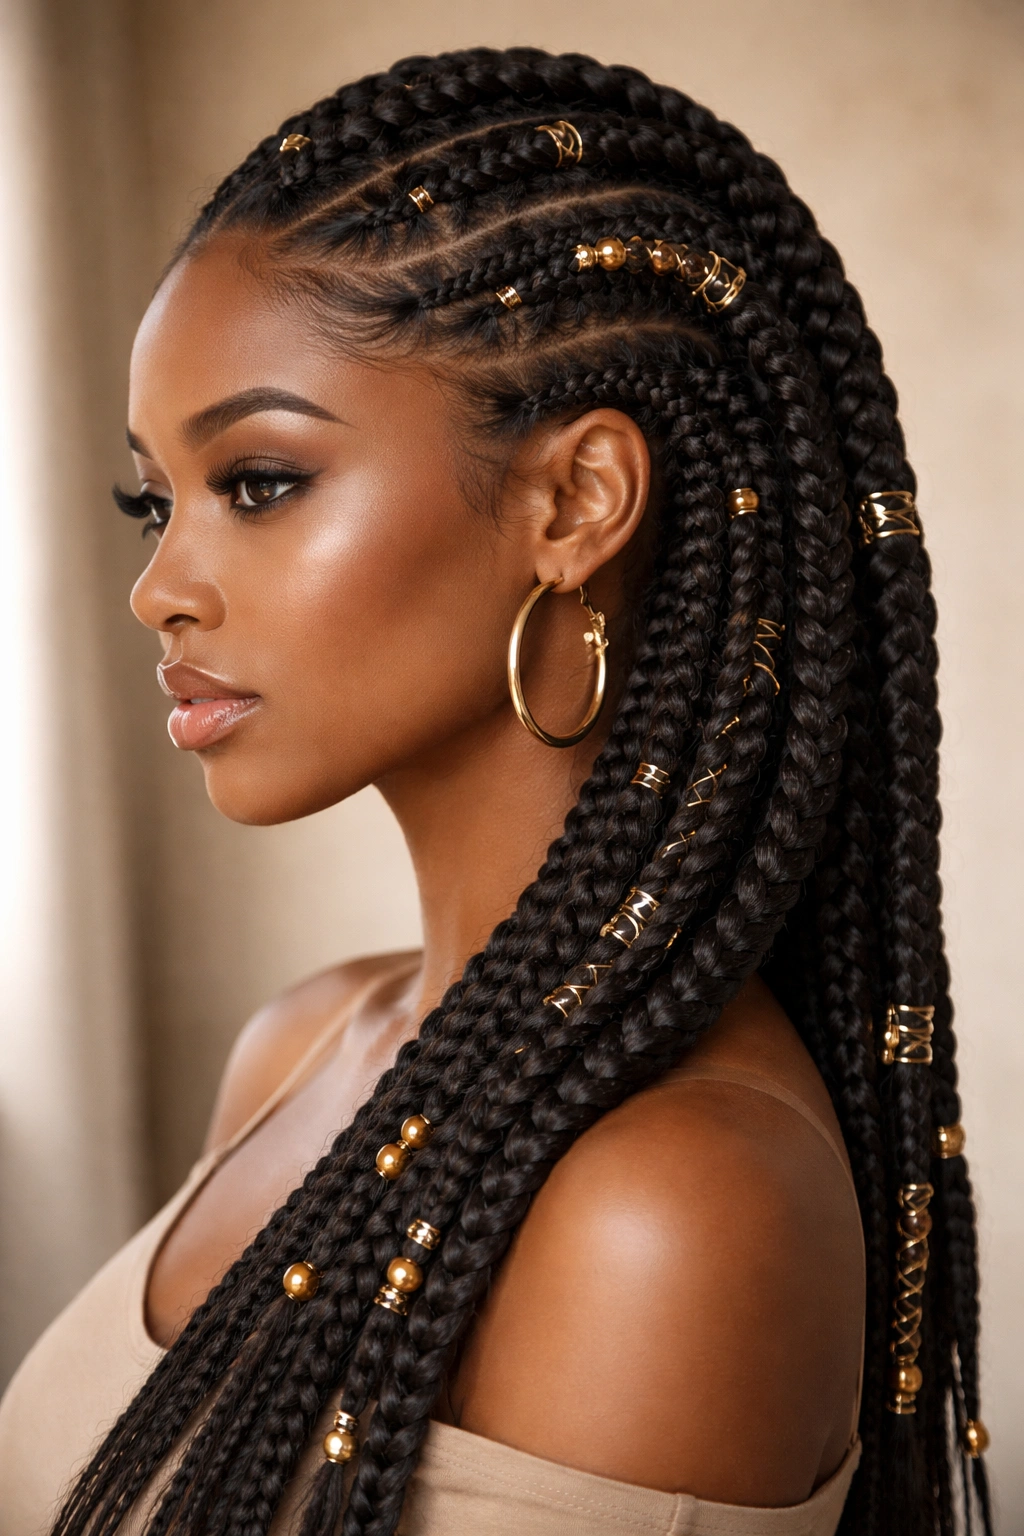
Goddess braids are thick, smooth braids (usually 4-8 per head) that sit on top of the scalp in a regal, ethereal way. They’re thicker and more elegant than box braids, require minimal daily styling, and genuinely make you feel like a queen. For natural afro hair, goddess braids are transformative because they’re so visual—each braid has room to show off dimension, texture, and any decorative elements you add.
Styling the Goddess Look
Start with deeply moisturized, detangled hair and create large sections (maybe 4-8 sections total, depending on the look you want). Braid each section using feed-in technique to ensure the roots are smooth and the braid is even. You can wear them swept to one side, pinned into an updo, or styled in a halo around your head. The beauty of goddess braids is how customizable they are—they work draped, pinned, curled, or adorned with jewelry.
Decorative Options That Complement Natural Hair
- Wrap thin gold or silver wire around the braids for an ethereal, bohemian vibe
- Attach small charms, beads, or shells at the ends of braids for texture and personality
- Intertwine delicate scarves or ribbons through the braids as you create them
- Create curls at the ends of the braids by wrapping them around a rod or perm rod while damp
- Add decorative hair cuffs at strategic points along the braids
Real talk: Goddess braids typically last 3-4 weeks max because the thicker braids can’t withstand extended wear as well as traditional box braids. But honestly, they’re such a stunning statement that you won’t mind installing them more frequently.
5. Fulani Braids for Cultural Expression
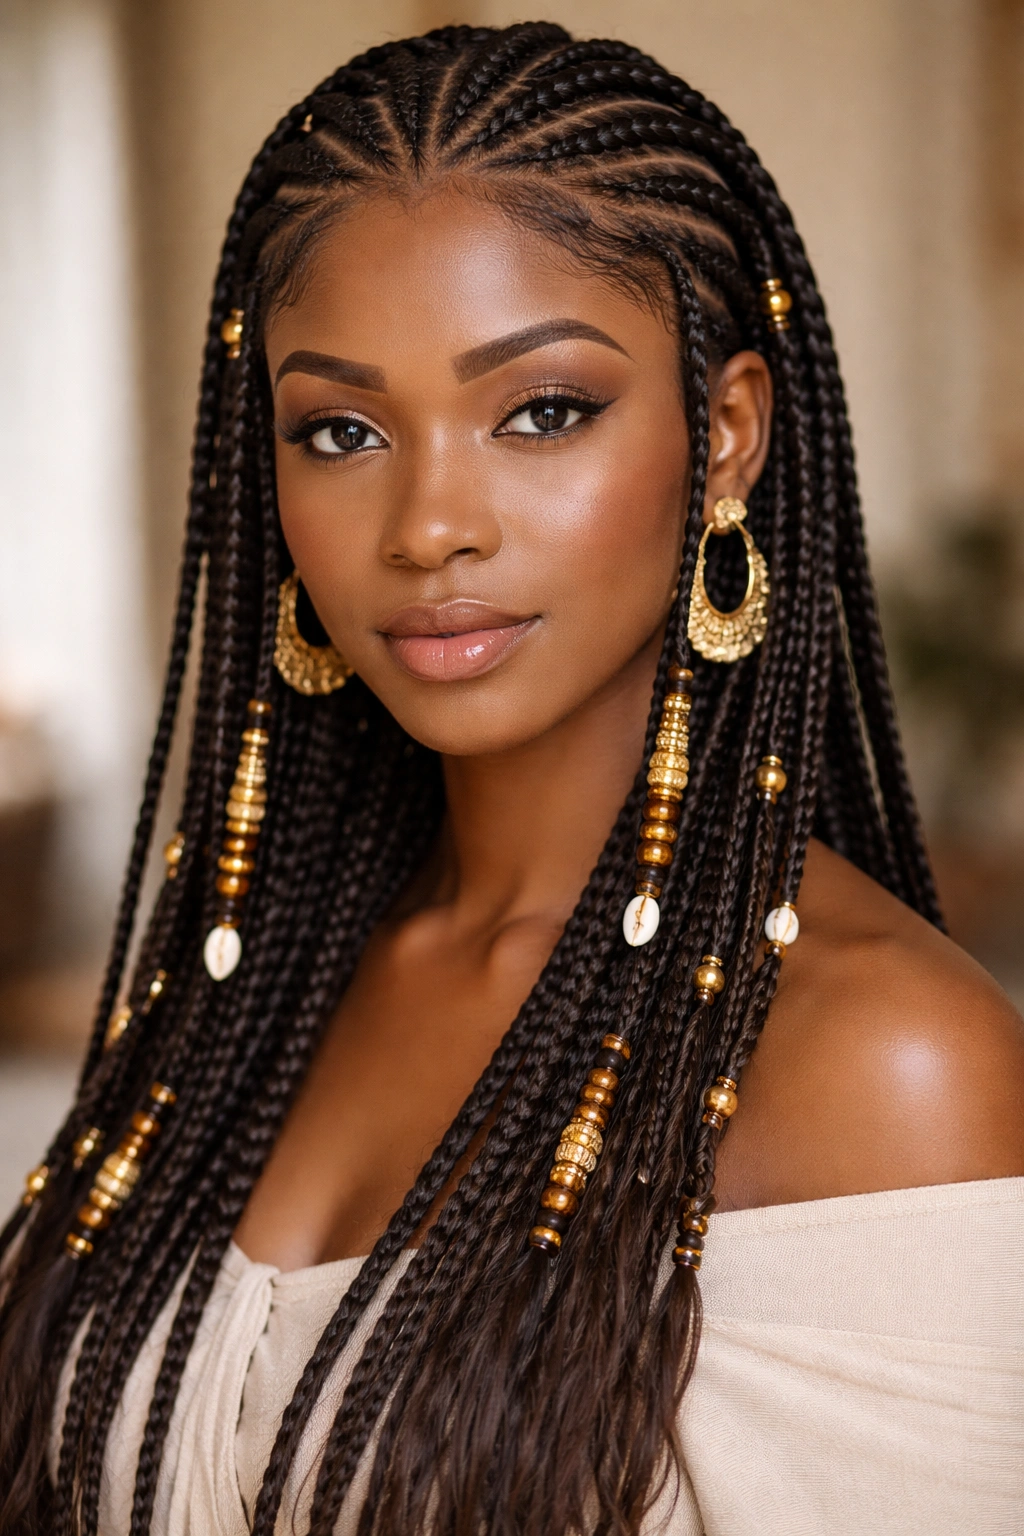
Fulani braids are a traditionally protective style with deep cultural roots in West African heritage. The style features cornrows (usually 3-5 thick braids) running from front to back along the center of the head, with small braids framing the face and sometimes decorative beads or gold cuffs adorning the braids. For natural afro hair, Fulani braids are powerful—they’re protective, cultural, and genuinely beautiful.
The Classic Fulani Structure
Traditional Fulani braids always include cornrows creating the main lines of the style, delicate smaller braids framing the face and edges, and some form of ornamentation (traditionally cowrie shells, now often beads or gold jewelry). The cornrows are typically braided close to the scalp for a neat, defined look, and the smaller accent braids give the style its signature elegance. The result is a protective style that’s also deeply decorative.
Installing With Intent
- Start with clean, moisturized hair and create a clear grid for where your cornrows will sit
- Use feed-in technique on the main cornrows for a seamless appearance
- Create smaller, more delicate braids on the sides and front—these don’t need to be super structured
- Allow space in your plan for beads, cuffs, or shells that will hang from the braids
- This style typically takes 3-4 hours for professional installation
Cultural Respect Matters
Fulani braids carry cultural significance—they’re not just a style, they’re a celebration of West African heritage. Wear them with respect and awareness of their origins. If you’re not of Fulani descent, wearing the style should be about appreciation and celebration, not appropriation. Learning the history matters.
Pro tip: Fulani braids work best when you have at least 4-6 inches of natural hair to work with. Shorter hair makes the cornrows harder to anchor and less visually striking.
6. Micro Braids for Delicate, Lightweight Wear
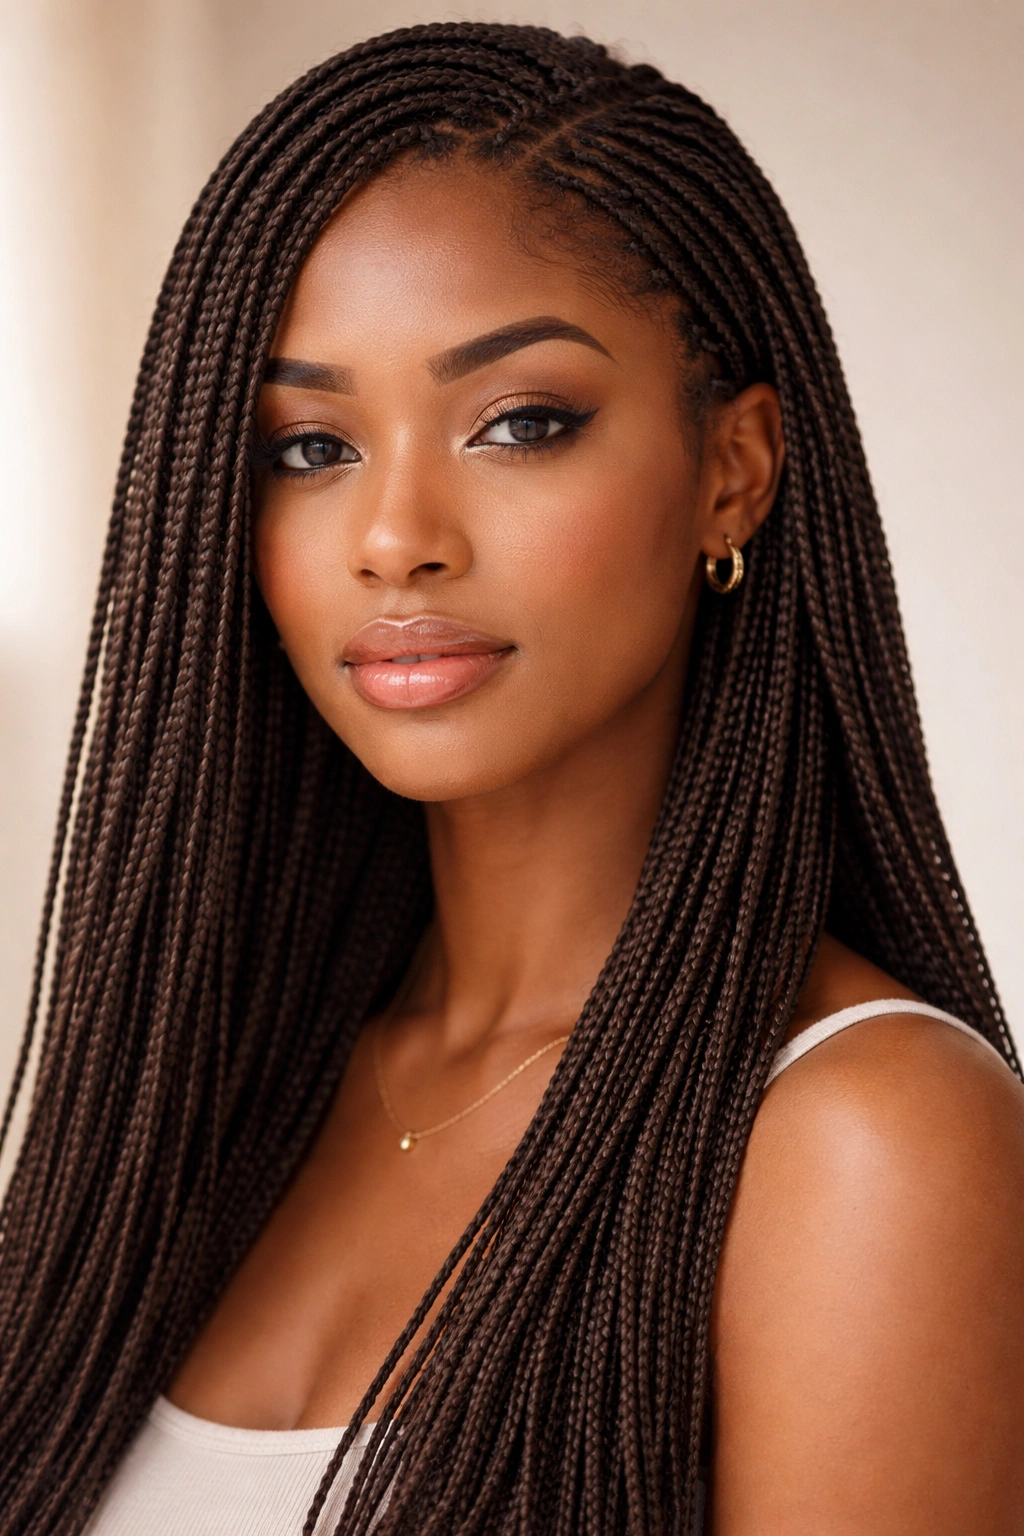
Micro braids are the ultimate low-manipulation protective style—they’re tiny (matchstick-thin), incredibly lightweight, and you can wear them for 8-12 weeks if your hair is in good condition. They require patience during installation (expect 6-8+ hours), but once they’re in, they’re legitimately hands-off. For natural afro hair, micro braids are protective because they keep your hair confined and undisturbed, but they’re also less harsh than larger braids because the tension is distributed across so many braids.
Is Micro Braiding Right for Your Hair?
Micro braids work best on fine to medium hair thickness. If you have very thick, coarse hair, the braids might feel too tight or uncomfortable—and if your hair is on the finer side, micro braids can sometimes feel too heavy overall. You also need honest-to-goodness patience, because even though a professional is doing the installation, you’re looking at a serious time investment.
Installation Considerations
- Professional installation is really the only realistic option—this isn’t a DIY-friendly style
- Your natural hair needs to be in genuinely excellent condition because you’ll be wearing the style for months
- The installation process is long and can be uncomfortable; bring pillows, snacks, and entertainment
- You can sleep better with micro braids than with larger braids because they’re so lightweight
- Maintenance is surprisingly simple—refresh edges with mousse, keep your scalp moisturized, that’s it
The Longevity Factor
- 8-12 weeks is realistic wear time for healthy hair
- Your natural hair grows underneath the braids, which is actually great for growth
- You’ll need a retouch at the roots around week 6-8 if you want to extend wear time
- Taking them down is tedious but necessary—rushing through removal can damage your hair
7. Cornrows in Creative Patterns and Directions
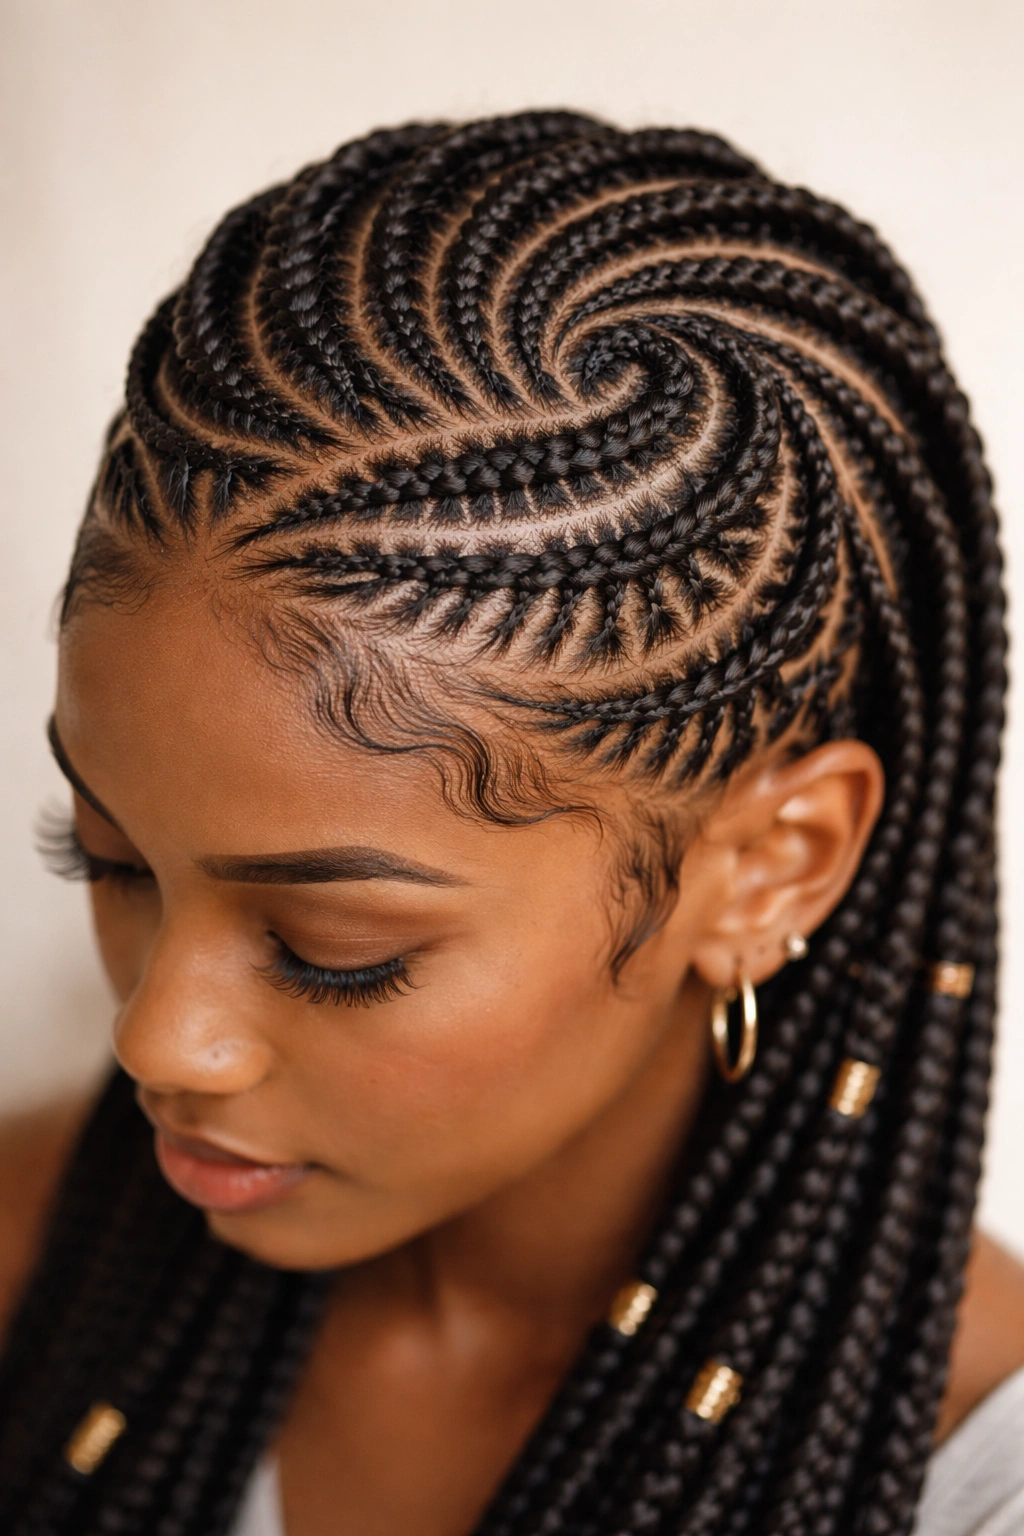
Cornrows are one of the most versatile protective styles available, and when you get creative with the patterns and directions, they become art. Instead of simple straight-back cornrows, imagine designs: curved patterns that follow the shape of your head, cornrows that create geometric designs, zigzag patterns, or even artistic freestyle designs. For natural afro hair, cornrows are protective, require minimal maintenance, and offer endless creative possibilities.
Pattern Ideas Beyond the Basics
- Curved cornrows: Braid in curves that follow the contours of your scalp, creating a wave-like appearance
- Zigzag patterns: Create angular, zigzagging paths instead of straight lines for a bold graphic effect
- Circular designs: Spiral cornrows from the center of your head outward, or create concentric circles
- Mixed thickness: Combine thick cornrows with delicate thin braids to create contrast and visual interest
- Freestyle patterns: Work with your stylist to design a one-of-a-kind pattern based on your vision
Installation Technique
Cornrows are braided close to the scalp, which means they require precision and skill. Each cornrow creates a defined line on your scalp, so the pattern has to be planned carefully. This is genuinely not a DIY-friendly style unless you have a lot of experience—creative cornrow patterns especially benefit from professional installation.
Worth knowing: Cornrows typically last 2-4 weeks on natural hair before they start looking fuzzy as new growth comes in. Some people find that loss of definition frustrating; others like the softer appearance that develops. Either way, plan for regular maintenance or accept that the style will evolve over time.
8. Passion Twists for Effortless Volume
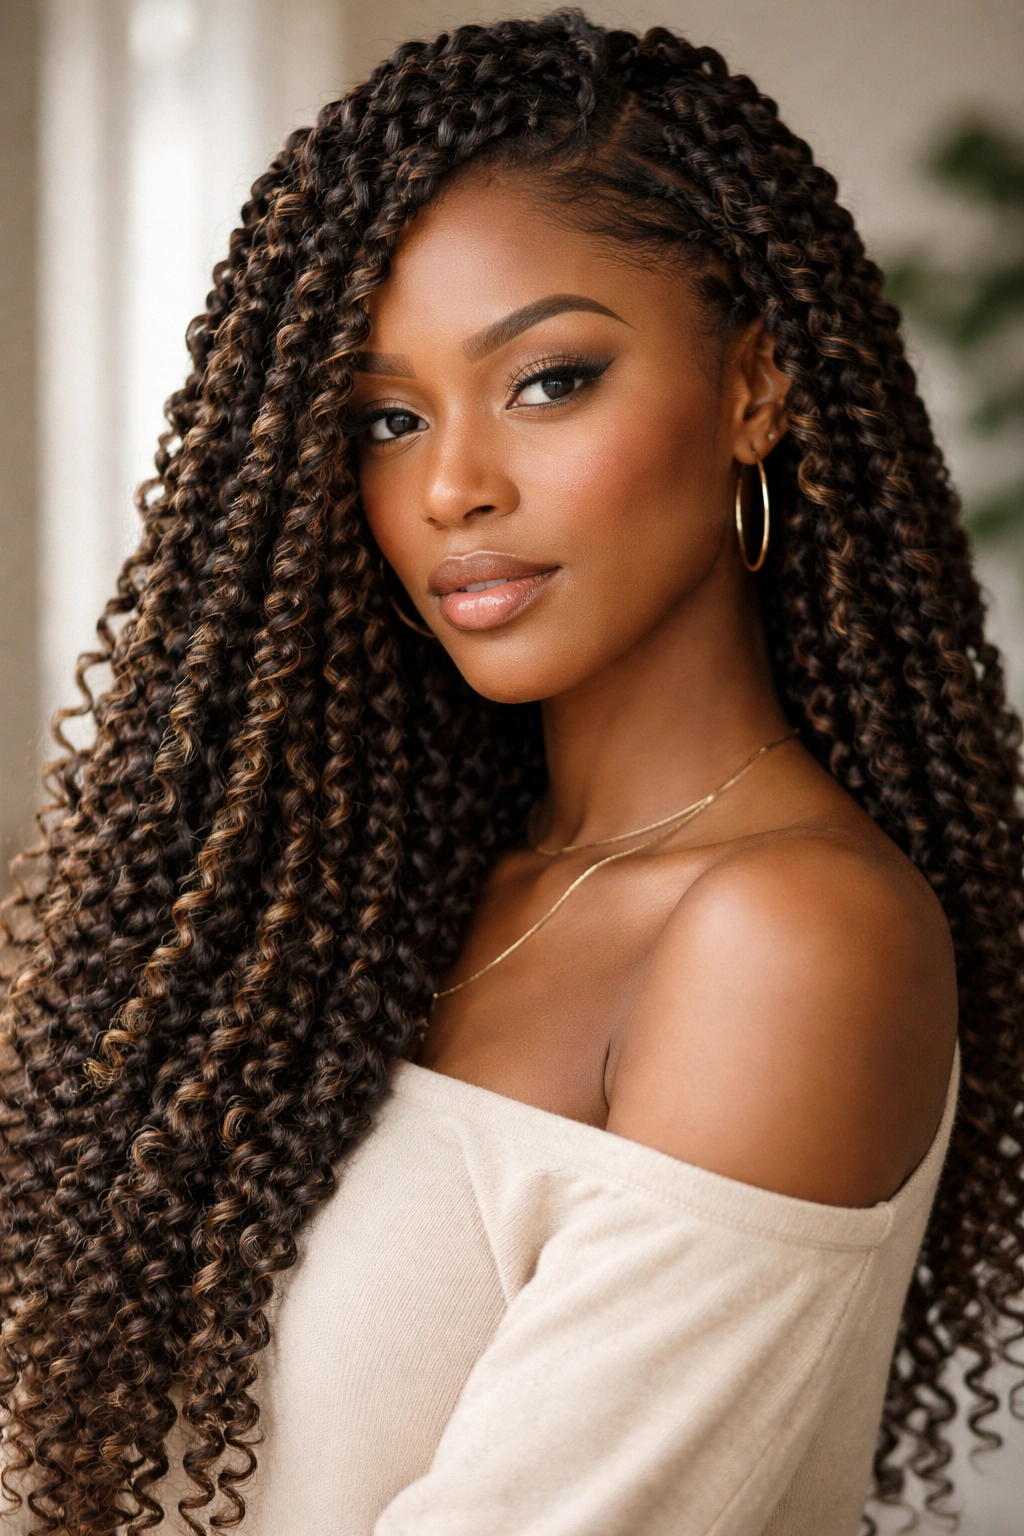
Passion twists are like the slightly softer, more relaxed cousin of box braids. Instead of tight braids, you’re creating two-stranded twists (created by twisting your natural hair together with extension hair), which gives you a protective style that looks fuller, more textured, and honestly, more fun. Passion twists are lighter weight than braids, feel softer to touch, and create a more casual vibe while still offering genuine protection.
Creating the Twist Texture
Start with clean, moisturized hair and section it the same way you would for box braids. Instead of braiding, take one piece of your natural hair and one piece of extension hair and twist them together down the length of the section. The magic of twists is that they look fluffier and more dimensional than braids—the twisted texture reflects light differently and creates visual interest. You can make them as neat or as textured as you want.
Why Twists Feel Different Than Braids
- They’re lightweight and comfortable for longer wear (4-6 weeks typically)
- The texture is softer and less defined, creating a more casual look
- They’re less tension-heavy on your scalp because the twisting motion distributes stress differently than braiding
- They work beautifully on all hair textures, from fine to thick
- Sleeping is more comfortable with twists than with braids
Styling Possibilities
- Wear them down and voluminous as-is
- Twist them up into buns or updos
- Create braids by plaiting twists together
- Braid-out the twists for incredible wavy texture
- Customize with beads, cuffs, or other decorations just like box braids
Pro tip: Twist while your hair is still slightly damp—this helps the twists lock in better and look neater once fully dry.
9. Senegalese Twists for Polished Elegance
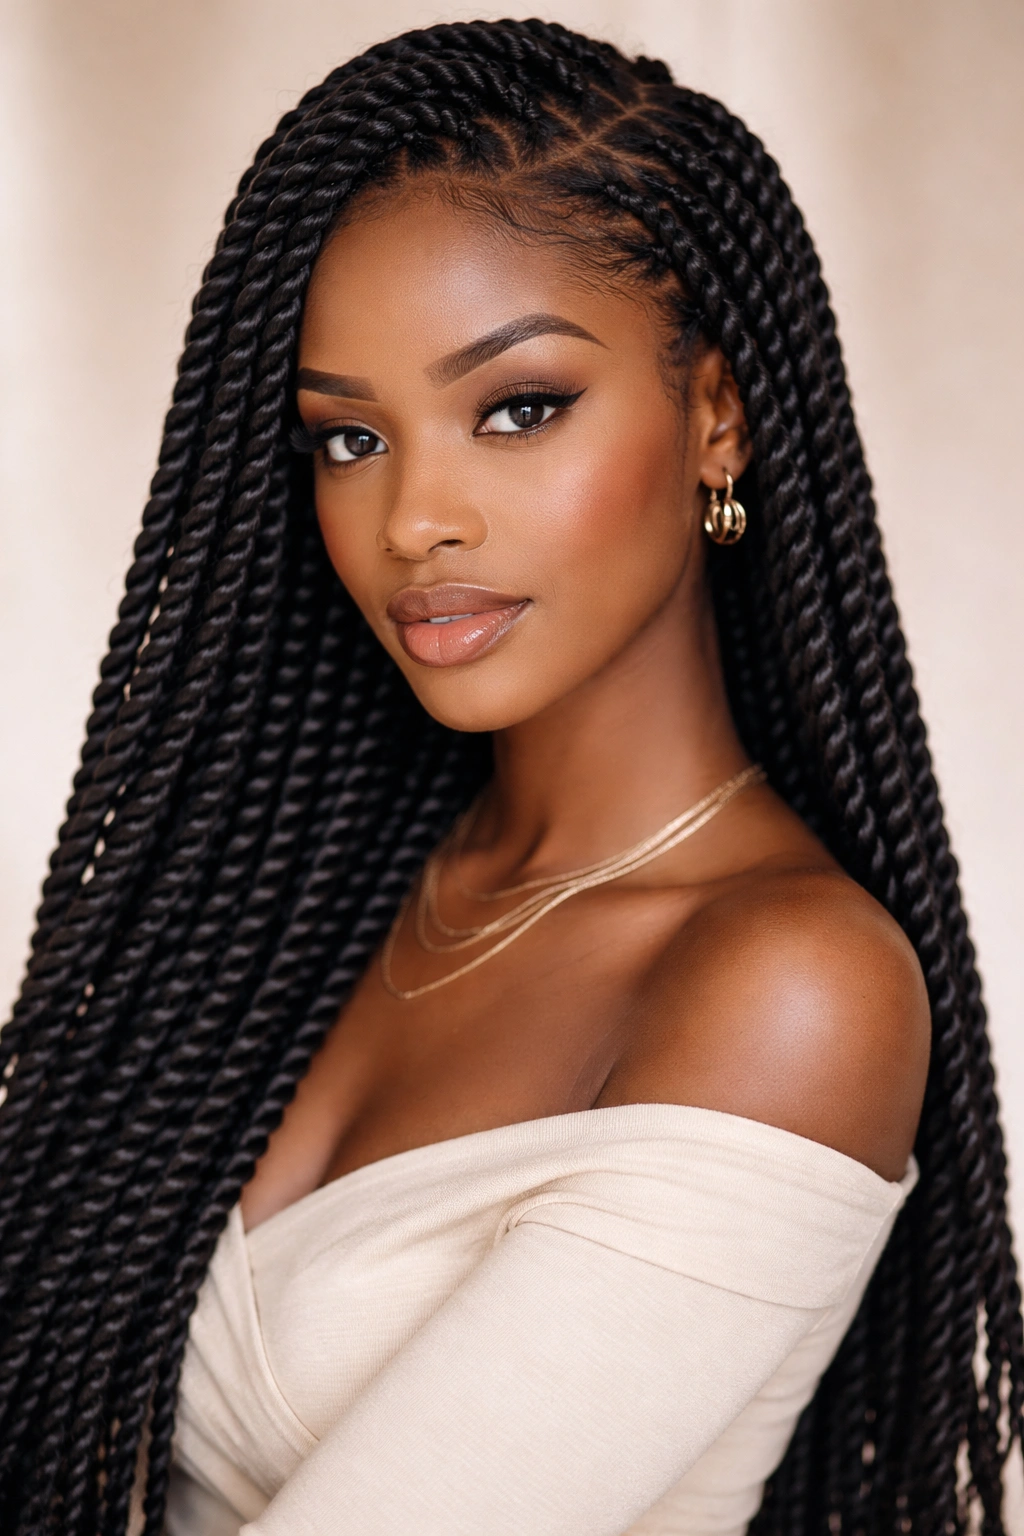
Senegalese twists are what happen when you make twists with three strands instead of two—the result is a twisted braid that’s thicker, sleeker, and more structured than passion twists, but softer and more elegant than traditional box braids. They have a sophisticated, polished appearance while still being protective and relatively low-maintenance. For natural afro hair, Senegalese twists are absolutely stunning.
The Three-Strand Technique
Instead of twisting two strands together, you’re creating a three-stranded twist with your natural hair and two strands of extension hair (or sometimes just twisting three strands of extension hair around your natural hair). This creates a thicker, rounder twist that looks more defined and sits differently on your head than two-stranded twists. The result is sleek, elegant, and honestly quite striking.
Installation and Wear Time
- These typically take 4-5 hours for professional installation (faster than box braids, similar to goddess braids)
- They last 4-6 weeks with proper maintenance
- The thicker twists mean less scalp coverage compared to thinner protective styles, so they’re not quite as protective
- They’re comfortable for sleeping and daily wear
- Maintenance is minimal—just keep your scalp moisturized and refresh edges as needed
Styling Versatility
- Wear them down in their full length and texture
- Pin them into buns, twisted updos, or wrapped styles
- Create braid-outs by undoing the twists and re-braiding for wavy texture
- Decorate with beads, cuffs, or scarves as you install them
- Style them half-up, half-down, or however your mood takes you
10. Two-Strand Twists for Protective Simplicity
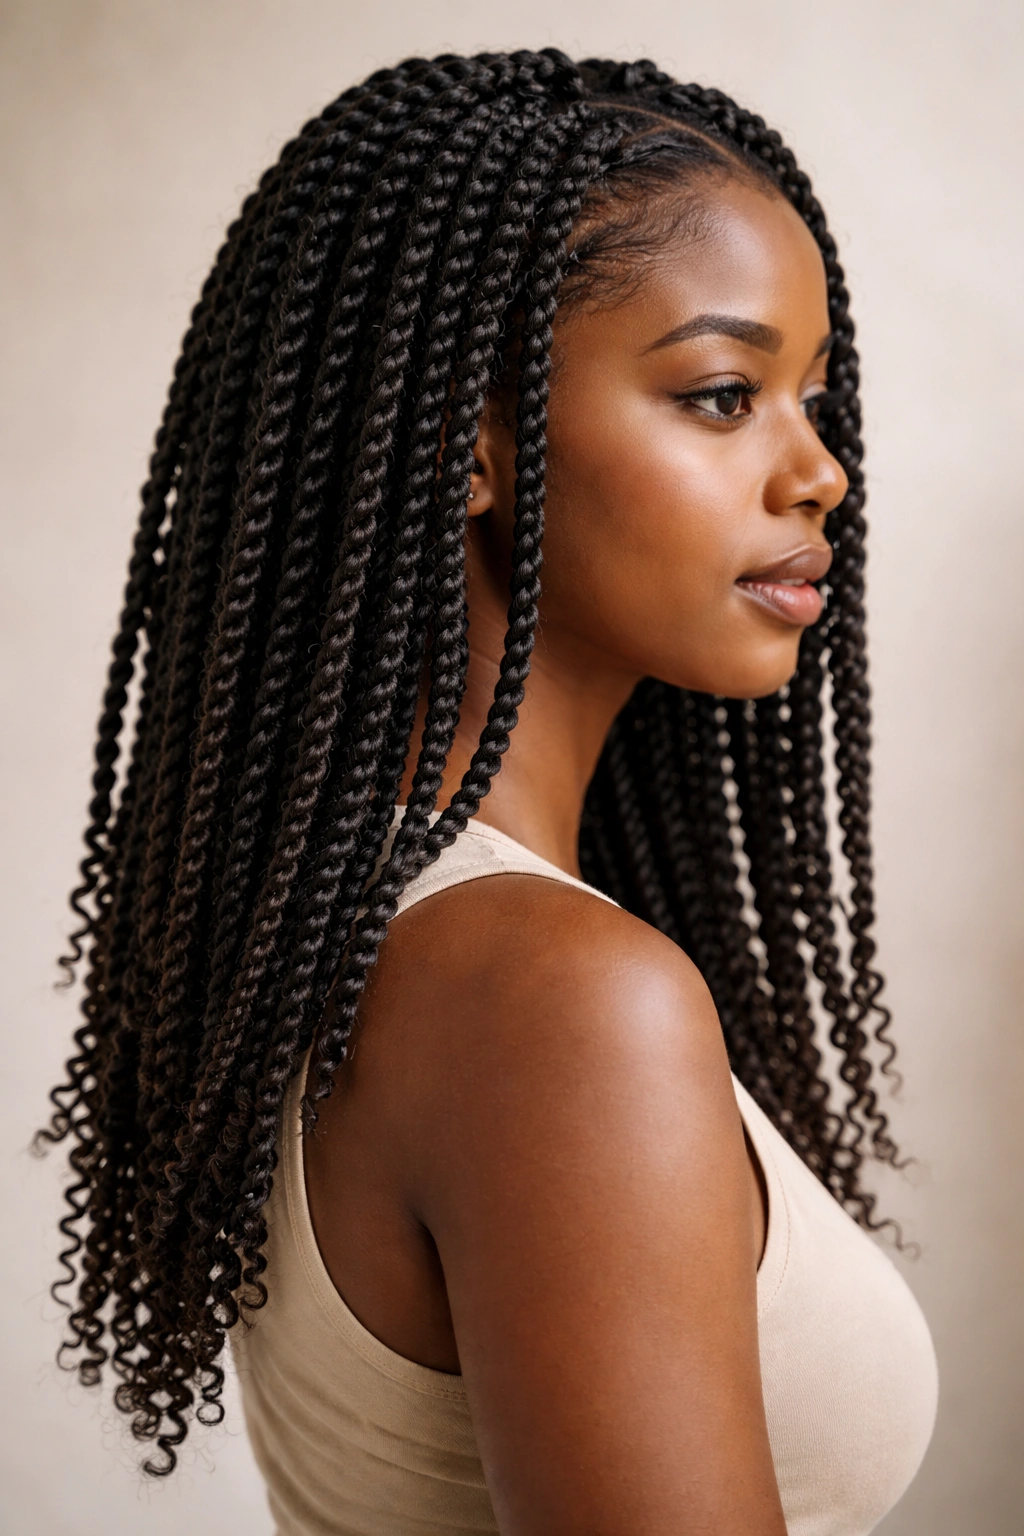
Two-stranded twists are the most fundamental protective style—take your natural hair, add extension hair, twist them together, and you’re done. What makes them work is their simplicity: they’re fast to install (3-4 hours), lightweight, comfortable, and genuinely protective. For natural afro hair, two-stranded twists are honest, unfussy protection that lets your hair rest while looking intentionally styled.
Why Simple Is Often Best
Two-stranded twists don’t try to be anything other than what they are—simple, elegant twists that protect your ends and give your hair a break. There’s something beautiful about that straightforwardness. You’re not covering your natural hair completely like you might with synthetic braids; instead, you’re enhancing it, making it thicker and more styled while keeping it relaxed.
Installation Basics
- Create sections in whatever size appeals to you—standard twists use small ½-inch sections, but you can go larger for fewer, thicker twists or smaller for more, delicate twists
- Moisturize your hair thoroughly before installing
- Twist while your hair is slightly damp for better lock-in
- These work beautifully on freshly washed hair
- Take time during installation to really moisturize—twists work best when your hair is well-hydrated
Maintenance for Longevity
- Refresh your edges regularly to keep the style looking neat
- Sleep in a bonnet or scarf to maintain the twist definition
- These can last 4-8 weeks depending on how well you maintain them
- As your natural hair grows and the twists loosen, you’ll get beautiful texture
Real talk: Two-stranded twists unravel faster than braids, so they’re not the longest-lasting protective style. But they’re protective enough and they feel so good that most people don’t mind the shorter wear time.
11. Side-Swept Braids and Half-Up Styles
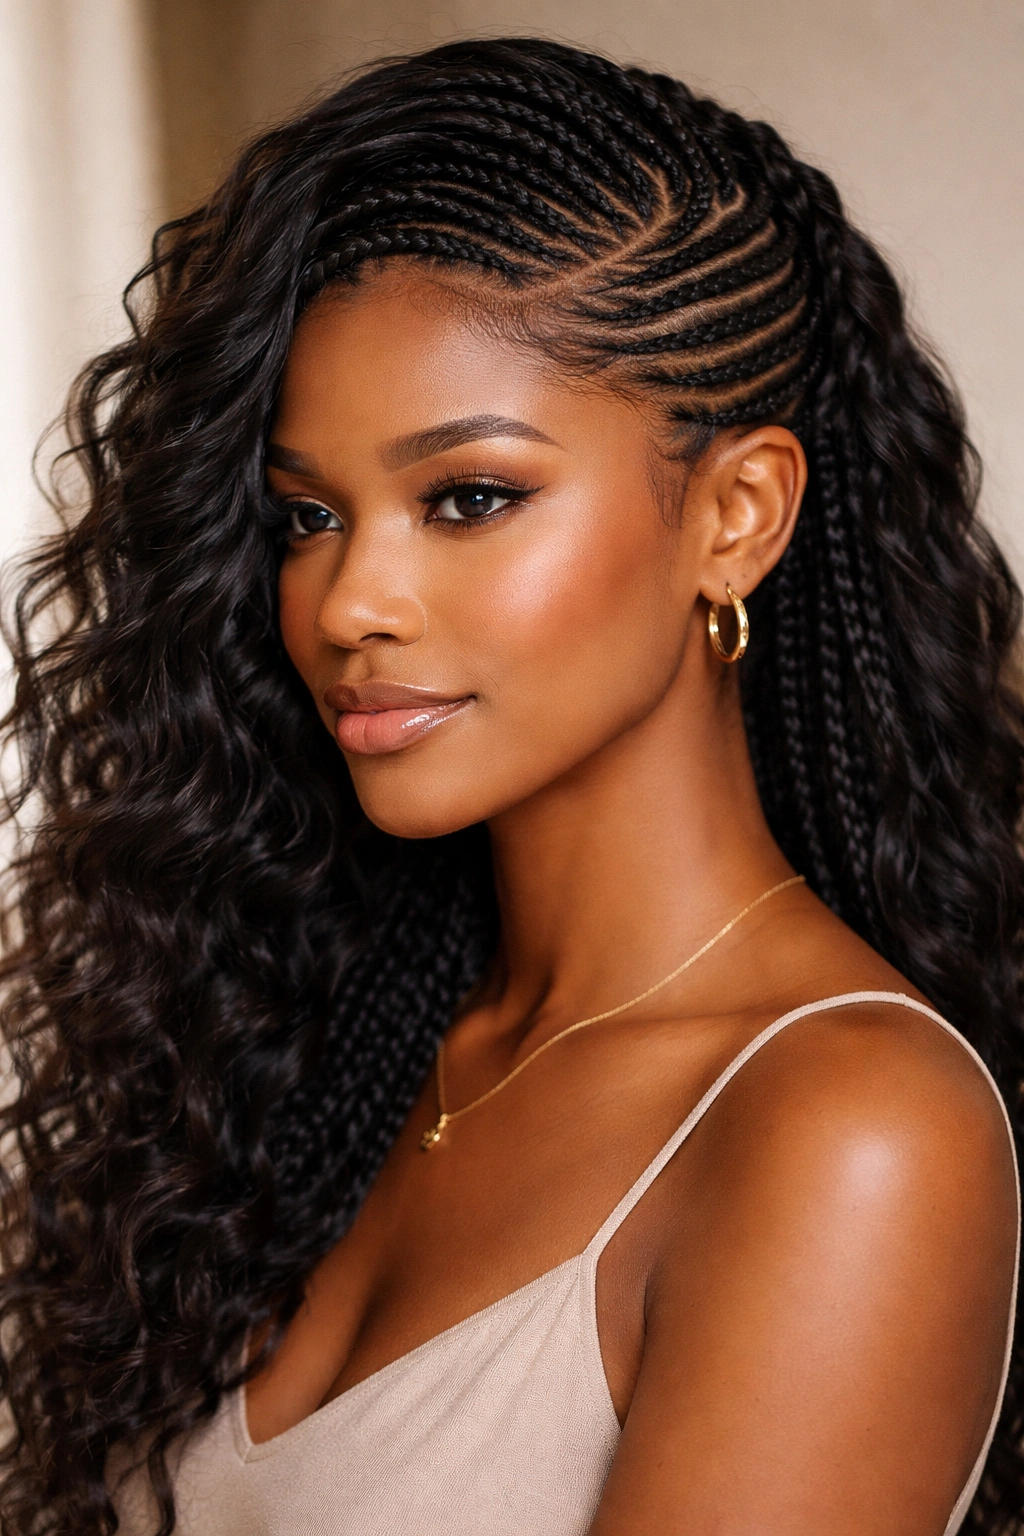
Not every protective style has to be symmetrical and structured. Side-swept braids—where you braid one side of your head and sweep the braids over to create an asymmetrical, romantic look—are a beautiful way to protect your hair while feeling effortlessly styled. Similarly, half-up styles where you braid the top portion of your hair and leave the bottom free create a look that’s protective without being committal.
Creating the Asymmetrical Look
Start by identifying which side of your head you want to emphasize. Create feed-in braids (or cornrows, or large goddess braids—the technique is flexible) along one side, then sweep them across to the other side and pin them down. The loose sections on the opposite side can be left as curls, braided again, or twisted. The result is a look that feels romantic, intentional, and genuinely protective (at least for the braided portions).
Half-Up Protective Styling
Take the top 40-50% of your hair, section it into braids, twists, or cornrows, and secure them into a ponytail or bun at the crown. Leave the bottom 50% loose to do its own thing. This approach protects the most fragile part of your hair (the top/crown area) while letting the rest enjoy freedom. It’s particularly good if you’re not ready to fully commit to a fully protective style.
Best Practices for Asymmetrical Styles
- These styles require more daily maintenance than full protective styles because part of your hair is loose
- They typically last 2-4 weeks before you’ll want to refresh them
- They work beautifully as a stepping stone between fully loose hair and full protective styles
- Sleep with the loose portions in a bonnet to maintain definition
Pro tip: Asymmetrical styles look best with some movement, so don’t braid or twist too tightly. Leave room for your natural texture to show through.
12. Braided Crown and Halo Styles for Special Occasions
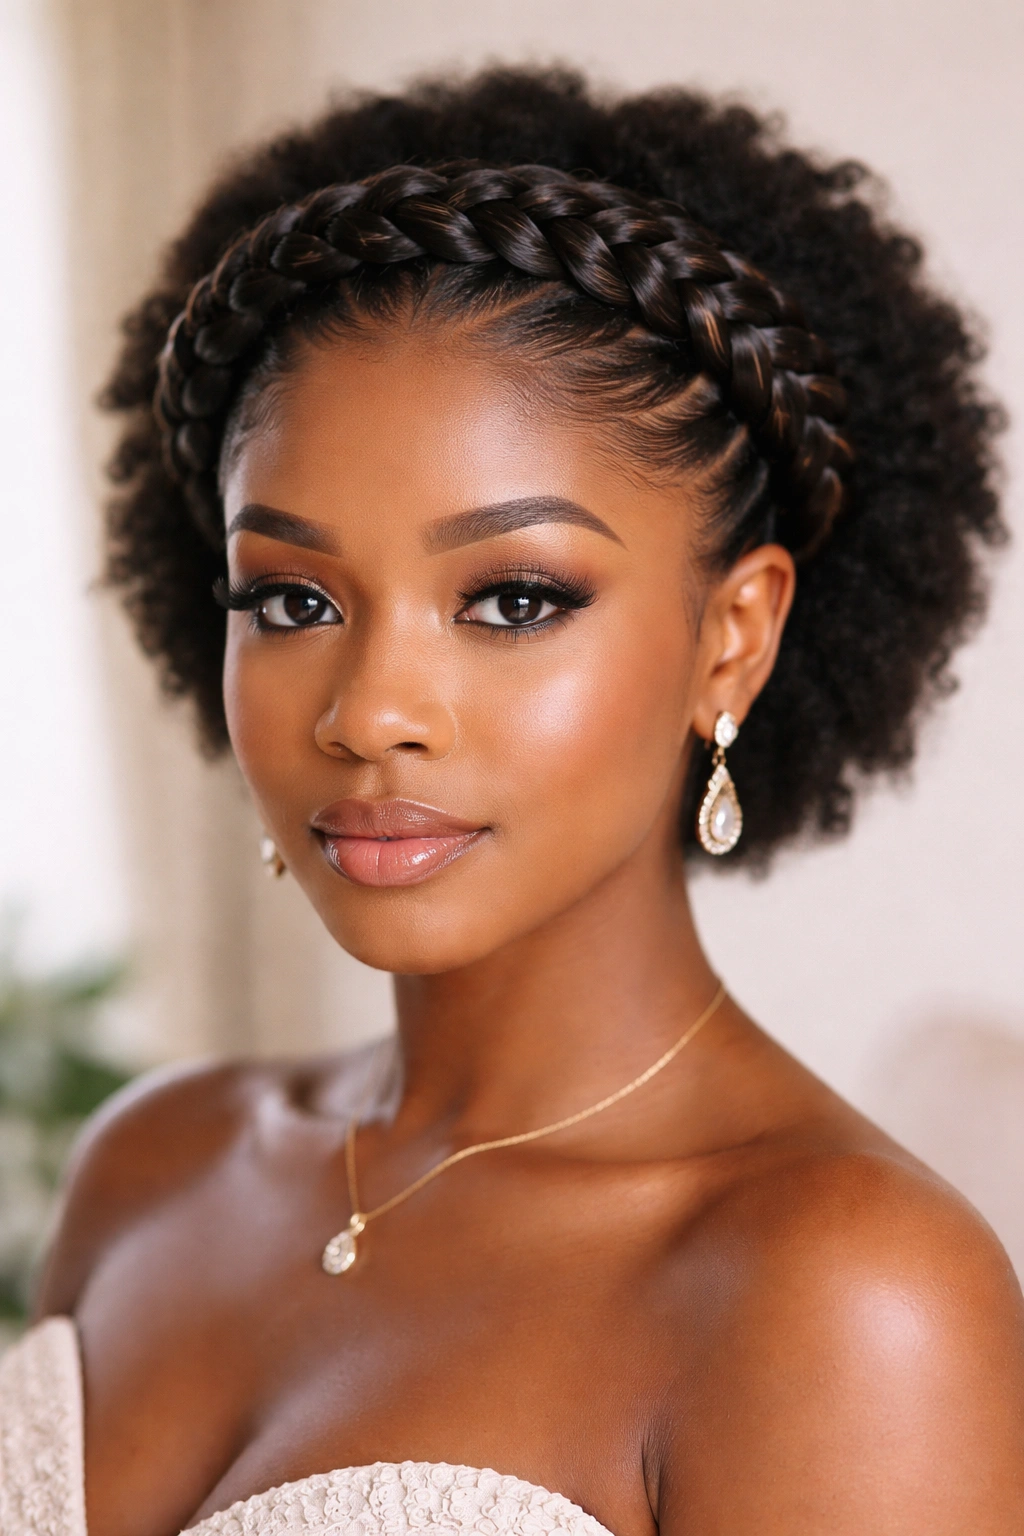
Braided crowns and halos are protective styles that double as utterly gorgeous special-occasion looks. Imagine thick braids (usually feed-in or goddess braids) that start at one temple, sweep across the top/back of your head like a crown or halo, and end at the opposite temple. They’re protective, stunning, and make any event feel special.
Creating the Crown Effect
Start with braids on one side of your head and gradually guide them across the top, securing them carefully at the back and sweeping them across to the opposite side. The braids should sit on top of your head rather than flat against your scalp (though some people prefer the tucked-in flat approach). The crown effect comes from the way the braids frame your face and create a defined line across the top of your head.
Decoration and Customization
- Wrap thin gold or silver wire through the braids for elegance
- Attach delicate jewelry, pearls, or crystals to the braids
- Add fresh flowers tucked into the braids for events
- Intertwine ribbons or scarves for color and texture
- Keep the look minimal and let the braids be the star
Wear Time and Care
- These styles can last 3-6 weeks depending on how well you care for them
- They’re less practical for everyday wear (they’re a bit delicate and really designed to be admired)
- Sleep gently with these—use a silk or satin pillowcase to protect them
- They work beautifully for weddings, formal events, or any time you want to feel extra special
Worth knowing: If you’re planning to wear a crown or halo style for an important event, schedule installation at least one day before—your braids need time to fully set and look their absolute best.
Final Thoughts
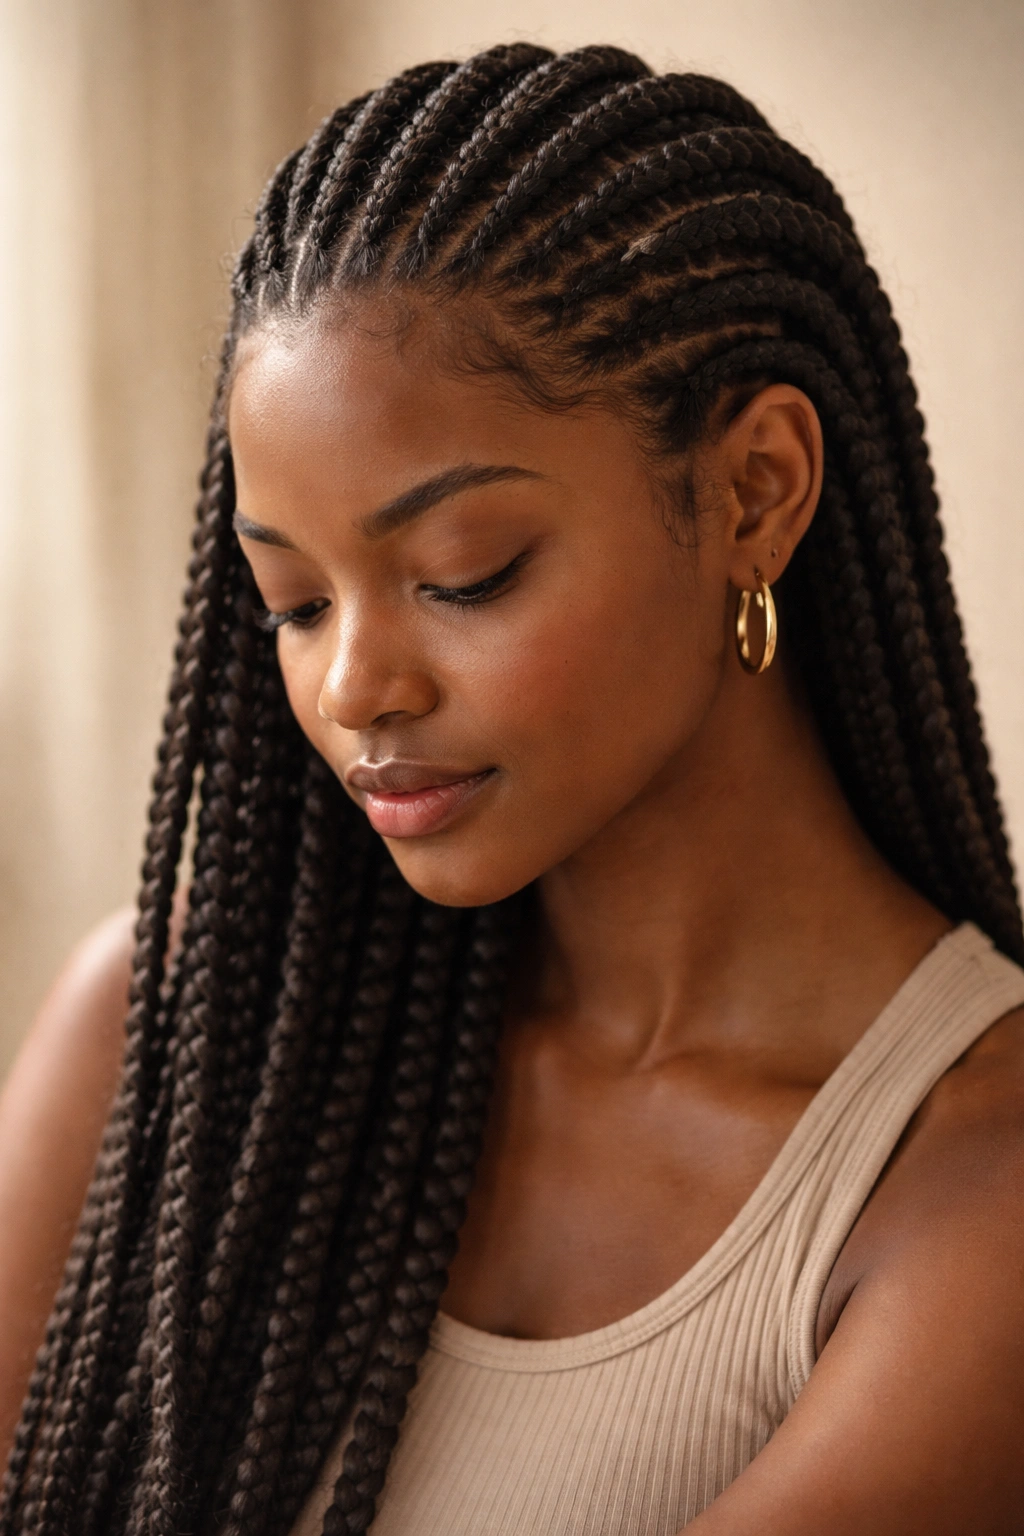
Natural afro hair braids are about so much more than just a protective style. They’re a way of honoring your hair’s texture, expressing your creativity, celebrating your heritage, and giving your curls the rest and protection they genuinely deserve. Whether you choose delicate micro braids that last months, bold jumbo braids that make a statement, intricate cornrow patterns that showcase artistry, or simple two-stranded twists that feel effortless, you’re making a choice to work with your natural texture instead of against it.
The right braid style depends on your hair’s texture, your lifestyle, how much time you want to spend on installation, and honestly, what makes you feel beautiful. Don’t feel locked into one style—try different braiding techniques, work with stylists who understand natural hair, and pay attention to what feels good on your scalp and what your hair responds to. Your natural hair is strong, versatile, and capable of holding whatever style you choose, as long as it’s installed with care and maintained with respect.
The most important thing? Choose styles that feel good, that celebrate your hair, and that let your natural texture shine. That’s when braids stop being just a protective style and become an expression of who you are.
