



When natural hair twists are done right, they become more than just a protective style—they transform into a statement. Springy twists that catch the light and move with energy showcase the texture and beauty of natural hair in a way few other styles can match. Whether you’re wearing them for a week or several weeks, the right twist style can make a real difference in how you feel about your look and how your hair responds to styling.
The magic of twists lies in their versatility and the way they work with your natural texture rather than against it. Unlike some styles that require heat or chemical manipulation, twists celebrate your curl pattern while giving you endless options for self-expression. You can go sleek and tailored, chunky and bold, delicate and intricate, or anywhere in between—and each approach creates a completely different vibe.
What makes a twist truly springy comes down to three things: how tightly you twist the sections, what products you use for hold and definition, and how you set them afterward. The springiness matters because it means movement, bounce, and that satisfying weight that feels both secure and free. A springy twist isn’t rigid or stiff—it’s responsive, it moves when you move, and it looks alive.
This guide walks you through eight distinct twist styles that work beautifully on natural hair, from chunky classics to delicate variations. Each one brings something different to the table, and by the end, you’ll know exactly which style matches your vibe, your hair length, your lifestyle, and the amount of time you’re willing to invest. Let’s dive into the possibilities.
1. Chunky Two-Strand Twists
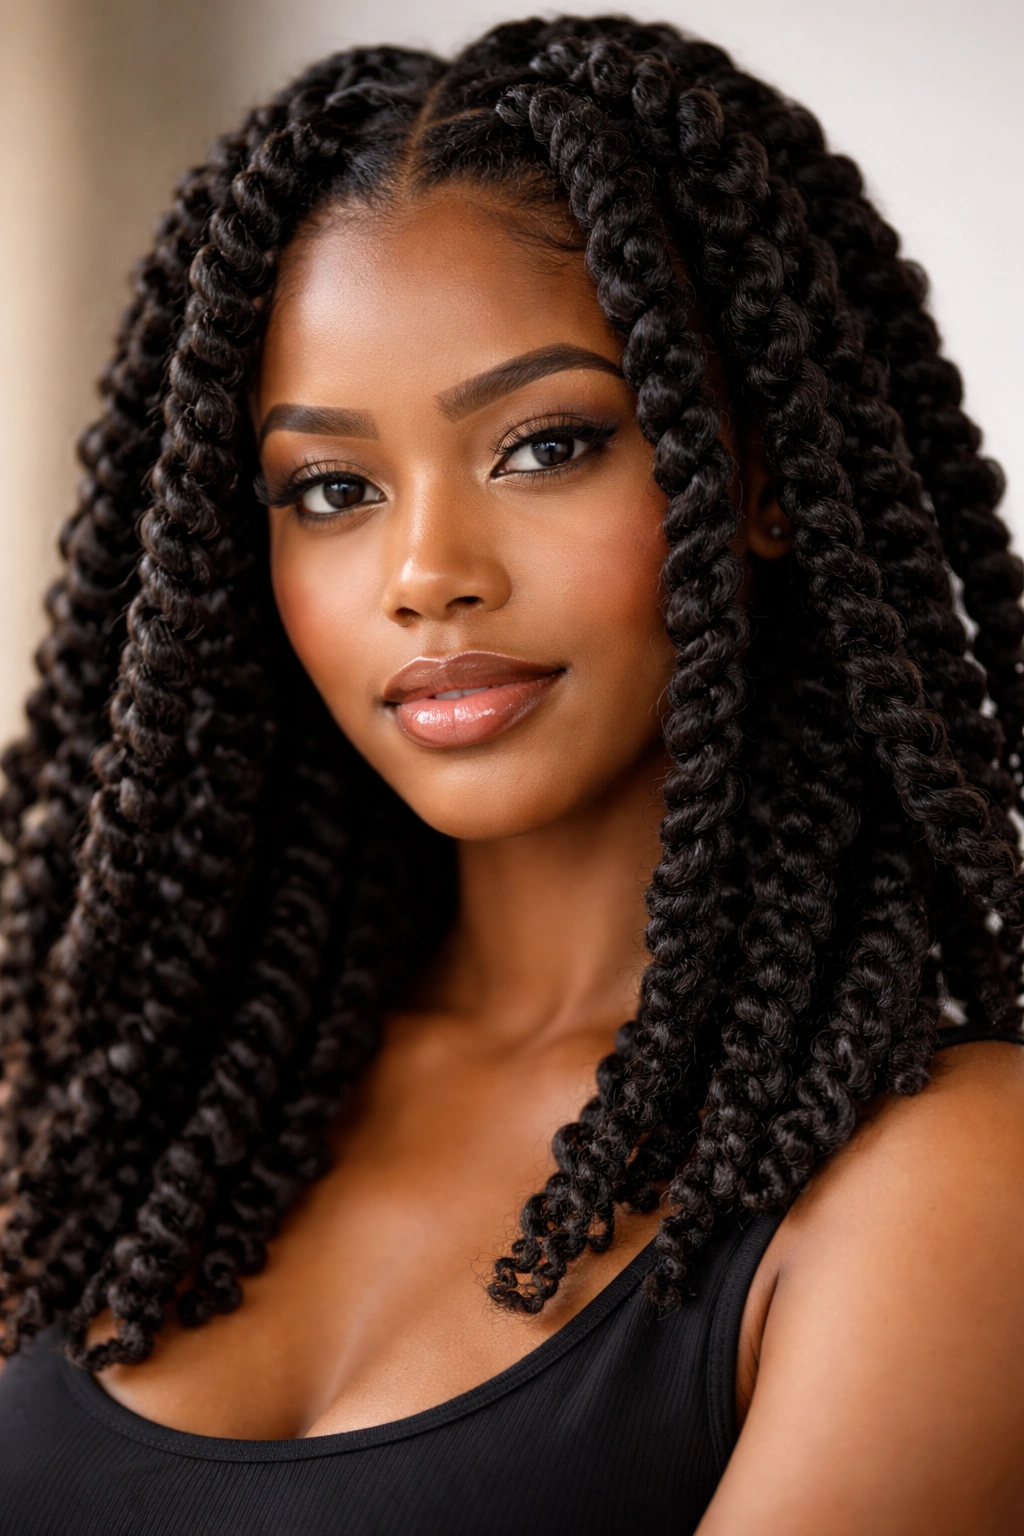
Chunky two-strand twists are the reliable workhorse of protective styling. They’re bold, they’re statement-making, and they’re forgiving enough for beginners while still looking polished in the hands of experienced naturals. These twists use thick, substantial sections that create defined spirals and a look that reads as intentional and confident.
The beauty of chunky twists lies in how quickly you can install them and how long they last. Because you’re working with larger sections, the entire process takes a fraction of the time it would with thinner twists. Most people can complete a full head of chunky twists in three to five hours, depending on hair thickness and length.
Why Chunky Twists Stand Out
Chunky twists create a sculptural effect that frames the face beautifully and shows off your natural texture in bold relief. The thicker strands mean less tension on your hairline while you’re twisting, which is especially important for preventing breakage. The springiness is usually more pronounced because each twist has more weight and momentum built into it.
What You Should Know About This Style
- Installation time: Expect 3–5 hours for a full head, making it ideal if you want something fast without sacrificing polish
- Longevity: These typically last 4–6 weeks without significant frizz or loosening, especially with proper nighttime wrapping
- Scalp health: The larger sections mean better airflow to your scalp, reducing buildup and itching during the wear period
- Styling versatility: Chunky twists pin up beautifully into buns, ponytails, and half-up styles for variety throughout the week
- Best for: Shoulder-length to long hair; shoulder-length hair shows the dimension best; fine to medium hair textures that need definition
Pro tip: Use a heavier styling cream or gel on each section before twisting. The extra product weight actually helps the twists stay springy because it gives them something to grip and hold their shape against. Lighter products often lead to premature frizz.
2. Thin Defined Twists
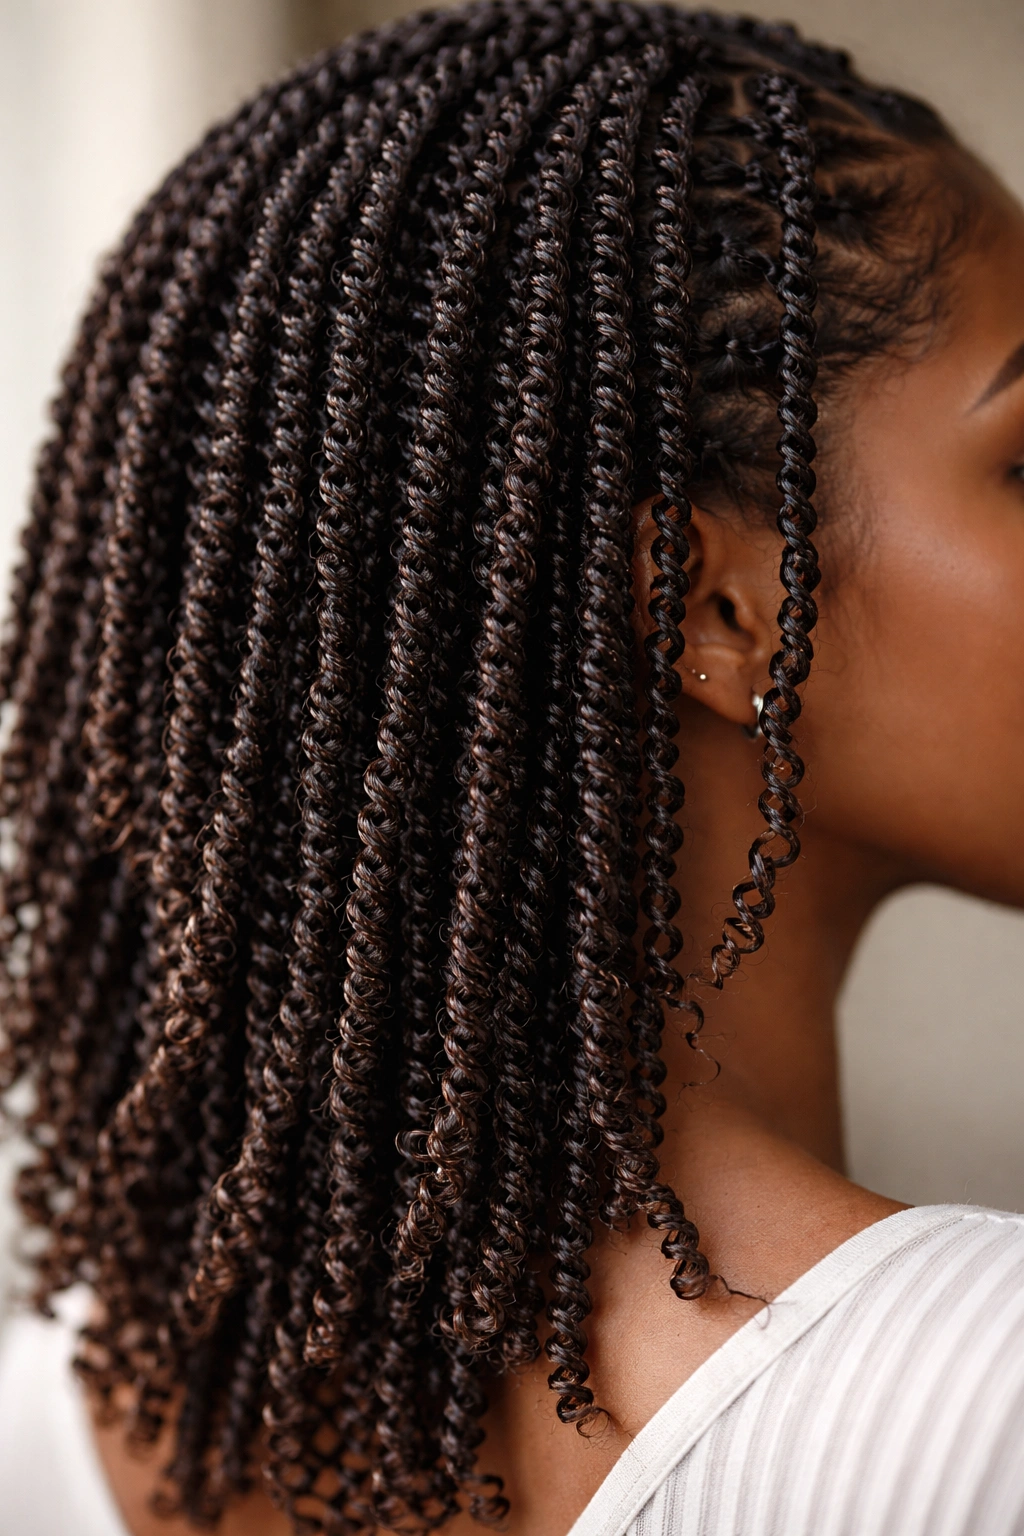
Thin defined twists take the opposite approach from chunky twists—they’re intricate, detailed, and create a sophisticated, polished look that reads as high-effort even when installation becomes quicker with practice. These twists work with narrow sections that showcase every spiral and deliver serious visual impact.
Thin twists demand more time and more precision, but the payoff is a style that feels like wearable art. Your curl pattern becomes the star, and every inch of twist shows dimension, movement, and personality. The springiness of thin twists is often the most pronounced because each thin section can bounce and move independently.
How to Achieve Perfect Definition
The difference between thin twists that look fuzzy and thin twists that look sharp comes down to product choice and technique. You need a product with strong hold that won’t flake or feel crunchy—think creamy gels, twist creams, or lightweight pomades specifically formulated for twists. Apply product generously, but not so much that it drips or separates the two strands.
Key Details About Thin Twists
- Installation time: Plan for 6–8 hours for a full head, but the intricate payoff makes it worth the investment
- Tension management: Work slowly and deliberately; thin twists can pull more easily if you twist too tightly out of habit
- Frizz control: These show every loose hair and every day of wear, so expect maintenance with a moisturizing spray and careful finger-combing every few days
- Longevity: 3–5 weeks typically, with intentional maintenance; some people get 6 weeks with excellent care
- Curl pattern emphasis: Perfect for showcasing coils, waves, or tight curls because the narrow twist shows every turn in your natural texture
Worth knowing: Install thin twists when your hair is freshly washed and conditioned. Older hair that’s been dry for a few days will frizz faster and feel more brittle. The added moisture and slip from just-washed hair makes the twisting process smoother and the final result last longer.
3. Rope Twists
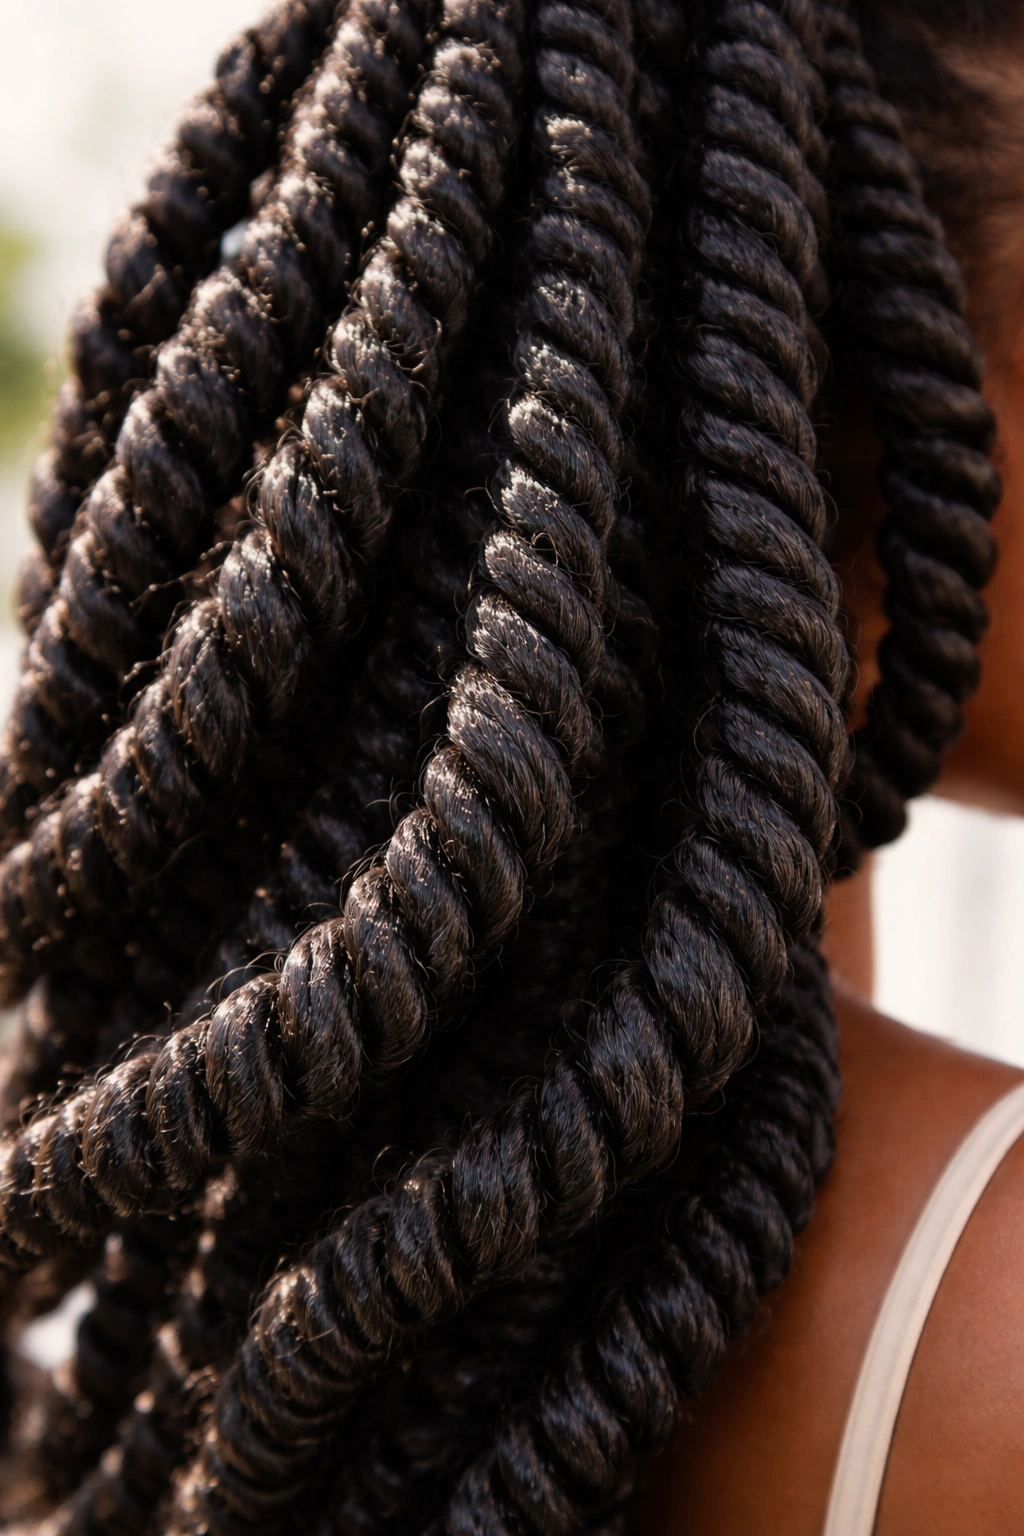
Rope twists sit somewhere between two-strand twists and something entirely their own—they’re created by twisting two strands together, then wrapping that twisted unit around itself to create a thicker, more sculptural spiral. The result is a twist that looks almost like a tiny rope or cable, with more dimension and visual interest than a standard two-strand twist of the same width.
Rope twists create incredible spring and bounce because of how the twist is constructed. The double-wrapping builds natural elasticity and gives the twist the ability to bounce back into shape even after hours of sleeping on it. They’re surprisingly less maintenance-heavy than you might expect, and they look stunning when you want something that feels special.
What Makes Rope Twists Different
The construction method creates multiple layers of twist within a single strand, which means the overall visual effect is more intricate and complex than a two-strand twist of similar width. Light plays across the rope twist differently, highlighting the dimensional twists within the twist. This makes them especially stunning in photos and in natural sunlight.
Essential Information About This Technique
- Difficulty level: Intermediate to advanced; the wrapping method takes practice, but becomes intuitive after a few tries
- Best size range: Medium to thick sections work best; thin rope twists can become too dense and lose their springy quality
- Installation pace: Slower than two-strand twists because of the extra wrapping step, usually 5–7 hours for a full head
- Longevity: 4–6 weeks with excellent definition retention because the construction naturally resists unraveling
- Styling flexibility: Can be worn straight down, pinned into updos, or worn half-up with stunning results
- Hair type suitability: Works beautifully on medium to thick natural hair; fine hair can look too thin with this technique
Insider note: The wrapping tightness determines the springiness. If you wrap loosely, you get more bounce and movement. If you wrap tightly, the rope twist holds its shape more rigidly. Decide your bounce preference before you start and aim for consistency across your head.
4. Flat Twists
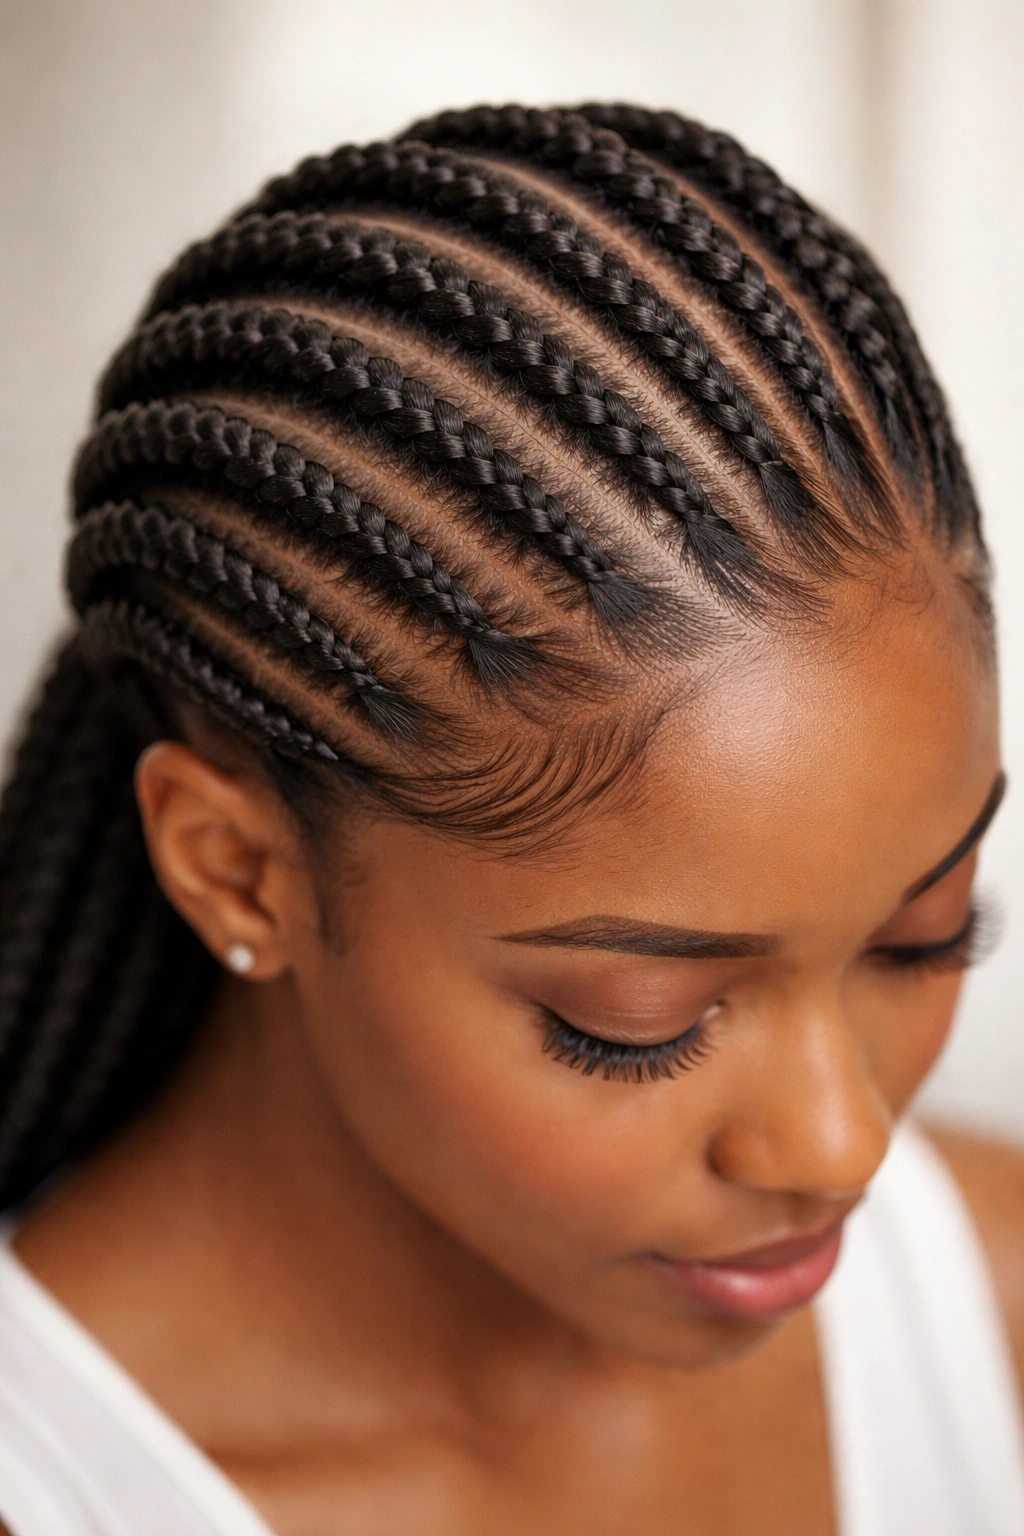
Flat twists are cornrow-adjacent protective styles that follow the scalp in a linear pattern, creating flat, elegant spirals close to the head. Rather than hanging loose like traditional two-strand twists, flat twists are anchored throughout their length, which gives them a polished, intentional look and incredible staying power.
The spring in flat twists comes from the twist itself rather than the movement of loose hair. They hold their shape beautifully, they look refined and put-together, and they’re less prone to frizz than loose twists because the pattern is locked in place. Flat twists work for people who want protective styling that looks sophisticated and requires minimal maintenance throughout the wear period.
Why Flat Twists Deserve Your Attention
Flat twists are inherently stronger than loose twists because the anchored pattern means less stress on individual roots and strands. The flat construction also means you can style them in almost any direction—create geometric patterns, follow your natural hair growth, create curved lines, or make them intersect for artistic effects.
Critical Information About Flat Twists
- Skill requirement: Intermediate; the anchor-while-you-twist technique takes practice but becomes natural with repetition
- Installation speed: 4–6 hours depending on pattern complexity and how much you want each twist to stand out
- Scalp visibility: This style shows your scalp more than loose twists, so part placement and pattern design matter aesthetically
- Longevity: 5–8 weeks because the anchored pattern resists frizz and maintains definition far longer than loose twists
- Styling options: Can be worn as-is, adorned with beads or jewelry along the pattern, or combined with loose hair
- Best texture match: Works on all hair types but shows most dramatically on medium to thick, coily natural hair
Pro tip: Practice your flat twist pattern on a friend or yourself in a mirror before committing to a full head. Sketching the pattern with a dry gel or pencil line first helps you visualize spacing and ensures even, intentional placement.
5. Tapered Twists
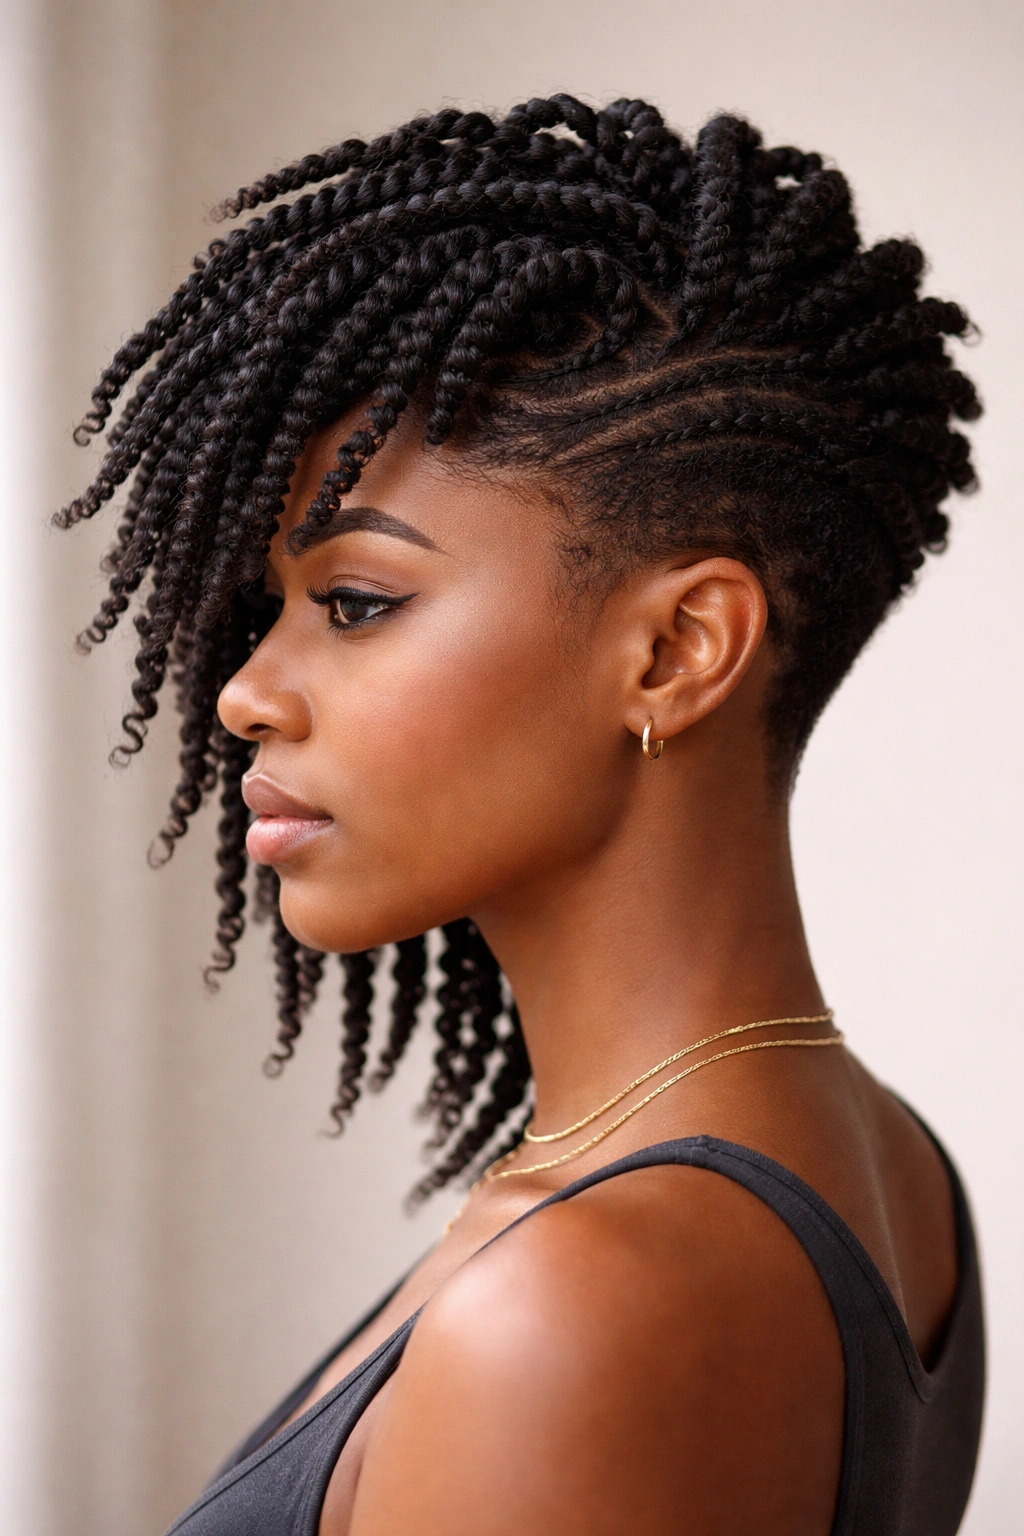
Tapered twists start thick at the roots and gradually taper down to a thinner, more delicate point toward the ends. This graduated approach creates visual movement and dimension that catches light differently at each point along the twist. They’re elegant, they’re romantic, and they feel like a hybrid between chunky twists and thin twists.
The tapered construction requires a specific technique—you work with thick sections at the roots but progressively use thinner amounts of added hair or combine strands as you move down the twist. The result is a style that offers the best of both worlds: quick installation at the roots and intricate detail at the ends.
The Appeal of This Sophisticated Style
Tapered twists photograph beautifully because the graduation creates natural depth and dimension. They feel luxurious and intentional, like you spent hours creating something special—but the installation is often faster than it looks because you’re not maintaining thick sections all the way through. The taper also creates excellent springy movement because the thinner ends bounce freely.
Everything You Need to Know
- Installation time: 4–6 hours, surprisingly fast because the taper means you’re using less hair overall
- Product requirements: Use more product at the roots and gradually use less as you taper, creating natural hold throughout
- Visual impact: The taper creates an elegant, elongated line that flatters most face shapes and hair textures
- Longevity: 4–6 weeks with excellent definition retention; the thinner ends may frizz before the roots do
- Length requirements: Best on shoulder-length or longer hair where the taper can fully develop and be seen
- Maintenance needs: Minimal because the shape is so clearly defined—even loose hairs read as intentional rather than sloppy
Worth knowing: Tapered twists are ideal if you want to try twists but worry about a “blocky” look. The taper creates a more fluid, refined aesthetic that feels contemporary and fashion-forward while still being a protective style.
6. Faux Locs via Twists
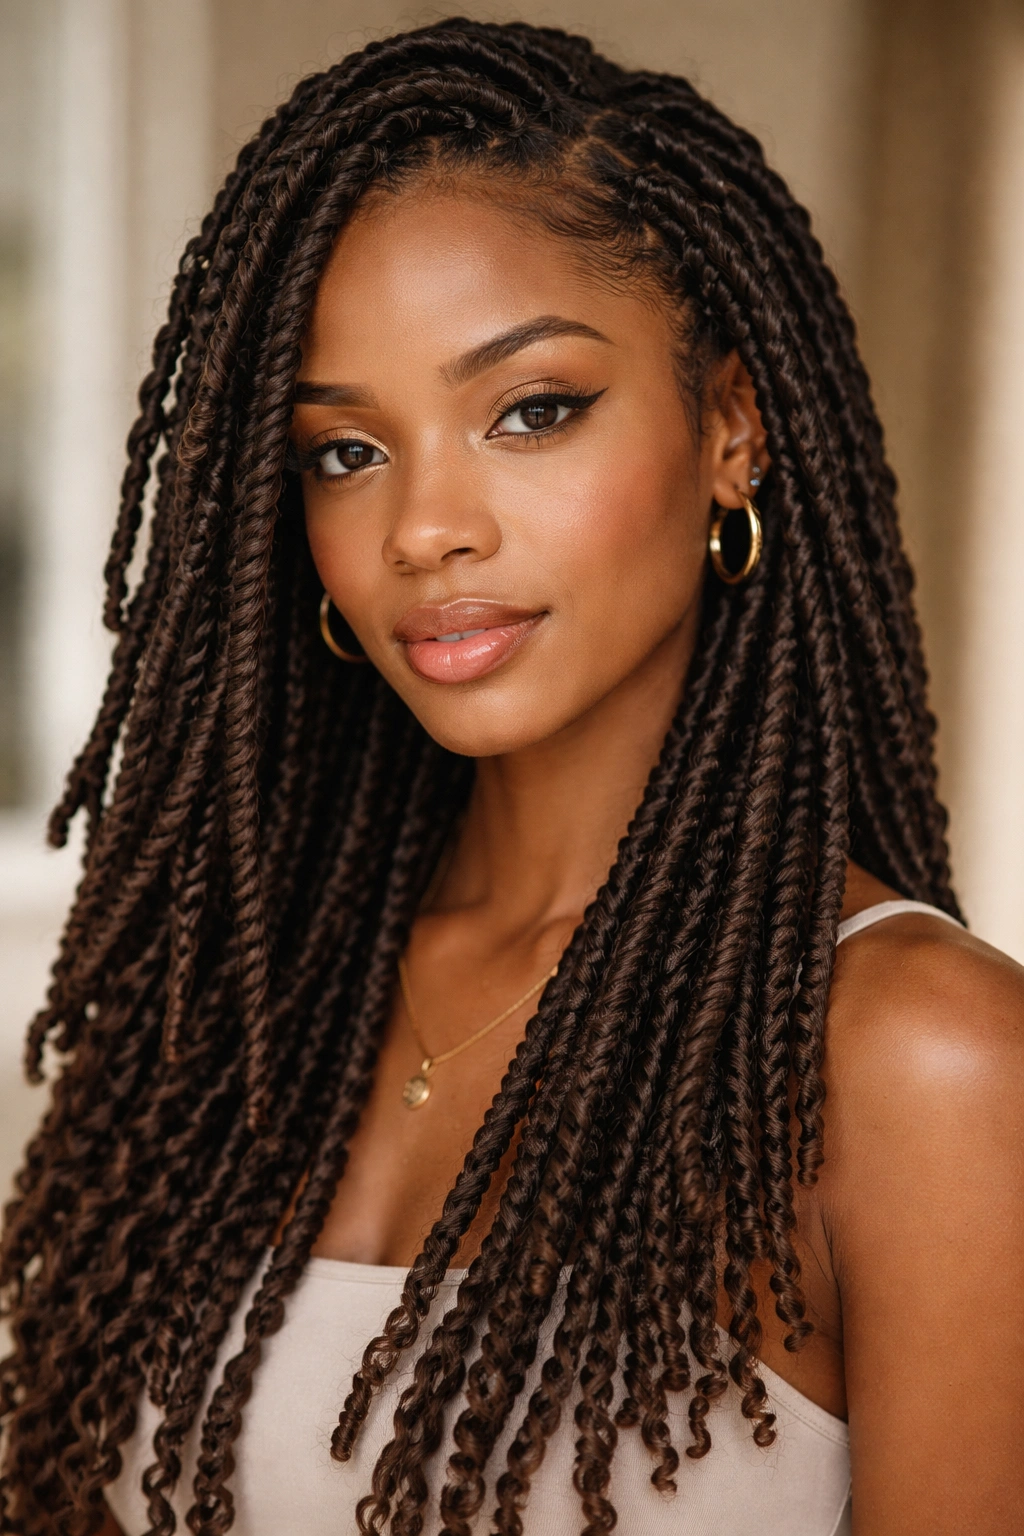
Creating faux locs by starting with twists as the foundation is genius—you get the protective benefits and springiness of twists combined with the longer wear time and distinctive look of locs. The twist serves as the core structure, and then you wrap yarn, thread, or additional hair around it to thicken and lengthen it, creating a faux loc aesthetic that can last two to three months.
This hybrid approach gives you flexibility. You can take down the wrapping while keeping the twist in place, then rewrap it after several weeks to refresh the style without starting from scratch. The twists underneath stay springy and protected while the wrapped exterior creates the visual of locs without the permanent commitment.
Why This Hybrid Works So Well
Faux locs created from a twist base give you the best of both worlds: the protective styling benefits of twists combined with the aesthetic and longevity of locs. Because the twist is the foundation, you can unravel the wrapping and explore it—or wrap it differently—without risking the health of your natural hair. The springiness of the twist base means the faux locs have movement and bounce rather than feeling heavy and static.
What You Should Know About This Approach
- Installation complexity: High—you’re essentially creating twists AND wrapping them, requiring 8–12 hours for a full head
- Lifespan: The twist base lasts 6–8 weeks; you can rewrap the yarn every 4 weeks to refresh
- Material options: Use yarn, thread, waxed linen, or thin synthetic hair for wrapping; each creates a different aesthetic
- Thickness options: The thickness of your final faux loc depends on the twist thickness plus the wrapping material
- Maintenance: Minimal; you can wet, wash, and moisture your faux locs throughout their wear period
- Removal difficulty: Lower than permanent locs; unwrap the yarn and untwist carefully to recover your natural hair in excellent condition
Pro tip: Choose a wrap material that matches your skin tone rather than your hair color. This creates a more cohesive look and makes any texture difference between wrap and hair less noticeable.
7. Bantu Knots from Twisted Sections
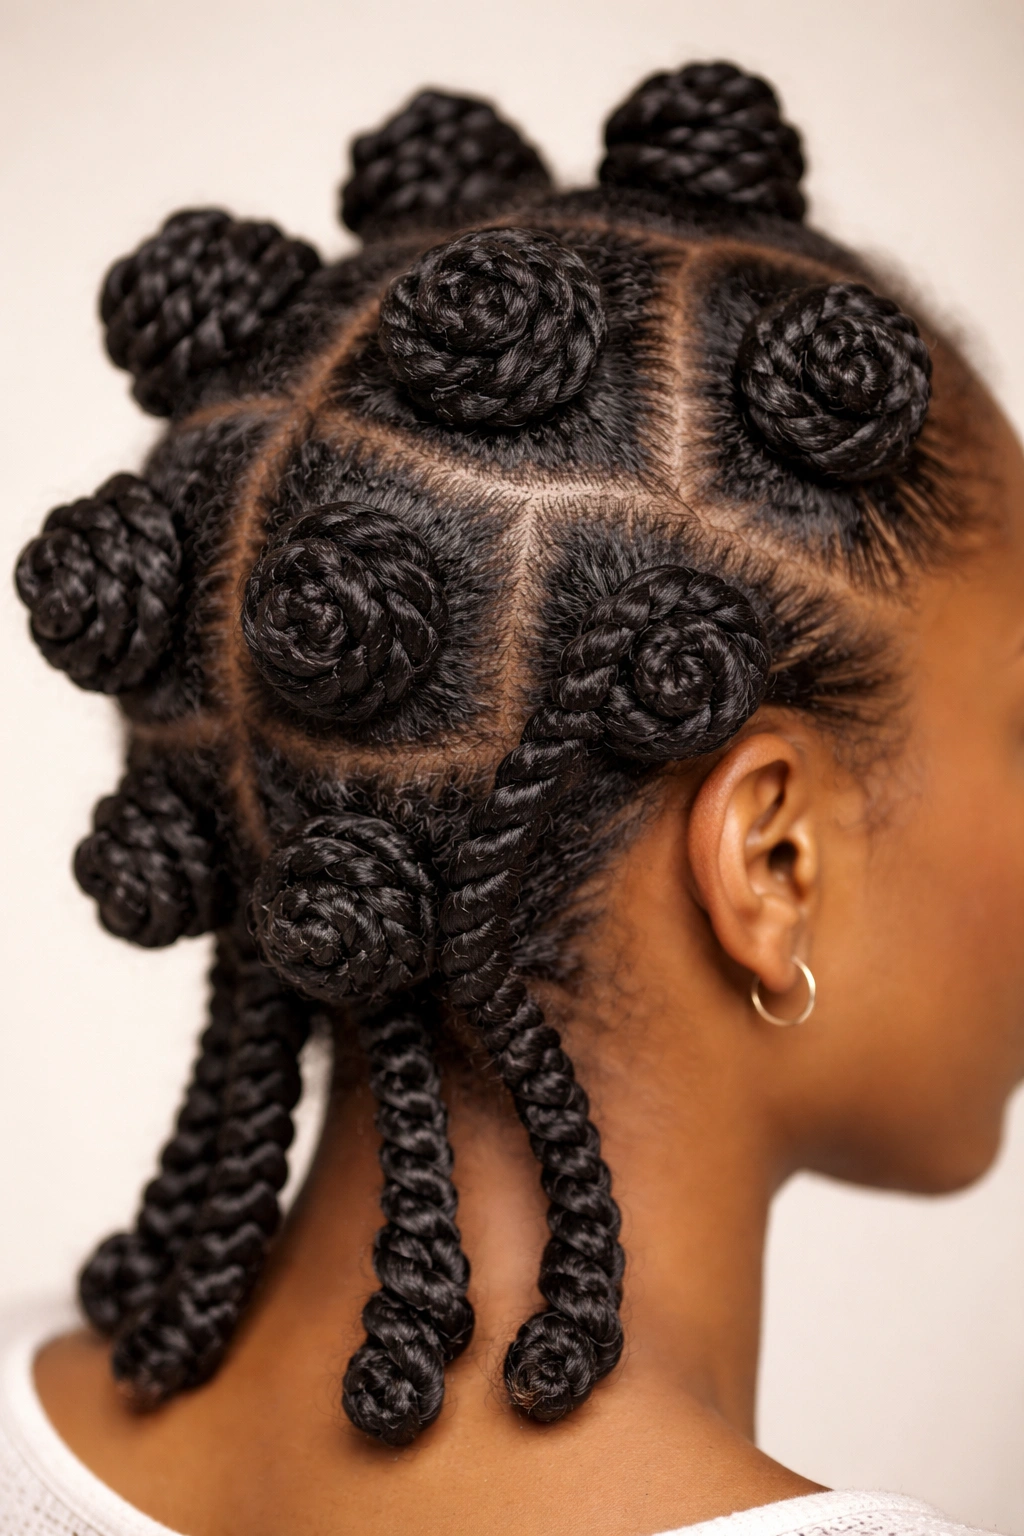
Bantu knots created from twisted sections rather than regular coils offer unique advantages: they set curls beautifully for bouncy waves or coils when you take them down, and during the wear period, they create a gorgeous textured look that’s totally different from traditional twists or knots. This style combines the protective benefits of twists with the dimensional styling options of set curls.
The process is simple: create two-strand twists, then coil each twist from the base up into a knot shape. You’re not starting from scratch with loose hair—you’re building on the twist foundation you’ve already created. This means installation is faster than it would be if you were creating Bantu knots from completely loose sections.
Why This Double-Technique Works
By twisting first, you’re adding structure and definition to the foundation. When you then coil that twisted section into a knot, you create a knot that holds its shape beautifully and doesn’t loosen or unravel the way a knot created from loose sections might. The twists also add springiness to the curls that emerge when you unravel the knots.
Essential Details About This Style
- Installation: 5–7 hours; you’re essentially creating twists first, then coiling them, which takes time but ensures precision
- Aesthetic versatility: Wear the knots as-is for a textured, dimensional look, or take them down for bouncy waves or coils
- Longevity: 3–5 weeks as knots; if you take them down to curls around week three, you extend wear significantly
- Curl definition: The twists underneath mean the resulting waves or curls are more defined and springy than they would be without that foundation
- Best on: Medium to long hair with medium to thick density; fine hair can look overwhelmed by both twists and knots
- Nighttime maintenance: Pineapple the knots or wrap them loosely to preserve shape and definition through sleep
Worth knowing: This is an excellent style for people who want to transition between looks. Wear the knots for one to three weeks, then take them down and enjoy bouncy waves for another two weeks—all from one installation.
8. Two-Toned Twists with Accessories
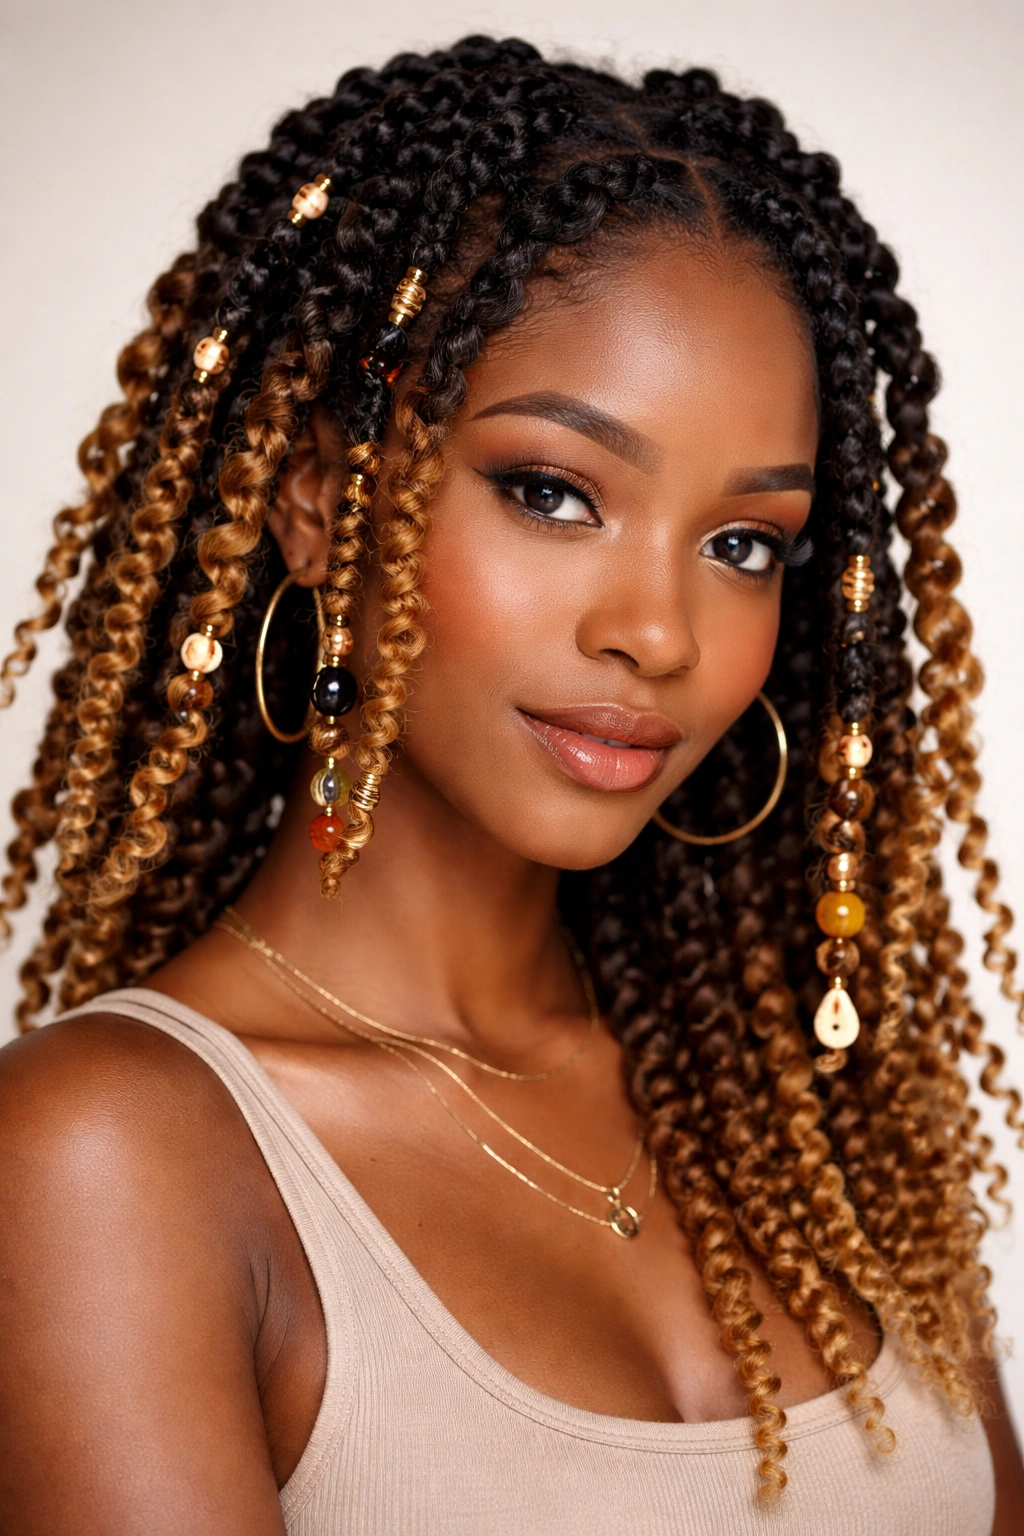
Two-toned twists incorporate contrasting colors (either through yarn, thread, or actually using two different hair textures) woven throughout the twists, creating a bold visual statement. Add beads, metal rings, shells, or other decorative elements, and you have a style that’s as much art as protective styling. The accessories add weight and visual interest while the color contrast creates modern dimension.
This style celebrates natural hair as self-expression and creative medium. Two-toned twists with accessories feel playful, confident, and intentional. The accessories add slight weight that can actually help twists stay springy because they anchor the twist slightly while still allowing movement.
The Creative Possibilities Are Nearly Endless
Two-toned twists work with virtually any color combination: natural black hair with gold or silver yarn, natural curls with contrasting hair in burnt orange or burgundy, lighter natural hair with deep jewel tones. The accessories can be functional (they help hold twists in place) or purely decorative (shells, beads, or wooden rings that add personality). You can be subtle or go completely bold—there’s no wrong answer because the whole point is self-expression.
Critical Information About Decorative Twists
- Installation: 5–8 hours, depending on whether you’re adding two-toned elements and how many accessories you want
- Material choices: Use yarn, thread, or synthetic hair for color; use beads, cowrie shells, wood rings, metal cuffs, or clips for accessories
- Weight consideration: Heavier accessories add pull to the twists, so use them strategically and don’t overload any single twist
- Scalp health: Metal accessories shouldn’t touch the scalp directly; place them along the twists where they won’t irritate
- Removal care: Take down accessories first before untwisting to prevent snagging your natural hair
- Personality factor: This style gives permission to be bold and creative; it’s inherently a celebration of individuality
- Longevity: Same as regular twists (4–6 weeks) but accessories may need replacing if they loosen
Insider note: Beads from craft stores work great, but test them first on a small section to make sure they don’t scratch or pull. Metal rings designed for locs work beautifully and feel more intentional than random beads—invest in quality pieces you actually love.
How to Prepare Your Hair for Twists
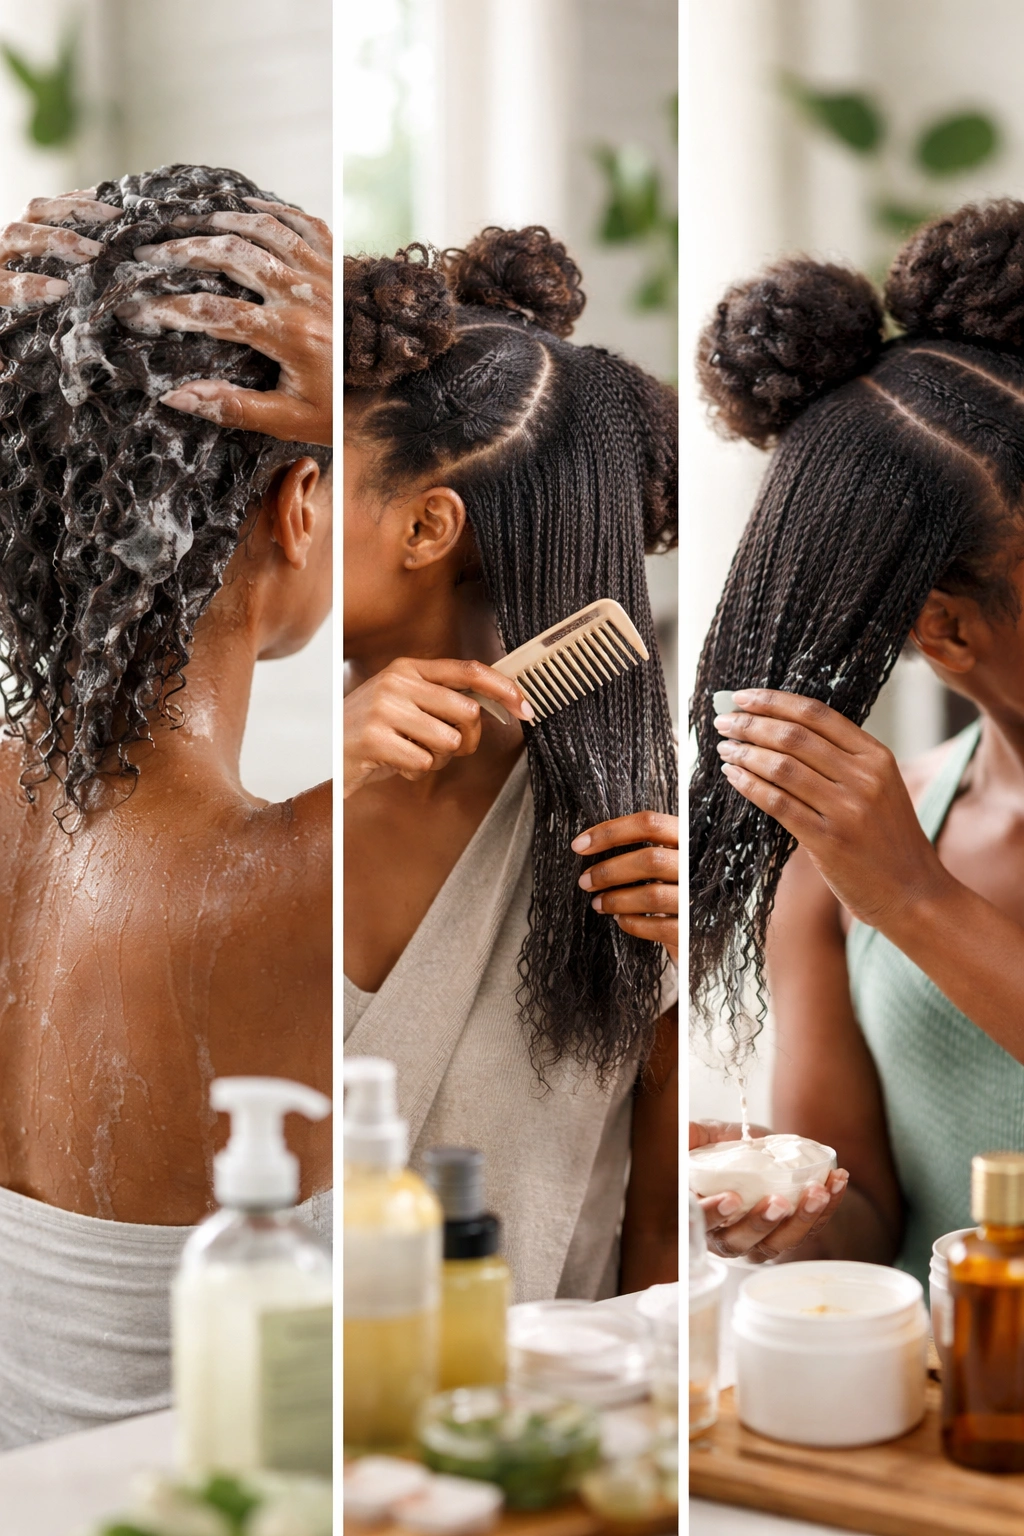
Before you install any twist style, proper prep makes a dramatic difference in how long they last and how springy they stay. Starting with clean, moisturized, detangled hair sets you up for success. The prep process takes time, but it’s genuinely non-negotiable if you want twists that last weeks rather than days.
Start with a clarifying wash to remove product buildup, then follow with a deep conditioning treatment. Buildup prevents moisture from penetrating your strands, and dry strands break more easily during installation. After conditioning, use a wide-tooth comb or detangling brush to work through your hair section by section while it’s still wet. Don’t rush—snagging and tearing during this phase means breakage during the wear period.
Allow your hair to air-dry or use a blow dryer on a medium setting until it’s about 80% dry. Some people prefer fully dry hair for twisting because it’s easier to control, while others like slightly damp hair because it has more grip. Experiment to see what works best for your texture. Apply your twist product (creamy gel, twist cream, or lightweight pomade) section by section as you prepare to twist.
Preparation Checklist
- Clarify deeply: Remove product buildup that prevents moisture and product grip
- Deep condition: Deeply moisturize hair the day before or morning of installation; dry hair breaks more easily
- Detangle thoroughly: Work section by section while wet with plenty of slip; this prevents breakage during installation
- Choose product wisely: Pick one product and stick with it throughout; switching products mid-installation creates inconsistency
- Section strategically: Smaller sections mean easier twisting and more control; larger sections mean faster installation
- Avoid installation on fully wet hair: Wet hair stretches more easily and is harder to control; aim for 80% dry or fully dry
Step-by-Step Twisting Technique for Best Results
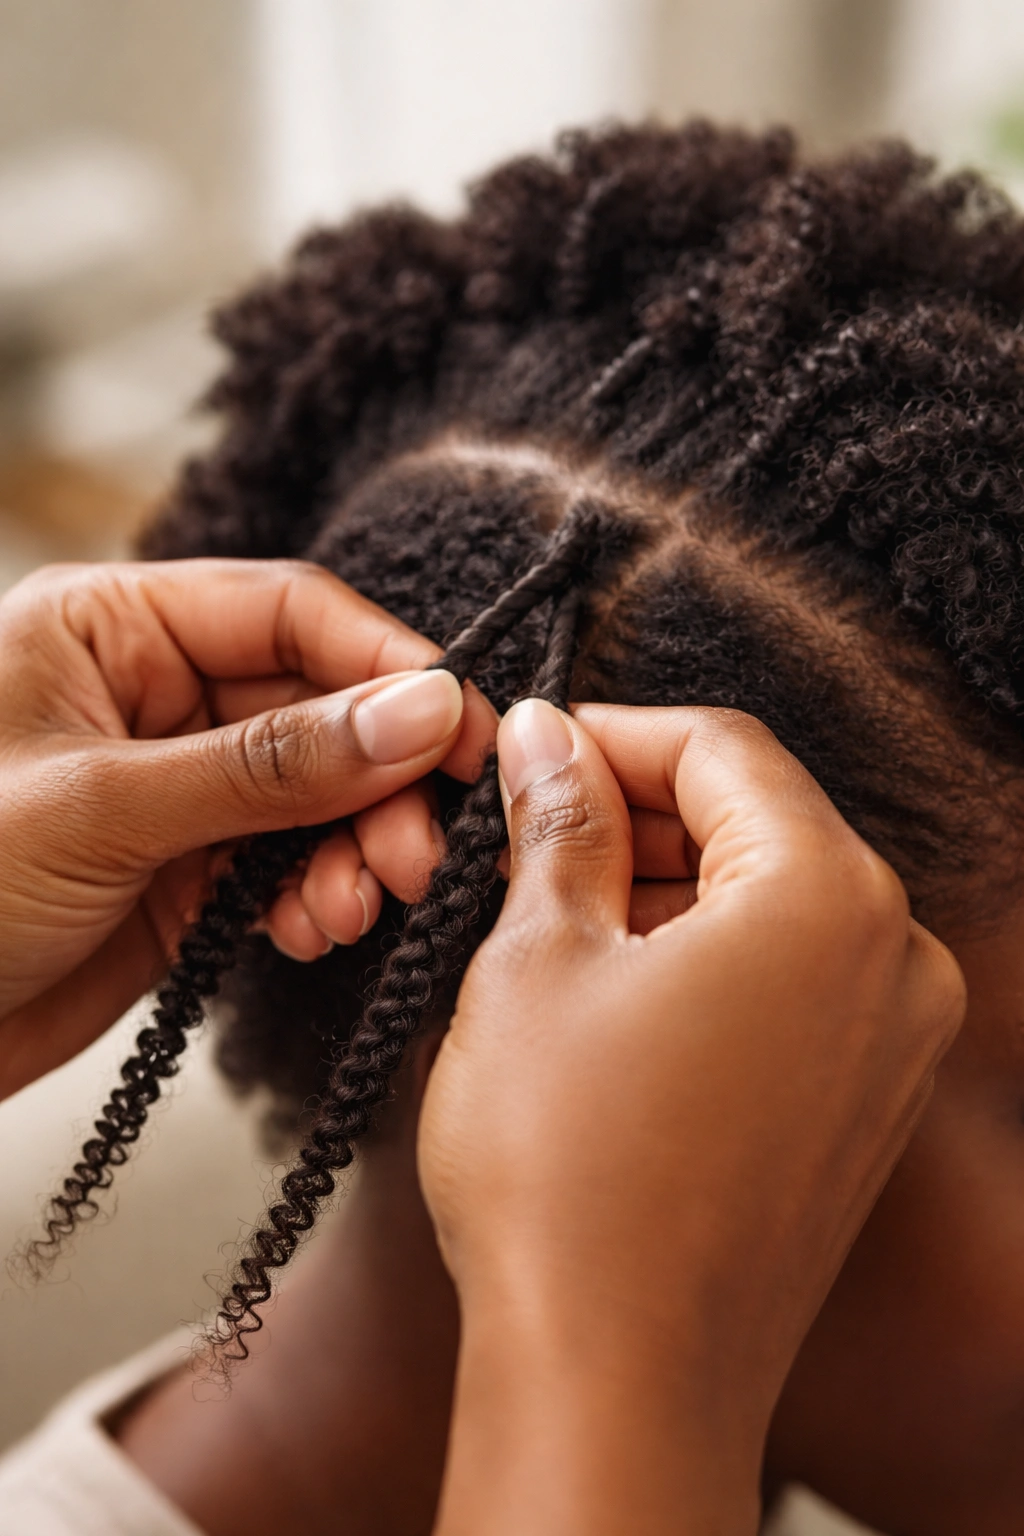
The twisting technique itself matters enormously—sloppy technique leads to loose twists that unravel, while tight technique leads to breakage and stress on your hair. Aim for that sweet spot: firm enough that the twist holds its shape, but not so tight that you’re pulling and straining.
Start by taking your first section. Divide it cleanly into two equal strands, making sure they’re approximately the same thickness. Apply your twist product to both strands. Now here’s the crucial part: cross one strand over the other, then bring it around and under. Cross and wrap, cross and wrap—that’s the rhythm. Many beginners go too fast and create loose, undefined twists.
As you twist, feed in additional hair if you’re using added hair extensions. If you’re doing twists with your natural hair only, simply twist the two strands from root to end without adding anything. Keep consistent tension throughout—don’t start tight and ease up, and don’t start loose and tighten up. Consistency is what makes the twist springy and uniform.
When you reach the end, seal the twist by bringing both strands around each other a few extra times, then smoothing any loose hair down. Some people dip the ends in hot water briefly to set them; others use a tiny dab of edge control. Find what works for your hair texture.
Technique Essentials
- Equal sections: Two strands of equal thickness create even, springy twists; unequal sections look wonky and unravel faster
- Consistent tension: Tight tension = breakage; loose tension = frizz and unraveling; aim for a firm, controlled middle ground
- Smooth feeding: If adding hair, feed it in smoothly without creating lumps or bunches; if not adding hair, simply twist through to the end
- End sealing: Secure each end firmly so it won’t unravel during the first few days or during washing
- Product application: Apply enough product for grip and definition, but not so much that twists feel stiff or crunchy
- Direction consistency: Decide if you’re twisting clockwise or counterclockwise around the head and stay consistent
Products and Tools Every Natural Hair Enthusiast Needs
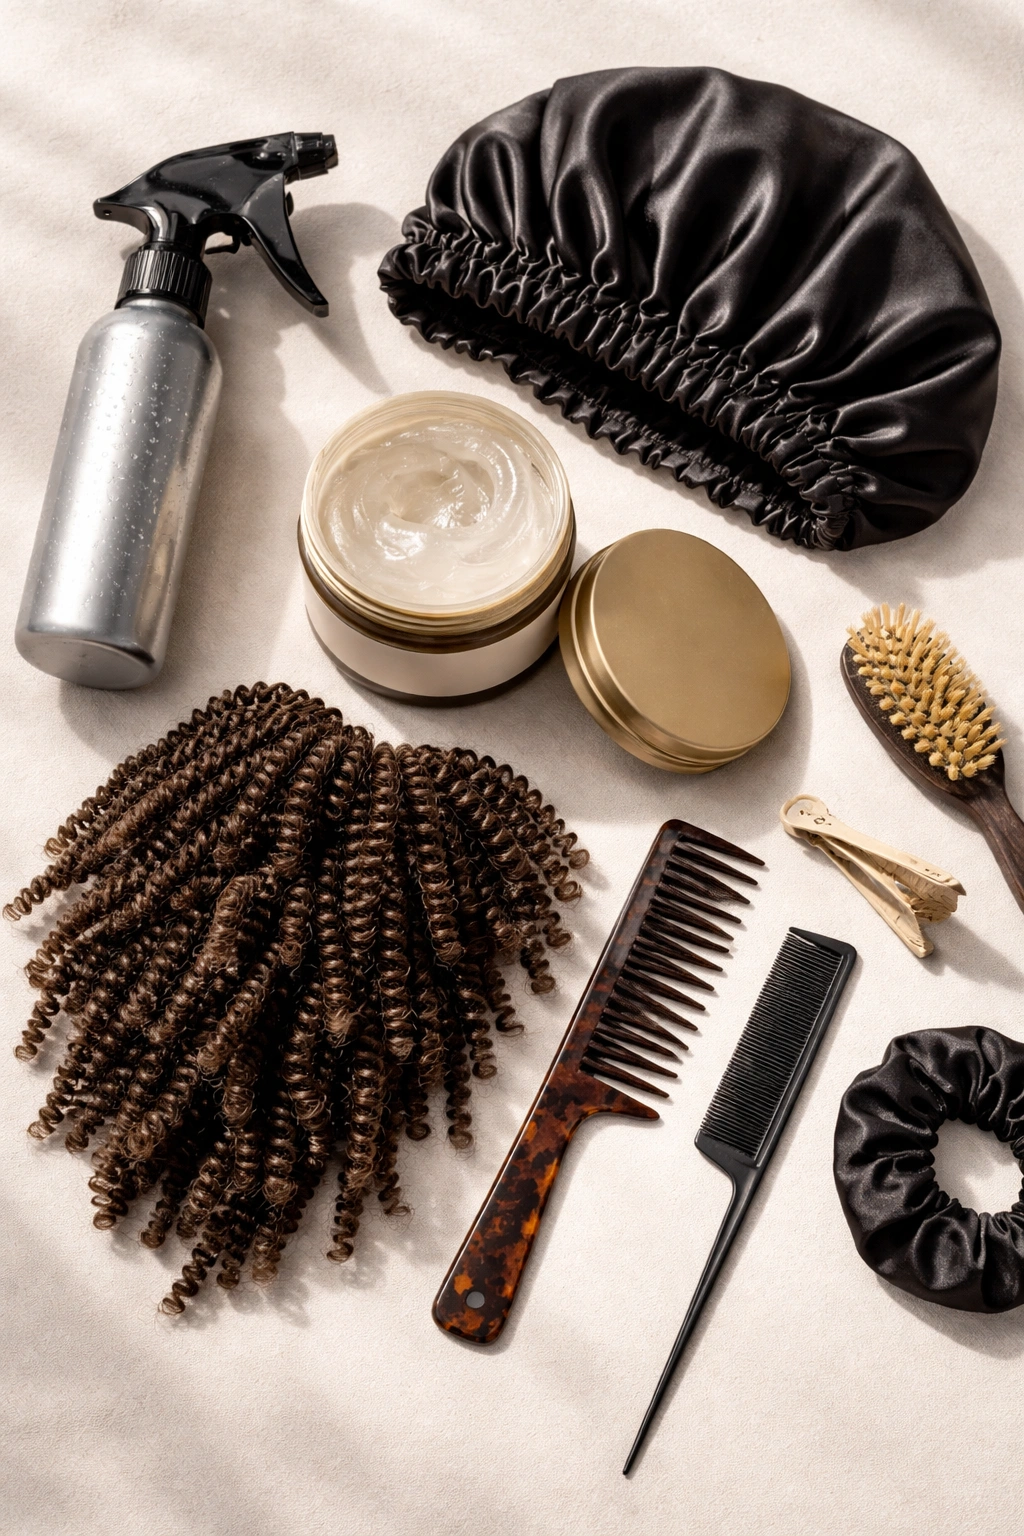
You don’t need fancy or expensive products to create beautiful springy twists, but you do need the right products. A heavy styling cream or gel designed specifically for twists works better than a general leave-in conditioner. These products have the right balance of hold and moisture, with ingredients that define curls while keeping hair flexible.
Your tool kit is equally important. A spray bottle filled with water allows you to dampen sections as needed. A wide-tooth comb helps with detangling without breaking. A sectioning clip keeps parts organized and prevents you from losing your place. For application, use a small applicator brush or your fingers to apply product evenly. A satin bonnet or scarf for nighttime is non-negotiable—cotton pillowcases absorb moisture from twists and create frizz.
If you’re using added hair for extensions or two-toned twists, choose quality Kanekalon or human hair. Cheap synthetic hair sheds excessively and looks artificial. Good-quality hair costs more initially but lasts longer and looks significantly better. For accessories, invest in quality beads or metal rings if you’re going to use them regularly. Cheap beads can be uncomfortable and may scratch.
Essential Product and Tool Recommendations
- Styling product: Creamy twist gel, specialized twist cream, or lightweight pomade designed for natural hair
- Spray bottle: Keep it filled with water to dampen sections during installation and to refresh twists during wear
- Sectioning tools: Clips, hair ties, or clips to organize your hair and stay on track during installation
- Detangling tools: Wide-tooth comb and soft brush to gently remove tangles without breaking
- Nighttime protection: Satin bonnet, satin scarf, or satin pillowcase to prevent frizz and moisture loss
- Application tools: Fingers work fine, but a small applicator brush gives more control and less product waste
- Added hair (if using): Quality Kanekalon or human hair; invest in good quality for better longevity and appearance
Maintaining Springy Twists for Longevity
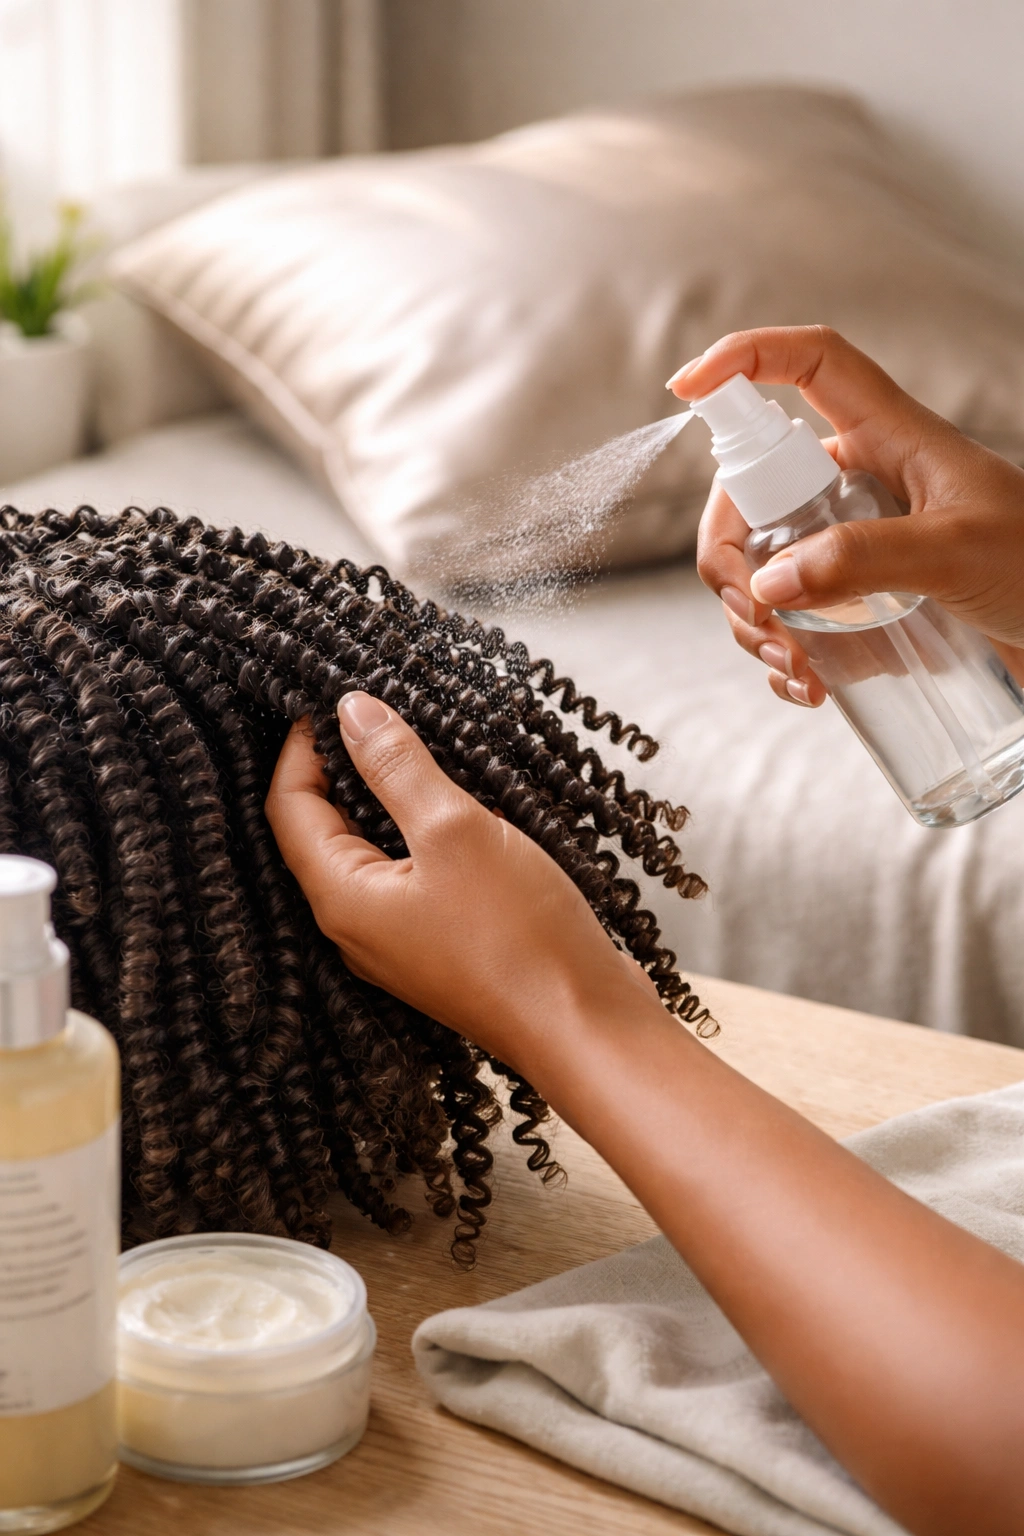
Twists don’t require constant fussing, but intentional maintenance keeps them springy and fresh-looking for their entire wear period. The biggest threat to twist longevity is moisture loss. Natural hair dries out quickly, and twists trap moisture unless you actively maintain hydration.
Moisturize your twists every three to four days using a lightweight spray moisturizer or a mix of water and leave-in conditioner. Spray your twists lightly until they’re damp, then seal that moisture with a light oil. Avoid heavy products that create buildup at the roots. This maintenance takes five minutes but dramatically extends the life of your twists.
Nighttime care matters equally. Sleep on a satin pillowcase or wrap your twists in a satin scarf or bonnet. Cotton pillowcases absorb moisture from your hair and create friction that leads to frizz and breakage. Satin reduces friction and preserves moisture, keeping twists looking fresh even after weeks of wear.
If your twists start feeling a bit loose or frizzy around week two or three, refresh them using the palm-rolling technique. Rub a light cream or gel between your palms, then roll each twist gently between your palms for a few seconds. This tightens up frizz and redistributes product throughout the twist. It’s a quick refresh that takes maybe five minutes for your entire head.
Maintenance Schedule That Actually Works
- Every 3–4 days: Light moisturizing spray, seal with oil; takes about five minutes
- Every night: Sleep on satin pillowcase or wrap twists in satin bonnet or scarf
- Weeks 2–3: Palm-roll twists to tighten and refresh if needed
- As needed: Gentle finger-combing any sections that feel tangled or matted
- Throughout wear: Avoid heavy, greasy products; keep maintenance lightweight and frequent rather than heavy and infrequent
Undoing Twists Without Causing Breakage
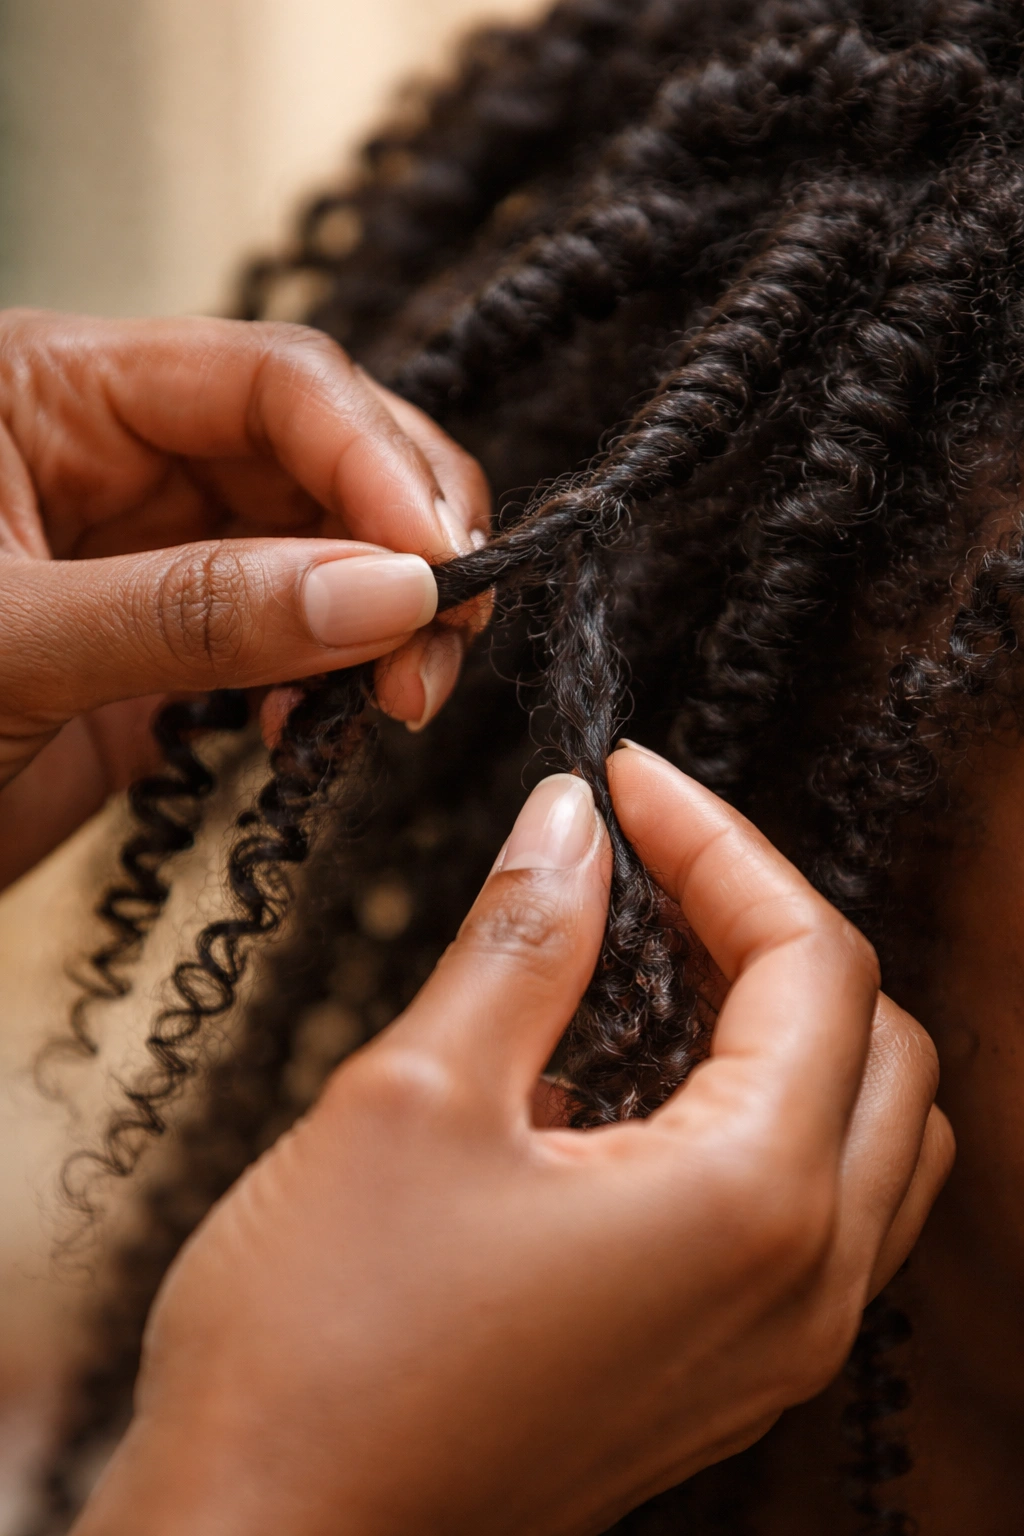
Taking down twists improperly can undo all the protective benefits and cause significant breakage. A rushed unraveling leads to snapping, torn strands, and damaged hair. The right approach is slow, gentle, and uses products to minimize friction and breakage.
Start by moisturizing your twists heavily. Use a rich leave-in conditioner or a mix of oil and water. Let it sit for 15 minutes so your hair is thoroughly conditioned and slip is maximized. If you used extensions or added hair, gently unravel those first, carefully separating them from your natural hair. This prevents pulling your natural strands.
Now slowly unravel each twist. Use your fingers, not a comb—combing can cause breakage. Work from the end upward, gently loosening the twist as you go. If you encounter any matting or tangling, spray with additional conditioner and work through it slowly. Don’t force anything. This process takes time, but patience prevents breakage.
Once all twists are unraveled, treat your hair to a deep conditioning session. Your hair just came out of a protective style and deserves serious moisture and care. Deep condition, then gently detangle using a wide-tooth comb with plenty of slip, working section by section from the ends upward.
Takedown Process for Minimal Breakage
- Heavy pre-moisturizing: Condition deeply before starting; take time so moisture penetrates fully
- Remove extensions first: Gently separate any added hair from your natural hair before fully unraveling
- Work slowly: Use fingers, not tools; patience is what prevents breakage
- Use additional conditioner: Keep a spray bottle of conditioner handy; use it on any tangles before gently working through
- Avoid yanking: Never pull or force anything; if resistance happens, add more conditioner and wait
- Deep condition after: Your hair needs serious moisture after weeks in twists; don’t skip this step
- Gentle detangling: Work section by section from ends upward with a wide-tooth comb and plenty of slip
Final Thoughts
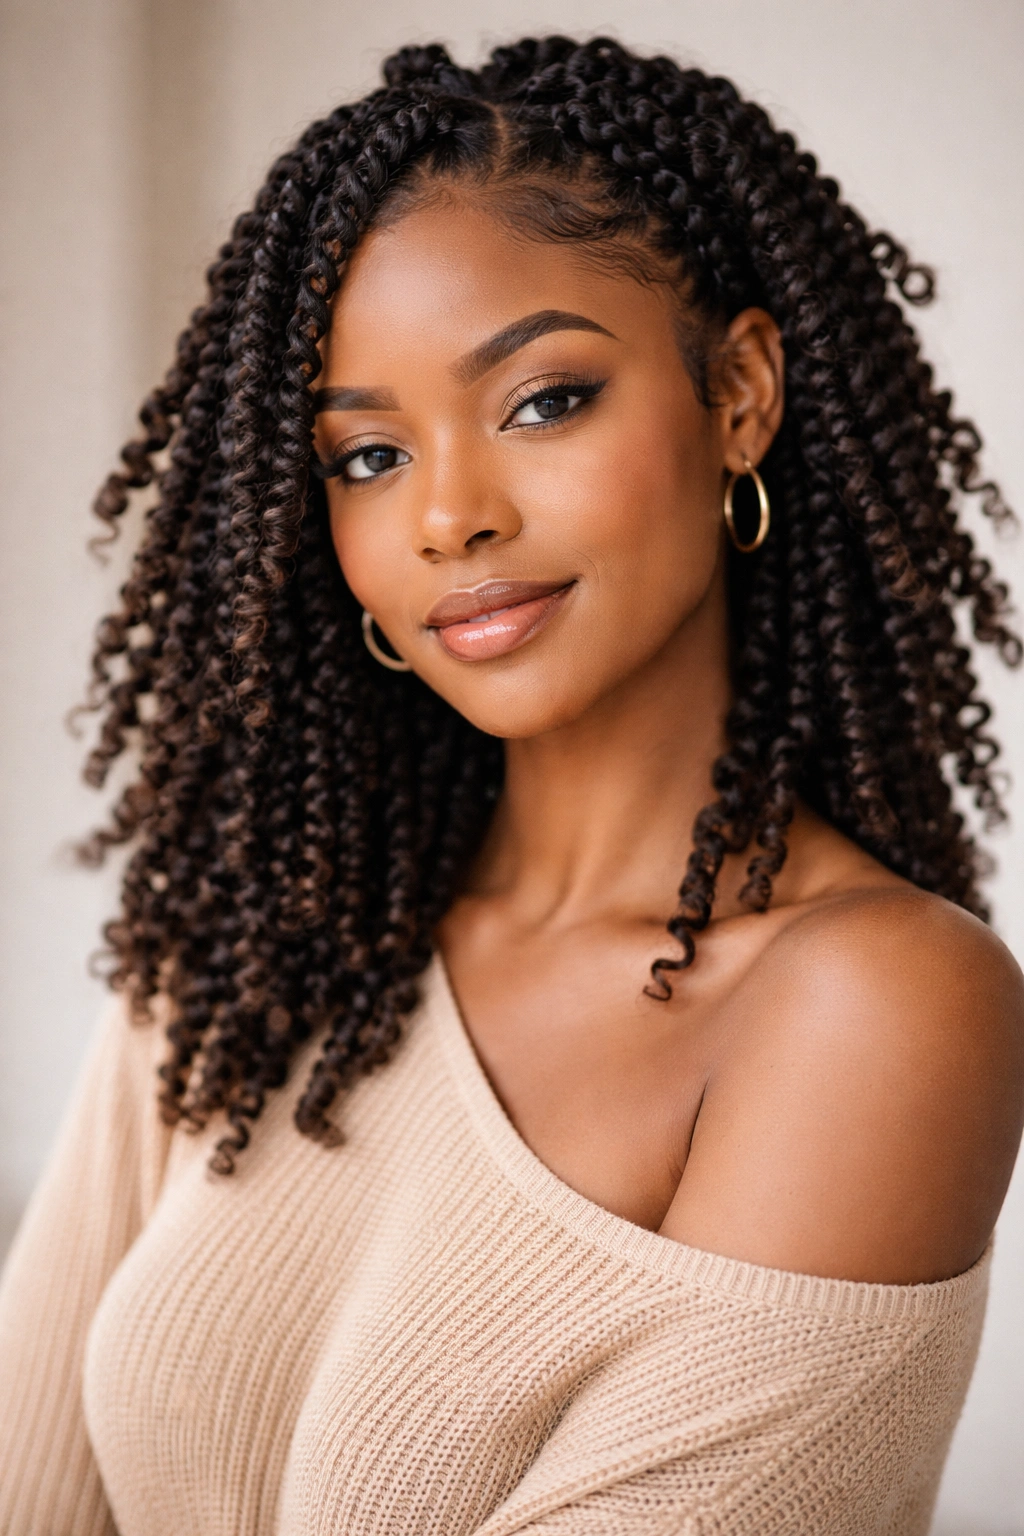
Springy twists are more than a protective hairstyle—they’re a celebration of natural hair texture and a way to express your creativity and personality. Whether you choose chunky classics, delicate thin twists, sophisticated tapered styles, or bold two-toned twists with accessories, the right style for you is the one that makes you feel confident and beautiful.
The key to success is preparation, proper technique, and consistent maintenance. Invest time in prepping your hair before installation, learn a twisting method that works for your hands and hair texture, and commit to keeping your twists moisturized throughout the wear period. That foundation means the difference between twists that frizz after a week and twists that stay springy and fresh for six weeks.
Remember that twists are inherently a protective style—they protect your ends, they reduce daily manipulation, and they give your hair a break from heat and constant styling. But they’re also an opportunity to experiment, to be bold, and to showcase exactly what natural hair can do. Don’t play it safe if you’re drawn to something more daring. Two-toned twists with beads, rope twists, flat twists in intricate patterns—these aren’t just hairstyles. They’re wearable art that happens to be excellent for your hair health.
The springiness you create with twists isn’t accidental—it’s the result of understanding your hair, using the right products, perfecting your technique, and maintaining your style consistently. Once you nail those elements, you have access to weeks of beautiful, healthy, protective styling that keeps your hair thriving while letting your personality shine through. That’s the real power of springy twists.
